Dragon's Dogma is one of the best open world action RPGs. This Capcom-produced game offers an extended single player campaign, dozens of sidequests and a few types of massive bosses. Such an abundance of challenges and attractions can be overwhelming and cause problems. Even more so since many quests are linked to each other in numerous ways.
This guide has been created with the thought of all the players who intend to delve into the world of Grannys. It includes walkthroughs of all Main Story Quests as well as Sidequests given by NPCs. Each mission contains descriptions and screenshots. We have also prepared a number of guidelines to help defeat the more powerful monsters.
The guide contains:
I wish good hunting to all of you who have bought the game and are just now journeying through the world created by Capcom. If you need help and are playing on Xbox 360, try out my Pawn Eldo which can help out with any situation. Have fun!
Szymon "Hed" Liebert
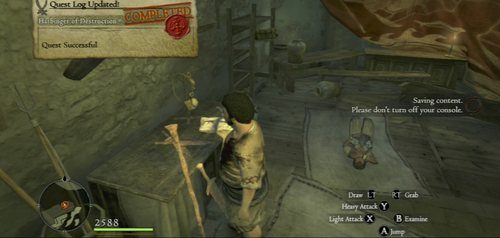
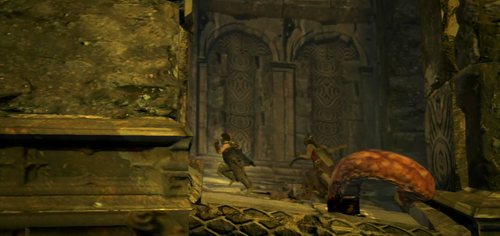
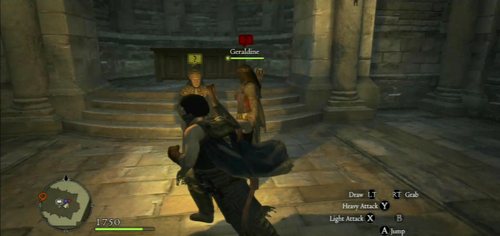
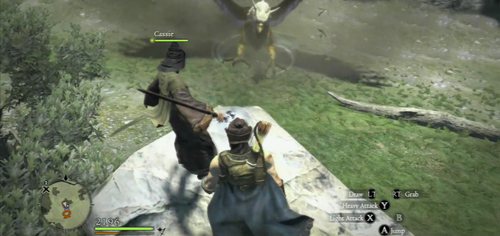
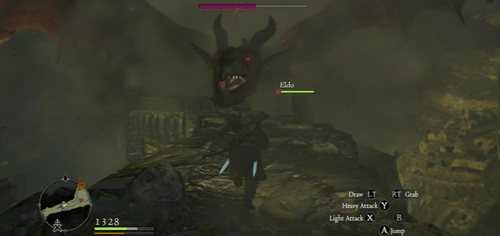
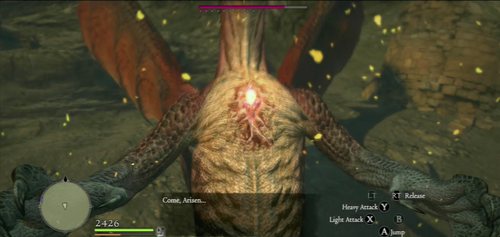
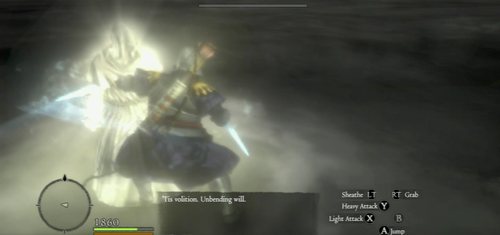
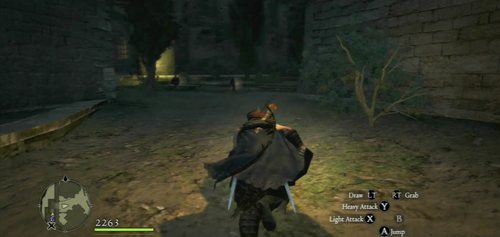
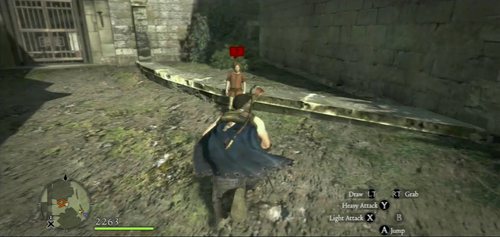
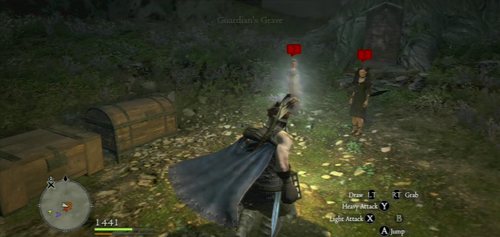
When the Dragon appears, rush at it to attack.
A while later the beast will push the hero away and... give him his heart.
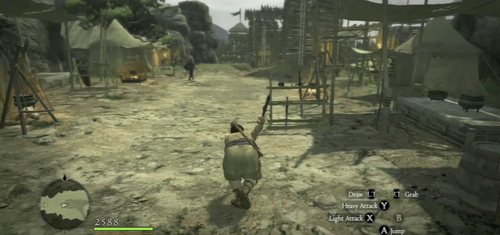
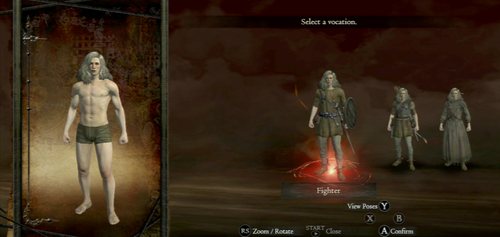
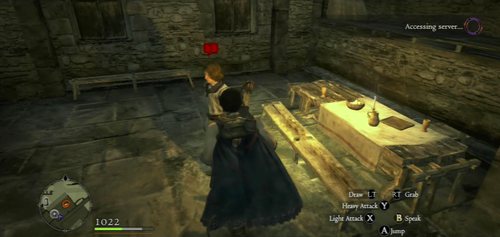
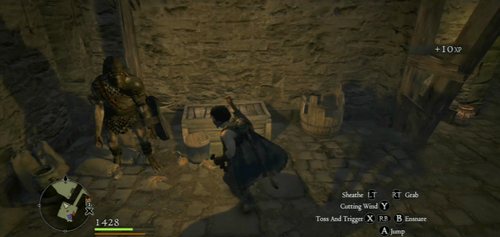
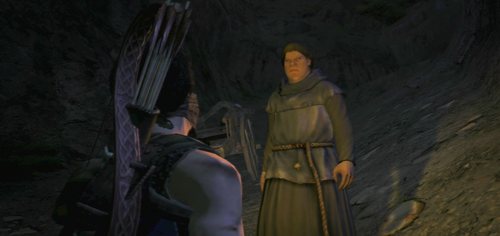
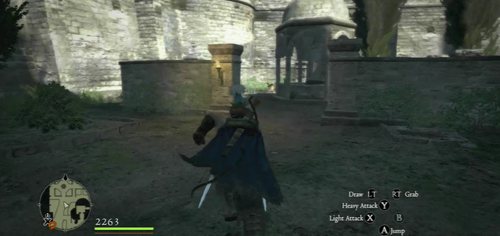
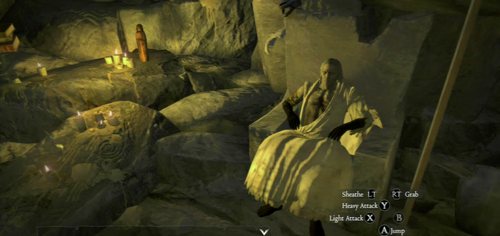
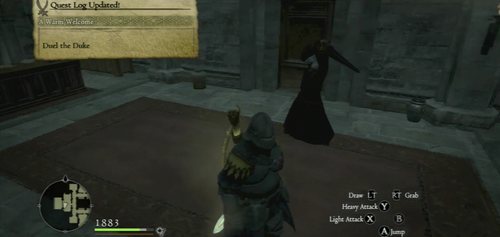
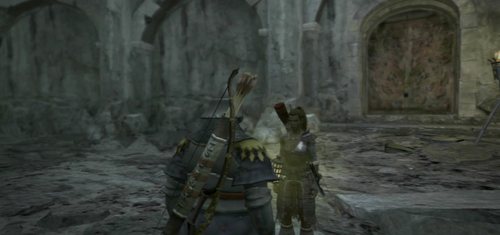
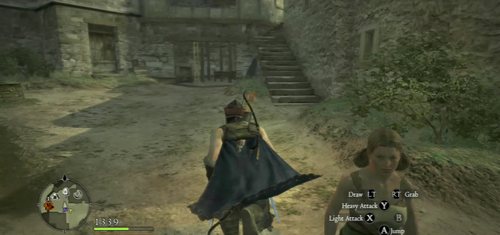
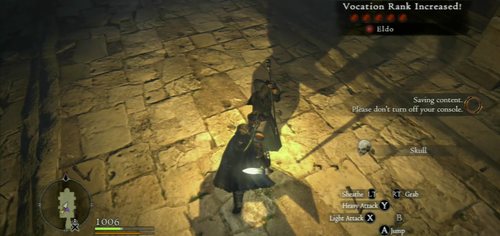
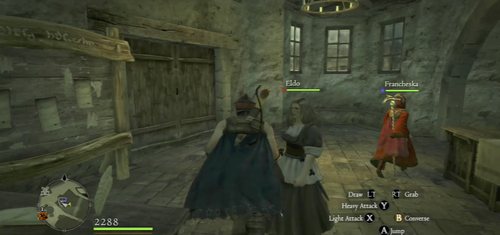
You wake up in a house. Approach the desk and choose Vocation - the character class.
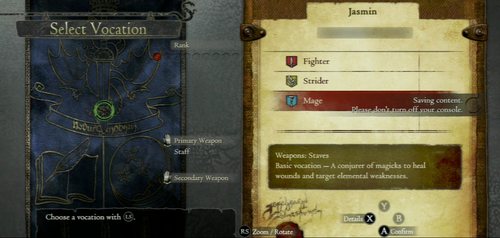
Fighter is a warrior, Strider is a combination of an archer and an assassin, while Mage can cast spells. You can change the settings further in the game (but not at once), so you don't have to worry that you made a wrong choice.

Leave the room and listen to the conversation.
Leave the house and run towards the village gates.
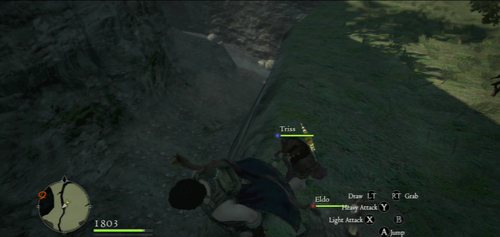
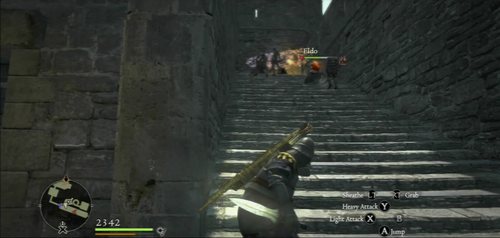
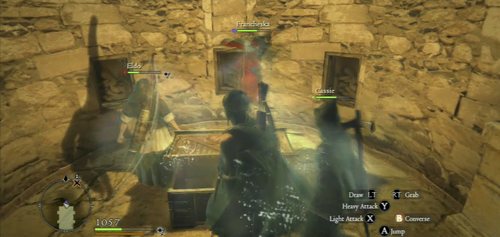
There, you will be stopped by Adaro, and also Rook will appear - the first Pawn. Pawns are our fighting companions.
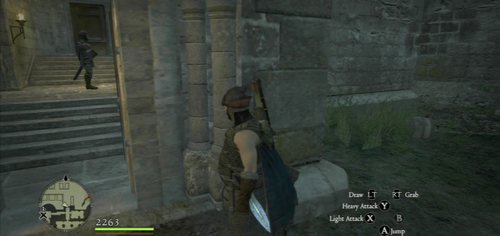
Leave the gate and take the road to the Encampment.
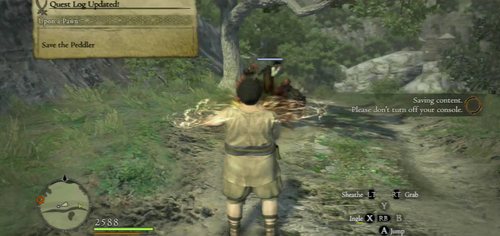
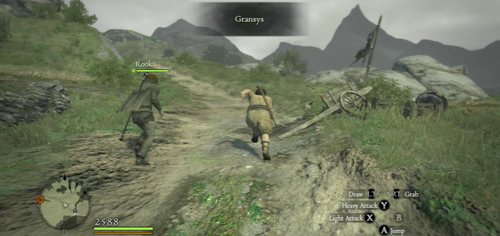
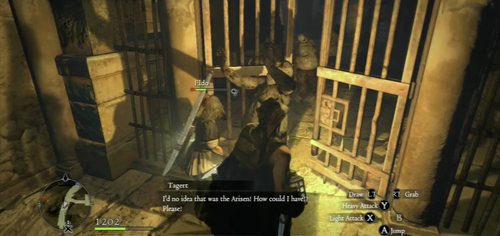
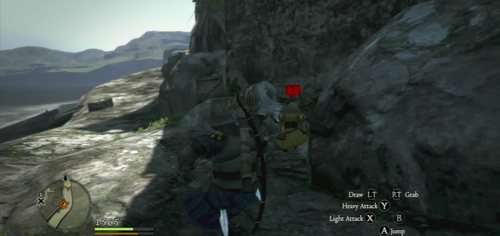
On your way you should find Reynard attacked by goblins. Save him.
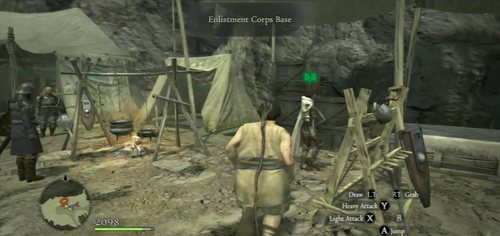
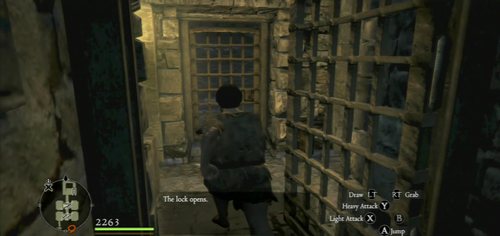
Enter the Encampment.
Go inside the tent indicated on the map.
Use the stone lying in the back.
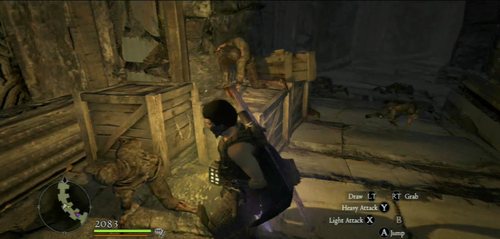
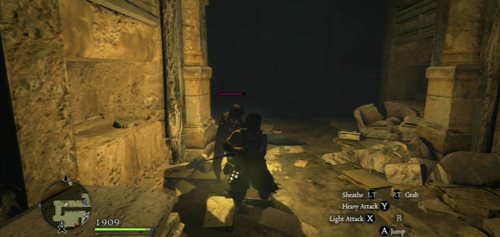
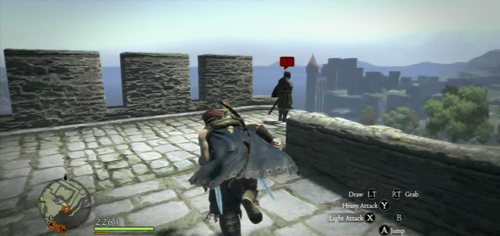
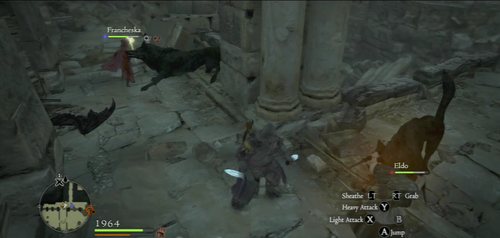
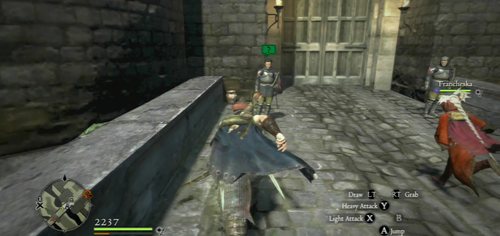
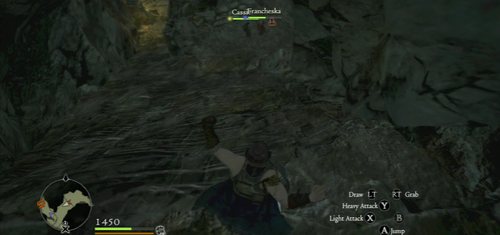
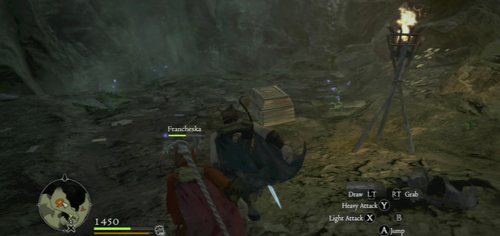
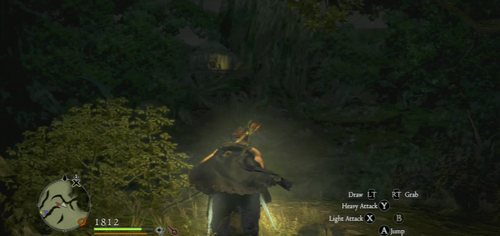
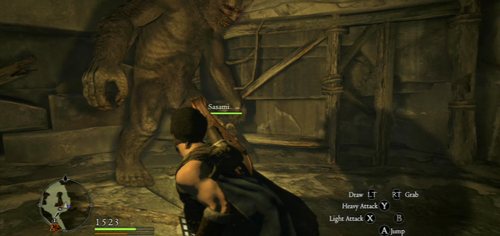
You'll receive a quest to search the area. Keep walking around the Encampment until you trigger a cutscene in which soldiers run to attack a beast.
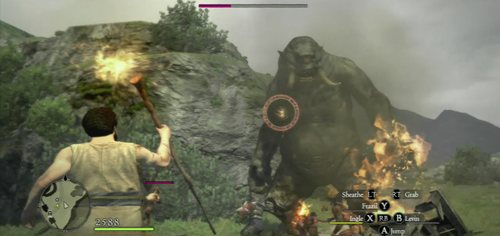
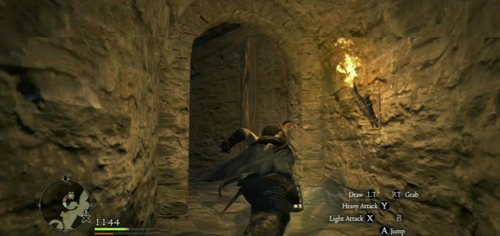
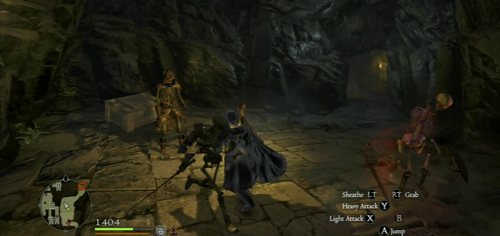
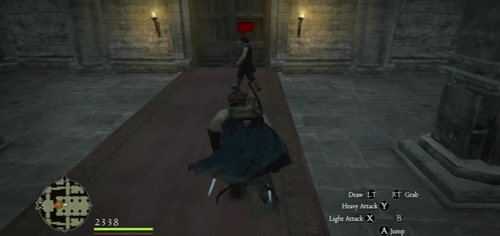
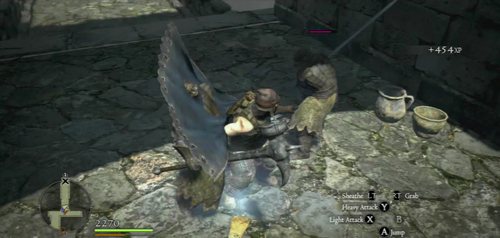
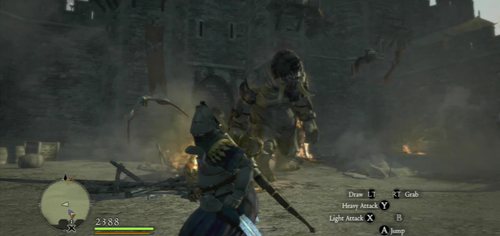
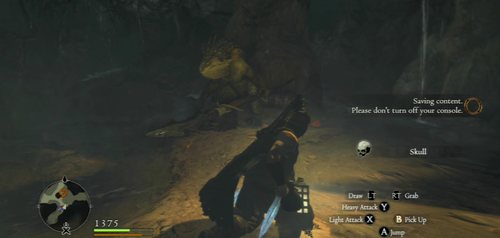
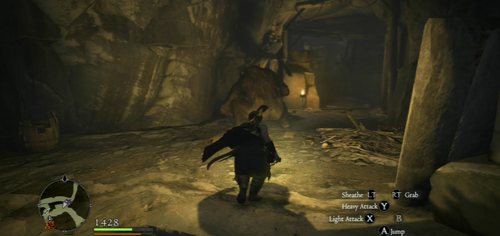
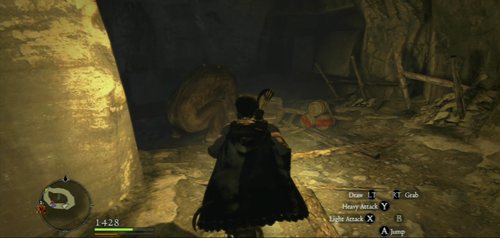
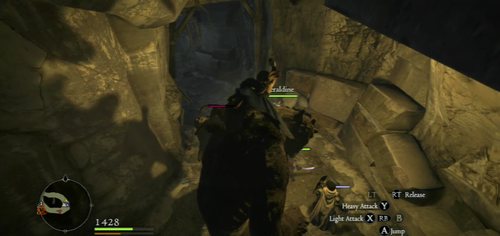
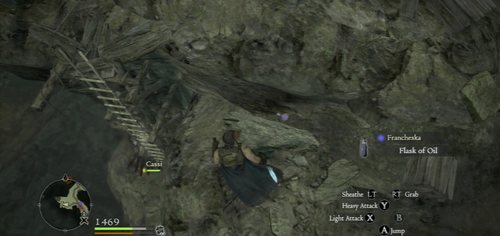
Leave by the east exit to help them. You'll meet a wounded Cyclops - beat him up with what weapons you have.
When the beast is dead, go back to the stone and create your own Pawn.
Now you can go to train - though it's a side quest which can be skipped. Simply leave the training area.
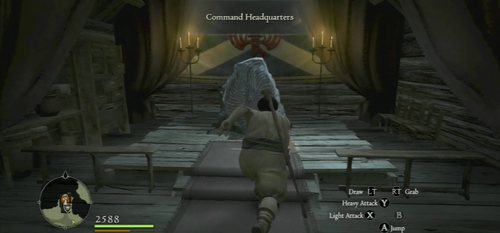
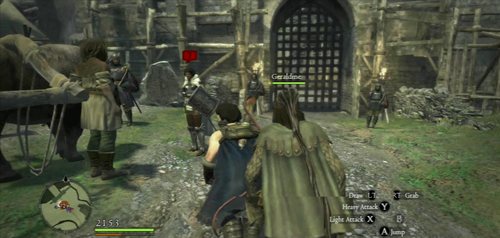
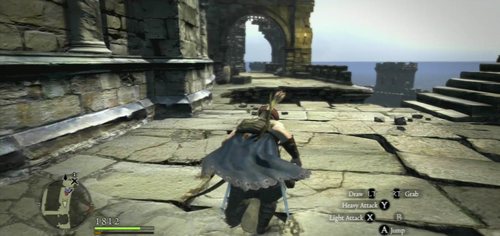
To begin the next quest, talk to Ser Mercedes. He'll suggest you take a nap. Agree.
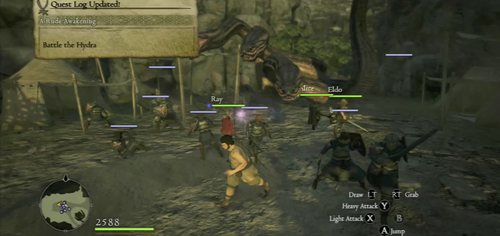
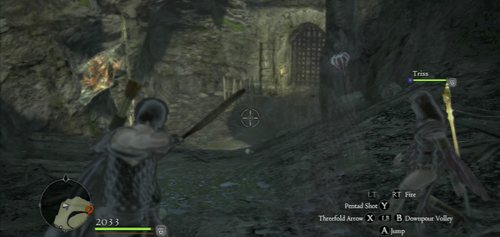
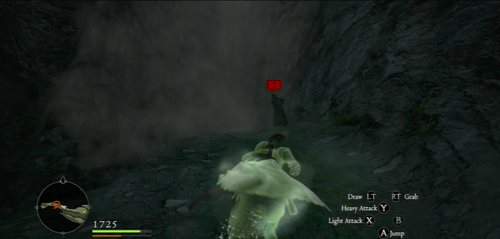
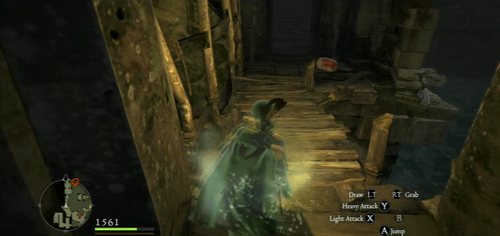
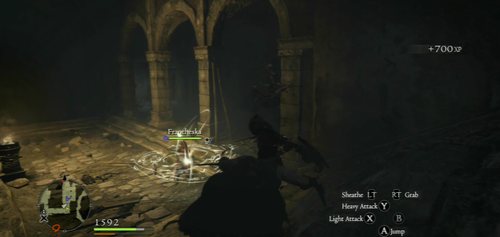
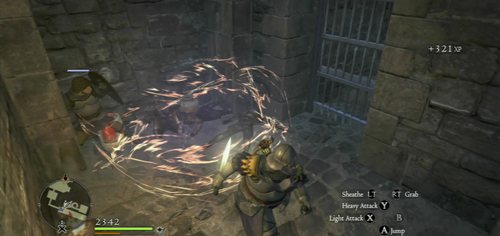
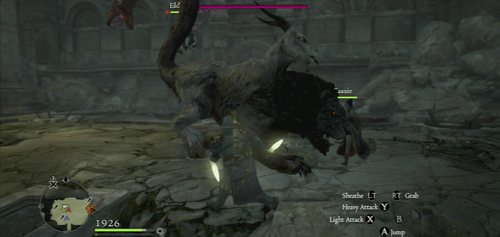
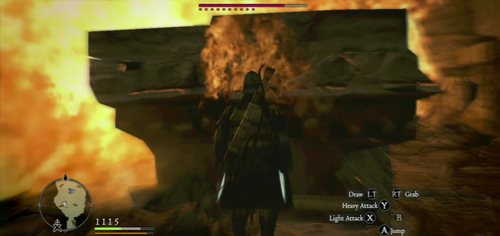
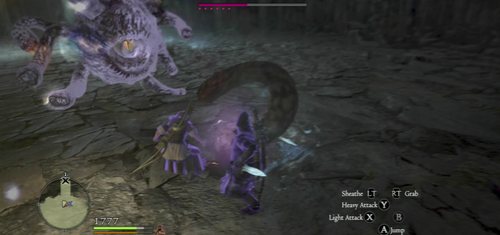
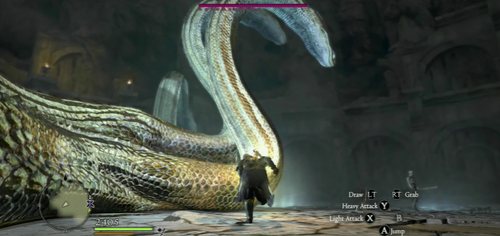
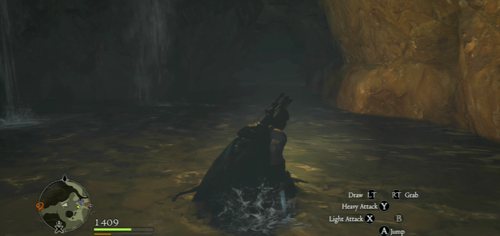
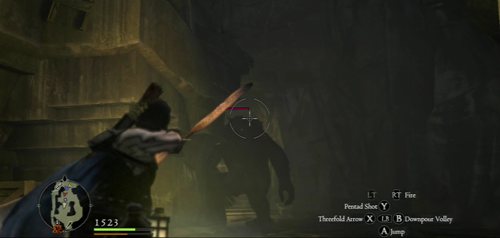
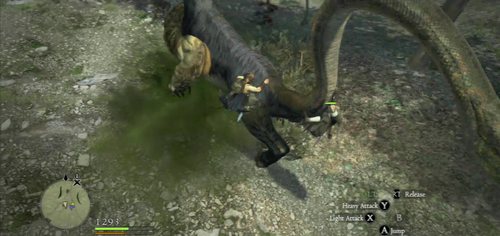
While you sleep, the Encampment will be visited by a Hydra. Fight it with arrows or by attacking one of the heads. You can climb onto it or keep it at bay.

You don't have to defeat the beast itself - it's enough to cut off one of the heads.
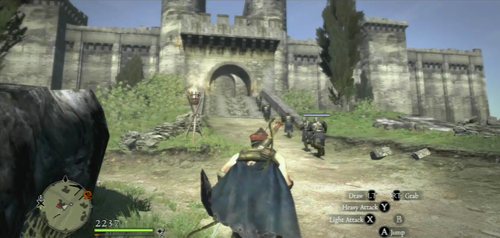
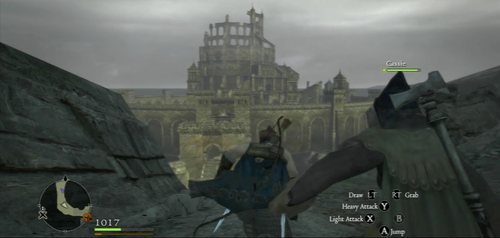
In short: Follow the caravan from the Encampment to the capital city. To initiate the quest, leave the Encampment by the east exit and head north, towards the castle ruins.
Difficulty level: Easy, since you're in a strong company all the time.
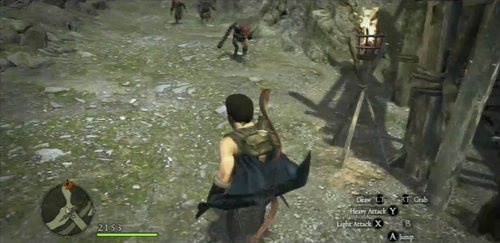
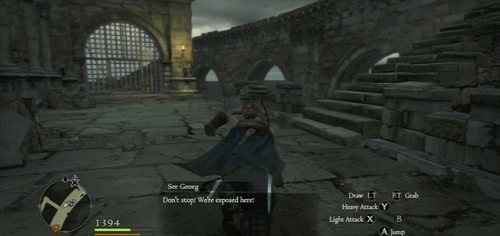
Leave the Encampment by the east exit and run towards the Mountain Waycastle.
Talk to Ser Mercedes and head out. The mission requires you to guard the ox pulling the cart. It can lose all its health points - it won't die, but will be moving very slowly. You can, however, speed it up by hitting it. Just remember not to do it too often. Keep close to the caravan throughout the whole quest - otherwise it will stop.
Just behind the bridge and the gate there are Goblins. Take care of them.
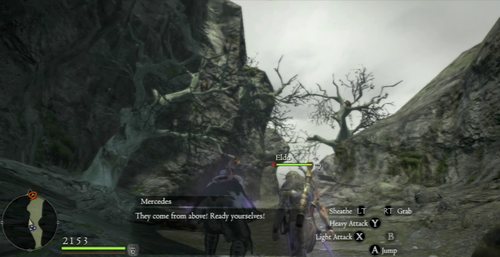
Further on you'll be attacked by Harpies living in the trees. To kill them, lure them to the ground by striking your shield or by shooting at them with the bow. It doesn't pay off to catch them in flight, because they can take you up in the air and throw you down.

Next in line are Wolves. They attack in packs. Focus on single enemies and attack them right after they charge.
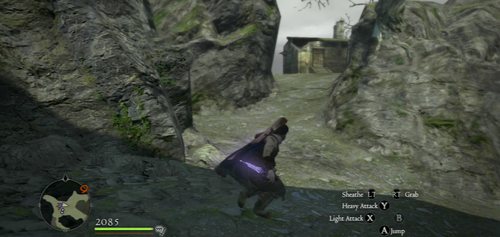
A while later you should see a cabin. A few thugs are standing in front of it, but it's better not to attack them - they can be too powerful at this point in the game. Stones will be falling off the rocks in this area.
When you reach the closed gate, kill off the Goblins guarding it and use the lever. Kill the monsters waiting on the other side.

Before you reach the city there is a large meadow where you'll probably be attacked by the last group of enemies - Bandits. Eliminate them one by one.
Step on the bridge and talk to Mercedes.
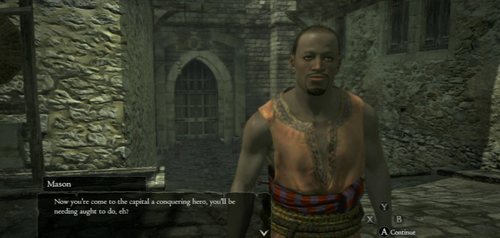
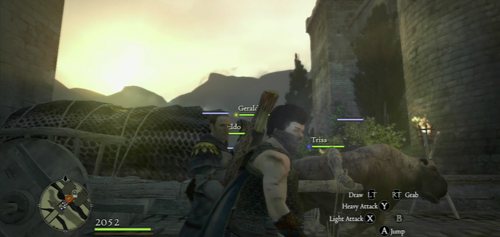
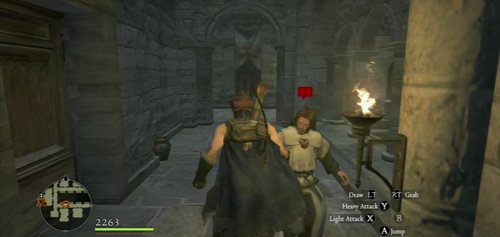
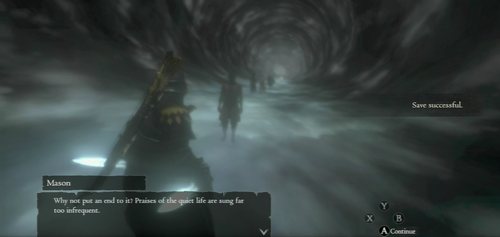
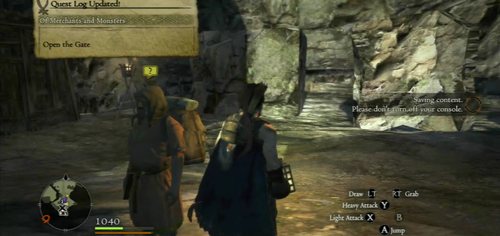
Just after entering Gran Soren (and completing the Off With its Head quest), you'll be stopped by Mason. He'll suggest that you should learn more about Pawns.

Ask the innkeep for advice and go to the Pawn Guild. You'll get there by taking the road north from the market.

There, talk to Barnaby.
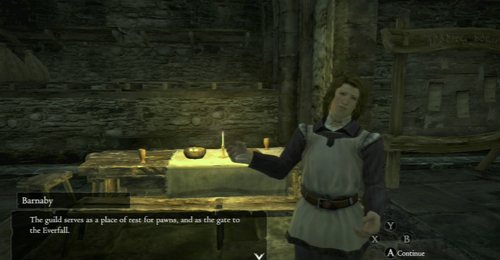
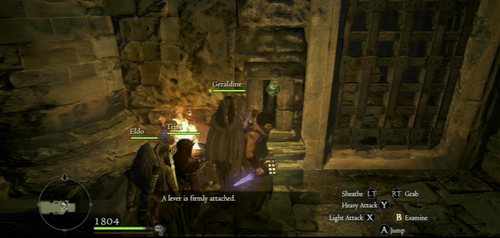
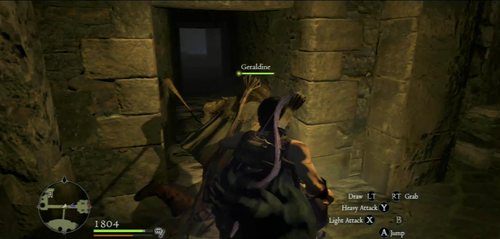
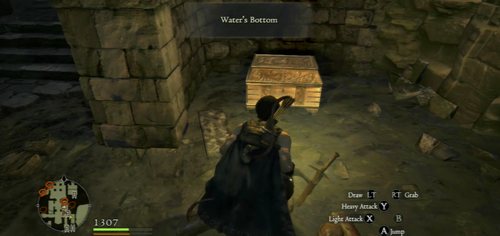
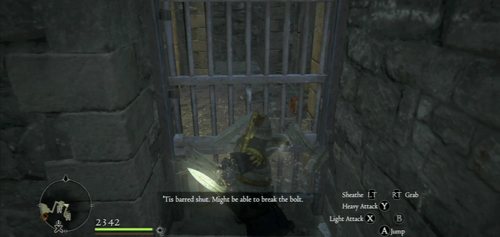
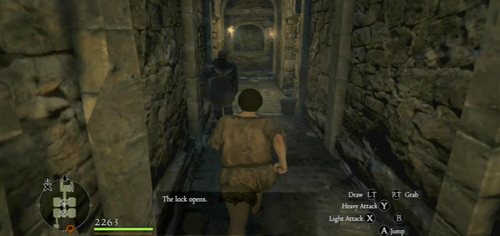
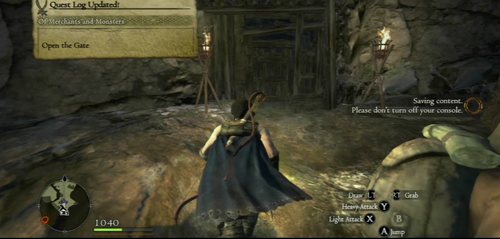
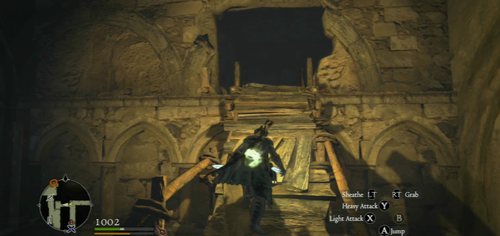
Keep Barnaby talking in order to help Pawns with their problems. He'll let you in to Evenfall - a mysterious underground.
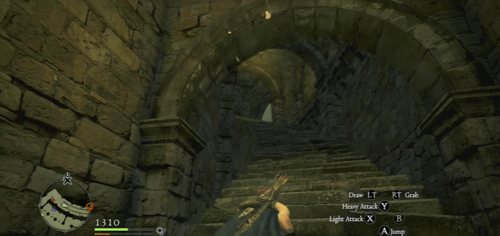
You need to go all the way to the bottom. Take the winding road. You'll be attacked by Bats.
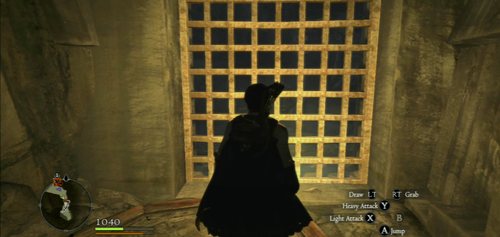
A few steps later you'll reach a gate blocking the way. There is a sideway path in front of it.
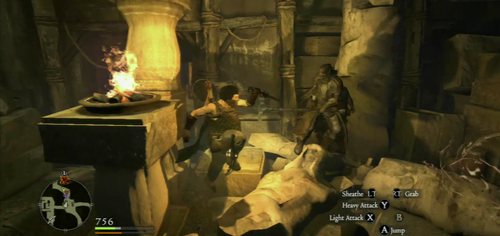
The sideway corridor leads to a chamber controlled by Skeletons. Kill them off. Archers will have an easy job by shooting the explosive barrels.
The path will take you back to the main road. Continue downwards.
There will be Skeletons to take care of near the chests. They're not difficult, but they have more health points and can grab the character - if they do, move the left stick to free yourself.
Go into another sideway corridor before another gate blocking the way.
This time the Skeletons have the more powerful Mages for company. Eliminate them first.
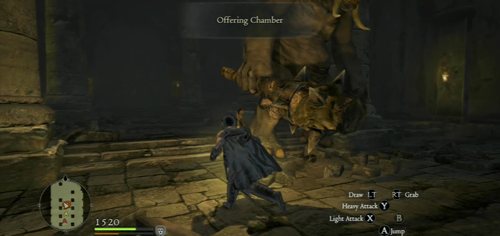
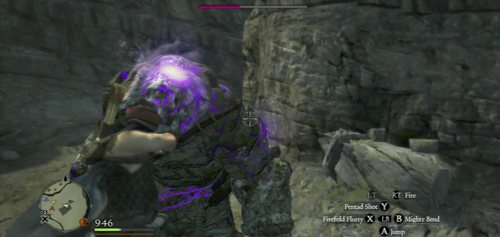
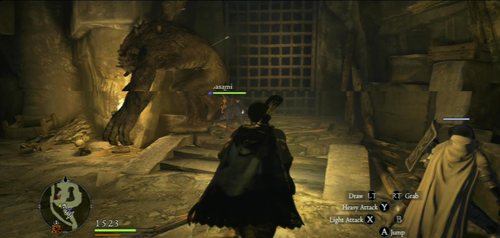
Finally, you'll be back on the main road. Check out the gate you've just went around - there is an Ogre on this side. He's a quite challenging opponent, but killing him now will make things easier later. If you can't defeat him, though, ignore him and go down.
There will be a third closed gate - again, take the sideway corridor.
You'll stumble upon more enemies (and more treasures) here. Eliminate Skeletons, Harpies and other creatures, and grab the loot from the lower parts.
Go to the other side of the room by using the way on top (use the slope and column fragments).
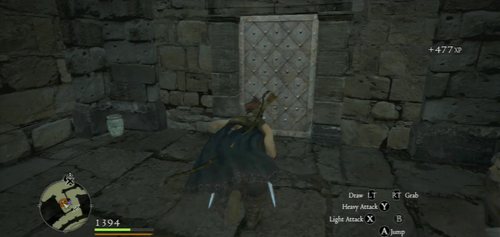
Here is the lever that will open the gate below. Use the unlocked path.
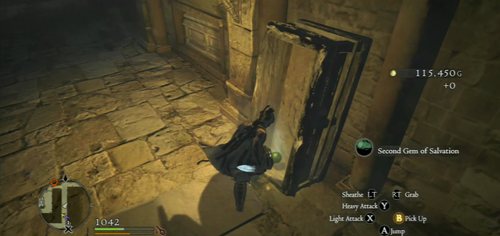
At the fork, go straight ahead (the road on the right leads back to the winding road down). You'll reach the Ceremonial Cage. Loot the tombs. An enemy will pop out from the last one, and he'll be more difficult to defeat. Kill them nonetheless and take a lever from the sarcophagus.
Attach the lever where it belongs at the gate and open it. Take what treasures there are on the other side.
Exit using the narrow corridor leading to the main chamber. Take the loot.
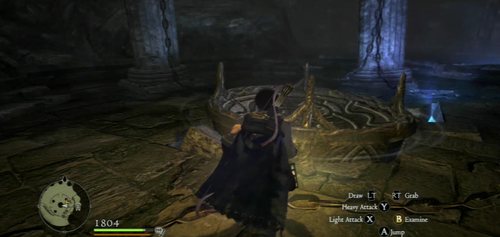
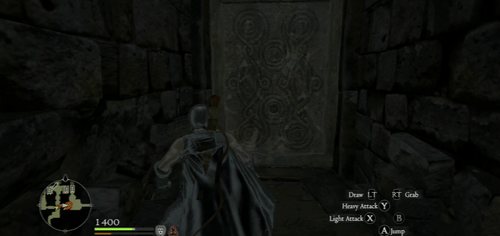
When you're ready, examine the round object in the middle (press B when you're close).
Some weird snakes will come from under the ground. There's no point fighting them - they'll keep respawning for all eternity. Run back upstairs. Ignore the Pawns and just run. If they die, you can summon them later.
You'll be safe once you trigger the animation showing the whole party escaping.
Talk to Barnaby to finish the quest.
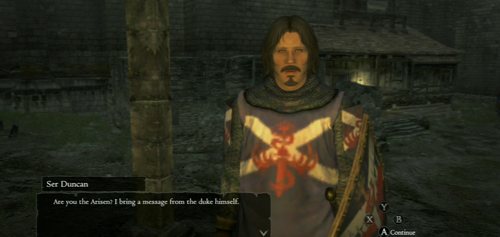
When you leave the Pawn Guild you'll be stopped by Ser Duncan. He'll point you towards the castle gates in the noble quarters, where you'll find more missions to complete.
You can get there by using the passage near the Pawn Guild.
In short: A quest in which you'll learn your calling.
Difficulty level: Easy.
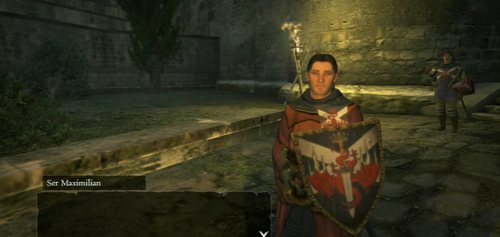
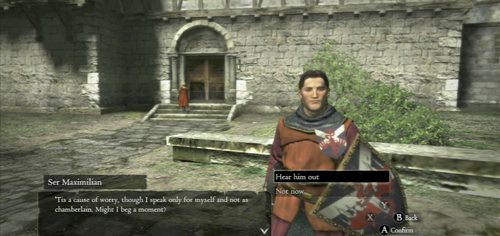
This is the first quest given to you by Ser Maximillian (they can be completed in random order). You can find him in the noble quarter before the castle gates, and he becomes active after the completion of Lure of the Abyss.
Begin by talking to the bishop in the Cathedral.
Now find Josias - he's usually out in the field.
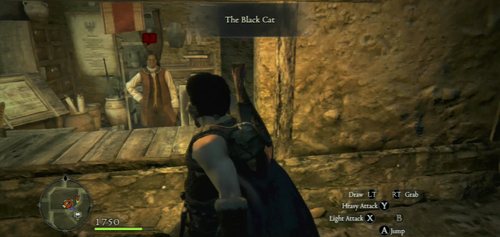
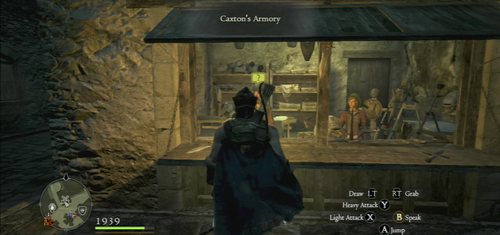
Then, pay a visit to Forger from The Black Cat shop located in the poorer area of Gran Soren.
The next person to ask for clues is the courier Maurin - the running man in yellow robes. He only appears during certain times of the day. It's best to wait at the inn until morning and then walk around the market. After a while the courier marker should appear on the map.
The next stop is the Hillfigure Knoll. To get there, leave the city by the northwest exit (near the field) and follow the river. Cross it over by the bridge.
You can shorten the way by going through the river, but you have to watch out for Saurians resting on the south beach.
Pass by the north castle and climb the hill. The place you're looking for is a stone altar.
Talk to the man and return to the city. Finish the quest in Gran Soren by talking to Ser Maximilian.
In short: A journey to a fort besieged by Goblins.
Difficulty level: Hard. I don't recommend taking it at the beginning of the game.
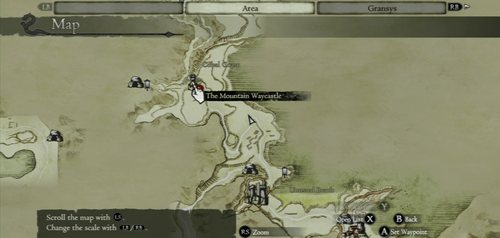
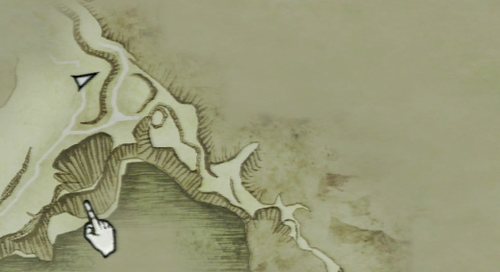
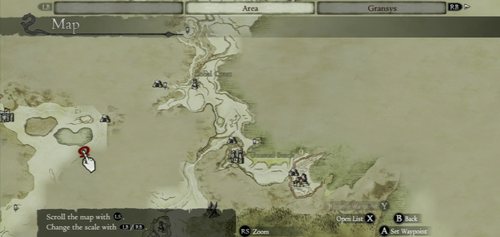
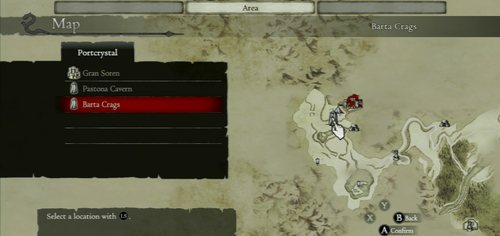
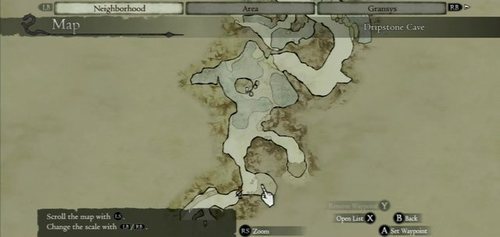
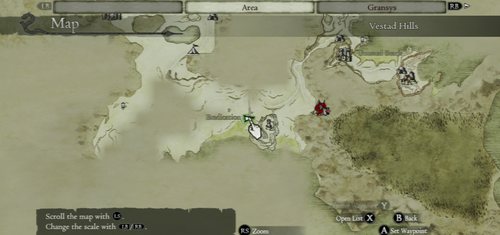
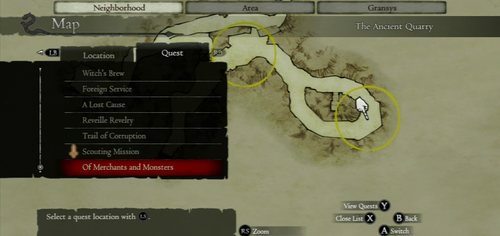
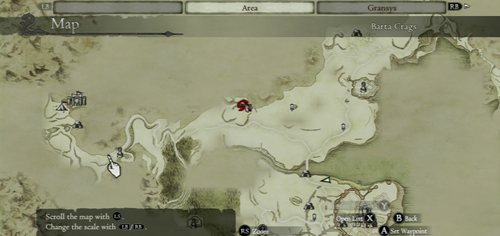
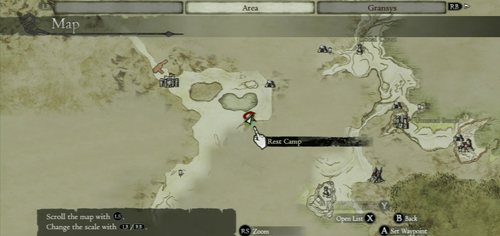
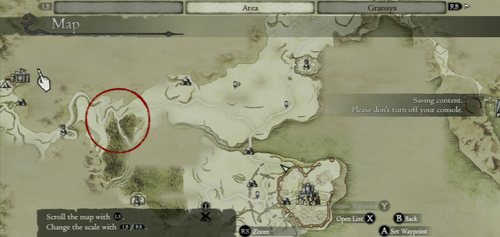
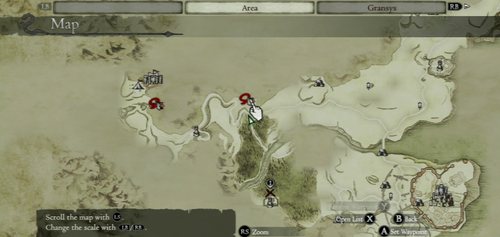
The quest requires you to get to the Shadow Fort - a fortress in the south of the land. You can get there by taking the passage through the Ancient Quarry. The entrance to the quarry lies southwest from Gran Soren (as seen on the map above).
Right before the Quarry there is a merchant with two quests - you can do them at once, that way you'll clear out the way through the caves. You'll be able to run through them without loosing stamina (just as inside a city).
Once on the other side, follow the road to the fort. Don't get close to the lake - a dangerous Drake lives nearby.
Enter the fort.
Talk to the local commander in front of the main gate. You need to get inside - use the underground passage not far from the troops.
You'll find yourself in the building controlled by Goblins. Eliminate them and use the stairs.

The stairs will lead you to the main courtyard. It's a large location with a multitude of enemies, including two Cyclopses. Ignore them all for now. On the right, there is a huge gate (you'll open it later). Climb the ladder on opposite the building.
Take care of the guards.
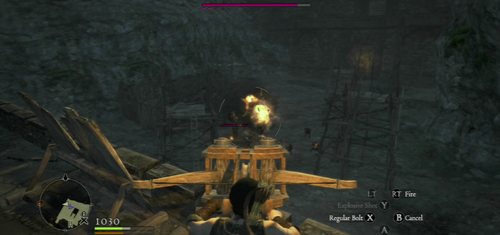
The next thing to do is destroying the two ballistas on the other side of the courtyard. Enemies will use it to attack you. Use the ballista on your side. Switch to incendiary missiles and destroy the enemy nests; aim at them separately and keep firing until you see an explosion (your missiles will "bump into" the enemies', so you need to fire continually until they reach the target).
Once you've cleared the way, climb down and go the ruins on the left - Station Room (halfway through the courtyard).
The main entrance to the ruins (the gate) will be blocked on the other side. To get inside, use the ladder on one of the side walls.
In the Station Room, go through the prison door and get rid of the Goblins.
On the other side of the prison, take the lever from the chest.

With the lever, return to the main gate to open it. The exit from the Station Room is probably blocked by Cyclopses - jump between their legs. The mechanisms to attach the lever to is located on the roof of the building on the right, by the walls. Open the gate.
Soldiers will appear on the courtyard - but their help is rather small. You need to kill two Cyclopses and Goblins. It's best to use the siege machine you've been shooting from before.
When the Cyclopses are down, enemies will retreat to the next part of the structure. Follow them. The road to the Goblin leader is on the right (inside the building).
Climb up the winding stairs. You'll meet another Cyclops there - you can fight it or ignore it. Continue through the corridors and go back down through the second tower.
Finally, use the double wooden door and fight the Goblin leader (he's not particularly difficult). When it's over, talk to Ser Robert and return to Gran Soren (to get the reward from Ser Maximilian).

In short: A journey to a mysterious cave.
Difficulty level: Medium. You'll be fighting Saurians and a Cyclops.
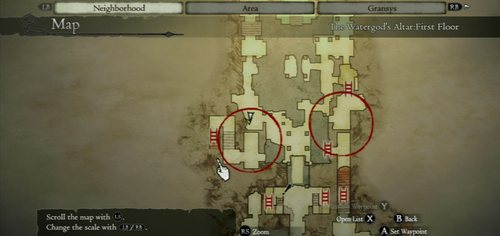
Begin the quest by talking to father Geoffrey at the Cathedral near Ser Maximilian (in Gran Soren's noble quarter). Then, head for the titular location west of The Mountain Waycastle.
Once you're at the castle ruins, go down towards the river.
At the riverbed, turn left towards the spring. Climb up the hill until you see a way down (in front of the waterfall). This is where you need to cross the stream.
Under the last waterfall there is a monk, Haslett. Talk to him and enter the cave.
Go straight ahead until you reach a drawbridge. The mechanism that controls it is missing a lever. Go down the nearby stairs.

In the caves below you'll encounter a large group of Saurians. When you kill enough of them, the rest of them will retreat, opening a way. At its end you'll find three chests - one of them holds the lever you're looking for.
The next step is of course going back up, attaching the lever and lowering the bridge.
You'll find yourself in a large chamber with a fragmented floor - watch out for the water below because any contact with it means death. First, go right to kill off the enemies and take the loot.
Then, go back to where you started and use the left path. A couple of Saurians will try to surprise you by jumping on the plank.
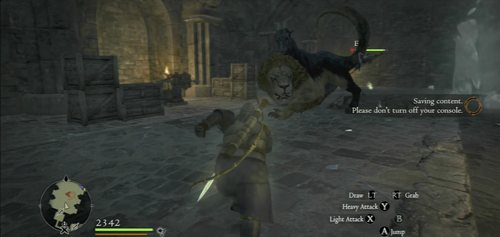
This way leads to a chamber with columns and a Cyclops. Examine the corpse of a man - that's what you're here for. Report back to Haslett in front of the cave. The monk will ask you to finish the case.
Go through the caves again to reach the chamber with columns. This time, kill the Cyclops. Take his eye.
Retreat in front of the bridge and take the dark corridor which ends with a closed door. Use the eye here.
Kill the enemies behind the door and go gown the stairs to the room below, which is controlled by the undead.

Afterwards, take the only available path. At its end, activate the switch on the floor. The water level will drop.
To finish the quest you also need to find five altar slates. They all weigh a lot, so distribute them among party members. Search the open paths - there are passages that have been previously unavailable because of the water level.
Three slates are on the lower level - the last of them has been hidden in a chest at the end of the cave. The winding road is guarded by a small Cyclops.
Two other artifacts are on the upper level - don't use the stairs, but the ladder below (in the side rooms).
Having collected all the slates, go back to the monk to finish the quest.
In short: A journey to the Catacombs to meet a lot of the undead.
Difficulty level: Easy.
At the beginning of the quest talk to one of the indicated NPCs in search for information.
Then, go to Mason - he can be found in the Slums/Sewers (you need to go down the ladder to reach them).
Mason will point you to your targets - go to one of them to express your interest in a mysterious cult. You'll learn that the meeting is held in the Catacombs.
The Catacombs are located north of Gran Soren, near the northern castle.
There, follow the only available path straight ahead, killing Zombies.
At one point you'll stumble upon a closed stone door. Open it with the lever lying nearby.
Further in the underground you'll keep finding torches - light them up so as not to fight in darkness.
Take the elevator down - simply use the switch.
Downstairs, run through the narrow corridor and enter the chambers with sarcophagi. Open another door. When you reach a fork in the road, chose either way - both lead to the same place.
Pass through the dark, narrow caves with an Ogre (you don't have to kill it). The next complex of chambers has a gate behind which is the mission goal. The gate cannot be opened, so use the winding stairs. Then climb back up on the shelves.
Turn into the corridor right of the mission marker. After a cutscene and interrupting the ceremony, fight back the Skeletons.
In the next chamber you'll run into Mason and a cult worshipper he had caught. Mason will tell you to kill the man. If you do it, you'll get on his good side (he'll have more quests for you). If not, he'll break off any contact with you.
A little behind the place where you meet Mason, there is a ladder leading to the surface.
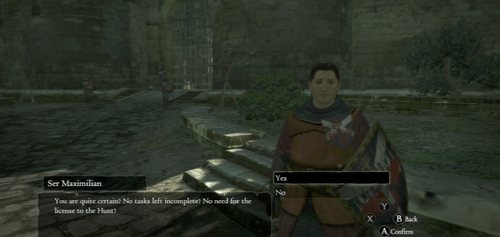
After completing the Wyrm Hunt quests, you can proceed to the next stage of the game and meet with the Duke. The decision is made during a conversation with Ser Maximilian. Max will warn you that some of your unfinished quests will be deleted. In practice, you risk only losing access to Lost and Found.
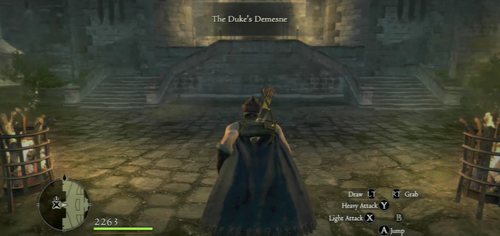
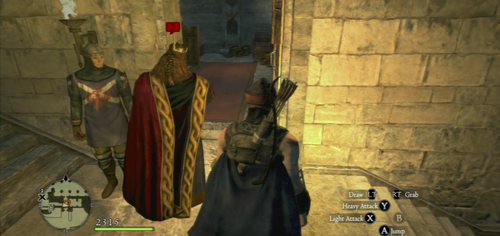
Enter the castle area and go inside the Duke's Demesne. Your goal is the throne room.
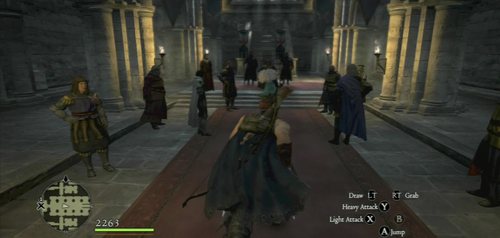
There, approach the ruler and listen to his speech.
Afterwards, you need to talk to the Duke's right hand - exit the building. The game will suggest to head for the Gardens. See what's there and talk to Aelinore until she takes the funny hat off the character's head.
To initiate the next part of the quest, try to leave to go back to the city.

You'll get further instructions from Aldous - he's usually in the throne room. He has a few quests for you to pick.
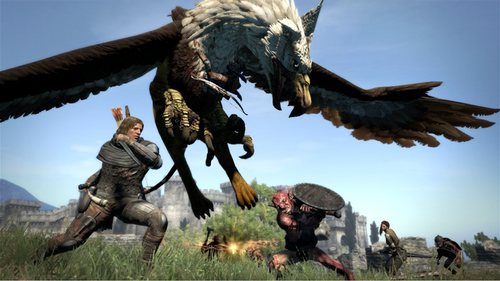
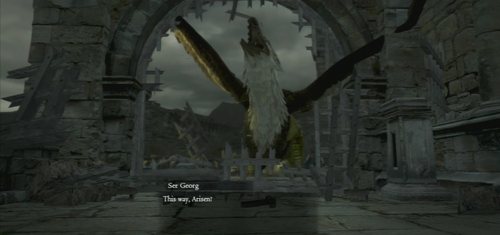
In short: A journey during which you'll kill a Griffin.
Difficulty level: Hard. The journey is long and dangerous.
Leave by the south gate and talk to the soldiers. Follow them south.
On the hill, the soldiers will hide in bushes. Your job is to lure the beast by placing a Goblin in an indicated spot (dead or alive, Goblins are found around the area or on the road you took to get here).
A Griffin will appear - fight it until it flies away (some information point out that the Griffin can be killed right then and there - but I couldn't do it during the tests I run for the purpose of this guide). You can light it up on fire, though (that's how you can force it back to the ground if it tries to lift off) but don't get close to its beak.
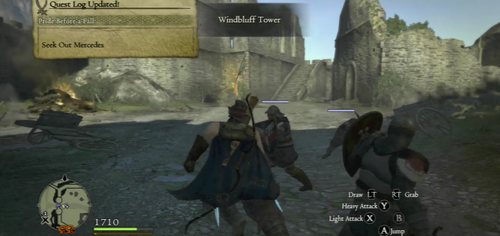
Now come the hard part - the journey to the far away Bluemoon Tower. Prepare well by taking a lot of potions/herbs. The shortest way leads back to Gran Soren. Run through the city and leave it by the northwest gate.

Head north and follow the road. You can kill the enemies - mostly Harpies, Wolves and Goblins - or you can ignore them, but it's better not to risk losing Pawns. Pass by Windbluff Tower.

Follow the road, which turns east. At the fork, go just in that direction. This is where you'll encounter Bandits.
Turn east again at the next fork, and after a while leave the road to reach a straight.
Behind the Harpies' nest you'll need to battle... the wind. It's strong enough to hinder your mobility.
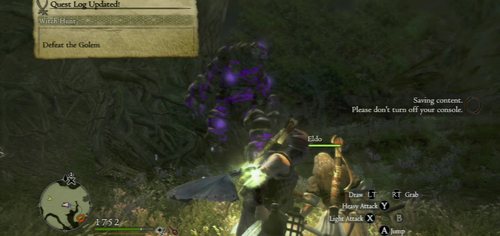
The most difficult part of the journey is going through the canyon, which is also the Bandits' hideout. The enemies are placed behind rocks and they shoot from above. Try to lure them out and finish them off in a safe place. Another option would be to run deep into the canyon and hide behind one of the side rooms. There you can face your enemies without the risk of being shot with an arrow.
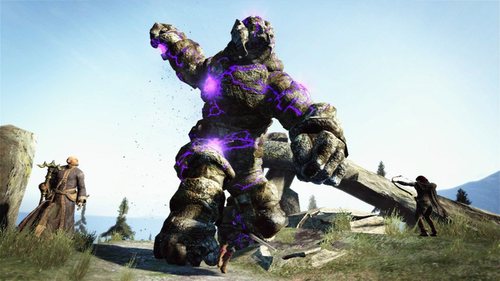
At the other side of the canyon there is another opponent - a Golem. You can either ignore it or fight it. What makes the fight easier is that there are ballistas on the nearby rocks.
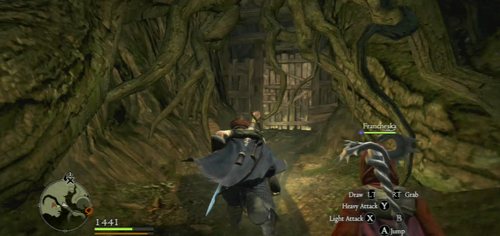
Finally, go down to the castle ruins.
Inside, there is a real battle going on. Kill off Harpies and Skeletons, all the while climbing the stairs to the very top. Pay closer attention to enemy mages.
Once you're in the building, go through the metal door. On the other side turn left and help the soldiers destroy the bolt locking the gate.
You can open the next gate in the same way. Alternatively, you can climb the side wall to go to the other side and use the lever.
The third gate will require another action - provoking the Griffin to attack. The beast will break the wall and start chasing you. Escape by going up.
Pass through other chambers and climb the narrow winding stairs.
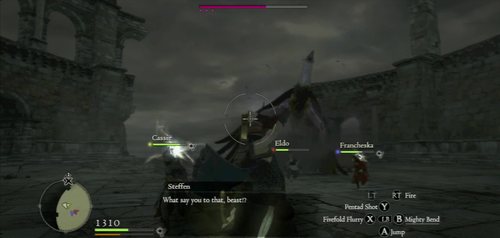
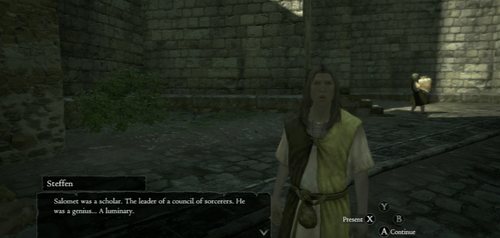
The final battle will begin upstairs. Fight the Griffin. If you completed the A Troublesome Tome quest, Steffen will show up and help you out.
Afterwards, loot the gold and take the portcrystal, which allows to set a teleportation spot. Report back to Gran Soren.
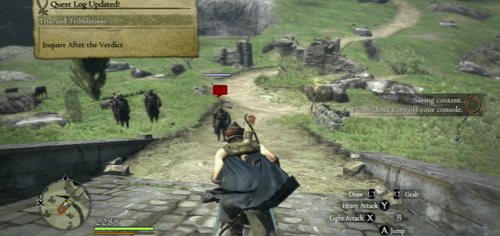
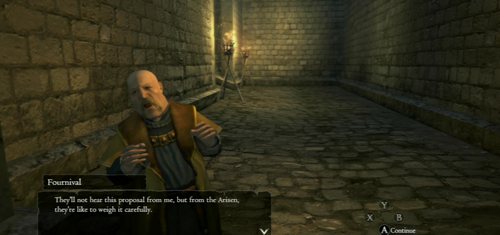
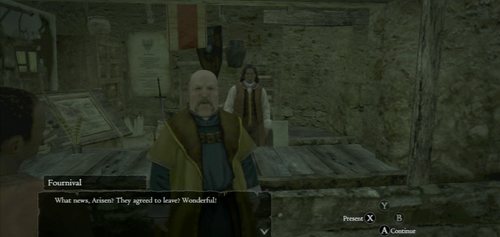
In short: Gather evidence for the trial of a wealthy resident of Gran Soren - Fournival.
Difficulty level: Easy, unless you want to prove Fournival not guilty.
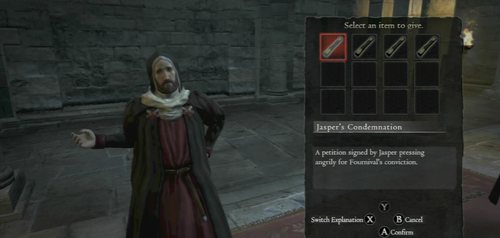
In the first stage of the quest you need to question several people and take their statements. You have three days to do it. Give each of their statements to Aldous - thought it's better to collect a few of them first. What's important is that you can decide what the verdict is going to be: either a sentence or an acquittal. The latter is much harder to achieve since it involves extra work and a bit of cheating.
You have two options:
- acquittal - escort the witness from Windbluff Tower, take statements from Fournival's daughter, bishop Geoffrey and Fedel from the castle, acquire Chamberlain's Affidavit, and, if needed, take the false statement from the merchant. This version gets you also: a discount in Fournival's shop and the possibility of buying the Magnanimous Clok from him.
- sentence - the case is much simpler. Talk to Jasper's family; you can also escort Ansell from Cassardis or acquire forged letters.
Below are the descriptions on how to do all of the above.
Follow the marker on the map. The first person, Fedel, keeps to the castle during the day. His statement speaks for Fournival's innocence.
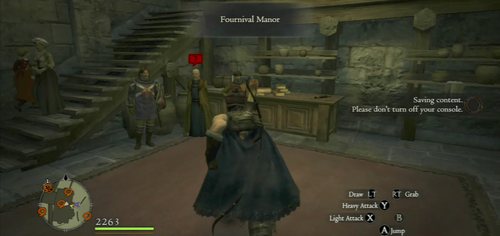
Before leaving the castle, it's worth checking out Fournival's manor. He's kept under guard. Take the Chamberlain's Affidavit from there (it's lying on the dresser) - it's another evidence that can prove Fournival's innocence. If you don't want to aqcuitt him, you can give it away as part of one of the quests on the Notice Boards (you can also make a copy of the document in The Black Cat).
The third evidence for his innocence is in the hands of Fournival's daughter - but only on the condition that you've completed the Escort Duty quest.

The fourth evidence will be given to you by Geffrey - the bishop from the Cathedral.
Three pieces of evidence against Fournival come from Jasper's family.
Another sentencing evidence will be given to you by Ansell from the village of Cassardis - on the condition that you've previously completed the An Innocent Man quest. In this case, walk him to Gran Soren. Another witness, speaking for Fournival's innocence this time, is located north of the city - in Windbluff Tower. He has to be walked to Gran Soren as well.
The quest also allows you to gather false condemnations. There're sold by a travelling merchant - sometimes he can be found around Fort Shadow, other times at the Encampment. He sells documents both incriminating and speaking for Fournival's innocence. Keep in mind, though, that two condemnations equal one motion for aqcuittal.
Having collected the evidence, hand them to Aldous. Now you can decide how you want to resolve the situation.
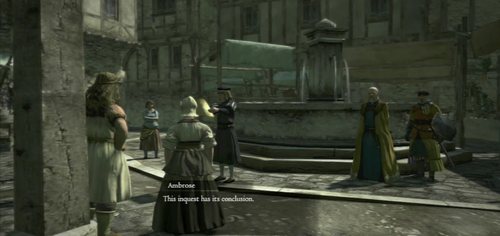
What next? You can ignore the quest while waiting for the trial. The verdict will be announced three days after the beginning of the quest on Gran Soren's market.
In short: An encounter with a mage a journey to a far away tower.
Difficulty level: Medium/hard. There are hordes of powerful Bandits and the undead in the mage's tower.
After completing all current quests, Aldous will have new ones. This time it's time to face Salomet. First, talk to the people in the castle.

In the city, find Mellard. He'll point you to a possible location of the mage - the Ancient Quarry. Leave by the west gate and head for the north entrance to the Ancient Quarry.
Inside, you'll stumble upon a large group of Salomet's supporters right away. Kill them. Focus on the mage alone, because he poses the greatest danger. Sadly, he'll escape. Go back to Gran Soren and report to Aldous.
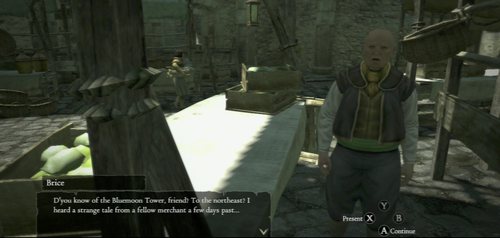
Brice can help you determine Salomet's location (the merchant from the market). It turns out the mage has chosen the Bluemoon Tower as his lair (it's where you fought the Griffin in Griffin's Bane).
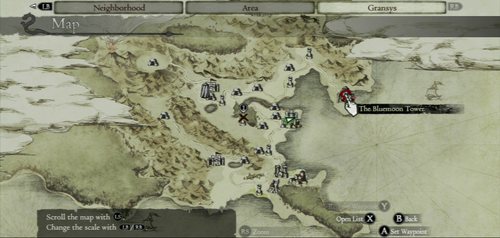
Walk or teleport there (if you have the crystal set up properly).
At the tower, there is a hard battle to be fought - with Salomet's henchmen. There are more challenging Bandits, so be careful. Archers are particularly dangerous, since they can throw you off balance with their arrows.
Cut through them and go upstairs, taking the same route as in Griffin's Bane.
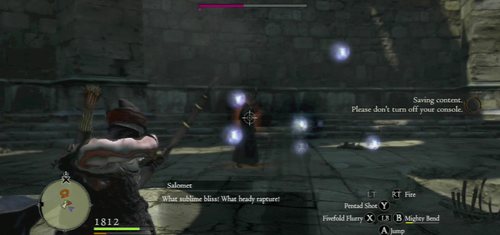
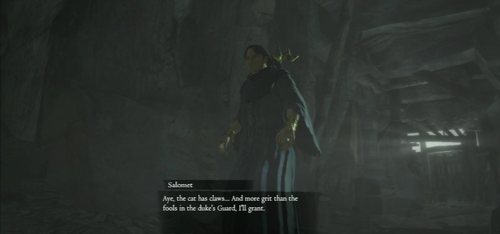
Battle will ensuse at the top of the tower. Try to focus on Salomet because he'll keep summoning powerful Skeletons. If you can hurt him enough, you won't have to fight with a horde of the undead. Keep in mind that Salomet teleports when you get close to him. It's better to take him out from a distance.

When Salomet dies, pick up the ring from the precipice and go back to Gran Soren.
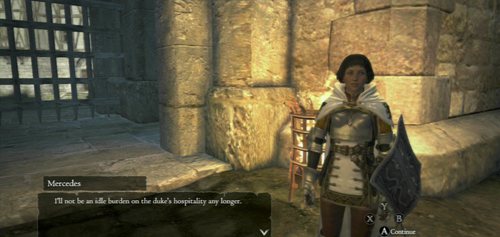
In short: Will Ser Mercedes gain the respect of her colleagues?
Difficulty level: Easy.
You begin this quest at the castle gate - Mercedes will brief you on the mission. You don't have to escort her to the Windbluff Tower - she'll get there on her own.
A battle takes place there. Ignore the soldiers and climb the stairs.
You'll see Mercedes fighting with Julien. You have a choice: either not to engage or to help the woman out. No matter what you do, Mercedes will go on her way. Afterwards, go back to Aldous.
In short: You get a call from the south. In fact, it's a ruse of the cultists.
Difficulty level: Hard. Make sure to arm yourself with potions and a Secret Softener before encountering the Cockatrice.
At the beginning of the quest, Aldous will receive a message from the south requesting help. Before you go, stock up on potions counteracting the effects petrification (Secret Softener).
Go south to the Waycastle.
The moment you step on the bridge leading to the Waycastle it will be revealed that the whole thing was a ruse. You need to quickly go back to Gran Soren.
On your way back you'll see that the city is on fire. Go to the west gate (the south one is blocked).
Inside, a Cockatrice is raging. To defeat it, proceed similarly as with the Griffin, but watch out for one crucial element: the Cockatrice releases a petrifying cloud that can turn you in stone. The process takes a couple of seconds, but if not stopped, it will kill your character. You can counteract it with a Secret Softener and other potions (you get them from a guard in front of the gate).
Afterwards, talk to the guard waiting for you.
Having completed the previous quest, Aldous will have good news for you - you can have a private audience with the Duke.
To get to the king's chambers, stay close to Aldous (otherwise, the NPC will be waiting for you there).
Follow the Duke to the Treasury. There, take the items and the gold from the chest.
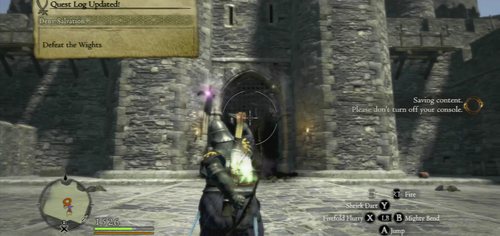
In short: The final encounter with the cult.
Difficulty level: Hard. The journey and the battle are challenging. There is also a new type of enemies - Wights.
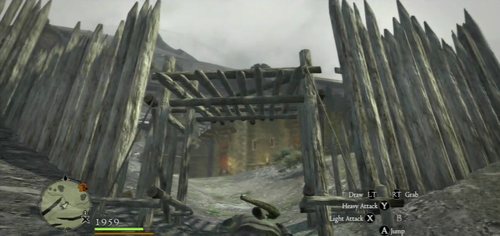
This quest takes you to the Greatwall Encampment. The road from Gran Soren isn't particularly complicated - simply take the northwest road - but it's surely dangerous. There will be Bandits, Goblins and other enemies to get through. Take a lot of curatives with you.
What makes this a lot easier is that at the Encampment before the wall you can rest, buy supplies, summon Pawns and change abilities. It's a good place for a ferrystone.
Once you cross the keep's gate, you'll see fleeing cultists. They'll be quickly replaced by Bandits, Harpies and... two Cyclopses. At this point in the game you should be fairly used to killing them, though. If you have trouble, check the Bestiary entries for advice.
On the premises, turn right to a small passage. The whole building is filled with Skeletons, treasures, walls that can be blown up by explosive barrels, and soldiers.
If you rescue the soldiers, they'll help not only with the fighting, but with navigation as well. The first one will open a passage leading to the staircase which will take you up.
Upstairs, smash the bar blocking the gate. Pass the stairs leading down and go straight ahead to a large chamber.
Ser Estoma will unlock the passage only once you've killed the Chimera. You can use the ballista near the gate behind which a knight is hiding.
A while later, rescure another knight to open a shortcut for you.
If you're too late, you can simply go upstairs - there are a few Skeleton Mages there.
Before you can reach the arena where you'll fight the boss, you also need to kill a Undead Warrior. Attacking out front doesn't make any sense. Circle around him to strike from the side.
Now it's time to face the Wights - two necromancers who summon Skeletons, cast offensive spells and can heal themselves.

There are numerous ways to fight the Wights. If you have large firepower, you can ignore the Skeletons and shoot the necromancers. Otherwise, destroy the hordes of the undead to lure the bosses to the ground. When they are busy summoning zombies, you can strike them all you like.

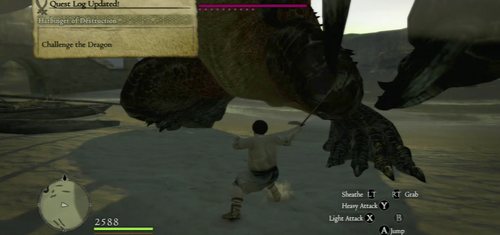
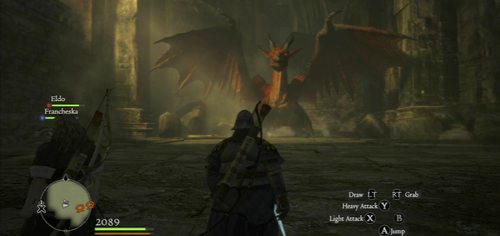
Afterwards, a Dragon appears.
In short: The final battle with a Dragon that will change everything!
Difficulty level: Very hard. Repeat: a battle with a DRAGON!
Before you rush out to fight the Dragon, get councel from Dragonforged. It's not mandatory, but in return you'll receive a scroll with techniques against dragons, which will allow the Pawns to learn a few tricks.
Before the journey to the Greatwall Encampment, you need to prepare really well. You're probably have to fight a Dragon there, and not only. Upgrade your weapons, buy lots of health and stamina curatives - in short, prepare for the worst. Ice and Dark magick will be useful against the Dragon.
Depart when you're ready. Once you get there, enter the keep and go straight ahead.
In the land controlled by the Dragon you'll encounter upgraded version of the well-known enemies. First, there are Geo Saurians - a very tough bunch. Make sure to cut their tails before they can do anything else.

Then, there are Succubi - stronger Harpies. Their voice can put you to sleep much quicker. Use Ice spells to kill them as fast as you can.
The Succubi will be back later, this time with the support of Hellhounds. Those are really challenging version of Wolves. It's not enough that they jump at your throat, they can also shoot fireballs. Gentlemen, Ice attacks work best.
Finally, you need to defeat a Gorechimera, and upgraded version of the lion-goat-and-snake mixture. The beast is more powerful and parts of it can resurrect after death, but the strategy is the same as with the regular Chimera.
In order to open the way to the Dragon, activate three buttons on the ground (step on them).
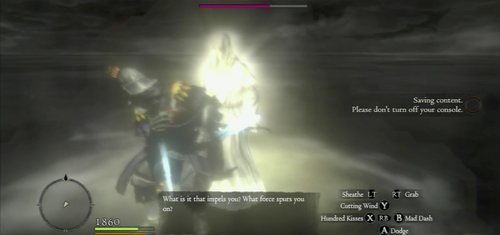
In the battle with the Dragon, the hero's beloved will appear. The Dragon will give you a simple choice: if you sacrifice the life of your beloved and leave, it will leave the land and the hero will become the new ruler of Gran Soren (so it's not the final ending!). If you want to save your beloved, you need to face the beast.
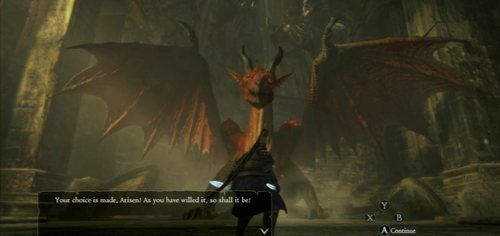
Approach the Dragon to challenge it. It'll ask you again if you're certain. Answer yes.
In the first stage, take your Pawns and escape to the sideway corridor, evading the falling boulders and fireballs.
When the beast is behind you, sprint ahead.
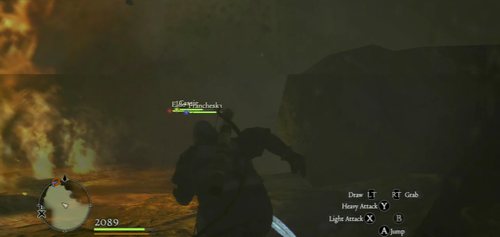
Stop only when you reach the chamber. The beast's head will appear behind you. Beat it with all you have.
When sparkles and flames start showing in the beast's mouth, retreat behind the wall fragment - you'll be safe from the Fiery Breath.
After a while the Dragon will free itself from the rubble. Attack its legs, or, even better, its heart - there is a weak spot on its chest. You can't see it at first, but after a few strikes it will start glowing.
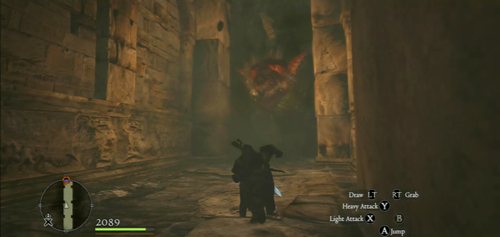
Finally, the beast will lift off. Go after it, using the wall to run into the next tower. Watch out for cracks - it's easy to fall through them. The Dragon won't forget to breathe fire on you - sometimes you can evade the flames by ducking behind the rubble.
Once you're through the first tower, run to another one. This time the Dragon will sit aside and breathe fire on the wall. Duck behind wall fragments.
Halfway through, the Dragon will leap on the wall - don't go back. Run straight at it and you'll break through under it.
At the top of the second tower, use the ballista and shoot the approaching Dragon.
You'll find yourself on Grigori's back. Move towards his wings, completing quick-time events (just shake the left stick).
When you're at the pulsating light, attack with any weapon.
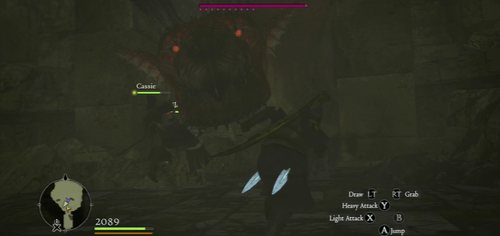
Now you process to the proper, the longest part of the battle - a regular battle under regular conditions. Focus on attacking its weak spot, which is the heart. If you can't, try hitting the claws.
Pay very close attention to the Dragon - it's freakishly fast. When it runs ahead and turns around - run to the side (it will attack with flames). When it leaps to the other side of the Arena - charge at it, jumping to the side when needed. In general, it's safest to stay under it.
On the rocks at the edges of the arena there are ballistas. They will come in handy when the Dragon starts flying - you can force it back to the ground, but you need to hit the heart.
If you're playing a capable Strider, you can also grab the Dragon's tail and climb up to his heart. One blow will take it down to the ground.
Holding onto its chest is generally a good idea in the second stage of the battle - the Dragon will often stand on its hind legs to use a powerful area attack.
Sadly, the Dragon will quickly realize what you're doing - when it reaches its paw to get you, let go quickly. Otherwise, it'll sweep the floor with you.

To kill the Dragon, the main character has to deliver the final blow to its heart.

After defeating the Dragon, you'll wake up in Cassardis. You'll find your beloved in the house as well. Unfortunately, killing the beast hasn't repaired the world - on the contrary. Head to Gran Soren to investigate what's happened.
When you get there, you'll be stopped by guards - they'll suggest you went to the castle.
Enter the royal chamber in the castle.
It turns out that the Duke has made a pact with the Dragon and lost his energy after its death. You need to defeat him. After the fight, guards will appear - there's nothing left but to make a bolt for it.

Flee the castle and head for the market. Ignore the pursuers led by Ser Maximilian's squad.
When you reach the market, something strange will happen. The ground will part.
Defeating the Dragon doesn't mean the end of the game - quite the contrary. It opens a path to the full and final ending which you can read about in the further parts of this guide. Getting rid of the beast also introduces the so-called "Hard Mode" or "Endgame".
What it means is that the properties of the realms change. It's not only a visual change, because the well-known locations now have more threatening versions of enemies, new quests and additional challenges. In turn, it also means additional items.

What's more, from now on you can visit The Everfall - a special location connected with the main quest, but containing a whole lot of new challenges. In practice, it means that at the end of the game you receive several dozen additional hours of new play.
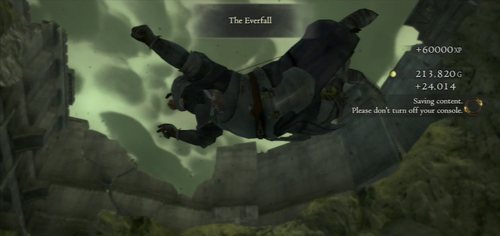
In short: You fall into a mysterious land. It's comprised of several levels with separate challenges on each.
Difficulty level: Medium/hard. It all depends on the level.
Fall into the abyss! Fly up to any edge and grab onto it.
Quince will appear. The Pawn woman will ask for help in saving her master. You need to obtain 20 Wakestones.
Enter the door behind her - the Chamber of Confusion. There will probably be two Pawns inside and another passage.
Behind the next door there is an arena with an Evil Eye. Defeat it, but keep in mind that it has powerful magick, tentacles and teleportation on its side.
Try to focus on cutting the tentacles off - this will cause the Eye to fall to the ground to rest and will reveal its weak tissue.
Having defeated the Evil Eye of the Chamber of Confusion, you have unlocked the remaining levels of The Everfall. What now? To answer this question, first you need to understand how this weird place works.
The Everfall, or Fathom Deep, is a special place with 16 levels. Most of them contain chambers filled with more powerful version of known enemies. The structure of this place is very specific - to get to any of the levels, you need to fly up to it while falling down, and grab onto to the ledge. You don't have to be very close or hit a specified spot - you just need to be close the ledge.
It's important to note that you can explore this location in any order, choosing your challenges as you fit. To begin the "falling down" from start, drop down to the very bottom - the character will then appear at the top. It's also worth noting that you can leave this place any time you want, to, for example, continue exploring the world in Hard Mode / Endgame. The Exit is located on the top level - it's a sideway corridor that ends with a door.
In The Everfall, there is one simple quest - to obtain 20 Wakestones in order to save Quince the Pawn's master. The stones can be gathered or bought (in limited quantities) in the regular game world. Only in The Everfall, they are very common. To finish the game, you need to visit several of The Everfall's levels. The stones are dropped by enemies - the smaller ones leave fragments, the bosses leave full stones. They are also hidden in chests - the ones you open or the ones you destroy.
The Everfall has 16 levels. Each of them has a pretty simple floor plan. It all comes down to the configuration of the enemies:
In practice, it's all very simple: explore subsequent chambers and levels, kill enemies, search the chests. Choose levels appropriately, so that it's not too hard to go through them - advanced characters will cope in every situation. There's no point in hiding that some of the enemies (i.e. Archydra) are very, and I mean very, challenging.
Having obtained the 20 Wakestones (each is comprised of several smaller fragments), go back to the top level and report to Quince.
In short: A quest leading to one of the game's ending - including New Game+.
Difficulty level: Easy.
After completing Quince's quest, jump into the abyss.
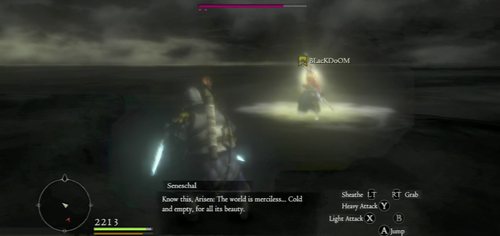
You'll find yourself in the chambers of the Seneschal, the ruler of the world. To replace it, defeat him.
The first stage of the battle, comprised of two fights, shouldn't be difficult simply attack him and watch out for his magick attack (a wave of energy).
After defeating the Seneschal twice, you'll proceed to the second stage. This time you'll be given a choice. If you turn back towards the magick village visible in the distance, you'll go back to a simple life. It's one of the endings rewarded with an achievement/trophy. It's not the final ending, though. By going back to the village you WON'T UNLOCK New Game+.
Instead, follow the tunnel filled with well-known characters. Each of them will attack you, some will say something. You don't have to fight them - you can just simply pass them by.
If you chose to continue the battle, face the Seneschal and his Pawn (with the help of your own). This time it's best to focus on the Pawn, since most of the time he's the weaker one. Then, bring down the ruler of the world.
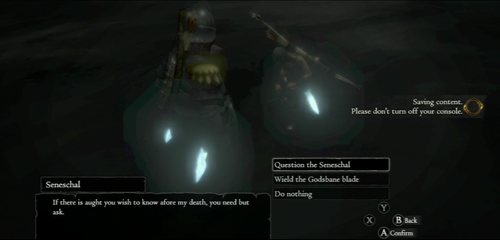
After winning the battle, the ruler of the world will surrender to your will. The option to question the Seneschall will reveal some interesting information about the structure of Dragon's Dogma's world. When you're ready, select "Wield the Godsbane blade". The god will die.
Congratulations, you've just become a god. This allows you to sit on the throne to be able to go back to the village of Cassardis. You'll walk around it as an invisible character, who unfortunately doesn't have any special abilities.
When you're bored with how things are, leave through the city gate to go back to the underworld.

There's only one option left - quit being a god. To do it, select the Godsbane blade (in the Tools tab) and choose the option to kill yourself.
NOTE: by doing this, you will unlock New Game+. It's activated by selecting LOAD GAME! Selecting New Game from the main menu will delete your character! In New Game+, you play the game from start, but keep your level, your Pawns's level and equipment (it's transferred to storage).
It's worth mentioning that New Game+ doesn't increase the level of monsters - the game doesn't become more difficult. The only new addition is the portal to Ur-Dragon, located on the side beach in Cassardis.
In short: Steffen is looking for a powerful tome - Salomet's Grimoire. The NPC is pretty easy to locate - he's walking around the market during the day and the night.
Difficulty level: Medium. You'll need to break through to a Bandit's camp. Or, in harder version (optional) - embark on a journey to a far away land.
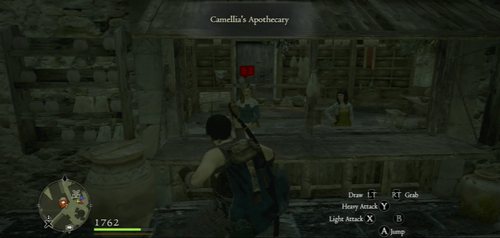
After accepting the quest, go to Camellia's Apothecary at the market. She'll point you to another destination.
Now you need to go to the Bandit's camp west of Gran Soren. You can, however, omitt this step and go straight south, in the direction of the Encampment. On your way you'll stumble upon a man under attack from thugs. Rescue him and talk to him. He'll show you the way to Aernst Castle Ruins.
The leader of the group in Aernst Castle Ruins won't tell you where he had hidden the tome. You don't need to worry about his permission, though, because...
You can simply climb a nearby tower, half in ruins. The tome is hidden in a chest on the top. Give it back to Steffen.
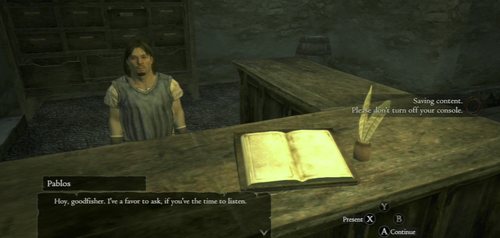
In short: Catch a thief. Start at the inn after completing several of the initial quests.
Difficulty level: Easy. The quest doesn't require levelling up - just a certain level of dexterity.
After a conversation with Pablos, go to a nearby shop and talk to Aestella (the shop is open only during the day).

Then, find Heraldo (he's in the fishermen's hut in the morning). Go back to Pablos. Tell him you're ready to set the trap.
Patrol the streets until you see a fleeing thief - he's usually around the main street.
The best way to catch him is to drive him towards the beach and wait at the crossroads (between the inn and the shop). When he turns back towards you, run and seize him.
If you're having trouble catching him, throw in a few punches when he'd passing by. It'll stop him for a moment.
Finally, report back to Pablos.
In short: A quest given by Mason, hanging around the market. Your job is to follow a certain character.
Difficulty level: Easy. Your job is to follow a certain character.
Meet with Mason at the market.
In the inn, wait until nightfall and go to the noble quarter under the cover of the night. At the gate to the castle there should be a cutscene.
Follow the target, but keep your distance. If the knight sees you - nothing will happen, he'll talk to you and go on his way.
Finally, you'll reach an abandoned house. Approach the window to eavesdrop on the conversation.
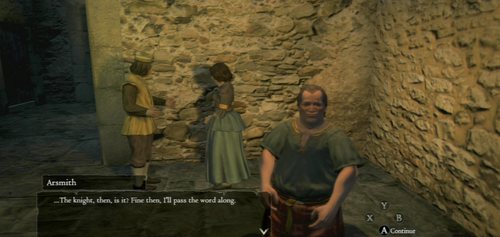
End the quest by reporting back to the barkeeper.
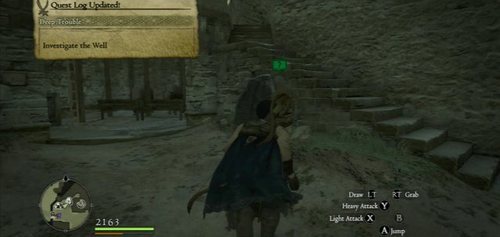
In short: There's something lurking in the well. A local guard asks for help.
Difficulty level: Medium. This is a quest that can take beginning characters aback.

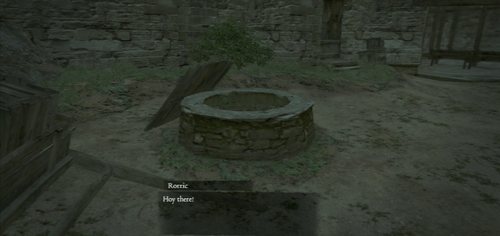
The quest begins at the well, with Poll. A short conversation will reveal that something evil is lurking inside the well.
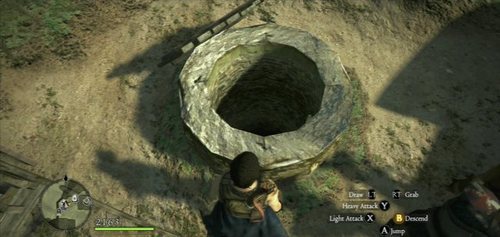
The next step is quite obvious - go down into the well.
You need to get to the central, swampy part and exterminate Saurians.
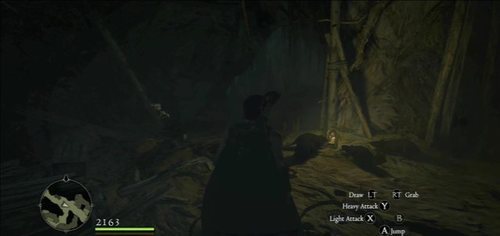
Turn left at the fork and jump down after you reach a larger chamber (with water).
The place is crawling with Saurians, but you can kill them one by one - just don't get dispersed too much. Try to cut their tails off. A Saurian without a tail is much weaker and more prone to damage.
The road further south of the cave is a shortcut leading back to the Encampment.
To complete the quest, though, use the tunnel back to the village and get out of the well.
In short: Another journey into the depths of the well. The quest becomes active after 7 days since the completing of Deep Trouble. Simply approach the well - you'll hear a voice calling from down below.
Difficulty level: Medium. You'll be fighting another batch of Saurians and their leader. He may be a little challenging to beginners.
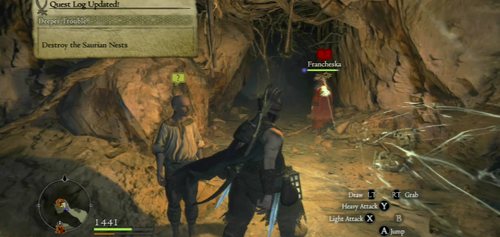
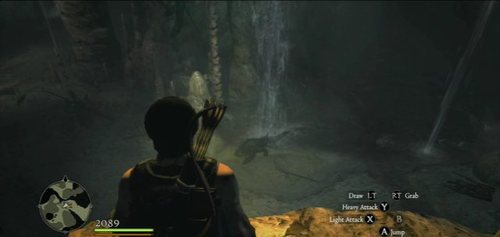
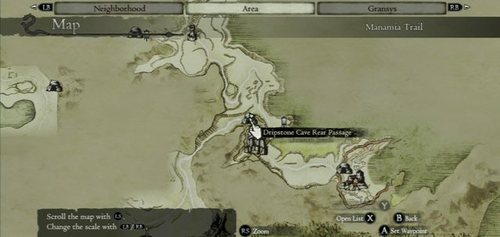
Go inside the well and talk to Rorric. Your job is to destroy the Saurian Nests. They're located in a new branch of the swampy part of the cave (it's been locked up till now).
Look for the new branch in the swampy part - once there, destroy the eggs and kill the beasts.
When you step into the deeper water (the side part of the cave), you'll be jumped by the leader of the Saurians. Fighting him is quite similar to other of his kind - cut off the tail, then attack the rest of the body.
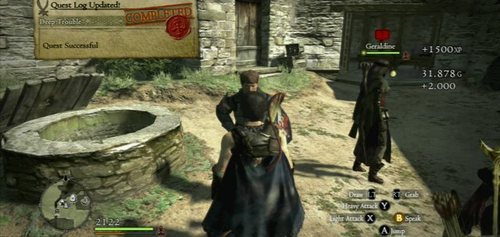
After clearing out the nest, report back to Rorric.
In short: A simple quest in which you need to pick flowers.
Difficulty level: Easy.
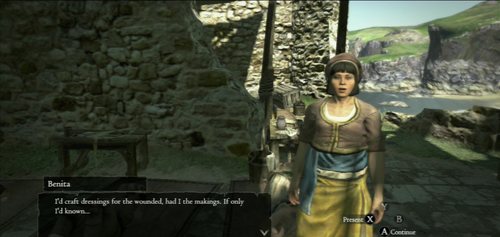
Benita, the local nurse, will ask you for help in finding two kinds of herbs which she needs to prepare a healing elixir.
The Sunbright kind can be found during the day just outside the village, near the larger trees (the ones with clearly thicker trunks). You need to find two such spots.
Moonglow appears only during the night - wait in the armory until nightfall. The herb can be found in the east bay of the village's beach.
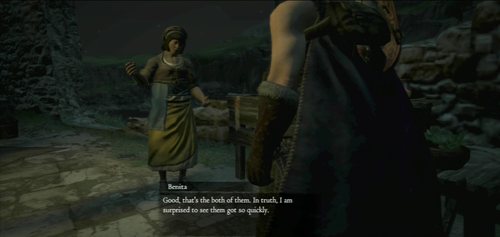
Take the herbs back to Benita.
In short: A simple quest in which you need to deliver a message from Elvar to Merin. Elvar can be found in one of the buildings. You'll find Merin near the ruined house with the wounded. Deliver the message to him and report back to Elvar.
Difficulty level: Easy.
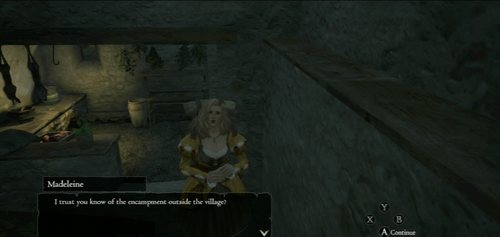
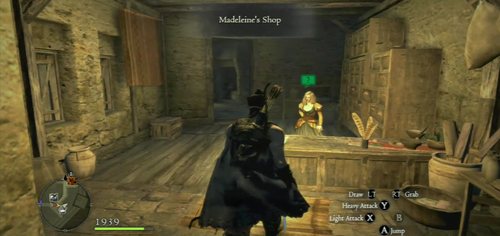
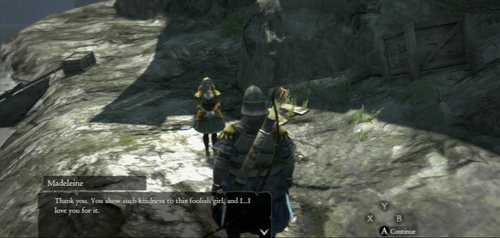
In short: Escort Madeleine from the village to the Encampment. You receive it from her after spending the night at the inn.
Difficulty level: Easy. The road from the village to the Encampment doesn't hold too much dangers.
Leave the village and take the road towards the Encampment. Medeleine will stay close, so she should't get lost.
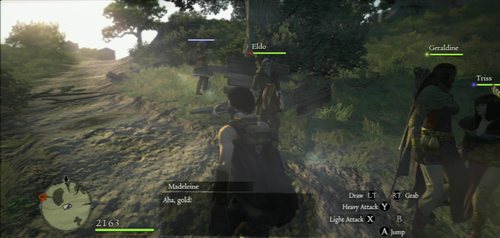
She will, however, take frequent stops to collect money and items. Naturally, you need to wait until she's done.
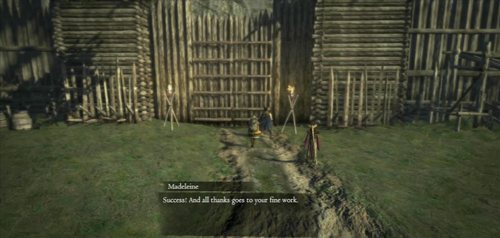
Once you reach the destination, Madeleine will enter the Encampment.
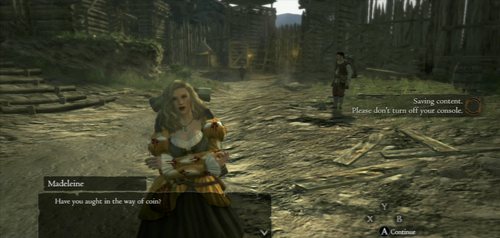
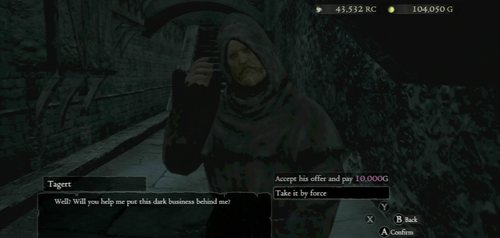
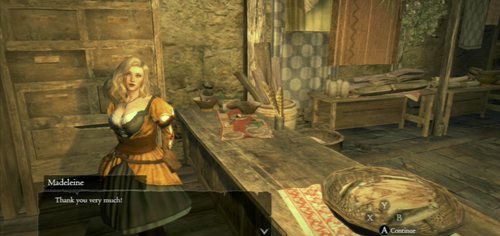
There, she'll ask you to giver her 10,000 gold to continue her journey. In return, she'll offer you a discount on her goods and open a shop in Gran Soren. You don't have to agree if you can't afford it. Nevertheless, Madeleine has got some rarities in her stock, so it pays off to take the offer.
In short: Fournival, one of the richer residents of Gran Soren, needs help convincing a certain family to sell their land. Fournival can be found in different parts of the city - near the market during the day, in the noble quarter during the night.
Difficulty level: Easy. Simply run around the city. The only requirement is having a certain amount of money: 30,000 gold for the bad ending or 80,000 gold for the ending that will be satisfactory to all parties.
In the quest, you need to talk to three people - Jasper, Sara and their son, Pip. The man is the city's doomsayer who can be found near the market. The woman is often at the inn (also near the market). Talk to them until they agree. If you have trouble locating them, wait a few minutes and try on a different part of the day, or leave the city and enter it again.
You also need to convince the little Pip. The boy can be found in the noble quarter. Sadly, he'll run away.
Chase after him to the craftsman quarter (near the Pawn Guild). Climb the workshop and jump onto the barn - the kid is hiding on the roof.
To convince Pip to agree, you need to chase after him all around the city - catch up with him and grab him when you're close. An alternative way to solve the quest is to ignore Pip completely and return to Fournival. You can buy a share of the land, which will satisfy both the merchant and the family. Unfortunately, this is an expensive solution - you need to give up on 80,000 gold.
Once you've caught Pip, go back to Jasper to get a final agreement (you need to pay to finish the quest). Now look for Fournival - he's usually in the noble quarter or on his way to The Black Cat.
In short: A servant to a local priest has lost his scriptures.
Difficulty level: Easy.
The quest is received from a priest in the temple or from his apprentice (standing outside the temple). You need to find the tome - it's on one of the rooftops. Go down the stairs near the church and jump onto the roof. The tome is on top of the neighboring building. Return it to its owner.
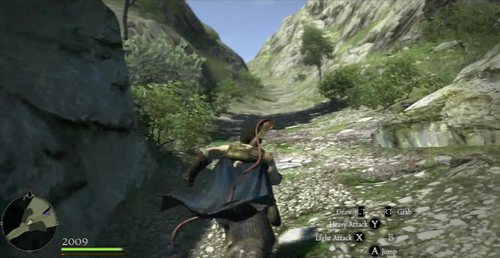
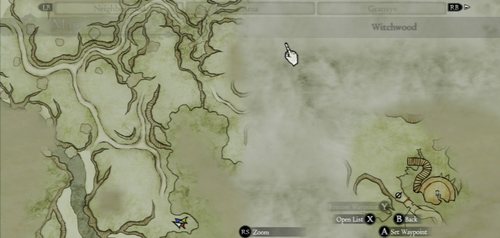
In short: You need to find Quina. The quest begins after killing the Hydra at the Encampment and heading back for Cassardis. You'll need to go back to the first village, and then follow Quina to Witchwood.
Difficulty level: Medium. The main problem isn't so much the Witchwood itself, but getting there. The way is blocked by hordes of Bandits who can easily crush an unexperienced character.
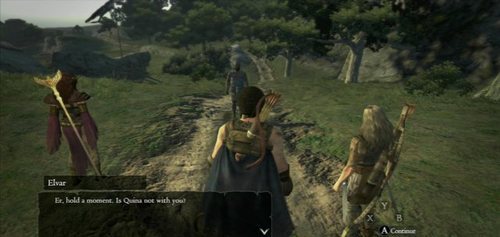
After killing the Hydra at the Encampment, leave towards Cassardis. You'll be stopped by Elvar with a question about Quina. The woman has disappeared from the town. To catch her trail, go back to Cassardis. If you ignore this matter, the quest will be gone and she will die.
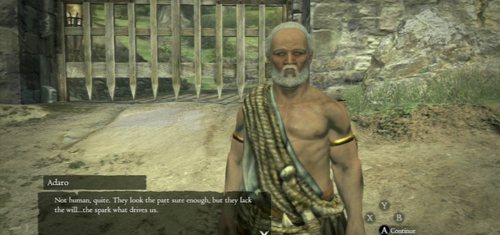
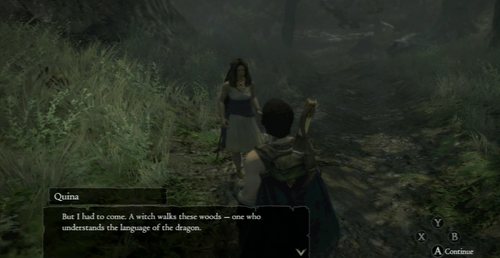
Return to Cassardis and find the leader of the village - Adoro. The old man will tell you that Quina has gone off to Witchwood for answers concerning the language of dragons. Go after her.
You can reach Witchwood by turning west behind the Encampment. There is an alternative route that leads through the well, provided you've cleared it out previously.
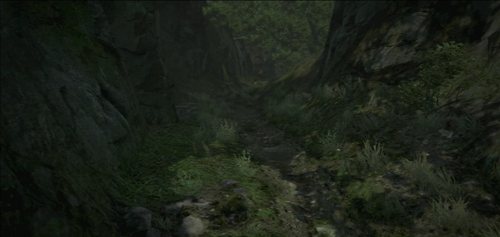
When climbing up the pass, watch out for Bandits - they can throw down rocks at you. The further way, through Nighfall Crevasse, is swarming with rouges. They can be problematic to unexperienced characters. I recommend killing them slowly or fleeing them.
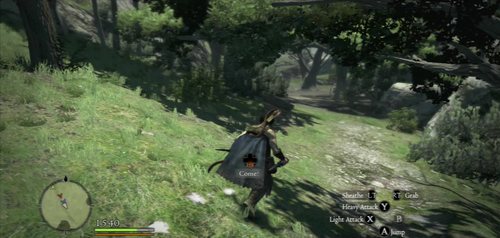
Follow the road south, killing off enemies. At the fork, turn west and enter Witchwood.
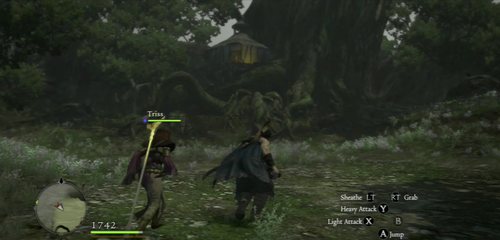
You'll find Quina on the road. Talk to her and continue onwards. From this moment you need to protect her. You'll surely encounter packs of wolves.
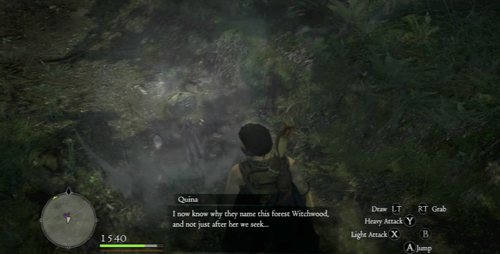
In Witchwood, follow the road. The navigation is hindered by a mist generated by mysterious totems. Destroy each of them to uncover the map.
Keep going southeast, looking for other totems. The witch's hut is located in the east.
Eventually, you'll reach a clearing - the hut is on the opposite end. Enter it and talk to the child.
When you leave the hut, you'll see Quina running on a sideway path - it's a shortcut leading to the vicinity of the village. Once you're back, talk to the leader to finish the quest.
In short: Austine's son, living near the Pawn Guild, is seriously ill. To cure him, a Wakestone is needed.
Difficulty level: Medium. The game easily allows you to buy/obtain fragments of the stone - however, the quest has to be completed relatively quickly, because at one point in the plot it becomes inactive.
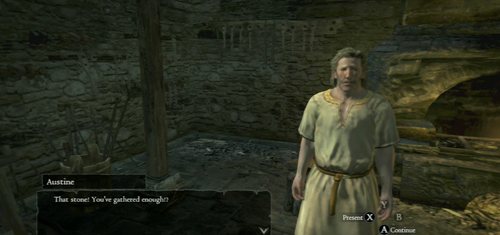
After collecting the stone fragments, go back to Austine and hand him the stone.
In short: A tutorial quest which is not mandatory (but if you refuse to do it, you won't be able to go back to it further in the game). Its goal it to teach you the basic elements of the gameplay. In the first stage you need to carry boxes. In the second and the third destroy targets as quickly as you can. The last one requires a proper selection of attacks - some scarecrows are prone to magick, some to other types of damage.
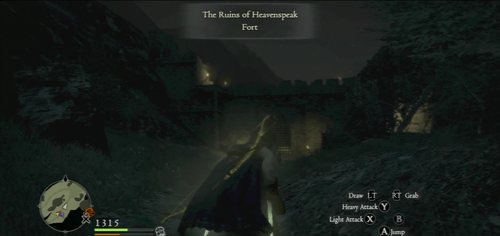
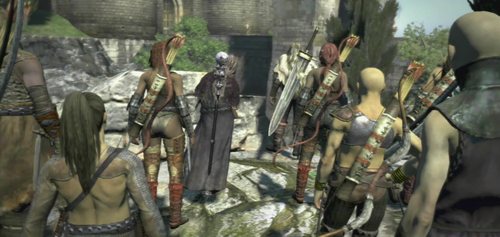
In short: A quest which can buy you the favors of a female group of bandits, stationed in the Ruins of Heavenspeak Fort. You can receive it from the leader of the gand, Ophis, on one condition: all characters in your party are female or male dressed as female (Lady's Garb, which can be bought at The Black Cat, works fine here).
Difficulty level: Medium. You'll need to fight Bandits.
After receiving the quest from Ophis, there are two things you can do:
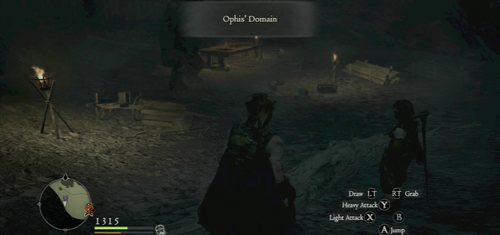
To complete both quests, agree to both of them, feed the Cyclops, kill the bandits, and only then report back first to Betiah and the to Ophis.
In short: Quina is saying goodbye to the abbey - the prioress needs a gift for her. The quest becomes available after completing Lost and Found and Talent in Bloom.
Difficulty level: Easy.
The quest requires you to bring the Pilgrim's Charm from the Catacombs. You can go there and find it or... buy it from Fournival in Gran Soren.
In short: Tomlin of Cassardis is looking for his father. It turns out that the men is rotting in Gran Soren's prison. You need to get him out by using two Skeleton Keys. Before that, though, you'll need to acquire some information from the citizens of the capital.
Keys can be bought or made by combining Shackle with Iron Ore (one of them is also hidden in a chest in the castle prison).
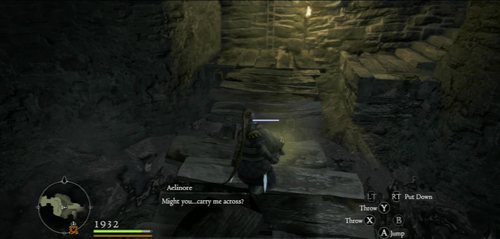
In short: A secret meeting with Aelinore can end in two ways. To receive this quest, you first need to talk to princess in the garden after the meeting with the Duke. The quest is given to you by the maid Mirabelle, who is usually standing in front of the throne room.
Difficulty level: Easy. Before taking it, make sure you have the Skeleton Key (you can make it by combining Shackle with Iron Ore).
After taking the quest, wait until the evening (i.e. at the inn) and enter the castle area. After dark there'll be guards here, so you'll have to avoid them. First, go right into the garden and talk to Mirabelle.
To get to the tower, go up to the first floor of the castle. Use the side entrance (near the garden). Before you go in, make sure that the guard has moved away from the door.
Be cautious in the throne room as well (it's patrolled by one person). When the coast is clear, run up the stairs and make a turn for the tower.
The quest will proceed further only if it's the night - otherwise the tower will be empty.
If the time is right, there will be a cutscene. Unfortunately, the ruler will quickly appear on the scene and start... chocking Aelinore. You have a choice: hide behind the curtain and let the woman die or reveal yourself. It's worth doing, because this way you won't lose Aelinore and will be able to complete the next quest (a rescue mission).
No matter what you choose, you'll end up in prison. To get out, you can bribe the guard or use the Skeleton Key. After leaving the cell, use the secret passage hidden in the cell at the end of the room. The corridor leading to freedom is full with Snakes and Spiders.
In short: A quest in which you need to make sure nothing happens to Valmiro, a citizen of Cassardis with a very restless soul. The quest begins during a conversation with Merin (found on the village coast or inside one of the huts). It'll become available after completing A Master of Myrmidons and will be available until the meeting with the Duke (Come to Court).
Difficulty level: Easy.
After you agree to the quest, you'll need to find Valmiro several times to give him healing herbs. You can find him:
Once you find and help him three times, you can go back to Cassardis and talk to Merin.
In short: Fournival is looking for someone to show his daughter around the city. The quest begins with him. Before you begin, make sure to have a bottle of water (can be bought in Camellia's Apothecary). You'll have to satisfy Symone's whims - if you can do it, you'll receive a Gold Idol (otherwise, you'll only receive a golden egg). The Gold Idol can be later given to Madeleine, and in return she'll have better equipment to sell. For the quest to become active, you first need to complete Chasing Shadows and Land of Opportunity.
Difficulty level: Easy.
Look for Fournival and Symone outside their manor. Take the girl to the city - make sure she doesn't get lost, you don't bump into her or under no circumstances lift her up. At one point, she'll decide she wants to play hide and seek. You'll find her in the inn or at the back of Union Inn (you need to be quick, the results of the quest depend on it).
In the later stage, not far from the Pawn Guild, Symone will tell you that she's thirsty - give the aforementioned water. Finally, you'll take part in a race. To make the girl happy you need to let her win. You can't, however, lag too far behind her or walk. You have to be running all the time (even in circles) and stay close right after her. If you succeed, you'll receive the idol.
In short: The merchant Caxton from Gran Sore promises better to sell better items in exchange for one of a few idols. You can give him only one, so make sure you find the best one possible:
In practise, giving the idol to Caxton pays off if you have a damage dealing character (male). Otherwise, the Gold Idol or a different one should go to Madeleine.
In short: A quest in which you need to face a Metal Golem, a special version of the magick beast. The quest becomes active after completing Witch Hunt, during which you end up in the secret part of Witchwood. There, near the water, there is a shining object - that's your golem. The battle can be started only after completing Witch Hunt, exiting the location and entering it back again (otherwise the golem won't be active).
Difficulty level: Hard. The quest requires an archer in the party - the foe is resistant to magick and has to be fought in a specific way.
Fighting the Metal Golem is a challenge - the beast is much more dangerous than a standard Golem. This boss doesn't care too much for spells and can be defeated only with physical attacks. Best with the bow. It all comes down to the fact that the glowing discs - the Golem's weak spots - aren't located on its body this time, but at various spots around it. To locate them, look for shining beams. Most of the discs are close to where the Metal Golem had been resting. Attack each of them and try to avoid the confrontation with the opponent itself.
In short: You need to become a victim of several traps laid by your enemies. The quest is given by one of the guards at Gran Soren's south gate. It becomes active if, during the Seeking Salvation quest, you haven't killed the target pointed by Mason, and met with the Duke (Come to Court).
Difficulty level: Hard. Fighting some of the groups can be troublesome.
Fights take place at these locations, during the night:
In short: A quest given by the leader of the gang at the Ruins Of Aernst Castle. To gain his respect, you need to eliminate the competition or solve the problem with the deserter. To complete it, you need to have finished An Uninvited Guest.
Difficulty level: Easy. Can be completed relatively easy.
You receive this quest from the leader of the band in the ruins of Aernst Castle. It becomes available after completing An Uninvited Guest in Cassardis.
You can choose one of two options - kill 10 bandits from the opposing band or take care of the deserter. It means Pike, who's hiding in Cassardis. He's usually walking near the smoked fish on the beach. Convince him to return to the thieves' camp - he'll be welcomed back into the band.
To complete the quest, report back to the leader - he'll give you your reward (a badge).

In short: A quest in which you need to open the way through the Ancient Quarry. It begins at the north entrance to that location. Simply talk to the worried merchant hanging around the entrance.
Difficulty level: Medium. You'll have to face a Ogre - he's a threatening opponent for untrained Pawns.
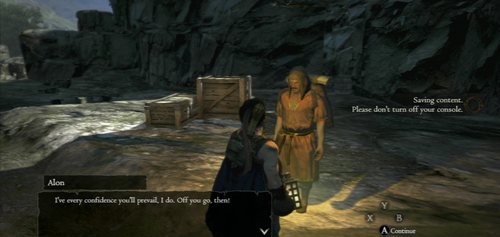
After reaching Ancient Quarry Northern Entrance talk to the merchant Alon.
Enter the cave and turn left at the first fork.
You'll reach a locked gate. To open it, have yourself and your companions stand on the large pressure plate.

Inside, pick up the key (Quarry Key) lying on the rock (it's going to be illuminated a little).
Take the second branch and turn left at the next fork. You'll stumble upon Bandits.
Continue south on the central path. In the larger and darker room with columns there is a giant Ogre.
If the beast gives you trouble (which is more than likely), you don't have to kill it. You'll need to, however, drive it to step on the pressure plate under the next gate. When the gate opens, you can leave the Ogre be and go back to the merchant.
The merchant will give you another quest - to clear the mines of monsters. If the Ogres are causing you trouble, finishing this quest might be a little difficult. Completing the quest is not necessary to get to the other side of the quarry.
The quest requires you to kill two Ogres in the south corridors. The road to one of them will only be unlocked after agreeing to the quest (the other one could be killed after the first trip to the quarry).
The first Ogre is having a meal on a ledge in the main corridor.
The second one is in the branch leading from the first Ogre's nest. You can start fighting it by blowing up the nearby barrels.
There is a simple way to immobilize the Ogres. Climb onto their backs and wait until they start shaking their arms - then quickly jump off. The Ogres will rush backwards to get rid of the ballast, which will cause to them to fall down. When it's on the ground you can beat it up all you want for 2-3 seconds.
After killing the two of them, report back to the merchant. You can now move around the Ancient Quarry as freely as around the city (without loosing stamina).
In short: Ser Maximilian asks for help concerning a mysterious cult. The quest becomes active after the meeting with the Duke (requires the completions of the Wyrm Hunt quests).
Difficulty level: Medium. The initial running around the city will be quickly turned into a battle with the undead.
At the beginning of the quest, go to the indicated location and eavesdrop on the conversation. Take information out of one of the cultist by threatening him (you don't have to pay him any money).
Now you need to go to the Catacombs.
There, use the elevator to go down to the lower level.
Run ahead until you reach a fork in the road, and open the gate (it's been closed, but now you have the key).
The further road leads back up, this time with a staircase.
The cultists' chamber is locked with a seal - you'll need five elements to unlock it. Look for them in the sarcophagi and chests in the further parts of the crypt.
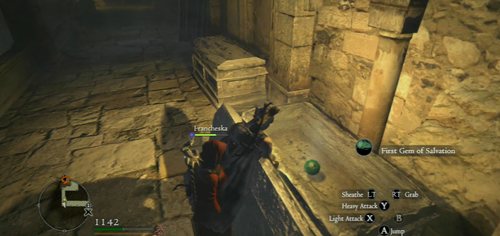
The first gem is inside one of the two sarcophagi next to each other.
The second one is behind the corner, in the sarcophagus leaning against the wall.
To get the third, go off the route to a side room - over a wooden plank. The gem is inside the sarcophagus.
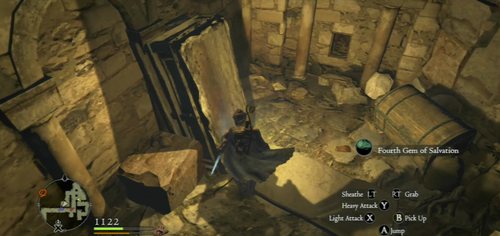
Moving forward, you'll enter a small labyrinth with branches to left and right. The fourth gem is in the left branch - in another sarcophagus leaning against the wall, near a chest.
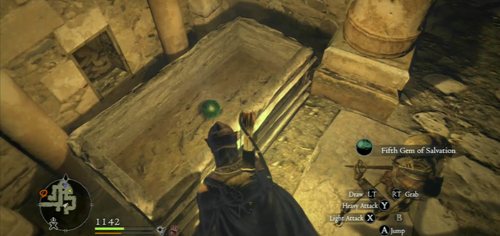
The last, fifth gem, is in the other branch - again, inside a sarcophagus.
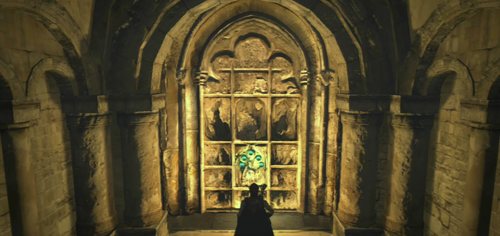
With five gems, you can now open the way.
In the next chamber there is Balsac to defeat. He'll be summoning Skeletons. Focus on him, backing away if needed.
Afterwards, collect the items from the chamber and report back to Ser Maximilian.
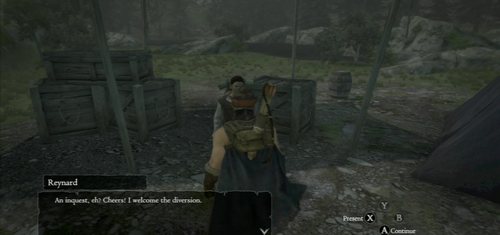
In short: The merchant Reynard is looking for certain items hidden in various corners of the Dragon's Dogma's world. To activate the quest, buy 10 things from him - meaning you need to buy something and end the conversation 10 times. Reynard is a merchant who you can save during a journey from Cassardis to the Encampment. He's being attacked by Goblins. Afterwards, Reynard will be travelling around the world - he's either at the Encampment, or the camp near the Shadow Fort lake.
Difficulty level: Medium. The quest requires you to visit a few locations.
After receiving the quest, you'll need to find a range of items. The first one is the Scrap Iron - it's dropped by Skeletons (they appear at night or in specific locations, i.e. the Catacombs). When you bring it back to Reynard, you'll need to buy 5 more things. Then, he'll ask you for Miasmite - a mineral dropped by Phantoms (found at night or at the Catacombs). After 10 more purchases, you'll begin the final stage of the quest. You'll have to collect 6 journals belonging to Reynard's father:
Return them to Reynard.
In short: Madeleine asks for idols with different properties (the quest becomes available when she opens up a shop in Gran Soren). In return, she promises to sell better items. You can give her only one idol, so make sure you find the best one possible. You can hand her:
In practise, giving the idol to Madeleine pays off if you have a female character or a spellcaster - they're the only types that can profit from her items. If you a have a male or a damage dealing character, it's better to do this quest for the merchant Caxton (Idol Worship).
In short: Ser Daerio of Windbluff Tower asks for food delivery.
Difficulty level: Easy.
You receive this quest at the Windbluff Tower. The case is simple - you need to take a message to Lord Julien in Gran Soren. Make sure you deliver the message to his own hand (not to the guards) and ask for supplies. In return, you'll receive Ambrosia Meat. Take it back to Daerio to complete the quest. This will reward you with a key to the Windbluff Tower, which opens a special chamber with items.
In short: The prioress of the Abbey asks you to deliver a flower to a priest of Cassardis or Gran Soren. The quest becomes active after completing Lost and Found and meeting with the Duke.
Difficulty level: Easy. The only problem is that the flower can wilt - so you can't linger with completing the quest.
In the Abbey, Quina will give you a flower, asking to give it to someone who will appreciate her abilities. She means the priest of Cassardis or Gran Soren. You need to hurry, because the flower can wilt. After talking to the priest, report back to Quina.

An alternative way to complete the quest is to give the flower to Quina herself - she'll be grateful, though admit that it won't help with her training.
In short: Fedel of the castle asks you to meet him after dark because he has a mission for you (retrieving a stolen letter). The quest becomes active after the meeting with the Duke, but before completing all quests from Trial and Tribulations.
Difficulty level: Medium/hard. There is journey to a far away land and a way through one of the most complicated locations!
Wait at the inn until nightfall and sneak into the meeting place (castle gardens). Wait for the man - he'll walk out of the castle in a while.
Then, go to the marked location.
You'll find a wrecked transport. It turns out that the letter the NPC needs and parcels have been taken by Gargoyles.
Go to the nearby Soulflayer Canyon cave (take the road as it leads you, and then jump down to a ledge below).
Inside, find the place with the parcels and the letter. The road is complicated, as it requires sliding down the slopes. First, though, go down the ladder and follow the only path available. Be very cautious, because Harpies have a tendency to drowse the characters and push them down the precipice. On your way you should pass by a bridge with Spiders, a fragment with Saurians and Panthoms, and a cave with Goblins.
Eventually, you'll stumble upon a Gargoyle. Kill it. Afterwards, climb up the ladders.
In the cave with Goblins, turn right at the fork (north).
You'll reach a stone bridge guarded by a Cyclops. Kill it. With any luck, you'll be able to throw him down. In case of trouble, retreat to the cave.
A while later, after defeating Harpies, there is a place where you have to slide down. It's a particularly difficult fragment - you can easily take the wrong way. The first, small slope you can take as you like. With the second, keep to the left to land on the left ledge (otherwise you'll slide all the way down and would have to climb up the ladder again).
The third slope you can also take as you like. With the fourth - keep to the right. This way you'll reach the spot with the letter.
Take the letter and head back to Gran Soren. Go to the castle.
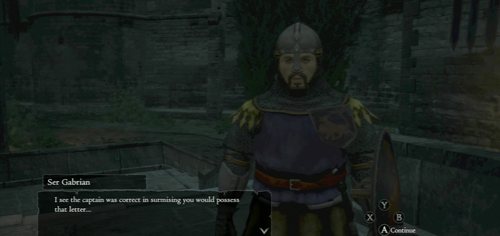
Before the entrance you'll be stopped by Ser Gabrian who'll ask you to give him the letter, claiming that Fedel has his own agenda. You can choose who to give the letter to.

In short: After completing the Witch Hunt quest, go back to Selene's grandmother's grave (where you talked to her). Pick up the Ancient Tablet.
Difficulty level: Easy.
With the tablet, go to the priest Joffrey in Gran Soren's Cathedral. After that, you're going to have to take it to Dragonforged in his seat at Hillfigure Knoll. In return you'll receive the Arisen's Bond ring.
In short: A quest in which you have to rescue Selene, a witch of Witchwood. The quest is received at the market in Gran Soren by listening to a conversation (after Come to Court). It will only be available for those who have completed Lost and Found.
Difficulty level: Easy/medium. There's a Golem encounter.
After listening to the conversation at the market, head for the Witchwood and the witch's hut (as in Lost and Found). There will be people trying to get inside.
A Golem will be woken up in the area. Fight it. You need to destroy the glowing discs on his body.
After killing it, go deeper into the woods using the door hidden underneath the roots (near the hut).
In the hidden part of the woods, follow the path towards the mission marker (the route is much more complicated here). It's worth mentioning that the totems which generate the mist are placed on the trees.
When you're at your destination, talk to Selene and her grandmother.
In short: Madeleine is in trouble. The quest becomes available only if she opened up her shop and you've completed Reward and Responsibility.
Difficulty level: Easy.
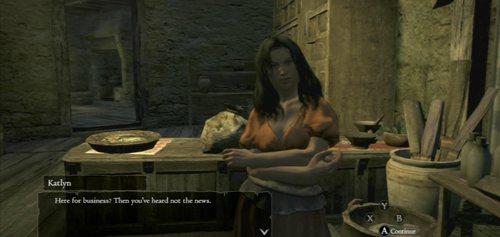
To begin the quest, go to Madeleine's shop (the abandoned house). You'll meet Katlyn there. Pick up the daggers from the table.
Then, go to the inn to talk to the owner and the waitress.
You'll be pointed at the aqueduct. On your way you may be stopped by guards - answer that you haven't seen Madeleine. She'll show up when you step on the bridge above the slums. Go trough the floor drain.
Look for Madeleine outside - she's behind the rock. Hand her the daggers. When guards show up, you'll have a choice: betray or cover Madeleine. Your further interaction with her depend on it.
If you save Madeleine, she'll ask for money to cover travel expenses. The quest should be completed even if you don't have the necessary sum (50,000).
In short: A quest in which you rescue the Duchess of the Blighted Manse (the castle north of Gran Soren). The quest becomes active after completing Reward and Responsibility (but before talking to Dragonforged in Deny Salvation). You can receive it outside the castle from Mirabelle. She'll give you a special armor which will allow you to enter the keep.
Difficulty level: Hard/medium. During the escape from the castle there'll be a lot of enemies to break through (you'll be alone part of the way).
Go to The Blighted Manse. Leave by the west gate and head north.
Before approaching the guards, equip the armor set from Mirabelle (Royal Guard Armor). The guard will take your character for another recruit.
Inside, climb the winding stairs. Open the cell and free the woman.

Escort Aelinore to the exit, killing guards. When you go down the wide staircase, the woman will suggest escaping using a secret passage, and will open the gate.
Go down to the basement. Here you'll sometimes have to grab Aelinore and jump over small crevices (sadly, the Duchess can't jump over them herself).
You'll be constantly attacked by thugs. Don't worry about Aelinore - it would seem she has unlimited stamina. In further parts of the basement, your Pawns will return.

Eventually, you'll reach the exit, where Mirabelle and her trusted men are waiting.
In short: Valmiro is sailing away. The quest becomes active after completing Dying of Curiosity and meeting with the Duke.
You can meet him near his house Cassardis. To complete the quest, you need to bring him:
Finally, load the chest on the boat.
Dragon's Dogma has several Notice Boards with minor sidequests. Generally, they can be divided into three kinds:
Of course, there are exceptions - more complicated quests. For example, there is a quest called Witch's Brew in which you need to bring herbs to a witch of Witchwood so that she could prepare a brew for the innkeep in Gran Soren.
Notice Boards can be found in:
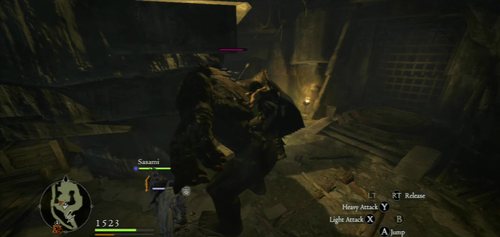
Description: A gigantic beast with one eye. Often armed with a cudgel and heavily armored. Cyclopses also appear in the company of Goblins and other monsters.
Location: Mountain areas
Weakness: The eye, Thunder damage
Attacks: The Cyclops has a wide range of hand and weapon attacks, is capable of crushing the characters with its foot when they're under it and jump on the enemies in front. However, the most dangerous technique of the one-eyed monsters is the grabbing - they use it when you're on their shoulders or the head.
Strategy: There are numerous ways to fight the Cyclopses - it all depends on your current party. The beasts are prone to magick, so the more powerful spells work great here (thunder spells can practically take them out of the fight). It's best to try and hit them in their weak spot, the eye - having an archer would be great. After hitting the eye, though, it's better to back away a little, because the beast will go berserk. Then just hit it will all you've got, watching out for the slow, but unavoidable grip.
Many Cyclopses are armored - including helmets which protect their weak spot, the eye. Armor pieces can be destroyed by continuosly striking them. Using shields or bludgeoning weapons works best here (much better than swords and daggers).
The method for the helmet is a little different. Simply climb onto the beast's back and attack its right shoulder (the one holding the weapon). It should start waving the other arm (jump away) and accidentally knock the helmet off.
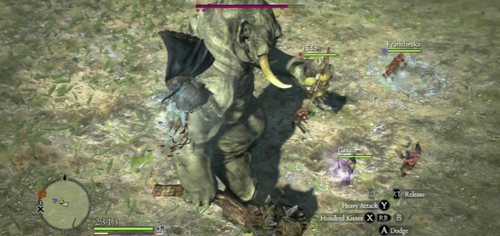
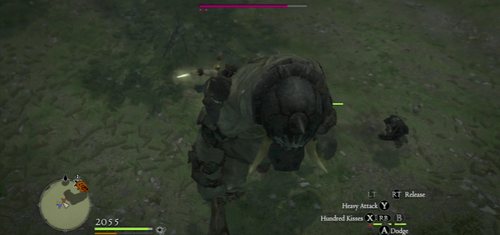
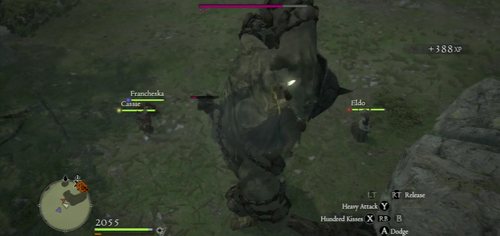
Description: A beast that looks like an overgrown gorilla, which can surprise you with its mobility and fierceness. The Ogre doesn't give up too easily - especially if its mad.
Location: The Everfall (before and after killing the Dragon), The Ancient Quarry, The Catacombs, near the Abbey, Bluemoon Tower (after killing the Griffin).
Weakness: Head, magick, Fre, Ice and... women (the Ogre attacks them first).
Attacks: The Ogre has a range of hand attacks with a very wide reach. The beast can also speed up and charge without notice. Throwing down and grabbing a fallen target is also a dangerous technique - to free yourself, wave the stick vigorously. The Ogres can also curl up for a while to increase their defence or go into frenzy when their low on health. They also have a two-edged attack - they do it if a characters jumps onto their backs.
Strategy: Fighting the Ogre can cause a lot of problems to an unexperienced party, as the beast has powerful attacks and moves very quickly. Naturally, monsters of this type possess certain weaknesses - they don't do well with magick damage and head attacks. The Ogres' mobility can also cause them to fall down a precipice.
The best and the safest way to defeat Ogres is to use the back attack. Climb onto its back (but not too high) and wait. When it starts "waving" its arms, jump back. The Ogre will fall down on the ground and be vulnerable for a fraction of a second. Repeat this until it dies. It's not a particularly spectacular method, but it allows to avoid the beats' enraged charges.

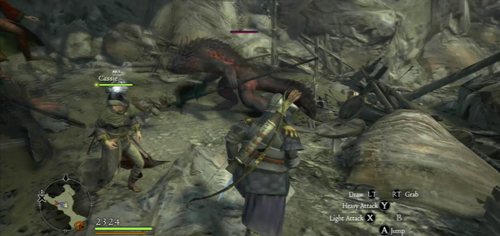
Description: The Chimera is a cross-species of a lion, a goat and a snake. It's a fast and powerful beast that can be quite challenging to weaker characters, but it becomes less threatening after learning the basic strategy on how to fight it.
Location: Barta Crags, The Everfall (Chamber of Fate), Cursewood, Deos Hills, Northface Forest, The Greatwall, Verda Woodlands, Vestad Hills. At some of these places it respawns after 3 days.
Weakness: Fire, magick (lion).
Resistance: Physical damage (lion).
Attacks: The Chimera has a lot of attacks. Most of all, the particularly dangerous is the goat which wields magick. It can put the party to sleep of simply deal a lot of damage. The snake tail can poison the characters and it attacks when the lion falls to the ground. The lion itself is also challenging when it stands alone. One of his attacks is directed at a sleeping character - you can snap out of it by moving the left stick.
Strategy: The Chimera consists of three independent parts and it has to be taken into account. If you kill the lion first, the goat takes control of the body. If you kill the lion and the goat, the snake will die automatically. In practice, though, it's better to focus on the two weakest parts: the goat and the snake tail, and only then fight the lion. The only downside is that in the last stage of the fight the lion becomes much more aggressive.
The most comfortable position to attack is on the beast' body. First, kill the tail, then move towards the front so as to strike the goat and the lion's head with each attack. In the last stage, the Chimera becomes faster and fiercer. Nevertheless, try to stay on its back and keep hitting the head. Mages are very useful against the lion since it's partially resistant to physical attacks.
Description: The Gorechimera is a more powerful version of the Chimera, which appears after killing the Dragon. The beast differs from its basic form in that it can, among other things, heal.
Location: The Everfall (Chamber of Apprehension, Chamber of Hope), Unusual Beach, Barta Crags (both places after killing the Dragon), Tainted Mountain Temple (before the fight with the Dragon).
Strategy: Fighting the enhanced Chimera is much like fighting the basic one, with two differences: the snake tail will grow back after a while, and the goat will be healing the beast. This means that your first priority should be the goat (once defeated, it won't be resurrected).
Description: The Golem is several tons of stone fuelled by powerful magick. Its characterized by clearly visible weak spots in different parts of its body.
Location: Outside BlueMoon Tower, Tomb of The Unknown Traveller (near the Bloodwater Beach), Moonsbit Pass (after killing the Dragon), The Everfall, Witchwood (during the Witch Hunt quest).
Attacks: The Golem has several types of arm swings, punches and blows. It can also suck the life energy from its enemies (by holding them in its hand). The boss' special attack is a laser which causes explosions. If you interrupt it by an arrow (when the Golem is busy loading the missiles) you can cause it to fall down.
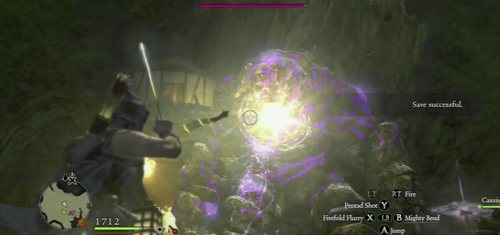
Weakness: Weak spots - glowing discs.
Resistance: Magick.
Strategy: When fighting the Golem, focus on its weak spots - the discs glowing on its body. There are several of them - on its arms, torso, head and legs. There is even one spot on the sole of one of the feet. After destroying a disc it's better to fall back, because that's when the Golem can attack with double strength (though it will become immobile for a moment). In time, its movements will become slower.
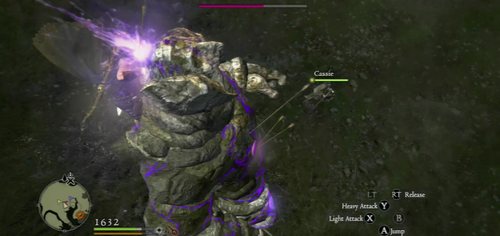
Description: The Metal Golem is a special version of the Golem, which is quite rare, but can be quite challenging. Especially to mage characters.
Location: Witchwood (during the Witch Hunt quest), The Everfall (Chamber of Estrangement).
Attacks: The Metal Golem is much more mobile and dangerous. It also has weak spots, but the difference is that they are scattered in the area around it. Watch closely to locate them - they glow in the direction of the enemy. The weak spot discs are highly resistant to magick, so spellcaster may be having some difficulties in this fight.
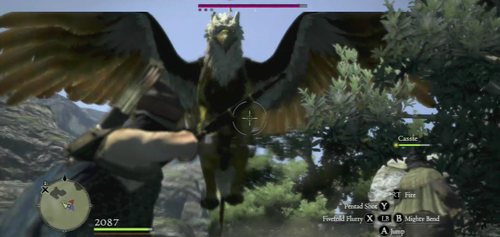
Description: A flying creature which is a mixture of an eagle and a lion. One of the most characteristic beasts that can be encountered in Grannys.
Location: Estan Plains, Moonshower Cliffs, Northface Forest, Bluemoon Tower, Eradication Site. Griffins appear mostly in the area around Gran Soren, where they hunt. They usually don't attack. You have to kill one of them in the Bluemoon Tower during the Griffin's Bane quest.
Attacks: The Griffin uses a wide range of attacks which it uses depending on the situation. In the air, in can suddenly drop down on its opponent. On the ground, it often tries to grab a character and smash them on the ground (move the left stick to free yourself) or charge. The flapping of the wings sweeps the characters off their feet.
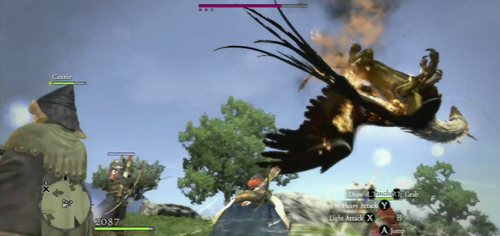
Weakness: Fire.
Strategy: A fight with a typical Griffin (not the one at the Bluemoon Tower) is divided into to stages. First, bring it to the ground. The fastest way to do this is to set its wings on fire (with magick, arrows, etc.) - a few seconds later you'll see an animation in which it crash-lands on the ground.
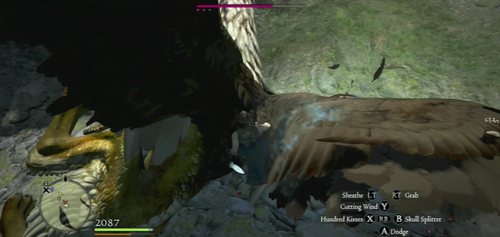
In a close contact fight, climb onto its back and strike the head. If possible, attack with fire and try to damage the wings. Griffins have a tendency to flee the battlefield - especially when the night falls in.
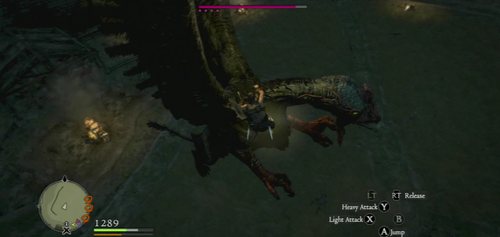
Description: The Cockatrice is a flying beast that resembles the Griffin, but with the head of cock. It's one of the most dangerous monsters in the game due to its petrifying gas.
Location: Gran Soren (quest), Vestad Hills, Soulflayer Canyon, Eradication Site, The Everfall.
Attacks: The most dangerous attack of the Cockatrice is the ability to petrify - it prepares for it by flapping its wings, and then releasing a cloud of gas. Petrifying means death, unless you cave a proper potion to counteract it. Apart from that, it also can poison you with its claws, cast Silence on mages, or grab you (move the left stick to free yourself).
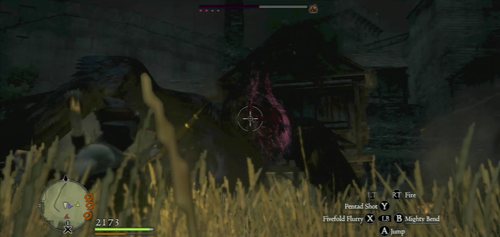
Weakness: Fire (causes it to crash-land)
Strategy: The most important thing is to avoid the petrifying cloud. To do it, strike the larynx first (especially when the beast puffs up - it means it's getting ready to attack). This way you can interrupt the attack, and, after striking it enough times, damage the organ (you won't have to worry about the petrification anymore).
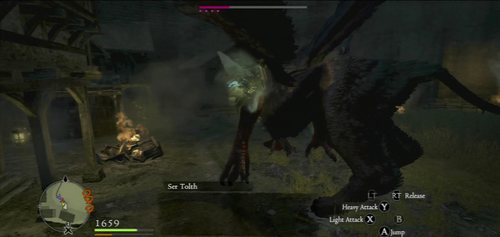
In any case, it's good to have a Secret Softener with you - a potion which removes the effects of the petrification. The Cockatrice itself is much like the Griffin - battle rules are similar.
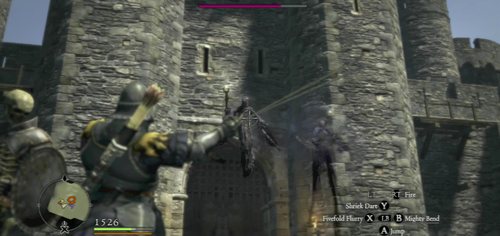
Description: Wights and Liches are formidable undead mages with a wide variety of spells. Their basic battle strategy is the summoning armies of Skeletons and other monsters.
Location: Miasmic Haunt, the vicinity of Greatwall, a quest in Greatwall (Deny Salvation).
Weakness: Holy damage, fire.
Attacks: Wights have several spells: thunder, ice spikes, slowing down (area effect), silencing (prevents the use of magick) and healing (are effect, but only on the undead, including the Liches themselves). The most dangerous is, however, Summon Monster and Malestrom (powerful area effect spell).

Strategy: The battle with Wights/Liches can be carried out in several ways, depending on what skills you possess. Spellcaster and bowmen can simply attack from a distance - holy and fire attacks work best here.
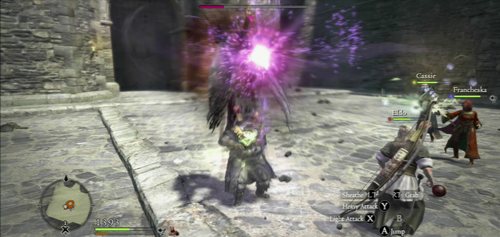
Another idea is to destroy the summoned undead in order to provoke the Lich back on the ground. It's the only way it can create a new army. When he's busy performing the summoning spell, you can strike it all the way you want.
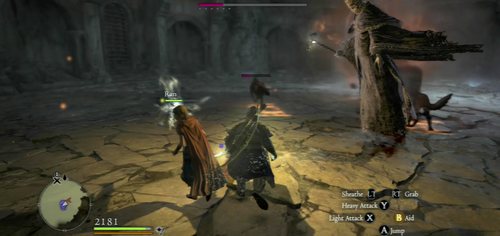
Description: The Lich is a special version of the Wight, with much more powerful spells at is disposal. The battle strategy is similar, though the fight will certainly be harder.
Location: The Everfall (Chamber of Fate, Chamber of Woe).
Attacks: The Lich can not only cast powerful spells which deal a lot of damage, but also petrify and poison the characters. The Lich also summons more formidable monsters, i.e. Hellhounds.
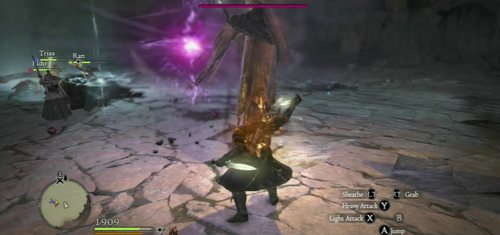
Strategy: The Lich may be tougher than the Wight, but its affected by the same battle strategy. Remember to avoid its area effect spells.
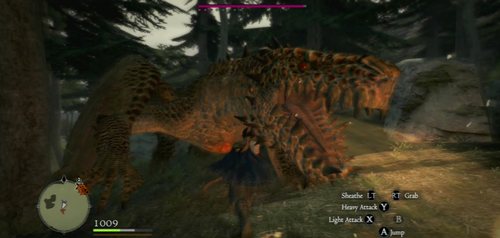
Description: A huge and powerful reptile. Fighting it looks pretty much the same as fighting the main Dragon's Dogma's boss - the Dragon.
Location: South of The Shadow Fort (respawns after 7 days), Conqueror's Sanctuary (after killing the Dragon), west of Gran Soren (after killing the Dragon), The Everfall (Chamber of Fate).
Weakness: Ice attacks, the heart (the glowing spot on its chest).
Attacks: The Drake and its kind has several types of attacks with its paws, tail and a fiery breath. In its special attack, the beast grabs a Pawn with an attempt to take control over them, and utter spells - to prevent it, attack the claws. The dragonkind can also fly - to force them back on the ground, shoot at the wings or at the heart.
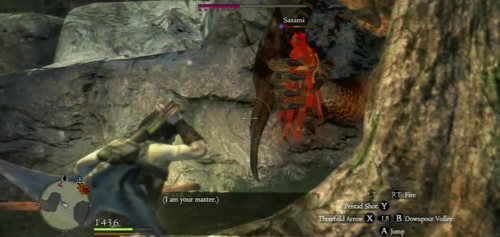
Strategy: Fighting the dragonkind is a true challenge even for the most advanced characters. Before you get to it, make sure to equip a lot of health potions and proper weapons. Begin the battle by forcing the beast on the ground - shoot at its wings, mouth or straight at the heart (it's not visible at first, but then it starts glowing).
When the beasts is on the ground, keep your position under its head and attack the heart (an attack directed at the air comes in handy). While under the Drake, don't allow it to grab you with its paw. Watch out, though, when if rises up in the air, because it can perform a ground attack then. Another threat is a "wall of fire" - the Drake will breathe a fiery breath and slowly back away.
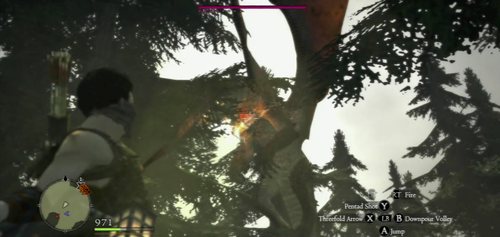
Characters with a high resistance can hold onto the Drake's chest and attack from there. Archers can shoot at it. After dealing a certain amount of damage, the dragon will drop down on the ground and fall to its side. Sometimes it flies away to a different spot and you need to catch up with it.
In most cases, killing the dragonkind requires delivering the final blow straight into its heart.
Description: An ice version of the Drake, which appears after killing the Dragon.
Location: The Everfall (The Chamber of Distress), The Watergods Altar (respawns after 3 weeks).
Weakness: Fire, the heart around the belly.
Resistance: Ice.
Strategy: This dragon type specializes in magick, which can make defeating it a little harder. You'll need to interrupt the spells and attack regularly, or use spells such as Silence (another strategy is to boost your own magick resistance). The battle itself looks quite similar, with a small difference - the heart is located near the beast's belly.
Description: Another version of the Drake, which this time specializes in thunder damage. Appears after killing the Dragon.
Location: Gran Soren (south gate), Conquest Road (near the Windbluff Tower), Bluemoon Tower.
Weakness: The heart on its back (between the wings), fire.
Resistance: Thunder damage.
Strategy: The Wyvern likes to fly around - and it's the main problem with this fight. The best way to defeat it is to attack its wings, so the damage they take prevents their further use. To force the beast on the ground, shoot the head. Characters without any distance attacks can grab its tail and climb onto its back. Apart from that, focus on attacking the weak spot - the heart located on the back.
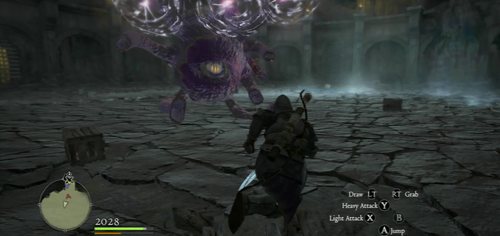
Description: A huge, flying, powerful and evil eye with magick at its disposal as well as... tentacles.
Location: The Everfall (Chamber of Confusion, Chamber of Sorrow).
Weakness: Holy damage.
Attacks: The Eye has a wide variety of tentacle attacks which it can "teleport" on the ground (they look like worms then). Each tentacle can cast its own offensive spells, which is a very dangerous thing. The tentacles on the enemies' body can attack. A dangerous one is a light beam - it causes blindness, poisons, slows down and petrifies (!). Evil Eye can also silence mages, teleport and resurrect its tentacles.
Strategy: Fighting the Eye is pretty distinctive, as most of the time the enemy holds a powerful barrier. When you see the eye flicker, focus on the tentacles (the ones in the ground too). Only after you've cut off all or most of them do you have a chance for the magick barrier to disappear.
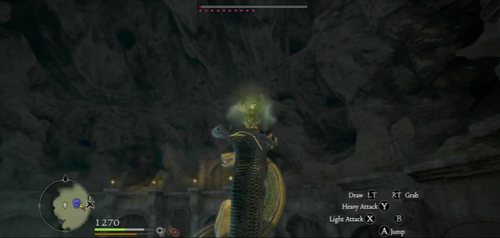
After a while, the monster will loose the shield - this is when you can attack or stun it. After dealing a certain amount of damage, the Eye will drop from its shell. Attack will all you've got - you'll be dealing quite serious damage then.
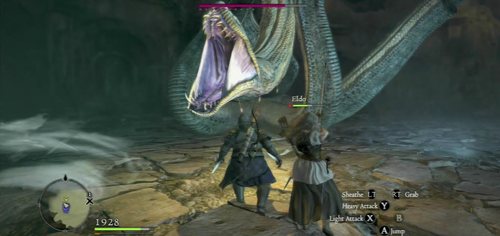
Description: A multi-headed, snake-like beast, which can be a problem. Although you encounter it at the beginning of the game, you only damage one of its head then. The true Hydra, or God forbid, the Archydra, is a lot more challenging.
Weakness: Slashing attacks (swords, daggers).
Location: The Encampment, The Frontier Caverns, The Everfall
Attacks: The Hydra has a few quite obvious attacks: it bites with the heads, striked with the tail, rams into you and poisons. Its most dangerous ability, though, is the swallowing: it can grab a character and start the process of "digestion". If the character or a Pawn is not saved in time - they will die.
Strategy: Fighting the Hydra may prove a problematic experience, since the beast has its size and several independent body parts. The best strategy is to eliminate subsequent heads. Focus all of your firepower on one of them and strike it until it's cut off. Repeat until you succeed. Naturally, each character can apply different types of attacks - but due to the Hydra's swallowing attack it's a good idea to keep your distance.
Another strategy is to cut off four head simultaneously. In case of the Archydra, which regenerates the heads quite quickly, you can slow that process down by setting it on fire. The Archydra allows you to hurt it in one other way - if you've dealt a certain amount of damage to a particular head, it will go down on the ground for a moment, open its mouth and become vulnerable. Jump onto it and strike as many blows as you can.
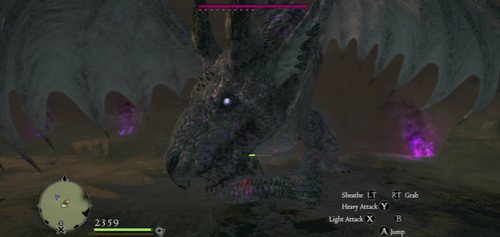
Description: A powerful dragon which hides in The Everfall. This unusual beast lives in two dimensions: online (where all players can fight it at one time) or offline (where you fight it alone). In the online mode, the game counts the sum of all damage dealt to it - this way Dragon's Dogma owners defeat the beast and at the same time cause its more powerful version to appear (the so-called "generations"). Each time you kill the dragon, you are received a reward.
Location: The Everfall (Chamber of Lament), Cassardis (Starfall Bay, New Game+).
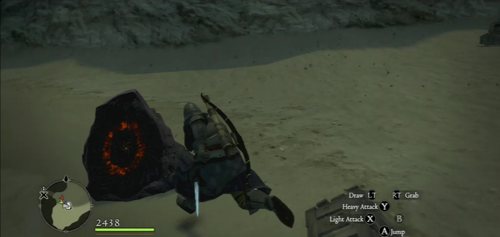
The entrance to Ur-Dragon's chamber lies in the Chamber of Lament in The Everfall (after killing the Dragon). If you're playing New Game+, you can join in the fight at any point in the campaign - the teleport is located on the side beach in Cassardis (Starfall Bay).
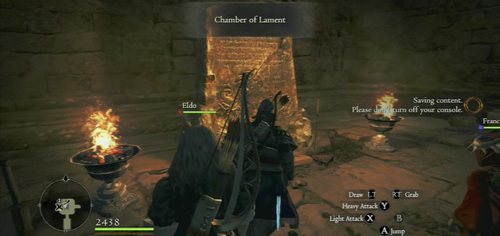
In the Ur-Dragon's location, you can check the board with players' scores.
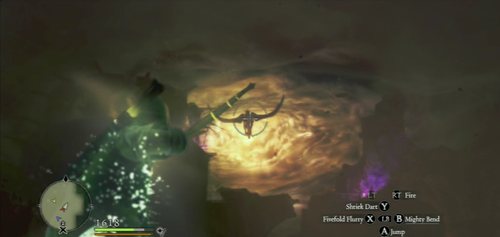
The entrance itself is guarded by three Pawns belonging to other players. You need to kill them to move forward.
When you reach the arena, wait a few minutes for the dragon to appear.
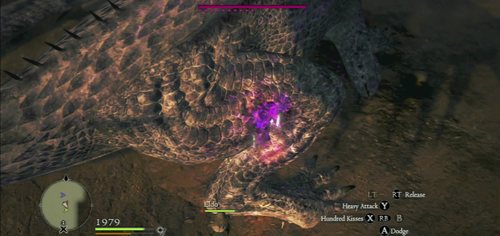
During the battle you need to deal as much damage as possible. The Ur-Dragon has a multitude of weak spots on its body. It's the purple-pink glowing ones. If you hurt it, there should be purple blood. Each weak spot uses up after a few strikes - you need to find another one. Each encounter with this dragon lasts only a couple of minutes. The person to strike the final blow receives the best rewards.


 Dragon Age: Origins Game Guide & Walkthrough
 Duke Nukem Forever Game Guide & Walkthrough
 DayZ Game Guide & Walkthrough
 Dragon Ball: Xenoverse Game Guide & Walkthrough
 Darksiders II Game Guide & Walkthrough