 Co-pilot: - Ok, man, I'll read it to you once again, but this is the last time: "Far away behind the seven mountains lived..."
Welcome to the unofficial game guide to Colin McRae: DIRT. This game is a quite enjoyable rally racer that offers an arcade-realistic model of driving (with an emphasis put on the first element of this mix), tons of vehicles to uncover and lots of tracks to drive on. However, after several weeks of playing, sooner or later, you will probably start perceiving that DIRT has also some shortcomings. The greatest are: weak and schematic SI of your virtual opponents (contrarily to the declarations made by Codemasters) and the most important and disappointing - very poor and unfinished multiplayer (only two kinds of races, without a possibility to run against other living players on the same track). But let's leave it for now, it's time to tell you what you may find in my guide to this game.
For these of you who have problems with running the game smoothly (and DIRT likes to slack even on relatively strong machines) I would strongly recommend to read especially the first part of my "Hints" chapter: you'll find there some advices that may help to solve this potential problem.
Second chapter consists of a description of settings you can apply to your rally vehicle components and how these settings may affect your car behaviour on the road. I'm trying also to bring to light in this chapter two important notions (of over- and understeering), which may seem foggy/sound strangely to some of you.
Fourth part of this guide is about effects of damages and how they can result in rally car's performance.
In penultimate chapter you'll find a list of all rally vehicles you may purchase in DIRT. However, I'm not so proud of this whole chapter - unfortunately I didn't have as much time to work on it as I would have.
Last part treats about tracks.
That's all for a start. Have a nice reading and I hope you'll find this guide useful.
PaZur'76
Some settings you're applying depend on track, some depend on your own preferences (I mean driving style), rest of them is connected with a specific car. Some settings are basics, other are advanced and you should avoid to play with them if you have no idea what you are doing.
You can save your car's configuration with a Ctrl key (on settings screen) to force the computer to remember your setup: this makes your life easier when coming back to game after a long pause (you don't need to experiment with settings again then).
Before we start off with car configuration two important terms must be probably explained: over- and understeering. Both terms refer to the vehicle's behaviour on the road.
Oversteering is the vehicle's tendency to tighten the corner's bend. In the moment when the vehicle is turning its front enters into the corner stronger then the rear. In other words: the rear of the vehicle starts to outrun the front, causing the rotation of the vehicle around its own axis and pushing the car off road, to the side in which the car is turning.
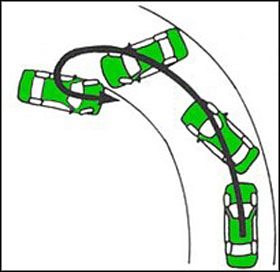 Oversteering
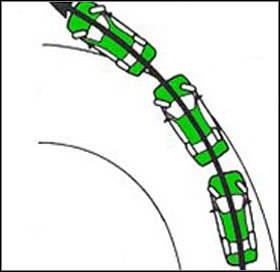 Understeering
Understeering is a term opposed to oversteering. An understeered car has a tendency to widen the corner. The vehicle is being blown off-course (outwards), in other words: reacts with a delay on wheel's turn.
Both cases aren't advantageous. However, you must learn how to react on non-typical car's behaviour by tightening the corner (in case of understeering) or letting out the steering wheel (in case of oversteering).
Oversteering is preferred only by a few rally drivers, rest of them sticks to a light understeering and obtains the oversteering needed in some situations by such channels of steering like the drive and braking. Even F1 bolides are set up for slight understeering to have a reserve of grip in rear wheels in the critical moment of exiting the corner.
Ok, now we can start with a proper part of this chapter.
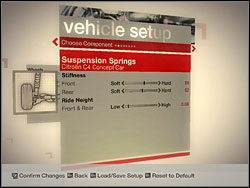
Stiffness
This obviously sets up how hard the car's springs are. In general these should be increased and decreased in proportion to each other, unless the car lacks an anti-roll bar at one or other end.
An overall stiffer car will have more grip on smooth surfaces because it will roll less. It will lose grip on uneven surfaces. So, when competing on tarmac, the stiffest setting possible should be used to keep the body roll of the vehicle to a minimum. By reducing body roll the car is able to change direction quicker, allowing the driver to take corners at higher speeds.
On gravel and mud surfaces a softer suspension is used. This allows the suspension to absorb the impacts of the rough road surface preventing damage to the chassis of the vehicle. Softer suspension also allows the vehicle to gain better grip on the loose surfaces.
Altering the spring rate affects the pitch of the vehicle also. A softer spring rate will let the vehicle pitch forward under braking and back under acceleration. Adjusting the front and rear settings independently will allow you to achieve a better balance to suit your driving style.
Ride Height
How high the car is from the road, or to put it another way, how much movement you want to allow the suspension to have. Ride height is of great importance in off road racing.
When competing on tarmac a low ride height should be used to give the vehicle a low centre of gravity and stability as it travels through tight yet high-speed corners. Care should be taken not to set the ride height too low as you run the risk of bottoming out.
When heading off road and onto the looser surfaces the ride height should be raised to allow greater travel in the suspension. This will allow the vehicle to handle uneven road surfaces at speed and manage jumps better.
Really this setting and suspension stiffness go hand-in-hand. Stiffer cars can run lower, and soft cars require a higher ride height to avoid grounding and hitting the bump-stops.
Summary: for smooth surfaces (tarmac for example) you should choose harder suspension and low ride height. For loose surfaces (mud, sand): softer suspension and high ride height.
Brake Bias
Setting the brake balance toward the front of the vehicle will give the vehicle a tendency to understeer, however, it will help the vehicle slow down faster on tarmac surfaces when braking in a straight line.
Setting the brake balance to the rear of the vehicle will give the vehicle a tendency to oversteer under braking. This can be useful when using left foot braking (rally technique) to drift the car around loose surface corners.
Check your car's drive train to better match the distribution of braking force. However, pay attention that strong shift of braking force will increase the danger of blocking the given axle when braking hard and violently.
Brake Set
Small discs should be used on stages where less braking is required because they disperse heat slowly, allowing the brakes to retain the correct temperature and hence function at full efficiency. Large discs will need to be used for stages involving lots of braking, as they help disperse the heat, reducing the chance of warping and damage.
Central diff
In other words - the drive balance (also known as drive bias). In four wheel drive vehicles a slider will allow you to adjust what percentage of the drive (how much of the engine's power) goes to the front and rear wheels.
This essentially acts like Brake Bias, but for power: set this forwards for stable and understeer car behaving more like a front wheel drive vehicle when the throttle is being applied mid-turn, and to the rear for power oversteer if you want an oversteering car behaving more like a rear wheel drive vehicle when accelerating and turning.
Limited Slip Diffs
Adjustments to the limited slip differentials will dramatically affect the vehicle's handling characteristics. In four wheel drive vehicles you can adjust the front and rear differentials independently.
By increasing the strength of the differential under acceleration, the traction will be increased when exiting corners. This is because the differential will prevent the inside wheel from spinning. Increasing the strength of the differential under deceleration will make the vehicle more stable under breaking and give the vehicle a tendency to understeer.
It is worth noting that a strong deceleration setting will make the car difficult to steer and is recommended only for drivers with a late braking driving style.
This determines how the air flows around the running vehicle.
High downforce settings will push the vehicle down onto the road at high speeds. This extra grip allows the driver to take corners faster but reduces the car's top speed due to the added wind resistance. It's proper to increase the downforce on tight and twisty tracks.
On fast open stages it can be advantageous to reduce the downforce so that the vehicle is able to obtain a higher speed, however, this will reduce the cornering speeds as the car will become more unstable. Similarly to the long gearing, also low downforce proves correct on tracks with long straights.
Sometimes known as stablilisers, the anti-roll bars are an additional way of improving the responsiveness of the vehicle when taking corners, of tweaking the car's balance in the turns.
A stiff anti-roll bar setting will suppress the body roll of the vehicle and allow the momentum to shift quickly. A soft anti-roll bar will allow more body roll and prevent the vehicle from bouncing on a stiff suspension set up.
So a car with a soft front end, with a hard back end will tend to oversteer, and a hard front end with a soft back end will tend to understeer.
ARB settings are often used to correct the natural handling balance of different drivetrains because they are a very powerful tool. The soft front/hard back is common in Front-wheel-drive cars because of the natural tendency they would have otherwise to understeer. You can see this in action if you look at pics of hot hatches and FWD touring cars being driven hard where you can see them "cocking a leg" and lifting the inside rear wheel in the air. Similarly, powerful rear-wheel drive cars tend to run with a stiff front ARB and soft at the rear.
Final Drive
According to the number of corners/hairpins and straights on the track you must choose proper gear ratios. For twisty tracks without long straights go for short ratios. This increases the vehicle acceleration but, on the other hand, decreases its top speed. For speedy stages with lots of straights and gentle bends you should choose long gearing which will allow you to reach high top speed, unfortunately at a cost of acceleration.
Gear Ratios
If the track consists of lots of hairpins but also has a couple of long straights (and usually you deal with this situation) the lower gear ratios can be set up with good acceleration in mind (for these hairpins) and then the higher gears can be stretched out to allow for higher top speeds (for those long straights). Remember only to test your settings on the shakedown first, to check if the gaps between gears are smooth, because it can often be a problem balancing the ratios when you're going for mixed low speed acceleration with a high top speed.
Camber
Increasing the negative camber settings on a rally vehicle allows it to use its tires more efficiently while cornering. This can be an advantage on tarmac stages where there is a lot of cornering involved. If the settings are pushed too high, the vehicle's braking ability will be affected.
Drivers can set up the front and rear camber separately to adjust how the vehicle behaves during cornering. This is a good way of subtly affecting the understeer and oversteer characteristics of the vehicle and should avoid any drastic changes to the handling.
Also, before you start your proper ride, test the manipulation's effects on the shakedown.
Most racing and rally cars run with a certain amount of negative camber.
Toe angle
By giving the front wheels a slight toe out angle it is possible to give the vehicle more stability after turning into a corner, however, you will lose some responsiveness in the steering. A slight toe in angle on the front wheels works inversely and will increase the steering response but may cause the vehicle to lose stability after turning into the corner.
So, if you're having difficulty with turning the car into hairpins, toe-out on the front wheels can help. If the car's wandering over the road when you want it to go straight, try toeing the front wheels in. At the rear, a touch of toe-in can help tame an oversteering car.
Increasing the rear toe angle of the vehicle will have a more pronounced effect on the vehicle's handling. When adjusting the rear toe angle it is wise to make small adjustments and then test the feel of the vehicle to see how it has affected it. Generally you should avoid to toe-out the rear wheels as this can make the car very unstable.
Bump
Increasing the absorption of the dampers will make the vehicle feel more rigid whilst decreasing this value will make the vehicle feel softer. If you set the value of the dampers too high the car will have a tendency to bounce off the road. So, if your car is shaky or bouncy after bumps, you need to soften your dampers and/or suspension (springs), but if you set the value too low the damper will fail to absorb bumps within the road causing the bottom of the vehicle to hit the track surface.
Harder suspension springs (look above) require stronger dampers. Adjusting them on their own producing an effect similar to that of adjusting suspension stiffness, but where they're really effective is in tweaking the car's behaviour in transitions: turning into the corner and coming out.
If you are oversteering you can reduce the damper in the rear/increase the damper in the front. Anti-roll (sway bar) can also be applied stiffer in the front and looser in the rear.
Rebound
Rebound settings are also very important as they affect the decompression of the damper. However, you should avoid using too soft settings. Rebound damping should usually be set at around 2/3rds of bump.
Fast Bump
Fast bump is needed for stages with lots of jumps with hard landings: your normal bump and rebound settings will contend with most of the track, but for those hard landings fast bump will kick in and save your suspension.
"Fast" in this case is referring to vertical wheel speed, not the car's speed. What this adds is the capability to have an extra damping force applied when the wheel is moving very fast upwards (landing from a jump, for example, or on rough surfaces.
You should make the strength of the fast bump higher than your bump setting and make the speed activation setting high enough that the fast bump setting is not being used all the time.
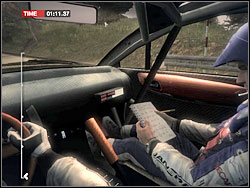
The guy, that sits next to you while you're driving through the stage, isn't an accidental amateur of strong impressions, which has managed to get to your rally car by deceit, but your co-pilot. His task is to safely lead you through the intricacies of the track. For this purpose he communicates with you using a short and simple language (jargon) and passes to you (up to date) the messages about the track. These data were collected by him during the reconnaissance drive. Listen to him carefully all the time and you shouldn't have bigger problems with the track and crashes. As I mentioned above (in hints chapter), it's a wise idea to volume up his voice (if you're using automatic transmission), to hear him clearly.
For some of you (English-speaking fellows) only digits and numbers pronounced by co-pilot can sound obscure. But their meaning is simple:
numbers (e.g. 100, 150) define how far (in meters) is to the next corner;
digits (6, 5, 4, 3, 2, 1) given past corner's direction mean suggested gear on which you should turn into that corner.
And here is an example of co-pilot's prompts:
"150, Left 2 and Right 5 Very Long Caution Rocks Outside, Crest 6 and Jump" - which means that after 150 meters you will have to turn left (co-pilot suggests to use 2nd gear then) and right (very long corner, he proposes to take it on 5th gear and you must beware of rocks outside this turning), then you must cross the crest (on 6th gear) and there is a jump finally.
Attention! In Colin McRae: DIRT there are couple of races where you're driving alone, without your pilot, so you must paddle your own canoe and pay attention to map or arrows appearing on top of the screen to avoid bursting out of the road.
During the race your vehicle comes under smaller or bigger damages: every corner's cutting off through the hard (uneven) shoulder, every impact affects the vehicle's technical condition. Sizable damages are communicated with red icons appearing on the screen during the ride - they symbolize which car's components are in bad shape. Additionally you can pause the game to get more detailed info (in %).
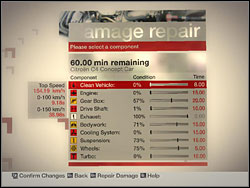
Every two races (in Rally competitions) you have a possibility to repair your rally vehicle. You have 60 minutes for this. In case of damaging all possible components it's too little. Impossibility of repairing all of them leads to the necessity of riding not fully efficient vehicle in next race and can affect that race's result. Damaged parts are de facto replaced with new ones, so before you decide to replace concrete component better check how big the damage is and whether or not you have urgent repairs. And you will be dealing with flows that affects following car components:
Clean vehicle - as a matter of fact this is not a flow (. Cleaning the vehicle will reduce the time it takes to repair components on the vehicle. It allows your mechanics to work in clean conditions, so, for example, a clean wheel nut can be removed far quicker than one covered in mud. A clean vehicle also gives marginally better aerodynamics, allowing for quicker acceleration. Generally, it is worth to clean the vehicle before you start any serious repairs, because time profit may be significant. For example, cleaning the vehicle will take 8 minutes, but the time you will have to spend on repairing of other components will be reduced by a quarter - so you'll gain additional 7 minutes. However, try to obtain more minutes than you must spend on cleaning the car and don't treat vehicle's cleaning as a priority: if there left only these 8 minutes and you can do other serious repair in that time - just do it.
Engine - keeping the engine in good shape is vital as it greatly affects performance. Losing power will mean slower acceleration and an increase chance of the engine stalling after rolls and high impacts. Damage can be terminal if the engine becomes severely damaged and the head gasket blows.
Gear box - if it is damaged then gear changes will be slower than normal. Heavy damage will result in gears becoming unselectable while racing. Do not overuse braking by gears reduction while using manual transmission because it may lead to "slaughtering" of a gear box!
Driveshaft - is situated on the underside of the car, which makes it susceptible to damage. If the driveshaft becomes damaged the vehicle will lose power distribution to the wheels, especially those furthest from the engine.
Exhaust - its damage will result in airflow problems and cause a power reduction of up to 50% where it is squashed or blocked. In consequence of this your car will lose acceleration and its top speed will also be affected, I mean reduced in this case. Sound pollution restrictions also mean that stewards will not allow you to continue racing where there is severe damage or complete loss of the exhaust, however, I didn't deal with such a situation in this game (not even once).
Bodywork - damaged bodywork will result in increased drag, making the vehicle accelerate slower (top speed is also reduced). Also if a front or rear spoiler is lost or damaged the vehicle will have reduced downforce which will make the vehicle less stable at high speeds. Finally if the exhaust needs replacing, then the bodywork must be repaired first, as you cannot fix on a new exhaust if the bodywork is damaged.
Cooling system - it contains the radiator, which is critical to the vehicle's performance. If a radiator becomes damaged not only is the result spectacular, but with no cooling the engine will also start to overheat quickly. An overheated engine can result in an early end to your race.
Suspension - can be knocked out of alignment and damaged from harsh landings and heavy impacts. If damage occurs vibrations will be inevitable and the vehicle will become more unstable while cornering. Damages can also reduce road-grip of the car and make its steering more difficult.
Wheels - if damaged, steering will become more difficult and unpredictable (damaged wheels often blow the car off course), acceleration will also be reduced in consequence of increased rotational resistance. If a wheel comes off completely you may be unable to continue the race.
Turbo - a critical component but not every car has it. If damaged you will have an instant drop in acceleration and performance.
If you look closer to the damage screen you will surely notice red numbers on its left side. They show the maximum speed of the vehicle and its acceleration from 0 (zero) to 100 and 150 km/h. These values change (increase) while you are replacing some components of your rally vehicle. In other words: your car's performance improves when you're replacing some of its parts. Thus these parts/components (the engine, driveshaft, wheels and turbo) are crucial and most important and you should fix (replace) them in the first instance. All other parts have a secondary importance de facto.
Name: McMillin Racing Car
Power to weight ratio: 340 hp/tonne
Torque: 575 Nm
Wheelbase: 3302 mm
Drive Train: RWD
Price: 440.000 E
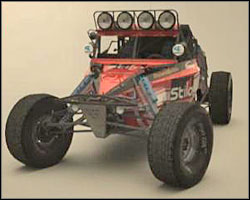
Name: Ickler Jimco buggy
Power to weight ratio: 410 hp/tonne
Torque: 580 Nm
Wheelbase: 3048 mm
Drive Train: RWD
Price: 500.000 E
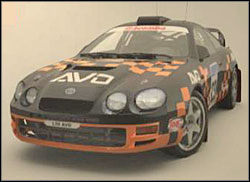
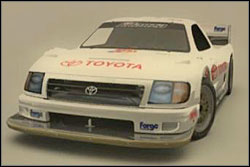
Name: Toyota Celica GT-Four
Power to weight ratio: 250 hp/tonne
Torque: 500 Nm
Wheelbase: 2545 mm
Drive Train: 4WD
Price: 400.000 E
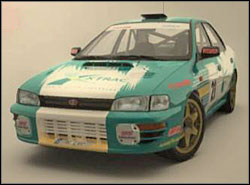
Name: Subaru Impreza 95 (WRX-RA STI version II)
Power to weight ratio: 250 hp/tonne
Torque: 400 Nm
Wheelbase: 2550 mm
Drive Train: 4WD
Price: 480.000 E
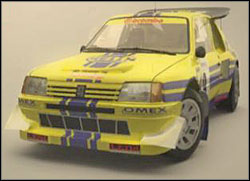
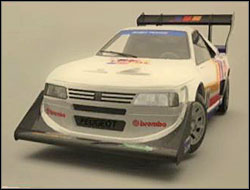
Name: Peugeot 205 T16
Power to weight ratio: 470 hp/tonne
Torque: 490 Nm
Wheelbase: 2540 mm
Drive Train: 4WD
Price: 520.000 E
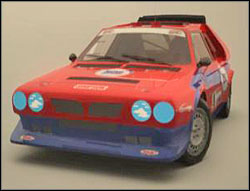
Name: Lancia Delta S4
Power to weight ratio: 560 hp/tonne
Torque: 480 Nm
Wheelbase: 2440 mm
Drive Train: 4WD
Price: 600.000 E
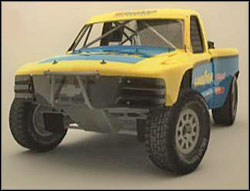
Name: Chevrolet Silverado
Power to weight ratio: 370 hp/tonne
Torque: 975 Nm
Wheelbase: 3073 mm
Drive Train: 4WD
Price: ---
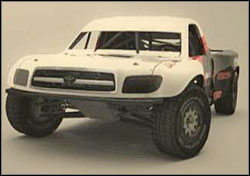
Name: Toyota Tundra
Power to weight ratio: 350 hp/tonne
Torque: 582 Nm
Wheelbase: 3200 mm
Drive Train: 4WD
Price: 600.000 E
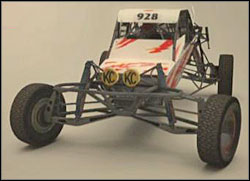
Name: Aaron Hawley Super Buggy
Power to weight ratio: 260 hp/tonne
Torque: 196 Nm
Wheelbase: 2845 mm
Drive Train: RWD
Price: ---
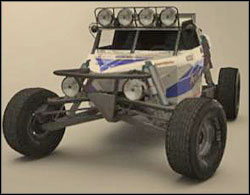
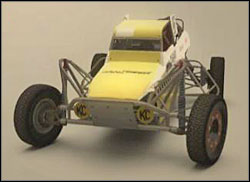
Name: Scott Schwalbe Super Buggy
Power to weight ratio: 300 hp/tonne
Torque: 215 Nm
Wheelbase: 2612 mm
Drive Train: RWD
Price: 400.000 E
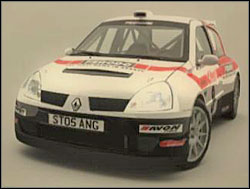
Name: Renault Clio Super 1600
Power to weight ratio: 230 hp/tonne
Torque: 196 Nm
Wheelbase: 2496 mm
Drive Train: FWD
Price: ---
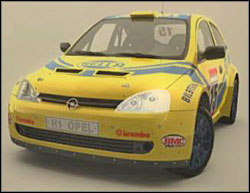
Name: Opel Corsa Super 1600
Power to weight ratio: 230 hp/tonne
Torque: 201 Nm
Wheelbase: 2491 mm
Drive Train: FWD
Price: 160.000 E
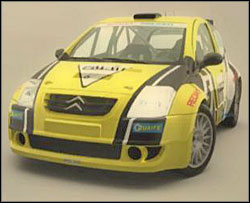
Name: Citroen C2 Super 1600
Power to weight ratio: 230 hp/tonne
Torque: 201 Nm
Wheelbase: 2326 mm
Drive Train: FWD
Price: 200.000 E
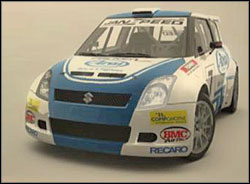
Name: Suzuki Swift Super 1600
Power to weight ratio: 220 hp/tonne
Torque: 186 Nm
Wheelbase: 2390 mm
Drive Train: FWD
Price: 240.000 E
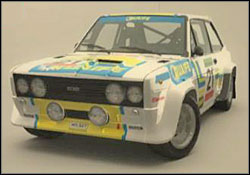
Name: Fiat 131 Abarth
Power to weight ratio: 240 hp/tonne
Torque: 242 Nm
Wheelbase: 2490 mm
Drive Train: RWD
Price: ---
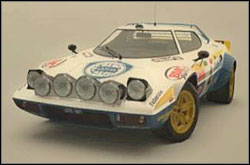
Name: Lancia Stratos
Power to weight ratio: 300 hp/tonne
Torque: 300 Nm
Wheelbase: 2180 mm
Drive Train: RWD
Price: 460.000 E

Name: McRae Motorsport Escort Mk2
Power to weight ratio: 320 hp/tonne
Torque: 332 Nm
Wheelbase: 2048 mm
Drive Train: RWD
Price: 500.000 E
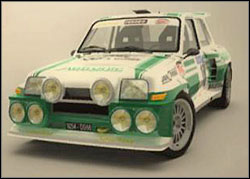
Name: Renault 5 Maxi Turbo
Power to weight ratio: 390 hp/tonne
Torque: 311 Nm
Wheelbase: 2430 mm
Drive Train: RWD
Price: 560.000 E
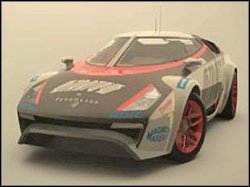
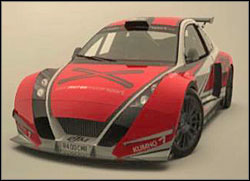
Name: New Stratos by Fenomenon
Power to weight ratio: 440 hp/tonne
Torque: 373 Nm
Wheelbase: 2275 mm
Drive Train: RWD
Price: 600.000 E
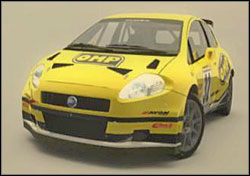
Name: Fiat Grande Punto Super 2000
Power to weight ratio: 230 hp/tonne
Torque: 250 Nm
Wheelbase: 2510 mm
Drive Train: 4WD
Price: ---
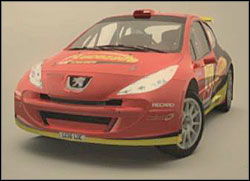
Name: Peugeot 207 Cup Super 2000
Power to weight ratio: 250 hp/tonne
Torque: 250 Nm
Wheelbase: 2560 mm
Drive Train: 4WD
Price: 360.000 E
Name: Subaru Impreza WRX STI Spec-C
Power to weight ratio: 200 hp/tonne
Torque: 422 Nm
Wheelbase: 2540 mm
Drive Train: 4WD
Price: 390.000 E
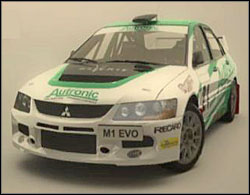
Name: Mitsubishi Lancer Evolution IX
Power to weight ratio: 210 hp/tonne
Torque: 570 Nm
Wheelbase: 2630 mm
Drive Train: 4WD
Price: 400.000 E
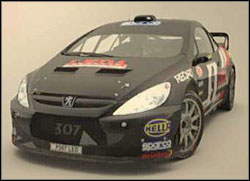
Name: Peugeot 307
Power to weight ratio: 240 hp/tonne
Torque: 580 Nm
Wheelbase: 2610 mm
Drive Train: 4WD
Price: 480.000 E
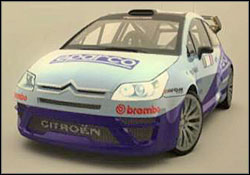
Name: Citroen C4 Concept Car
Power to weight ratio: 260 hp/tonne
Torque: 568 Nm
Wheelbase: 2608 mm
Drive Train: 4WD
Price: 500.000 E
Name: Colin McRae R4
Power to weight ratio: 340 hp/tonne
Torque: 332 Nm
Wheelbase: 2500 mm
Drive Train: 4WD
Price: it's an award after completing the career mode.
Name: Kenworth T2000
Power to weight ratio: 270 hp/tonne
Torque: 1650 Nm
Wheelbase: 4064 mm
Drive Train: RWD
Price: 560.000 E
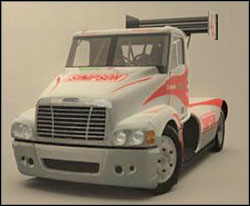
Name: Freightliner Century Class S/T
Power to weight ratio: 340 hp/tonne
Torque: 3657 Nm
Wheelbase: 3937 mm
Drive Train: RWD
Price: 700.000 E
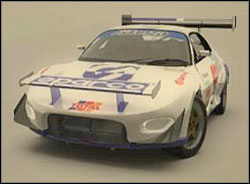
Name: Mitsubishi FTO
Power to weight ratio: 650 hp/tonne
Torque: 653 Nm
Wheelbase: 2515 mm
Drive Train: 4WD
Price: ---
Name: Peugeot 405 T16 Pikes Peak
Power to weight ratio: 590 hp/tonne
Torque: 638 Nm
Wheelbase: 2888 mm
Drive Train: 4WD
Price: 700.000 E
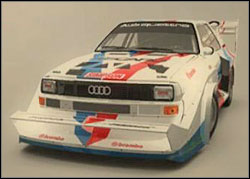
Name: Audi Quattro S1 Pikes Peak
Power to weight ratio: 590 hp/tonne
Torque: 590 Nm
Wheelbase: 2224 mm
Drive Train: 4WD
Price: 760.000 E
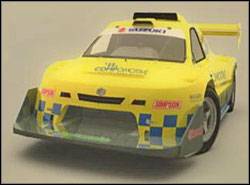
Name: Suzuki Escudo
Power to weight ratio: 930 hp/tonne
Torque: 785 Nm
Wheelbase: 2690 mm
Drive Train: 4WD
Price: 800.000 E
Name: Toyota Celica GT Pikes Peak
Power to weight ratio: 960 hp/tonne
Torque: 1500 Nm
Wheelbase: 2545 mm
Drive Train: 4WD
Price: 900.000 E
Name: Toyota Tacoma
Power to weight ratio: 960 hp/tonne
Torque: 1500 Nm
Wheelbase: 2711 mm
Drive Train: 4WD
Price: 1.000.000 E
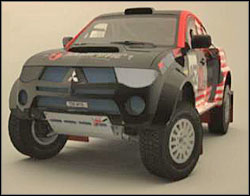
Name: Mitsubishi L200 Triton
Power to weight ratio: 110 hp/tonne
Torque: 510 Nm
Wheelbase: 2780 mm
Drive Train: 4WD
Price: ---
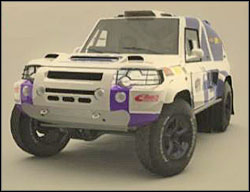
Name: Rally Raid UK Desert Warrior
Power to weight ratio: 130 hp/tonne
Torque: 480 Nm
Wheelbase: 2800 mm
Drive Train: 4WD
Price: 540.000 E
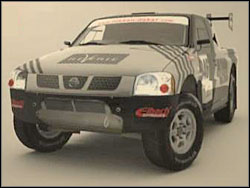
Name: Dakar Nissan Pickup
Power to weight ratio: 150 hp/tonne
Torque: 360 Nm
Wheelbase: 2800 mm
Drive Train: 4WD
Price: 660.000 E
Name: BMW X3 CC X-Raid
Power to weight ratio: 140 hp/tonne
Torque: 620 Nm
Wheelbase: 2850 mm
Drive Train: 4WD
Price: 700.000 E

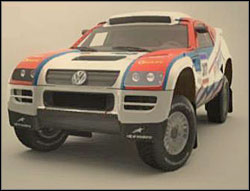
Name: Volkswagen Race Touareg 2
Power to weight ratio: 140 hp/tonne
Torque: 500 Nm
Wheelbase: 2820 mm
Drive Train: 4WD
Price: 840.000 E
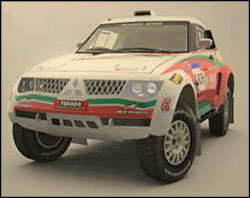
Name: Mitsubishi Montero EVO MPR11
Power to weight ratio: 120 hp/tonne
Torque: 412 Nm
Wheelbase: 2775 mm
Drive Train: 4WD
Price: 900.000 E
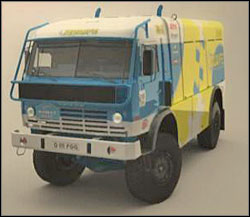
Name: Kamaz 4911
Power to weight ratio: 70 hp/tonne
Torque: 2700 Nm
Wheelbase: 4200 mm
Drive Train: 4WD
Price: ---
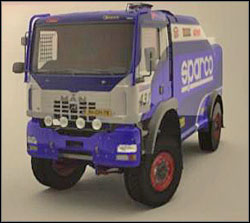
Name: MAN TGA
Power to weight ratio: 80 hp/tonne
Torque: 3000 Nm
Wheelbase: 4390 mm
Drive Train: 4WD
Price: 660.000 E
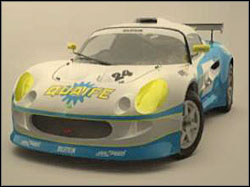
Name: Lotus Exige
Power to weight ratio: 250 hp/tonne
Torque: 198 Nm
Wheelbase: 2300 mm
Drive Train: RWD
Price: ---
Name: Audi TT
Power to weight ratio: 460 hp/tonne
Torque: 350 Nm
Wheelbase: 2429 mm
Drive Train: FWD
Price: 400.000 E
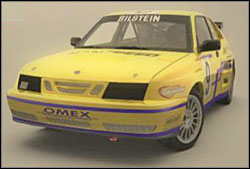
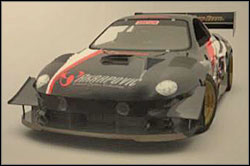
Name: Saab 9-3 T16
Power to weight ratio: 480 hp/tonne
Torque: 672 Nm
Wheelbase: 2625 mm
Drive Train: 4WD
Price: 440.000 E
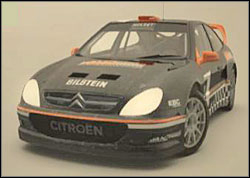
Name: Citroen Xsara 4x4 T16
Power to weight ratio: 430 hp/tonne
Torque: 720 Nm
Wheelbase: 2555 mm
Drive Train: 4WD
Price: 500.000 E
Car settings for suitable tracks that I suggest below are only my propositions since these settings depend on particular vehicle and even on your driving style.
Tracks with "B" letters in their names (i.e. Punta Brava B) are de facto inverted versions of other stages.
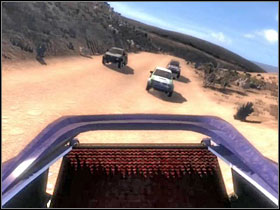
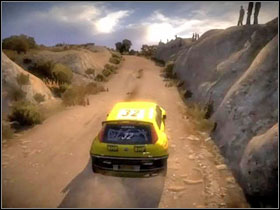
As I mentioned in the introduction the SI of your virtual opponents is weak in Colin McRae: DIRT. During the races in which we're competing with these drivers we can beat them easily using a simple scheme: right after the start of the race we're cutting in on the road of our neighbours from one side. Thereupon, on the first corner and along the inner edge of it, we're skirmishing with rest of the adversaries. If during the taking of a first corner we weren't able to go past all of the opponents, we should still try to do this on next bends, always by forging ahead along the inner edge of the road. From time to time we're looking back for a while and skillfully cutting in on the road of our pursuers. In Buggy Class races (and similar) pay attention to the jumps and first of all - to the flinders that have come off from other vehicles and now lie on the track: if you run into them your suspension or wheels may become damaged. Wrecks will disappear but these flinders will lie on the track for a long time.
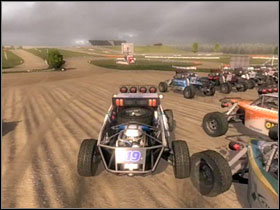 Right after the start of the race cut in on the road of your neighbours.
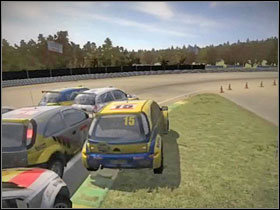 On the first corner skirmish the rest of the opponents by forging ahead along the inner edge of the corner.From time to time look back for a while and cut in on the road of your pursuers.
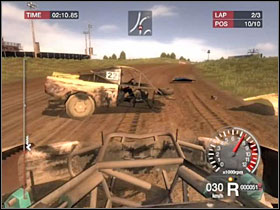 In CORR and Rallycross races pay attention to the flinders that have come off from other vehicles and lie on the track.
Car settings for suitable tracks that I suggest below are only my propositions since these settings depend on particular vehicle and even on your driving style.
Tracks with "B" letters in their names (i.e. Punta Brava B) are de facto inverted versions of other stages.
Japanese surface is a combination of damp/wet, smooth and rough tarmac, so I would suggest using a stiff and low suspension. Also, shift the brake bias toward the front of the vehicle rather, use intermediate gearing and set the strength of the downforce on low. There are almost no cuts on Japanese tracks.
 Some hairpins on Komoro.
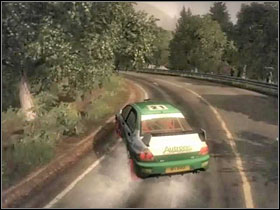 Spacious turnings on Lake Ono track - you can turn into these corners at full speed by strongly twisting the steering wheel.
 Maebashi track: drive at top speed through the village and quickly brake right behind it, in order to take a sharp corner to the right.
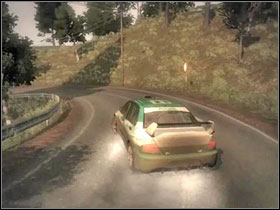 Twisty, low-speed section about half way of Maebashi stage.
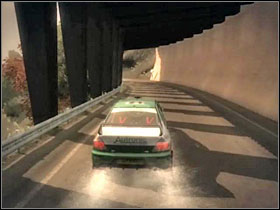 Drive through the tunnels on Numata without hitting the walls, use good technique.
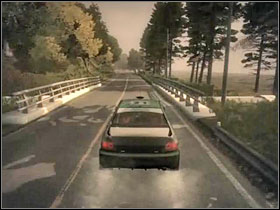 Numata B: long straights with gentle bends - you will need a long top gear for them.
On Komoro track there is quite a lot of hairpins, watch out also for jump near the finish line.
Lake Ono consists mainly of spacious turnings, though you can take them on full speed by strongly twisting the steering wheel and straighten it out in the moment when you're coming out. Watch out for a jump near the bridge on this track - after a bad take-off you may land on the road margin or score a high impact.
During the race on Maebashi maintain full concentration while driving at full speed through the village situated at the seaside: there is some rough tarmac and just behind the village there is a sharp hairpin to the right - you must brake as quick as a flash when you reach it. About half of Maebashi there is exceptionally twisty section you must drive through very carefully, without unnecessary sliding and as close as possible to inner edges. On this track watch out for a narrow bridge when entering the village near the finish line.
There are some twisty tunnels on Numata - flash through them technically and without hitting the walls. You'll deal also with long straights with gentle bends on this track, so a long top gear may be useful too. And these gentle bends you should take bravely, at top speed and as close to the kerbs as you can. Maintain a special concentration while driving at full speed through the villages.
Car settings for suitable tracks that I suggest below are only my propositions since these settings depend on particular vehicle and even on your driving style.
Tracks with "B" letters in their names (i.e. Punta Brava B) are de facto inverted versions of other stages.
Sunny Spain founds us twisty, tarmac stages, thus use hard and low suspension setting, move the brake bias toward the front, choose large brake discs because there is a lot of turning and high downforce. Oh, and an intermediate gearing. There is a fat lot of cutting, because you have rough rocky wall on one side and stony, wooden or metallic barrier rails on the other side of road margins. You can cut as if just at these stony overhangs, but only there where you see a rutty space and really very carefully: if you hook up even a little your rally car may go to pieces.
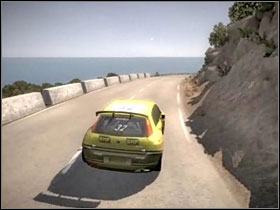 Tossa de Mar B: rocky wall on one of road margins and stony barriers on second.
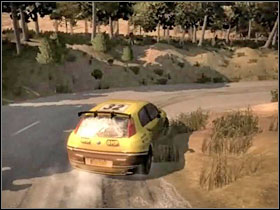 Twisty section on Calogne: watch out where are you cutting through corners to avoid rolling the car on its back.
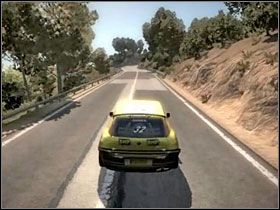 Roan tarmac and speedy long straights on Punta Brava B.
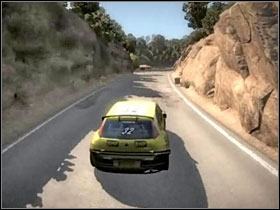 Tight gap on the same track.
On Tossa de Mar B watch out for a tunnel and a sharp hairpin just behind it (near the finish line): crashing just before the finish line may be very frustrated (.
One of the stages (Calogne) takes place in slightly different, greeny scenery. There is a bit more cuts (however, you must take care of where you are cutting, because driving onto the slope can lead to a crash/roll you on your back) and the track is uniquely twisty in the latter part.
Punta Brava B consists of a few long straights (besides the piebald/roan tarmac): they allow you to gain really high speed. There is also a tight gullet between the rocks in which you can score up a... wonderful crash (. Watch out for sharp turns just before the finish line.
Car settings for suitable tracks that I suggest below are only my propositions since these settings depend on particular vehicle and even on your driving style.
Tracks with "B" letters in their names (i.e. Punta Brava B) are de facto inverted versions of other stages.
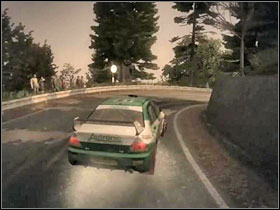
German rally tracks are quite fast. Wet thus slippy tarmacs with different road-grip, sometimes concrete or even gravel. So you will need a stiff and low suspension, low strength of downforce, long gearing and brake bias shifted towards the front wheel axis.
 Ockfen stage: Avoid sliding on these german hairpins. You can cut some of them through the grass but not too deeply.
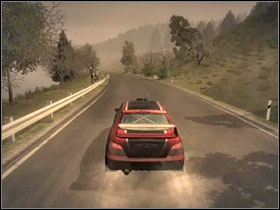 Biebelhausen: Step on the gas on these long straights but watch out for poles on road margins and remember: this tarmac is wet and slippy.
However, hairpins are also one of the characteristic features of german stages (i.e. on Ockfen). Some of them you can cut off through the grass, though I wouldn't recommend to do this too deeply, because the game will put you back on the tarmac and you'll lose precious seconds. Don't slide through the hairpins, take them fluently. Also, watch out for some pegs and poles on road margins, especially at the beginning of this track (which is very fast).
On Sonnenberg track pay attention while closing to and crossing the bridge (concrete surface).
Black tarmac sections on Biebelhausen allow you to gather momentum (maintain full concentration earlier, when driving through the town).
Car settings for suitable tracks that I suggest below are only my propositions since these settings depend on particular vehicle and even on your driving style.
Tracks with "B" letters in their names (i.e. Punta Brava B) are de facto inverted versions of other stages.
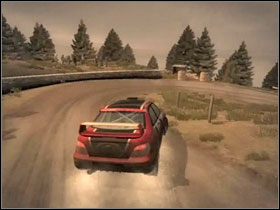
On Italian twisty, bumpy and uneven tracks you will be dealing with several kinds of surfaces: with gravel, sometimes with mud and rarely with tarmac. Thus soft/high suspension should prove its usefulness. Shift the brake bias toward the rear axle, it is also worth to experiment with fast bump setting on the shakedown. You're cutting through corners only at your own risk because of pretty uneven road margins. On these hard shoulders you may find almost everything you can imagine: rocks, stones, pegs, grooves, low walls, fences, barrier rails and ribbons.
 First section of Tempio Pausania track seems to be most interesting because of its technical difficulty.
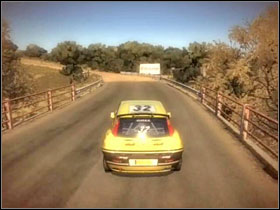 On Cunconi watch out for couple of bridges and prepare for surface change (from tarmac to gravel).
On Tempio Pausania the first section seems to be the most interesting because of its technical difficulty: you can find there probably everything what you can find on Italian tracks. Watch out for rocks along both road margins, also for small and dark grove in which it is hard to see the road.
On one of the stages (Cunconi) prepare for some very rough tarmac. Watch out for couple of bridges and surface change.
You should know Monte di li Conchi track very well - this one was in demo.
Car settings for suitable tracks that I suggest below are only my propositions since these settings depend on particular vehicle and even on your driving style.
Tracks with "B" letters in their names (i.e. Punta Brava B) are de facto inverted versions of other stages.
British rally tracks are generally quite fast so I would propose to use on them long gearing. You'll be driving here on damp gravel mostly, interwoven here and there with smooth as a baby's bottom tarmac and on mud (a little bit of mud). On these tracks there is quite a lot of corner's cutting through the grass shoulder, but sometimes you must be careful of logs lying on it. Also off-road riding not necessarily must end incuriously, because you can return on the track pretty fast, easily and without serious damages.
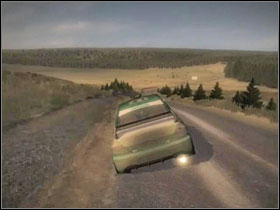 Falston founds you bumps and jumps.
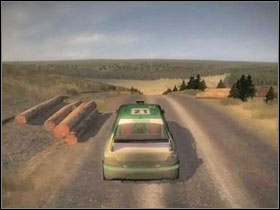 Be careful of logs lying on grass shoulders.
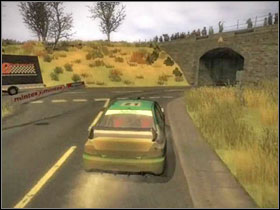 Watch out for numerous gates and coarctations on Crawberry Crag. Prepare also for surface change (gravel to tarmac).
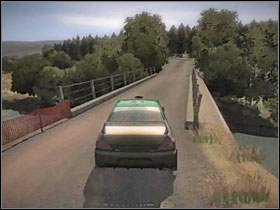 Deadwater Moor's trap near the finish line: after a speedy section there is a jump and a sharp right turn into the tight bridge.
Tracks are pretty bumpy, here and there on the tarmac also (Butteryhaugh) and there are also some jumps (Falston): you can jump out on some of them, other it's better to choke. Therefore use rather intermediate suspension (not so stiff/low and not so soft/high) and experiment with fast bump on the shakedown first. You can also play with drifts and slides on these British roads, thus brake bias should be shifted toward the rear of the vehicle.
You should also watch out for surface changes (and that means simultaneously: road-grip changes), as well as fit in numerous gates and road's coarctations (Crawberry Crag).
An "ambush" in the latter part of Deadwater Moor: after a very fast section there is a small jump and just behind it: a sharp right turn into the tight bridge.
Car settings for suitable tracks that I suggest below are only my propositions since these settings depend on particular vehicle and even on your driving style.
Tracks with "B" letters in their names (i.e. Punta Brava B) are de facto inverted versions of other stages.
Pea gravel is a surface which allows you to spectacularly slide on it. Stages are pretty fast so choose a long gearing and a soft suspension/high ride height.
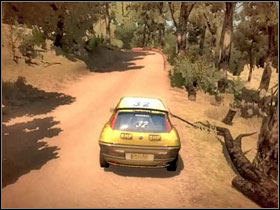 Be careful of logs on road margins in woods, maintain attention as tree shadows can make difficult road perception.
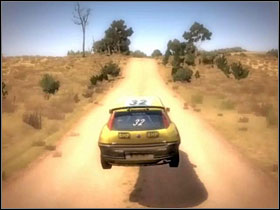 Uriarra Forest: several bumps will test your fast bump setting.
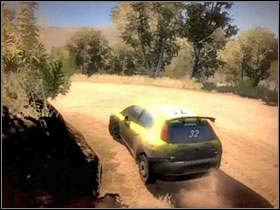 On Tidbinbilla track watch out for a sharp left turn near the finish line!
In the latter part of Bendora track you must drive through the wood: trees shadows can make difficult road perception.
Generally there is a lot of corners cutting on open stages, though in woods (Brindabella) you must maintain attention and watch out for branches or logs lying on the road margins.
Several bumps will test your fast bump settings on Uriarra Forest track.
Before you cross the finish line on Tidbinbilla watch out for a sharp left turn - if you won't be able to bring to a stop (well, almost () your rally car, it's possible you'll land in thicket (and you may waste many seconds on returning on the track).

 Crackdown Game Guide & WalkthroughCommand & Conquer 3: Kanes Wrath Game Guide & Walkthrough
 Crusader Kings II Game Guide & WalkthroughCall of Duty: Modern Warfare 2 Game Guide & Walkthrough
 Cities XXL Game Guide & Walkthrough