This guide to Castlevania: Lords of Shadow 2 contains a very detailed walkthrough for all the missions in the single player campaign mode, on the highest difficulty level you can select from the very beginning. The description of each mission includes hints on how to solve all the existing obstacles, puzzles and platform-like challenges, while also describing each of the individual opponents existing in the game, with a detailed description of a method used to effectively fight against them. Additionally, the guide contains all the needed information about every piece of equipment used in the game, with a recommended path of development. Aside from that, the guide includes a richly illustrated description of all the collectibles existing in the game: Life, Void and Chaos Gems, Memorials, Soldier Diaries, keyholes for Dungeon Keys and Piles of Sacrifice. The guide also contains a variety of general gameplay tips, as well as information regarding all the in-game challenges and achievements, with a detailed description of how to unlock and complete them. The Castlevania series is one of the longest among all the video games - over the years, different installments of this franchise were developed on all of the biggest and most influential gaming platforms. Castlevania: Lords of Shadow 2, being a game from a action/adventure genre, is a second installment available on PC, in which we play as the titular Lord of Shadow, Dracula. In this piece we will visit locations typical to the franchise, full of monumental, breathtaking castles, as well as more modern, like science districts, trying to regain Dracula's lost powers, to be able to stand against the Satan and his servants. The main character of this piece contrasts heavily with a typical Castlevania Hero - normally, we would be playing as a Champion of Brotherhood of Light.
Guide to Castlevania: Lords of Shadow 2 contains:
Jakub Bugielski ()
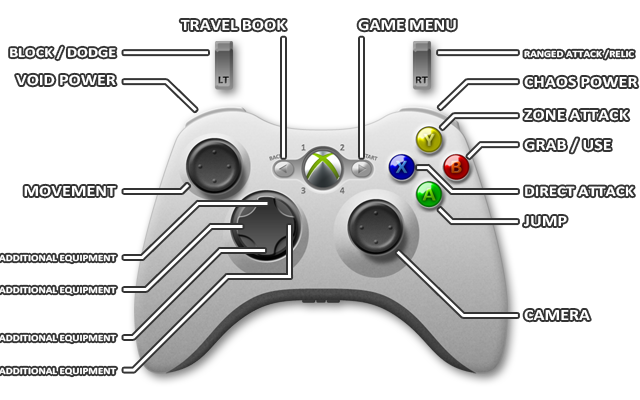

Movement

Absorb Void Magic

Camera movement

Absorb Chaos Magic

Jump

Grab / Use

Direct attack

Zone attack

Void Power

Block / Dodge

Chaos Power

Ranged attack / Relic

Additional equipment

Additional equipment

Additional equipment

Additional equipment

Travel Book

Game Menu


Movement

Absorb Void Magic

Camera movement

Absorb Chaos Magic

Jump
Grab / Use

Direct attack

Zone attack

Void Power

Block / Dodge

Chaos Power

Ranged attack / Relic

Additional equipment

Additional equipment

Additional equipment

Additional equipment

Travel Book

Game Menu

Character movement

Jump

Block / dodge

Direct attack

Area attack

Camera centering

Grab / Use

Game Menu

Secondary weapon

Void Power / Chaos Power activation

Absorb Void Magic

Absorb Chaos Magic

Bat Swarm

Projectile

Mist Form

Relic selection

1. Health Bar. During the game (and finding Life Gems) the health bar will grow longer. Naturally, if it goes empty, you will die and be transported back to a save point.
2. Number showing how much experience points you currently have - you earn it for killing enemies, after using the Stolas' Clock Relic, by picking up certain items and for finishing a chapter.
3. Information shown in this place tell you about your progress in mastering certain skills - each hit increases that number by a certain amount (the more difficult it is to hit with it, or the more Void / Chaos magic it uses, the faster it increases). When it reaches 100%, it won't show up there again.
4. In this place (below experience points) the currently equipped skill is shown (in this particular case, Chaos Bomb). Some skills require a certain amount of time before they can be used again (cooldown time) - the cooling progress will be shown in this place.
5. Bars representing the actual amount of Void and Chaos Magic you currently possess - if any of those reaches zero, you won't be able to use that Magic. It can be recharged by picking up Blood Orbs dropped by enemies. Ensnared Demon Relic gives you unlimited amount of Void and Chaos Magic for a short time.
6. The Minimap, showing a fragment of terrain, in which you currently are - below the Minimap you can find the name of the district.
7. Combat Focus bar - see "Tips" section to learn more.
Interface in the game is no different than that which you can find in any other games from this game genre - it doesn't block the view and it has all the most important information you may need. In the left upper corner [1] there's a health bar of your character (when it reaches zero, you die), and just below it [4] the icon representing your currently equipped skill or relic. In the opposite corner [6] there's a Minimap, which unfortunately has to be discovered first to be visible. The Minimap won't show the position of enemies either. In the opposite corners of the screen [5] you can find bars representing your current amount of Void / Chaos Magic - if any of those bars is empty, you can't use that type of Magic. Between them [7] there's the Combat Focus bar - you can learn more about it in the "Tips" section. Below the health bar [2] you can find information about the amount of experience points you currently have, and your mastery over a certain skill [3].
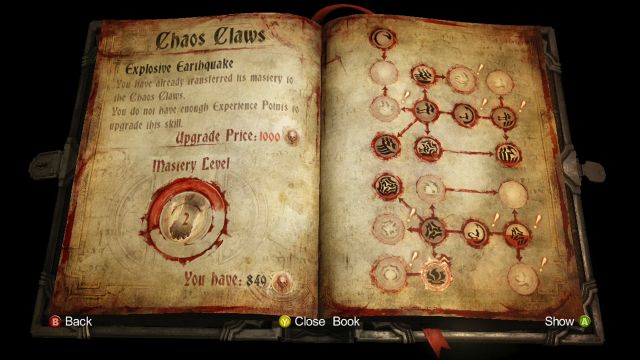
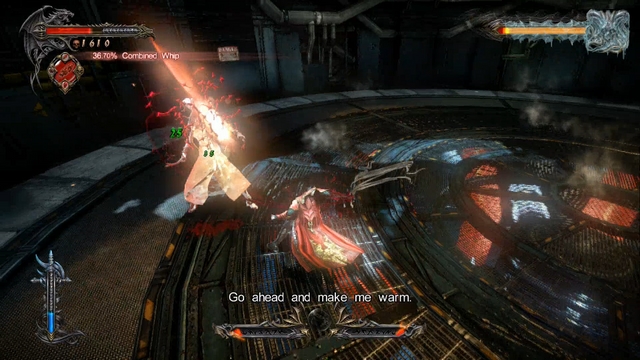
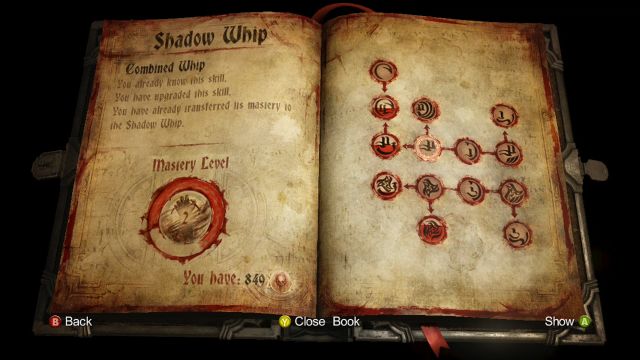 Shadow Whip upgrade window.
The Shadow Whip is the first available weapon in the game. You can use it how much you want (it doesn't require any resource to be used), but at the same time it lacks any special abilities, like freezing / healing of the Void Sword or armor piercing / dealing addition damage of the Chaos Claws. Shadow Whip offers the longest attack range in the game.
Shadow Whip, of all the primary equipment, stands right in the middle - attacks done with it are faster than those from the Chaos Claws, and are stronger than those from the Void Sword. Using this weapon is also the only way to generate focus (Combat Focus) - using any other weapon or skill empties the Combat Focus bar.
Unlocking and upgrading different attacks in the case of the Shadow Whip is way cheaper those of Void Sword / Chaos Claws. That is precisely why you can (and probably will) unlock most (if not all) of them. Here is short description, presented in the recommended order of unlocking:
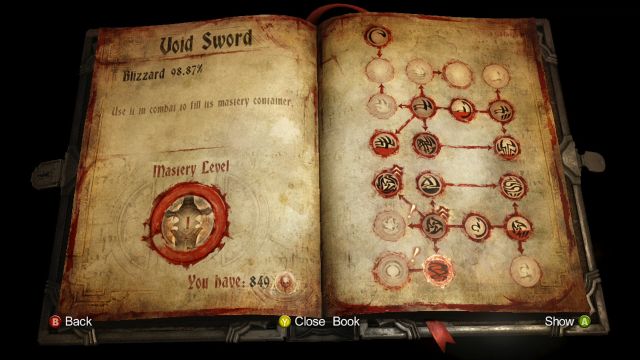 Void Sword upgrade window.
The first (of two) additional weapon that you will gain access soon after the beginning of the game. It can be described as:
Unlike the Shadow Whip, unlocking skills connected with the Void Sword (and those with Chaos Claws) isn't so easy, because they are very expensive (especially some of them). Below you can find a list of those most effective, together with a short description (the list is arranged in the order in which you should buy them):
Below you can find an optional list of skills (you can live without them, and given their huge cost, you can certainly find a more suitable way to spend some experience):
The rest of the skills available to the Void Sword are far less effective, than the previously mentioned and even if any of them are good (like Void Shield) they are so expensive (Void Shield - 10,000 experience points!) and eat through your Void Magic reserve insanely fast. With the recommended skills mentioned in this section, you should more than prepared for what's coming.
 Chaos Claws upgrade window.
The second (and the last) additional primary weapon that you will gain access to. It can be described as:
Like in the case of the Void Sword, the skills available to Chaos Claws are more expensive than those for Shadow Whip. That's why you won't be able (at least for the most part of the game) afford wasting precious experience points on useless skills. Below you can find a list of those most effective, together with a short description (the list is arranged in the order in which you should buy them):
Below you can find an optional list of skills (you can live without them, and given their huge cost, you can certainly find a more suitable way to spend some experience):
 All 6 Relics available to you in the game.
The first relic that you will come across in the game. It fully restores your health bar and increases it for a short duration.
Unlocks all available skills in the game and increases your mastery with weapons for a short time. This relic comes in handy especially at the beginning of the game, when you can't afford to unlock all the available skills. It loses its power later on as the game progresses, but thanks to increase in mastery, it can be useful throughout the game.
This relic gives you an unlimited supply of Void and Chaos Magic for its duration, which allows you to use your abilities almost as much as you want - it's especially useful versus flying enemies (you need Void or Chaos magic to bring flying foes to the ground), or during some of the challenges, which are really hard to do without a large supply of magic power.
Remember: after the duration of the relic ends, your supply of both magic will be emptied, even if you have "your own" supply before activation. It's crucial to use this relic only when your magic bars are empty.
Upon activation, enemies struck by your attacks will be slowed (to the point of not moving at all - larger enemies are more resistant to this and can occasionally attack you) and will drop additional experience points - if you feel a deficiency in experience or when you are having a hard time with some foe, use this relic.
Unfortunately, this relic doesn't work on some of the larger enemies (or slows them instead of stopping) and bosses.
If you care about finding all the secrets in the game (and you should, as most of them will make your game a lot easier), then this relic is ideal for you. After activation, you send out a Dodo Bird, which will locate the nearest treasure and its (treasure) location will be shown to you on the map. Dodo will only guide you to those treasures, which are available to you (you need certain abilities, like double jump or Mist to gain access to most of them) - if there is none available to you, because you lack the necessary skill or if there simply are none left on the district, you will get an appropriate message displayed on the screen.
Remember: Dodo Bird won't be "sitting" at the treasure for an unlimited time - after several minutes his "mark" will start to flash and it will disappear. Fortunately for you, the time provided by this relic is sufficient in most cases.
A relic which allows you to take the form of a dragon - at least for a split second. After activation, an effective animation awaits you, after which all the enemies in your vicinity will take gigantic damage - most of them (besides bosses) will be turned to ashes. In order to activate it, you have to collect 5 Dragon Scales, which are sometimes dropped out of slain enemies. You can also buy them at the Chupacabras' (he can sell only 3 scales at a time). Leave this relic on some tough enemies or especially annoying enemies, like Riot Mechs.
A special medallion, which is given to you by Trevor. It allows you to travel between two "time zones" - medieval (City of the Damned, Overlook Tower, Bernhard's Wing, Carmilla's Lair) and present time (Downtown, Victory Plaza, Arts District, Sciences District). Aside from story-related quests, you will mostly use it to get to the Chupacabras' shop in the City of the Damned.
An item, which is used to activate different kinds of mechanisms - from elevators, with which you must travel to push the story forward, to treasures hidden on the map (which award you with a large amount of experience points).
There are two ways to acquire them - by killing the only enemy who drops them (Dungeon Jailer), or by buying them at the Chupacabras' shop. You should buy them whenever you can (whenever you are close to the shop), because you never know when they will come in handy and you don't want to waste time going back for them.
An item, which can be used to gain access to Kleidos Challenges (which you can activate in the Chupacabras' shop). Kleidos consists of a mask and special nails - you need 4 of them to unlock the first Challenge group, 8 to unlock the next and so on, finishing at 16 nails, which will give you an access to all the Kleidos Challenges.
During the fight, you have to remember about the most important thing - defense. Spamming the enemies with random, chaotic attacks can work at the smaller foes, but when you will come across stronger, faster or simply more complex enemies it will be insufficient. That is precisely why you must learn and master 3 key skills: block, synchronized block and dodge.
The easiest way to defend yourself and the least useful. Blocking incoming attacks allows you to avoid getting damaged, but besides this it won't help you at all - it's not making the fight easier, as enemies are not losing health, it's not exposing their weaknesses and it's not rewarded in any way (be it experience points or building up of Combat Focus bar).
A regular block is only useful at the beginning of the game, when you can't use its synchronized equivalent yet and you don't have any other skill which will allow or help you with dodging enemies' attacks. That is why you should learn and master synchronized block as fast as you can.
Harder to master and execute successfully than a regular block, but giving a huge advantage if used correctly. To use it, you must block just as an attack is about to hit you - if you do it right, you will get a white flash at the point of impact and the game will slow down. Aside from avoiding damage, the blocked enemy will now be defenseless for a brief time and you can (and should) use this window to deal huge amounts of damage. It works on all enemies, even bosses, but you can't block unblockable attacks with this (you will see a red flash above the enemy head when he is preparing such an attack).
You will fail execution of this move dozens of times, it's inevitable, but when you will master this maneuver, all the future fights will be a lot easier for you.
Unfortunately, not all attacks can be blocked. When you see a red flash above the enemy head just before he attacks, it means that he's preparing an unblockable attack and you should dodge it to avoid getting hit. You will be dodging a lot, way more often than blocking, because this move is easier to execute and works on all enemies, especially on those who have loads of unblockable attacks (and you will start to encounter them sooner or later).
A variant of dodge, which can simply be called "shoulder charge" is a move that is not covered in the tutorial in the game but it's extremely useful. To use it, you have to "dodge onto the enemy" - there's a chance to knock down smaller enemies this way, giving you an opportunity to freely attack them. Unfortunately, it doesn't work every time and it's useless on anything bigger than yourself.
Remember: you are not invincible during a dodge! If you time it wrongly, you can (and probably will) still be hit, which will most likely knock you down.
Combat Focus is represented by a focus meter in the bottom of the screen. It fills whenever you strike an enemy and it gets emptied when you take damage or use any other skill or weapon besides the Shadow Whip. When it becomes full, the gem at the center will start glowing and every following attack to any enemy will drop a Blood Orb from them, at the point of impact. Those Orbs can be picked up by you to replenish your supply of Void / Chaos Magic
The speed of filling of the Combat Focus bar depends on two things:
Remember, that the Combat Focus bar will be emptied (or will drop down slowly) when:
Weapon Mastery shows the extent of your mastery over a certain weapon and it has a direct impact on how much damage that weapon will do. To increase the mastery of a given weapon, you need to:
When you transfer a sufficient "amount of skills" to the weapon mastery, it will advance on a higher level (every weapon starts at level 1), which will increase the overall effectiveness (damage) of the weapon. The game forces you to use different attacks all the time to be effective - without increasing the mastery of a weapon, you will soon do almost no damage to the tougher foes you will come across.
There are a few things that you must remember:
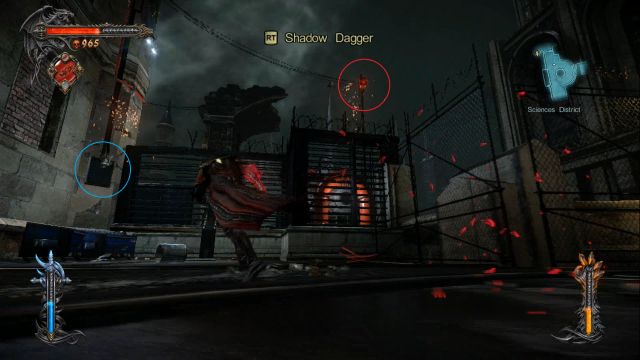
A ranged attack that you will gain access at the beginning of the game. It allows you to throw a dagger at the enemy, dealing minor damage. Given the amount of damage that this attack do (almost none), you will soon replace it with other ranged attacks.
Usage of Shadow Daggers is necessary in a few places to push the story forward and those occasions will probably be the only ones in which you will use that attack.
A ranged attack offered by the Void Sword. It allows you to freeze (or slow, in case of a bigger enemy) the enemies, making the fight a lot easier. This skill can be (and in some cases, must be) used on waterfalls and some mechanisms (this points are marked with a blue flame) to freeze them and open up a path to a previously blocked / closed place - or, in case of a waterfall, to climb it up to get to a higher place. It's immensely useful against flying enemies, as freezing them brings them down on the ground, when you can fight more effectively.
To use this skill you must have an appropriate amount of Void Magic.
An equivalent of Void Sword's Void Projections - in this case Chaos Bombs are offered by the Chaos Claws. This skill allows you to shoot a special bomb, which deals a decent amount of damage (and destroys the armor of your enemies). It can also be used to fight aerial enemies - even if they won't fall, like in the case of freezing them with Void Projections, a few of those bombs are more than enough to just kill them off. Chaos Bombs are also required to destroy specific points (marked with a red flame), to open a path to previously blocked place or to knock something down.
To use this skill you must have an appropriate amount of Chaos Magic.
A move which is similar to dodge, but it is performed while being mid-air. It allows you to instantaneously land on the ground, which is a good way to keep yourself from getting hit while fighting flying enemies. What's more, landing on the ground allows you to knock away / down smaller foes standing in the vicinity of your landing spot. Also, it allows you to destroy any "scenery equipment" you will come across, like barrels, chests, containers - most of them will be blown to pieces after just one hit from a Stomp.
A skill allowing you to send a swarm of bats, which will distract an enemy for a certain amount of time. You will use this skill mostly during stealth sections, as use of it during actual combat is somehow limited - it can be, however, used to distract a strong or particularly annoying enemy, keeping him off the fight for a short while.
With this skill, Dracula can turn himself into mist. It allows two things: getting into places which are normally inaccessible to you (blocked by bars, for example), or to avoid some of the enemies (this skill is somehow required to get through one of the stealth sections, which you will read about later in the guide).
The only drawback of this skill is that during its duration you are awfully slow and it can't be maintained for a long time, as well as its cooldown time is about twice longer than its duration.
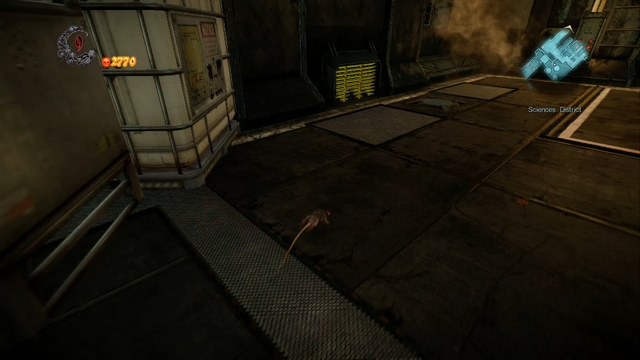
A skill which allows you to turn yourself into a rat, which enables you to get into normally inaccessible places, like ventilation shafts. You can only turn to and from rat by using Shadow Portals. This power is only used during stealth sections and in order to get to some of the hidden treasures, it cannot be used in combat.
Like Plague of Rats, this skill is only used during stealth sections - you cannot use it in any way to aid yourself in combat. In order to use this skill, you have to sneak behind an unaware enemy then possess him by pressing the interact button. While in possession of an enemy's body, you move slowly and your new body loses life - if it reaches zero, the body implodes and you will be returned to Dracula's form.
After getting an item called Demonic Wings, you will be obtain the power of double jump - you can jump again while being in mid-air. It basically doubles the height of your jumps, allowing you to get to previously inaccessible places (you will mostly use it while backtracking, to get to dozens of treasures you couldn't have picked up earlier without it). Double jump can be used in fight, in a similar manner to Stomp - instead of going down to the ground to avoid getting hit, you can basically "jump over" an aerial attack.
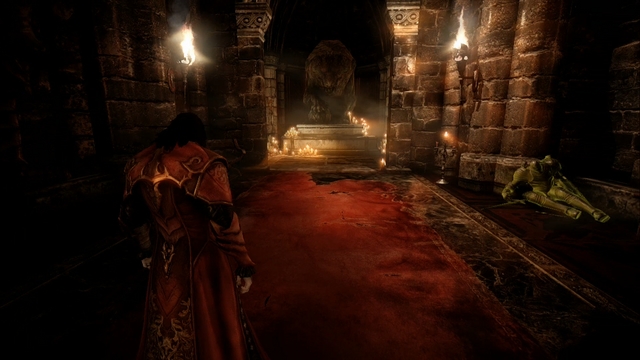
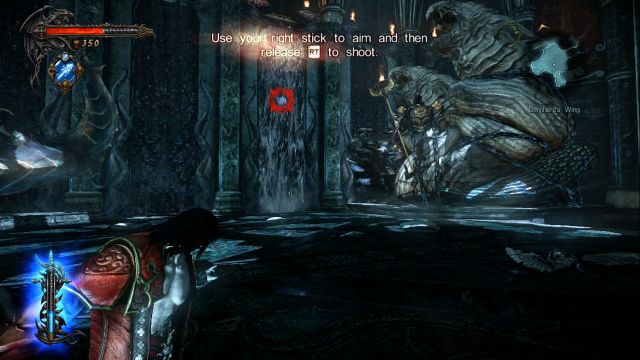
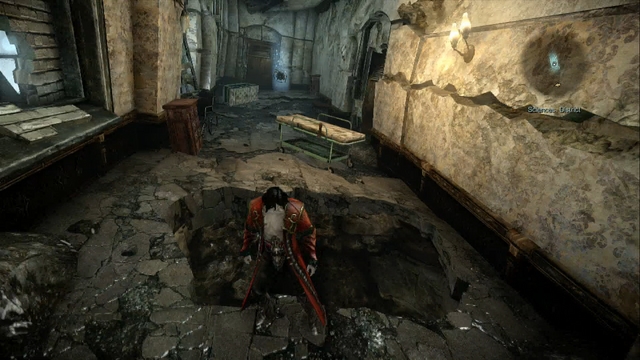
 The beginning of the game - you will learn all the basic game mechanics here.
This mission can be treated as a tutorial, because you will learn all the basic game mechanics here. For this mission only, you will have an unlimited supply of Void and Chaos Magic, so use them to your heart's content. Also, there aren't any items to collect during this mission.
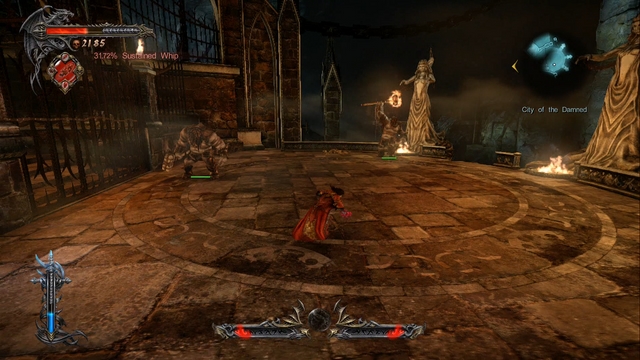
This stage starts in the throne room - get near the gate in front of your starting position, to activate a cutscene, after which you will encounter your first enemies. If you have any trouble understanding the defensive maneuvers (block, synchronized block and dodge), use the Tips section in this guide. After the fight, Dracula will force his way through the collapsed gate.
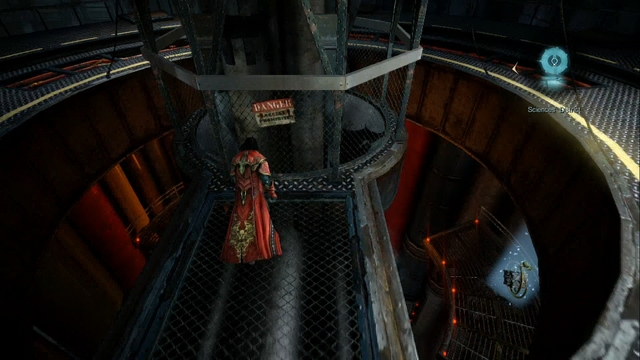
 Metal fence that you much climb in order to get to the other side.
After leaving the throne room, jump onto the metal fence, to the left of precipice, to start climbing. There should be an on-screen information about the button responsible for showing you the climbing route - remember it and use it frequently, as it will show you hidden passages from time to time. Jump down at the other side and another cutscene will initiate.
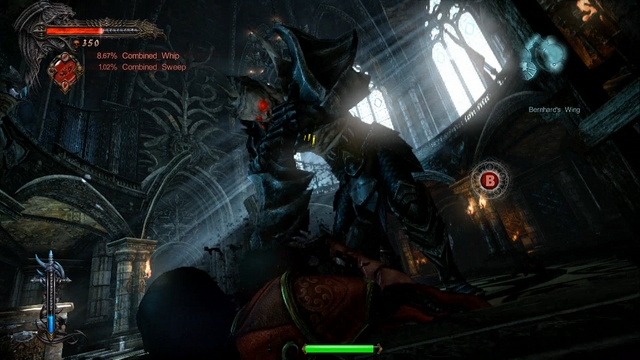
 Paladin - first round.
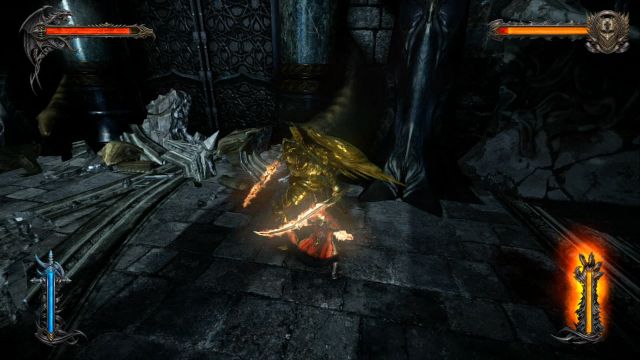
Basically, just as the rest of the mission, this boss fight is for training purposes - this is further emphasized by the fact that during this fight (and the whole first mission) you will have an constant, unlimited supply of Void and Chaos Magic and access to most of the skills. It will allow you to deal large amount of damage while being able to endlessly heal yourself by using Void Magic.
Attack the boss all the time, while trying to block (using synchronized block, if possible) his normal attacks and dodging his unblockable ones (remember, there will be a red flash before those kind of attacks). When his health drops to about 2/3, the battle will be interrupted by a cutscene.
You will find yourself standing on top of Brotherhood's siege machine, where you will face a few waves of regular soldiers. Deal with them and prepare for another scene, during which you will have to jump at the right moment.
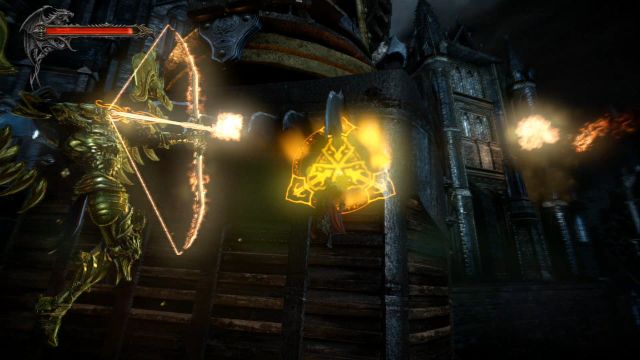
Provoke the enemy to attack the hinges.
After a while, the action will "become vertical" - your job is to climb the robot's arm. After reaching the top, yellow hinge-like points will be shown to you, which must be destroyed if you want to continue your journey. To do so, you have to provoke the Paladin to shoot them with his bow. Hang on the yellow point until a yellow mark from Paladin's bow will appear on top of you - all you have to do now is to just jump over to other foothold and the hinge will be destroyed. Repeat the process again and climb up afterwards.
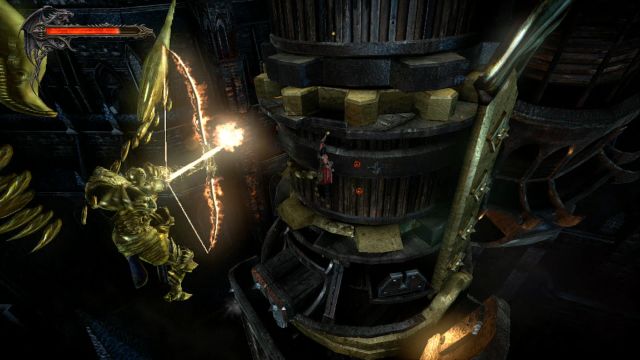 Watch out while climbing - getting hit by some mechanisms will drop you down.
During the climbing you need to watch out for different mechanisms along the way - if you run into some gear or other rotating mechanism, you will be dropped down and brought back to a save point. After a while you will return on solid ground, where you will encounter some more soldiers and 3 additional hinges to destroy. Use the same method as earlier - stand on top of the yellow point and after a mark from Paladin's bow appear on top of you, dodge to the side. After destroying all 3 of them, press the indicated button to tear out a fragment blocking your way and push forward.
Continue climbing until you get to a gear wheel - hold onto it until you get to a place where you can jump to the left side, and continue your journey upwards to get to a place with another (last) 3 hinges to destroy. Tear out the blocking fragment to activate a cutscene, which will lead you to another boss fight.
 Final encounter with the Paladin.
This encounter is very similar to the first round you fought with the Paladin. The only difference is that, from time to time, the enemy will use one of his ranged attacks:
Again, attack him all the time, avoid getting hit by his ranged attacks, block normal and dodge unblockable attacks and after a short while the fight will end and a long series of cutscenes will begin.
 Follow the boy.
After defeating the Paladin, you will have to sit through a long series of cutscenes in which you will find out that your character, Dracula, is not a badass anymore. After regaining control, you will find yourself on the streets to notice, that a lot of time passed from the last battle. Go to the left and follow the boy observing you (in this location there aren't any items to collect, so ignore all the other things).
Soon, you will encounter a new enemy and a "battle" will begin. Don't try very hard, as this is a fight that you must lose, regardless of how hard you try not to. After a short while someone will come to your aid and the screen will black out. After regaining consciousness locate the two humans in your vicinity and feed upon one of them, to regain a portion of your former power.
Again, you start on the streets - look around yourself and try to destroy all the barrels, pallets and chests you will find, because you can find plenty of experience points and / or relics inside them. Additionally, some of them may drop artworks - they aren't necessary in any way (besides one achievement awarded after collecting all 400 of them), so if you aren't a trophy / achievement hunter you don't need to bother yourself with them.
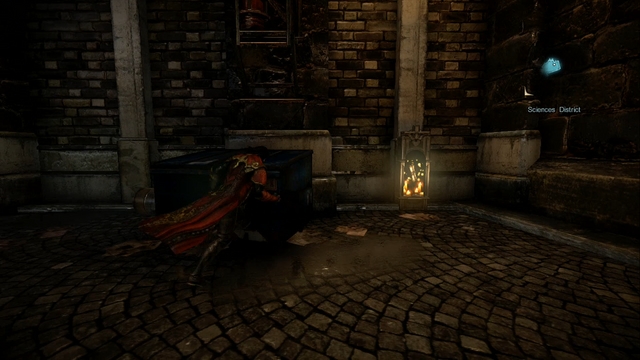
 Memorial - first real collectible in the game.
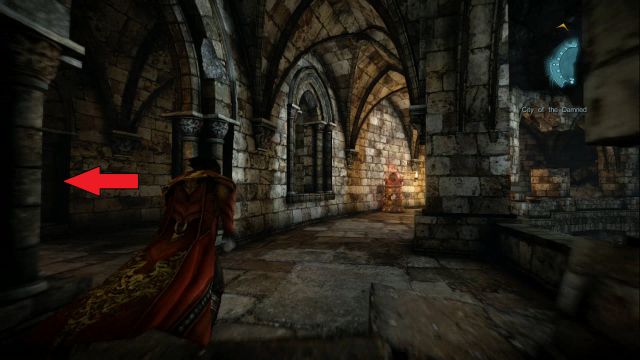
Back to the mission - not far away from your starting location there is a gate (a marker on the map indicates the place), through which you have to go to continue on with the mission. Don't go there yet - instead, skip it and go up, to the end of the street and turn left. In a small shrine you will find your first collectible - Memorial. Collect it and go through previously skipped gate.
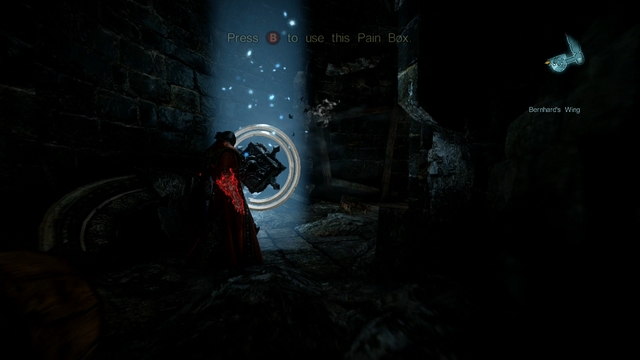
After getting inside, you will be informed about your new ability - Shadow Daggers - which you must use to open another gate. Follow the instructions on the screen, to throw a dagger at the indicated spot, which should open the passage. After getting through it, turn around to your right and notice a box behind metal bars - this is another type of collectible, called Pain Box, which hold one of the Gems that you can find in the game. You cannot collect it yet, as you lack the required skill.
 This enemy is certainly not expecting to be possessed!
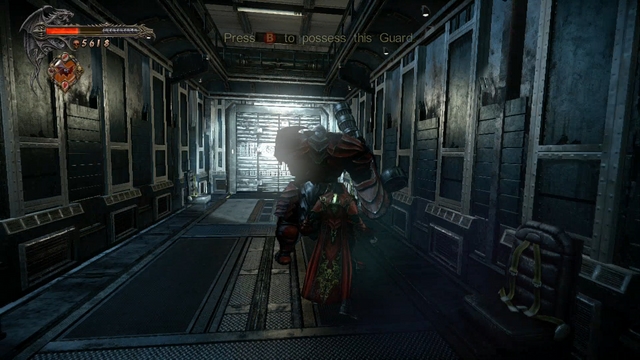
You will run into the first stealth section in the game - you must slip past the guard, as you cannot engage him directly in combat. To the right side from your entry point, you will find a Shadow Portal - activate it to use another one of your skills. Dracula will take the form of a rat, which should allow you to get to some places undetected.
Change yourself into a rat, get past the guard (ignore destroyable items in the room, as you cannot attack in this form) and return to your Dracula form by the second Shadow Portal (you can find it to the left of the corridor that the guard came from). After you do this, your next objective it to take control over the guard by using the ability of Possession - get close to him from behind and follow the onscreen instructions. After seizing control over the Golgoth Guard close in to the door that he came from and use the mechanism on the right side to open them.
 The enemy you must attack with your Bat Swarm.
After returning to your Dracula form, clear out all the junk in the room (barrels, chests, etc) and go through the recently opened passage and activate the switch, to get past the next blockade. Another stealth fragment awaits you and you will be given a new skill - Bat Swarm.
Use the newly acquired ability on a patrolling guard - it will stun him for a few seconds and attract the attention of the other Golgoth Guard. When they are distracted, climb up the ladder where the "static" guard was and jump on the pipe on your left - you need proper timing, because electricity flows through the pipe every few seconds and getting hit by it will alarm the guards.
 Pain Box with a Life Gem inside.
After the cutscene, climb down the ladder opposite your current position and pay attention to the guard marching below you. Wait until he exposes his back to you and jump down, to take control over him. Afterwards, open the metal door (he was patrolling near them) and activate the Pain Box to collect a Life Gem. Get out of the small room and climb up the ladder to get back to the place from where you jumped a second ago.
Go through the metal footbridge in the direction of the marker on the map and ignore two collectibles near you, because you won't be able to collect them at this moment - you will have to return to this place later when you have unlocked necessary skills. Now a short cutscene will commence and you will change the scenery.
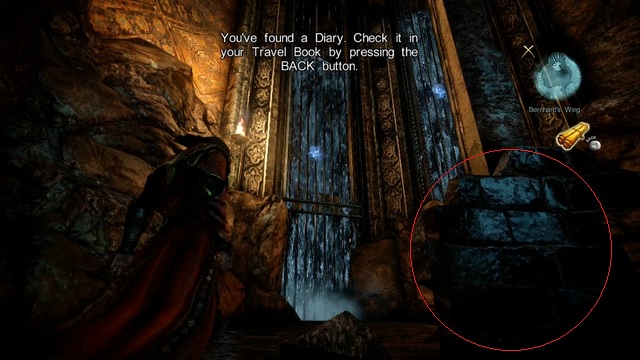
 Soldier Diary right in front of your starting position.
After regaining control over your character, collect the Soldier Diary from a fallen soldier on your right. The corridor behind you is inaccessible to you at the moment - again, you lack the necessary skill to go there. Turn back, pass the soldier's corpse and continue onward until you get to a statue with a glowing heart - you can use it to regenerate your health to full if you need it.
 Pain Box and a foothold behind it leading to another Pain Box.
Next, climb up the remains of the stairs on your left to get to another Pain Box with a Life Gem inside. Collect the treasure and climb up using the footholds marked by the bats. An information about a button responsible for showing you the possible course of climbing should be displayed for you now - remember and use it every time as you climb something, because it can (and will) reveal a whole lot of secret passages, which you wouldn't normally notice. Soon, you should get to yet another Pain Box, also containing a Life Gem.
After collecting both Gems, jump down and go on the stairs to the left of the healing statue and climb the wall there. After a short cutscene go in the only possible direction - ahead - until you get to a lever which controls the gate to the next area. The mechanism is jammed - you will have to use your Shadow Daggers to get rid of blood blocking it.
 You can see both Pain Boxes - one to the right and the second one below your current position.
After entering a spacious room with chandeliers hanging under the roof, jump down and collect another Life Gem from a Pain Box. Afterwards, get back to the place you just jumped from (a foothold leading upwards is located below the tunnel you came from) and jump on the first chandelier. To get to the next one, you have to give the momentum to the one you are standing on - to do this you have to run from one end to the other (if you want to go forward you have to move back and forth) and jump at the right moment. After getting to the second chandelier, don't jump on the next in front of you - instead, turn around to your right. Right in front of you should see a second Pain Box - use the chandelier in front of you to get to the treasure. After collecting a Life Gem, get back to the "chandelier crossing" turn right and get to the balcony on the other side.
 Soldier Diary lying at the end of the stairs.
Follow Trevor until you get to another climbing part. Jump to the other side and run down the stairs, where you will find a Soldier Diary. Standing by the soldier's corpse, climb up and jump to the other side by using the hanging platform. There are two collectibles here - one on your current level and one hidden below you - but you lack the required skill to collect them. Go back to the place where you found your diary and go up the stairs to activate a cutscene.
After regaining control over your character, you will have to escape, because the floor is falling apart. Run ahead, jumping between footholds (remember about the button displaying the possible climbing route) until you escape from the death trap. You will retrieve your second weapon - Void Sword - and face a decently challenging boss.
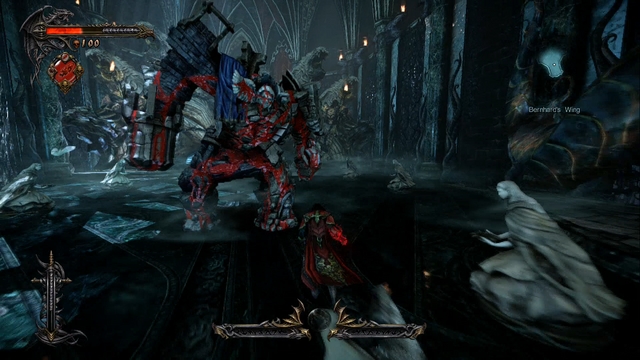 Stone Golem - first real threat in the game.
This boss fight, especially compared to the one with the Paladin, who you encountered earlier, is more difficult because you won't be having an unlimited supply of Void and Chaos Magic anymore (and you won't have Chaos Magic at all). Because of that, you will deal less damage and you won't be able to heal yourself all the time.
This fight introduces a new mechanism, called Combat Focus. With it, you can regenerate your supply of Void and Chaos Magic - when the focus bar becomes full, your attack will "drop" Blood Orbs from the enemies you strike. This Blood Orbs can be absorbed by you (by pressing a specific button) to replenish either or both of your Magic. The bar is filled by attacking enemies and is emptied whenever you are hit or you use any other skill or weapon than Shadow Whip (you can read more about it in the Tips section of this guide). You must master this mechanism as soon as possible, as being able to use your Void and Chaos Magic is crucial - without them, some foes you encounter in the future will be a pain in the ass to deal with.
The fight itself is divided into two stages - in the first, the boss doesn't have any special attacks or abilities, moves slowly and most of this attacks are very easy to block. When you empty the first bar of his health, you will have to activate a short QTE sequence, after which the fight will go into the second stage.
Here, the Golem gains an access to a considerable arsenal of moves (besides normal, melee attacks), such as:
The most important aspect of the second phase of this battle is the fact, that the boss is almost invincible - you can only attack him in the places marked by blood (mostly abdomen area), which makes aerial combat practically the only way to damage him. Jump into the air, attack a few times and jump back, to avoid getting hit, which will allow you to build your focus bar and replenish your Void Magic. Use Hit & Run tactics throughout the whole second phase, and when his life bar is almost empty, you will have to finish another QTE sequence, after which the fight will end.
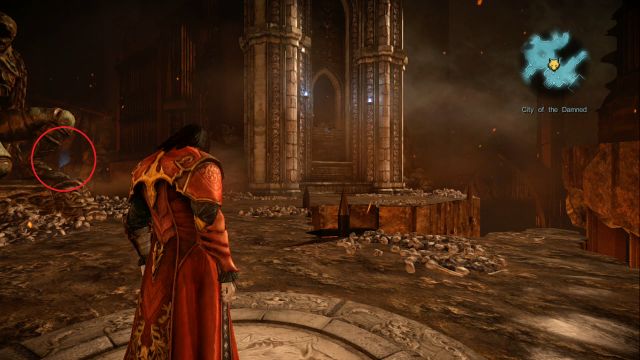
After the encounter, collect the Primordial Gem from the boss' remains (the location will be marked with a large X on your map).
 By using the Void Projections you can freeze waterfalls to climb them.
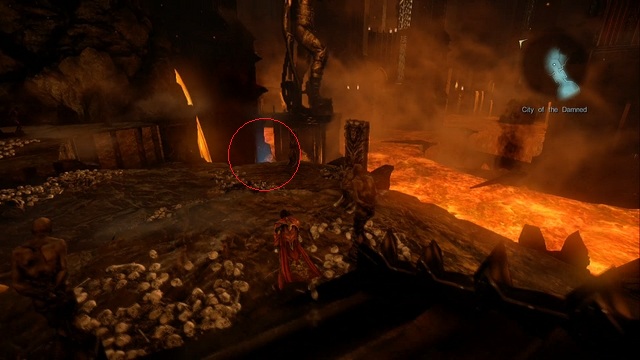
You will be awarded with another skill - Void Projections - allowing you to freeze (or slow, depending on their size) most enemies. The main application of this skill is, however, the ability to freezer waterfalls, which will allow you to climb them - this requires a small amount of Void Magic. As your Void Magic capacity is empty now, go to a small room to the south from the waterfall. You will find a Magic Font there, which allows you to replenish your Magic (both Void and Chaos) indefinitely. Refill it, feed on the statue's heart and get back to the waterfall. Follow the on-screen directions and use Void Projections to freeze it and finally climb it up.
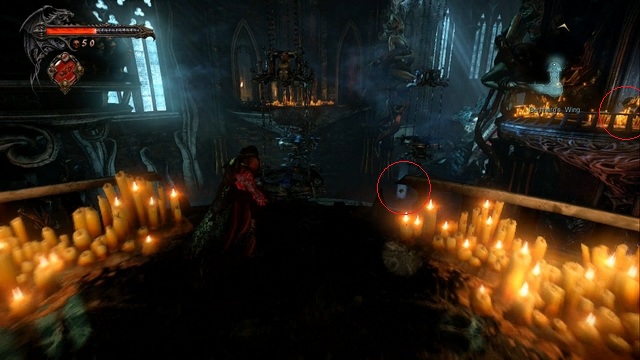
 You will find a Pain Box at the end of this passage.
Soon after getting to the top, look around and note the large wooden box on your right - destroy it to unlock a hidden passage. Inside you will find your first relic, and if you follow the corridor you will reach a mechanism hidden in the wall. To operate it you will need a Dungeon Key, which you don't have at the moment. Ignore it and go further into the tunnel, until you get to another climbing sequence. Get to the other side of the passage by using numerous footholds and chandeliers until you reach a Pain Box - a Void Gem is hidden inside. Collect the treasure and get all the way back, to the place where you found your relic.
 Waterfalls leading to a Pain Box - red marker points the location of a Soldier Diary.
Get through a misty corridor to a room with two waterfalls. Get closer to them and collect a Soldier Diary from the corpse lying opposite the waterfalls, hidden behind a pillar. Freeze the waterfalls and climb them up, until you get to a small, round room with a destroyed wall - inside a Pain Box with a Life Gem awaits you. Collect it, jump down, and climb up the wooden scaffolding near the entrance to the misty corridor you came from.
 Pain Box containing a Void Gem at the end of a passageway.
After getting to the top, turn to the left, jump over the gap and continue along the right wall - after a while you will reach another Pain Box with a Void Gem. After collecting it return to the area you ended up after climbing the scaffolding and go to the right, towards the marker on the map, until you activate a cutscene.
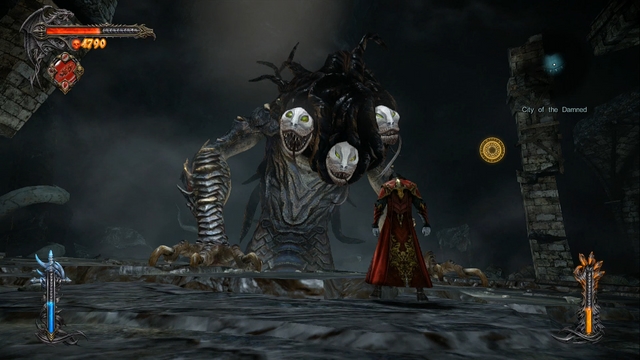
 One of the most annoying enemies in the game.
You will face a group of annoying and rather dangerous enemies. Dishonored Vampires can teleport in a random place (mostly near your vicinity), are moderate when it comes to speed or power and they have one nasty, unblockable attack - after getting hit by it, a QTE sequence will initiate and you will have to mash an indicated button rapidly to set yourself free. The required button changes each few seconds and the attack itself deals high amount of damage. It is therefore crucial to avoid getting hit by it (a red flash will signal this attack) and, in case of getting grabbed, try to get out of it as fast as possible. The best tactic against this enemy is aerial combat - knock vampires in the air to prevent them from using their teleport or grab.
 Another Pain Box containing a Void Gem.
After this wearing encounter another cutscene will be initiated and Trevor will give you the White Wolf Medallion. With this item you can summon a wolf, activating the medallion in a designated place (something like an altar, which you should have in front of you). The wolf will then simply guide you to the other timeline - you can use this to travel between "modern" and "medieval" areas (you can read more about White Wolf Medallion in the "Additional Equipment" section of this guide).
Activate the medallion and climb the pillar to the west of altar. However, don't go forward after the wolf - instead, go to the left, jump over the gap and continue along the wall until you reach another Pain Box with a Void Gem inside. On the other side of the room you can see another collectible - but like before, you lack a necessary skill to pick it up. Follow the wolf and go into the tunnel.
After getting to the other side, jump down - you can find an altar leading back to the place you just came from (ignore it) and a Magic Font, to replenish your powers. After doing so, jump down again to initiate another cutscene and get ready for a short fight. You are back exactly in the place where Trevor "took" you from to the castle, just after the second stealth part. There's no point in going back to the place where two Golgoth Guards were (now the place is empty), because you can't pick any of collectibles present there.
 Use Void Projections to get past the blocked gate.
The gate leading to the marker on the map is closed - you have to freeze the small waterfall to your right and climb it to get to the other side. Afterwards, pay attention to a ventilation shaft from which an air current can be seen. Freeze it, using Void Projections again and use a nearby Shadow Portal to get into your rat form - use it to get to the ventilation. Be swift, because the ice won't hold for a long time.
Get through the yellow-marked grid and go in the direction of the marker, jumping over the burning surface. After getting to the part with electricity all over the place, use the narrow passage to get to the other side safely. After getting to a crossing, go to the right, to collect experience - further part is blocked, so now you have to go back and enter the left tunnel.
 In the left corner, by the console, is the technician you have to possess.
After leaving the ventilation don't change your appearance yet - instead, go through the next grid (the entrance is highlighted in yellow, as always). At the end of the tunnel you will find a cable - you have to bite it. There's a bouncing cable in your way - go past it when it's not moving (wait for a bit to understand its patterns) and is harmless and bite the cable. It will lure out a technician, who will come to fix the problem with the power. Leave the tunnel now, get to your Dracula form and use the Bat Swarm ability on the Golgoth Guard to distract him - after doing so, possess the technician, open the gate by using the switch on the other side of the corridor and move through the passage.
After getting to the other side, a short cutscene will initiate and you will face a new enemy - Possessed Citizen. They are basically cannon fodder - they aren't especially fast, strong or agile and they lack any distinct attacks. Get rid of them and prepare for another boss fight.
 This boss encounter is fairly easy.
At the beginning of the fight, you will have to use Void Projections to slow Raisa down, because she moves way too fast for you to be able to do anything. When she finally stops flying like a mad(wo)man, the encounter will become fairly easy.
Besides standard attacks, which you can easily block, Raisa uses:
Every now and then Raisa will call some backup in the form of foes you recently fought against - it's an ideal moment for you to refill your supply of Void Magic and/or heal yourself, if you are wounded. There's a possibility that Raisa will start doing her charge attack again (the same as she done at the beginning of the encounter) - you have to freeze her again with your Void Projections. After a short while the fight should be over. A series of cutscenes will now commence - after regaining control, go towards the tall door to initiate another cutscene with Trevor and get transported to the castle again.
 The red marker indicates the location of a Pain Box.
After regaining control, collect the Soldier Diary laying by the left wall. Afterwards, go inside a round room and activate the mechanism on the left side. Get out of the elevator and head forward, to initiate another cutscene. After that collect the Void Gem from the Pain Box located in front of you - you should be able to see the blue light from the entrance to the elevator. Continue in the direction of the marked on the map to initiate another cutscene and encounter a new enemy.
 Dungeon Jailer stunned with his own attack.
Dungeon Jailer is a strong, heavily-armored foe. As you still can't use your Chaos powers, which allow to pierce through the armor, the most effective way of dealing with him is to wait a bit until he decides to charge at you. When that happens, jump to the side at the last moment and observe as he smashes into the wall, stunning himself in the process - use this few precious seconds to damage him as much as you can. Rinse and repeat if it's needed and if you are having problems with the fight, consider getting rid of the smaller ones before concentrating on the Jailer. Upon death, Dungeon Jailers drop a Dungeon Key - it's one of the two ways of acquiring it (the other being the Chupacabras' shop - you will gain access to it later in the game). Dungeon Keys are required in a number of places to push the story forward (Dungeon Jailers will wait for you at those places to drop the key) and to activate mechanisms in hidden places (it will award you with 2,000 points of experience for doing so) - you saw one such mechanism, looking like a keyhole, in the previous mission.
 Soldier Diary hidden behind the wall.
Use the key to activate the indicated device and open the gate with it. Don't go through it yet - instead, get close to a locked gate to the left of it and activate the blood mechanism. After a short while the gate will unlock - go through it and turn around to your right side and collect the Soldier Diary you will find there. Go back to the "device room" and open the gate to the right from where you found the diary (those which were opened after you used the Dungeon Key).
The red arrow leads to the wolf, the blue one to the keyhole for the Dungeon Key.
Go left, in the direction of the marker on the map - after a while you will reach an altar to activate the White Wolf Medallion. Summon the wolf, climb up, and then go to the left to get to the ledge where the wolf is awaiting you. There's nothing really you can do at the moment, so use the altar again and get back to the previous location (to the castle).
 Dracula standing on the bar before the chain.
Go to the right from the gate that you came from (from the room in which the device controlling the doors is), jump on the rocks, and after that get on the stone bar to stand in front of a giant chain. Jump on the chain and start climbing up - notice that the chain will be dragged down, increasing in speed the longer you're going to be climbing it. To slow it down, you have to jump on the footholds to the left from time to time, stay there for a few seconds and get on the chain again when it stops. When you climb to the top, jump to the left, and then again, to reach another chain - you have to climb it down this time. Wait for it to fall down low enough for you to jump on the foothold to the left and continue your trip until you reach 3 chains hanging close to each other.
 Watch out for the lava bursting from the vents.
To get to the top you need to jump from one chain to another, jumping diagonally, until you are high enough to jump on the ground to the left. Now you will have to jump through a number of vents - be wary though, as lava will burst from them from time to time, knocking you down and teleporting you back to the save point. Observe the vents to know when to jump - just before the eruption the vent will exhale steam. Also, remember that some of the ledges you will jump on will crumble after you land on them, so you can't stay on them for very long and you need to jump soon after landing. Get to the other side to activate a save point and initiate a cutscene.
 There's a Pain Box to the left, just before you jump down into the hole.
Stand on the edge and turn the camera to the left - you will find there a Pain Box with a Life Gem inside. Jump to the treasure, pick it up, and then jump down, where you will encounter a small group of enemies. After dealing with the threat, climb up the wall on the other side. Pick the Soldier Diary from the corpse and get to the device in front of you. With it you can create a bridge to get to the other devices - in order to "connect" it to a place where another device is, at least one fragment of the bridge must touch the edge. Firstly, extend the bridge all the way forward, to connect it to the place where the second device is and go through the bridge. Instead of activating the device, go up the stairs to initiate a cutscene with a Chupacabras.
 Red marker indicates the Pain Box, blue one the device you need to operate in order to get there.
After it ends, get close to the second device and get to the one in front of you, extending the bridge all the way forward again. Activate the third device and get to the one in front of you - you need to press up, right and up again to connect it. At the fourth device extend it to the left, rotate your camera to the left as well and extend it to the left two more times (you should "wrap it around yourself" with that combination). Cross the bridge and collect a Void Gem from a Pain Box and then get back to the device you were at just a moment ago (fourth device).
Activate it and press up, right, right, cross the bridge and go to the right, to activate a mechanism that will release the Chupacabras' cage. Get back to the fourth device, activate it and press left three times to get the cage on the platform. Afterwards, activate the button again and press up, up, and right to link the platform to the third device and be able to get there. Activate the third device, press left, rotate your camera to the left (just as you did with the Pain Box) and press left twice to connect the cage to the seal breaker, freeing Chupacabras. After the cutscene ends, the Chupacabras will open the gate for you - go through it and cross the bridge to get to another location.
 A clever hiding spot for a Soldier Diary.
Run up the stairs on the left side to activate a cutscene - be ready for a QTE sequence to avoid taking damage from a new enemy, Harpy of the Depths. Due to the fact that Harpies spent most of their time in the air, you might have some trouble fighting with them. The best solution to this problem is to use your Void Projections to freeze them and bring them down to the ground, where you can easily dispatch them. Rinse and repeat until all the Harpies are gone and go back to the room that you came from (climb the wall opposite the marker on the map). To the left of the stairs you just climbed, in a small hollow, you will find a corpse with a Soldier Diary.
Get back to the place where you fought the Harpies and climb up the destroyed gate, leading to a bridge - another Soldier Diary awaits you there. Collect it and cross the platform connecting two buildings. You will encounter some more Harpies - the same rules apply, so just use your Void Projections to get rid of them. After the fight jump on the pillar (through a hole in the balcony) and jump along the footholds to the other side.
 Fighting two Dungeon Jailers is easier than you might think...
You will encounter two Dungeon Jailers this time. The best solution to this problem (as you still lack the power of Chaos) is to just wait patiently for them to charge at you and dodge the attack at the last moment - the enemy will smash into the wall, stunning him, so you can deal some nice damage without fear of counterattack. Remember, that this time there are two enemies, so pay attention to their attacks and try to dodge them instead of blocking, and don't attack them head on, as they are armored and most your attacks will just bounce off. After dealing with them, take two Dungeon Keys that they dropped and activate the device to open up the gate.
 Standing at the gate you just opened, you can see a Pain Box in the distance.
Climb up the stairs - while halfway, go to the right to collect a Void Gem from a Pain Box. After collecting the treasure, continue towards the room. Activate the device in the statue to open a secret passageway leading underground. After running down the stairs, you will find yourself on a crossing - take the Soldier Diary by the corpse and go into a hole, to the opposite direction to the marker on the map. At the bottom of the hole there is a keyhole (to the right) where you can use your Dungeon Key to get an enormous amount of experience. Collect it, climb up and go in the direction of a giant X on the map.
 Another easy boss fight - Gorgon.
There are two similarities between this fight and the previous one, with Raisa - it's fairly easy and mobility is your biggest friend. Most of Gorgon's attacks are very easy to dodge, provided that you are always in motion. Possible moves are:
Besides the boss himself, you will have to face tentacles at the back of the arena. They deal almost no damage and the biggest problem is that fighting them can be annoying. The tentacles are there so you can replenish your Magic supply - each one of them drop a few Blood Orbs upon "death", even when you don't have your focus bar filled.
 When the boss smashes his hand in the ground, use Void Projections to freeze it and climb it.
At the beginning of the fight, you must destroy a stone wall created by the enemy - use your newly acquired Chaos Claws, which allow you to destroy armored targets. After breaking through the wall, keep on attacking the enemy (unfortunately, you will be forced into aerial combat again) until its health drops to about 2/3 - a QTE sequence will begin after that, during which the Gorgon will smash his hand in the ground and you will have to freeze it by using Void Projections. After that, you need to climb it until you reach one of its heads - here you will encounter another QTE sequence, after which the enemy will fall to the ground and you will have a brief window of time to attack him. Soon, one of its heads should be gone.
At this point you have to repeat the whole process from the beginning - another QTE sequence will be initiated when the boss' health drops to 1/3 value. This time the frozen hand will be protected by a stone armor - destroy it by using Chaos Claws and climb it up again. An unpleasant surprise awaits you - the enemy will hide his head, preventing you from attacking it. Wait for a few seconds for it to emerge again and jump between footholds to avoid the boss' hand. Destroy the exposed head to get into the final part of this battle.
 Use Void Projections when Gorgon prepares his Fire Breath attack.
When the Gorgon is left with only one head, you will have to avoid his attacks until he uses his Fire Breath attack - at this point all you have to do is freeze him with Void Projections to initiate a final QTE sequence, which will end the fight.
After collecting the Primordial Gem you will be awarded with a new ranged ability - Chaos Bomb (you can read more about it in the section about Ranged Attacks). Afterwards, climb up using the "stoned" boss' left hand to get to the upper level.
 The arrow indicates the location of a Pain Box.
Run through the corridor and a while before getting to the Magic Font turn to the left - at the end of the corridor to the left there's a Pain Box with your first Chaos Gem inside. Collect it, replenish your Magic at the font and blow up the roof (in the indicated place) with your Chaos Bombs to open up a passage. Run down the stairs and activate the device and get down using the elevator. After getting to the bridge, you will encounter another Dungeon Jailer - but this time you finally have your Chaos Claws. Use your newly acquired weapon to literally punch through Jailer's armor - as long as you have Chaos Magic you can attack him head-on as much as you want, as your attacks will break his armor. Take the key he dropped, activate the device and get through a bridge - a cutscene will be initiated and soon after you will be taken to the Chupacabras' shop.
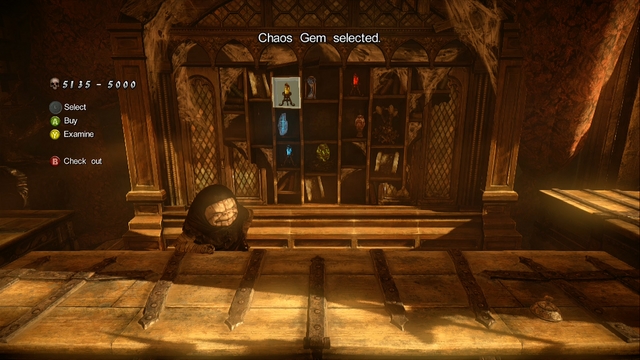 Chupacabras' store - you can buy Gems, Relics and Dungeon Keys.
You can buy all the things you may want here: Gems (only once, though), Relics (up to 3 at once) and Dungeon Keys. The currency is experience, so you should think about each transaction done here, especially at the beginning of the game. There's also a special mirror in the shop, which allows you to do challenges - to activate it you need a Kleidos (which you will soon find). After you're done with shopping, get back to the elevator - another cutscene will initiate and you will be given a Talisman of the Dragon (read section about Additional Equipment to find more about it).
 Soldier Diary, which you can find to the left of the elevator's entrance - opposite to it you will find a Pile of Sacrifice).
After leaving the elevator look around - to the right of your actual position there's a corpse with Soldier Diary, and to the left you will find a Pile of Sacrifice. Activate the pile to pick up the Kleidos (you can read more about this item in the "Additional Equipment" section in this guide). Going forward from the soldier's corpse and climbing the stairs, you will get to a room with the world map (Map Room) - inside you can look around at the whole map of the game and you can transfer to a previously discovered district.
 The red mark indicates the location of Pain Box and Soldier Diary.
Ignore the map room and go to the altar to activate the White Wolf Medallion (to the north-west of your position you will find a Pain Box and a Soldier Diary, but you lack a skill necessary to get there at the moment). Get to the place where the wolf awaits you and continue to the next location. Jump down, use the Magic Font to replenish your Magic and continue towards the marked on your map, which leads to an elevator (on a parking lot you will be marching through there are numerous collectibles, but you can't get to any of them at the moment).
 A target for Void Projections above the Dracula.
After the long series of cutscenes are finished, get to the elevator, and soon you will be back on the parking lot - it changed a little, as you will soon find out. Marching towards the marker on the map you should get to a damaged door - destroy them with your Chaos Bombs. When you will try to freeze the flames, it will prove ineffective - turn around to the right and freeze the water leakage in the pipes (under the roof) by using your Void Projections. It will extinguish the flames in the corridor, allowing you to pass and enter another elevator.
 A Pain Box on the roof of a building you have to enter.
After the cutscene is over, you will emerge on the surface and a small group of enemies will greet you. After the fight is over, look around - you should be able to see a Pain Box near your position, but you can't pick it up because you luck a requisite skill. Go towards the marker on the map until you reach a bridge - ignore the passage to the left and cross it. Get to the end of the alley, climb up (at the right side of the street) and collect a Chaos Gem from a Pain Box. Afterwards, jump down and enter the building (the entrance is covered by a burning car).
 A Memorial hidden in the corner of the alley.
Find a Shadow Portal (in front of the entrance to the building), take the form of a rat and get into the ventilation shaft, located by the entrance to the building. Go through the tunnel until you reach a new room - find a second Shadow Portal to get back to your Dracula's form. Climb the fallen bookstand and jump of the building to the streets. As you land there, turn around to the left - you should now be looking on a shrine containing a Memorial.
 Memorial hidden between the waterfall and the wall you just fell off.
Continue your journey towards the marker on the map, kill the lone enemy you will encounter and jump down (to your right there should be a huge waterfall, hidden behind metal bars). Defeat the enemies awaiting you at the bottom and then turn around to the wall you just jumped from - in the corner, on the left side, there's a Memorial inside a shrine.
 Red marker - place to throw Shadow Dagger at. Blue - climbing route.
Going towards the marker on the map, you will soon encounter more enemies by the fountain. Defeat all of them and find an electricity pole, behind a generator. Throw a Shadow Dagger at the box on top of the pole to cut off the power, which will allow you to climb up the cables on the wall of the building to the left. Before jumping into the building, look around - below yourself you should be able to see another Memorial - jump down, collect it, and then get back to the place you started climbing the cable to enter the building.

After a shower scene, leave through a newly opened door and go forward - you will encounter a small group of enemies and a Memorial to pick up. Get rid of the enemies, pick up the treasure and get back to the entrance of the room with showers. Turn to the left, destroy the remains of the door blocking the way, climb up the wall to the left, and jump to the other side.
 A rat-view on the Pain Box - you can't pick it right now.
Use the Shadow Portal to turn yourself into a rat and go through the grid to enter the second room, in which you will find a Pain Box - you can't pick it up right now, because you can't do anything in the rat form. Ignore it (you will come back for it soon) and march through the next grid, and through the hole in the floor.
 In the room in front of you, you will find a Shadow Portal.
Skip the patrolling enemies and go into a small room on the right side, where you will find a Shadow Portal. Get back to Dracula's form, get rid of all the enemies and go to the room opposite the one you found a Shadow Portal in to get to a Magic Font. Replenish your Magic and go down, in the direction of the marker on the map, until you bump into the old & annoying Dishonored Vampires.
 In front you can see a Pain Box - to the left there's the generator you need to turn on.
After defeating them, ignore the lever by the door and go to the corridor to the left, until you reach a room with an entrance blocked by flames. Freeze the flames using the Void Projections, get the Void Gem from the Pain Box and activate the generator. Get back to the place with a lever, switch it and go through newly opened door.
 After climbing up, turn around - at the end of the corridor you should be able to see a Pain Box.
Go forward (ignore the Memorial on the right side - you can't reach it at the moment), climb up and then turn around - at the end of the corridor there's a Pain Box with a Chaos Gem inside. After collecting the treasure continue your journey in the direction of the marker on the map, until you reach a room resembling a reception, in which you will fight some more vampires.
 The red marker shows the location of a Memorial at the top floor.
After the fight, run up the stairs on the highest floor (behind the destroyed stairs) - you will find another Memorial there. Collect it, get down on a lower floor and enter the next, familiar room.
Go along the corridor, in the direction of the marker on the map, but before entering the elevator, look to the penultimate room on the right side - you will find a Pain Box in there, the one you missed earlier as a rat. Collect the treasure and go into the elevator, where a short custcene will initiate and you will meet your new enemy - Riot Police.
Those guys are probably one of the most difficult enemies you will face in the entire game, especially when they are in a group. They can use melee-ranged attacks or can fire at you with their machine guns, damaging you from afar. Later on in the game they also use proximity mines, but they are easy to avoid, because they are extremely visible. Before you can even think about damaging them, you need to destroy their shields by using your Chaos powers - the task is even more difficult, as the enemy will jump back (or up into the air) after getting hit a few times. Try to stay as close to them as possible, as their ranged attacks are far more dangerous than their melee attacks. After getting rid of their shields, the battle becomes a lot easier. Lastly, remember that those guys explode on death, so try to get away from them after dealing the killing blow.
 Red marker indicates the ladder leading to a Pile of Sacrifice.
After the fight, go through a hole in the fence, but don't go into the building in the front - instead, turn to the right, climb up the ladder and collect a Kleidos Nail from a Pile of Sacrifice. Jump down, get into the building and turn the power back on, to open the next door. After getting outside, stand on the edge of the building and look down - you should see a group of Riot Police and demons fighting each other. Wait for them to kill each other and finish off any survivors.
 A Memorial hidden at the end of the street.
When you're down, go down the street in the opposite direction to the marker on the map - at the end of it you will find a Memorial. Collect it and go towards the marker on the map to get to a familiar place.
 Ventilation shaft you must enter can be seen on this picture.
You were here during the Bioquimek Corporation mission. Go towards the marker on the map, until you reach a door which you must open by switching a lever. After getting through, turn to the left where you will find a Shadow Portal, needed to find a nearby collectible. Leave it at this moment and go to the room in which there were 2 Golgoth Guards (you used Bat Swarm for the first time there). Kill all the enemies you encounter and get back to the portal, to turn yourself into a rat. Go through the ventilation shaft in the room you possessed the guard to gain access to your first Pain Box (the place can be seen on the picture above). Go through the tunnel (go forward on the crossing), until you reach a cable you need to bite through.
 Here's the second ventilation shaft entrance, near the ladder you climbed after your first Bat Swarm.
After doing that, get back to the crossing and go to the left, which will allow you to get out of the ventilation faster. Now go to the room where there were 2 Golgoth Guards and enter another ventilation shaft (in the close vicinity to the ladder you climbed after using your Bat Swarm for the first time). Go through the tunnel, then under a turned-off fan to get outside on the other side, where you will find a Pain Box with a Life Gem inside. To activate the box you need to active the nearby Shadow Portal to get back to your Dracula form. To get out of that place, you need to get into the rat form again and go through the ventilation all the way back.
 An old enemy, with a new, incredibly annoying equipment.
After getting your Dracula's form back, go in the direction of the marker on the map (it's the same route as when you were here on the Bioquimek Corporation mission) - if you need your Magic refilled, check the location of the White Wolf Medallion altar (you will walk by it either way), because there's a Magic Font near it. Go into the room with a ventilation shaft you froze with your Void Projections - you will meet an old enemy (Possessed Citizen) with a new equipment (shotgun or a grenade launcher-like weapon). They are not a major threat, but they can be incredibly annoying, especially in a larger group - it's hard to avoid their ranged attacks (the best way is to stay airborne as much as you can - you can dodge to an extent on the ground, but you need proper timing to do so successfully) - and they can fire upon you even while you are attacking them. The best method to deal with deal is the same as with the vampires - knock them up into the air and defeat them in aerial combat, as they won't be able to counterattack. If you are having an especially hard time fighting them, use a Stolas' Clock relic to slow their movements.
 Stairs leading up to the marker - on the right side there's a ladder leading to a Memorial.
Feed on the statue's heart and follow the marker on the map, until you reach a chamber in which you met the boss (Raisa). There's another encounter with weapon-wielding Possessed Citizen here, so apply the same tactic as before to deal with them. After the fight, get to the arena where you fought Raisa, where's yet another group of annoying enemies. After dealing with the last group, go through the stairs leading towards the marker on the map. On the mezzanine (halfway through the floor) before the highest floor there's a ladder to the right - climb it up, go through the tunnel and jump down to encounter a small group of Riot Police. After dealing with them, collect the nearby Memorial and go back to the stairs you were just climbing (there's no point into going to the other tunnel - you will exit it in a place where you started the Bioquimek Corporation mission) and continue your journey to the marker on the map.
 Another Pain Box with a Chaos Gem inside.
Soon you should reach a frozen corridor. The ice is blocking the mechanism controlling the door - get rid of it by using Chaos Bombs and open the now unblocked door with a switch on the left side. Afterwards, jump through the gap to get to the other side, and jump down a platform below you, where you can find another Pain Box with a Chaos Gem inside. A bit further you will encounter another group of gun-wielding enemies.
 Pain Box (with a Dodo bird on top of it) - in the distance there's the tunnel leading to the tower.
Get rid of them and turn to the tunnel on the left (just before the crossing) - you will come across yet another Pain Box, with a Chaos Gem inside. Collect it and go through the opposite tunnel, until you reach a tower that you will have to climb.
 After arriving to the top, stand on the edge and look below - you should be able to see a Pain Box.
You should be careful while climbing - some of the handholds are "protected" with electricity or a steam vent, which will hurt you and knock you down all the wait to the base of the tower. After reaching the top, stand on the edge and look below - you should be able to see a Pain Box there. Jump down, collect a Chaos Gem from it and climb up to the top of the tower again. Jump to the other platform and go through it until you reach a place in which you must climb some ladders and cables. When you reach the top, go towards the marker on the map (in the opposite direction there's a collectible, but you can't get to it yet). Replenish your Magic with the nearby Magic Font and climb up the stairs to get to a Pain Box with a Void Gem hidden inside.
 The marker shows the place you need to jump into from the bridge.
Go to the right of where you found the gem and jump down over the railing. Collect the Memorial and unlock the doors by using Chaos Bombs in the indicated places. Afterwards, get inside and activate the elevator.
 Avoid getting hit by the "electric gates".
To the left from the elevator's exit, there's a handhold you need to jump onto in order to start climbing up, and then jump on the nearby contained. Go "onboard" the contained until you reach another one below you - jump at the right moment to land on it. To get to the end of its course, you need to avoid the "electric gates" on its way - avoid the first one by hanging down the container's side and climb up and go on top of it to go through the second one. Afterwards, jump on the ground below.
 Use your Bat Swarm on the guard standing in the corner.
Collect a nearby Memorial and jump down the tunnel towards the marker on the map. Turn the valve on the door to open them and jump further down. You will run into another stealth section in the game. In order to slip by, you need to use your Bat Swarm on the guard standing in the corner of the room (the one that is not moving) - the other one will come to his aid and you will have to sneak up on and possess him. With his "help" open the door on the left side.
 While going through the footbridge, note the on the right side - at the top of it there's a Pain Box.
After getting through a pair of doors, you will run into another guard - use your Bat Swarm on him and quickly climb up the ladder on the right side. Jump over the fence, landing on another ladder, and move to the right, being above the ground all the time. Soon, to your right, you will notice a ladder - climb it up to collect a Life Gem from the Pain Box inside the small room. Get back to the footbridge and continue ahead. Jump off the ladder in such a way so that the guard won't see you and sneak up on him to possess him. Afterwards, open up the gate leading to the other section of this room.
 Shadow Portal near the door you came from just a second ago.
You have reached the train, but it's protected by a pair of Golgoth Guards - besides, your only way into the train is through the grid below the door. Get back to the place you used your Bat Swarm on the guard - there's a Shadow Portal near the door you came through just a second ago. Use it to get into your rat form and get inside the train by using the mentioned grid below the door. Afterwards, locate a Shadow Portal inside the wagon to get yourself into your Dracula form. After a cutscene you will find yourself on the roof of one of the wagons - you will encounter a new enemy, Satan's Soldier.
 The enemy looks badass, but he's not that hard to beat.
Well, technically, he's not that new, as you met him while you were playing as the "old weak Dracula", but that encounter couldn't really be called a fight. The duel itself isn't really very difficult - hit him long enough for him to start flashing in yellow, which will indicate that you must grab him to initiate a cutscene. Afterwards, you will be inside a wagon with a Golgoth Guard - get out of it by jumping through the window on your right and climb up the wagon to reach its roof.
 Ignore the closest enemy and use a Bat Swarm on the Golgoth Guard in front of you.
After a short cutscene, you will land on a wagon again, with Satan's Soldier attacking you melee range and a Golgoth Guard standing on the other wagon, trying to disconnect the one you are standing on from the rest of the train. Ignore the nearby enemy and use your Bat Swarm on the guard, which will initiate another cutscene. After regaining control over your character, climb up the wagon - you must do this before the train enters a tunnel. After yet another cutscene you will have to get to the ladder on the left side of the wagon, move to the right and jump inside it through the window.
 Wait for the guard to turn around and then possess him.
You will face a Golgoth Guard again, but don't move from behind the cover, behind which you landed upon entry to the wagon, and wait for the guard to turn around - when that happens, sneak up on and possess him. Using your temporary body open the door, which will trigger another cutscene and you will face Satan's Soldier again.
If you want to, you can make this fight a lot easier by using the Stolas' Clock relic - after hitting the enemy just once the fight will be practically over, as he won't even be able to move. Another advantage of using it during this fight, is the fact that you will earn an enormous amount of experience in the process.
 Avoid the lights in a similar manner.
Soon, the fight will end, and the train will enter a tunnel, interrupting the fight. Another encounter with a Golgoth Guard awaits you. Run to the wagon the guard is in, trying to stick to the right side, and climb up the door on the right. After getting on the side of the wagon, move to the right, avoiding the guard's attacks and climb to the top. Now you will have to avoid light bars - look for a gap in between them and position yourself into it, so you won't be hit by them. After about a dozen of lights come by the action will move inside the wagon and you will encounter Satan's Soldier for the last time.
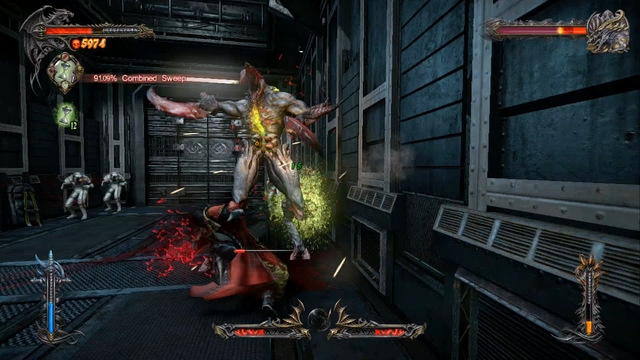 The last time you will encounter this enemy...
This time the enemy will have a health bar, as in the case of a regular boss fight. However, it's nothing like that - Satan's Soldier is easy to defeat and you can use the Stolas' Clock relic again (which you should do) to make the encounter extremely easy. After emptying his health bar, the fight will end, and you will leave the training in a flashy style, to meet a familiar face - Zobek's Lieutenant.
 Red marker shows the location of Memorial, and the blue one of an inaccessible Pain Box.
After regaining control over your character, go along the railroad tracks in the direction from which the train came - there's quite a long journey before you, so be patient. You should soon get to the station from which the train set off - there's a couple of things to do here. Get rid of a group of vampires awaiting your arrival, then go to the other side of the rails, to collect a Memorial - above it you can see a Pain Box, but you lack a necessary skill to get to it (the screen above shows the location of both collectibles).
 Another Pain Box can be seen in the distance.
Standing near the place from where you collected a Memorial, turn around to the right - you should be able to see a Pain Box located at the end of the rails. Go there and collect a Life Gem from inside the box.
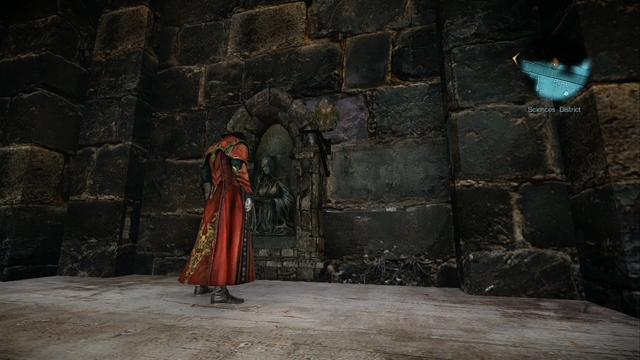 The last collectible accessible to you at this moment.
The last thing you can do here is to use a Dungeon Key to activate the device holding a 2,000 experience point boost - you can find the keyhole to the left of where you found a Memorial.
After collecting all the above mentioned things, go back to where the train crashed, then climb up the wall where Zobek's man awaits you. Jump down and switch the lever to restore power, and go through newly opened door, in the direction of the marker on the map.
 A Pain Box visible above you - unfortunately, it's beyond your reach.
You will reach a large room - below you there's a group of enemies awaiting you (they are unaware of you, though), and above you there's a platform holding a Pain Box, which is inaccessible for you at the moment. Jump down and get rid of Possessed Citizen. Zobek's Lieutenant will provide backup - he won't be dealing a lot of damage, but some enemies will focus him instead of you, making the fight a lot easier. After dealing with the first wave, reinforcements will arrive - this time wielding guns, but it's not something that you can't handle.
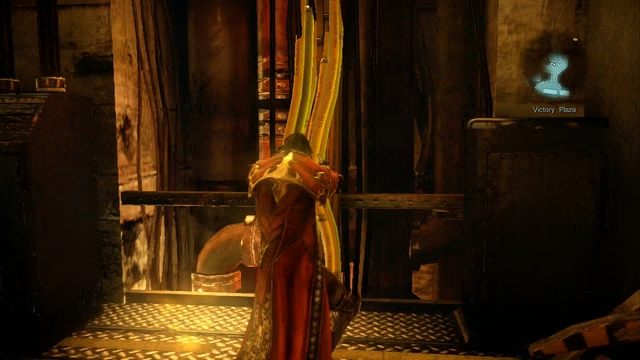 The cables you must tear apart, so that Zobek's Lieutenant can reach your position.
The passage is blocked by cables hanging from the top - use a nearby switch, to turn the power off, then ask your ally to hold the lever for you. Run through previously blocked passage and go forward - near the wall you will find another bundle of cables, which you must tear apart, to turn the power off permanently, allowing you ally to catch up to you.
Standing in the way, that the cables you just destroyed are to your right, go straight ahead, turn right, jump down, and then get to a small hole in the wall, where you will find a keyhole for a Dungeon Key. Active it, if you have the required key - if not, ignore the place for now. Climb back up and head towards the marker on the map. You will soon run into a group of enemies, among which you will find a new, regular enemy - a smaller version of Satan's Soldier.
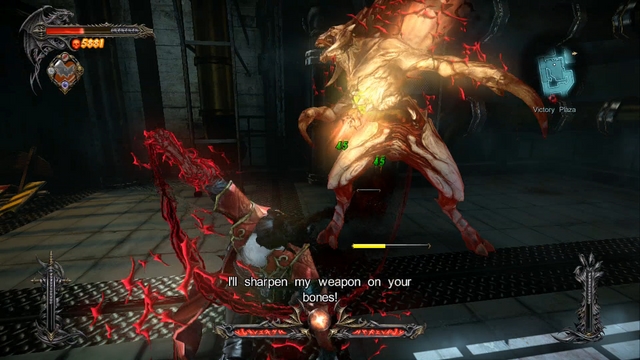 A smaller, weaker version of Satan's Soldier.
Fighting him is nothing really special - he's just a smaller, weaker version of the mini boss you fought at the end of the previous level. Avoid his unblockable attacks and get away from him after dealing the finishing blow - his corpse will explode, sending a shockwave to all directions.
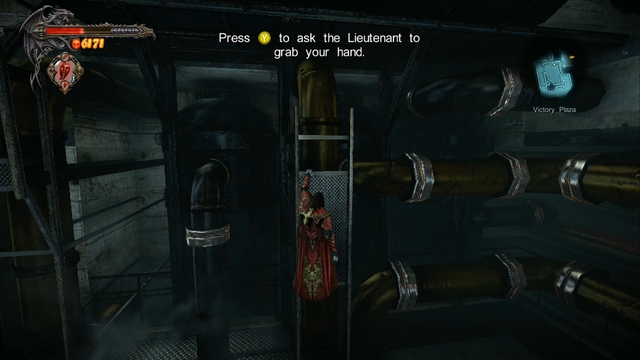 Climb up a metal construction and ask Zobek's Lieutenant for assistance
After dealing with the enemy, you will notice that the passageway is blocked - to get through it you will have to cooperate with your ally. Climb up a metal construction resembling a scaffolding and press the indicated button to grab and launch Zobek's Lieutenant - follow the on-screen instructions, and both of you will soon be behind the gate.
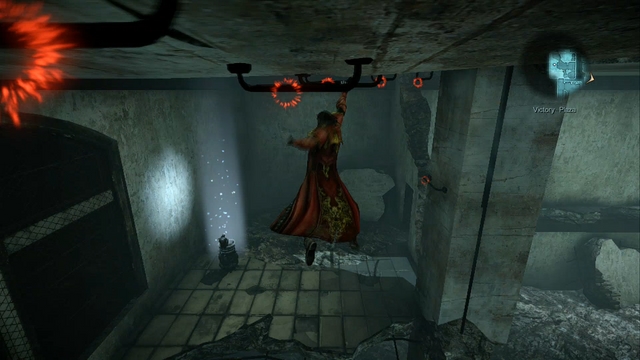 Pile of Sacrifice, below your climbing route.
You will arrive at a collapsed building - there's plenty of climbing and jumping here. Climb up a pillar situated at the center of the room and your ally will leave you. Continue your journey (remember that you can highlight your course by pressing the block button) until you reach something that previously was a second floor - there you will find a Pile of Sacrifice. Jump down, collect the Kleidos' Nail from it, and then get back on the ceiling.
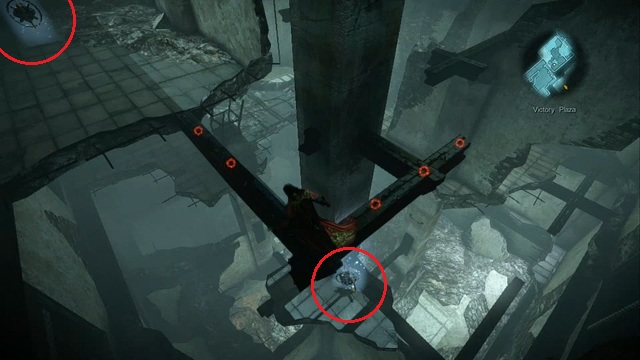 Markers showing the location of two Pain Boxes, both containing a Chaos Gem.
After getting to the highest floor, you will be able to see two Pain Boxes (screen above shows their location) - first, collect the one located on your level (highest floor), and then go back for the one situated below you. As you have noticed, both boxes contain a Chaos Gem. The exit from this room is located on the floor where you found the second Pain Box - just head towards the marker on the map.
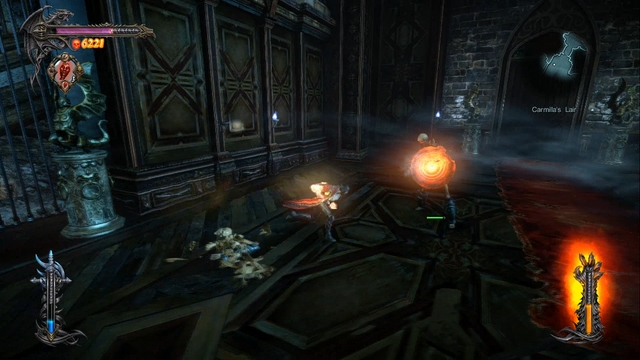 A Pain Box, which you cannot reach at the moment.
After leaving the collapsed building, you will see a Pain Box right in front of you, on a adjacent building - unfortunately, you lack a skill necessary to get there, so for now ignore it. Jump down and get close to the place market with a large X on the map, to initiate a cutscene, after which you will change the scenery again.
A new, quite challenging enemy - Bloody Skeleton.After regaining control, turn around - behind the bars you will see a Pain Box, but you can't reach it at this moment, because, again, you lack a necessary skill to do so. Go in the only available direction - ahead - to initiate a cutscene. After it, you will notice that Carmilla poisoned you - your health bar now has a purplish shade. Part of the damage you will receive in this state will decrease your health bar permanently - you won't be able to regenerate it through feeding on your enemies, using relic or healing by a statue. Because of that, you will have to rely more on dodging than on blocking attacks. Soon after the cutscene you will face a new enemy - Bloody Skeleton. They are typically cannon fodder, if not for three things - they can (and in most cases will) wield a shield, which will block your normal (non-chaos) attacks, they aren't staggered by your attacks (they can attack you even during your combos - very few attacks can stagger them), and last but not least, after "dying" they will turn into a bloody pulp. During that phase, they will look around for a usable corpse - if they will succeed in it, they will be resurrected, as many times as there are corpses nearby.
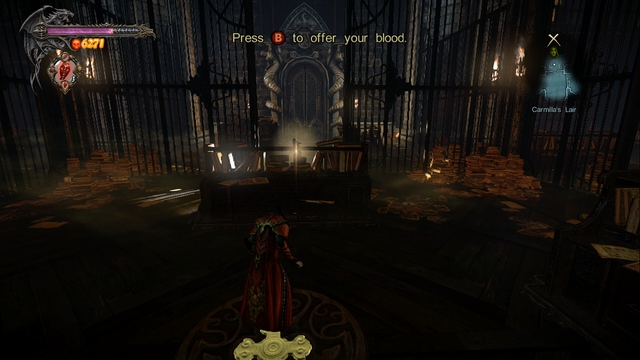 One of the 4 devices you need to activate in order to open the passage.
Soon after the fight, another cutscene will initiate - your health will be regenerated, but you are still poisoned, so keep on dodging attacks instead of blocking them to avoid unnecessary damage. You will face one of the most difficult fragments in the game - a stealth section, in which you must activate 4 devices scattered around the room. Their locations resemble an inverted cross - you start near one of them, two are on both sides and one is in front of you, from where Carmilla comes. To active all of them, you will have to move in such a manner, so that Carmilla won't spot you - if that happens, you will be locked on a small ring-like space and two Dishonored Vampires will come to attack you. It is important to note that Carmilla can deactivate devices, so you will have to do it numerous times.
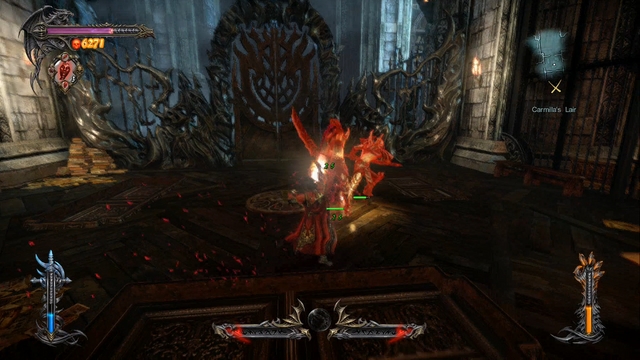 Use the endlessly spawning enemies to farm experience.
This spot is ideal for experience farming and mastering your skills - after getting spotted by Carmilla, a fight will await you, after which you will get back to the stealth section. You can repeat the whole process infinite number of times, without any consequences - if you devote several dozens of minutes, you will get enough experience to unlock most (if not all) and master some of your skills. The only flaw in this plan is that your health won't regenerate - if you're not careful, you will be killed and transported back to the save point, losing all the accumulated experience. Therefore, if you plan on staying here for a longer time, you will have to be extra careful and switch yourself into dodging, instead of blocking attacks. A good tactic against Dishonored Vampires is to knock them up into air and defeat them in aerial combat, where they can't counterattack. Use your Stolas' Clock relics if you need an additional boost to experience.
 In the distance you can see two collectibles - unfortunately, both are out of your reach.
After getting through the stealth section and unlocking the gate, you will certainly notice that there are lots of collectibles all around you - unfortunately, you lack the necessary skills to be able to get to any of them, that is why you should ignore them for the time being and go through the newly opened gate, to activate a device inside (to the left of the device you will notice a Pain Box, but like the rest of collectibles, it's beyond your reach).
 A Pile of Sacrifice visible on the upper level.
After opening the next door, go through them, collect the heart from the statue (which probably won't heal you much), and then turn to the left (from the statue) - climb up, where a Pile of Sacrifice, with a Kleidos' Nail, awaits. Collect it, jump down and go through a passage behind the statue.
 Another Soldier Diary lying by the corpse.
After going outside, turn the camera to the side - to the left of the passage you just went through, there's a Soldier Diary lying by the corpse. Collect it and go towards the marker on the map, where a cutscene will be initiated, after which you will have to make a choice (Marie standing on the right is the proper one). After that, the most difficult boss fight (at least to this moment) awaits you.
 In order to damage Carmilla, you have to destroy her shield bubble.
Carmilla is the toughest foe you have come across (and one of the most difficult battles in the game). There are several reasons to that - your life diminishes permanently each time you are hit and Carmilla is accompanied (almost all the time) by two Vampires. To make matters worse, she surrounded herself with a shield bubble - you can penetrate it only with the Chaos Magic. There's more - you must attack the shield all the time, because it will regenerate if left untouched for a brief moment. And you have to break the shield twice to get to her.
If you finally destroy her annoying bubble, the fight will become a hell lot easier. Carmilla is too fast for you and she will teleport away whenever you will try to close the distance to her - you have to use Void Projections to freeze her, which should allow you to hit her a few times. Rinse and repeat until her health drops to 2/3 - Carmilla will multiply herself, creating 8 identical copies and will surround you with a special, impassable to you, barrier. At this point you have two tasks: avoid her attacks (you have to jump over them) and attack her clones (a few strikes will destroy each one).
 After breaking through her shield bubble, the rest of the fight is a lot easier.
After destroying all her clones, Carmilla will summon a ghost, which will attack you each time you will try to get close to her - to prevent that from happening use Void Projections again to simply freeze her, which will allow you to freely attack her. You will soon discover that you have stolen Carmilla's power - Mist Form - which allows you to turn into mist. It helps a lot during some of the fights (for instance with Carmilla's ghost - if it grabs you, use your Mist power to get away) and is primarily used to pass through certain objects, like metal bars. During this fight, mist for can be used to something else - whenever your health drops below 50%, you will be told to get near Marie (you have to pass through the bars with Mist power) and feed on her, regenerating your health to full. At this point the fight is basically over, as you can do this infinite amount of times - the only limit is a short "cooldown" between feedings.
A few tips which may come in handy during the process of breaking through her shield bubble:
By using the above tips you should soon be able to defeat Carmilla and finish the fight in a brutal style. After the fight, go all the way back to the device you activated after the stealth section with Carmilla - a cutscene will initiate and you will be transported back to the city.
 Stand above the airflow, to get to the upper level.
Use your freshly acquired ability, to get through the bars, and then stand above the airflow and use the Mist power again - it will allow you to get to the upper level. Replenish you Magic by the Magic Font, climb up the scaffolding, and then, hanging in the airflow, use Mist yet again, to get to the other side.
 After reaching a hole in the ground, go to the right.
You will land on a Shadow Portal - use it, to get into your rat form and get inside the nearby grid. Go through the tunnel, until you reach a place where you can jump down through a hole in the ground - turn to the right, ignoring the hole, to reach a room with a Pile of Sacrifice (containing a Kleidos' Nail), which will unlock a first set of challenges for you (remember: you can access them in the Chupacabras' store). Collect the treasure and run back to the place with the hole in the ground - jump through it, until you reach a familiar Pain Box located on the roof (it contains a Void Gem). Use a nearby Shadow Portal to get into your Dracula form and collect it.
 A collectible you left behind a few missions back - to the right there's a passage leading to it.
A little bit of backtracking awaits you now - you will go for a collectible you left behind a few missions earlier. Use a Dodo Egg if you want to make it easier for you. Jump down the roof and get all the way back to the room in which you restored power with Zobek's Lieutenant (where you had to tear the cables apart) - to get there, climb up the scaffolding (to the opposite of the place from which you collected a Void Gem a second ago), and in the next room, where you had to climb a lot, jump down and go straight ahead. Pass through the bars by using your Mist power and climb up the ladder (remember about the keyhole for a Dungeon Key, which is located near the ladder), until you reach the room in which you fought Satan's Soldier. Deal with all the enemies chasing you and climb up the scaffolding. Use your Mist power to pass through the bars in front of you, which will allow you to get to a Pain Box with a Life Gem inside.
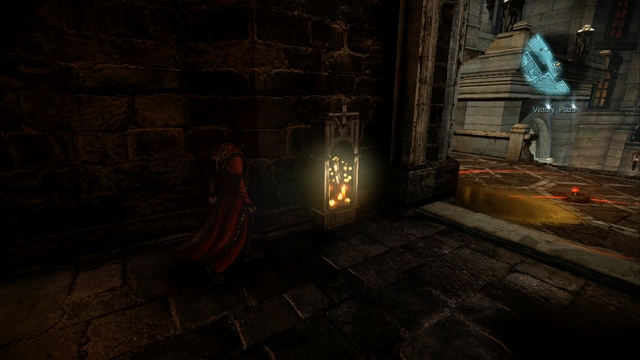 Memorial and a proximity mine lying at the entrance.
Get all the way back to the place in which you activated a Shadow Portal (after going through 2 airflows with your Mist power) and head towards the marker on the map - in the next room you will find a Memorial, and a freshly placed proximity mine at the entrance. The mine will immobilize you for a short while upon detonation. Jump down on the square below, to summon the enemies, with more proximity mines. An effective method of dealing with them is to "go through them with your dodge" - use it at the last second, the moment you get into the mine's range, to avoid taking damage and getting immobilized.
 Another Pain Box - behind you there's a Map Room.
After dealing with the enemies, head towards the marker on the map and climb up the wall of a building with a Windrunner signboard on it (to the left of your actual position, there's a truck, behind which you will find a Pain Box - you can't reach it just yet) to get to the other side. Jump into the hole on the right side of the street (to the opposite direction to the marker on the map) - you will find a Pain Box (with a Chaos Gem inside) there, as well as a door leading to a Map Room. Collect the gem and head towards the waypoint. Find a grid you must slip through by using your Mist power, to get to a lower level. All you have to do now is to restore the power and get inside the elevator.
You will enter a building consisting of several floors - your job here is to get to the top floor, obviously. Don't run up the stairs - instead, mist through the bars on your right, where you will find a Pain Box with a Chaos Gem inside. Collect it, go back to the stairs and then go to the left side, use your Mist power to get through the bars blocking your way and flip the switch, to restore the power to the elevators in the building - note, that the power will shut down after a while, so you will have to come back and turn in back on at least a few times in this section.
 Notice a Pain Box in the distance.
After restoring the power, run up the stairs and notice a Pain Box in the distance, located on damaged stairs. Get rid of the nearby enemies and collect a Void Gem from the mentioned Pain Box. Afterwards, head towards the elevator marker by the waypoint - to reach it, you will have to mist through the bars on the other side of the floor (opposite the marker on the map). After passing through them, deal with another group of enemies, collect a nearby Memorial, and enter the elevator (you must use Mist to get inside), to get to the upper floor (provided that the power is still there).
 Another Memorial located on the second floor.
After leaving the elevator, go to your right - you will encounter another group of enemies and a Memorial to collect. Grab the treasure, go back to the elevator and head to the corridor on the left side. At its end, slip through a grid on the ground to get to another room - climb up the destroyed wall in front of you and run towards the marker on the map, to the second elevator. If the power is down, you will have to repeat the whole process. Either way, use the elevator to get to the second floor.
Pain Box containing a Life Gem - in the distance you can see a wall, which you must climb to get to a Pile of Sacrifice.Leave the elevator and go to the right, but don't go into the corridor marked by the waypoint - instead, go straight ahead. Jump over a series of gaps, to get to a Pain Box with a Life Gem inside. To the left of your current position there's a Pile of Sacrifice - to get there, you will have to jump onto a thick wall, and run across it to get to the collectible (the above screen marks the mentioned wall). You won't get a Kleidos' Nail - this time you will be awarded with an upgrade to your Ensnared Demon relic, increasing the amount you can carry at a time (from 3 to 4). There's another Pain Box on this floor, but you can't reach it at the moment, so just ignore it and head towards the marker on the map, to initiate a cutscene.
 The red marker indicates the location of a Shadow Portal.
You will encounter another stealth section. Find the nearby Shadow Portal and go through a grid to get into a room with a Golgoth Guard. Locate the door from which the technicians enter the room - to the left there's a second Shadow Portal. Go near and use it and wait for your prey. As soon as the technician enters the room, sneak up on him and possess him. Afterwards, get inside the room the civilian was planning to enter. A series of cutscenes will initiate, after which you will encounter yet another boss.
After Carmilla's boss fight, this encounter will be a child's play. During the fight, Raisa will use the following attacks:
 Attacks using energy waves are the only ones that you should pay attention to.
By using the above tips you shouldn't have any problems with defeating her - try to stay close to her and avoid her charge and energy attacks and she will pose no threat. After the boss drops dead, you will be transported to a new location.
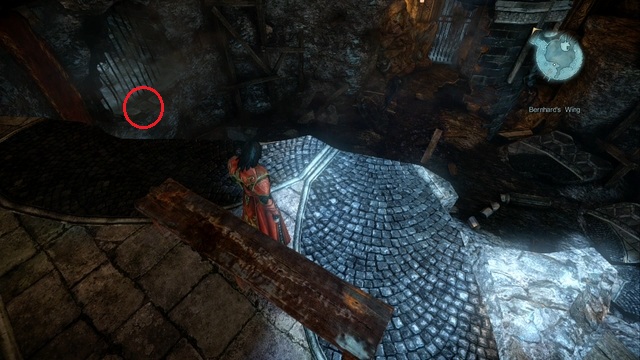
After regaining control, don't go towards the castle (ahead), but turn around and go to the device. Destroy the ice blocking the device with a Chaos Bomb, and then pull the lever. Pass through the bars blocking the way and go through a tunnel on the right side.
Stand on the edge and jump on a small stone ledge (the above screen shows the location you should stand in and the red market indicates the place you must jump to) - behind the bars you will find a Pile of Sacrifice, which will award you with another Kleidos' Nail. Ignore the further part of the tunnel (as you lack a skill necessary to get there), jump down from the ledge, and then get inside the tunnel on your right side.
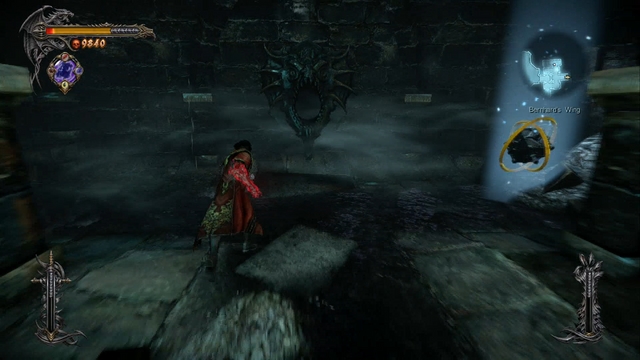 One of the two Pain Boxes - the second one is on the other side.
After entering the tunnel, go to the right, where you will find two Pain Boxes (with a Void and Chaos Gem inside). After collecting both gems, go to the right part of the tunnel, where you will find a keyhole for a Dungeon Key (you were here during the Buiquimek Corporation mission, but you didn't have any keys on you at that moment - if you don't have one this time, remember this place and get back here later). After grabbing all the collectibles, go back to the place in which you ended up after the boss fight.
 The upper climbing route leads to a keyhole for a Dungeon Key.
Get outside and move in such a way as to have the mountains on your right side (ignore the castle and the entrance on the left side). Jump down and enter a small room, to find a Pain Box with a Life Gem inside. Grab it and head towards the building. Hop on a wooden bar to start climbing - after getting to the crossing, move all the way up to reach a place with a keyhole for a Dungeon Key (again, you will receive 2,000 points of experience for unlocking it). Go back to the crossing and go right this time, in the direction of the marker on the map.
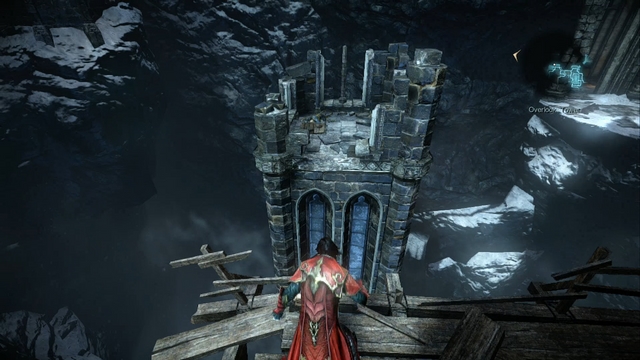 A Soldier Diary located at the top of a lone tower - unfortunately, you can't reach it yet.
After jumping down the wooden bar, you can see a lone tower behind you - at the top there's a Soldier Diary, but you can't get there yet. Continue your journey, until you reach a high tower, which you must climb - one of the planks will break and you will drop down to encounter some new enemies.
Your old buddies - humans - are back. Besides cannon fodder in the form of regular soldiers, you will encounter a heavy version of a footman - Heavy Brotherhood Warrior. Those guys are nothing like their regular buddies - they are protected by a heavy armor, and because of that you will need to get rid of it (by using your Chaos Magic) before even thinking about injuring him. Watch out for his charge-like attack - maintaining a distance may not be sufficient, as he will probably still reach you. To avoid getting grabbed, all you have to do is to simply jump over him at the right moment. After dealing with this group of enemies, a foe will appear.
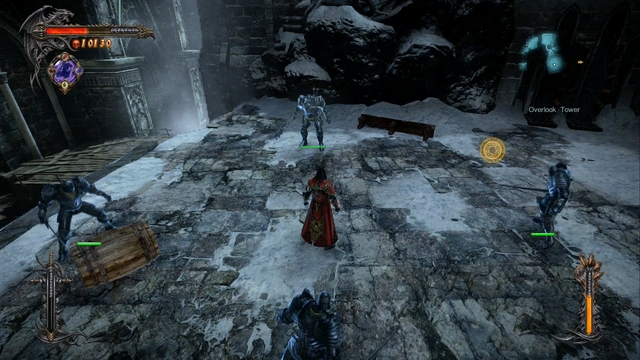 Four versus one?! It's so unfair for them!
The Brotherhood Cleric isn't necessary a strong opponent, but fighting him may be insanely frustrating and time-consuming. Each time you reach him, you can be sure, that he will teleport away on the other side of the arena. Additionally, he can summon regular soldiers to his aid - it's his main weakness at the same time. After summoning them, he will start casting an enchantment - the incantation takes a lot of time and you can easily land a few easy hits and break the preparation of the spell. Unfortunately, unlike other mobile bosses (Raisa, Carmilla) you can't freeze (or slow) him with Void Projections.
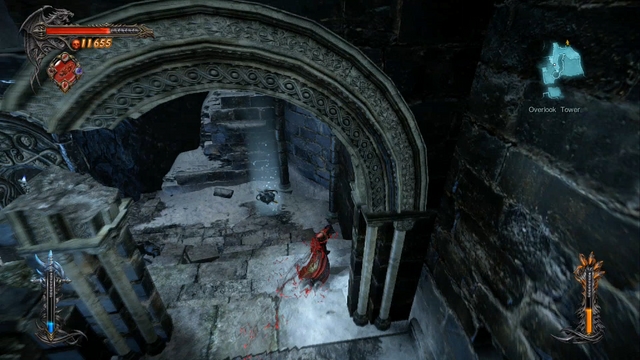 To get to a Pain Box in front of you, you must jump onto a marked ledge.
After the fight ends, activate the nearby device to collapse the fence above, revealing a handhold. Don't go inside the building in front of you - instead, turn to your left until you reach an edge where you should see a Pain Box, a little below you. Jump onto a marked ledge to get near it and collect a Chaos Gem from inside of it.
Another Pain Box in this place - the road to the left leads to a Map Room.Jump down and go down the stairs, to bump into another Pain Box - inside you fill find a Void Gem. You can travel downwards, to get to a Map Room (in order to get to the Chupacabras' shop, for instance). Either way, climb the high tower from which you have fallen a while ago, jump down and head towards the marker on the map, climbing up the wooden bars, until you enter a building resembling a cathedral.
 Soldier Diary hidden in the room where Trevor is.
Go into the next room and activate the device (sculpture) controlling the door. A cutscene will initiate, informing you of your current mission - finding pieces of Mirror of Fate for Trevor. After the scene is over and you have the marker on the right side of the map, turn around and go forward - in a small gap in the wall there will be a Soldier Diary to pick up. After collecting it, head towards the marker on the map.
After leaving the canyon, turn around to the left (to the opposite to the marker on the map) - right in front of you will notice a Pain Box, but you can't reach it yet. Ignore the box at this moment and head towards the marker - collect a Soldier Diary from a corpse lying on your course and enter the bridge, to initiate a fight with another Heavy Brotherhood Warrior and a group of cannon fodder. After the fight go through the bridge, enter the room and activate the device on the right side, to open the next door.
 In the distance there's another Pain Box unavailable to you at this moment.
After entering the gardens, stand by the metal fence on the right side - in the distance there's a Pain Box. Run down to activate a cutscene, after which you will encounter yet another stealth section.
This stage is probably one of the most annoying and difficult parts of the game - just like the stealth section with Carmilla, you have to go to a certain place (marked by a giant X on the map) unseen. The difference is that when Agreus sees you, he will run over to you extremely fast, which will transport you back to the waypoint, all the way back to the beginning of the stealth section. It basically means that you cannot let Agreus see you even once, if you want to get through this stage - a waypoint is situated at the place you need to go to.
There are few things worth noting, to make this part of the game a little easier:
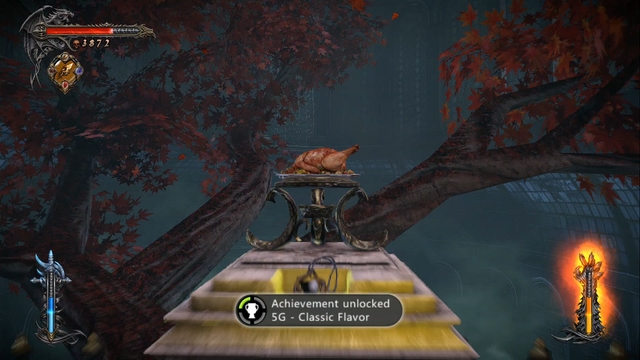 Yummy!
After reaching the indicated spot, activate the device and go through the now open door to reach an elevator leading to the top. After emerging on the upper level, go to the right to feed upon a statue's heart, to the left to replenish your Magic, and then go forward. The camera will focus on the bird which stole the fragment of the mirror - use a Chaos Bomb on it to kill it with one shot and earn a Classic Flavor achievement. Collect the mirror piece, which will initiate a boss battle.
 Agreus looks epic, but he is one of the weakest bosses in the game.
Agreus is probably one of the easiest bosses in the game - he doesn't have any special attack (besides one, which is covered below), nor he can fight from afar (besides the one mentioned exception). His arsenal of attacks is limited to melee fight - unfortunately, most of his melee attacks are unblockable (again, look for a red flash just before those kind of attacks), which is why this time you will rely more on dodging than blocking attacks.
Every now and then Agreus will swap his weapon (from a 2-handed to two 1-handed swords), which adds some mobility to his attacks - luckily, it's a dream come true for you, because most of those attacks are blockable or trivial to dodge, in comparison to his normal attacks performed with 2-hander. The one special attack that was mention before is:
Try to "sit on him" as much as you can, trying to avoid getting hit by his unblockable attacks and the fight shouldn't take long. When his health drops to zero, a final QTE sequence will be initiated and after that the fight will be over.
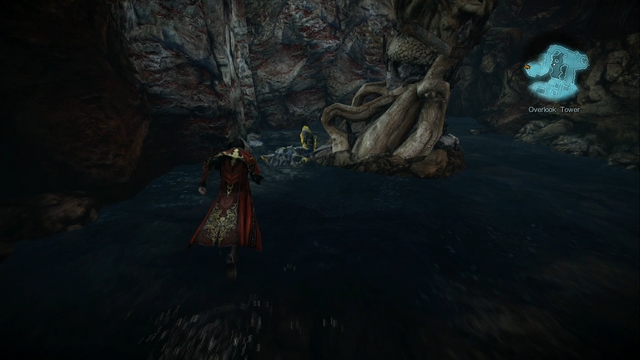 Another Soldier Diary lying in a small lake.
After the fight, head towards the marker on the map, but before going up to the top, turn to the left side and enter a small lake - you will find a Soldier Diary there. Collect it, go up, and then head to the waypoint. On the bridge where you fought Brotherhood soldiers you will encounter a group of Harpies - but they aren't any real threat for you. Defeat them and head back to Trevor, in the direction of the marker on the map.
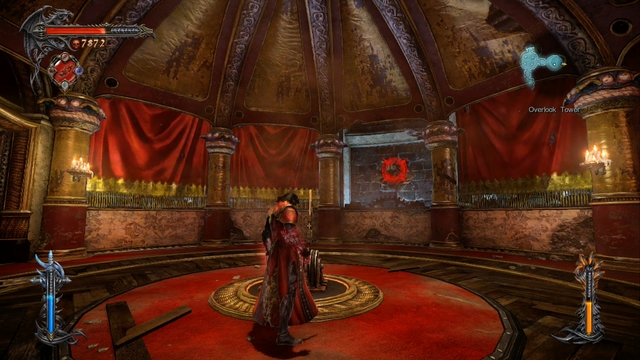 A mini-game allowing you to get some easy experience.
After giving Trevor the mirror piece, go to the newly opened room, indicated by the marker on the map. After using the lever you will encounter a mini-game, in which you have to throw your Shadow Daggers at the emerging targets. If you will do this fast enough, you will be awarded with some experience points.
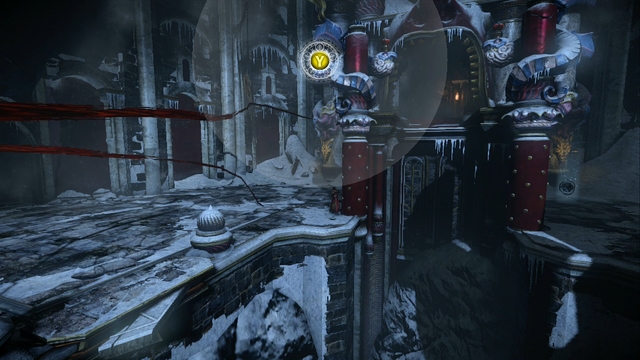 Pillar-like device - to the right you can see a Pain Box.
When you have enough of the mini-game, get outside through the new passage, where you will encounter a small group of Brotherhood of Light soldiers. After dealing with them, get close to the device (resembling a pillar) and activate it - after a short QTE sequence a new footbridge will extend, allowing you to get to the top. Instead of going towards the waypoint, jump down on the other side - you will find a Pain Box with a Life Gem inside there.
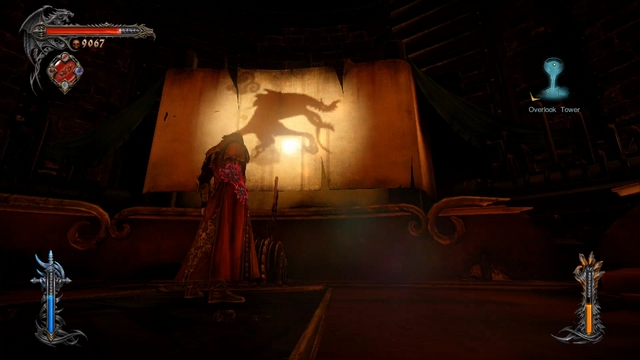 A very climatic elevator, which will lead you near the Chupacabras' store.
After collecting the treasure, go inside a small room located nearby - it's an elevator which will lead you near the Chupacabras' store. Use this opportunity and go to the shop - buy all the Dungeon Keys, Dodo Eggs and, if you have enough experience, one (or more) of the gems. Get back using the elevator, activate the pillar-like device again and go towards the marker on the map.
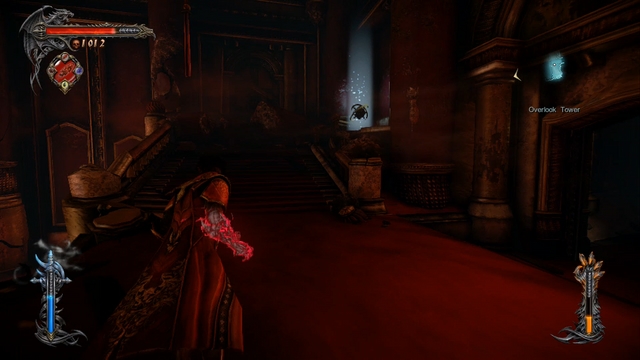 To the right of the entry point is a Pain Box.
Wait for the door to open, go through them and after entering the new room turn to the stairs on the right - you will find a Pain Box with a Chaos Gem inside there. Collect it, jump down and deal with all the enemies. After the fight is finished, turn around into the direction that you came from - you should be able to see a corpse with a Soldier Diary, lying by the wall.
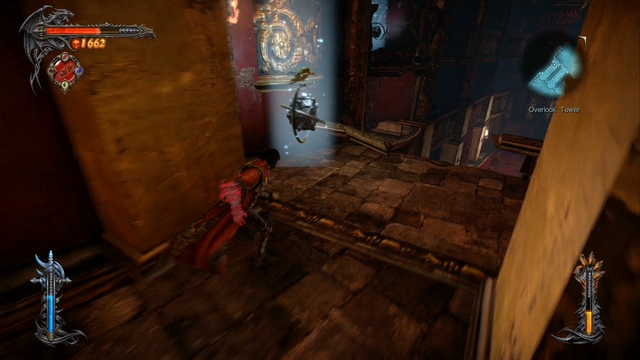 Two Pain Boxes - the farther one is inaccessible to you.
After collecting the diary, climb up the wall - you have two possible routes here, leading through the middle and left tunnel (you can't access the right one at the moment - there's a Pain Box there). Go into the left tunnel, collect a Void Gem from a Pain Box and look ahead - you should be able to see another Pain Box in the distance, but you can't reach it yet, so just jump down.
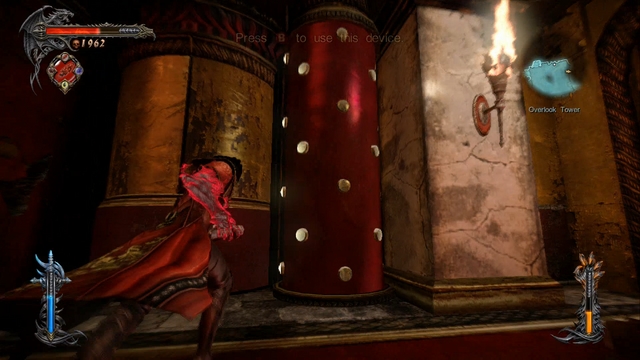 Magic Font hidden behind a device.
Along the left wall (while looking at the theater) you will find another pillar-like device, which you saw earlier - activate it to reveal a hidden Magic Font. To the right from the stairs leading to the stage there's a lever, but it won't work at the moment, as there's no power. Directly above the lever you should see a bat swarm, indicating a handhold - go there, climb up the wall and get on the balcony. Look around and collect a Soldier Diary.
 A grid located to the left of the stairs leading on the stage - this is where the generator is.
After collecting the diary, go deeper into the balcony. Jump down, where you will find a Pain Box (Void Gem inside), and a Shadow Portal. Collect the gem, turn yourself into a rat and go through the grid to get back to the room with the stage. To the left of the stairs leading on the stage is another grid, which you must go through. You will arrive in a room with a Shadow Portal, Magic Font and a generator, which you must restart by using a Chaos Bomb on it.
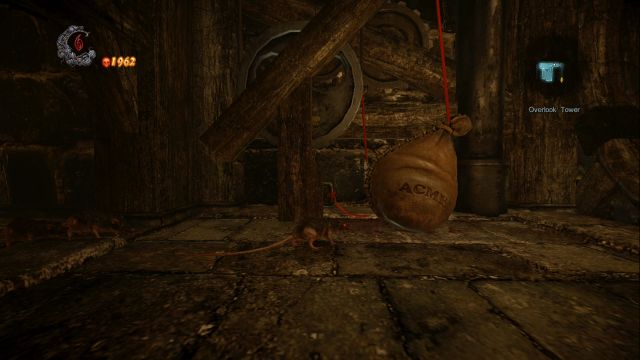 Can you guess what does the sign ACME mean? :)
Turn yourself back into Dracula, restart the generator, turn yourself back into a rat, and then get out by using a small lane on the right side. You will have to cross a series of easy traps - stop by before each of them and analyze their movement schematics. After getting through the drill-like traps, bite through the rope on the left side, to open up the rest of the path - continue the journey until you reach the theater room again.
Go back to the place in which you found the first Shadow Portal (after getting there through a balcony), to restore yourself into Dracula form. Afterwards, climb up the wall (leading to the mentioned balcony) to get back near the stage. Switch the lever and, after the cutscene ends, get close to the "computer" which emerged before the stage and activate it.
 Theatre-like section is a very good and climatic moment of the game.
You will hear a story told by a puppet and you will have to set the proper backgrounds and characters during its narration. The stages of the story are as follows (you much accept each step after placing the right props) :
After this the show will be over- you will find a boy on the stage, holding Toy Maker's heart in his hands. Get close to him and take the heart, to initiate a cutscene, after which you will face a boss.
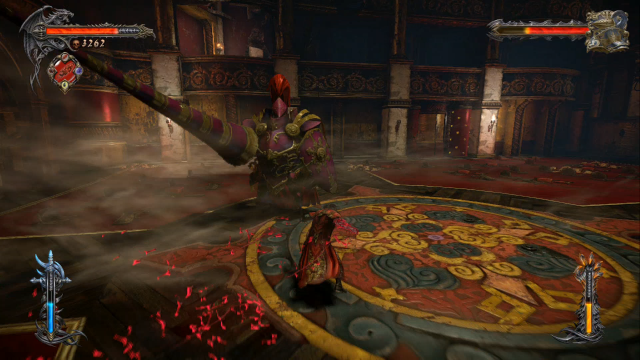 First of the Toy Maker's summons.
This boss fight is unlike any other, as you will spend more time fighting with Toy Maker's summons than the boss himself. The fight starts with an encounter with a knight wielding a shield (which is purely cosmetic, as he doesn't seem to use it at all) and a long lance. This fight is fairly easy, but most of knight's attacks are impossible to block - you have to either jump sideways or up in the air, depending on the type of his attack. When his health reaches zero, the proper boss will emerge.
Toy Maker is easy to defeat, if you follow a simple scheme - run up to him, hit him a few times (remember that you need to hit him in the head, as other places are invulnerable) and after that jump back. A simple hit & run tactic is necessary for him, as the boss frequently uses a grab attack, which cannot be blocked and which deals a decent amount of damage, before you can free yourself.
Besides the grab, Toy Maker uses both his long arms to attack - those attacks are easy to block, but there is still a risk that instead of simply smacking you with them, he will try his grab attack, which is why you should concentrate on hit & run tactics, instead of going all in. Every now and then the boss will smash the ground with his arms, creating giant shockwaves - you've seen this type of attack before, so you know how to countermeasure it (jump over them).
 The second and final summon.
When his health reaches 2/3 value, Toy Maker will summon another helper, this time resembling a giant snake-like dragon. Its typical attacks are:
Aside from the above mentioned, the dragon uses "normal" attacks by using its tail, but they are easy to block. When its health drops to zero, you have to finish it with a Chaos Bomb, which should lure out Toy Maker.
 And here's the guest of honor , Toy Maker himself.
Compared to you earlier experience with him, he gained one additional attack. It allows him to ignite a selected fragment of the arena - if you find yourself in the ring of fire, try to carefully jump out of it to avoid taking damage. When his health goes down to 1/2 value (he will lose one whole health bar), he will "transform" - he will now be standing on his arms, as if they were legs.
At this moment, the fight is basically over - all you need to do is to hit him with Void Projections. It will make him go down on the ground, stunning him for a few seconds in the process and allowing you to freely attack him during that time. After he gets up repeat the whole process until the fight ends. You will receive a piece of Mirror of Fate.
The only thing left for you to do now is to get back to where Trevor awaits you (head towards the marker on the map) - there's nothing you can do or collect at the moment, so just concentrate on getting back to Trevor. After reaching him, a series of cutscenes will initiate.
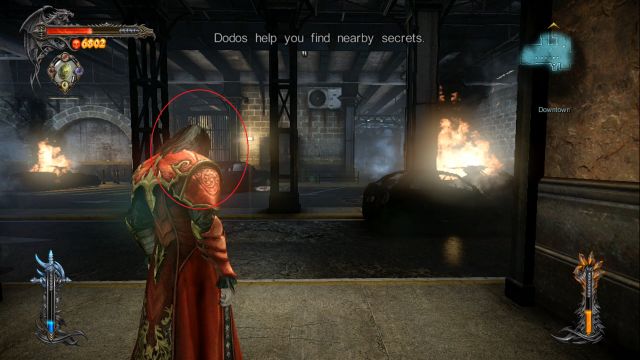 The red marker indicates the location of collectibles.
The mission begins on a familiar street - be ready though, because as soon as you flinch you will be attacked by two Satan's Soldiers. After dealing with them, mist through the bars located opposite your starting location - in front of you, at the end of the room, you will find a keyhole for a Dungeon Key.
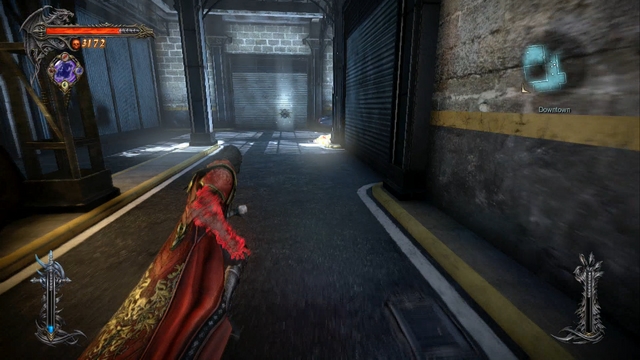 A Pain Box visible in the distance.
After collecting the experience points, go through the corridor on the left (from the keyhole) and go to the end of the street - you will find a Pain Box there. Collect the Chaos Gem from inside of it and go back to the place where you fought Satan's Soldiers.
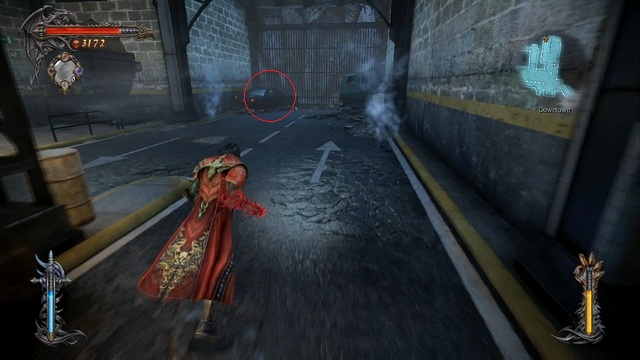 Red marker shows the location of a hidden Memorial.
Afterwards, head towards the waypoint. Before you go through the hole in the wall, go to the end of the street - behind the bars, hidden by a car, you will find a Memorial. Collect it and go inside an elevator.
 You can pick this Pain Box at last!
After emerging on the surface, take care of the enemies awaiting you and go forward, until you reach a bridge. From there, turn to the right (there's nothing in front of you and you can't do much by going to the left), go through the bars, and then collect a Void Gem from a Pain Box on the right side. After collecting the gem, go down towards the marker on the map (notice the tower on the left side - there's a Memorial there, but you can't get there yet).
 Handhold to climb up is located near a big, red pipe.
Continue until you get to the bottom, where a short encounter awaits you. Deal with the enemies and start climbing up on the other side (the place with the required handhold is located near a red pipe). Climb up a metal platform and turn to the right - you should be able to see a Pain Box there. Collect a Life Gem from inside it and go in the opposite direction, to the other side of the platform.
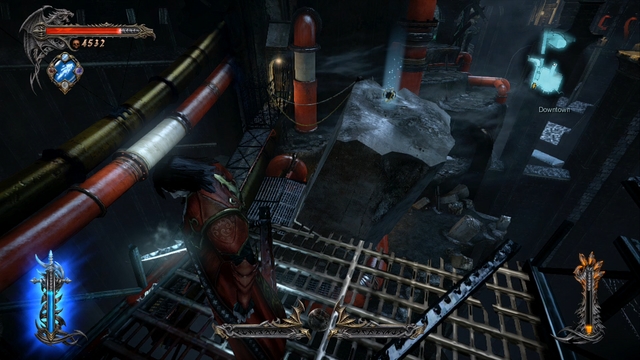 In the distance an inaccessible Pain Box can be seen.
Use your Mist power so that the fan can carry you up and continue going upwards by using the ladders. At the top you will have to face a duo of Riot Police, which isn't really anything new for you. Get rid of them and get on a metal ledge extending from the building - from here you should be able to see a Pain Box in the distance, but, as usual, you lack a skill necessary to collect it. Get back into a damaged pipe and use your Mist power to get to the top. Open the hatch, jump down and climb up the ladder on the other side - tunnel on the left side leads to the roof on which you fought Riot Police a second ago.
 First enemy you encounter with a double health bar - one of it regenerates automatically.
After emerging on the surface, jump to the other side of the wall. You will face a group of enemies, among which you will find a new face - Riot Mech. In short it's an upgraded, way more irritating version of Riot Police. Surely you noticed that the enemy has two health bars - the upper one represents his armor, which you must first destroy (with Chaos Magic, for instance) in order to deal any damage to him. The thing is, that after destroying his armor, the enemy can still regenerate it, if he won't be attacked for a couple of seconds. Mech uses melee attacks (some of which are unblockable), flamethrower and when you try to keep your distance he will resort into using his shotgun or a slow-loading rocket launcher. Try to keep close and prevent him from regenerating his armor and everything should be fine.
 Turn into the tunnel on the left after going down the ladder - you should see this.
After the fight, head towards the marker on the map, climb up the remains of a building and jump on a ladder. Restore power to unlock the passage and go down the ladder to reach the streets. After touching the ground, enter to the tunnel on your left side - you will find a Memorial there. In the further part of the tunnel you will get to a small street, where there's a Pile of Sacrifice - it's on an elevation, inaccessible to you at the moment.
Get back to the ladder - to the right, by the wall, there's another Memorial to collect. If you will go to the left of the ladder, you will get to a Magic Font and altar to activate the White Wolf Medallion - go there if you need to restock in the Chupacabras' store. After collecting all the items, head towards the marker on the map to initiate a cutscene - you will meet a new, hooded character and a boss you will soon fight with.
 A Pain Box at the end of the collapsed tunnel.
After regaining control over your character and fighting off a small group of enemies, head into the collapsed tunnel in front of you to collect a Pain Box, with a Chaos Gem inside. Turn around and collect a Memorial located in the gap on the left side. Afterwards, head towards the waypoint and enter the hatch. Restore power and get out on the other side of the street. Eliminate all the enemies and use a Chaos Bomb on a ladder (to your left, looking from the place you entered the street after emerging from the hatch - there's a purple trail nearby) to pull it down.
 A lot of jumping awaits you here...
Climb the ladder, run up the stairs, grab a handhold near the window (above you there's a Pain Box - to get to it you need to jump off from the roof of the building) and continue all the way to the right, until you finally enter the building. The interior is one, big platforming section - before you start climbing up, jump down and deal with a small group of enemies awaiting you there. Afterwards, scan the area and grab a Memorial, and then go back to the top. Moving through the platforms in this building is done in the same way as with the chandeliers in Dracula's Castle you did a few missions back. Jump on the platform in front of you, swing it by moving forward and back and jump on the second one. Continue jumping along the platforms (ignore a Pain Box on the right - you will soon get to it) until you reach a fourth one, from which you must jump on a ladder, to get to the upper level.
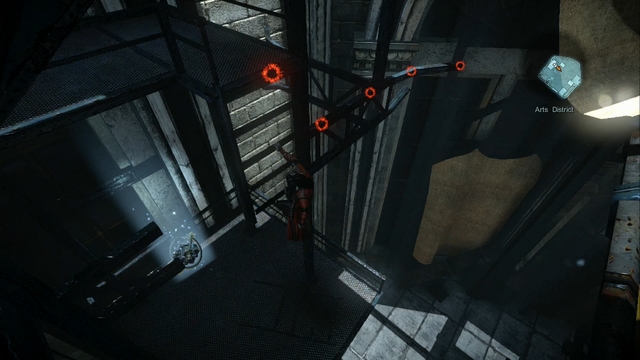 Below you is the long anticipated Pain Box.
After reaching it, you will have to jump through two more platforms, after which you will land on a solid ground. Grab a handhold on a broken scaffolding and drop down to collect a Life Gem from a Pain Box you saw earlier. Grab the scaffolding again and continue climbing. Soon, you should reach the roof of the building, where a small group of enemies awaits your arrival.
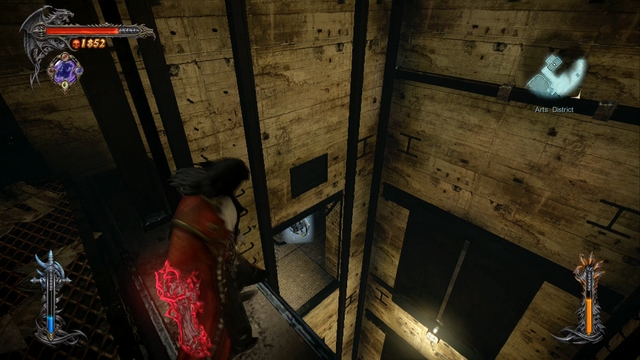 A Pain Box visible below your current position.
Finish them off and use a Chaos Bomb to knock down a metal footbridge (the place in which you must throw your Chaos Bomb is indicated by a red flame-like smoke, as always), but don't cross it just yet - go in the opposite direction, to enter a small room in the building, leading to a elevator shaft. Stand on the edge of the shaft, turn your camera to look down, and you should be able to see a Pain Box in a small gap in the wall - jump into the gap, collect a Void Gem from the box and jump at the bottom of the shaft, where you will find a keyhole for a Dungeon Key. Collect the experience (if you have the key) and get back to the roof.
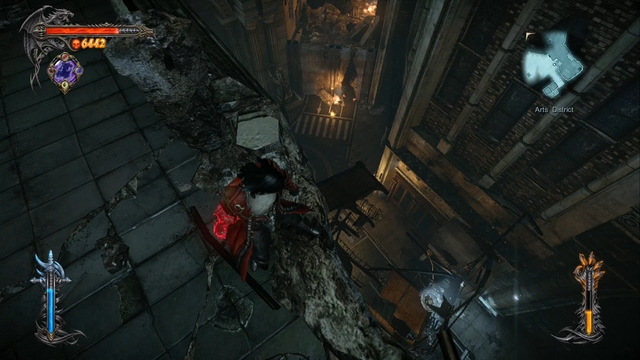 A Pain Box visible from the roof of the building.
Stand on the edge of the building (the screen above shows the exact location) and jump down, to get to a Pain Box mentioned earlier. Collect a Chaos Gem from inside it and climb all the way back to the roof of the building. Afterwards, go through the footbridge you unlocked earlier with your Chaos Bomb to initiate a cutscene - pay attention to the waterfall before you, as you will climb it in a moment.
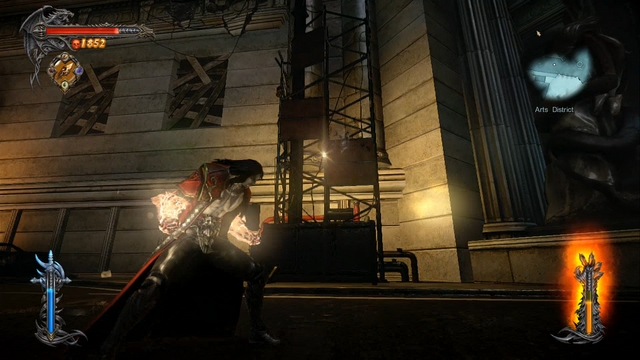 A scaffolding leading to a Pile of Sacrifice.
Eliminate the enemies and climb up the scaffolding opposite the building you just fell of - at the top you will find a Pile of Sacrifice, which will increase the amount of Stolas' Clock relics you can carry (from 3 to 4). Get back to the waterfall you saw during the cutscene, freeze it using your Void Projections and climb it up.
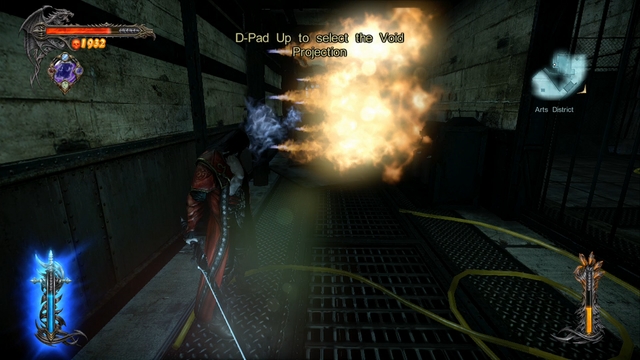 Flames are blocking the way - Void Projections will deal with this problem with ease.
Deal with a group of enemies, and go through the bars, until you reach a passageway blocked by flames. Freeze them with Void Projections, restore power and get back to the room in which you fought the enemies a second ago. Activate the fan and use your Mist power to let the airflow carry to the upper level. Upon arrival, use your Chaos Bombs to ignite fuse on the "rocket" and observe as Dracula crashes it stylishly into another building.
 Another inaccessible Pain Box in the distance.
After regaining control, find a way down through a hole in the ground, descent to a lower level and turn the power back on. It will open a gate leading into a demolished library - ignore a Pain Box visible in the distance, as you can't get there yet. Get down on a lower floor of the library and deal with the enemies awaiting your arrival. There's nothing to collect here, so all you can do is to go in the direction of the marker on the map, to initiate another cutscene, which will begin a boss fight.
 Another epic-looking boss who at the same time is one of the weakest.
Like Agreus, this boss is pretty easy to handle - he doesn't have any hard to avoid attack, his strikes deal moderate damage, and to make matter worse (for him) there are dozens of small monsters next to him, whose only purpose is to be a supply of Magic and healing for you.
Each time his life goes down by 1/3, he enters a berserk-like state - he starts to attack with his claws in a rapid succession, following your trail all the time. To avoid this attack, try to get away from him as soon as his health bar goes down by 1/3 - he needs a few seconds to "charge" his attack and you should use that time to get as far away as possible. This attack is unblockable, so don't even try blocking it - dodging isn't really a good idea either, because even if you avoid getting hit by one of his attacks, he brandishes his claws so rapidly that it's almost certain that you will get hit soon after.
Besides his frenzy-like charge attack, he can use an artillery attack, shooting projectiles up in the air, for them to fall on you after a few seconds. This attack is very similar to that of Raisa (in her Satan's Daughter form), but it's way slower than hers. Due to its speed it's almost impossible to get hit by any of those projectiles - try to be mobile and you should be fine.
Every now and then, Abaddon will drive his claws to the ground. After a short while a spike will burst from the ground (in the place you are or were just now), impaling you (if it hits you) and doing some damage. To set yourself free from it, you have to complete a QTE sequence. Fortunately, this attack is more annoying than damaging, so you shouldn't really be worried about it. To avoid it try to be mobile, as always.
 Abaddon's downfall is drawing near...
When his health reaches 1/3 value, there's another berserk charge awaiting you, and when you drop his life near zero, a QTE sequence will be initiated - if you fail it you will be killed and brought back to a checkpoint. After that QTE sequence the fight will end.
 The red arrow shows the location of a Memorial.
After the boss fight, go towards the waypoint, restore the power to open the next door, but don't go through them just yet - instead, go to the end of the room, where you will find a Memorial hidden behind a scaffolding. Collect it and go outside, where an incredibly annoying encounter awaits you - two Riot Mechs. Use one of the relics (Stolas' Clock to slow the enemies down or Ensnared Demon to have an unlimited supply of Magic) to make this fight a lot easier.
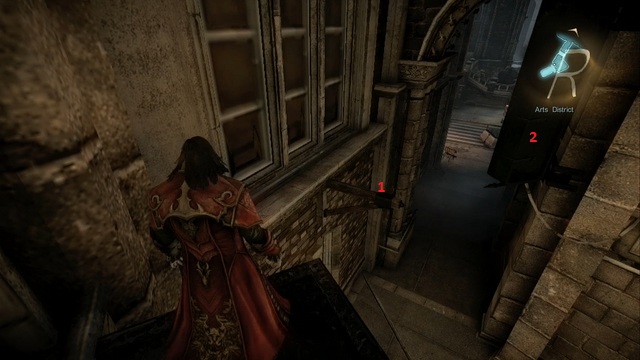 The screen shows the order in which you must jump to reach a Pain Box.
After eliminating both Mechs, run into a small alley (in the opposite direction to the marker on the map - there's a White Wolf Medallion altar nearby) and climb up, to where the wolf awaits you after activating the medallion. Jump on a bar extending from the building, next on a signboard and climb up to reach a Pain Box - there's a Life Gem hidden inside.
 A clock tower holding a Pain Box inside.
Get back to the main street and locate a clock tower - inside it you will find another Pain Box. Get through the wall to arrive at the base of the tower and climb it up. Collect a Chaos Gem from inside and get back on the main street once more.
 A red marker pinpointing the location of another Pain Box.
Locate the proximity mines, which are placed at the base of a white, tall tower - behind the tower, at the end of the street, there's a Pain Box. Get there by passing through the minefield (remember, you can "outsmart" the mines by using a dodge just before the mine activates) and defeat a Riot Mech protecting the collectible. Collect a Void Gem from the box and climb up the white tower you just passed.
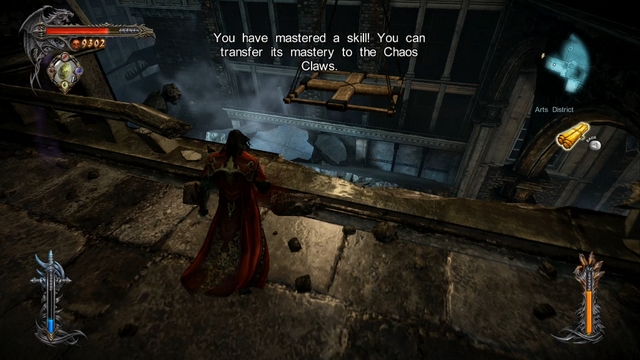 Jump down to land on a ledge with a hidden Memorial on it.
After climbing the tower and standing on a solid ground again, get close to the edge (in such a way that the hanging platform is in front of you) and jump down - you will land on a ledge, where a Memorial is hidden. Grab the treasure and climb up the tower again, jump on the platform, swing it and get inside the building indicated by a purple trail.
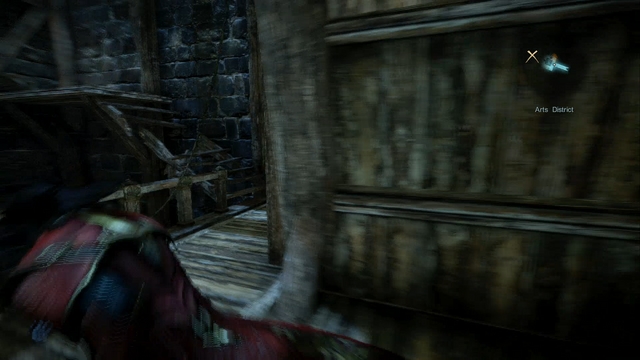 Go upstairs to reach another Pain Box.
You will reach the stairs - directly above you there's a last collectible in the area, a Pain Box (with a Chaos Gem inside). Go upstairs, grab the gem and jump all the way to the bottom of the building. Mist through the bars to enter a boss fight.
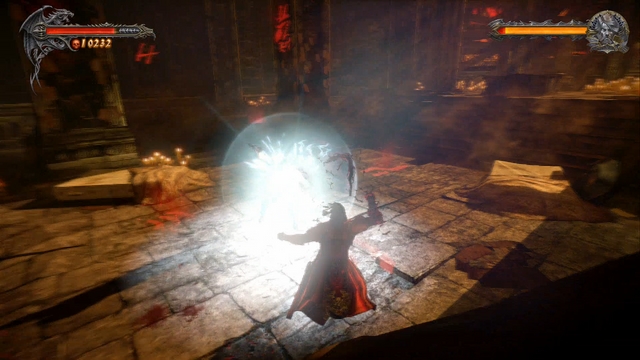 Just as you, the Hooded Man can use synchronized block!
The encounter with the Hooded Man is one of the most unusual in the game, because his fighting style is very similar to yours. He uses a whip-like weapon, can throw daggers (which is an unblockable attack) and can dodge and block attacks (as well as use a synchronized block) in the same manner as you do. It can somehow seem that this fight will be a tough one - nothing could be further from the truth! The encounter is quite easy just because you know how the enemy will fight - there's just only one detail which makes this battle a little harder, which will be explained in a second.
The fight is divided into two stages - in the cathedral-like building in which you start and below it. In the first stage your powers (Void and Chaos Magic and relics) are unavailable to you, which means that your only weapon is the Shadow Whip and that you won't be able to heal yourself in any way - that is precisely why you need to be extra careful during this part and try to dodge attacks instead of blocking them.
When Hooded Man's health drops to 2/3 value, the fight will be moved underground. Here you again use all your powers, meaning that the fight itself is going to be a lot easier now. The enemy can use also use relics (like shield) or special attacks (like shockwave), but they don't affect the course of battle that much. The key rule to all the boss fights still holds true - avoid unblockable attacks and try to block normal ones to expose the enemy to your counterattack. Remember, that the enemy can also use synchronized block to parry your attacks.
 Destroy all the obelisks floating around the battlefield.
When his life reaches zero, he will use a special relic, summoning stone obelisks, which will float around the arena, preventing you from escaping it. The enemy will also be enlarged and you won't be able to harm him with direct attacks - you need to destroy all the obelisks, at the same time avoid the boss' attacks. After destroying all of them, a QTE sequence will be initiated and the boss fight will end.
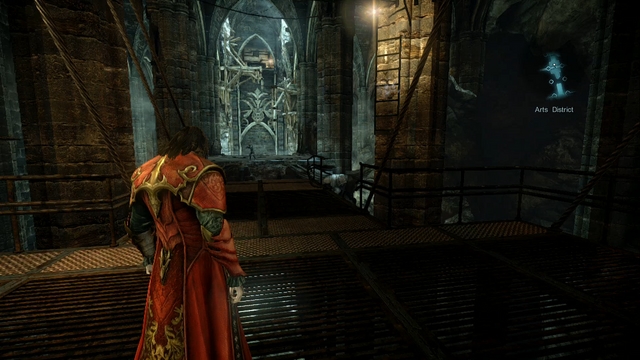 Follow your new ally.
After the fight, your goal is to follow Victor - until the moment you two arrive on the streets, there's nothing to pick up here, so just concentrate on following his trail. Unfortunately, unlike Victor, you can't do a double jump, so your course will be a little different than his - you will climb more.
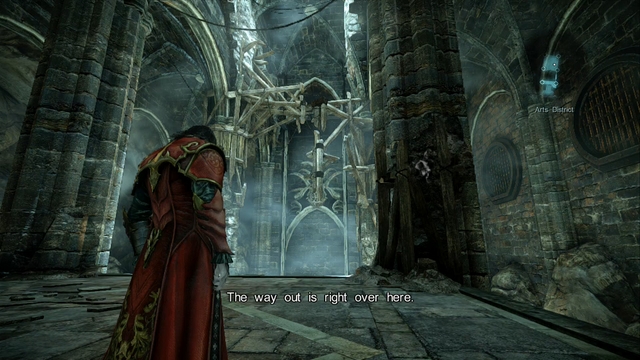 Climb up the pillar to the right.
After turning the power on and entering the next room, jump on a ladder on the right side and climb up. Stand in the airflow and use your Mist power, to get to place where Victor awaits you. Climb up the pillar to the right and get to the other side by jumping through the wooden construction.
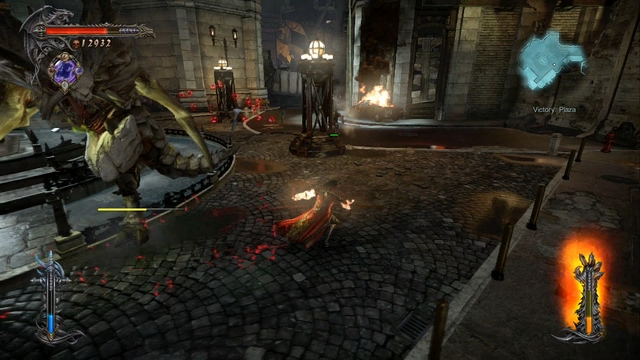 Horned Demon - a new enemy, resembling one of the bosses.
After emerging on the street, a cutscene will initiate and Zobek's Lieutenant will join you again. You will encounter a group of enemies with a new face among them - a Horned Demon. This foe greatly resembles the fight with one of the bosses, the Abaddon - he uses similar attacks, but he's less durable, but more mobile. He explodes upon death, just as Satan's Soldiers do. After the fight a series of cutscenes will initiate and another boss fight awaits you.
 Inner Dracula's Golem form.
Yup, you are going to fight with your inner self. The fight is divided into two stages - against a blood golem and against a blood-vomiting snake-like creature.
Fighting against the golem is moderately difficult - his strikes are powerful, deal large amounts of damage and most of them cannot be blocked, but his movements are extremely slow and easy to predict, which makes them easy to avoid. At the beginning the golem with use melee attacks and a stomp-like attack - he will jump high into the air and crash down, generating a shockwave attack of blood, which you can avoid by jumping above it.
When the golem's life is almost empty, you will receive a prompt to get close to and grab him, initiating a QTE sequence. If you done everything correctly, Dracula will rip a part of golem's body and absorb it, giving you access to one of the most useful skills in the game - double jump (Demonic Wings). They allow you to jump a second time while being in mid-air, which probably isn't the best combat-oriented skill, but it's required to get to most of the hidden treasure in the game.
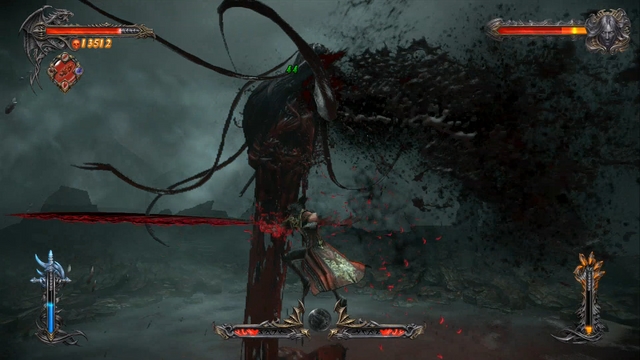 And here's his blood-vomiting snake form...
Back to the fight - every time you bring the golem's life to zero, the Inner Dracula's true form (that of a vomiting snake) will appear. Attacking him in this state is rather difficult, as the only place you can hit him is his head - aerial combat and usage of newly acquired double jump is the only way for you to harm him.
The snake-like creature has 2 attacks :
The enemy is in the snake-like form only for a short time, after which he will resummon the golem. Rinse and repeat until Inner Dracula's health drops to zero, ending the fight. After a series of cutscenes you will be transported to the city.
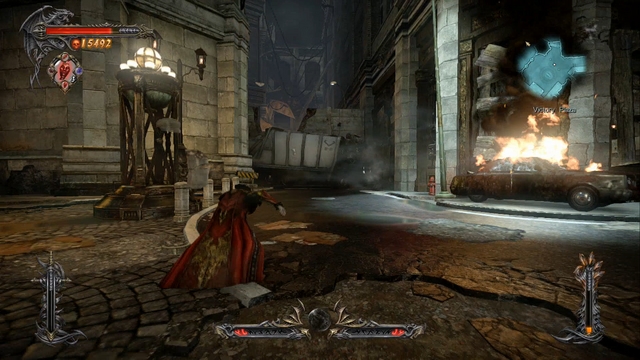 There's a Pain Box hidden behind the truck in the distance.
The mission starts in the place you were just before the fight with Inner Dracula. In front of you there's a building you must go to, but before it you have one other thing to do - turn around to the right and notice a truck blocking the street. You couldn't get there earlier, but now you have your double jump and the situation has changed. Go there, jump over the truck and collect a Void Gem from a Pain Box.
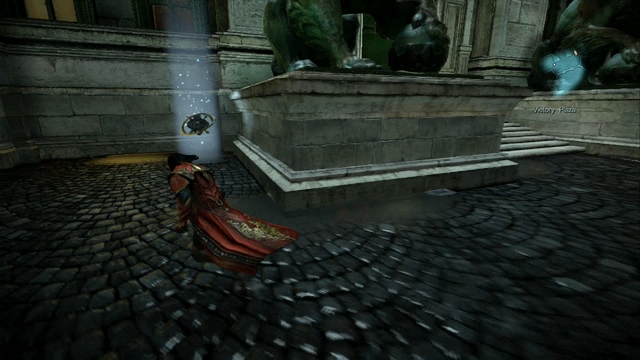 A Pain Box hidden to the left of the sculptures.
After collecting the gem, head towards previously mentioned building and jump over the hole in the wall. There are two sculptures in front of the building - near the right one there's a hatch you need to go through in your quest, and near the left one there's a Pain Box containing a Life Gem. Collect the gem and enter the hatch on the right side.
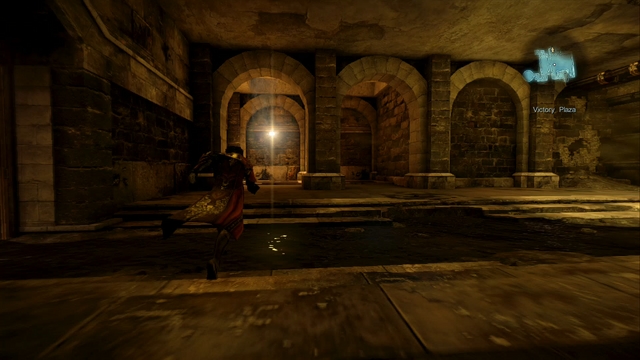 In front of you there's an airflow, which you must use to get to the upper level.
You will land in a sever-like location - go in the only available to you direction until you arrive in a room with a save point. Stand above the airflow on the left side of the room and use your Mist power to get to the upper level, where another stealth section awaits you. In the room there are 3 Golgoth Guards - two are patrolling the room and one is blocking the stairs where you have to go.
 The guard you must use your Bat Swarf is right in the middle of the screenshot.
Use your Bat Swarm on one of the patrolling guards (the one standing further away from you) to distract him and the one that will arrive to help him, allowing you to get past them to the other side of the room - to get there you can possess the other guard or use Mist to slip near them undetected. After reaching the other side, stand above the grid without the airflow (closest to the elevator) and use your Mist power again to get to the lower level.
 A keyhole for a Dungeon Key.
You will get into a room with a Memorial. Collect it and use a nearby Shadow Portal and cross the narrow tunnel below ground to get to another room. After reaching it, use a Shadow Portal to regain your form and activate a nearby keyhold with a Dungeon Key to collect experience points. Afterwards, get back to the room with a Memorial and use the airflow to get back to the room with Golgoth Guards.
Stand behind the pillar, near the grid you used to get to the lower level and throw a Bat Swarm at the guard standing on top of the stairs. You need to choose an ideal moment, in which both of the patrolling guards won't be looking in your direction and rush towards the stairs - slip through him by using your Mist power. After reaching the other side the door will be closed and you will have to face a laser-protected section.
 An airflow can be seen on the screenshot.
In the distance you should be able to see an airflow extracting from the floor - it is where you must go and use your Mist power to get through the ceiling. A few tips to make it more simple:
By trial and error you should soon be able to get to a plate with the airflow - use your Mist power to get to the upper level. After arrival, use nearby Magic Font and statue to replenish your Magic and health and enter the elevator. After arriving at the top, follow Trevor into the corridor on the left side - you can't do much here at the moment, but you will return to this place in a moment. Go back to where you met Trevor and enter the room indicated by the marker on the map, to initiate a cutscene (notice a Pain Box behind Dracula).
After regaining control over your character, you will notice that Dracula is severely weakened and you can't fight. Drag the Acolyte to the arena-like room that you were in previously with Trevor - it will initiate another cutscene and a boss fight will begin.
 Ram-wielding enemy - this is the foe you should be concentrated on.
This fight is rather unusual, as you won't be fighting the boss himself but with a three monsters controlled by him. It means a three versus one fight, but often appearances are deceptive and the battle is a lot easier than you would ever think.
Three Raiders of the Storm are equipped with:
Concentrate on the ram-wielding enemy - his attacks are the slowest and less problematic from the boss' trio. When he prepares an unblockable attack, simply jump over him and when he raises his ram in the air get away from him and jump over the shockwave. While fighting him, you must pay attention to his allies, who will constantly attack you from afar.
When the health of the Acolyte drops to 2/3 value, a cutscene will initiate, during which the sword-wielding enemy will be destroyed - his power will be absorbed by the one wielding a spear, which will enable him to use both wind and electricity in his attacks. After that the second stage of the fight begins, which is identical to the previous - the only difference is that you will have one less enemy to worry about. Bring the Acolyte's health to 1/3 initiates another cutscene, after which you will be one on one versus the ram-wielding monster.
After the death of his comrades, he gets charged with both electricity and wind, which give his abilities a slight boost - most of his attacks are now unblockable. He also acquired two additional attacks: first one, in which he spins around with his ram (you have to jump over this attack to avoid getting hit) and the second one is just an upgraded version of his shockwave attack - the shockwave is now simply bigger and it's harder to jump over it. Keep attacking him to drop his health down and when it goes near zero, he will jump back to the opposite side of the arena and you job will be to get close to him, avoiding his energy attacks. When you finally get close, a QTE sequence will initiate, after which the fight will end.
 To the left there's a Pile of Sacrifice, and to the right there's wooden scaffolding allowing you to climb up.
You will be rewarded with a Dissipated Storm achievement and after another cutscene you will regain control over your character. Ignore the hole behind you and climb up a wooden scaffolding on the right side of the room. From there you can jump on a ledge on the other side of the room, where a Pile of Sacrifice is located. Use your double jump to get there and collect a Kleidos' Nail. Get back on a previous ledge and go to the other room.
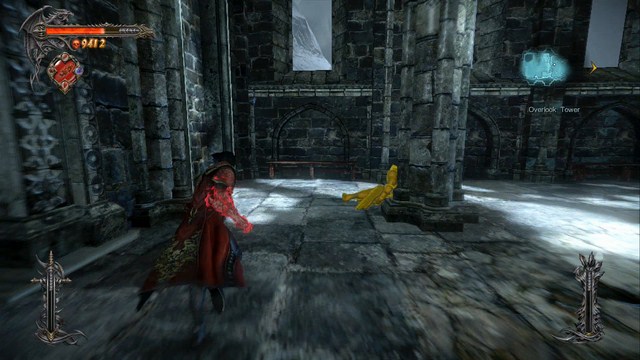 A Soldier Diary lying by the pillar.
Jump down and go to the left of your landing spot - you will find a body containing a Soldier Diary, lying by one of the pillars. Collect it and go towards the marker on the map, to get to Trevor and initiate a series of cutscenes.
 Below is the room you must go into.
After leaving the elevator, to towards the marker on the map - you can't collect anything at the moment, so just focus on this goal. Your task is to get into a room you visited during one of the previous missions but where you couldn't do anything. Go downwards all the time and soon you will arrive in the mentioned room.
 A Castlevania-style puzzle.
Activate the device in the center of the room to use the Mirror of Fate, which became your new and last item in the game, which you will use a few more times. You will have to complete the mirror from the fragments - use the on-screen information to navigate the pieces. To be able to place a fragment on the mirror frame, you need to rotate the piece and place it in a proper place - the piece will automatically be placed on its spot. After completing the mirror, the doors in front of you will be opened. Go through them to the next room.
 Set your camera in a similar fashion - it will help you get past this section.
Another cooperation section between you and your ally. Grab the rope located just before the broken bridge and wait for Zobek's Lieutenant to operate the device. You need to get to the other side, avoid the flames. If this section gives you some problems:
 A puzzle which requires some thinking.
After getting to the other side, a bridge will be raised and your ally will join you. Another puzzle awaits you, but before you enter it, go through a corridor towards the closed door and turn right - behind the bars you will find a keyhole for a Dungeon Key. Collect the reward and go back to the place where your ally awaits you.
This section is harder than the previous one, because you can't lead to a situation in which your ally will get hit by a fireball - you will be dragged back to a save point and will have to start over again. A few tips:
The order, in which you should activate the footbridges and the plates you need to stand on to be able to hit them is as follows:
 Dark Monks are one of the most difficult enemies in the game.
After your ally reaches the other side, the door will open. After getting through them, jump down to initiate a cutscene, after which you will have to face a new enemy - Dark Monk.
Dark Monks are one of the most difficult enemies you will encounter in the game. Most of their attacks are impossible to block, and to make it even worse they are extremely mobile, and they like to attack from afar. Their most dangerous ability, however, is that they can open a portal, through which they can summon reinforcements. There are green orbs levitating above the portal - if there are at least 3 of them and you won't destroy them soon enough, get ready for an arrival of another enemy - Dark Apostle.
Paradoxically, fighting with this enemy is extremely easy - practically the only attack, he will throw at you, as a fire breath. It can easily be avoided (don't try to block it, though), because the enemy needs a long time to prepare it, which gives you plenty of time to get away from him. Close the portal (by destroying the green orbs), deal with the Apostle and kill all Monks, to end the fight. Afterwards, go towards the marker on the map and activate a device (to the right you can find a statue where you can replenish your health) to get to the other side.
After a short cutscene you will be back in the room controlled by the Mirror of Fate. Finish the puzzle again and enter the throne room. This will trigger a lot of cutscenes and you will have to face fragments of battles you encountered earlier. After all this, you will have to face another boss.
 Zobek is a chea... one of the most difficult enemies you will face.
Most of Zobek's attacks are based on his chain-like weapon. Almost all of them, besides one which he hardly even uses, are unblockable and are insanely difficult to dodge - Zobek waves his weapon in all directions like a madman, which means, that if you are close to him when he starts his attack, it's almost certain that you will get hit.
There's one method, to avoid those attacks - you must use hit & run tactics. Get close to him, hit him a few times and immediately jump back - if he starts his unblockable attack, he won't be able to reach you. There's a chance that he won't attack at all and will just close in on you - in this case rinse and repeat the whole process. It's an irritating way of getting through this encounter, because it takes a lot of time to do so, but it will allow you to avoid most of his attacks.
Besides his melee attacks, Zobek uses another one - he summons a beam of energy, which will follow your trail for a few seconds (fortunately, it moves slowly, so you won't have much trouble to outrun it). If it reaches you, a QTE sequence will be initiated - if you hit the button at the right moment, you won't get any damage at all. He generally uses this attack when you are out of his melee attacks' reach.
When his health drops to about 2/3 value, he will leave the arena and an army of living corpses will emerge in his place. Undead aren't really a threat on their own, but you have to be extra careful about their grab. If you notice one of them running at you, you must avoid getting grabbed at all cost - if you fail to do so, you will encounter an extremely irritating QTE sequence and you will lose an enormous amount of health if you won't set yourself free quick enough.
 You must destroy the ghost-like sculptures above the arena to prevent the undead from respawning.
To get rid of them and force Zobek back into the arena, you must destroy the ghost-like sculptures that were summoned by the boss himself - they are above the arena and you can reach them with your Shadow Daggers (you need few of them to destroy one sculpture) or Chaos Bombs (one hit destroys the sculpture). After destroying 4 of those sculptures, the undead will start to fade away and Zobek will return.
There are two things related to the "undead stage" :
After the "undead stage", Zobek returns and the fight looks exactly the same as before. After getting to 1/3 health, Zobek will again leave the battlefield to his corpse army - repeat the process of destroying the sculptures to get rid of them once and for all. After dropping his health near zero, he will revert back to his human form to regenerate himself and his weapon will float around him, protecting him from your reach. Use your Mist power to get through the chain shield, which will initiate a cutscene, ending the fight in the process.
 Memorial, and to the left you can find a Pillar of Sacrifice.
After regaining control over your character, get out of the arena and go to the right - you will find a Memorial and Pile of Sacrifice (increasing amount of Dodo Eggs you can carry to 4) there. On the other side of the same room in which you activated the Pile of Sacrifice, you will find a keyhole for a Dungeon Key.
After collecting all the items, it's time to get back to the room in which you activated the Mirror of Fate - it's located close to a nearby Map Room.
Author's note: backtracking (which is basically going through previously visited areas to collect items you couldn't reach earlier because you lacked a skill) is quite irritating in this game and I assumed that no one would want to go back through all those places each time they have unlocked a new skill. I decided to describe the process of backtracking only when you will unlock access to all the skills and areas available in the game - which happens to be right now, after the Zobek fight. If you are interested in finding all the collectibles hidden in the game, go to a section dedicated to this issue. If you don't care about collectibles and you just want to finish the game, ignore this paragraph.
 Go straight ahead and then turn to the left, to get to Trevor.
By using the Map Room, get to the Arts District, to engage in the last quest in the game. Go towards the place indicated by the marker on the map (it's close to the place you met Victor and Abbadon for the first time).
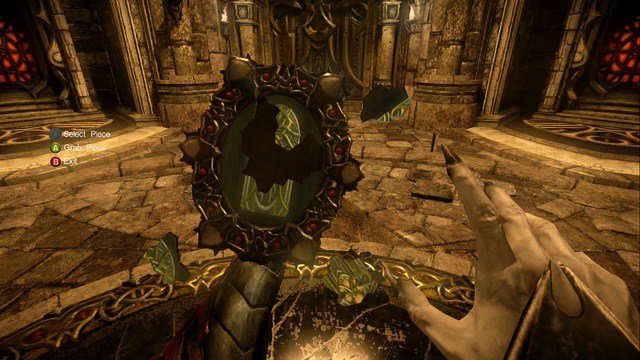 Third, and final, puzzle quest in the game.
Going straight from the street is impossible, that is why you need to use a side alley in which you have found a Memorial (for details head to the description of the 8th mission in this guide). You will encounter Trevor and after a short cutscene you will have to climb up (the route is marked by a purple trail). After arriving at the top the trail will vanish and you will have to jump down and activate the device to operate the Mirror of Fate one last time.
After completing the mirror, go straight ahead to activate a long cutscene. You will be transported on a flying monster's back. At the beginning all you have to do is to climb upwards, avoiding the green explosions. After reaching the top, a short scene will initiate, and after that you will have to avoid the green exploding points again, but this time on foot. Go up (or from your perspective - straight ahead), until you reach giant chains - activate one of them to initiate another cutscene.
 One of the climbing sections before the final boss battle.
After that you will encounter another climbing section - this time you will have to move to the side. The rules are the same - jump in the upper left corner, while avoiding the green explosions, after you reach the back of the monster. You will encounter a group of enemies here, which you can ignore and just go to the right side, to activate another chain an initiate a cutscene leading to a final boss battle.
 Non-climatic, extremely easy to defeat - the last boss of the game, Satan himself.
The final boss of the game is a major disappointment if you were looking for any decent challenge. Most of his attacks are unblockable, but he executes them so slowly (and signals the usage of some of them, giving you even more time to react) that they pose no real threat. After fighting with Zobek, this one will really be a child's play.
Again, the most effective tactic is hit & run - get close to him, smack him a few times and jump back. No point in flooding him with your attacks, as he can (and will) block most of them after getting hit a few times. Sometimes the boss will use "an invisible attack" - a black cloud will appear beside him and he will disappear for a brief moment, to reappear near you and attack. It sounds dangerous, but with a little bit of timing you shouldn't have any problems avoiding this attack.
Despite the fact that Satan's attacks are slow, they deal large amounts of damage, so if you generally have a hard time avoiding or blocking enemies, you should consider preparing yourself for that battle by buying all the relics, which may come in handy.
Each time you drop his health down to a certain amount, a scene will initiate and the boss will attack you with ranged attacks for afar. The system works in a similar manner to that of Paladin's - a symbol will appear under your feet and after a short while the place marked by it will explode. The difference is that Satan's explosions occur much faster and there's a black grease-like substance left on the ground for a few seconds, which will damage you upon contact. Avoid standing in the marked places (try to dodge to the side at the last moment) and after a few shots the boss will reappear and the fight will continue.
Satan will "activate" this power a few more times during the encounter, but dodging them isn't really a big problem. Bring his health down to zero to activate a final scene, which will end the fight and the whole game.
 Paladin - first round.
Basically, just as the rest of the mission, this boss fight is for training purposes - this is further emphasized by the fact that during this fight (and the whole first mission) you will have an constant, unlimited supply of Void and Chaos Magic and access to most of the skills. It will allow you to deal large amount of damage while being able to endlessly heal yourself by using Void Magic.
Attack the boss all the time, while trying to block (using synchronized block, if possible) his normal attacks and dodging his unblockable ones (remember, there will be a red flash before those kind of attacks). When his health drops to about 2/3, the battle will be interrupted by a cutscene.
Final encounter with the Paladin.This encounter is very similar to the first round you fought with the Paladin. The only difference is that, from time to time, the enemy will use one of his ranged attacks:
Again, attack him all the time, avoid getting hit by his ranged attacks, block normal and dodge unblockable attacks and after a short while the fight will end and a long series of cutscenes will begin.
 Stone Golem - first real threat in the game.
This boss fight, especially compared to the one with the Paladin, who you encountered earlier, is more difficult because you won't be having an unlimited supply of Void and Chaos Magic anymore (and you won't have Chaos Magic at all). Because of that, you will deal less damage and you won't be able to heal yourself all the time.
This fight introduces a new mechanism, called Combat Focus. With it, you can regenerate your supply of Void and Chaos Magic - when the focus bar becomes full, your attack will "drop" Blood Orbs from the enemies you strike. This Blood Orbs can be absorbed by you (by pressing a specific button) to replenish either or both of your Magic. The bar is filled by attacking enemies and is emptied whenever you are hit or you use any other skill or weapon than Shadow Whip (you can read more about it in the Tips section of this guide). You must master this mechanism as soon as possible, as being able to use your Void and Chaos Magic is crucial - without them, some foes you encounter in the future will be a pain in the ass to deal with.
The fight itself is divided into two stages - in the first, the boss doesn't have any special attacks or abilities, moves slowly and most of this attacks are very easy to block. When you empty the first bar of his health, you will have to activate a short QTE sequence, after which the fight will go into the second stage.
Here, the Golem gains an access to a considerable arsenal of moves (besides normal, melee attacks), such as:
The most important aspect of the second phase of this battle is the fact, that the boss is almost invincible - you can only attack him in the places marked by blood (mostly abdomen area), which makes aerial combat practically the only way to damage him. Jump into the air, attack a few times and jump back, to avoid getting hit, which will allow you to build your focus bar and replenish your Void Magic. Use Hit & Run tactics throughout the whole second phase, and when his life bar is almost empty, you will have to finish another QTE sequence, after which the fight will end.
 This boss encounter is fairly easy.
At the beginning of the fight, you will have to use Void Projections to slow Raisa down, because she moves way too fast for you to be able to do anything. When she finally stops flying like a mad(wo)man, the encounter will become fairly easy.
Besides standard attacks, which you can easily block, Raisa uses:
Every now and then Raisa will call some backup in the form of foes you recently fought against - it's an ideal moment for you to refill your supply of Void Magic and/or heal yourself, if you are wounded. There's a possibility that Raisa will start doing her charge attack again (the same as she done at the beginning of the encounter) - you have to freeze her again with your Void Projections. After a short while the fight should be over.
 Another easy boss fight - Gorgon.
There are two similarities between this fight and the previous one, with Raisa - it's fairly easy and mobility is your biggest friend. Most of Gorgon's attacks are very easy to dodge, provided that you are always in motion. Possible moves are:
Besides the boss himself, you will have to face tentacles at the back of the arena. They deal almost no damage and the biggest problem is that fighting them can be annoying. The tentacles are there so you can replenish your Magic supply - each one of them drop a few Blood Orbs upon "death", even when you don't have your focus bar filled.
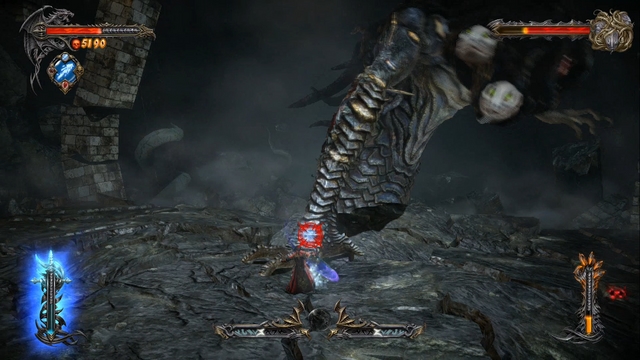 When the boss smashes his hand in the ground, use Void Projections to freeze it and climb it.
At the beginning of the fight, you must destroy a stone wall created by the enemy - use your newly acquired Chaos Claws, which allow you to destroy armored targets. After breaking through the wall, keep on attacking the enemy (unfortunately, you will be forced into aerial combat again) until its health drops to about 2/3 - a QTE sequence will begin after that, during which the Gorgon will smash his hand in the ground and you will have to freeze it by using Void Projections. After that, you need to climb it until you reach one of its heads - here you will encounter another QTE sequence, after which the enemy will fall to the ground and you will have a brief window of time to attack him. Soon, one of its heads should be gone.
At this point you have to repeat the whole process from the beginning - another QTE sequence will be initiated when the boss' health drops to 1/3 value. This time the frozen hand will be protected by a stone armor - destroy it by using Chaos Claws and climb it up again. An unpleasant surprise awaits you - the enemy will hide his head, preventing you from attacking it. Wait for a few seconds for it to emerge again and jump between footholds to avoid the boss' hand. Destroy the exposed head to get into the final part of this battle.
 Use Void Projections when Gorgon prepares his Fire Breath attack.
When the Gorgon is left with only one head, you will have to avoid his attacks until he uses his Fire Breath attack - at this point all you have to do is freeze him with Void Projections to initiate a final QTE sequence, which will end the fight.
 In order to damage Carmilla, you have to destroy her shield bubble.
Carmilla is the toughest foe you have come across (and one of the most difficult battles in the game). There are several reasons to that - your life diminishes permanently each time you are hit and Carmilla is accompanied (almost all the time) by two Vampires. To make matters worse, she surrounded herself with a shield bubble - you can penetrate it only with the Chaos Magic. There's more - you must attack the shield all the time, because it will regenerate if left untouched for a brief moment. And you have to break the shield twice to get to her.
If you finally destroy her annoying bubble, the fight will become a hell lot easier. Carmilla is too fast for you and she will teleport away whenever you will try to close the distance to her - you have to use Void Projections to freeze her, which should allow you to hit her a few times. Rinse and repeat until her health drops to 2/3 - Carmilla will multiply herself, creating 8 identical copies and will surround you with a special, impassable to you, barrier. At this point you have two tasks: avoid her attacks (you have to jump over them) and attack her clones (a few strikes will destroy each one).
 After breaking through her shield bubble, the rest of the fight is a lot easier.
After destroying all her clones, Carmilla will summon a ghost, which will attack you each time you will try to get close to her - to prevent that from happening use Void Projections again to simply freeze her, which will allow you to freely attack her. You will soon discover that you have stolen Carmilla's power - Mist Form - which allows you to turn into mist. It helps a lot during some of the fights (for instance with Carmilla's ghost - if it grabs you, use your Mist power to get away) and is primarily used to pass through certain objects, like metal bars. During this fight, mist for can be used to something else - whenever your health drops below 50%, you will be told to get near Marie (you have to pass through the bars with Mist power) and feed on her, regenerating your health to full. At this point the fight is basically over, as you can do this infinite amount of times - the only limit is a short "cooldown" between feedings.
A few tips which may come in handy during the process of breaking through her shield bubble:
By using the above tips you should soon be able to defeat Carmilla and finish the fight in a brutal style.
After Carmilla's boss fight, this encounter will be a child's play. During the fight, Raisa will use the following attacks:
 Attacks using energy waves are the only ones that you should pay attention to.
By using the above tips you shouldn't have any problems with defeating her - try to stay close to her and avoid her charge and energy attacks and she will pose no threat.
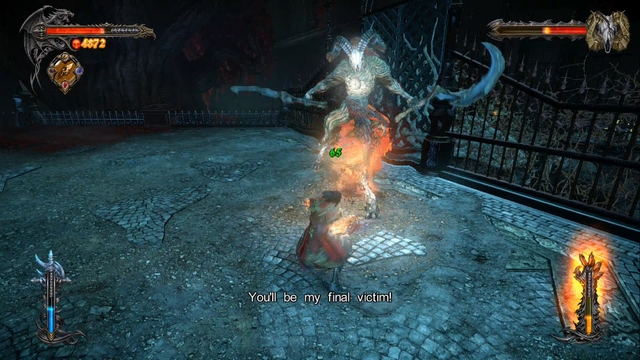 Agreus looks epic, but he is one of the weakest bosses in the game.
Agreus is probably one of the easiest bosses in the game - he doesn't have any special attack (besides one, which is covered below), nor he can fight from afar (besides the one mentioned exception). His arsenal of attacks is limited to melee fight - unfortunately, most of his melee attacks are unblockable (again, look for a red flash just before those kind of attacks), which is why this time you will rely more on dodging than blocking attacks.
Every now and then Agreus will swap his weapon (from a 2-handed to two 1-handed swords), which adds some mobility to his attacks - luckily, it's a dream come true for you, because most of those attacks are blockable or trivial to dodge, in comparison to his normal attacks performed with 2-hander. The one special attack that was mention before is:
Try to "sit on him" as much as you can, trying to avoid getting hit by his unblockable attacks and the fight shouldn't take long. When his health drops to zero, a final QTE sequence will be initiated and after that the fight will be over.
 First of the Toy Maker's summons.
This boss fight is unlike any other, as you will spend more time fighting with Toy Maker's summons than the boss himself. The fight starts with an encounter with a knight wielding a shield (which is purely cosmetic, as he doesn't seem to use it at all) and a long lance. This fight is fairly easy, but most of knight's attacks are impossible to block - you have to either jump sideways or up in the air, depending on the type of his attack. When his health reaches zero, the proper boss will emerge.
Toy Maker is easy to defeat, if you follow a simple scheme - run up to him, hit him a few times (remember that you need to hit him in the head, as other places are invulnerable) and after that jump back. A simple hit & run tactic is necessary for him, as the boss frequently uses a grab attack, which cannot be blocked and which deals a decent amount of damage, before you can free yourself.
Besides the grab, Toy Maker uses both his long arms to attack - those attacks are easy to block, but there is still a risk that instead of simply smacking you with them, he will try his grab attack, which is why you should concentrate on hit & run tactics, instead of going all in. Every now and then the boss will smash the ground with his arms, creating giant shockwaves - you've seen this type of attack before, so you know how to countermeasure it (jump over them).
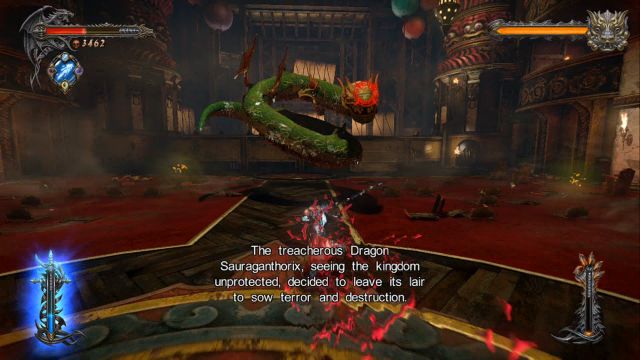 The second and final summon.
When his health reaches 2/3 value, Toy Maker will summon another helper, this time resembling a giant snake-like dragon. Its typical attacks are:
Aside from the above mentioned, the dragon uses "normal" attacks by using its tail, but they are easy to block. When its health drops to zero, you have to finish it with a Chaos Bomb, which should lure out Toy Maker.
 And here's the guest of honor , Toy Maker himself.
Compared to you earlier experience with him, he gained one additional attack. It allows him to ignite a selected fragment of the arena - if you find yourself in the ring of fire, try to carefully jump out of it to avoid taking damage. When his health goes down to 1/2 value (he will lose one whole health bar), he will "transform" - he will now be standing on his arms, as if they were legs.
At this moment, the fight is basically over - all you need to do is to hit him with Void Projections. It will make him go down on the ground, stunning him for a few seconds in the process and allowing you to freely attack him during that time. After he gets up repeat the whole process until the fight ends.
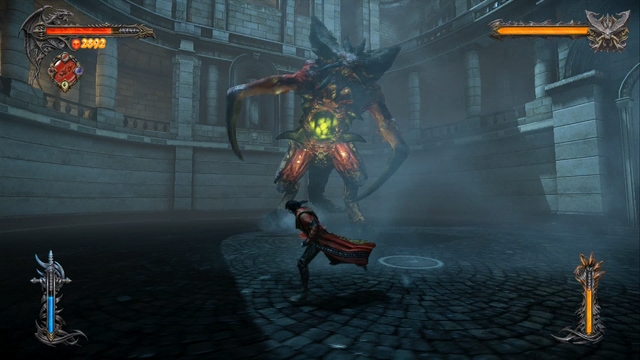 Another epic-looking boss who at the same time is one of the weakest.
Like Agreus, this boss is pretty easy to handle - he doesn't have any hard to avoid attack, his strikes deal moderate damage, and to make matter worse (for him) there are dozens of small monsters next to him, whose only purpose is to be a supply of Magic and healing for you.
Each time his life goes down by 1/3, he enters a berserk-like state - he starts to attack with his claws in a rapid succession, following your trail all the time. To avoid this attack, try to get away from him as soon as his health bar goes down by 1/3 - he needs a few seconds to "charge" his attack and you should use that time to get as far away as possible. This attack is unblockable, so don't even try blocking it - dodging isn't really a good idea either, because even if you avoid getting hit by one of his attacks, he brandishes his claws so rapidly that it's almost certain that you will get hit soon after.
Besides his frenzy-like charge attack, he can use an artillery attack, shooting projectiles up in the air, for them to fall on you after a few seconds. This attack is very similar to that of Raisa (in her Satan's Daughter form), but it's way slower than hers. Due to its speed it's almost impossible to get hit by any of those projectiles - try to be mobile and you should be fine.
Every now and then, Abaddon will drive his claws to the ground. After a short while a spike will burst from the ground (in the place you are or were just now), impaling you (if it hits you) and doing some damage. To set yourself free from it, you have to complete a QTE sequence. Fortunately, this attack is more annoying than damaging, so you shouldn't really be worried about it. To avoid it try to be mobile, as always.
 Abaddon's downfall is close...
When his health reaches 1/3 value, there's another berserk charge awaiting you, and when you drop his life near zero, a QTE sequence will be initiated - if you fail it you will be killed and brought back to a checkpoint. After that QTE sequence the fight will end.
 Just as you, the Hooded Man can use synchronized block!
The encounter with the Hooded Man is one of the most unusual in the game, because his fighting style is very similar to yours. He uses a whip-like weapon, can throw daggers (which is an unblockable attack) and can dodge and block attacks (as well as use a synchronized block) in the same manner as you do. It can somehow seem that this fight will be a tough one - nothing could be farther from the truth! The encounter is quite easy just because you know how the enemy will fight - there's just only one detail which makes this battle a little harder, which will be explained in a second.
The fight is divided into two stages - in the cathedral-like building in which you start and below it. In the first stage your powers (Void and Chaos Magic and relics) are unavailable to you, which means that your only weapon is the Shadow Whip and that you won't be able to heal yourself in any way - that is precisely why you need to be extra careful during this part and try to dodge attacks instead of blocking them.
When Hooded Man's health drops to 2/3 value, the fight will be moved underground. Here you again use all your powers, meaning that the fight itself is going to be a lot easier now. The enemy can use also use relics (like shield) or special attacks (like shockwave), but they don't affect the course of battle that much. The key rule to all the boss fights still holds true - avoid unblockable attacks and try to block normal ones to expose the enemy to your counterattack. Remember, that the enemy can also use synchronized block to parry your attacks.
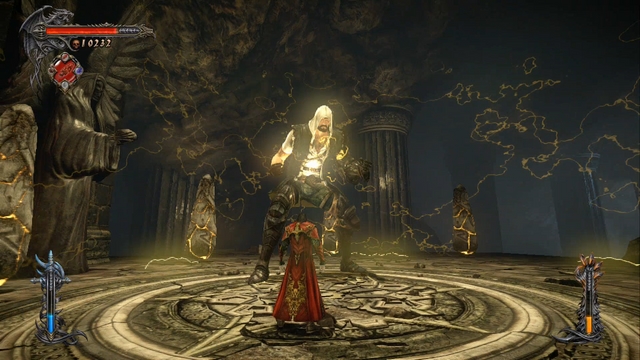 Destroy all the obelisks floating around the battlefield.
When his life reaches zero, he will use a special relic, summoning stone obelisks, which will float around the arena, preventing you from escaping it. The enemy will also be enlarged and you won't be able to harm him with direct attacks - you need to destroy all the obelisks, at the same time avoid the boss' attacks. After destroying all of them, a QTE sequence will be initiated and the boss fight will end.
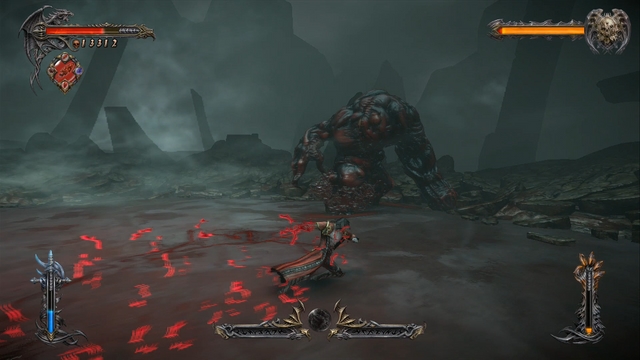 Inner Dracula's Golem form.
Yup, you are going to fight with your inner self. The fight is divided into two stages - against a blood golem and against a blood-vomiting snake-like creature.
Fighting against the golem is moderately difficult - his strikes are powerful, deal large amounts of damage and most of them cannot be blocked, but his movements are extremely slow and easy to predict, which makes them easy to avoid. At the beginning the golem with use melee attacks and a stomp-like attack - he will jump high into the air and crash down, generating a shockwave attack of blood, which you can avoid by jumping above it.
When the golem's life is almost empty, you will receive a prompt to get close to and grab him, initiating a QTE sequence. If you done everything correctly, Dracula will rip a part of golem's body and absorb it, giving you access to one of the most useful skills in the game - double jump (Demonic Wings). They allow you to jump a second time while being in mid-air, which probably isn't the best combat-oriented skill, but it's required to get to most of the hidden treasure in the game.
 And here's his blood-vomiting snake form...
Back to the fight - every time you bring the golem's life to zero, the Inner Dracula's true form (that of a vomiting snake) will appear. Attacking him in this state is rather difficult, as the only place you can hit him is his head - aerial combat and usage of newly acquired double jump is the only way for you to harm him.
The snake-like creature has 2 attacks :
The enemy is in the snake-like form only for a short time, after which he will resummon the golem. Rinse and repeat until Inner Dracula's health drops to zero, ending the fight.
 Ram-wielding enemy - this is the foe you should be concentrated on.
This fight is rather unusual, as you won't be fighting the boss himself but with a three monsters controlled by him. It means a three versus one fight, but often appearances are deceptive and the battle is a lot easier than you would ever think.
Three Raiders of the Storm are equipped with:
Concentrate on the ram-wielding enemy - his attacks are the slowest and less problematic from the boss' trio. When he prepares an unblockable attack, simply jump over him and when he raises his ram in the air get away from him and jump over the shockwave. While fighting him, you must pay attention to his allies, who will constantly attack you from afar.
When the health of the Acolyte drops to 2/3 value, a cutscene will initiate, during which the sword-wielding enemy will be destroyed - his power will be absorbed by the one wielding a spear, which will enable him to use both wind and electricity in his attacks. After that the second stage of the fight begins, which is identical to the previous - the only difference is that you will have one less enemy to worry about. Bring the Acolyte's health to 1/3 initiates another cutscene, after which you will be one on one versus the ram-wielding monster.
After the death of his comrades, he gets charged with both electricity and wind, which give his abilities a slight boost - most of his attacks are now unblockable. He also acquired two additional attacks: first one, in which he spins around with his ram (you have to jump over this attack to avoid getting hit) and the second one is just an upgraded version of his shockwave attack - the shockwave is now simply bigger and it's harder to jump over it. Keep attacking him to drop his health down and when it goes near zero, he will jump back to the opposite side of the arena and you job will be to get close to him, avoiding his energy attacks. When you finally get close, a QTE sequence will initiate, after which the fight will end.
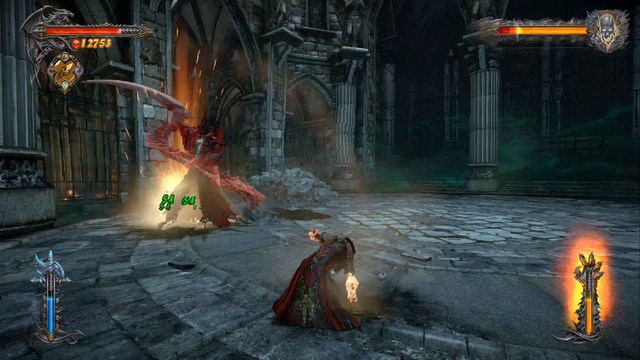 Zobek is a chea... one of the most difficult enemies you will face.
Most of Zobek's attacks are based on his chain-like weapon. Almost all of them, besides one which he hardly even uses, are unblockable and are insanely difficult to dodge - Zobek waves his weapon in all directions like a madman, which means, that if you are close to him when he starts his attack, it's almost certain that you will get hit.
There's one method, to avoid those attacks - you must use hit & run tactics. Get close to him, hit him a few times and immediately jump back - if he starts his unblockable attack, he won't be able to reach you. There's a chance that he won't attack at all and will just close in on you - in this case rinse and repeat the whole process. It's an irritating way of getting through this encounter, because it takes a lot of time to do so, but it will allow you to avoid most of his attacks.
Besides his melee attacks, Zobek uses another one - he summons a beam of energy, which will follow your trail for a few seconds (fortunately, it moves slowly, so you won't have much trouble to outrun it). If it reaches you, a QTE sequence will be initiated - if you hit the button at the right moment, you won't get any damage at all. He generally uses this attack when you are out of his melee attacks' reach.
When his health drops to about 2/3 value, he will leave the arena and an army of living corpses will emerge in his place. Undead aren't really a threat on their own, but you have to be extra careful about their grab. If you notice one of them running at you, you must avoid getting grabbed at all cost - if you fail to do so, you will encounter an extremely irritating QTE sequence and you will lose an enormous amount of health if you won't set yourself free quick enough.
 You must destroy the ghost-like sculptures above the arena to prevent the undead from respawning.
To get rid of them and force Zobek back into the arena, you must destroy the ghost-like sculptures that were summoned by the boss himself - they are above the arena and you can reach them with your Shadow Daggers (you need few of them to destroy one sculpture) or Chaos Bombs (one hit destroys the sculpture). After destroying 4 of those sculptures, the undead will start to fade away and Zobek will return.
There are two things related to the "undead stage" :
After the "undead stage", Zobek returns and the fight looks exactly the same as before. After getting to 1/3 health, Zobek will again leave the battlefield to his corpse army - repeat the process of destroying the sculptures to get rid of them once and for all. After dropping his health near zero, he will revert back to his human form to regenerate himself and his weapon will float around him, protecting him from your reach. Use your Mist power to get through the chain shield, which will initiate a cutscene, ending the fight in the process.
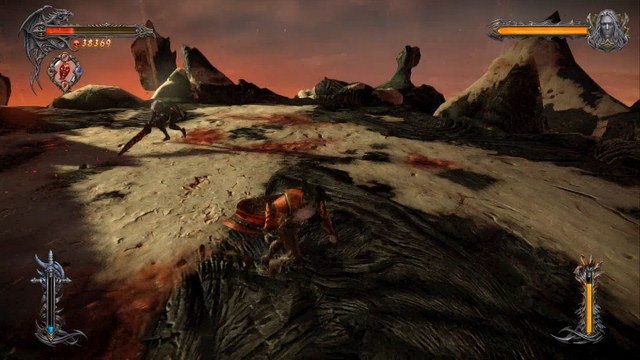 Non-climatic, extremely easy to defeat - the last boss of the game, Satan himself.
The final boss of the game is a major disappointment if you were looking for any decent challenge. Most of his attacks are unblockable, but he executes them so slowly (and signals the usage of some of them, giving you even more time to react) that they pose no real threat. After fighting with Zobek, this one will really be a child's play.
Again, the most effective tactic is hit & run - get close to him, smack him a few times and jump back. No point in flooding him with your attacks, as he can (and will) block most of them after getting hit a few times. Sometimes the boss will use "an invisible attack" - a black cloud will appear beside him and he will disappear for a brief moment, to reappear near you and attack. It sounds dangerous, but with a little bit of timing you shouldn't have any problems avoiding this attack.
Despite the fact that Satan's attacks are slow, they deal large amounts of damage, so if you generally have a hard time avoiding or blocking enemies, you should consider preparing yourself for that battle by buying all the relics, which may come in handy.
Each time you drop his health down to a certain amount, a scene will initiate and the boss will attack you with ranged attacks for afar. The system works in a similar manner to that of Paladin's - a symbol will appear under your feet and after a short while the place marked by it will explode. The difference is that Satan's explosions occur much faster and there's a black grease-like substance left on the ground for a few seconds, which will damage you upon contact. Avoid standing in the marked places (try to dodge to the side at the last moment) and after a few shots the boss will reappear and the fight will continue.
Satan will "activate" this power a few more times during the encounter, but dodging them isn't really a big problem. Bring his health down to zero to activate a final scene, which will end the fight and the whole game.
The process of collecting all the treasures hidden in the game (collectibles) was divided into two parts, called "first pass" and "second pass".
First pass - the collectibles described here are only the ones you can grab while not doing any backtracking, using only those skills you have at your disposal at a given time. The collectibles described in this part are the same ones you can find in the walkthrough section of this guide. The "first pass" section was divided into 3 groups: Gems (Life, Void and Chaos Gems), Memorials and Diaries and Piles of Sacrifice and Dungeon Keys. They are further divided into subsections, depending on the mission they can be found in.
Second pass - basically meaning backtracking. In this section you can find all the locations of all the collectibles available in the game and which you can't pick up on your first try, without visiting some places again. This section assumes that you have all the skills (Void and Chaos Magic, Mist power and double jump) and location unlocked (after the Zobek fight). A lot of location revisiting awaits you here, because there's a possibility that some new place was opened (or appeared). The section called "second pass" was divided to 8 parts, each representing a different district available in the game. It was described in such a way that everyone will be able to find what they need (each chapter assumes that you will begin it in a easily accessible, characteristic place).
Author's note: I assumed that no one would want to go back through all those places each time they have unlocked a new skill. I decided to describe the process of backtracking only when you will unlock access to all the skills and areas available in the game - which happens to be right after the Zobek fight. A few tips before you start the search:
Whenever it is possible, visit Chupacabras' store to restock on relics (especially Dodo Eggs) and Dungeon Keys.
Don't begin backtracking when you haven't unlocked all the skills (the last one being the double jump), because you won't be able to get to large number of them and it will end in a waste of time and unnecessary frustration.
To check your progress of collecting treasures, enter the Travel Book and open up the World map - every district will have a "x/y" number next to it, meaning the number of collectibles found (X) and available to collect (Y).
The first Life Gem is located in the place where you gain access to a Bat Swarm ability. Go down the ladder, possess the patrolling guard and open up the doors near his patrol route to gain access to a Pain Box with a Life Gem inside.
Two Pain Boxes await you in the place where you will find your first statue to feed upon. The first box is in the gap to the right of the statue (Life Gem). Collect it and climb upwards, to get to a ledge where the second box (with another Life Gem) is located.
 Another two Life Gems can be found in the room with chandeliers.
Another two Life Gems can be collected in the room with chandeliers. To get to the first one, use the mentioned chandeliers - jump on the first, swing it and jump on the one in front of you. Next, turn to the right and jump on the third one and on the ledge, where you can pick a Life Gem from a Pain Box. The other Pain Box is below you - jump down and collect a Life Gem from inside.
 A Pain Box visible in the distance.
This Gem awaits you after defeating the boss (Stone Golem) and climbing up the waterfall. Soon after getting to the top, look around and note the large wooden box on your right - destroy it to unlock a hidden passage. Inside you will find your first relic, and if you follow the corridor you will reach a mechanism hidden in the wall. To operate it you will need a Dungeon Key, which you don't have at the moment. Ignore it and go further into the tunnel, until you get to another climbing sequence. Get to the other side of the passage by using numerous footholds and chandeliers until you reach a Pain Box - a Void Gem is hidden inside.
Two Pain Boxes await you in the cave with two waterfalls. To get to the first one, freeze the waterfalls, climb them and enter a small room above the ground. You will find a Life Gem inside. Jump down and climb up a wooden scaffolding. After coming to the top, turn to the left, jump over the gap and travel along the right wall - soon you should get to the second Pain Box with a Void Gem inside.
The last gem available in this mission is in the room where you get your White Wolf Medallion from Trevor. Activate the medallion and climb the pillar to the west of altar. However, don't go forward after the wolf - instead, go to the left, jump over the gap and continue along the wall until you reach another Pain Box with a Void Gem inside.
 The red marker indicates the location of a Pain Box.
You will bump into this gem at the beginning of the mission. Get out of the elevator and head forward, to initiate another cutscene. After that collect the Void Gem from the Pain Box located in front of you - you should be able to see the blue light from the entrance to the elevator.
This Gem awaits you after the part in which you must jump through a number of vents. After landing on the ground there will be a short cutscene. After regaining control, stand on the edge and turn the camera to the left - you will find there a Pain Box with a Life Gem inside.
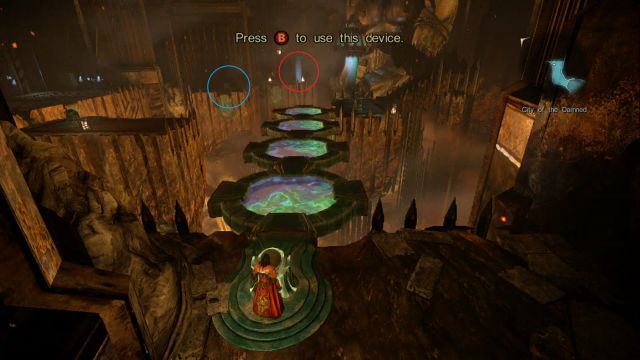 Red marker indicates the Pain Box, blue one the device you need to operate in order to get there.
The third gem in this mission awaits in the Chupacabras' prison room. At the fourth device extend it to the left, rotate your camera to the left as well and extend it to the left two more times (you should "wrap it around yourself" with that combination). Cross the bridge and collect a Void Gem from a Pain Box.
You will find this gem after a fight with two Dungeon Jailers. After the fight, activate the device to open up the gate and climb up the stairs - while halfway, go to the right to collect a Void Gem from a Pain Box.
 The arrow indicates the location of a Pain Box.
The last gem available in this mission awaits for you after the boss battle (Gorgon). Climb up using the "stoned" boss' left hand to get to the upper level. Run through the corridor and a while before getting to the Magic Font turn to the left - at the end of the corridor to the left there's a Pain Box with your first Chaos Gem inside.
After leaving the elevator, go towards the marker on the map until you reach a bridge - ignore the passage to the left and cross it. Get to the end of the alley, climb up (at the right side of the street) and collect a Chaos Gem from a Pain Box.
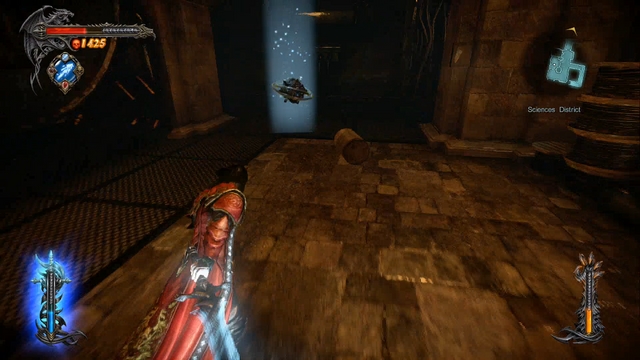 In front you can see a Pain Box - to the left there's the generator you need to turn on.
After you arrive in the room with a lever, ignore it and go to the corridor to the left, until you reach a room with an entrance blocked by flames. Freeze the flames using the Void Projections, get the Void Gem from the Pain Box.
You will find this gem soon after turning the generator on and you will open the door with a lever. Go in the direction of the marker on the map, climb up and turn around- at the end of the corridor you will see a Pain Box with a Chaos Gem inside.
 A rat-view on the Pain Box.
Another and the last gem in this mission can be found in the room you passed earlier as a rat, just before you enter the elevator. Go along the corridor, in the direction of the marker on the map, but before entering the elevator, look to the penultimate room on the right side - you will find a Pain Box in there, the one you missed earlier as a rat, containing a Life Gem.

You were here during the Bioquimek Corporation mission. Go towards the marker on the map, until you reach a door which you must open by switching a lever. After getting through, turn to the left where you will find a Shadow Portal, needed to find a nearby collectible. Leave it at this moment and go to the room in which there were 2 Golgoth Guards (you used Bat Swarm for the first time there). Kill all the enemies you encounter and get back to the portal, to turn yourself into a rat. Go through the ventilation shaft in the room you possessed the guard to gain access to your first Pain Box (the place can be seen on the picture above). Go through the tunnel (go forward on the crossing), until you reach a cable you need to bite through.
After doing that, get back to the crossing and go to the left, which will allow you to get out of the ventilation faster. Now go to the room where there were 2 Golgoth Guards and enter another ventilation shaft (in the close vicinity to the ladder you climbed after using your Bat Swarm for the first time). Go through the tunnel, then under a turned-off fan to get outside on the other side, where you will find a Pain Box with a Life Gem inside. To activate the box you need to active the nearby Shadow Portal to get back to your Dracula form. To get out of that place, you need to get into the rat form again and go through the ventilation all the way back.
The second gem in this mission is behind the frozen door. The ice is blocking the mechanism controlling the door - get rid of it by using Chaos Bombs and open the now unblocked door with a switch on the left side. Afterwards, jump through the gap to get to the other side, and jump down a platform below you, where you can find another Pain Box with a Chaos Gem inside
 Pain Box (with a Dodo bird on top of it) - in the distance there's the tunnel leading to the tower.
A bit further you will encounter another group of gun-wielding enemies. Get rid of them and turn to the tunnel on the left (just before the crossing) - you will come across yet another Pain Box, with a Chaos Gem inside. Collect it and go through the opposite tunnel, until you reach a tower that you will have to climb.
After reaching the top of the tower, stand on the edge and look below - you should be able to see a Pain Box there. Jump down and collect a Chaos Gem from it.
5th gem in this mission can be found soon after you got back on the surface (after climbing the tower and cables). When you reach the top, go towards the marker on the map. Replenish your Magic with the nearby Magic Font and climb up the stairs to get to a Pain Box with a Void Gem hidden inside.
 While going through the footbridge, note the on the right side - at the top of it there's a Pain Box.
You will find the 10th Life Gem in the game after the stealth section with 2 guards - you will run into another, lone guard. Use your Bat Swarm on him and quickly climb up the ladder on the right side. Jump over the fence, landing on another ladder, and move to the right, being above the ground all the time. Soon, to your right, you will notice a ladder - climb it up to collect a Life Gem from the Pain Box inside the small room.
 Another Pain Box can be seen in the distance.
Another gem can be picked up after the train crash. After regaining control over your character, go along the railroad tracks in the direction from which the train came - there's quite a long journey before you, so be patient. You will arrive on a station from where the train left - at the end of the rails you will find a Pain Box with a Life Gem inside.
 Markers showing the location of two Pain Boxes, both containing a Chaos Gem.
Two last gems await you in the room where Zobek's Lieutenant leaves you. After getting to the highest floor, you will be able to see two Pain Boxes (screen above shows their location) - first, collect the one located on your level (highest floor), and then go back for the one situated below you. As you have noticed, both boxes contain a Chaos Gem.
 A hole leading to the Void Gem.
You will find another Void Gem at the beginning of the mission. Use your newly acquired skill to pass through metal bars, and stand above the airflow and use the Mist power again - it will allow you to get to the upper level. Replenish you Magic by the Magic Font, climb up the scaffolding, and then, hanging in the airflow, use Mist yet again, to get to the other side. You will land on a Shadow Portal - use it, to get into your rat form and get inside the nearby grid. Go through the tunnel, until you reach a place where you can jump down through a hole in the ground - the hole will lead you to a roof with a Pain Box containing a Void Gem.
 A collectible you left behind a few missions back - to the right there's a passage leading to it.
Jump down the roof and get all the way back to the room in which you restored power with Zobek's Lieutenant (where you had to tear the cables apart) - to get there, climb up the scaffolding (to the opposite of the place from which you collected a Void Gem a second ago), and in the next room, where you had to climb a lot, jump down and go straight ahead. Pass through the bars by using your Mist power and climb up the ladder (remember about the keyhole for a Dungeon Key, which is located near the ladder), until you reach the room in which you fought Satan's Soldier. Deal with all the enemies chasing you and climb up the scaffolding. Use your Mist power to pass through the bars in front of you, which will allow you to get to a Pain Box with a Life Gem inside.
After the fight with the Riot Police (after they used proximity mines for the first time), head towards the marker on the map and climb up the wall of a building with a Windrunner signboard on it (to the left of your actual position, there's a truck, behind which you will find a Pain Box - you can't reach it just yet) to get to the other side. Jump into the hole on the right side of the street (to the opposite direction to the marker on the map) - you will find a Pain Box (with a Chaos Gem inside) there.
 Notice a Pain Box in the distance.
You will enter a building consisting of several floors. Don't run up the stairs - instead, mist through the bars on your right, where you will find a Pain Box with a Chaos Gem inside. Collect it, go back to the stairs, get rid of the nearby enemies and collect a Void Gem from the mentioned Pain Box.
 A Pain Box located on the right side.
Another gem is located on the top floor of the same building. Leave the elevator and go to the right, but don't go into the corridor marked by the waypoint - instead, go straight ahead. Jump over a series of gaps, to get to a Pain Box with a Life Gem inside.
 One of the two Pain Boxes - the second one is on the other side.
After regaining control, don't go towards the castle (ahead), but turn around and go to the device. Destroy the ice blocking the device with a Chaos Bomb, and then pull the lever. Pass through the bars blocking the way and go through a tunnel on the right side. Stand on the edge and jump all the way down (a group of Harpies will be nearby) and locate the entrance to the tunnel (probably to your left). After entering the tunnel, go to the right, where you will find two Pain Boxes (with a Void and Chaos Gem inside).
This gem is located near the place, where you started after fighting with Raisa. Get outside and move in such a way as to have the mountains on your right side (ignore the castle and the entrance on the left side). Jump down and enter a small room, to find a Pain Box with a Life Gem inside.
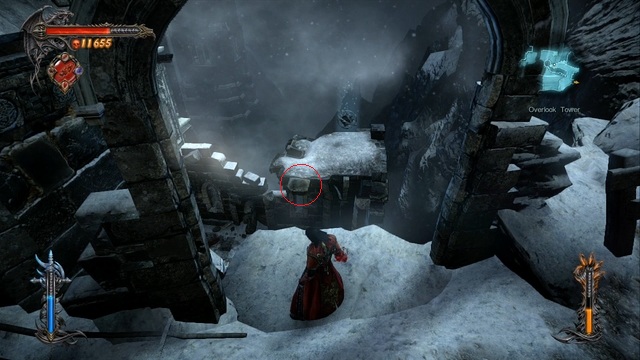 To get to a Pain Box in front of you, you must jump onto a marked ledge.
After the fight with the Brotherhood soldiers ends (and your first encounter with the Cleric), activate the nearby device to collapse the fence above, revealing a handhold. Don't go inside the building in front of you - instead, turn to your left until you reach an edge where you should see a Pain Box, a little below you. Jump onto a marked ledge to get near it and collect a Chaos Gem from inside of it. Jump down and go down the stairs, to bump into another Pain Box - inside you fill find a Void Gem.
 Pillar-like device - to the right you can see a Pain Box.
When you have enough of the dagger-throwing mini-game, get outside through the new passage, where you will encounter a small group of Brotherhood of Light soldiers. After dealing with them, get close to the device (resembling a pillar) and activate it - after a short QTE sequence a new footbridge will extend, allowing you to get to the top. Instead of going towards the waypoint, jump down on the other side - you will find a Pain Box with a Life Gem inside there.
After entering the mouth-like door, turn to the right - on top of the stairs you will find another Pain Box with a Chaos Gem inside.
After collecting the diary, climb up the wall - you have two possible routes here, leading through the middle and left tunnel (you can't access the right one at the moment - there's a Pain Box there). Go into the left tunnel, collect a Void Gem from a Pain Box
After collecting the diary, go deeper into the balcony. Jump down, where you will find a Pain Box (Void Gem inside), and a Shadow Portal.
The first gem in this mission can be found at the very beginning. Mist through the bars located opposite your starting location and turn left from the place with a keyhole. Mist through another bars and go to the end of the street, to collect a Chaos Gem from a Pain Box.
After emerging on the surface, take care of the enemies awaiting you and go forward, until you reach a bridge. From there, turn to the right (there's nothing in front of you and you can't do much by going to the left), go through the bars, and then collect a Void Gem from a Pain Box on the right side.
 Another Pain Box.
Climb up a metal platform and turn to the right - you should be able to see a Pain Box there. Collect a Life Gem from inside it and go in the opposite direction, to the other side of the platform. You can't really miss it as you will be walking by near it.
After the scene with Abaddon and Hooded Man, go straight ahead until you reach the end of the street - there's an entrance there to a collapsed tunnel, where you can find another Chaos Gem.
After going through the hatch, eliminate all the enemies and use a Chaos Bomb on a ladder (to your left, looking from the place you entered the street after emerging from the hatch - there's a purple trail nearby) to pull it down. Climb the ladder, run up the stairs, grab a handhold near the window (above you there's a Pain Box - to get to it you need to jump off from the roof of the building) and continue all the way to the right, until you finally enter the building. Use the platforms to get to the first Pain Box, in which you will find a Life Gem and continue your climbing until you reach the roof.
 A Pain Box visible from the roof of the building.
Enter a small room on the roof of the building, leading to an elevator shaft. Stand on the edge of the shaft, turn your camera to look down, and you should be able to see a Pain Box in a small gap in the wall - jump into the gap and collect a Void Gem from the box. Get back on the roof of the building, stand on the edge and jump down, to get to a Pain Box mentioned earlier. Collect a Chaos Gem from inside of it.
After the boss fight (with Abaddon) you will get back on the street, where you will encounter two Riot Mechs. After eliminating both Mechs, run into a small alley (in the opposite direction to the marker on the map - there's a White Wolf Medallion altar nearby) and climb up, to where the wolf awaits you after activating the medallion. Jump on a bar extending from the building, next on a signboard and climb up to reach a Pain Box - there's a Life Gem hidden inside.
 A clock tower holding a Pain Box inside.
Get back to the main street and locate a clock tower - inside it you will find another Pain Box. Get through the wall to arrive at the base of the tower and climb it up. Collect a Chaos Gem from inside and get back on the main street once more.
 A red marker pinpointing the location of another Pain Box.
Locate the proximity mines, which are placed at the base of a white, tall tower - behind the tower, at the end of the street, there's a Pain Box. Get there by passing through the minefield (remember, you can "outsmart" the mines by using a dodge just before the mine activates) and defeat a Riot Mech protecting the collectible. Collect a Void Gem from the box and climb up the white tower you just passed.
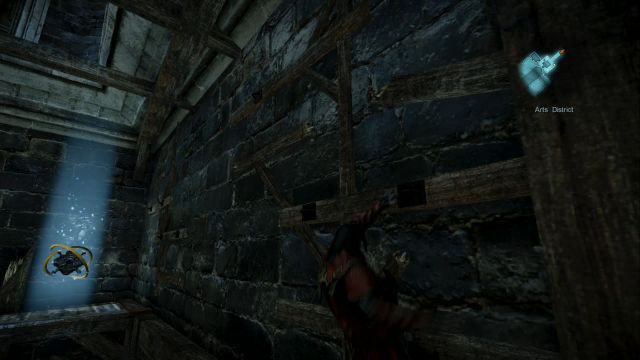 Last Gem available in this mission.
Get to the tower indicated by the purple trail. You will reach the stairs - directly above you there's a last collectible in the area, a Pain Box (with a Chaos Gem inside). Go upstairs and grab the gem.
 There's a Pain Box hidden behind the truck in the distance.
The mission starts in the place you were just before the fight with Inner Dracula. In front of you there's a building you must go to, but before it you have one other thing to do - turn around to the right and notice a truck blocking the street. You couldn't get there earlier, but now you have your double jump and the situation has changed. Go there, jump over the truck and collect a Void Gem from a Pain Box.
After collecting the gem, head towards previously mentioned building and jump over the hole in the wall. There are two sculptures in front of the building - near the right one there's a hatch you need to go through in your quest, and near the left one there's a Pain Box containing a Life Gem. Collect the gem and enter the hatch on the right side.
Not far away from your starting location there is a gate (a marker on the map indicates the place), through which you have to go to continue on with the mission. Don't go there yet - instead, skip it and go up, to the end of the street and turn left. In a small shrine you will find your first collectible - Memorial
After regaining control over your character, collect the Soldier Diary from a fallen soldier on your right.
 Soldier Diary lying at the end of the stairs.
Follow Trevor until you get to another climbing part. Jump to the other side and run down the stairs, where you will find a Soldier Diary.
 Waterfalls leading to a Pain Box - red marker points the location of a Soldier Diary.
Get through a misty corridor to a room with two waterfalls. Get closer to them and collect a Soldier Diary from the corpse lying opposite the waterfalls, hidden behind a pillar.
After regaining control, at the very beginning of the mission, collect the Soldier Diary laying by the left wall.
 Soldier Diary hidden behind the wall.
You can collect it after your first fight with a Dungeon Jailer. Use the key to activate the indicated device and open the gate with it. Don't go through it yet - instead, get close to a locked gate to the left of it and activate the blood mechanism. After a short while the gate will unlock - go through it and turn around to your right side and collect the Soldier Diary you will find there
This Diary awaits you after the part in which you must jump through a number of vents. After landing on the ground there will be a short cutscene. After regaining control, stand on the edge and jump down. After dealing with the threat, climb up the wall on the other side. Pick the Soldier Diary from the corpse.
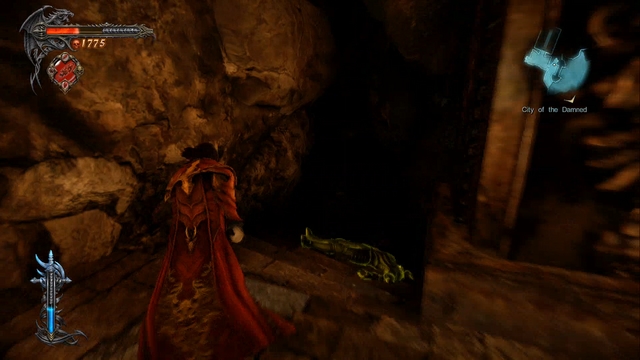 A clever hiding spot for a Soldier Diary.
You can pick it up after your first encounter with the Harpies. Go back to the room that you came from (climb the wall opposite the marker on the map). To the left of the stairs you just climbed, in a small hollow, you will find a corpse with a Soldier Diary.
Get back to the place where you fought the Harpies and climb up the destroyed gate, leading to a bridge - another Soldier Diary awaits you there.
Sixth, and the last Soldier Diary awaits you just before the boss battle (Gorgon). Activate the device in the statue to open a secret passageway leading underground. After running down the stairs, you will find yourself on a crossing - take the Soldier Diary by the corpse.
 Soldier Diary, which you can find to the left of the elevator's entrance - opposite to it you will find a Pile of Sacrifice).
After leaving the elevator look around - to the right of your actual position there's a corpse with a Soldier Diary.
 A Memorial hidden in the corner of the alley.
After the section in which you had to use a Shadow Portal, jump out of the building, landing on the street - turn to your left to pick up a Memorial.
From the place you picked the last Memorial, continue your journey towards the marker on the map, kill the lone enemy you will encounter and jump down (to your right there should be a huge waterfall, hidden behind metal bars). Defeat the enemies awaiting you at the bottom and then turn around to the wall you just jumped from - in the corner, on the left side, there's a Memorial inside a shrine.
 Another Memorial on the ground below you.
Throw a Shadow Dagger at the box on top of the pole to cut off the power, which will allow you to climb up the cables on the wall of the building to the left. Before jumping into the building, look around - below yourself you should be able to see another Memorial - jump down, collect it
 Another Memorial available to collect.
After a shower scene, leave through a newly opened door and go forward - you will encounter a small group of enemies and a Memorial to pick up.
 The red marker shows the location of a Memorial at the top floor.
After the fight, run up the stairs on the highest floor (behind the destroyed stairs) - you will find another Memorial there. Collect it, get down on a lower floor and enter the next, familiar room.
When you're down, go down the street in the opposite direction to the marker on the map - at the end of it you will find a Memorial. Collect it and go towards the marker on the map to get to a familiar place.
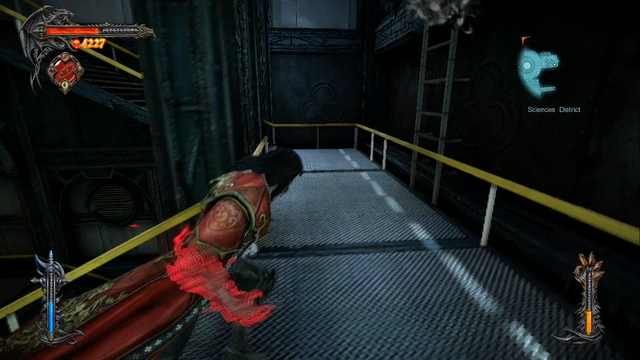 Stairs leading up to the marker - on the right side there's a ladder leading to a Memorial.
After the fight, get to the arena where you fought Raisa, where's yet another group of annoying enemies. After dealing with the last group, go through the stairs leading towards the marker on the map. On the mezzanine (halfway through the floor) before the highest floor there's a ladder to the right - climb it up, go through the tunnel and jump down to encounter a small group of Riot Police. After dealing with them, collect the nearby Memorial.
Go to the right of where you found the gem and jump down over the railing. Collect the Memorial and unlock the doors by using Chaos Bombs in the indicated places. Afterwards, get inside and activate the elevator.
The third Memorial in this mission can be collected in the place where you will land after jumping off the container - it will be directly in front of you.
 Red marker shows the location of Memorial, and the blue one of an inaccessible Pain Box.
Another gem can be picked up after the train crash. After regaining control over your character, go along the railroad tracks in the direction from which the train came - there's quite a long journey before you, so be patient. You will arrive on a station from where the train left. Get rid of a group of vampires awaiting your arrival, then go to the other side of the rails, to collect a Memorial
 Another Soldier Diary lying by the corpse.
After the stealth section with Carmilla (and just before the boss fight with her), after going outside, turn the camera to the side - to the left of the passage you just went through, there's a Soldier Diary lying by the corpse.
You will get to this Memorial while leaving one of the buildings - a Riot Police will use a proximity mine for the first time near the location of the collectible.
Two additional Memorials can be found in the multi-story building, in which you will have to turn on the elevators. One is on the ground floor, and the other one is on the first floor - you can't really miss them as you will be walking by just a few meters away from them.
 Soldier Diary hidden in the room where Trevor is.
After the scene with Trevor (during which he asks you to collect pieces of Mirror of Fate) is over, and you have the marker on the right side of the map, turn around and go forward - in a small gap in the wall there will be a Soldier Diary to pick up.
You will run into it before entering the bridge where you will fight Brotherhood of Light.
After the fight with Agreus, head towards the marker on the map, but before going up to the top, turn to the left side and enter a small lake - you will find a Soldier Diary there.
After going through a mouth-like entrance to the theatre, jump down, deal with the enemies and turn around in the direction you just came from - near the wall on the right side there's a Soldier Diary to pick up.
 Soldier Diary which can be found on the balcony near the stage.
Next Soldier Diary can be found on a balcony near the stage - you can't really miss it, as you will be walking near the corpse.
 Red marker shows the location of a hidden Memorial.
After dealing with Satan's Soldiers, head towards the waypoint. Before you go through the hole in the wall, go to the end of the street - behind the bars, hidden by a car, you will find a Memorial. Collect it and go inside an elevator.
 Turn into the tunnel on the left after going down the ladder - you should see this.
After climbing down the ladder and entering the streets, enter to the tunnel on your left side - you will find a Memorial there. Get back to the ladder - on your right side (looking in such a way that the ladder you just climbed down is behind your back) you should be able to see another Memorial.
After the scene with Abaddon and Hooded Man, go straight ahead until you reach the end of the street - there's an entrance there to a collapsed tunnel and to the right off there you will find a 3rd Memorial in the area.
 A Memorial in the building with platforms hanging from the ceiling.
After going through the hatch, eliminate all the enemies and use a Chaos Bomb on a ladder (to your left, looking from the place you entered the street after emerging from the hatch - there's a purple trail nearby) to pull it down. Climb the ladder, run up the stairs, grab a handhold near the window (above you there's a Pain Box - to get to it you need to jump off from the roof of the building) and continue all the way to the right, until you finally enter the building. Afterwards, jump down, get rid of all the enemies and pick up a Memorial.
 The red arrow shows the location of a Memorial.
After the boss fight, go towards the waypoint, restore the power to open the next door, but don't go through them just yet - instead, go to the end of the room, where you will find a Memorial hidden behind a scaffolding
After climbing the tall, white tower and standing on a solid ground again, get close to the edge (in such a way that the hanging platform is in front of you) and jump down - you will land on a ledge, where a Memorial is hidden.
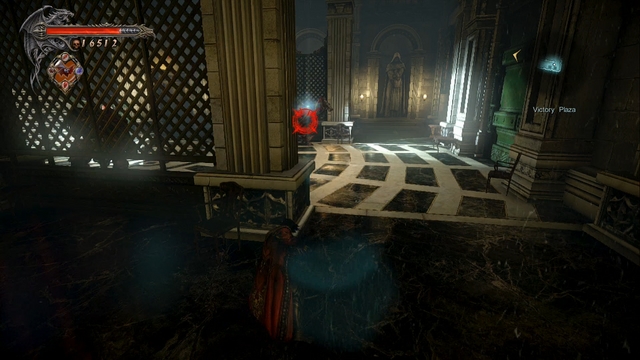 The guard you must use your Bat Swarf is right in the middle of the screenshot.
Use your Bat Swarm on one of the patrolling guards (the one standing further away from you) to distract him and the one that will arrive to help him, allowing you to get past them to the other side of the room - to get there you can possess the other guard or use Mist to slip near them undetected. After reaching the other side, stand above the grid without the airflow (closest to the elevator) and use your Mist power again to get to the lower level. You will get into a room with a Memorial

At the beginning of the mission, ignore the hole behind you and climb up a wooden scaffolding on the right side of the room and enter the next room. Jump down and go to the left of your landing spot - you will find a body containing a Soldier Diary, lying by one of the pillars. Collect it and go towards the marker on the map, to get to Trevor and initiate a series of cutscenes.

After defeating Zobek, get out of the arena and go to the right side of the room - near the wall you will find a shrine with a Memorial (and a Pile of Sacrifice nearby).
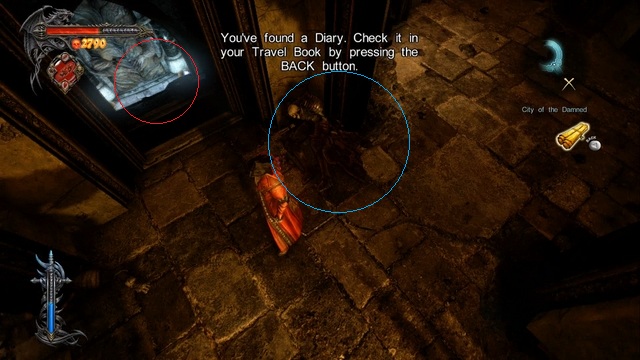 Red mark indicates the place with a keyhole for a Dungeon Key
The only place you will be able to use Dungeon Key in this mission is just before the boss battle (Gorgon). The entrance is on the crossing where you will find a Soldier Diary - go through the hole in the wall to get into a room where you will find a keyhole.
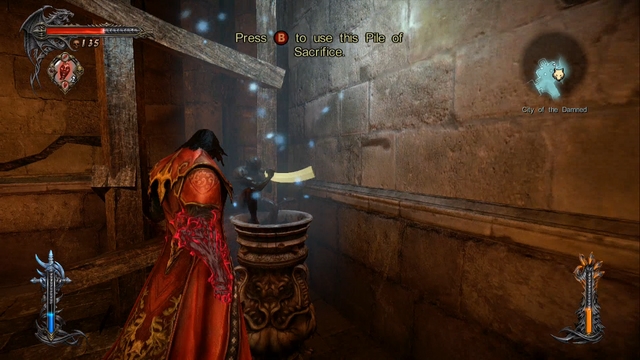 First Pile of Sacrifice in the game is located at the entrance to the elevator leading to the Chupacabras' store.
After leaving the elevator look around - to the right of your actual position there's a corpse with Soldier Diary, and to the left you will find a Pile of Sacrifice.
 Red marker indicates the ladder leading to a Pile of Sacrifice.
Second Pile of Sacrifice is located in the place when you will encounter Riot Police for the first time. After the fight, go through a hole in the fence, but don't go into the building in the front - instead, turn to the right, climb up the ladder and collect a Kleidos Nail from a Pile of Sacrifice
 Keyhole located in the station from where the train left.
Another keyhole for a Dungeon Key can be found after the train crash. After regaining control over your character, go along the railroad tracks in the direction from which the train came - there's quite a long journey before you, so be patient. You will arrive on a station from where the train left. Go along the left wall and soon you should reach the keyhole (a Memorial is nearby).
Another keyhole is located near the place that you had to tear the cables apart (Zobek's Lieutenant was accompanying you). Standing in the way, that the cables you just destroyed are to your right, go straight ahead, turn right, jump down, and then get to a small hole in the wall, where you will find a keyhole for a Dungeon Key.
 Pile of Sacrifice, below your climbing route.
You will arrive at a collapsed building - there's plenty of climbing and jumping here. Climb up a pillar situated at the center of the room and your ally will leave you. Continue your journey (remember that you can highlight your course by pressing the block button) until you reach something that previously was a second floor - there you will find a Pile of Sacrifice. Jump down, collect the Kleidos' Nail from it, and then get back on the ceiling.
 A Pile of Sacrifice visible on the upper level.
This Pile of Sacrifice is located just outside the room that you encountered Carmilla (in her stealth level). After opening the next door, go through them, collect the heart from the statue (which probably won't heal you much), and then turn to the left (from the statue) - climb up, where a Pile of Sacrifice, with a Kleidos' Nail, awaits.
 After arriving near a hole leading below, turn to the right.
Use your freshly acquired ability, to get through the bars, and then stand above the airflow and use the Mist power again - it will allow you to get to the upper level. Replenish you Magic by the Magic Font, climb up the scaffolding, and then, hanging in the airflow, use Mist yet again, to get to the other side.
You will land on a Shadow Portal - use it, to get into your rat form and get inside the nearby grid. Go through the tunnel, until you reach a place where you can jump down through a hole in the ground - turn to the right, ignoring the hole, to reach a room with a Pile of Sacrifice (containing a Kleidos' Nail).
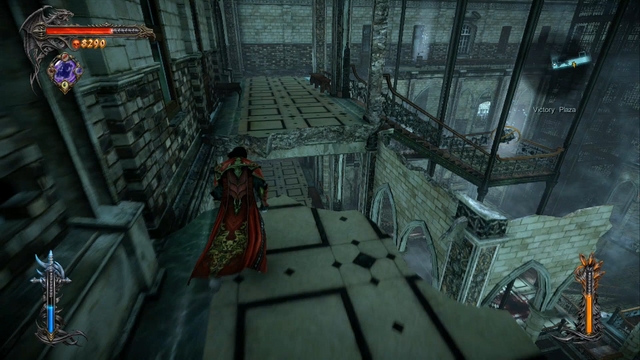 A Pile of Sacrifice can be seen in the distance.
Another Pile of Sacrifice is located on the top floor of the multi-story building. Leave the elevator and go to the right, but don't go into the corridor marked by the waypoint - instead, go straight ahead. Jump over a series of gaps, to get to a Pain Box with a Life Gem inside and jump on a thick wall (located to the left from the Pain Box you just collected) to get to a place where a Pile of Sacrifice is located. You won't get a Kleidos' Nail - this time you will be awarded with an upgrade to your Ensnared Demon relic, increasing the amount you can carry at a time (from 3 to 4).
 Ledge leading to a Pile of Sacrifice.
After regaining control, don't go towards the castle (ahead), but turn around and go to the device. Destroy the ice blocking the device with a Chaos Bomb, and then pull the lever. Pass through the bars blocking the way and go through a tunnel on the right side.
Stand on the edge and jump on a small stone ledge - behind the bars you will find a Pile of Sacrifice, which will award you with another Kleidos' Nail. Ignore the further part of the tunnel (as you lack a skill necessary to get there), jump down from the ledge, and then get inside the tunnel on your right side.
 A tunnel leading to a keyhole for a Dungeon Key.
After entering the tunnel, go to the right, where you will find two Pain Boxes (with a Void and Chaos Gem inside). After collecting both gems, go to the right part of the tunnel, where you will find a keyhole for a Dungeon Key (you were here during the Buiquimek Corporation mission, but you didn't have any keys on you at that moment.
 The upper climbing route leads to a keyhole for a Dungeon Key.
Get outside and hop on a wooden bar to start climbing - after getting to the crossing, move all the way up to reach a place with a keyhole for a Dungeon Key (again, you will receive 2,000 points of experience for unlocking it).
 A keyhole in front of you.
The first keyhole can be found right at the beginning of the mission. After dealing with the enemies, mist through the bars located opposite your starting location - in front of you, at the end of the room, you will find a keyhole for a Dungeon Key.
 A scaffolding leading to a Pile of Sacrifice.
This Pile of Sacrifice is located near the building you fell off when a footbridge was destroyed. Eliminate the enemies and climb up the scaffolding opposite the building you just fell of - at the top you will find a Pile of Sacrifice, which will increase the amount of Stolas' Clock relics you can carry (from 3 to 4).
 The guard you must use your Bat Swarf is right in the middle of the screenshot.
Use your Bat Swarm on one of the patrolling guards (the one standing further away from you) to distract him and the one that will arrive to help him, allowing you to get past them to the other side of the room - to get there you can possess the other guard or use Mist to slip near them undetected. After reaching the other side, stand above the grid without the airflow (closest to the elevator) and use your Mist power again to get to the lower level. You will get into a room with a Memorial.
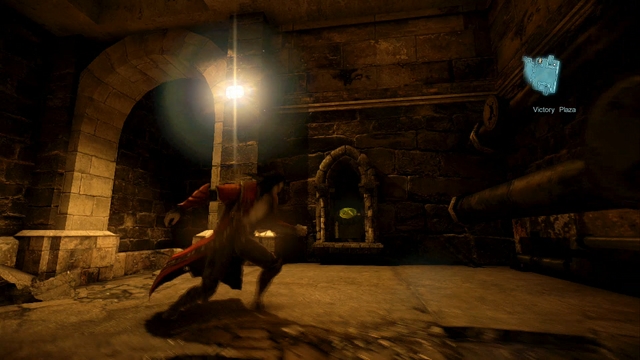 A keyhole for a Dungeon Key.
Collect it and use a nearby Shadow Portal and cross the narrow tunnel below ground to get to another room. After reaching it, use a Shadow Portal to regain your form and activate a nearby keyhold with a Dungeon Key to collect experience points.
 To the left there's a Pile of Sacrifice, and to the right there's wooden scaffolding allowing you to climb up.
Ignore the hole behind you and climb up a wooden scaffolding on the right side of the room. From there you can jump on a ledge on the other side of the room, where a Pile of Sacrifice is located. Use your double jump to get there and collect a Kleidos' Nail.
 Behind this gate, there's a keyhole for a Dungeon Key.
After getting to the other side through the first cooperative puzzle, a bridge will be raised and your ally will join you. Another puzzle awaits you, but before you enter it, go through a corridor towards the closed door and turn right - behind the bars you will find a keyhole for a Dungeon Key.
 Memorial, and to the left you can find a Pillar of Sacrifice.
After regaining control over your character, get out of the arena and go to the right - you will find a Memorial and Pile of Sacrifice (increasing amount of Dodo Eggs you can carry to 4) there.
On the other side of the same room in which you activated the Pile of Sacrifice, you will find a keyhole for a Dungeon Key.
Begin your journey in the place where you activated the Mirror of Fate (Downtown district, near the Map Room)
 Pain Box on a stone slope.
Climb up the wooden scaffolding to arrive on the street (you should be close to a bridge where you encountered Riot Police a lot in the past). From the bridge go to the right, climb down and then up (near a red pipe). Go to the neighboring building through the catwalk and climb it up by using your Mist power and nearby ladders, until you reach the roof (where you fought 2 Riot Police in the past). Get on the metal ledge extending from the building - from there, in the distance, on a stone slope, you should be able to see a Pain Box. Use your double jump to get there and collect a Void Gem.
Go back to the roof from where you jumped on the slope and enter the cracked pipe. Use your Mist power to go up, open up the hatch and climb up the ladder in front of you to get to the surface. Turn left and halfway through the stairs climb up the wall. Go straight ahead and jump on a stone plate. Turn slightly to the right and jump on yet another stone plate. Stand near the edge on the right side and jump on the last stone plate (to the left of a stone sculpture) and from there jump down, to collect a Memorial. Now go all the way back to the place you've collected a Void Gem from.
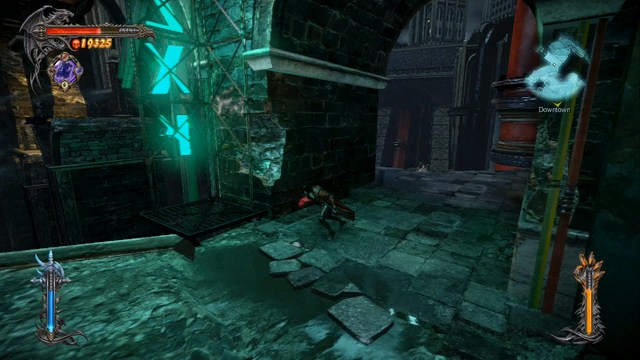 Climb up near the green signboard.
Jump down from there and climb up, towards the bridge. When you're at top, go under an overpass and climb up the wall, near a green signboard. Afterwards, stand on the edge and look ahead - in the distance you should be able to see a Memorial (you were here a few missions back, too). Get to it by using your double jump.
After collecting the Memorial, climb up and continue along the steel scaffolding, until you reach the neighboring building. There's a Pain Box with a Void Gem awaiting for you on a lower level.
 Red marker shows the building which you must climb in order to get to Victory Plaza.
You should have all the items from Downtown collected by now. Climb up from the place you've collected the last gem, stand on the edge and jump on a building to the left (under the damaged HOTEL sign). Climb it up and enter the elevator to go to the next district - Victory Plaza.
 Sewers below the stealth section with 3 Guards have a new corridor unlocked.
After leaving the elevator, jump down, get rid of enemies and go to the building on the left side (with 2 lion sculptures in front of it) and enter the canal to the right. After landing at the bottom, notice that a new passage has been opened (right in front of you - previously you could only go to the right). Go there, use your Mist power to get up and collect a Kleidos' Nail from a Pile of Sacrifice.
 Pain Box hidden in the office of the Second Acolyte.
Use your Mist power again, to get out of the place with a Pile of Sacrifice and jump down, back to the canal. Get to the room where there were 3 Golgoth Guards in the past (if you don't remember how, look up the 9th Mission in the walkthrough section of this guide). Go into the room where there were laser sensors and go up the stream of air (just as when you were going to meet with the boss). Ride the elevator and enter the room where you've met the Second Acolyte. In his office, opposite the desk he was at when you arrived there, you can find a Pain Box hidden in a small hole - go there and collect a Chaos Gem.
 Elevator shaft on the 2nd floor - you must climb it with the help of your double jump.
After collecting the last gem, go back on the street (where you've emerged from the elevator). After leaving the canal, go through a broken wall on the left side (North-West - neighboring building has a Windrunner signboard on it) and go back to the multi-story building (if you don't remember, look up the 6th mission in the walkthrough section of this guide). Mist through the grid, turn the power on and enter the building via an elevator.
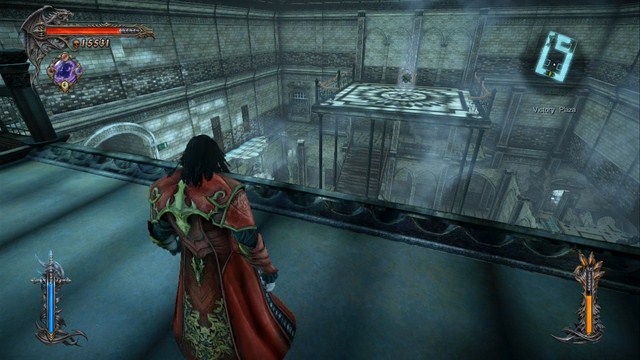 And here's the view (while standing on top of elevator shaft) on a Pain Box in the distance
After entering the building, get to the second floor. Near the place where you've collected a Pile of Sacrifice (during 6th mission), you will find an elevator shaft. Stand in the place where there should be an entrance to the elevator and look up - you should be able to see a swarm of bats (inside the shaft) indicating a handhold. Climb it up (using your double jump to reach it) and turn around to the right - there should be a Pain Box in the distance. Get to it by using your double jump again and collect a Void Gem from inside of it.
You've collected all the treasures in the Victory Plaza - leave the multi-story building, enter the Map Room (near the exit from the building) and go to the Arts District.
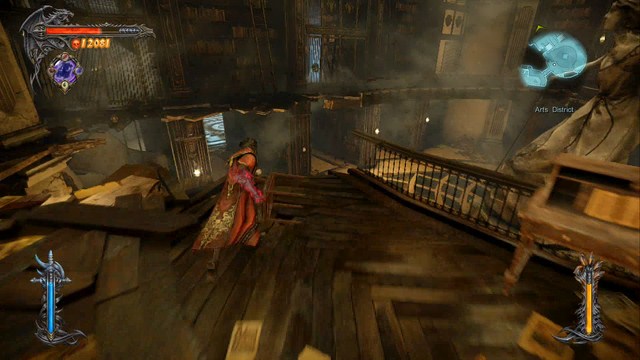 Pain Box visible in the distance (in the library before the Abaddon boss fight).
After leaving the Map Room, you will land in a place where you've fought Abaddon. Go to the left, to a small rectangular room and use your Mist power to land in a familiar library. Go straight ahead and climb up the stairs to reach the 2nd floor. Stand near a gap in the floor and you should be able to see a Pain Box in the distance. Jump to the other side, go around the bookshelves and collect a Life Gem.
Next, turn around - there's a Memorial on a neighboring "balcony". Jump to the other side and collect the treasure.
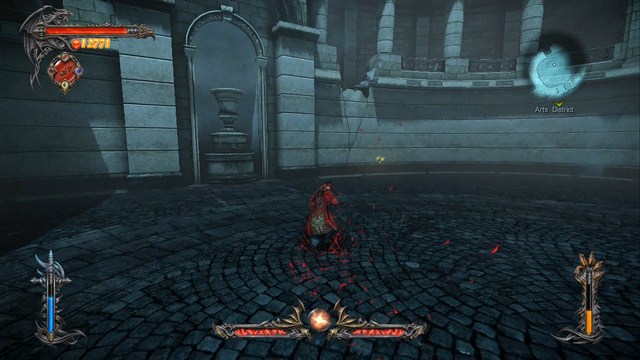 A crack in the stone balustrade - climb up there to reach a Pile of Sacrifice.
Go back to the arena where you've fought Abaddon. Look around carefully and find a crack in the stone balustrade above - climb it up and collect an upgrade to a Seal of Alastor relic (you can carry 4 instead of 3 now) from a Pile of Sacrifice.
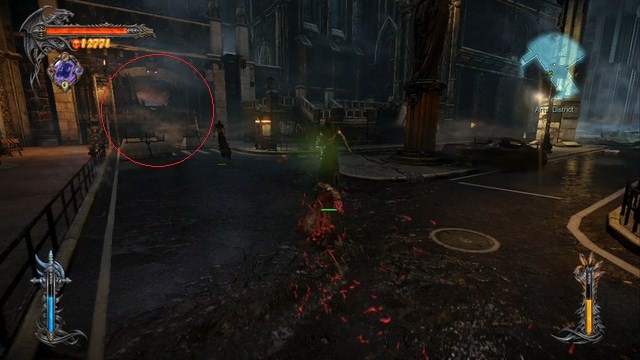 Red mark indicates the place you must go to now.
Jump down and, from the arena, enter a small room, where you must restore the power. After landing on the street again (you've fought two Riot Mechs here in the past), turn to the left and jump over a barricade (to the left there's an altar to active the White Wolf Medallion). Continue your journey, until you reach a room where you've followed Victor - you will now have to go through the same course, but in the opposite direction.
Jump down, restore the power to open the door and enter the next chamber. Locate a pillar with a ladder on the right side and climb it up. Go through the catwalk to the left side, until you reach a second pillar and look ahead - you should be able to see a small ledge in the distance. Get there by using your double jump and activate a nearby keyhole by using your Dungeon Key.
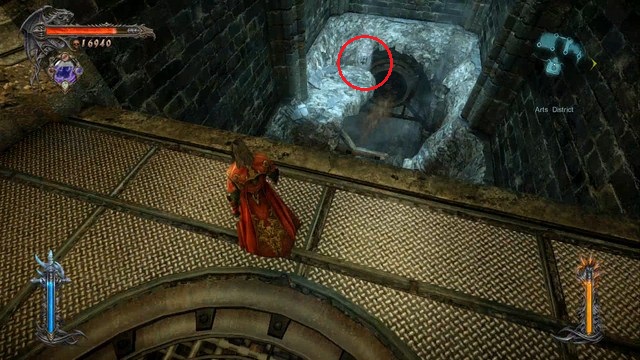 Chaos Gem located right below your position.
After collecting the experience, go upwards by using the airflow. Stand near the edge - below you there's a Pain Box. Use your double jump to reach it - inside, you will find a Chaos Gem. After collecting it, go back all the way back to the street.
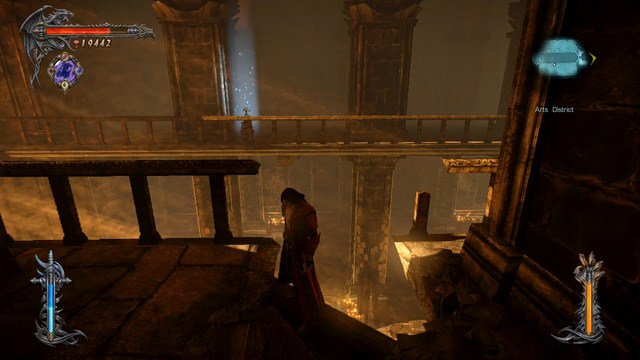 A "double" Pile of Sacrifice in the room where you've fought Victor.
After getting back on the street, go to the chapel-like building where you've fought Victor (Hooded Man - if you don't remember, look up the 8th mission in the walkthrough section of this guide). Inside, locate a pillar that you can climb (right in the middle of the room) and get to the second floor. After reaching it, jump to the other side, where you will find a Pile of Sacrifice. It differs from the other piles you've found in the past - you can activate it two times. Collect a Kleidos' Nail and an increase to Tears of a Saint relic from it. Afterwards, get back on the street.
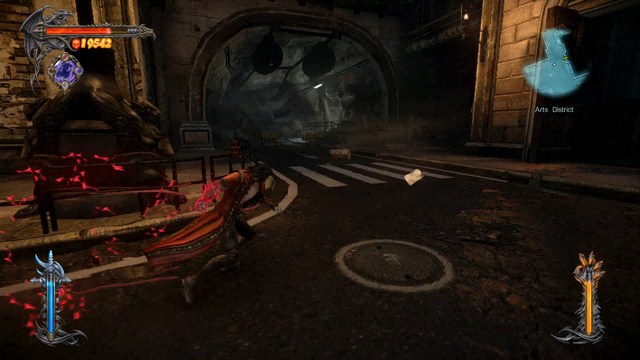 Go through the tunnel on the left to get to another collectible.
After jumping from the tower, go straight ahead and turn to the tunnel on your left side. Switch the lever in the next room and get to the other side of this district. Again, go straight ahead, skip the ladder (there will be a White Wolf Medallion altar to your right), turn to the left (there was a Memorial here) and mist through the bars. Above you, slightly to the right, there will be another Pile of Sacrifice, with an upgrade to a Tears of a Saint relic (you can now carry 5 at a time).
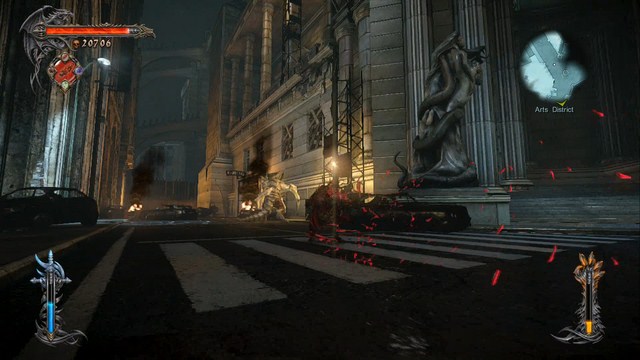 Climb up the scaffolding to reach the last collectible in this district.
Get back on the street and stand in such a way that you will have the White Wolf Medallion altar to your left. Afterwards, go to the other side of the street, skip the collapsed tunnel and enter the hatch to get to the other side of the district. Climb up the scaffolding (near the waterfall) and enter the building through the rubble.
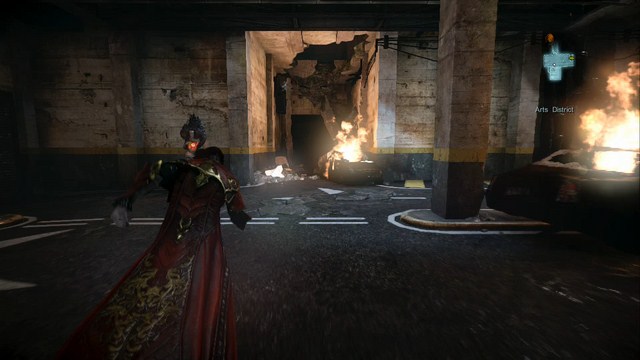 There's a wall you must climb near a car wreck in front of you.
Jump down into the room with a power switch - ignore it and jump down again. Flip the switch and enter the parking lot. Go straight ahead, skipping the statue with a heart, and, behind a car wreck, climb up the wall and jump to other hole. There you will find a keyhole for a Dungeon Key.
Go back to the car wreck you've just passed and turn to the left and mist through the bars. At the right end of the street, behind a burning car, you will find another Memorial. Now you've collected all the treasures in this district. Go to the Map Room and transfer to the Sciences District.
A place where you will find the most collectibles so far. The best way is to get back all the way to the beginning of this location, where you've encountered your first Golgoth Guard (1st mission). After leaving the Map Room, go through the metal catwalk towards a pillar, jump to the right and climb up the broken ladder, until you reach the top of the tower you've climbed few times in the past.
Jump all the way down to the bottom of the tower and go through the tunnels - turn into "the second left" (skip the first turn to the left), then turn right, left and again to the right. Soon you should land on the arena you've fought Raisa on - head towards a square room, get into the corridor and flip the switch.
Go straight ahead (you can't really get lost, as there's only one way), climb up the pipes on the left side (in the room with an airflow coming from a vent). You will soon enter the room where there were two Golgoth Guards in the past (you acquired your Bat Swarm ability here) - go further back, until you reach a room where you've encountered a lone guard (and used a Shadow Portal for the first time).
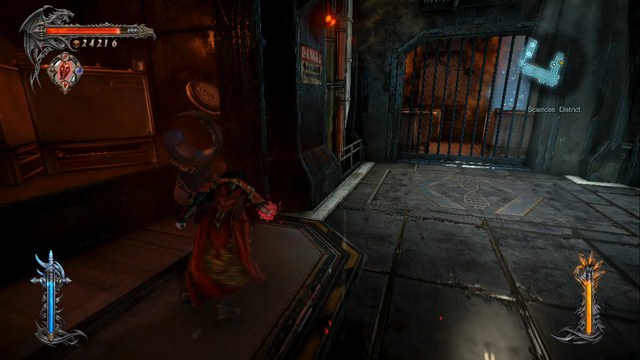 The first Pain Box you've found in the game.
In the place where you've used the Shadow Portal for a first time, behind the bars, there's a Pain Box - mist through them and collect a Life Gem.
 In front of you there's a room with a Pain Box - on the right, slightly above you, another one.
Go into the room where there were two Golgoth Guards and climb up the ladder. Get off the ladder, turn to the right and mist through the bars to get to a Pain Box with a Void Gem.
Go back to the ladder and look to the left - behind a pillar (the ladder is attached to it) there's a catwalk with a Pain Box on it. Get to it by using your double jump and collect a Chaos Gem.
 Tanks in front of you, which you must climb.
Get back on a metal catwalk and go along it, until you reach white tanks hanging from the ceiling. Jump on the middle one and, avoid the steam blowing in some places, jump along the other handhold (first to the left, then down and after that to the right). You should reach platform with a Pile of Sacrifice. Collect a Kleidos' Nail from it.
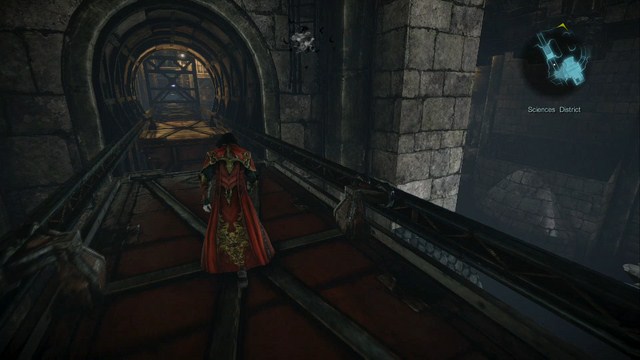 Jump into the airflow and use Mist power.
After collecting all those items, get to the room in which there's an airflow going from the ventilation. Jump into it (the airflow) and use your Mist power to get upwards. From there, use your Mist power again, to get to the upper level. There, a Pile of Sacrifice awaits you, with an upgrade to the Seal of Alastor relic (you can now hold 5 of the at a time).
Afterwards, use your Mist power again, to get to a lower level. You will land in a close vicinity of a keyhole - use a Dungeon Key to get a 2,000 experience boost.
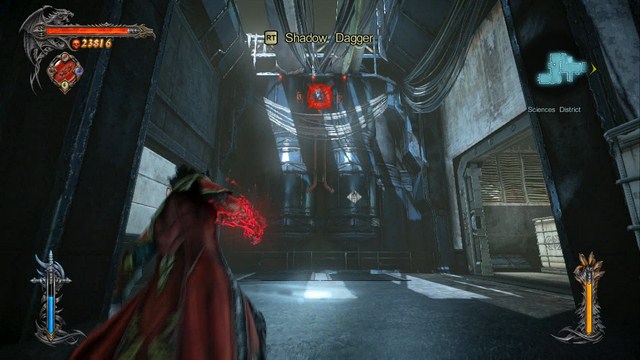 You need to throw a Shadow Dagger at those tanks.
After collecting the experience, jump down - you will be in a room with the airflow again. Go into the next room, in which you possessed the first technician in the game (1st mission). Locate giant tanks hanging from the ceiling and throw a Shadow Dagger at them (use the above screenshot if you can't find them) - it will open up a passageway, through which you will go in a few moments.
Find a Shadow Portal, turn yourself into a rat and enter the grid (to the right of the Shadow Portal). Run down the tunnel, and turn left on a crossing. You will soon get to a fork - go through the left tunnel and avoid the piston moving up and down. Reach the end of the tunnel, snap off the cable to turn the power down and get back to the fork. Now, go into the right tunnel, until you reach the surface. Turn yourself back into your Dracula form at the Shadow Portal, collect a Life Gem from a Pain Box. Afterwards, turn yourself back into the rat form and get back to the place you threw daggers at tanks.
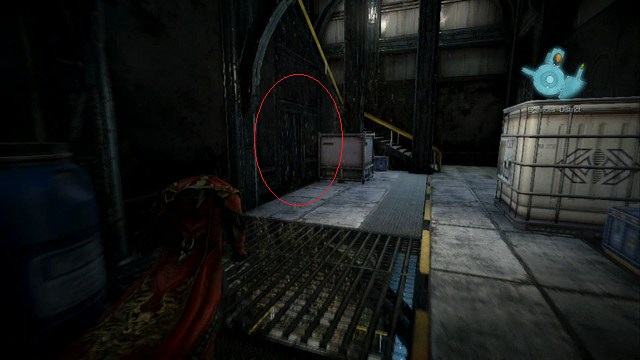 Entrance to a small room with a Pile of Sacrifice.
Continue your journey until you reach the arena that you fought Raisa on. Run into the room with stairs leading up and mist through the bars at the base of the stairs. Use a Shadow Portal and jump through the hole in the ground. Get back into Dracula form and activate a Pile of Sacrifice, collecting a Kleidos' Nail. After that, use airfow to get back.
Run up the stairs so that you are standing above the arena. In the middle, below you, there's a tank which you must jump onto. Run around it to find a handhold and jump on him, to reach (by going to the left) to a Pain Box with a Void Gem inside.
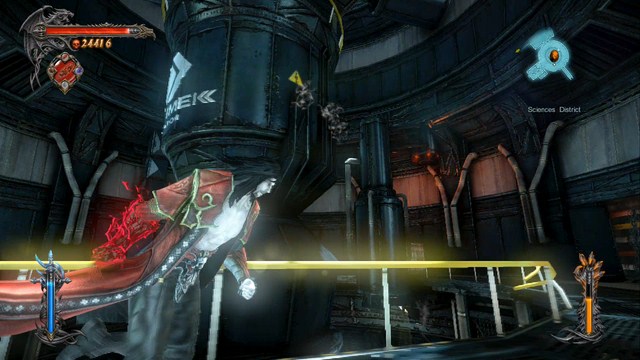 One of the tanks that you must climb in order to get the goods.
Go back above the arena and find another tank, this time above you. Again, run around it and find a handhold, jump on it and climb all the way up to reach a Pile of Sacrifice. You will get an upgrade to Dodo Egg relic (you can carry 5 of them now).
After collecting all those items, you must now reach the location in which you climbed a moving container - if you can't recall the route, look up the 4th mission in the walkthrough section of this guide, because the it's the same.
A handhold on the right side of the tunnel.After reaching the place, to the left of the entrance there's a handhold - grab it, climb it up and jump on a nearby moving container. After another one will be under you, jump down on it. After going through the tunnel, turn around - on the right side there's a ladder leading up, where you will find a Memorial.
Afterwards, jump down from the container, to land near the place where you've found a Memorial in the past (near the entrance to the station) - between the Memorial's shrine and entry to the station there's a ladder leading upwards. Climb it up and jump on a moving container on the right. Hang on one of its walls, so that you won't be electrocuted, and after that get on top of it and jump to the right side, where you will find a keyhole for a Dungeon Key.
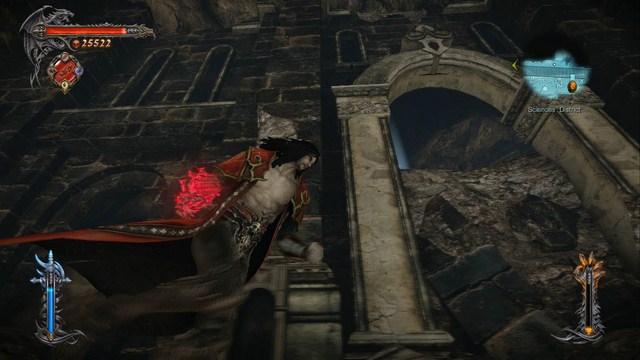 A Pain Box behind a Memorial that you've picked up in the past - behind it there's an airflow.
Afterwards, jump down and get to the metro station (in case of some problems, look up the 4th mission in the walkthrough section of this guide again). After reaching it, go straight ahead, until you reach the wall - turn to the right and go along the wall. Above the shrine that held a Memorial (you've picked it up during 5th mission) there's a Pain Box, hidden in a small cavity. Get there with your double jump, collect a Void Gem and go further into it, until you reach an airflow - stand on it, use your Mist power and fly to the other side of the station. You will find a Pile of Sacrifice with a Kleidos' Nail inside.
After collecting the items, go back to the arena where you fought Raisa on. After reaching it, climb up the stairs and jump on a ladder on the right side, on the mezzanine just before the last floor (look up the 4th mission in the walkthrough section of this guide if you can't find it). Jump down and climb the opposite ladder, to get back on the surface.
Now go to the left, through a hole in the fence and climb up the ladder on the left side. Continue your journey until you reach a room with a power switch. Flip it and go through the newly opened passage. After going outside, turn to the left, climb up the ladder (there was a Pile of Sacrifice there a few missions back) and jump through the hole in the fence. Enter the elevator and ride down.
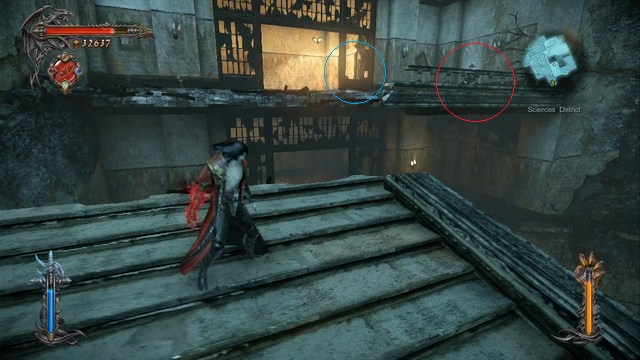 Red marker indicates the location of a Pain Box, the blue one of a keyhole.
After leaving the elevator go straight ahead and at the end of the corridor (before the room with showers) turn to the right. Using your double jump get on the highest floor (through broken stairs), where you will find a Pain Box with a Void Gem inside. Go into a nearby room with a damaged floor - there's a hole in one of the walls, where you will find a keyhole for a Dungeon Key.
 Behind the fence you will find the last collectible in the "modern times".
Go into the room with showers, close the door and leave it with the other door. Jump down and get through the fence to stand in front of a fountain (you threw Shadow Daggers at an electricity pole a few missions back). Right in front of you there's a small, fenced off alley - mist through the gate to get to the last collectible in the "modern times". Collect a Life Gem from this Pain Box and get to the closest altar to activate the White Wolf Medallion, to transfer yourself into the Dracula's Castle (if you can't find the altar, enter your Travel Book and set the altar as a waypoint, which should mark it on your map now).
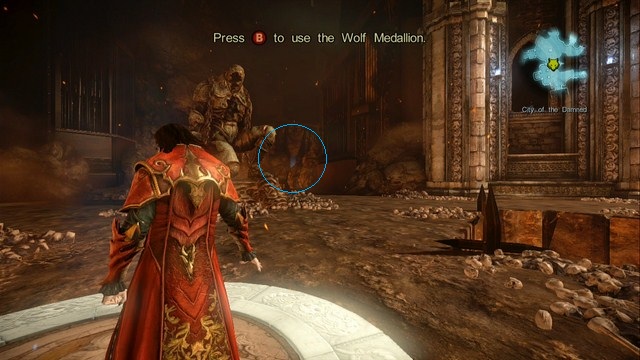 Blue marker shows the location of a Soldier Diary and Pain Box.
Stand on the altar to activate the White Wolf Medallion in such a way, so that there will be a statue in front of you and the Chupacabras' store to your left. In the distance you should be able to see a dim blue light. Go there and using the double jump get to a platform where you will find a Pain Box (Chaos Gem) and a corpse with a Soldier Diary.
After collecting them, go to the elevator located to the right of the Chupacabras' store building. Activate the device and wait for the doors to open.
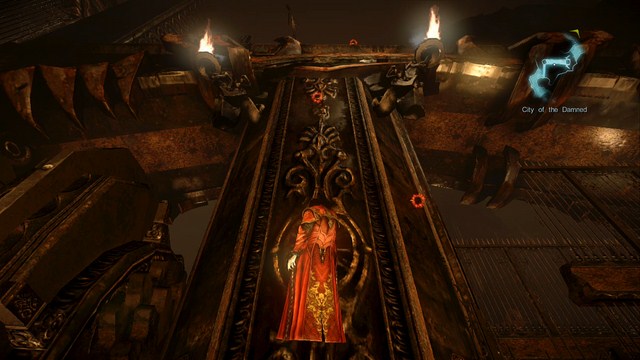 The route to right leads to a Pile of Sacrifice, the one going up to a Pain Box.
After you leave the elevator, come close to the edge (stand on a small ledge) and jump onto the wall in front of you. Climb up and get to the other column by moving to the left. Watch out for blades and flowing lava - if you get hit, there's still a chance to save yourself from going back to the save point by using your second jump. After reaching the second column, go up a little (instead of continuing to the left). Notice the hole in the fence to your right - you can jump there to get to a Pile of Sacrifice, from which you will collect an upgrade to the Stolas' Clock relic.
Get back on the column and climb all the way up, to stand on top of the wall. From there, move to the left, stand on the edge and look ahead - you will see a narrow ledge there. Jump onto it, move to the other side and collect a Chaos Gem from a Pain Box.
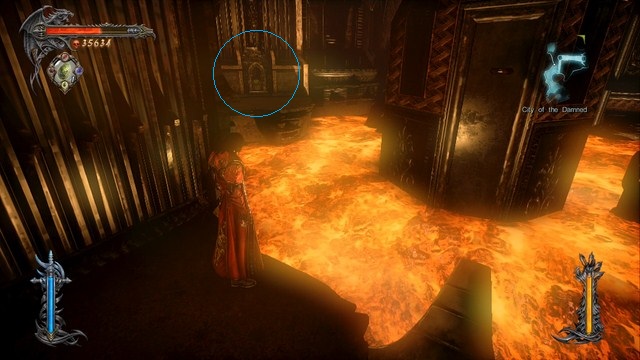 Blue marker indicates the location of a keyhole.
Jump down and move close to the wall again (standing on the ledge) - turn your camera to the left, where you should see a keyhole. Use your double jump to get there, activate the mechanism with a Dungeon Key and collect 2,000 points of experience.
After collecting all the items near the wall, go into a room with devices activated by Dracula's blood. To get there, stand on the ledge in front of the wall (the keyhole you just activated should be to your left) - the mentioned room is right behind you, you just need to use a Chaos Bomb to bring the platform down.
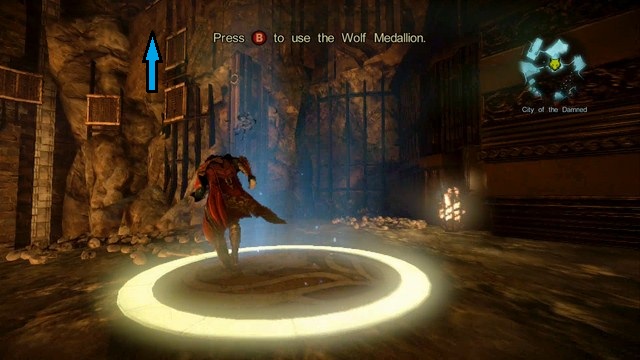 The arrow points the route to the keyhole.
When you enter the room, active the device to your left (ignore the one in front of you, leading to a narrow passage). Leave the room through the passage you just opened and you should see an altar to active the White Wolf Medallion. Go there, but don't activate it - instead, climb the wall all the way up to reach a keyhole for a Dungeon Key.
Collect the experience boost and get back to the altar and stand on the edge in the opposite direction to the place where you've just activated a keyhole (behind you will be the altar and to your right the lava-spitting vents). Jump over the lava to the other side, get into the hole and climb up on the other side. Soon, you will be in the chamber where you had to free the Chupacabras.
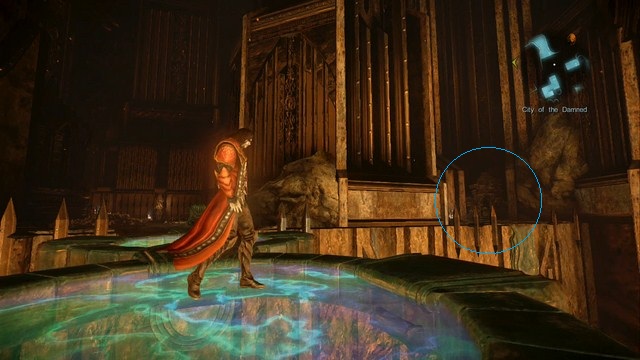 The last collectible in this district.
Activate the first device and extend the bridge all the way to the front. Afterwards, stand on the middle of the bridge, turn around and you should be able to see a keyhole for a Dungeon Key in the distance, slightly to the right. You access it by extending the bridges or simply by using your double jump - jump near the mechanism in front of you and then jump again to reach the keyhole. Collect it, find a Map Room (near Chupacabras' store) and transfer to Overlook Tower.
 Red marker shows the location of a Soldier Diary located on a lone tower.
After leaving the Map Room, turn to the left, climb up the wooden boards and continue moving upwards through the collapsed stairs. Stand near the edge in such a way, so that a tall tower you climbed in the past (you will do that again in a moment) will be on your left - this way you should be able to see a lone tower in the distance. Get there, by using your double jump, and collect a Soldier Diary.
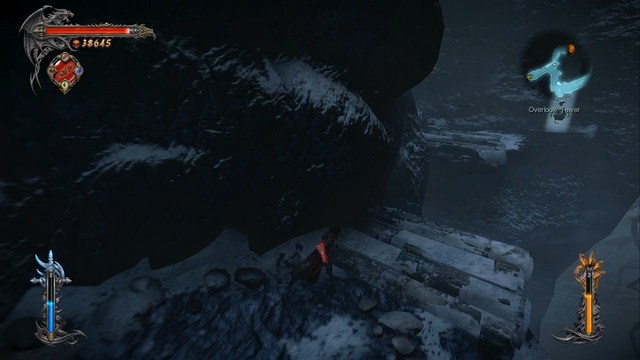 Chaos Gem in a Pain Box which can be seen in the distance.
Get back to the mentioned tower and climb it up and at the end of the route jump down. Climb up the wooden bars and head inside the building resembling a castle. Active the device to get to another room (you were there a few times in the past to give Trevor pieces of the Mirror of Fate). After entering the next room, turn into the corridor on the left side to emerge outside. Go straight ahead (ignore the route to the right) and you should soon be able to see a Pain Box. Use your double jump and collect a Chaos Gem from inside and head through the bridge.
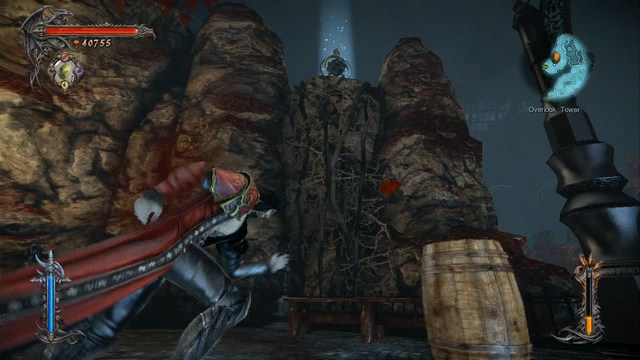 After entering the Agreus' gardens, turn your camera up - you should see this.
Get into the next room and activate the device. You will be back in the Agreus' gardens. While standing near the entrance, tilt your camera up - you should see a Pain Box. To get there, you must jump to it from the route to your right. Do it and collect a Life Gem from inside the box.
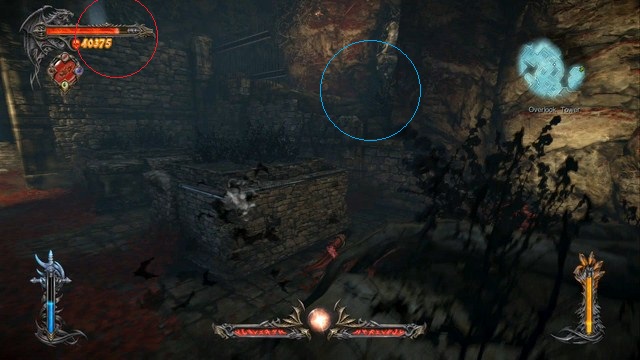 The red mark indicates the location of a Soldier Diary.
Run down the route to enter the gardens. Go along the right wall, until you reach a place with a hole in the fence. Jump through the hole, using your double jump, and collect a Soldier Diary and a Void Gem.
Jump down and go along the right wall again. At the end of it you will find an elevation, on which you will find another Pain Box, which a Life Gem this time.
Now, go all the way back to the room in which Trevor was playing his "chess" game in the past (you collected piece of the Mirror of Fate for him and gave them to him there). Run straight ahead to reach another device opening a passageway (after activating it you will play a dagger throwing mini-game). After emerging outside, create a ledge by using the "pillar-like device" and get inside the building through a mouth-like door.
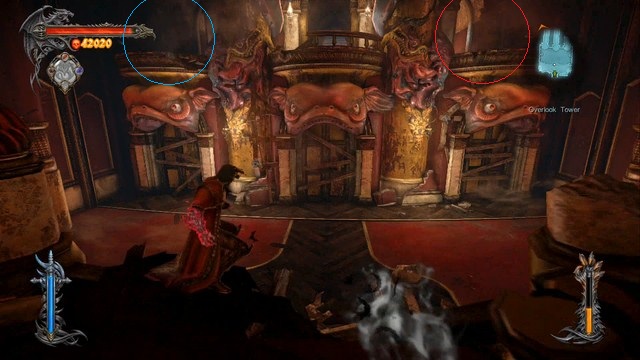 Red marker shows the location of a Pile of Sacrifice, the Blue on of a Pain Box.
Afterwards, stop for a second and look around - there are 3 tunnel in front of you, which you can enter. Go to the rightmost one at first and collect a Kleidos' Nail from a Pile of Sacrifice.
Jump down and go to the leftmost tunnel and reach its end - in front of you, on the other side, you will see a Pain Box with a Chaos Gem inside. Go there, use your double jump and collect the gem. As there are no more collectibles here, go to the Map Room and transfer to Berhnard's Wing.
After leaving the Map Room, on the left side, there will be a Soldier Diary lying by the corpse.
After reaching the gulf, use a Chaos Bomb on a chain on the right side, to lower down a platform. Jump on it and go to the left, to collect a Void Gem from a Pain Box.
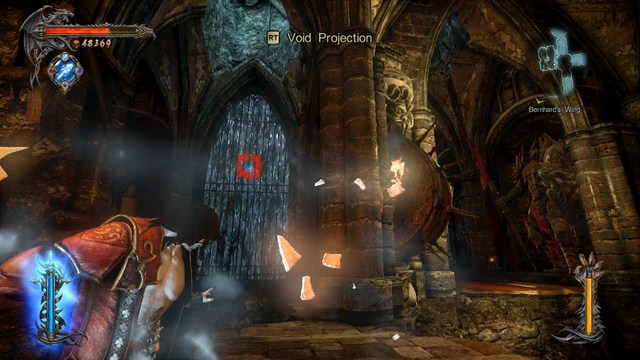 A waterfall, which you must freeze, in order to get to a Pain Box.
In the place you've found the last Pain Box, turn your camera to the right - you will see a waterfall there. Freeze it with Void Projections and quickly jump on the pillar to the left and move to the right, towards the waterfall. Climb the frozen water, to reach a Pain Box with a Life Gem.
Jump down and enter the tunnel overlooking the map room, until you reach a statue with a heart you can feed upon. Go through the stairs on the left and climb the wall all the way to the top. There's nothing to collect here, so just run straight ahead, until you reach another room - flip the level inside.
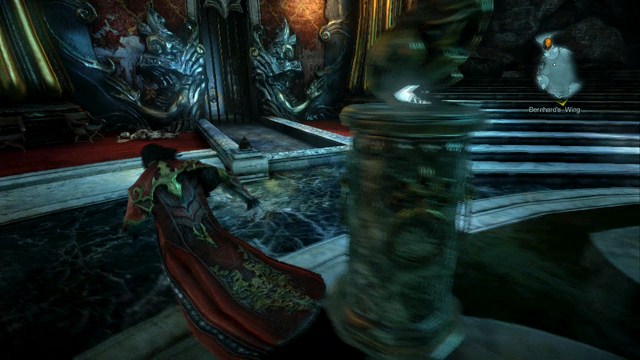 To the left of the stairs you can see bars, and behind them a Pain Box.
You will be in a familiar place - a room with chandeliers. Jump to the bottom and turn around - behind the bars (to the left from the stairs) there's a Pain Box with a Chaos Gem inside.
Go back through the bars and freeze the waterfall on your right side and climb it up to the top. There, you will find another Pain Box, with a Void Gem this time.
Stand on the edge where you've found the Void Gem - in front of you there's a passage ("chandelier route" leads to it). Jump on the chandeliers and get to the other side (just like during the 1st mission).
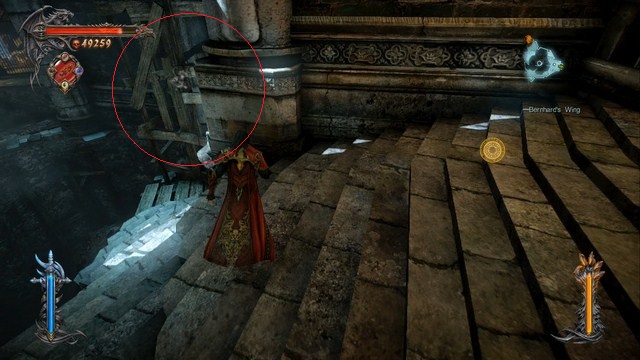 Scaffolding, which you must climb, in order to get to the goods.
Go along the right wall in the next room, until you reach the stairs. At their base there's a wooden scaffolding, which you must climb. Jump on the other side using the hanging platform, to land on another scaffolding. In front of you there are bars, behind which there's a Pain Box (with a Life Gem), and below you, slightly to the right, another set of bars, behind which there's a Pile of Sacrifice (with an upgrade to Ensnared Demon relic, which will allow you to carry 5 of them at one).
Collect both of those items, get back and run up the stairs, to the next room. Stand on the edge and turn around - in the right corner there's a place that you must climb up. Go forward, until you reach the last wooden ledge - get inside the tunnel behind it. You will reach a room filled with mist - go through it and turn to the right (in the direction of a waterfall - there should be Harpies nearby).
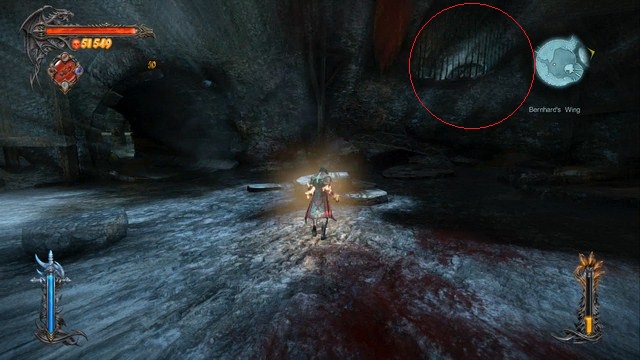 The red marker shows the tunnel leading to a Soldier Diary.
After you exit the tunnel, stand in the middle of the cave and turn around - above you, slightly to the right, you should see metal bars. Jump there, mist through the bars (you were here in the past, to collect a Pile of Sacrifice) and go to the end of the tunnel. Climb up the hole in the roof and collect a Soldier Diary on the upper level.
After collecting it, jump down and get back to the cave with Harpies. Climb up the scaffolding (to the left of the tunnel you came here through). From there, turn to the left, jump over the gap and look for a handhold on the right wall (slightly above you). Continue along the other handholds until you reach a small room with a Pile of Sacrifice, with a Kleidos' Nail inside.
 The last collectible in this district.
Jump down and go the room with the altar to activate the White Wolf Medallion (if you can't find it, set a waypoint in your Travel Book). After reaching it, climb up the pillar in front of you. Afterwards, turn your camera slightly to the right - in front of you, near the wooden scaffolding on the other side, you should be able to see a Pile of Sacrifice. Get there, by using your double jump and pick up the last upgrade to Tears of a Saint relic.
There are no collectibles left in this district - go to the last one, to Carmilla's Lair.
The first Pain Box with a Chaos Gem awaits right in front of the exit from the Map Room.
 Use your double jump to get to the upper level.
Next, go to the right, mist through the bars and go along the right wall, until you reach the edge. Above you, on a damaged balcony, there's a Pile of Sacrifice - use your double jump to get there and collect a Kleidos' Nail.
Jump down, then over some destroyed steps of the stairs and pick up a Soldier Diary.
After collecting the diary, go along the right wall again and climb up the bookshelves to reach the upper level. Afterwards, head straight ahead, where you will find a Pain Box with a Void Gem inside.
Turn to the stairs on the left side of the box and turn around when you reach their top - above you there should be a Pile of Sacrifice. Use your double jump and collect a Kleidos' Nail from it.
 A Pain Box visible on the right side.
Go along the right wall (while being on the top floor where you found the nail) and run down the stairs on the left side, to reach a pillar. On the right side, on a small balcony you should see a Pain Box - get there, by using your double jump again, to collect another Chaos Gem.
Go to the right from the place you just picked up the gem, until you reach the edge of the balcony - directly below you there will be another Pain Box with a Life Gem inside.
 Red mark shows the location of a keyhole.
Get back on the stairs from where you jumped to the Pile of Sacrifice and run to the right side - you will find a small wooden plank extending from the pillar and a chandelier in front of it. Jump on the chandelier and on a balcony behind it to reach a keyhole for a Dungeon Key.
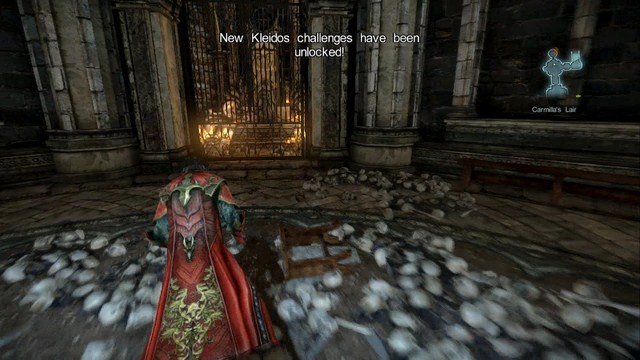 You can find a Pain Box at a place where you begun your 5th mission.
Jump all the way down and go to a small room behind you (where you begun the 5th mission - there's a ton of skulls on the floor). Mist through the bars to collect the last Void Gem from the Pain Box.
Leave the room and run straight ahead, to the next one. When you reach the device, go to the left, mist through the bars and collect the last Life Gem from a Pain Box.
Continue into the room where you've just found a gem and jump down, where you will find the last collectible in the game - Pile of Sacrifice with the last Kleidos' Nail.
By now, you should have:
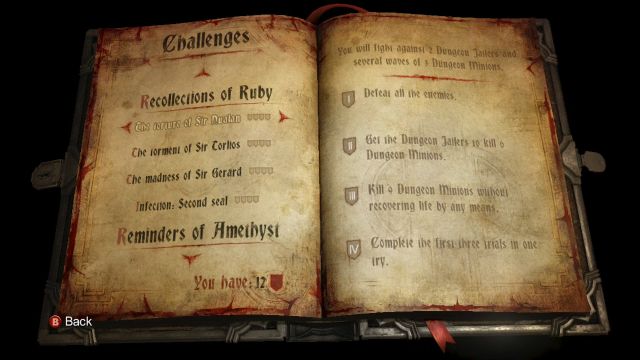 Reminiscences of Sapphire challenges.
To unlock this group of challenges, you need at least 4 Kleidos Nails.
Enemy: 3x Dungeon Jailer
Quest:
Hints: to complete this challenge, freeze ale the enemies using your Void Sword, severely damage them and finish them one after another. You can blow them up at the same time by using Talisman of the Dragon.
Enemy: 3 waves: 2x Satan's Soldier, 4x Possessed Citizen
Quest:
Hints: use your Stolas' Clock relic to slow down the enemies. Once you have filled your concentration bar, try to avoid the enemies, hitting them occasionally to keep your focus at maximum. After 30seconds have passed, kill all the remaining enemies - remember to not use Void or Chaos powers.
Enemy: 2x Harpy, few waves of Dishonored Vampires.
Quest:
Hints: use Chaos Bombs to quickly get rid of Harpies and freeze the vampires using the Void Sword and avoid hitting their shield while attacking them, especially while using Chaos Claws.
Recollections of Ruby challenges.To unlock this group of challenges, you need at least 8 Kleidos Nails.
Enemy: 2x Dungeon Jailer, several waves of 3 Dungeon Minions
Quest:
Hints: start off by killing one of the Jailers. Afterwards, lure Dungeon Minions close to the Jailer to force him to attack you and kill them in your place. After the Jailer have killed 6 Minions, kill him and clear all the remaining forces.
Enemy: 4x Bloody Skeleton
Quest:
Hints: kill 3 skeletons, but remember to freeze them before dealing the killing blow. Afterwards, kill the last skeleton 4 times, allowing him to regenerate and after that freeze him and defeat him once more, gaining 8 skeleton kills in total.
Enemy: 3x Dishonored Vampires, 3x Bloody Skeleton.
Quest:
Hints: freeze the enemies to be able to attack them in the back, avoid contact with their shield. Afterwards, attack them with an allowed weapon. Remember to not use your Void Sword to heal yourself - if your health drops low, use a relic instead.
Enemy: You will fight with Trevor against 50 Possessed Citizen.
Quest:
Hints: This challenge is more of annoying than a difficult one. Don't use your Void powers and try to spend most of the time in the air, as those enemies have a hard time aiming at you.
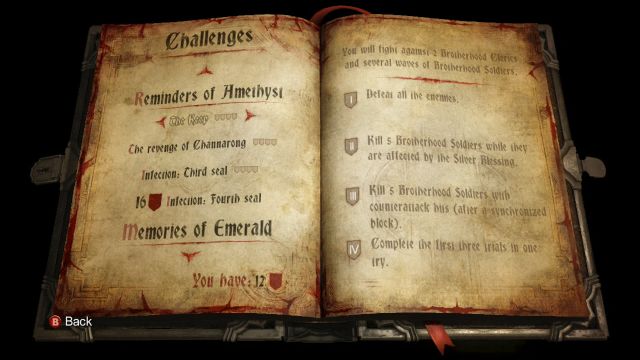 Reminders of Amethyst challenges.
To unlock this group of challenges, you need at least 12 Kleidos Nails.
Enemy: 2x Brotherhood Clerics, several waves of Brotherhood soldiers.
Quest:
Hints: start by killing one of the Clerics. As soon as the cleric boosts his allies with a yellow blessing, kill 5 of them as fast as you can. Remember to kill another 5 by using counterattacks.
Enemy: 2x Heavy Brotherhood Warrior, few waves of Brotherhood Soldiers..
Quest:
Hints: use your Enssnared Demon relic to gain an unlimited supply of Magic and attack the heavy enemies with Chaos Bombs. If there are no Blood Orbs in the area, kill of one of the smaller ones.
Enemy: 2x Riot Mech, few waves of Riot Police.
Quest:
Hints: dodge their attacks long enough for them to reveal their weapons. You have to destroy 3 of them on each of Mechs (6 at total): flame thrower and a rocket launcher, both of which you can destroy with Chaos Bombs and an energy cannon, which must be destroy by using Void Projections.
Enemy: 1x Horned Demon, few waves of Possessed Citizen
Quest:
Hints: freeze the demon and carefully attack him only a few times, to not attack him when he is not frozen. You will have to attack smaller enemies from time to time s to provide a constant experience supply.
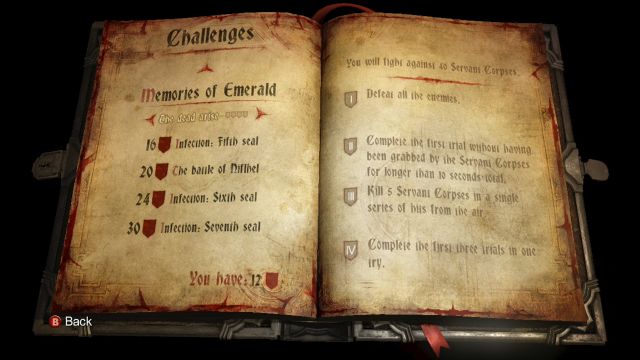 Memories of Emerald challenges.
To unlock this group of challenges, you need all 16 Kleidos Nails.
Enemy: 40x Servant Corpses
Quest:
Hints: start of by killing 5 enemies at the same time (use moves like Fire Cover to make the job easier). After that you just have to kill all the enemies and don't get grabbed.
Enemy: 3 waves of Dark Monks
Quest:
Hints: use Void Kata or Fire Cover to quickly dispose of the enemies.
Enemy: 1x Paladin, 3 Heavy Brotherhood Warrior
Quest:
Hints: run around the Heavy Brotherhood Warriors and lure the Paladin into attacking and crushing their armor. You can heat their armors by hitting them with a few Chaos Claw hits. After the Paladin breaks their armor, get rid of them quickly.
Enemy: 4x Riot Police, 2x Dark Monk
Quest:
Hints: the challenge will do itself on its own - get to a safe distance and enjoy the show. After completing 2nd and 3rd quest, clear the rest of the enemies.
Enemy: you will fight with Victor Belmont against 75 Servant Corpses
Quest:
Hints: don't let the enemy grab you and don't use any of your powers, besides the Shadow Whip.
There are 46 achievements ready to get unlocked - 16 from them are hidden at the beginning of the game. Achievements are divided into two groups: those, in which you have to work at least a little to earn them, and those, which "earn themselves" (the hidden 16 are those). Below you will find complete list of every achievement in the game, with a short description on how to unlock it (if needed).
Requirements: finish the game on the Prince of Darkness difficulty level.
Description: finish the game on any difficulty level to unlock the Prince of Darkness difficulty level and after that finish the game on it.
Requirements: complete all the Reminiscences of Sapphire challenges.
Description: to earn the achievement, complete all the Reminiscences of Sapphire challenges.
Requirements: complete all the Recollections of Ruby challenges.
Description: to earn the achievement, complete all the Recollections of Ruby challenges.
Requirements: complete all the Reminders of Amethyst challenges.
Description: to earn the achievement, complete all the Reminders of Amethyst challenges.
Requirements: complete all the Memories of Emerald challenges.
Description: to earn the achievement, complete all the Memories of challenges.
Requirements: complete all the Kleidos challenges.
Description: to earn this achievement, complete all the Kleidos challenges.
Requirements: complete all the Kleidos challenges on the Prince of Darkness difficulty level.
Description: to earn this achievement, complete all the Kleidos challenges on the Prince of Darkness difficulty level.
Requirements: collect 30 Void Gems.
Description: to earn this achievement, you need to collect 30 Void Gems hidden in the game.
Requirements: collect 30 Chaos Gems.
Description: to earn this achievement, you need to collect 30 Chaos Gems hidden in the game.
Requirements: collect 30 Life Gems.
Description: to earn this achievement, you need to collect 30 Life Gems hidden in the game.
Requirements: collect all the Life, Void and Chaos Gems.
Description: to earn this achievement, you need to collect all the Life, Void and Chaos Gems in the game.
Requirements: collect all the relic upgrades.
Description: to earn this achievement, you need to collect all the relic upgrades in the game (they can be found in Piles of Sacrifice).
Requirements: collect all the art.
Description: to earn this achievement, you need to collect all 400 art in the game. They can be obtained by doing most of the things, like destroying environment, defeating enemies and completing the quests.
Requirements: buy a skill.
Description: to earn this achievement you must buy any skill.
Requirements: buy all the skills and upgrades of the Shadow Whip.
Description: to earn this achievement you must buy and upgrade all the skills available to the Shadow Whip.
Requirements: buy all the skills and upgrades of the Void Sword.
Description: to earn this achievement you must buy and upgrade all the skills available to the Void Sword.
Requirements: buy all the skills and upgrades of the Chaos Claws.
Description: to earn this achievement you must buy and upgrade all the skills available to the Chaos Claws.
Requirements: buy all the skills and upgrades available in the game.
Description: to earn this achievement, you need to buy all the skills and upgrades for Shadow Whip, Void Sword and Chaos Claws.
Requirements: buy an item in the Chupacabras' shop.
Description: to earn this achievement simply buy any item in the Chupacabras' store.
Requirements: spend 20,000 experience points in the Chupacabras' store.
Description: to earn this achievement, you must spend at least 20,000 points of experience while shopping in the Chupacabras' store.
Requirements: increase the mastery of a weapon.
Description: to earn this achievement, you need to increase the mastery level of any given weapon (you can read more about weapon mastery in a section dedicated to that issue).
Requirements: increase the weapon mastery of Shadow Whip to the maximum.
Description: to earn this achievement, you must increase the weapon mastery of Shadow Whip to the maximum level.
Requirements: increase the weapon mastery of Void Sword to the maximum.
Description: to earn this achievement, you must increase the weapon mastery of Void Sword to the maximum level.
Requirements: increase the weapon mastery of Shadow Claws to the maximum.
Description: to earn this achievement, you must increase the weapon mastery of Chaos Claws to the maximum level.
Requirements: increase the weapon mastery of every weapon to the maximum.
Description: to earn this achievement, you must increase the weapon mastery of Shadow Whip, Void Sword and Chaos Claws to the maximum level.
Requirements: cook a chicken in the old style.
Description: you can earn this achievement before the boss battle with Agreus. His bird stole the fragment of Mirror of Fate and you must kill him using ranged attacks - use a Chaos Bomb to kill him and earn the achievement.
Requirements: gain a total of 10,000 experience points.
Description: to earn this achievement, you need to gain at least 10,000 experience points..
Requirements: gain a total of 50,000 experience points.
Description: to earn this achievement, you need to gain at least 50,000 experience points..
Requirements: gain a total of 100,000 experience points.
Description: to earn this achievement, you need to gain at least 100,000 experience points..
Requirements: complete 110% of the game.
Description: to earn this achievement, you need to complete the story mode once (any difficulty level), collect all the arts and secrets, buy all the skills and upgrades, increase the mastery of all the weapons to the maximum and complete the Kleidos Challenges on the Prince of Darkness Difficulty level.
Requirements: defeat the Paladin.
Description: this is a story-based achievement, you will earn it by completing the story mode.
Requirements: accept Zobek's gift.
Description: this is a story-based achievement, you will earn it by completing the story mode.
Requirements: destroy the golem.
Description: this is a story-based achievement, you will earn it by completing the story mode.
Requirements: capture Raisa Volkova.
Description: this is a story-based achievement, you will earn it by completing the story mode.
Requirements: release the Chupacabras from his prison.
Description: this is a story-based achievement, you will earn it by completing the story mode.
Requirements: kill the Gorgona.
Description: this is a story-based achievement, you will earn it by completing the story mode.
Requirements: survive the train trip.
Description: this is a story-based achievement, you will earn it by completing the story mode.
Requirements: subdue Carmilla.
Description: this is a story-based achievement, you will earn it by completing the story mode.
Requirements: eliminate Satan's first acolyte.
Description: this is a story-based achievement, you will earn it by completing the story mode.
Requirements: defeat Agreus.
Description: this is a story-based achievement, you will earn it by completing the story mode.
Requirements: sabotage the Toy Maker's show.
Description: this is a story-based achievement, you will earn it by completing the story mode.
Requirements: gain the trust of Victor.
Description: this is a story-based achievement, you will earn it by completing the story mode.
Requirements: shed your darkest self.
Description: this is a story-based achievement, you will earn it by completing the story mode.
Requirements: finish off Satan's second acolyte.
Description: this is a story-based achievement, you will earn it by completing the story mode.
Requirements: get rid of Zobek forever.
Description: this is a story-based achievement, you will earn it by completing the story mode.
Requirements: Annihilate Satan and save the world, again.
Description: this is a story-based achievement, you will earn it by completing the story mode.
Castlevania: Lords of Shadow 2 has a decent, but not really high-end graphics, which means that the game requirements are not steep at all. It should run smoothly even on some older PC configurations. This guide was prepared based on a Xbox 360 version of the game.
Singleplayer: Yes
Offline coop (split screen/hot seat): No
Online coop: No
Multiplayer: No
The guide was prepared based on the Xbox 360 version of the game.
Yes, playing Castlevania: Lords of Shadow 2 is playable on a notebook, provided that is has at least Intel HD Graphics 3000.


 Call of Duty: Black Ops III Game Guide & Walkthrough
 Car Mechanic Simulator 2015 Game Guide & Walkthrough
 Command & Conquer: Red Alert 3 Game Guide & Walkthrough
 Call of Juarez Game Guide & Walkthrough
 Command & Conquer 3: Kanes Wrath Game Guide & Walkthrough