Welcome in the guide for the second Xbox 360 installment of the Battlefield series, titled Bad Company - the game mixing awesome multiplayer mode and humorous singleplayer campaign.
The guide's construction is similar to the game's one - you'll find here combined advices about both single and multiplayer modes.
I hope that a complete walkthrough, thorough online mode description, special chapters about vehicles, stationary weapons and full list of achievements will help You in mastering the game and maximizing the satisfaction connected with playing Battlefield: Bad Company.
Now I want to wish You all good luck in both game modes. I hope You'll enjoy playing BF: BC as much as I enjoyed writing this game guide!
Once You obtain control over Preston, follow Sarge's instructions. Look up, then look down. If the controls are fine, press [A]. Now move forward - jump over the rock and then crouch under the damaged car.
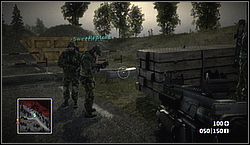
Sweetwater will advise You to heal Yourself. Grab Your Auto Injector and make an injection.
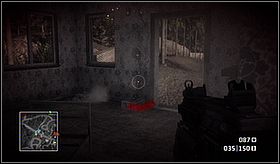
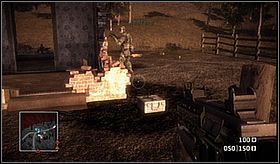
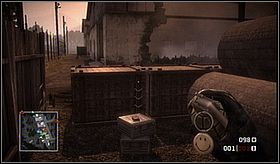
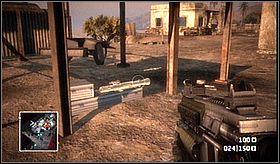
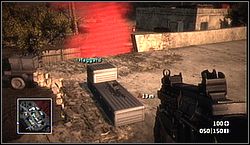
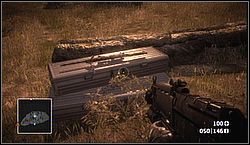
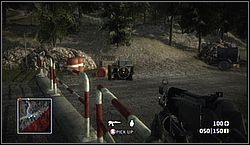
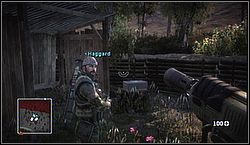
Now it's time for some shooting practice. Destroy all the red barrels in the vicinity. Reload Your weapon and approach the ammo crate (You'll find it next to Haggard).
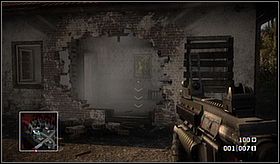
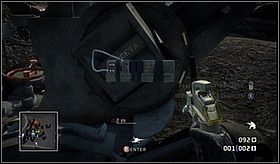
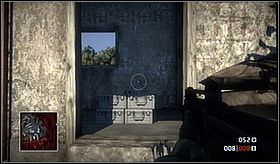
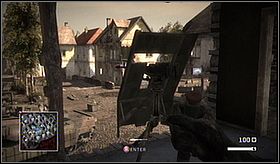
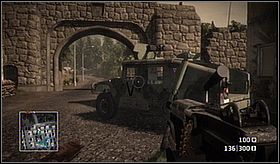
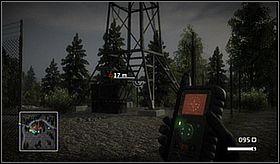
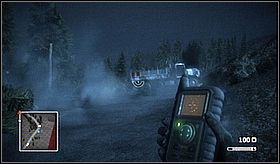
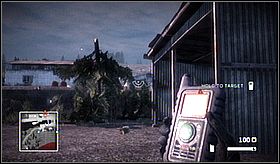
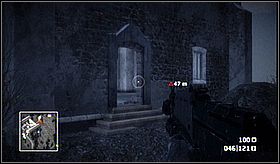
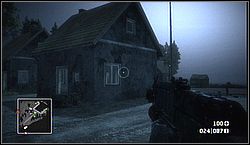
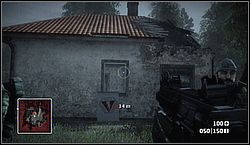
Now let's use the grenade launcher. Shoot one grenade at the nearby building's wall. Then enter the building through the hole You just made and take the Power Tool. It allows You to repair any friendly or empty vehicle. Use it to repair the Hum-Vee locater nearby.
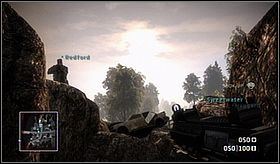
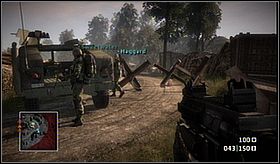
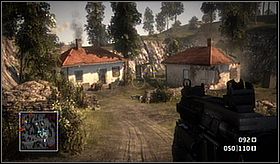
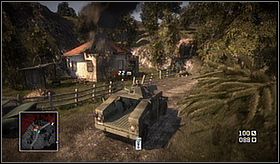
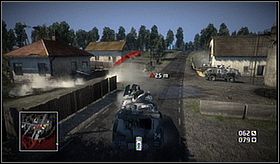
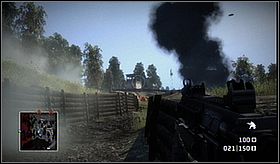
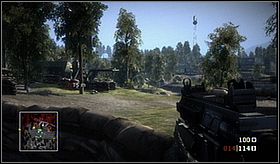
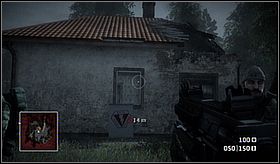
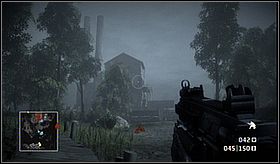
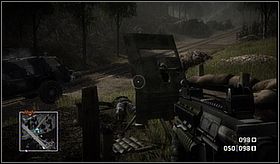
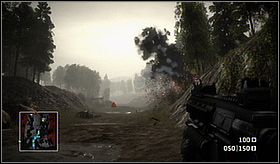
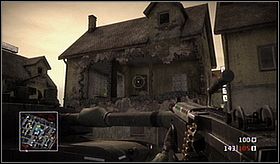
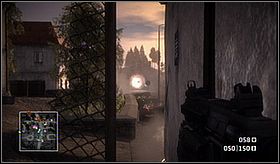
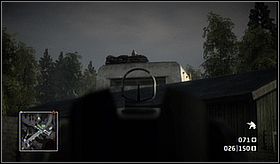
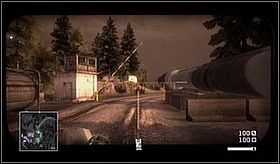
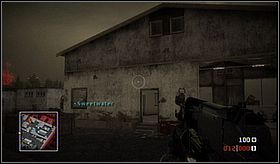
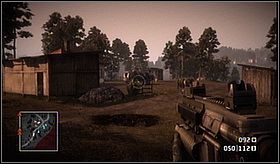
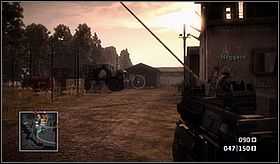
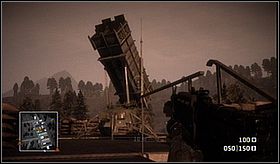
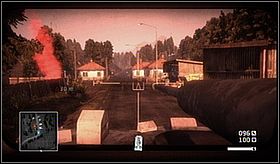
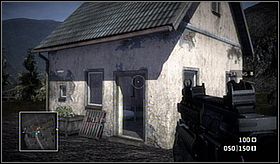
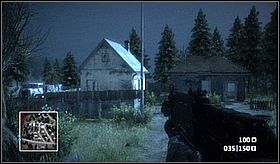
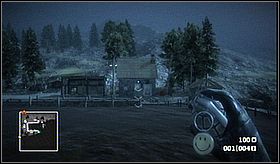
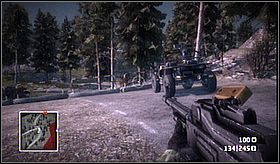
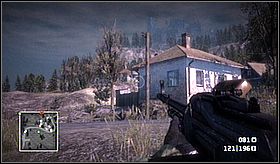
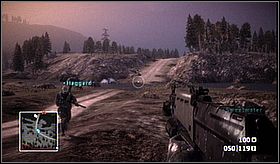
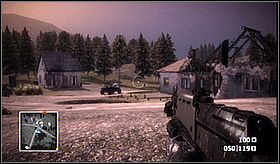
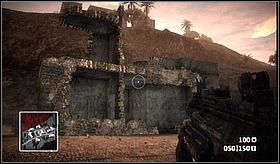
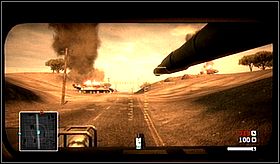
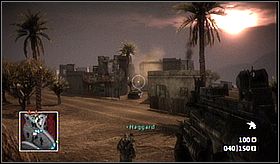
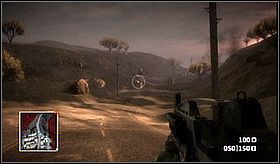
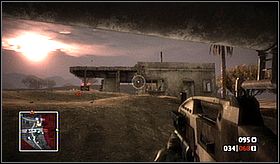
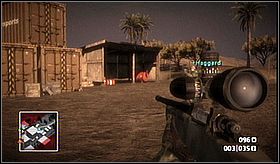
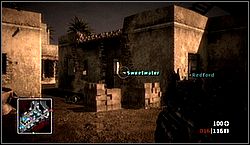
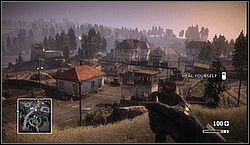
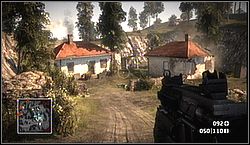
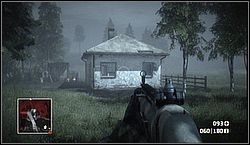
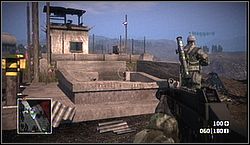
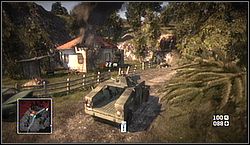
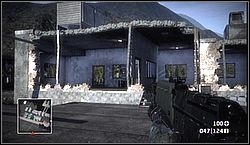
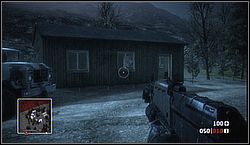
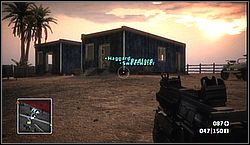
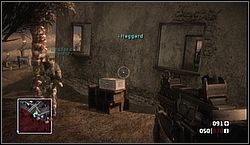
Now get behind the wheel and drive forward, towards the enemy artillery position. Once You reach the roadblock, get out and proceed on foot. You'll reach two houses - You'll meet Your first enemies there. Finish all three soldiers patrolling this location and then go through one of the buildings (it's the left one on screenshot below). Move towards the artillery.
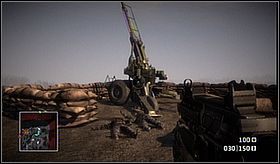
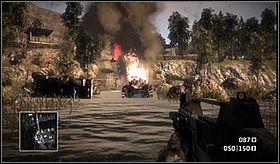
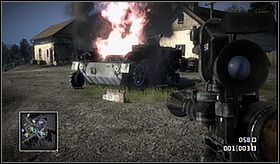
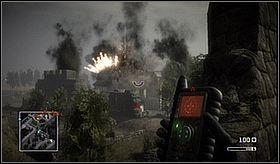
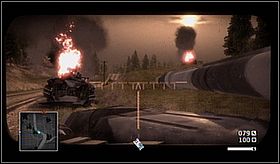
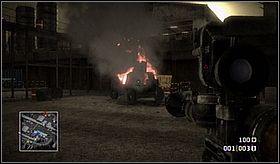
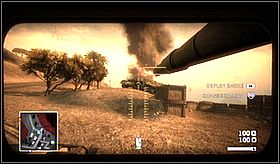
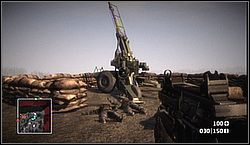
Just move forward and shoot all soldiers You encounter; You don't have to blow up the guns, just win all the gunfights. Once You kill the last enemy here, a cut-scene will turn on. When it's over, go use one of the artillery guns - You need it to eliminate all incoming forces - infantry and light-armored vehicles. Moreover, You have to watch where You're shooting, as there are friendly units nearby. There'll be a lot of opponents, but they shouldn't be a problem if You target the area they're right about to enter. As You may know, shells need some time to fall on the ground.
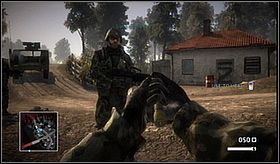
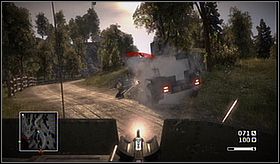
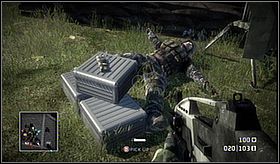
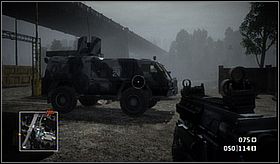
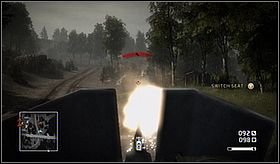
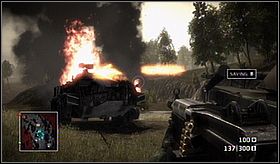
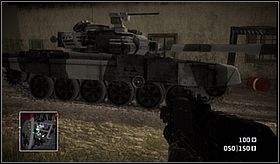
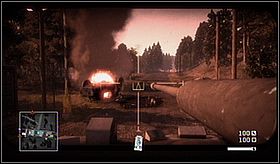
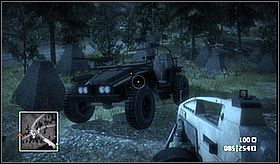
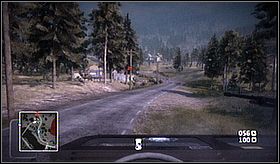
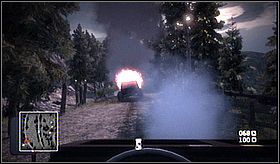
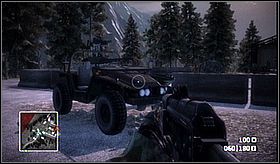
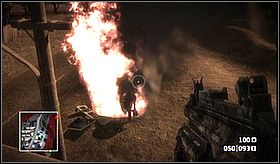
When You finish all the bad guys, move to Your next objective. You must get Yourself a new vehicle and actually there is one standing not so far from here. The problem is, when You approach it, an enemy car will arrive. This is why You have to quickly jump in the vehicle, grab the mounted .50 cal machine gun and destroy the Russian vehicle.
Your car will be surely damaged - use Your Power Tool to repair it. Once You restore its full 'health', move forward towards the village - the one You just attacked with artillery.
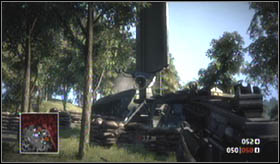
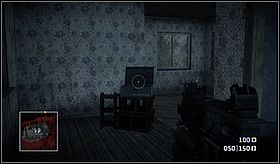
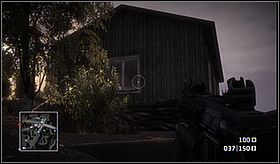
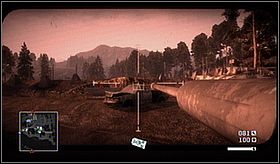
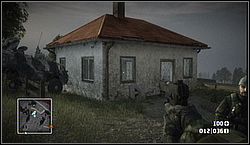
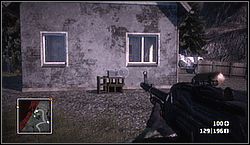
Pass by friendly forces and proceed to Your next objective. You'll reach a single white building. Get out and check what's inside. You'll find there XM8 assault rifle - the first of four collectables in this mission. Get back to the car and move forward.
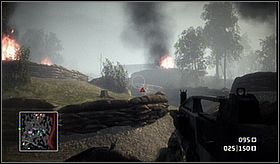
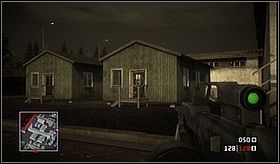
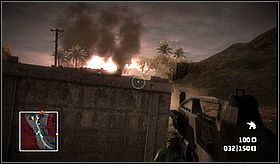
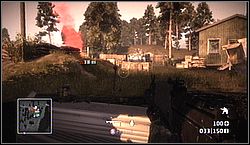
You'll reach an enemy camp. Eliminate all opponents with the gun mounted on Your car, and then walk or drive into the compound.
There are two machine gun emplacements on the other end of the camp. Sweetwater will man one of them, Your have take care about the second.
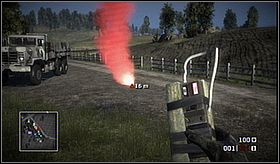
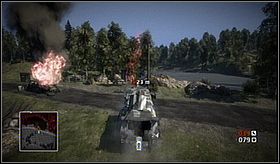
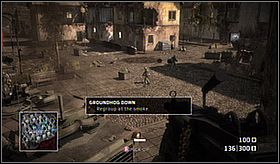
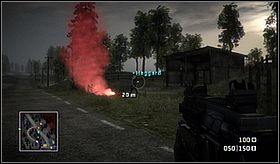
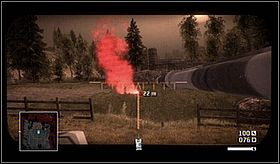
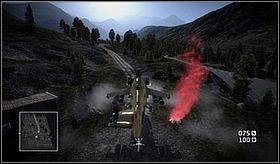
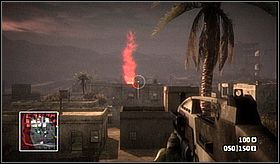
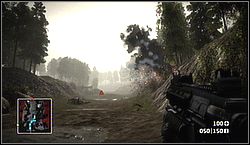
A light tank will arrive soon, but shortly after that, a friendly chopper will take it out. Make sure nobody is trying to shoot You and go regroup with Your group. Just approach the red smoke to do it.
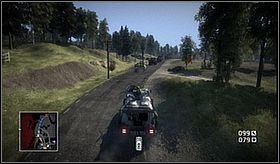
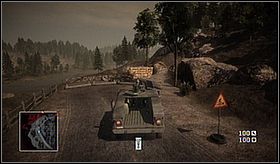
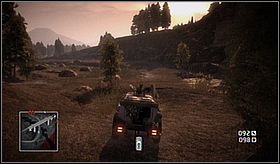
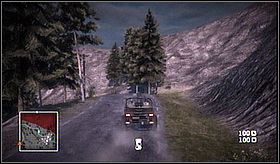
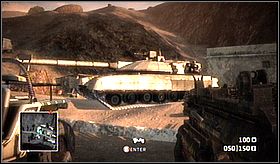
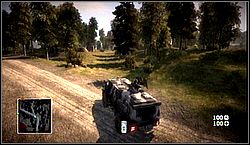
A cut-scene will turn on. Once it's over, get into the Russian vehicle and move forward.
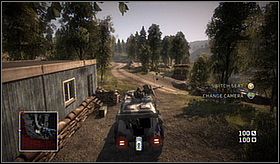
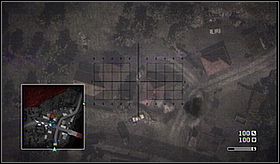
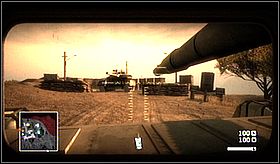
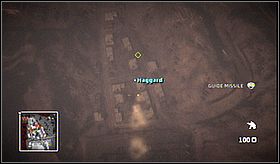
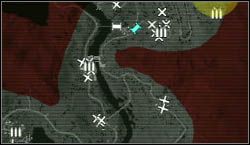
Observe the radar however - You'll notice that the road is dividing into two in a specific place - one of the branches leads to fields, while the second one leads to an enemy camp located in the forest. You'll find another collectable in there.
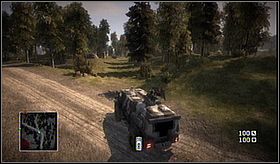
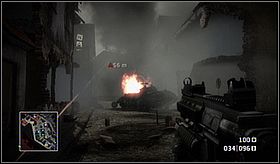
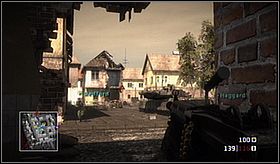
It actually doesn't matter what You'll do in this moment, because sooner or later You'll reach Your destination - another roadblock. Get out of the car and secure the village. Grenade launcher can come in quite handy here. There's a lot of enemies here, but fortunately they won't attack You simultaneously.
Once You finish all the Russians here, go regroup. The gate nearby will open soon, revealing another enemy - a light tank.

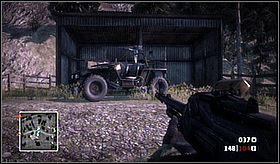
To defeat him, You must take an RPG from the barn (You'll find it near the car) and shoot at him two projectiles. Preston will take the weapon in exchange for Power Tool, so make sure You won't forget to take the tool once the fight with light tank is over.
Regroup, get in the car and go to Your next objective - anti-air guns.
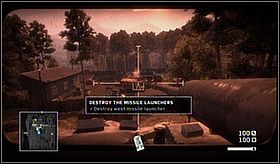
You have to find C4 charges and use them to blow up three enemy guns. The bombs are located near the machine gun emplacement in the western part of the camp.
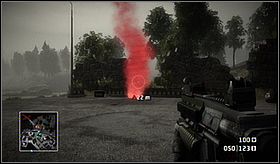
Approach the enemy guns from the south - You'll avoid a lot of enemy's bullets. Simply get close to the anti-air battery, shoot its crew, plant the explosives and detonate it. Once You destroy all three guns, finish remaining enemy forces and walk towards the red smoke. Oh, and hey - don't throw away the C4! You'll need it soon.
Once the cut-scene is over, get close to the car nearby and sit behind its wheel. Perform a U-turn and go to the nearest crossroads. Once You get there, turn right and press the pedal to the metal. Just don't fight with the soldiers You'll meet - they can't do any harm to You.
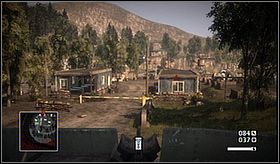
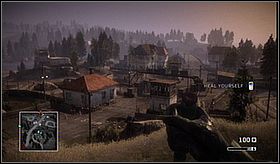
You'll reach a small village, which must be secured. Drive among the buildings for a while, so the guy operating the mounted gun will finish some enemies. You'll surely find out that some opponents are hiding inside structures - these must be eliminated on foot.
Once You clear the whole village, you should get an order of defending the settlement. Place Your vehicle (if the one You used to get here is badly damaged, use the second one near the barn) on the crossroads - from there You'll be able to see the bridge in the east, as well as the southern road. The enemies will attack from these two directions. First pack of opponents will come from the east, in a light-armored vehicle. Get to machine gun placed on the roof of Your car and shoot them all. The others will attack from the south - perforate them too.
In the end, a light tank will show up. As You know, it is invulnerable to bullets. It may come from the east, as well as from the south. To destroy it, You need a powerful weapon. C4 charges would be perfect.. You still have some, right? One charge is enough to destroy a light tank.
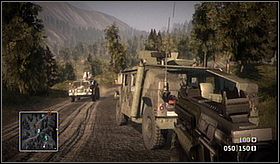
Now regroup in the designated area. Once the cut-scene ends, get to the vehicle You used to defend the village and follow the convoy.
You'll be attacked now by an artillery. Drive to the marker placed near the road (red smoke).
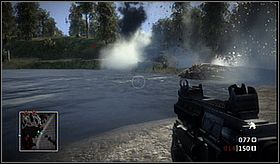
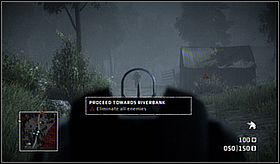
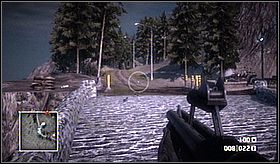
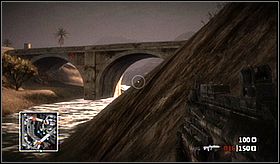
After the cut-scene You'll have to leave the vehicle here - move through the water towards the land located in front of You. Stop only if You notice enemy soldiers trying to shoot You.
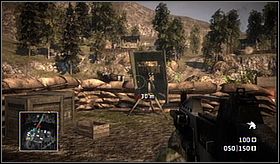
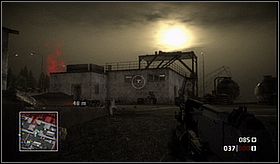
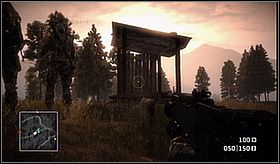
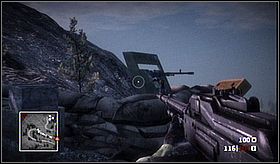
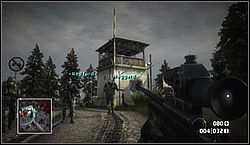
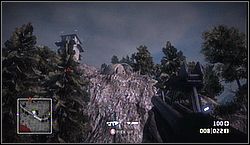
When You reach that land, get into one of the trenches and follow them towards the top of the hill. You'll surely see that this position is quite well fortified. To make it weaker, You have to kill soldiers using machine guns mounted on top of the towers.
Approach the sandbags located between the towers. There are a few enemy soldiers behind them. Finish them, using the sandbags as a cover. Remember that You still have Your Life-2. Once You clear the territory, jump over the sandbags and check what's inside the towers - You'll find there some explosives. Use them to destroy two radar jammers standing in this location.
You may also destroy the jammers with the RPG You found it the village. Anyway, once You take them out, some bombers will fly to Your position and clear the entrenchments located nearby.
Although the bombs did a lot of damage, there's still a vast group of enemy forces. Forget about the stationary machine gun next to You - if You use it, You'll be a sitting duck, a perfect target for the opponent. Better enter the trenches and cautiously clear them step by step.
The trenches end with a small bunker with one enemy operating a stationery machine gun. You can either get in front of his barrel and shoot him in the face or flank him, preferably from the left side.
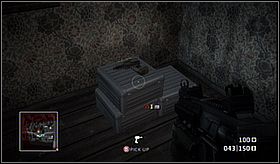
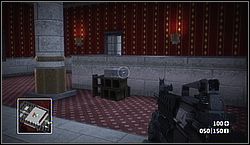
In the beginning, Haggard will ask You to search the building in front of You. Enter it and open the gold crate located there. Take also the C4 laying nearby.
Get out of the building and go to the eastern part of the map. You'll see there a few buildings occupied by enemy soldiers. Secure them and go to the riverside. Secure this place too and regroup with Your squad in the red smoke area.
Your next task is to eliminate weapon warehouse and a fuel dump. We'll get there by using a motorboat.
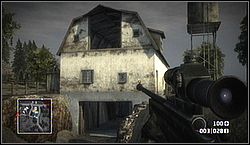
You'll meet a few enemy boats on the river. Try to approach them from the side, so Your machine will not be exposed to the grenade launchers' fire. Stop the boat near the old factory and continue the mission on foot.

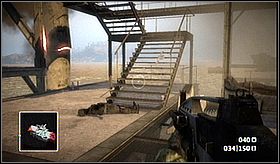
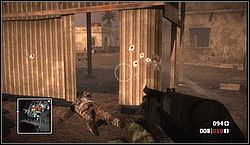
Make an entrance for Yourself by blowing up the fuel container located next to the fence. Eliminate all the Russians trying to prevent You from completing this mission. After the firefight, enter the factory. I advise You to take the stairs located in the vicinity of the fence You just blown up. Thanks to them, You'll reach the factory's upper level, which is a nice vantage point.
You'll find some rockets in the main room. Blow them up, using the C4 You found at the beginning of this mission (if You forgot them, search the factory for other explosives). And watch out, as there may be a guy on the rooftop, trying to shoot You through the fence in the ceiling.
Once You destroy the missile depot, You'll have to move to the fuel dump. Get out of the old factory and go to the east. You'll meet another group of enemy infantry and one light-armored vehicle. If the enemy doesn't get out of the car, You'll have to attack him with a grenade launcher.
Now look around. There are two ways leading to the fuel dump. Once of them leads through the bridge, and the second through the swamps. We'll take the second one.
But before You move, try to shoot the guy operating the stationary grenade launcher located next to the swamps. Once You do that, secure the vicinity (that includes fighting the car with a mounted machine gun).
Use Your grenade launcher attachment to make an entrance to the fuel dump. Feel free to use the projectiles against Your enemies hiding behind barracks' walls. You'll find here the next abandoned factory. Fuel is located inside, protected by several enemies. The fuel tanks on the ground floor can be destroyed with a single grenade. The others are hidden behind walls... but You can destroy those walls with Your grenade launcher too, right?
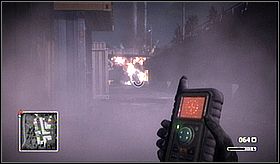
When You destroy the fuel, go regroup. After the cut-scene, take the MRTR-5, a device with which You can mark targets for artillery. Use it to destroy incoming enemy forces (on the bridge).
Now find some wheels and go the town marked on Your map.
You'll be attacked by an enemy vehicle on Your way to the destination. Destroy it and leave Your car next to the ruins. Go to the red smoke, eliminating all the enemy troops You meet.
Your next task is to eliminate a few stationary rocket launchers located in the town. Note, that the MRTR-5 is still working - it'll come in quite handy here, as You'll meet here not only those launchers, but also an enemy light tank.
I advise You to call in the artillery as often as possible. Eliminate the remaining troops in the bombarded area, as You move deeper and deeper into the town.
Use the artillery to destroy the light tank. When You secure the town, go to the red smoke location.
Your next task is to protect the friendly tanks. Exchange the MRTR-5 device for a Power Tool and get inside the tank in the front of the convoy. Thanks to that, they'll start moving.
The tank has a special radar installed - it'll give You the location of all enemies in the tank's surroundings. Don't let them destroy the tanks - get in front of the first tank and get rid of every enemy forces You encounter. If the Russians will manage to damage the tanks, repair them.

You'll also meet enemy tanks, but with constant repairs they're actually not a serious problem.
In the end, You'll reach the graveyard. Regroup right there.
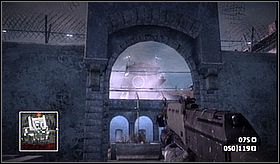
Now enter the next urbanized terrain. You have to reach the enemy radio station, and in order to do this, You must quickly eliminate all the enemies using stationary machine guns and grenade launchers located in the city. One of the tanks should help You in this.
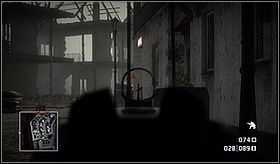
The radio station is located on the upper floor of a yellow building in the western part of the city. You can either destroy it with C4 also located inside, or You can throw or launch a grenade through the window on the left. When You give the station and 'out of order' status, go regroup with Your buddies.
Get back to the tank standing in the town square (Power Tool is no longer necessary). Enemy forces will arrive here soon. They'll try to destroy the tank and Your job is to stop them. There's a building standing next to the tank. On the upper floor, You'll find a stationary machine gun emplacement and an RPG anti-vehicle weapon. Take it, grab Your Auto Injector and man the machine gun.
You'll meet a lot of enemy infantry, ready to destroy Your tank. Don't let them do it. If they hurt You, leave the gun for a while, so You can use the Auto Injector (with the device in hand it'll only take a second). When the armored vehicles show up, make sure there isn't too many enemy anti-armor infantry, leave the gun, grab the RPG and blow up the opponent's tank.
When You finish the enemy forces, friendly military personnel will enter the town. Go meet with Your squad. And keep the RPG, it may become useful once again.
Now get to the Hum-Vee and go towards the enemy base located at the shore.
You'll notice the road ends in a specific place. You have to proceed on foot.
Go to the red smoke and watch the cut-scene. When it's over, go towards the mercenaries' base. Finish all the enemies and go the trucks. The mission is over.
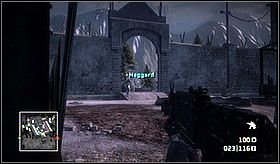
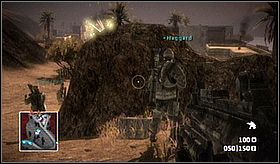
We're starting the mission by finding that moron Haggard... deal with the enemies at the gate (red barrels located here should be quite useful here).
Search the building located next to the gate. You'll find here the MRTR-5 device. Take it, as it may become useful in the next part of the mission.
You'll meet quite heavy resistance here (infantry with rocket launchers and a heavy tank), so precise aiming and frequent artillery strikes will be essential here. You can also use the stationary rocket launcher to eliminate that tank.
Once You destroy it, get to the bridge, but don't enter it. Use the artillery to destroy the camp on the other side of the river.
If You jump into the water and approach the camp from the left, You'll avoid enemy fire (including the one from the bunker). Clear the buildings located here and deal with the guy inside the bunker.
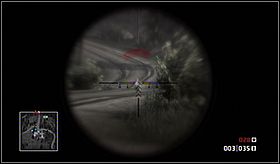
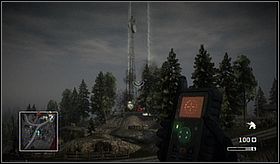
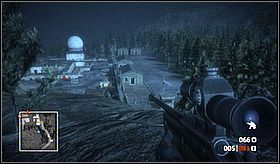
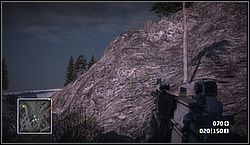
Now go to Haggard (red smoke). Your next target is the antenna located on the hilltop. This place is crawling with snipers, so try to run to the first enemy You see, kill him and take his rifle. A new weapon will allow You to clear the rest of the hill. And don't forget about the artillery strikes - You can still request them.
On the hilltop, You'll find a building, with a C4 inside. Use the charges or the artillery to blow up the antenna box.
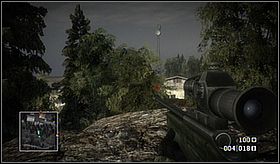
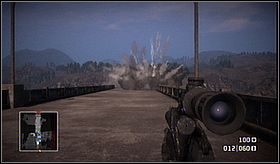
Now move forward. Use the sniper rifle to get rid of incoming enemies. After a long march You'll see the next antenna. Kill all the infantry defending it. When You secure the terrain, destroy the antenna box with an artillery strike.
An enemy chopper will come here soon. You'll find an RPG next to the antenna. Take it and use it to destroy the helicopter. It's not easy, but still possible. When You turn him into scrap metal, go to the third antenna. However, remember You're still on enemy's soil - expect snipers and soldiers with assault rifles.
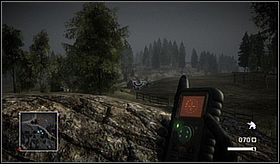
Once You get through the fields, You should see the antenna and a few buildings. Get Yourself an assault rifle. And don't forget about attacking the enemy base with artillery, in order to eliminate its personnel.

There's a possibility You'll be attacked from behind by an enemy vehicle. Hit it with the artillery too.
Once You secure the base, search the guard tower standing near the antenna. You'll find there some C4 - Use it to blow up the antenna box. Better don't use the artillery here - we don't want to damage the heavy tank that Russians are willing to lend us :)
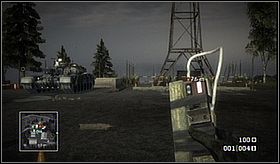
Hint: there's an AA gun located next to the antenna. Use it to destroy the trees nearby (Manic Lumberjack achievement).
After the explosion, exchange the C4 for a Power Tool, it lays next to the tank. Go regroup with Your buddies.
Now get inside the tank and follow the gold! Go to the harbor marked on the map. I advise You to change the view - Your shots will be more accurate.
You'll encounter some enemies, including a light tank. Once You finish it, I bet Your tank, will be damaged. Repair it and continue Your journey.
You'll reach a small village. A light and a heavy tank will attack You simultaneously. If the enemy will manage to destroy Your tank, use the second one, located in the village.
It is standing next to the barn, which provides great cover in a fight against the heavy tank. Remove all the enemies and move forward.
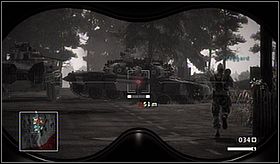
When You reach the second antenna You damaged here, You'll meet a vast force - about 5-6 tanks. Destroy them all, repairing Your machine from time to time.

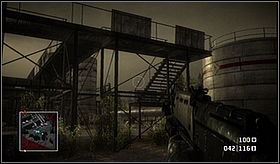
When the fight is over, follow the gold and go to the harbor. Reach the red smoke and continue the mission on foot (the tank is going to disappear). Enter the compound and shoot every enemy You meet. Moreover, get on the metal footbridge leading through the fuel silos - it provides a quite good vantage point.
You'll meet here a light-armored vehicle. Eliminate it with Your grenade launcher.
You'll soon meet another enemy car. You can destroy it with RPG - You'll find one in a warehouse on the right.
In the next part of the compound, You'll meet some snipers and soldiers with assault rifles. You'll find them on a rooftop - try to eliminate them as fast as possible.
You'll find the MRTR-5 device in one of the warehouses. Take it.
Secure the terrain and regroup. Time to enter the docks, but first get the sniper rifle located in the barracks (on the right, next to the antenna).
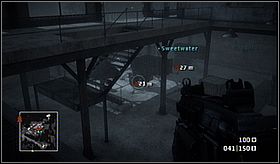
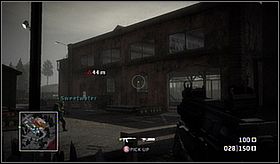
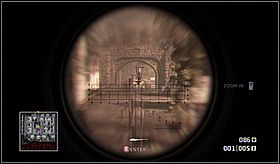
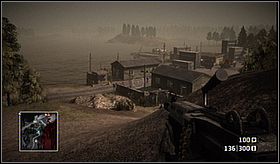
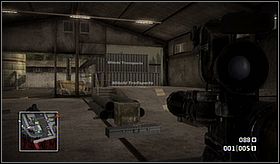
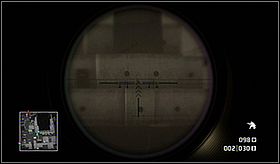
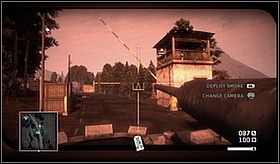
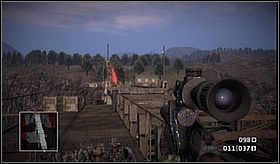
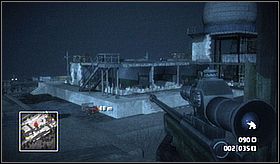
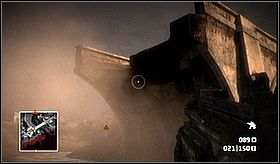
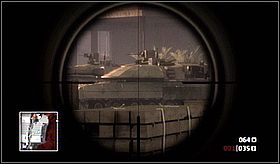
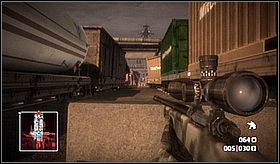
Now get close to the footbridge presented on the picture below. From that point, You can eliminate several enemies guarding the cargo ship. Use not only Your sniper rifle, but also the artillery barrages.
Your target is to get close to the cargo ship. Get on the end of the footbridge and eliminate every mercenary You see. And watch out for the sniper standing on the ship.
Get down to the harbor and move forward. Still, beware of the snipers. You'll meet a lot of them here.
When You get to the end of the harbor, the mission will be completed.
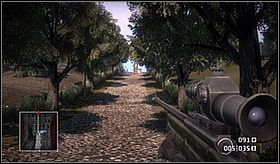
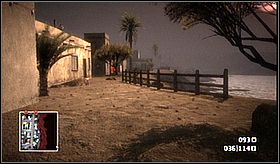
Take the mountain way and get to hilltop. You'll reach the point, from which You'll see... a golf course. After the cut-scene, continue the walk. You'll see a car nearby. Get inside and move forward.

You'll reach a village and some heavy resistance. Get out of the car if You don't want to be killed by an RPG and deal with the Russians on foot. Destroy the car with a grenade launcher or kill the gunner with an accurate shot.
Search the village. You should find a Power Tool here. Take it and get in the car (mint condition!) standing in this village. Let's continue the mission.
Secure the grove near the village and take the road leading under the bridge.
When You reach the camp with the first AA missile launcher, get out of the car, as the enemies has some RPGs. Clear the area. The enemy is quite weak here.
There is an MRTR-5 device located in the western part of the enemy camp. Take it and use against the enemies.
Once You deal with the troops, search the white building standing in the centre of the base. You can either take the C4 You'll find inside and blow up the launcher, or You can simply destroy it with artillery.
When You destroy this target, enter the warehouse in the northern part of the camp. You'll find a light tank over there. Don't forget to take the Power Tool, I should be in the place You picked up MRTR-5 from.
An enemy car will approach You, but it is not really a serious opponent for the light tank. A few shots should help You take rid of him. Move forward, towards the next launcher.
It is quite difficult to get close to the next AA missile launcher, as the whole terrain is surrounded with fence and anti-tank concrete barriers. You can of course try to shoot the launcher while standing on the road, but I You want to finish the Russians and search the whole camp, I advise You to drive around from the right - there is a place without all those fortifications.
When You're done here, move to the launcher number 3.
Destroy the stationary rocket launcher at the crossroads as fast as You can. Continue the mission. Eliminate all enemy infantry hiding among the trees You encounter on Your way to the last launcher.
Get to the launcher from the south and destroy it using the tank's main gun. It is highly possible You'll meet an enemy light tank on Your way. You can destroy it, but only if You repair Your machine from time to time.
Once You destroy the last AA missile launcher, regroup with Your squad at the red smoke.
Now we have to go for a supply drop. Find a tank (there is one in mint condition near the AA launcher) and move to the designated area.
When You get there, get out of Your tank and approach the red smoke. You'll find there a laser designator, with which You can mark vehicles as targets for bomber. The first target (heavy tank) will arrive here very soon. Mark him for the pilot and wait for the bomb drop.
Once he release the bomb, You'll have to guide it precisely on that tank - use Your analog sticks to do this. Go regroup after that bombardment.
Now continue Your journey. You should reach another enemy camp. There's a Power Tool near the entrance, so if Your tank is damaged, You have an occasion to repair it. And don't ignore that occasion, as soon You'll have to fight another light tank and a quite big pack of infantry.
Clear the whole camp with any weapon You like. When You defeat all the enemies here, get to the helipad. There's no chopper there actually, but You'll see two heavy tanks there. Take the Power Tool (if You don't have one), take one of the machines and continue the mission.
You'll find more enemies near the bridge, but they're not a serious threat (how someone driving a golf cart can be a deadly enemy? :) ). Move forward. You'll reach a few buildings, but - besides the heavy tank standing nearby - there's nothing worth Your attention here. However, it is quite wise to secure this place, so nobody will interrupt You during the fight with the tank standing a click ahead of You.
Once You defeat him, repair Your tank and move forward. Before You reach Your destination, You'll also meet two heavy tanks, then one light and two heavy (attacking at the same time!) after that. During the fight with that couple in the end, I advise You to approach them from the east (just drive next to the map's border).
In the end, You'll reach the enemy outpost.
There is a bridge ahead of You. Get of the tank and simply walk on it... but only for a second, as the whole construction is going to explode.
Fortunately, the footbridges at the sides are still intact. Take one of them to get on the other side of the bridge. The VSS sniper rifle laying near the bridge should help You get rid of the enemy Russian soldiers.
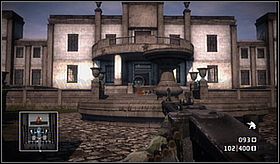
Once You get on the other side, a cut-scene will turn on. Take the SV98 sniper rifle from the building on the right (it'll be better than VSS in the fight against mercenaries). Move forward, to the presidential palace.
A pack of professional mercenaries is defending the president. However, the walls in the gardens provide quite good cover - use them in the firefight. The biggest problems here are the gun emplacements located near the palace entrance... but that's the reason You brought a sniper rifle here.
Once You secure the gardens, borrow some medium-range weapon and approach the palace. Try shooting at mercenaries through palace windows.
When You kill them all, get to the safe's door. You'll see another cut-scene, but this one ends the whole mission.
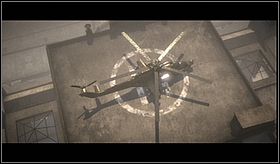
We start in a helicopter. Move forward and land in the designated area.
Search the building nearby. You'll find there a Power Tool - use it to repair Your machine.
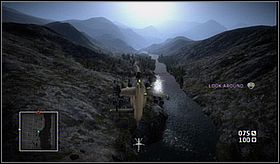
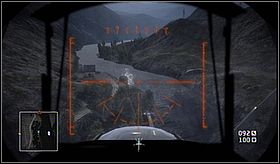
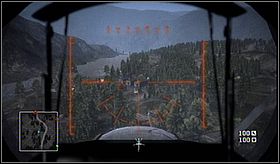
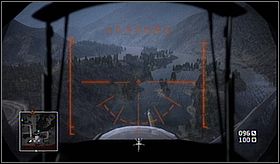
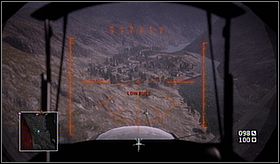
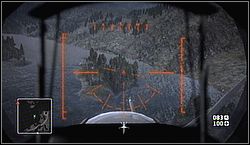
Get to the cockpit and ascend. Better turn on the view from inside of the helicopter. Thanks to that, aiming will be far more accurate. You can just check the truth of my word by destroying Your first helicopter targets - the trucks.
Haggard will suddenly inform You can sit in the gunner's place anytime You want. And don't fly to high, or the Russians will shoot You down.
Destroy the trucks and continue the mission. You'll spot two boats - these are just another easy targets.
When You reach the dam, You'll that Your targets are marked with red triangles. Leave the cars on the dam and move forward.
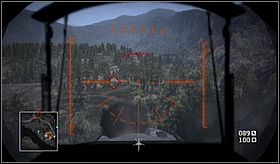
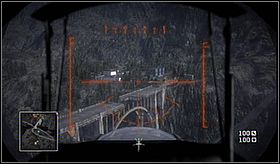
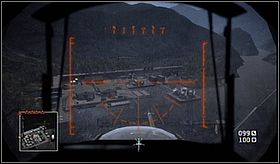
If You take a look on the map, You'll see there are three targets one the island nearby. These are fuel tanks - destroy them with rockets. And watch for the AA vehicles. Two of them will arrive at the fuel dump through the bridge and try to take You down. Attack them too.
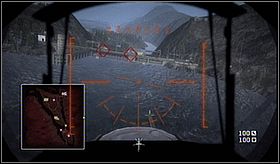
Enemy barracks in the forest are Your next target. To complete this task, You have to make at least one hole in each building. And once again, AA vehicles will try to stop You. Destroy them, before they do the same to Your machine.
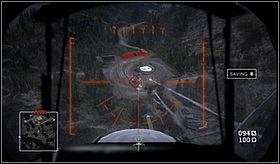
Now move forward. Enemy radio outpost is Your new objective. Use missiles to eliminate the ground forces, then land on the helipad and finish the job on foot. The radio station is located in the underground level of the facility. Take the stairs, take out the guards and use the C4 to take out the radio station.
Get back to the helicopter and deal with the enemy car that will arrive here. After that, follow the river to continue the mission.
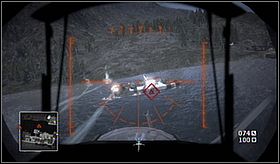
Your next task is based on destroying several trucks with supplies. Destroy not only cars, but also all the AA vehicles defending the cargo.
Your next targets are in the base on the other side of the river. Destroy them all, of course. A second later You'll receive a new task - destroy the incoming destroyers. They'll try to fight back, so watch out.
Once You complete all the task, You'll notice Your fuel is about to run out. To refill it, You'll have to visit the next base on Your way.
Just land in there. There is some space for You on the helipad.
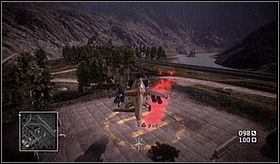
Preston will automatically get out of the chopper. Run to the nearest machine gun emplacement and use it to destroy the incoming enemy vehicle and to neutralize enemy soldiers trying to destroy Your machine.
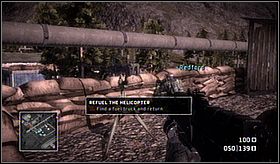
Now You have to find some fuel for the helicopter. You'll find it on three trucks located in the base. Fortunately, You have to bring only of these. Grab an assault rifle and go to the closest truck. Vast amount of explosives in this base should help You deal with the Russian remaining forces.
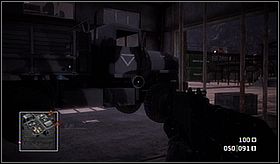
When You bring the truck to the helicopter, You'll have to defend the machine once again. Grab Your Auto Injector and get back to the machine gun You used before. A lot of infantry is coming to You. Shoot them all, of course. To eliminate the only car coming here, You can use the rocket launcher emplacement standing left to the machine gun. When You defeat all the enemies, get back to the helicopter.
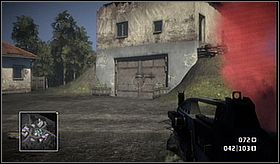
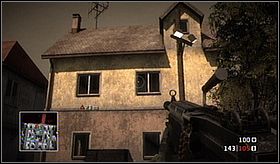
You start this mission alone and without a rifle. Approach the road ahead of You I try to shoot with Your pistol the very first enemy You'll see here. Take his weapon and prepare for a fight with other soldiers patrolling this area. I advise You to find a AEK971 assault rifle - the majority of Your opponents uses this weapon, there'll be no problem with finding extra ammo.
Moreover, do something to fight only with one enemy soldier at a time. That shouldn't be difficult; always aim at the guy, who is actually alone.
Throwing the MTN-55 devices also might be useful. They can help You localize Your enemies, a with such information, You can plan Your attacks better.
Move to the south-eastern corner of the map. You'll find a Russian camp over there and a river flowing next to it. But before You get there, You'll face an enemy stationary grenade launcher, standing next to a truck and a yellow building. You can deal with that enemy by simply shooting the red barrel standing next to the emplacement, or by flanking it, preferably from the left side.
You'll meet the most enemies in their camp, of course. Prepare Your grenade launcher.
Once You enter the enemy building, a cut-scene will turn on. When it's over, a pack of enemy Russian soldiers will attack You, so before You enter the base, prepare a lot of ammunition.
When the fight is over, You'll have to get on the other side of the river and search for Your teammates. Before we assault the main enemy base in this region, let's find some extra equipment. If You take the boat and go to the camp in the western part of the map, You'll find an MRTR-5 device in the building standing just next to the harbor.
But, if You go to the pack of enemies located near the eastern part of the river (next to the stone bridge), You'll find a repairing tool and a lightly-armored jeep with mounted grenade launcher and a machine gun.
I advise You to get the MRTR-5 (option number 1). That way of completing the mission is described below. Also remember that while storming these bases, You can use the grenade launcher installed on the boat.
Once You grab the device, sit behind the wheel of the car standing nearby. You'll see it is standing in front of a narrow road, which is not marked on the map. Make sure You've got a weapon with a grenade launcher and move along that road.
In the end, You get on an asphalt road. It leads to the southern part of the main enemy base in this region. Move forward and watch out for the opponent in their own cars. Try to eliminate them with Your grenade launcher on foot. If You want to shoot them with the gun mounted on Your car, be aware that if You lose Your wheels, You'll have a great walk ahead of You.


However, if You lose the vehicle, You can search the camp in the southern part of the map. You'll find there some trucks.
Now let's move forward. You'll meet a couple of snipers. Finish them and take their weapons. Don't get back to the car - we'll proceed on foot. When You face a roadblock, use the artillery to eliminate it.
Now move forward. There's a hill on the left side of the road. There's a lovely view on the whole base from top of it. Get rid of the sniper on that hill and prepare for some more fun with the artillery. Destroy everything here and use Your sniper rifle to finish remaining enemy forces. Just try not to damage the vehicles - they might become useful.
When You get rid of absolutely everyone in the base, get inside.
Now You have to get to the underground level of the central white building. The problem is, when You approach it, an additional group of enemies will show up there. Take them all out with Your sniper rifle and enter the building.
After the cut-scene get on the surface and - using the remaining building walls - defeat all the soldiers attack You. Try to get behind the wheel of any vehicle in this base.
But before You leave this base (through the northern entrance), You must call the artillery to eliminate the roadblock at the entrance.
Now go to the northern part of the map, towards the nearest enemy camp. You'll meet two jeeps on Your way, but with a mounted grenade launcher and artillery device MRTR-5 they actually should pose a threat.
The enemies will quickly realize that You're coming. You have to find a good hiding spot, as the Russian forces have a grenade launcher emplacement installed here. Use the artillery to clean this place - barrages should help You get rid of the majority of hostiles in this region. Finish the rest with Your firearm and get to the jeep standing on the other end of the village. Move to Your next target.
Leave Your jeep where the road ends and proceed on foot.
Order the artillery crush this whole place. However, You'll need to finish some enemies personally.
Once You clean up this place, prepare for a trip to the next target. Before You even get out of the base, You'll be attacked by an enemy car. Use Your artillery and the mounted grenade launcher to deal with that problem.
After the fight, move to the next target.

The settlement You'll see is defended by some heavy machinery. Just like before - artillery strikes will be quite useful here. You can also use the rocket launcher located in one of the buildings standing nearby.

Actually, only the tank is a problem here. Destroy it and then eliminate the enemy infantry. Find some wheels and move forward.

On the mountain way, You'll be suddenly attacked by an enemy car, so make sure You can rapidly get to the grenade launcher.
Same thing refers to the machine gun emplacement You'll meet a bit further.
After that, You'll meet two soldiers. Finish them and proceed on foot. You'll surely notice that there's a crossroads nearby, with one road blocked. Note there's also a bridge (with a few guards) in the vicinity. Eliminate the guards and get on the other side of the bridge. Move along the road, eliminate enemies on Your way and finally approach the monastery gates.
You can also use the side entrance in the wall. You'll find in on the right side of the main gate.
To clear the camp, simply call in an artillery barrage. Make Your way to the tower. You'll surely hear a gunfight, but ignore it, just go to the tower.
Hint: if You get on the top of the tower Your buddies were kept inside, You'll reach the highest point in the whole game (On Top of The World achievement).
After the cut-scene, You'll have to find Serdar. To complete this task, You need to get on the other side of the map, to the camp by the river (the one You took the MRTR-5 device from). But before You even leave the monastery, You must eliminate incoming mercenaries. After the fight, get Yourself a vehicle and move to Your target.
Well, that definitely won't be easy. You'll meet a few roadblocks on Your way and I advise You to... pass them by. Drive through the forests, among the trees - that'll help You avoid enemy fire. The Russians are about to throw at You everything they've got - tanks, anti-armor infantry and a helicopter. To survive, I advise You to just drive fast. And try to use jeeps only - they're the fastest light vehicles.
It is quite hard to predict what will happen on Your way to Serdar. I advise You to take the same road You took before, but better avoid the settlement where You encountered an enemy heavy tank. Now You'll find there a light tank for sure.
In the half of the way You'll see a shoal and a few buildings next to its. In these structures You'll find some anti-armor weapon - a rocket launcher. Use it in combination with artillery to defeat the tanks and the helicopter. That's quite difficult, but I can assure You it is possible.
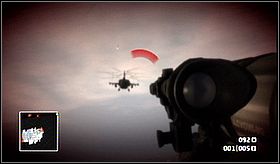
Hint: this is actually the first and the last chance to destroy a helicopter with a laser designator (One In a Million achievement). You'll meet one more chopper in the game, but destroying it with an air bomb will not be awarded with unlocked achievement. There is one laser designator in the enemy base with a dam.
Continue the journey. Go to the village in which You started the mission. You can take a boat from there, but before You do so, use the artillery to destroy enemy ships on the river. And watch out for the tank on the other side of the river - it'll try to hunt You down too.
One of the boats moves constantly, so You have to find Your own vehicle and use the grenade launcher to sink the enemy. Once You destroy all enemy forces in this region, go to Serdar. You don't need to fight anymore in this mission. Instead, watch the cut-scene.
First of all, move to the nearest village. You must secure this terrain. Take the rocket launcher located just at the entrance - You'll need it, because a light tank will arrive here shortly. Finish the infantry and then deal with the tank.
Regroup with Your squad. Take the Power Tool from the building in the south and get inside the heavy tank.
Drive to the nearest camp. You'll meet a lot of enemy soldiers with RPGs over there, so repairs will be essential for survival. Shoot the buildings' walls to eliminate soldiers inside.
If they manage to destroy Your tank, take the second one standing in the base.

Continue the mission. When You get out of the tank, a light tank will attack You. He's no match for Your heavy machinery.
You'll face a bigger problem just in a moment, as three light tanks will attack You simultaneously. However, winning this struggle is very possible, even without repairing Your own tank.
Soon, You'll participate in a regular tank battle. To defeat a few first enemy machines, You can use the rocket launcher laying next to the light tank. But remember to take the Power Tool in Your further journey!
Now You have to get close to the artillery guns. Secure the terrain by defeating enemy tanks in this region and then - if you want - use the artillery to destroy remaining tanks.
Now get to the oilfields. Incoming tank will receive an artillery shot, so You don't actually need to fight him. Get close to the tank wreck and watch the cut-scene.
Now move towards the town. You have to destroy two bridges to delay the US Army's advance. Hide behind a huge stone and take the C4 charges laying there.
Shoot the guy at the machine gun as fast as You can. Enter the city, but try to get through it rapidly - American tanks that follow You CANNOT reach the bridges faster than You. And remember - You can't die during this part of the mission. To get to the first bridge, I advise You to run close to the shore.
There's an enemy heavy tank standing near the bridge, but it doesn't matter - just run under the bridge, install a C4 charge on the bridge pier and detonate it.
Now follow the river to the next bridge. Run on the other side of the rive, so the enemies won't be able to hit You.
When You blow up both bridges, proceed to the next part of the town. Infantry should't be a problem here. Only two jeeps can pose a serious threat here. A grenade launcher and a precise aim should help You solve this little problem.
If You manage to clear one of the jeeps without destroying the whole machine, You'll have Your own mean of transport. But if You don't have so much luck, You'll have to march to the next destination.
Hide behind what You can and shoot the machine gun shooters. Then crouch under the pipes and clear the building in front of You. Be careful, however, as the enemy has a grenade launcher here. Move forward, towards the red smoke.
After the cut-scene, go to the building marked with the red smoke.
You'll find another laser designator here. Use it to mark the nearby oil silo, and then guide the bomb right on it.
Now You have to run away from there, towards the place marked on the map. You'll meet about three tanks on Your way. Destroy them all with the designator and then enter the construction site.
Take the GOL sniper rifle laying in the garage and continue the mission. Get on the highest level of the building. From there, mark the light tank with the designator. When You eliminate it, get on the ground and move towards two unmanned heavy tanks.
You won't use them, however - because of an airstrike, You'll only have the jeep. Get inside
Now You're the grenade launcher's operator and Haggard is the driver. This part of the mission is quite short and actually I guess it is impossible to die here. Just shoot some enemies if You want to.
After the cut-scene You'll receive Your last task - You have to reach the AA gun and take down the enemy helicopter. And better hurry, as the enemy machine's pilot is only waiting for You to stop, even for a second.
When You reach the gun, the helicopter will destroy it. You need to find another way to bring down Legionnaire's chopper. Get Yourself an assault rifle and make Your way to the helipad.
You'll find a rocket launcher there, You can use it to destroy the helicopter. You need to hit it about 2-3 times.
Destroying the enemy helicopter ends the last mission of the singleplayer campaign in Battlefield: Bad Company.
If You're looking for extra weapons (called here "Collectables") I advise You to not only follow the instructions below, but also look for white crosses on the maps. They indicate locations of weapon stashes. Some of them may contain additional weapons to Your arsenal. However, firearms dropped by Your enemies are not marked on the map.
There is one another problem with collectables - if, for example, the SV98 sniper rifle appears for the first time in mission Crossing Over, You'll find it also in further levels. This delivers a little bit of chaos, so I advise You to look for the guns AFTER completing the whole campaign. Filling the collection will be a bit easier then.
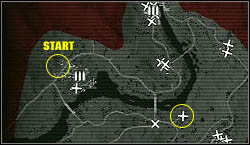
The 870MCS shotgun is located in Welcome to Bad Company. After the moment, when a friendly chopper destroys an enemy light tank, continue Your journey. Take a look at the map, however, as You'll see a weapon stash in the forest nearby. It is actually a whole enemy camp. Secure it and search for the weapon.
The 9A91 sub-machine gun is in the Ghost Town mission. Search the enemy soldiers in the city, near the two bridges You have to blow up.
The assault rifle AEK971 is an ultrapopular weapon. You'll find it everywhere, for example at bodies of Russians defending the artillery guns in Welcome to Bad Company.
AKS74u is also quite popular. You can get it, for example, in Acta Non Verba. After You destroy the missiles in the old factory, a pack of Russians will attack You - these guys should have this weapon.
The AN94 assault rifle is in the Crossing Over mission. Search the very first guard tower You'll see to get it.
AUG is in Ghost Town. It is on the roof of a building located next to Your first regroup location in this mission.
The GOL sniper rifle can be found in Crash and Grab mission. Search the snipers patrolling the hills located to the south of the enemy com base.
M16 is in Par for the Course mission. Turn on the whole map view and take a closer look at the north-west corner of the map. There's a little camp there. One of the buildings, the M16 assault rifle is laying on a gray box.
The M24 can be found in Par for the Course too. There's an island in the northern part of the map. You'll find the firearm right there.
M249 is in Acta Non Verba. When You have to protect the tanks, search the building on Your right-hand side. You'll find there a few enemies and the machine gun.
The M95 sniper rifle is in the Crash and Grab mission, in the first enemy camp You meet. Search the barrack to find it.
MG3 is in Par for The Course. The firearm is located near the northern AA missile launcher. I'd like remind You that blowing up those launchers is one of the main objectives here.
The MG36 light machine gun can be found in Crossing Over. It can be found in many different places; I got mine at the end of the mission. Before You get to the cargo ship, search the warehouses in the compound, near the antenna. In one of the buildings, You'll find a soldier with the desired gun.
NS2000 shotgun is in Par for the Course. When You reach the first AA missile launcher, search the nearby buildings to find it.
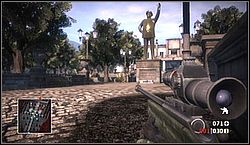
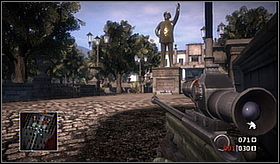
The PKM is a very, very popular weapon in Bad Company. You'll get one in Par for the Course. When You arrive at the first village, secure it and then search the grove nearby. You'll find there two soldiers - one of them will have a PKM. If you have some troubles with finding it, You can find another one in the palace gardens. The PKM is laying next to the statue.
PP2000 can be found in Par for the Course. Just after You receive the laser designator, use it to destroy the tank and then move to the next camp. Search it thoroughly to find the weapon

QJU88, just like the 9A91 sub-machine gun, can be found in the town with two bridges in the Ghost Town mission.
S20K is the first weapon You get. Search the very first enemies You encounter in Welcome to Bad Company.
SCAR with a silencer can be found at the beginning of the mission called Acta Non Verba. Once You secure the first town You see here, You'll notice a damaged bridge standing nearby. Swim on the other side of the river and search the white building standing there.
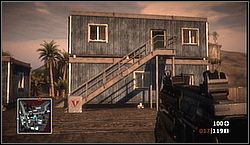
SPAS12 can be found at the end of the Crossing Over mission. Search the white building (the one with snipers on the roof) to find the shotgun.
SPAS15 can be found in the Ghost Town mission. Once You find Your first tank here, move to the nearest enemy camp. Search the first blue building on Your way to get the weapon.
SV98 is very popular in this game. During the Crossing Over mission, search the snipers defending the first antenna You have to blow up.
SVU is located only in Crossing Over mission, next to the second antenna. The rifle is in the guard tower located at the camp entrance.
The T194 shotgun is just at the beginning of the Ghost Town mission. Search the first guy You kill here.
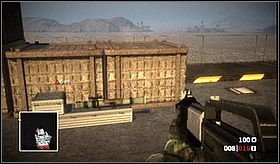
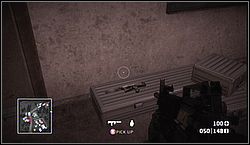
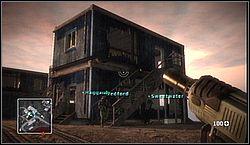
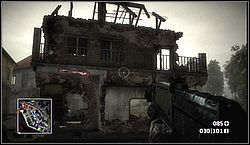
UMP is in Par for The Course mission, in a small building near the bridge leading to the palace (on the picture You can see that the building is already leveled).
VSS can be found in the same place as UMP, just even closer to the bridge.
XM8 is in Welcome to Bad Company, in a small white building. Obtaining this weapon is a regular task, so You surely won't miss it.
You'll find the XM8 LMG in the Crash and Grab mission, in the same village in the western part of the map, where You can find the MRTR-5 device.
XM8C is located in the Crossing Over mission, in vicinity of the hill, on which the first antenna is located. Look for a white cross on Your map.
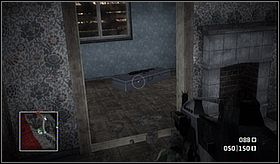
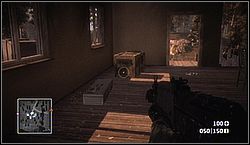
The first one is at the beginning, in the house You're searching on Haggard's request.
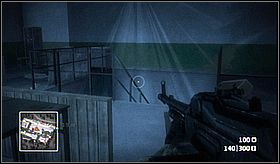
The second one is a bit further. Check out the upper floor of the yellow building with a machine gun emplacement.
Once You take a boat, don't go to Your target. There's a small enemy camp located by the shore on Your right. You'll find one gold crate there.
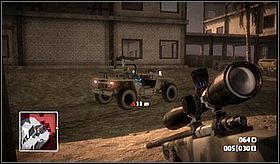
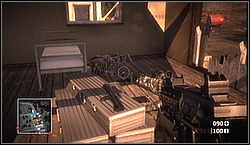
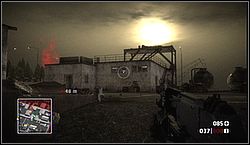
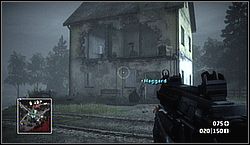
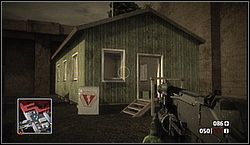
The fourth box is in the southern part of the town, in which You have to destroy enemy stationary rocket launchers. You'll find it in a building with a HOTEL sign above the entrance. In the picture on left You can see that building... but it's pretty devastated.
The last crate is in the graveyard You reach after helping the tanks. It's in the south-western corner of the graveyard.
The first crate is located next to XM8C sub-machine gun, next to the hill with the antenna on top.
The second one is in the barn You reach after destroying the second antenna box and shooting down the helicopter.
Once You clean that barn, go straight towards the south, to a white cross indicating a weapon stash. You'll find a weapon (MG36) and the gold crate in a white building marked with the mercenaries' logo.
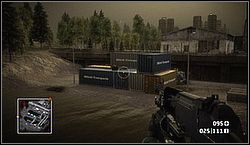
The fourth box is in the mercenaries' compound, on some colored containers. You can get there only by jumping from the top of the staircase located behind those containers.
The last crate is at the harbor, close to the cargo ship. When You unlock the last part of the map, enter it, turn right and look for a barrack marked with mercenaries' logo.
The first crate is on the island located in the northern part of the map.
The second one is in the same camp, in which You find the M16 assault rifle, in the north-western corner of the map. Search the barracks to find the crate.
The third one is quite hard to find. Once You get to the base with two tanks near the helipad (right after acquiring the laser designator), search the northern surroundings of the base.
The fourth map is in the north-eastern corner of the map (just north from the place where the palace road turns straightly south).
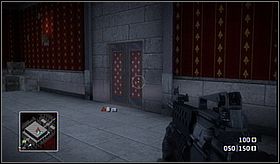
The last box is in the palace, on its ground floor. Search the southern rooms to find it.
The first crate is located near the dam. Land on its left side and search the big, white building standing there.
The next crate is in the same building, where You blow up the radio station. Search the underground level to find it.
The third crate is among the ruins on a small island You pass by after destroying the radio station.
That's how the island looks from the helicopter.
These are the ruins on the island.
The fourth one is in the white building located in a base by the river, where You have to eliminate a lot of trucks.
And the last gold crate here is in the helicopter refueling base. Try to get the gold BEFORE delivering the fuel to Your chopper, as it is impossible after doing that. The crate is located in the white building standing in the centre of the base.
The first crate is in the southern part of the map. It is located inside a building, in a base full of trucks.
The second one is in the camp located north to the crossroads controlled by the enemy (white cross in the yellow circle in the picture on the left).
The next one is in the northern part of the map. Take a boat and go to the northern end of the river. You'll reach here a small pier, with a road leading to the gold. Take that road, and You'll reach two buildings, with two enemies and a jeep. Ignore this place and move forward. You'll reach a crossroads. Look at the map - there's a small enemy outpost located just north to that crossroads. And this is where the gold crate is.
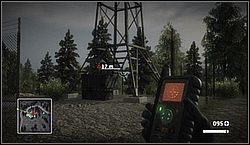
The fourth crate is located in the vicinity of the bridge, near the monastery. The problem is, the gold is located on an almost non-accessible hill. However, you can reach it by walking along its slope.
This is where You have to walk on the slope. Notice the bridge in the left part of the picture.
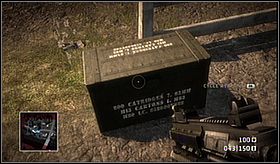
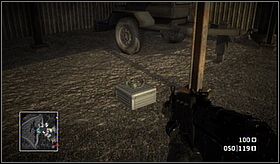
The last crate is almost at the and of the mountain way leading to the monastery. Search the area just north to the ammo crate to get that gold.
The first gold crate here is in the camp You reach just after finding the first tank in the mission. You'll see there many blue buildings, but only one has the mercenaries' logo.
The second crate is near the artillery position. When You drive a tank along the main rod, You'll notice two barracks and a jeep on Your right hand side. The gold is in one of the buildings.
The third gold crate stands next to the building You see after crouching under the pipes.
The fourth gold crate can be found just after destroying the fuel silo. Go towards the construction sites, but notice that building in the picture You pass by on Your way to the target. It stands right next to the tank You encounter here. The gold is on the rooftop of this structure.
And the last box can be found next to jeep and destroyed tanks. On Your right hand side, You'll find empty water pools. The crate is just between them.
Gold Rush is a game mode in which players are divided into two groups - attackers and defenders.
The attackers' task is to destroy all the gold crates located on the map. The defenders must naturally prevent their enemies from doing this.
The Gold Rush mode starts on a small map. If the attackers destroy all the crates on that little piece of terrain, the defenders team will have to fall back to further, previously locked part of the map. There we go again - if the attackers blow up the boxes, the defending group falls back again. What is more, most of the places with gold crates become spawn points for the attackers once they destroy the boxes.
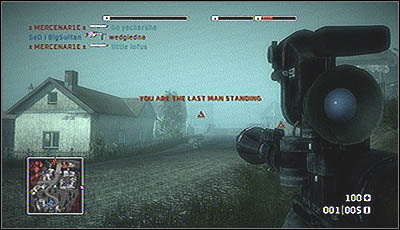
The game ends either when all gold crates are destroyed, or when attackers run out of their reinforcements.
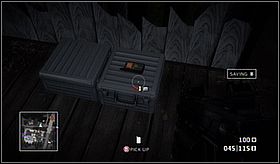
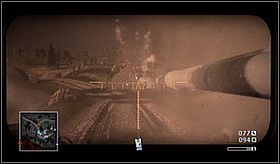
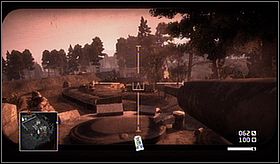
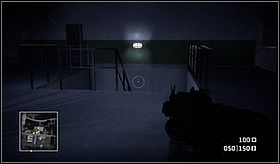
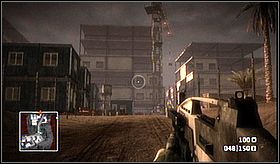
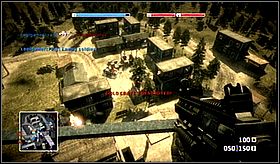
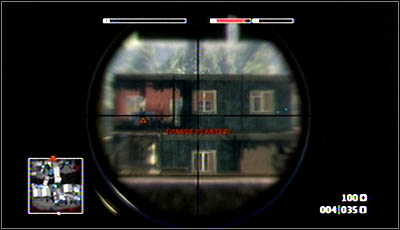
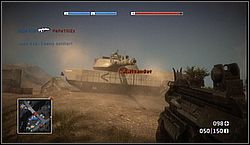
 Short bars at the top of the screen inform about the gold crates' conditions, while the long one shows the amount of reinforcements still available to the attackers.
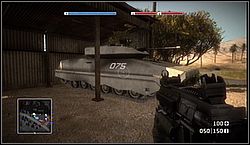
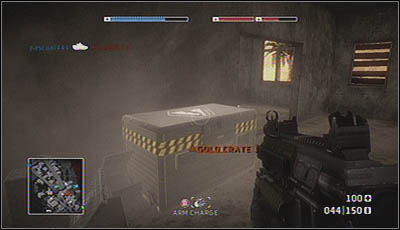 Big, grey, with precious gold inside.
To destroy a gold crate in 100%, the attackers must place an explosive charge on it. It can be done by any soldier class. Arming the bomb takes a while, so before You attempt to do it, make sure that enemies won't surprise You during planting the explosives.
The bomb goes off after several seconds, so You have to keep an eye on it all the time, as the defenders may reach the charge and defuse it before the explosion.
In the further part of this game guide You'll find descriptions to all maps used in the multiplayer mode. To understand them properly, take a look on the map legend first.
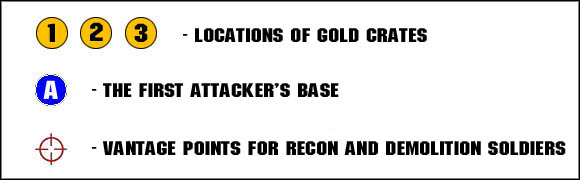
The map descriptions have been divided into two parts - the first one describes the map structure. That includes terrain geometry, water presence, level of urbanization, possibilities of maneuvering with heavy machinery, etc. The second part is about the most common plays executed by players. The most important things are written in bold and sometimes a proper screenshot is provided.
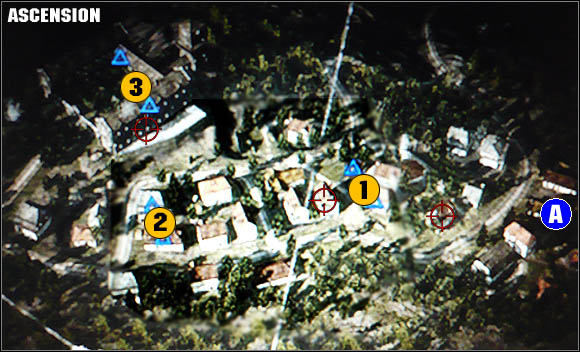
Ascension is an exceptional map. First of all, there are only pairs of gold crates to blow up here. Secondly, except the one infantry transport vehicle, there are no other machines here. Infantry have to do everything here. The fight takes place in a small town, with a monastery located at the top of the hill - that's where the last pair of crates is located.
The whole town is built on the slope of that hill. The attackers - by destroying the gold crates - go higher and higher, and finally they reach the monastery mentioned above. That kind of terrain geometry creates a lot of vantage points located on the highest floors of the buildings. What is more, the structures are standing close to each one, so You can not only watch the crates from the windows, but also all the routes leading to them.
It is worth noticing that the crates and their defenders often cannot be attacked from behind. Frontal assaults and flanking are the only tactical propositions here.
The defenders' team have some machine guns emplacements here, but they're becoming useful quite rarely. In the chaos of war, the shooter sometimes may not notice enemies coming from the flank or the snipers trying to take him out with a single shot through the hole in his shield.
First of all, check what You can see from the windows of buildings standing in the vicinity of gold crates. Some of them provide great cover and a nice defensive position.
Because the are no vehicles worth marking with the laser designator, and the distances are here quite short, the Recon class is nearly useless on this map. Most of the players pick the Assault class (always with M16 assault rifle!), Support (for healing and huge clips) and the Specialist (for extremely high rate of fire of his primary weapon).
However, there is one place designated just for sniper - the monastery's windows, from which You can see the town and the attackers coming towards the last pair of gold crates.
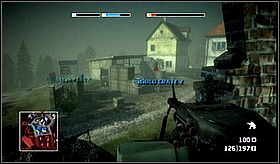
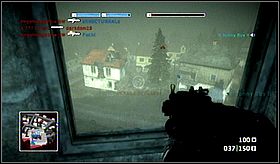
The whole city is like one big vantage point.
The attackers - in search for the best way to the gold crates - should walk through every building on their way. Most of the houses on the map are placed in a specific way, so they can easily enter the structures through one door and get out through another (located near the defenders). Sometimes it is possible to get through a series of buildings, which not only allows to get close to the crates without being spotted, but also protects from the artillery strikes.
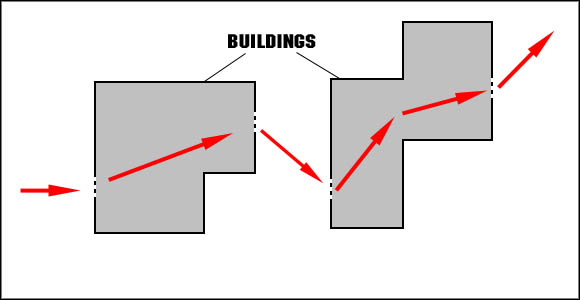 Walking through buildings gives the element of surprise while attacking. Take a medium-range weapon if You plan to do such a thing.
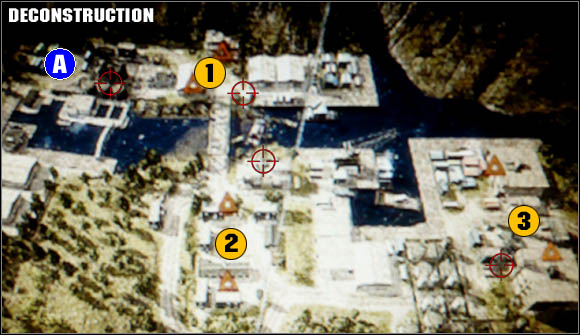
We've got here only three pair of gold crates. Everything takes place in a base located at the river. There are only light tanks (one for each side) at players' disposal. The terrain is generally flat, but however, there's a lot of vantage points that may be used by snipers. And so, in the north-western part of the map, it's a footbridge leading through fuel reservoirs, used very often by the attacker's team.
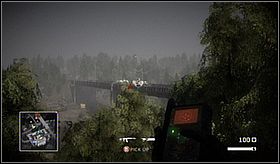
![The vantage point indicator located near [1] on the map above means actually that all the rooftops in the vicinity of the first pair of gold crates are being used by the attackers after destroying the first pair - Deconstruction - Maps analyses - Battlefield: Bad Company - Game Guide and Walkthrough](https://game.lhg100.com/Article/UploadFiles/201512/2015121216461909.jpg)
The vantage point indicator located near [1] on the map above means actually that all the rooftops in the vicinity of the first pair of gold crates are being used by the attackers after destroying the first pair.
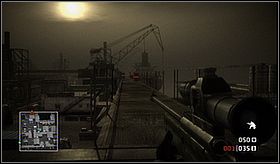
On the other hand, we have construction cranes in the southern part of the map. They're great vantage points, so they're often being used by snipers of both sides of the conflict. If You receive a sniper bullet, check if the shooter is on one of these cranes.
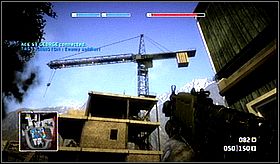
Actually, every single rooftop can become a useful vantage point on this map. And there's a lot of them here. What is more, notice that the bridge connecting the southern and the northern part of the map is blocked; only infantry can use it, but I don't advise it, as it is under constant sniper surveillance.
The defender fighting near the second pair of gold crates should be aware of one important thing. The gold located on the higher level in a blue barrack can be easily destroyed after making a hole in the wall. When that happens, every soldier with a rocket launcher and the light tank driver can destroy it from the other side of the river. And even the machine gun emplacement next to the crate won't help - snipers actively working in this area watch everything, especially the guys near the gold.
The attackers must cope with constant artillery attacks at the beginning of the round. Actually, it isn't so difficult to survive. Also, note that the light tank can't just drive into the enemy's territory, as there are concrete barriers located on the road. The infantry should help the vehicle deal with this problem.
Defenders at their first gold crate usually concentrate in the closest vicinity of their gold. Because it is located under roofs, the crates cannot be destroyed with an artillery fire. The situation changes at the second pair - this is where the most of the team focuses on the bridge, leaving one of the crates in the south. That allows the attackers to perform a swift and efficient assault from... the east. To do that, they have to swim across the river, and then - walking next to the crane - surround the whole enemy camp. It takes a lot of effort, but the result can be positively surprising.
The most common kits here, are: Support (firepower + artillery), Specialist (extraordinary short-range weapon) and Recon (high cranes on the map!). And here's a little extra tip - better don't enter higher levels of buildings if You don't have a sniper rifle. A soldiers without the ability of returning sniper fire is practically a sitting duck here.
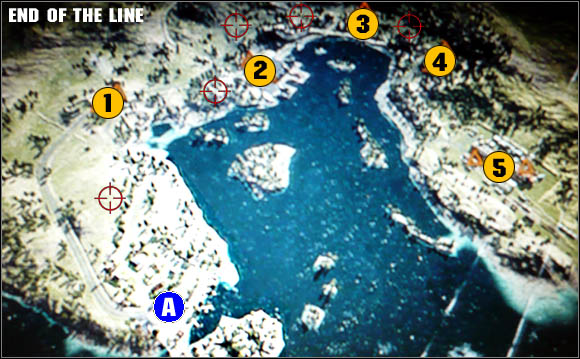
End of the Line is quite a flat map. All the bases are located at the shores of a small gulf. Tanks dominate on this map, and I mean both light and heavy ones. Moreover, each side has a helicopter (either there should be a real flying master in the cockpit, or nobody. We don't want to lose men senselessly, right?).
A massive field between the attackers and the first pair of gold crates allows snipers to eliminate single soldiers, especially those armed with rocket launchers. Marking enemy vehicles with the laser designator is also possible. Support class soldiers can also call artillery strikes from there and tanks can easily fight each other. Everything written above refers to both sides of the conflict.
When the battle takes place in the northern part of the map, near [2], the situation changes a little, as the attackers may use boats. Disembarking at the harbor and capturing the AA gun near the water helps in eliminating enemy infantry and crushing walls, which usually disturb in destroying gold crates.
Moreover, note the small forest, located south west to the point [2]. From there, the attackers can aim and shoot at the defenders on the harbor. The forest can be also one of the routes leading to gold - the space between containers located at the fence near the trees is big enough, so tanks can drive between them.
Snipers may also find a vantage point on the slope of the hill, located in the northern part of the map (marked with three crosshairs). You can see points [3] and [4] from up there. A pack of marksmen won't probably change the tides of battle, but can make the enemy really upset.
About one I already mentioned above - attacking point [2] from the water and capturing the anti-air gun can draw the defenders' attention, so the tanks can do some more serious damage. Moreover, each time the defending team is falling back to another pair of gold crates, some soldiers are instantly grabbing some stationary rocket launchers and waiting for first enemy tanks to show up.
It is a nice idea to complete tanks crew in a way, in which the gunner using the machine gun on the turret has a Power Tool. Such a crew can survive longer on the battlefield. What is more, if You see that the pilot of Your team's helicopter is an real master, You can check from time to time how he's doing and eventually repair his machine if it needs it.
The most common kits here are Support (great firepower and artillery), Recon (long-ranged weapon and a laser designator) and Demolition (the best against vehicles). From time to time You can also meet some Assault class soldiers. It's quite good in those attacks from the water and inside the base, where the last pair of gold crates is located.
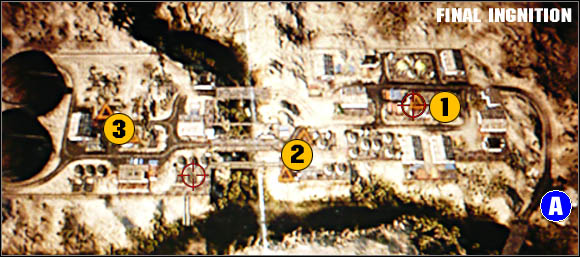
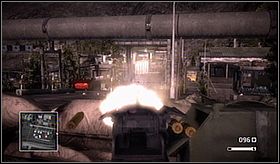
Another short and flat map. I have to say in first place, that the attackers have quite an easy job here. Everything takes place in some oil refinery, so expect high fuel tanks limiting the field of vision. The first pair of gold crates is located in a factory. The gold is quite inaccessible for the vehicles, so only one clever defender sniper with a laser designator should be enough to eliminate all the vehicles trying to do some damage. From the rooftop (and the upper floor of the factory), defenders can shoot at incoming enemies.
When the whole battle moves to point [2], the meaning a vehicles increases significantly, as the crates can be easily destroyed by attacker's light tank. Moreover, snipers sitting in the vicinity of the factory can also be quite annoying. However, the most important here is, that the attacker's infantry can attack the crates with the element of surprise, Thanks to the fuel tanks located east to the gold, they can appear in the very last moment.
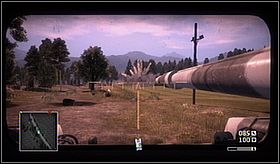
The assaulting team can attack the third pair of gold crates only after crossing the river, which sometimes may be quite difficult. They already have a heavy tank, however among the fuel tanks located south west to the bridge, some anti-tank infantry and snipers may hide and wait with their weapons, ready to attack incoming enemy vehicles.
Among the bridges here, You can see some pipelines that can be used by the infantry to get from one shore to another. It is not easy, however, as a soldier with a white pipe and a sandy map in the background, is perfectly visible.
While attacking the first pair of gold crates, You can do a little trick. The box located on the upper floor in factory cannot be damaged with a direct light tank shot, but You can always shoot the wall near the crate. It is unbreakable, so shooting at it leads to destroying the crate.
Although the pipelines in the central part of the map are not the best way for infantry, some of them just can't prevent themselves from using them. A few shots with a rocket launcher right at the pipes will make them burn. That should stop the trespassers.
The defenders' team should also put some mines near the point [2]. The crates over there can be easily damaged by a light tank, so the defenders must prevent them from driving into that area.
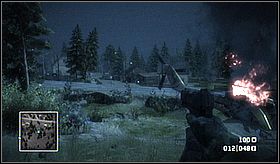
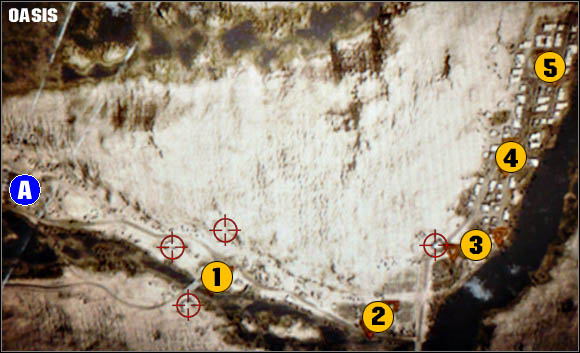
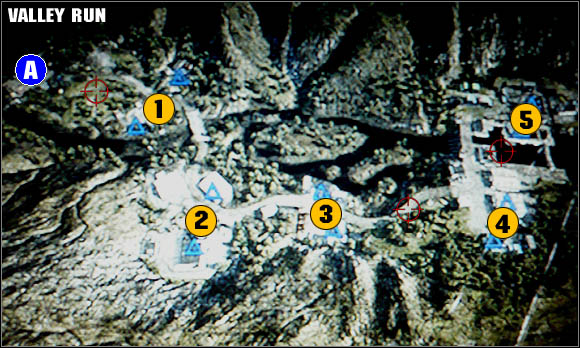
This map is actually a one huge hill with the hilltop located in the place, where the last pair of gold crates is located. During the struggles for pairs [1], [2] and [3], players are often fighting on long distances with the usage of sniper rifles, assault rifles and rocket launchers. Heavy machinery also actively participates in these fights. A lot of various defensive weapons (like stationary anti-tank weapons and grenade launchers) can serve well, until they're destroyed by an artillery strike. After that, the only thing left for the defender is using vehicles and fighting on foot.
The fight for the point [4] takes place in a small town, where heavy and assault rifles dominate massively. Vehicles are no longer as active as before, but the attackers should keep them running, in order to launch a swift attack on the point [5], just after eliminating the fourth pair of gold crates. Moreover, from the town's buildings You can watch other structures, as well as the gold, so it is important to find as good vantage point as possible. It really helps the defenders in completing their task, but on the other hand, it creates a great occasion for the attackers to sneak up to the shooters and stab them.
Also, notice that I put a vantage point indicator near the point [1] on the map above. I think only the Demolition class can use it; there's a quite high hill, with a forest on top and slopes. From there, the defenders can watch enemy vehicles coming from the south. What is more, it that location You can find a lot of defensive stationary weapons - keep an eye on this place.
Using cars, in the fight as well as for transport, is quite difficult here. The infantry here is prepared for fighting tanks and that means they can deal with small infantry vehicles in no time.
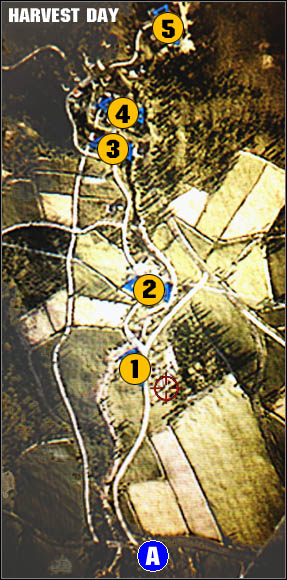
This map is quite one-sided - the defenders are usually winning here.
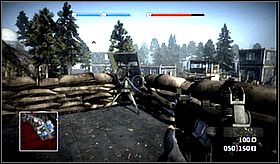
Mines, mines, mines and yet more mines, especially at the beginning of the game. During the fight for the first pair of gold grates, heavy vehicles are very active and their paths can be easily anticipated. That creates a great occasion to set some explosives.
If You're playing for the attackers, forget about rushing with a tank. The enemies will see You long before You reach the first pair of gold crates, so they'll prepare their rocket launchers and keep waiting for You. The infantry should attack first - artillery, snipers and precise bombardments should effectively make the resistance weaker. After that, bring some tanks to the battle - they'll finish the job and eliminate the gold crates.
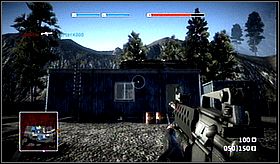
On this map, most of the gold crates is easily accessible for the vehicles. That means, tanks can use their cannons to destroy them. So, the defenders cannot let the tanks to get close to the gold, and the attackers must simply eliminate the defenders.
The last three pairs of gold crates are connected with almost entirely infantry work. As I mentioned above, shooting from the windows and using weapons on short and medium distance (shotguns, assault rifles) should help in here. Assault and Support kits should dominate in the town, as these classes have appropriate weaponry and the ability of healing. Few soldiers with rocket launchers can be useful too, just in case a tank show up.
The bridge between the points [2] and [3] can be destroyed, but this will stop the attackers only for a short moment. Better consider - as a defender - destroying the bridge between crates [3] and [4]. This'll seriously make enemy vehicles' job a lot more difficult.
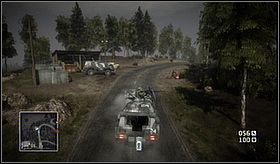
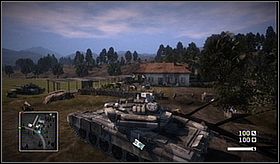
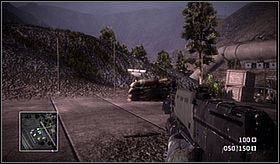
Along the main road located next to a river, there are a few bunches of buildings, occupied by both sides of the conflict. Between those bunches there's a no man's land, where battles between players are struggled practically constantly. In the western part of the map, that no man's land is just a piece of empty terrain, while in the east it's a small, but heavily urbanized town.
Notice the hill on the north to the battlefield. Getting on top of it actually results in death, as the map ends there, but if You just get on its slope, You'll reach a great vantage point, allowing to scope the whole southern part of the map. The slope is a great place for snipers and soldiers armed with rocket launchers. Now check the map above - You'll surely notice that there's another vantage point located near to the third pair of gold crates. It is a high building with locked door. Destroy it with a knife and get to the balcony to see how much terrain You can observe through Your sniper scope. Screenshots below present that vantage point.
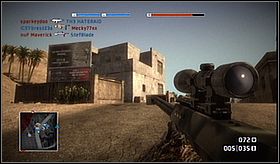

Left image - southern corner of the building. Right image - southern view from the balcony.
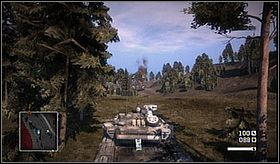
Western parts of no man's land allow tank drivers to show their abilities. Terrain in the west is undulating, filled with trees and several buildings - use these things to cover Your tank, so the enemies won't be able to hit it. Such hideouts will sooner or later fall into pieces, but before that happens, they'll be useful to all tank drivers fighting in the west.
The town in the east is heavily urbanized, so comfortable use of heavy machinery in there is almost impossible. Maneuvering in that area is quite difficult, even while driving such a versatile vehicle like light tank. Infantry carrying short- and medium-ranged firearms rules in the town. From time to time, You can meet here some snipers, but there's not as many snipers here as in the western part of the map.
Using boats on this map doesn't rather have sense. Gamers on the river can be easily spotted and executed by enemy forces. What is more, even if they won't be noticed coming and disembarking close to a gold crate, a specific icon of an empty boat will appear on enemy's radar. That'll only make them wonder what is going on. Better travel inside a land vehicle, even if all You can get at the moment is a simple jeep.
The attackers practically always try to attack frontally and from the flank simultaneously - tanks and a bunch of soldiers armed with assault rifles coming from the west are just trying to distract the defenders and deliver some chaos into their base. At the same time, a group of infantry is sneaking from the side of the river (or hill). These forces are rarely using vehicles - their strength is based on forming squads, in which soldiers respawn near their leader. Thus, only one living player hiding near the enemy base is required to perform rapid and efficient attacks on the gold crates.
During the defense, take a look at the guns installed on the rooftops and also forget about the rocket launchers located on the ground. These second ones won't last long.
Moreover, notice that in the western part of the map there are a few buildings located at the southern bank of the river - that's a perfect vantage point for snipers, eager to kill all those soldiers who either try to operate the gun on the roof or precisely aim at incoming enemy tanks.
What is more, attackers' vehicles almost always take the most obvious route - lay down some mines on them to get some extra frags.
And one more thing - snipers equipped with laser designators can mark the boats located in the attackers' base. Thanks to that, they're able to bombard everything in the camp, including the artillery gun.
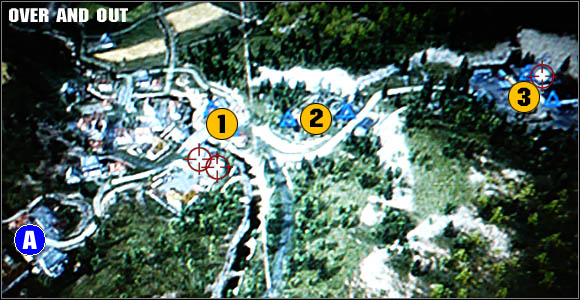
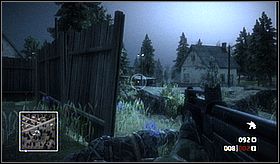
It's a typical urbanized map. It can be easily divided into two territories. The first one is a town with buildings on both sides of the river. In the second, we can ruins, a small forest and a communication center. As You can see on the map, there are two pair of gold crates in that second area.
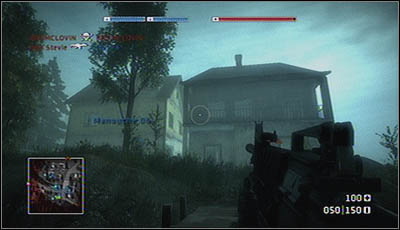
The town is built on an exceptionally flat terrain. On the other hand, the second area has a geometry of a slope. You can find a lot of vantage points on the upper floors of buildings standing in the town. The most important structures are here two houses standing next to each other, by the river, on the attackers' side. Both teams can use them, as they provide great field of vision. This allows not only shooting at enemies, but also calling in the artillery.
The bridge on the river actually has no tactical meaning - nobody walks through it, as everyone are aware it is a certain way to death. Moreover, the attackers have no vehicles in the first part of the round, so the bridge is utterly useless.
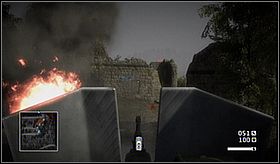
Both crates in the first pair are exposed to enemy fire after crushing the walls that surround them. The situation at the second pair's location is different. The crates are surrounded by unbreakable ruins and everything is placed on a very steep hill. The best way of attacking actually leads through forest, where the hill is the steepest. Taking the road can end tragically, as there are two machine guns emplacements located near it.
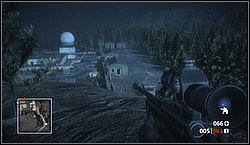
In the last part of the round, snipers are joining the battle. The com center's roof (including the radar dome) is a very nice vantage point. The crates are here a quite tough nut to crack. It is difficult to approach them with rocket launchers. What is more, one of them is located below the ground level, so installing an explosive charge is the best solution here.
Both teams are trying to secure strategically important buildings located by the river. Moreover, the attackers have to crush all the walls around the first pair of gold crates - this allows the Demolition soldiers to destroy the crates. Sometimes they just don't have to see them. Try aiming at the triangle, launching a projectile and watching if the crate loses energy.
Although the snipers in the city and ruins are less popular than Assault and Support kits, their MTN-55 motion sensors provide great help while defending the crates. Better make sure that there's one or two snipers in the team, busy with searching incoming enemies.
The terrain here is flat... with a few exceptions. There's a river flowing through the central part of the map, but it actually doesn't matter. Even if the bridge on it (near point [2]) is destroyed, vehicles and infantry can successfully use the shoal nearby.
Vehicles don't play a significant role here, but the attackers often use the light tank support in their assaults on the gold crates. Actually however, it is difficult to drive a vehicle near the gold crates, and that's because of the snipers watching the terrain and marking all the tanks with their laser designators.
There are also a few locations, in which the amount of marksmen is higher than in the other ones. The first one You can see just at the beginning. It is that meadow and hills between the attackers and the first pair of gold crates. In here, snipers of both teams try to pick off each other.
In point [2] You can also meet some snipers, but actually these guys over there think mainly about marking vehicles with laser designators. You'll see more of them on the slope, in front of point [4]. This region is heavily fortified (the defenders have here a few watch towers and a bunker), so snipers, soldiers with rocket launchers and people equipped with a MRTR-5 device are quite common there. Naturally, You can meet some tanks in there too.
The last region of a fierce fight with the usage of long-ranged weapons is located near the water, at the dam. Players are shooting each other, so the bullets fly above the water, from every possible position - windows, from between tanks, etc.
I have to admit that mines are very popular here, especially in the closest vicinity of the buildings with the gold crates inside.
The players usually divide into large groups of Assaults, snipers (Recon) and Supports. Thanks to that, they can support vehicles, that provide an inevitable help in attacks on gold.
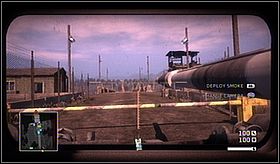
The grenade launcher on the building near point [3] is INSANELY important here. Remember that there always have to be a shooter at that launcher (preferably the one with a medipack, so an Assault or Support soldier). Fighting enemy infantry with that weapon can literally change the course of battle. The weirdest thing is, that the attackers rarely try to pick off the shooter. That gives him a lot of opportunities to get some frags and defend the gold. In order to defeat vehicles, the defenders need some Demolition class soldiers. What is more, that kit has a shotgun, so players with it can fight the enemies trying to attack crates from the north.
Tasks:
Advantages:
Disadvantages:
Weaponry and equipment:
Tasks:
Advantages:
Disadvantages:
Weaponry and equipment:
Tasks:
Advantages:
Disadvantages:
Weaponry and equipment:
Tasks:
Advantages:
Disadvantages:
Weaponry and equipment:
Tasks:
Advantages:
Disadvantages:
Weaponry and equipment:
Heavy tanks
These vehicles has the toughest armor and we can surely say they're the best land units in the whole game. A heavy tank has two seat - one for the driver (who also uses the main cannon) and the second is occupied by the gunner, operating a heavy machine gun installed on the tank's turret. This vehicle, even when alone, may cause a lot of serious damage to the enemy. However, tank crew perform best when it is supported by infantry. Soldiers should repair the tank and eliminate enemy Demolition and Recon soldiers trying to hunt down the vehicle.
The biggest disadvantage of the heavy tank is undoubtedly its low maximum speed and questionable efficiency in a fight against single infantry units when there's only the driver sitting in the tank. Moreover, the ability of releasing smoke seems to be quite useless.
Light tanks
Fast, but worse armored than the heavy tanks. However, the reload time is amazingly short, so these machines can lay some intensive, deadly for infantry fire. In a fight against other vehicles, light tanks easily deal with transport machines, but they may have problems with tanks of any type. That is why they need some Demolition class or vehicle support.
It has four seats - one for the driver/main gun operator, the second for gunner using a machine gun on the turret and the remaining two are for soldiers shooting through the windows at the rear of the tank. Just like with the heavy tank, the smoke doesn't seem to be quite efficient.
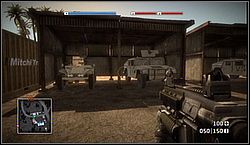
Infantry transport vehicles
Weakly armored vehicles designated to serve as a transport units for infantry. We can divide them into two types, let's call them - bigger ones (on the right in the picture) and smaller ones (on the left). These types differs in armor and weaponry. Bigger type can take more shots, but it has only a heavy machine gun, while the smaller vehicles are weaker and have (beside the MG) a quite good grenade launcher.
Each type has four seats - the first one is for the driver, the second for machine gunner, third for grenade launcher operator (in bigger type soldier sits in the back and covers the six) and the fourth seat is for a passenger who can't do nothing apart from watching what is going around him.
These vehicles - although they have nice weaponry - are too weak to actively participate in battles. However, their velocity allow soldiers to move rapidly from one place to another.
In the singleplayer mode You can also find completely unarmed army trucks.

Helicopters
Experienced pilot in a cockpit of this machine can be a real problem for the enemy. We have here two seats. The first one is for the pilot, who also operates rocket pods and machine guns simultaneously, by pressing one button. That combination is deadly for both infantry and vehicles (including the flying ones).
There is also a gunner sitting in the cockpit. He operates a cannon similar to the one installed in a light tank - it's a great weapon against infantry and light vehicles. Helicopter's disadvantages are weak armor and pilotage practice requirement.
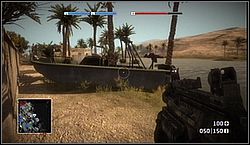
Boats
The only floating unit in the whole game. Rarely used and lightly armored. Armed with two grenade launchers (one in the front and the second in the back). Boat has enough space for four players. The first one steers the vehicle, the second uses his own firearm to fight encountering enemies and the two left operate the grenade launchers.
Although boats are quite fast, they can be easily destroyed by tanks, rocket launchers, other boats, etc.

Machine guns
Machine guns with special shield deployed on tripods are rather a bad weapon in an infantry fight. These emplacements are often placed on rooftops and that means the shooter is a great target for snipers and tanks. Of course, if You see the opportunity to kill one or two enemies, You may grab the gun for a while and surprise opponents with an accurate, deadly fire; but don't spend much time near the emplacement or You'll get a shot in the face.
Snipers should also know that the shooter can be killed not only by a bullet fired from the side, but also from the front of the machine gun - the sight in the shield is big enough for a bullet to get through, right into the shooter's skull.
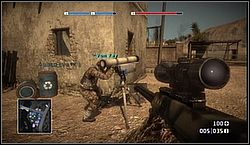
Rocket launchers
The problem with stationary rocket launchers is the same as there is with machine guns - the shooter is incredibly exposed to enemy fire. Missiles fired from such emplacements are actually quite mighty, by often player has to sacrifice his life in order to launch a rocket.
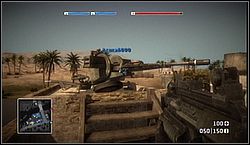
Anti-air guns
They're shooting fast and need really a lot of time to get overheated - these cannons are great against helicopters, vast groups of enemy infantry, walls and light vehicles. Heavy machinery requires definitely more shots before it falls apart.
The biggest disadvantage of this cannon is the fact that its operator is exposed to sniper fire. Moreover, if the gun is placed on a rooftop, it is impossible to shoot units located near the cannon.
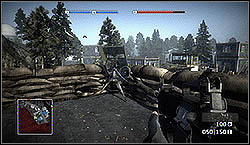
Grenade launchers
There is no better anti-personnel stationary weapon than the grenade launcher. It doesn't need precise aiming and it can eliminate even whole groups of infantry with one shot. It can be also used against light-armored vehicles. It's rapid overheating is, however, undoubtedly the biggest disadvantage of this launcher. This is why I advise You to practice shooting, in order to keep proper launching frequency, allowing to fight effectively and disallowing overheating.
Grenade launcher is actually useless and defenseless against tanks and helicopters, so it needs to be supported by other units. Snipers also pose quite a serious treat to the launcher's operator.
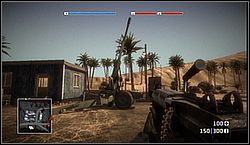
Artillery
The artillery is manned by only one soldier. When we decide to operate it, a bird's eye view turns on and a specific crosshair appears on the screen. Thanks to that solution, we can attack almost any part of the map without trouble. After launching a series of shells, a long reload starts, during which I advise You to look for some new targets.
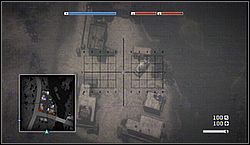
If the enemy manages to destroy the artillery gun, it repairs itself after a few moments.
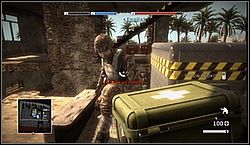
Healing
Support class soldiers always have a medkit. When You grab a medkit, not only You heal yourself, but also the soldier standing in front of (just like in the picture on the left). You can also drop the medkit - in such situation the health boost goes to the player who reaches the medkit first. In that case, healing takes a lot less time.
Assault class also have medicaments - they can unlock that thing called Life-2. It allows Assault soldiers to heal themselves, but they can't do anything for their teammates.
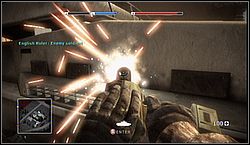
Repairing
Only the Support class has the repairing device. In order to repair a vehicle, simply grab the tool, approach the machine and hold the fire button. The bar located near the crosshair informs about the vehicle's condition.
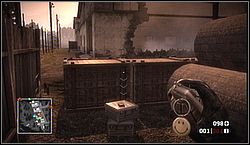
Grenades might come in handy while cleaning buildings. Infantry can also use it to crush walls (however grenade launcher is better here, as the projectiles don't bounce). This type of weapon is effective against infantry and extremely lightly-armored vehicles, like jeeps.
This weapon's range can be really long, if You lift the crosshair on a proper height. I advise You to practice aiming, especially the grenade launcher, as it required a lot of precision.
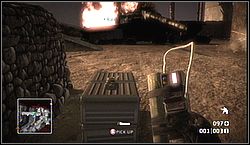
C4 charges require a lot of practice and patience. You can use them for less-offensive purposes, like collapsing bridges or making holes in walls. However, there is a more interesting usage of these explosives - You can sneak up on an enemy tank and install a charge or two on its armor (C4 sticks to every surface). But You have to know it may be very, very difficult, as You must catch the vehicle while it's unprotected and busy fighting someone.
C4 can also be used as an explosive trap - just plant the explosives in a strategic place and wait for the enemy to get close to the charge. Unfortunately, it requires a good hideout, from which You'll be able to watch the explosives. Actually that is impossible when 90% of the environment is destructible.

Mines can be very, very useful. Observe, which routes are used by enemy vehicles and then plant some explosives on them. You can also attack the vehicles with a rocket launcher, so the driver will so be busy fighting You he won't notice mines laying ahead of him. That ma give You sometimes even a couple of frags.
The best places for mines are actually roads marked on the map (place a few of them across the road, so the enemy will have a little problem with avoiding them). Moreover, lay some of them between buildings, where the space is big enough for a tank to drive through.
Snipers can unlock a laser designator allowing to destroy enemy vehicles. In order to call an airstrike, You have to target the designator's crosshair at an opponent's machine and hold the fire button. Remember that during this action the driver knows someone is trying to knock him down with a powerful bomb.
Anyway, once You target the vehicle, You'll have to wait for the plane to drop the explosives. When that happens, a bird's eye view turns on. The camera follows the bomb and You'll have to guide the bomb in flight, as it is always a bit inaccurate. Use analog sticks to do it.
Sometimes Your target may leave the vehicle and escape the area or simply drive out of the bomb's range. In such case... find another target as fast as possible :) It is quite difficult, but there is nothing better to do in such situation.
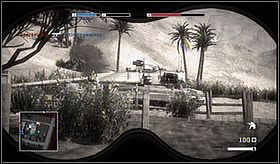
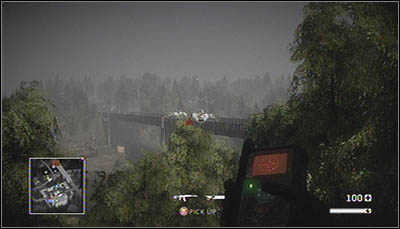
It also possible to call in an artillery strike. Support class can use the MRTR-5 device, thanks to which You can mark a target for the barrage anywhere on the map.
Artillery is effective actually against everything that moves on land or water. However, because You can't precisely predict where the shells will hit, some units may survive the barrage, especially the toughest ones - heavy tanks.
Achievements
Name
Points
Description
Action, not words!
25
Complete 'Welcome To Bad Company' on hard
Always get paid in gold bars
15
Complete 'Welcome To Bad Company' on normal
Be the best
20
(Online) Place #1 in a ranked match
Beans Bullets Bandages
30
(Online) Get 10002 kills
Been There, Drove That!
20
Drive all vehicle types (Jeep, Tank, Heli, Boat)
Capitalist pigs, very nice
25
Complete 'Crash and Grab' on hard
Cart Wheels
25
Complete 'Par for the Course' on hard
Catch The 'Bad' Moment
15
(Online) Take 3 pictures using the image system
Check My Grill
20
Find half of the gold bars
Clean sweep
25
Find all collectables
Colonel
25
(Online) Reach Rank 20
Darwin's Parachute
10
(Online) Glide in the parachute for 3 seconds
Death From Above
20
Kill 25 enemies in a helicopter
Dog owner!
20
(Online) Collect 5 unique dog tags
Drive By
25
(Online) 100 kills using vehicle
Forest Ranger
15
(Online) Knock down 1000 trees
General of the Army
35
(Online) Reach Rank 25
Get me started
15
(Online) Participate in one online match (Ranked)
Get the dog!
20
(Online) Collect 50 unique dog tags
Gold Digger
30
Find all gold bars
Half way thru
20
Find half of all collectables
He might come in handy
15
Complete 'Par for the Course' on normal
Here is your DD-214
30
Complete 'Ghost Town' on hard
Hold on!
15
Complete 'Air Force One' on normal
Home Wrecker
15
Destroy 200 walls
I am Bad Company!
25
(Online) Achieve all the awards
I Love Gold!
10
Find one gold bar
Killer on the loose
25
Kill 25 enemies
Leatherneck
25
(Online) Play 100 online matches
Lets take that boat
15
Complete 'Crash and Grab' on normal
Manic Lumberjack
15
Knock down a small forest
Master Sergeant
15
(Online) Reach Rank 8
Never Used a Door
15
(Online) Destroy 1000 walls
Not even a nugget!
15
Complete 'Acta Non Verba' on normal
On Top of The World
20
Climb to the highest spot in the game
One In a Million
20
Hit hostile helicopter with laser designator
Ooh Rah
20
(Online) Achieve half of all awards
Russia?
25
Complete 'Air Force One' on hard
Say goodbye to the gold!
25
Complete 'Crossing Over' on hard
Sir, yes sir!
30
Complete 'Ghost Town' on normal
Specialist
10
(Online) Reach Rank 3
Staying Alive
15
Complete one mission without dying (any difficulty)
The Anti-Mechanic
20
Destroy 50 vehicles. (containing enemy AI)
The Hypochondriac
20
Use Auto Injector 50 Times
There is no I in Squad
15
(Online) Have 20 Squad members spawn on you without dying in a single round
Vehikill
20
(Online) Get at least one kill in every vehicle
Where are they going so fast?
25
Complete 'Acta Non Verba' on hard
With My Devil Dogs
15
(Online) Use Squad in the menu, find a friend and play one round
You and what army?
15
Complete 'Crossing Over' on normal
You found it you keep it
15
Find 5 unique collectables
 Battlefield: Bad Company Game Guide & Walkthrough
 Beyond: Two Souls Game Guide & Walkthrough
 Bloodborne Game Guide & WalkthroughBattleForge Game Guide & Walkthrough
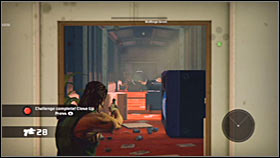 Bionic Commando Game Guide & Walkthrough