

The end is nigh for your old smartphone. Your upgrade came, and it’s a Sony Xperia, perhaps one of last year’s models, or even the 2015 Sony Xperia Z5.
You’re bracing yourself for the time intensive and often frustrating task of copying your data and contacts from your old smartphone (Android, iPhone, or Windows Phone) to your new one. And then you discover Xperia Transfer, and all is right with the world once more.
Sony provides two Android apps designed to manage your migration from your old phone to a new Sony Xperia — one mobile and one desktop. The former is Xperia Transfer Mobile, which works wirelessly; the latter is Xperia Transfer Desktop, which sends the data via a client app on a PC or Mac.
But which method should you use? Well, in simple terms, if you’re using Android 4.0 Ice Cream Sandwich or later, then using the Xperia Transfer Mobile app will be fine.
However, for those wanting to transfer data from an old Android device (below Android 4.0), a Nokia (running Symbian), a BlackBerry, a Windows Phone, or an iPhone, then your best bet is to use the desktop method, outlined below.
First, we’ll look at the mobile app.
To get started, check your Sony Xperia for the Xperia Transfer Mobile app, which should be listed in the App Drawer. If not, open the Play Store and install it. When you’ve done that, install it on your old Android as well.
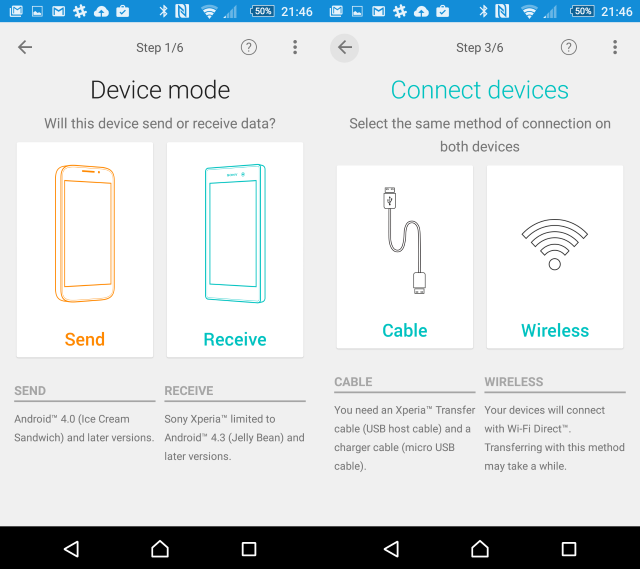
Next, launch the app on both devices. Select Wireless connection, and choose PIN or NFC (near field communication) to establish a relationship. Using a PIN is quicker (NFC naturally requires you to activate this feature, which for security reasons should be left disabled), so choose this on your old phone, then again on your new phone.
Xperia Transfer Mobile will then display a PIN on the new phone that you must enter on the old one. You will then see a notification informing you of an Invitation to Connect — click Accept on the new phone.
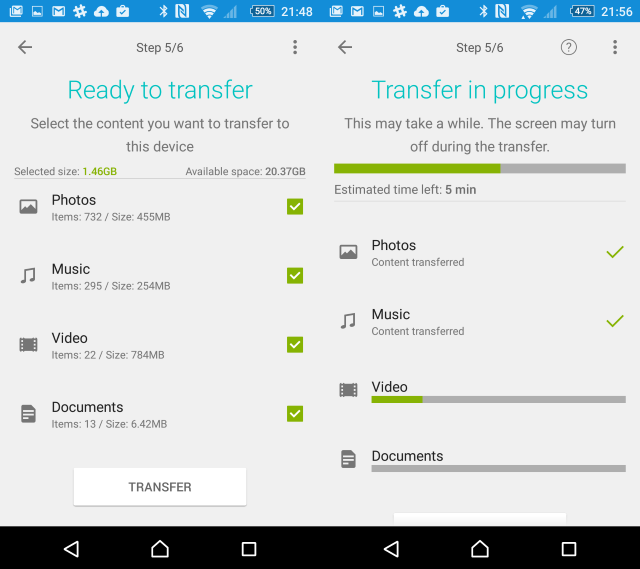
It’s almost time to start transferring data. All you need to do first is confirm what exactly you want to migrate, using the check boxes.
Once you tap Transfer, the new phone will confirm that you want to give Xperia Transfer Mobile permission to access and move the selected data. The app will then transfer the data, and as long as you have enough space on your new phone, you’ll soon have everything moved over.
Migrating from an old Android device (running a version prior to Android 4.0), one with problematic wireless networking, or one that runs BlackBerry, iOS, or Windows Phone/Mobile is just as simple, but it requires you to first install a desktop client. You’ll find this on the Sony Mobile website; choose the link for PC Companion or Mac Bridge. We’ll continue with this guide focusing on PC Companion (a 29MB download), but the options on both apps are more or less identical.
After installation, connect your Xperia via USB cable to prompt for the drivers to be installed; check your phone’s display to complete installation. The desktop app is multi-purpose and also provides any information you need concerning updates, so it is worth leaving it installed (assuming it doesn’t interfere with your other apps).
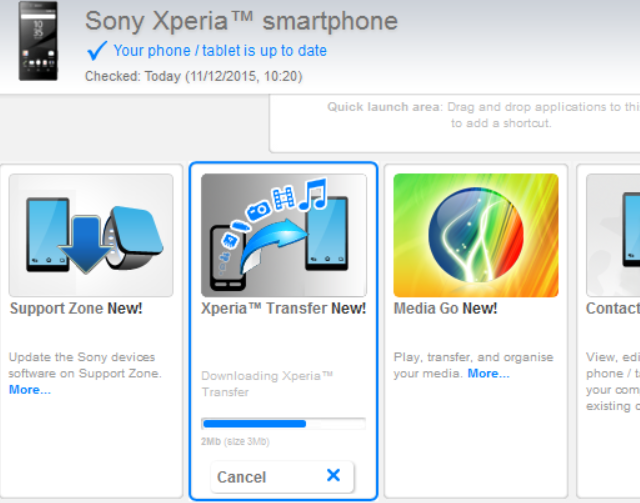
With the software installed, the PC Companion feature opens, so click Start and work through the setup wizard until you click Finish. Once this is done, find Xperia Transfer on the main app window, click Start, and wait as the component is installed.
While this is happening, on your old phone, which should be disconnected from your PC, install the Xperia Transfer Desktop application. When this is done, run the app (which installs as) and follow the wizard to extract your data.
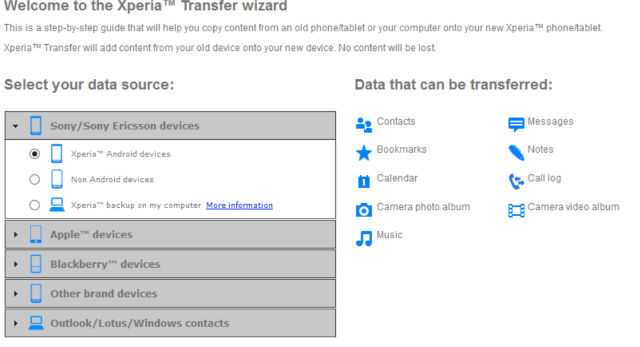
On your computer, you will be presented with a menu, where you can select your data source. Each selection you make will display the type of data that can be transferred on the right. When you’re happy with your selection, once again click Start.
You’ll be given the chance to review the data that will be transferred, including the opportunity to add or drop contacts, or manually merge them if you have duplicates.
If you’re using the Xperia Transfer Desktop app on your old Android device, now is the time to connect it via USB. Make sure you have the USB connection type set to MTP — you should be able to change this in your notifications once it’s connected.
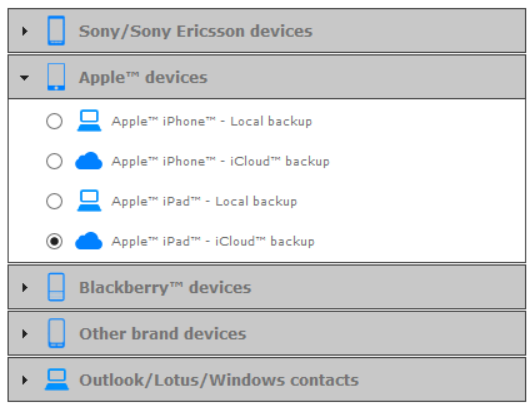
For transferring via iPad or iPhone, first make a backup either to iCloud or to your desktop using iTunes. You can then proceed with Xperia Transfer Desktop to migrate the data to your new Xperia device. If you’re moving from Blackberry, the Sony transfer software will take everything across to your new Xperia.
Windows Phone or Windows Mobile users should choose the final option in the list above, after first ensuring their contacts are synced via Outlook or Windows. Content will need to be manually transferred, or else you’ll need to sync to OneDrive and use the Android OneDrive app.
When the data is ready to be transferred to your Xperia, and you have connected the device, simply click Transfer to complete the process.
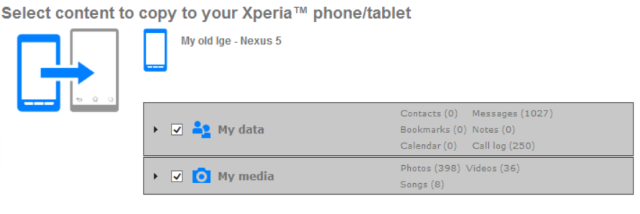
Sit back as the data moves from the old device to the new one, relatively effortlessly.
This is a great way to keep hold of your contacts and those much-loved photos, although don’t overlook cloud solutions when it comes to digital keepsakes you don’t want to lose! Keeping everything backed up this time around could mean an even easier switch next time.
Do you have a Sony Xperia phone or tablet? Have you used the Xperia Transfer software, or perhaps run into trouble with it? Tell us in the comments.



 Traveling Through Uncanny Valley: Economic Worlds in RPGs
 Saints Row 2 Guide
 Fuse Review
 How To Get Silent Scream Emblem and Ultra Knight Location In Destiny: The Taken King
 Fallout 4: Best way to obtain Benevolent Leader Achievement/Trophy