Saints Row 2 picks up 5 years after the events that took place in the first game of the series. Since then, three new rival gangs have sprung up; The Sons of Samedi, The Brotherhood, and The Ronin, as well as the enterprising Ultor Corporation. The city of Stilwater is hotly contested, with each gang controlling certain territories. After recovering from an explosion that left the main character burned beyond recognition, it’s time to break out of the Stilwater penitentiary and restore the 3rd Street Saints to its former glory!
This guide includes a walkthrough covering all fifty-six missions, strategies for all activities and diversions; maps showing the location of every tag, CD, stunt jump, and barnstorm; a list of every unlockable, cheat, achievement, and requirement for attaining the 100% completion stat, as well as general tips and an overview of the multiplayer mode.
Note: All strategies contained within are based on single-player gameplay. Activity requirements differ in co-op mode.
Left Trigger - Secondary Attack / Kill Shield
Left Bumper - (tap) Throw Human Shield / (hold) Hold Human Shield
Right Trigger - Primary Attack
Right Bumper - (hold) Sprint
Left Stick - Move / Select Weapon / (click) Crouch
Right Stick - Camera / (click) Enter Fine-Aim
Y Button - Action / Enter Car
B Button - Inventory
A Button - Reload / (hold) Pick Up Weapon/Object
X Button - Jump
D-pad UP - Recruit Followers / (hold) Dismiss Followers
D-pad DOWN - Quit Gameplay Mode
D-pad RIGHT - Compliment
D-pad LEFT - Taunt
Back Button - Map
Start Button - Pause Menu
Left Trigger - Handbrake / (helicopter) Alt Attack
Left Bumper - Cruise Control / (aircraft) Rudder Left
Right Trigger - Primary Attack
Right Bumper - Look Behind / Reset Camera / (aircraft) Rudder Right
Left Stick - Steer / Select Weapon / (click) Nitrous / Hydraulics
Right Stick - Camera / (click) Horn
Y Button - Action / Exit Car
B Button - Inventory
A Button - Accelerate
X Button - Brake / Reverse
D-pad UP - Recruit Followers / (hold) Dismiss Followers
D-pad DOWN - Quit Gameplay Mode
D-pad RIGHT - Change Radio
D-pad LEFT - Change Radio
Back Button - Map
Start Button - Pause Menu
PlayStation 3 Controls
L1 Button - (tap) Throw Human Shield / (hold) Hold Human Shield
L2 Button - Secondary Attack / Kill Shield
R1 Button - (hold) Sprint
R2 Button - Primary Attack
Left Stick - Move / Select Weapon
Right Stick - Camera
L3 Button - Crouch
R3 Button - Enter Fine-Aim
Triangle Button - Action / Enter Car
Circle Button - Inventory
X Button - Reload / (hold) Pick Up Weapon/Object
Square Button - Jump
D-pad UP - Recruit Followers / (hold) Dismiss Followers
D-pad DOWN - Quit Gameplay Mode
D-pad RIGHT - Compliment
D-pad LEFT -Taunt
Select Button - Map
Start Button - Pause Menu
Driving Controls
L1 Button - Cruise Control / (aircraft) Rudder Left
L2 Button - Handbrake / (helicopter) Alt Attack
R1 Button - Look Behind / Reset Camera / (aircraft) Rudder Right
R2 Button - Primary Attack
Left Stick - Steer / Select Weapon
Right Stick - Camera
Left Stick Button - Nitrous / Hydraulics
Right Stick Button - Horn
Triangle Button - Action / Exit Car
Circle Button - Inventory
X Button - Accelerate
Square Button - Brake / Reverse
D-pad UP - Recruit Followers / (hold) Dismiss Followers
D-pad DOWN - Quit Gameplay Mode
D-pad RIGHT - Change Radio
D-pad LEFT - Change Radio
Select Button - Cycle Camera Modes
Start Button - Pause Menu
The GPS - Pay close attention to the GPS in the bottom-left corner of the screen. This is your in-game guide to the world. During a mission, objectives will appear on the GPS as different coloured shapes. Squares denote targets at your elevation, triangles denote targets above you, and upside-down triangles denote targets below you. Furthermore, a marked trail accompanies location target markers and will lead you to the target if you follow it. Keep in mind, however, that this trail only marks the fastest, legal route to the target. You can likely find a quicker way around if you take some time to study the map. GPS shortcuts are unlocked when you pass over them, and the marked trail will from then on be amended to include this shortcut if applicable.
Waypoints - You can place a waypoint on any location on the map screen. Press back/select to call up the map. Set waypoints appear on the GPS, along with a marked trail. You can also place numbered “bookmarks” to mark locations you wish to remember.
Easy Respect - The “Septic Avenger” and “Fuzz” activities are the easiest to complete, and they both offer some helpful rewards. Complete both instances of each of these activities to earn a decent amount of cash and the all-important Respect, enough to allow you to play through a good number of missions. See each activity’s respective section in this guide for strategies and tips.
Cash Stash - Money is added to the stash in your crib each day. The amount added depends on the number of territories you control, as well as the number of stores you own. The stash is denoted by a bundle of bills icon in the world; it’s near your wardrobe and weapon cache.
Health Matters - Although your character’s health regenerates slowly over time, it’s a good idea to keep some food in your inventory for occasions when you need to quickly replenish lost health. Food can be bought at restaurants, which are denoted by hamburger icons on the GPS and map. The more expensive the food, the more health it will replenish when consumed. To consume a food item, pull up your inventory and use the D-pad to select from the available items.
Forgive and Forget - Money solves all problems in Stilwater. If the police are after you, you can get them off your back by visiting one of the “Forgive and Forget” drive-throughs scattered around the city. Drive through the Forgive and Forget and for a modest fee ($100 per star), your notoriety level will be completely diminished. If you’re being tailed during a mission, make your way to one of these drive-throughs to rid yourself of your pursuers, allowing you to complete the objective unhindered.
Cruise Control - Saints Row 2’s cruise control feature can make things a bit easier when you’re tasked with taking out a target in a vehicle. When you’re traveling at a fast enough speed, press the LB button on the Xbox 360 version or the L1 button on the PS3 version to activate cruise control. While cruise control is active, your vehicle will remain accelerated at that set speed, leaving you to only have to concentrate on steering and shooting. Cruise control is best used on long stretches of road, as it can be difficult to turn corners if you’re traveling too fast.
Needs Improvement - Most vehicles can be taken to a mechanics, where they can then be customised aesthetically and upgraded with reinforced parts. After you’ve customised a vehicle, be sure to store it in one of your crib garages for later use. Mechanic shops are denoted by wrench icons on the map and GPS.
Fast Travel - Dial 555-455-8008 on your mobile phone to call a taxi over to your location. The taxi is marked by a blue blip on the GPS. When the taxi arrives, you can get in and then select any marker to instantly travel there for a modest fee (a maximum of $100). The driver can’t take you to either of the islands on the west side of the map however, but it is a good way to quickly get to the other side of the city. TNA Taxis can be called via the Phonebook menu after the initial call.
Perks - Many of the game’s optional activities offer up some nice rewards when completed. An example of this is unlimited ammo for a certain weapon type, which definitely comes in handy during the main storyline. Check out the list of abilities under the “Unlockables” section of this guide for more information.
Ground Support - When you gain a territory after completing a mission or capturing an enemy stronghold, Saints will begin to populate that area from then on. Saints are denoted by purple blips on the GPS. Nearby Saints will provide support if you are attacked or if you are attacking. If you’re being tailed by the police or an enemy gang, lead them into Saints territory and seek some allies to help you out.
Hitch a Ride - If you need some wheels and you’re in Saints territory, you can take an ally’s vehicle by recruiting them as they drive by. Press up on the D-pad when one of your gang cars is near and the driver should get out, allowing you to take the vehicle. You can hold up on the D-pad to disband your followers afterwards, or simply leave them in the dust.
Home Sweet Home - When you load your save file, you’ll be transported to the nearest Saints crib. You can make use of this fact by saving and then loading your game to get quick access to your weapons, money, wardrobe, and garage. Just be sure to save your game before loading, and that you load the most recent save file.
Gray Matter - As is the case with most any gun-heavy action game, delivering a shot to your target’s head will deal severe to lethal damage.
We've covered all the activites in Sain't Row 2. Each one is detailed on their own page, so please use the menu on the left to make your selection.
- Crowd Control
- Demolition Derby
- Drug Trafficking
- Escort
- Fight Club
- Fuzz
- Heli Assault
- Insurance Fraud
- Mayhem
- Septic Avenger
- Snatch
- Trailblazing
CD Collection: There are 50 CDs in Stilwater. See the “CD Locations” section for a map and text descriptions of each location.
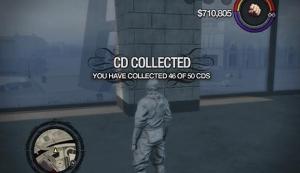
A secret track is unlocked for every 10 CDs collected. Collect all 50 CDs to unlock a 100% discount at “Scratch That” music stores, as well as the “Hi Fidelity” achievement on the Xbox 360 version.
Tagging: There are 50 tag locations in Stilwater. Stand on a tag marker and press Y/Triangle to start spray painting. Fill in the outline until the prompt to complete the tag appears, at which point press Y/Triangle.
You’ll have to shake the spray-paint can using the Left Thumbstick if it runs out to continue spraying. Don’t spray too much out of the lines, otherwise you’ll be forced to start the tagging process again. You’ll gain some notoriety with the police if they spot you tagging, so be careful.
See the “Tag Locations” section for a map and text descriptions of each location.
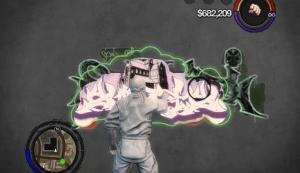
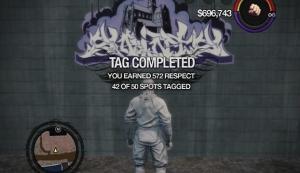
Tag all 50 locations to unlock the “All-City” achievement on the Xbox 360 version.
Barnstorming: See the Barnstorming section for instructions and a map. Completing all 35 aerial stunts unlocks the “Maverick Goose” achievement on the Xbox 360 version.
Stunt Jumps: There are 80 stunt jump locations in Stilwater. See the “Stunt Jump Locations” section for instructions and a map. Completing all 80 Stunt Jumps unlocks “The Duke” special Bootlegger car and the “Duke of Stilwater” achievement on the Xbox 360 version.
 1. Welcome Back
 2. Seppuku
 3. Brother's Keeper
 4. Remind Me of the Babe
 5. Crime Lord
 6. Velvet Rope
 7. Demolition Man
 8. Purple Haze
 9. Trickster
 10. Do Not Talk About It
 11. Reality Star
 12. HeliGood
 13. Stuntman
 14. Ambulance Chaser
 15. Wrecking Crew
 16. Splatster Chief
 17. ...But It Sure Is Fun
 18. Blue Collar
 19. Duke of Stilwater
 20. Maverick Goose
 21. Hi Fidelity
 22. All-City
 23. Where's My Car?
 24. Hello 47
 25. 2 Quick 2 Pissed
 26. Romero's Hero
 27. Surf's Up
 28. Duelist
 29. Pot Luck
 30. Separated at Birth
 31. Partners in Crime
 32. Confidence Men
 33. True Pal
 34. Strong Armed
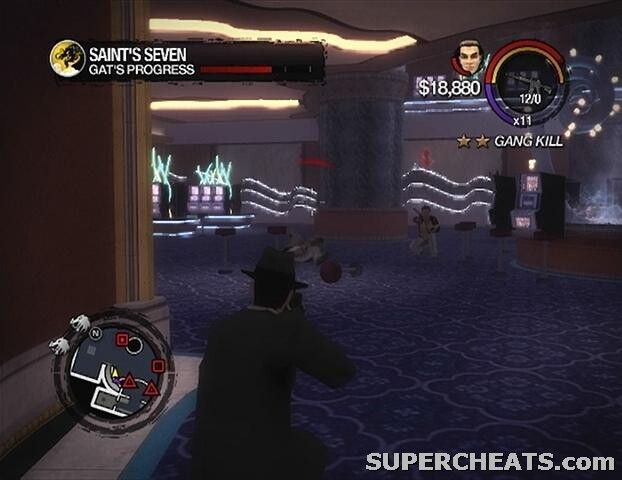
 35. Saint's Seven
 36. Spread the Love
 37. Tested
 38. Hoodlum
 39. Made
 40. Kingpin
 41. A Brighter Future (Secret Achievement)
 42. Vengeance (Secret Achievement)
 43. Going the Distance (Secret Achievement)
 44. Love Thy Neighbor (Secret Achievement)
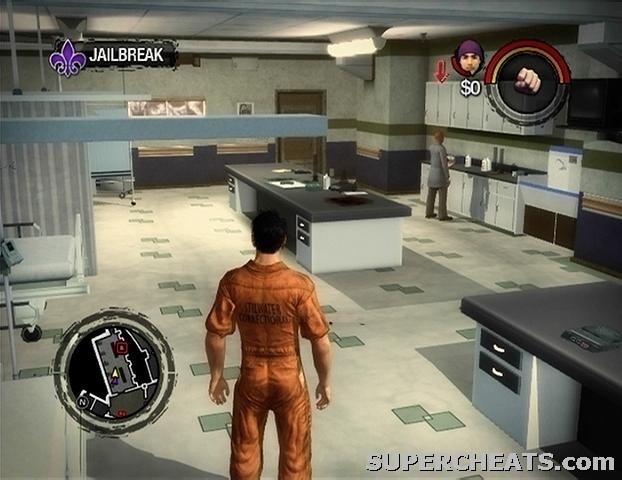 45. Aww Nuts! (Secret Achievement)
 46. Stilwater Welcoming Committee (Secret Achievement)
 47. I'm Not Addicted! (Secret Achievement)
 48. Trash Talker (Secret Achievement)
 49. Soprano (Secret Achievement)
 50. Still Addicted to tha Row (Secret Achievement)
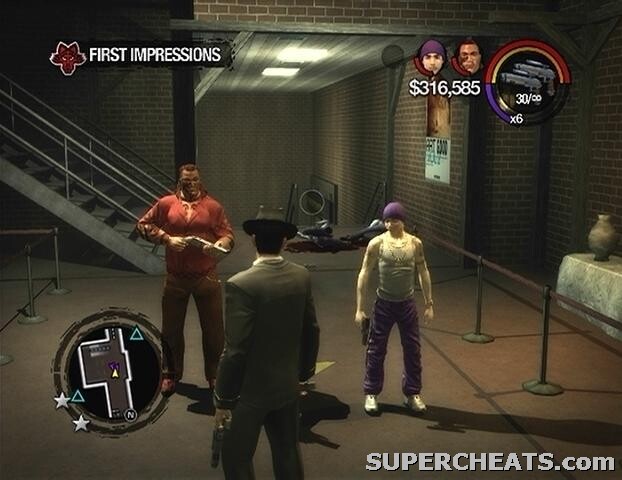
Your very first task in Saints Row 2 is to design your in-game persona. Your character's body may have been badly charred and burned at the end of the first Saints Row, but luckily there are apparently some pretty stellar plastic surgeons in the city of Stilwater. There are plenty of sliders and options that you can manipulate to get your character looking just as you want him or her to, however you need not perfect your creation right now at the start of the game; you can change any aspect of your character after his or her initial creation by visiting one of the plastic surgeon offices in the city once you're out of jail.
After confirming your character's appearance, study the 'Melee Combat' pop-ups that appear onscreen before continuing. Your first objective is to kill the doctor in the first room, so waltz up to and hit him with a string of melee attacks. You are then given the opportunity to play through the game's tutorial. It would be a good idea to follow the tutorial if you're new to the Saints Row series.
If you chose the tutorial path, step into the green marker in front of the door and press the Y button (Xbox 360) or the Triangle button (PS3) to kick open the door. Kick open the next door that you come to, kill the two guards that confront you, and then follow Carlos up to the roof. Follow the instructions that appear onscreen to make it up to the roof. Kill the guard that has his back turned to the vent and pick up the NR4 Pistol he drops. There are more guards on the roof to contend with, but even though you now have a ranged weapon, it's best to stick to melee combat for now.
Make your way over to the glowing marker in the northeast corner of the roof and go down the stairs there. Follow the markers that appear on your GPS until you reach ground level. Don't bother trying to take down the police helicopter, just continue on to the docks instead. You can easily avoid the cops outside of the prison by sprinting past them (hold RB on the X360, hold R1 on PS3), but don't leave Carlos behind. Steer clear of any officers as you run past because they are carrying stunguns, which can incapacitate you for a short period of time.

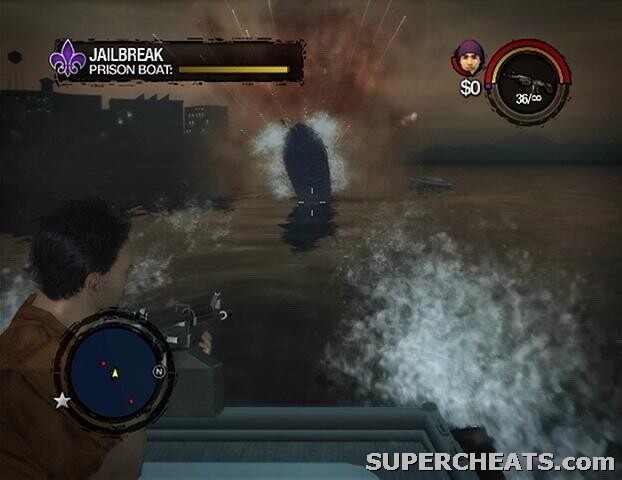
Steal one of the parked police cruisers, wait for Carlos to get in, and then follow your GPS over to the docked gunboat. When you reach the spot, get out of the cruiser and hit the glowing marker on the dock to board the boat.
It's your job to fight off the police boats and helicopters that are in fast pursuit. You're on a mounted turret with infinite ammo, so fighting off your pursuers shouldn't be a problem. The Prison Boat can only sustain a certain amount of damage, as indicated by the bar in the upper-left corner of the screen. However, with this being the first mission in the game and all, escaping from the prison will not be too difficult a task.
Once you're back on the streets, make your way to the 3rd Street Saints marker on your GPS to get things started.
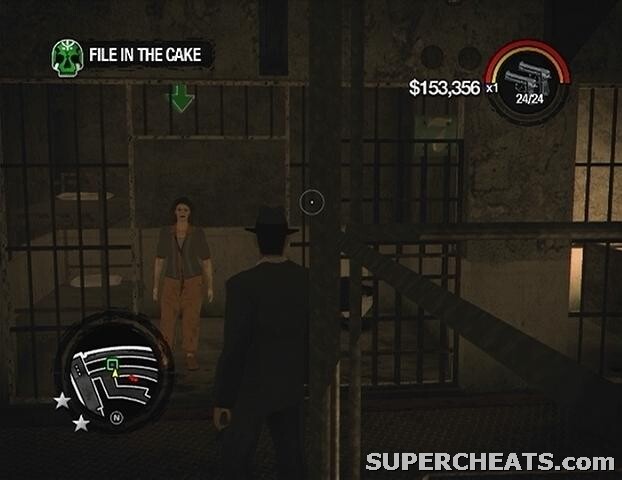
Get a vehicle and drive to the Sloppy Seconds Thrift Store, which is denoted on the GPS by a cyan square. It's time to lose that orange prisoner's garb in favour of something less conspicuous. The clothes selection here is quite limited, so just put something together and be on your way.
Next, follow the trail on your GPS to the TeeNay club in the Red Light District. Hit the blue marker outside of the club to trigger a cutscene. Afterwards, beat down the two gang members who are looking for a fight and leave the club. You have four-minutes to reach the courthouse in the Downtown District before it's too late.
You are likely being pursued by the Brotherhood after having killed two of their members at TeeNay. Just try to ignore any that are tailing you on the way to the courthouse. When you reach the marker, step out of your vehicle and open the doors to enter the courthouse. Johnny is in one of the courtrooms upstairs, so go up the stairs to the left of the circulation desk, head down the hall, and step in the marker to trigger another cutscene.
Switch to your NR4 pistol and move through the courtroom and into the adjacent hallway. The hallway is littered with guards, and some of them are carrying the Tombstone shotgun. Be sure to pick up all of the guards' dropped ammo after gunning them down, and continue down the stairs to the lobby.
There are many more guards in the lobby, and likely some police officers. Switch to the Tombstomb if you picked one up and sprint to the marker in front of the double-door at the other end of the lobby. Get in one of the vehicles parked outside, wait for Johnny Gat to get in, and then start towards the Forgive and Forget drive-through marked on the GPS. Forgive and Forget drive-throughs will remove all of your current notoriety for a price, allowing you to finish this mission unhindered.
Once you've lost the cops, drive Johnny Gat to Aisha's house in the Suburbs District to complete the mission and unlock the Red Light Apartment Crib.
You'll need to fill-up your Respect meter before you can start this next mission. There are several different ways to go about earning Respect, but by far the most efficient method is to run-through some activities. Refer to the 'Activities' section for more information on the various activities in the game.
When you're ready to get started, make your way over to the 3rd Street Saints icon in the Suburb District. After the cutscene, get in the car with Gat and drive to the abandoned mission house in the Red Light District. Once you reach the marker outside of the mission house, proceed through the double door and follow the cyan markers to the abandoned hotel underground.
The hotel is currently occupied by 14 Samedi gang members. You'll have to clear it out before the hotel can be used as the Saints' new base of operations. The majority of the Samedi here can be found in the grassy lower area, but there are a few of them on the ruined second-floor walkway.
When all 14 of the Sons of Samedi gang members have been eliminated, make your way over to the shanties in the next area. There are seven total shanties in this area, as well as armed homeless defending them. To destroy the shacks, first take an enemy as a human shield by holding LB (X360) or L1 (PS3) when standing next to them. Then, aim your shield towards one of the shanties, and then press the LB/L1 button again to throw the enemy at it.
Once all seven shanties have been destroyed, kill the remaining enemies in the area to complete the mission and unlock the Saints Hideout at this location.
Enter the mission house and stand in the marker there to get started. After the introductory cutscene, get in a car and drive over to the Suburbs District. When you reach the location, three green markers will appear on your GPS. Each of these markers denotes a recruitable Lieutenant. Start with the southwest-most marker, which is Carlos.
Carlos wants you to help him force a friend of his to repay a debt. Get in the tow truck nearby after speaking to Carlos and drive to the marker in the Mourning Woods Cemetery. When you reach the car, back the tow truck up to its front and hold the shoulder buttons (LB RB/L1 R1) until it is completely hitched. With the car in tow, make your way to the garage marked on your GPS and drive into the marker there to gain Carlos as a lieutenant.
Another recruit, Pierce, is denoted by the southeast-most marker, which is just a short ways east from Carlos' location. Pierce wants to see you to kill a total of nine Ronin gang members before he'll agree to join the Saints. Drive to the red markers on your GPS and kill the Ronin there until you have reached the quota to gain Pierce as a lieutenant. There's no need to step out of your vehicle to fight every batch of Ronin; you can just as easily run them over or fire at them from the driver's seat.
Once Pierce is satisfied, meet Shaundi at the final marker. You'll have to hit the three jumps marked on your GPS to impress Shaundi. Get in the car parked in the driveway and head for the Trailer Park District just down the road. Drive down the slope and hit the ramp to clear the gap. To clear the next two, speed through the half-pipe across from the hill, hit the jump, and then continue speeding off of the broken ramp to clear the next one.
Gain all three lieutenants to complete the mission and unlock the 'Welcome Back' achievement if you're playing the Xbox 360 version. You'll also unlock the ability to recruit one follower by pressing up on the D-pad when targeting a Saint.
Now you must choose which of the three mission lines to start. The starting points for the Ronin and Sons of Samedi are just outside the mission house. The Brotherhood starting point is in the Factories District on the southeast end of the map.
Follow the marked route on your GPS to reach Stilwater University at the southwest end of the map. There are dealers selling the Sons of Samedi's product at two different locations in the Stilwater University District. One batch is selling in Frat Row at the north end of the district, and the other batch is at the south end of the district by the observatory.
Both groups are carrying a package containing Loa Dust. You must kill both groups and collect the packages they drop. There are five dealers by the observatory, and four in Frat Row. Kill all of the dealers at both of these locations; the last one you kill at both locations should drop the stash. After collecting both packages, you'll get a call from Shaundi; she tells you that a dealer by the name of Mr. Gabby is nearby, and that he tends to bring in a lot of money for the Samedi.
Mr. Gabby is at the east end of the district. Just follow the marked route on your GPS to reach him. Gabby is in a car, so if you're coming at him head on just shoot at him through the car's windshield. If he does manage to get away, the car he is driving is quite slow, so you shouldn't have too much trouble catching up to him. When Mr. Gabby is dead, get out of the car and pick up the last package.
Take the dust to Shaundi in Sommerset to complete the mission.
You have four minutes to reach the prison before the bomb detonates. Get in the boat that's docked nearby and start towards the cyan marker on your GPS. When you reach the island, start following the marked trail.

When you come to the secret cove, get out of the boat and start down the tunnel. Head up the steps that you come to, kill the security guard on the catwalk, and then kick open the door to the generator room. Stand in the marker here, plant the bomb, and then sprint out of the room to avoid being caught in the blast.
With the generator destroyed, return to your boat and move around to the east side of the island. Get off the boat when you reach a low hillside, climb up, and start down the curved road towards the marker on your GPS. There are plenty of security guards on the island, however most are carrying the relatively weak NR4 pistol, so taking care of them shouldn't be too much of a problem.
When you reach the correctional facility, fight your way to the stairwell door on the other side of the room. A lot of the guards here are wielding shotguns, so try to keep your distance. Shaundi's drug expert is in a cell on the third floor, denoted by a green marker on the GPS. When you find her, move towards her to have her follow you and then start back down the stairs. Note that everyone is trying to kill you here, inmates included, so there's no need to discriminate.
The string of cyan markers on the GPS will lead you to a helipad with a police helicopter on it, which you can use to take Laura back to the city. Once you're in the chopper with Laura, fly away from the island to complete the mission.
This is a real simple one. Your first task is to destroy the farming equipment in the field that Toby flies you over. The pieces of equipment are marked on the GPS, and evident by the large, red arrows above them. The helicopter is outfitted with a mounted AR-200 SAW machine gun that has unlimited ammo, so just fire down at any visible pieces of farming equipment while the helicopter passes over the field.
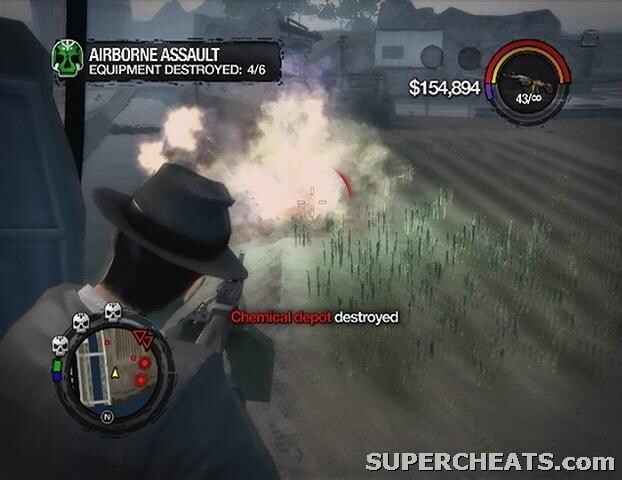
This mission is not without its hazards, however, as the Samedi below—including a couple armed with RPG Launchers—will fire at the helicopter in an attempt to ground it. Pick off these enemies first before you continue firing at the equipment. When all six pieces of equipment have been destroyed, four Samedi lieutenants will attempt to escape in four different cars packed with supporting gang members. Fire at each one of these cars until they explode, killing the lieutenants inside.
The mission is complete once all four lieutenants are dead. The News Helicopter will then be available at your crib helipads, and you can call Tobias on mobile phone to have him join you as a follower.
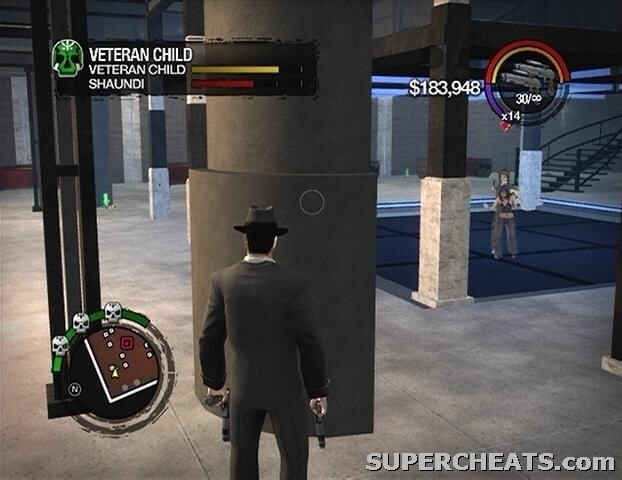
Shaundi is being held at the Cocks night club in the High End Retail District. Follow the marked route on the GPS and then enter the club when you reach it. Your first task is to clear out all of the Samedi in the club. All of the Samedi that need to be killed are marked on your radar, so track down and eliminate each one of them to complete the objective. With that done, leave the club and follow the marked route on the GPS to the On Track club in the Barrio District.
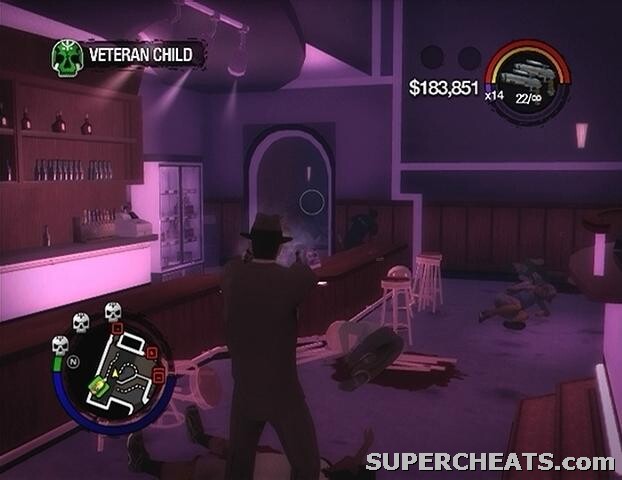
By now the Sons of Samedi are after you, and they are likely going to hit you with some major resistance since you took so many of their own. Try to ignore your pursuers if you can, because killing more of them will only make things worse. If they're really making it hard for you to get from point A to B, you're going to have to fight them off to give yourself some space.
When your reach the On Track club, step out of your vehicle and kill off any Samedi that were pursuing you in their cars before entering. Clear out the Samedi around the bar, and then step into the marker in front of the door at the other end of the room. A number of enemies will be waiting on the other side of this door, so be ready with a shotgun and pump them full of lead. Fight your way over to the marker at the end of the walkway, and then step onto the ground floor to trigger a cutscene.
Veteran Child is using Shaundi as a human shield here, so you're going to have to find some way to separate them so you can deal damage to him without harming her. There are Flash Bang grenades littered throughout the room; swap out whatever explosive you have in your inventory for one of these. Throw a Flash Bang in front of Veteran Child and Shaundi (make sure your character is faces away to avoid being stunned) and then rush in and blast Veteran Child with a shotgun if the Flash Bang managed to incapacitate him. While the two of them are stumbling about, be careful not to shoot Shaundi, as she can't take very damage.
You can only carry one Flash Bang at a time, but all you have to do is run over one of the batches to pick up another. The best place to lob the Flash Bangs at Veteran Child is from behind one of the pillars at the north end of the room. This way you can avoid being shot by Veteran Child while he has Shaundi, and you can simply sprint over the Flash Bangs in front of the pillar when you need one.
Samedi gang members will occasionally enter the fray to help Veteran Child, so pick any of them off from behind cover before throwing the Flash Bang. All you have to do is deplete Veteran Child's health bar to complete the mission.
There are four Samedi dust labs locations in the city that must be shutdown. Follow the marked route on your GPS to reach the first location. The first building contains two dust labs. The labs explode when shot, so use this to your advantage to clear out some of the gang members inside, but make sure you're a safe distance from the explosion as well. When the first location is clear, return to your vehicle and start towards the second building.
Things get progressively more difficult the more you kill Samedi gang members, since doing so builds up your notoriety with the gang. They'll send a ton of enemies when you reach the five-star notoriety level, which can make driving to the next location difficult. Before getting back in your vehicle after having shut down a lab, clear out all of the Samedi in the area to give yourself a head start before more arrive.
Fortunately the third and fourth locations aren't too far apart. There are four lab technicians to eliminate in the fourth building before you can get to the lab. Pick up the key dropped by the third technician and use it to open the locked door marked on the GPS. The lead technician runs outside and flees in a getaway car, so you're going to have to chase after him. If you're quick enough you may be able to blast him as soon as you step outside, otherwise there should be a car parked across the street that you can get in and use to chase after him.
All you have to do is kill the technician to complete the mission. You can use Saints Row 2's cruise control feature to make things a bit easier. When you're traveling at a fast enough speed, press the LB button on the Xbox 360 version or the L1 button on the PS3 version to activate cruise control. While cruise control is active, your vehicle will remain accelerated at that set speed, leaving you to only have to concentrate on steering and shooting. Cruise control is best used on long stretches of road, as it can be difficult to turn corners if you're traveling too fast.
You must make it to the Saints hideout and rescue Shaundi before her health bar is depleted. Unfortunately the short spin your character took in the smoke-filled Samedi limo has intoxicated him or her, so driving may be a bit of an issue. With your vision blurred, it can be difficult to avoid obstacles on the road, but luckily the hideout isn't too far from your current location. When you reach the hideout, clear out the enemies in the first room, and then head down the stairs to rescue Shaundi.
Pierce needs rescuing next. Clear out the Samedi in the parking lot before his health bar is depleted. Eliminate all of the marked Samedi that enter the parking lot to complete the mission. There are a lot of them (60 or so), so hopefully you have plenty of ammo. Just be sure to revive Shaundi and Pierce if they're incapacitated, and sprint away to regenerate some health if things are looking dire. You must remain at the hideout, however, so don't go too far away from the parking lot.
You'll unlock the Samedi melee fighting style after completing the mission, which can be added to your character at a Plastic Surgeon.
Six helicopters are headed for drop-off points around the city. It's your job to shoot them down before they can make those deliveries. This is another on-rails mission; Pierce is driving, and your character is armed with an AR-50 XMAC with unlimited ammo. There really isn't much to this; just fire at each helicopter as they appear and have them shot down before they reach the drop-off point. Your weapon is exceptionally accurate, so just keep the reticule trained on your target and fire away.
The vehicle is exceedingly sturdy if not indestructible, so there's little chance of death here. The first two helicopters fly over the city, however the following two will be flying over the water. After downing the first two helicopters you'll have to follow Pierce to a docked boat and get in. The last two helicopters are flying over the city, so follow Pierce on to land when he docks the boat and wait for him to steal a vehicle.
Down the sixth and final helicopter to complete the mission.
The starting point for this mission is over in Black Bottom, which is part of the Factories District at the southeast end of the map. Purchase a sub-machine gun and a good amount of ammo if you don't have one already, as you'll need it during this mission.
Mr. Sunshine has sent a horde of drug addicts over to the warehouse where the Saints are unloading the stolen Loa Dust. The addicts will enter the warehouse with a variety of weapons, including Molotovs, so keep your distance. Hold out in the warehouse with Shaundi while Pierce heads off to get a truck to move the drugs.
Eventually Pierce will arrive with the truck, at which point he and Shaundi will take to loading the crates onto the truck. You must cover them while they do this. The addicts can enter the warehouse through the open bay door, the side door, or through the door at the back of the warehouse, so keep an eye on these spots.
Fight off the addicts until Shaundi and Pierce have managed to load all 12 crates, then head for the cyan marker on the GPS and get in the car there. Now it's your job to escort the truck to safety. The truck can take quite a beating, however it does have quite a long ways to travel. Addicts will pull up behind the truck and fire at it; the addicts are denoted by red blips on the GPS just like other enemies, but you can easily distinguish them by the junk cars they drive in.
You have to remain pretty close to the truck, otherwise Pierce will slow down and wait for you to catch up. Since the truck can take such a beating relatively unscathed, the biggest threat here is having your own car destroyed. For this reason you'll have to hang back far enough to avoid getting caught in the explosions caused by enemy vehicles when they've been damaged enough. When a car pulls up behind the truck, fire at it with your weapon until it catches fire, at which point you'll want to start to slowing down. After the vehicle has exploded, move up closer to the truck. Explosions from enemy vehicles don't seem to do any damage to the truck.
The meat packing plant is crawling with Samedi gang members, and simply stepping into the area nets you a five-star notoriety level. Clear out the enemies surrounding the plant, and then follow the marker on the GPS to the entrance. Kick open the door and step inside. Fight your way to the stairs at the other end of the area and then take them up to the second floor.
Mr. Sunshine is up on the third floor, so find your way to a second set of stairs and climb up. Hit the marker in front of the doorway to start the fight. A large number of gang members are supporting Mr. Sunshine here, so you'll want to retreat to the walkway below so you can take cover behind one of the tanks there. Mr. Sunshine is completely immune to gunfire while he's holding the voodoo doll, so to get anywhere you must shoot it out of his hand.
Wait until he stops and raises both arms in the air, at which point take aim and shoot the doll. You should be able to still see him from the second floor walkway, otherwise you'll have to head back up and hit him from the top level. When the voodoo doll is out of his hand, start firing at him to deplete his health bar. Mr. Sunshine is carrying a powerful assault rifle that can bring you down quickly if you aren't careful, so take cover behind one of the tanks on the lower walkway to regenerate health if you're close to death.
Kill Mr. Sunshine to complete the mission
Your first task is to acquire a repairman's uniform. Follow the marked route on the GPS to reach a parked repair van. You have less than three minutes to get to the location. Fire at the driver through the windshield and then hijack the van to put on the uniform. Next, head for the marker outside of the police station and hit it to trigger a checkpoint. Put away your weapon and enter the station.
Speak to the clerk at the front desk to learn that the camera room is on the fourth floor. Take the stairs up to the fourth floor and enter the camera room. At this point you'll earn a four-star notoriety level with the police, so prepare for some heavy resistance. If you have a shotgun in your inventory, switch to it as it will come in handy here.
Crouch down by the doorway and wait for the officers to approach. Take out the officers surrounding the camera room and those that come to the door while Shaundi hacks into the system. There are tons of officers after you, and some of them are wielding shotguns, so be extra careful here, and duck down in the room to regenerate health if things are looking dire.
When Shaundi is finished with the computers, head through the door at the end of the hall and sprint to the helipad. Get in the police helicopter and start towards the helipad atop the Saints hideout. An attack chopper will be pursuing you, so try your best to swerve out of the way of its gunfire. Luckily the hideout isn't very far when traveling by air.
Land on the Saints Hideout helipad to complete the mission. Now you must capture the four Samedi strongholds to unlock the final mission. See the 'Gang Strongholds' section for more information.
Once you've captured the four Samedi strongholds, step into the mission marker outside of the mission house to get started. You'll want to purchase a rifle (the AR200 SAW will do) and a sub-machine gun with plenty of ammo before attempting this mission.
Get in a car with Shaundi and head for the ambush location on Nob Hill. Reach the ambush location before two minutes are up to trigger a cutscene. Your task after the cutscene is to eliminate all 11 of The General's bodyguards. Remain up on the walkway and fire down at them. Two or more of the Samedi here are likely carrying RPG Launchers, so single them out first. Be sure to collect the RPG Launcher ammo for later use.
When all 11 of the bodyguards have been killed, The General will get out of his armoured limo and flee into the mall. Follow him.
The mall is huge, and swarming with Samedi. They even managed to get some of their vehicles into the mall. If you do encounter a car-load of Samedi gang members, kill them and get their car to make descending here a bit easier. Follow the cyan marker on your GPS to locate The General.
Unfortunately he's riding in an armoured Bulldog Humvee. As soon as you gain control over your character, hit the Bulldog with any explosives you have and then switch to another high-powered weapon (assault rifles work best) and continue firing at the vehicle. The General will drive off when the Bulldog has taken a certain amount of damage, at which point a marker pointing to a small vehicle appears on the GPS. Don't get on the quad just yet; continue firing at the Bulldog until it's completely out of sight.
The General then proceeds to drive the Bulldog all around the mall in a seemingly aimless manner. Hop on the quad that is marked on the GPS and trail after him. Fire at the vehicle with your sub-machine gun to further damage it. Deplete the Bulldog's health bar completely to kill The General and complete the mission.
Your reward for completing the Sons of Samedi mission line is $50,000, the Prawn Court territory, The General's Bulldog and Samedi vehicles (available at your crib garage), the Samedi Personality (taunts and compliments available at a Plastic Surgeon), and you can now call Shaundi on your mobile phone to have her join you as a follower.
The starting point for this mission line is over in Black Bottom, which is part of the Factories District at the southeast end of the map
A legion of police officers appear and interrupt the Saints’ meeting with Maero, the leader of the Brotherhood gang. You must escape from the Stilwater Caverns with Maero and Carlos in tow. This objective can be met by simply following the cyan markers that appear on the GPS. Some of the officers in the caverns are armed with NR4 Pistols, but a good number are carrying shotguns, so you’ll want to keep your distance. They are also carrying pepper spray and stunguns, both of which can incapacitate you for a short while.
When you reach the end of the caverns, there are two methods of escape you can choose from: Take the staircase at the south end of the room up to reach street level, or continue down the stairs north to escape by sea. Heading up the stairs to exit at street level is the quickest route, although you will meet considerable resistance from the police. Whichever means of escape you choose, take Maero back to his hideout to complete the mission.
You’re taking Donnie to tamper with some Brotherhood trucks. There are four trucks to destroy here. Follow the marked route on the GPS to the first location, get out, and stand by Donnie while he tends to the truck there. You’ll gain some notoriety with the Brotherhood as soon as Donnie starts working, so you’ll have to fight them off as they come. Keep an eye on the GPS; the red dots denote enemies, so prepare for battle when you spot a red dot closing in on your location.
When Donnie has finished rigging the explosive, get back in the car and drive it out of the red circle now visible on the GPS. The circle denotes the bomb’s blast radius, so you won’t be able to trigger the explosive until you’re at a safe distance from it. Turn your vehicle so you can see the rigged truck and then pull the trigger to set off the explosive.
There are two trucks at the second location. Step out of the car at the start of the alley and then lead Donnie over to the trucks. By now the Brotherhood will be sending vehicles with one or two gang members in them to try and stop you, so keep an eye on the GPS. When the two trucks have been rigged with explosives, get back in the car, move away from the blast zone, turn towards the trucks, and pull the trigger. If your car has been destroyed or is smoking excessively, you may want to take one of the vacant trucks to the next route instead.
The last truck isn’t very far from the last two. This one is a little different, however; after rigging the explosive, the trigger ends up malfunctioning, which means you have to wait for the timer in the top-left corner of the screen to reach zero before the explosive will go off. This gives one of the Brotherhood gang members enough time to get in the rigged truck and start following you. Immediately take off down the street to avoid getting caught in the explosion when the bomb finally goes off.
It doesn’t appear that you have to be completely out of the blast radius when the bomb goes off to avoid getting caught in the blast; just be a good ways away from the red blip at its center when the timer reaches zero and you should still survive blast. You’ll unlock Donnie’s car (available at your crib garage) after completing the mission.
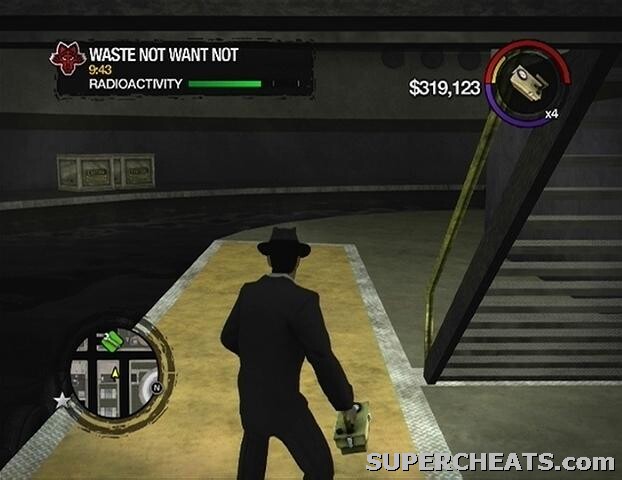
This is a timed mission, but you are given a generous amount of time to complete it. Start by visiting the Friendly Fire gun shop, which is marked on the GPS. When you reach the store, head inside and touch the shopping cart icon to purchase a Geiger counter. Next, follow the marked path on the GPS to reach a docked boat. Get in the boar and start towards the nuke plant, which is situated on the island at the southwest end of the map.
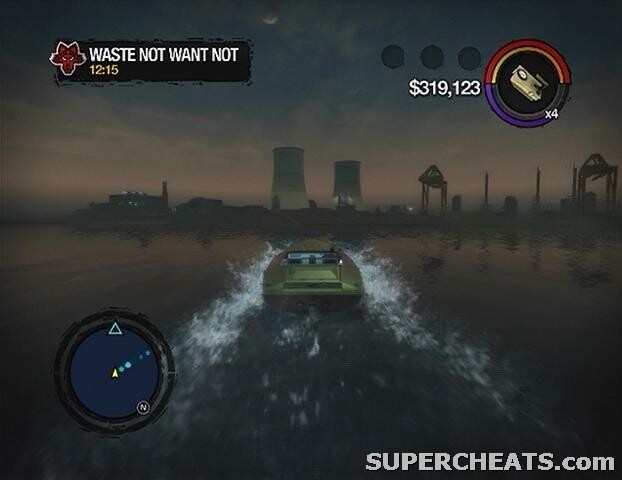
Your task once you reach the island is to track down some toxic waste with the Geiger counter, preferably without being spotted. Being seen does not mean the end of the mission, however; you can go in with guns blazing if you wish, though this probably won’t be necessary. With the Geiger counter equipped, start down the water tunnel by the dock at the east end of the island.
The Radioactivity meter that appears in the top-left corner of the screen while you have the Geiger counter equipped indicates how far you are from the toxic waste. Continue down the channel until the Radioactivity meter begins to decline, at which point you’ll want to get on the catwalk and head through the doorway at its end. There are two guards sitting at the desk here, but you should be able to sneak past them if you crouch down and creep to the door.
Once you’re outside, look for the building marked “Water Tunnel Access 2,” which should be right across from the building you just exited. Enter the building, step into the blue marker in front of the desk, and press Y/Triangle to take the toxic waste. There are some stairs along the south side of the large building with the helipad on it. Head up these stairs and start taking out the security guards that are marked on the GPS.

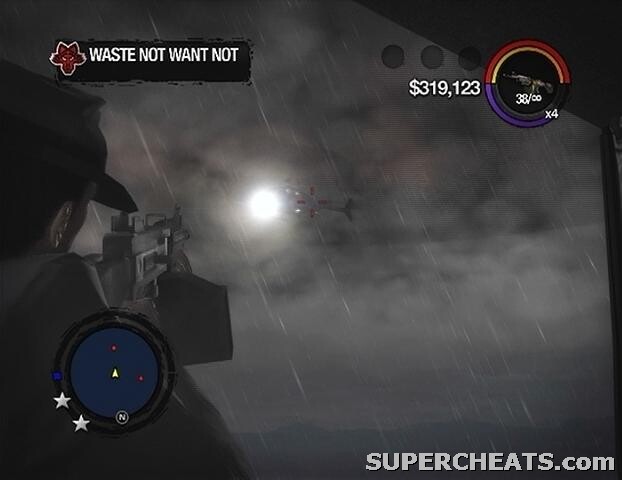
Kill all 10 of the security guards and then defend the helipad until the timer in the top-left corner of the screen reaches zero. When the helicopter arrives, get on the helipad to start the escape. You’re given an AR200 SAW with unlimited ammo to fight off the boats and helicopters that are pursuing you. Shoot down the police helicopters and eventually the helicopter you are riding in will start going down. After the crash, quickly steal a vehicle and start following the marked route on the GPS. You must get to the marker before the timer in the top-left corner of the screen reaches zero. If you don’t have enough time and end up failing the mission, reload from the last checkpoint and you should be given some more time.
Hit the marker outside of the tattoo parlour to complete the mission.
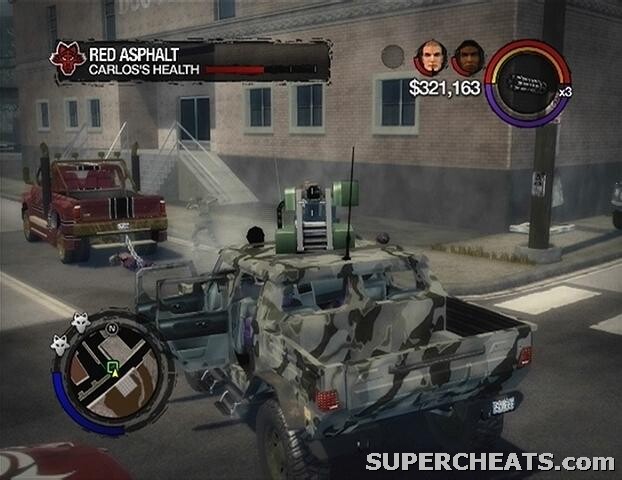
Head to Donnie’s and clear out the Brotherhood gang members outside. Enter the garage when the way is clear; you’ll find Donnie in the backroom. Hit him with melee attacks until he tells you where the Brotherhood is keeping Carlos. You must rescue Carlos before the health bar in the top-left corner of the screen is depleted. If there’s a Bulldog parked in the garage, be sure to take it before heading off.
Carlos is chained to the back of a truck and is being dragged through the city. Immediately start after the red marker on your GPS. You have to catch up with the truck and deal enough damage to force it to stop. If you managed to acquire a Bulldog at Donnie’s, this will be a simpler task since the turret attached to it is quite powerful, however the gang members that are constantly following you throughout this mission can make things a bit tough. If you don’t have a Bulldog, use a sub-machine gun instead.
You can use Saints Row 2’s cruise control feature to make things a bit easier. When you’re traveling at a fast enough speed, press the LB button on the Xbox 360 version or the L1 button on the PS3 version to activate cruise control. While cruise control is active, your vehicle will remain accelerated at that set speed, leaving you to only have to concentrate on steering and shooting. Cruise control is best used on long stretches of road, as it can be difficult to turn corners if you’re traveling too fast.
When the truck stops, get out and approach Carlos to complete the mission.
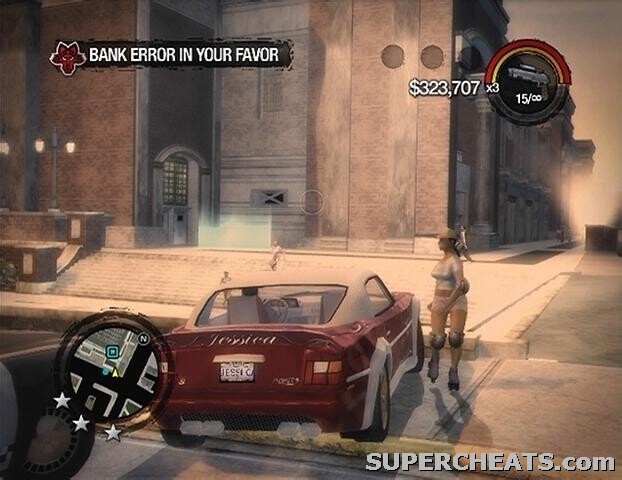
Follow the marked route on the GPS to reach the bank. Step inside, make a beeline for Jessica, and press and hold the LB/L1 button to take her as a human shield. You don’t need to hold the button any longer once you have her, but be sure not to press it again because doing so will cause your character to launch her across the room.
You must keep Jessica between you and the armed guards in the bank, which means walking backwards if you must. Keep an eye on the GPS and look for red dots to avoid backing up and leaving yourself open to a guard. Take Jessica over to the switch up the stairs, stand in the marker, and press Y/Triangle to have her shut off the alarm. There’s now a SWAT team downstairs, so you’ll have to kill them off before sprinting to Jessica’s car. Back yourself against the wall across from the doorway and start picking them off. Use the GPS to make sure every single enemy has been dealt with before heading outside.
Sprint over to the marker behind Jessica’s car and press the Y/Triangle button to put her in the trunk. Your next task is to drive her car to the Stilwater University Arena, which is quite a ways off from the bank. You’ll meet some considerable resistance from the police force as well. Jessica’s car is quite speedy, however the police cruisers seem to have no trouble keeping up. You must make it to the marker outside of the arena with the car intact, otherwise the mission is failed.
You’ll come to several SWAT truck barricades along the way, so try and swerve around and keep moving. The barricades tend to just pop-up, so avoiding the barricades can be difficult sometimes. Keep moving and get to the marker outside of the arena to complete the mission.
There’s a fireworks truck parked behind a warehouse in Harrowgate. Follow the marked route on the GPS to reach the warehouse. The place is being guarded by Brotherhood, so you’re going to have to fight your way to it. The fireworks truck is parked behind the warehouse, so be careful not to damage it during the firefight.
One or more of the enemies here may have an RPG Launcher which could potentially damage the truck, so don’t take cover behind it or anything. After killing all 12 of the gang members outside, you’ll appear in the back of the truck with a box of fireworks in hand. You’re headed to the Ultor Dome where the Feed Dogs are having a concert.
It’s your job to protect the truck from police and Brotherhood. The truck’s condition is indicated by the bar in the top-left corner of the screen; do not let this bar be depleted. You have access to an unlimited amount of explosives, so just throw them at the pursuing vehicles. The crates take some time to explode unless they hit a vehicle directly. Don’t hesitate to lob the crates at tailgaters, since the truck appears to be immune to explosions.
Make it to the Ultor Dome with the truck still intact to complete the mission. Completing this mission unlocks the Brotherhood melee style, which can be added to your character at a Plastic Surgeon.
There are four Brotherhood Lieutenants in the districts at the southeast end of the map. One group is in the Brown Baggers department store in Copperton. Here you must prevent the Brotherhood from damaging the store. A counter in the top-left corner of the screen indicates how much money is lost in damages. Do not let the counter reach $1000 in damages or the mission will be failed. The counter only starts when you reach the department store in question, so there’s no need to rush over to this location first.
The second lieutenant in Copperton is being arrested by the police. When you arrive he’ll be standing in a police line-up. Take him out. He’ll have a red arrow above him.
Another lieutenant is driving around the Docks and Warehouses District in a truck full of explosives. Get a fast car and start trailing after the truck. Don’t drive directly behind it, however, since explosives are periodically dropped from the truck. Fire at the truck with your sub-machine gun until it explodes to take out the lieutenant.
A Brotherhood meeting is taking place on top of a parking garage in Encanto, which is part of the Barrio District. Enter the parking garage and drive up to the top level. The lieutenant flees by driving off a ramp and landing in the street below, so follow him down. You have to pursue the lieutenant and destroy his vehicle to kill him.
Kill all four marked lieutenants to complete the mission.
You’re going to want plenty of SMG ammo and possibly some explosives before attempting this mission.
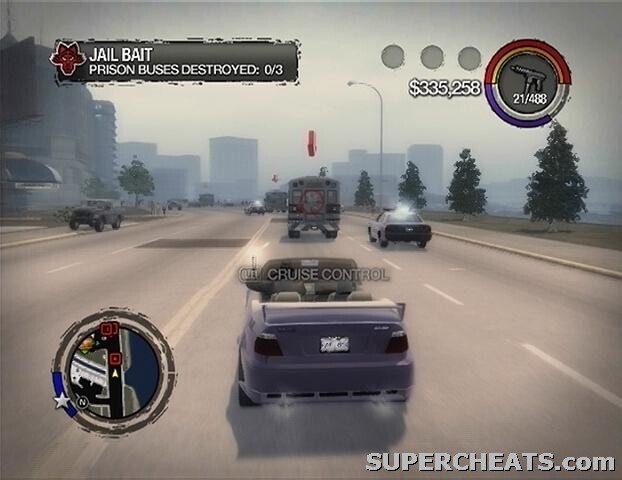
There are three prison buses marked on the GPS; you are to destroy each of them before they reach the drop-off point. If you’re quick enough, you can catch the buses together and take them all out, but if you’re too slow they’ll branch off and make things a bit more difficult.
Saints Row 2’s cruise control feature will make things much easier here. When you’re traveling at a fast enough speed, press the LB button on the Xbox 360 version or the L1 button on the PS3 version to activate cruise control. While cruise control is active, your vehicle will remain accelerated at that set speed, leaving you to only have to concentrate on steering and shooting. Cruise control is best used on long stretches of road, as it can be difficult to turn corners if you’re traveling too fast.
When all three prison buses have been destroyed, you’ll get a call from Pierce informing you that more Brotherhood are being evacuated from the prison by boat. There’s a docked boat in Huntersfield, and two vacant fighters at the Wardill Airport. Taking one of the fighters isn’t really the best option, since they are a lot further than the boat, and very difficult to use since they can only shoot straight ahead.
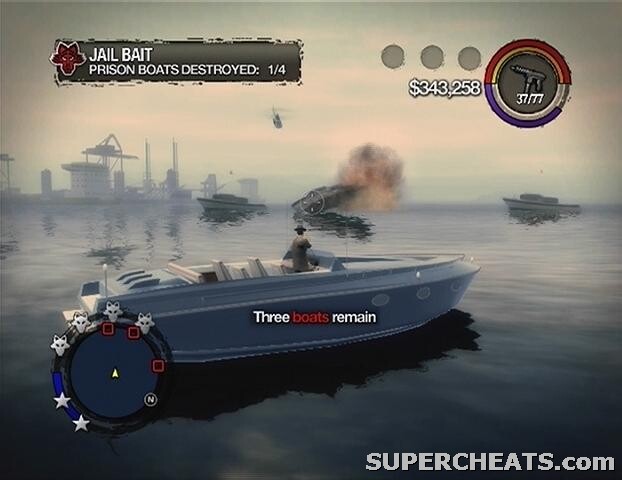
Get to the apartment dock and hop in the boat. Start towards the red markers on the GPS to locate the boats. You must destroy all four boats before they reach the coast to complete the mission. It doesn’t take much gunfire to destroy a boat; just stop shooting when your target catches fire to conserve ammo. Always target the boat furthest ahead first. The cruise control feature works with boats, too.
There are three markers on your GPS; each one is a means you can employ to board the cargo ship carrying the Brotherhood’s weapon shipment. Your best bet is to take the helicopter on top of the Crash Landing building in Huntersfield, which is part of the Airport District. Enter the Crash Landing building, take the elevator up to the rooftop, and get in the helicopter on the helipad. Ascend and then start towards the cyan marker on the GPS.
As your GPS will surely indicate as you hover above the cargo ship, the thing is packed with enemies. Don’t take too long with your landing, since one of the guys on the Ultor security team is packing an RPG Launcher. Your first task once onboard is to clear out the marked Ultor workers on the ship. Start by clearing the helipad, and then follow the markers on the GPS to the remaining workers.
Make your way down to the ship’s hold to get your hands on some weaponry. After the cutscene, stand in each of the two cyan markers, mash the Y/Triangle button until you’re full up on RPG Launcher and assault rifle ammo, and then make your way back to the deck to defend the ship. You’ll be facing three separate waves of Brotherhood here, each consisting of ground troops and helicopters.
Since the helicopters flying above pose no threat, you’ll want to focus on taking out the ground troops first. There will be a lot of commotion outside, so hang back in the corridor that leads down to the weapon cache and wait for the Brotherhood to approach you. Blast them as they come to the door until they stop coming. When the way seems clear, step onto the deck and take to shooting down the helicopters flying overhead. There may still be some stragglers onboard, so don’t let your guard down.

The assault rifle works well enough for this task, and it’s much easier to track the helicopters as they fly by. When all of the blips on the GPS have been extinguished, quickly return to the weapon cache in the ship’s hold and refill your RPG Launcher and assault rifle ammo in preparation for the next wave. Return to the corridor just before the doorway that leads out onto the deck and wait for the Brotherhood ground troops to come to you. When they stop coming, head outside and start firing at the helicopters.
After surviving the second wave, return once again to the weapon cache, and then hold out in the same corridor until Brotherhood stop coming at you. There are many helicopters flying around this wave, so this may take awhile. Before destroying the final target outside, return to the weapon cache one last time to refill both of your weapons for use after this mission.
Survive the third and final wave to complete the mission.
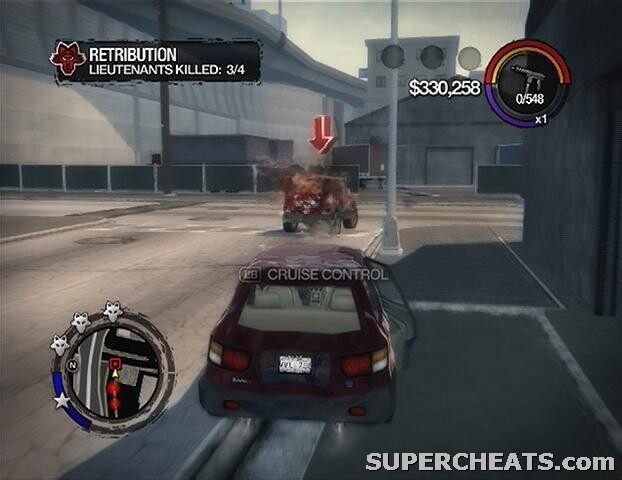
Start following the marked route on the GPS. You are to meet some Saints near the Brotherhood hideout. When you reach the spot, your first task is to eliminate all 10 of the Brotherhood lieutenants marked on the GPS. Accomplishing this won’t exactly be a cakewalk, since as you kill more lieutenants, your notoriety with the Brotherhood increases, which means more will be sent after you.
Be particularly careful of vehicles, as they tend to speed towards you in an attempt to make you roadkill. There is plenty of cover around the hideout, however, and you can even climb atop the crates to avoid being run over by the vehicles. When all 10 lieutenants have been dealt with, follow the cyan marker on the GPS and enter the warehouse you come to. The marker here is on the third floor, so find the stairwell and take the stairs up to the third floor. On the third floor, you’ll have to cross the plank on the west side of the warehouse to cross the gap.
After stepping into the marker across the gap, follow the next one that appears on the GPS over to an unblocked stairwell. There are Brotherhood on the next few floors, so be ready for a fight. Continue following the GPS and eventually you will reach the sixth floor. Hit the marker there to confront Maero.
Maero is armed with a Mini-Gun, but fortunately there are plenty of pieces of cover on the rooftop. These pieces of cover can be destroyed by Maero, however, so you’ll have to shift around to avoid leaving yourself open. An assault rifle can take this guy down fast, so hopefully you still have plenty of ammo from the last mission.
Wait until Maero is reloading before popping out from cover and filling him with lead. Duck back behind a piece of cover once he starts firing again. If you’re willing to take some damage, you can stand out in the open and fire at him while he’s shooting, but just be sure to get back behind some cover when your health begins to dwindle.
Once you’ve defeated Maero, you are given $25,000 for completing the mission, and the Mini-Gun is added to your crib weapon cache. You must now capture the four Brotherhood strongholds to unlock the next mission. See the “Gang Strongholds” section for more information.
It’s time for the final showdown with Maero at the Ultor Dome. This mission only becomes available once you have captured all four Brotherhood Strongholds. Definitely invest in an RPG Launcher and plenty of ammo before attempting this mission, as having that weapon in your arsenal will make succeeding much, much easier.
Here’s the setup: you’re on-foot, all by your lonesome, while Maero and a bunch of his friends ride around the arena in vehicles, with Maero himself in a monster truck. Hardly seems fair, but if you have an RPG Launcher, besting Maero here should be a cinch.
Maero is the only marked enemy on the GPS. You must deplete the bar in the top-left corner of the screen by damaging his truck. You’ll want to ignore his friends for the most part, since you’ll need to conserve around eight RPG shots to completely destroy Maero’s truck. Maero just circles around the trench throughout the match, and will try to run you over if you venture down there.
Move down to the side of the arena and wait for Maero’s truck to come by. As it’s approaching, blast it with the RPG Launcher as many times as possible before he continues down the track. Be sure to sprint out of the way if he’s about to run you over. Just remain where you are and use your other weapons to kill the unmarked Brotherhood until he comes back around.
If you run out of RPG Launcher ammo, switch to another weapon and just fire at the truck while it passes by. Keep the reticule trained on Maero’s truck until it’s out of sight. Continue to damage the truck until the bar in the top-left corner of the screen is depleted to complete the mission.
You’re awarded $50,000 and the Little Shanghai neighbourhood for completing this mission. You’ll also unlock Maero’s Monster Truck and the Brotherhood vehicles (both now available at your crib garage), the Brotherhood Personality (taunts and compliments available at a Plastic Surgeon), and you can now call Pierce on your mobile phone to have him join you as a follower.
Get in the parked car with Johnny and follow the marked route to the Poseidon's Palace casino in the Hotels and Marina District. You may be tailed by some Ronin on the way there, but just ignore them and let Johnny do the shooting. The killing can start as soon as you enter the casino. All of the Ronin in the casino appear on your GPS; red squares denote Ronin on your level, while red triangles denote Ronin upstairs.
Your first objective is to kill all 15 of the Ronin guards. Luckily the guards aren't heavily armed, so clearing them out shouldn't be too much of a problem. Just be sure to take cover behind tables and slot machines if you're low on health. Once the initial batch of 15 guards has been dealt with, Johnny will take to rigging the vault room doors with explosives. You must protect him from Ronin while he does this. Remember that red triangles denote enemies above or below you, so the red triangles that appear on the GPS here mark Ronin in the rooms up the stairs that are on either side of the doors that Johnny is rigging.
You can crouch to improve your accuracy by clicking the Left Thumbstick on the Xbox 360 version and by pressing L3 on the PS3 version. Stand by Johnny and keep an eye on your GPS to determine where the enemies are coming from. Also pay attention to the 'Gat's Progress' bar in the top-left corner of the screen, because once the bombs have been rigged, you'll have to quickly clear the area to avoid getting caught in the explosion. As soon as Johnny finishes setting the bombs, sprint away from the doors to complete the objective.
Now for the getaway. The Mule is a considerably sturdy vehicle, allowing you to barrel over most of the smaller vehicles on the road. Follow the route to Aisha's House and drive into the marker there to complete the mission.
Answer your cell phone after the cutscene and then hop in the car parked in the driveway. You're headed to see a used car salesman in the Trailer Park District. Get in the car after speaking the seller and start towards the arms dealer. You'll get a call from Pierce shortly after, informing you that the Ronin are on their way. Luckily the car you just purchased is quite fast, fast enough to allow you to avoid the Ronin completely.
When you reach the arms dealer, step out of the car and have a chat with him to obtain the powerful AR-50 gun. Unfortunately you won't be able to keep this weapon or car for very long, as your next objective is to resell the merchandise to a fence.
The car must be in pristine condition or the fence will not buy it; luckily there's a repair shop right across from the fence's location. Make sure that all enemies in the vicinity have been taken care of before driving the vehicle into the garage. With the vehicle repaired, drive it back over to the buyer.
Before you're given the money, the fence first must take the merchandise to a lockup. You're riding shotgun. Armed with the AR-50, it's your job to protect the fence from the pursuing Ronin. The AR-50 has unlimited ammo, as well as a grenade launcher attached to it (pull LT on Xbox 360, press L2 on PS3). Use the AR-50's grenade launcher to blast pursuing enemy vehicles. Most of the Ronin gang members will follow on motorcycles, but there is one roadblock to watch out for. Keep an eye on your GPS to know when to look ahead.
The mission is complete once the fence reaches her destination.
There are four to six Ronin bikers headed to the Saints hideout. You must disable all of the motorcycles to complete the mission. Fortunately you've been outfitted with an Uzi that has unlimited ammo for this task. There really isn't much to this; just get on the motorcycle, follow the markers on your GPS, and fire at the Ronin once they're in sight. All of the Ronin are headed in the same direction and travel down the same path, so simply following a single marker will allow you to track all of them.
You can use Saints Row 2's cruise control feature to make things a bit easier. When you're traveling at a fast enough speed, press the LB button on the Xbox 360 version or the L1 button on the PS3 version to activate cruise control. While cruise control is active, your vehicle will remain accelerated at that set speed, leaving you to only have to concentrate on steering and shooting. Cruise control is best used on long stretches of road, as it can be difficult to turn corners if you're traveling too fast.
There's a mess of Ronin outside, and Johnny is in critical condition. Your first task is to protect Johnny from enemies until the ambulance arrives. A timer in the top-left corner of the screen indicates how much time is left to go. The bar below it displays Johnny's health. The Ronin seem uninterested in Johnny for the most part, so your main priority here is to simply survive.
Crouch to improve your accuracy by clicking the Left Thumbstick on the Xbox 360 version and by pressing L3 on the PS3 version, and trigger Fine Aim by clicking the Right Thumbstick or pressing R3. Kill the Ronin in the street—running out to collect their ammo if need be—until the timer reaches zero. Unfortunately the ambulance never arrives, but your character quickly calls for another ride.
When the car arrives, you'll appear in the passenger seat armed with an RPG Launcher that has unlimited ammo. Simply turn around and blast the pursuing enemy vehicles until the driver reaches the hospital. The hospital is quite a ways out, but the car appears to be very sturdy, if not indestructible. Blasts from the RPG Launcher seem not to damage your own vehicle, so don't hesitate to fire at tailgaters.
The Ronin are set to arrive at the airport marked on the GPS in two minutes time. Get in the parked car outside of the mission house with Pierce and follow the marked route to reach the airport. When you reach the marker, drive around to the back entrance and hit the marker there to enter the airport.
Head for the stairs at the other end of the room and start firing at the Ronin at the top. There are four Ronin lieutenants to kill here, so take cover behind something and eliminate them, as well as the gang members surrounding them. Make your way to the second gate when the first batch of Ronin have been dealt with.
After the brief cutscene, start after the two Ronin in the cart and keep up with them until they reach the exit. The two Ronin will step out of the cart when they reach the doorway that leads outside. The two Ronin then head for a parked motorcycle outside, so get out of the cart if you have to and gun them both down before they can manage to escape.
Get a vehicle and follow the marked route on your GPS to Kanto. When you reach the spot, step out of your vehicle, ignore the Ronin outside, and enter Kanto. Here your task is to best Jyunichi and surrounding Ronin in a sword duel.
Tap one of the shoulder buttons (LT/RT, L2/R2) just as an enemy's attack is about to connect to perform a counter attack. The normal Ronin can be killed with regular sword slices, but to kill Jyunichi you have to fully utilize counter attacks to drain his health bar. Jyunichi automatically counters normal attacks, so do not attempt to strike him. Don't get too close to him either, as he'll just throw you over his shoulder.
More lesser-Ronin will enter the fray to replace fallen ones, so don't bother with them unless they're right in front of you or about to strike. Hit Jyunichi with one or more counter attacks to bring him down and complete the mission. Completing this mission unlocks the Ronin melee style, which can be added to your character at a Plastic Surgeon's office.
A bunch of Ronin have been sent to kill Johnny at the hospital he's being held in, so you're going to have to bust him out of there. Grab hold of the gurney and start pushing it down the hall. You're able to wield a weapon while pushing the gurney and you can even sprint too. There are plenty of Ronin in the hospital, and Johnny's health bar is depleting fast, so you're going to have to be quick and efficient here. Be sure to pick up the ammo dropped by the Ronin to avoid running out. Johnny can't take a whole lot of gunfire either, so clear the way quickly.
Follow the marker on your GPS and gun down the Ronin in the hall until you reach the next section of the hospital. Luckily your character manages to find some medicine for Johnny which automatically restores his health bar completely. Make a beeline for the front door to find it blocked. Head back to the elevator to travel to a different floor.
Head to the other end of the hall and move the gurney into the marker on the rooftop. Again, some more found medicine restores Gat's health bar here. Fly the helicopter to the Saints Hideout building and land it near the marker in the parking lot to complete the mission.
The Medical Helicopter is now available at your crib helipads.
Get in a car with Johnny and make your way to the hotel marked on the GPS. The hotel is packed with Ronin. Kill the five enemies on the ground floor and then head for the elevator that appears on the GPS. Your next task is to plant a total of seven bombs in the hotel. When the first bomb is set, the countdown begins, so you'll have to be quick about it.
There are two bomb spots on the second floor, marked by cyan squares on the GPS. Clear the walkway of Ronin, plant the two bombs, and then get to the stairs and take them up to the next floor. You have four minutes to plant all seven bombs, which starts when the first bomb is planted.
Plant the next four bombs on the two floors above, and then move on to the final floor. There is a group of Ronin waiting in the stairwell that leads up to the last floor, so be ready with a shotgun to blow them away. When the way is clear, head up the stairs to reach the top floor and place the last bomb.
Your next objective is to clear out the Ronin lieutenants in the penthouse suite. Time is still ticking, so you'll have to move fast. If you picked up an RPG Launcher from one of the downed Ronin on the walkway, use it to blast the four lieutenants in the first room, and then hit the other two in the adjacent room. If you don't have an RPG Launcher, use a shotgun or other powerful to quickly empty the room.
When the suite is clear, exit the room and vault over the railing. While failing, press the Y/Triangle button to activate your parachute. All you need to do is land in the atrium to complete the mission.
It's time to take out Shogo here. If you have an AR-40 or a similar weapon, crouch down, enter Fine Aim, and fire at Shogo until he runs off. If you don't have a suitable weapon, pick off the lesser Ronin surrounding Shogo before filling him with lead.
When about half of his health bar is depleted, Shogun will run off. Your next task is to kill the Ronin lieutenants marked on your radar. Immediately sprint away and take cover to avoid being overwhelmed. The easiest way to survive this fight is to take one of the Ronin cars, drive around, and hit the lieutenants in the graveyard. Wait away from the crowd of lieutenants and eventually a gang car will come after you. Kill the driver and passenger and get in the car with Johnny.
Once you're in the car, simply drive around the graveyard and ram the Ronin lieutenants with your vehicle. Of course the car can only sustain so much gunfire, so step out and get a fresh car if yours starts smoking excessively. When all 17 of the Ronin lieutenants have been dealt with, start towards the house that Shogo ran into.
Shogo speeds off on a motorcycle, leaving you to chase after him. You are automatically placed on a motorcycle of your own. The hard part here are the Ronin cars that are pursuing you, as they will frequently ram the back of your bike, possibly sending your character flying off. This affords Shogo a large amount of leeway, so you're going to have to bring him down quickly. Luckily you should have just hit a checkpoint, so even if you fail you can just try again.
You can use Saints Row 2's cruise control feature to make things a bit easier. When you're traveling at a fast enough speed, press the LB button on the Xbox 360 version or the L1 button on the PS3 version to activate cruise control. While cruise control is active, your vehicle will remain accelerated at that set speed, leaving you to only have to concentrate on steering and shooting. Cruise control is best used on long stretches of road, as it can be difficult to turn corners if you're traveling too fast.
The mission ends once you've dealt enough damage to Shogo.
The Ronin have crashed the Saints hideout, so your job here is to defend it. Gun down the Ronin in the first room and then quickly head for the two support columns marked on your GPS. You must prevent the Ronin demolition team from destroying these pillars. The bar in the top-left corner of the screen displays how much more damage the pillars can take before they give way. The timer above the bar indicates how much longer the pillars must be defended before you can move on to the next objective.
The Ronin demolition team are packing RPG Launchers, so take them out first. Enemies do appear on your GPS as small red dots here, however you'll have to do a bit of running around since the GPS doesn't provide a very wide view. When the timer reaches zero, follow the marker on the GPS to reach the next area that needs defending.
There are many more support columns to defend, but it's the same idea; just hold off the Ronin until the timer reaches zero. After killing an RPG Launcher-using enemy, be sure to pick up the dropped ammo, as it will certainly come in handy. Continue to defend the ceiling supports until the timer reaches zero.
Once the timer reaches zero, your next objective is to kill Akuji. Akuji is surrounded by several lesser Ronin. If you happened to pick up a fallen enemy's RPG Launcher, equip it and blast the group of motorcycles that Akuji and the other Ronin are standing by to quickly end this fight.
The mission is complete once Akuji's health bar is depleted. You'll have to capture the four Ronin strongholds to unlock the next mission. See the 'Gang Strongholds' section for more information.
Once you have captured all four Ronin strongholds, make your way to the Ronin mission marker in front of the Technically Legal strip club to get started.
You have four minutes to reach the Heritage Festival in uptown New Hennequet. Ronin will be pursuing you, but you have no time to waste fighting them off. When you come to the spiral road, just dive off the ridges and to land on the beach below. Get out of your vehicle when you reach the docked watercraft.
Hop on the watercraft and start towards the marker on the GPS. Here an enemy helicopter will be flying overhead dropping explosive barrels down into the water. Whoever is in charge of tossing those barrels must have impeccable aim and timing, since they can be quite difficult to dodge. The best way to avoid the barrels is to slow down when you spot one and then veer off to the left or right depending on how the barrel is falling. If the barrel is curving to the right, veer off to the left and vice versa.
When you reach the docks, use them as momentary shelter while you cross the final stretch to the marker. Your next objective at the marker is to kill the 20 Ronin at the festival. Take the craft over to the beach next to the pier to avoid affording them the higher ground. Move up the beach to the street above and start towards the marked Ronin. Start out the Ronin on the street, then move down to the pier. Remember that the squares on the GPS denote enemies that are on the same elevation as you, while triangles denote enemies that are above or below you.
When all 20 marked Ronin have been dealt with, get on the first junk boat and kill the two Ronin inside. You must get to Wong before the bar in the upper-left corner of the screen is depleted. Head up the stairs at the north end of the first level. Enter the second level of the boat and go through the doorway at the other end. Cross the plank over to the second junk boat and kill the Ronin waiting there. Enter the boat's interior and move across the room to the doorway at the other end.
Head down to the lower deck and enter the dining area. Locate the door along the east wall of the boat's interior and cross the bridge outside over to the third junk boat. Make your way to the marker on the second level of the boat to face Akuji.
The final fight with Akuji is similar to the battle against Jyunichi, although Akuji can take a great deal more damage. Like Jyunichi, Akuji will automatically counter all normal sword swipes, so you'll have to perform a counter attack to deal damage. Tap one of the shoulder buttons (LT/RT, L2/R2) just as Akuji's sword is about to come down to perform a counter attack. Another trait Akuji shares with Jyunichi is the shoulder toss he'll hit you with if you get too close to him, so keep your distance.
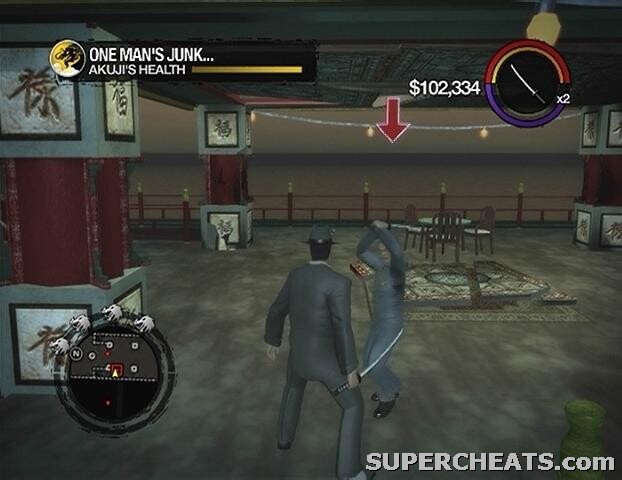
After countering one of Akuji's attacks, there is a small window in which you can hit him with normal sword slashes while he's on the ground and getting up. The problem here is that your character's counter attacks tend to knock Akuji away, and your character walks exceptionally slow while holding the katana so you won't really be able to take advantage of the opportunity. If you can lure Akuji over to a corner or side of the boat, you may be able to use the wall to prevent Akuji from sliding too far when your character performs a counter attack, allowing you to deal full damage to him while he's on the ground.
Best Akuji to complete the mission. This mission marks the end of the Ronin mission line. You'll earn a sizeable cash reward and the Stilwater Boardwalk territory for completing the mission. You'll also unlock the Ronin vehicles (available at your crib garage) and personality (taunts and compliments available at a Plastic Surgeon). Akuji's Prototype Bike (Kaneda) is also added to your crib garage, and you can now call Johnny Gat on mobile phone to have him join you as a follower.
Now you've unlocked the Kaneda, try this trick
Complete the Sons of Samedi, Brotherhood, and Ronin mission lines to unlock the Ultor Corp. string. After you've done everything, a new marker will appear in Mission Beach. Travel to the marker and watch the cutscene. It's time to take back the city!
The club is now swarming with Ultor Masako squad members, and each one is armed with a shotgun or assault rifle. You're going to have to take it slow here to survive. The club has two exits, and your first task is to fight your way to one of them. Both exits are denoted by cyan shapes on the GPS. The front door at the north end of the club seems suitable for the escape, although you'll run into a troop of Masako squad members outside of either exit. Sprint away from the enemies and quickly find a vehicle.
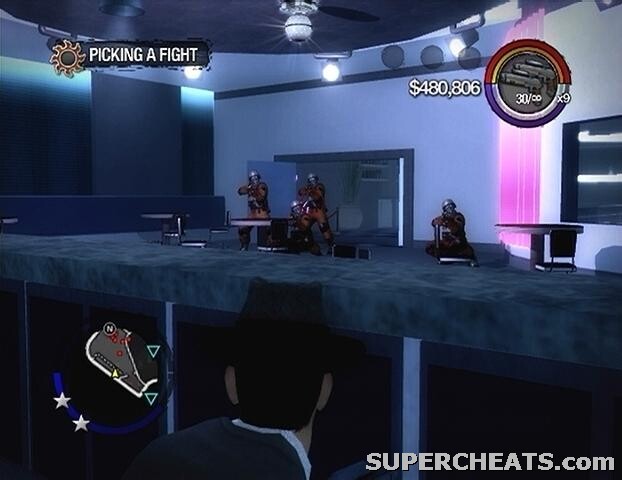
You're next task is to rescue Shaundi and Pierce from the Ultor assassins that have been sent to kill them. They're at different locations, but there's no need to rush until you actually reach one of them. Head for the cyan marker closest to your current location first, which is Pierce. When you near Pierce's location, a Masako unit will appear on the GPS, and a health bar will appear in the top-left corner of the screen. You must kill all 10 assassins before Pierce's health bar is depleted to rescue him.
After killing all 10 assassins, get in one of the parked Ultor APCs with Pierce and start towards Shaundi's location. The police will put forth some considerable resistance along the way, although you should be able to barrel through everything with the APC. There will be plenty of SWAT truck barricades as well; try to swerve around if you can, but you should be able to just nudge your way through.
APCs are quite slow, however, so take a police cruiser instead if you would rather try speeding your way there.
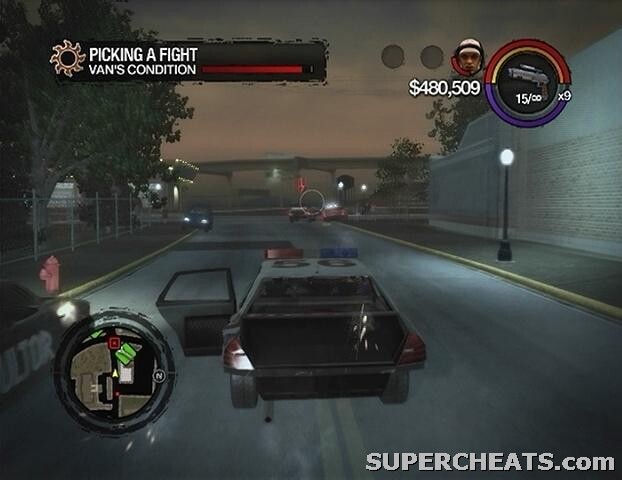
Do yourself a favour and stop by the 'Forgive and Forget' drive-through just south of Shaundi's location. For a modest fee you can completely lower your Police Notoriety level, making this next objective much easier. Get a fresh car if yours is trashed and then continue to the marker on the GPS.
Your next task is to disable the van that is transporting Shaundi. To disable the van you must empty damage it enough to empty its health bar, which is visible in the top-left corner of the screen. Though the police may have backed off, the Ultor guys won't, but try your best to just ignore them and concentrate on disabling the van. When the bar is empty, back off to avoid destroying the van completely.
Make your way to the Saint's Row District. Your goal here is to raise your Ultor notoriety to four stars. Ultor Corp. essentially acts as the police force in the Saint's Row District, so all you have to do is cause enough mayhem to warrant a four-star notoriety level. An RPG Launcher can make things happen here real fast, so you may want to stop by a Friendly Fire outlet and purchase an RPG Launcher and some ammo before getting started.
Once you're all suited up, find a suitable location to make your stand and then begin firing at civilians and vehicles. When you gain one-star of Ultor notoriety, they start sending cars after you. Use your RPG Launcher if you have one to destroy these cars as they come. You'll be notorious enough in no time.
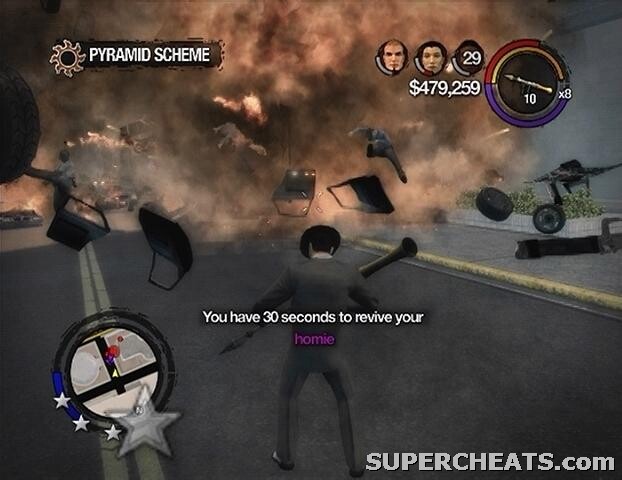
As soon as you have attained four-stars, steal a vacant Ultor cruiser and start towards the Forgive and Forget drive-through at the west end of the district. Try to swerve around any blockades that have been placed in your path and speed through the drive-through to wipe your notoriety level. Now it's time to hit Ultor while they're distracted.
Follow the markers that appear on the GPS to locate a secret entrance in the sewers. When you've reached the entrance to the sewers, continue following the marker on the GPS and eventually you will meet Johnny Gat. There is a sparse population of Ultor security guards in the tunnels, and they are only armed with Pepper Spray or a Taser, which are more of an annoyance then anything. Just keep an eye out for red blips on the GPS and there shouldn't be any trouble.
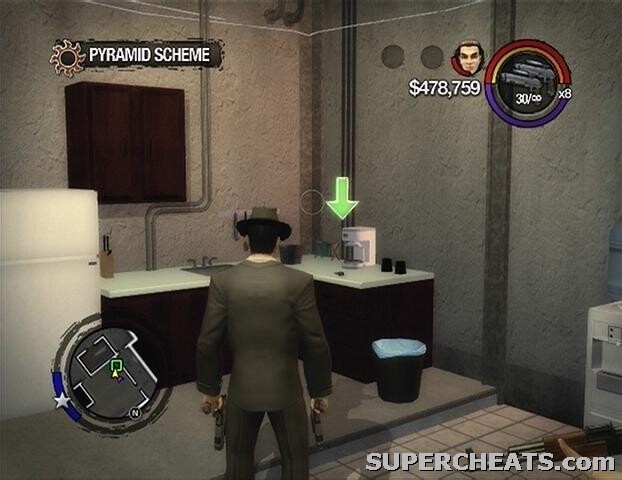
The keycard for the lab doors is in another part of the tunnel system, so follow the marker on your GPS to locate it. Once you have the keycard, your next objective is to plant bombs in the three labs marked on the GPS. The Ultor security guards should now have shotguns, so you're going to have to be a bit more careful.
Follow the cyan markers on the GPS and plant a bomb at each location. After the bombs have been planted, you only have a minute or so to make it out of the facility. Sprint out of the lab and start towards the marker on the GPS. There may be a parked quad around, so hop on if there is one and continue towards the marker. Eventually you'll come to a vacant APC, so hop in with Gat and speed down the tunnel. Make it to the end of the tunnel before time runs out to complete the mission.
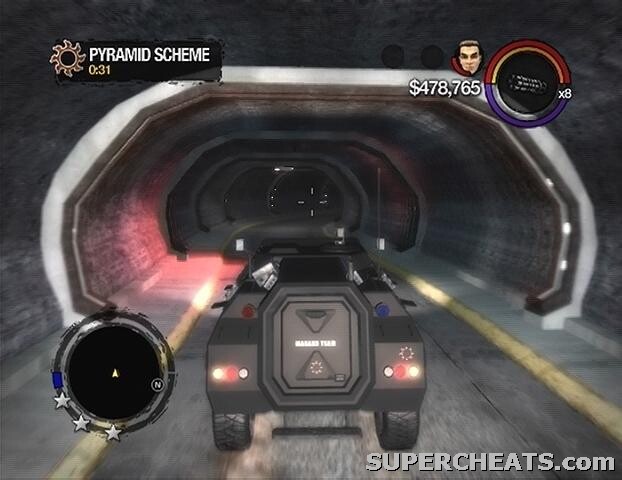
The Ultor APC is added to your crib garage after the mission is complete, and the Pimp Cane shotgun is added to your weapon cache.
Follow the marked trail on your GPS to the docked watercraft at the east end of the Saint's Row District. Once you have the craft, speed towards the yacht at sea. When you reach the yacht, get onboard and start after the five Ultor executives marked on the GPS. Though the executives themselves are not armed, there are many security guards onboard, so clear them out before turning to the cowering targets.
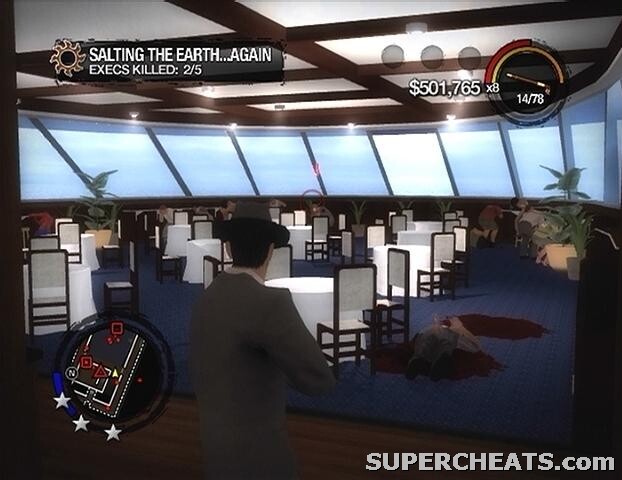
After eliminating the initial five executives, a sixth takes off in a speedboat. Follow the marker on your GPS down to the lower deck to get a boat of your own. The fleeing executive is traveling at a fairly slow speed uncharacteristic of someone running for their life, so taking him down shouldn't be a problem.
To unlock the final mission, you first must capture the Ultor stronghold in the High End Retail District. See the 'Gang Strongholds' section for more information.
Purchase an SMG and plenty of ammo before attempting this mission.
After the cutscene, get in the Ultor cruiser and start after the Vogel limo. Your first task is to disable the limo by damaging it, depleting the bar in the top-left corner of the screen. Ultor forces can make this quite difficult, since they'll constantly ram into your car in an attempt to knock you off course. If you can manage to get right next to or behind the limo and activate cruise control, you may be able to just have the other Ultor vehicles pushing your car against the back or side of the limo, rather than knocking you away from it.
Remain close to the limo at all times; if you fall out of the red circle that is visible on the GPS, you'll have to get back to it within 20 seconds to prevent Vogel from escaping. Once the limo reaches the Ultor tower, get to the helicopter marked on the GPS and immediately start ascending.
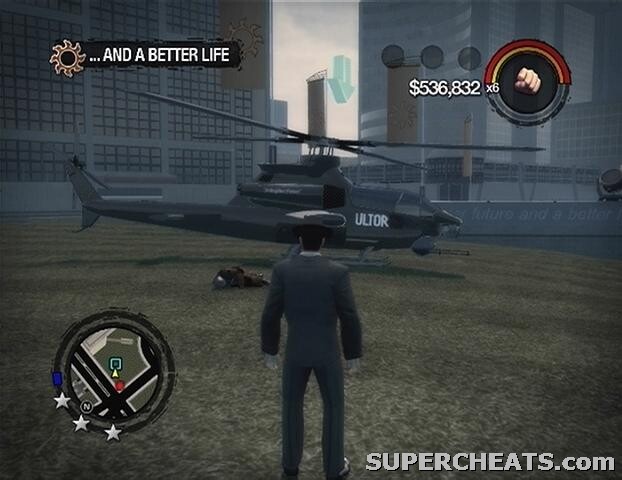
Start by shooting the enemy helicopter out of the sky. The Ultor helicopters are outfitted with mini-guns (RT/R2) and homing missiles (LT/L2), so lock-on to the enemy helicopter by focusing the reticule on it and hit it with a missile when the box turns red to bring it down. A new attack helicopter will be sent periodically, so when the message announcing the arrival of one appears on-screen, ascend a bit higher and hit the helicopter with another homing missile when it arrives.
Next you need to destroy the four power stations on the building. The first is on the north side of the tower, at about midway down. Use the elevation arrows on the GPS to determine if you are on level with the station.
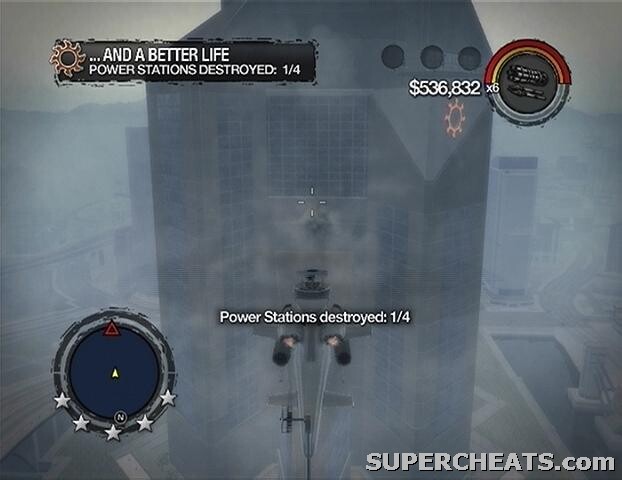
The second station is on the east side of the tower, again at about midway down.
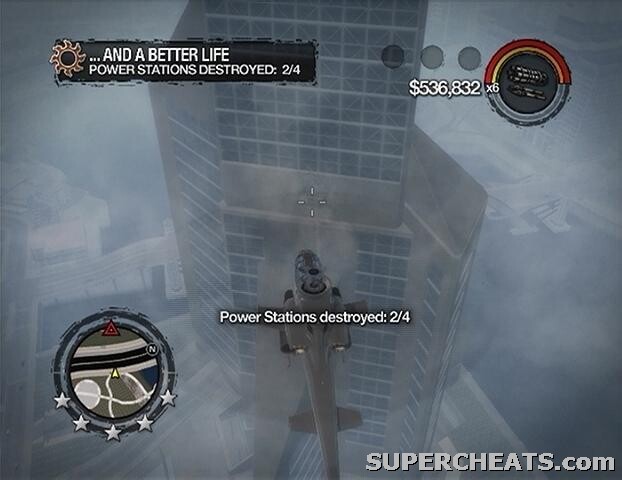
The third station is on the tower's southwest face.
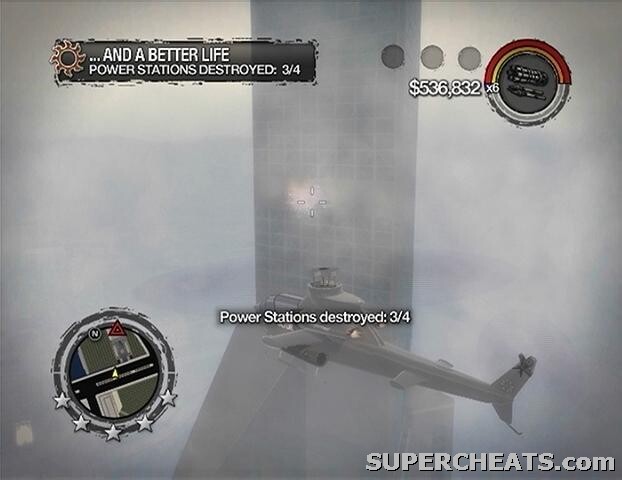
The final station is on the north side of the tower, below the upper row of see-through windows
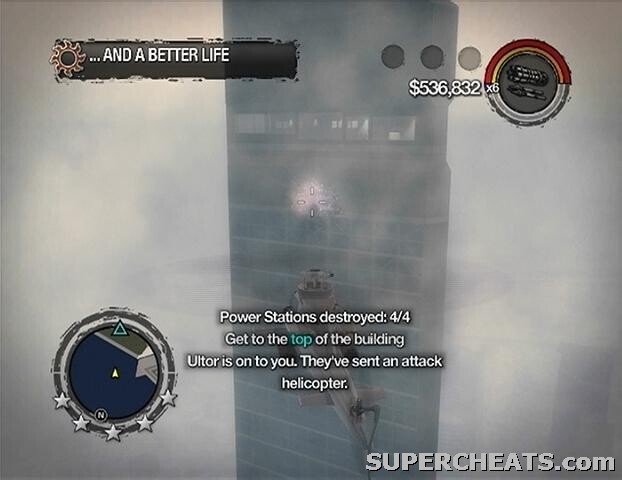
With the final power station destroyed, ascend to the very top of the tower to trigger a cutscene. After the cutscene, kill off the Masako squad members surrounding your target. Vogel is armed with nothing but a pistol, so he should be easy enough to take down. Deplete Vogel's health bar to complete the mission and win back the city!
The reward for completing this mission is $500,000 gold. You'll also unlock the Attack Helicopter, which is then available at your crib helipads.
There is one secret mission in Saints Row 2 that can be triggered at any time. Completing it yields the “Vengeance” achievement on the Xbox 360 version, and it also counts towards the 100% completion rating.
The starting point for this mission is in the Stilwater Police Station in the southwest quarter of the Saint’s Row District.
Put away your weapon and enter the station. Make your way to the third floor via the staircases in the room behind the circulation desk. Enter the room that is marked “Authorized Personnel Only.” The officers in here won’t shoot you, so head inside. You’ll be able to see three Saints markers. Stand in each of these markers and listen to the wiretap conversations.
Afterwards, enter the office in the northeast corner of the room to spot another Saints marker. Stand in the marker and press Y/Triangle to pick up Julius’ file and add Dex’s number to the mobile phone.
Select “Phone” in the pause menu, open up the Phonebook, and call Dex from there. He tells you to meet him at the old hideout, which is in front of Ultor Corporation tower.
After the cutscene, unit after unit of Masako squad members will enter the church. You must eliminate the squad members of one unit to face the next. The first three units consist of four or five squad members. They are all carrying assault rifles, so take cover behind a pew if your health is low.
When you’ve survived three or so waves, slightly larger Masako units will appear outside. The first unit hits the west side of the church, the second the east, and the last to the south. Don’t bother firing at the Ultor APC; just wait for the squad to step out.
Right after protecting the church from three more units, you are then faced with an Ultor attack helicopter. The helicopter can endure a great deal of damage, but it doesn’t seem to attack at all. Just stand in the doorway and fire at the helicopter until it crashes. With the helicopter down, sprint to Julius’ car.
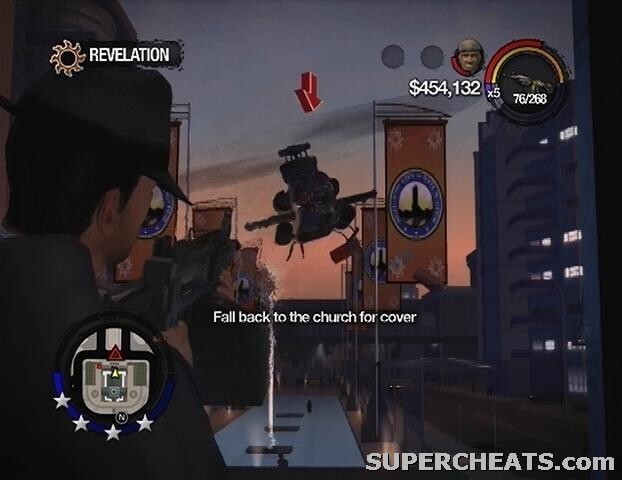
You’re in charge of defending the car from pursuers. The AR-50 XMAC you’ve been given has infinite ammo, but there really doesn’t seem to be a whole lot of need for a defender. Only Ultor APCs will really trail after you, and they don’t seem to ever attack. Nevertheless, just pelt the APCs with grenades until Julius crashes the car.
At this point, you’ll be surrounded by a mess of Masako squad members. There are two attack helicopters flying overhead, and you’ll have to shoot them both down to complete this mission. You should be relatively safe from the squad members if you head down to bottom of the amphitheatre, since they don’t tend to venture down into this area.
The helicopters here take just as long to destroy as the one you faced at the church. You still have that AR-50 XMAC with unlimited ammo, so completing this objective is more tedious than anything.
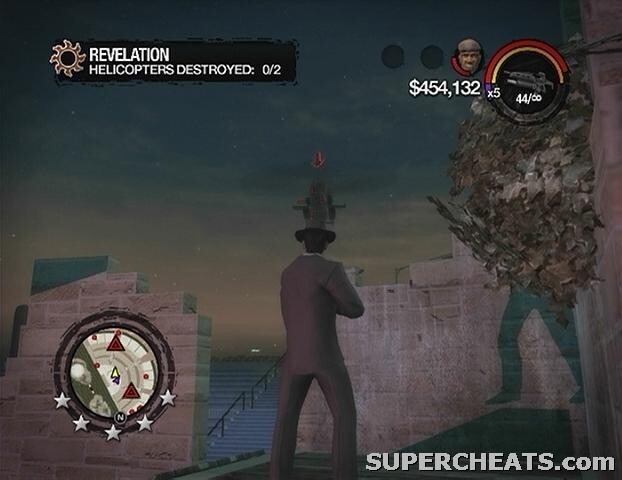
Shoot down both helicopters to complete the mission. Your reward is $30,000 and Julius’ car added to your crib garage.
As you progress through a specific mission line, that gang’s strongholds are eventually marked on the map for you to take over. Taking over an enemy gang’s stronghold awards you that territory, as well as some cash. Capturing all of a gang’s strongholds is required to unlock the final mission in their respective mission line.
Stilwater Caverns: Black Bottom/Factories District
All you have to do is destroy the six shanties in the homeless area to capture Stilwater Caverns. Follow the cyan marker on the GPS to reach the shanties, and throw a homeless person at each of one to destroy them.
Strongholds for the gangs appear on the following pages...
Bavogian Plaza Drug Labs: Rebadeaux/Red Light District
Your first task is to kill the seven crackheads in the back room of the sex shop. The stronghold is heavily guarded by Samedi gang members as well, so don’t just rush in there. When you enter the back room, all seven of the targets will appear on the GPS as red squares. Track down and kill each of the crackheads, and then head up the stairs and take to the destroying the labs. There are four labs upstairs, all surrounded by gang members.
When the fourth and final lab has been destroyed, head through the door marked on your GPS to reach the roof and start picking off the Samedi there. You need to shoot down the helicopter flying overhead to capture Bavogian Plaza. If you have an assault rifle, sub-machine guns, or an RPG Launcher, use any of those to destroy the copter.
Sunnyvale Gardens Fishing Dock: Sunnyvale Gardens/Projects District
The Samedi have stashed drugs inside of raw fish being kept in the freezers in each of the three buildings by the dock. Your first objective is to destroy all six drug stashes. Head for the first building, slide open the freezer door, and shoot all of the hanging fish to clear the stash. Make sure that every fish has been hit or the stash will not count as destroyed. Your character will become intoxicated as he or she breathes the fumes from the destroyed stash, though this shouldn’t inhibit you in combat too much.
Your second objective is a bit tougher due to the sheer volume of Samedi now at the dock. There are four docked boats that must be destroyed. A gang member on the dock should be armed with an RPG Launcher, which you can pick up and use on the boats once you’ve taken him out. If you don’t have an RPG Launcher, use an assault rifle or sub-machine gun instead to quickly destroy the boats. If you need to take a breather, sprint into one of the buildings and hold out in a freezer until your health is completely regenerated, or consume some food.
Once the four boats have been destroyed, move on to your final objective; planting a bomb on the large freighter. Head up the ramp to reach the deck and fight your way to the interior. Shotguns are best used for close-quarters combat, so switch to your shotgun if you have any ammo and start following the marker on your GPS. If you need time to heal, duck into one of the crevices along the hall and hold there until your health is regenerated.
When you reach the marker, plant the bomb there and then start back up to the deck. More Samedi will have spawned in the halls and on the deck, so be ready to face them. Unfortunately the bomb malfunctions, leaving you with about 30 seconds to get off of the freighter and out of the blast radius. The red circle on the GPS denotes the bomb’s blast radius, so you must make it out of this circle before time runs out to avoid death. Make it out alive to capture Sunnyvale Gardens.
Stilwater University Student Union: Stilwater University/Stilwater University District
Start by killing the five Samedi recruiters in front of the university, and then head inside and make your way to the student union. A mess of Samedi will run out of the building and onto the stairs, so be ready with a rapid-fire weapon to pick them off as they funnel out. All you have to do is kill the nine marked Samedi inside of the student union building to capture Stilwater University.
Elysian Fields Trailer Park: Elysian Fields/Trailer Park District
Head into the building at the center of the district and fight your way over to the map in the back room. View the map to learn which trailers contain the Samedi’s drug labs. Once the trailers have been marked on your GPS, all you have to do is locate and destroy each one. Hit the gas tanks on the sides of the marked trailers with an explosive (RPG Launcher, Molotov Cocktail, etc.) to destroy them. Blow up all five to capture Elysian Fields.
Poseidon Alley Docks: Poseidon Alley/Docks and Warehouses District
Your task is to tail a convoy of Brotherhood vehicles to find their meeting spot so you can clear the place out. Head up the incline, kill the gang members around the marked truck, then get in and wait for the Brotherhood vehicle to pass by. When the marked vehicle arrives, head down the slope and start following it. You must remain in the red circle on the GPS; if you fall out of it, return to it within 20 seconds to avoid failing the mission.
When you reach the spot, all you have to do is kill the 12 marked Brotherhood to capture Poseidon Alley. Note that the blue oil drums in the warehouse explode when destroyed, so avoid taking cover by one.
Imperial Square Pagodas: Little Shanghai/Chinatown District
There are four different shop locations marked on the GPS at the start. You must travel to each of these locations, lure the shop’s owner outside, and then intimidate them into supporting the Saints. When you reach a location, some Brotherhood will spawn around you, and a red area will appear on the GPS. Kill the Brotherhood in the vicinity, and then proceed into the red area. You must fill up the Damage meter in the top-left corner of the screen to lure the shop owner outside. Fill up the damage meter by shooting or knocking down tables and chairs in the store radius.
Once you’ve managed to completely fill the bar, the shop’s owner will come outside. Put away your weapon and punch and kick the owner until you’ve managed to scare them, at which point start towards the next shop.
After you’ve intimidated the four shop owners, your next target is the owner of the Pagoda Hotel at the south end of the Chinatown District. The hotel is surrounded by Brotherhood, so clear the area before opening the door. There are gang members in the hotel as well, but you likely won’t have to fight them off since the hotel owner should come running out shortly. When you spot the owner, beat him down until he gives in to capture Imperial Square.
Sommerset Apartments: Sommerset/Apartments District
The Brotherhood is dealing drugs in three different apartment buildings in Sommerset. Each of these locations is marked on the GPS. There are three lieutenants to eliminate per operation. Your first task is to clear out the lieutenants at each apartment. Head to the apartment buildings one after the other and kill the marked targets that appear on the GPS.
When the lieutenants have been dealt with, you are then tasked with destroying a mobile drug lab. The truck moves at a very slow pace, so accomplishing this shouldn’t be too much of a problem. Just drive alongside the target and shoot at it until it catches fire. Complete this last objective to capture Sommerset.
Wardill Airport Hangars: Wardill Airport/Airport District
It would be a good idea to invest in some RPG Launcher ammo for this stronghold, since having that weapon in your arsenal will make things much easier.
Your first task is to prevent the Brotherhood in the computer room from transferring some money. The computer room is at the end of the catwalk in the large hangar. Fight your way onto the catwalk and follow the marker on your GPS to locate the computer room. Quickly clear out the three Brotherhood there to stop the transfer, then stand in the marker and press Y/Triangle to transfer the money to another client.
Hold out in this room for one minute and then eliminate the Brotherhood that just entered the hangar. There’s a deal happening outside now, so you’re going to have to put a stop to it. Follow one of the cyan markers on the GPS to get back outside. First you are to destroy the four Brotherhood trucks parked outside of the hangar. You can use an RPG Launcher to quickly dismantle the trucks if you have one, but it would best to conserve your ammo for the final objective.
Before destroying the final truck, make sure that you are a bit north up the runway. Your final objective is to destroy the four marked planes here. One or more of them will start down the runway, so target these first before moving on to the stationary ones. It takes two RPG Launcher shots to destroy one of these planes. Destroy all of the planes before one manages to take off to capture Wardill Airport.
Suburbs Strip Club: Misty Lane/Suburbs District
The Suburbs Ronin stronghold is a small, two-story strip club called “Technically Legal.” All you have to do here is enter the club and kill all 14 Ronin lieutenants inside, and then fight off the reinforcements. Use your GPS to locate the 10 lieutenants downstairs, kill them, and then head up the stairs and take care of the four lieutenants there.
When the reinforcements arrive, follow the cyan marker on your GPS to reach the roof. Kill the 13 reinforcements to capture Misty Lane.
New Hennequet Rec Center: New Hennequet/Suburbs Expansion District
Enter the rec center through the front door to meet the Saint, and then follow your GPS to the underground casino. When you reach the first game room, rack up $100,000 in damages by destroying the casino games (slot machines, tables) scattered around. Gun down the armed guards in the room first, and then take to the machines with your melee weapon to conserve ammo.
Once you have achieved the required amount of damage, head to the next game room, kill the armed guards, and rack up another $100,000 worth of damage by destroying the machines and tables there. Next, step into the marker in front of the counting room door. Your next objective is to destroy the 12 cash boxes here. Kill the Ronin guards and smash the marked cash boxes. The last two boxes are guarded by a guy with AR200 SAW rifle, so be careful.
When all 12 cash boxes have been destroyed, take the elevator upstairs. Kill the 12 Ronin reinforcements in the gymnasium and adjacent room to capture New Hennequet.
Humbolt Park Science Museum: Humbolt Park/Museum District
Your objective is to destroy the servers that host the Ronin’s porn ring. The museum is packed with Ronin, so you’re going to have to take it slow here. The server room is through the “Fiction or Future” exhibit on the top floor of the museum. There are quite a few explosives in the large, unfinished area just outside of the server room, so use them to your advantage.
There are 12 servers to destroy. Kill off the Ronin guards in the server room and then take to the servers. There’s no need to waste any ammo here; a single melee attack is enough to destroy one of these servers. When all of the servers have been destroyed, head for one of the doors marked on your GPS.
Return to the ground floor, kill the Ronin outside, and then look for the enemy helicopter in the sky. Shoot down the helicopter to capture Humbolt Park.
Amberbrook Museum Pier: Amberbrook/Museum District
There are nine marked Ronin to kill at the start of this stronghold. One of the Ronin on the walkway has an RPG Launcher, so be careful. There are 10 more Ronin to kill after the initial batch; they’re in the ruins at the top of the hill further up.
When all 19 of the marked Ronin have been eliminated, make your way to the boats down by the pier. At least one of the Ronin in the area nearby should be wielding an RPG Launcher, so kill him or her and pick it up. There’s a mess of Ronin by the boats, so use the RPG Launcher to wipe some of them out, or use it to destroy one or more of the boats. The boats can be destroyed quite easily with normal gunfire, however. Destroy all five marked boats to capture Amberbrook.
Rounds Square Shopping Center: Nob Hill/High End Retail District
The starting point for this stronghold is actually inside of the mall. You can enter the mall through the parking garage a bit south of the stronghold icon as it appears on the map.
Some Ultor executives are enjoying a day of shopping at the mall, so naturally you’re going to use this opportunity to track down and eliminate each one. There are four execs marked on the GPS initially, so start towards any one of those targets. Each target is being escorted by a team of Ultor security officers. There are a lot of them, and most are well-armed, so try to pick off the target from afar.
After killing the four initial targets, your objective is to clear out the nine executives in the board room on the bottom floor. By now guards will constantly be coming at you on quads, so keep an eye out for red blips on the GPS to avoid being run over. The board room is crawling with Ultor security guards, so don’t just charge in there with guns blazing. Kill all of the marked execs in the board room and then prepare for the final task.
All you have to do is reach the marker on the top floor of the mall to succeed. Ultor Masako squad members have entered the mall, which can make things a bit difficult since they are all wielding assault rifles. If you can, steal a quad and use it to quickly scale the stairs. Also, if you spot a car on display, get in and use it to speed things up. When you reach the final stretch, there will be a couple of Ultor APVs and a mess of Masako squad members between you and the marker. Try to run past them if possible, since you just have to step into the marker to capture the shopping center.
This activity has you working as a personal body guard in charge of protecting a celebrity from crazed fans during one of their public appearances. While the celebrity struts around, crazed fans will appear and attempt to harass him or her. If the Annoyance bar in the top-left corner of the screen fills up, you’ll fail the level. The more the crazed fans are able to hit the celebrity, the more the bar fills up.
To move on to the next level, you must earn the dollar amount that is indicated by the counter above the Annoyance bar before time runs out. The amount needed to move on to the next level increases as you progress.
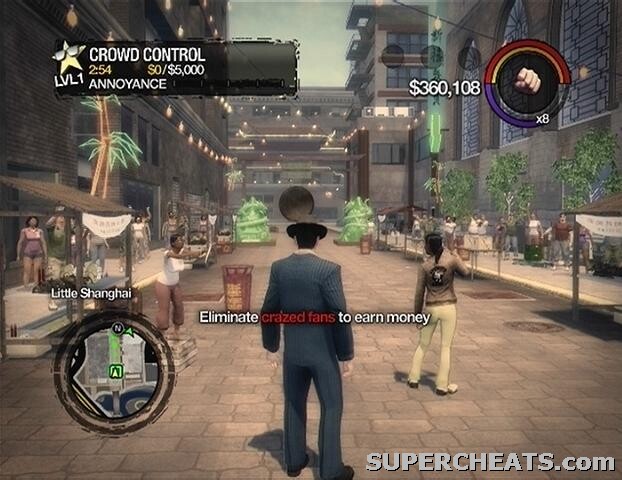
Money is earned by taking out crazed fans when they appear. To grab and throw a fan, tap the LB/L2 button when standing next to one. Throwing a fan at or into a marked object nets you $1000, throwing one at an unmarked object or off of a ledge adds $750, and simply knocking a crazed fan aside with the baseball bat adds $250. You aren’t given a bat at the start of each level, so you’ll have to pick one up from a downed fan.
Things start getting difficult at the fifth level. At this point, many more of the fans are given bats, and there are usually so many of them that taking the time to throw one or more will leave the celebrity open to far too much pummelling. Get throws in while the fans are sparse, but immediately switch to the baseball bat and start swatting them away if the celebrity gets swarmed. You can likely succeed by simply swatting the fans away with the bat due to the frequency at which they spawn in the later levels.
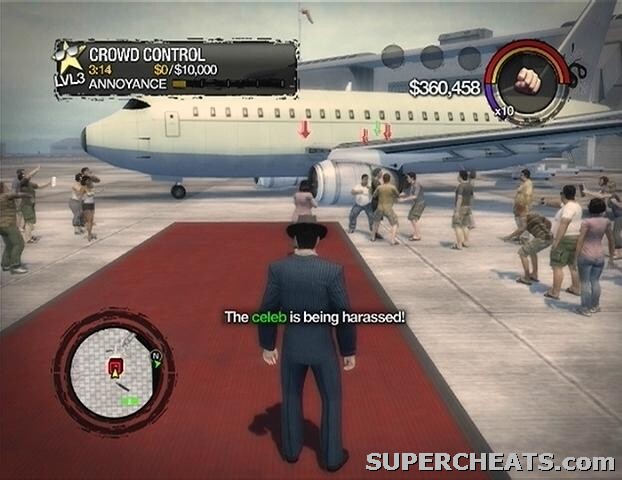
Crazed fans can hit you too, which can be a problem since your character will take a few seconds to stand back up, leaving the celebrity open to harassment all the while. Try to take out the baseball bat-wielding fans before they can get to the celebrity, or else they are likely to knock you down while you move in to swat them away.
You’ll need to make heavy use of the GPS to succeed here. Crazed fans are denoted by red squares on the GPS. Keep an eye on the GPS and spin the camera to face them when red markers appear so you can knock the fans aside as they approach the celebrity.

The sixth level is markedly more difficult than the previous ones. There’s no sure-fire strategy, and there seems to be a bit of luck involved since some stages are better suited for racking up cash. The stage changes each time you retry a level after failing, and you can retry each level as many times as necessary.
There are two instances of the Crowd Control activity: one is in the Suburbs District (Tidal Spring), and the other in the Hotels and Marina District (Stilwater Boardwalk). Complete all 12 levels of Crowd Control between the two instances to unlock the “Velvet Rope” achievement.
If you don’t like the location you’re assigned to, press down on the D-pad twice and then press the A/X button to retry the activity.
Suburbs District Instance: Perhaps the best stage to complete the sixth level of the Suburbs District Crowd Control instance is the one with the fountain and train track. The strategy below is tailored for the aforementioned stage.
The celebrity starts by a fountain with three water jets. Throwing a crazed fan onto one of these water jets nets you $1000. At the beginning of the level when the fans are sparse, throw as many of them onto the fountain as possible before the celebrity starts to get swarmed. Switch to your bat when too many fans appear and swat them away as they come. The celebrity will eventually start to ascend up the steps, so protect him or her while they do.
When the celebrity reaches the top of the platform, wait until he or she is standing just before the track. At this point fans start to spawn on the other side of the track, and a few from the sides of the platform. The fans on the track won’t always climb up onto the platform, instead continuously running at the ledge. If there are no fans harassing the celebrity on the platform, drop down onto the track and start throwing the fans down there over to the opposite side of the track. Don’t step on the adjacent track yourself, as a train regularly passes by there.
If there are any fans on the track when the train passes by, it will crush them and add $1000 to the counter. You’ll also be given $750 for throwing a fan through the gap at the far edge of the track, so throw each one as far as possible to ensure you are awarded at least some money. The celebrity should be standing close enough to the track that you are able to hit the legs of any crazed fans that swarm him or her on the platform. If not, climb back up onto the platform, bat them away, and then get return to the track and take to the fans there.
As you near the $25,000 target of the sixth level, a number of fans may appear with pistols and start shooting at the celebrity. They can quickly build up the annoyance bar, so you’ll have to act fast. Rush these guys with the baseball bat and swat them all down. Keep hitting them until you reach the $25,000 target.
Hotels and Marina District Instance: The two best stages for completing the sixth level of this instance appear to be the airport and Little Shanghai due to their narrowness.
If you’re on the airport stage, sprint towards the celebrity at the start. Throw as many fans as you can into the plane’s turbine to get a good basis of cash. Switch to your bat when the fans start really swarming. Since crazed fans spawn so frequently at the sixth level, you can likely manage to simply use the bat to reach the required $25,000.
If on Little Shanghai, start by throwing as many of the fans as you can at the large gong behind you when the level begins. Again, since crazed fans spawn so frequently when on the sixth level, you can likely manage to reach the $25,000 goal just by using your bat to swat them away as they appear.
Suburbs District (Tidal Spring) Rewards:
Complete Level 3 - All Clothing Stores 5% Discount.
Complete Level 6 - All Clothing Stores 15% Discount.
Hotels and Marina District (Stilwater Boardwalk) Rewards:
Complete Level 3 - Pepper Spray (added to your crib weapon cache).
Complete Level 6 - Chainsaw (added to your crib weapon cache).
There is only one instance of this activity, and it’s located in Frat Row, which is part of the Stilwater University District.
At the start of each level, you first must choose which vehicle to use in the derby from a limited roster. You can then upgrade the vehicle of your choice by allocating points into three different areas: offense, defence, and speed. Completing levels adds more upgrade points. Level 1 upgrades cost a single point, while level 2 upgrades require three.
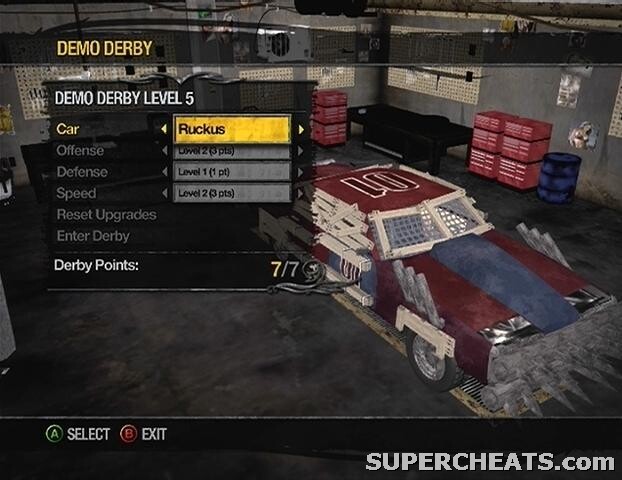
To progress to the next level, you must inflict the dollar worth of damage indicted in the upper-left corner of the screen. The amount required to move on to the next level increases as you progress. Simply surviving is not enough; even if yours is the last car in the ring, you must meet the damage requirement to complete the level. Cause a vehicle to explode and you’ll earn a $500 explosion bonus.
The Ruckus is a well-balanced vehicle that can easily carry you to the final stage. When each level begins, start towards the other cars in the distance, activate Nitro, and try to ram into the other contenders. The trick here is to keep moving, as sitting idly by leaves you at the mercy of the other drivers. Hitting a car on its side inflicts the most damage. Circle around the arena until you spot an opponent, then use the nitrous and try to ram them.
Your first upgrade should be to speed, followed by offense. Upgrade the speed attribute to level 2 when you have enough points, and fill out the rest following that.
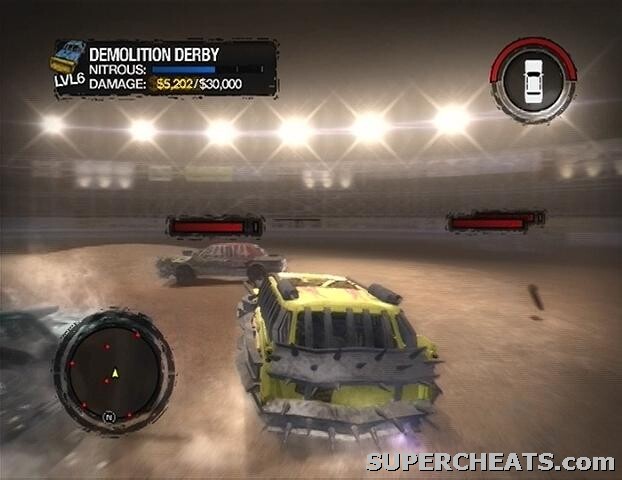
As with most of the other activities, the first five levels are a cakewalk, however things do become difficult at the sixth and final level. Use the Ruckus until the sixth stage, at which point you’ll want to switch to the Rampage. The Rampage is all speed, and that’s exactly what you need to meet the final level’s damage requirement of $30,000. You have to get in there and inflict as much damage as possible before all of the vehicles are destroyed by the other combatants.
Completing all six levels of the Demo Derby activity unlocks the “Demolition Man” achievement on the Xbox 360 version. The upgraded Demo Derby vehicles are also added to your crib garage.
Stilwater University District (Frat Row) Rewards:
Complete Level 3 - 5% Discount at Mechanic Shops.
Complete Level 6 - 15% Discount at Mechanic Shops.
In this activity, you must protect a dealer while he or she sells drugs around the city. You ride shotgun while the dealer drives to each buyer. The dealer has to make the number of deliveries indicated in the top-left corner of the screen for you to progress to the next level.
When the dealer reaches a buyer, it’s your job to protect the both of them from the enemy gang while they make the deal. Sometimes the buyer will refuse to pay and run off, at which point you’re tasked with killing him or her. Once the required number of deals has been made, you’ll just have to protect the dealer on their way home.
The number of deals needed to complete the level increases as you progress, and so does your notoriety with the enemy gang.
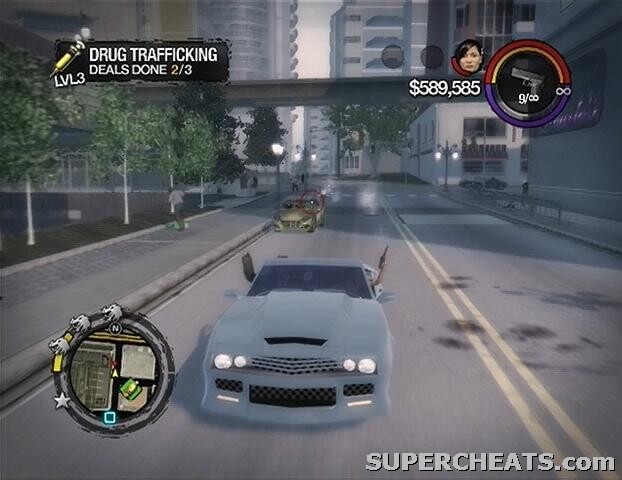
Depending on which instance of this activity you are playing, your enemy is either the Ronin or Brotherhood. You are given some notoriety with the gang in question at the start of each level, and this gang will continue to pursue the dealer throughout. You are given unlimited pistol ammo, but none of the other weapons in your inventory share this perk, though you are given a generous amount of ammo for each.
When defending the vehicle, always spray the driver’s side of the windshield with bullets in an attempt to take him or her out. If you do manage to hit the driver, their vehicle will swerve off course, so don’t bother shooting at it anymore. The pistol, SMG, and assault rifle seem to be the best weapons to use here. Refrain from using the RPG Launcher and other explosives while not on foot unless the target is a good distance away, since you can damage your own vehicle with it.
Although the dealer is doing the driving, he or she will follow you while on foot. You do not need to stay in the dealer’s original vehicle for the duration of the level; just get in to any other vehicle and the dealer will get in as well and take the wheel. If the vehicle is smoking or catches fire, bailout and ditch it in favour of another, although you can likely stick to the same car for the first few levels. The best time to swap vehicles is during a deal, since the enemy gang, police officers, and Saints tend to get out of their vehicles when you do, leaving their rides unattended to.
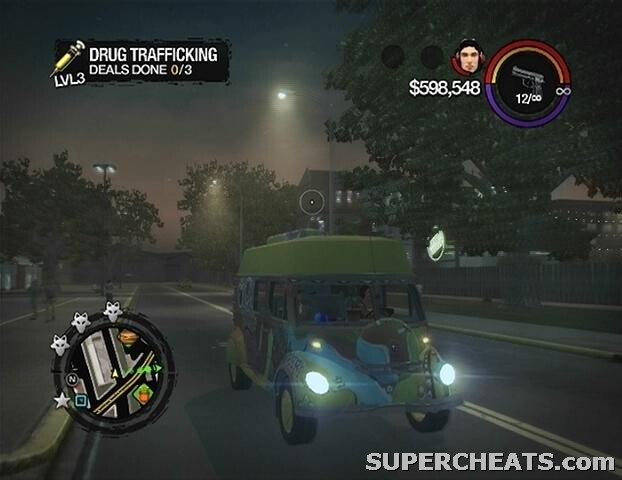
You can also revive the dealer if he or she is incapacitated, so keep an eye on their status in the top-right corner of the screen. For the first few levels you can probably sit in the car during a deal and protect the dealer from there, but later on you’ll have to get out and fight off the gang members that roll up. This is the time to use the RPG Launcher, and also if possible, prepare a getaway vehicle by carefully picking off the enemies that step out of theirs to keep it optimal condition.
As with many of the other activities in Saints Row 2, things only really start to get tough once you reach the sixth level. At this point, you’ll have a five-star notoriety level with the gang that’s after you, which means that they’ll come at you with relentless fervour. It becomes necessary to swap your vehicle during each drug deal to give yourself a better chance of making it to the next buyer.

There are two instances of Drug Trafficking: one is in the Hotels and Marina District (Stilwater Boardwalk), and the other in the Airport District (Wardill Airport). Complete all 12 levels of Drug Trafficking between the two instances to unlock the “Purple Haze” achievement on the Xbox 360 version.
Hotels & Marina District (Stilwater Boardwalk) Rewards:
Complete Level 3 - Ronin Notoriety Reduced (Ronin Notoriety falls at a slightly faster rate).
Complete Level 6 - Ronin Notoriety Reduced (Ronin Notoriety falls at a much faster rate).
Airport District (Wardill Airport) Rewards:
Complete Level 3 - XS-2 Ultimax (added to your crib weapon stash).
Complete Level 6 - Unlimited Shotgun Ammo (available at your cribs).
In Escort, you pick up the clients of an escort service and drive them around town while they fool around with a girl in the back seat. The goal is to fill the pleasure bar that appears in the top-left corner of the screen before the media manages to capture enough footage of the client, as measured by the footage bar. If the footage bar fills up completely, the level is failed, so it’s your job to keep the client away from news vans, which are denoted by large red circles on the GPS. The footage bar increases while you are within one of these red circles.
As soon as the client has the door open and is entering the car, start moving forward. The best way to keep away from these vans is to speed down lengthy roads, since your car is much faster. Turning corners may actually afford the media some time to catch up, since the AI can turn on a dime. Swerving in and out traffic may help too, and sometimes the media van barricades can serve to slow down pursuing vans if you can manage to make it past them unhindered.
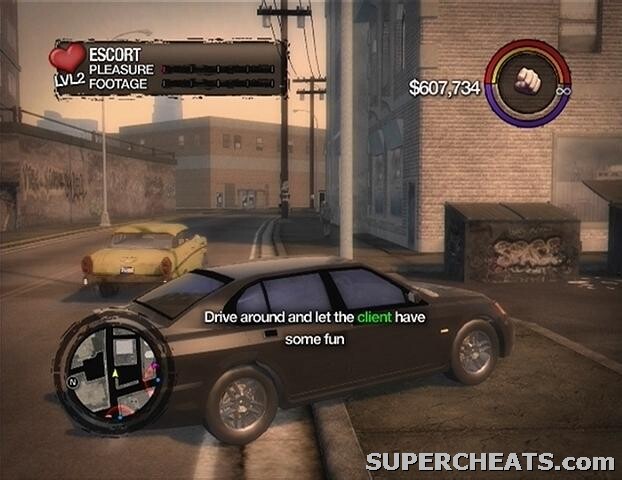
The media doesn’t just resort to tailing your car to get the footage; they’ll use their vans as road blocks too. If you notice a cluster of vans on the GPS, avoid the barricade if possible by turning down another street, but they do tend to just suddenly pop up. The escort vehicle is very sturdy and can plow its way past most other vehicles, including the media vans. If you can collide with the front counter one of the vans that make up the roadblock, you may be able to knock it aside and maintain speed.
There are also objectives that pop up and need to be completed in order to increase the pleasure bar. When an objective appears on screen, it must be completed before the pleasure bar will increase any further. The objective can be killing a target, driving the client to a specific location, dealing 1000 points of damage to other vehicles with your vehicle, gaining two bronze stars by powersliding or through the near miss diversion, or traveling at 55 mph for four seconds straight.
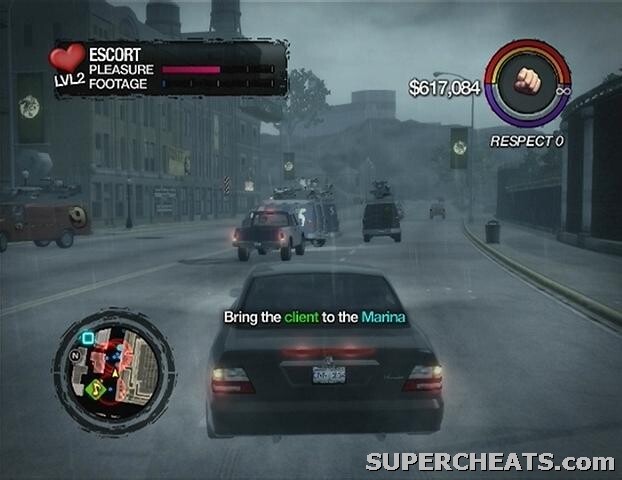
Firing a weapon for any reason other than to fulfill the target killing objective will rapidly decrease the pleasure bar, so don’t shoot without good cause. When the client’s pleasure bar is completely full, you then just have to drop him or her off at a marked location nearby. The media vans will back off at this point, so there’s no need to rush.
The amount of effort needed to fill up the pleasure bar increases as you progress, and so too does the intensity at which the media pursues you. As with several of the other activities in Saints Row 2, it seems that a bit of luck is involved in order to succeed in the later levels, since some objectives are much easier to complete than others. Sometimes the client wants to be dropped off at a very far location, other times he or she will just have you drive fast or powerslide. The objectives are random, though, so just retry if you fail the level and you may get easier ones the next time around.
There are two instances of Escort: one is in the Red Light District (Rebadeaux), and the other in the Stilwater University District (Frat Row). Complete all 12 levels of Escort between the two instances to unlock the Escort vehicles (available at your crib garage) and the “Trickster” achievement on the Xbox 360 version.
Red Light District (Rebadeaux) Rewards:
Complete Level 3 - Vehicle Delivery (have vehicles in your garage delivered to you for $1000).
Complete Level 6 - Vehicle Delivery (have vehicles in your garage delivered to you for free).
Stilwater University District (Frat Row) Rewards:
Complete Level 3 - Sons of Samedi Notoriety Reduced (falls at a slightly faster rate).
Complete Level 6 - Sons of Samedi Notoriety Reduced (falls at a much faster rate)
In this activity you act as a participant in an MMA style tournament. Apparently “MMA” encompasses the use of cinderblocks and neck-snapping. Who knew?
It’s your goal to defeat the other brawlers in the ring before they deplete your health bar to move on to the next level. That’s Fight Club in a nutshell, and there really isn’t that much more to it. Additional brawlers are added to the ring with as you progress, but the main idea remains.
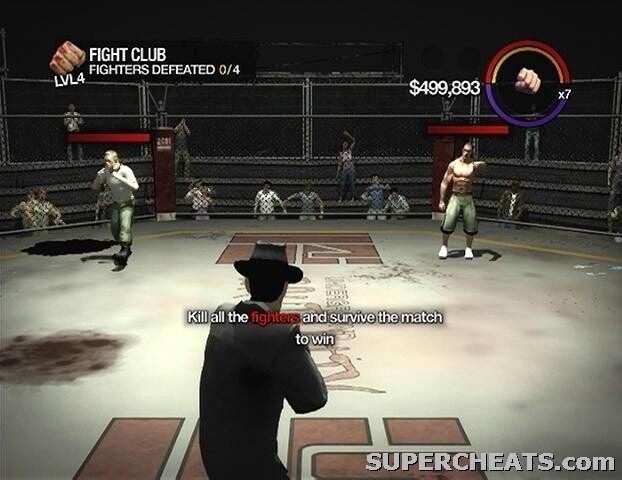
Although you are likely familiar with the melee system in Saints Row 2, here is a quick refresh: The shoulder buttons (LT/L2, RT/R2) are used to punch or kick, and holding both shoulder buttons at the same time causes your character to guard.
A health bar appears over each fighter’s head, which is depleted when that fighter is hit by a melee attack. Three successive melee strikes in a row will result in a combo, which temporarily grounds the target. There’s no need for honour here, so kick ‘em while they’re down!
If enough damage has been dealt to the downed opponent, a red arrow will appear over them. This arrow signifies that they are ready to be finished off. Approach the floored brawler and press the Y/Triangle button to start the elimination. Rapidly press the button that appears above the bar to fill it up. When you’ve managed to completely fill the bar, your character will take the fighter out of the match. Of course you can still kill opponents by depleting their health bar with normal strikes, but eliminating them this way is much quicker.
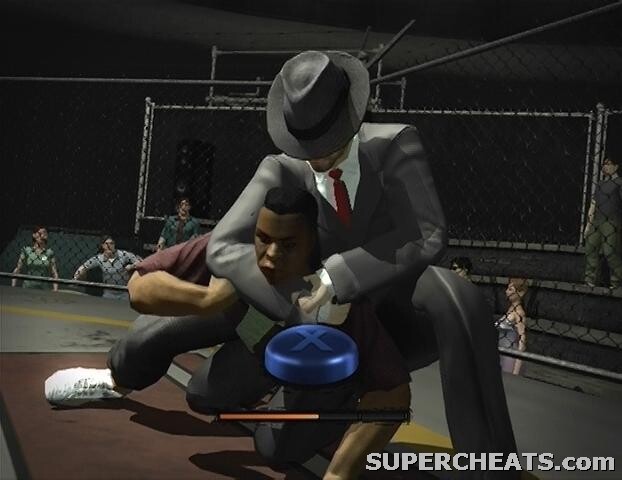
Your health bar does not automatically regenerate during this activity, though you can consume food to replenish lost health. The audience also participates here by throwing food and melee weapons into the ring. Melee weapons—such as a chair or an old TV set—can dish out some serious damage, so always rush to pick these up when they appear. Your opponents can pick weapons up too, so keep your distance if an opponent does manage to get their hands on one.
Don’t bother concentrating on a single target before moving on to the next; just run around the ring and hit opponents to dwindle away their health. Eventually it will all come together, allowing you to eliminate them all in quick succession. If you spot a knocked down fighter that has a red arrow over him, make a beeline for him and press Y/Triangle to start the elimination.
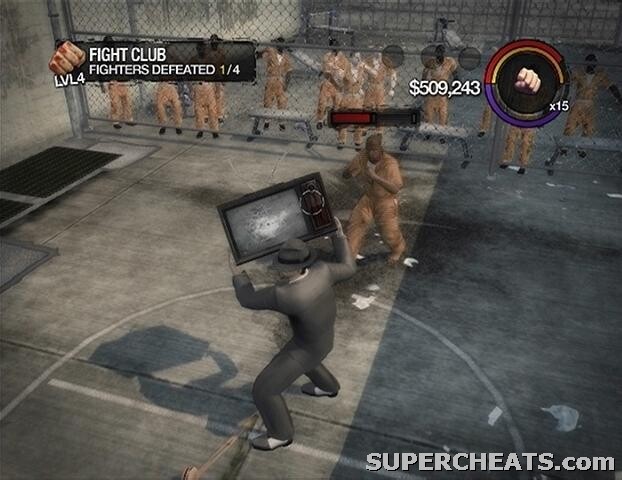
The setup doesn’t change until you reach the sixth and final level. On the sixth level, eliminating your opponent works a bit differently. Instead of a single button appearing over the progress bar, the required button will abruptly change to a different one. Pressing the wrong button during an elimination attempt rapidly depletes the progress bar, so you’ll have to be more reserved here. If one of the shoulder buttons—which can be harder to mash—is the required button, just tap it fast enough to keep the progress bar up until one of the face buttons appears.
There are two instances of Fight Club: one is in the Arena District (Ultor Dome), and the other in the Stilwater Prison District (Stilwater Penitentiary). Complete all 12 levels of Fight Club between the two instances to unlock the “Do Not Talk About It” achievement
Arena District (Ultor Dome) Rewards:
Complete Level 3 - Melee Damage Increased by 15%.
Complete Level 6 - Melee Damage Increased by 30%.
Stilwater Prison District (Stilwater Penitentiary) Rewards:
Complete Level 3 - Legal Lee (Homie).
Complete Level 6 - Troy (Homie).
In this activity, you’re the star of a reality TV show called FUZZ, which is essentially a depraved, no-holds-barred version of COPS. It’s your job to provide quality footage of criminals being “apprehended.” The Footage bar in the top-left corner of the screen must be filled up completely to move on to the next level. The bar must be filled before the timer to the left of it reaches zero.
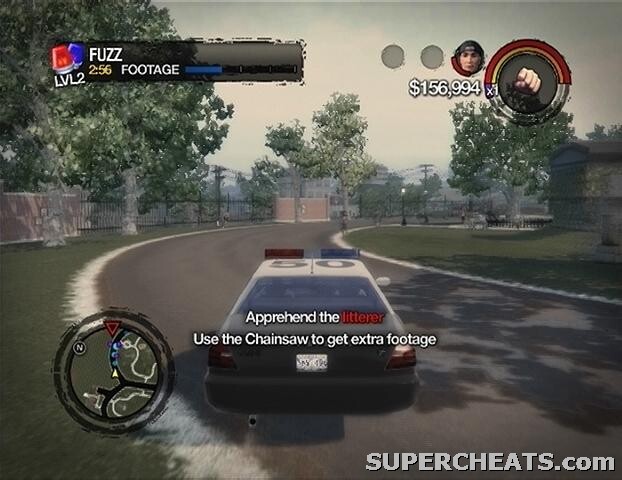
You’ll be given one or more targets in the district, and instructed to “apprehend” them, which your case means kill. The Footage bar fills up a notch once a criminal has been dealt with, however you must do the job in a variety of ways to keep things fresh. If you eliminate two targets or groups of targets in the same fashion, you won’t receive credit for the second kill(s) since the cameraman already has footage of that style. Stick to a single style per target (or group of targets) to leave more options open later on.
Usually you’ll be given a weapon and explicitly told to kill the target(s) with it to receive extra footage. Always use the indicated weapon to rack up the most points, except in cases when time is running out and you’re close to filling the bar.
Note that if the bar is full but you are in the middle of a takedown, you’ll still have to finish off the rest of targets to move on to the next level.
You aren’t restricted to solely using a police cruiser, but make sure that the cameraman is with you before moving on to the next target. Also, be careful not to kill the cameraman if you’re using a wide-range weapon (like the Flamethrower). If he’s knocked out, revive him within 30 seconds to avoid failing the level.
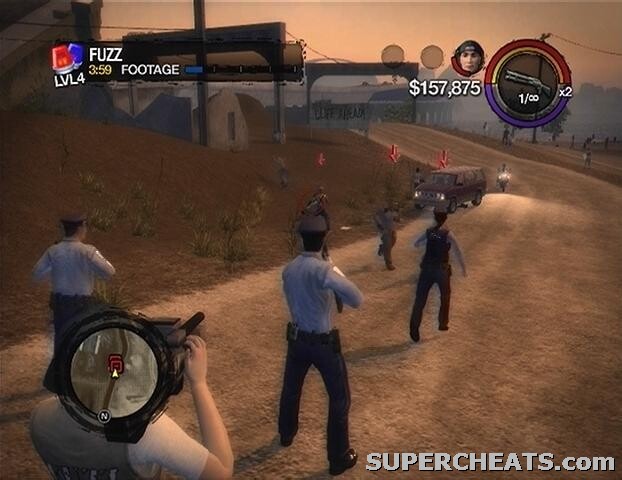
As you progress through the levels, the time limit rises, but so does the amount and variety of footage needed to fill up the bar. Usually one or more of your weapons will be given unlimited ammo for certain targets, so mix-up your weapon usage, run over targets with your car, and beat them down with melee weapons or hand-to-hand combat to gain more footage. There are six levels of Fuzz per location.
There are two Fuzz activity locations: one is in the Suburbs Expansion District (Quinbecca), and the other in the Projects District (Shivington). Complete all 12 levels of Fuzz between the two instances to unlock the “Reality Star” achievement
Suburbs Expansion District (Quinbecca) Rewards:
Complete Level 3 - Police Notoriety Reduced (Police Notoriety falls at a slightly faster rate).
Complete Level 6 - Police Notoriety Reduced (Police Notoriety falls at a much faster rate).
Projects District (Shivington) Rewards:
Complete Level 3 - Kobra Pistol (added to your crib weapon stash).
Complete Level 6 - Unlimited Pistol Ammo (available at your cribs).
In Heli Assault, you’re piloting an attack helicopter and must use it to defend your gang while they make stops in a van. Although the first level of this activity sets it up as a timed, objective-based activity, most of the levels have you flying overhead and defending the van from enemy vehicles.
The attack chopper is outfitted with a mini-gun and a homing missile launcher. Don’t even both with the mini-gun. You can lock onto targets by training the reticule on them until a green box appears. Keep the reticule around the green box until it turns red, at which point fire the missile with LT/L2 to send it after the target vehicle. The missiles are quite reliable, however a red target box does not ensure a hit. Misses usually only occur if the target follows the van under a bridge or overpass. The target lock should remain after a miss, so just fire another.
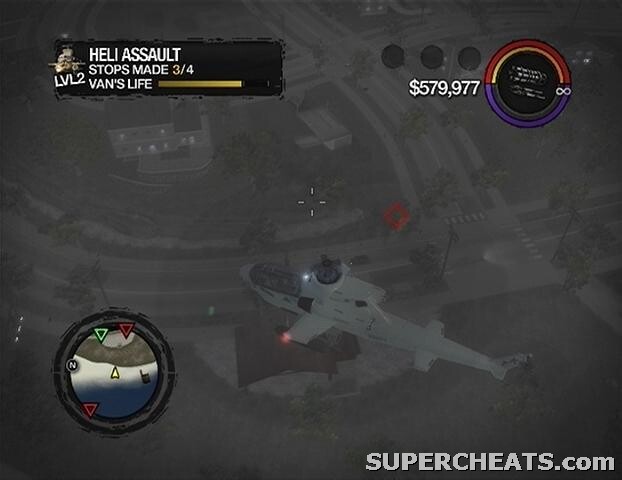
Gang vehicles appear on the GPS as red shapes: red upside-down triangles denote enemies below you (usually cars), red upward triangles denote enemies above (helicopters), and squares denote enemies at the same elevation (helicopters). You don’t want to be flying too high while following the van, because if you’re up too high up it can be hard to lock-on with the missile launcher and spot enemies.
Always take out enemy vehicles first, as they do the most damage to the van. Hit helicopters with a homing missile to bring them down when the streets are clear. Enemy helicopters—and even some gang members in the vehicles at street level—will occasionally target your craft with homing missiles of their own, so keep an eye out for projectiles headed your way.
You’ll need to frequently manipulate the camera with the Right Thumbstick for best results with the missile launcher. Targets behind the helicopter can be locked onto, so while the van is making a stop, hover over the area, look to your GPS for red blips, spin the camera around and lock onto the vehicles that roll up. You can quickly turn the helicopter left or right with LB/L1 and RB/R1.
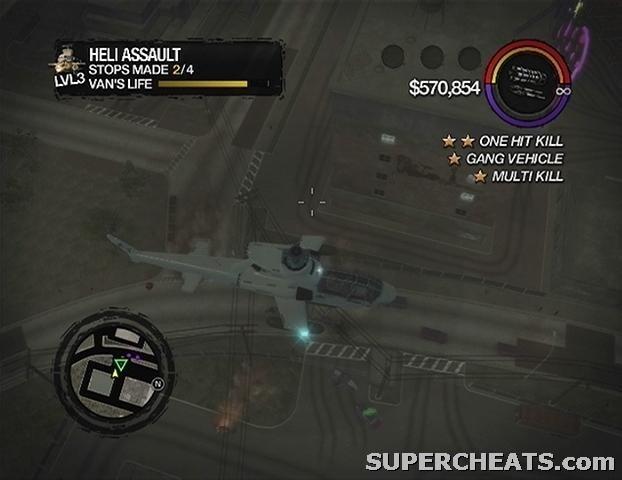
As mentioned previously, for the first mission of this activity you must complete a few objectives before the time runs out. From the second level on, however, there is no time level, but you must defend the van until it makes the number of stops indicated in the top-left corner of the screen. The van’s health bar must not be completely depleted, or else the level is failed.
At the end of the third level of both instances, the van breaks down at the second to last stop, so you’ll then have to lower the helicopter down so the Saints can grab hold of the skids. Once they are hanging from the helicopter, you must take them over to a marked location on the map, which is never too far from the breakdown site. You have to be careful not to fly too fast here, otherwise the Saints can lose their grip, forcing you to return to the ground to pick them up again. No enemies will attack while you do this, nor is there a time limit, so there’s no need to rush. Move at a speed just fast enough as to not tilt the helicopter’s nose forward and you should be fine.
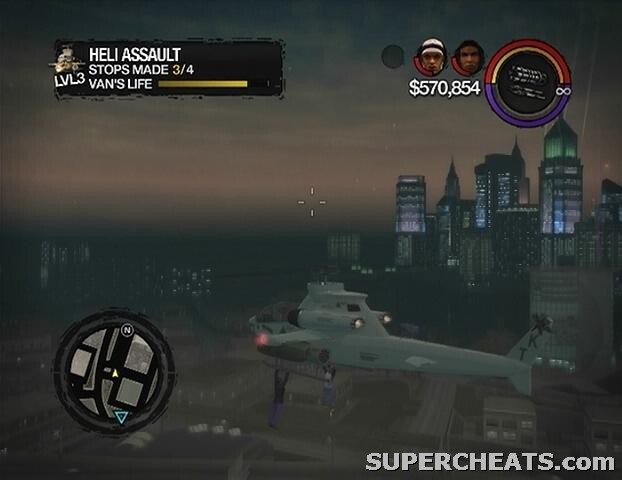
There are two instances of Heli Assault: one is in the Barrio District (Encanto), and the other in the Trailer Park District (Elysian Fields). Complete all 12 levels of Heli Assault between the two locations to unlock the “HeliGood” achievement on the Xbox 360 version.
Barrio District (Encanto) Rewards:
Complete Level 3 - Bullet Damage Reduced by 5%.
Complete Level 6 - Bullet Damage Reduced by 15%.
Trailer Park District (Elysian Fields) Rewards:
Complete Level 3 - All Weapons Store 5% Discount.
Complete Level 6 - All Weapons Store 15% Discount.
To progress in Insurance Fraud, you must attain the dollar amount indicated in the top-left corner of the screen before time runs out. Score is built by diving in front of oncoming vehicles, however there is much more to it than that. Though the time limit increases with each successive level, so too does the score needed to progress.
The shoulder buttons (LT/L2, RT/R2) are used to dive in front of incoming vehicles. Getting hit by a vehicle without diving does not increase your score and will only waste time, so always dive before being struck. Pressing one of the shoulder buttons while your character is lying on the ground causes him or her to stand up immediately, adding the score you had been collecting to your total. Always make your character stand up this way when it is certain that no other vehicles will collide with him or her.
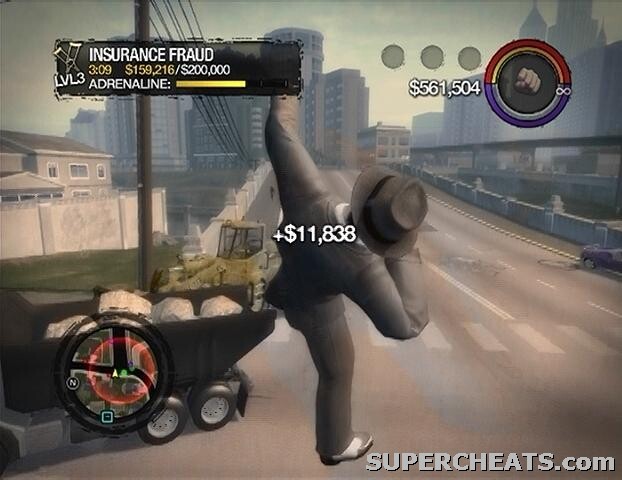
The adrenaline bar in the top-left corner of the screen fills when you take damage. Once the bar is completely full, you’ll enter adrenaline mode. While in adrenaline mode, the ragdoll physics are amped up, and collisions will more often than not send your character hurtling into the air. Adrenaline mode is the key to success for this activity.
At the start of each level, you are directed to a certain district where the activity will take place. The timer starts as soon as you enter the specified district, however always travel to one of the special bonus areas that then appear on the GPS. Though you can increase your score anywhere in the specified district, getting damaged in a bonus area fills up the adrenaline meter at a much faster rate.
There is usually more than one bonus area on the GPS, so before heading to one, look at your map and set a waypoint on the area that looks most suitable (those in intersections and near bridges are usually the best). When you reach the bonus area, bailout of your transport or collide with another vehicle have your character crash through the windshield to get started on the adrenaline bar.
Air control is very important. Your character can often be launched up into the air when struck by a vehicle, especially during adrenaline mode. While in the air, you can direct your character using the Left Thumbstick/Analog Stick. Landing on top of other vehicles or being struck again is worth the most score, so try to direct your falling character onto vehicles or towards an approaching vehicle in hopes of building on the score.
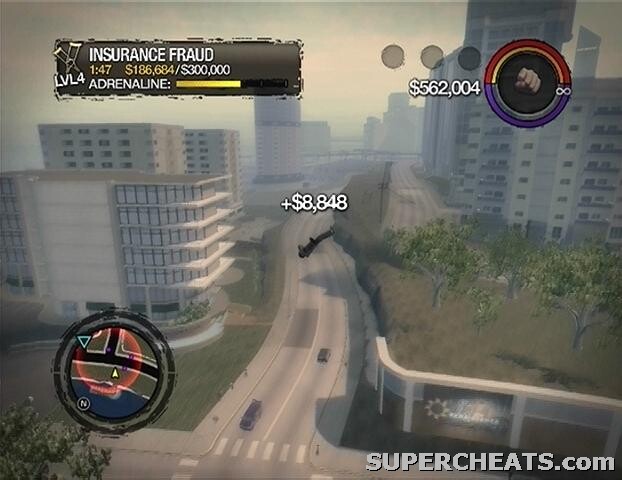
If the timer reaches zero while adrenaline mode is active, it’s not over! As long as there is still some bar left, you’re in overtime. So if you only have a minute or so left and adrenaline mode is not active. Work as fast as possible to trigger it so you can go into overtime when the timer hits zero.
The best areas for attaining a high score for each instance of this activity are listed below. If you don’t like the location you’re assigned to, press down on the D-pad twice and then press the A/X button to retry the activity.
Factories District Instance: The highway that runs along the south half of the Saint’s Row District and the T-junction in the northeast quarter of the Barrio District seem to be the most traffic-heavy areas in this instance.
Museum District: The majority of the bonus areas in this instance seem suitable for racking up enough damage. Just pick the bonus areas by bridges or in the middle of a T-junction.
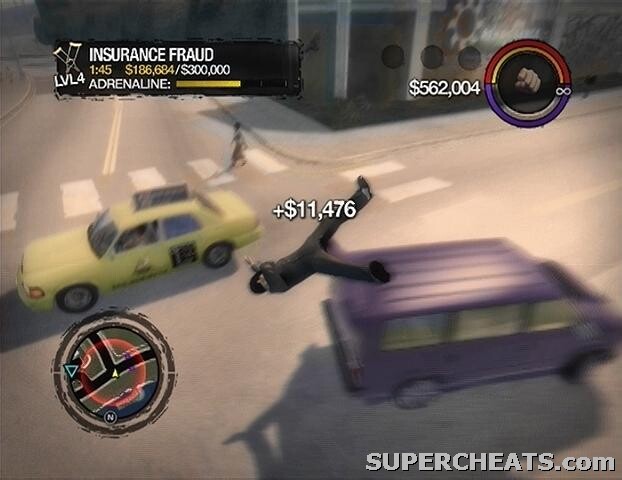
Completing all 12 levels of Insurance Fraud between the two instances unlocks the “Ambulance Chaser” achievement.
Factories District (The Mills) Reward:
Complete Level 3 - Sprint Increase (character can sprint for twice as long).
Complete Level 6 - Unlimited Sprint.
Museum District (Amberbrook) Reward:
Complete Level 3 - Vehicle Damage Reduced by 5%.
Complete Level 6 - Vehicle Damage Reduced by 15%
In Mayhem, you’re tasked with doing what you do best: blowing stuff up!
To move on to the next level, you must cause the dollar amount in damages displayed in the top-left corner of the screen before the time limit runs out. Hitting people, vehicles, fences, benches, lamp posts, tables, and a load of other objects adds to the damage count. At the start of each level, you are directed to a specific district; the timer starts as soon as you step into this district. Bonus points are given for destroying a certain type of vehicle, which is identified when you first enter the district.
You are provided with unlimited ammo for certain weapons, and more weapons open up as you progress. On the third level, you’ll be given an RPG Launcher with unlimited ammo, which is by far the best weapon to use. Till then, use the shotgun or grenades.
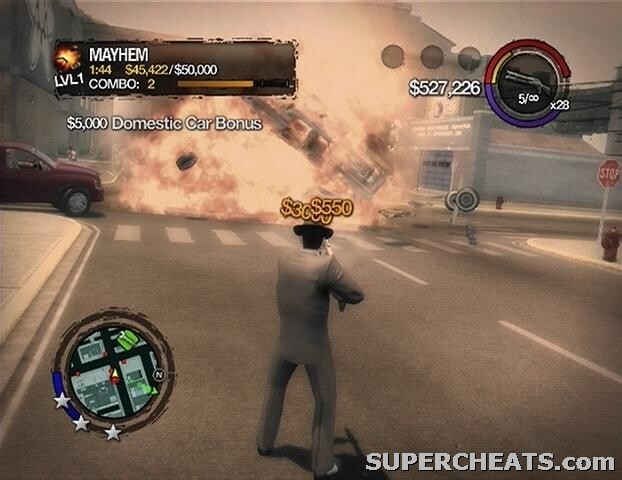
The combo counter displayed in the top-left corner of the screen fills up and stacks as you destroy targets in quick succession. The higher the combo count, the more bonus points you’re given per target.
Although the allotted time increases with each successive level, so does the amount of damage needed to progress. Targeting people and cars is not the quickest way to raise the damage counter. By far the best way to rack up damage is by destroying fences or railing. Most districts have lengthy spans of fencing within them, and each panel counts as a single target, so it becomes really easy to achieve a huge combo. Sitting areas outside of restaurants are good to target too, due to all of the tables and chairs.
The police will constantly pester you throughout your rampage. The biggest problem with the police force is that they constantly try to run you over with their vehicles, which usually knocks your character to the ground and takes out a large chunk of health. While on the ground, your combo counter will surely revert to zero. Try to blast the police cruisers and FBI vans before they become too much of a problem. The FBI vans actually yield a large worth when destroyed, although it takes two RPGs to destroy one.
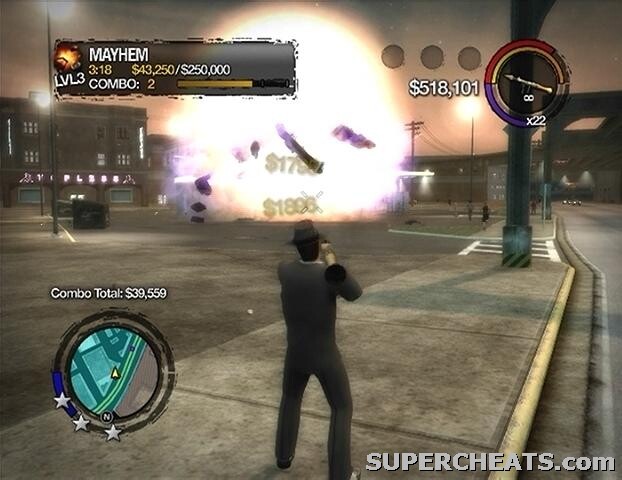
Things get tough once you reach the sixth level, in which $800,000 worth of damage is needed to succeed. At this point it seems that a bit of luck is required to meet the target, since some areas are better than others for racking up damage. The best locations for completing both instances of this activity are detailed below. If you aren’t sent to that location, press down on the D-pad twice and then press the A/X button to retry the activity.
Red Light District Instance: The Hotels and Marina District, as well as the Suburbs Expansion District, are the best locations for this instance due to the amount of fencing and railing in the area. Starting on the Hotels and Marina District is essentially a guaranteed win, since there is railing all along the pier at the north end of the district. You can cause damage worth well into the millions here.
Stilwater Nuclear Power Plant Instance: The best location for this instance is the Stilwater University District. Target the railing surrounding the patches of grass, trees, and shrubs in the northwest quarter of Frat’s Row to achieve a big combo.
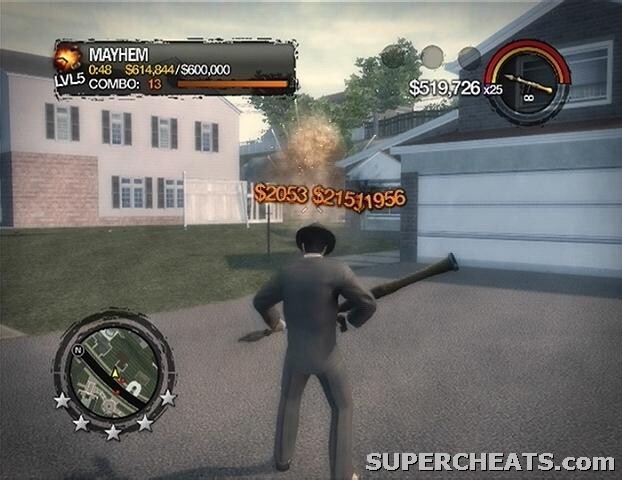
Complete all 12 levels of Mayhem between the two instances to unlock the “Wrecking Crew” achievement on the Xbox 360 version.
Red Light District (Bavogian Plaza) Rewards:
Complete Level 3 - Crib Customization 5% Discount.
Complete Level 6 - Crib Customization 15% Discount.
Stilwater Nuclear Power Plant District (Stilwater Nuclear) Rewards:
Complete Level 3 - Flamethrower (added to your crib weapon stash).
Complete Level 6 - Annihilator RPG (added to your crib weapon stash).
Septic Avenger is an on-rails activity. You are a passenger in a Septic Truck and must use the nozzle attached to it to cover marked targets with raw sewage. Targets are denoted on your GPS by red squares and triangles. Although you can’t control the truck, you can make it come to a complete halt (by holding LT on X360, and L2 on PS3). The nozzle is controlled with the Right Thumbstick/Analog Stick and the RT/R2 button is used to spray sewage.
Sewage cannot be sprayed indefinitely, however; the blue half-circle below the target reticule denotes how much more can be sprayed before it has to recharge.
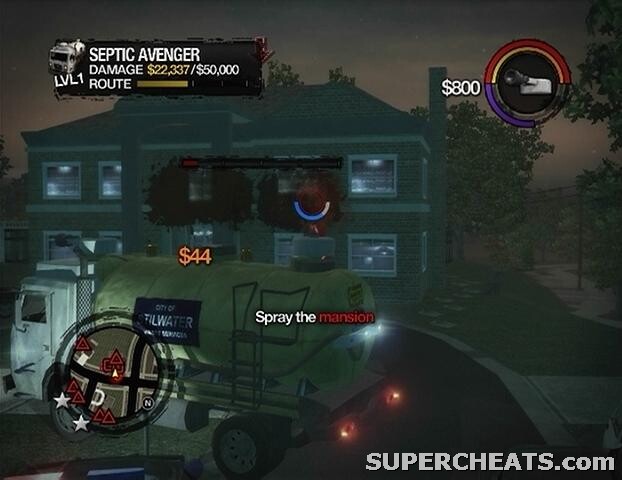
Reach the target damage amount displayed by the counter in the top-left corner of the screen to move on to the next level. There are six levels total per instance. Basically, stop the truck when you reach a marked target and continuously spray it with sewage until the red bar is depleted. Spraying unmarked people and vehicles racks up score as well, but of course marked targets will net you more. Use sewage to fight off police cruisers and SWAT trucks when you encounter them.
Though the Septic Truck can take quite a beating, it isn’t indestructible, so use sewage to knock away police and any other people who are firing at the truck.
The Route meter below the Damage counter indicates how much farther the truck has to travel before the level ends. If you are nearing the end of the level and have yet to reach the damage target amount, halt the truck and spray police and civilian vehicles until the amount is attained.
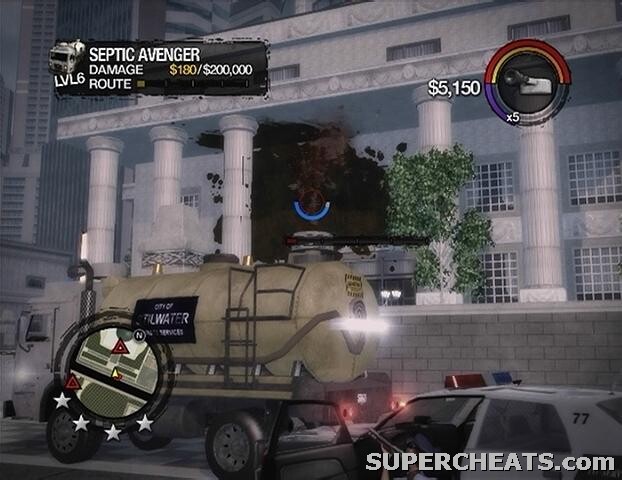
This is a very simple activity suitable for earning Respect early on in the game.
There are two different Septic Avenger activity locations: one is in the Suburbs Expansion District (New Hennequet), and the other is in the Red Light District (Rebadeaux). Complete all 12 levels of Septic Avenger between the two locations to add the Septic Truck to your crib garage and unlock the “Splatster Chief” achievement on the Xbox 360 version.
Suburbs Expansion District (New Hennequet) Rewards:
Complete Level 3 - Improve Weapon Accuracy by 5%.
Complete Level 6 - Improve Weapon Accuracy by 15%.
Red Light District (Rebadeaux) Rewards:
Complete Level 3 - Food and Liquor Store 5% Discount.
Complete Level 6 - Food and Liquor Store 15% Discount.
In this activity, you must take girls away from their abusive pimps and drop them off at a brothel. You have to collect a certain number of girls (as indicated in the top-left corner of the screen) before the time runs out to progress to the next level.
Since you can have up to three girls with you at once, you’ll want to start with a four-door car or four-seat convertible to hold that many. If you don’t have a vehicle, a boxy four-door car can be found nearby the starting point.
The girls are denoted by green shapes on the GPS. When you reach them, you’ll have to get close and then press up on the D-pad to recruit them as followers. Their pimp won’t like this, and will therefore immediately attack. You can kill the pimp and supporting gang members before recruiting the girls if you wish, however you can probably manage to just get the girls and speed away without taking too much damage.
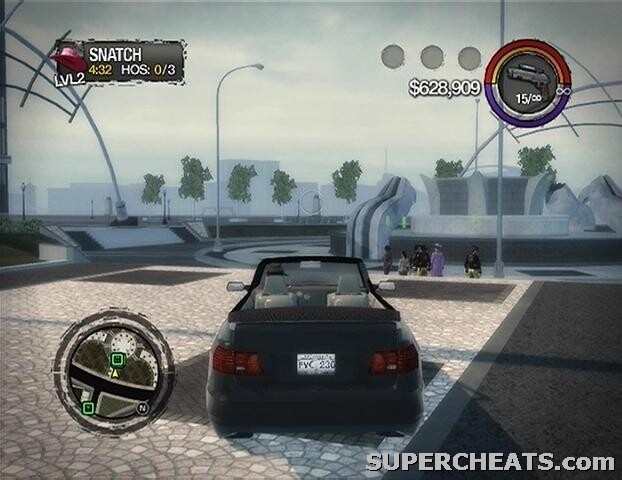
Depending on the instance of the activity you’re playing, either the Brotherhood or the Ronin will be supporting the pimps. You’ll gain some notoriety with the gang upon recruiting the girls. Try not to kill any gang members as they pursue you on your way back to the brothel, because doing so just raises your notoriety level and makes things worse.
Although the time limit increases as you progress, so too does the number of girls you need to take back to the brothel to complete the level. However the amount of time you are given is very generous, so it shouldn’t be overly hard to succeed as long as you don’t die and don’t kill any of the girls.
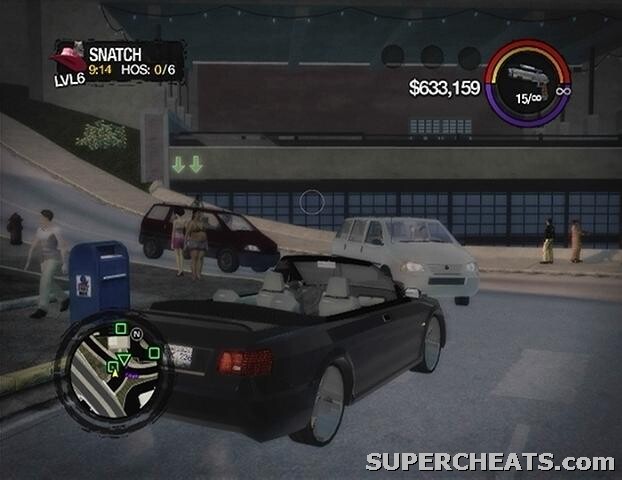
Since the number of girls needed increases as you reach the later levels, you’ll have to make more than one trip. The girls are usually in pairs or groups of three, so you’ll only have to make two trips at the most. If your vehicle is in bad condition, get out and steal another, but only settle for four-seaters unless you only need one more girl.
At one point a pimp may have the last girl in a limo that you must stop in order to collect her. Just shoot at the vehicle and the pimp will eventually stop and get out. Kill him to rescue the girl.
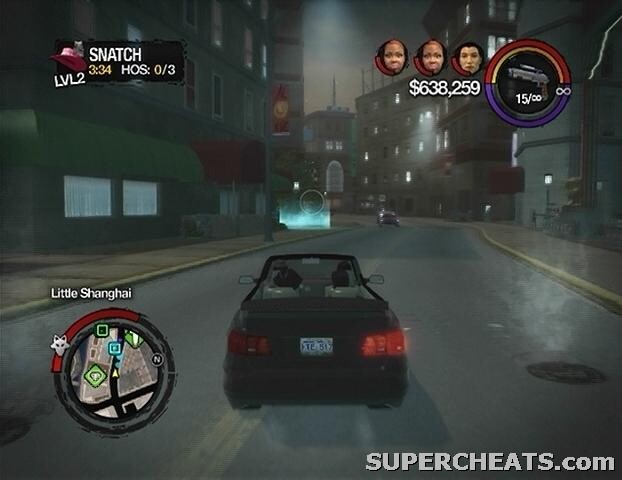
There are two instances of this activity: one is in the Downtown District (Brighton), and the other in the Chinatown District (Imperial Square). Complete all 12 levels of Snatch between the two instances to unlock the “...But It Sure Is Fun” achievement on the Xbox 360 version.
Downtown District (Brighton) Rewards:
Complete Level 3 - Gal 43 Sub-Machine Gun (added to your crib weapon stash).
Complete Level 6 - Unlimited SMG Ammo (available at your cribs).
Chinatown District (Imperial Square) Rewards:
Complete Level 3 - Health Regeneration 2X.
Complete Level 6 - Health Regeneration 3X.
The goal of this activity is to hit each of the checkpoints before time runs out. It sounds simple enough, but there’s much more to it than that. Your character is riding an ATV, wearing a full firefighter suit, while on fire. Extra time is acquired by hitting pedestrians ( 2 seconds) and vehicles ( 1 seconds). The bonus time you earn stacks until you hit a checkpoint, after which the total number of seconds you earned between checkpoints is added to the timer.
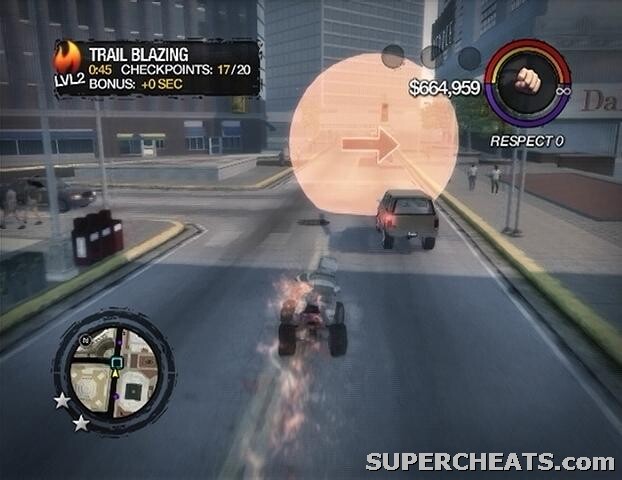
Barrels and gasoline trails are strewn throughout the course, and hitting either one causes a large explosion, likely netting you a bunch of seconds extra time. Gasoline trails appear as a burning flame in the world; you’ll always want to hit these trails, as they usually lead to one or more barrels.
You’ll definitely have to hit people and vehicles if you’re going to make it to the end of the track. People can be hard to hit, so only try hitting them if there is a cluster on the sidewalk, or if you’re on a walkway. Occasionally there will be a setup of explosive barrels near a sitting area that can be used to hit the pedestrians there, so keep an eye out.
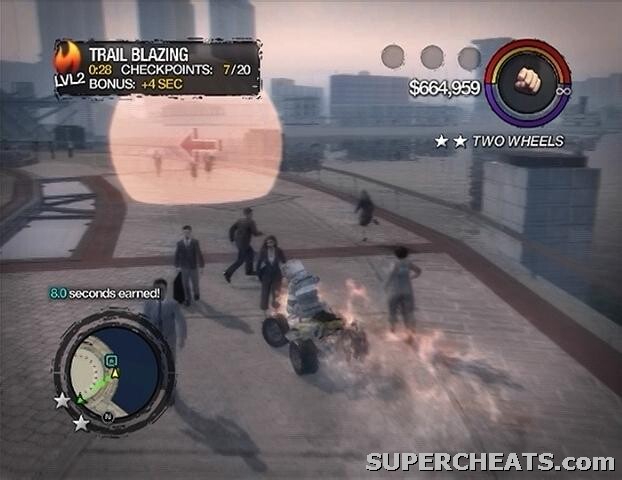
Vehicles immediately explode when you come into contact with them, and the quad won’t be thrown off course or anything. Although vehicles don’t provide the best time bonus, the explosion they cause can wipe out nearby pedestrians too. So if you’re heading down a long street, always try to hit the cars that are next to a sidewalk where pedestrians are walking.
Success in the later levels has a lot to do with knowing the course. You may have to run through a level a few times before you are able to succeed. The arrows in the markers point in the direction that the next will appear, although sometimes it may be in a hard to reach an area. Being familiar with the course can spare time wasted turning around when a mistake is made.
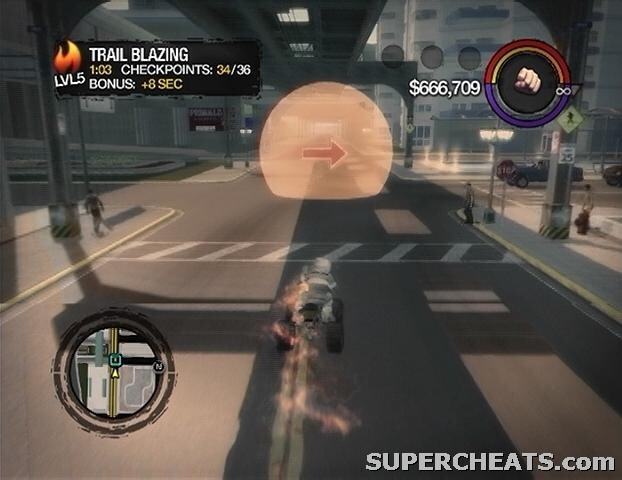
There are two instances of Trailblazing: one is in the Apartments District (Sommerset), and the other in the Downtown District (Adept Way). Complete all 12 levels of Trailblazing between the two instances to unlock the Firefighter Suit (added to your crib wardrobe), and the “Stuntman” achievement on the Xbox 360 version.
Apartments District (Sommerset) Rewards:
Complete Level 3 - Brotherhood Notoriety Reduced (notoriety falls at a slightly faster rate).
Complete Level 6 - Brotherhood Notoriety Reduced (notoriety falls at a much faster rate).
Downtown District (Adept Way) Rewards:
Complete Level 3 - Explosion Damage Reduced by 5%.
Complete Level 3 - Explosion Damage Reduced by 15%.
There are five lists of hitman targets in Stilwater. There are six targets per list, and each listing contains their location and details on how to make them appear. If for some reason the target disappears after appearing, or a rival hitman gets to them first, just repeat the requirement to trigger them again.
Below is a list of every target, their locations, as well as expanded details on how to make them appear on the GPS.
Complete One List - Hand Grenades added to your crib weapon cache.
Complete Three Lists - Satchel Charges added to your crib weapon cache.
Complete Five Lists - Unlimited Rifle ammo (available at your crib weapon cache), and the “Hello 47” achievement on the Xbox 360 version.
Name: Alvan
Location: Pleasant View, Arena District - Drive In
Detail: Go to the abandoned drive-in theatre in the Arena District and drink two 40 oz’s, which can be purchased at any liquor store. He should appear on the GPS then. On the map, the drive-in is the brown patch below the bend that continues south to Frat Row.
Name: Brad
Location: Barrio District
Detail: You have to tag a spot in Barrio to draw Brad out (See the map under the “Tag Locations” section). If you sprayed all of the tags in Barrio prior to triggering this activity, Brad should show up automatically.
Name: Anoop
Location: Anywhere
Detail: Attain a Police Notoriety level of at least three stars and he will appear.
Name: Frank
Location: Anywhere
Detail: Call the cab company (555-455-8008) using the “Dial” option on your mobile phone and Frank will appear in a cab.
Name: Scott
Location: Anywhere
Detail: Call Freckle Bitch’s (555-6328) using the “Dial” option on your mobile phone to have some food delivered and Scott will appear.
Name: James
Location: Misty Lane, Suburbs District - Technically Legal
Detail: Travel to the Technically Legal in the Suburbs District, which is just a bit north of the “On The Rag” clothing store that appears on the map. Trigger the Ho-ing mini-game by standing in the blue marker to your left when you first enter the club and hit the Y/Triangle button. Run through a few levels and James should appear on the GPS afterwards.
Name: Jeremiah
Location: Marina/Museum Districts
Details: Ride a motorcycle around the Marina and Museum districts and he should appear.
Name: Nate
Location: Hotels & Marina District - Poseidon Casino
Details: Travel to the Poseidon’s Palace casino, which is near shell-shaped structure south of the “Branded” clothes store icon on the map. Play some casino games, then return to the casino and he should soon appear.
Name: Brian
Location: Anywhere
Details: Call 911 using the “Dial” option on your mobile phone to lure the target over to you.
Name: Chris
Location: Amberbrook, Museum District - Buy Jove
Details: Travel to the Buy Jove store in Amberbrook, wait around there, and the target should soon appear on the GPS.
Name: Randy
Location: Stilwater Boardwalk, Hotels & Marina District
Details: Buy a boat or Wavercraft at the Ship IT vehicle dealer just north of the Hitman icon on the map and Randy will appear on the GPS.
Name: Nick
Location: Stilwater Boardwalk, Hotels & Marina District - Heron Hotel
Details: Travel to the Heron Hotel, which is just up the road from the Poseidon’s Palace Casino (the hotel closest to the “Branded” clothing store icon on the map, more specifically). There are two double-doors on the west and east sides of the hotel that can be used to enter. Take the elevator in the lobby up to the target’s floor. Kill him and everyone else in the room.
Name: Apoop
Location: Encanto, Barrio District - On Track
Details: Travel to the On Track night club (denoted by a liquor bottle icon on the map) in Encanto and wait on the dance floor downstairs. He should soon appear on the GPS.
Name: Larry
Location: Trailer Park District
Details: You first need to purchase a “Men’s Tank Top 1” at an “On The Rag” clothes store; there’s one a bit east of the Trailer Park District. Travel to the Trailer Park District wearing the shirt and he should appear on the GPS.
Name: Seabaugh
Location: Stilwater Boardwalk, Hotels & Marina District - Pirate Ship
Details: Travel to the pirate ship restaurant at the Marina and he should appear on the GPS.
Name: Mr. Flegel
Location: Bavogian Plaza, Red Light District - Rusty’s Needle Tattoo Parlor
Details: Get a tattoo at the Red Light District tattoo parlour and to make him appear.
Name: Lt. Freeball
Location: Anywhere
Details: Attain a Police Notoriety level of at least two stars and he will appear.
Name: Russell
Location: Underground Caverns
Details: Travel to the Spelunker’s clothes shop in Black Bottom, which is part of the Factories District. Enter the Underground Caverns from there and wait around until he appears on the GPS.
Name: Everett
Location: Red Light District
Details: Kill a pimp (they appear at night around the Red Light District, or try calling 555-PIMP) to trigger the appearance of Everett’s location on the GPS.
Name: Justin
Location: Mourning Woods Cemetery, Suburbs Expansion District.
Details: You can find him at the cemetery between 10pm and 4am.
Name: Chris
Location: Arena, Projects District
Details: Get a motorcycle and ride it around the Arena District and he will appear on your GPS.
Name: Tim
Location: Anywhere
Details: Call the Fire Department using the “Dial” option on your mobile phone (555-FIRE) and kill him when he shows up.
Name: Mitri
Location: Factories District
Details: Drink some beer around the highway exchange in the northeast corner of the Factories District and he should appear.
Name: Frank
Location: Anywhere
Details: Attain a five-star Police Notoriety level and he will appear in an FBI van.
Name: Shannon
Location: Trailer Park District
Details: Start a fight in the Trailer Park District and someone should call him over.
Name: Jim
Location: Stilwater Nuclear District
Details: Call the hazmat team (555-OOPS) using the “Dial” option on your mobile phone while in the Stilwater Nuclear District to lure Jim over.
Name: Roje
Location: Suburbs Expansion District - Music Store
Details: Buy some music tracks at the “Scratch That” music store in Quinbecca and he should appear on the GPS.
Name: Mike
Location: Downtown District
Details: Drive around the Downtown District until he appears on the GPS. You may need to intentionally die in the district before he will appear.
Name: Clint
Location: Stilwater University District
Details: Purchase some 40 oz’s at a liquor store or gas station and down a couple outside of the Stadium in Frat Row (where the Demolition Derby activity icon appears on the map). The target should then appear.
Name: Greg
Location: Any Freckle Bitch’s
Details: Buy one of every item on the menu at any Freckle Bitch’s and he will appear on the GPS.
There are five chop shop lists in Stilwater. Each list contains eight vehicles that the chop shop is interested in having delivered. The listings include the cash and respect amounts reward for the vehicle’s delivery, as well as the name of the district that the vehicle can definitely be found in. Select a vehicle from the list to have it appear on the GPS when it spawns in that district. You must be in the indicated district for the vehicle to appear on the GPS.
You don’t have to collect the vehicle in the listed district, however, though driving around that district with the vehicle selected is a sure-fire way to have it appear. If you spot a vehicle on the list while searching for a different one, you may as well grab it.
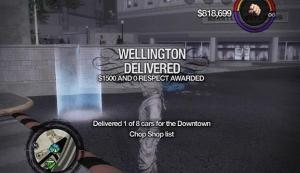
When you enter a vehicle on one of the lists, you are told that it is wanted and then directed to the nearest chop shop. You don’t need to bring the vehicles to the chop shop that the list belongs to.
The drivers of the vehicles on the lists act differently as well; they’ll speed off if you ram into them, or try to open the door. The best way to collect a vehicle is to stand in front of it and shoot the driver through the windshield. Try placing your car in front of the target to stop it, but don’t come into contact with it at all, otherwise the driver will speed off.
Complete One List - Special variant of the Buggy (delivered to your crib garage).
Complete Two Lists - Special variant of the Combine (delivered to your crib garage).
Complete Five Lists - 75% Discount at all mechanic shops, and the “Where’s My Car?” achievement on the Xbox 360 version.
Vehicle: Go!
Location: Trailer Park District
Cash: $1,000
Respect: 200
Vehicle: Taxi
Location: Suburbs Expansion District, but just call TNA Taxis at 555-455-8008.
Cash: $1,250
Respect: 250
Vehicle: Wellington
Location: Downtown District
Cash: $1,500
Respect: 300
Vehicle: Alaskan
Location: Hotel & Marina District
Cash: $1,750
Respect: 400
Vehicle: Varsity
Location: Downtown District
Cash: $2,000
Respect: 500
Vehicle: Zenith
Location: Hotel & Marina District
Cash: $2,500
Respect: 600
Vehicle: Justice
Location: Suburbs Expansion District
Cash: $3,000
Respect: 700
Vehicle: Titan
Location: Downtown District
Cash: $3,500
Respect: 800
Vehicle: Mockingbird
Location: Suburbs District
Cash: $1,000
Respect: 200
Vehicle: Churchill
Location: Suburbs Expansion District
Cash: $1,250
Respect: 250
Vehicle: Hammerhead
Location: Downtown District
Cash: $1,500
Respect: 300
Vehicle: Compton
Location: Museum
Cash: $1,750
Respect: 400
Vehicle: Topher
Location: Hotels & Marina District
Cash: $2,000
Respect: 500
Vehicle: Quota
Location: High End Retail District
Cash: $2,500
Respect: 600
Vehicle: Five-O
Location: Suburbs District, but just gain some notoriety with the police to lure one over to you.
Cash: $3,000
Respect: 700
Vehicle: Ambulance
Location: Suburbs Expansion District, but just dial 911.
Cash: $3,500
Respect: 800
Vehicle: Swindle
Location: University District
Cash: $1,000
Respect: 200
Vehicle: Betsy
Location: Arena District
Cash: $1,250
Respect: 250
Vehicle: NRG V8
Location: Barrio District
Cash: $1,500
Respect: 300
Vehicle: Raycaster
Location: Chinatown District
Cash: $1,750
Respect: 400
Vehicle: Melbourne
Location: Airport District
Cash: $2,000
Respect: 500
Vehicle: Bezier
Location: Apartments District
Cash: $2,500
Respect: 600
Vehicle: Cosmos
Location: Projects District
Cash: $3,000
Respect: 700
Vehicle: Status Quo
Location: Red Light District
Cash: $3,500
Respect: 800
Vehicle: Voyage
Location: Docks & Warehouses District
Cash: $1,000
Respect: 200
Vehicle: Danville
Location: Truck Yard District
Cash: $1,250
Respect: 250
Vehicle: Mag
Location: Projects District
Cash: $1,500
Respect: 300
Vehicle: Bag Boy
Location: Airport District
Cash: $1,750
Respect: 400
Vehicle: Backhoe
Location: Barrio District
Cash: $2,000
Respect: 500
Vehicle: Bulldozer
Location: Factories District
Cash: $2,500
Respect: 600
Vehicle: Delivery Truck
Location: Saint’s Row District
Cash: $3,000
Respect: 700
Vehicle: Longhauler
Location: Red Light District
Cash: $3,500
Respect: 800
Vehicle: Voxel
Location: Barrio District
Cash: $1,000
Respect: 200
Vehicle: Magma
Location: Projects District
Cash: $1,250
Respect: 250
Vehicle: Attrazione
Location: Red Light District
Cash: $1,500
Respect: 300
Vehicle: Superiore
Location: Airport District
Cash: $1,750
Respect: 400
Vehicle: Venom Classic
Location: Chinatown District
Cash: $2,000
Respect: 500
Vehicle: Eiswolf
Location: Saint’s Row District
Cash: $2,500
Respect: 600
Vehicle: Socialite
Location: Apartments District
Cash: $3,000
Respect: 700
Vehicle: Peacekeeper
Location: Saint’s Row District
Cash: $3,500
Respect: 800
Ambulance EMT: Call 911 using your mobile phone and steal the ambulance that arrives to get started. This is a very simple mini-game in which you must travel to the scene of an accident and resuscitate a certain number of victims to complete the level. There is a time limit, which is visible in the top-left corner of the screen. The time really stacks up as you progress, however, so the limit shouldn’t be too much of an issue.
When you reach the scene, get out of the ambulance, stand over one of the marked victims, and press Y/Triangle when the prompt appears to start reviving them. There are two different mini-games for reviving a victim: chest compressions and shock paddles. When using the shock paddles, you first must charge them up by moving one Thumbstick down and the other up simultaneously. When the paddles are charged, press both shoulder buttons (LT/RT, L2/R2) at the same time to revive the victim. For chest compressions, you must move both Thumbsticks up and down concurrently in a slow and steady fashion to revive the victim.
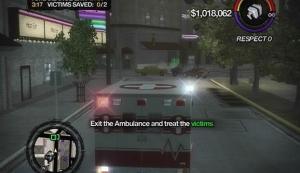
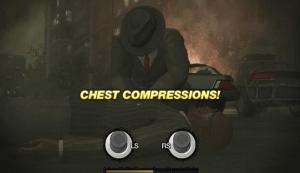
There appears to be a glitch where a victim sometimes spawns too close to a burning vehicle, preventing you from starting the resuscitation process. If this happens, you can push the vehicle that’s blocking your way using another vehicle to give yourself enough room to operate.
Completing all 10 levels of this diversion unlocks a special variant of the Ambulance and the Shock Paddle melee weapon (added to your crib weapon cache).
Fire Truck: Dial 555-FIRE and steal the truck that shows up to investigate the call. The fireproof Fire Fighter Suit that is unlocked after completing both instances of the Trailblazing activity is a must here, as it makes things infinitely easier. If you don’t have this unlockable yet, it is suggested that you hold off on this diversion until you have completed both instances of Trailblazing (see the “Trailblazing” section for more info). You won’t have to worry about being set aflame yourself while wearing this outfit.
In this diversion you’re tasked with entering buildings and putting out the fires inside. Time is added to the total in the top-left corner of the screen after each level. If time runs out, it’s over, and you’ll have to start this diversion again from the first level. A cyan shape marks the building that needs to be cleared in order to complete the current level. You must travel to the scene, get out of the truck, enter the building, and use the fire extinguisher to put out all of the marked objects. Don’t waste any time putting out people who are on fire, just go for the objects with red arrows above them.
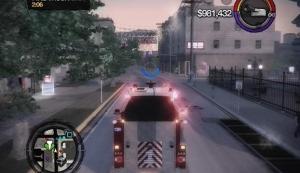
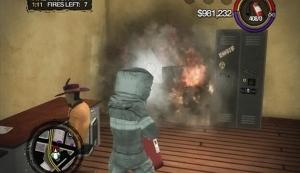
Don’t be too liberal with the fire extinguisher, because it can run out. If the extinguisher runs out, you’ll have to return to the truck to refill it. Quickly get back to the truck after putting out all of the fires and start towards the next location. Complete the tenth level of this diversion to unlock a special variant of the Fire Truck (available at your crib garage), as well as the Fireman Outfit (added to your wardrobe).
Ho-ing: Look for a blue marker outside of gas stations, and in some night clubs, and press Y/Triangle to get started. Rotate the Right Thumbstick until the controller starts vibrating, and then hold it in place while pushing the Left Thumbstick in the directions indicated to the left. Raise the pleasure bar in the top-left corner of the screen by moving the Left Thumbstick in the correct direction.
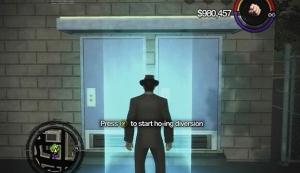
If you fail a level, you can continue from the same level by standing in the blue marker again and hitting Y/Triangle. Complete the tenth level of this diversion in the Red Light District to unlock the Pimp Suit (added to your wardrobe).
Taxi Driver: There are many taxis driving around the city, but you can also call TNA Taxis at 555-455-8008 and kill the driver if you don’t feel like looking for one. It would be a good idea to upgrade the taxi at a mechanics shop; specifically by reinforcing all of its parts, and maybe upgrading with nitrous.
This job is played just as you would expect; you’re driving around town ferrying the citizens of Stilwater for cash. You must get the customer to their destination before the timer in the top-left corner of the screen runs out. When the timer reaches zero, they passenger will start to deduct money from their fare. Some customers prefer slow and steady driving, while others prefer fast and reckless. Satisfying their preference adds bonus time to the counter.
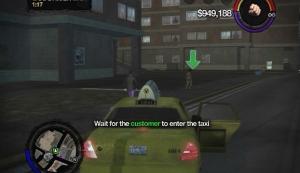

There are some special instances, such as customers that are wanted by the police hitching a ride with you, giving you an automatic three-star wanted level for the remainder of the fare, or robbers trying to steal your cash (perform a near miss and drive in the oncoming lane to scare them off). These are random occurrences, and can make things a bit harder.
A special variant of the Taxi (available at your crib garage) is unlocked when you complete the tenth level of this job.
Tow Truck: Although there is no phone number to dial here, tow trucks most frequently spawn in the Downtown and Suburb districts, so head there and start looking. Before getting started, take the tow truck to a mechanics shop and reinforce its bumper, frame, and tires. Store the upgraded tow truck in your crib garage so you can get it back if you should fail the diversion.
It’s your job to repo vehicles from their deadbeat owners. Doing so involves traveling to the marked spot on the GPS, backing the tow truck’s rear to the front of the target vehicle, holding RB and LB or R1 and L1 until the vehicle is completely hitched, and then taking the vehicle to the nearest tow yard (mechanics shop). A generous amount of time is added to the total each time a vehicle is delivered to the tow yard. The number of vehicles that must be repossessed increases as you progress.
This is by far the toughest of the vehicle jobs to complete solo. Time isn’t the issue, nor is the actual towing of the vehicles. The durability of the tow truck is the biggest problem here. Towing certain vehicles will add gang notoriety depending on the owner. The owners of the target vehicles won’t be too happy to see you, so of course they will interfere too, and enemy gangs often fire at the truck. The tow truck has to last until the end of the tenth level, and worst of all you cannot repair it at a mechanics shop while attempting this diversion, nor can you steal a fresh one and continue from there.
Occasionally you’ll have to get out of the tow truck to position a target vehicle that is parked too close to a wall so you can hitch it. You must get back in the tow truck within 30 seconds, so you’ll have to be quick about it.
Do this job in co-op mode if at all possible, since having another player helping out makes things much easier. In co-op you can simply have the other player bring the vehicles to you, rather than having to go out there yourself and risk damaging the truck. Of course if you don’t have access to Xbox Live or system link, you’ll have to do this solo.
Complete all 10 levels of this diversion to unlock a special variant of the tow truck.
Base Jumping: Take a helicopter or plane as high as possible and jump out. If you are falling over a certain area, a prompt telling you to press Y/Triangle to start the diversion will appear. Your goal is to land as close to the marker as possible. Deploy your parachute and use the Left Thumbstick to glide or pullback in a certain direction. Land perfectly at the center of the marker to unlock the no fall damage ability.
Blackjack and Poker: These games can be played on the machines in the Poseidon’s Palace casino, which is located along the Stilwater Boardwalk in the Hotels & Marina District. It looks like a shell on the map. Spend a total of $500,000 playing both of these games to unlock the “I’m Not Addicted!” achievement on the Xbox 360 version.
Vehicle Surfing: Stand on the roof of an occupied vehicle and wait until the diversion prompt appears before pressing Y/Triangle. Use the Left Thumbstick to balance by keeping the ticker near the center of the bar. It becomes harder to balance when the vehicle turns corners. You can handstand to build up the stars a bit faster, but it is considerably harder to keep balance this way.
Get three gold stars vehicle surfing to unlock the Traffic Cone hat (added to your wardrobe) and the “Surf’s Up” achievement on the Xbox 360 version.
Drive-Bys: Gun down a few gang members from your vehicle and press Y/Triangle when the prompt appears to start this diversion. Drive to the marked locations and kill the gang members there. You must kill the targets by shooting them from your car for it to count. The number of gang members needed to move on to the next level increases as you progress. Time is added to the total at the end of each level.
Flashing: Wear no clothes other than the Flasher Coat (which can be purchased at the “Let’s Pretend” store in the Rounds Square Shopping Center in Nob Hill), and press down on the D-pad twice to start the diversion. Hold RT/R2 while facing a pedestrian to flash them. Some people get angry and will run at you, so just sprint away. Flash the number of people indicated in the top-left corner of the screen to move on to the next level. The best place for this is the Stilwater Boardwalk in the Hotels & Marina District.
Mugging: Enter Fine Aim (click RT/R3) and keep the reticule trained on a pedestrian until they drop money. Mug 30 different people to unlock the Paintball Mask (added to your Wardrobe), and 50 different people to unlock the “Stilwater Welcoming Committee” on the Xbox 360 version.
Store Hold-Ups: Enter Fine Aim (click RT/R3) and aim at a shopkeeper (jewellery stores, clothes stores, etc.) until they put their hands up. Keep the reticule trained on them while they walk over to the safe in the back room. When the safe has been opened, take the money inside. You’ll likely attain an automatic three-star Police Notoriety level afterwards, however. Perform 20 hold-ups to earn a 100% discount at all food and liquor stores.
Hostage: Take the driver’s seat of a vehicle with one or more passengers and immediately start driving. If the passenger remains in the car, press Y/Triangle when the prompt appears to start the hostage diversion. You’ll be given a police notoriety level of three stars, and you must keep the hostage in the car until the timer in the top-left corner of the screen reaches zero. If you slow down, the hostage may be able to escape, so keep moving. Successfully complete 10 different instances of the hostage diversion to unlock a special variant of the Toad.
Racing: Travel to one of the chequered flag icons on the map to get started. There are two types of races: one is a race against the clock to clear a certain number of checkpoints, and the other is a race against AI opponents. You just have to place with at least a Bronze rank for the race to count as complete. Each checkpoint has an arrow pointing in the direction that the next checkpoint will appear at its center. You aren’t able to choose the vehicle you race with, since each instance has its own vehicle.
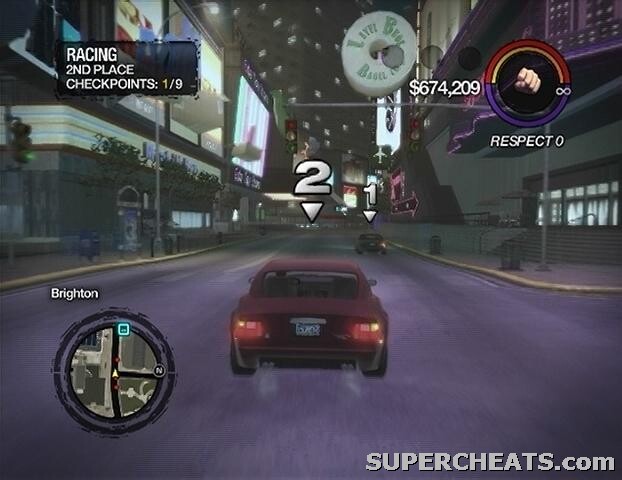
In the races against AI opponents, don’t try to push the other racers off course, because no matter how you come at them they’ll usually just send you into a wall instead. Try to beat them by turning corners faster and then just keep up the lead until you reach the last checkpoint.
There are car, bike, plane, helicopter, and boat races. Complete all bike races to unlock the Race Bike, all car races to unlock a special variant of the Bezier, all boat races to unlock the Race Boat, all plane races to unlock the Race Plane, and all helicopter races to unlock the Race Helicopter. Complete all of the races to unlock a Cowboy Hat (added to your wardrobe) and the “2 Quick 2 Pissed” achievement on the Xbox 360 version. You do not need to earn Gold on all of the races to get the achievement and unlockables.
Streaking: Wear no clothes and tap down on the d-pad twice to start this diversion. Shock the number of people indicated in the top-left corner of the screen by running past them to move on to the next level. Having the Infinite Sprint ability helps here. As with the Flashing diversion, the best place for this is the Stilwater Boardwalk in the Hotels & Marina District.
Zombie Uprising: This game can be played on any television set. Stand in the icon in front of the TV in your crib and press Y/Triangle. Shift over to the “Video Games” section and select Zombie Uprising. In Zombie Uprising, you play as a survivor fighting off a horde of zombies. There are six waves total. To move on to the next wave, you must kill the number of zombies indicated in the bottom-left corner of the screen. Your character’s health is the number value in the top-left corner of the screen.
There are melee weapons, guns, and food strewn about. Melee weapons only last for so long, and the gun ammo is limited, so you need conserve the weapons. Don’t bother reviving a survivor if they fall, since you’ll need to use a food item to heal them. The fountain in the middle of the starting area has an acidic substance in it, so standing in it drains your health. However there is a ledge in the fountain that the zombies can’t get to, so if you stand there you can pick them off with headshots for as long as you have ammo.
Survive the sixth wave to unlock the Zombie Mask (added to your wardrobe) and the “Romero’s Hero” achievement on the Xbox 360 version.
Tag Locations
Refer to the map for the general location of each tag, but use the text descriptions to pinpoint the collectible if necessary.
Tag (01/50): Amberbrook, Museum District. To the right of the large double door with Roman-style columns surrounding it at the bottom of the stairs.
Tag (02/50): Centennial Beach, Hotels & Marina District. In the parking lot behind the burger place, in the southwest corner of the wall.
Tag (03/50): Humbolt Park, Museum District. Along the west side of the science museum.
Tag (04/50): Stilwater Boardwalk, Hotels & Marina District. At the north end of the casino’s west wall.
Tag (05/50): Stilwater Boardwalk, Hotels & Marina District. Along the west-most hotel’s northern wall.
Tag (06/50): Nob Hill, High End Retail District. Along the west wall of the “102.4 KLASSIC” radio station building.
Tags (07/50), (08/50), (09/50), (10/50): Nob Hill, High End Retail District. All four are in the Rounds Square Shopping Mall. See the map below for their locations.

Tag (11/50): Tidal Spring, Suburbs District. At the west end of the hotel’s northern wall.
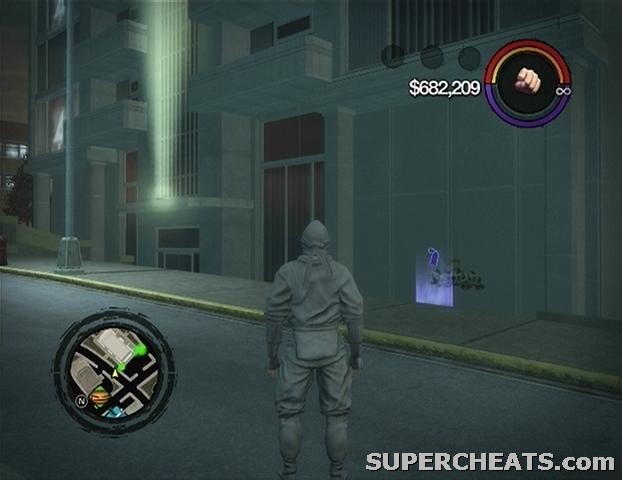
Tag (12/50): Misty Lane, Suburbs District. On the south wall of the apartment building north of the Friendly Fire weapon store.
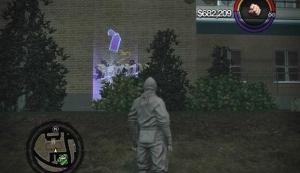
Tag (13/50): Misty Lane, Suburbs District. On the gated mansion’s east wall.
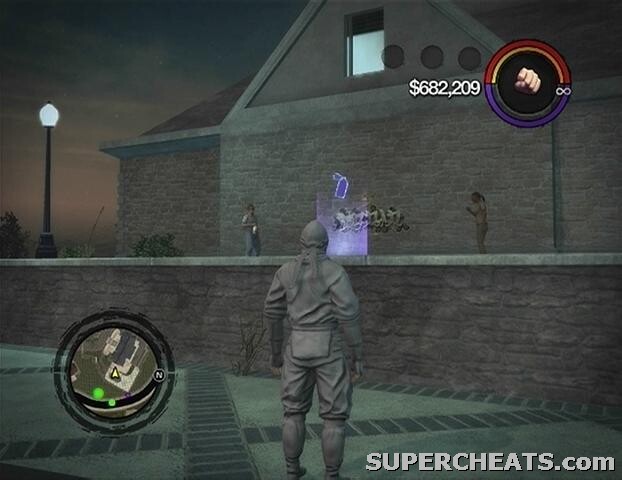
Tag (14/50): New Hennequet, Suburbs Expansion District. Along the church’s inner west wall.

Tag (15/50): New Hennequet, Suburbs Expansion District. On one of the interior walls of the under construction building on the north side of the road.
Tag (16/50): Mourning Woods Cemetery, Suburbs Expansion District. On the back wall of the garage next to the large house.

Tag (17/50): Elysian Fields, Trailer Park District. Along the convenience store’s southern wall.
Tag (18/50): Hangman’s Wharf, Stilwater Prison District. Along the northern wall of the dockyard building.
Tag (19/50): Hangman’s Wharf, Stilwater Prison District. At the start of the water tunnel below the wharf.
Tag (20/50): Hangman’s Wharf, Stilwater Prison District. Along the high wall behind the employee housing and office buildings.
Tag (21/50): Stilwater Penitentiary, Stilwater Prison District. Along the wall in the prison yard (near the Fight Club marker). You’ll have to go through the prison to get to it.
Tag (22/50): Stilwater Penitentiary, Stilwater Prison District. Along the exterior of the wall surrounding the Stilwater correctional facility. Up some steps at the north end.
Tag (23/50): Pleasant View, Arena District. Along the south wall of the ruined farmhouse.
Tag (24/50): Frat Row, Stilwater University District. Along the back of the west-most building on the lot.
Tag (25/50): Stilwater University, Stilwater University District. Along the history building’s east wall.
Tag (26/50): Stilwater University, Stilwater University District. Along the north wall on the middle walkway.
Tag (27/50): Stilwater Nuclear, Nuclear Power Plant District. On one of the cargo containers between the back ends of the two docked freighters.

Tag (28/50): Stilwater Nuclear, Nuclear Power Plant District. On one of the cargo containers across from the “Ultor Nuclear” billboard
Tag (29/50): Stilwater Nuclear, Nuclear Power Plant District. Along the wall in the underground water tunnel. Look for a building marked “water tunnel access” and head down the stairs there to enter the tunnel. Just walk along the stream until you come to the tag.
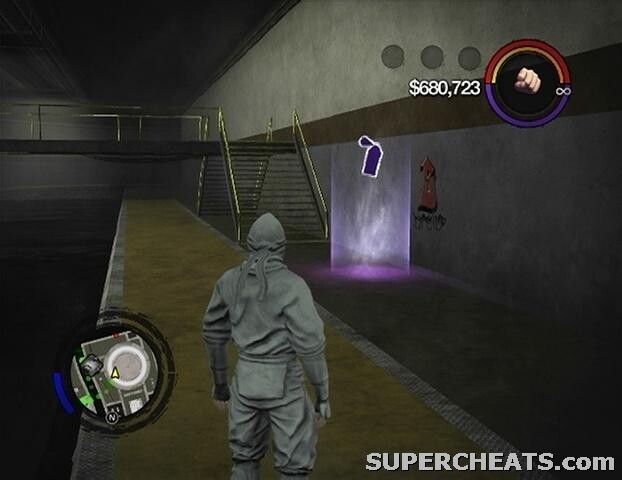
Tag (30/50): Stilwater Nuclear, Nuclear Power Plant District. On the south side of the large Stilwater Nuclear building.
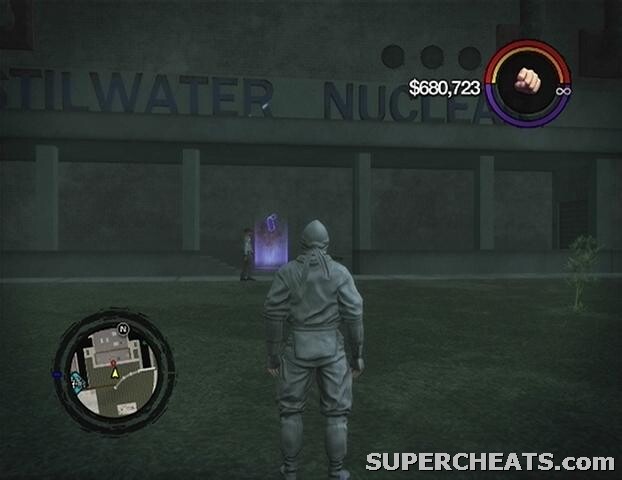
Tag (31/50): Stilwater Nuclear, Nuclear Power Plant District. In the northeast corner of the parking lot between the buildings.
Tag (32/50): Wardill Airport, Airport District. On the hangar alongside the south-most road just before the bend.
Tag (33/50): Wardill Airport, Airport District. Along the north wall of the west-most terminal building.
Tag (34/50): Cecil Park, Barrio District. On the southeast corner of the hospital building.
Tag (35/50): Little Shanghai, Chinatown District. Along the south side of the west-most warehouse on the lot.

Tag (36/50): Sunsinger, Arena District. On the southern wall of the strip mall.
Tag (37/50): Sunsinger, Arena District. On the northern wall of the yellowish building next to the freeway.
Tag (38/50): Bavogian Plaza, Red Light District. On the wall northwest from the Saints Hideout building entrance.
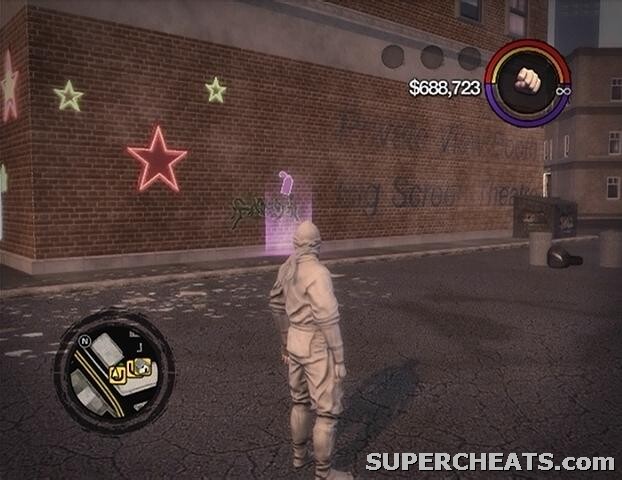
Tag (39/50): Bavogian Plaza, Red Light District. On the western wall of the square building east of the Saints Hideout building.
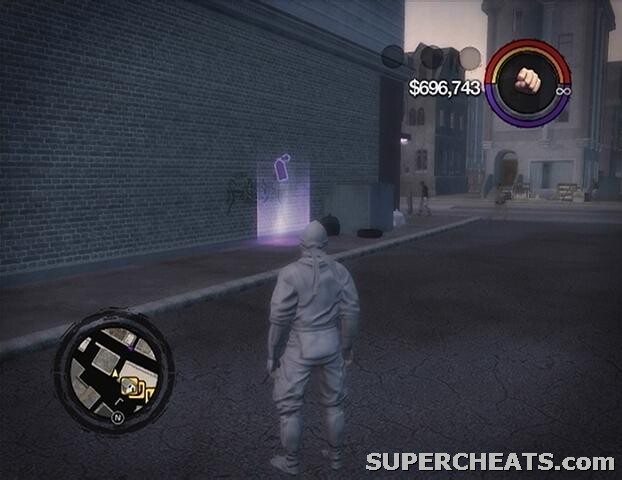
Tags (40/50), (41/50): Both tags are in Old Stillwater, near the Saints Hideout. One is just outside the door at the northeast corner of the second floor walkway. The other is on the lower floor; exit the Saints Hideout through the double-door on the first floor in the northwest corner and turn right to spot the tag.
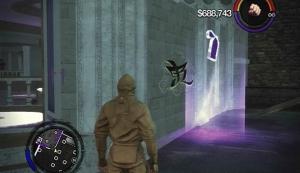
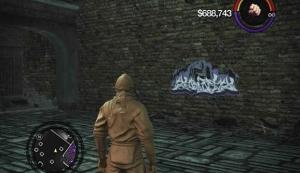
Tag (42/50): Stoughton, Docks & Warehouses District. Along the southern wall of the large factory building.
Tag (43/50): Stoughton, Docks & Warehouses District. On the south side of the tall factory building north of the cliff.
Tags (44/50), (45/50): Black Bottom, Factories District. Both are in the Stilwater Caverns, which can be accessed through the Spelunkers store. See the map below for the tag locations.
Tag (46/50): Athos Bay, Saint’s Row District. On the west side of the bridge’s off-ramp.
Tag (47/50): Mission Beach, Saint’s Row District. Along the east side of the Ultor tower.
Tag (48/50): Adept Way, Downtown District. Along the south wall of the office building.
Tag (49/50): Filmore, Downtown District. In the southeast corner of the office building.
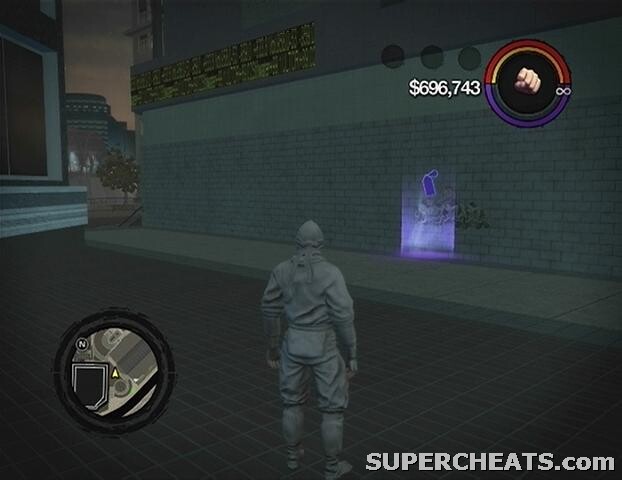
Tag (50/50): Brighton, Downtown District. On the western wall of the building east of the Rhombus.
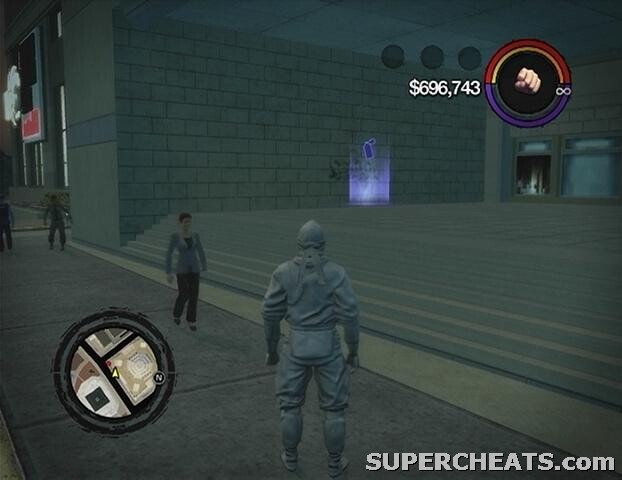
Refer to the map for the general location of each CD, but use the text descriptions to pinpoint the collectible if necessary.
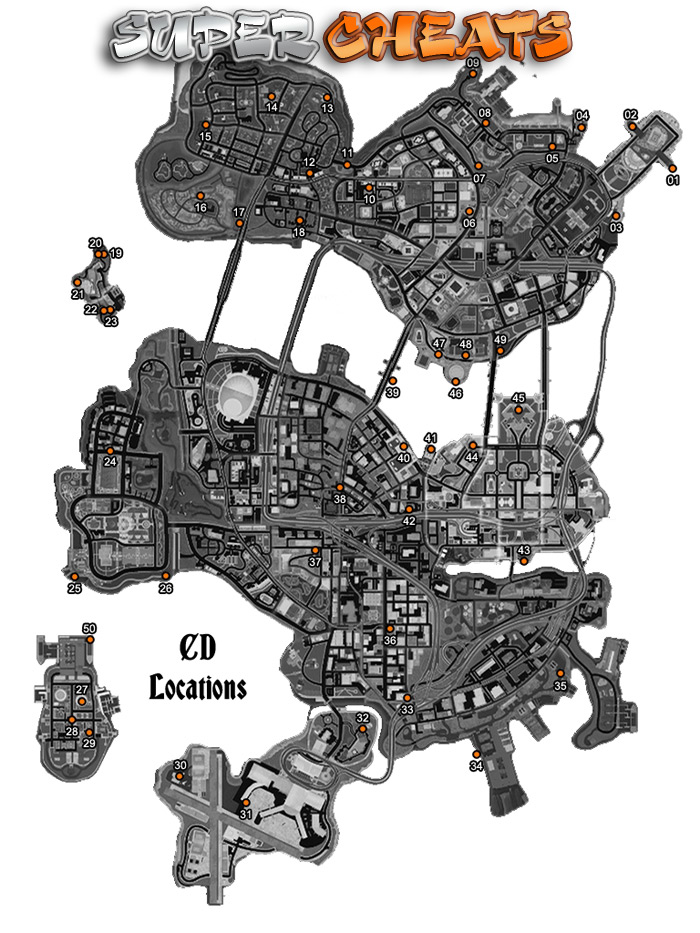
CD Locations
CD (01/50): Amberbrook, Museum District. Along the east side of the lower walkway.
CD (02/50): Amberbrook, Museum District. Through the doorway across from the sitting area.
CD (03/50): Amberbrook, Museum District. By the stairs on the second floor of the parking garage (to the left of the exit).
CD (04/50): Centennial Beach, Hotels & Marina District. Along the east side of the building’s second floor walkway. The stairs up to the walkway are along the north side of the building.
CD (05/50): Centennial Beach, Hotels & Marina District. In the booth to the right when you enter the underground museum parking area.
CD (06/50): Nob Hill, High End Retail District. On the walkway along the east side of the “Nat & Ramin’s Jam House” building.

CD (07/50): Stilwater Boardwalk, Hotels & Marina District. On the wooden walkway behind the Poseidon’s Palace casino.
CD (08/50): Stilwater Boardwalk, Hotels & Marina District. In the developer’s office, which is on the second floor of North Shore Marina Super Mall. The door to the stairs is in the southwest corner of the first floor.

CD (09/50): Stilwater Boardwalk, Hotels & Marina District. Inside of the lighthouse, at the bottom of the stairs.
CD (10/50): Tidal Springs, Suburbs District. On the loading zone ramp north of the King Grocery store.
CD (11/50): Tidal Springs, Suburbs District. On the walkway below the bridge. The start of the walkway is just south of the bridge’s west end.
CD (12/50): Misty Lane, Suburbs District. On top of the Technically Legal strip club building. You’ll have to move through the club to gain access to the roof. Go through the double-door on the stage at the west end of the club and follow the hallway there to some stairs. Take the stairs up to the second floor, and then head through the door marked “rooftop access.”
CD (13/50): Misty Lane, Suburbs District. In the empty, mossy pool behind the gated mansion.
CD (14/50): New Hennequet, Suburbs Expansion District. On top of the Marshall Winslow Recreation Center building. There is a series of ramps along the south side of the building that lead up to the roof.
CD (15/50): New Hennequet, Suburbs Expansion District. Inside the under construction house along the west side of the street.

CD (16/50): Elysian Fields, Trailer Park District. Along the dock at the bottom of the wooden stairs on the southern side of the gorge.
CD (17/50): Elysian Fields, Trailer Park District. Inside of the support pipe below the piece of road that forms a ramp.
CD (18/50): Misty Lane, Suburbs District. On the top level of the apartment building at the center of the lot.
CD (19/50): Stilwater Penitentiary, Stilwater Prison District. On the north end of the island, at the end of the road below the lighthouse
CD (20/50): Stilwater Penitentiary, Stilwater Prison District. This one is at the top of the prison lighthouse. You’ll have to purchase the lighthouse for $25,000 to enter. Head up the stairs and open the door at the top to spot the CD.
CD (21/50): Stilwater Penitentiary, Stilwater Prison District. In the watchtower outside of the northern wall of the Correctional Facility.
CD (22/50): Hangman’s Wharf, Stilwater Prison District. On the platform in the northwest corner of the yard behind the house atop the hill.
CD (23/50): Hangman’s Wharf, Stilwater Prison District. This one is on top of one of the warehouses in the southeast quarter of the island. You’ll need a helicopter to reach it.
CD (24/50): Frat Row, Stilwater University District. Along the northern side of the building that houses the “SU’s Computer Repair” store.
CD (25/50): Stilwater University, Stilwater University District. In the university observatory attached to the large building with the domed roof. There are some stairs just to the left of where the walkway to this tower is that lead up to it
CD (26/50): Stilwater, Stilwater University District. Behind the tree in the middle of the outside sitting area.
CD (27/50): Stilwater Nuclear, Nuclear Power Plant District. In the middle of the corridors beneath the east-most tower.
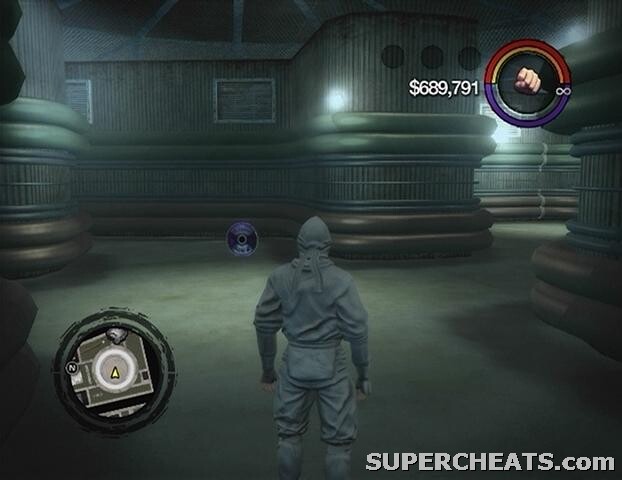
CD (28/50): Stilwater Nuclear, Nuclear Power Plant District. In the underground water tunnel. Look for a one-story building marked “water tunnel access” south of the medical station to enter the tunnel. The CD is below the bridge stairs.
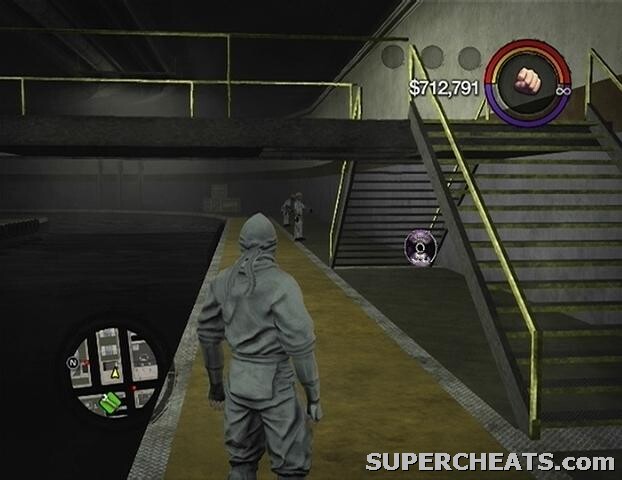
CD (29/50): Stilwater Nuclear, Nuclear Power Plant District. On top of the white-coloured building with the dome roof. Some stairs along the east side of the building just west of it lead up to the roof.
CD (30/50): Wardill Airport, Airport District. This one can be a bit of a chore to get to. The CD is up on top of the ruined multi-story building. You’ll need to land a helicopter on the lower portion of the white building next to it. There’s a plank that you can cross to reach the building’s fire escape. Head up the steps and move through the debris until you come across the collectible.
CD (31/50): Wardill Airport, Airport District. In the baggage chute at the west end of the terminal building.
CD (32/50): Huntersfield, Airport District. At the top of the monument’s multi-levelled base.
CD (33/50): Southern Cross, Barrio District. In the empty lot below the freeway.
CD (34/50): Stoughton, Docks & Warehouses District. At the end of the dock west of the south-most factory.
CD (35/50): Stoughton, Docks & Warehouses District. Along the east side of the Holloway’s factory.
CD (36/50): Espata, Barrio District. At the bottom of the driveway along the west side of the white and brown apartment complex.

CD (37/50): Little Shanghai, Chinatown District. On a metal bridge between two buildings. There are some stairs along the “Fancy Wigs and Moustaches” building at the west end of the north side of the street. Climb the stairs and head for the metal bridge at the east end of the rooftops.

CD (38/50): Shivington, Projects District. In the parking lot west of the building that houses the Saints Hideout.
CD (39/50): At the top of the southeast-most tower along the bridge that spans between Rebadeaux and Filmore.
CD (40/50): Rebadeaux, Red Light District. On the platform next to the large yellow wheel along the water.
CD (41/50): Rebadeaux, Red Light District. Behind the Kanto restaurant.

CD (42/50): Prawn Court, Red Light District. Behind the transportation center building.

CD (43/50): Athos Bay, Saint’s Row District. At the top of the stairs behind the statue.
CD (44/50): Harrowgate, Saint’s Row District. Below the circular walkway ramp
CD (45/50): Mission Beach, Saint’s Row District. Behind the Ultor building (along the low road on the north side of the building).
CD (46/50): Brighton, Downtown District. Behind the dome building.
CD (47/50): Brighton, Downtown District. By the windows below the walkway.
CD (48/50): Brighton, Downtown District. On the high rise garden atop the “107.77 The Mix” radio station building. You’ll need a helicopter to get to it
CD (49/50): Adept Way, Downtown District. On the dock at the bottom of the stairs at the start of the sheltered walkway tunnel.
CD (50/50): Stilwater Nuclear, Nuclear Power Plant District. At the back of the east-most docked freighter at the north end of the island.
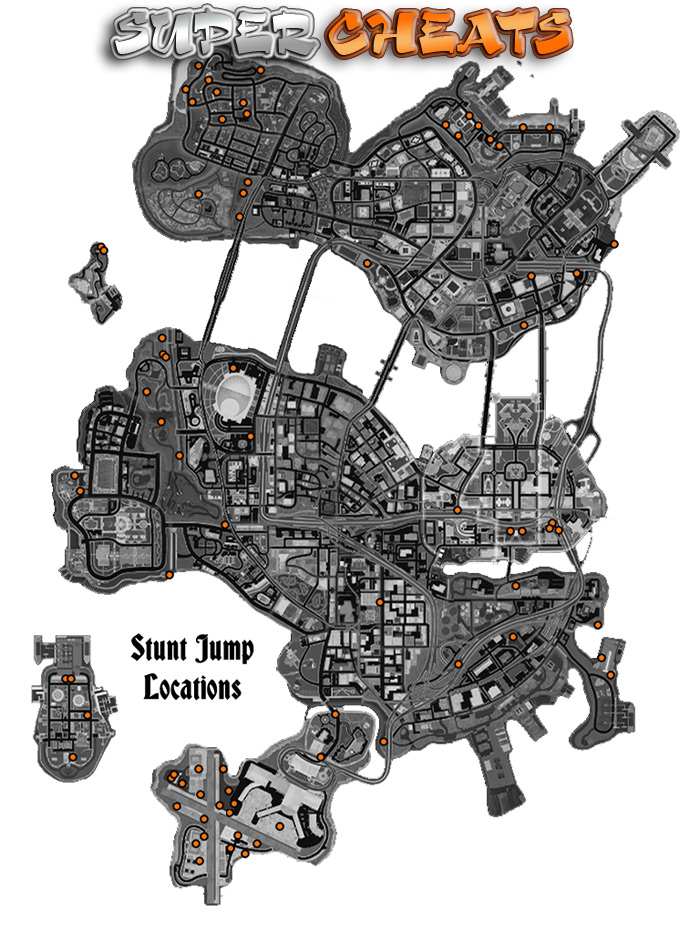
Stunt Jump Locations
Some ramps and natural inclines act as stunt jumps. There are a total of 80 of these stunt jumps in Stilwater. These jumps are quite easy to spot; just travel to the area marked on the map, search around for the ramp, then get a good run-up and drive off.
The type of vehicle used doesn’t really matter for most, since you almost never have to fly that far for it to register. Cars are safer than bikes, but if you are unable to reach a certain platform with a car, you’ll have to use a bike instead. The best bike to use here is the prototype Kaneda that is unlocked after completing the Ronin mission line. Any of the fast cars (Superiore, Vortex, Bezier, etc.) are suitable.
Having the Stored Vehicle Delivery ability that is unlocked after completing the Escort activity in the Red Light District can make things much easier, since you can just call to have one of the vehicles in your garage delivered to your location.
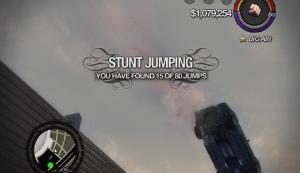
Make sure that the completion message appears on screen before you move on to the next jump. If a jump will not register, there are several reasons why this could be:
1) You are not flying far enough after hitting the jump.
2) You are flying too far after hitting the jump. Try hitting the ramp at a slower speed because sometimes you must to land in a certain area for it to count.
3) You are not using the right ramp. Sometimes there are several different ramps in one area, but not all of them count as the stunt jump. Look around for alternatives if the ramp you are using won’t register.
4) You have already completed the jump. No confirmation message appears after the jump is completed a second time. There are several stunt jumps that are completed during the main storyline, so if you finished the game you’ll have four or five jumps already. There are three the Trailer Park district completed during the “Three Kings” prologue mission. The jump near the north-west end of Sunsinger in the Arena District is completed during one of the epilogue missions, so don’t bother pursuing that one if you haven’t completed the main storyline. Another that may have been completed is the one on the parking garage in Encanto, which is reached during the Retribution mission in the Brotherhood mission line.
Some of the ramps are on higher platforms, so you’ll have to look around for a ramp that you can drive off to reach it.
Completing all 80 Stunt Jumps unlocks “The Duke” special Bootlegger car and the “Duke of Stilwater” achievement on the Xbox 360 version.
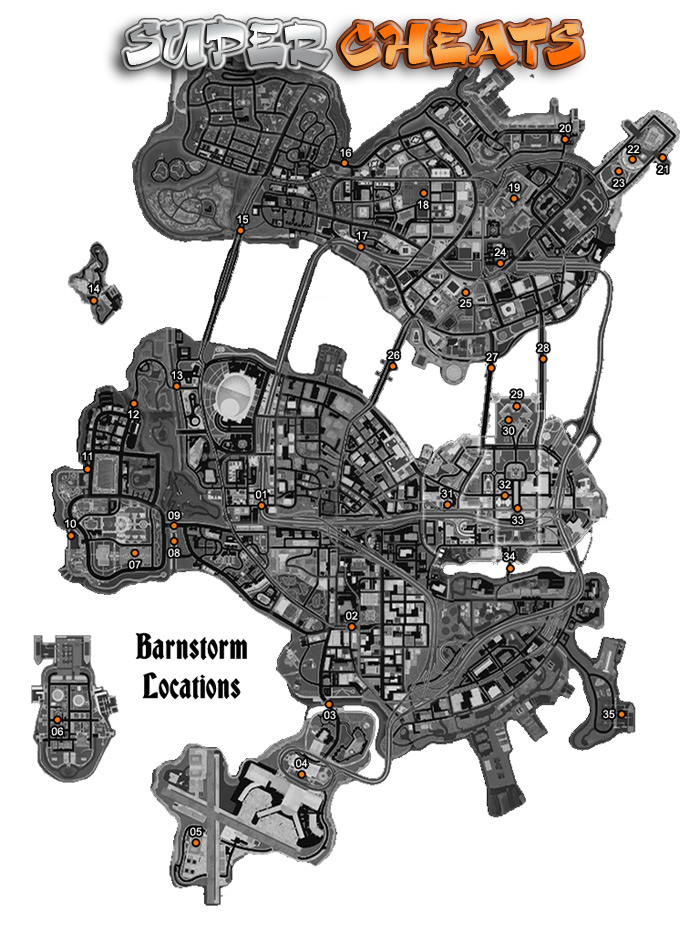
Barnstorming Locations
Barnstorming entails flying a helicopter or plane below bridges, walkways, through tunnels, or between buildings. There are 35 Barnstorming locations in Stilwater. For the stunt to register, you’ll usually have to come at the obstacle from a certain direction. All of the details are listed below, so match the map points with the corresponding text if necessary.
Small stunt planes, such as the Wolverine and Corsette, are better suited than helicopters for completing most of these stunts. It would be a good idea to purchase the Airport Hangar crib at the Wardill Airport before attempting this, since the hangar can be used to store aircrafts. There should be a Corsette parked by the airport terminal, which you can roll over to the hangar and store it in your garage for easy access.
By far the easiest way to complete these stunts is to use the Destroy UFO, which is unlocked using a code that was given out to those who pre-ordered the game. This code has been shared over the internet, however, and can be entered using the Dial option on the mobile phone just like a cheat code. The UFO does not count as a cheat, so as of this writing, making use of it will not disable achievements. To unlock the UFO, dial #728237 on the mobile phone, open the Cheats menu, then go to Vehicles and activate it. The UFO is stored in the aircraft helipad on the Saints Hideout crib in the Red Light District.
Use the UFO at your own discretion, because even though as of this writing entering the code does not disable achievements, this could change. If a prompt appears when you enter the code informing you that it will disable achievements, you’ll have to use a stunt plane instead.
Completing all 35 aerial stunts unlocks the “Maverick Goose” achievement on the Xbox 360 version.
Aerial Stunt (01/35): Fly west to east under the highway.
Aerial Stunt (02/35): Fly west to east under the tracks.
Aerial Stunt (03/35): Fly west to east under the bridge to the airport.
Aerial Stunt (04/35): Fly west to east under the glass shelter between the terminal building and the highway.
Aerial Stunt (05/35): Fly west to east through the large, purchasable hangar. It’s a tight squeeze, so take your time.
Aerial Stunt (06/35): Fly west to east below the two walkways that connect the buildings.
Aerial Stunt (07/35): Fly west to east through the gap between the four buildings. You’ll have to be flying about halfway down for it to count.
Aerial Stunt (08/35): Fly through the water tunnel (north to south, south to north, doesn’t matter). This one is tough when not using the UFO.
Aerial Stunt (09/35): Fly through the Stilwater University sign east to west.
Aerial Stunt (10/35): Fly east to west through the middle arch below the bridge.
Aerial Stunt (11/35): Fly south to north below the bridge.
Aerial Stunt (12/35): Fly west to east through the north-most arch below the bridge.
Aerial Stunt (13/35): Fly south to north below the bridge.
Aerial Stunt (14/35): Fly northwest to northeast below the bridge over that spans the chasm.
Aerial Stunt (15/35): Fly east to west below the freeway. You must fly over the street along the shoreline for it to count
Aerial Stunt (16/35): Fly south to north through the arc below the bridge.
Aerial Stunt (17/35): Fly east to west below the overpass.
Aerial Stunt (18/35): Fly south to north below the glass shelter over the mall.
Aerial Stunt (19/35): Fly west to east below the two covered walkways.
Aerial Stunt (20/35): Fly south to north through the “North Shore Marina” sign.
Aerial Stunt (21/35): Fly west to east below the roofing.
Aerial Stunt (22/35): Fly north to south through the underground tunnel by the stairs next to the west-most domed building.
Aerial Stunt (23/35): Fly east to west through the gap between the archway and circular building.
Aerial Stunt (24/35): Fly west to east through the tunnel.
Aerial Stunt (25/35): Fly west to east through the King Plaza Station glass covering.
Aerial Stunt (26/35): Fly west to east through the arch between the four towers on the bridge.
Aerial Stunt (27/35): Fly north to south to the other end of the bridge.
Aerial Stunt (28/35): Pass below the two support structures along the bridge.
Aerial Stunt (29/35): Fly west to east through the archway above the gap in the tunnel at the north end of the tower.
Aerial Stunt (30/35): Fly through the gap south of the helipad about halfway up the Ultor tower.
Aerial Stunt (31/35): Fly through the archway and below the train track that you come to.
Aerial Stunt (32/35): Fly below the glass covering between the two buildings.
Aerial Stunt (33/35): Fly east to west along the tracks through both glass shelters.
Aerial Stunt (34/35): Fly west to east below the bridge.
Aerial Stunt (35/35): Fly north to south below the three pipes over the water.
Below is a list of every activity that is worth some percentage toward the game completion stat. If it isn’t listed here, it doesn’t count, however many of the game’s optional activities yield unlockables or an Xbox 360 achievement (see achievement listing).
Complete Story Missions
- 3rd Street Saints Missions (4) and Stronghold (1)
- Sons of Samedi Missions (11) and Strongholds (4)
- The Brotherhood Missions (11) and Strongholds (4)
- The Ronin Missions (11) and Strongholds (4)
- Ultor Missions (4) and Stronghold (1)
- Secret Mission (Revelations)
Complete Activities
- Crowd Control (2)
- Demolition Derby (1)
- Drug Trafficking (2)
- Escort (2)
- Fight Club (2)
- Fuzz (2)
- Heli Assault (2)
- Insurance Fraud (2)
- Mayhem (2)
- Septic Avenger (2)
- Snatch (2)
- Trailblazing (2)
Complete Diversions
- Tagging (50)
- CD Collection (50)
Below are lists of all of Saints Row 2’s unlockable content, as well as what part of the game needs to be completed to unlock them.
Abilities
Brotherhood Notoriety Reduced 15% - Trailblazing Level 6, Apartments
Brotherhood Notoriety Reduced 5% - Trailblazing Level 3, Apartments
Health Regeneration 2x - Snatch Level 3, Chinatown
Health Regeneration 3x - Snatch Level 6, Chinatown
Improved Weapon Accuracy 15% - Septic Avenger Level 6, Suburbs
Improved Weapon Accuracy 5% - Septic Avenger Level 3, Suburbs
Increased Melee Damage 15% - Fight Club Level 3, Arena
Increased Melee Damage 30%- Fight Club Level 6, Arena
No Fall Damage - Perfect Base Jump
Police Notoriety Reduced 15% - Fuzz Level 6, Suburbs
Police Notoriety Reduced 5% - Fuzz Level 3, Suburbs
Reduced Bullet Damage 15% - Heli Assault Level 6, Barrio
Reduced Bullet Damage 5% - Heli Assault Level 3, Barrio
Reduced Explosion Damage 15% - Trail Blazing Level 6, Downtown
Reduced Explosion Damage 5% - Trail Blazing Level 3, Downtown
Reduced Vehicle Damage 15% - Insurance Fraud Level 6, Museum
Reduced Vehicle Damage 5% - Insurance Fraud Level 3, Museum
Ronin Notoriety Reduced 15% - Drug Trafficking Level 6, Hotel and Marina
Ronin Notoriety Reduced 5% - Drug Trafficking Level 3, Hotel and Marina
Sons of Samedi Notoriety Reduced 15% - Snatch Level 6, University
Sons of Samedi Notoriety Reduced 5% - Snatch Level 3, University
Sprint Increased - Insurance Fraud Level 3, Factories
Unlimited Sprint - Insurance Fraud Level 6, Factories
Weapons
Annihilator RPG - Mayhem Level 6, Nuclear Power Plant
AR-50 XMAC Special - All Combat Tricks Completed
Chainsaw - Crowd Control Level 6, Hotel and Marina
Flamethrower - Mayhem Level 3, Nuclear Power Plant
Gal-43 - Snatch Level 3, Downtown
Grenades at Crib - One Hitman List
Kobra - FUZZ Level 3, Projects
Mini-Gun - The Brotherhood Mission 10
Pepper Spray - Crowd Control Level 3, Hotel and Marina
Pimp Cane - Epilogue Mission 2
Satchel Charges - 3 Hitman Lists Complete
Shock Paddles - All Ambulance Missions
Unlimited Pistol Ammo - FUZZ Level 6, Projects
Unlimited Rifle Ammo - All Hitman Targets Killed
Unlimited Shotgun Ammo - Drug Trafficking Level 6, Airport
Unlimited SMG Ammo - Snatch Level 6, Downtown
X2 Ultimax Shotgun - Drug Trafficking Level 3, Airport
Vehicles
Akuji's Prototype Bike - The Ronin Mission 11
Ambulance - Ambulance Complete
Attack Helicopter - Epilogue Mission 4
Bezier - All Races
Brotherhood Vehicles - The Brotherhood Mission 11
Buggy - First Chop Shop List
Combine - 2 Chop Shop Lists
Demolition Derby Vehicles - Demolition Derby Level 6, University
Donnie's Vehicle - The Brotherhood Mission 2
Escort Vehicles - Escort Both Instances
Firetruck - Firetruck Complete
Gang Customization Cars (First Set) - 15% Hoods Conquered
Gang Customization Cars (Last Set) - 65% Hoods Conquered
Gang Customization Cars (Second Set) - 45% Hoods Conquered
Julius' Car - Bonus Mission 1
Maero's Monster Truck - The Brotherhood Mission 11
Medical Helicopter - The Ronin Mission 7
News Helicopter - Sons of Samedi Mission 3
Race Boat - All Boat Races
Race Car - All Car Races
Race Heli - All Helicopter Races
Race Motorcycle - All Bike Races
Race Plane - All Plane Races
Ronin Vehicles - The Ronin Mission 11
Septic Truck - Both Septic Avenger Instances
Sons of Samedi Vehicles - Sons of Samedi Mission 11
Super Taxi - All Taxi Missions
The Duke - All Stunt Jumps
The General's Bulldog - Sons of Samedi Mission 11
Toad - 10 Hostages
Tow Truck - Tow Truck Complete
Ultor APC - Epilogue Mission 2
Store Discounts
Clothing Store Discount 15% - Crowd Control Level 6, Suburbs
Clothing Store Discount 5% - Crowd Control Level 3, Suburbs
Crib Customization Discount 15% - Mayhem Level 6, Red Light District
Crib Customization Discount 5% - Mayhem Level 3, Red Light District
Food and Liquor Store Discount 100% - Perform 20 Store Hold-Ups
Food and Liquor Store Discount 15% - Septic Avenger Level 6, Red Light District
Food and Liquor Store Discount 5% - Septic Avenger Level 3, Red Light District
Mechanic Discount 15% - Demo Derby Level 6
Mechanic Discount 5% - Demo Derby Level 3
Mechanic Discount 75% - All Five Chop Shop Lists
Scratch That Music Store Discount 100% - Collect All 50 CDs
Weapon Store Discount 15% - Heli Assault Level 6, Trailer Park
Weapon Store Discount 5% - Heli Assault Level 3, Trailer Park
Homies
Jane Valderama - 50 Muggings
Johnny Gat - The Ronin Mission 11
Legal Lee - Fight Club Level 3, Prison
One Follower - Prologue Mission 4
Pierce - The Brotherhood Mission 11
Shaundi - Sons of Samedi Mission 11
Three Followers - 50% Hoods Conquered
Tobias - Sons of Samedi Mission 3
Troy - Fight Club Level 6, Prison
Two Followers - 25% Hoods Conquered
Vehicle Delivery ($1,000) - Escort Level 3, Red Light District
Vehicle Delivery (Free) - Escort Level 6, Red Light District
Zombie Carlos - All Brotherhood Missions, then call Eye for an Eye at 555-5966
Customization Items
Avenger Jacket - 3 Gold Stars in Gang Kills
Bodyguards Gang Style - Game Progression
Brotherhood Melee - The Brotherhood Mission 6
Brotherhood Personality - The Brotherhood Mission 11
Chop Shop - 1 Chop Shop List
Cowboy Hat - All Races
Fireman Outfit - Firetruck Complete
Free Music Track - 10 CDs Collected
Free Music Track - 20 CDs Collected
Free Music Track - 30 CDs Collected
Free Music Track - 40 CDs Collected
Ninjas Gang Style - Game Progression
Paintball Mask - 30 Muggings
Pimp Suit - Ho-Ing Level 10, Red Light District
Red Light Apartment Crib - Prologue Mission 2
Ronin Melee - The Ronin Mission 6
Ronin Personality - The Ronin Mission 11
Saints Hideout - Prologue Mission 3
Samedi Melee - Sons of Samedi Mission 6
Samedi Personality - Sons of Samedi Mission 11
Traffic Cone Hat - 3 Gold Stars in Vehicle Surfing
Zombie Mask - Survive the Sixth Wave in Zombie Uprising
Enter these codes using the "Dial" option on the mobile phone in the pause menu. Activating cheats disables achievements on the Xbox 360 version, so do not save if you wish to unlock achievements on that save file.
And, if you don't know how to enter the codes, check this video out.
Player Ability
Full Health: #1
Car Mass: #2
Milk Bones: #3
Add Police Notoriety: #4
Player Pratfalls: #5
Infinite Sprint: #6
Unlimited Clip: #9
Infinite Ammo: #11
Heaven Bound: #12
Add Gang Notoriety: #35
Never Die: #36
No Cop Notoriety: #50
No Gang Notoriety: #51
I Am Giant: #200
Itty Bitty: #201
Give Cash: #2274666399
The Itty Bitty Cheat in action.
Vehicles
Ambulance: #1040
Anchor: #1041
Atlasbreaker: #1042
Attrazione: #1043
Backdraft: #1044
Backhoe: #1045
Bag Boy: #1046
Baron: #1047
Bear: #1048
Bootlegger: #1049
Bulldog: #1050
Bulldozer: #1051
Compton: #1052
Destroy (UFO): #728237
Eiswolf: #1053
FBI: #1054
Five-0: #1055
Gyro Daddy Helicopter: #4976
Hollywood: #1057
Horizon: #711
Hurricane: #825
Justice: #1058
Kaneda: #801
Kenshin: #802
Kent: #1059
Mag: #1060
Melbourne: #803
Miami: #826
Mixmaster: #1061
Mongoose: #1062
Oring: #1063
Peewee: #7266837
Phoenix: #1064
Python: #827
Quasar: #1065
Quota: #1066
Rampage: #1067
Raycaster: #1068
Reaper: #1069
Repair Car: #1056
Sabretooth: #804
Sandstorm: #805
Septic Avenger: #1070
Shaft: #1071
Shark: #828
Skipper: #829
Snipes57: #712
Stilwater Municipal: #1072
Superiore: #1073
Taxi: #1074
The Job: #1075
Titan: #1076
Toad: #1077
Tornado: #713
Varsity: #1078
Venom Classic: #1079
Vortex: #1080
Widowmaker: #806
Wolverine: #714
Zenith: #1081
Weapons
.44 Shepherd: #921
12 Gauge: #920
Annihilator RPG: #947
AR200: #922
AR50 Launcher: #924
AR50: #923
AS14: #925
Baseball Bat: #926
Chainsaw: #927
Fire Extinguisher: #928
Flamethrower: #929
Flashbang: #930
GAL43: #931
GDHC: #932
Grenade: #933
Holt 55: #934
K6 Krukov: #935
Knife: #936
Machete: #937
McManus 2010: #938
Mini-Gun: #939
Molotov: #940
Nightstick: #941
NR4: #942
Pepper Spray: #943
Pimp Cane: #944
Pimp Slap: #969
Pipe Bomb: #945
RPG: #946
Samurai Sword: #948
Satchel: #949
Shock Paddles: #950
SKR-9: #951
Sledgehammer #952
Stungun: #953
T3K Urban #954
Tire Iron #955
Tombstone: #956
Vice 9: #957
XS-2: #958
Weather
Normal Weather: #78670
Clear Skies: #78669
Overcast: #78665
Light Rain: #78668
Heavy Rain: #78666
Wrath of God: #666
The Wrath of God Cheat
World
Super Explosions: #7
Drunk Pedestrians: #15
Evil Cars: #16
Everybody Must Get Shrunk: #202
Pedestrian War: #19
Time Set Noon: #1200
Time Set Midnight: #2400
Super Saints: #8
Raining Pedestrians: #20
Low Gravity: #18
Gangsta Brawl: This is the standard Deathmatch mode, where points are earned for killing opponents. Weapons are strewn about, and can be picked up by walking over them. The player with the most kills at the end of the round wins.
Team Gangsta Brawl: A team-based version of Gangsta Brawl. Each player’s kills are added to their team’s total. The team with the most kills at the end of the round wins.
Strong Arm: This game type is comprised of a number of rounds, with each focusing on a different objective. Many of the objectives are similar to the activities in story mode, however they have all been altered for competitive play. Money is gained by killing players on the opposing teams, and by completing objectives. The team that earns the most money during an objective nets a $10,000 bonus. The team with the most money at the end of the match wins.
Tagging: This is an on-going objective throughout a Strong Arm match. There are several graffiti locations on each map—denoted by spray can icons on the GPS—and each one offers a different perk to the team that controls it. These perks include abilities such as increased sprint duration, more health, more ammo, and police support. To tag a location, stand in the marker and hold Y/Triangle until it is completely covered. This takes about 10 seconds time, but all the while you leave yourself vulnerable to opponents. Spray over an opposing team’s tag to take the perk it offers away from them.
Brawl: The objective here is to simply kill players on the opposing team. More money is rewarded per kill than normally.
Demolition Derby: Earn money by damaging other vehicles with your own. Hitting opponents is worth the most money. Throughout the match, an Atlasbreaker dubbed “Gigatruck” roams the streets. The truck is denoted by the red shape on the GPS. Avoid Gigatruck if possible, as it will quickly trash your car, killing you in the explosion. Destroying Gigatruck is worth $10,000 however.
Hitman: Kill marked targets on the GPS to earn cash for your team ($1,500 per kill).
Insurance Fraud: This objective is similar to the story mode activity of the same name, however there is no adrenaline mode and weapons can be used. Travel to the highlighted area on the GPS and press RB/L1 to throw yourself into traffic to rack up cash.
Mayhem: Travel to the highlighted area on the GPS and destroy tables, chairs, benches, and other objects to earn points. Teams share a single combo bar, which increases the amount of money earned per object.
Racing: Follow the checkpoints around the map and make it to the end of the track before the race ends to earn a cash bonus. Get a car and make your way to the starting point before the race starts. You can jump in the race at any time, however, but get there early so you can mess with your opponents a bit. There are green bonus checkpoints along the way, and passing through them adds money to the team total. Cash is given to players who finish the race, with the largest amount being given for 1st place. The entire team should run through the race to rack up the most cash.
Snatch: This objective differs considerably from the story mode activity of the same name. Teams fight to recruit prostitutes denoted by green shapes on the GPS. Stand by an unclaimed girl until the bar next to her portrait is completely full to recruit her. A girl may be accompanied by an armed pimp whom must be killed before she can be recruited. Bring the girl to the client when they appear on the GPS (denoted by a cyan marker) to earn some extra cash.
Theft: The objective here is to steal marked objects, pick them up, and then sell them to a fence ($2000 apiece). Valuable goods are denoted by green shapes on the GPS, and the fence is denoted by the cyan shape. The team that makes the most money selling stolen goods to the fence wins the round.
Badges are unlocked for meeting certain requirements in multiplayer matches. The requirements listed below are cumulative.
Arr... - Play and complete a multiplayer match on September 19th.
Assault and Battery - Get 10 melee kills.
Brain Surgeon - Get 100 headshots.
Burnout - Get 15 kills with fire.
Demo Demon - Drive your car around until it explodes (not due to gunfire).
Fully Loaded - Fill every inventory slots.
Leadfoot - Spend 2000 seconds in first place.
Mass Murder - Get 10 multi-kills.
No Questions Asked - Have 10 matches with 15 or more kills.
Nut Job - Get 100 nutshot kills.
Original Gangsta - Play 10 ranked matches.
Party Animal - Host and win 1 custom match.
Pimp - Play 20 matches.
Regulator - Win 5 matches with $30,000 scored.
Road Rage - Get 50 vehicle impact kills.
Saint Picasso - Take 100 tags.
Team Spirit - Get 10 kills with the Pimp Slap.
Track Star - Spend 3000 seconds sprinting.
Trigger Happy - Shoot 100,000 times.
Wrecking Crew - Deal $50,000 worth of Mayhem and Demolition Derby damage.
Earn the approximate amount of money listed below to rank up. A new badge is unlocked with each rank.
New Jack -$0
Thug - $2,500
Killa - $10,000
Gangsta - $25,000
Soldier - $55,000
Assassin - $105,000
Enforcer - $187,500
Dominator - $310,000
Terminator - $501,250
Executioner - $776,250
Kingpin - $1,198,125
King of Kingpins - $2,198,125
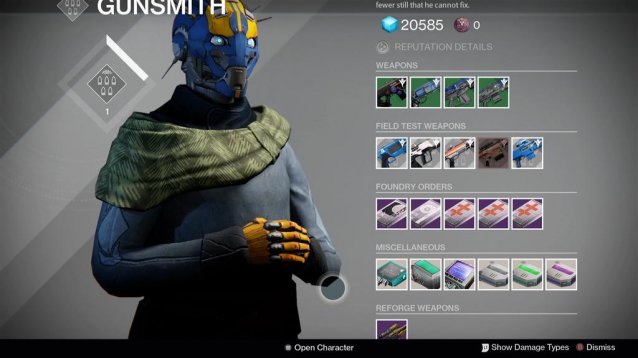
 Boost OneNote Productivity With the Quick Access Toolbar
 The Best Gaming Podcast Ever: Episode 7
 Beyond: Two Souls Review -- Perfectly Awful
 You Should Be Taking Risks. Here's How
 How to Learn Any Skill with Your Own Solid Training Plan