

Although Windows is still the most-used operating system for PC gaming, Linux has seen an impressive rise in the gaming scene. A few years ago, Linux had virtually no games available for it, aside from some oft-mentioned open source ones. Fast forward to today, and Linux now has more than 1,500 games available on Steam alone, with a few AAA titles littered among those 1,500.
If you’ve become interested in gaming on Linux, using SteamOS as your Linux distribution of choice is a good idea. But how do you get SteamOS on your computer so you can start playing on it? Here’s a detailed guide that will cover every step and possible question you may have along the way.
For those who don’t know, Steam is an online game distribution platform. You can make an account with Steam, download their client, browse their massive library of games, buy a few (as well as pick out a few free ones as well), and let the client download and install the games for you. It’ll also keep them updated for you automatically. For anyone with a decent Internet connection, this is easily one of the best ways to get games. Origin is a similar competitor from EA, but Origin carries only EA titles while Steam is publisher-independent.
Valve, the company behind Steam, has made it publicly known that it doesn’t like Windows 8 nor Windows 10, and sees the future of gaming on Linux. To help entice more gamers to switch to Linux, Valve made Steam available on Linux and created SteamOS — a custom Linux distribution based on Debian. The main goals of SteamOS is to make it easy to install to create your own “Steam Boxes” (console-like devices that run on PC hardware), run optimized software and drivers for gaming, and have the Steam client bundled with the operating system.
While it’s possible to dual-boot with SteamOS, its intended purpose is to be the sole operating system on your computer. Hence, SteamOS is best used on a system that you plan on using solely for gaming (on Linux).
To get started, we’ll need to download SteamOS and have a USB flash drive of at least 2GB ready. If your computer can boot via UEFI, download the custom installer (or the default installer, but be warned that it requires that your system have a hard drive of at least 1TB!).
Once the download finishes, go ahead and reformat your USB flash drive to FAT32. If it’s already FAT32, reformat it anyway so that it’s wiped clean. Next, unzip what you downloaded earlier and copy the contents of the unzipped folder (the contents, not the folder itself) onto your USB flash drive. Once that finishes, restart your computer and make sure that your motherboard boots via the USB flash drive in UEFI mode.
If you’d rather have an ISO file that can boot up on any system, you can still find it by going here, choosing the latest release folder (“brewmaster” at time of writing), and clicking on the ISO file to download it. Once that finishes, you can burn it to a DVD or write it to a USB flash drive using established methods. For the purposes of this article, I will be using the ISO for my installation.
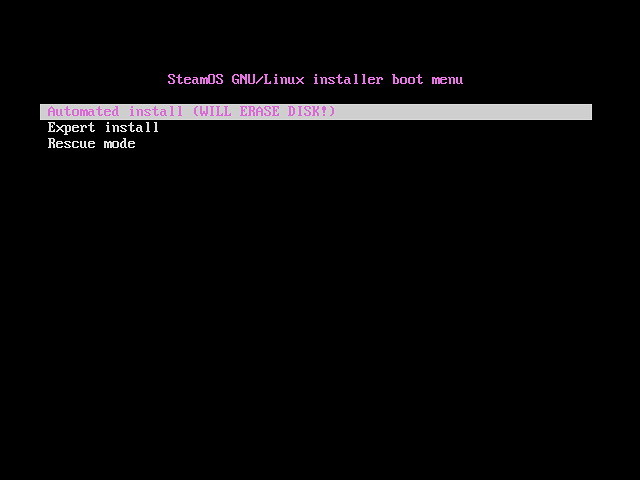
If that was successful, you should see something like this. Choose Expert install (unless you only have one hard drive in your system and use want to use the entire drive for SteamOS).
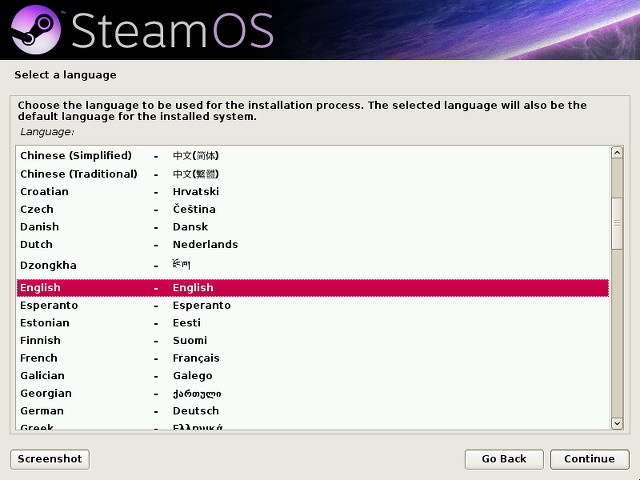
It will then ask you for your preferred language, your country, and your keyboard’s layout.
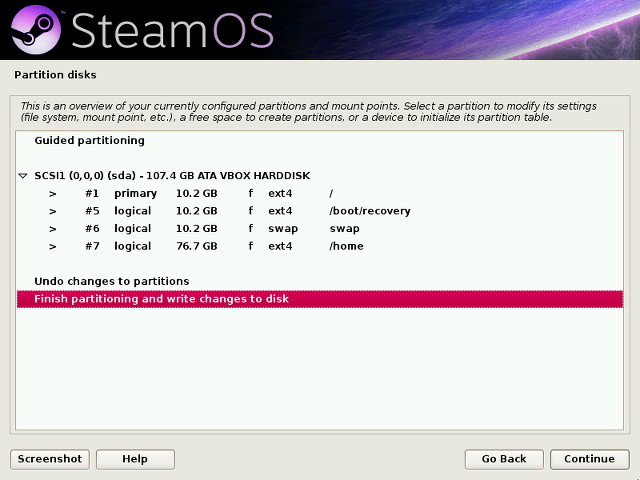
It will then try to give you a suggestion for the partition layout and where SteamOS will be installed. You can go with its recommendation if you are fine with it, otherwise you can configure the partitions to your liking by double clicking on them to view the options for each partition. Once you’re done configuring the partitions, it will confirm that you want to actually write the partition changes to the disk before beginning to install the core utilities of SteamOS.
If you do a custom partition setup and you get warned about not having a SWAP partition, read up on the details of SWAP partitions before continuing with or without one.
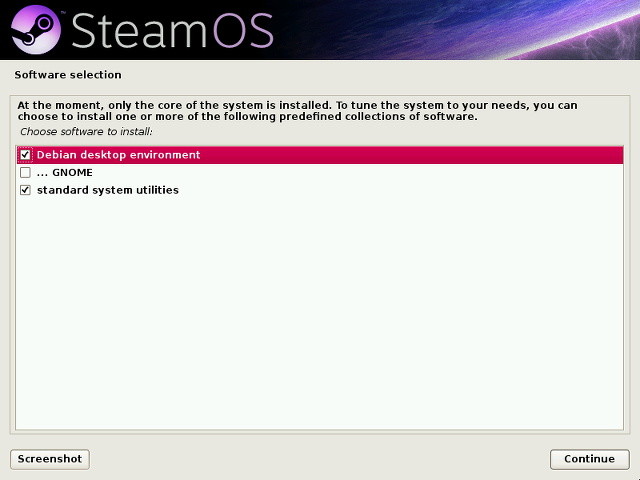
Once that is done, it will ask you what else you’d like to install in addition to the SteamOS core. I would recommend the default selects of the Debian desktop environment and the standard system utilities. However, you can add more GNOME utilities to the Debian desktop environment (which is just GNOME Shell), or include all three options if you’d like. After that, there’s one last step.
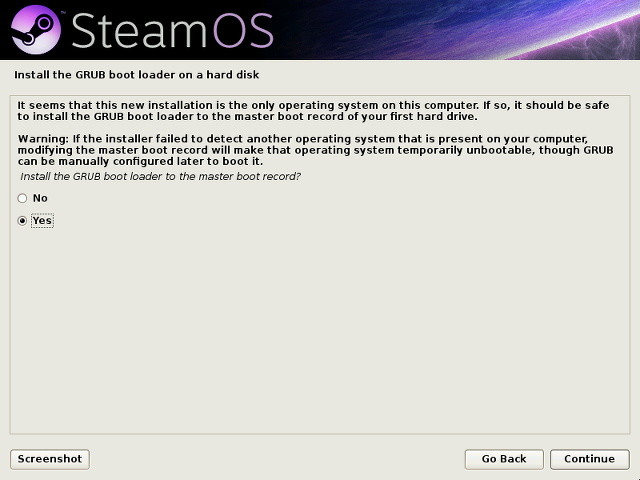
Choose Yes when it asks to install the GRUB boot manager (it will play fine with Windows if you’re dual-booting).
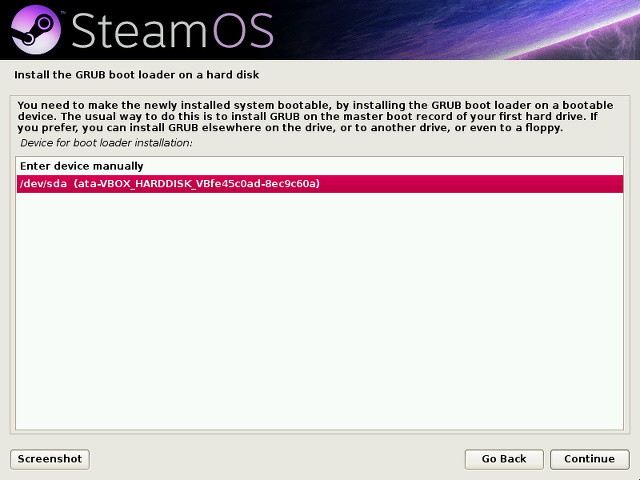
Then choose the hard drive that SteamOS is installed on or whichever hard drive the BIOS is set to boot first.
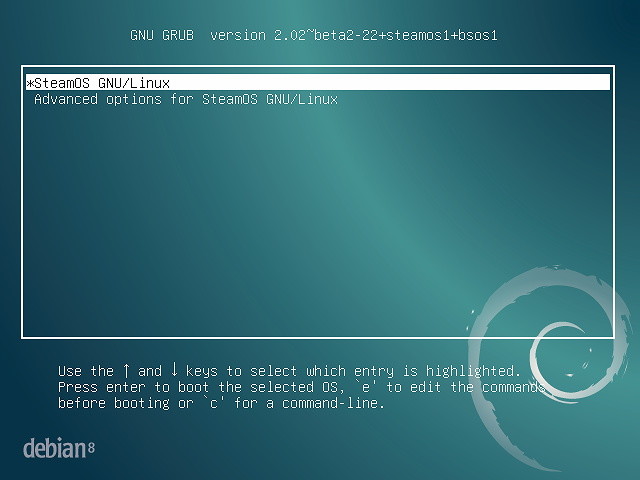
After GRUB is installed, your computer will restart and boot into SteamOS.
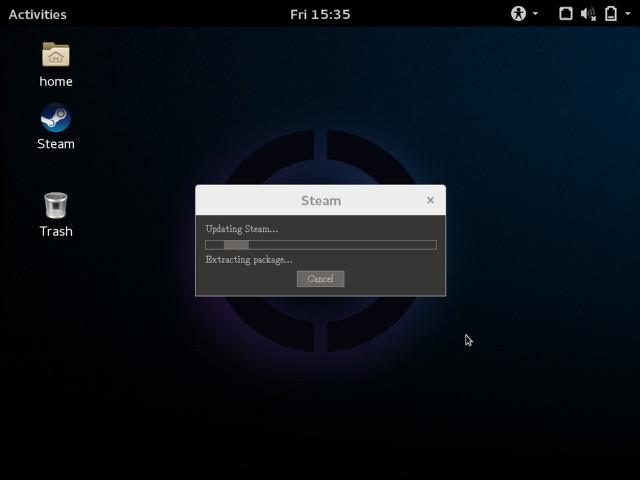
The Steam client will automatically launch and start updating itself if it’s already connected to the Internet. It will then configure some kernel modules to optimize performance on your system and then restart one more time. After some work to set up those kernel modules, you’re finally done. Congrats, you’re now running SteamOS!
From here, you can configure things that you’d normally do, such as install any other system updates, and then launch the Steam client and install your games. Don’t forget — if you want to have a more console-like experience with your new SteamOS-powered system, you can go into Big Picture mode and navigate using a mouse, keyboard, or gamepad.
Would you use SteamOS? If not, would you stay with Windows or use a different Linux distribution instead? Let us know in the comments!

 Torchlight 2 Glitches: Unlimited Mana, Augmented Weapons & More
 Football Manager 2016: strategy / tactics guide
 Castlevania: Mirror of Fate Walkthrough
 FIFA 16: Score Goals from Long Distance / Shooting tips
 Is There A Valid Excuse For Not Having Playable Women in GTA 5?