Find Game Front’s extensive video library of cheats and guides on our free mobile apps.
GameFront Video Walkthroughs app for iOS
GameFront Video Walkthroughs app for Android
The Belmont clan returns on the 3DS in Castlevania: Lords of Shadow – Mirrow of Fate and we’ll show you to navigate the dark castle’s denizens. Dracula has risen again, and the mysterious Alucard makes a return alongside Trevor Belmont to explore the castle’s evil history. Here, we’ll show you how to complete every stage and provide strategies for the tough bosses you’ll face. Crack your whip and journey forth.
Looking for more Castlevania in your life? Check out Game Front’s Lords of Shadow text walkthrough. Or, find secrets and codes on our list of Castlevania: Lords of Shadow cheats.
Check back soon for new updates.
Castlevania: Mirror of Fate Walkthrough
Prologue
After the opening cut-scene, continue moving your character forward along the path to reach the campfire ahead and activate a short action sequence.
Follow the on-screen instructions to learn the character’s moves and use combination strikes to eliminate the creatures that drop on either side you with the help of the other knights.
Continue forward up the trail to encounter another demon and press the indicated button to block the enemy’s initial strike, then follow the next set of on-screen instructions to roll backwards and avoid the creature’s un-blockable attack.
Switch between offensive and defensive maneuvers depending on the enemy’s distance from you or its current attack pose. Assault demons at a distance from you with combination strikes, block the ones that move in close and roll backwards when their mouths start to glow.
Eliminate the next wave of enemies that drop around you to activate a cut scene and cross the bridge ahead to encounter another creature, then follow the on-screen instructions to counter attack and grab the demon for a finishing move.
Use the tactics you just learned to eliminate the next group of demons that descend and activate another cut scene to complete the prologue.
Castlevania: Mirror of Fate Walkthrough
Act 1: Cursed Village
Move forward down the path in front of you to pass through the shanty town and encounter the zombies that emerge from the ground, then take them out from a distance with a combination of quick strikes from your whip.
Continue along the road ahead to crawl beneath a low-hanging roof and cross the bridge on the other side to use a Health Font, then proceed forward to enter the mill and approach the crate against the far wall.
Pull the crate backwards until it’s left side is lined up with the broken wooden ledge above you, then jump on top of the box to reach this landing and turn around to climb the partial section of steps in front of you.
Flip the switch at the top of the steps to open the door in front of you and turn around to jump up to the next partial staircase above, then read the purple-glowing scroll and turn around to drop back onto the previous landing below.
Move through the door you opened to activate a short action-sequence and acquire the Throwing Axe as a new weapon, then drop down over the ledge ahead to reach the ground below and proceed forward at the bottom to eliminate the next wave of zombies.
Fight your way past the zombies up the next hill ahead and use the whip to break apart the barrels blocking the path, then pick up the axe ammunition and crawl forward through the tunnel in front of you to reach the Castle’s Outer Wall.
Castlevania: Mirror of Fate Walkthrough
Act 1: Castle’s Outer Wall
Use the health font at the bottom of the hill in front of you and read the scroll past that to learn more about the story, then proceed forward along the trail ahead to cross another bridge and activate a short cut scene.
Afterwards, approach the indicated series of the ledges ahead and follow the on-screen instructions to drop down them one-by-one until you land on the ground below.
Move left to drop down another series of ledges and turn right at the bottom to repeat the same action, then follow the next set of on-screen prompts to jump across the gap and continue your descent to land on the ground below.
Pull the crate beside you towards the right to collect the axe ammunition on the other side and proceed forward through the cave to eliminate the group of zombies that emerges ahead, then cross the next bridge to spot the swing point above and access your map to leave a note.
Drop over the ledge in front of you to read the scroll below and head left to jump over the next two gaps in the path, then drop down another ledge to turn around at the bottom and continue moving forward.
Clear the next gap in the path ahead to activate a short cut scene and step onto the bridge in front of you to fall through it, then dive beneath the water to swim through the tunnel below on your left and collect oxygen from the bubble fountain on the other side.
Continue swimming through the next tunnel on your left to finally surface on the other side and jump onto the piece of land beside you to read another scroll, then return to the previous bubble fountain and swim straight upwards to collect the Bestiary Card above.
Dive beneath the surface to swim back into the tunnel on your right and continue forward to eventually climb back onto dry land above, then proceed through the open doorway in front of you to reach the Forgotten Caves.
Castlevania: Mirror of Fate Walkthrough
Act 1: Forgotten Caves
Use the health font in front of you and proceed forward across the next bridge to encounter the fish creature on the other side, then jump over the enemy’s initial attack and eliminate him with a series of combination strikes.
Eliminate multiple fish enemies at once by jumping over the creatures until they are all across from you on the opposite side of the screen and attacking them at once with multiple whip strikes.
Continue moving forward to fight past the next wave of fish creatures and clear the next two gaps in the road to grab onto the wall at the end, then climb onto the ledge above and jump across another gap in front of you.
Proceed to the end of the ledge you’re on and jump to grab the rope above, then climb forward along it to clear the gap and open the chest on the other side to increase the maximum amount of life.
Jump onto the overhead landing to climb the ledges above and transfer to the bridge across from you, then head left to clear the next gap and grab onto the hanging section of wood.
Climb up onto the bridge above to clear the gap on your left and proceed forward to make your way across the next rope above, then wait for the steam bursts to dissolve before continuing ahead each time.
Drop down onto the next ledge ahead to proceed forward and eliminate the next group of fish creatures using combination whip strikes from a distance, then continue moving left to climb down over the edge at the end and descend to the very bottom of the rock wall below.
Transfer to the landing across from you on the left and ascend the narrow shaft above to stop just below the first steam burst, then wait for the smoke to dissolve to climb onto the next overhead ledge and jump to cling onto the wall on your right.
Climb up onto the next ledge above and head right to collect from a health font, then drop over the edge in front of you and clear the two gaps ahead to grab onto the opposite wall.
Ascend the rock wall to proceed forward at the top and activate the next cut scene, then turn around to climb up onto the ledge above and crawl through the tunnel on your left to eliminate the fish creature on the other side.
Continue moving left to crawl through the next tunnel and roll past the steam after it dissolves, then jump to the ledge above at the end and clear the acid pool in front of you to grab onto the opposite wall.
Ascend onto the next ledge above to climb down over the edge in front of you and turn around at the bottom to break open the crates, then proceed forward to approach the steps ahead and activate the next cut scene.
Afterwards, press the indicated button to summon the Spirit of Belnades and use her to block any incoming attacks from surrounding enemies.
Use jumping combination strikes with your whip to attack both the ground and flying creatures at once until the area is clear, then proceed towards the right to ascend up the wall at the end and proceed forward at the top to climb down over the next ledge.
Climb down to the lowest ledge to jump over the pool of acid on your right and use the Magic Font in front of you, then drop over the next edge and activate the spirit to safely travel through the steam trap ahead.
Continue moving forward to climb down over the ledge at the end and land on the ground below, then head right to activate the spirit again and pass beneath the acid waterfall unscathed.
Proceed forward on the other side of the acid obstacle to reach the Deadly Waterfalls.
Castlevania: Mirror of Fate Walkthrough
Deadly Waterfalls
Visit the magic font in front of you and proceed forward beneath the acid waterfall ahead, then continue moving towards the right to reach the next crate and pull it backwards to line it up with the ledge above on your left.
Use the crate to reach the ledge above your left and ascend the rock steps beside you to pass beneath the acid waterfall at the top, then jump down through the gap on the other side to land on the next ledge below and collect a new bestiary card.
Drop to the ground below to return to the previous crate and use it to reach the ledge above on the right again, then pass beneath the acid waterfall for a second time and jump-dash to clear the next gap ahead.
Pass beneath the acid waterfall beside you and jump across the gap on the other side to cling onto the far wall, then ascend up the ledges above by waiting for the steam trap to dissolve first.
Climb onto the ledge above to proceed towards the left and eliminate the enemy laying in wait, then visit the magic font on the next over landing and jump across the gap beside you to now head right.
Activate the spirit to pass safely beneath the first acid waterfall and jump up through the next shaft you see in the ceiling to climb onto the over ledge, then proceed towards the left to pass above another waterfall and get behind the crate on the other side.
Push the crate towards the right to move it beneath the previous acid waterfall and allow it to fall through the bridge on the other side, then drop down after it to continue pushing it forward and pass under a second waterfall ahead.
Once you have passed beneath the aforementioned waterfall, jump on top of the crate to reach the next ledge above and visit the nearby magic font.
Drop back to the ground below to continue pushing the crate forward beneath the next acid waterfall ahead and lock it into place on the other side, then visit the magic font behind the box and jump on top of it to reach the ledge above.
Grab onto the wall in front of you and ascend up the shaft above by transferring between the series of ledges, then climb onto the next ledge on your left and visit the health font.
Ascend up the next series of ledges above on your right by first waiting for the steam traps to dissolve, then move left at the top to descend the rock steps below and jump across the gap at the bottom to proceed forward.
Eliminate the first wave of creatures to jump across the next two gaps above on your left and clear another group of enemies to proceed forward, then ascend up the far wall and transfer to the landing beside you at the top.
Continue your ascent up the ledges and between the walls above to exit the shaft at the top, then head right to eliminate the next wave of zombies that emerges from the ground and proceed forward.
Jump across the two gaps at the top of the next incline and continue moving forward to cut through another pair of zombies, then climb up the far wall to transfer onto the wooden platform above on the left and take out the harpy in front of you with mid-air whip strikes.
Climb the next two walls above on your right to reach the ledge at the top and proceed forward to eliminate the zombies in front of you, then take the upper tunnel at the fork in the corridor ahead and break open the barrels at the top.
Make your way back down the previous set of steps to take the lower tunnel at the fork in the corridor and visit the magic font below, then enter the elevator in front of you and press the indicated button to ride it to the next floor above.
Exit the elevator to climb the wall above on the left and ascend the ledges in front of you to crawl through the tunnel at the top, then open the next chest below to increase your maximum amount of magic.
Crawl back through the previous tunnel and jump across the gap in front of you to grab onto the wall above, then ascend the ledges to proceed forward at the top and enter the Castle Hall.
Castlevania: Mirror of Fate Walkthrough
Castle Hall
Exit the tunnel to turn left at the top and break open the barrels against the wall to collect various items, then head right to visit the health font and proceed forward to read the next purple-glowing scroll.
Continue moving forward to activate the next cut scene and encounter the boss, then attack the creature in front of you with combination whip strikes until the other monster moves in closer from behind.
Block the enemy the enemy in front of you to momentarily stun it and quickly turn around to attack the other approaching monster, then continue fending off both creatures and assaulting them one-at-a-time until the pair has been defeated.
Once you have defeated the boss’ pets, hit him with two to three whip strikes and quickly roll backwards to dodge the enemy’s counter-attack.
Continue striking the boss to back him up across the room and roll away from each the enemy’s staff attacks to avoid taking damage, then drain his health bar to the halfway point to activate a short action sequence.
Afterwards, activate your spirit to protect you from the surrounding enemy ambush and use jumping whip combination strikes to start clearing them out.
Eliminate the surrounding wave of creatures to have the boss jump on top of you and tap the indicated button repeatedly to kick him off, then continue draining the enemy’s health with combination whip strikes and roll away from his initial staff attacks.
Using your spirit as a protective barrier, clear out the third wave of creatures and continue attacking the boss as you did before until all that remains is his floating staff.
Roll backwards as the floating staff approaches, then roll forward beneath the weapon as it makes an upward arching motion through the air.
Continue dodging the staff until the boss returns to the battle, then immediately start striking him with your whip and dodging his series of follow-up attacks.
When the enemy has a quarter of his life remaining, fall back to a safe distance and use the last of your magic to knock him down multiple times with throwing axes.
Use the aforementioned defensive and offensive tactics to continue draining the boss’ health until the next cut scene is activated, then press the indicated buttons to defeat this enemy and complete the boss battle.
Proceed forward to collect a new Bestiary card and visit the nearby magic font, then enter the elevator in front of you and ride it to the next floor below to enter the Guards Room.
Castlevania: Mirror of Fate Walkthrough
Guards Room / Cells
Exit the elevator to approach the lever in front of you and press the indicated buttons as quickly as possible to start opening the gateway ahead, then release the switch to eliminate the zombies that suddenly appear.
Continue pulling the lever and eliminating the demons that repeatedly appear until there are none remaining, then finish opening the gateway ahead and proceed forward through it to visit the next health font.
Move through the next doorway ahead to reach the Cells and proceed forward to jump into the mine cart at the end of the ledge, then press the indicated buttons to propel yourself across the tracks and stop in front of the staircase on the other side.
Ascend the steps ahead to eliminate the next group of zombies that appear at the top and proceed forward to climb down over the ledge at the end, then drop to the ground below and continue moving right after the steam trap in front of you dissolves.
Eliminate the enemy at the top of the next set of steps and enter the elevator in front of you to ride it to the floor above, then exit the car to proceed forward and clear out another group of zombies that emerge ahead.
Visit the next health font and proceed forward to read another purple-glowing scroll, then continue moving towards the right to activate a cut scene in which you obtain the Oil Flask.
Afterwards, jump over the surrounding skeleton warriors to put them on the opposite side of the screen from you and toss your oil flask amongst these enemies to set them on fire.
Use combination whip strikes to eliminate the burning skeletons and to deflect the oil flasks they toss your way as well, then activate the spirit to safely finish clearing the area and proceed forward to reach the Inner Cells.
Castlevania: Mirror of Fate Walkthrough
Inner Cells / Vertical Prison
Jump up onto the ledge directly above and eliminate the enemies that emerge to collect items from the barrels in front of you, then drop back to the ground below and head right to push the next crate blocking the path all the way forward.
Use the crate to reach the top of the doorway above on the right and climb down to reach the ground on the other side, then proceed forward to descend over another ledge at the top and break open the barrel at the bottom to collect additional ammo.
Head right to approach the skeleton warrior below and roll beneath their initial oil flask tosses to eliminate the enemies at close-range, then proceed forward to drop through the gap in the floor and turn around to defeat another hostile.
Finish clearing the area to collect the food from the barrel and climb the next set of steps to your right, then read the purple-glowing scroll at the top and return to the previous room.
Crawl into the tunnel on your left and press the indicated buttons halfway through to avoid being choked, then continue moving forward to jump across the gap on the other side and collect ammo from the barrels.
Drop to the next level beneath you to enter the elevator on your right and ride it to the floor below to reach the Vertical Prison, then exit the car to proceed forward and pull the lever in the area partially submerged by water.
After the water levels have risen, swim left to jump on top of the cage at the far end of the room and clear the gap in front of you to land on the opposite ledge.
Throw an oil flask to help eliminate the group of skeletons ahead and return to the previous cage to jump back on top of it, then clear the next three gaps in front of you to reach the ledge on the other side.
Proceed forward to pull the lever in the next room and raise the water levels even higher, then swim back through the tunnel on your left and surface to approach the partially submerged cage beside you.
Swim beneath the cage to continue moving left and enter the tunnel ahead where you eliminated the previous group of skeleton warrior, then ascend through the shaft above and climb up the series of ledges after the overhead steam trap dissolves.
Climb onto the next ledge above to pull the lever on your left and raise the water levels further, then swim through the open doorway on the right to return to the chamber of cages and surface to regain oxygen.
Swim to the middle of the room to jump onto the platform above and read the purple-glowing scroll, then drop back into the water and descend towards the right to enter the first tunnel below.
Surface in the room at the end of the tunnel to read the next scroll above and drop back into the water below, then return to the platform where you read the previous scroll and jump onto the nearby crate to reach the top of the cage.
Make your way forward across the rope to reach the ledge on the other side and continue ahead to pull the lever in the next room, then swim back into the chamber of cages and climb up the right-side wall as the steam traps above dissolve.
Transfer to the cage on the left to climb on top of it and slide down the rope above to activate a short action sequence, then proceed forward to enter the Kitchen.
Castlevania: Mirror of Fate Walkthrough
Kitchen
Ascend the staircase in front of you and the next one above after that to proceed towards the right, then jump over the stack of cages to visit the health font on the other side and enter the elevator ahead.
Ride the elevator to the next floor above and activate a cut scene, then use mid-air charged oil flask throws and combination whip strikes to eliminate the goblins in front of you.
Activate your spirit and roll backwards or jump into the air to dodge the goblin’s lanterns, then finish clearing the room and proceed forward to exit this area.
Descend the first staircase below to eliminate the goblin on the next landing and continue down the steps on your left to crawl through the tunnel behind the pile of barrels, then read the scroll on the other side and exit the chamber.
Make your back up the two previous staircases above to move through the open doorway on the left and eliminate another group of goblins, then crawl through the tunnel ahead to pull the lever on the other side and open the door in front of you.
Proceed forward through the open doorway to return to the Guards Room and collect a new Bestiary card, then eliminate the surrounding enemies and pull the nearby lever to open another door.
Return to the Kitchen and crawl back through the previous tunnel ahead, then scale the shaft above by waiting for each steam trap to dissolve and climb up onto the right-side ledge.
Crawl through the tunnel in front of you to climb the steps on the other side and move through the doorway at the top to enter the Theatre.
Castlevania: Mirror of Fate Walkthrough
Theatre / Terrace
Ascend the next two staircases to visit a health font and move through the open doorway ahead, then proceed forward down the theatre aisle to jump up onto the stage at the bottom and continue towards the left to activate a cut scene.
Afterwards, activate your spirit and roll backwards repeatedly from the approaching puppets while using mid-air whip strike combinations to destroy or fend them off.
Finish defeating the first wave of enemies to activate a short action sequence and encounter a new type of cart-wheeling puppet, then jump over or roll away from these hostiles as they spin towards you and eliminate them with more mid-air combination whip strikes.
Continue eliminating these puppets before they can touch down on the stage until the next cut scene is activated, then exit the theatre to visit the previous health font and move through the open doorway below on the right.
Ascend the upper staircase to eliminate the group of enemies at the top and proceed forward to drop down two more sets of steps, then head left at the bottom to read another purple-glowing scroll and turn back around to face off against another wave of puppets.
Use mid-air striking combinations to clear the area and crawl through the tunnel on the right side of the room, then scale the next shaft above by wait for the steam traps to dissolve and collect the Bestiary card near the top.
Climb up onto the right-side ledge above and proceed forward to reach the Terrace, then visit the magic font in front of you and ascend out of the tunnel to continue towards the right.
Use mid-air whip combinations to eliminate the group of harpies that appears and enter the elevator ahead to ride it to the next floor above, then exit the car to defeat another wave of enemies on your left and proceed forward to enter the Ballroom.
Castlevania: Mirror of Fate Walkthrough
Ballroom / Library
Visit the next health font and continue moving forward to encounter a werewolf.
Use combination whip strikes to push the werewolf back until he starts to block these attacks, then dodge his follow-up assault and continue striking the creature into defeat.
Eliminate the second werewolf that appears and proceed forward across the room to encounter another wave of monsters, then activate your spirit as a means of protection and finish clearing the area with the help of axe throws to continue moving towards the left.
Ascend the next set of steps ahead to turn around at the top and climb up onto another staircase above, then jump off the right side of the landing and collect the Bestiary card hanging in mid-air.
Make your way back towards the left side of the room to pass through the doorway at the end and enter the Courtyard, then proceed forward to another open doorway and move through it to reach the Library.
Proceed forward across the library to visit the next health font and crawl through the tunnel in front of you, then enter the open room on the other side to activate the magic book and use mid-air striking combinations to destroy it.
Activate your spirit to help you defeat the surrounding group of werewolves and the magic books that continue to appear, then crawl back through the previous tunnel to climb the next staircase above and read the purple-glowing scroll at the top.
Turn around to climb the next series of ledges above and enter the room at the top to activate the indicated pedestal, then proceed through the secret passageway that opens in front of you to return to the Courtyard.
Castlevania: Mirror of Fate Walkthrough
Courtyard
Approach the opposite end of the room to pick up the weapon at the top of the steps ahead and activate a cut scene in which you encounter the boss.
Wait for the minor enemies to finish emerging from the ground, then jump repeatedly to position yourself on the opposite side of the screen from both them and the boss.
Activate your spirit and use mid-air combination strikes with axe throws to fight the group of enemies back, then roll backwards when ever you see the boss charging his scythe and continue attacking him from long distance.
Quickly push yourself towards the boss at close-range to roll beneath the floating enemy and jump into the air to attack him from behind, then continue striking until he turns around again and steals your spirit.
Now that you are unprotected, remain at a safe distance from the boss to attack him with mid-air whip strikes or axe-throws and pause momentarily to focus on maneuvering between the falling green flames from above.
Once the green flames have passed, roll beneath the boss again to strike him from behind in mid-air and fend off the demons below at the same time.
Dodge the boss’ next attack by rolling away to a safe distance and continue draining his health with axe throws until he surrounds himself with a green forcefield, then approach the circular field at as close a range as possible and watch the rotation of the two layers that it consists of.
Wait for the openings in both forcefield layers to line up and quickly roll through them to activate a short action sequence, then sprint towards the boss and roll beneath each of the energy blasts he sends your way.
Strike the boss at close range until he disappears, then turn around to sprint towards his new location and jump over or roll under next volley of energy blasts.
Repeat the previous step to finish draining the boss’ health and activate his next series of green forcefields, then wait for the openings in all three to line up and quickly roll through them.
Press the indicated buttons as they appear to defeat the boss and recover Trevor Belmont’s Combat Cross, then approach the swing point above on the left and use your new weapon on it to scale the wall.
Ascend the series of ledges above to move back through the broken window at the top and proceed forward to visit the health font, then exit the room via the doorway ahead to return to the library.
Castlevania: Mirror of Fate Walkthrough
Library / Castle Hall
Press the indicated button to grip the swing point ahead and stop yourself halfway across the gap to descend onto the platform below, then pull the lever and drop to the floor below.
Eliminate the magical books and move left to approach the statue against the far wall, then pull the sculpture out into the open and jump on top of it to reach the next ledge above on the right.
Read the indicated book resting on the pedestal and return to the statue below to enter the tunnel behind it, then grip the swing point on the other side and descend to the bottom of the wall.
Swing out towards the left to jump and land on the next ledge across from you, then proceed forward to return to the Castle Hall and climb down through the shaft ahead.
Use the combat cross’ chain to safely descend onto the balcony below and crawl through the tunnel on the left to read the scroll on the other side, then exit the secret chamber to swing across the next chandelier across from you and collect a Bestiary card.
Swing across the next two chandeliers below to reach the floor beneath you and read another nearby scroll, turn left to eliminate the creatures laying in wait and pass through the elevator ahead to visit a magic font.
Use the three previous chandeliers to return to the balcony above and re-enter the Library, then make your way back into the room guarded by magic books and defeat them quickly.
Crawl through the tunnel on the right side of the room to visit a health font and climb the staircase above on your left to turn around at the top, then ascend the next set of steps across from you and crawl through another tunnel at the top.
Climb down the ledges on the other side of the tunnel to turn around at the bottom and use the swing point in front of you to cross the gap ahead, then proceed forward to read another scroll.
Swing back across the previous gap to climb the ledges on the other side and crawl into the tunnel at the top to make your way back down the steps, then pass through the first open door below on the left and turn around to scale another wall.
Collect the ammo at the top and turn around to swing across the wide gap again, then land on the opposite ledge to proceed forward through the open doorway and eliminate the creature at the top of the next staircase.
Turn around to climb another staircase and collect the Bestiary card at the top, then drop back through the open doorway below on your left and proceed forward to enter the next area ahead.
Scale the wall directly behind you to turn around at the top and read the scroll located across the gap, then jump back to the previous ledge and head right to reach the teleporter at the bottom of the next staircase.
Approach the teleporter and press the indicated button to travel back to the Inner Cells.
Castlevania: Mirror of Fate Walkthrough
Inner Cells / Spirit of Schneider
Read the scroll on the ledge above to your left and pull the next lever below to open the door in front of you, then proceed forward to slash through a group of zombies and climb the steps ahead to turn around at the top.
Jump to the ledge above on the left to collect from the barrels and clear the gap beside you to crawl through the tunnel above, then proceed forward on the other side to eliminate the enemies in the open room below and continue up the next staircase ahead.
Turn around midway up the steps to climb up onto the ledge above and move left to reach the next orange-lit landing overhead, then use the swing point to cross the gap on your right and activate a cut scene to acquire the Spirit of Schneider.
Summon the spirit and pull the lever in front of you to open the next door ahead, then proceed forward up the staircase on the other side and jump over the gap at the top to visit a health font.
Proceed forward into the next room above and clear it of harpies to safely exit out the other side, then swing halfway across the gap ahead to stop in the middle and descend down through the pit of spikes below.
Drop to the ground beneath the spikes to open the chest and increase your maximum amount of magic, then crawl through the tunnel on the left to climb up the shaft on the other side and pull the lever at the top to open the trapdoor above.
Climb up out of the tunnel to proceed towards the left and swing down through the gap ahead , then stop above the pit of spikes below and propel yourself out onto the next right-side ledge.
Fight through the tunnel ahead to drop down the gap on the other side and activate your protective spirit, then collect the Bestairy card on the left and climb over the ledge on the right.
Crawl through the tunnel at the bottom of the shaft to climb down over the ledge on the other side and eliminate the next enemy below, then ascend the wall ahead to reach the landing above on the right and proceed forward to increase your maximum amount of life.
Make your way back through the previous series of tunnels and shafts to re-visit the previous health font above, then proceed towards the right to swing across the next gap and enter the elevator on the other side to ride it to the floor below.
Exit the elevator to visit the magic font in front of you and proceed forward to eliminate the next wave of zombies, then climb the steps on your right to clear the gap at the top and turn around to reach the ledge above.
Head left through the orange-lit area ahead to eliminate another group of harpies and jump across the gap at the end to grab the far-side wall, then ascend to the next ledge above and turn around.
Jump onto the next overhead staircase to proceed forward and eliminate another group of demons, then continue moving towards the right to enter the tele porter and travel back to the Library.
Castlevania: Mirror of Fate Walkthrough
Library / Toy Maker’s Funfair
Visit the magic font ahead on the right and climb the next two staircases past it to proceed towards the left at the top, then activate your archer spirit to help clear out the surrounding enemies and grab onto the swing point that appears above.
Swing to the ledge above on your left to visit a health font and cross back to the opposite side of the room to reach the ledge above on the right, then climb up the wall in front of you and crawl through the tunnel at the top to ascend the steps at the end.
Turn around at the top of the steps to proceed across the left-side ledge and eliminate the goblins in front of you, then collect the ammunition against the wall and make your way back towards the opposite side of the room to enter the Toy Maker’s Funfair.
Proceed forward to encounter the magical books and the werewolves, then activate your archer spirit and start clearing them out with combination whip strikes.
Move through the open doorway on the right to visit the health font inside and proceed onto the carousel ahead to activate a short action sequence, then push yourself forward to stay between the surrounding laser walls and start maneuvering around the oncoming obstacles.
There are three heights that the carousel obstacles approach from: ceiling level, mid-level and floor level. Run beneath the ceiling-level obstacles, roll beneath the mid-level obstacles and jump over the floor level obstacles.
Continue evading the obstacles until another short action sequence is activated in which the speed and direction of the carousel starts to alternate frequently.
Keep your character towards the middle of the platform to better anticipate these changes and stay alive long enough to activate the next extended cut-scene, then proceed forward to step off the carousel and push the crate below against the wall ahead.
Use the crate to climb up the wall above and wait for the overhead steam trap to dissolve to reach the top, then swing out towards the left to land on the carousel’s roof and move forward across it to reach the ledge above on the other side.
Head left to pass through the next elevator and push the crate on the other side of it against the far wall, then use the box to reach the ledge above on the right and increase your maximum amount of life.
Return to the elevator below and ride it to the next floor above to reach the Main Tower Outside.
Castlevania: Mirror of Fate Walkthrough
Main Tower Outside
Exit the elevator to jump onto the hanging platform ahead and turn the crank to reach the next ledge above, then release the mechanism to quickly jump up onto it and visit the magic font in front of you.
Proceed forward to step onto the next hanging platform ahead and activate your archer spirit to fend off the demon flying above, then turn the crank as quickly as possible to reach the overhead ledge and jump towards the right to land on it.
Climb the wall in front of you to transfer to the next wooden landing at the top and ascend the next series of overhead ledges to reach the hanging platform above on the left, then turn the crank to lower the weight on your right and jump onto it to continue the ride upwards.
Quickly jump from the weight to land on the next wooden ledge to the right and proceed forward across it to activate a cut scene in which you encounter a fire-breathing demon, then summon your archer spirit and defeat this enemy from a distance with axe-throws or mid-air whip strikes.
Ascend the wall in front of you to reach the ledge above on the left and step onto the next hanging wooden platform ahead, then turn the crank to lower the weight and jump on top of it to read the purple-glowing scroll below.
Return to the previous hanging platform to crank it all the way to the top and proceed forward across the ledge above on the right, then pull the crate in front of you backwards to visit the next magic font and use the box to reach the landing above on the left.
Make your way across the next rope above and activate the protective spirit to safely pass beneath the fire-breathing demon, then drop to the wooden platform on the other side and ascend the overhead ledges to proceed forward at the top.
Use the swing point directly above to ascend the wall in front of you and summon your protective spirit to fend off the fire-breathing demon, then proceed forward at the top to do battle with this enemy.
Summon your archer spirit to keep the flying demon at bay and attack it with a series of mid-air combination whip strikes, then roll backwards each time the enemy breathes fire and continue the assault until this hostile is defeated.
Use the swing point above to climb the wall in front of you and visit the fonts at the top, then use a second swing point located over the stain glass window on the right to continue your ascent and press the indicated button to smash through the glass.
Castlevania: Mirror of Fate Walkthrough
????
Walk forward during the next cut scene to approach the maiden ahead and tap the indicated button to avoid having your soul sucked out, then summon the protective spirit and start attacking the boss with mid-air whip combination strikes.
Continue striking the boss until she starts to charge her next series of assaults, then roll backwards quickly several times and follow it up with a volley of axe throws to activate a short action sequence.
Once the boss has created a blue forcefield around herself, summon your archer spirit and assault the bubble with mid-air whip combinations from the side to evade the enemy’s counter-attacks.
Attack the boss until you are prompted to grab her shield and press the indicated button to destroy it, then continue using mid-air whip combinations to drain the enemy’s health until she returns to the pedestal in the background.
After grabbing the maiden girl with your combat cross, tap the indicated button repeatedly to remove her from the boss’ grasp and summon the archer spirit to help continue the assault.
Continue yanking maidens from the boss’ grasp and draining her health with mid-air combinations strikes until the next action sequence is activated, then summon your protective spirit to deflect fireballs from the three shielded enemies and attack whichever one is currently flashing red.
Use evasive rolling maneuvers to dodge the fireballs coming at you from either side and alternate between attacking all three forcefields until the real boss shows herself, then continue draining this enemy’s health with mid-air whip combinations and defeat her to activate the a short action sequence.
Approach the fallen boss to finish her off and watch the next extended cut scene unfold to become Dracula.
Castlevania: Mirror of Fate Walkthrough
Belfry / Tower’s Link
Read the scroll located to your right and exit the room through the open doorway towards the left, then descend the next staircase to proceed forward at the bottom and enter the Belfry.
Continue moving forward to climb the next piece of wooden scaffolding ahead and turn around at the top, then ascend the opposite wall as the flame burst disappear to reach the ledge above and jump the gap beside you to eliminate your first enemy.
Climb the next wall ahead to turn around at the top and use the swing point across from you to reach the ledge above on the right, then read another scroll and jump across the gap on the left.
Crawl beneath the next overhang to continue moving towards the left and eliminate the enemy below, then proceed forward under another overhang to climb down over the ledge on the other side and descend through the shaft to reach the first landing on the right.
Drop over the next ledge ahead to attach your combat cross’ chain onto the swing point towards the right, then descend to the ground below and read the next scroll on the left.
Climb the wall in front of you to proceed forward at the top and reach the Tower’s link, then continue moving towards the left to walk along the enormous chains and activate an action sequence on the other side to start a new boss battle.
Roll backwards from the boss’ initial attack and jump into the air when the monster executes a sumersault tail strike, then assault the creature several times with your whip as it stands back up and prepare to evade an upcoming claw swipe.
Continue attacking the monster until he is able to kill you and the next cut scene is activated to splash down in the pool of water below, then dive beneath the surface to read the scroll at the bottom and swim towards the right along the ground to enter the tunnel that leads into the Abandoned Mine.
Castlevania: Mirror of Fate Walkthrough
Abandoned Mine
Swim up through the next shaft ahead to reach the ledge above on the left and move forward across it to visit the health font against the wall, then ascend another shaft to reach the ledge above on the right and crawl beneath the overhang in front of you.
Proceed forward to activate a cut scene in which you obtain the Bat Projectile, then continue moving towards the right and follow the on-screen instructions to eliminate the harpies ahead with the help of your new ability.
Pass through the elevator ahead to climb down over the ledge on the other side and descend onto the next hanging platform below as the steam traps dissolve, then drop to the ground to pull the lever in front of you and use bat projectiles to fend off the creatures that suddenly appear.
Keep a safe distance from the monsters by hitting them repeated whip combinations and bat projectiles, then jump above the sections of floor they electrify and continue your assault to defeat these creatures.
Finish clearing the area of all remaining creatures and pull the lever again to open the door ahead, then proceed forward to visit the next health font and drop into the water in front of you.
Dive down beneath the surface to encounter the enemy near the wooden floor below and evade each of the creature’s charged attacks to swim towards the left, then read the scroll on the next platform above and head back towards the right.
Swim all the way towards the surface at the right end of the pool and enter the next tunnel near the top, then proceed forward to exit the water through the shaft at the end and climb up the walls above as the flame bursts pass by to reach the ledge on the left.
Proceed forward across the ledge to encounter the harpies and eliminate them with mid-air whip combinations, then drop into the mine cart ahead and turn the crank to propel yourself along the tracks.
Stop turning the crank as each harpy descends in front of you to remove them from your path and jump over the flame burst they emit, then continue propelling the mine cart across the tracks ahead to reach the opposite ledge and ride the elevator to the next floor above.
Exit the elevator to visit the health font and proceed forward to jump over the three flame traps below, then continue moving towards the left to approach three more traps and use mid-air whip strikes to eliminate the harpies that suddenly appear above.
Climb the next staircase ahead to proceed forward into the tunnel at the top and enter the Kitchen.
Castlevania: Mirror of Fate Walkthrough
Kitchen / Theatre
Make your way up the tunnel to jump over the gap ahead and collect the bestiary card on the other side, then climb down through the shaft behind you and proceed forward at the bottom to encounter a pair of serpentine creatures.
Eliminate the surrounding monsters to continue ahead safely and climb up through the next shaft above to proceed left at the top, then eliminate another pair of enemies to move forward and drop down a second shaft.
Cross the next pool of water ahead to climb the wall on the other side as the steam traps dissolve and turn around at the top to jump onto the wooden platform above, then pull the indicated lever to raise the water levels and drop back onto the landing below.
Proceed towards the left to visit a health font and continue past the elevator shaft behind it to activate a cut scene, then press the indicated buttons to take the form of mist and pass through the line of enemies in front of you to regenerate your life.
Turn around to eliminate the group of goblins with whip combinations and continue passing through them to replenish your health, then finish clearing the area to visit the magic font ahead and proceed towards the left.
Select mist form to pass through the locked door ahead and proceed forward down the next two staircase below to visit the magic font at the bottom, then ascend the three previous staircases above to eliminate the goblin at the top.
Continue up the next three staircases to proceed forward into the open room at the top and approach the enormous stove ahead to do battle with the surrounding wave of goblins, then take mist form to pass through them and replenish your health when necessary.
Use mid-air and ground striking combinations to clear out the group of goblins, then read the scroll against the right-side wall and exit the room to descend the previous staircase.
Pass through the next door below on the left to proceed forward into the tunnel ahead and read the scroll on the other side, then return the way you came to climb up the next two shafts above and continue towards the left at the top to enter the Theatre.
Approach the block ahead to pull it backwards into the open and ride the wind jet up to the ledge on the left, then pull back on the magnet block in front of you as well to attach it to the weight block above.
Push the two blocks forward to activate the floor switch ahead and open the trap door behind you, then climb up through it to reach the level above and visit the health font on the right.
Use the weight block to reach the next ledge above and push the fire block in front of you forward to burn the ropes, then approach the second weight block that dropped nearby to jump to the next overhead landing with a wind block on it.
Move the wind block beneath the pipeline ahead to push the weight block onto the floor switch above, then pass through the door you just opened to activate a cut scene.
Afterwards, press the indicated button to change the camera’s view and proceed forward along the lowermost level to reach the opposite wall.
Turn around to reach the fire block on the level above and push it forward to land on the next overhead platform without being burned, then push the fire block back onto the floor indentation and pull the indicated lever behind you to shift the flame cube upwards.
Pull the lever again to move the fire block up another level and approach the weight block below on the right to move it into the nearby floor indentation, then pull the lever two more times to remove the obstruction and make your way towards the fire block again.
Push the fire block past the weight block’s floor indentation on the right and move it beneath the next wooden platform ahead to burn it away, then pull the wind block that dropped below over towards the left and leave it against the wall.
Use the lever to put the weight block on the bottom level and pull it into the left side floor indentation, then pull the lever again to move the cube onto the top level and ride the wind block to land beside it.
Pull the weight block all the way to the left and move the magnet block right beside it, then use the lever below again to shift the magnetic cube to the bottom level and push it out of the left-side floor indentation.
Return to the top level and push the weight block back into its original resting place, then use the lever below to move the cube onto the second level and pull the magnetic block beneath it.
Push both blocks all the way towards the right so that the weight one above activates a floor switch and activate the trap door in front of you, then move the wind block directly beneath this new opening and shift the fire block onto the right-side floor indentation.
Use the lever to move the fire block back onto the top level and watch the wind blow it towards the right to activate an extended cut scene, then proceed towards the right to defeat the next wave of puppets and continue forward to reach the Terrace.
Castlevania: Mirror of Fate Walkthrough
Terrace / Clock Room
Proceed forward to enter the elevator ahead and ride it to the next floor above to encounter the enormous monster that jumps onto the roof of the car, then roll away from the creature’s initial attack and activate mist mode.
Pass through the creature’s body to attack it from the opposite side and continue this line of assault until smaller versions of the same monster appear, then jump to maneuver yourself across the screen from the entire group of enemies and keep them at bay with bat projectiles.
Continue draining the monster’s health until it turns its back on you and attach your chain to the golden object hanging directly above the creature, then tap the indicated button to dump acid from the ceiling and follow the next set of on-screen prompts to escape from being eaten.
Activate mist mode to continue fighting off the monster and the additional creatures that appear, then sprint in the opposite direction away from the larger enemy when prompted to and continue moving until it stops chasing you.
Release a second shower of acid to drive the monster up onto the ledge above, then use jumping whip strikes to deflect the explosive objects it rains down on you and maneuver between the ones laying on the ground by sprinting or dashing sideways in mid-air.
Wait for the monster to rejoin you on the ground, then activate mist mode to continue draining its health and drive the creature back onto the ledge above.
Dodge another volley of explosive objects from the overhead ledge and continue attacking the creature with combination whip strikes, then drop a third vat of acid on the monster to activate an action sequence and tap the indicated buttons to finally win this battle.
Afterwards, head left to jump on top of the elevator car ahead and follow the on-screen prompts to climb between the walls above using Shadow Claws.
Collect the bestiary card at the top and proceed towards the left to enter the Clock Room, then ascend up out of the tunnel to pull the next lever ahead and open the doors in front of you.
Proceed forward to activate a short cut scene, then continue towards the left to visit the magic font ahead and use the purple device at the center of the room to watch an action sequence unfold in which you discover Wolf Form.
Afterwards, approach the far wall on the right to reach the next ledge above and use wolf form to knock down the barricade in front of you.
Read the scroll on the other side and proceed forward to swing across the next gap ahead, then visit the nearby health font and continue moving towards the right to reach the Toys Assembly Line.
Castlevania: Mirror of Fate Walkthrough
Toys Assembly Line / Clock Room
Descend the staircase in front of you to eliminate the next wave of puppet enemies and magic books below, proceed forward to enter the elevator ahead and ride it to the floor above.
Exit the elevator to continue moving towards the right and jump onto the next metal platform that descends in front of you, then ride it to the ledge above to proceed forward and clear the metal platform ahead as the electricity disappears to avoid falling through the trap door.
Move forward past the electricity trap in front of you to land on another metal platform and ride it to the ground below, then read the scroll on your left and continue towards the right to reach the shaft above at the end.
Wait for the first overhead blast of electricity to disappear, then use your claws to ascend the shaft above and land on the right-side ledge.
Continue up the shaft by waiting for another blast of electricity to disappear and land on the next right-side ledge above, then activate wolf form to break through the barrier in front of you and proceed forward past the steam traps to increase your maximum amount of life.
Head back towards the left to jump over the previous shaft and continue moving forward to step onto the next descending metal platform, then land on the first ledge below and quickly vault off of it to avoid the electrified floor.
Clear the next rigged metal platform ahead to land in front of two electricity traps and wait for them to disappear before proceeding forward, then stop in front of the far left-side wall and climb the shaft above as the steam trap dissolves.
Drop over the left-side ledge at the top to read the scroll below, then jump back over the previous shaft to head towards the right and clear the next trapdoor in front of you.
Quickly launch yourself forward off the trapdoor in front of you and grab onto the opposite wall, then climb upwards to swing through the window at the top and proceed towards the right to reach the Toy Maker’s Workshop.
Proceed forward to pass through the green-lit area and read the scroll on the other side, then head back the way you came to reach the metal structure on the left and use the swing point above to climb on top of it.
Visit the nearby health font and proceed forward to collect items from the barrels ahead, then turn back around and use the next swing point above to climb up the hanging section of bridge as the electrical trap disappears.
Climb down over the ledge in front of you at the top and swing out towards the right to land on the next circular platform, then descend the edge ahead and jump out towards the right again to grab the opposite wall.
Ascend the wall to drop over the other side at the top and open the chest below to increase your maximum amount of life, then climb back up the shaft above to return all the way to the ground floor beneath you and head left to scale the previous metal structure again.
Make your way to the top of the hanging bridge section across from you again and clear the next gap ahead to grab onto the opposite wall, then ascend to the ledge above on the right and proceed forward to acquire the Stopwatch at the top of the steps.
Drop back through the previous gap to descend the objects below and land on the ground floor beneath you, then activate wolf form to eliminate the wave of enemies that appear next and head left to return to the Toys Assembly Line.
Climb over the ledge in front of you to clear the next pair of trap doors ahead and jump over the gap past that, then descend another ledge to walk through a curved tunnel slowly and make your way down the wall at the end to land on the metal platform below.
Drop to the ground below on your left to eliminate the surrounding enemies and continue moving in this direction to return to the Clock Room, then proceed forward to swing across the next gap ahead and activate a short cut scene on the other side.
Descend into the clock room below to visit the magic font towards the left and turn around to freeze the electrified traps above with your stopwatch, then ascend the next two overhead ledges and collect the bestiary card near the wall.
Wait for the first trap above to disappear, then drop a charged stopwatch to ascend the next three ledges above safely and use the purple mechanism at the top to activate another cut scene in which you upgrade the Combat Cross.
Approach the magnetic rail on your right to ride it across the gap and proceed forward to enter the Toy Maker’s Workshop.
Castlevania: Mirror of Fate Walkthrough
Toy Maker’s Workshop / Carousel’s Engine
Proceed forward to ride the next magnetic rail above and drop onto the platform that descends in front of you at the end, then step onto the landing below and ascend the pair of overhead ledges to continue moving towards the right at the top.
Activate wolf mode to help clear out the next wave of puppets and magic books that appear ahead, then continue moving towards the right to jump onto the platform that descends in front of you at the end and ride it to the magnetic rail above.
Ride the series of magnetic rails forward and stop at the end of each them to wait for the electrical trap to disappear before continuing forward again, then drop onto the next ledge below to visit the health font ahead and grab the railing above to reach the wooden platform at the top.
Grab onto the wall across from you to scale it and head left at the top to ride the next magnetic rail above the electrified floor, then drop down on the other side to proceed forward and reach the Carousel’s Engine.
Use mid-air whip combinations to eliminate the hunchbacks in front of you and climb the next wall ahead to activate wolf form at the top, then knock down the barrier on the left to open the chest on the other side and increase your maximum amount of magic.
Move back towards the right to ride the magnetic railing across the next gap and proceed forward to activate a short cut scene, then change your viewpoint and read the scroll behind you to get a clue.
Push the mirror in front of you forward until it’s directly below the rightmost one above, then jump up to the ledge on the left and pull the lever overhead.
Drop beside the mirror below you and push it against the left-side wall, then cross to the opposite side of the room and pull the other lever.
Pull the mirror beneath you towards the left to shoot the laser beam across to the other side of the room, then return to the ground floor below and move the nearby mirror to the center of the area to create a criss-cross effect.
Jump back to the ledge above on the left and pull the overhead lever again, then cross to the opposite side of the room and push the mirror against the far wall.
Cross to the opposite side of the room again and pull the mirror away from the wall to line up with the next reflector above, then drop back to ground level and push the mirror beneath the rightmost reflector overhead.
Return to the right-side ledge above and pull the mirror away from the wall so that it aligns with the uppermost reflector in the top corner of the room, then jump onto the highest platform in this area to push the leftmost mirror forward into the laser beam and pull the rightmost mirror beneath the inside reflector.
Push the right-side mirror on the second story against the wall and pull both levers to activate a cut scene.
Castlevania: Mirror of Fate Walkthrough
Resurrection Room / Vampire’s Tower
Proceed forward to visit the health font and read a scroll, then drop into the next room below and continue moving towards the right to encounter the boss.
Dash backwards and execute jumping whip combinations to hang in the air above the monster’s initial attack, then activate wolf mode and attack the creature at close-range.
Stand still in front of the creature each time it executes a somersault attack to let the boss pass completely over you, then continue striking the enemy repeatedly to activate the next short action sequence.
Charge your stopwatch to slow down the spinning laser traps and sprint beneath the beam towards the generator on the left to destroy it with combination strikes, then hold the indicated button to deflect the boss’ next attack and jump-dash over him to avoid the energy blast he releases from his tail.
Activate wolf mode to continue striking the boss at close-range and watch another action sequence unfold, then drop your charged stopwatch again to destroy the generator on the right and tap the indicated button repeatedly to escape the electricity trap.
Use mist mode to pass through the boss and strike him from behind, then activate wolf mode to finish draining the creature’s health with combination whip attacks and activate the next cut scene.
Tap the indicated buttons as they appear to finally defeat this enemy and obtain the Demonic Wings, then use them to fly up onto the next ledge above on the right and proceed forward through the elevator to increase your maximum amount of life.
Enter the elevator behind you to ride it to the next floor above and reach the Vampire’s Tower, then exit the car to proceed towards the left and fly over the locked door at the end to approach the wall on the other side.
Ascend the wall to visit the health font above and pull the lever beside you to open the next door ahead, then proceed forward through it to reach the room at the end and encounter a new breed of harpy demon.
Use a series of jumping mid-air striking combinations to bring the harpy down to the ground, then finisher off by blocking any sword attacks and continuing to lash out with your whip or bat projectiles.
Activate wolf mode to help you finish clearing the are of harpies and proceed back towards the left to visit the health font again, then head right to continue fighting your way forward and climb the steps at the opposite side if the room.
Turn around to fly up onto the next ledge above and clear the gap beside you to reach another overhead landing, then climb across the rope on your left by waiting for each flame burst to disappear and maneuvering between them.
Jump to the ledge above on the left and fly across the gap beside you to grab onto the opposite wall, then scale it as the steam traps dissolve to use the swing point at the top and ascend the chain to reach the next staircase.
Climb the steps to move through the doorway at the top and reach the Throne Entrance.
Castlevania: Mirror of Fate Walkthrough
Throne Entrance / Vampire’s Tower
Climb the steps in front of you to proceed forward and drop your stopwatch to help eliminate the next wave of harpies that appear ahead, then continue moving towards the left to scale the wall at the end and jump to the opposite ledge at the top.
Clear the gap beside you on the right to proceed forward and eliminate the fire-breathing demon that blocks your path, then dash beneath the gate ahead to climb the steps on the other side and drop through the next shaft below to open the chest at the bottom.
Ascend back to the ledge above and climb the overhead staircase to defeat the harpy that appears at the top with the help of your stopwatch, then proceed forward to visit the next health font and activate a short cut scene.
Visit magic font ahead to scale the wall behind it and swing through the stained glass window at the top to reach the floor on the other side below, then eliminate the next harpy that appears in front of you and continue moving towards the left to descend a staircase.
Jump across the gap at the bottom of the steps to read the scroll on the opposite ledge and drop to the ground below, then activate mist mode to proceed forward through the closed door ahead and eliminate the fire-breathing demon on the other side.
Proceed forward to drop down through the gap in front of you and eliminate the harpies below by first using the stopwatch, then activate wolf mode to break apart the barrier ahead and continue moving towards the left to re-enter the Vampire’s Tower.
Swing across the gap in front of you to grab onto the opposite wall and climb down it to reach the ground, then proceed forward to drop between the ledges below and eliminate the fire-breathing demon to continue moving towards the right.
Fly and swing across the next three gaps ahead to pull the lever on the other side, then use the magnetic rail above to reach the overhead platform at the top and pull on a second lever.
Continue moving towards the left to fly across another gap and read the scroll on the other side, then use the magnetic rail above to reach the ledge at the end and pull a third lever to open the next two doors in front of you.
Ride the magnetic rail back to the ledge below and fly across the gap beside you, then head right to use a second magnetic rail above and reach the ledge on the other side.
Jump halfway across the gap in front of you and latch onto the overhead swing point, then land on the ledge above to your left and move through the recently opened doorway to clear another gap.
Proceed through the doorway on the opposite ledge to reach the altar in the next room and press the indicated button to obtain the first Blood Orb, then pull the nearby lever to open the gate in front of you and continue moving towards the left to fly across the gap at the end.
Climb the steps in front of you to jump onto the ledge above and drop through the next shaft below to head right at the bottom, then make your way to the floor below and eliminate the nearby fire-breathing demon.
Drop over the ledge on the right to reach the floor below and fight through the doorway on the left to visit the next health font, then descend to the floor below and fly above the entrance to the right.
Dash forward past the enemies in the next series of rooms ahead and enter the elevator at the end, then ride it to the floor below to return to the Resurrection Room.
Castlevania: Mirror of Fate Walkthrough
The Second Blood Orb
Exit the car to drop into the room below and eliminate the surrounding puppets, then proceed forward to climb up onto the next ledge above and continue moving towards the left to visit another health font.
Proceed forward to enter the elevator ahead and descend to the floor below to reach the Carousel’s Engine, then exit the car to read the scroll in front of you and continue moving towards the left to ride the magnetic rail at the end.
Drop to the ground below and head right to enter the Toy Maker’s Workshop, then use the magnetic rail in front of you to clear the electrified floor and proceed forward to drop through the next gap in the floor.
Use the next magnetic railing below on the left to reach the opposite ledge and proceed forward to cross another series of rails as the electrified traps disappear, then land on the moving platform at the end and ride it downward to enter the red-lit room beside you.
Dash past the puppets in this room to drop down over the opposite ledge and hang off the wall in front of you to land on the moving platform below, then ride it towards the right to use the next magnetic rail above.
Propel yourself forward to land on the next moving platform below and ride it towards the right to latch onto the swing point above, then scale the wall in front of you as the electrified traps disappears to fly to the ledge above on the left and activate mist form to pass through the locked gate ahead.
Open the chest on the other side to increase your maximum amount of ammunition and head back across the electrified floor below to return to the previous ledge above on the right, then wait for a moving platform to descend in front of you and ride it to the next magnetic rail overhead.
Ride to the opposite ledge and proceed forward to return to the Clockroom, then cross the next two gaps ahead using the magnetic rails above and reach the landing in the upper left corner of this room.
Increase your maximum amount of magic and turn around to drop down over the ledge, then use the demon wings to glide safely to the floor below and proceed forward to climb up onto the landing at the end.
Swing across the gap in front of you to visit the health font on the other side and turn around to drop to the floor below, then head right to return to the Terrace and proceed forward to slide down the walls of the next shaft.
Proceed left at the bottom of the shaft to return to the theatre and continue moving towards the left to fight past a wave of puppets in the next room, then climb down over the ledge at the end of the hall and head right to descend a pair of staircases.
Move through the open doorway on the left to reach the Kitchen and proceed forward down the steps to collect the Bestiary card at the bottom, then jump over the next gap in front of you to fly up onto the ledge above and climb up the shaft to activate wolf mode at the top.
Break down the barrier on the right to open the chest on the other side and descend back down the entire length of the previous shaft to reach the floor at the bottom, then proceed towards the right and make your way down the next series of staircases.
Approach the next iron gate below on the right and activate mist mode to pass through it, then eliminate the group of hunchbacks ahead and jump to the next ledge above.
Use the cage against the wall to fly up to the next magnetic rail above on the left and ride it forward to land on the wooden platform at the end, then approach the hunchback to activate an action sequence and tap the indicated button to acquire the second Blood Orb.
Castlevania: Mirror of Fate Walkthrough
Return to the Throne Entrance / Throne Room
Drop back to the floor below and head right to climb down over the next ledge at the end, then fall into the water and dive beneath the surface to swim through the tunnel on the left.
Surface on the other side of the tunnel to open the chest on the overhead ledge and increase your maximum amount of ammunition, then swim back the way you came to return to the previous room above and move left across it to pass through the gate at the end using mist mode.
Ascend the series of staircases above to pass through the next open doorway on the left and climb up the next shaft ahead to proceed towards the right at the top, then continue moving forward to return to the Theatre.
Climb the next staircase to enter the theatre area above and turn around to jump onto the overhead reach, then proceed towards the right to enter the teleporter and travel to the Toy Maker’s Workshop.
Use the magnetic rail on your left to travel above the electrified floor and enter the Carousel’s Engine on the other side, then proceed forward to climb the next wall in front of you and use another magnetic rail at the top to clear the gap on the right.
Proceed forward to enter the elevator at the opposite side of this area and ride it to the next floor above to return to the Resurrection Room, then exit the car to head right and climb up onto the far ledge.
Enter the next elevator to ride up to the Vampire’s Tower and head left to eliminate a harpy, then proceed forward to encounter a pair of fire-breathing demons and activate wolf mode to help you defeat them.
Fly over the next doorway ahead to reach the landing above on the right and proceed forward across the chandelier in front of you to land on the opposite ledge, then drop your stopwatch to navigate past the fire traps and collect the bestiary card.
Swing across the next gap ahead to activate wolf mode and break down the barrier on the opposite ledge, then proceed forward to swing over to the opposite wall and climb up it to open the chest at the top.
Make your way back across the previous gaps and chandelier to continue ascending the shaft on the other side, then enter the room above on the right and fight past the harpies to climb the staircase at the end.
Jump to the next ledge above and climb towards the right along the rope over to reach the opposite landing, then ascend the wall ahead to reach the staircase across from you at the top and return to the Throne Entrance.
Proceed forward and use the swing point at the opposite end of the room to reach the ledge above, then head right across the gaps to ascend the next staircase and approach the enormous door at the top to place the two blood orbs in the statues on either side of it.
Following the next cut scene, jump backwards from the boss to avoid his initial ground pound attack and vault over him repeatedly to execute mid-air whip strikes.
Wait for the boss to levitate and quickly dash beneath him to avoid the red energy projectiles he emits, then use upward strikes to continue draining the enemy’s life and roll away to a safe distance after he lands.
Try to keep the enemy between you and your teammate so that attacks come from both sides, then continue draining his health by throwing bat projectiles at the boss and prepare to block any attacks he attempts at close-range.
Activate wolf mode to inflict further damage onto the boss until the next cut scene is activated in which your partner to removed from the fight, then continue lashing out with whip strikes and rolling away from the enemy’s projectile assaults.
When you see the boss form a ball of energy in his hands, quickly jump over him to avoid the impending dash attack and launch a volley of bat projectiles upon landing.
Continue flying above the dash attacks, ground pounds and between the red projectiles to survive this battle, then activate mist mode to pass through the boss and regain as much health as possible.
While under mist mode, attack the boss with a combination of whip strikes and bat projectiles until the next cut scene is activated in which a possessed Simon approaches you.
Afterwards, block or roll away from every attack attack that Simon throws at you to take a hold of him and tap the indicated button to start removing the spell.
Repeat the previous step until the spell possessing Simon has been lifted, then tap the indicated button to free yourself from the boss’ grasp and continue inflicting damage on him with whip combinations.
Activate mist or wolf mode to continue draining the boss’ health with the help of your teammate and finish defeating him with a few extra volleys of bat projectiles, then press the indicated buttons as they appear to chase the enemy around the throne room and allow Simon to kill him to complete ACT 2.
Castlevania: Mirror of Fate Walkthrough
Castle Entrance / Unholy Church
After the opening cut scene, make your way forward across the bridge to enter the castle grounds and use jumping combination strikes to clear out the first wave of demons you encounter ahead.
Continue fighting your way forward to encounter a heavily-armed horned demon on the steps ahead, then roll backwards from the enemy’s initial strike and move in at close-range to attack with multiple sword combinations.
Roll backwards and double-jump each time the demon rears its axe back to dodge his impending attack, then use jumping combination strikes to land behind this enemy continuously and assault his back until you are able to remove the monster’s green energy source.
Proceed forward up the steps ahead to read the scroll at the top and continue moving towards the right to enter the Unholy Church, then cross to the opposite side of the room and approach the purple-glowing device against the wall to obtain the Boomerang.
Follow the on-screen instructions to eliminate the flying demons that appear with your boomerangs and mid-air combinations strikes, then double-jump up onto the indicated broken ledge and use the swing point above on the right to reach the chandelier across from you.
Swing to the next wooden landing ahead to read the scroll and continue moving forward across the chandeliers to reach the opposite concrete ledge, then turn around to grab the smaller circular platform above.
Clear the next two gaps in front of you to climb up the wooden structure on the opposite wall and use the chandelier at the top to reach the wheel below on the right, then press the indicated button to release the rope and hang from the swing point that appears to descend back through the room.
Return to the ground below to drop through the hole you just created in the floor, then head left to enter the Crypt.
Castlevania: Mirror of Fate Walkthrough
Crypt / Entrance Bridge
Proceed forward to descend the next staircase and read the scroll at the bottom, then continue moving towards the right to reach the next locked gate and jump up to the ledge above on your left.
Continue ascending the shaft to enter the Cemetery above and left at the top to collect the next bestiary card, then proceed back towards the right to increase your maximum amount of ammunition.
Return to the Crypt to drop back beside the locked gate below and head left to clear out another wave of enemies, then climb down through the next shaft in front of you and fight your way towards the left to enter the underground tunnel.
Crawl towards the right through the tunnel to drop over the next ledge ahead and turn around to swing across the gap in front of you, then pull the lever on the other side to open the locked gate above.
Make your way back to the level above to pass through the previously locked gate and proceed forward to activate a short sequence, then cross the room ahead to pull the lever on the other side and continue towards the right to reach the Entrance Bridge.
Proceed forward to the next locked gate and turn around to climb up onto the ledge above, then ascend the overhead shaft to continue moving towards the right at the top and activate a short sequence.
Climb the staircase ahead to proceed forward at the top and activate a cut scene in which you encounter a large executioner-dressed demon, then roll backwards to avoid the initial axe attack and move in at close-range to assault the monster with combination strikes.
Continue attacking the large demon until he picks you up with one hand, then press the indicated buttons to escape his grasp and roll away again to a safe distance.
Inflict further damage on the enemy from distance by tossing repeated boomerangs until the demon roars at you, then follow the on-screen prompts to double-jump over the charging monster and continue attacking at close-range.
Dodge another charging attack and continue inflicting damage on the monster until he roars at you again, then follow the on-screen prompts to roll beneath the demon’s jumping assault and return to close-range striking combinations.
Finish draining the monster’s health and press the indicated buttons to finally kill it, then proceed forward past the gate that descends to climb the next staircase ahead and activate a cut scene at the top.
Afterwards, make your way back down the previous staircase to eliminate the enemies that appear at the bottom and descend through the shaft ahead as the fire trap disappears to reach the tunnel below.
Eliminate the surrounding enemies to proceed towards the left and swing across the next gap ahead, then read the scroll on the ledge below and turn around to climb down over the edge of the wooden platform.
Climb across the next rope on your left by waiting for the series of fireball traps to momentarily pause each time, then ascend the wall on the other side to reach the rock ledge above on the left.
Descend through the next shaft ahead as the fire trap disappears to eliminate the enemy below and proceed forward to activate a short sequence, then jump across the gap in front of you to grab the opposite wall and make your way down it to turn around at the bottom.
Swing across the gap in front of you to reach the rock ledge on the other side and collect the Light Magic Medallion, then swing back to the previous landing and enter the red lit tunnel above to fight your way past the next enemy.
Proceed forward to approach the symbol on the wall and use light magic to open the next door ahead, then continue moving towards the left to return to the Crypt.
Jump to the wall above on the right to land on the statue’s arms across from you and use light magic to open a blue-lit below, then drop down through it to enter the Crypt’s Labyrinth.
Castlevania: Mirror of Fate Walkthrough
Crypt Labyrinth / Lady of the Crypt’s Chamber
Proceed forward to drop over the next two ledges ahead and slide through the next shaft on the left to jump into the opening across from you at the bottom, then continue moving towards the right to read the scroll at the end and ascend back up the previous shaft.
Drop over the ledges to your right and fight past the zombies waiting below to proceed forward, then fly across the gap to reach the locked door on the other side and climb up onto the landing above it.
Descend the shaft in front of you to jump towards the right at the bottom and climb down over another ledge ahead to attach to the next swing point on the opposite wall, then launch yourself onto the landing below to the left and turn around.
Climb down between the walls below to proceed through the next tunnel on the left and eliminate the group of zombies that appear beneath the spiked ceiling, then continue moving forward to visit the health font on the ledge above.
Drop through the shaft below on your left to enter the Lady of the Crypt’s Chamber and activate a short sequence, then roll backwards repeatedly from the charging enemy in front of you and wait for her to descend into the ground.
Stay on the move until the demon emerges from the ground again, then stand your ground to block her initial attack and respond with a few combination strikes to start inflicting damage.
Repeat the previous step until the she-demon charges a dash attack, then jump over the incoming enemy and continue your assault as soon as you turn to face her again.
Continue the previous line of offensive and defensive strategies until the enemy is finally defeated to activate a cut scene in which the demon reveals a larger creature underneath, then press or hold the indicated buttons to crawl forward across the monster’s tail without being thrown off.
Follow the on-screen prompts as they appear to travel along the creature’s back, then eliminate the smaller enemy attached to its head to activate another action sequence and reach the Entrance Bridge.
Castlevania: Mirror of Fate Walkthrough
Castle Hall / Games Room / Guards Room
Move through the broken doorway ahead to enter the Castle Hall and proceed forward to encounter the large heavily armored enemy, then jump over its initial mace attack and execute mid-air combination strikes to start inflicting damage.
Continue double-jumping either over or directly in front of the large armored enemy and execute multiple mid-air combination strikes to defeat this demon, then proceed forward to activate the next cut scene.
Afterwards, continue moving towards the right to eliminate the next wave of flying demons and climb the steps ahead to activate a short sequence.
Use the overhead swing point to make your way across the chandeliers above on the left and reach the opposite ledge to jump over the next barrier in front of you, then push the nearby block forward to open the hidden chest and use the crate to clear the top of the locked gate ahead.
Swing across the next gap to collect the bestiary card and land on the opposite ledge to proceed forward, then read the nearby scroll and continue moving towards the left to climb over the wooden scaffolding in front of you.
Crawl beneath the cement debris to pull the lever on the other side and return to the ground below, then fight your way back towards the right to pass through the doorway you just opened and enter the Games Room.
Proceed forward across the game board below to encounter the next wave of enemies and use mid-air combination strikes with projectile attacks to start clearing them out, then climb down through the shaft that appears in the floor and drop onto the moving bridge beneath you.
Jump to the rope above on the right to climb forward across it and slide down the wall at the end to read the scroll at the bottom, then ascend back up the previous shaft to return to the moving bridge and ride it towards the left to use the next pair of swing points ahead.
Land on the opposite ledge to climb down the next shaft in front of you and visit the health font at the bottom, then jump across the series of bridge on the right to drop off the one at the end and quickly launch yourself up towards the right before being crushed in the gears below.
Pull the nearby lever and jump back across the moving bridges on your left as they each shift towards you to return to the previous ledge, then pass through the open doorway ahead to reach the Guards Room and descend the staircases below to visit the magic font at the bottom.
Move right to collect the next bestiary card above and head back towards the left to defeat the next wave of shielded enemies with the help of blocking maneuvers, then proceed forward to pull the lever against the far wall and start attacking the hunchbacks that appear behind you.
As you eliminate the hunchbacks, watch the heavily-armored enemy in the back ground and roll backwards each time you see him swing his mace in your direction.
Finish clearing out the group of hunchbacks and use mid-air combination strikes to defeat the heavily-armored demon that emerges from the background, then proceed towards the right to pass through the green-lit gateway you opened and enter the Cells.
Castlevania: Mirror of Fate Walkthrough
Cells / Vertical Prison
Enter the mine-cart ahead and follow the on-screen prompts to propel yourself forward as the fireballs pass by in front of you, then double-jump across the next gap to land in another cart and continue towards the right to reach the opposite ledge.
Proceed forward up the steps to encounter the serpentine enemies and jump over them to stay across the screen from them, then clear out the demons with combinations strikes and continue moving towards the right to reach the next staircase above on the left.
Approach the purple-glowing mechanism ahead to obtain the Electric Bomb and move back towards the right to eliminate another pair of serpentine enemies with your new explosive devices, then climb up onto the next ledge above and proceed forward to enter the elevator.
Ride the next two elevators to the floor below and head left to jump up onto the ledge above, then ascend the overhead shafts to read the scroll at the top and drop back to the previous floor to enter the third elevator.
Descend to the next floor below to drop over the ledge in front of you at the bottom and proceed forward to the locked door ahead, then use magic to open it and read the scroll on the other side.
Enter the previous elevator you passed through to ride to the next floor below and head right to eliminate a group of serpentine demons, then proceed forward to reach the Vertical Prison.
Use the next two magnetic rails ahead to reach the ledge above and visit the health font, then drop into the water below to dive beneath the surface and swim down through the submerged tunnel in the corner.
Surface on the other side of the tunnel to increase your maximum amount of magic and return to the previous underwater area, then swim towards the left to descend through the shaft in the floor and continue moving in a downward direction to use the bubbler below in the corner.
Swim back towards the right to pass through the first tunnel above and ascend through the next shaft in the ceiling to continue moving upward to the right, then surface to climb up onto the dry ground ledge and pull the nearby lever.
Jump up through the grate that you just opened and head right to approach the partially closed gateway, then climb the wall above it to reach the next ledge and move across the cages on your left to read another scroll.
Continue towards the left to climb the wall at the end and use the magnetic rails at the top to proceed towards the right, then land on the opposite ledge to read the next scroll and ascend the shaft above the barrier ahead.
Head left to swing across the next gap and climb up the opposite wall to reach the rope at the top, then proceed along it towards the right to land inside the cage below and examine the corpse to obtain the Shadow Magic Medallion.
Proceed forward across the rope to read another red-glowing scroll on the other side and turn back around to climb down over the ledge ahead, then descend the wall to swing over the previous gap at the bottom and use shadow magic on the next object to open the door in front of you.
Read the scroll on the other side of the door and turn around to drop over the ledge behind you, then move through the tunnel beside the series of cages and use light magic to open the next gateway ahead.
Ascend the ledges above to read the last red-glowing scroll at the top and drop back through the previous shaft to return to the lowermost floor in the Vertical Prison, then eliminate the surrounding demons and crawl beneath the partially closed gate on the right.
Read the scroll on the other side and approach the four object puzzle ahead to solve it in this manner with the designated magical amulets: Shadow-Light-Shadow-Light, then pass through the door that opens ahead to enter the Abandoned Mine.
Castlevania: Mirror of Fate Walkthrough
Abandoned Mine / Clock Tower
Read the next scroll below and dive beneath the surface of the water ahead to move right across the bottom, then ascend along the ceiling to use the bubblers above and continue swimming forward to reach the dry ground ledge on the right.
Proceed forward to eliminate the next wave of serpentine demons and continue ahead to activate a short sequence, then climb up the wooden structure behind you to jump across the gap at the top and read the scroll on the other side.
Jump back across the previous gap to enter the mine cart below and propel yourself forward along the tracks as each fireball passes in front of you, then continue moving towards the left to eliminate a group of flying demons and turn around to climb up onto the next ledge above.
Ascend between the wooden ledges above to visit the magic font at the top and proceed forward to drop onto the walkway below, then pull the next lever ahead to activate a short sequence.
Afterwards, use mid-air combination strikes to inflict damage on the enormous executioner demon and avoid his falling axe attacks.
Wait for the executioner to charge his dashing attacks and jump over him to immediately continue your previous mid-air assault, then watch the background for the hunchbacks throwing projectiles and roll backwards to avoid the fire.
Jump backwards to avoid the executioner’s diving attacks and continue attacking with combination strikes to eventually defeat this enemy, then pull the nearby lever again to open the door ahead and pass through it to upgrade your combat cross on the next purple-glowing object.
Use your combat cross to pull down the barricade in front of you and proceed past it to climb the next shaft above, then ride the elevator at the top to reach the Clock Tower.
Proceed towards the left to grab the block across from you and pull it backwards, then use the crate’s wind to reach the ledge above and swing past the steam traps ahead to land on the other side.
Enter the elevator on the other side to ride it to the next ledge above and proceed forward at the top to uncover the wind block below, then make your way past the steam traps on the right to reach another crate and push it against the far wall to block the red laser beam.
Pull the nearby lever and head back towards the previous wind block to grab one of the moving platform above, then ride it forward to land on the opposite ledge and jump across the gap in front of you to avoid the electricity below.
Land on the moving platforms as they emerge from the walls to ascend the shaft above and visit the health font at the top, then ride on top of another series of moving platforms ahead to reach the ones descending vertically at the end.
Climb up the series of descending platforms to swing across the gap at the top and proceed forward on the other side by using the platforms above to pass beneath the steam traps, then enter the next elevator to ride it to the floor above and jump to the wind block on the left.
Land on the green-lit moving platform to reach the circular rotating ones above and move across them to read the scroll on the right, then continue around the moving platform wheel to ride the magnetic railing on the left.
Ride the next series of descend platforms to reach the ledge below on the left and remove the cage from the opening ahead, then pull the lever that’s been uncovered and climb the wall above as the electrical traps disappears to proceed right at the top.
Read the next scroll and use your combat cross the pull down the barrier ahead, then use shadow magic on the first object and light magic on the second one.
Turn around to jump up onto the small circular platform above and move across the series of them above to reach the overhead ledge on the right, then approach the wall beside you to activate a cut scene and acquire the Speed Boots.
Follow the on-screen prompts to jump across the gap beside you using the speed boots and proceed forward on the other side to enter the Belfry.
Castlevania: Mirror of Fate Walkthrough
Belfry / Abandoned Mine
Continue moving towards the left to eliminate another heavily-armored enemy and a group of flying demons as you have before, then proceed forward through the next elevator ahead and clear out another wave of enemies on the other side.
Proceed forward to reach the outside area and read the scroll at the opposite end, then head back the way you came to defeat a pair of heavily-armored enemies with the help of your electric bombs and mid-air striking combinations.
Return to the previous room to enter the elevator ahead and ride it to the next floor above to activate a cut scene, then slide down the wall in front of you and attach to the swing point on the left before hitting the gears below.
Swing to the opposite wall on your left to slide down it and transfer between the series of ones below without hitting the gears, then use the swing points at the bottom to continue your descent and ride the next magnetic railing to slide down another wall.
Descend the staircases below and smash past the obstacles to stay ahead of the rolling bell, then slide down another series of walls to ride the halfway across the next magnetic railing on the left and wait for the spinning blades ahead to collapse before proceed forward.
Continue your descent through the belfry to activate a cut scene at the bottom and return to the Abandoned Mine, then read the scroll on your left and head right to ride the next elevator to the floor below.
Exit the elevator to pull the next lever ahead and ride the wooden platform beside you to the ground below, then proceed towards the left to ascend on another platform and continue moving forward past the steam traps at the top.
Descend slowly through the tunnel below on the left as each fire or steam trap disappears and pull down the barrier at the bottom to eliminate the serpentine demon on the other side, then proceed forward to climb over the ledge ahead and transfer onto the magnetic railing across from you.
Propel yourself forward across the magnetic railing to enter a teleporter on the other side and travel back to the Games Room, then pull the lever on the left to ascend the next shaft above and visit the magic font at the top.
Use the speed boots to clear the next gap ahead and open the chest on the other side to increase your maximum amount of magic, then re-enter the teleporter to return to the Abandoned mine and proceed forward to ride the magnetic rail across the chasm in front of you.
Fight past the flying demons ahead to enter the next mine cart and propel yourself forward to reach the opposite ledge, then climb down over the ledge in front of you to land on the ground below and use the speed boots to clear the chasm on the right.
Approach the wall on the right to open the next doorway and pass through it to activate a cut scene.
Castlevania: Mirror of Fate Walkthrough
Mirror of Fate: Final Boss Battle
During the next cut scene, press the indicated buttons to ride the flying creature through the boarded up window and continue following the on-screen prompts to navigate the belfry tower above.
Spin your joystick as indicated to knock the flying monster out of the air and follow the next sequence of on-screen prompts to defeat this enemy for good.
After returning to the Belfry, enter the elevator ahead to ride it to the next floor above and use your speed boots to proceed forward across the gap ahead.
Pass through the next two open doorway in front of you to activate a cut scene and begin the final boss fight, then select shadow magic to counter the enemy’s light magic and jump over his initial projectile blade attacks.
Keep a safe distance from the boss until he teleports, then quickly move in at close range to start dealing damage with combination sword strikes and block any counter-attacks that follow.
Roll backwards as the boss charges his weapon to avoid his oncoming attack and move back in to continue your assault at close-range, then back the enemy against the wall and jump over another volley of blade projectiles.
Continue draining the boss’ health until he switches over to shadow magic and charge your weapon with light magic as a counter-measure, then jump backwards from the enemy’s initial series of attacks and roll away from the light beams he raises from the floor around you.
Use mid-air combination strikes as you jump over the boss to continue inflicting damage and avoid the enemy’s various attack patterns, then switch your magical abilities again to resume a close-range assault and executing repeated blocking maneuvers.
Repeat the previous offensive and defensive strategies listed above to eventually drain the boss’ health completely, then press the indicated buttons during the next action sequence and dodge the oncoming fireballs as you fall back towards the ground to win this battle and finish the game.


 10 Konami Games That Need a Good Revival
 How to Spot a Phishing Email
 What We Want from Diablo III: 10 Must-Have Features
 How to use TV, Keyboard and mouse with PlayStation 4
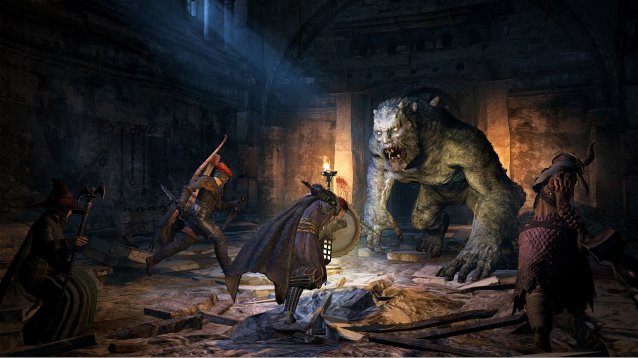 Review: Dragons Dogma Dark Arisen