How to create your PS3 Themes
Many of us always feels the need to have our own style of theme on our PS3. PlayStation 3 has a feature of allowing gamers to create their own theme and install them on it. The step by step procedure for doing the same is explain below.
First of All the Requirements:
- Any Image Editing Program for example MS Paint, Adobe Photoshop.
- Provided Compiler Program
Downloading the Zip File:
- Download the Zip file of HowtoMakePS3Themes.zip which is of size 3.77MB from this link Download HowToMakePS3Themes.zip, this zip file consist of all the necessary and required files and step of the process.
Step 1: Creating the Theme:
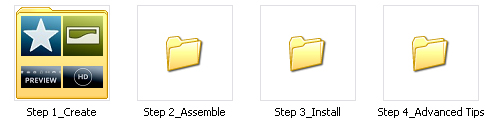
The Zip file downloaded will consist of four folders named as Step 1_Create, Step 2_Assemble, Step 3_Install, Step 4_Advance Tips.
A) For Creating Icons:
- In the first folders, you will find images that make XMB, its Sub-icons, background wallpapers. Important to note first is that do not change the name of these files and folders as it will cause problem ahead.
- Select the icon you like to customize with and open that particular icon in the image editing program.
- Do all the necessary changes with the icon according to your need like change color, add effects or even replacing the image completely with personal photo of yours.
- The dimension of the icon should not be alter, if it is 140 X 140 pixels before editing than it should be of the same size after editing also.
- Once done with the editing overwrite the original icon with the new custom icon of yours.
- Save the File as "PNG" file and not any other file type.
B) For Creating Background follow tha same above step and make this necessary changes which is difference:
- Save the File as a .JPG file and not the PNG file like the icons.
There will be one more file named “PS3Theme_template.xml” in the Step 1_Create folder which will be used in Assemble process.
Step 2: Assemble :
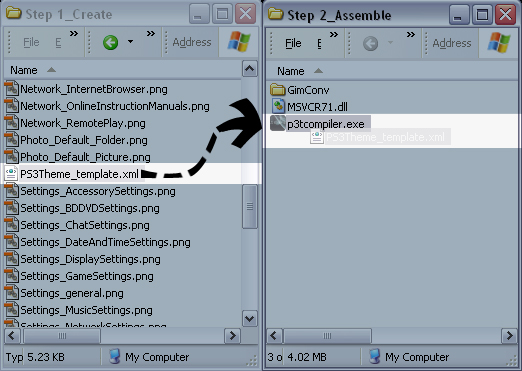
Done with creating the new icons and background, now the next step is to get the whole thing into one and making a actual Theme file. This step will be more easy when user has two window open, where one window showing the content of Step 1_Create and the other window showing the content of Step 2_Assemble.
- Click and drag the “PS3Theme_template.xml” from “Step 1_Create” folder and drop it onto the file name “p3tcompiler.exe” in the “Step 2_Assemble” folder.
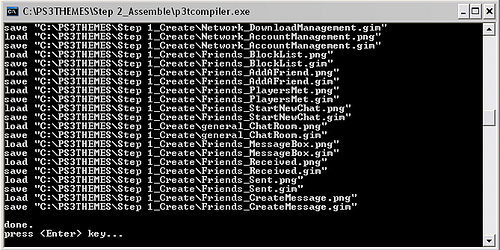
- As you do this, a new window will appear which will show the progress of the program as it put all the things together of your theme.
- If an error is detected the program progress will be halted and a file causing the error will be notified to the user.
- When the progress of the program has done the assembling successfully a notification is displayed which will prompt to press ENTER to exit the program.
Step 3: Install
- Go back to “Step 1_Create folder, which will now consist of more new files with GIM extension which are special temp file. A file name “PS3Theme_template.p3t” will also be there which is nothing but the new Theme file.
- Copy this file to a USB device or to memory sticks.
- Now connect the device to your Playstation 3 or insert the memory stick into the reader.
- Go to Setting and select the option "Theme"
- You will find a Install option on top, once you have properly installed you theme on to your Playstation 3, you can select it now from Theme list and apply it.
Step 4: Advance Tips: The fourth folder "Step 4_Advance Tips" consist of detail information for those user who want to do more customization, it consist of details like:
- change your Theme’s title
- change your Theme’s preview art
- change your Theme’s font
- change your Theme’s color selection
- change your Theme’s Author avatar
- create a Theme with random background images


 Love South Park? Buy Stick of Truth. Now. (NSFW)
 Gamings Top 10 Most Controversial Scenes
 Destiny: Moon, Archers Line and The Summoning Pit Gold Loot Chest locations Walkthrough Guide
 Bloodborne: The Old Hunters – Here's how to get the Milkweed Rune
 Fallout 4: Minimum / Recommended PC Specs and useful info