Are you excited to play Until Dawn? Well, As per the developer Supermassive Games, the game was designed with 6 different endings. You have to play the game multiple times to avoid missing out any content in a single player. Until Dawn has a very strict auto-save process that will prevent players from reloading their previous save file if they regret an in-game decision they have made and need to change. The only way now to change you decision is by Restarting the game.

To avoid playing the game multiple times, here is the guide for all the collectibles in the Game. This will prevent you from missing any valuable content. Until Dawn has 107 collectibles which are 30 Totems and 77 Clues.
THIS IS VERY IMPORTANT:
If you want to collect all the collectibles you must make everyone survive. Any single characters die and this will lead to missing the collectible(of the character died). The other way to collect the missed items is to select the episode in the story and find it(Only available complete the episode). You can also use the save episode to save the character from dying. Every time you collect an object your progress will be saved automatically. You can also keep a track of you current progress in collectible Tacker inside the Main Menu.
The 77 Clues are divided into 3 categories: (20) The Twins Clues, (27) 1952 Clues and (30) The Mystery Man Clues. The Location to all the 77 clues displayed according to the Chapters.
Chapter 1:
Mystery Man Clue 1: Wanted Poster
The first clue is just beside the cable car station. All you need to do is peek around when you head back are with Chris.

Chapter 2:
Mystery Man Clue 4: Axe Holder
When you are searching for the lodge check the windows at the back of the lodge and you will find the Clue.
Mystery Man Clue 2: Newspaper Fragment
You need to Enter the Garage and the room on the left have the Clue.
;
Twins Clue 4: Family Portrait
Check the Hallway after you exit the garage.
Mystery Man Clue 3: Answerphone Message
Just head to the opposite as you enter the Darkened Living room and you will notice a small dining room is a phone. On the phone, you will hear your next clue.
Twins Clue 3: Prom Night Photo
Now Exit the dining room and stick to the right, you will come across to some closed double doors. There is your next clue.
Twins Clue 2: Beach Photo
When you go down in the center, the next clue is on the table next to the cinema room doors.
Twins Clue 1: Film Trophy
On the right side of the balcony when you overlook the dining room entrance. The next clue is on the Shelf.
Mystery Man Clue 5: Cigar Stub
In the Mines, a beam will fall as you move upwards. Take right as you reach on the Top and you will find the next clue on the drum.
;
Mystery Man Clue 6: Mystical Symbol
The next clue is in the same area as the previous one and is on the rear wall.
1952 Clue 1: Mine Danger Map
Search on the top of the table into the mine.
Mystery Man Clue 8: Postcard
When you have the control on Sam, don't enter the bathroom take right instead and you will enter Hannah's bedroom. This next clue is beside her bed.
Twins Clue 5: Tattoo Card
On the Dresser right next to Hannah's bed.
Twins Clue 6: Compatibility Test
Check the Closet in Hannah's Bedroom.
Chapter 3:
1952 Clue 2: Old Mask
As you try to pass the shacks you see a short path to the cabin. Enter the cabin and you will find the next clue.
Mystery Man Clue 7: Native American Book
In the same cabin check on the northeast corner of the room, you will find the book.
Twins Clue 7: Tennis Photo
Check the top of the furniture in the Hallway
Twins Clue 9: Hannah's Glasses Case
When Ashley, you need to head opposite of the stairs and the clue is on the desk.(Near the Bookshelf).
Mystery Man Clue 10: Light from Below
Now use the stairs and in the room you will find the clue.
Twins Clue 9: Portrait Photo
This clue can be found in the secret room behind the bookshelf.
Mystery Man Clue 9: Threatening Letter
This clue can be found in the secret room behind the bookshelf.
Mystery Man Clue 11: Native American Letter
After the secret room head down to the hallway and take the left. The letter is on the desk(Flip the cover).
Chapter 4:
Mystery Man Clue 15: Pig's Head
When you head out with Chris in search for Ashley, you need to take left when the path splits. In the end, you'll find a head of a dead pig near the tree.
Chapter 5:
1952 Clue 3: Administration Notes
When you enter inside the Sanatorium, Walk towards north from the front door and search on the top of a Stone.
1952 Clue 6: Clocking-In Cards
After entering the admin room take left to the mail room. Check the plank on the ground and the clue is inside.
1952 Clue 4: Broken Camera
Come out of the mail room and again keep on the left. Check for the Filing cabinet and on the top of it is the next clue.
1952 Clue 8: Old Newspaper
The next clue is on the desk inside the decrepit office which is on the south of the same room.
1952 Clue 5: Medical Notes
Before Taking the stairs out for the morgue just duck through the doorway on the right. The next clue is on the workbench.
1952 Clue 9: Restraining Chair
In the Morgue, head south to find a green curtain. Go there and see the next clue.
1952 Clue 10: Telegram about Miners
When near the two doorways take the right one and you enter a small office. The clue is on the desk.
1952 Clue 12: Strange Skull
In the same room check on the right, there is a shelf. Check it for the next clue.
1952 Clue 13: Death Certificate
There are two cold chambers just opposite to the strange skull. Check the right one to find the next clue.
1952 Clue 11: Name Tag
In the same chamber you entered there is another door. Slide the bed to find the other side.
Mystery Man Clue 12: Cigar Box
When you enter the Chapel check on top of the drum in the middle of the room.
Mystery Man Clue 13: Clippings Wall
In the same room check on your right where you notice a large Cork board.
1952 Clue 7: Mine Rescue Photo
In the same room check the picture frame. You have your next clue.
Mystery Man Clue 16: Axe
A moment later you find the axe by default(included in story) near the wall of the station.
Twins Clue 10: Beth's Phone
Before you reach the top of the hill you see a walkway. take left to find the next clue near the bridge.
Mystery Man Clue 14: Business Card
Once back to Sam, Follow the balloons to the main floor. Move towards the garage and towards the right where Chris opened the door earlier and on the table is your next clue.
Chapter 6:
Twins Clue 11: Hannah's Poster
Inside the Fire Tower, on the top floor open the locker.
Twins Clue 12: Beth's Poster
After the power is restored use it to print another missing poster in the same room.
Mystery Man Clue 17: Hidden Camera
When you enter the basement take right, Examine the Dollhouse.
Mystery Man Clue 19: Lightbulb Catalogue
The room with the hidden camera, check with the workbench nearby and flip through pages to see the next clue.
Mystery Man Clue 18: Faked Newspapers
This clue is in the old hotel which is under the lodge.
Mystery Man Clue 20: Batteries and Timers
After the faked newspapers, you head down and the clue is easily visible.
Mystery Man Clue 21: Dead Pig
Enter the kitchen through the big doors in the same old hotel. Check there for your next clue.
Mystery Man Clue 22: Photos of Friends
The wall opposite in the same kitchen is your next clue.
Mystery Man Clue #23: Hooks and Chains
This clue is also found in the same kitchen hanging above the sink.
Chapter 7:
Mystery Man Clue 26: Death Machine Plans
Go off screen to the right to find some plans on the board in the psycho's workshop.
Mystery Man Clue 30: Psychiatric Report
Search the nearby desk to find the drawer.
Mystery Man Clue 27: Josh's Cellphone
In the same room, the shelf across te desk.
Mystery Man Clue 28: Remembrance Board
On the other side of the shelf. Just push the boxes.
Mystery Man Clue 29: Voice Recordings
Before exiting the workshop, you can check the windowed door at the psycho. check the tape recorder on the table. Listen to it for the next clue.
Mystery Man Clue 24: Video Camera
The next one is next to the double doors.
Mystery Man Clue 25: Dummy in Sam's Clothes
This is very easy. Right next to the camera.
1952 Clue 15: Miner Photo
Pushing the mine cart through the locked doors. This is done by Emily in the Mines. now examine the green trunk.
1952 Clue 14: Clocking-In Machine
Now send the mine carts through the wooden doors, check the wall on the northeast and find the device.
1952 Clue 16: Miner's Family Photo
After you slide down the tunnel take a U-turn to your right and Inside little grotto is a box you can open to find the photo inside.
Twins Clue 13: Hannah's Glasses
check the ground near this wooden structure to find the clue.
Twins Clue 17: Tattoo Photo
Check the drums opposite Hannah's Glasses to find the clue.
Twins Clue 15: Marks on the Rock
Move the metal sheets out of the way. This is on the left of Hannah's Glasses
Twins Clue 16: Beth's Cross
After moving on your path turn right, you'll find the clue on the ground.
Twins Clue 14: Hannah's Locket
Find a drum at the end of the path. The locket is on the top of it.
Twins Clue 18: Beth's Head
Head southeast and you'll see it creep into the frame.
Chapter 8:
1952 Clue 17: Romantic Postcard
While Emily in control, Duck into the mines little shack to find the clue inside.
1952 Clue 18 to 22: Intro, Cannibalism, History, Combat and Bite
Part of the story where Ashley reads the Flamethrower Man's journal. Flip pages to find every clue.
Chapter 9:
1952 Clue 23: Makeshift Graveyard
You'll see a bunch of crosses in the snow as you step outside.
1952 Clue 24: Doctor's Report
In the psych ward, duck left into a small room by a "detention" sign.
1952 Clue 25: Old Film Reel
Turn south, follow the hall, and enter the first door on the right. Activate the projector for the next clue.
1952 Clue 27: Case Study Dossier
The Old Film Reel is a doctor's office. Check the desk drawer for the clue.
1952 Clue 26: Suicide Note
You'll find the body of Jefferson Bragg, the former head of this sanatorium, clutching a note. Take it and read it for the clue.
Chapter 10:
Twins Clue 19: Beth's Watch
Follow the path to the left before you drop into the water. Dug-up the grave and you can pull the watch from.
Twins Clue 20: Scrawled Journal
Now drop into the water to and take a left to reach another ledge for the clue.
Here were all the 77 collectible Clues in Until Dawn. Stay tuned for more guides, tips and cheats for Until Dawn.


 Kane and Lynch 2: Dog Days Guide
 Top 8 Call of Duty: Black Ops III Tips and Tricks For Beginners
 Wii U Usability Lifehacks: Hints & Tips
 Left4Dead, Bioshock and Zelda Chibi Stickers
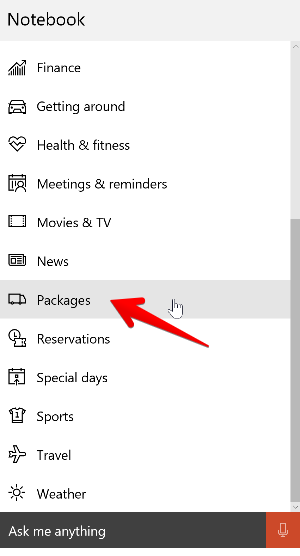 Did You Know Cortana Can Manually Track Packages on Windows 10?