Toy Soldiers: Cold War – Evil Empire / Napalm DLC Guide
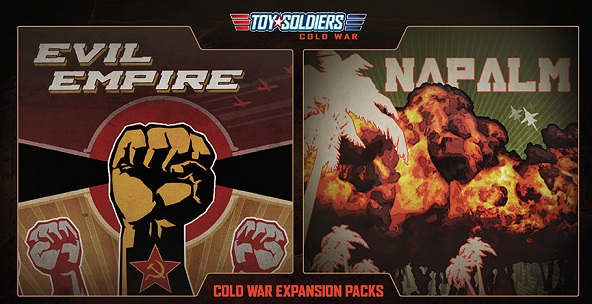
Communism just won’t quit in the next two DLC mini-campaigns for Toy Soldiers: Cold War. Play as the Soviets themselves in Evil Empire as they invade two third-world countries and defend Russian soil from an American invasion force. Jumping back on as the Americans, you’ll do battle with more hardened VC in the jungles of Napalm. With three new singleplayer missions per campaign, with additional end bosses, minigames, and all new Barrage abilities, these two DLC packs will set you back $5 each. If you’re planning to survive the extended difficulty, join Game Front as we walk you through the Cold War all over again.
Looking for our walkthrough for the vanilla version of Toy Soldiers: Cold War? Check it out right here.
And this war never ends. If you’re in need of more cold hard facts concerning vanilla Toy Soldiers: Cold War, look up our mission briefs on achievements and cheats. Good hunting, soldier!
Evil Empire Campaign
Arms Race
Welcome back to Toy Soldiers: Cold War! It’s time to reacquaint ourselves with the controls and systems of this out-of-control Tower Defense title.
First, remember your Overcharge Meter. If you kill lots of soldiers quickly, your meter will charge up and your turret will activate Overcharge Mode, where it has infinite ammo, fires faster, and deals far more damage.
Refill the Overcharge Meter and you’ll unlock a free Barrage Attack. These special abilities provide a variety of special attacks — like a Nuke, artillery barrage, or anything else.
You can directly control all of your turrets. Doing so provides you with a few bonuses. You make more money, deal more damage, fire faster, have extra abilities available, and charge the Overcharge Meter.
Tanks and vehicles appear on recharge pads around each mission. Remember these can be controlled at any point once the blue meter is full. If you don’t want to destroy them, drive or land your vehicle back on the recharge pad to get it back into the fight faster. Until the blue meter is full, you won’t be able to use it again.
Last, remember that the directional pad allows you to quick select functions. The most useful function you’ll need to play Toy Soldiers is the Repair option. Press down on the control pad with a turret selected to initiate a quick-repair.
Now that you’re back in the game and ready to fight, start up the first mission. Forget about the Americans, you’re playing as the Soviets this time.
The Soviets use different turrets, but mostly remain the same. There are major differences, but we’ll go over those as they become important.
On this map, the Americans hold the high ground with MG and Artillery turrets near their base. As the mission begins, you’ll be in control of a Soviet IFV. Use the IFV to blast the rallying soldiers on the American base at the top of the hill for some quick early money, and target the artillery cannons. Try to destroy the American MG nests while you’re at it.
Jump out of the IFV once the American Soldier charge steps and build an MG nest on the small mound near your Toy Box. If any artillery turrets remain, they’ll be destroyed if you build any turrets closer.
Use the IFV until it’s destroyed or runs out of power, and keep hitting the arty on the hill. Use the camera-guided rockets to dish out a little extra damage with each rocket attack.
Now quickly switch to directly control your MG nest as the soldiers close-in. One should be enough to put you in Overcharge Mode and clear out the rest. If you can manage it, try to wait for the soldiers to close-in before attacking — that way you can get yourself an early barrage.
Repeat the process until both artillery cannons are down. Now with the field clear, start building. You should have plenty of cash on hand. Construct an artillery turret on the left large mound and an AA turret on the right mound. In the forward position, build two MG nests and one AT turret in the center. Mix up your strategy as much as you want. Replace the forward MG turrets with Makeshift turrets or mortars.
After the first few waves of soldiers, more fighters and soldiers will appear. Upgrade as necessary, and keep your turrets repaired after the fighters make their bombing runs.
The next wave of Jeeps won’t be a problem if all your turrets are prepared and repaired. Use the IFV if necessary. Two waves of cannon-fodder soldiers, and para-troopers will follow with a fighter escort. Upgrade your AA turret to the second rank to easily swat the fighters.
Keep your anti-infantry weapons upgraded as well. The MG turrets at Rank 2 will easily handle the next waves of infantry.
Next up is a wave of Jeeps, fighters, and elite soldiers. Upgrade those MG turrets to easily handle those waves.
Rank 2 AT Turrets can quickly fire a barrage of shells, and tear apart fast moving light vehicles. Rank 3 MG turrets are powerful auto-shotguns armed with grenade launchers that can only be used while in direct control. Don’t forget to use those grenade launchers against clusters of soldiers or light vehicles.
After the jeeps and elite soldiers, a swarm of medium tanks will attack. Save your cash to upgrade the Artillery turret and AT turret. Use direct control on the Rank 3 AT turret to devastate the medium tanks — a single shot fired with Shell Cam will destroy the tanks.
Make repairs, and prepare for a breather with a para-drop wave. Next up are Heavy Tanks, and they aren’t so easy. Use the Soviet IFV and shell-cam to help your Artillery and AT turrets destroy these powerful tanks. The one-two punch of the Rank 3 Artillery and your shell-cam direct fire AT turret will destroy the incoming Heavy Tanks in two hits.
That completes the first mission. That one is a cakewalk compared to the next. Prepare for a long slog.
Tides of Change
Right away, soldiers are streaming into the area from landing boats on the beach below. You have access to a Medium Tank, and some early cash. Forget the tank and build a Makeshift turret right in the center, just ahead of the controllable tank. Then build two MG turrets to the left and right.
You’re going to need to prepare for some serious armor coming after the first wave. Use your new funds to purchase two Artillery turrets and point them toward the beach. The second wave is Jeeps and soldiers, but the artillery support should make them easy pickings.
In the far back, there are three small mounds. Build two AT turrets on the left and right most, then a mortar turret in the center when you have the funds. Next up are soldiers and tanks. Use your controllable Medium Tank to help during this wave. When you’re finished, park it back on the recharge pad.
Another wave of soldiers follows, but there are a lot of them. Upgrade your MG turrets and Makeshift to handle them, and save some extra funds for the following wave of Medium Tanks and soldiers. Use the IFV again if you need it.
Next up are going to be tough APCs that drop soldiers. Upgrage the AT turrets, but not the artillery turrets. After the APCs come more APCs with Medium Tanks for the next two waves.
When in direct control of a vehicle, sometimes you’ll notice a big red star over an enemy’s head. Destroying that enemy will grant you an instant barrage roulette.
After those waves are dealt with, you’ll have a bigger problems — Heavy Tanks and Elite Soldiers. Upgrade your AT turrets to Rank 3, and save enough money to sell your artillery after that wave. Lots of air-units will attack after the Heavy Tanks, so prepare to bring in some AA.
If you have a barrage, use it now against these Heavy Tanks. Then, prepare for air attacks. Sell your artillery turrets and replace them with AA batteries. Sell and upgrade the AA. You’ll also gain access to a Soviet Attack Helo with powerful missile attacks.
Once the fighters are destroyed, you’ll have two waves of Helo Drop soldiers. They won’t be a problem with your AA defenses. The Bombers that follow them will. Just hunker down and be quick to repair your turrets after the bombers make their run.
The Bombers are followed by Paradropping soldiers, then Heavy Tanks. With Rank 3 AT turrets and your Assault Helo, they won’t last long — but definately save your Assault Helo for the wave of Heavy Tanks. During the Paradrop, use your left MG nest to target the falling soldiers, one of them will have a Red Star. Kill the marked soldier for a useful Barrage.
Fighting off the Heavy Tanks, make sure to target the tanks on the right path first with your Helo, they’ll reach your Toy Box quicker. Once they’re destroyed, switch over to the left path.
ATVs are next, repair your turrets and they should be no problem. After the ATVs, you’ll have a wave of Fighters, then light Helos. Neither will offer a challenge to your AA defenses. The bombers afterward, will. Make sure your turrets are all prepared before they make their run, and repair immediately after the attack.
Following the Bomber Run will be Attack Helos. These are dangerous, so use your own Attack Helo to swat these powerful enemy choppers out of the sky. APCs will follow, then more Attack Helos. Make repairs, as the Attack Helos will always do damage, and prepare for a short Helo Drop, then the final wave.
The last wave consists of American IFVs, which are a deadlier form of APC, armed with a cannon and a group of soldiers. Use the Medium Tank or Attack Helo to help your defenses, but with the upgraded AT turrets, they shouldn’t be a problem as long as you keep your turrets repaired.
Once again, target the IFVs on the right path with your controllable vehicle before moving on to the left. Keep pounding away, picking your targets one at a time. Eventually, the enemy will crumble before your Soviet might.
Proletarian Defense
The Americans are landing on Russian soil! Time to put up a massive defense! As the battle begins, allied soldiers and tanks will attack the American turrets in control of the railyard. Help clear the area out, but focus your attacks on the Artillery cannon at the top of the highway overpass. That’s your biggest problem.
To destroy the Americans, you’ll have your pick of three Soviet battered powered vehicles. The Soviet Heavy Tank, the Soviet Naval Helo, and the Soviet Fighter. Don’t use the Soviet Fighter quite yet, you’ll have to deal with American AA on the other end of the map. Between waves, use the Fighter or Helo to damage the AA, you’ll need the skies clear as soon as possible.
Looking at your three vehicles, the Heavy Tank is perfect for ground defense against slower moving forces like APCs, Medium or Heavy tanks, or clusters of soldiers. The Naval Helo is a great weapon for taking out the large Helo waves to supplement your AA, but it can also be useful for light ground support against weaker armored fast vehicles and soldiers. The Fighter is best used against Fighter or Bomber waves, but almost makes a last-ditch ground attack weapon with it’s ability to drop chemical bombs.
If you’re quick, jump into the Naval Helo and destroy the American Artillery and MG turrets at the railyard, then keep your distance and shoot down the AA turret in the back right corner of the field. With all the American turrets destroyed, you’re safe to start building your own defenses.
Build a combination of AA and AT type turrets — anything at all will help. A single MG nest at your Toybox is enough to defend it against the first few waves of Paradropping soldiers. After the first two waves of paradropping troops, you’ll have to deal with Jeeps and APCs.
The Jeeps shouldn’t be a problem once you’ve constructed an AT turret, the Jeeps will come down the overpass and drive down the double tracks leading into the Toy Box. Keep your Naval Helo recharged, you’ll want it for the Helo wave after the APC wave. Your Heavy Tank can take care of the APCs.
The Jet Fighter can also help against the Helo wave. Make sure to construct an AA turret before they arrive, just to help you clear the skies. APCs follow, but they shouldn’t be a problem. The problem is next, with Elite Soldiers and Heavy Tanks.
As the Heavy Tanks approach, employ your own Heavy Tank to crush them. When the Helo wave arrives, simply switch to your Fighter and crush the arriving Helos. If you feel up to it, launch the next wave of Heavy Tanks and Jeeps, then use your Jet’s Bombing Capabilities to destroy them all as they arrive on the street to the left of your turrets.
To use the Jet’s bombing ability, click the right stick and pull back on the left to slow down. Then use the fire button to drop bombs. Moving slowly, you can easily line up bomb drops using the large green circle and destroy entire columns of Heavy Tanks.
Spend your new funds to upgrade what you have. The next wave is all APCs, and lots of them coming from the left and right of your base. A Rank 3 AT turret can destroy an APC in two hits. If you have two of these among the central small mounds, you’ll take care of the APCs with no problem.
The following wave is all American Jets. Switch to your own Jet Fighter and shoot them down, and if you feel prepared, launch the next attack of Attack Helos and Heavy Tanks. Focus your Fighter’s AA missiles on the Attack Helos. When the few Attack Helos are down, pick up an extra battery and bomb the rest of the Heavy Tanks as they slowly move down the central causeway.
Heavy Bombers are the next wave. They can destroy most of your base if you aren’t careful. Use the Naval Helo to try to shoot down the first few, or as many Bombers as you can to minimize damage. When the Bombers have passed, dump the Naval Helo and repair.
Paradrop Helos will appear as the next wave, but they won’t pose much of a threat. If you’re worried, take direct control of an MG turret near your Toy Box and train your sites towards the nearest green flare.
The next wave of Heavy Tanks come from three different directions. Target two of the three far off directions with an Artillery turret, then jump into your Heavy Tank to clear out the rest. Park your tank in front of your Toy Box and crush any that try to pass.
Make repairs, then use your Fighter Jet again; a enemy Fighter wave is approaching. Use the Fighter to shoot the group down without a problem, preferably with the help of one Rank 3 AA turret.
Grab extra batteries after the Jets are done, and train your sights on the far end of the field with your Jet still in use. Use the Fighter Jet to down as many of the bomber wave as you can — this is a large Bomber wave, and will destroy the turrets they attack if you don’t destroy two or three of the enemy.
Attack Helos and Heavy Tanks follow that up, and they’re really playing hardball. Use whatever you have on hand, even taking direct control of your AA will help, as you’ll be able to target four of them at a time, while the AI only attacks enemies one at a time.
For the last wave of Heavy Tanks and Attack Helos, use the Fighter Jet to wipe out the Attack Helos, then either focus on the Heavy Tanks with bombs, or switch to a Rank 3 AT turret to finish them off. One of the Attack Helos will have a Red Star, giving you an instant Barrage abilitiy, perfect for use against the Super Tank coming up next.
The Super Tank appears last! Before it does, sell all your AA and replace them with Rank 3 Artillery, you’ll need everything you’ve got! Keep your MG nests, but if you have any open mounds, build AT turrets.
At Stage 1, the Super Tank will roll down the main road, firing with it’s double heavy MGs and massive artillery cannon, while rolling over your turrets. Point all your artillery at it, so it’s constantly taking damage as it moves down the main double track causeway. It’ll also fire barrages of missiles.
The Naval Helo and Fighter will go down fast to it’s double MGs. Luckily, the double MGs and rocket launchers can both be destroyed independently. The Super Tank will circle the field, blasting away, and your Heavy Tank is your best bet to do real damage to this beast easily. If you keep out of distance, you can actually attack the MG turrets on the Tank from far away, or use the Fighter to drop a salvo of chemical bombs.
As the Super Tank nears your base, it’ll launch infantry from it’s front, as well as ATVs. Tanks will drop out of it’s backside as it turns and drives toward the tall buildings on the left side of the field. Make sure you have plenty of AT defense to wipe the medium tanks out.
Target the MG turrets and rocket launchers on the Tank’s back during the first stage to weaken it for the rest of the battle. The biggest challenge will be rebuilding.
During the second stage, after it’s health is brought down a bar, it will become faster and more aggressive. You have plenty of time — until the third stage.
At the third stage, the Super Tank will employ a devastating Laser Artillery weapon that destroys anything it targets. Make sure to destroy the Super Tank fast, but save the Heavy Tank. Use the Naval Helo and Fighter Jet to help destroy the stage 3 Super Tank, and make sure your artillery is pointed toward your Toy Box. You need to destroy the Super Tank fast at stage 3, it’ll circle the battlefield once before going straight for your Toy Box.
Once it’s down to the Final Stage, it will just charge your Toy Box with dramatically lower health. You don’t have much time, switch to your Heavy Tank and go all out with your main cannon and secondary MG. Keep shooting, and save any Barrage attacks you may still have for this last part.
If you use the Heavy Tank, you should be able to just barely destroy the Super Tank before it crushes your Toy Box. Congratulations, the Soviet Union is saved!
Achievement Unlocked: The Might Of The Red Army (10 Points) – Destroyed the Super Tank.
Napalm Campaign
Trailblazer
Welcome to the American DLC campaign, where you’ll be more familiar with your own weapons and tactics. But, that doesn’t mean the Soviets won’t try some new tricks. What sets this map apart from other missions is the second Toybox in the back left corner with no defenses whatsoever.
Periodically, a wave of Soviet transports will move along the ridge and attempt to take over your secondary Toy Box. The only effective way to combat these tanks and transports is with artillery. Luckily, you’ll have four large mounds to build on.
Don’t worry about building yet, you start under attack by VC. Jump into your Medium Tank, armed with a flamethrower, and quickly find the Soviet AA guns on the map. There should be one directly ahead of your Tank, and another to the left. Spot them by the Soviet flag in the distance.
If you’re quick, you can take out both AA turrets and unlock a decoration. The second decoration is also very easy to get with the right defense set-up, and we’ll go over just what you need to keep the Soviets out of your Toybox.
With the AA gone, a wave of VC will move on your base. Start off by building two MG nests to the left and right of your Toybox, with an AT turret in the center. Take direct control of one of your MG turrets and wipe out the VC infantry.
Another three waves of VC infantry will follow, giving you plenty of time to make money and prepare your defenses. Build either two Makeshift turrets or two mortar turrets in the left and right forward positions of your base to help defend against infantry and vehicles later on. Personally, go with mortars to assure hits.
This will also be your chance to construct four artillery turrets. Don’t upgrade all of them yet, but you’ll want to upgrade a few one at a time as the battle continues. Leave one artillery turret un-upgraded, as you’ll need to sell it and replace it with an AA turret later in the mission.
It’s best to upgrade the two turrets to the far left and far right first, as they have the most room to hit targets. Take time to upgrade your AT turret in the center, as well. It’ll become very useful later in the mission when more tanks and transports show up in the convoy.
After the first waves of infantry, you should have four artillery turrets and an AT turret built, with at least one of the artillery turrets upgraded to Rank 2. Then you’ll be ready for the convoy. Point all artillery toward the ridge, and take control of either your AT turret or artillery to help destroy the trucks. I recommend using the Rank 2 artillery, and taking advantage of its Shell Cam MIRV ability.
With the first convoy crushed, two tank columns will appear. Target to artillery turrets forward and two left to wipe the tanks out, and make sure to keep your mortars repaired. Following the tanks is another convoy. Use your new funds to upgrade another artillery piece. If you can get one to Rank 3, that would be best. Getting your single AT turret to Rank 3 will also help, target the vehicles just as they cross the path up the hill for an easy shot and let your artillery mop up.
Another wave of Medium Tanks will appear, from forward and left positions. Point your artillery, and keep your mortars repaired to make short work of this wave. Tanks with VC infantry follow. Take this turn to sell one of your Rank 1 Artillery to prepare for the next wave of Helos. Upgrade the AA as much as you can, if you keep it alive, you’ll only need one for this mission.
The Helos will go down easily with even a single Rank 1 AA turret. Once they’re clear, you’ll have to deal with more Medium tanks and Infantry in a wave. With one less artillery turret, but your three upgraded Artillery turrets should be more than enough to handle them all, just be extra diligent in keeping them pointing at your targets.
Smash the infantry and tanks, and prepare for yet another convoy wave. Point your artillery, and take direct control of the AT turret to wipe your opponents out. Start hitting them while they’re still moving into position on the wooden plank with the Rank 3 Turret’s Shell Cam.
Now that the convoy is gone, you’ll have to fight Elite Infantry. Prepare to repair your mortars or makeshifts, and upgrade the rest of your turrets to Rank 3 to mop up. The Elite Infantry aren’t a problem compared to a double attack of Medium Tanks and Trucks both on the ridge and both going for your secondary Toybox.
By this point, you should have three Rank 3 Artillery turrets and one Rank 3 AT turret. With those combined arms, the tanks won’t be a problem. Aim and direct your artillery, and use Direct Fire to weaken the tanks for your Artillery to finish off.
Next, is Heavy Tanks from the left and VC forward. Aim all your artillery left to take care of the tanks, with the AT turret as a last ditch defense. The VC should be easy pickings for your Mortars or makeshifts, and your MG turrets. The followed wave is Heavy Tanks forward and VC infantry left. Switch your artillery to point in the right direction, and you’ll have no problem.
By now, make sure your AA is fully upgraded to Rank 3. Attack Helos will appear for your next wave. Take direct control of the AA turret and knock the Helos out of the sky personally. Take them out one at a time, then make repairs.
The last two waves aren’t too tricky — the first is another convoy with Heavy Tanks and trucks. Start shooting early, and use your AT turret to target the vehicles while they’re still on the big sign in the background to destroy them in one hit. The very last wave is just Elite Infantry. Wipe them out and complete the first part of this humid campaign.
Knee-deep
Here is where your mission gets tricky. This is an ambush, and you have three Toyboxes that need to be protected. You’ll start with a Helo Gunship, armed with an MG and rockets. This vehicle will be crucially to your victory here.
First, let’s go over the layout of your base. In front of each Toy Box are three small mounds. At all three corners of the Toyboxes themselves, you’ll find a large mound for three large mounds total.
Directly ahead of your Helo Gunship is the first Toybox. We’ll call this Toybox 1. To your right is the second Toybox that will come under attack, we’ll call it Toybox 2. And last is the Toybox to the Helo’s left, which is the final Toybox to be threatened by Soviet Invasion. We’ll call that one Toybox 3.
Just as the mission starts, you’ll use the Helo Gunship and must defend your Helo Gunship from two Soviet AA turrets to your left and right. Back away and paint each AA turret with MG fire and rockets one at a time until they’re destroyed. Stay out of their range and you’ll have no problem destroying both for a quick payday.
Clear out the VC infantry in the first wave with your Helo, picking up batteries to stay alive, and take out the second wave of armored cars. With that done, drop out of the Helo and start building. If you already lost your Helo, just start building right away to begin your defense.
In front of each of the three Toyboxes are three small mounds. To keep the Toyboxes safe, build one MG turret, one AT turret, and one Mortar at Toybox 1 as soon as possible. Then move on to build the same in front of Toybox 2, as the third wave of VC infantry will attack there.
Upgrade your MG and AT turrets at Pillbox 2 as quickly as you can, preferably before the first wave of VC infantry attacks, followed by a wave of armored cars. The armored cars won’t be a problem with a Rank 2 AT turret, but if you’re in a pinch and don’t have time to upgrade, construct an artillery turret to over-watch Toybox 2.
After those waves are complete, build a MG, AT, and mortar turret at Pillbox 3. They’ll arrive by Helo Drop soon, but first you’ll need to deal with Elite Infantry at Toybox 1.
When you’re able, construct one artillery piece to over-watch Toybox 1, and another artillery turret to watch Toybox 2. You won’t need to watch Toybox 3 with artillery, so use the last large mound to construct an AA turret when you have the money.
Once the Elite Infantry at Toybox 1 are dead, another wave of VC infantry will attack at Toybox 1 and 2. Fight them off and build your artillery to prepare for future waves.
Destroy the VC, and a Helo Drop wave will arrive outside Toybox 3. Prepare yourself with all the essentials, and upgrade your MG turret first, followed by the AT turret. Make sure all your MG and AT turrets are upgraded at least once by now.
Following the Helo Drop is a small bombing run. On normal, you’ll only have to deal with three Bombers per run. Build an AA turret, and jump into your Helo Gunship to down at least one of the three Bombers for a large payday of funds.
Make repairs after the bombing run, and prepare for another VC infantry charge at Toybox 1 and 2. Use the artillery to supplement your regular outfit of MG, AT, and mortar turrets at each Toybox. Upgradge your AT and MG to Rank 3 as soon as you’re able to.
The next wave is heavy at Toybox 3. ATVs and Transport Helos will arrive to drop soldiers. Hop onto your US Helo Gunship to help defend Toybox 3 from the ATV, and make sure your MG and AT turrets are upgraded at least once.
Things aren’t about to get easier. Next up is VC infantry and Medium Tanks. Toybox 1 is attacked by Medium Tanks, while Toybox 2 is charged by VC. Keep the Helo Gunship in action with a battery, and help destroy the Medium Tanks before splitting off and clearing away some VC infantry if needed.
Kill off the remaining infantry and tanks, then dump your Helo. It’s time to upgrade fast. Upgrade your AT and MG turrets at Toybox 1 and 2, then upgrade your two Artillery turrets providing over-watch. Try to get everything you can upgraded up to Rank 3, with the mortars last in order of importance.
The next wave is all APCs. Repair your turrets often to keep them from being destroyed. Focus all your upgraded, if you’re low on funds, on Toybox 2 where the APCs attack. Toybox 1 only needs to deal with infantry.
After the double attack, upgrade you Anti-Air turret to Rank 3, if you’re able, and take control of the Us Helo Gunship. More Bombers will arrive soon, take out at least one to make yourself extra cash, then make repairs.
The bombers will pass, and the wave after replaces them with IFVs and Elite Infantry. Boost your AT defenses at Toybox 2 with a Rank 3 Artillery and Anti-Tank turret, with a Rank 3 Mortar helping out. Point both artillery turrets to watch Toybox 2 to help crush the enemy IFVs, and prepare to make quick repairs on your turrets.
Things are reversed afterwards, where you’ll have to deal with Heavy Tanks at Toybox 1 and Elite Infantry at Toybox 2.
Move your artillery into position and use your Rank 3 AT turret’s direct fire to shell cam rockets directly into the tanks to destroy them fast.
Before this wave is done, repair and upgrade your AA turret to Rank 3. That way, you’ll be safe against the wing of Soviet Fighters that follow. Use the Helo Gunship to help out, then grab some batteries in preparation for another wave of ATVs and Helo Drops at Toybox 3.
Keep the Helo Gunship in action if you can, because the last wave is all Heavy Tanks at Toybox 1 and 2. If you have an Rank 3 AT turret, a Rank 3 mortar, and a Rank 3 artillery turret all protecting each of the two Toybox entrances, you’ll have no trouble taking care of the Heavy Tanks with a little Helo help.
No Respite
This is it, the last episode of the DLC US campaign. The VC infantry are already in the city, and you’ve got nothing to stop them yet. Work quickly.
Once again, you have access to an US Helo Gunship. Hop inside and wipe out the VC infantry attacking the complicated run into your Toybox. There are two main roads that twist around a tall wall back through your main base, with a few extra mounds outside the walls. Ignore those for now, just focus on clearing the VC with your Helo.
They can be hard to spot on the dark road, so make extensive use of your rockets. With the Helo, look ahead down the right road to spot a Soviet AA turret. Take it out with your Helo, it’s the only one on the map, but it’ll give you a good bonus to your early funds.
The second wave is all Armored Cars and VC infantry. Focus on the Armored Cars with your Helo’s rockets, but you won’t have much time. Once the vehicle’s batteries are up, start constructing defenses.
On the main wall into your base, there are four small round mounds. Build two Anti-Tank turrets on the left and right looking down the two main roads. In the inner two mounds, construct Machine Gun turrets. On the two large square mounds inside your walls, build two artillery turrets.
On the left and right sides of your inner base, there are two more small mounds. Construct another AT turret to watch the main entrance of your base on the left, then a makeshift turret on the right near your Toybox.
After the Armored Cars and infantry are defeated, you’ll have to contend with Medium Tanks and Elite Infantry, then APCs.
Keep your AT turrets upgraded first, followed by your artillery to help fight off the enemy armor. Very tough armor will be coming soon, so save your Helo Gunship for now.
Save any Barrages you might collect until after the APC wave. Laser Tanks appear once the APCs are gone, and they’re the toughest enemy wave available. They’ll destroy any of your turrets in range very quickly, but you’ll make plenty of funds back. Don’t bother constructing anything in the free two mounds outside your base, they’ll only be destroyed very quickly.
Use any barrage once enough Laser Tanks are deployed, and then jump into your Helo Gunship to soften them up for artillery and AT turrets. Try to upgrade your Artillery and AT as quickly as you can to prepare for the very tough Laser Tanks.
The Laser Tanks will drive down the right road and circle around. Just as stated above, you’ll want to hit them early and fast. Upgrade your AT turret on the right to Rank 3 and start shooting early. Once enough are out, switch to the Helo and barrage them with rockets.
Once the three Laser Tanks are dead, repair, rebuild, and upgrade. use your new funds to get your artillery up to Rank 3.
You’ll also soon have a new toy to play with — the captured Laser Tank. This thing uses batteries fast, but it’s very powerful against vehicles. Don’t use it yet, though.
The Laser Tank’s power would be wasted on this wave of Armored Cars and VC infantry. Helos will arrive next, so build and upgrade an AA turret in the forward large mound, outside your base. Protect it and help out with your own remote-controlled Helo Gunship.
Now you’ll need to keep that AA turret protected, and it won’t be easy. The next wave is Medium Tanks coming from both roads, followed by Heavy Tanks doing the same. Use Rank 3 Artillery to help stave the tanks off, and take direct control of your AT turrets to soften the enemy up and clear them out.
If the tanks become a problem, use the Laser Tank to help defend your Toybox. Once the tanks are gone, make sure your AA turret is fully upgraded and repaired, then use your Helo Gunship. Fly up, and prepare for a large bombing run. This one is dangerous, and some of your weaker turrets might be destroyed. Try to take down as many of the bombers as you can, and try to target whichever your AA turret has picked first.
Following that deadly bombing run, repair and rebuild. IFVs attack next, they’re fast and very deadly. This is another good time to break out the Laser Tank to supplement your turrets. You may need to repair your AA turret multiple times to keep it alive, but it’s worth it, as Fighter Jets will attack afterward. A single fully-upgraded AA turret will tear the Fighters to pieces without a problem.
The battle is winding down now. Take direct control of your AA turret and target the Fighters as they appear on the far side of the map. Helos and Heavy Tanks will follow, but they won’t be a problem with your Rank 3 AA turret in action. Just focus on the Heavy Tanks with your artillery and AT.
With the Tanks and Helos gone, prepare for another tough round. Four Laser Tanks will arrive, two on each approach. Jump into your Laser Tank and start picking them off. The boss is next, but you won’t be needing the Laser Tank for it, instead save your Helo Gunship.
Take out the Laser Tanks, then repair your small turrets. Sell off your artillery, and build all AA turrets on each of the three large mounds. Upgrade them all to Rank 3, and prepare yourself. Don’t use your Helo Gunship until the Final Stage, which comes after Stage 3, don’t forget!
The Mi-29 “Homer” is here, and this Super Helo will ruin your day if you aren’t prepared. Upgraded and build three Rank 3 AA turrets to really damage this flying monster.
The Homer will circle the battlefield, dropping tanks, paratroopers, and bombs. You know it’s about to bomb when it slowly passes through your base. When it does, be quick with the repairs, you don’t want to lose any turrets during this crucial battle.
With all your turrets ready, they can do most of the work for you. You just need to keep the repairs coming. The AA will focus on the Homer, while your ground turrets take care of the dropping enemy units.
The Homer also comes equipped with a powerful main cannon on it’s front. It’ll use that once it backs away. Take control of one of your rear AA turrets to keep launching even far out of the AI’s range.
At Stage 3, the Homer will drop off powerful IFVs. Use the Laser Tank to wipe the IFVs out once they’re about to drive through the main entrance into your base. By that time, the Homer should be almost down to it’s Final Stage.
When the big “FINAL STAGE” prompt appears on screen, stop whatever you’re doing and jump into your waiting Helo Gunship. Pummel the Homer with rockets and MG fire until it’s destroyed — if you don’t move fast, it’ll fly right into your Toybox and destroy it in one swift move. Don’t let that happen, keep your Helo Gunship saved for this last moment. If you do, the Final Stage won’t be a problem at all.
Smash the Homer, and you’ll be the proud owner of a new achievement.
Achievement Unlocked : The End Of An Odyssey (10 points) – Destroyed the Homer.




 How to get the Best Warlock Chest Armor in Destiny
 Everything You Can Do With 3D Touch on Your iPhone
 Dead Island Riptide Wiki: Everything you want to know about the game .
 Bloodborne: The Old Hunters - How to Get to Hunter's Nightmare
 Top 5 Best Gaming Phones of 2015