Spelunky Walkthrough
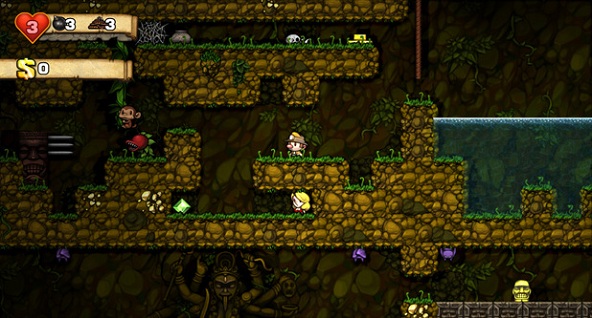
How long can you survive in Spelunky? The indie 2D platformer has made the rounds on PC, but it’s finally coming to consoles on the X-Box 360. Like games of old, Spelunky is all about surviving to the make it to the end of four increasingly difficult areas while collecting all the treasure you can.
Each playthrough is randomly generated by the level, so never expect to see the same trap laid twice in just the same way. Save damsels in distress, buy from a shopkeeper, and discover the mystical City of Gold — all in Spelunky.
Join the Game Front text and video teams as we dive deep into these deadly caves. Find even more amazing walkthrough videos and content on the Game Front Youtube Channel (Subscribe!). Get the rest of your Spelunky info with our achievements and cheats.
Check back soon for more new updates.
Video Walkthrough
The Mines
For Level 1-1, and all of the mines levels in general, you will need to keep making your way towards the bottom level. Keep dropping down along whichever edge is opposite the side you started on and you should have an easy time finishing off this first puzzle.
In 2-1, move to the left from your starting position and drop down. Head to the right side (or whichever opposite side the random level generates) and use the pot to activate the arrow (better the pot than you.. right?). The end point of 1-2 lies on the bottom level in the center.
Moving on to Mines 1-3. Make your way all the way to the left, and head back all the way to the right when you reach the middle level. The bottom level will require you to throw your damsel partner before you get to the door in the middle.
The spiders will multiply in 1-4. This level is significantly more tricky. Make sure to clear the spiders out of the way before moving through the level. Also, be cautious of the drops- often times you will jump on spikes without seeing them.
You are allowed to throw the aforementioned damsel that you will be carrying with you- but be very careful where you aim.
The Jungle
In 2-1, you can typically either choose to go right initially or use a bomb for a shortcut and blow up the left side of the floor. These options are usually consistent no matter which level you are presented with. Be careful here, as this level introduces the spiky Tiki Traps. Don’t scrape the sides of those things or you will experience a quick and annoying death.
The best way to avoid getting killed by the frogs in the jungle is by exercising patience and waiting for them to jump out of position before proceeding.
The only way to deal with the man eating plants is to avoid them altogether. They do move around, so you could get around them with a bit of patience.
Whenever you reach a water crossing in the Jungle levels, be sure to look across preemptively before jumping. Typically, these water gaps try to lead you to jump into one of the Tiki traps.
Whenever you see vines hanging from the ceiling, chances are that this part of the puzzle will require you to hang on the vines and destroy an obstacle directly ahead of you. If they’re there, they’re there for a reason.
The Ice Caves
The first thing you might notice about the ice caves are the mammoths. The mammoths freeze you when you get within a certain range of them.
Yetis are typically slow moving and are mostly located placed at the bottom of large drops. They can be avoided by quick reflexes- you’ve got to anticipate them coming.
When you jump on the ice blocks that are glowing lighter blue, that means that you will slide across them when you land. Be careful which way you direct your momentum when landing- it’s easy to slide yourself right into a trap if you’re not careful.
Whenever you see the bats, note that you can bounce off them and onto ledges if you time your jump right. Make sure you land on top of them though, or you will die.
Temple
The Tiki Traps are back with a vengeance! They function in the exact same way, except the rate and speed at which the spikes poke out to destroy you both increase significantly.
Instead of water pits, there are lava pits this time around. Always check before you jump!
The mummies inside of the Temple complexes move extremely slowly. Use your speed to avoid them and be sure to stay out of range of their breath attacks.
Olmec’s Layer: The giant golden statue head bounces back and forth. It bounces completely on rhythm though, so it is completely predictable when it will slam down. You will need to constantly be running side to side and making your moves when the head is slammed down. This requires som specific timing so don’t be dejected if it takes a couple of tries.


 Artifact Locations List for The Last of Us Remastered
 Brink: Failure or Death
 RIGS Wiki – Everything you need to know about the game .
 The Banner Saga Walkthrough
 How to get extra Crossy Road Gift boxes and Coins, Mascots, Planes and more, Tips and Tricks