Mass Effect 3: Leviathan DLC Walkthrough
Looking for more Mass Effect 3 strategies, secrets, and easter eggs? Check out Game Front’s video walkthrough apps to get our extensive library of top-quality gaming video guides.
Welcome to our full text walkthrough for Mass Effect 3′s first single-player post-launch DLC pack. If you haven’t stopped the Reaper invasion yet, you might want to save Earth with our walkthrough for Mass Effect 3 before you tackle this next chapter in Shepard’s story. Hunting down yet another weapon to defeat the Reapers, the Leviathan of Dis is supposedly strong enough to fight the robotic aliens from the dark spaces of the galaxy.
Save Earth and take out the Reapers with style using our extra articles on the Mass Effect 3 cheats page. Or, check out any extras we uncover for the Leviathan DLC in our DLC cheats page.
Check back soon for new updates.
Bryson’s Lab
To begin Mass Effect 3′s Leviathan DLC head to the Citadel. When you dock with it, you’ll get an option to dock directly onto Bryson’s Lab. When Shepard touches down he’ll meet Dr. Bryson and his assistant, Derek Hadley. You’ll find out that Dr. Bryson’s mandate is to investigate legends, myths and rumors about the Reapers, before the population even knew they existed.
As the conversation between Shepard and Dr. Bryson continues, you can ask questions to get to know more about their investigation through the dialogue wheel.
After a bit more talk, Dr. Bryson’s assistant will walk into the room, albeit in a less relaxed matter. Something is wrong. He’ll shoot Dr. Bryson. During this sequence you can trigger a paragon response to disarm Hadley. Hadley will then speak as if not himself.
The next scene begins with Shepard, Hadley, EDI and two guards talking about the situation. Shepard will go through some dialogue with Hadley who seems to have come to. During the conversation, Shepard can initiate a renegade response. Soon enough, Shepard hears word of a creature named “Leviathan” as the camera pans toward a spherically liquid artifact.
Hadley will soon pass out and EDI finds a recording of Dr. Bryson and Admiral Hackett talking about Leviathan.
From here Shepard will need to find clues to get more information on Leviathan. When the cut-scene ends EDI suggests to find a research log from a field researcher. The audio log will be directly in front Shepard. Access it and your next lead will be Garneau.
Shepard will need to find out where Garneau is located based on the clues in Bryson’s Lab. There are technically 3 areas to explore here. The room with the galaxy map, the lab proper and the courtyard outside. To get it out of the way first, head to the courtyard and look for a pile of crates. Grab the “Pistol Cranial Trauma System I” weapon upgrade.
Now enter the room adjacent to the galaxy map room, the lab proper. To be thorough, we’ll access any objects that are accessible.
In the lab proper, first access the Sovereign Fragment. Next to the fragment is a monitor with a video log and some encrypted data to the right of it. You’ll get into the encrypted data in a bit.
Now turn around and head to the lab area with the Plesiosaur skeleton hanging above. Underneath the skeleton is another monitor. You can access the console, a video log and a picture below it.
Head deeper into the lab to access a PDA on the island counter. On the L-shaped counter along the wall, there’s a switch. Flip it to see images appear on the wall. They were notes Bryson was taking. Access the notes. This will add a filter to the galaxy map giving the map parameters to narrow down Garneau’s location.
To the left of the notes that appeared on the wall, are some rocks. Examine the rocks, then use the scope. Another filter. As you check the area, look for the low shelf that contains a “SMG Mass Pulse Recoil System I” .
Now head up the stairs into Bryson’s bedroom. Next to the chair is a stand with a picture placed on top. Examine it to grab the code for the encrypted piece of data under the monitor next to the Sovereign fragment.
After accessing the encrypted data, another filter will be available. Now head back to the galaxy map room. Look for the corner of the room with two monitors hanging on the wall. Access the consoles for each to get another filter.
Move to the galaxy map and you’ll see 4 filters. The one on the bottom right is for creature sightings, top right is blackout crimes, top left is locations with element zero, and bottom left is reaper activities.
To find Garneau’s location, activate all the filters except for the blackout crimes. You’ll find his location.
Now head back to the courtyard and get into the shuttle, to get to the Normandy.
When you’re on the Normandy, access your galaxy map, then look for “Caleston Rift”. It’s on the right side of the galaxy. When you enter the rift, immediately leave the system, and head right toward Aysur. Scan south of the sun to find Mahavid located in the asteroid belt.
Return to the Main Walkthrough Page
The Mining Facility
Upon landing, move forward, then head down the ramp ahead. You’ll reach an elevator. Activate it.
When you reach the bottom, you’ll see a couple of marauders and a highly armored brute. Take cover here and strategically take them out. Remember, marauders have shields and the huge brute has high armor. If you need ammo, head toward the right side of the room, past the seats to find an ammo box.
As you move deeper in this lobby area, you’ll see a set of stairs on the left. There’s another brute there. You should be able to take it down from a distance before it closes in. Use any incendiary rounds or armor piercing rounds if you have it.
Head up the stairs. In the corner are some crates where you can replenish your ammo, plus grab a med-kit. Afterward, bypass the door ahead, then enter the next one as you move through the short corridor. A cut-scene will begin showing the workers are a little too comfortable with the recent threat Shepard has dipatched.
After the cut-scene, which include some dialogue choices, you’re free to look around the area. Take note of the broken elevator. You’ll be facing a small set of stairs when you’re back in control. Head up, then head left.
Access the “Repair Drone Terminal” by the door. Keep close with the drone as you guide it to the elevator. The doors will open. Head through, then access the elevator.
Exit the elevator. You’ll see two doors, one in front of you, and one to the right. They both lead to the mineral lab. Head through the one in front of you. Enter the room, and hug the wall to your right. You’ll see bookshelves. Use the terminal to grab some creds. There is also a table with plants on it with a datapad. Use that as well to get more creds.
Move into the next room through the open doors. It will narrow down into a corridor. As you move past the room, take note of the terminal on the right with the black background and white lines indicating a map of the area.
Follow the corridor, then bypass the door at the end. When you head through, you’ll see people gathered around a small galaxy map. Examine the datapad by the rock, then head up the stairs to enter the door ahead, labeled “Sector 4″. Enter the room, then make a right.
Enter the office behind glass windows to grab a datapad. The door next to the windowed room is where you need to go, but won’t allow you inside just yet. Head back to the room with small galaxy map, then enter the door behind it. Examine the datapad. You’ll hear Garneau’s recording. You can also pick up a “SMG High-Velocity Barrel II” in this storage room.
You’ll now need to find the security console. Remember the monitor with the black background with the map displayed on it? That’s the security console. After accessing it, head for the medical bay, the door previously locked next to the windowed room. Wait for one of your party members to open it.
Head inside, then make a left. You’ll see a body inside one of the shadowed rooms. Access it for a cut-scene and some dialogue choices. You’ll find out that Garneau is being controlled by Leviathan. After the interesting sequence is over, you’ll start chasing Garneau.
Bypass the door he just locked, along with a second one. Head up the ladder on the right, where the game will load. Move down the ramp, then head down the ladder. Head left, take cover, and wait for the husks to approach. Take them out.
Keep moving forward, then jump over the gap. Turn right, then hop over the barrier while collecting a “SMG Mass Pulse Recoil System II”. Drop down, take cover, look left, and take out some more husks.
Keep moving forward. You’ll see Garneau up ahead, along with the “Mines” as your waypoint. Take cover in this medium scale battlefield. Groups of enemies will emerge on the ground and up in the balcony: including Ravagers, marauders, husks and eventually two banshees. There is a Reaper Blackstar on the left hand side under the balcony.
When you’ve thinned out the herd, head to the “Mines” waypoint. Before accessing the door, head down the hallway and grab a “Pistol Cranial Trauma System II” and medi-gel.
Now use the door. In the cut-scene, the door’s power supply shuts down. Shepard accesses a drone to repair the damage. There are two trouble spots. Guide the drone to both spots while fighting off enemies.
Head back to the door and head through to initiate a cut-scene. You’ll hear Garneau tell you to turn back before he triggers a detonator. You’ll talk to the miners after they’ve been let out of their trance.
Time to head back to Bryson’s lab.
Return to the Main Walkthrough Page
Return to Bryson’s Lab
Once you’re in Bryson’s Lab again with EDI, both Shepard and EDI will focus on the spherical artifact. From here, you’ll need to find more clues to follow Leviathan’s trail.
In the galaxy map room, examine the artifact. On the desk, next to the husk head, check out the Data File and the microscope.
Enter the adjacent room where the skeleton is and examine the “Project Information” on the island counter. EDI will mention Basilisk. She’ll also mention to check Bryson’s personal comm terminal upstairs.
Head up the staircase. There will be two items, the Audio Log and his terminal. Check both, however, the terminal will trigger the cut-scene. You’ll find out about Bryson’s daughter, Ann. EDI deciphers that she’s located in the Pylos Nebula. From here, Shepard will need to find clues on where in the nebula she is located.
In the lab, check out the “Sovereign Fragment”. Also, you’ll notice a computer terminal behind the fragment. When you cycle through the terminal, you’ll see the names of ships cycling through. You have to find out which one Ann boarded.
Head back into the lab. Examine the PDA on the island counter. Shepard will find out that Ann boarded the Icarus. Go back to the terminal and cycle to the Icarus to grab a filter.
Examine the “Creature Sightings” on the back wall. Examine the “Scope” you used earlier on the rocks. Examine the Data Pad next to the monitor underneath the skeleton. Underneath the staircase, examine the “Stone Paintings”. We are just doing this to be thorough.
Head back to the galaxy map room to examine the “Blackout Crimes”. Behind that monitor, is a locker. At the moment, it can’t be opened. Open the drawer to the left of the husk head.
Examine the PDA, then open the locker. Look through the equipment, once it’s been opened. The filter will trigger when you focus on the “Missing Equipment”.
Now go to the galaxy map and activate both filters, the “Ship Schematics” and “Equipment”. From here you’ll have narrowed down Ann’s location.
Head back to the Normandy. Access the galaxy map. Look for the Pylos Nebula. It’s toward the top right. When you enter the system, fly out of it to reach Zaherin.
Scan the second planet from the sun, Namakli. Scan the planet and send out a probe.
Once you’ve located the dig site, it’s time to land.
Return to the Main Walkthrough Page
Namakli
This is an action packed level. Before landing, the crew will enter some dialogue. Once you enter the battle zone, Shepard and crew will immediately be under attack. He’ll see Ann before landing. Shepard must fight through the horde of Reapers.
When your feet are on the ground, move toward the rusty colored pod trailer on the left. Take out the husk that crashes down as you head there.
Move through the pod. You’ll see a another pod ahead. Before you can access the door, the pod will crash to the bottom. Ann will mention an elevator you need to take. Drop down on the freshly crashed pod and head for the “Elevator” marker, while taking out enemies along the chaotic way.
On the way, grab the “SMB High-Velocity Barrel III” and ammo where the room full of cannibals are located. The path here will be barred by the platform collapsing, so look behind you and take the ladder up. Jump over to the rocky cliffside.
Follow the path to reach the bridge, then activate the controls. Defend this position as the bridge extends. Use the explosive barrels to make quick work of the eventual banshee.
Move across the bridge, then take the ladder up. The elevator waypoint appears again. Slide down the ladder on the other side and take the ramp up. Access the elevator. It will stop and you’ll have to find another path.
The door next to the elevator will open. Head through the room. Grab the “SMG Mass Pulse Recoil System III” on your way out. Jump across, then take the stairs up. Take cover when you reach the top to take out a group of enemies. Take note of the ravagers in the distance.
Once clear, take the ladder ahead to the elevated pod. Take out the lone cannibal when you reach the top. Grab some ammo and medi-gel in the room. Exit the side, then move up the ladder on the back of the pod.
When you reach the top, hop over a barrier and run through the fire. Take the ladder up, then take another ladder up as you climb to the top of a rusty-colored pod. Head right, and take cover by the pillars. It’s a corridor of enemies. Take them out.
Head through the open corridor, then take the ramp on the right after you see the platform crash above. Take the ladder down, then take out more enemies as they spawn. Keep moving forward as you pass by another rusty colored pod. Enter the pod.
Up ahead, you’ll see a ladder, next to some cave paintings. Take it up. Pick up the “Assault Rifle Omni-Blade II” upgrade in this room before you head to the ladder.
Slide down the next ladder. Before you activate the elevator, grab some medi-gel, ammo and data in the room next to the elevator shaft.
Enter the lift and activate it. You’ll reach a cut-scene as you begin your conversation with Ann. During the cut-scene you’ll see Leviathan’s influence and power.
When you’re back in control, you’ll need to kill the harvestor before Cortez can land.
After the harvestor is dead, fight your way to the shuttle to leave the battle zone.
Inside the shuttle, Shepard lets Ann know the bad news. It’s back to Bryson’s lab.
Return to the Main Walkthrough Page
Last Stop at Bryson’s Lab
When you reach the lab for the last time, you’ll automatically head up the stairs to see Ann crying at her father’s bedside. There will be some dialogue choices here.
Ann will walk down the stairs. Follow her and continue to talk to her when she’s available to be accessed. You’ll continue following her into the galaxy map room. James will also be there. You can chat with him too. But to continue, keep talking to Ann.
Ann will eventually suggest that the only way to trace Leviathan is to let it control her. It’s the only signal that can be traced. Allow it to happen.
During the sequence you can trigger a Renegade response if you’re going that route.
Once the signal has been traced, head back to the Normandy.
Access the galaxy map, then head toward “Sigurd’s Cradle”. When you enter the system, you’ll have to scan the nearby systems to scan Leviathan. There are four possible choices.
You can scan the other areas, to get more assets, however, to get Leviathan’s signal, head to the “Psi Tophet” system.
Scan the first planet from the sun, “2181 Despoina”. Scan the planet for a signal, then send out a probe.
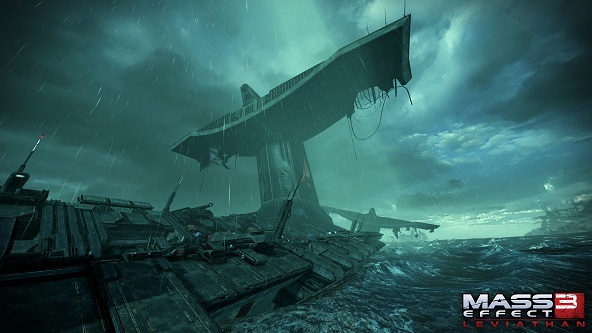
Land on the planet. You’ll find out that it’s a planet covered in water.
Return to the Main Walkthrough Page
Leviathan
When you get your feet on the ground, you can explore the rain soaked area a bit. You’ll find more of those spherical artifacts as well as data pads, a broken ATLAS mech, star charts and medi-gel. If you search the left side next to the water you can find a “Pistol Cranial Trauma System III” .
As you explore further after exhausting your search for more creds, you’ll see a Reaper begin to touch down from the sky above. Head back to the shuttle and defend it as Cortez makes repairs. Expect marauders, cannibals, husks and brutes.
Cortez will eventually repair the shuttle and provide cover fire, but it doesn’t last long. He’ll crash land across the platform. Fight your way to him, then head up to have a chat with him. Behind him is a hydra missile launcher and some medi-gel.
Cortez mentions that the ATLAS model behind glass can traverse underwater, but to open the cargo door, the power needs to be restored.
From here, Cortez says that you need to bring power to the sockets on the platform. He’ll keep providing power cells for you to carry. All you need to do is head to a socket and charge it up. You’ll have to go back and forth from cell to socket, to charge it fully. From my experience, you only need to charge one socket. Choose the one closest to the cargo door.
As soon as the door is open, hop into the ATLAS, then take out swarm of enemies on the platform, especially those brutes, which can be taken out easily now.
After the platform is clear, head to Cortez and Shepard will prepare to descend into the watery depths.
When the ATLAS touches down. Move forward. Shepard will launch flares to light to way. Move forward, then head right.
Follow the sandy path, then drop down. You’ll see a huge drop. Drop down all the way.
When you land, continue forward past the probe on the right.
Levaithan will eventually appear as you see it ascend.
This final part is essentially a long cut-scene. This is your chance to learn the history of the Reapers by asking questions.
Eventually, you’ll convince Leviathan to help you in the fight against the Reapers, but on their own terms considering they are an apex species.
Enjoy the final revelations. You’ve just beaten Mass Effect 3′s Leviathan DLC!
At the end, you’ll receive the Dominate ability, and some war assets.
Return to the Main Walkthrough Page






 NBA Live 14 Review: A Missed Opportunity for a Solid Comeback
 Titanfall level unlocks and XP requirements
 Dark Souls 2: Everything Thats New & Changed
 Mission 4 - Meridian Station: Halo 5 Guardians Guide
 Ark - Survival Evolved (PC) Tame and Ride Dinosaurs