Learn how to get started right with the State of Decay survival guide, where the zombie-hunters at Game Front provide expert tips and tricks for managing this survival sim. Unlike other zombie games, there is no central character and the plot isn’t really the focus — building your base and keeping your survivors productive is the biggest goal.
There’s still plenty of brain-smashing, but you’ll spend more time sneaking into homes and carefully searching for gear in a desperate bid to keep your camp well-stocked while hordes of the undead stalk the streets. Death comes quickly to those unprepared, and the game doesn’t really explain many of its core features.
Instead of wandering around in the dark, get a helping hand with our beginner’s guide below. Learn how to earn new playable characters, how to use unique items, when to unlock powerful new fighting abilities, and what to do to keep your base safe. State of Decay is a brutal and punishing game for beginners. Don’t let the hungry dead munch on your character’s corpse. Get our tips and tricks and become a survival expert.
Once you’re a master scavenger, check out more of Game Front’s secrets, unlockables, Easter eggs and extras on the State of Decay cheats list.
Your Survivor – Getting Started
Welcome to State of Decay, a very unique zombie survival sim on XBLA. Before becoming a badass, your survivors will start off pretty frail. Don’t worry, they get better.
The game starts with Marcus and Ed. Marcus is the first, but soon you’ll find Maya – a soldier equipped with a good rifle.
Progressing through State of Decay, you’ll come into contact with many survivors and other enclaves (small communities) that you can help or trade with. Don’t worry, none of the enclaves are hostile, even the military.
Survivors have several skills the denote how good they are at different things; Cardio, Wits, Fighting, Shooting, Powerhouse, and Leadership.
Not every survivor has powerhouse or leadership, and others will appear with useless skills. Ed, for instance starts with a 7-star “Reality Show Trivia” skill. Totally useless. Check out every survivor, sometimes they’ll appear with a unique skill that does gives them a bonus.
To check out your skills, open the menu with [Up] on the D-Pad, then switch to the star sub-menu. Here, you can view every skill and what benefits are available to unlock.
Eventually, leveling up skills will unlock new abilities. Check them by pressing [A] with the skill selected. Later, after earning 4-stars with shooting or fighting, you’ll be able to specialize in a weapon type.
Upgrading the powerhouse stat will also unlock special fighting moves. Learn more about skills and unlockable abilities in the skills section further in this guide.
-Using Weapons-
Survivors can equip two weapons, and several useable items. Melee weapons are your standard tools that come in three varieties; blunt, edged, and heavy.
Each has a slightly different effect. Blunt weapons are basic, effective clubs. Edged weapons can quickly slice off limbs and heads, but they’re prone to breaking faster if your fighting skill is low.
Heavy weapons are slower but more powerful, just like you’d expect. Many heavy weapons seem to overlap with edged or blunt weapons, so check your equipment menu to learn exactly what type of weapon it is.
Guns can also be equipped, and are used only when holding down the [Left Trigger] to aim.
Ranged and melee weapons are both susceptible to wear. They’ll eventually break after too much use. When a weapon is damaged, a yellow icon silhouette of your weapon will appear above the mini-map.
Place damaged weapons in your base’s stockpile. If you have a workshop, the weapon will be repaired over night – learn more about workshops and stockpiles in the base section of this guide.
To the right of the mini-map, your survivor should show their useable item. You can equip food, medicine, explosives, mines, or distraction devices here.
Medicine will increase your health – if it’s below max, pain-killers will boost it up and heal slightly more over time. That isn’t true of stamina items.
Distraction items include; firecrackers, alarms, and talking dolls. These are either thrown or placed on the ground with a timer. Zombies will be drawn in and gather around the device. This is a good way to draw hordes away from you and destroy them all with firebombs or grenades.
Each survivor has a weight limit. Be sure to stay under their limit – don’t equip large backpacks to characters will low weight limits.
Often, a heavy item, weapon, or gun has a lighter counterpart that is just as good. Melee weapons and guns do not have wildly different strengths – it’s all based on the survivor’s skill.
-Fighting Tips-
Starting the game with just a stick makes fighting zombies difficult. Standard swings aren’t your only attacks, as a survivor there are multiple moves Marcus can pull off right from the start.
The basic buttons for fighting are [X] for attacks, [Y] for pushes, shoves, or kicks, and [B] to dodge. Tap [B] while moving to dodge in different directions.
The basic attacks are your bread and butter, but always remember that each attack chips away at the status of your weapon. Hold [LB+X] and stand still to perform an over-head power-attack. While sprinting, you’ll perform a leap-attack.
If you have stamina to spare, kicks will do just fine. Holding [LB+Y] while shove zombies away, if you’re sprinting the survivor will perform a full jump-kick, instantly knocking a zombie on its back.
Always watch for stunned zombies. If a zombie is on its knees, on its back, or leaning against a wall it is vulnerable for an instant kill. Hold [LB+Y] to instantly kill a stunned zombie.
Instant-kills are very effective. They don’t hurt your weapon’s durability, and give your survivor invincibility while he performs the animation.
Sneaking is important. One things to always be aware of is that zombies are watching and listening. Loud noises will attract them to your location. Gunshots especially. Use guns as a last resort, or equip home-made silencers.
Cars are also noisy. Running, knocking down doors, breaking windows, or searching for items in stashes quickly will all attract zombies to your location.
Survival is all about staying patient, sneaking, and fighting effectively.
Before going out, it’s recommended to equip your survivor with these items at all times; a repaired melee weapon, a repaired gun, at least one extra magazine’s worth of ammo, 2-3 health items, and 2-3 stamina items.
Bring firecrackers or any noise-makers while searching houses. These are easy to use, and quickly create a distraction if you’re overwhelmed.
-Fatigue-
Using weapons, sprinting, shoving or climbing all deplete stamina. Stamina is a very important, and you’ll want to monitor it carefully.
The Cardio skill dictates your survivor’s stamina. It’s only raised by sprinting, and some characters have special attributes that lets them increase their Cardio level faster. Building the Training Area in the base will also unlock options to speed up your Cardio XP gain.
Before going into a fight, eat a snack. Your stamina will continue to quickly recover for a short amount of time. Sports drinks also work well. This way, your survivor won’t get tired during a long fight.
Using a single survivor for too long will make them enter a “tired” state. They’ll lose 25% of their stamina at the first tired level, then lose another 25% and so on if you continue to use them.
Playing through the campaign, eventually the player will unlock a special inspirational radio command that will fully increase your survivor’s maximum stamina back to it’s normal level.
Taking too much damage can also lead to your survivor taking on a “hurt” state, where their maximum health will be lower. This doesn’t happen often if you’re in control, but it can happen often to your other survivors while they complete field missions on their own at the base.
It can happen, but it doesn’t happen often – other AI base survivors can become “tired” even if you aren’t playing as them, but, it rarely happens.
Survivors can only be cured of the “hurt” or “tired” state if you have enough beds for sleeping, and a medical area. Upgraded medical areas give a greater chance of curing your hurt survivors.
-Survivor Swapping-
Survivors can only be swapped if they’re a “Friend”. Open the menu to look at all the different survivors currently in your group.
There’s a trust icon in the top right corner – by completing side-quests for them or for the base at large, you can increase their trust until they become a “friend”.
Friends can be swapped and played as, leaving your previous survivor to rest and complete missions on his own.
Completing missions to kill special zombies will increase trust with the survivor at that mission. The survivor that appears to give side-quests is always random.
If there’s a problem at the base, such as a fight, the survivor is afraid, needs training, or is mad, a special icon will appear where you can take them outside for a talking to. These missions will also increase trust.
Whenever going out to rescue survivors in trouble that want to join your group, at least one of the new survivors will always be a playable friend.
Zombies – Freaks & Hordes
Single zombies aren’t so dangerous, but hordes can quickly tear your survivor apart. These large conflagrations of zombies stalk the roads, with a red vision cone appearing on your mini-map.
Hordes will constantly threaten your base. Killing them will earn you trust and improve morale.
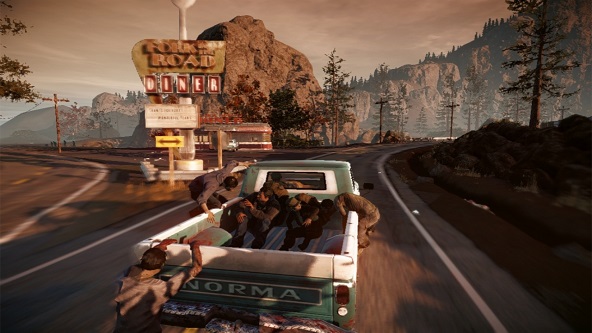
Cars are the best, and easiest, way to deal with hordes early on. Grab a truck and run the hordes down. But, that can quickly sap a car’s durability. A few hordes and that truck becomes useless. New cars do not spawn into the world, so you have a limited amount. They can be fixed, but only with an upgraded workshop.
To better deal with Hordes using a car, use the car’s door attack. Hold open the door while driving with [X] and swipe the horde as you drive past. Your car won’t take nearly as much damage this way, oddly enough.
There are more freak zombies that appear in the game. Learn all about them below.
Only headshots will kill zombies. With melee weapons, use [LB+Y] to kill them while they’re stunned.
Screamers: These zombies appear often in Hordes or inside Infestations. Screams are tall zombies with no arms, and their only attack is to loudly screech when your survivor is near. This will stun your survivor, and cause any nearby zombies to come running. Use a silenced gun to deal with them, or a fire bomb. You can kill them before screaming – sprint forward and attack to knock them over, then finish them off.
Feral: One of the toughest zombie types. These fast zombies will rush straight for you and attack wildly. Defending doesn’t work well, and they’re difficult to run from thanks to their heightened speed. Look out for gaunt, large zombies that stand hunched over. Gunshots work well, and if you use weapons simply attack to stammer them. Kill them instantly while they’re down before they get back up.
Juggernaut: The hardest zombie type by far. These giant obese monsters have the most health, and they’re difficult to run down with even the largest trucks. Though slow, they can charge forward or slam the ground to stun your survivor. If caught, they’ll pick up a survivor with one hand and begin chewing.
Melee attacks are not recommended, their ground pound attack is difficult to dodge. Bring lots of ammo, and aim for the head. Sprint away when it charges, or always bring a friend. If your allied survivor is grabbed by the giant, go nuts with a melee weapon to get them free.
Armored: These army or SWAT zombies appear later in the story, and aren’t particularly threatening. They wear armor that protects them from firearms, but melee weapons work just as well.
Bloaters: These ghastly zombies are naked and slimy, appearing more mutated than any of the others. Instead of attacking, they’ll try to run close and explode to release a poisonous gas. Never attack a Bloater with a melee weapon, one bullet will kill them.
Base Management – How to Keep it Safe & Morale High
After the tutorial, the true game begins once Marcus and his friends reach Ascension Church.
Open the menu and switch to the “Home” page. Here, you can select facility slots to construct new facilities, or select current facilities to start upgrades or projects at the cost of some influence and materials.
Each base starts with the Radio Room – your hub, and the most important facility. From here, you can call for Survivors to recruit new members, or put out a search for materials you need to construct or maintain the base.
The base uses material resources daily. Fuel, food, ammo, medicine, and construction supplies are expended depending on how many facilities you have running, and how many survivors are currently staying in your base.
Look on the “Assets” menu to see the status of your base. Here, you can see how many items are in your base inventory, how many materials are in your stockpile (and how much is expended daily) and other factors like; influence, fame, population, beds, and labor.
Influence is the currency with which all things are purchased. Radio commands use influence. Taking items from your base locker uses influence, and building outposts or new facilities costs some influence.
Influence is gained by dropping items into the locker, helping the base by completing side-quests, clearing hordes or infestations, and helping survivors. Bringing back materials will provide an influence bonus, or just by being impressive (such as killing tons of zombies at once) will give you influence.
To keep your base happy, you’ll need to pay attention to the morale meter. This meter shows the current status of your base, and gives a basic barometer for how everyone is feeling. Low morale leads to despair, accidents on missions, and might cause survivors to leave the base compound.
High morale gives benefits to your base. Survivors will be better at scavenging on their own, they’ll fight less, and generally operations will run smoother.
To keep morale high, you’ll need to complete side-quests for the base, build facilities they want, and make sure they are well provided for.
Food is the most important. Rations are used up quickly, so you’ll need to gather a large stockpile to keep people happy. Medicine will keep people from getting sick, and a stockpile of fuel will keep the generators running.
Whenever your base is having trouble, a request will appear under the Home Status bar when you open the menu. Usually, Lilly will recommend a facility or suggest a side-quest.
Completing these side-quests is important. Helping a survivor through fear, anger, or sadness on a mission will increase their trust and slowly turn them into a functional member of the base.
If zombies manage to break into the compound, morale will drop like a rock. Keep zombies out by equipping every friendly survivor with a gun so they can defend themselves before the zombies get in.
Setting up outposts is incredibly important for the well-being of your base. Outposts can be set on any building or field with a white icon. To create an outpost, you must explore the area (step over every white dot on the mini-map to clear it) then search through every container for items.
Outposts serve four purposes. First, a locker will appear inside an outpost. Outpost lockers share items with your main base, allowing you to restock or put away items without having to return to base.
Second, they clear the area and make it a safe zone. Zombies cannot infest an outpost, and will not spawn inside the safe zone.
Third, any materials inside will slowly be siphoned into your base. Setting up an outpost over an area with an ammo, food, fuel, construction, or medical icon will earn your base more of those materials over a greater amount of time. You won’t get the items instantly, but you’ll earn more in total.
Note: To earn materials, make sure you DO NOT loot the salvage and bring it home. Leave it at the location, then set up an outpost first.
The fourth, and most valuable use for outposts is a wider net of defense. Once an outpost is established, open the Home menu and select the outposts in the slots below. Here, for a small price you can set traps around every outpost. It needs to be reset every 24 hours of real-time, but the cost is minuscule and it’s a single payment to upgrade all of your outposts.
To keep your base safe from hordes, build outposts covering every angle. Hordes usually only approach through the main roads, but sometimes they’ll attack from forested areas. Surround your base with outposts, and hordes will never get past the explosive traps.
With hordes dealt with, you can spend more time earning influence and trust. Many of the facilities will improve morale, such as the Dining Area. For the cost of food and influence, you can choose to cook a large meal in the church to improve morale. Upgrading the Bunk Area to include more beds will help everyone get good rest.
Eventually in the story, a new plague will hit the area. Randomly, certain survivors will develop sickness. To cure this ailment, open the Home menu and upgrade the medical area. Upgrading it to the third-tier medical area will help improve chances of recovery even more.
If survivors are mishandling firearms, try building a Training Area and taking on projects to improve survivors.
Don’t forget to use the radio! Outside of establishing outposts, you can call for scavengers to collect materials for you. You won’t earn trust or influence, but it’ll save another trip. Don’t call for scavengers too far from your base – the survivors will literally run to the location in real-time. The further from your base you call scavengers, the longer it will take and the more danger that survivor will experience.
Follow those simple steps to keep your base happy and zombie-free.
Upgrading Skills – Becoming a True Survivor
Cardio : Improved cardio increases your Survivor’s max stamina. The only way to increase this skill is by sprinting. Eat a snack before sprinting to keep your stamina high, or swallow some trucker pills.
Building a training facility will also help boost stamina to make gaining cardio easier.
Wits : This stat is tied with searching for supplies. Looting containers gives Wits XP, and it’s another stat that very slowly increases.
The higher your Wits, the faster the Survivor will search, the less likely items will break, and the less noise you’ll make during quick searches.
Fighting : Swinging a melee weapon increases this stat. This is the most basic stat. Be prepared to fully level-up fighting very quickly. High fighting skill gives a special counterattack – dodge [B] then attack [X] to use this power.
Shooting : Killing zombies with firearms boosts this stat, and provides several upgrades as your star level increases.
Build a watchtower to unlock the ability to train your base with firearms – activated in the Base menu under the watchtower. Your Survivor will gain 3 times more XP for shooting.
Don’t forget to check out the stat menu by selecting shooting. Automatic rifles can switch to semi-auto by pressing [A] while aimed.
Upgrading this skill unlocks many bonuses; faster movement while aiming, faster reload speed, better auto-aim, improved maintenance, and the final abilities upgrades all your shooting skills.
Powerhouse (Optional): Not every survivor possesses the final three optional skills. Powerhouse is a unique, and powerful, stat that offers some helpful rewards.
Powerhouse is closely tied with melee combat. Gain it by performing killing blows on downed zombies.
Upgrading the powerhouse stat lets your Survivor carry more weight, use big weapons better than others, use big guns, and unlocks unique Utility and Defensive skills.
Leadership (Optional): Another optional skill, this powerful trait provides a bonus to friendship gain when working with other survivors. If you’re planning on doing missions with people, bust out a survivor with leadership.
Marcus starts the game with leadership. Try to keep him alive!
Reflexes (Optional): Similar to powerhouse, reflexes is connected with melee combat, but it’s just slightly less useful.
Instead of giving survivors extra strength, it increases their stamina regeneration. Upgrading it fully unlocks unique Utility or Defensive skills to choose.
Scavenging Materials – Where to Look & How to Keep it Coming
Scavenging is a time-consuming and dangerous proposition. To keep your base happy, you’ll need food, fuel, construction materials, ammo, and medicine.
In general, there are specific buildings you’ll want to look out for and specific containers you’ll want to loot to find these items.
Materials spawn randomly, but only in logical locations where they would be found in reality. Don’t bother looking for fuel in the fridge, and don’t check out the medicine cabinet looking for ammo.
In general though, these are loose recommendations. Snacks can be found almost anywhere, and you’ll be surprised to see where middle-class families are keeping their guns. Search every nook and cranny of a house before giving up.
Food:
Buildings to Search: Homes, General Stores, Restaurants Containers to Loot: Counters, refrigerators, almost anywhere
Fuel:
Buildings to Search: Gas Stations, Construction Sites, Barns, Auto-Repair, Warehouses, FieldsContainers to Loot: Barrels, jerry cans
Construction:
Buildings to Search: Warehouses, Storage Sheds, Construction Sites, Hardware Stores, FieldsContainers to Loot: Pallets of boxes, large wooden crates, toolboxes
Ammo:
Buildings to Search: Homes, Barns, Gun Stores, Army Tents, the Police StationContainers to Loot: Metal lockers, shelves, cabinets, black boxes
Medicine:
Buildings to Search: Pharmacies, Gas Stations, Homes, Veterinary ClinicsContainers to Loot: Cabinets, thin white shelves, store counters
Side-Quest Tips – Managing Infestations, Hordes & Freaks
Side-quests randomly appear as you attempt to survive the zombie apocalypse. These quests, unlike the story quests, don’t last forever. Most will only last an hour or so.
Some missions can be skipped, but others result in grave consequences. Below, most of the major side-quests are listed below. See which ones you can skip, and which are worth doing.
-Missions-
Zed Hunts: These are fairly innocuous missions, and they can be skipped. Failing to complete these will not hurt your survivor, but it will drain morale.
Clearing Infestations: Unlike Zed Hunts, clearing infestations is more important to the well-being of your base.
Too many infestations will drain morale constantly, and a Survivor can be injured if you don’t help them out. Failing to complete these quests can also lead to a loss of ammo.
Incoming Hordes: These can’t be ignored. If several hordes are moving toward your base, grab a car and start running them down.
Luckily, hordes can be managed. Set up outposts in the buildings or fields surrounding your base to avoid horde attacks.
Missing Survivor / Survivors in Peril: While on missions, your other Survivors will sometimes need rescue.
Usually it involves finding the survivor and escorting them back to base. It’s very important to complete these! There’s a chance the Survivor will never return if you don’t rescue them.
These missions don’t last forever. Put off the main missions to rescue your Survivors. To prevent these from happening, try fighting zombie hordes, infestations, and completing Zed hunts.
Rescuing Survivors: To gain new survivors, select the Radio Room in the Base menu and request to search for survivors.
Besieged: These side-missions last a long time, but they’re rare. When an Enclave is besieged, prepare for combat. Hordes of zombies will attack alongside freaks. These are long missions, but if you fail to complete them, the entire Enclave will die.
Base Missions: Every once in awhile, Survivors will cause problems at your base. Speaking with them will lead into a short mission.
Skipping these missions will cause a loss in morale. Completing them will boost your trust with the Survivor.




 Clean Up on Cyber Monday with an Extra 25% off E-Learning
 A Small Favor Walkthrough
 PlayStation 4: Build Your Own PS4 Ultimate Player Edition
 Life is Strange Episode 3 - All 10 Optional Photo Locations
 What We Expect of Skyrim