

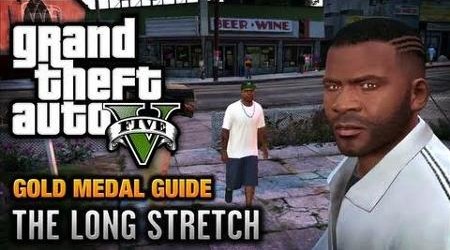
Mission Can Be Triggered By: Franklin
After completing both “Father/Son” as Michael and “Chop” as Franklin, a new story mission for Franklin is unlocked. Follow the green “F” icon to Franklin’s house . He walks in on some femininity rejuvenation with Aunt Denise. Back outside, Lamar and Stretch talk Franklin into being their driver for a little business transaction
Go to Ammu-Nation.
Get in your car, wait for Lamar and Stretch to join you, and follow the yellow route to the Ammu-Nation gun store . Exit the car, go inside the store, and approach the counter to make a purchase. Use the controls shown onscreen to browse weapons until you highlight the Pump Shotgun
Buy a flashlight mod for the Pump Shotgun.
If you’ve been diligently picking up weapons dropped by enemies in previous missions, chances are good that Franklin already has the Pump Shotgun in his weapon inventory. If not, buy it now. Press the Upgrades button for the Pump Shotgun, then scroll down to Flashlight and buy that, too.
Go to the meeting at the recycling plant
Exit the Ammu-Nation and get in the car with Lamar and Stretch. Follow the new yellow route to the Rogers Salvage & Scrap plant at Mutiny Road and South Arsenal Street. Drive through the gate to the parking lot behind the building under the “Keep Clear” sign. Exit the car and go through the doors next to the row of dumpsters.
Climb the stairs to the yellow door marked “Reception” to trigger a cutscene: The contact for the transaction is none other than D, the very same Balla gangster you tried to kidnap in the “Chop” mission. Of course, the meeting goes south quickly as Franklin spots carloads of Ballas arriving outside. After dealing with D, Franklin’s partners sprint into the next room with weapons drawn.
Escape the recycling plant.
Follow Lamar and Stretch. The plant is poorly lit, so wield the Pump Shotgun with the flashlight for better vision. Target the three Ballas in the room.
Remember that enemies appear as red blips on your radar, so keep an eye on that display to see what’s up ahead. As you fight your way across the room, two more Ballas rush in from the far doorway. Gun them down!
When the room is clear, Stretch and Lamar continue forward.
Follow your partners into the locker-lined hallway. Lamar moves down the hall to an exit door that suddenly explodes open. Take out the two Ballas, who burst through, before they can kill Lamar.
The next corridor is long and filled with stacks of crates. Hustle to take cover behind the first crate on the left. Then methodically pick off the Ballas at the other end, moving from crate to crate for better shooting angles.
When you reach the stairwell at the far end, descend carefully! There’s one more gunman on the landing below. At the bottom, push through the doors into another box-filled hall and get ready for another Balla rush from the opposite end.
Escape the burning warehouse.
The doorway just around the corner leads into a big warehouse area filled with hostile gunmen. Your best bet is to sprint hard through the doors and take immediate cover behind the crates directly ahead. Clearing the warehouse does two unfortunate things. First, the gunfight triggers a fire. Second, your radar starts flashing because you also just triggered a three-star Wanted Level, and police are arriving outside in force. Go through the exit and be ready for more Ballas to blow open the next door. Gun them down quickly! Then proceed to the Fire Escape door and hustle out of the plant.
Take out the LSPD chopper.
Onscreen text suggests that you open your weapon wheel, and for good reason. An LSPD helicopter with a searchlight and a sharpshooter hovers to F your right, spraying you with gunfire. Switch to your Assault Rifle and shoot it out of the air.
Escape the junkyard.
Follow the new yellow blip to the ladder and climb up to the catwalk with your partners. Go to the end of the catwalk, then sprint across the corrugated tin roofs. Hurry! Another police chopper is hovering above you now. You can try to shoot it down, but more cops are arriving below, so just head for a getaway car.
Follow Stretch and Lamar across the roof as they veer right toward the gap in the barbed wire atop the wall. Climb over at the gap and drop into the street on the other side.
Lose the cops.
Stretch and Lamar step in front of a driver, who stops and abandons his car as police cruisers approach down the street. Hop in the car with both partners, then get busy losing the cops. This is a tough escape it’s not easy to ditch a helicopter. You must cut off its line of sight.
Good escape tactics include hiding in alleys, tunnels, or secluded spots off the road when you’re out of all police cones of vision. Another tactic is to switch cars.
Go to Franklin’s place.
When you finally lose the three-star Wanted Level, a new yellow destination marker pops onto the map. Follow it back to Franklin’s driveway to complete the mission.
Mission Completion Stats: The Long Stretch 100 percent
Accuracy – Finish with a shooting accuracy of at least 60 percent
Headshots – Kill 10 enemies with a headshot
Unmarked – Complete with minimal damage to health and armor
Mission Time – Complete within 10:30
Grand Theft Auto V (Special Edition) – Playstation 3
Gameplay Video:
Be Sociable, Share!


 Shogun 2 Walkthrough
 First Westworld (HBO series) trailer released
 The Witcher 3 Wild Hunt - Alternate Endings
 Voices In Your Head: 7 Biggest Video Game Voice-Over Stars
 Phils Story Corner – Isaac Clarke: From Engineer to Soldier in Dead Space 3