
Navigate down the coastline.
You start out in control of Michael. Follow the yellow destination blip south along the coastline to a location in the bay just off-shore from the Humane Labs and Research facility. When you reach the spot, Dave reports that the dive team can reach the lab via an underwater discharge tunnel. After the FIB agents drop into the water, press the button indicated onscreen to dive in, too.
Swim to the discharge tunnel outlet.
Follow Dave and Steve (the blue radar blips) to the discharge tunnel outlet (the yellow blip). Swimming into the destination marker triggers a cutscene: Michael approaches a metal grill that covers the tunnel outlet.
Cut through the grill over the outlet.
Use the controls shown in the upper-left corner to slice through the grill with the oxy-hydro cutter. As Steve points out, it burns at over 3500 degrees, and fuel is limited, so use it carefully. The fuel level is displayed in the lower-right corner. Apply the torch on the 26 green spots marked on the metal bars. Each burn isn’t complete until you hear a sound cue (a “clunk”) and the green spot turns into a glowing red cut line. To remove the grill, burn through all 26 spots.
Gain entry to the lab.
Once you finish cutting, Michael pushes down the grill. Swim down the long vent, then glide carefully between the blades of the two turbines you reach.
At the two-way vent opening, swim through either opening, then continue past a third turbine.
When you finally reach the big open room at the end, swim left then upward to find the ladder. Surface and swim into the ladder to climb out of the water.
You’re now in the lab facility , and this triggers a cutscene: Steve and Dave’s “plan” is pretty sketchy, and Michael gets assigned to stun gun duty.
Follow Dave to the elevator.
When control returns, Michael is automatically armed with a Stun Gun. Dave takes point at the doorway as Steve decides to “lead from the rear” Follow Dave down the hall and stun everyone he holds at gunpoint. proceed around the corner to the Floor -3 elevator and stun the scientist who emerges. Walk Michael over the fallen man’s access card (the green blip) to snag it. Then get in the lift to trigger a quick scene: Steve feels good about the progress.
Incapacitate the lab workers.
When the elevator stops on Floor -1, follow Dave to the Laboratory 1 doorway. Stun the white-coated workers in the lab, then continue down the hall and G” around the corner through the Cold Room doors. Join the FIB agents as they wait for a security team to enter. Stun both guards and follow the agents down a hall into the room marked Decontamination 1. Approach the security door Michael automatically uses the access card to open it.
In the next area, you find a lone worker in a red-lit room with a security door that can only be triggered internally. when another scientist enters from the far door, Steve backs him to the red-lit door as “collateral” to intimidate the
worker in the room. It works: he opens the door from inside for you. Zap both lab workers.
Get the nerve toxin.
Now enter the red-lit room and approach the counter (green radar blip) to trigger a scene: Michael carefully extracts the nerve agent tube from its holding container. When control returns, exit the red-lit room and follow the FIB agents to the doorway labeled “Analysis”.
Take out the security guards.
Time to swap out the Stun Gun for a more lethal weapon. Security guards pop out of the next doorway labeled “Sample Storage Loading Bay” Gun them down and start following the signs toward the loading bay. check your radar for red blips-more guards lurk up ahead, including one around each corner. Roll a grenade ahead or use Michael’s special ability to clear the corridor. Keep following the signs pointing the way to the Sample Storage Loading Bay.
As you get closer to the bay, you hear monkeys chattering and screaming. Fight your way through the cages of the monkey room and push through the final door labeled “Loading Bay.” Unfortunately, the big open bay is crawling with guards now. Eliminate the gunmen in the bay. This is another good place to use Michael’s special ability.
Put the nerve toxin in the refrigeration unit.
When the area is clear, follow the green radar blip to the refrigeration unit behind the truck outside. Your approach triggers a cutscene: Michael gently places what he calls “the apocalypse in my pocket” into the unit’s holding chamber.
Switch to Trevor and collect the container.
Agent Norton reports that Trevor is on his way. Here you automatically switch to Trevor, who flies a big Cargobob helicopter. Follow the green radar blip and maneuver the chopper over the container holding the refrigeration unit with the nerve toxin. Drop low directly over the container to trigger another cutscene. Agent Haines tries to abort the mission-a deadly Agency response team is swift approaching. He adds, “If that bird goes down, it’ll take half the West Coast!” But Michael and the crew decide to move ahead, so Haines concocts a clever ruse to distract the response team in the loading bay. Fly to the airfield and land the crate on the trailer. Follow the yellow map blip to Trevor’s airstrip in Sandy Shores . On arrival, fly directly over the trailer attached to the semi-truck. When the container is centered over the trailer, press the control indicated onscreen to release it.
Land the helicopter.
Now simply land the chopper in the spot marked by the yellow radar blip. This triggers a cutscene: Dave drives off with the nerve toxin container. Michael learns that Lester has settled accounts with Martin Madrazo, clearing the way for a return to Los Santos. Then you automatically switch to Trevor.
Drive Patricia to the farm house.
Trevor is driving his truck down Calafia Road with Patricia Madrazo as the passenger. Follow the yellow route to the Madrazo’s estate, La Fuente Blanca Watch the mission ending scene as Trevor reunites the Madrazos despite his deep well of personal pain about the delivery.
Mission Gameplay
Be Sociable, Share!


 Eminem is sued for plagiarism in Rap God
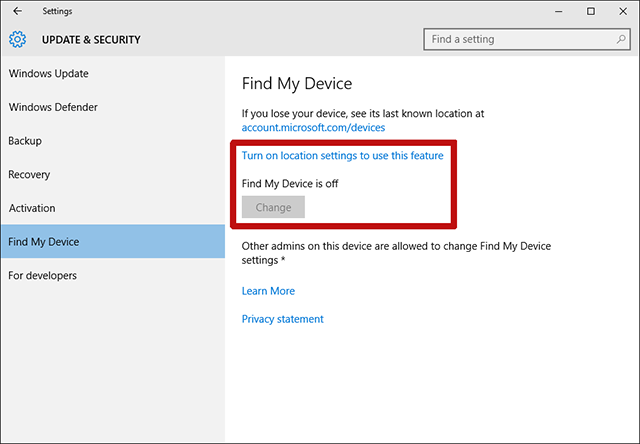 Never Lose Your Windows 10 Laptop Again With This One Feature
 Top 15 Badass Moments in Gaming
 Hands-On With USCs Project Holodeck: a True Virtual Reality Experience
 How Much Does it Cost to Get To Outer Space?