Buy Assassin’s Creed III on Amazon
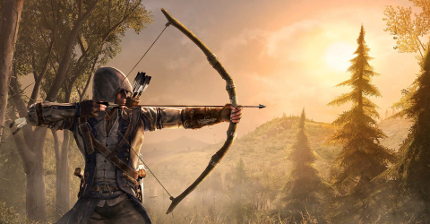
While it may be nice to get up close and personal with your targets before they bite the dust, there’s nothing wrong with playing it safe from a distance. While it helps to have a hawk’s eye to keep your munitions in good number, it certainly pays off in the end to know when to use a certain weapon over another.
A quick note: While Assassin’s Creed 3 does feature muskets, which you can use, these weapons are only disposable and cannot be purchased–only picked up off of the ground in-game.
Ranged weapons are classified as tools in Connor’s inventory, with each having replenishable stocks of munitions specific to different types (arrows, rope darts, cartridges, etc.). While there are many ways to get these items for use, one of the most effective is to craft saddlebags, used by Connor’s horse; each type of saddlebag will hold stocks of specific items which get moved to your inventory once you draw near to them.
Small Saddlebags: Available through crafting after sequence 9; Replenishes Arrows & Cartridges.
Medium Saddlebags: Available through crafting after sequence 10; Replenishes Arrows, Cartridges, Rope Darts, & Smoke Bombs.
Large Saddlebags: Available through crafting after Sequence 12; Replenishes Arrows, Cartridges, Rope Darts, Smoke Bombs, Poison Darts, Trip Mines, & Snares.
While these weapons are most often used to wound enemies from a distance, it is still very possible to administer them at close range through a Special Counter–this attack instantly kills most enemies. Unlike with melee weapons, there are no specifically numbered stats for ranged weapons, like damage or speed, instead each weapon is measured by the number of shots required to down each character archetype at varying ranges (after each archetype name, two numbers will be listed, indicating the required shots at Short and Long range respectively, followed by other information).
 Reflex Shot Bow: Soldier/Snitch (1, 2); Officer/Scout (2, 2); Grenadier/Jager (3, 3); Shots per reload (N/A); Available (part of initial equipment)
Charged Shot Bow: Soldier/Snitch (1, 1); Officer/Scout (1, 2); Grenadier/Jager (2, 3); Shots per reload (N/A); Available (part of initial equipment)
Musket: Soldier/Snitch (1, 1); Officer/Scout (1, 1); Grenadier/Jager (2, 2); Shots per reload (1); Available (from guards & racks)
Flintlock Pistol: Soldier/Snitch (1, 2); Officer/Scout (1, 2); Grenadier/Jager (2, 3); Shots per reload (1); Available (general stores, sequence 6)
Duckfoot Pistol: Soldier/Snitch (1, 2); Officer/Scout (1, 2); Grenadier/Jager (2, 3); Shots per reload (1); Available (general stores, sequence 6)
Double-Barrel Pistol: Soldier/Snitch (1, 2); Officer/Scout (1, 2); Grenadier/Jager (2, 3); Shots per reload (2); Available (general stores, sequence 9)
Pitcairn-Putnam Pistols: Soldier/Snitch (1, 1); Officer/Scout (1, 1); Grenadier/Jager (1, 2); Shots per reload (1); Available (complete sequence 7)
Italian Flintlock: Soldier/Snitch (1, 1); Officer/Scout (1, 1); Grenadier/Jager (2, 2); Shots per reload (1); Available (through crafting)
Royal Pistol: Soldier/Snitch (1, 1); Officer/Scout (1, 1); Grenadier/Jager (2, 2); Shots per reload (2); Available (through crafting)
English Flintlock Pistol: Soldier/Snitch (1, 2); Officer/Scout (1, 2); Grenadier/Jager (1, 3); Shots per reload (1); Available (through crafting)
French Coat Pistol: Soldier/Snitch (1, 2); Officer/Scout (1, 2); Grenadier/Jager (1, 3); Shots per reload (2); Available (through crafting)
Royal Navy Sea Service Flintlock: Soldier/Snitch (1, 1); Officer/Scout (1, 2); Grenadier/Jager (1, 3); Shots per reload (1); Available (through crafting)
Naval Duckfoot: Soldier/Snitch (1, 1); Officer/Scout (1, 2); Grenadier/Jager (1, 3); Shots per reload (1); Available (through crafting)
Pirate Flintlock: Soldier/Snitch (1, 2); Officer/Scout (1, 2); Grenadier/Jager (1, 3); Shots per reload (2); Available (collector’s edition or pre-order)
Scottish Flintlock: Soldier/Snitch (1, 1); Officer/Scout (1, 1); Grenadier/Jager (2, 2); Shots per reload (1); Available (collector’s edition or pre-order)
 Combat Notes:
Bows are silent weapons and excellent for stealthy kills from a distance. Bows can fire in two different modes: reflex and charged. A reflex shot is performed by merely tapping Y/’Triangle’, while a charged shot, which has better range and power, hold the same button until the bow is drawn taught, then release. A bow’s maximum range of 25 metres is also only exploited if you’re firing with Precision Mode aiming. The bows special counter causes Connor to block his enemy’s attack and then kill them with a point-blank reflex shot.
With the varied strengths and weaknesses of firearms, it is important to note when each one is applicable. For example, the duckfoot pistol has great stopping power, but is completely discharged in one pull of the trigger, as opposed to many other pistols that hold 2 cartridges. While reloading a pistol in combat is nearly impossible, you can later fashion an additional holster to carry two pistols, doubling your firing capacity. While powerful, though, the pistol is never an option for stealth; its loud bang attracts entire patrols from the nearby area as though you were the Native American Pied Piper. Much like with the bow, the pistol’s Special Counter is a point-blank shot, albeit non-retrievable as with arrows.
Both bows and pistols enjoy capacity upgrades, as well (always through crafting or through UPlay): you begin with a quiver of 8 arrows with two upgrades available that increase it 4 arrows each time (the second upgrade being available only by UPlay); your cartridge pouch has the same default capacity 8, but has 4 more upgrades, adding 8 to the capacity each time (the fourth upgrade also being through UPlay).
Buy Assassin’s Creed III on Amazon

 Dbrand PlayStation 4 Skin Review
 Mario Kart 8 Wiki – Everything you need to know about the game .
 How to get Destiny The Dark Below Heart, Hand and Eyes of Crota, Location and Tips Guide
 The Witcher 3: Wild Hunt All The Monster Nests Location Guide
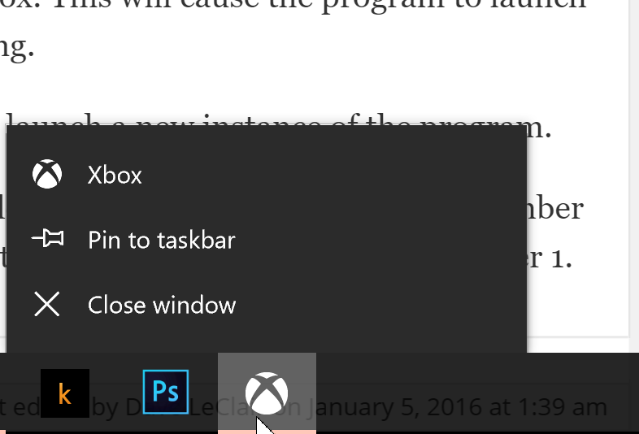 How to Create New Instances of Running Programs in Windows