If you're feeling a bit overwhelmed with the game so far, take a look at our beginner's guide to Starbound!
While the main goal of Starbound is undoubtedly survival, there comes a point in the game where you will want to search out better resources, plunder more hi-tech labs and take on more dangerous enemy bases. In order to do this, you need to travel beyond the confines of the Alpha sector, and if you want to do that successfully, you’ll first need to upgrade your armour.
In order to make armour, you’ll need to mine an awful lot, as you need 67 metal bars (equating to 134 ore) for each full set. It’s best to always keep some copper ore in your inventory to repair your pickaxe or drill (to do this, select the copper ore and right click on the mining tool until the status bar disappears). It’s also a good idea to upgrade your mining tools whenever you have enough resources to do so, and to obtain the drill as early as possible for faster mining.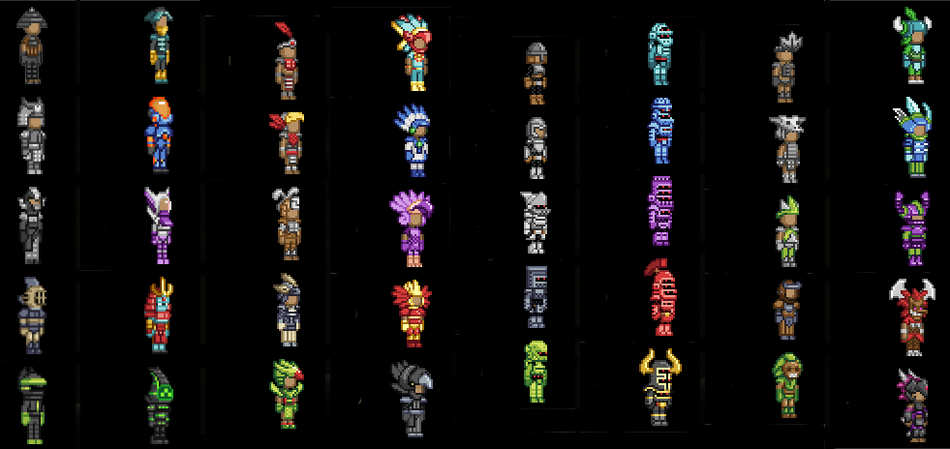
There are two types of armour: Racial (pictured above from left to right: Hylotl, Avian, Glitch, Floran) and non-Racial armour. The former is unique to each race (though blueprints for armour of other races can be bought from merchants), while the latter can be crafted by all races. Each armour set consists of three pieces: Helmet, Chestpiece, and Greaves. See below examples of the Racial armour sets for (from left to right)
For the first 3 tiers of Racial armour, you will first need to craft a specific set of non-racial armour as a prerequisite. All of these can be made at an Iron Anvil or a Metalwork Station: Pre-Tier 1: Copper Armour
Copper Helmet: 20 Copper bars
Copper Chestpiece: 35 Copper bars
Copper Greaves: 12 Copper bars
Pre-Tier 2: Silver Armour
Silver Helmet: 20 Silver bars, 20 Pixels
Silver Chestpiece: 35 Silver bars, 30 Pixels
Silver Greaves: 12 Silver bars, 10 Pixels
Pre-Tier 3: Gold Armour
Gold Helmet: 20 Gold bars, 200 Pixels
Gold Chestpiece: 35 Gold bars, 500 Pixels
Gold Greaves: 12 Gold bars, 100 Pixels
General tips...
- Try to visit a number of planets. After you have mined fairly extensively on one planet, try heading to another one and starting a mine there. Each journey costs 200 coal, though once you have set yourself a home planet (done from the nagivation chair on your ship) you can simply warp back there any time by left clicking the teleportation pad on your ship and selecting "Warp Home".
- To make the most out of your mining sessions, ensure you have a good supply of food and bandages. You can sometimes find fruit-bearing plants in caves, or kill creatures with the bow and arrow to increase the chances of them dropping raw alien meat that you can cook on a camp fire. You can make more bandages out of plant fibres.
- If you’re on a particularly difficult planet, ensure you always have some dirt blocks assigned to one of the hotkeys. These are very useful if you get into trouble, as you can literally wall yourself in with dirt and protect yourself from enemies while you heal.
- Carry torches. Your flashlight is good for narrow tunnels, but isn’t much use in larger caves.
- If you’ve mined particularly deep, use the Save & Quit option to spawn back on your ship. This is a far easier solution than trying to navigate your way back up the mine, though it’s not clear if this will work beyond the Furious Koala Beta.
- This may seem obvious, but NEVER throw away ore, even if you don't need the material anymore. If you start to run out of space in your inventory, smelt some of the excess ore into bars and store it in your ship's container. These bars can come in handy if you ever need to make some easy pixels later on in the game, and it never hurts to have a good stockpile.
Now onto the Racial armour itself. The tables below represent the items you will need to craft each respective armour set...

Tier 3 armour requires Titanium, which can only be found on Level 3 planets and above. This means that you have to venture into the Gamma sector, which requires you to craft the Starmap Upgrade MK3. It can be crafted at the Robotic Crafting Table and requires 5 Steel bars and 750 Pixels.

Tier 5 armour requires Aegisalt: a metal found on Level 5 planets. In order to work with Aegisalt, you will need to construct the Durasteel Tech Upgrade, which requires 40 Durasteel bars. In fact, from here on out, you will need to craft a tech upgrade between each set of Racial armour in order to progress. They each require 40 bars of whatever the latest material is that you’ve unlocked, so be sure to get the additional 80 ore before you surface from your mine in order to save yourself a bit of time!
Furthermore, as Aegisalt is only available on level 5+ planets, you’ll need to head into the X sector, which has the most difficult planets in the game. To travel to the X sector, you need to have defeated the Delta sector boss and crafted the Durasteel Tech Upgrade. Be careful!

Tier 7 armour requires Cerulium, found on level 7 planets.

Tier 9 armour requires Rubium, found on level 9 planets.

Now that you've obtained your Tier 10 armour, you'll likely have plenty of materials to start building some epic constructions, and enough Pixels to buy almost anything you want! If youfind yourself short of pixels at this point, craft a Refinery and use it to turn any spare metal ore or bars into Pixels!
Did you find these tips useful? Have anything to add? Let us know in the comments section below!
If you liked this, here are some that you may also like:


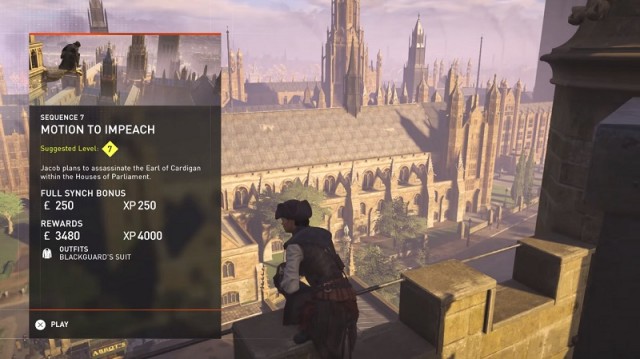 Sequence 7 - Motion to Impeach: Kill the Earl of Cardigan - Assassin's Creed: Syndicate Walkthrough
 MGS V: The Phantom Pain PC Error: Fix For Crash On Startup, Low FPS and Resolution, Slow Download Speed & More
 The Wonderful 101 Review - Illustrative Freedom
 Halo 5: Guardians Guide To Skull Locations
 Rive (PC) beginners guide