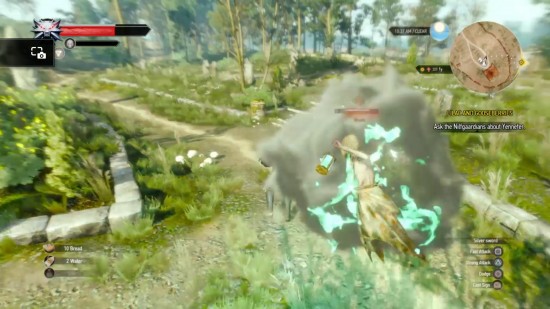
Yrden is the first sign on the list in The Witcher 3: Wild Hunt and it is a surprisingly useful one although it doesn’t always seem that way. The Yrden sign is a magic trap that is cast on the ground and takes up a relatively large circle around the point where Geralt is standing at the moment of casting. Once an enemy steps into the circle, that enemy receives a drastic loss of speed, and in some cases (like with certain wraiths) becomes vulnerable to physical attacks.
This Sign is perfect when dealing with several quick-footed melee fighters at once. Geralt of Rivia can dance around with the best of them, but even he has his limits, so slowing things down allows players to adjust and catch a much needed breather. The Witcher 3: Wild Hunt will also throw spectral opponents at Geralt every now and then, and in those cases the Yrden sign is absolutely necessary. Anything that steps into the circle loses its magical defense on top of being slowed.
So, when neither one of your swords seems to be cut out for the job, cast the Yrden sign and take control of the battlefield.
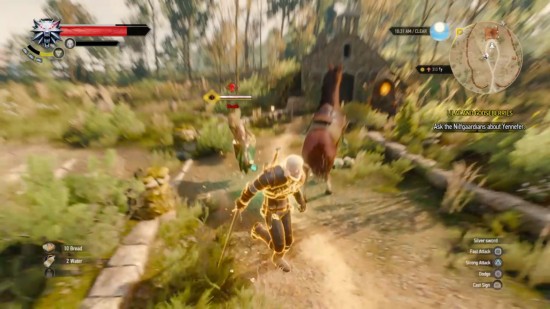
Quen is the sign for those who like to approach battles in The Witcher 3: Wild Hunt a bit more defensively. Casting this sign places a temporary protective shield around Geralt that helps to mitigate a large portion of incoming damage. Although it is very useful against powerful foes, it should be noted that it wears out rather quickly, and players shouldn’t be surprised to see their Quen aura shatter after a single hit.
Yet, even though it doesn’t last very long, it’s ability to save Geralt from certain death from an otherwise fatal attack makes it perfect for last second attacks for the kill. If a player is up against one of The Witcher 3: Wild Hunt‘s bandits that happen to brandish a heavy weapon, Quen will allow that player to get in close without having to worry about getting stunned, or losing half of their health.
Quen may not help Geralt dish out extra damage like the other four signs available to him in The Witcher 3: Wild Hunt, but it can certainly be used to keep him alive. And staying alive is most certainly just as important as making everyone else dead.
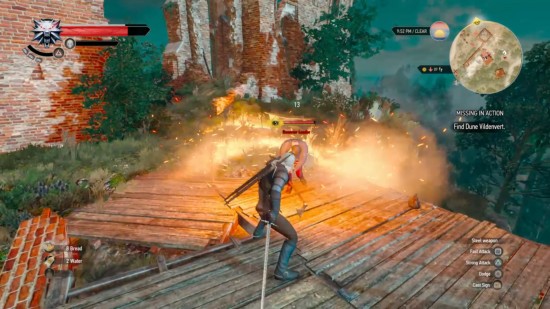
Igni is the sign players should cast when they want to turn up the heat on their foes in The Witcher 3: Wild Hunt. But, Igni has plenty of use outside of just simply setting a foe ablaze. It can be used on the environment in order to collect certain materials, and to trigger certain traps. Of course, that means Igni can also be detrimental to those who wield its power haphazardly.
Geralt is far from invincible so casting Igni without watching out for environmental threats such as explosive barrels, and flammable toxic gasses will lead to either death or a condition very close to death. On the plus side, Igni happens to be the weakness of some of The Witcher 3: Wild Hunt‘s more persistent (a.k.a. annoying) enemies. Groups of drowners and wolves are easily brought down with a well-placed Igni cast, just so long as players are mindful of their location.
Fire burns all, but learning how to use Igni at the right time will help players out in the long run.
Axii is the sign that can influence the minds of others and it is one of the most interesting signs that can be casted in The Witcher 3: Wild Hunt. For starters, it is incredibly useful when Geralt is up against an attacker with a really solid defense. When things get tough, players can literally force opponents to drop their guard, opening them up for a vicious attack.
Outside of battle, Axii is probably the sign that will be used most by players in The Witcher 3: Wild Hunt. You see, being able to directly influence the choices made by Geralts enemies is something that will prove useful quite often throughout the game. By spending ability points in order to upgrade this particular sign, players will boost their ability to coerce and intimidate opponents in conversation. A better Axii skill means more conversation options, which in turn leads to more experience points and less blood on Geralt’s hands (usually).
Axii is definitely a sign that those playing The Witcher 3: Wild Hunt should grow comfortable with. While it can only affect one opponent with a single cast, it is vital in taking down well-armored, human opponents, although it shouldn’t be relied too heavily upon when facing foes of a more bestial variety.
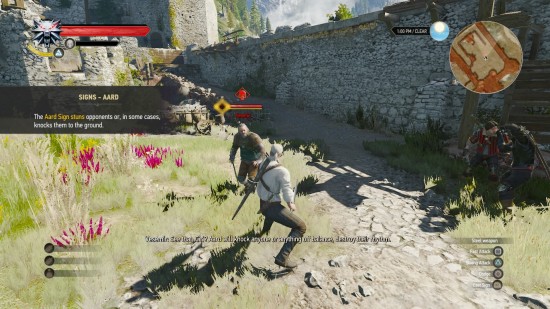
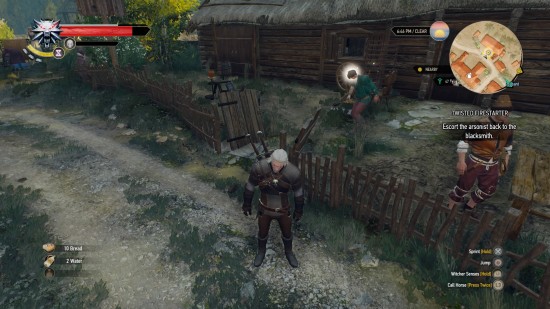
The Aard sign is useful both offensively and defensively in The Witcher 3: Wild Hunt depending on the situation. Casting Aard causes a telekinetic blast which is basically a Jedi force push. More often than not this move is good for creating just enough space in order to get out of a rather dour situation. It activates in a small arc immediately in front of the player, so it’s even more useful in tighter spaces. When upgraded, it becomes more powerful and has an increased chance of actually knocking enemies to the ground, leaving them open for the kill.
But, knocking enemies to the ground isn’t the only offensive benefit of Aard in The Witcher 3: Wild Hunt. There are plenty of environmental hazards that can be used to Geralt’s benefit. When fighting on a cliff, enemies can be pushed to their death, saving the player the hassle of a drawn out sword fight. They can also be pushed into fires, poison clouds, and all sorts of other threats making Aard a powerful addition to a brutal combo. It should be noted that it isn’t incredibly useful against some of The Witcher 3: Wild Hunt‘s larger beasts, but it will still create a brief stun that should provide players ample time to get out of harm’s way.
Aard is also one of the signs that is useful outside of battle since it has the ability to clear many types of debris that may be blocking Geralt’s path throughout his adventure.
So there you have it, the five signs that will become second nature to players ensnared by The Witcher 3: Wild Hunt. How are you faring with the sign system so far? Feel free to let us know in the comments below.


 Most Popular Firefox Add-ons and Posts of 2015
 The Witcher 3: Wild Hunt Guide - How to Complete Triss Merigold's NPC Questline
 Rain Shows the Potential for Interactive Poetry in Games
 Binding of Isaac: Rebirth (PS4) Challenges
 Fragrant Branch of Yore Locations - Dark Souls ii