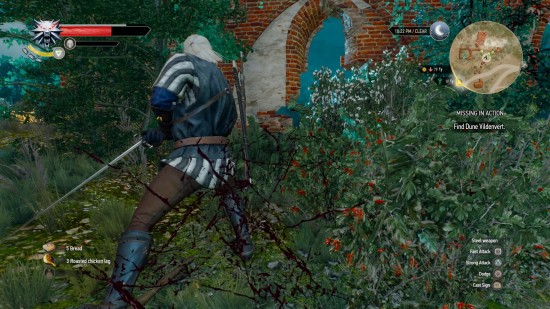
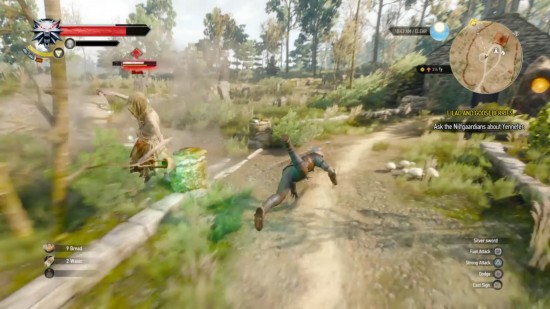
Combat in The Witcher 3: Wild Hunt can get a bit complicated at times with all of the signs (which we break down for you here), dodging, parrying, rolling, attacking, and different enemies that the game throws at players. In fact, it gets so complicated that players who are prone to panicking may find themselves making simple mistakes, starting with their choice of weapon. You see, Geralt of Rivia (the nice man with the white hair controlled by you) carries melee weapons, one steel and the other silver.
The steel weapon is used for dealing with human aggressors. Geralt can easily cut them down with no worry of them getting back up for whatever creepy reason the world of The Witcher 3 could come up with. The silver weapon on the other hand is used for the more supernatural enemies players will come across. Most of the time, The Witcher 3: Wild Hunt will automatically draw the proper weapon for the scenario for you, but with players being able to switch between the two at will, mistakes can (and sometimes will) be made. This is especially common when fighting a group comprised of both human bandits, and supernatural creatures such as ghouls.
In some cases, the wrong weapon will do less damage and waste a bit more of your time, but in other cases the wrong weapon will be completely useless and players would just be ruining a perfectly good tool of death. So always keep in mind what weapon you’re swinging around, you want to make sure that you put your best foot forward at all times.
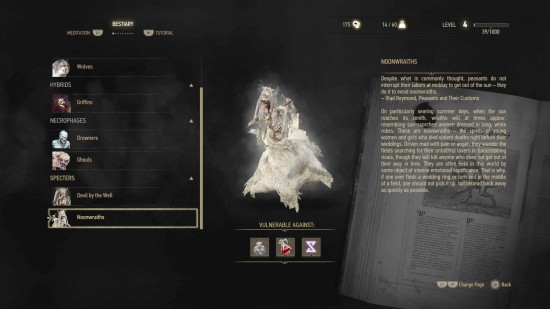
The Witcher 3: Wild Hunt includes a constantly upgrading, comprehensive bestiary of the many different beasts Geralt will unfortunately cross paths with. Once one of an enemy type is slain, an entry for that particular monster will be added to the bestiary complete with background information, and weaknesses. Considering the vast variety of enemies present in The Witcher 3: Wild Hunt, it’s a good thing that this resource is present, because memorizing every intricacy of every foul creature would be next to impossible.
Of course, the bestiary is completely pointless if players don’t take the time to utilize it. Knowing exactly what sign to cast, as well as what item to use, against a specific foe is invaluable information. As the game progresses, combat will only grow more difficult, and having any type of strategic advantage going into these battles is something definitely worthwhile.
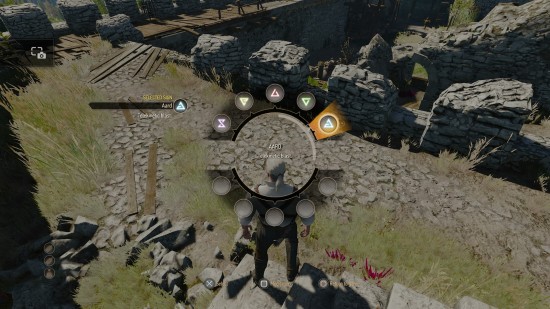
Just like in previous entries to the series, The Witcher 3: Wild Hunt gives players the ability to use five different, and potent, signs. These are you magic abilities, and they each serve their very own special purpose both inside and outside of battle. The thing is, when battles grow hectic it’s easy to forego using these powerful abilities, and that does nothing but make the job much harder for the player.
In the beginning, signs can be a bit confusing, especially to new players. Since the enemy variety at the onset of The Witcher 3: Wild Hunt is a bit more restrained, the signs that players should focus on are Igni, Aard, and Quen which are fire, telekenetic push, and shield respectively. This will allow for some variety in attacking, while also protecting Geralt in ways that his swords just can’t do.
Thankfully, gameplay slows to a crawl while selecting signs so players don’t become too overwhelmed by whatever ambush they may find themselves in the center of. So put those Witcher abilities to good use, and show your enemies you inner power.
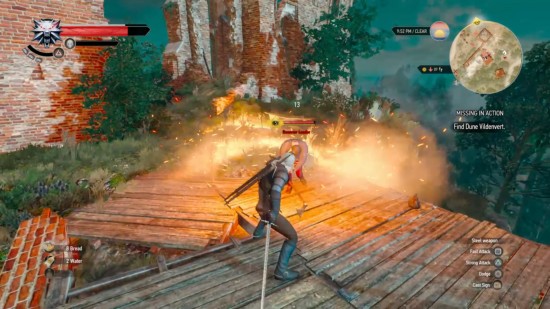
Combat in The Witcher 3: Wild Hunt can be very brutal. Enemies will not hesitate to swarm you in droves, and they are very skilled at dodging Geralt’s attacks. Because of their speed and ferocity, sometimes connecting an attack will cause the adrenaline to kick in, leading players to want to continue their string of offense. This is a very bad idea.
For one, enemies will create an opening if you become to aggressive. They will step right out of reach and then lunge in for a high damaging attack. Also, opponents are rarely alone, meaning while you’re in the middle of a string of attacks your target’s friends will be flanking you. The best course of action is to get in, deliver 2-3 blows, then get out and dance around. Wait for an opening or create one when the opportunity presents itself. Also, don’t forget to use signs strategically in order to create space and keep Geralt in control of the battle at all times.
It may seem slower, but this more deliberate approach to battle tactics will keep Geralt alive and save players from having to view the load screen. Death tends to come swiftly to those who overstep their limits, so keep in line.
Adding to the complexity of The Witcher 3: Wild Hunt‘s combat are its evasive maneuvers. There is blocking, parrying, dodging, and rolling. All of which can only be triggered while in the middle of combat. While most are easily understood, dodging and rolling aren’t really touched upon in the game’s tutorial. In fact, when giving you basic combat training, The Witcher 3: Wild Hunt has players perform a roll to avoid enemy attacks. The problem with this is that it often leaves you out of reach for a counter attack.
Sure you’re now safe, but so is the enemy. Dodging, on the other hand, places Geralt beside or behind his foe, as well as at close range. This almost always leads to critical attacks which are key to quickly dispatching large groups of enemies. Rolling is best used against large enemies with area of effect attacks. But, when up against smaller enemies that rely on melee attacks, always opt for the basic dodge instead, it will save you much more time while also keeping you alive.

The final thing beginners need to know in order to find victory in The Witcher 3: Wild Hunt’s brutal combat is that timing is everything. Battles in this latest entry are a very intricate dance that require all parties to understand the steps, and to approach them with a certain level of finesse. This goes for everything ranging from when to attack, casting signs, dodging, and even when to use healing items.
The best thing about the timing in The Witcher 3: Wild Hunt is that the enemies are also trapped in the same song and dance. They too must rely on the movements of their opponent in order to pin, trap, cast, and eviscerate Geralt. Take your time, read the situation, and fall in tune with the flow of combat and you’ll find yourself slaying beasts like a pro with very little effort.
These tips should help you get started in the world of The Witcher 3: Wild Hunt. It will be a long, tough journey but one that can easily be overcome with a bit of perseverance and patience.
How has the combat in The Witcher 3 been treating you so far? Have you mastered the art of timing, or are you still trying to wrap your head around signs? Feel free to share your thoughts in the comments below.


 5 Vital PS4 Accessories To Have When You Get Your Shiny New System
 Grand Theft Auto V Wiki .
 How to get the 5 Best Hunter Helmets in Destiny
 Before Dragonborn: Top 10 Graphical Mods For Skyrim in 2013
 The Witcher 3: Wild Hunt Guide - How and Where to Get a Haircut