
Receiving critical acclaim from professionals all over the world, Uncharted 2 is quite an extraordinary game that one could call almost perfect. And a game this good deserves a good guide to enrich and ease your experience. I welcome you.
Fortune hunter Nathan Drake returns in Uncharted 2: Among Thieves, a third-person action-adventure/shooter created by award-winning developer Naughty Dog. Down on his luck, Drake is lured back into the treacherous world of thieves and mercenary treasure-seekers he had sought to leave behind. When a mysterious artifact propels Drake on an expedition to find the legendary Himalayan valley of Shambhala, he finds himself embroiled in a dangerous game of cat-and-mouse against a fugitive war criminal who’s after more than just the fabled riches of the lost city.
Caught in a web of deception and plunged into an increasingly deadly pursuit that tests the limits of his endurance, Drake will be forced to risk everything - but has his luck finally run out?
SPOILER ALERT:
What exactly happened during Nathan Drake's first adventure? This section briefly goes over the adventures of the first episode. If you haven't played the first game, be warned that this section contains several SPOILERS for the first installment of the Uncharted series. If you don't mind, dive into the story synopsis below and enrich your Uncharted 2 experience!
Two years ago, Nathan Drake already had quite an adventure during his search for the El Dorado treasure.
Nathan finds the coffin of his ancestor Sir Francis Drake, inside which is a journal of the man himself. Apparently the journal contains information leading to a grand treasure called El Dorado. Nate and Victor Sullivan quickly set out for the treasure. They don't immediately find anything of particular interest at the correct coordinates, but soon discover an ancient tomb.
It looks like the Spanish already raided the tomb ages ago, but as Nate and Sully traverse the tomb they find that the temple has been built around a gold statue: ‘El Dorado', the golden man. It has already been raided, so Nate and Sully decide to follow the tracks the statue left behind while it was being dragged out of the temple.
Outside, Nate and Sully reach a waterfall with a stranded U-boat and decide to check it out. Inside, Nate finds a corpse holding onto some Spanish coins which he can't quite identify. The decomposing captain holds the missing page of the dairy: A map leading to the next location. After making his way out of the soon-to-be- blowing-up-submarine, Nate finds that a man named Gabriel Roman has captured Sully. He takes the map from Nate, shoots Sully and is about to kill Nate as the submarine blows up, allowing Nate to just barely escape. He runs into Elena along the way and the two of them continue with the adventure.
After backtracking through the tomb, the two of them travel to a small island in the Pacific Ocean by a small aircraft. It doesn't take long before they're shot out of the air, separated from each other. Nate battles his way through the jungle, fighting off numerous goons until he reaches his downed aircraft. He retrieves the map from the aircraft and makes his way to a nearby fortress in search for Elena.
Shortly after finding Elena's parachute, Nate spots Elena in the distance and goes after her, while defeating many more henchmen. A journey throughout the enormous fortress leads Nathan to eventually locate Elena again, but he's captured immediately by an old enemy, Eddy Raja. Nathan is only captured for a whole five minutes as Elena heroically frees Nathan by pulling out the cell wall with a jeep. A long chase pursues until the two reach a cliff. Eddy Raja asks for the map, but Nathan drives the jeep backwards into the water, barely escaping once more.
In this drowned city, many firefights take place throughout the ruins. Nate and Elena reach a jetski and make their way to the harbor where they spotted several ships earlier from top of the fortress. As they reach the custom's house, Nate finds a journal in which the load of the Esperanza - one of the Spanish ships - is described in detail. Among heaps of other treasure, the golden statue with a weight of 500 pounds was also on the Esperanza.
Nathan and Elena split up for the moment. When Nathan reaches the boat, Elena shows him a video she recorded a few moments back in which Sullivan is seen along with Gabriel Roman, boarding a chopper. This causes them to seriously question his loyalty and trustworthiness. The boat sails off to a monastery up north, and Nate & Elena pursue once again.
Shortly after another jetski ride, the two bump into several groups of mercenaries. In the library they find Sullivan and rescue him after partaking in a big firefight. Sullivan explains that the Drake's Journal took the bullet for him and that he had been misleading Roman ever since. After solving a puzzle inside the library, Nathan traverses underground catacombs and overhears Raja and Roman talking about business. Raja says the island is cursed, and Roman isn't satisfied with the results from Raja and his henchmen.
As he reaches a secret entrance at the top of the church, he finds that Roman and his right hand Navarro are located in the monastery, right on top of where the treasure is located. Solving another puzzle, Nathan eventually winds up at a treasure vault.
When Nathan reaches a large chamber he meets Eddy once again. Before it comes to a showdown, both are attacked by a large horde of monstrosities, and they're forced to work together. Unfortunately for Eddy, he is soon dragged down to the depths of the tomb. Nate barely escapes with Elena and winds up in a Nazi Bunker. The treasure appears to be nearby, but Nate first needs to find a way to power an elevator. The switch just happens to be located in an old experimental laboratory, crawling with monstrosities.
Nathan also comes across a video tape and a letter of Francis Drake, telling that the treasure of El Dorado is cursed and turns people into demons. He writes how he burned down the ships as he never wanted the evil to leave the shores of this cursed isle.
As Nathan reaches the control room in which he and Elena split up he finds that Roman has captured Elena. The monstrosities and goons both roam the areas as Nate tries to catch up. After making his way out of the area, another big shootout takes place outside and Nate is eventually lent a hand by Sullivan. Another large shootout unfolds in the church.
When Nate and Sully finally find the golden El Dorado statue, Roman has already beaten them to it. In the scene that unfolds, Navarro tells Roman that the real treasure is inside the coffin and that he should open it. Upon doing so, Roman is cursed by a shady breath of the mummy inside, after which Navarro shoots him through the head. He then orders his men to take the statue away by helicopter. Moments later the place is once again roaming with monstrosities - in other words - cursed Spaniards who never left the island after all.
The chopper takes off with Navarro, Elena and the statue, but Nate manages to leap and cling onto the statue, catching a short but intense ride as the chopper crashes onto Navarro's cargo ship. A final showdown with Navarro and a large batch of his goons unfolds. Nate eventually manages to get the upper hand in a melee fight with Navarro, rescues Elena from the wrecked chopper, and pushes the chopper, the golden statue, and Navarro - dragged by a rope around his leg - down the ocean. Sullivan then arrives in a smaller boat and the three of them sail off in the sunset.
Nathan Drake:
An experienced treasure hunter and deep-sea salvage expert, Nate travels the world in pursuit of legendary sunken wrecks and rumoured lost gold. He operates in the murky world of international fortune seekers, antiquities dealers and smugglers, but unlike others in his line of work, Nate claims to be driven more by the thrill of the hunt than by treasure itself. Exploration may even run in his blood - a family legend holds that he is descended from Sir Francis Drake, the 16th century Vice Admiral of the English navy.
Elena Fisher:
After coming to prominence in a popular reality TV show, Elena scored her dream job: hosting her very own archaeology programme on a well-known cable channel. It's a good show, but the budget is pretty small - Elena not only produces and presents, she also lugs and operates all her own equipment. Still the financiers managed to cough up enough cash to fund an expedition to recover the coffin of Sir Francis Drake, buried at sea 400 years ago. This expedition took place two years ago, during the first installment of the game: Drake's Fortune.
Victor Sullivan:
Nate's occasional business partner and one-time mentor. A seasoned adventurer and explorer, “Sully” is the consummate conman who loves captivating an audience with a good yarn. His stories are always believable and the old scoundrel puts this skill to good use when charming potential investors or swinding buyers. But surely, one day he's going to push the wrong guy too far..
Harry Flynn:
An old friend of Nate and fortune hunter partner alike, Flynn talks Nate into the current adventure by providing a lead on an enormous unsolved mystery centred around Marco Polo's lost fleet. They set up a plan to infiltrate a museum in Istanbul, from which the adventure takes off fully.
Chloe Fraser:
Nate meets Chloe through Harry Flynn and they soon get a loose relationship. Chloe can be very pushing towards Nate and while she only wants the best for him, she doesn't really care as much what happens to other people around her.
Zoran Lazarevic:
Lazarevic is a war fugitive thought to be dead by the governments, and is currently one of the most fearsome treasure hunters in the world. He has set his mind on finding the Cintamani Stone to attain extroardinary powers.
Lazarevic has hired an enormous army to assist him in this task. Nate is up against an enemy more ruthless than ever.
.-------------.----------------------------------------------------------------.
|Button:      |Uses:                                                           |
|=============|================================================================|
|Left Analog  |Move Around                                                     |
|Right Analog |Move Camera                                                     |
|Cross        |Jump/Climb                                                      |
|Square       |Melee Attacks                                                   |
|Circle       |Roll/Drop from ledge/Take cover/Push things                     |
|Triangle     |Interaction button/Pick up items/Melee gripple counterattack    |
|L1           |Aim                                                             |
|L1   Triangle|Quickly switch weapons                                          |
|L1   L3      |Change Camera View                                              |
|R1           |Fire/Blind fire from cover                                      |
|L2           |Aim Grenade                                                     |
|R2           |View hints (if possible)                                        |
|R3           |Accurate Aim/Zoom in/Scope                                      |
|D-Pad Left   |Select One-handed Weapons (Pistols)                             |
|D-Pad Right  |Select Two-handed Weapons (Rifles, etc)                         |
|Select       |View Journal/Map (when possible)                                |
|Start        |Pause                                                           |
'-------------'----------------------------------------------------------------'
Tip: Additionally you can use the SIXAXIS of PS3 controllers when Nate is hanging from a ledge and you want him to reach out to something in the opposite direction. Simply turn the controller towards your body to perform this move.
Damage Indicator:
o The Uncharted Series has a rather raw and realistic appearance. You have no health bar. Instead, when you're hit by enemies the screen's outer edges get a little bloody, and if you get severely hurt the screen will turn grey.
o When you get hit several times, stay behind cover to make sure you're not hit for a short period of time. This will allow you to recover, and you can do this as many times as you like. Keep in mind however that if you're hit during any time while recovering, the whole process starts over again and you have to wait several seconds once again to recover.
o The blood on the screen's sides also gives an indication as to where the enemy fire is coming from. If the left side of the screen turns red, quickly take cover behind something to your right as you can be sure that enemies are firing at you from your left.
Taking Cover:
o It's extremely important to take cover in Uncharted 2. Rushing over to groups of enemies is the best way to quickly get yourself killed.
Blindfire:
o While it's not an effective way to kill enemies, blindfiring from behind cover is done by simple pressing R1 while in cover.
Headshots:
o Try to take enemies out with headshots. The pistol is the weapon of choice for trying to kill soldiers with headshots. Weapons such as the AK-47 lack the accuracy to perform well on this task, and Shotguns lack the range to effectively hit the enemy. Magnums are not suited either; A Desert - 5 will take out the enemy regardless of where you hit them either way, while a Pistole lacks once again the range in a similar way Shotguns lack this.
Grenades:
o Hurl grenades at your foes with L2 and adjust the throwing angle with the right analog stick. Nate will throw grenades quite precisely, so you can greatly use this as a tactical advantage against turrets.
o When enemies throw grenades at you they'll usually shout something such as “flesh him out!”, so be alerted when this happens and try to kill the wanker who's about to hurl one at you. Of course, you're always alarmed by the grenade indicator on screen, as well as the bleeping sound, and even Nate himself as he comments on the grenade. Enough indications to roll away in time from the explosion.
Propane Tanks:
o You'll occassionally come across propane gas canisters. These are highly inflammable and shooting them will cause an explosion similar to a grenade.
o Alternatively you can pick these tanks up and hurl them away in the same fashion you throw grenades. It's possible to immediately shoot the tank by tapping the R1 button.
Stealth Kills:
o There are various ways to perform a stealh kill, and they all require that no enemy has spotted you thus far.
o Even when you can perform a stealth kill, always check your surroundings to see if other enemies can see what you're doing. If they can, try and wait until they're looking away.
o Sitting behind a crate or a low wall with an enemy standing on the other side is a guaranteed stealh kill. Press Square and Nate'll grab them over the crate and punch them KO.
o Similarly, while crouching behind a crate or even standing behind a corner you can stealthily kill any approaching enemy.
o Enemies standing near ledges while you're hanging can be pulled off, killing them instantly.
o When you kill an enemy with stealth they'll drop more ammunition. This is indicated by the blue ninja icon next to the item pickup. Sometimes the extra ammo comes in the form of a grenade.
Aiming:
o Aiming is done with L1, but you can also shoot from the hip by just firing with R1 as you run around. This is not the best choice with regular soldiers around, but you may rarely want to resort to this technique.
Collecting Ammo:
o You can only hold two weapons at any time; One Pistol and a two-handed weapon. You furthermore have four grenade slots. If you swap a weapon, the other weapon will be dropped and must be left behind.
o If you stealthily kill an enemy they'll drop more ammo as described above.
o While you may not be able to take a certain weapon with you, it is however possible to take ammunition along for it. For example, if you only have a few AK-47 bullets left and you want to bring a shotgun along with a pistol, you'll need to leave the AK behind. But shotguns don't usually hold large clips, so it may run out rather quickly. By collecting all AK-47's from downed enemies you can fill up on ammo for this weapon type. Then, the next time you want to swap your shotgun for an AK-47 you'll have a full clip instead of only one clip.
Melee Combat:
o You can initiate a melee fight with any soldier you come across, but it's best not to attempt this with groups of troops moving in on you or you'll be gunned to death.
o During a melee fight, attack your enemy with the Square button. If the enemy gets you in a grapple however, quickly press the Triangle button instead to counter attack and break free. You can then continue the melee fight if it hasn't already ended.
Treasures:
o There are essentially 101 treasures to be found in Uncharted 2. Treasures always sparkle with a bright, characteristic shine, allowing you to spot them from afar .. that is, if they're hidden in plain sight. This guide has all treasure locations embedded in the main walkthrough. There is also a quick checklist available for you at the end of this guide.
Treasure on this level:
|.---.------------------------.-----------------------------------------------.|
||BOX|Treasure Name:          |Location:                                      ||
||===|========================|===============================================||
||[ ]|Wrathful Deity Statue   |Nearby a tree immediately to the right of cliff||
||[ ]|Saraswati Statue        |Nearby first body - in the corner with rubbish ||
||[ ]|Tibetan Snuff Bottle    |After shooting 1st lock; Look up and shoot body||
||[ ]|Bhutanese Lime Box      |Lower snowy area right before entering a cabin ||
||[ ]|Ghau Amulet Thogchag    |After leap of faith, in back of the train cabin||
|'---'------------------------'-----------------------------------------------'|
Weapons on this level:
|---------------------.--------------------------------------------------------|
|WEAPON PICKUPS:      |o 92FS (9mm Pistol)                                     |
|                     |                                                        |
 ¯¯¯¯¯¯¯¯¯¯¯¯¯¯¯¯¯¯¯¯¯¯¯¯¯¯¯¯¯¯¯¯¯¯¯¯¯¯¯¯¯¯¯¯¯¯¯¯¯¯¯¯¯¯¯¯¯¯¯¯¯¯¯¯¯¯¯¯¯¯¯¯¯¯¯¯¯¯
Treasure Video for this level (part 1)
Nate awakens in a train cabin hanging over a snowy cliff. As he looks at his abdomen, he notices that he's heavily bleeding. To make matter worse, he's actually sitting in a vertically hanging cabin that's about to fall down the cliffs.
When you gain control of Nate, shimmy to the left with the analog stick and go around the cabin from where you can climb up. After Nate dodges a large rock, climb up further and jump when the game prompts you. Go left around the cabin, up the pipe and enter inside afterwards. Climb the seats, then move to the right side to reach the pipe again - make your way up and climb the platform. Climb into the other cabin, then rush over to the cliff in order to make the jump - do this quickly.
The game now flashes back as Nate meets Harry Flynn and Chloe Fraser, who manage to convince him to dive into a new adventure revolving around Marco Polo's expedition to Asia. A mongolian lamp appears to be the missing puzzle piece in solving the mysteries that this expedition had always been cloaked in.
.----- TREASURE #1: WRATHFUL DEITY STATUE -------------------------------------.
|!|This one's found to the right, just after climbing the first cliff. Watch |!|
|!|the shiny glimmer coming from nearby a tree. Press Triangle to pick it up.|!|
|!|Be warned - you can not backtrack to this treasure after proceeding!      |!|
'------------------------------------------------------------------------------'
Proceed to the wreckage and push several iron beams out of the way. Lying nearby is a dead grunt with a [92FS - 9mm Pistol], so arm yourself with this.
.----- TREASURE #2: SARASWATI STATUE ------------------------------------------.
|!|This is found right after collecting the pistol from the body. It's lying |!|
|!|in the corner nearby a pile of rubbish - just look for it's shine.        |!|
'------------------------------------------------------------------------------'
Open the door of the wrecked cabin with the triangle button prompt, collect a pistol clip as you go through, and shoot the lock off the chain at the end to clear the way.
.----- TREASURE #3: TIBETAN SNUFF BOTTLE --------------------------------------.
|!|After opening the door, don't immediately proceed but look up instead.    |!|
|!|Spot the dead body of another grunt  on the opposite side and shoot the   |!|
|!|body to make it fall down in the snow, then collect the treasure.         |!|
'------------------------------------------------------------------------------'
Kill the thug as you continue until you reach a dead end. From here, climb up, then leap across another cabin.
.----- TREASURE #4: BHUTANESE LIME BOX ----------------------------------------.
|!|Before exploring the train cabin, drop down on the platform behind you and|!|
|!|then drop down in the snow to your south.  This treasure's located here.  |!|
'------------------------------------------------------------------------------'
Proceed through the train cabin, then climb up when you reach the door at the other end. Another flashback will occur. Afterwards, proceed to the opening at the end of the cabin, take a leap of faith to the other side and cling onto the pipe. From here, climb into another train cabin.
.----- TREASURE #5: GHAU AMULET THOGCHAG --------------------------------------.
|!|Climb up in the train cabin, then turn around.  You'll spot another shiny |!|
|!|glimmer in the back - simply walk over to it by the ledge and collect it. |!|
'------------------------------------------------------------------------------'
Treasure Video for this level (part 2)
Treasure on this level:
|.---.------------------------.-----------------------------------------------.|
||BOX|Treasure Name:          |Location:                                      ||
||===|========================|===============================================||
||[ ]|Byzantine Gold Coin     |After manhole; On top of crate in the corner   ||
||[ ]|Glass Evil Eye          |Climb up twice;On platform after turning around||
||[ ]|Ottoman Ring            |Treasure Room; Armor to the right of the steps ||
||[ ]|Silver Amulet Box       |Drop from metal roof; Search plant box nearby  ||
||[ ]|Silver Belt Buckle      |Second open area; Search area inside fountain  ||
||[ ]|Ivory Chess Knight      |At the far right end of the wooden beam area   ||
||[ ]|Ottoman Bracelet        |After swinging by rope, around building,go down||
||[ ]|Antique Pocket Watch    |On a wall after hopping down, before hopping   ||
|    |                        |from roof to roof to the whistling guard       ||
||[ ]|Antique Pipe            |Museum Room; At lion head relief left of gate  ||
||[ ]|Jeweled Bracelet        |In sewer area with guards aiming at you        ||
|'---'------------------------'-----------------------------------------------'|
Weapons on this level:
|---------------------.--------------------------------------------------------|
|WEAPON PICKUPS:      |o Tranquilizer Gun                                      |
|                     |                                                        |
 ¯¯¯¯¯¯¯¯¯¯¯¯¯¯¯¯¯¯¯¯¯¯¯¯¯¯¯¯¯¯¯¯¯¯¯¯¯¯¯¯¯¯¯¯¯¯¯¯¯¯¯¯¯¯¯¯¯¯¯¯¯¯¯¯¯¯¯¯¯¯¯¯¯¯¯¯¯¯
Treasure Video for this level (part 1)
Follow Harry and climb up the ledges, then follow him across several pipes. Apparently Nate and Harry reach a dead end .. or not? Look up with the D-pad and a manhole far up becomes visible. After a short dialog, Flynn gives Nate a boost. Climb all the way up to the manhole and go through.
.----- TREASURE #6: BYZANTINE GOLD COIN ---------------------------------------.
|!|Right after getting out of the manhole, turn around and look for a shiny  |!|
|!|glow coming from a corner with a fragile crate.  The treasure is lying on |!|
|!|top of it.                                                                |!|
'------------------------------------------------------------------------------'
Hop over the big green pipe crossing the hall and give Flynn a boost by holding the Triangle button nearby the wall. He'll drop the ladder for Nate, so follow up. Climb up twice, then turn around.
.----- TREASURE #7: GLASS EVIL EYE --------------------------------------------.
|!|After climbing the platform, turn around and look for a ladder on the     |!|
|!|other side - this leads to a small catwalk containing the treasure near a |!|
|!|fire extinguisher at the back.                                            |!|
'------------------------------------------------------------------------------'
Hot steam is blocking the way over at the green pipes; Flynn tells Nate to look for a valve. This is located exactly to the other side across the pipes - climb up and turn it so the guys can continue their infiltration.
Leap over to the pipe, then swing to the platform left. From here, leap over to the structure on the side, shimmy a little to the left, climb up and go down the other side in order to shimmy around the obstacle fence, then drop down on the catwalk below you. Proceed and a short cutscene initiates. Proceed forward and pass through a treasure room.
.----- TREASURE #8: OTTOMAN RING ----------------------------------------------.
|!|As you walk up the small steps of the treasure room, turn right and       |!|
|!|explore the corner.  The treasure is located on an armor here.            |!|
'------------------------------------------------------------------------------'
As you attempt to enter through the door, Nate is quick to stop Flynn on opening it; An alarm has been set up. To find the junction box, follow the red wiring from the alarm - this leads you right to the junction box. Backtrack to where you came from, hop on the platform next to a fire extinguisher and flip the switch in the box, then go through the doors.
Take out the guard by holding the analog stick and tapping Circle to come out of your cover position, then press the Square button to perform a stealth attack. Follow Flynn and hop down - then take cover near the center and take out the guard by using the same technique as you did just now. Following this, climb the gate to your left and shimmy over to the balcony.
There are two guards conversing here, but Flynn'll take care of the other one whenever you rush over them and melee them KO. Follow Flynn to the right, hop down to the area below and do ass Flynn says: He goes right, you go left.
Stay low and take cover - a guard is on patrol not too far away, but you should have no problem approaching him from around the corner and taking him out with a stealth maneuver. Go over the stairs, leap over to a roof, then drop down when the guard(s) aren't looking and take one of them out as Flynn deals with the other one.
.----- TREASURE #9: SILVER AMULET BOX -----------------------------------------.
|!|Right after dropping down from the metal roof, inspect one of the plant   |!|
|!|boxes for a shimmering light - this treasure's located here.              |!|
'------------------------------------------------------------------------------'
The doors appear to be rigged with another alarm, so you'll have to follow the alarm wiring to the junction box once again like earlier. Climb the gate, shimmy to the right and climb the pillar ledges leading to the junction box. Don't carelessly leap down or the guard on the upper balcony may poop your party by spotting you and telling his Turkish buddies that you're up to no good. You don't want that, really.
In the next area are eight guards in total, and it's advisable to deal with all of them, not only to make the gameplay easier but for trophy purposes as well. Follow Flynn to the right side and hop over to the area down below. First of all, take out the guard standing nearby the pillars - he may not be visible at first, so carefully circle around the pillars to spot him.
From here, take out the guard at the fountain by going around it counterclock-wise. Also take note of the guard standing on the balcony to the right - you'll want to take him out next by pulling him over in the plant box. As soon as you do this, two more guards enter the balcony. Wait until they're standing with their backs turned to you, then rush over to the one closest by to you and knock him out - Flynn should take care of the other guard, if not, do so yourself.
Hop down below when the guard there isn't looking and take him out as well. All who remain now are the two guards nearby the initial staircase. This is an easy task - simply head over there and kick the crap out of them.
.----- TREASURE #10: SILVER BELT BUCKLE ---------------------------------------.
|!|This one's best gotten after dealing with all guards in this area.  Just  |!|
|!|hop over inside the big fountain and look around for the shiny treasure.  |!|
'------------------------------------------------------------------------------'
From the door in the upper right corner of the area - where the two guards came out of - climb the flower box and proceed over the metal roof. From here, use the grated window to climb over to several ledges and to the open window.
This next area has another set of guards, but fortunately Flynn took a set of [Tranquilizer Guns] with him. Hit one of the guards with a dart as Flynn takes out the second one, then take cover behind some boxes. Move forward to a next set of boxes and take out the remaining (two) guard(s) on the upper level.
Flynn tells you to help him by pushing a cart with a very heavy box on it to the wall so you can climb the balcony. Do so, then climb the rope that Flynn clings to the wall. As you're about to shimmy over the ledges, a guard catches Flynn by surprise, busting through the door. Hanging from the ledge above, simply pop a tranquilizer in the back of his spine to make him (un)comfortably numb. He must've seen a fleeting glimpse from the corner of his eye, but as he turned to look it was gone.
Make your way over to the other upper side of the area by swinging from ledge to ledge. Here, cross the first wooden beam and head towards the right.
.----- TREASURE #11: IVORY CHESS KNIGHT ---------------------------------------.
|!|At the far right end of the wooden beam you can spot another shiny        |!|
|!|treasure.  Simply walk over there to collect it.                          |!|
'------------------------------------------------------------------------------'
Cross the bars and leap over to a platform with stairs. From here, continue outside and the target tower is in sight. Follow Flynn; hop over a ledge, leap over to the roof on the other side and walk around the ledge following another roof afterwards. Leap over to a last roof and a small scene initiates.
Flynn sets up another rope which you can use to swing over to the ledges right of it - wiggle the analog stick appropriately and press X when ready.
Treasure Video for this level (part 2)
.----- TREASURE #12: OTTOMAN BRACELET -----------------------------------------.
|!|Before climbing up, instead look for a ledge that leads to the edge of the|!|
|!|building.  From here, the treasure can be found by proceeding to the sewer|!|
|!|grate down below.                                                         |!|
'------------------------------------------------------------------------------'
Pull the guard at the top over the edge, then explore the roof. Climbing one of the metal crates at the right end, you'll find a ladder hanging from the tower left. Climb it, then shimmy around the tower counterclockwise and take out the guard on the adjacent balcony before swinging over.
.----- TREASURE #13: ANTIQUE POCKET WATCH -------------------------------------.
|!|Hop down to the roof below and turn around and follow the path to your    |!|
|!|right.  Go around the corner (left) and stand still at the edge of the    |!|
|!|roof.  This treasure's shine can be spotted on the wall to your left.     |!|
|!|Shoot it off, then drop down to collect it.                               |!|
'------------------------------------------------------------------------------'
Jump from roof to roof until you reach another balcony. There's a whistling guard on this balcony, so pop a dart in him before proceeding. Simply make your way to the tower after Chloe turns off the lights. A scene occurs and trouble begins.
.----- TREASURE #14: ANTIQUE PIPE ---------------------------------------------.
|!|When you gain control of Nate, immediately search for this treasure.  It  |!|
|!|is located in an alcove of this room - at a relief of a lion head.  This  |!|
|!|relief is located to the left of the closed barred gate with three guards |!|
|!|behind it, constantly aiming at you.                                      |!|
'------------------------------------------------------------------------------'
Quickly dodge any red laser beams and rush for the hall with red flashing lights. As you head down the hall, the gate is closed - immediately turn right and down the stairs, after which you can climb through the open window. Make a run for the manhole on the other side and jump down.
Run through the tunnel and make your way through the next area as well, but be quick as you do so, because guards will be aiming for your head at all times.
.----- TREASURE #15: JEWELED BRACELET -----------------------------------------.
|!|This treasure is located in the area right where all the guards are       |!|
|!|aiming for your head.  You should be able to spot its shine nearby a pipe.|!|
|!|Just be sure to quickly grab it to avoid getting shot.                    |!|
'------------------------------------------------------------------------------'
After three months of detainment, Sullivan, an old pal of Drake bails him out and with Chloe they make a plan.
Treasure on this level:
|.---.------------------------.-----------------------------------------------.|
||BOX|Treasure Name:          |Location:                                      ||
||===|========================|===============================================||
||[ ]|Yuan Dynasty Coin       |After first explosives; Tree in area on left   ||
||[ ]|Yuan Dynasty Jade Animal|Isolated area nearby first two enemies         ||
||[ ]|Jade Pei Pendant        |On top of a waterfall                          ||
||[ ]|Amber Jade Chimera      |After big melee fight; Climb area; Near barrel ||
|'---'------------------------'-----------------------------------------------'|
Weapons on this level:
|---------------------.--------------------------------------------------------|
|WEAPON PICKUPS:      |o .45 Defender (Pistol)       o AK-47 (Machine Gun)     |
|                     |o Wes - 44 (Magnum)           o Moss - 12 (Shotgun)     |
|                     |                                                        |
 ¯¯¯¯¯¯¯¯¯¯¯¯¯¯¯¯¯¯¯¯¯¯¯¯¯¯¯¯¯¯¯¯¯¯¯¯¯¯¯¯¯¯¯¯¯¯¯¯¯¯¯¯¯¯¯¯¯¯¯¯¯¯¯¯¯¯¯¯¯¯¯¯¯¯¯¯¯¯
Treasure Video for this level
Simply travel through the jungle until you reach the first set of explosives that Chloe has left behind for you, indicated by a bright green led light. Arm it and proceed. Where Sully heads right over a tree trunk, look to your left instead.
.----- TREASURE #16: YUAN DYNASTY COIN ----------------------------------------.
|!|Right after arming the first explosives, search the area to your left and |!|
|!|look for a glimmer in a tree branch.  Shoot the treasure to collect it.   |!|
'------------------------------------------------------------------------------'
Continue onward and climb a small cliff. Proceed through the jungle until you can jump down. In this area are several grunts - take the first two out with headshots. As soon as you do this, the gunfire will alarm an other group of enemies further on, so take cover behind tree trunks and fight your way through.
.----- TREASURE #17: YUAN DYNASTY JADE ANIMAL ---------------------------------.
|!|Backtrack to where you killed the first two enemies and search the small  |!|
|!|isolated area to the left (or, as see from when you first dropped off the |!|
|!|ledge, to the right).  The shine is easily spotted, so go on and collect  |!|
|!|the treasure.                                                             |!|
'------------------------------------------------------------------------------'
Climb the boxes until you're high enough to use the pole to swing across the other side. Collect the [AK-47] from the dead grunt and continue to the end of the trail where you can push a large rock down to assist Sully. When he's climbed up the ledge, proceed and take out several enemies in the area of the first excavation site.
To the right of the area is a treasure you may want to collect.
.----- TREASURE #18: JADE PEI PENDANT -----------------------------------------.
|!|This is located above a waterfall you've already passed once.  When you're|!|
|!|climbing the wood, head right instead and climb up the ledge.  Simply walk|!|
|!|walk to the very end of the path to collect this treasure.                |!|
'------------------------------------------------------------------------------'
After climbing up and dropping down a ledge you'll reach a small settlement with various enemies. The first guard can be downed by a sneak melee attack, but his comrades won't go down as easily; You'll find yourself in a big firefight. Take note that while machine guns such as the AK-47 are great for semi close-ranged fights, the pistol is still superior when aiming for heads popping up behind distant crates. Accuracy aside, it also fires one round at a time, saving you ammunition in the long run.
Take out the remaining guards and collect any weapons and ammo they left behind. A new batch of enemies is quick to assault from the left. The one on the upper platform is especially vicious in firing, so dispatch him first. Look for a red explosive on the ground level and shoot it several times to blow it up, causing great damage.
Wade through the water and take cover as you dispatch more enemies. After doing so, your search for the four explosive charges starts. The first one is located immediately below the explosive you might've already fired at. Turn around and find the second one under the wooden jetty. The other two are located even further back, also at the wooden jetty. Look around for their green lights and bleeping sounds.
After arming all four of them, proceed to the upper right part of the area and give Sully a boost, who'll gladly knock the ladder down for Nate. In this area with tents, look for a passage on the right and a cutscene initiates.
Take down the enemies with melee attacks and break free from their grapples with the Triangle button. Climb back up by the rope, then continue by leaping over to the ledge on the right.
.----- TREASURE #19: AMBER JADE CHIMERA ---------------------------------------.
|!|A fairly tough treasure to locate, jump to the ledge on your right after  |!|
|!|Sully climbing up by the rope.  Follow the trail a few steps and very     |!|
|!|carefully keep your eyes open for a set of white bricks in the wall on    |!|
|!|your left.  Climb these, then swing over to several poles that leads Nate |!|
|!|hanging onto the big trunk.  Shimmy to the right, pull yourself up the    |!|
|!|ledge, and finally make a leap to the far left area.  The treasure can be |!|
|!|found among the pile of rubbish, nearby a barrel.                         |!|
'------------------------------------------------------------------------------'
Simply head back to where Sully's waiting and follow the blue tube leading to a waterfall.
After encountering several grunts and arming explosives in a settlement, Nate and Sully continue the adventure.
Treasure on this level:
|.---.------------------------.-----------------------------------------------.|
||BOX|Treasure Name:          |Location:                                      ||
||===|========================|===============================================||
||[ ]|Mongol Paiza Passport   |On top of one of the ship masts nearby building||
||[ ]|Jade Belt Slide         |The tombs lower chamber;Embedded in a statue   ||
||[ ]|Yuan Dynasty Helmet     |Room with Phurba                               ||
|'---'------------------------'-----------------------------------------------'|
Weapons on this level:
|---------------------.--------------------------------------------------------|
|WEAPON PICKUPS:      |o .45 Defender (Pistol)       o AK-47 (Machine Gun)     |
|                     |o Wes - 44 (Magnum)           o Moss - 12 (Shotgun)     |
|                     |o Mk - NDI (Grenade)                                    |
|                     |                                                        |
 ¯¯¯¯¯¯¯¯¯¯¯¯¯¯¯¯¯¯¯¯¯¯¯¯¯¯¯¯¯¯¯¯¯¯¯¯¯¯¯¯¯¯¯¯¯¯¯¯¯¯¯¯¯¯¯¯¯¯¯¯¯¯¯¯¯¯¯¯¯¯¯¯¯¯¯¯¯¯
Treasure Video for this level
Proceed to follow the tube to a generator, then explore the nearby trunks to initiate a cutscene. When you regain control of Nate, wait for the enemy to come close any perform a stealth melee attack on him while in cover position. Collect his [AK-47], then proceed to the building.
The guard nearby the crate can be dispatched easily with another stealth melee move. Just take cover behind the crate and perform the move. Sully will also dispatch a few grunts along the way with the sniper rifle he just found. Move over to some crates to your left, then look for a set of explosives in the distance and blow them up to severely hurt the nearby enemy. After disposing of him, approach the building to initiate a cutscene.
After the cutscene, many grunts ambush you and Sully. Take cover inside the building and hurl grenades at groups of enemies while resupplying from the shiny box inside the building, nearby your starting position.
You'll want to resort to firepower from guns as well. Keep plucking away until Sully tells Nate that he's being flanked by enemies. Close in on Sully and take out the enemies from both sides. Afterwards, reinforcements show up and you'll want to retreat again to the building. Dispatch the next wave of enemies and Nate and Sully find themselves under heavy fire from the machinegun in the tower to the left. Follow the left path and chuck a grenade inside the opening to destroy it.
.----- TREASURE #20: MONGOL PAIZA PASSPORT ------------------------------------.
|!|This treasure can be found on top of one of the wrecked ships masts.  From|!|
|!|where Sully is waiting for you to team up again it is the second mast to  |!|
|!|the middle, surrounded by several trees.  Shoot the shiny glow on top of  |!|
|!|the mast to make the treasure fall down, then collect it in the water.    |!|
'------------------------------------------------------------------------------'
You can reach Sully by walking over a fallen beam on the left side of the area.
Follow the trail through the jungle until you reach the top of the mountain. Make sure to enjoy the breathtaking view, then enter some sort of tomb that appears to be thousands of years old. Only meters away from the camp, you can't help but wonder if it hasn't been discovered yet, right?
Jump down the tomb and look around for clues.
.----- TREASURE #21: JADE BELT SLIDE ------------------------------------------.
|!|This treasure is located in this area.  From your starting position, look |!|
|!|around and check the wall on your left for a statue higher up.  The shiny |!|
|!|glow shouldn't be very hard to spot - shoot and collect it.               |!|
'------------------------------------------------------------------------------'
As you enter the upper right chamber, inspect the barrels and Nate will light a torch with resin. Now follow the blood trail on the floor to an opening in a wall. Press Triangle to reveal a hidden area behind the wall. Follow the hall to another large chamber and you'll find just what you've been looking for. By the way, ever seen the movie The Shadow? If you fancy the Phurba, go see that movie.
.----- TREASURE #22: YUAN DYNASTY HELMET --------------------------------------.
|!|Before continuing back out of the tomb, check the upper walls of this     |!|
|!|chamber first.  Look for an opening with light falling inside the tomb,   |!|
|!|and the treasure will glimmer very close by.  Shoot it down to collect it.|!|
'------------------------------------------------------------------------------'
Backtrack your way out of the tomb and climb the same pillar Chloe did. As you exit, a cutscene unfolds. As soon as you gain control of Nate, make a run for it. Don't stop to shoot or melee anyone - it'll only get you killed. You may get hit a few times, but you'll live. When you reach the ledges, climb them, make your way to the end of the cliff and a series of scenes unfolds.
After once again barely escaping the gunfire of his enemies, Nathan Drake travels to Nepal for more action.
Treasure on this level:
|.---.------------------------.-----------------------------------------------.|
||BOX|Treasure Name:          |Location:                                      ||
||===|========================|===============================================||
||[ ]|Strange Relic           |Sewer area; Down the manhole near bicycles     ||
|'---'------------------------'-----------------------------------------------'|
Weapons on this level:
|---------------------.--------------------------------------------------------|
|WEAPON PICKUPS:      |o .45 Defender (Pistol)         o AK-47 (Machine Gun)   |
|                     |o FAL (Machine Gun w/Scope)     o Mk - NDI (Grenade)    |
|                     |9 Micro - 9mm (Machine Pistol)                          |
|                     |                                                        |
 ¯¯¯¯¯¯¯¯¯¯¯¯¯¯¯¯¯¯¯¯¯¯¯¯¯¯¯¯¯¯¯¯¯¯¯¯¯¯¯¯¯¯¯¯¯¯¯¯¯¯¯¯¯¯¯¯¯¯¯¯¯¯¯¯¯¯¯¯¯¯¯¯¯¯¯¯¯¯
This chapter has one of the most amazing gaming moments ever seen. Hold down the analog stick down while emptying your AK-47 on the truck. Two clips oughta do it, just make sure you keep that stick pulled down!
After that explosive chapter opening, walk down the street and another scene initiates. Take out the four enemies, preferably with headshots afterwards. Make your way over to where the red bus went and search a body for the [FAL] machine gun. This gun has a scope that you can use by pressing the Right Analog Stick. As you attempt to proceed further, well, your attempt ends.
Look around for a green box next to an electric pole and climb the structure to reach the blue pipe attached to the house. Go your way around the house by hanging and leaping from sign to sign until you enter the upper room. Exit through the back, leap across another house and find yourself in a completely ravaged living room.
Hop onto the nicely parked truck, shimmy across the two cabinets and leap to the planks to reach the stairs. Up here, climb the table and cabinet, then you'll see a chopper taking off. Dispatch the enemy on the balcony, then drop down by either the pipe or leaping to the sign on the right.
Treasure Video for this level
.----- TREASURE #23: STRANGE RELIC --------------------------------------------.
|!|In the open area, head for the upper right and search around for an open  |!|
|!|manhole nearby some bicycles. The sewer area below contains this treasure.|!|
'------------------------------------------------------------------------------'
Head down the other alley and perform a sneak attack on the enemy standing in the opening of the wall. This next area is roaming with enemies - take out the ones on your left, then use your FAL machine gun to swiftly pick them off one by one while staying covered. They'll occasionally hurl grenades at you, but all it takes is a few steps and a barrel roll to avoid getting blown to bits.
After clearing the crowd, proceed down the street and a heavily armed truck - including a machine gun - blocks off the way. Take cover and try to fell a few more troops, but don't go out your way trying to kill the gunner - a cutscene is initiated shortly.
Follow Chloe to a set of doors - of course they're locked. Back in the street, climb the signs of the street lantern and swing your way across the house on the other end. Shimmy around it, then climb up. Make your way across the other side, exit the building by walking over a thin bar, then finally leap over to a balcony.
As you hang onto one of the nearby signs, enemies appear down below. Hurl a well-placed grenade into the middle of them to knock them all out. Alternatively use one of the gas canisters lying around this area.
You'll want to get that door unlocked asap to let Chloe in on the fight. Rush to the door, shoot the lock on the chain and kick the door in. Dispatch the remaining enemies, then finally continue. At the end of the alley, give Chloe a boost and follow her up the ladder.
Make your way through the house and shoot the bars in the doorway. Next, lift the heavy beams to let Chloe cross. As you enter the next room, a new chapter starts.
Lazarevic' troops are everywhere. How are Nate and Chloe going to manage themselves in this situation?
Tresure on this level:
|.---.------------------------.-----------------------------------------------.|
||BOX|Treasure Name:          |Location:                                      ||
||===|========================|===============================================||
||[ ]|Brass Bird Lamp         |At top of the electricity pole at the square   ||
||[ ]|Silver Dress Clasp      |Above the temple's entrance at the square      ||
||[ ]|Copper Rice Measure     |Hotel roof; Before entering, walk around it    ||
||[ ]|Yuan Dynasty Urn        |Upper end of staircase; Inside elevator shaft  ||
||[ ]|Enameled Snuff Bottle   |Destroyed hotel; Roof adjacent/below balcony   ||
||[ ]|Incense Burner          |On top of a small higher roof with a water tank||
|'---'------------------------'-----------------------------------------------'|
Weapons on this level:
|---------------------.--------------------------------------------------------|
|WEAPON PICKUPS:      |o .45 Defender (Pistol)           o AK-47 (Machine Gun) |
|                     |o FAL (Machine Gun w/Scope)       o Mk - NDI (Grenade)  |
|                     |o 9 Micro - 9mm (Machine Pistol)  o Moss - 12 (Shotgun) |
|                     |o M32 - Hammer (Grenade Launcher) o RPG(Rocket Launcher)|
|                     |                                                        |
 ¯¯¯¯¯¯¯¯¯¯¯¯¯¯¯¯¯¯¯¯¯¯¯¯¯¯¯¯¯¯¯¯¯¯¯¯¯¯¯¯¯¯¯¯¯¯¯¯¯¯¯¯¯¯¯¯¯¯¯¯¯¯¯¯¯¯¯¯¯¯¯¯¯¯¯¯¯¯
Chloe has a plan, but it basically boils down to killing everyone on this town square, which adds up to several dozen of soldiers. First you'll want to sneak over to the truck with the soldier armed with the RPG rocket launcher. There's an other guard nearby, so take both of them out in a stealthy fashion. After having done so, take cover and start to clear out the square. The RPG has two rounds - you might want to use one on a group of enemies and save one round for soon.
And soon becomes now as reinforcements show up. A truck with a heavy machinegun shows up at the far right end of the square. Waste the troops and, if you're up for it, use the RPG to take out the gunner, otherwise do so with gunfire. More troops also enter the scene by a building on the opposite side. Keep your ammo healthy by scavenging bodies from all around and defeat the final few troops with the help of Chloe.
Treasure Video for this level
.----- TREASURE #24: BRASS BIRD LAMP ------------------------------------------.
|!|Before continuing with the story, head back to the truck standing nearby  |!|
|!|the beginning of the area where you entered.  The troop with the RPG used |!|
|!|to be stationed on here.  From here, look around and you'll spot a long   |!|
|!|street lantern with several commercial signs attached.  Climb all the way |!|
|!|to the top and claim this treasure - shooting it won't work.              |!|
'------------------------------------------------------------------------------'
.----- TREASURE #25: SILVER DRESS CLASP ---------------------------------------.
|!|This is a very easy treasure to claim.  Drop down to ground level from the|!|
|!|pole of the previous treasure and approach the temple from this side.  You|!|
|!|can see the shiny glow from the treasure right above the doorway, attached|!|
|!|to the symbolic relief.                                                   |!|
'------------------------------------------------------------------------------'
With these treasure obtained, head for the hotel. Chloe's already waiting for Nate to give her a boost, so put those hands to use and do it.. Head up the stairs, then leap over to the pole and climb it to reach the roof and get inside the hotel.
.----- TREASURE #26: COPPER RICE MEASURE --------------------------------------.
|!|Before entering the hotel through the window, head around the other side  |!|
|!|of this roof.  The treasure is simply lying on the dead end side.         |!|
'------------------------------------------------------------------------------'
It is here that you encounter a new enemy type, a rather tough armored troop, this time armed with a shotgun. It'll take more rounds to kill these, so aim for the head. After getting on the elevator a scene initiates. You'll now have to find some way to get the power back online.
Travel through the rooms and leap over to the flag poles, swinging from each to the other until you reach the next room. Shoot the planks blocking the doorway, then climb over to the other building.
Take note of the various gas canisters here that you can use to blow up the various troops lurking in these rooms. Dispatch several troops until you reach a staircase. Go all the way to the top until it appears the stairs can't get you any further.
.----- TREASURE #27: YUAN DYNASTY URN -----------------------------------------.
|!|From the broken down stairs at the top, leap to the elevator ledge in the |!|
|!|middle and climb over to the inside of the elevator shaft.  Drop down and |!|
|!|collect this treasure from here.                                          |!|
'------------------------------------------------------------------------------'
Go back down one flight of stairs and go into a destroyed part of the hotel, where more troops are already awaiting you. Dispatch them, but be careful of troops with shotguns as they can fell you with one or two shots. Proceed to another building by the wooden walkway and defeat several more troops.
.----- TREASURE #28: ENAMELED SNUFF BOTTLE ------------------------------------.
|!|In this room, head onto the balcony and look to your left.  Hop over the  |!|
|!|balcony's railing to drop onto a long roof that goes around the corner.   |!|
|!|The treasure is located at the far end - don't forget to enjoy the view!  |!|
'------------------------------------------------------------------------------'
Walk to the very end of the pillar hanging dangerously from the balcony and use it to reach a pipe, which then leads you to the next floor above. Leap over the gaps and take cover as another soldier appears in the hallway.
In the next room, drop down and hit the power switch to free Chloe. You can then give her a boost to reach the ladder in this same room. In the next area, take a dive in the swimming pool for a funny easter egg. To continue with the game, hop over the railing in the upper hand corner, then continue along the roof to reach the higher platform where a cutscene initiates.
Glide down the rope, then try to get across to the other building and a short scene causes you to.. stay where you were. Quickly rush from platform to platform until the final one breaks down. Leap over to the roof of the building and take cover from the chopper's heavy fire while also dealing with around four troops. When you've done so, leap over to the next building top and drop down inside.
Proceed through the rooms and the gun ship will blow the walls apart. Don't worry too much about these explosions, but be sure to avoid its gunfire. Down a few troops and go around the corner. Here, hop down the stairs and dispatch the soldiers down here. When the chopper starts to fire its second wave of rockets, quickly jump over to the other building as you slide downwards. Close call Nate and Chloe!
Make your way through the hotel by going upstairs and leap over to the roof of the next building. You'll encounter several soldiers here, one who is armed with an RPG, so quickly take cover and take him out first. There are also gas canisters nearby that you can hurl at them, although it's hardly necessary.
.----- TREASURE #29: INCENSE BURNER -------------------------------------------.
|!|After crossing the bridge to over to the building, look for a cabin with a|!|
|!|water tank on top of it and climb this.  The treasure is lying on top of  |!|
|!|this small roof.                                                          |!|
'------------------------------------------------------------------------------'
Be sure to grab the grenade launcher around here, then look to your left and take out a group of enemies below. As you jump down the next set of buildings, the gun ship will come out one last time. Are you up for a final showdown?
THE GUNSHIP:
Its only attack is the heavy machine gun which you'll want to avoid at all costs, so always stay in cover behind ledges. The grenade launcher can bring the chopper down, but it'll take a good amount of hits - 14 or so - to down it. There's plenty of ammo lying around, but you don't want to miss the gunship too often either. After a short while the gunship will start to smoke and a few additional troops will assault you as well. Take them out and continue to blast the chopper. When it catches fire you'll know you're almost there. After it finally goes down, lower the bridge to be on your way.
Hop down the building and look for a large sign up ahead. Cling onto it, go over to the other side and leap to the next building. Here, jump down to the next building on your right and press Triangle when prompted to find a wire that Chloe and Nate'll use to reach the next building. Or at least ..
When you're back in control of Nate, go around the corner and climb the blue pipes to cross the downed gunship. Continue to end the chapter with a lengthy cutscene.
Nate runs into Elena Fisher, love interest from the 1st installment of the series. And they're coming along.
Treasure on this level:
|.---.------------------------.-----------------------------------------------.|
||BOX|Treasure Name:          |Location:                                      ||
||===|========================|===============================================||
||[ ]|Worn Pendant            |Burned-out house at initial start;Cardboard box||
||[ ]|Nine Jewel Ring         |Inside the fountain statue's bell              ||
||[ ]|Ankhara Water Vessel    |Pile of rubbish down the river                 ||
||[ ]|Silver Shiva Amulet     |Blue cart in courtyard right before the temple ||
|'---'------------------------'-----------------------------------------------'|
 ¯¯¯¯¯¯¯¯¯¯¯¯¯¯¯¯¯¯¯¯¯¯¯¯¯¯¯¯¯¯¯¯¯¯¯¯¯¯¯¯¯¯¯¯¯¯¯¯¯¯¯¯¯¯¯¯¯¯¯¯¯¯¯¯¯¯¯¯¯¯¯¯¯¯¯¯¯¯
Treasure Video for this level
Proceed onwards and take out the handful troops that initially appear in the square.
.----- TREASURE #30: WORN PENDANT ---------------------------------------------.
|!|This one's found by backtracking to nearby where this chapter began.  Head|!|
|!|inside the destroyed building to the right and look for a cardboard box in|!|
|!|the corner.  Thsi treasure's lying on top of it.                          |!|
'------------------------------------------------------------------------------'
.----- TREASURE #31: NINE JEWEL RING ------------------------------------------.
|!|This treasure is located in the fountain statue.  Look up and inspect the |!|
|!|bell - you should see a shine glowing inside of it.  Shoot the treasure to|!|
|!|make it fall down in the fountain's water to collect it from there.       |!|
'------------------------------------------------------------------------------'
Meet up with the group at the upper left part of the town square and open the double doors. As you reach the river you'll find that the current is too strong and that you'll have to find another way to get across. First of all, shoot the gas can nearby the car in the river - this is step one of making your way across.
Back at the doors, explore the left section and go upstairs. You'll reach a ladder which Chloe can reach if you boost her up. She'll push down a crate, allowing you to also reach higher ground. Here, grab one of the gas canisters and hurl it down, near the other car in the river and shoot it. This will cause the car to float to the end, completing your way across.
.----- TREASURE #32: ANKHORA WATER VESSEL -------------------------------------.
|!|From the bottom of the stairs, turn left and head into the river, jumping |!|
|!|to the pile of rubbish where the previously mentioned car was located at. |!|
|!|Simply make your way across the river to a pile of rubbish and look for   |!|
|!|the shiny glow: The treasure can be found there.                          |!|
'------------------------------------------------------------------------------'
Once you continue after crossing the river you'll wind up in a fairly big firefight once again. Up the stairs is a heavy machinegun stationed, and you'll run into a dozen soldiers in total. Take out the majority of the troops first, then take note of the gas canister to your right - you can hurl this at the machinegun for a quick defeat. Otherwise, snag one of the shotguns lying around and move in for a fast kill. Several other troops appear once you move in, so get back and waste them as well. One of them is armored, so be cautious around him.
Look for a blue pipe on the wall to the right of the machinegun and go through the open window. From here, proceed over the small catwalk at the billboard, then through the building until you reach an open courtyard with a big temple.
.----- TREASURE #33: SILVER SHIVA AMULET --------------------------------------.
|!|Don't immediately move towards the temple but explore the courtyard first.|!|
|!|Search the blue cart on the left side of the courtyard and look for a glow|!|
|!|as usual - the treasure is located here.                                  |!|
'------------------------------------------------------------------------------'
Approach the temple to initiate a cutscene and the chapter will end.
The group has found the temple they were looking for. What secrets will they find inside?
Treasure Locations:
|.---.------------------------.-----------------------------------------------.|
||BOX|Treasure Name:          |Location:                                      ||
||===|========================|===============================================||
||[ ]|Bronze Altar Spoon      |From entrance, hall to your right, upper area  ||
||[ ]|Bronze Varaha Statue    |When ceiling is closing in on you; On ground   ||
|'---'------------------------'-----------------------------------------------'|
 ¯¯¯¯¯¯¯¯¯¯¯¯¯¯¯¯¯¯¯¯¯¯¯¯¯¯¯¯¯¯¯¯¯¯¯¯¯¯¯¯¯¯¯¯¯¯¯¯¯¯¯¯¯¯¯¯¯¯¯¯¯¯¯¯¯¯¯¯¯¯¯¯¯¯¯¯¯¯
.----- TREASURE #34: BRONZE ALTAR SPOON ---------------------------------------.
|!|This one's easy if you know where to look.  As soon as you enter the      |!|
|!|temple, immediately head right through a doorway and climb the wall at the|!|
|!|end of this small hall.  The treasure can be found up there.              |!|
'------------------------------------------------------------------------------'
Treasure Video for this level. Also solves statue puzzle
Enter the hall and take a look at Drake's Journal by pressing Select. The book will automatically be brought to the right page, but you can flip through it with the left analog stick. Check out those faces of Sully!
But on the serious side of things, how are you going to climb that statue?
First, the arms need to be put into the proper positions.
1. The arm with the Trident is already in the proper position.
2. Look for a broken pillar on the right side of the chamber and climb it, then reach out for a pipe and climb up. Shimmy left and make your way to the statue. Leave the arm with the Trident alone and instead, look for bricks in the corner. Climb all the way up and you'll reach the upper arm - move this with the triangle button.
3. To reach the other arms, simply go the other way, starting from the broken pillar and pipe leading to the upper area. Swing across several poles and jump onto the next walkway, which will then collapse. You can still climb
4. up however, so do so and move the lower and higher arms both. The upper arm can be reached by climbing the bricks in the corner, swinging to the pipe, then back to the wall, dropping down the ledge and leaping for the arm.
Now that you've done all that, insert the Phurba into the keyhole to lower the water down below (you expected that, didn't you?). Head down the dark stairs and go into the tombs below.
Walk down the hall, turn right and climb the collapsed remains after which you can drop inside a new area. Continue down the halls, wading through shallow water and the you'll reach an intersection. It doesn't matter which path you take, as they join together very soon. Proceed down the enormous hall until Nate and Chloe fall down a trap.
.----- TREASURE #35: BRONZE VARAHA STATUE -------------------------------------.
|!|Immediately start looking for this treasure as you don't have much time.  |!|
|!|Spot the shiny glow on the floor and quickly collect it.                  |!|
'------------------------------------------------------------------------------'
With the spikey ceiling closing in, think fast. Spot the cogwheels on one of the walls? Hurl a grenade or two at those to destroy them and the ceiling will promptly stop. Climb up through an opening in one of the walls and follow the halls until you reach a very large chamber.
Nate and Chloe traverse deeper into the temple's tomb until they reach an enormous chamber. What's next?
Treasure locations on this level:
|.---.------------------------.-----------------------------------------------.|
||BOX|Treasure Name:          |Location:                                      ||
||===|========================|===============================================||
||[ ]|Copper Lahke Mask       |Large chamber;1st upper walkway at the very end||
||[ ]|Carved Jade Figurine    |Third upper walkway, on a wall, look above     ||
||[ ]|Bronze Ganesh Statue    |Hidden chamber underneath large chamber        ||
|'---'------------------------'-----------------------------------------------'|
 ¯¯¯¯¯¯¯¯¯¯¯¯¯¯¯¯¯¯¯¯¯¯¯¯¯¯¯¯¯¯¯¯¯¯¯¯¯¯¯¯¯¯¯¯¯¯¯¯¯¯¯¯¯¯¯¯¯¯¯¯¯¯¯¯¯¯¯¯¯¯¯¯¯¯¯¯¯¯
Treasure Video for this level
There's a puzzle to be solved here, that much is for sure. Adjust the first light-reflecting mirror right in front of you and shine the beam directly onto the forehead of the head far in front of you to make it glow. Approach it and stick your Phurba in it. The first of three blades will come down.
Climb this blade; You'll be required to switch between sides of the blade every now and then in order to reach the top. Then, very carefully walk over the thin edge of the extended blade to reach a statue. As Nate clings onto an eyebrow of the statue, light emerges from it and a new pathway in the form of ledges is revealed. Follow that way until you can drop down to a walkway below.
.----- TREASURE #36: COPPER LAKHE MASK ----------------------------------------.
|!|At the very end of this corridor you can find this treasure, just look for|!|
|!|the shiny glow.                                                           |!|
'------------------------------------------------------------------------------'
After collecting the treasure, drop down once more by the green ledges that Nate already inspected from a distance. Here, move towards the mirror and reflect it onto the rightern mirror-cage hanging from the ceiling. If you aim it correctly at the mirror's opening it will then reflect light into a second statue head. Head over to the statue and stick the Phurba dagger in it once again to continue with the game.
As the second blade descends, climb up once more after heading back to the center of the room. Walk to the far end of the last dagger and it'll break down. Nate is left hanging onto it - shoot the nearly crumbled structure with light beams coming through several cracks and hurl yourself over to the mirror cage during the scene. Climb it and leap to the last walkway with the final statue head.
.----- TREASURE #37: CARVED JADE FIGURINE -------------------------------------.
|!|This treasure can be found by keeping an eye out for a shine on the upper |!|
|!|walls.  Shoot the glimmering light to acquire this treasure - it's located|!|
|!|on the left side of the statue when you face it.                          |!|
'------------------------------------------------------------------------------'
Turn the final mirror and activate the final statue head by sticking the Phurba in one last time. This reveals a secret opening down the throat of the big lying statue in the middle of the chamber. Head down and you'll reach a hidden area.
.----- TREASURE #38: BRONZE GANESH STATUE -------------------------------------.
|!|Once you're in the hidden area below the large chamber, simply circle     |!|
|!|around it and look for the shine of this treasure - you can just walk up  |!|
|!|to it and collect it.                                                     |!|
'------------------------------------------------------------------------------'
Inspect the orb at the base of the circle and a cutscene unfolds, then the chapter comes to an end.
Nathan and Chloe have just discovered the location of the treasure they're after, but they got company.
There are no treasure pickups for this level.
This chapter essentially requires you to backtrack out of the tomb, while dealing with several soldiers along the way. When you ascend the hidden room, your enemies will not yet be aware of your presence. You'll want to take out the sniper at the top of the stairs first - he's especially dangerous. After downing him, the others can be felled swiftly.
Collect the sniper rifle to kill a few more troops down the long hall, then swap the weapon for something more corridor-handy such as a shotgun. Make your way down the stairs, defeat more soldiers, chug a grenade down and continue.
Chapter 10 Shootout Video
You'll face several more firefights as you travel back outside, but most of them are self-explanatory and require little thinking. Always stay behind cover and when assaulted from up close, use the combination of Square and Triangle to beat the shit out of your assailant.
When you reach the courtyard, several snipers are stationed in the buildings, which can easily be identified from their characteristic red laser sights. Take these soldiers out first, then down the other troops and head over to Elena and her camera man Jeff.
Elena and her camera man Jeff are still alive, but Jeff is in bad shape. Nate will have to support him.
There are no treasure pickups on this level.
During this chapter you'll be supporting Jeff, so Nate can only use single-handed weapons such as the Pistol or 9mm Micro.
In the first area, follow Chloe and Elena, then turn left inside the building. Elena will barricade the door to buy you some time. Continue down the alley and down two or three more soldiers. As you hear Chloe choke, quickly assist her by wasting the sucker doing naughty things to her.
Head down the street until an army jeep blocks your way. As you proceed through the next alley, a rocket will destroy the gate up ahead. Quickly continue, wait for the glass of the yellow window to break and head inside. Move into the alley to your right, then immediately into the next building on the right side of the street and go upstairs. An important cutscene will initiate.
Right after you gain control of Nate again, run away from all enemies. You'll come across a truck near the end; Run into the left alley, then jump over to a pipe and climb to safety. You'll still have to press Triangle in order to get Elena across. Soon after, this chapter ends.
Things aren't looking too bright, but Nate and Elena have to continue - they have a train to catch.
Treasure on this level:
|.---.------------------------.-----------------------------------------------.|
||BOX|Treasure Name:          |Location:                                      ||
||===|========================|===============================================||
||[ ]|Nepali Bronze Lion      |In dark alley to the right of first square     ||
||[ ]|Yuan Dynasty Lotus Jar  |On top of the green fire escape catwalk        ||
||[ ]|Cham Lion Mask          |On the other side of the blocked door          ||
||[ ]|Jeweled Statue Crown    |After gliding down, check the far end of area  ||
||[ ]|Three-Stone Coral Ring  |Inside warehouse, use middle train to get there||
|'---'------------------------'-----------------------------------------------'|
 ¯¯¯¯¯¯¯¯¯¯¯¯¯¯¯¯¯¯¯¯¯¯¯¯¯¯¯¯¯¯¯¯¯¯¯¯¯¯¯¯¯¯¯¯¯¯¯¯¯¯¯¯¯¯¯¯¯¯¯¯¯¯¯¯¯¯¯¯¯¯¯¯¯¯¯¯¯¯
Treasure Video for this level
You won't have any weapons at your disposal when this chapter starts, since you have been stripped of them earlier. Sneak your way over to the guard to the left by leaping to the billboards and making your way over to him. Snap his little neck and grab his grenade and gun. Start taking out the guys below and when the coast is clear, Nate'll mention this to Elena.
.----- TREASURE #39: NAPALI BRONZE LION ---------------------------------------.
|!|This is an easy one.  It's found at the far end of the dark alley you can |!|
|!|spot from top of where you snapped the guard's neck.                      |!|
'------------------------------------------------------------------------------'
Give Elena a boost at the fire escape ladder, then climb up.
.----- TREASURE #40: YUAN DYNASTY LOTUS JAR -----------------------------------.
|!|Check out the green catwalk with the ladder you boosted Elena up and you  |!|
|!|will spot this shiny treasure.  Just walk up the staircase to find it on  |!|
|!|the catwalk above you.                                                    |!|
'------------------------------------------------------------------------------'
Follow Elena until you reach a dead end. Appears the door is stuck, well if it ever isn't stuck! If you go back around the corner you'll spot an electricity pole with signs onto it. Leap over and aim at the planks barricading the door so Elena can bust through. Right around this time, troops will assault the couple.
You can't drop down from the sign boards as it's too high, so you'll have to take cover while dealing with the soldiers. They won't come all at once, but instead, after defeating a few of them in one building, more appear on other buildings. When you've dispatched all of them, Elena lowers a walkway, allowing Nate to make it across.
.----- TREASURE #41: CHAM LION MASK -------------------------------------------.
|!|Simply check out the shiny glow on the other side of the previously       |!|
|!|blocked door to find this treasure.                                       |!|
'------------------------------------------------------------------------------'
Climb the ladder to reach the roof with the water tank and a cutscene will play.
Look for a rope to glide down on the left.
.----- TREASURE #42: JEWELED STATUE CROWN -------------------------------------.
|!|In this treasure-rich chapter, the next one is found right across the far |!|
|!|end of the area you land in.  Just head over to the dead end and look for |!|
|!|the usual shine.                                                          |!|
'------------------------------------------------------------------------------'
Push the cart away from the doors to enter the warehouse. This is a pretty big hall, but there's not all that much to do. In order to continue with the story, make your way up the trains, then go all the way over to the other side.
.----- TREASURE #43: THREE-STONE CORAL RING -----------------------------------.
|!|Before activating the train with a lever on the other side of the area,   |!|
|!|look for this treasure by getting on top of the middle train.  Here, walk |!|
|!|to the back of the warehouse and check the above wall on your left, where |!|
|!|the treasure's glow can be spotted.  To get there, use the rusty pipes to |!|
|!|swing over.                                                               |!|
'------------------------------------------------------------------------------'
Use the train cabin on the far other side of the area to smash the wooden obstruction down below - just pull the lever at the entrance of the cabin. After you've done so you'll be caught in another big firefight. Fortunately for you there's plenty of weapons you can grab. Use the sniper rifle to take out the three sniper troops stationed far away and hurl grenades at groups of troops that move in. Eventually two heavily armored grunts with chainguns appear, but shortly after Elena comes to the rescue, allowing Nate to still catch the train. Close one!
Elena showed up just in time for Nate to catch the train. His search for Chloe continues here.
Treasure on this level:
|.---.------------------------.-----------------------------------------------.|
||BOX|Treasure Name:          |Location:                                      ||
||===|========================|===============================================||
||[ ]|Miniature Bronze Stupa  |At the very back of the train's last cabin     ||
||[ ]|Yama and Buffalo Statue |Top of cabin with a troop coming through window||
||[ ]|Newari Bronze Figures   |Inside train car where troops are swept off    ||
|'---'------------------------'-----------------------------------------------'|
 ¯¯¯¯¯¯¯¯¯¯¯¯¯¯¯¯¯¯¯¯¯¯¯¯¯¯¯¯¯¯¯¯¯¯¯¯¯¯¯¯¯¯¯¯¯¯¯¯¯¯¯¯¯¯¯¯¯¯¯¯¯¯¯¯¯¯¯¯¯¯¯¯¯¯¯¯¯¯
Treasure Video for this level
Shimmy across the train until you reach a short ladder. Cross the roof and drop down where the cabins are connected.
.----- TREASURE #44: MINIATURE BRONZE STUPA -----------------------------------.
|!|Simply walk to the very back of the train's last cabin to find this one.  |!|
'------------------------------------------------------------------------------'
To get across the next cabin, shimmy along the yellow pipe and use the little platforms to get by. The next few cabins have troops stationed on them, and they're armed with M4 machineguns, along with the usual junk. Take them out and proceed through the cabin, but beware of a soldier who'll jump at you out of a window. Since the door is locked, hop out of the window and be on your way.
.----- TREASURE #45: YAMA AND BUFFALO STATUE ----------------------------------.
|!|This treasure is located on top of the train cabin in which a soldier     |!|
|!|jumped through a window, resulting in a melee fight.  Just climb the cabin|!|
|!|and you'll easily find the treasure on there.                             |!|
'------------------------------------------------------------------------------'
Continue and deal with more soldiers - just make sure to stay well covered and everything'll be fine. When troops move in you can usually push them off the train or melee them otherwise. The cabin further down has a heavy machinegun stationed at the end of it, so you'll want to take cover making your way through the first cabin, then climb the second and drop behind the gunner to take him out. There will be more of his buddies walking around, so snap those little necks as well, or use your own preferred method.
The next few train cars are straightforward, but there will be warning signs that can sweep you right off the train unless you dodge them by hanging from the cars' side.
.----- TREASURE #46: NEWARI BRONZE FIGURES ------------------------------------.
|!|You can find this treasure inside the cabin on which two troops got swept |!|
|!|off the train by a warning sign.  Simply hang to the left side and enter  |!|
|!|this cart - the treasure is then easily spotted.                          |!|
'------------------------------------------------------------------------------'
Shortly after passing the tank you'll encounter a variation of this game, with warning sides on the sides of the train as you shimmy across the yellow pipe of the next train car. Reach for the higher ledges to avoid the warning signs. A few more troops to dispatch and you'll reach the second part of this train level.
A chopper shows up, and by the way it acts you can't help but think you've killed his brother a few chapters ago. Quickly jump to the next car, take cover and proceed onward. Don't even bother shooting at the chopper, it won't help.
The next few carts are considerably more difficult to pass than the ones you've had so far. Dispatch the soldiers in the distance and do this quickly - the chopper will soon fire rockets at the train cars you're on, disconnecting them from the rest of the train.
To make matters worse, the next cabin has an additional warning sign obstacle coming up, so hang from the side to avoid this. The next two cars have several more soldiers on them - hurling a grenade to the group isn't a bad idea. The last car contains an RPG, so fire it at the chopper .. why not? Tap Triangle at the door on the far end to conclude this chapter.
Nate barely survives the first part of his unpleasant train ride and makes his way to the front for a refund.
Treasure on this level:
|.---.-------------------------.----------------------------------------------.|
||BOX|Treasure Name:           |Location:                                     ||
||===|=========================|==============================================||
||[ ]|Gilded Bodhisattva Statue|Inside train car after the car with coals     ||
||[ ]|Tibetan Saddle Ring      |At back of the cabin after you exit the tunnel||
|'---'-------------------------'----------------------------------------------'|
 ¯¯¯¯¯¯¯¯¯¯¯¯¯¯¯¯¯¯¯¯¯¯¯¯¯¯¯¯¯¯¯¯¯¯¯¯¯¯¯¯¯¯¯¯¯¯¯¯¯¯¯¯¯¯¯¯¯¯¯¯¯¯¯¯¯¯¯¯¯¯¯¯¯¯¯¯¯¯
Treasure Video for this level
Climb the car up ahead and shimmy across the pipe. Pull the guard down by hanging from the side, then get on top of the car. Collect the sniper rifle just ahead, which you can then proceed to use on five soldiers total.
.----- TREASURE #47: GILDED BODHISATTVA STATUE --------------------------------.
|!|As you continue onward, this treasure is found inside the train cabin that|!|
|!|comes after the one filled with coals.  Hang to either side to enter this |!|
|!|cabin and look for the treasure on the floor.                             |!|
'------------------------------------------------------------------------------'
You'll want to be careful of warning signs again (yes, warning signs inside a tunnel, very nice). Cross the car with jeeps and enter the next cabin.
.----- TREASURE #48: TIBETAN SADDLE RING --------------------------------------.
|!|Before climbing up, check the back of this cabin to find this treasure.   |!|
'------------------------------------------------------------------------------'
Climb the crates and the train finally exits the tunnel. Move to the end of the cabin, drop down, quickly shoot the lock of the door and take cover so you can deal with the approaching troops. Continue to press forward and you'll soon run into one of those chaingun wielding menaces. To defeat this bastard, first come close enough so you can see that he's actually standing on a car with tree trunks. Simply shoot the two metal clasps on top of the car and he'll fall into the depths.
Gunship Boss Video
Unfortunately, shortly after the gunship returns. Press onward and hop inside the vehicle with a turret. In order to win this battle it is important to note that the chopper will regularly fire a series of rockets at your vehicle, and you can only sustain 2 to 3 hits at most. Shoot these rockets out of the air before it's too late, and always keep your eye on the chopper. You don't need to worry about running out of ammo or even overheating - keep that finger on the trigger to speed things up!
With the chopper downed, let's take care of that bloody commander in the last cabin up ahead. He's a tough one, but shooting him several times allows you to eventually finish him off with a brutal melee combo. Don't bother tossing grenades at the commander - he'll simply outrun their blast. With him felled and the Phurba back in your possession, a crucial cutscene initiates, and the game ends where it began.
The game continues where it started. Nate barely survived the train crash, but the action never ends.
Treasure on this level:
|.---.------------------------.-----------------------------------------------.|
||BOX|Treasure Name:          |Location:                                      ||
||===|========================|===============================================||
||[ ]|Tibetan Knife           |Far right corner of the area                   ||
||[ ]|Tibetan Prayer Wheel    |Near initial starting place, near some boxes   ||
||[ ]|Tibetan Silver Vase     |Elevated cabin, shoot this treasure down       ||
|'---'------------------------'-----------------------------------------------'|
 ¯¯¯¯¯¯¯¯¯¯¯¯¯¯¯¯¯¯¯¯¯¯¯¯¯¯¯¯¯¯¯¯¯¯¯¯¯¯¯¯¯¯¯¯¯¯¯¯¯¯¯¯¯¯¯¯¯¯¯¯¯¯¯¯¯¯¯¯¯¯¯¯¯¯¯¯¯¯
Treasure Video for this level
Climb the cabin like you did before and the game will flash forward to where it left you behind quite some time ago.
The initial wave of troops is easily killed. Just aim for the head of the first soldier, then climb the cabin he was walking towards and grab the grenade launcher. This should be plenty enough firepower to take out this wave.
The second wave comes from behind you. If you're quick you can blow up the gas canister a group of three troops lands next to when jumping down the cabins, dealing heavy damage.
The third wave comes from afar, but will spread throughout the area. Try to pick them off from a distance; You'll have plenty of ammo lying around, so don't be shy to use it.
The fourth and final wave consists of three armored grunts with shotguns, and is arguably the toughest wave to kill. Two of them pack together, the other one comes from the right side - waste this one first. It's best to fell them with a shotgun and grenades, but picking them off from a great distance will also work - just don't let them come close.
.----- TREASURE #49: TIBETAN KNIFE --------------------------------------------.
|!|When you're supposed to climb the cliff next to the exploded cabin that   |!|
|!|caught fire, instead head to the very far right edge.  This treasure's    |!|
|!|shine can be seen just next to the edge of the cliff.                     |!|
'------------------------------------------------------------------------------'
.----- TREASURE #50: TIBETAN PRAYER WHEEL -------------------------------------.
|!|Head back to where you initially gained control of Nate and explore the   |!|
|!|area around the boxes to the right.  Wait for the treasure icon to pop up.|!|
'------------------------------------------------------------------------------'
.----- TREASURE #51: TIBETAN SILVER VASE --------------------------------------.
|!|Facing towards the train cabin that caught fire, head to the left side of |!|
|!|the area, and you'll spot a train cabin that isn't entirely standing on   |!|
|!|the ground.  Head towards the rocky cliffs, turn around and face the      |!|
|!|cabin, then look up.  Spot the shiny treasure somewhere on the upper ledge|!|
|!|of the train cabin and shoot it down to collect it.                       |!|
'------------------------------------------------------------------------------'
Simply climb the cliffs next to the exploded train car far to the upper left and the chapter ends with a lengthy scene.
Nate was assaulted by a large team of Lazarevic's grunts but managed to defeat them. He awakens .. where exactly?
Treasure on this level:
|.---.------------------------.-----------------------------------------------.|
||BOX|Treasure Name:          |Location:                                      ||
||===|========================|===============================================||
||[ ]|Ram's Head Thogchag     |Behind initial house                           ||
||[ ]|Bronze Buddha Statue    |To the right of area where kids are playing    ||
||[ ]|Singing Bowl            |Nearby the big tree next to the elder's house  ||
|'---'------------------------'-----------------------------------------------'|
 ¯¯¯¯¯¯¯¯¯¯¯¯¯¯¯¯¯¯¯¯¯¯¯¯¯¯¯¯¯¯¯¯¯¯¯¯¯¯¯¯¯¯¯¯¯¯¯¯¯¯¯¯¯¯¯¯¯¯¯¯¯¯¯¯¯¯¯¯¯¯¯¯¯¯¯¯¯¯
Treasure Video for this level and petting
This chapter is very straightforward, but you can grab some treasures along the way, so listen up.
.----- TREASURE #52: RAM'S HEAD THOGCHAG --------------------------------------.
|!|Go outside, then turn right and walk past the animal.  This treasure is   |!|
|!|located somewhere behind this house.                                      |!|
'------------------------------------------------------------------------------'
.----- TREASURE #53: BRONZE BUDDHA STATUE -------------------------------------.
|!|Continue to follow the man until you reach some kids playing soccer. Head |!|
|!|right and climb the blue ladder, then immediately go left and jump over   |!|
|!|the green wall.  The treasure can be found somewhere in the grass here.   |!|
'------------------------------------------------------------------------------'
.----- TREASURE #54: SINGING BOWL ---------------------------------------------.
|!|This one's really easy.  Before going up the small stairs of the house    |!|
|!|that the man has lead you to (the elder's house), inspect the area near   |!|
|!|the large tree next to this house.  The treasure is lying right there.    |!|
'------------------------------------------------------------------------------'
Nate was taken good care of in a small Tibetan village. Not quite up for another adventure, off he goes.
Treasure locations on this level:
|.---.------------------------.-----------------------------------------------.|
||BOX|Treasure Name:          |Location:                                      ||
||===|========================|===============================================||
||[ ]|Tibetan Ritual Blade    |After descending the ladder, area nearby cliff ||
||[ ]|Clay Deity Head         |Area with tent; Swing the rope to left ledge   ||
||[ ]|Bronze Chenrezig Statue |Around the corner, before climbing ropes up    ||
||[ ]|Skull Cap Drum          |At the waterfall head right, search at dead end||
||[ ]|Silver Needle Case      |On cliff before jumping down to area w/ladder  ||
||[ ]|Bronze Stupa Ornament   |After fight with beast; concealed area that you||
||   |                        |can reach after leaping over several cliffs    ||
|'---'------------------------'-----------------------------------------------'|
 ¯¯¯¯¯¯¯¯¯¯¯¯¯¯¯¯¯¯¯¯¯¯¯¯¯¯¯¯¯¯¯¯¯¯¯¯¯¯¯¯¯¯¯¯¯¯¯¯¯¯¯¯¯¯¯¯¯¯¯¯¯¯¯¯¯¯¯¯¯¯¯¯¯¯¯¯¯¯
Treasure Video for this level
Follow Tenzin down the mountain trail into a cave. Swing the rope across to a ladder and drop down.
.----- TREASURE #55: TIBETAN RITUAL BLADE -------------------------------------.
|!|Instead of following Tenzin after descending the ladder, search this area |!|
|!|first.  The treasure can be found near the edge of a misty cliff.         |!|
'------------------------------------------------------------------------------'
Follow Tenzin down the cave and curve through some cracks along the way. Hop down in the area with the tent to initiate a cutscene.
.----- TREASURE #56: CLAY DEITY HEAD ------------------------------------------.
|!|After the cutscene, Tenzin will prepare another rope.  Instead of using it|!|
|!|to continue down the main path, use the rope and swing it to the right    |!|
|!|side of the area.  You can just barely make it to a ledge with this       |!|
|!|treasure on top of it.                                                    |!|
'------------------------------------------------------------------------------'
You know who to follow; Use the rope to walk-swing your way over the gap, then follow the straight path until Nate mentions the wolves. After the scene, look for a place where you can give Tenzin a boost - he'll give you a boost instead.
Walk to the far end of the path, then jump to the walls on your right and shimmy all the way to a safe platform.
.----- TREASURE #57: BRONZE CHENREZIG STATUE ----------------------------------.
|!|Don't climb the ropes hanging here just yet.  Instead look around the     |!|
|!|left corner to find this treasure sparkling on a snowy ledge.             |!|
'------------------------------------------------------------------------------'
Continue by climbing up those ropes, jumping from ledge to ledge - sometimes even barely possible leaps. When you reach the other side of the path that crumbled down just now, press Triangle to get Tenzin across. Swing the rope to the area he goes, then shimmy your way into the next cave.
You'll find several dead wolves up ahead, and as you continue it becomes apparent that some sort of monster did this to them. Drop down in the large icy area to continue. Continue down the left path and a large rock blocks the way behind you - forward we go!
.----- TREASURE #58: SKULL CAP DRUM -------------------------------------------.
|!|Simply follow the river to a waterfall.  Here, go right and look for the  |!|
|!|treasure at the dead end around the corner.                               |!|
'------------------------------------------------------------------------------'
Go back to the corner and climb the ledges to take the upper path of this cave. At the end, use the cliffs to get to even higher ground. At the far end, look for a ladder down below and leap to this cliff.
.----- TREASURE #59: SILVER NEEDLE CASE ---------------------------------------.
|!|Don't jump down yet!  Instead, search this cliff for a treasure - it's    |!|
|!|located on the left side.                                                 |!|
'------------------------------------------------------------------------------'
Hop down the circular area with the ladder and grab the gun. Use it to destroy the icicles nearby. When you've done so you'll witness how a creature is bashing Tenzin. Shoot it several times to attract its attention and some sort of boss fight commences.
Take note that you've got infinite ammo, so you'll want to run and gun if the creature is chasing you - and he'll be chasing you a LOT, and FAST. When it manages to get to you there are three things that can happen.
1. It'll deliver regular punches, but these'll still hurt a good deal.
2. It'll knock Nate on the ground and you'll have to input Triangle and Square to knock the beast off you. This will also cause some damage to it.
3. It'll grab Nate by his throat and choke him. Quickly fire a few rounds into the beast's head to make it release Nate.
After inflicting enough damage on the beast it'll grab Nate by the throat like described in #3 above, but knocks his gun away. This is scripted, however.
With the beast gone, give Tenzin a boost at the ladder and climb up yourself after Tenzin pushes down a crate for you. Follow him, leaping across another cliff.
.----- TREASURE #60: BRONZE STUPA ORNAMENT ------------------------------------.
|!|Hug the wall and follow the path to a smaller area. Jump across and you'll|!|
|!|already have found this treasure.                                         |!|
'------------------------------------------------------------------------------'
To continue, look for a crate with a rope attached high up a cliff and shoot it down. Use to rope to walk-swing your way across the ravine. The ledges will lead you to some stairs and the rest is quite self-explanatory.
Icy cliffs, yeti-like creatures. What else will this cold place have in store for nate and his guide?
Treasure locations for this level:
|.---.------------------------.-----------------------------------------------.|
||BOX|Treasure Name:          |Location:                                      ||
||===|========================|===============================================||
||[ ]|Mandala Thogchag        |On a wooden board of 3rd rotating cylinder     ||
||[ ]|Dipa Oil Lamp           |In cogwheel area; use rope to swing towards it ||
||[ ]|Tibetan Flint Lighter   |After falling down; underneath nearby cogwheel ||
||[ ]|Tibetan Ceremonial Axe  |Ride large cogwheel up; platform accessed by   ||
||   |                        |jumping from beam to beam                      ||
||[ ]|Bronze Dorje            |After cogwheels, shimmy right of snowy ledge   ||
||[ ]|Trigram Thogchag        |At very top of large statue                    ||
|'---'------------------------'-----------------------------------------------'|
 ¯¯¯¯¯¯¯¯¯¯¯¯¯¯¯¯¯¯¯¯¯¯¯¯¯¯¯¯¯¯¯¯¯¯¯¯¯¯¯¯¯¯¯¯¯¯¯¯¯¯¯¯¯¯¯¯¯¯¯¯¯¯¯¯¯¯¯¯¯¯¯¯¯¯¯¯¯¯
Treasure Video for this level
When you reach the end of the stairs, follow the big path to another seemingly ancient area. Stand on one of the tiles and Nate'll shout to Tenzin to step on the opposite one to lower the pillars, allowing passage.
Climb the nearby wall and grab the pole - which turns out to be a lever. As you continue to climb those bricks, be warned that they will retract within seconds, so you'll want to reach that upper ledge very quickly. From there, make your way to the right side of the wall until you can drop down to safe ground below.
Continue and you'll reach a large gap with large cylinders hanging overhead. Head back a few steps and go down the small stairs on the side, which lead to a lever. This one actually lowers the cylinders on the opposite side, but Tenzin is kind enough to lower yours as well. Atta boy.
Each cylinder has wooden boards attached to them which can make you drop down as they rotate. Jump over to the third cylinder first.
.----- TREASURE #61: MANDALA THOGCHAG -----------------------------------------.
|!|This one's attached to one of the wooden boards on the third cylinder. Get|!|
|!|below it and you'll be able to grab it when in hand-reach.                |!|
'------------------------------------------------------------------------------'
From the next platform, carefully jump to the wooden pillar sticking out of the walls, then to the wall on the opposite side and shimmy to some beams on the left side. From here, cling onto an enormous cogwheel, followed by leaping towards another cogwheel in the distance, using a pole to swing across in the process.
The next cogwheel is missing a part, which is good for you as it allows you to cross. Shimmy across the next cogwheel, then use the bricks in the wall to reach some pillars from which you can drop down on a cross-shaped beam.
From here, leap over to the pipe to your right, then on top of a cogwheel. Spot the rope in the middle of the area and jump for it.
.----- TREASURE #62: DIPA OIL LAMP --------------------------------------------.
|!|While hanging onto the rope, swing over to the platform but don't let go  |!|
|!|just yet.  This treasure is attached to the ejected wall - you can only   |!|
|!|grab it while hanging from the rope, and you only have a moment to do so  |!|
|!|when nearby.                                                              |!|
'------------------------------------------------------------------------------'
As soon as you grab the platform it'll collapse - ah well, at least you're down there now.
.----- TREASURE #63: TIBETAN FLINT LIGHTER ------------------------------------.
|!|Hang off the large cogwheel nearby and you'll be able to grab this        |!|
|!|treasure underneath it as it spins round.                                 |!|
'------------------------------------------------------------------------------'
Use the cogwheels to get up a ledge with a lever and flip it. After the scene, find the ladder nearby, climb down and make your way over to yet another big cogwheel. From here you can leap over to a small platform to your left.
The horizontal pole allows you to cling to the mechanism in the distance. Ride it up, then shimmy across to reach the platform on the other side. Spot the rope, swing it over to the wall, climb down and ride the large cogwheel down to the area below. What a trip.
.----- TREASURE #64: BRONZE DORJE ---------------------------------------------.
|!|Ride the cogwheel up on the other side and don't jump on any of the other |!|
|!|cogwheels yet.  Instead, all the way up, climb on to the wooden bar.  This|!|
|!|area is fairly dark, but you can jump from bar to bar here, eventually    |!|
|!|reaching a platform with this treasure.                                   |!|
'------------------------------------------------------------------------------'
Head back to the cogwheel and go from one to another. From the final cogwheel, jump to a snowy ledge.
.----- TREASURE #65: TIBETAN CEREMONIAL AXE -----------------------------------.
|!|Shimmy to the right from this snowy ledge and shoot the shiny eye from the|!|
|!|statue head, then collect this treasure.  I had personally expected a gem |!|
|!|of some sorts, but it's something completely different.                   |!|
'------------------------------------------------------------------------------'
Climb up into a new area from the snowy ledge. Step on the tile at the end; Tenzin will make his way to the middle platform. Go downstairs and jump from pillar to pillar until you reach the middle platform. Beware that the final pillar will sink into the ground as soon as you cling onto it - quickly make that final leap!
As Nate and Tenzin step onto the tiles, a large sequence is set in motion, and the large statue finally becomes accessible. Head over to the statue by means of the new bridge.
.----- TREASURE #66: TRIGRAM THOGCHAG -----------------------------------------.
|!|When you finally reach the big statue, aim your gun at the very top of it.|!|
|!|Shoot the treasure's shine to make it fall down, then claim it as yours.  |!|
'------------------------------------------------------------------------------'
Go downstairs and a cutscene unfolds. When you gain control of Nate, head for the lever at the top of the stairs and flip it to bring an elevator down. You'll get company from two yeti-like creatures, the same ones as you fought before. You don't need to kill them, so wait for the elevator to lower completely and jump on it. Take note that during this ascend you'll have to perform one last move during the scene. More scenes follow and the next chapter starts.
Nate and Tenzin arrive back at the village and roll right into the action as Lazarevic' troops have arrived.
Treasure locations for this level:
|.---.------------------------.-----------------------------------------------.|
||BOX|Treasure Name:          |Location:                                      ||
||===|========================|===============================================||
||[ ]|Amber Skull Bead        |Hay shack opposite of the turret               ||
||[ ]|Antique Ghau            |Second area; At base of tree left to building  ||
||[ ]|Bell Thogchag           |Wooden shack with blue roof                    ||
|'---'------------------------'-----------------------------------------------'|
 ¯¯¯¯¯¯¯¯¯¯¯¯¯¯¯¯¯¯¯¯¯¯¯¯¯¯¯¯¯¯¯¯¯¯¯¯¯¯¯¯¯¯¯¯¯¯¯¯¯¯¯¯¯¯¯¯¯¯¯¯¯¯¯¯¯¯¯¯¯¯¯¯¯¯¯¯¯¯
Treasure Video for this level
After gaining control of Nate again, head outside to aid the villagers in their combat against a dozen soldiers. As you press forward, be especially careful when downing the armored, shotgun-wielding grunt. Head down the trail, felling more soldiers in the process and head around the corner until you run into a turret.
Head to the right side of the area, dispatching soldiers as you go. Head inside the house, grab a grenade, then take cover behind the little wall outside and carefully toss the grenade over to the turret. Alternatively you can use the various gas canisters lying around the area, but that's slightly more tricky to pull off. You can also rush around the gunner and waste him.
Press onward and through the gate until a short scene initiates and the road is blocked. Quickly down the soldier with the RPG, then defeat his buddies.
.----- TREASURE #67: AMBER SKULL BEAD -----------------------------------------.
|!|Before proceeding with the game, search around for this treasure first,   |!|
|!|which can be found in the upper barn of the area opposite of the turret.  |!|
|!|The treasure is located nearby the hay stack.                             |!|
'------------------------------------------------------------------------------'
Proceed through the doors at the far end of the stage and follow Tenzin upstairs. Dispatch the soldier in the house at the end, then go up the ladder.
Back outside, hop over to the building in front of you and kill the soldiers below. There will be one armor shotgun grunt among them, so be careful as always. You can grab the GAU 19 gatling gun inside the house, but it's a rather slow weapon and it has a startup time. Only use it to mow groups of enemies down.
.----- TREASURE #68: ANTIQUE GHAU ---------------------------------------------.
|!|This is an easy one.  From the building you leaped onto, look to your     |!|
|!|left for a tree.  The treasure is lying at the base of it.                |!|
'------------------------------------------------------------------------------'
Continue down the trail and head up the roof of the next house for a better overview. Dispatch all troops below and proceed only when you think the coast is clear.
.----- TREASURE #69: BELL THOGCHAG --------------------------------------------.
|!|Treasure sixty-nine - a bell thogchag - isn't very sexy.  It's located in |!|
|!|a sexy structure with a blue painted roof and shouldn't be too difficult  |!|
|!|to spot after proceeding when the troops down below have been killed.     |!|
'------------------------------------------------------------------------------'
Follow Tenzin inside the house to the far left of the area and the chapter comes to a close with a short cutscene.
Looks like Nathan is up against some heavy resistance again, this time in the form of a tank!
Treasure locations for this level:
|.---.------------------------.-----------------------------------------------.|
||BOX|Treasure Name:          |Location:                                      ||
||===|========================|===============================================||
||[ ]|Yak Horn Carving        |In a corner before proceeding at burning house ||
||[ ]|Bronze Tsongkhapa Statue|After tank blows through a wall, left of path  ||
||[ ]|Tibetan Trumpet         |Inside gap after tank nearly drives off cliff  ||
||[ ]|Gilt Tara Statue        |                                               ||
|'---'------------------------'-----------------------------------------------'|
 ¯¯¯¯¯¯¯¯¯¯¯¯¯¯¯¯¯¯¯¯¯¯¯¯¯¯¯¯¯¯¯¯¯¯¯¯¯¯¯¯¯¯¯¯¯¯¯¯¯¯¯¯¯¯¯¯¯¯¯¯¯¯¯¯¯¯¯¯¯¯¯¯¯¯¯¯¯¯
Treasure Video for this level
Despite being in an open field you're still in a tigh position with that tank quickly moving in. Rush over to the upper right side of the area, dispatching two soldiers as you go. Stay away from that wall on your left; you'll soon find out why. Tenzin opens the door of the house for you - quickly go inside, grab the AK's and hop back out.
Follow Tenzin upstairs, dispatching a few more soldiers along the way. When you reach the burning house up ahead, defeat the troops on top of it first before following Tenzin again.
.----- TREASURE #70: YAK HORN CARVING -----------------------------------------.
|!|Easy treasure to find as it is placed along the main path you need to     |!|
|!|take in order to continue.  Right before proceeding at the burning house, |!|
|!|look around the right corner where several weapons are also placed.       |!|
'------------------------------------------------------------------------------'
Follow Tenzin by climbing over the wall, then continue following him upstairs and immediately head right in the open area. In the next area, quickly, and I mean quickly press onward before the tank arrives, or things will only be more difficult. Your destination is essentially the alley on the left side of the area as you first enter. Walk past the weak stone shacks, and make your way for that stairs on the far opposite end of the tank.
As you continue and attempt to cross the red wooden bridge, the tank will promptly blow it up. Run down inside another house, go through the window and climb the ladder. Dispatch a soldier in the building across, leap over and head through the buildings and help Tenzin move some wooden beams to clear the way.
The tank is quite persistent in following, so quickly swing over to the wall's edge and make your way across. The tank blows straight through the wall that looked so safe and comfortable for half a second, leaving you with little other options but to run down the pathway.
.----- TREASURE #71: BRONZE TSONGKHAPA STATUE ---------------------------------.
|!|This treasure is lying on the left side, only meters after you start      |!|
|!|running down the path when the tank blew through a wall.  It's placed     |!|
|!|slightly out of place in a corner.                                        |!|
'------------------------------------------------------------------------------'
You'll need to defeat several more soldiers along the way, so nothing new here. The tank'll block the way once again, so turn right and dispatch two more soldiers. Follow the linear path - just stay void of the tank - until you reach a mountain trail. The tank will shortly after try to kill you in a rather strange fashion by driving nearly off the cliff.
.----- TREASURE #72: TIBETAN TRUMPET ------------------------------------------.
|!|This treasure is found right after the tank tried to kill you by nearly   |!|
|!|driving off the cliff.  When you reach the wooden roofs with a flag on    |!|
|!|them, don't jump over the gap - instead inspect it for this treasure.     |!|
'------------------------------------------------------------------------------'
Continue with the tank on your tail, dispatch a handful of soldiers in the building after climbing the stairs, and then climb the ladder onto the roof. It is here that you can find the first RPG - just what you're looking for. Carefully aim for the tank and fire the first RPG; just don't miss. It should catch a little fire already.
Proceed to leap across the next buildings and take out the soldier with the RPG on top of this building. Collect it afterwards and fire it at the tank. Two more to go.
.----- TREASURE #73: GILT TARA STATUE -----------------------------------------.
|!|Search the building roofs for a small destroyed hatch and jump down.  Find|!|
|!|the treasure in the mossy area below.                                     |!|
'------------------------------------------------------------------------------'
Continue over the buildings until you reach a zipline. Use this to get across the street. Here, take out the enemies with RPG's and use the remaining two on the tank to finish the chapter.
After an intense car chase, Nate and Elena arrive at the monastery where Lazarevic has brought Schäfer to.
Treasure locations for this level:
|.---.------------------------.-----------------------------------------------.|
||BOX|Treasure Name:          |Location:                                      ||
||===|========================|===============================================||
||[ ]|Tibetan Silver Earring  |Directly above the large sealed doors          ||
||[ ]|Silver Official Seal    |Outer side of broken wall right of the turret  ||
||[ ]|Ritual Crown            |From starting gate, go right, down upper corner||
||[ ]|Silver Offering Pot     |After leaping over bridge, climb down          ||
||[ ]|Tibetan Turquoise Ring  |After closed door; On a overhead left of wall  ||
||[ ]|Carved Wooden Ghurra    |Before entering 2nd tower, check right side    ||
||[ ]|Bronze Tiger Bell       |2nd tower, jump over the large bridge gap, the ||
||   |                        |treasure is on the right side of lowest area   ||
||[ ]|Antique Bronze Lion     |                                               ||
|'---'------------------------'-----------------------------------------------'|
 ¯¯¯¯¯¯¯¯¯¯¯¯¯¯¯¯¯¯¯¯¯¯¯¯¯¯¯¯¯¯¯¯¯¯¯¯¯¯¯¯¯¯¯¯¯¯¯¯¯¯¯¯¯¯¯¯¯¯¯¯¯¯¯¯¯¯¯¯¯¯¯¯¯¯¯¯¯¯
Treasure Video for this level
Climb the cliff, carefully use the ledge to walk over to the right and climb up - just stay hanging off the ledge until the soldiers are done chatting, then throw them off the cliffs one after another and collect their weapons.
Back on terra firma, defeat a few more soldiers and be on your way.
.----- TREASURE #74: TIBETAN SILVER EARRING -----------------------------------.
|!|Inspect the large sealed doors to your left and look up.  This treasure is|!|
|!|attached to the top of these doors.                                       |!|
'------------------------------------------------------------------------------'
Head upstairs and you'll reach the first area of the monastery, swarming with Lazarevic' troops. Perform a stealth move on the first soldier outside the gate, and try to get a headshot on one of the guards behind the walls. After alarming the rest of them, carefully pick them off one by one. Be careful of the armed shotgun grunt - you know these guys can pack a punch, especially with their SAS shotgun.
After dispatching around ten soldiers you'll run into a turret placed far away. Cross the bridge and push the cart as far as you can, then drop down the area to your left. Ignore the turret for now as it can't reach you here and focus on the reinforcements on the right side of the area. When these have been taken care of, rush over to the turret when it ceases firing and take out the wanker who had been controlling it.
Press onward through the building with the turret placed in front and dispatch a handful of soldiers here. Head back outside as Elena tells you more are coming - she isn't kidding! Station yourself behind the turret and mow down all enemies. The turret doesn't have infinite ammo, but it should be more than enough to defeat every single one of them.
.----- TREASURE #75: SILVER OFFICIAL SEAL -------------------------------------.
|!|From the turret, hang from the ledge on your right, off the destroyed wall|!|
|!|near the waterfall.  You can shimmy across the red wooden planks to reach |!|
|!|this treasure - it's in plain sight now.                                  |!|
'------------------------------------------------------------------------------'
.----- TREASURE #76: RITUAL CROWN ---------------------------------------------.
|!|Head back to the first gate and pretend you're walking in here for the    |!|
|!|first time.  Turn right and move to the open area with a burning barrel.  |!|
|!|Move to the upper right corner and climb down.  This treasure is hanging  |!|
|!|at the end of a pole.                                                     |!|
'------------------------------------------------------------------------------'
Help Elena open the door to reach a new breathtaking area. Climb down the red ledges and throw the rope to Elena, then move over the beam. Swing across the gap, climb the stones and leap over to a higher area. Nate can then catch Elena while she makes a jump for it. Push the statue to the left, climb it and proceed over the wooden walkway. After climbing the rope up, a brief cutscene shows your next destination. Jump over the bridge to continue.
.----- TREASURE #77: SILVER OFFERING POT --------------------------------------.
|!|Drop down the lowest area of the bridge after jumping over it, and climb  |!|
|!|down to the right.  Shimmy to the far end of this ledge to find this one. |!|
'------------------------------------------------------------------------------'
Follow Elena up the stairs and jump over the gap. She'll mention that the door is locked up ahead and that you'll have to find a way around it. You can climb the lone pillar on the right side of the area, just climb down the floor beside it (the pillar is on the left side if you stand with your back against the door).
From the roof of this building, leap over to the beams and from here to the bricks on the wall up ahead.
.----- TREASURE #78: TIBETAN TURQUOISE RING -----------------------------------.
|!|Hanging from the bricks of this wall, go left and jump on top of a small  |!|
|!|overhead platform.  Drop down and look up; the treasure is attached to it.|!|
|!|Shoot it down to grab it.                                                 |!|
'------------------------------------------------------------------------------'
Climb the wall again and head around the right. Make your way on top of a platform and throw the guard off the cliffs. You'll now begin a long descend with essentially one big firefight along the way. Jump down a lower platform and dispatch a few soldiers.
From here, walk over the beam and climb out the window, then lower yourself to the area below, but only after killing those soldiers first.
The rest of the descend is fairly straightforward, but you'll want to take things nice and slowly. Avoid taking unnecessary risk and all should be fine.
When you reach the ground floor, explosions will open the door - very subtly - for Elena. Take cover and waste that damn RPG soldier in the distance with the Sniper Rifle to your left, standing behind some crates. Use it to kill several soldiers before they can move in and finish the rest of ‘em with shotgun shells and regular M4 power. When things calm down, proceed to the next tower.
.----- TREASURE #79: CARVED WOODEN GHURRA -------------------------------------.
|!|Before entering, tempting as it might be, check out those bricks to the   |!|
|!|lower right side of the tower you're about to enter.  Climb those down to |!|
|!|find this treasure shining right under the bridge.                        |!|
'------------------------------------------------------------------------------'
Give Elena a boost at the ladder and start climbing the tower. Don't bother shooting at the snipers right now - you'll get to a sniper rifle soon enough. Dispatch a dozen soldiers in side this tower, then grab the sniper rifle on the very top by going outside, climbing the pillar and reaching the top.
First of all, aim for the soldier with the RPG, located in the second tower from the right. Then pick the snipers one by one and a small army comes running over the bridge - do your best to kill as many as you can with your sniper rifle. Elena will give you the go-ahead when you've wasted them all.
.----- TREASURE #80: BRONZE TIGER BELL ----------------------------------------.
|!|After wasting every single enemy around this area, head back down to the  |!|
|!|ground level of this floor.  You can spot a broken bridge at the corner   |!|
|!|of the tower that seems like quite a jump.  Rest assured that it's the    |!|
|!|biggest jump you'll ever have to make in the game, and it's only BARELY   |!|
|!|possible.  Run from far away and jump at the very, VERY LAST POSSIBLE     |!|
|!|moment, directly to the other side of the bridge.  Nate will barely make  |!|
|!|the jump.  Now, climb down two ladders.  At the lowest area, inspect the  |!|
|!|outer side of the wall to the right of the ladder and shoot this treasure |!|
|!|down.  Thought you'd made it?  Think again - you still need to jump back  |!|
|!|to the tower.  Then again, if you fail you'll still have gotten this      |!|
|!|treasure nonetheless.                                                     |!|
'------------------------------------------------------------------------------'
Tip: Bring along your sniper rifle and look for any remaining rounds.
Head back up and cross the beam - then cross the bridge. It will collapse and you're required to carefully time to jump over the gaps as it collapses. Lastly, shimmy, zig-zagging all the way up as the wooden remains crumble apart. People say Nate has great luck? I say it balances out with his bad luck - this same bridge held over 15 people just seconds ago.
Head through those doors and go upstairs. Another big firefight will take place in this open area. If you brought the sniper rifle it will give you a great advantage as you can easily snipe enemies from far away, including snipers. Kill all enemies and proceed.
When you do, more snipers will show up around the area.
It's important to note that you can find extra sniper rifle round on the left side of the area, nearby some sandbags. Alternatively you can find a grenade launcher on the right side of the area, nearby a door with some steps leading down to it. Use these weapons to clear the area of any remaining snipers and proceed to Elena to open the door.
Give her a boost at the end of the stairs, then use the poles to get across. Follow Elena up the wall and you'll soon reach another building with a new dozen enemies. Quickly hop inside, toss a few grenades over to the other side and start clearing the place out.
.----- TREASURE #81: ANTIQUE BRONZE LION --------------------------------------.
|!|From your starting position, look at the room to the far opposite end.    |!|
|!|Look up and you should be able to spot a glow just above several bars.    |!|
|!|Shoot this treasure to make it fall down .. on that same platform. You can|!|
|!|fortunately use the pillar nearby to climb up and reach it.               |!|
'------------------------------------------------------------------------------'
Go outside and make your way over to the red double doors on the left for a short scene and the next chapter will commence.
Having found the location where Lazarevic is holding Schäfer doesn't mean it's over just yet.
Treasure locations for this level:
|.---.------------------------.-----------------------------------------------.|
||BOX|Treasure Name:          |Location:                                      ||
||===|========================|===============================================||
||[ ]|Tibetan Ritual Vase     |Use rope to swing nearby pillar on the left    ||
||[ ]|Tibetan Conch Horn      |Climb stairs in area where you spot the yeti's,||
||   |                        |go left, then look for a snowy platform left   ||
||[ ]|Bronze Oil Lamp         |In the area where you defeat 2 gatling gunners;||
||   |                        |Attached to the top of a pillar; higher ground ||
||[ ]|Ancient Sword Guard     |After climbing through window; On ceiling      ||
||[ ]|Tibetan Coral Earring   |After shimmying right, on platform to the right||
||[ ]|Tibetan Square Ghau     |On statue; hang from corner of left roof       ||
||[ ]|Carved Bone Ornament    |From gap in the stairs, look up at ceiling     ||
||[ ]|Tibetan Hair Ornament   |Atop of statue wall, second statue in the area ||
||[ ]|Tibetan Mala Beads      |                                               ||
|'---'------------------------'-----------------------------------------------'|
 ¯¯¯¯¯¯¯¯¯¯¯¯¯¯¯¯¯¯¯¯¯¯¯¯¯¯¯¯¯¯¯¯¯¯¯¯¯¯¯¯¯¯¯¯¯¯¯¯¯¯¯¯¯¯¯¯¯¯¯¯¯¯¯¯¯¯¯¯¯¯¯¯¯¯¯¯¯¯
Treasure Video for this level
This chapter starts off with a nice little shootout. Clear the place out, but be especially careful around the armored shotgun grunt. Also dispatch the two soldiers with RPG's immediately when the show up (one on the opposite side of the room, one in the right corner nearby).
When you've cleared the area, head up the stairs on the right side of the room. You'll immediately be assaulted by another small dozen of troops, so take cover and kill them one by one. (Let's reflect a little, shall we? Nate probably killed over 250 people during his first adventure - if not more - and we're probably over 250 during this adventure as well. 500 people killed, well, that's more than I counted in all Rambo movies! Although .. maybe not all Rambo movies combined. Rambo does kill a lot of people, now that I think of it.. Or maybe just in more gory fashion).
Go upstairs and clear the room. Pass through a few more rooms, go up the last few stairs and approach the door to witness a scene.
After the scene, Nate and Elena will split up. Go over the beams until you reach a rope; you've guessed it, jump over to it.
.----- TREASURE #82: TIBETAN RITUAL VASE --------------------------------------.
|!|Use the rope to swing to the pillar on the left side as this treasure's   |!|
|!|attached to it.  Don't let go of the rope, but simply press Triangle as   |!|
|!|the game's prompt comes up.                                               |!|
'------------------------------------------------------------------------------'
Use to rope to get across the next platform, then head outside and jump over to the snowy roof. Dispatch four enemy troops here, then continue through the room and drop down the window on the other side. At the end of the path, head up the ladder, dispatch the soldier, then climb the bricks to your left (the room is a dead end).
Climb the bricks up, then go around the building to the right until you can swing over to a new walkway. Jump down the next roof and head down from here by leaping over a walkway around the corner. Don't kill the soldiers down below just yet - they're fighting off two yeti-like monstrosities you've encountered before. When those flee, feel free to pick off these four enemies.
As you climb all the way down, expect a fairly intense firefight to initiate. First of all, waste that RPG-wielding troop on the far end of the area as he's the most dangerous. Then quickly turn to the three armored shotgun grunts coming your way and lay them to rest with grenades and safe, distant gunfire.
Tip: Collect the grenade launchers around the area and continue with 12 rounds.
Climb the stairs to the far end of the area to continue with the game.
.----- TREASURE #83: TIBETAN CONCH HORN ---------------------------------------.
|!|After climbing the stairs, turn left and explore the area.  You'll spot a |!|
|!|snowy platform to the left as you turn around; jump onto this and search  |!|
|!|for this treasure here.                                                   |!|
'------------------------------------------------------------------------------'
From the stairs, turn right, open the doors and go through. You'll face two highly armored grunts with GAU-19 gatling guns. It'll take a lot to fell these two toughies, although four rounds of the grenade launcher will do one in.
Tip: Alternatively, climb the ladder, go around the upper area and lower yourself down on the platform below to find two fully loaded RPG's. Three rounds will do each GAU-19 grunt in, so you've got enough to down both of them. From this position, kill the rest of the snipers and other enemies. An other RPG can be found on the snowy platform to the right of this location.
More enemies show up after defeating the grunts, so you may want to grab one of their gatling guns and head upstairs, simply waiting for something to show up to mow down. Dispatch the other enemies quickly, including an RPG-wielding soldier and several armored shotgun grunts.
After clearing the area, head back to your starting point and locate the green ladder against the building. Climb up and move to higher ground to the right.
.----- TREASURE #84: BRONZE OIL LAMP ------------------------------------------.
|!|Simply climb that platform and inspect the last pillar to your left.  Look|!|
|!|up and you'll see this treasure's shine - shoot it down to collect it.    |!|
'------------------------------------------------------------------------------'
To cross that enormous gap, be a man and go for the jump. (Actually, that jump is just barely possible if you jump at the very last possible moment, but use those bricks on the wall to the side instead to cross). Go inside that open window to continue with the game. Climb down to the rubbish below.
.----- TREASURE #85: ANCIENT SWORD GUARD --------------------------------------.
|!|Inside this room, simply look up and shoot the shiny treasure down.  This |!|
|!|is one of the easiest treasures to get in the game.                       |!|
'------------------------------------------------------------------------------'
Climb the stairs, jump over the gap, go outside and climb the wall. Soldiers and monsters are goofing around below, but it's none of your business right now. Shimmy all the way to the right and climb up.
.----- TREASURE #86: TIBETAN CORAL EARRING ------------------------------------.
|!|Hop down to your right on a destroyed pathway.  This treasure is attached |!|
|!|in the corner on the left, under the stone plate.  Shoot and collect it.  |!|
'------------------------------------------------------------------------------'
Use the red wooden poles to swing over to a window and head through, then jump to the area below. Use the wooden cabinets here to climb the structure.
.----- TREASURE #87: TIBETAN SQUARE GHAU --------------------------------------.
|!|Before heading right, climb the roof to your left first, and hang down to |!|
|!|the far other corner.  You can spot a statue here - by hanging down from  |!|
|!|the roof you can grab the treasure without dropping down.                 |!|
'------------------------------------------------------------------------------'
Climb the other roof, then use the bricks on the wall to finally reach the tower, and a cutscene initiates. When you're back in control of Nate, have a look at his journal by pressing select. You're going to have to solve another puzzle.
At the end of the journal you'll come across several pages relevant to this puzzle. There are several creatures in the journal, each with an elemental name next to them. The first page represents the four objects in the room, each with a specific element attached to them. Simply look for the objects and place them in front of each correct relief according to the key below:
          .------------------.--------------------------------------.
          |Object's Elements:|Animal's Element & Object:            |
          |==================|======================================|
          |Bowl     = Air    |(East) Green Tiger = Air = Bowl       |
          |Pylon    = Fire   |(West) Red The Devourer = Fire = Pylon|
          |Orb      = Water  |(South) Dragon = Water = Orb          |
          |Box      = Earth  |(North) Yellow Snow Lion = Earth = Box|
          '------------------'--------------------------------------'
After correctly placing the objects, the second part of this puzzle will reveal itself. Check the page of your journal with the elements on it and note their colors: Air is Green, Fire is Red, Water is Hollow and Earth is Orange. Now note the color of the symbols on top of the page. There will be six symbols in total, including a blue and a black one, but you don't need those.
Starting with the Green Tiger, check the green symbol on top of the page and match it on the wheel. Do the same with the other three creatures to reveal a pedestal in the middle of the room. Stick the Phurba dagger in it, then go through the opening on the upper side.
From here, use the rope to your right to slide down. Jump over the gap, then turn left and head up the rather dark stairs around the corner.
.----- TREASURE #88: CARVED BONE ORNAMENT -------------------------------------.
|!|Jump over the gap of the stairs, then turn around and look up.  You can   |!|
|!|spot this treasure attached to the ceiling - shoot it down, then jump back|!|
|!|to collect it.                                                            |!|
'------------------------------------------------------------------------------'
At the end of the stairs, climb the ledges/bricks and you'll trigger a cutscene. Afterwards, crouched behind those crates, perform a sneak attack on the first guard by pulling him over the crates when the other isn't looking. Then, sneak over to that little wall to your left and perform a stealth kill on that troop as well when he closes in.
Let's try to stay in that stealth vibe a little longer, shall we? (If you fail you'll have to fight all the guys packed together, making for a slightly less comfortable situation as it includes several armored grunts and one with an RPG.)
Make your way over to the right side of the area and take cover before the troop stationed at the top of the ladder can spot you. Sneak up to the ladder and take this (otherwise RPG wielding) soldier out stealthily by pulling him off.
While it's possible to kill at least one or two more troops by stealth kills, this will put you in an uncomfortable position. Instead, use the RPG on this platform to kill one or two armored grunts down below, then quickly backtrack to cover in the previous area or you'll be a sitting duck.
Execute the sniper to the right first, then take care of any armored grunts coming your way. After thinning this first wave, proceed to the second area and hurl a grenade at the turret, then clear the rest of the enemies before exploring the rest of the area. There will be a few more enemies at the far end side, but you'll have cleared it afterwards.
.----- TREASURE #89: TIBETAN HAIR ORNAMENT ------------------------------------.
|!|This treasure is located on top of the broken statue wall of the statue in|!|
|!|the middle-to-back area (not the first plain in the center statue).  Look |!|
|!|up, shoot it down, the climb the back of the statue, hop over to the other|!|
|!|side (during which the game controls might hinder you slightly, but it's  |!|
|!|definitely possible), then collect the treasure.                          |!|
'------------------------------------------------------------------------------'
Tip: Collect all ammo from the area. The M4 is an excellent weapon of choice during this time as it has a large clip capacity.
Inspect the secret entrance in the middle of the area, then turn the wheel. After opening the secret entrance, use the rope for a quick descend and jump down the platform with the ladder, the climb this down.
A wave of enemies quickly moves in, including a tough grunt with a riot shield Throw a grenade somewhat in front of him to make him walk over it, then gun him down with controlled bursts of fire. After killing the rest of the enemies, continue and a new wave will come down from above with ropes. Dealing with this wave is easier than the last, however.
.----- TREASURE #90: TIBETAN MALA BEADS ---------------------------------------.
|!|Before proceeding, backtrack and check the left corner of the area from   |!|
|!|this vantage point.  This treasure is simply glowing somewhere in the     |!|
|!|corner, so walk over to collect it.                                       |!|
'------------------------------------------------------------------------------'
Climb the ropes the soldiers nicely left for you and things should look familiar. Head inside the secret entrance under the old tree, go down the stairs (and more stairs around the corner), until you finally reach the secret entrance to Shambala.
Nate and Elena have finally found the secret entrance to Shambala after traversing the enormous monastery.
Treasure locations for this level:
|.---.------------------------.-----------------------------------------------.|
||BOX|Treasure Name:          |Location:                                      ||
||===|========================|===============================================||
||[ ]|Bronze Garuda           |On the walls inside the first chamber with orb ||
||[ ]|Toad Censer             |When with Flynn; Jump over gap, search alcove  ||
||[ ]|Eight Emblems Pendant   |Before climbing final stairs, look left        ||
|'---'------------------------'-----------------------------------------------'|
 ¯¯¯¯¯¯¯¯¯¯¯¯¯¯¯¯¯¯¯¯¯¯¯¯¯¯¯¯¯¯¯¯¯¯¯¯¯¯¯¯¯¯¯¯¯¯¯¯¯¯¯¯¯¯¯¯¯¯¯¯¯¯¯¯¯¯¯¯¯¯¯¯¯¯¯¯¯¯
Treasure Video for this level
.----- TREASURE #91: BRONZE GARUDA --------------------------------------------.
|!|Before anything, look around the walls for that characteristic treasure   |!|
|!|shine. Shoot this treasure down to collect it, then feel free to continue.|!|
'------------------------------------------------------------------------------'
Notice that the daggers on the sides of the wall aren't all aligned. Spot the two Phurba's that have their faces downward and rotate them so that their faces are facing up. Inspect the orb to initiate a thrilling cutscene.
Note: While trekking with Flynn you can get away with trying to melee him once. A second attempt will result in him killing you.
Afterwards, continue with Flynn along the way. Follow the path and jump over the gap.
.----- TREASURE #92: TOAD CENSER ----------------------------------------------.
|!|After jumping over the gap, immediately look to your left and look for    |!|
|!|this shiny treasure in the dark alcove.                                   |!|
'------------------------------------------------------------------------------'
Continue with Flynn by jumping to the walls slightly right and shimmy down the ledges. Head for the platform, give Flynn a boost, follow him and take quite literally a leap of faith toward him. From here, climb the steps to your left and you'll soon reach a narrow opening you'll have to squeeze through. Move the stone head out of the way with Flynn, then shimmy across the ledge by climbing down.
Get behind the other side of the cart and push it with Flynn's help, allowing you to reach those skulls. Shimmy all the way until you reach the platform, then move to the end, jump to the walkway and head for the stairs.
.----- TREASURE #93: EIGHT EMBLEMS PENDANT ------------------------------------.
|!|When you leap over to these stairs, don't climb them just yet.  Instead,  |!|
|!|facing the stairs, simply move to your left and you should already see    |!|
|!|this treasure shining on a small platform.                                |!|
'------------------------------------------------------------------------------'
Climb the stairs and you're up for another puzzle. Bring Drake's Journal up with the select button and you'll see those same symbols again on the last two pages. Look at the symbols in squares: Those are also displayed on the grating on each side of the room. Simply align the symbols onto the cylinders as they are displayed in Drake's Journal, then turn the wheel that shows up in the middle of the room and you're all set.
Nate has finally found Shambala, but there's plenty going on at this time, so first things first.
Treasure locations for this level:
|.---.------------------------.-----------------------------------------------.|
||BOX|Treasure Name:          |Location:                                      ||
||===|========================|===============================================||
||[ ]|Phurba Thorchag         |Attached to statue closest by on higher ground ||
||[ ]|Clay Yamantaka Head     |Top of stairs after clearing vines with resin  ||
||[ ]|Gold-leaf Statue Head   |Far right of open area, down some broken steps ||
||[ ]|Fibula Thogchag         |Ancient sewers; Above platform on the left     ||
||[ ]|Unusual Bronze Mask     |Climb up from cart; Beyond rightern balcony    ||
||[ ]|Mani Jewel Thogchag     |Attached to torch in center of the area        ||
||[ ]|Wooden Vajrapani Mask   |Attached to pillar decorations in upper hall   ||
||[ ]|Bronze Statue Head      |During ascend of stairs, nearby some debris    ||
|'---'------------------------'-----------------------------------------------'|
 ¯¯¯¯¯¯¯¯¯¯¯¯¯¯¯¯¯¯¯¯¯¯¯¯¯¯¯¯¯¯¯¯¯¯¯¯¯¯¯¯¯¯¯¯¯¯¯¯¯¯¯¯¯¯¯¯¯¯¯¯¯¯¯¯¯¯¯¯¯¯¯¯¯¯¯¯¯¯
Treasure Video for this level
Since you don't have any weapons at your disposal in the early going of this chapter, simply rush forward through the fairly linear path until a cutscene initiates and you slide down with the entire platform. Quickly grab the M4 of one of the downed troops, shoot the others and watch the scene unfold.
Jump across the platforms down the waterfall and another scene initiates. Collect the Ak-47's from around the area as two scarecrows appear. These guys are extremely fast an pack a punch. Run and gun on the one who'll drop down, and make sure you STAY on the run or he'll definitely kill you before you know it. There are three grenades located in the ruins to the other side which you may find helpful.
When the first scarecrow goes down, killing the second one is much easier and a few focused bursts of gunfire will eventually do it in. After downing him a third and final scarecrow shows up, hurling rounds of resin at you. He's very easily downed if you pick up the crossbows from the other two scarecrows, however. Climb those ruins where you found the grenades and move to higher ground.
.----- TREASURE #94: PHURBA THOGCHAG ------------------------------------------.
|!|After climbing to higher ground, look up and inspect the statue closest   |!|
|!|to you.  This treasure is attached - shoot to collect it.                 |!|
'------------------------------------------------------------------------------'
From here, leap over to the stone liana that will help you get across to the next platform. Jump to the platform in the middle, then over to the last one. Look around for a blue resin glow and fire a round in it to make this explode and clear the way. At the end of the stairs, shoot the blue resin here once again.
.----- TREASURE #95: CLAY YAMANTAKA HEAD --------------------------------------.
|!|This treasure is found nearby the vines at the top of these stairs, where |!|
|!|just shot at some resin again.                                            |!|
'------------------------------------------------------------------------------'
Clear the path by shooting the large concentration of resin, then make your way across the wall by bricks and the rope. Once hanging from the pole up above, first shoot the blue sap in front of you, then pass through the opening. From here you can shoot at another blue, sappy vine to reveal the doorway below. Climb the stairs and you'll be in a large open area again. Hop down the walkway to continue.
.----- TREASURE #96: GOLD-LEAF STATUE HEAD ------------------------------------.
|!|To find this treasure, head to the very far right of this area, and walk  |!|
|!|down a few broken steps.  This treasure's sparkling in the corner here.   |!|
'------------------------------------------------------------------------------'
As you proceed to the upper right corner of the area and attempt to open this door you'll find that the area is slowly filling with troops behind you. It's possible to get in a few stealth kills, but it's just as much trouble to kill a few guys in the early going. Especially be careful with the sniper and RPG wielding soldier - those are dangerous as always.
The firefight itself isn't very tough, but scarecrows show up in the final stages. If you still have a crossbow, good. It'll only take one shot of their own weapon to fell these tough foes. Otherwise you'll need to kill one of them, collect their crossbow and use those rare rounds to carefully defeat the other two. Open the door after all this.
To do so, find some stones to climb nearby the steps, shimmy over to the other chain and hang on to it - looks like Nate's belly is of some good use to us after all.
In the next area, drop down the ancient sewers and toss a grenade in the group in front of you, then immediately after take out the guy with the grenade launcher on higher ground, follower by the armored grunt. After defeating this first wave of enemies, grab the shotgun from the grunt, head around the corner and promptly empty it on the three armored grunts slowly moving around the corner.
As you continue, take note of that blue sap on the upper right wall and shoot it to automatically dispatch a sniper. Feel free to climb the stairs to collect Grenade Launcher ammo and even Sniper Rounds.
.----- TREASURE #97: FIBULA THOGCHAG ------------------------------------------.
|!|After the coast is clear, proceed through the area and climb the upper    |!|
|!|platforms by using the stairs.  This treasure is on the far high end      |!|
|!|above one of the platforms to the left. Shoot it down to collect this one.|!|
'------------------------------------------------------------------------------'
At the far end, climb those mossy bricks and drop down the other side. When you continue in the next area, take note of those blue resin vines, because you're about to get ambushed by several armored suckers. The split second this happens, holler back to take cover and immediately fire at those resin vines to incur damage. Defeat the remaining enemies with regular gunfire.
Use the cart to get to the higher area.
.----- TREASURE #98: UNUSUAL BRONZE MASK --------------------------------------.
|!|After hoisting yourself up from the cart, check out the balcony directly  |!|
|!|to your right and jump over to the dark upper area back where you just    |!|
|!|had another firefight.  The treasure is shining back there on a slippery  |!|
|!|platform.                                                                 |!|
'------------------------------------------------------------------------------'
Simply climb the large stairs leading your to the final destination of the game. Inside you'll encounter all types of enemies in the game, basically. Regular troops, armored troops, one with a chain gun, several scarecrows, you name it. Essentially work your way through the enemies and never take big risks out in the open. Use Crossbow bolts for the guardians, shotguns for close-range combat and the M4 for long distance firefights. Definitely shoot any blue sap inside roots whenever enemies are near - this deals big damage.
In the final stages, several guardians start hurling resin from top of the other stairs. Loot the area for remaining crossbow bolts and take them out with one or two well aimed rounds.
Note: The game is known for freezing after the entire shootout has ended. Fortunately when you restart you should be able to continue from this checkpoint.
.----- TREASURE #99: MANI JEWEL THOGCHAG --------------------------------------.
|!|After defeating all enemies in this area, head up to the large torch in   |!|
|!|the middle of the chamber.  Look around it and inspect the upper sides to |!|
|!|spot this treasure. Simply shoot it down, then collect it. Two more to go!|!|
'------------------------------------------------------------------------------'
.----- TREASURE #100: WOODEN VAJRAPANI MASK -----------------------------------.
|!|From the stairs opposite to where you started, or in other words from the |!|
|!|stairs where the last few guardians were hurling resin over to your asses,|!|
|!|move into the hall, go around the corner and you'll spot this treasure in |!|
|!|open sight as it's attached to the upper right side of one of the         |!|
|!|structural pillars' decorations near the ceiling.  Shoot and collect it,  |!|
|!|and there'll be only one more to go!                                      |!|
'------------------------------------------------------------------------------'
.----- TREASURE #101: BRONZE STATUE HEAD --------------------------------------.
|!|This statue is found along the way - climb three stairs up. This treasure |!|
|!|is located nearby some dirt debris - look for its shine.                  |!|
'------------------------------------------------------------------------------'
After climbing the stairs completely a cutscene will initiate. Afterwards, clear the path from any snipers and other grunts while taking cover behind fallen pillars and crates. Snipers always take priority over all other enemies, but armored grunts that move too close are just as dangerous. It doesn't take long before you'll reach the end of this chapter after felling all soldiers.
It's time for the final showdown with Lazarevic, and he's not going to go down nice and easy. Oh no.
There are no treasure pickups for this level.
Simply jump down the platforms until you reach the final boss stage. A long cutscene will play and you're up against Lazarevic.
Final Boss Battle Video
FINAL BOSS: LAZAREVIC
o You're located inside a circular area with several minor threats you need to be aware of. First of all there's the center you'll want to avoid, secondly there is a small ravine nearby the center which you don't want to fall down if you love your life (or Nate's life, rather).
o Don't even bother shooting at Lazarevic directly - he'll take too little damage from this to be noteworthy. Don't bother with grenades either unless you feel lucky; Lazarevic moves too fast and won't stay around long enough for the explosions to hit him.
o Instead, shoot the large resin bulbs from the Tree of Life when Lazarevic passes by. This will significantly hurt him, and it's the key to win this fight.
o Always stay on the run from Lazarevic. His only really long-range attack is to throw several grenades at once at you, and he'll only start doing this after you've made him kneel once at least. While his shotgun can still cause damage when you're meters away, it's much less dangerous when you're on the far side of the area.
o The first phase of the battle is straightforward. Take some time and familiarize yourself with the area, then start running in circles, at all times staying away from Lazarevic.
o When you think you've moved far enough away from Lazarevic, turn around – if possible, take cover behind something - and look where Lazarevic is running. Quickly shoot a resin bulb as he passes by and he'll take a direct hit.
o There will be three short cutscenes in which Lazarevic will visibly get more hurt by those resin blasts in his face - we gotta get that scar back on there!
o If Lazarevic manages to catch up with you he'll grab you and starts bashing the crap out of you. When this happens, quickly tap Square when the prompt comes up and Lazarevic will hurl you away. This will still cause great damage, but if you're lucky it won't completely kill you.
o When you've successfully made Lazarevic kneel three times, keep doing what you were doing and he'll fall shortly afterwards.
After the concluding cutscene, cross the bridge as it crumbles down. The camera angle will change about 3/4th way through and you'll have to move towards the screen. Upon reaching Elena and Chloe, only last interactive cutscene plays in which you'll need to shoot the guardian off Chloe. Upon doing successfully you have beaten Uncharted 2, so sit back and enjoy the ending!
Note: You can now try the game on a harder difficulty. If you beat the game on hard difficulty you'll unlock the hardest difficulty, Crushing.
With Elena back at his side, Nate pursues Lazarevic' troops who brought Schäfer along, who had the Phurba.
There are no treasure pickups on this level.
Start this chapter off nicely by pulling the soldier off the truck. Start off by shooting the enemies around you while you keep on truckin'. It doesn't take very long, however, until a truck shows up with a soldier stationed behind a turret that fires grenade rounds.
At this point you'll need to switch to other trucks the moment yours catches fire, and Nate will always point this out. After switching trucks several times and still shooting all soldiers around you, it looks for a moment that there are no trucks nearby, and the one with the grenade launcher appears to be gone as well.
Quickly jump over to the right side of the cliff and you'll land right on this truck. After dealing with the soldier, you're now in control of the turret, and Elena's yellow car comes in sight as well. Shake off all other enemies by blasting all other trucks except Elena's.
It doesn't take long before you'll have to leap back over to Elena's car. The chapter ends here.
Assuming you'd like a quick checklist next to you as you go treasure hunting, here's a perfectly printable quicklist. Tick off those boxes as you go. If you can't find a treasure with the very short description in this quicklist, consult this walkthrough for a much broader and more in-depth description. Good luck with collecting all of them!
                                  CHAPTER 1:
.---.------------------------.-----------------------------------------------.
|BOX|Treasure Name:          |Location:                                      |
|===|========================|===============================================|
|[ ]|Wrathful Deity Statue   |Nearby a tree immediately to the right of cliff|
|[ ]|Saraswati Statue        |Nearby first body - in the corner with rubbish |
|[ ]|Tibetan Snuff Bottle    |After shooting 1st lock; Look up and shoot body|
|[ ]|Bhutanese Lime Box      |Lower snowy area right before entering a cabin |
|[ ]|Ghau Amulet Thogchag    |After leap of faith, in back of the train cabin|
'---'------------------------'-----------------------------------------------'
                                  CHAPTER 2:
.---.------------------------.-----------------------------------------------.
|BOX|Treasure Name:          |Location:                                      |
|===|========================|===============================================|
|[ ]|Byzantine Gold Coin     |After manhole; On top of crate in the corner   |
|[ ]|Glass Evil Eye          |Climb up twice;On platform after turning around|
|[ ]|Ottoman Ring            |Treasure Room; Armor to the right of the steps |
|[ ]|Silver Amulet Box       |Drop from metal roof; Search plant box nearby  |
|[ ]|Silver Belt Buckle      |Second open area; Search area inside fountain  |
|[ ]|Ivory Chess Knight      |At the far right end of the wooden beam area   |
|[ ]|Ottoman Bracelet        |After swinging by rope, around building,go down|
|[ ]|Antique Pocket Watch    |On a wall after hopping down, before hopping   |
    |                        |from roof to roof to the whistling guard       |
|[ ]|Antique Pipe            |Museum Room; At lion head relief left of gate  |
|[ ]|Jeweled Bracelet        |In sewer area with guards aiming at you        |
'---'------------------------'-----------------------------------------------'
                                  CHAPTER 3:
.---.------------------------.-----------------------------------------------.
|BOX|Treasure Name:          |Location:                                      |
|===|========================|===============================================|
|[ ]|Yuan Dynasty Coin       |After first explosives; Tree in area on left   |
|[ ]|Yuan Dynasty Jade Animal|Isolated area nearby first two enemies         |
|[ ]|Jade Pei Pendant        |On top of a waterfall                          |
|[ ]|Amber Jade Chimera      |After big melee fight; Climb area; Near barrel |
'---'------------------------'-----------------------------------------------'
                                  CHAPTER 4:
.---.------------------------.-----------------------------------------------.
|BOX|Treasure Name:          |Location:                                      |
|===|========================|===============================================|
|[ ]|Mongol Paiza Passport   |On top of one of the ship masts nearby building|
|[ ]|Jade Belt Slide         |The tombs lower chamber;Embedded in a statue   |
|[ ]|Yuan Dynasty Helmet     |Room with Phurba                               |
'---'------------------------'-----------------------------------------------'
                                  CHAPTER 5:
.---.------------------------.-----------------------------------------------.
|BOX|Treasure Name:          |Location:                                      |
|===|========================|===============================================|
|[ ]|Strange Relic           |Sewer area; Down the manhole near bicycles     |
'---'------------------------'-----------------------------------------------'
                                  CHAPTER 6:
.---.------------------------.-----------------------------------------------.
|BOX|Treasure Name:          |Location:                                      |
|===|========================|===============================================|
|[ ]|Brass Bird Lamp         |At top of the electricity pole at the square   |
|[ ]|Silver Dress Clasp      |Above the temple's entrance at the square      |
|[ ]|Copper Rice Measure     |Hotel roof; Before entering, walk around it    |
|[ ]|Yuan Dynasty Urn        |Upper end of staircase; Inside elevator shaft  |
|[ ]|Enameled Snuff Bottle   |Destroyed hotel; Roof adjacent/below balcony   |
|[ ]|Incense Burner          |On top of a small higher roof with a water tank|
'---'------------------------'-----------------------------------------------'
                                  CHAPTER 7:
.---.------------------------.-----------------------------------------------.
|BOX|Treasure Name:          |Location:                                      |
|===|========================|===============================================|
|[ ]|Worn Pendant            |Burned-out house at initial start;Cardboard box|
|[ ]|Nine Jewel Ring         |Inside the fountain statue's bell              |
|[ ]|Ankhara Water Vessel    |Pile of rubbish down the river                 |
|[ ]|Silver Shiva Amulet     |Blue cart in courtyard right before the temple |
'---'------------------------'-----------------------------------------------'
                                  CHAPTER 8:
.---.------------------------.-----------------------------------------------.
|BOX|Treasure Name:          |Location:                                      |
|===|========================|===============================================|
|[ ]|Bronze Altar Spoon      |From entrance, hall to your right, upper area  |
|[ ]|Bronze Varaha Statue    |When ceiling is closing in on you; On ground   |
'---'------------------------'-----------------------------------------------'
                                  CHAPTER 9:
.---.------------------------.-----------------------------------------------.
|BOX|Treasure Name:          |Location:                                      |
|===|========================|===============================================|
|[ ]|Copper Lahke Mask       |Large chamber;1st upper walkway at the very end|
|[ ]|Carved Jade Figurine    |Third upper walkway, on a wall, look above     |
|[ ]|Bronze Ganesh Statue    |Hidden chamber underneath large chamber        |
'---'------------------------'-----------------------------------------------'
CHAPTER 10: No Treasure
CHAPTER 11: No Treasure
                                  CHAPTER 12:
.---.------------------------.-----------------------------------------------.
|BOX|Treasure Name:          |Location:                                      |
|===|========================|===============================================|
|[ ]|Nepali Bronze Lion      |In dark alley to the right of first square     |
|[ ]|Yuan Dynasty Lotus Jar  |On top of the green fire escape catwalk        |
|[ ]|Cham Lion Mask          |On the other side of the blocked door          |
|[ ]|Jeweled Statue Crown    |After gliding down, check the far end of area  |
|[ ]|Three-Stone Coral Ring  |Inside warehouse, use middle train to get there|
'---'------------------------'-----------------------------------------------'
                                  CHAPTER 13:
.---.------------------------.-----------------------------------------------.
|BOX|Treasure Name:          |Location:                                      |
|===|========================|===============================================|
|[ ]|Miniature Bronze Stupa  |At the very back of the train's last cabin     |
|[ ]|Yama and Buffalo Statue |Top of cabin with a troop coming through window|
|[ ]|Newari Bronze Figures   |Inside train car where troops are swept off    |
'---'------------------------'-----------------------------------------------'
                                  CHAPTER 14:
.---.-------------------------.----------------------------------------------.
|BOX|Treasure Name:           |Location:                                     |
|===|=========================|==============================================|
|[ ]|Gilded Bodhisattva Statue|Inside train car after the car with coals     |
|[ ]|Tibetan Saddle Ring      |At back of the cabin after you exit the tunnel|
'---'-------------------------'----------------------------------------------'
                                  CHAPTER 15:
.---.------------------------.-----------------------------------------------.
|BOX|Treasure Name:          |Location:                                      |
|===|========================|===============================================|
|[ ]|Tibetan Knife           |Far right corner of the area                   |
|[ ]|Tibetan Prayer Wheel    |Near initial starting place, near some boxes   |
|[ ]|Tibetan Silver Vase     |Elevated cabin, shoot this treasure down       |
'---'------------------------'-----------------------------------------------'
                                  CHAPTER 16:
.---.------------------------.-----------------------------------------------.
|BOX|Treasure Name:          |Location:                                      |
|===|========================|===============================================|
|[ ]|Ram's Head Thogchag     |Behind initial house                           |
|[ ]|Bronze Buddha Statue    |To the right of area where kids are playing    |
|[ ]|Singing Bowl            |Nearby the big tree next to the elder's house  |
'---'------------------------'-----------------------------------------------'
                                  CHAPTER 17:
.---.------------------------.-----------------------------------------------.
|BOX|Treasure Name:          |Location:                                      |
|===|========================|===============================================|
|[ ]|Tibetan Ritual Blade    |After descending the ladder, area nearby cliff |
|[ ]|Clay Deity Head         |Area with tent; Swing the rope to left ledge   |
|[ ]|Bronze Chenrezig Statue |Around the corner, before climbing ropes up    |
|[ ]|Skull Cap Drum          |At the waterfall head right, search at dead end|
|[ ]|Silver Needle Case      |On cliff before jumping down to area w/ladder  |
|[ ]|Bronze Stupa Ornament   |After fight with beast; concealed area that you|
|   |                        |can reach after leaping over several cliffs    |
'---'------------------------'-----------------------------------------------'
                                  CHAPTER 18:
.---.------------------------.-----------------------------------------------.
|BOX|Treasure Name:          |Location:                                      |
|===|========================|===============================================|
|[ ]|Mandala Thogchag        |On a wooden board of 3rd rotating cylinder     |
|[ ]|Dipa Oil Lamp           |In cogwheel area; use rope to swing towards it |
|[ ]|Tibetan Flint Lighter   |After falling down; underneath nearby cogwheel |
|[ ]|Tibetan Ceremonial Axe  |Ride large cogwheel up; platform accessed by   |
|   |                        |jumping from beam to beam                      |
|[ ]|Bronze Dorje            |After cogwheels, shimmy right of snowy ledge   |
|[ ]|Trigram Thogchag        |At very top of large statue                    |
'---'------------------------'-----------------------------------------------'
                                  CHAPTER 19:
.---.------------------------.-----------------------------------------------.
|BOX|Treasure Name:          |Location:                                      |
|===|========================|===============================================|
|[ ]|Amber Skull Bead        |Hay shack opposite of the turret               |
|[ ]|Antique Ghau            |Second area; At base of tree left to building  |
|[ ]|Bell Thogchag           |Wooden shack with blue roof                    |
'---'------------------------'-----------------------------------------------'
                                  CHAPTER 20:
.---.------------------------.-----------------------------------------------.
|BOX|Treasure Name:          |Location:                                      |
|===|========================|===============================================|
|[ ]|Yak Horn Carving        |In a corner before proceeding at burning house |
|[ ]|Bronze Tsongkhapa Statue|After tank blows through a wall, left of path  |
|[ ]|Tibetan Trumpet         |Inside gap after tank nearly drives off cliff  |
|[ ]|Gilt Tara Statue        |                                               |
'---'------------------------'-----------------------------------------------'
CHAPTER 21: No Treasure
                                  CHAPTER 22:
.---.------------------------.-----------------------------------------------.
|BOX|Treasure Name:          |Location:                                      |
|===|========================|===============================================|
|[ ]|Tibetan Silver Earring  |Directly above the large sealed doors          |
|[ ]|Silver Official Seal    |Outer side of broken wall right of the turret  |
|[ ]|Ritual Crown            |From starting gate, go right, down upper corner|
|[ ]|Silver Offering Pot     |After leaping over bridge, climb down          |
|[ ]|Tibetan Turquoise Ring  |After closed door; On a overhead left of wall  |
|[ ]|Carved Wooden Ghurra    |Before entering 2nd tower, check right side    |
|[ ]|Bronze Tiger Bell       |2nd tower, jump over the large bridge gap, the |
|   |                        |treasure is on the right side of lowest area   |
|[ ]|Antique Bronze Lion     |                                               |
'---'------------------------'-----------------------------------------------'
                                  CHAPTER 23:
.---.------------------------.-----------------------------------------------.
|BOX|Treasure Name:          |Location:                                      |
|===|========================|===============================================|
|[ ]|Tibetan Ritual Vase     |Use rope to swing nearby pillar on the left    |
|[ ]|Tibetan Conch Horn      |Climb stairs in area where you spot the yeti's,|
|   |                        |go left, then look for a snowy platform left   |
|[ ]|Bronze Oil Lamp         |In the area where you defeat 2 gatling gunners;|
|   |                        |Attached to the top of a pillar; higher ground |
|[ ]|Ancient Sword Guard     |After climbing through window; On ceiling      |
|[ ]|Tibetan Coral Earring   |After shimmying right, on platform to the right|
|[ ]|Tibetan Square Ghau     |On statue; hang from corner of left roof       |
|[ ]|Carved Bone Ornament    |From gap in the stairs, look up at ceiling     |
|[ ]|Tibetan Hair Ornament   |Atop of statue wall, second statue in the area |
|[ ]|Tibetan Mala Beads      |                                               |
'---'------------------------'-----------------------------------------------'
                                  CHAPTER 24:
.---.------------------------.-----------------------------------------------.
|BOX|Treasure Name:          |Location:                                      |
|===|========================|===============================================|
|[ ]|Bronze Garuda           |On the walls inside the first chamber with orb |
|[ ]|Toad Censer             |When with Flynn; Jump over gap, search alcove  |
|[ ]|Eight Emblems Pendant   |Before climbing final stairs, look left        |
'---'------------------------'-----------------------------------------------'
                                  CHAPTER 25:
.---.------------------------.-----------------------------------------------.
|BOX|Treasure Name:          |Location:                                      |
|===|========================|===============================================|
|[ ]|Phurba Thorchag         |Attached to statue closest by on higher ground |
|[ ]|Clay Yamantaka Head     |Top of stairs after clearing vines with resin  |
|[ ]|Gold-leaf Statue Head   |Far right of open area, down some broken steps |
|[ ]|Fibula Thogchag         |Ancient sewers; Above platform on the left     |
|[ ]|Unusual Bronze Mask     |Climb up from cart; Beyond rightern balcony    |
|[ ]|Mani Jewel Thogchag     |Attached to torch in center of the area        |
|[ ]|Wooden Vajrapani Mask   |Attached to pillar decorations in upper hall   |
|[ ]|Bronze Statue Head      |During ascend of stairs, nearby some debris    |
'---'------------------------'-----------------------------------------------'
With the proper amount of cash you unlock during the single-player campaign of Uncharter 2, you can unlock all kinds of goodies in the menu at the store found under bonuses.
Note: If you have a savegame from Uncharted: Drake's Fortune you'll be rewarded with a one-time $20000. If that savegame also has that game completed, you'll be given an extra $80000.
                              Single-Player Skins:
                              --------------------
.-----------------------------.--------.---------------------------------------.
|Unlockable:                  |Cost:   |Requirements:                          |
|=============================|========|=======================================|
|Drake - Street Clothes       |  FREE  |                                       |
|-----------------------------|--------|---------------------------------------|
|Drake - Heist Gear           | $10000 |                                       |
|-----------------------------|--------|---------------------------------------|
|Drake - Winter Gear          | $20000 |Purchase Drake - Heist Gear            |
|-----------------------------|--------|---------------------------------------|
|Drake - Dirty and Beat-up    | $20000 |Purchase Drake - Heist Gear            |
|-----------------------------|--------|---------------------------------------|
|Drake - Doughnut Drake       | $50000 |Purchase Drake - Winter Gear           |
|                             |        |& Drake - Dirty and Beat-up            |
|-----------------------------|--------|---------------------------------------|
|Chloe - Street Clothes       |  $5000 |                                       |
|-----------------------------|--------|---------------------------------------|
|Chloe - Winter Gear          | $20000 |Purchase Flynn - Heist Gear            |
|                             |        |& Flynn - Winter Jacket                |
|-----------------------------|--------|---------------------------------------|
|Flynn - Street Clothes       |  $5000 |Purchase Chloe - Street Clothes        |
|-----------------------------|--------|---------------------------------------|
|Flynn - Heist Gear           | $10000 |Purchase Flynn - Street Clothes        |
|-----------------------------|--------|---------------------------------------|
|Flynn - Winter Jacket        | $10000 |Purchase Flynn - Street Clothes        |
|-----------------------------|--------|---------------------------------------|
|Elena - Street Clothes       |  $5000 |                                       |
|-----------------------------|--------|---------------------------------------|
|Elena - Winter Gear          | $10000 |Purchase Elena - Street Clothes        |
|-----------------------------|--------|---------------------------------------|
|Jeff - Elena's Camerman      |  $5000 |Purchase Elena - Winter Gear           |
|-----------------------------|--------|---------------------------------------|
|Victor Sullivan              |  $5000 |                                       |
|-----------------------------|--------|---------------------------------------|
|Tenzin                       |  $5000 |Purchase Victor Sullivan               |
|-----------------------------|--------|---------------------------------------|
|Karl Schaefer                | $20000 |Purchase Tenzin                        |
|-----------------------------|--------|---------------------------------------|
|Dragan - Helmet Soldier      |  $5000 |                                       |
|-----------------------------|--------|---------------------------------------|
|Sark - Face Mask Soldier     |  $5000 |Purchase Dragan - Helmet Soldier       |
|-----------------------------|--------|---------------------------------------|
|Vodnik - Ski Mask Soldier    |  $5000 |Purchase Sark - Face Mask Soldier      |
|-----------------------------|--------|---------------------------------------|
|Lovac - Headphones Soldier   |  $5000 |Purchase Sark - Face Mask Soldier      |
|-----------------------------|--------|---------------------------------------|
|Tetram - Gas Mask Soldier    | $10000 |Purchase Vodnik - Ski Mask Soldier     |
|                             |        |& Lovac - Headphones Soldier           |
|-----------------------------|--------|---------------------------------------|
|Zorskel - Skull Mask Soldier | $10000 |                                       |
|-----------------------------|--------|---------------------------------------|
|Lieutenant Draza             | $10000 |Purchase Zorskel - Skull Mask Soldier  |
|-----------------------------|--------|---------------------------------------|
|Zoran Lazarevic              | $20000 |Purchase Lieutenant Draze              |
|-----------------------------|--------|---------------------------------------|
|Zoran Lazarevic - Healed     |  FREE  |Purchase Zoran Lazarevic               |
|-----------------------------|--------|---------------------------------------|
|The Dead Explorer            | $20000 |Purchase Zoran Lazarevic               |
|-----------------------------|--------|---------------------------------------|
|Skelzor the Skeleton         | $30000 |Purchase Dead Explorer                 |
|-----------------------------|--------|---------------------------------------|
|Sir Francis Drake            | $30000 |Purchase Skelzor the Skeleton          |
|-----------------------------|--------|---------------------------------------|
|???                          |  FREE  |Complete game on Crushing Difficulty   |
|-----------------------------|--------|---------------------------------------|
|???                          |  FREE  |Obtain the Platinum trophy             |
'-----------------------------'--------'---------------------------------------'
                                   Weapons:
                                   --------
You can buy weapons from the store to use these during single player mode.
In order to actually use these weapons you'll need to have beaten the game at least once on the difficulty you're currently playing.
In other words, if you've beaten the game on Normal you'll be able to use your bought weapons on Normal difficulty and below,
but not on Hard or Crushing.  To use bought weapons, simply select them from the menu under Bonuses -> Store -> Weapons.
                 .----------------------------------.-------.
                 |Weapon Unlockable:                |Cost:  |
                 |==================================|=======|
                 |Tranquilizer Dart Gun             | $5000 |
                 |----------------------------------|-------|
                 |.45 Defender Semi-automatic Pistol| $5000 |
                 |----------------------------------|-------|
                 |AK-47 Assault Rifle               | $5000 |
                 |----------------------------------|-------|
                 |FAL Assault Rifle                 | $5000 |
                 |----------------------------------|-------|
                 |Moss - 12 Shotgun                 | $5000 |
                 |----------------------------------|-------|
                 |92FS - 9MM Semi-automatic Pistol  | $5000 |
                 |----------------------------------|-------|
                 |Wes - 44 Revolver                 |$10000 |
                 |----------------------------------|-------|
                 |SAS - 12 Shotgun                  |$10000 |
                 |----------------------------------|-------|
                 |Mk-NDI Grenades                   | $5000 |
                 |----------------------------------|-------|
                 |Desert - 5 Semi-automatic Pistol  |$10000 |
                 |----------------------------------|-------|
                 |Micro 9mm Fully Automatic Pistol  | $5000 |
                 |----------------------------------|-------|
                 |MP40 Submachine Gun               | $5000 |
                 |----------------------------------|-------|
                 |P08 - 9mm                         | $5000 |
                 |----------------------------------|-------|
                 |M4 Assault Rifle                  |$10000 |
                 |----------------------------------|-------|
                 |M32 Hammer                        |$20000 |
                 |----------------------------------|-------|
                 |Dragon Sniper Rifle               |$20000 |
                 |----------------------------------|-------|
                 |Pistole Shotgun Pistol            |$10000 |
                 |----------------------------------|-------|
                 |GAU - 19                          |$20000 |
                 |----------------------------------|-------|
                 |RPG-7                             |$20000 |
                 |----------------------------------|-------|
                 |Eddy's Golden Gun                 |$20000 |
                 |----------------------------------|-------|
                 |Chloe's .45 Defender              |$20000 |
                 '----------------------------------'-------'
                                 Render Modes:
                                 -------------
                           .----------------.------.
                           |Render Name:    |Cost: |
                           |================|======|
                           |Black and White |$10000|
                           |----------------|------|
                           |Sepia Tint      |$10000|
                           |----------------|------|
                           |Next Gen Filter |$10000|
                           '-----------------------'
                                 Bonus Movies:
                                 -------------
             .-------------------------------------------.-------.
             |Unlockable Name:                           |Cost:  |
             |===========================================|=======|
             |Behind The Scenes: Technology and Gameplay |$10,000|
             |-------------------------------------------|-------|
             |Behind The Scenes: Story and Art           |$10,000|
             |-------------------------------------------|-------|
             |Behind The Scenes: Making of the Cinematics|$10,000|
             |-------------------------------------------|-------|
             |Behind The Scenes: Online Technology       |$10,000|
             |-------------------------------------------|-------|
             |Behind The Scenes: Naughty Dog             |$10,000|
             |-------------------------------------------|-------|
             |Behind The Scenes: Mastering the Cell      |$10,000|
             |-------------------------------------------|-------|
             |Behind The Scenes: Thinking Like a Dog     |$10,000|
             |-------------------------------------------|-------|
             |Test Trailer Animatic                      |$10,000|
             '---------------------------------------------------'
                                Art Galleries:
                                --------------
                    .------------------------------.-----.
                    |Unlockable Name:              |Cost:|
                    |==============================|=====|
                    |Concept Art Gallery 1         |$5000|
                    |------------------------------|-----|
                    |Concept Art Gallery 2         |$5000|
                    |------------------------------|-----|
                    |Concept Art Gallery 3         |$5000|
                    |------------------------------|-----|
                    |Concept Art Gallery 4         |$5000|
                    |------------------------------|-----|
                    |Concept Art Gallery 5         |$5000|
                    |------------------------------|-----|
                    |Concept Art Gallery 6         |$5000|
                    |------------------------------|-----|
                    |Concept Art Gallery - Bonus 1 |$5000|
                    |------------------------------|-----|
                    |Concept Art Gallery - Bonus 2 |$5000|
                    '------------------------------------'
                                    Tweaks:
                                    -------
                           .----------------.------.
                           |Unlockable Name:|Cost: |
                           |================|======|
                           |Fast Motion     |$20000|
                           |----------------|------|
                           |Slow Motion     |$20000|
                           |----------------|------|
                           |Mirror World    |$25000|
                           |----------------|------|
                           |Flip World      |$30000|
                           |----------------|------|
                           |Infinite Ammo   |$60000|
                           |----------------|------|
                           |One-Shot Kills  |$80000|
                           |----------------|------|
                           |No Gravity      |$50000|
                           '----------------'------'
SINGLE PLAYER MEDALS:
.-------------------------------.----------------------------------------------.
|Medal Name:                    |How to obtain:                                |
|===============================|==============================================|
|First Treasure                 |Find  1 treasure                              |
|Beginner Fortune Hunter        |Find  5 treasures                             |
|Apprentice Fortun Hunter       |Find 10 treasures                             |
|Rookie Fortune Hunter          |Find 15 treasures                             |
|Novice Fortune Hunter          |Find 20 treasures                             |
|Trainee Fortune Hunter         |Find 25 treasures                             |
|Cadet Fortune Hunter           |Find 30 treasures                             |
|Enthusiast Fortune Hunter      |Find 35 treasures                             |
|Intermediate Fortune Hunter    |Find 40 treasures                             |
|Adept Fortune Hunter           |Find 45 treasures                             |
|Practiced Fortune Hunter       |Find 50 treasures                             |
|Skilled Fortune Hunter         |Find 55 treasures                             |
|Proficient Fortune Hunter      |Find 60 treasures                             |
|Advanced Fortune Hunter        |Find 65 treasures                             |
|Professional Fortune Hunter    |Find 70 treasures                             |
|Senior Fortune Hunter          |Find 75 treasures                             |
|Expert Fortune Hunter          |Find 80 treasures                             |
|Ace Fortune Hunter             |Find 85 treasures                             |
|Crack Fortune Hunter           |Find 90 treasures                             |
|Consummate Fortune Hunter      |Find 95 treasures                             |
|Master Fortune Hunter          |Find 100 treasures                            |
|Relic Finder                   |Find the Strange Relic                        |
|Survivor                       |Defeat 75 enemies in a row without dying      |
|20 Headshots                   |Defeat 20 enemies with headshots              |
|100 Headshots                  |Defeat 100 enemies with headshots             |
|250 Headshots                  |Defeat 250 enemies with headshots             |
|Headshot Expert                |Defeat 5 enemies in a row with headshots      |
|Blindfire Marksman             |Defeat 20 enemies by blind-firing while in    |
|                               |cover (without aiming with L1)                |
|Run-and-Gunner                 |Defeat 20 enemies by shooting from the hip    |
|Hangman                        |Defeat 20 enemies with gunfire while hanging  |
|Shield Attacker                |Defeat 10 enemies with your pistol while you  |
|                               |are holding the Riot Shield                   |
|Master Shield Attacker         |Defeat 20 enemies with your pistol while you  |
|                               |are holding the Riot Shield                   |
|50 Kills: .45 Defender         |Defeat 50 enemies with the .45 Defender       |
|50 Kills: 92FS - 9mm           |Defeat 50 enemies with the 92FS - 9mm         |
|50 Kills: Micro - 9mm          |Defeat 50 enemies with the Micro - 9mm        |
|30 Kills: Wes - 44             |Defeat 30 enemies with the Wes - 44           |
|30 Kills: Desert - 5           |Defeat 30 enemies with the Desert - 5         |
|20 Kills: Pistole              |Defeat 20 enemies with the Pistole            |
|30 Stuns: Tranquilizer Dart Gun|Defeat 30 enemies with the Tranquilizer Gun   |
|50 Kills: P09 - 9mm            |Defeat 50 enemies with the P09 - 9mm          |
|50 Kills: AK-47                |Defeat 50 enemies with the AK-47              |
|70 Kills: FAL                  |Defeat 70 enemies with the FAL                |
|70 Kills: M4                   |Defeat 70 enemies with the M4                 |
|50 Kills: MP40                 |Defeat 50 enemies with the MP40               |
|50 Kills: Dragon Sniper        |Defeat 50 enemies with the Dragon Sniper      |
|30 Kills: Moss - 12            |Defeat 30 enemies with the Moss - 12          |
|70 Kills: SAS - 12             |Defeat 70 enemies with the SAS - 12           |
|50 Kills: M32 - Hammer         |Defeat 50 enemies with the M32 - Hammer       |
|30 Kills: RPG - 7              |Defeat 30 enemies with the RPG - 7            |
|20 Kills: Crossbow             |Defeat 20 enemies with the Crossbow           |
|200 Kills: GAU - 19            |Defeat 200 enemies with the GAU - 19          |
|30 Kills: Mk-NDI               |Defeat 30 enemies with the Mk-NDI             |
|Double Dyno-Might!             |Defeat 2 enemies with one explosion           |
|Triple Dyno-Might!             |Defeat 3 enemies with one explosion           |
|Quad Dyno-Might!               |Defeat 4 enemies with one explosion           |
|Dyno-Might Master              |Defeat 5 enemies with one explosion           |
|Dyno-Might Hotshot             |Defeat 3 enemies with one explosion 5 times   |
|Grenade Hangman                |Defeat 10 enemies with grenades while hanging |
|Drop the Bomb                  |Make 3 enemies drop their grenade by shooting |
|Drop the Bomb Hotshot          |Make 5 enemies drop their grenade by shooting |
|Drop the Bomb Master           |Make 10 enemies drop their grenade by shooting|
|Bare-Knuckle Brawler           |Defeat 20 enemies with melee combat           |
|Bare-Knuckle Slugger           |Defeat 50 enemies with melee combat           |
|Bare-Knuckle Expert            |Defeat 10 enemies in a row with melee combat  |
|Stealth Attacker               |Defeat 25 enemies with stealth attacks        |
|Master Ninja                   |Defeat 50 enemies with stealth attacks        |
|Expert Ninja                   |Defeat 5 enemies in a row using stealth attack|
|Riot Rocker                    |Defeat 5 Riot Shield enemies by running over  |
|                               |their shield                                  |
|Steel Fist                     |Defeat 10 enemies with a single punch, after  |
|                               |softening them up with gunfire                |
|Steel Fist Master              |Defeat 20 enemies with a single punch, after  |
|                               |softening them up with gunfire                |
|Steel Fist Expert              |Defeat 10 enemies in a row with a single punch|
|                               |after softening them up with gunfire          |
|Beast Mode                     |Pet all the yaks in the village               |
|Marco!                         |Play a game of swimming pool tag              |
|Polo!                          |Play a game of swimming pool tag              |
|Charted! - Very Easy           |Finish the game in Very Easy Mode             |
|Charted! - Easy                |Finish the game in Easy Mode                  |
|Charted! - Normal              |Finish the game in Normal Mode                |
|Charted! - Hard                |Finish the game in Hard Mode                  |
|Charted! - Crushing            |Finish the game in Crushing Mode              |
'-------------------------------'----------------------------------------------'
                              MULTIPLAYER MEDALS:
.----------------.-------------------------------------------------------------.
|Medal Name:     |How to obtain:                                               |
|================|=============================================================|
|Thrillseeker    |Complete 1 Competitive Multiplayer game                      |
|Buddy System    |Complete 1 Cooperative Multiplayer game                      |
|Captured        |Your team captured the treasure                              |
|Assistant       |Assist in the defeat of 5 enemies by shooting them but not   |
|                |getting the final shot                                       |
|Afterlife       |Defeat an opponent after you yourself have been defeated     |
|Gunslinger      |Defeat 5 enemies using any pistol or pistols in a single or  |
|                |Competitive game                                             |
|Commando        |Defeat 5 enemies using any long gun or long guns in a single |
|                |Competitive game                                             |
|Fisticuffs      |Defeat 2 enemies using hand-to-hand combat                   |
|Big Brawls      |Defeat 5 enemies using hand-to-hand combat                   |
|Streak          |Defeat 5 enemies without being defeated                      |
|Fury            |Defeat 10 enemies without being defeated                     |
|Rage            |Defeat 15 enemies without being defeated                     |
|Rampant         |Defeat 20 enemies without being defeated                     |
|Drop It         |Defeat an enemy player while they are carrying the Treasure  |
|                |in a Competitive Plunder game                                |
|Double Down     |Defeat 2 enemies in rapid succession                         |
|Tripled         |Defeat 3 enemies in rapid succession                         |
|Connect Four    |Defeat 4 enemies in rapid succession                         |
|Five Not Alive  |Defeat 5 enemies in rapid succession                         |
|Wipe Out        |Defeat the entire opposing team                              |
|Fire In The Hole|Defeat 3 or more enemies at once with an explosion           |
|BBQ             |Defeat an enemy with a propane tank                          |
|Expansionist    |Capture five territories                                     |
|Assassin        |Defeat 3 enemies using stealth                               |
|Ninja           |Defeat 5 enemies using stealth                               |
|Pull Down       |Pull an enemy off a ledge                                    |
|Kick Off        |Kick an enemy off a ledge                                    |
|Perfect         |Win a game without dying                                     |
|Triple Threat   |Defeat 3 enemies with long guns, 3 enemies with pistols, and |
|                |3 enemies with explosives                                    |
|Spray and Pray  |Defeat 5 enemies with blindfire                              |
|Half Blind      |Defeat 5 enemies with blindfire and the Veiled booster       |
|Get Off My Lawn |Defeat 5 enemies with the Invalid booster                    |
|Miserly         |Defeat 5 enemies with the Half Loaded booster                |
|Duck and Weave  |Defeat 5 enemies with the Glass Jaw booster                  |
|Ego Maniac      |Defeat 5 enemies with the Come Get Some booster              |
|Head Hunter     |Defeat 3 enemies with head shots                             |
|The Long Ranger |Defeat 3 enemies from at least seventy metres away           |
|Shut'em Down    |End an enemies killing streak (Defeated enemy had five or    |
|                |more kills in a row)                                         |
'----------------'-------------------------------------------------------------'
                              COOPERATIVE MEDALS:
.-----------------------.------------------------------------------------------.
|Medal Name:            |How to obtain:                                        |
|=======================|======================================================|
|Treasure Hunter        |Find 5 Treasures in Co-op                             |
|Medic                  |Rescue 5 downed teammates                             |
|Big Bang               |Defeat 3 enemies with a single grenade                |
|Purple Heart           |Get revived 10 times in a game                        |
|Punch Out              |Defeat 5 enemies with a hand-to-hand combat in a      |
|                       |single Co-op game                                     |
|Killer Combo           |Achieve Combo Level Ten                               |
|Let 'Em Go             |Defeat an enemy who is choking a teammate             |
|Covert Ops             |Defeat 5 enemies using stealth                        |
|Heat Seeker            |Defeat 3 enemies with a single rocket                 |
|Master Chef            |Defeat 3 enemies by exploding one propane tank        |
|Easy Rider             |Defeat 3 enemies by exploding one car                 |
|Dead Eye               |Defeat 3 enemies quickly with the sniper rifle        |
|Gift River             |Assist in defeating fifty enemies                     |
|12 Parsecs             |Beat a Co-op game in fifteen minutes or less          |
|Masters of the Universe|Beat any objective Co-op level on Crushing            |
|Back to Back           |Beat any objective Co-op level on Crushing with only  |
|                       |two players                                           |
'-----------------------'------------------------------------------------------'
   _____________________
 _/Tranquilizer Dart Gun\_______________________________________________________
 ¯¯¯¯¯¯¯¯¯¯¯¯¯¯¯¯¯¯¯¯¯¯¯¯¯¯¯¯¯¯¯¯¯¯¯¯¯¯¯¯¯¯¯¯¯¯¯¯¯¯¯¯¯¯¯¯¯¯¯¯¯¯¯¯¯¯¯¯¯¯¯¯¯¯¯¯¯¯¯
 OVERALL RATING: [1 / 5]
WEAPON TYPE: Secondary/Pistol
 CLIP CAPACITY: 1

 MAX. CAPACITY: 100

 STRONG POINTS: o It's better than running around unarmed

 WEAK POINTS:   o Only holds one round per clip, resulting in many reloads
 _______________________________________________________________________________
   __________________________________
 _/.45 Defender Semi-automatic Pistol\__________________________________________
 ¯¯¯¯¯¯¯¯¯¯¯¯¯¯¯¯¯¯¯¯¯¯¯¯¯¯¯¯¯¯¯¯¯¯¯¯¯¯¯¯¯¯¯¯¯¯¯¯¯¯¯¯¯¯¯¯¯¯¯¯¯¯¯¯¯¯¯¯¯¯¯¯¯¯¯¯¯¯¯
 OVERALL RATING: [2 / 5]
 WEAPON TYPE: Secondary/Pistol

 CLIP CAPACITY: 8

 MAX. CAPACITY: 64

 STRONG POINTS: o The .45 Defender has an excellent accuracy, allowing you to
                  pull headshots off with fair ease

 WEAK POINTS:   o The .45 only holds 8 rounds per clip which is less than the
                  92FS 9mm Pistol
 _______________________________________________________________________________
   ___________________
 _/AK-47 Assault Rifle\_________________________________________________________
 ¯¯¯¯¯¯¯¯¯¯¯¯¯¯¯¯¯¯¯¯¯¯¯¯¯¯¯¯¯¯¯¯¯¯¯¯¯¯¯¯¯¯¯¯¯¯¯¯¯¯¯¯¯¯¯¯¯¯¯¯¯¯¯¯¯¯¯¯¯¯¯¯¯¯¯¯¯¯¯
 OVERALL RATING: [2 / 5]
 WEAPON TYPE: Primary/Machine Gun

 CLIP CAPACITY: 30

 MAX. CAPACITY: 150

 STRONG POINTS: o The AK-47 is one of the first machineguns you come across,
                  and it's a perfectly capable weapon to take out large groups
                  of enemies if they're not located too far away

 WEAK POINTS:   o The AK-47 severely lacks in accuracy and your arms will shake
                  upwards making compensative movement necessary
 _______________________________________________________________________________
   _________________
 _/FAL Assault Rifle\___________________________________________________________
 ¯¯¯¯¯¯¯¯¯¯¯¯¯¯¯¯¯¯¯¯¯¯¯¯¯¯¯¯¯¯¯¯¯¯¯¯¯¯¯¯¯¯¯¯¯¯¯¯¯¯¯¯¯¯¯¯¯¯¯¯¯¯¯¯¯¯¯¯¯¯¯¯¯¯¯¯¯¯¯
 OVERALL RATING: [4 / 5]
 WEAPON TYPE: Primary/Machine Gun

 CLIP CAPACITY: 30

 MAX. CAPACITY: 150

 STRONG POINTS: o The FAL is a fine machinegun with excellent accuracy
                o Shoots burts of three rounds at once, contributing to the
                  overall accuracy and helps save ammunition
                o Comes with a scope that zooms in for about 25%
 WEAK POINTS:   o In heated firefights against armored shotgun grunts, the FAL
                  isn't the weapon of choice due as it lacks to rapidly fire
 _______________________________________________________________________________
   _________________
 _/Moss - 12 Shotgun\___________________________________________________________
 ¯¯¯¯¯¯¯¯¯¯¯¯¯¯¯¯¯¯¯¯¯¯¯¯¯¯¯¯¯¯¯¯¯¯¯¯¯¯¯¯¯¯¯¯¯¯¯¯¯¯¯¯¯¯¯¯¯¯¯¯¯¯¯¯¯¯¯¯¯¯¯¯¯¯¯¯¯¯¯
 OVERALL RATING: [3.5 / 5]
 WEAPON TYPE: Primary/Shotgun

 CLIP CAPACITY: 6

 MAX. CAPACITY: 12

 STRONG POINTS: o The Moss - 12 Shotgun is *the* weapon for intense fights up
                  close, including but not limited to enemies groups
 WEAK POINTS:   o The Moss - 12 Shotgun has a very limited maximum capacity, so
                  you are always at risk of running out of ammunition
                o The Moss - 12 Shotgun isn't suited for long range kills
 _______________________________________________________________________________
   ________________________________
 _/92FS - 9mm Semi-automatic Pistol\____________________________________________
 ¯¯¯¯¯¯¯¯¯¯¯¯¯¯¯¯¯¯¯¯¯¯¯¯¯¯¯¯¯¯¯¯¯¯¯¯¯¯¯¯¯¯¯¯¯¯¯¯¯¯¯¯¯¯¯¯¯¯¯¯¯¯¯¯¯¯¯¯¯¯¯¯¯¯¯¯¯¯¯
 OVERALL RATING: [3.5 / 5]
 WEAPON TYPE: Secondary/Pistol

 CLIP CAPACITY: 15

 MAX. CAPACITY: 75

 STRONG POINTS: o The 92FS has an excellent fire rate, much faster than the
                  .45 Defender, and it furthermore has excellent accuracy
                  allowing for headshots
 WEAK POINTS:   o None really, it's the best regular pistol
 _______________________________________________________________________________
   _________________
 _/Wes - 44 Revolver\___________________________________________________________
 ¯¯¯¯¯¯¯¯¯¯¯¯¯¯¯¯¯¯¯¯¯¯¯¯¯¯¯¯¯¯¯¯¯¯¯¯¯¯¯¯¯¯¯¯¯¯¯¯¯¯¯¯¯¯¯¯¯¯¯¯¯¯¯¯¯¯¯¯¯¯¯¯¯¯¯¯¯¯¯
 OVERALL RATING: [3.5 / 5]
 WEAPON TYPE: Secondary/Magnum

 CLIP CAPACITY: 6

 MAX. CAPACITY: 12

 STRONG POINTS: o The Wes - 44 Revolver is one of the first magnums you can
                  acquire in the game, and it's a nice change from a regular
                  pistol as this baby fells regular enemies with one shot
 WEAK POINTS:   o Low clip and low max. capacity
 _______________________________________________________________________________
   ________________
 _/SAS - 12 Shotgun\____________________________________________________________
 ¯¯¯¯¯¯¯¯¯¯¯¯¯¯¯¯¯¯¯¯¯¯¯¯¯¯¯¯¯¯¯¯¯¯¯¯¯¯¯¯¯¯¯¯¯¯¯¯¯¯¯¯¯¯¯¯¯¯¯¯¯¯¯¯¯¯¯¯¯¯¯¯¯¯¯¯¯¯¯
 OVERALL RATING: [4 / 5]
 WEAPON TYPE: Primary/Shotgun

 CLIP CAPACITY: 8

 MAX. CAPACITY: 16

 STRONG POINTS: o The best Shotgun in the game, it will make mincemeat out of
                  any enemies you within close range
                o Compared to the other Shotgun in the game (Moss - 12), the
                  SAS holds two extra clip rounds and four extra rounds in total
 WEAK POINTS:   o Relative low clip and low max. capacity
 _______________________________________________________________________________
   _______________
 _/Mk-NDI Grenades\_____________________________________________________________
 ¯¯¯¯¯¯¯¯¯¯¯¯¯¯¯¯¯¯¯¯¯¯¯¯¯¯¯¯¯¯¯¯¯¯¯¯¯¯¯¯¯¯¯¯¯¯¯¯¯¯¯¯¯¯¯¯¯¯¯¯¯¯¯¯¯¯¯¯¯¯¯¯¯¯¯¯¯¯¯
 OVERALL RATING: [4 / 5]
 WEAPON TYPE: Grenades

 CLIP CAPACITY: 1

 MAX. CAPACITY: 4

 STRONG POINTS: o Grenades are a different type of weapon and you can always
                  keep four of them in total with you
                o Grenades can take out turrets with ease
                o Grenades can take out groups of enemies
 WEAK POINTS:   o Not suited for use against fast enemies or at close range
 _______________________________________________________________________________
   ________________________________
 _/Desert - 5 Semi-automatic Pistol\____________________________________________
 ¯¯¯¯¯¯¯¯¯¯¯¯¯¯¯¯¯¯¯¯¯¯¯¯¯¯¯¯¯¯¯¯¯¯¯¯¯¯¯¯¯¯¯¯¯¯¯¯¯¯¯¯¯¯¯¯¯¯¯¯¯¯¯¯¯¯¯¯¯¯¯¯¯¯¯¯¯¯¯
 OVERALL RATING: [5 / 5]
 WEAPON TYPE: Secondary/Magnum

 CLIP CAPACITY: 7

 MAX. CAPACITY: 14

 STRONG POINTS: o The Desert - 5 is the most effective magnum in the game as it
                  combines power, accuracy, range, rate of fire and to extent
                  capacity all into one
 WEAK POINTS:   o Relative low maximum capacity
 _______________________________________________________________________________
   __________________________________
 _/Micro - 9mm Fully Automatic Pistol\__________________________________________
 ¯¯¯¯¯¯¯¯¯¯¯¯¯¯¯¯¯¯¯¯¯¯¯¯¯¯¯¯¯¯¯¯¯¯¯¯¯¯¯¯¯¯¯¯¯¯¯¯¯¯¯¯¯¯¯¯¯¯¯¯¯¯¯¯¯¯¯¯¯¯¯¯¯¯¯¯¯¯¯
 OVERALL RATING: [2.5 / 5]
 WEAPON TYPE: Secondary/Pistol

 CLIP CAPACITY: 25

 MAX. CAPACITY: 125

 STRONG POINTS: o The Micro is the only automatic pistol - uzi if you'd like -
                  in the game and it has a very large clip and capacity
 WEAK POINTS:   o Very poor accuracy
                o Fairly weak power
 _______________________________________________________________________________
   ___________________
 _/MP40 Submachine Gun\_________________________________________________________
 ¯¯¯¯¯¯¯¯¯¯¯¯¯¯¯¯¯¯¯¯¯¯¯¯¯¯¯¯¯¯¯¯¯¯¯¯¯¯¯¯¯¯¯¯¯¯¯¯¯¯¯¯¯¯¯¯¯¯¯¯¯¯¯¯¯¯¯¯¯¯¯¯¯¯¯¯¯¯¯
 OVERALL RATING: [4.5 / 5]
 WEAPON TYPE: Primary/Machine Gun

 CLIP CAPACITY: 32

 MAX. CAPACITY: 150

 STRONG POINTS: o Great power
                o Large capacity
 WEAK POINTS:   o Average accuracy
 _______________________________________________________________________________
   _________
 _/P08 - 9mm\___________________________________________________________________
 ¯¯¯¯¯¯¯¯¯¯¯¯¯¯¯¯¯¯¯¯¯¯¯¯¯¯¯¯¯¯¯¯¯¯¯¯¯¯¯¯¯¯¯¯¯¯¯¯¯¯¯¯¯¯¯¯¯¯¯¯¯¯¯¯¯¯¯¯¯¯¯¯¯¯¯¯¯¯¯
 OVERALL RATING: [3.5 / 5]
 WEAPON TYPE: Secondary/Pistol

 CLIP CAPACITY: 7

 MAX. CAPACITY: 56

 STRONG POINTS: o Solid power for a pistol
 WEAK POINTS:   o Low maximum capacity and clip capacity
 _______________________________________________________________________________
   ________________
 _/M4 Assault Rifle\____________________________________________________________
 ¯¯¯¯¯¯¯¯¯¯¯¯¯¯¯¯¯¯¯¯¯¯¯¯¯¯¯¯¯¯¯¯¯¯¯¯¯¯¯¯¯¯¯¯¯¯¯¯¯¯¯¯¯¯¯¯¯¯¯¯¯¯¯¯¯¯¯¯¯¯¯¯¯¯¯¯¯¯¯
 OVERALL RATING: [5 / 5]
WEAPON TYPE: Primary/Machine Gun
CLIP CAPACITY: 32
MAX. CAPACITY: 160
STRONG POINTS: o Rapid firing machine gun with an excellent range, power,
accuracy and capacity, and enemies will often resupply your
ammunition as well later in the game
WEAK POINTS: o None
_______________________________________________________________________________
____________
_/M32 - Hammer\________________________________________________________________
¯¯¯¯¯¯¯¯¯¯¯¯¯¯¯¯¯¯¯¯¯¯¯¯¯¯¯¯¯¯¯¯¯¯¯¯¯¯¯¯¯¯¯¯¯¯¯¯¯¯¯¯¯¯¯¯¯¯¯¯¯¯¯¯¯¯¯¯¯¯¯¯¯¯¯¯¯¯¯
OVERALL RATING: [4 / 5]
WEAPON TYPE: Primary/Grenade Launcher
CLIP CAPACITY: 6
MAX. CAPACITY: 12
STRONG POINTS: o The M32 is called the Hammer for a reason; It simply packs a
punch and can take out groups of enemies with ease, even from
relatively long distances
WEAK POINTS: o Low capacity
_______________________________________________________________________________
_____________
_/Dragon Sniper\_______________________________________________________________
¯¯¯¯¯¯¯¯¯¯¯¯¯¯¯¯¯¯¯¯¯¯¯¯¯¯¯¯¯¯¯¯¯¯¯¯¯¯¯¯¯¯¯¯¯¯¯¯¯¯¯¯¯¯¯¯¯¯¯¯¯¯¯¯¯¯¯¯¯¯¯¯¯¯¯¯¯¯¯
OVERALL RATING: [4.5 / 5]
WEAPON TYPE: Primary/Sniper Rifle
CLIP CAPACITY: 5
MAX. CAPACITY: 10
STRONG POINTS: o The Dragon Sniper is the game's only sniper rifle, and boy
is it good! This baby can take out almost any enemy in one
shot and allows you to do so at long, safe distances
WEAK POINTS: o Low capacity
_______________________________________________________________________________
______________________
_/Pistole Shotgun Pistol\______________________________________________________
¯¯¯¯¯¯¯¯¯¯¯¯¯¯¯¯¯¯¯¯¯¯¯¯¯¯¯¯¯¯¯¯¯¯¯¯¯¯¯¯¯¯¯¯¯¯¯¯¯¯¯¯¯¯¯¯¯¯¯¯¯¯¯¯¯¯¯¯¯¯¯¯¯¯¯¯¯¯¯
OVERALL RATING: [4 / 5]
WEAPON TYPE: Secondary/Shotgun Pistol
CLIP CAPACITY: 2
MAX. CAPACITY: 10
STRONG POINTS: o The Pistole is an excellent weapon to pick up and kill a
group of enemies with from close range, only to replace it
again with an other weapon when you run low on ammo
WEAK POINTS: o Low capacity
_______________________________________________________________________________
________
_/GAU - 19\____________________________________________________________________
¯¯¯¯¯¯¯¯¯¯¯¯¯¯¯¯¯¯¯¯¯¯¯¯¯¯¯¯¯¯¯¯¯¯¯¯¯¯¯¯¯¯¯¯¯¯¯¯¯¯¯¯¯¯¯¯¯¯¯¯¯¯¯¯¯¯¯¯¯¯¯¯¯¯¯¯¯¯¯
OVERALL RATING: [2 / 5]
WEAPON TYPE: Primary/Gatling Gun
CLIP CAPACITY: 500
MAX. CAPACITY: 500
STRONG POINTS: o The GAU - 19 Gatling Gun. Power sums it up.
o Extremely high capacity
WEAK POINTS: o Very slow movement, not able to roll without dropping it
o Has a startup time of a second before firing
_______________________________________________________________________________
_______
_/RPG - 7\_____________________________________________________________________
¯¯¯¯¯¯¯¯¯¯¯¯¯¯¯¯¯¯¯¯¯¯¯¯¯¯¯¯¯¯¯¯¯¯¯¯¯¯¯¯¯¯¯¯¯¯¯¯¯¯¯¯¯¯¯¯¯¯¯¯¯¯¯¯¯¯¯¯¯¯¯¯¯¯¯¯¯¯¯
OVERALL RATING: [3 / 5]
WEAPON TYPE: Primary/Rocket Launcher
CLIP CAPACITY: 1
MAX. CAPACITY: 3
STRONG POINTS: o It's a portable rocket launcher and essentially the most
powerful weapon in the entire game
o You can temporarily swap it with your weapon for usage
WEAK POINTS: o Limited capacity
_______________________________________________________________________________
_________________
_/Eddy's Golden Gun\___________________________________________________________
¯¯¯¯¯¯¯¯¯¯¯¯¯¯¯¯¯¯¯¯¯¯¯¯¯¯¯¯¯¯¯¯¯¯¯¯¯¯¯¯¯¯¯¯¯¯¯¯¯¯¯¯¯¯¯¯¯¯¯¯¯¯¯¯¯¯¯¯¯¯¯¯¯¯¯¯¯¯¯
OVERALL RATING: [5 / 5]
WEAPON TYPE: Secondary/Magnum
CLIP CAPACITY: 7
MAX. CAPACITY: 14
STRONG POINTS: o The gun from one of the main antagonists of Drake's Fortune,
this magnum can be bought from the store and can be used after
beating the game
o Its power is excellent as is its firing rate and accuracy
WEAK POINTS: o Only one usage
_______________________________________________________________________________
____________________
_/Chloe's .45 Defender\________________________________________________________
¯¯¯¯¯¯¯¯¯¯¯¯¯¯¯¯¯¯¯¯¯¯¯¯¯¯¯¯¯¯¯¯¯¯¯¯¯¯¯¯¯¯¯¯¯¯¯¯¯¯¯¯¯¯¯¯¯¯¯¯¯¯¯¯¯¯¯¯¯¯¯¯¯¯¯¯¯¯¯
OVERALL RATING: [2.5 / 5]
WEAPON TYPE: Secondary/Pistol
CLIP CAPACITY: 7
MAX. CAPACITY: 75
STRONG POINTS: o Chloe's gun can be bought from the store after finishing the
game. It's not very special in terms of stats, however
WEAK POINTS: o Fairly small pistol clip
(35) Bronze Trophies:
---------------------
.------------------------------.-----------------------------------------------.
|Trophy Name: |How to achieve: |
|==============================|===============================================|
|100 Headshots |Kill 100 enemies with a headshot |
|20 Headshots |Kill 20 enemies with a headshot |
|20 Kills (Pistol) |Kill 20 enemies with the Pistol |
|200 Kills (GAU-19) |Kill 200 enemies with the GAU-19 |
|30 Kills (Desert 5) |Kill 30 enemies with the Desert-5 |
|30 Kills (MK-NDI) |Kill 30 enemies with the MK-NDI |
|30 Kills (Moss 12) |Kill 30 enemies with the Moss 12 |
|30 Kills (RPG-7) |Kill 30 enemies with the RPG-7 |
|30 Kills (Wes 44) |Kill 30 enemies with the Wes 44 |
|50 Kills (92FS 9mm) |Kill 50 enemies with the 92FS 9mm |
|50 Kills (Dragon Sniper Rifle)|Kill 50 enemies with the Dragon Sniper Rifle |
|50 Kills (M32 Hammer) |Kill 50 enemies with the M32 Hammer |
|50 Kills (Micro 9mm) |Kill 50 enemies with the Micro 9mm |
|70 Kills (FAL) |Kill 70 enemies with the FAL |
|70 Kills (M4) |Kill 70 enemies with the M4 |
|70 Kills (SAS 12) |Kill 70 enemies with the SAS 12 |
|Apprentice Fortune Hunter |Acquire 10 treasures |
|Bare-Knuckle Brawler |Defeat 20 enemies with hand-to-hand combat |
|Buddy System |Complete a Cooperative Multiplayer match |
|Cadet Fortune Hunter |Acquire 30 treasures |
|Crack Fortune Hunter |Acquire 90 treasures |
|Expert Fortune Hunter |Acquire 80 treasures |
|First Treasure |Acquire 1 treasure |
|Grenade Hangman |Kill 10 enemies with grenades while hanging |
|Hangman |Kill 20 enemies while hanging |
|Headshot Expert |Kill 5 enemies in a row with headshots |
|Intermediate Fortune Hunter |Acquire 40 treasures |
|Novice Fortune Hunter |Acquire 20 treasures |
|Practiced Fortune Hunter |Acquire 50 treasures |
|Professional Fortune Hunter |Acquire 70 treasures |
|Proficient Fortune Hunter |Acquire 60 treasures |
|Relic Finder |Acquire the Strange Relic |
|Run-and-Gunner |Kill 20 enemies without aiming (wild shooting) |
|Thrillseeker |Complete a Competitive Multiplayer match |
|Triple Dyno-Might |Kill three enemies with a single explosion |
'------------------------------------------------------------------------------'
(8) Silver Trophies:
--------------------
.------------------------------.-----------------------------------------------.
|Trophy Name: |How to achieve: |
|==============================|===============================================|
|250 Headshots |Kill 250 enemies with a headshot |
|Bare-Knuckle Expert |Kill 10 enemies in a row using melee combat |
|Bare-Knuckle Slugger |Kill 50 enemies using melee combat |
|Charted (Easy) |Finish the game on Easy Difficulty |
|Master Fortune Hunter |Acquire all 100 treasures |
|Master Ninja |Kill 50 enemies with stealth attacks |
|Steel Fist Master |Kill 20 enemies with a single punch after |
| |hurting them enough with firearms |
|Survivor |Kill 75 enemies in a row without dying |
'------------------------------------------------------------------------------'
(3) Gold Trophies:
------------------
.------------------------------.-----------------------------------------------.
|Trophy Name: |How to achieve: |
|==============================|===============================================|
|Charted (Crushing) |Finish the game on Crushing Difficulty. |
| |[Crushing is unlocked after beating Hard] |
|Charted (Hard) |Finish the game on Hard Difficulty |
|Charted (Normal) |Finish the game on Normal Difficulty |
'------------------------------------------------------------------------------'
(1) Platinum Trophy:
--------------------
Collect all other trophies.
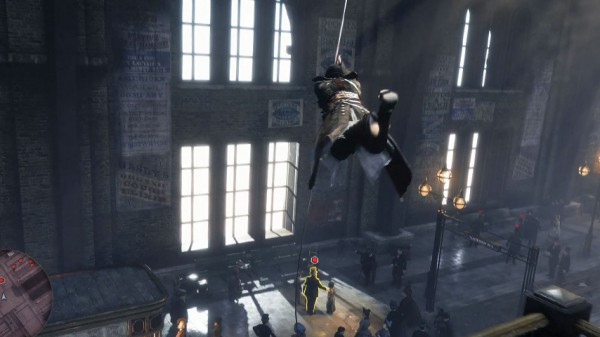

 12 New Destiny: House Of Wolves Wanted Bounties Location Discovered
 HDMI: Fix sound problems - Set the audio after connecting PC to TV
 Did You Buy Any Gadgets on Black Friday? [MakeUseOf Poll]
 How to access Recovery Mode of Playstation VITA
 Star Wars Battlefront: How to Play Luke Skywalker