Unofficial Transformers: War for Cybertron Guide by Vhayste for
The game features a story of the epic battle between the Autobots and decepticons before they've made contact to Earth, in a grand civil war that tore their homeworld apart, Cybertron. Players will be able to experience this untold chapter of the Transformers® saga by playing both factions' campaigns. The game is divided to 10 chapters, with the decepticons preluding the Autobots' campaign. Players will also be able to select the character of their choice. Each character has their own class with their own skills and strengths. Transformers: WFC is a 3rd person shooter that features a campaign that can be played alone or through online co-op. Players can also freely transform their characters as they see fit. This guide will feature screenshots and videos on certain game events and highlights. This guide is written using the 360 version of the game. Some achievements and how to obtain them will be discussed in this guide whenever possible but there's no guarantee that this guide will help you obtain all achievements in the game. The game features four different classes, each with their own set of skills, strengths and weaknesses. This section will give a brief overview about these. Take note that equipment, skill and perk assignments are used only in Multiplayer; you'll be forced to use the pre-selected skills and primary weapons when playing the campaign. Leader The leader's role is primarily to boost the team's strength and defense, as well providing other support skills.
Abilities Effect Warcy AoE skill that increases your team and allies' armor and damage output Moleculon Bomb Slow down enemies and deal crippling damage upon explosion Shield Barrier Deploy an energon shield to protect your team Transform Disruptor Force the target to transform and lock it down in that state for a brief period
Character Classes
Killstreaks
Effect
Intercooler
Greatly decrease ability cooldown
Pole 2.0
Deadly attack that causes enemies to explode
Thermo Mine Re-Spawner
Spawn a trail of thermal mines.
Scientist
This class has the ability to transform into a flyer or jet-form. This gives him more mobility and can cover more area to deliver support to the team.
Abilities
Effect
Shockwave
Release a blast of energy that stuns and pushes back enemies in range
Spawn Sentry
Swan a sentry turret anywhere on the map
Drain
Absorb some HP from the target
Disguise
Appear as the opposing faction's player
Killstreaks
Effect
Health Matrix 2.0
Team mates' HP recovers for every kill
Overshield Matrix
Team mates receive Overshield
Nucleon Shock Cannon
Spawn an usable rocket turret
Scout
Scouts are very agile and mobile. They use their speed to execute hit-and-run attacks, as well as routing enemy forces.
Abilities
Effect
Cloak
Become invisible
Decoy Trap
Spawns a fake pickup that stuns enemies when touched
Dash
Enables you to make a quick dash or boost
Mark Target
Tag enemies to reveal their locations while weakening their armor
Killstreaks
Effect
Orbital Beacon
Displays enemy locations
Energon Recharger
HP constantly regenerates
Orbital Beacon v2
Causes a level-wide blast that tags all enemies (see Mark Target)
Soldier
This is a class that has access to skills for the aggressive player. This class is favored by those that really love shooting than tactical fighting.
Abilities
Effect
Hover
Hover to increase your weapon range and damage
Whirlwind
Deliver a deadly melee attack using the momentum of spins
Ammo Beacon
Deploy a beacon that automatically refill teammates' ammo within range
Energon Sling
Disable your enemies' abilities for a brief time
Killstreaks
Effect
Ammo Matrix
Refills the team's ammo and grenade
Electromagnetic Pulse
Disables enemy team's ability use for a brief period
Omega Missile
Fires off a guided missile that deals massive damage
The HP gauge of players are divided into several bars. As long as the damage taken does not exceed one bar, that bar regenerates in a few seconds. You can replenish health bars by picking up energon cubes scattered along the way. Ammo in the game is not infinite; they run out and you need to constantly pick up ammo caches to replenish them. Players can also pick up secondary weapons on specific locations in the game. Unfortunately, only one secondary weapon can be carried at a time so players will need to swap it out for another if they'll come across one.
A game is not complete without collectibles. There are “symbols” scattered in the game that can be collected for achievement. There are also certain “tasks” or challenges that you can complete to unlock even more achievements.
Crash Site / Entering Orbital Station
Objective: Escape the Crash Site
Once in control, follow your allies and make your way out of the crumbling ship. Just press A to jump, press it twice to double-jump. Controls like movement and looking around is done through your left and right analog sticks respectively. Just exit the crash site to reach your first checkpoint and another scene. Destroy the wall-mounted turrets afterward. Fire with your RT (right trigger) and press X to reload. The next path will opened by your reinforcements.
Objective: Secure the station
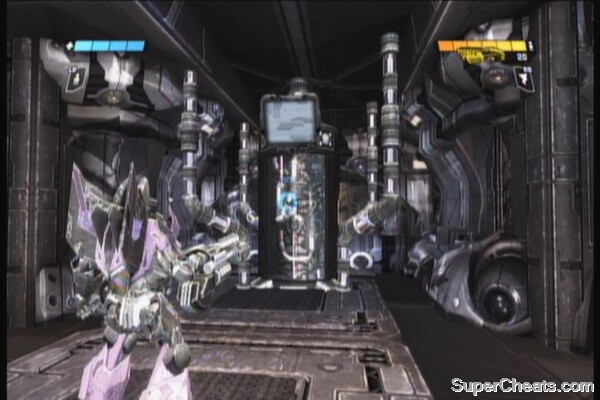
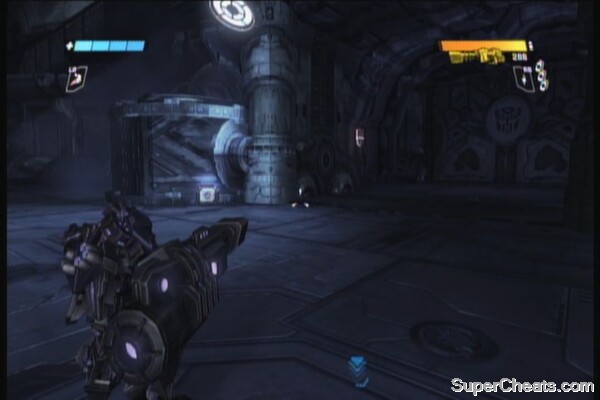
Follow the hallway and grab the energon cube if along the way. There is also an ammo cache in the deadend to the left. Continue following the hallway and destroy the sentry guns on the ceiling as your team move forward. Use the pillars as cover to avoid taking too much damage. Continue along the hallway, and interact with the console to open the next area. There will be several autobots here so take cover and destroy them all. Once cleared, walk up the ramp unto the platform and interact with the console there to activate the mechanical arm.
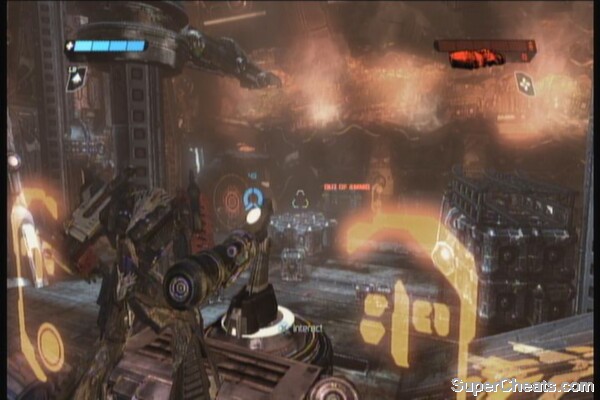
Destroy the autobots that will appear from the upper platform, then use the crates to reach it. Carefully move through the flame jets until you reach the next large area. Equip the Magma Frag Launcher beside the crushed autobot (switch weapons by pressing Triangle)
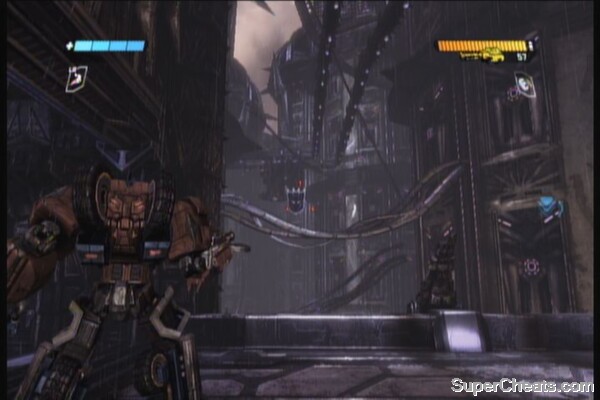
The Ambush
AUTOBOT symbol: From this ledge, look to your upper left to find the symbol on top of the ledge/ scaffolding. Shoot it to acquire the symbol
Objective: Meet Soundwave at the forward base
Use the height advantage to launch some frags to Starscream's ambush troops below. There will be several energon cubes scattered in the area so pick them up as needed. Use the crates as cover to avoid getting ripped apart by the enemy forces. After getting rid of the first wave, another wave of reinforcements will appear. Defeat them as well. If you need ammo, there is a cache behind those crates piled in front of the orange-circles. You can also use those crates to reach another energon cube on the platform.

Moving Forward
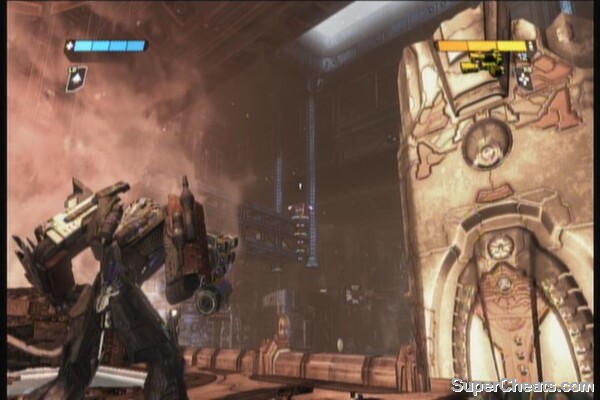
Continue along the newly opened path, and grab the energon cubes and ammo caches as you need. Push your way through the next hallway and fight through autobot forces until you reach a closed door. Destroy the energy canister for some free shards then go through the door.
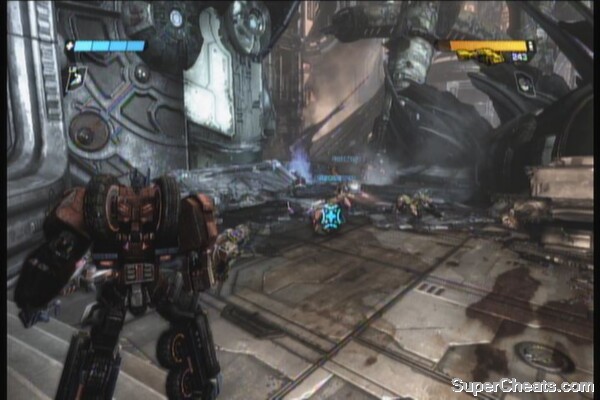
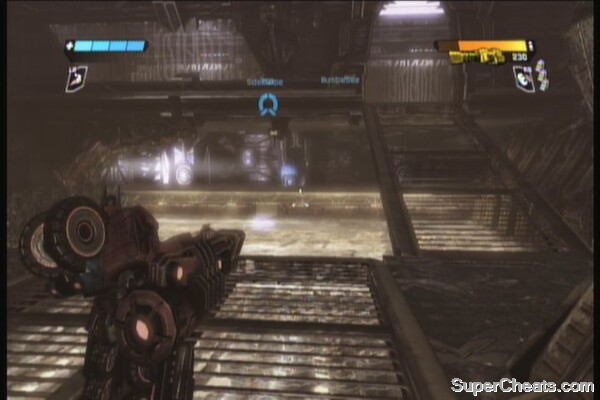
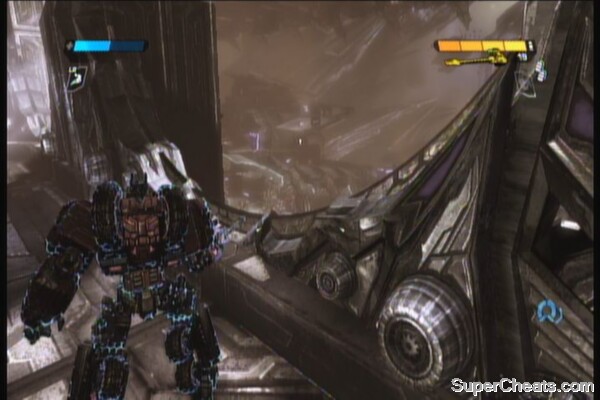
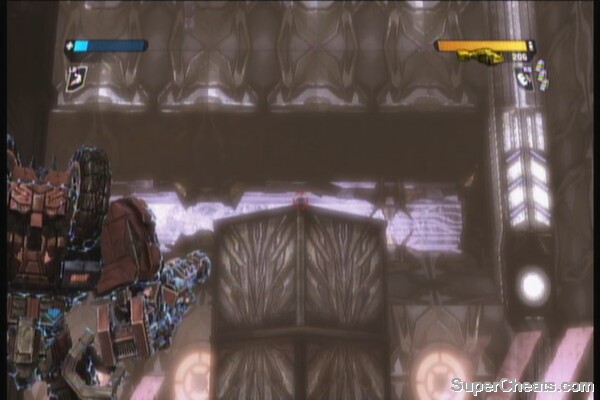
You need to drop to the bottom floor in the next room but you can grab the Overshield power up located in the other end of the broken bridge. You need to do this quickly before the bridge collapses.
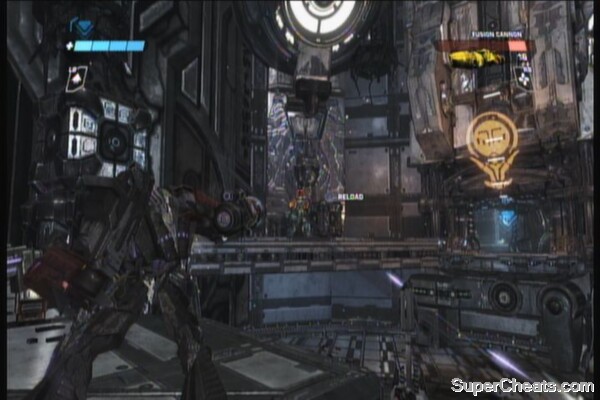
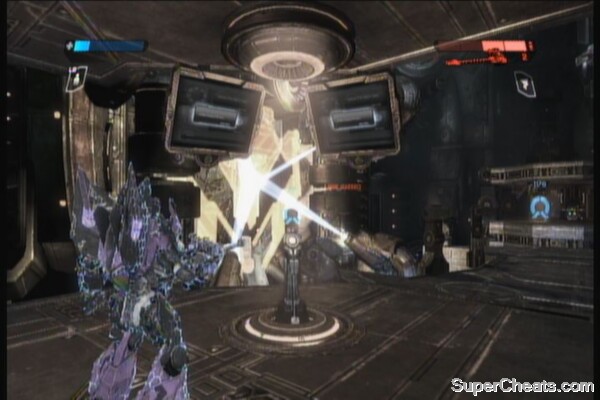
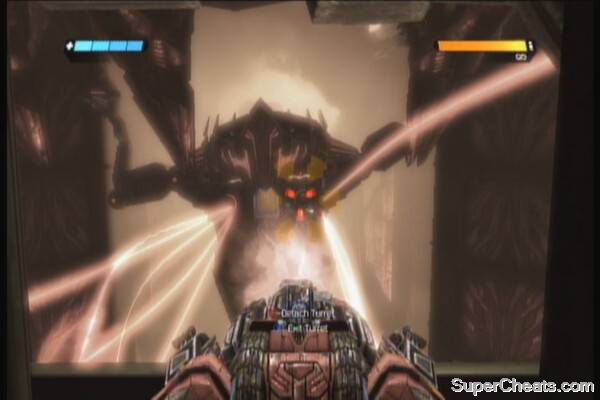
Once you reach the bottom floor, there will be multiple enemies that will start pouring in this room. Mount the turret by pressing X then detach it by pressing B. Score 10 kills while carrying the detached turret to unlock the “Action Master” achievement. Make sure you make every shot count since the turret has limited ammo. There is another turret here you can detach in case you failed to kill 10 enemies with the other turret.
Action Master Achievement
There is an Energon Repair Ray behind the broken part of the bridge but I'll suggest to stick with your launcher for now. You can carry the other turret along for some extra heavy firepower but since your double-jump is disabled with this massive weapon on, you can only carry it until the next room. Grab the ammo cache in the other side of the room. Continue along the next hallway, destroy the enemies in the next room then go up the platform. Missile launcher-wielding enemies will appear. Use the crates to protect yourself while destroying them. Jump along the platforms and follow the path until you reach the next room.
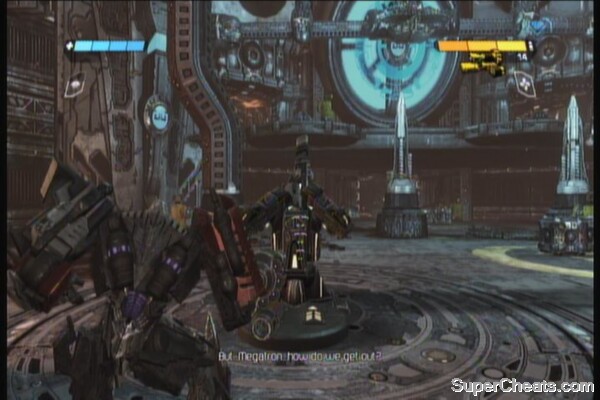
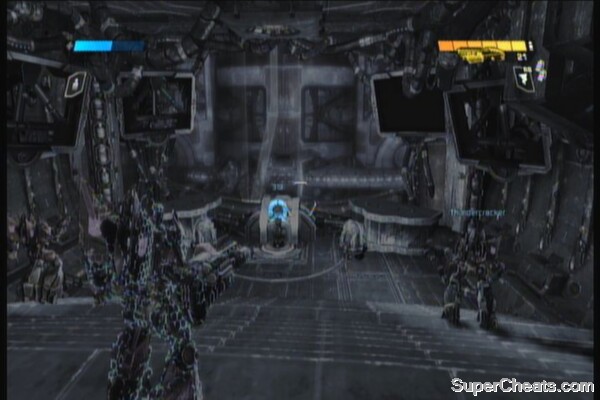
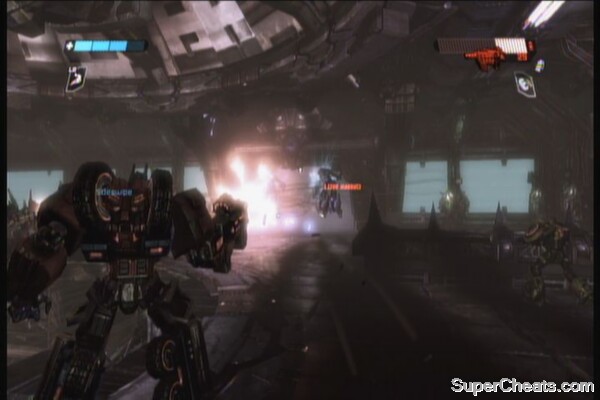
You'll find several captured autobots (bound in energy rings) here. To get the “Your Lucky Day” achievement, kill ALL but ONE of the prisoners. It doesn't matter which prisoner you leave alone then take the lift. If done correctly, you'll get the achievement as the lift ascends. Watch the next scenes.
Prisoners
Base of Operations
Objective: Secure the station schematics
Fuse some Flak Grenades by pressing X near the grenade symbol. To the left of Soundwave is a red chest. Destroy it to reveal another weapon: Energon Battle Pistol. There is also an energon cube nearby if you need to. Continue along the hallway (there is an EMP Shotgun beside the soldier). Continue along the lift then use it. Fight through the hallway; be careful of the wall-mounted missile turrets that will appear near the end of the hallway. After turning in the curve, find an ammo cache, a weapon chest containing a Neutron Assault Rifle and an energon cube. The next room has some fortified enemies; just keep shooting on their shield to overload it and render them vulnerable. Use the crates for cover. Activate the console to create a walkway and kill the reinforcements that will appear.

To the Data Center
Proceed to the next hallway then grab the ammo cache, energon cube and a Neutron Assault Rifle behind the crate. Go through the door and another door to reach the data center. Kill all the enemies; use the energon cubes in the center in case you need health refill. Activate the pedestal in the middle. After a short chat with Starscream, more forces will appear. Find your cover and quickly defeat them. Grab the energon cube before approaching the main door.
Objective: Infiltrate the manufacturing area to proceed
As you get near, the large autobot called Brute will appear. This guy is invincible if attacked up front; the trick here is to run around until he changes targets then quickly get behind him and throw everything you got to destroy his backpack.
Brute Battle
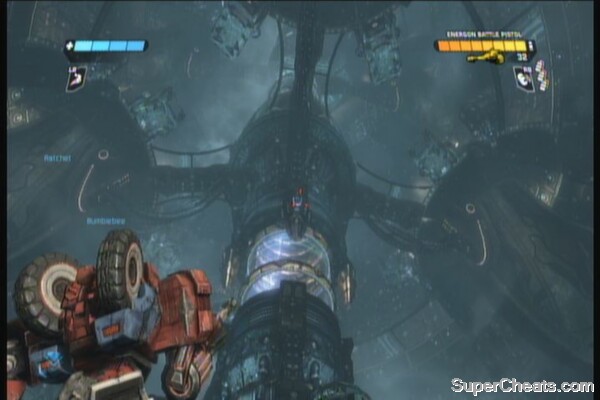
Ventilation Shafts
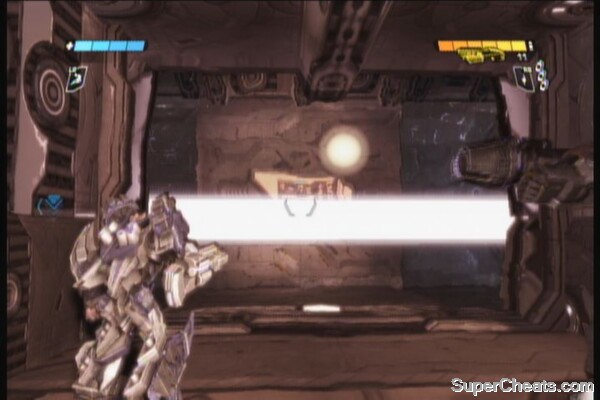
Exit the room and follow the next hallway. There is an EMP shotgun and an ammo cache here so grab them both. The next hallway has some electric traps so shoot the wall-mounted emitters to clear the path. Follow the hallway to find a large area with blue liquid. Destroy the fortified autobot guarding the other end then interact with the console to create a walkway. Shoot open the vent and jump through it.


Continue along the walkway, avoiding the jets of fire that shoot from the floor. Shoot the large fans to destroy them. Continue until you reach the large vent at the end. Shoot the fan, then drop in the middle platform. There are some grenades and an EMP Shotgun in one of the shafts there. Carefully drop down and destroy two more fans.
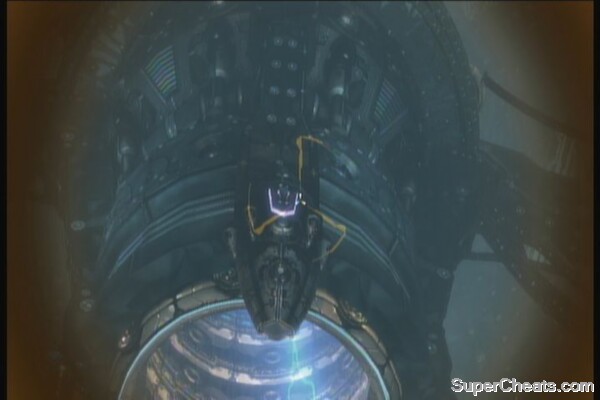
AUTOBOT symbol: After destroying the third fan, look for a platform in one of the sides of that you can land on. There is a shaft there that contains the symbol and an overshield power up. Carefully fall off from the edge of the platform then move your character forward so it lands inside the shaft.
Autobot Symbol in the Ventilation Shafts
After grabbing the overshield and destroying the symbol, jump down to the bottom.
Objective: Find and secure Dark Energon.
Continue along the ramp and you'll find a large room with enemy snipers. Take cover behind the large debris in the middle and switch your weapon to the Energon Battle Pistol. This is the best place to get the “Targetmaster” achievement. To do this, you must kill two snipers within 5 seconds. Remember that the Battle Pistol is a rapid-fire, long-ranged weapon so if you can't take them out with headshots, just shoot rapidly and adjust from the recoil accordingly. It will just take 2-3 shots to destroy a sniper. There is also an ammo cache to the left of the middle cover.
Targetmaster Achievement
Move along from cover to cover and take out the snipers. After clearing them all, move to the end of the ramp and enter the next hallway. A Brute will appear here so use the covers to avoid it and shoot its back once it chases your other team mates.
Continue to the next area with pistons. You need to traverse this place by heading left. You must avoid the getting crushed or move only as soon as the electricity dissipates. Doing this in your normal form can be risky. You can transform into vehicle mode and use Boost/ Dash by pressing LT. Continue to the next area, activate the next console to create a walkway, then proceed to the lift.
Laboratory
Once you reach the upper floor, walk forward a bit to trigger the arrival of the autobot flyers. Shoot their leg thrusters while they're in normal mode to kill them instantly. Killing 5 flyers using this method will award you with the “Footloose and Fancy Free” achievement. Next one is a bit risky so it will be helpful if you have the Overshield upgrade on. Take the ramp up and destroy a flyer up close with your melee weapon to get another achievement. “Fire in the Sky”
AUTOBOT symbol: From the entrance, look to your upper left to find a platform. The symbol should be sitting there. 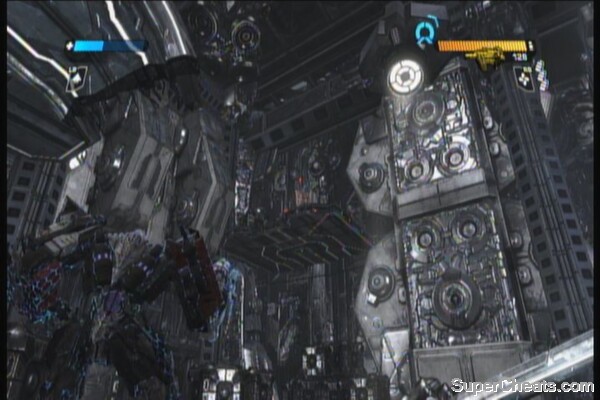
Continue up the ramp and then go to the right to find a console. Before activating it, check out the platforms at the back, which will lead to an Overshield upgrade and grenades. Activate the console and more flyers will arrive. Destroy them all.
Detritus
Continue along the new walkway and continue along the floating space debris. More flyers will attack so take cover and destroy them.
AUTOBOT symbol: Follow the path until you find two lights beside each other and look in the middle. The symbol should be barely visible in the right side. Shoot it to count to your achievement progress. 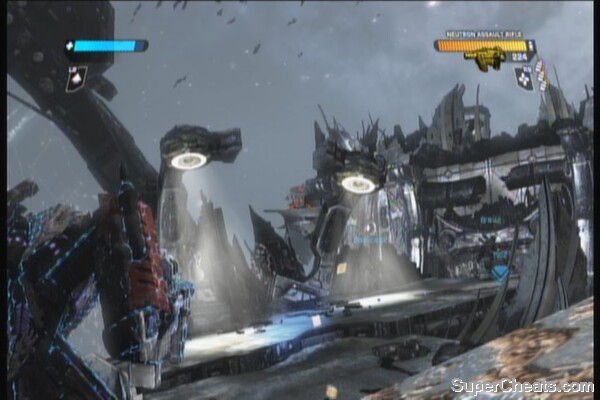
Continue along until you reach the other part of the station. Destroy all the enemies that will ambush you here, including a brute that will appear during the second wave with some gunners on the upper platform. The best way to is to jump to the upper platform and get rid of the gunners first. After destroying the brute, go back to the upper platform and find an Overshield upgrade behind the door before jumping down and joining your team mates. 
On the first debris, swap your secondary weapon to the Thermo Rocket Launcher and jump to the next debris. Two waves of flyers will do a bomb run so stay clear off the middle to avoid getting pummeled. The rocket launcher should be enough to destroy them with ease. Continue along the debris and get rid of the resistance you'll encounter. Continue along to reach another part of the base.
Dark Energon
As soon as you enter, you can go to the right to find an Energon Battle Pistol. Continue along and drop down the hole on the floor. Grab the grenades and the overshield behind you then continue along. Some flyers will be foolish enough to engage you so destroy it then open the door using the console nearby.
AUTOBOT symbol: In the next room where the floor breaks off, look for a hidden hallway near the blue flames. Just follow it to find the symbol at the end.
Autobot Symbol
Objective: Destroy the Dark Energon containment
Enter the next room and continue to the core. Starscream will send more of his men to intercept you. Just fight your way until you reach the core. Clear the whole place and destroy the containment as targeted. After the scene, move along and destroy the last remaining autobots. Watch the follow scene to end the chapter.
Kaon Cliffs
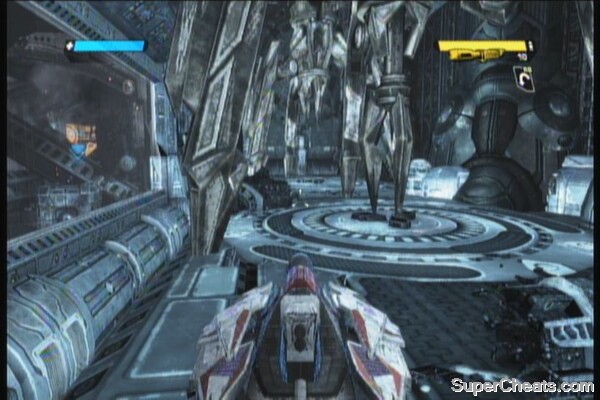
You'll start the stage in flyer mode (regardless of the character you selected). View the tutorials for the controls of this mode in the start menu.
Objective: Find the hidden underground entrance
AUTOBOT symbol: As soon as the stage starts, press A to ascend. The symbol should be barely visible on top of the rocky arc ahead.
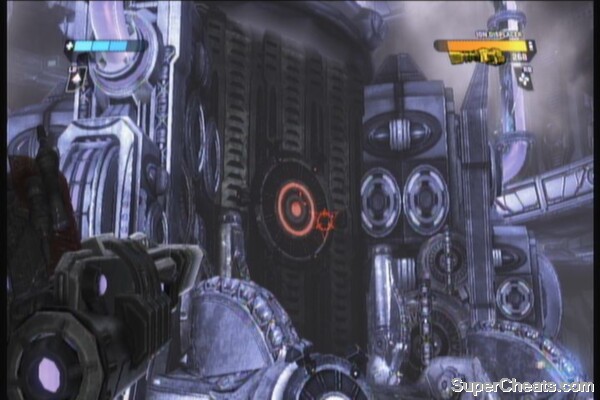
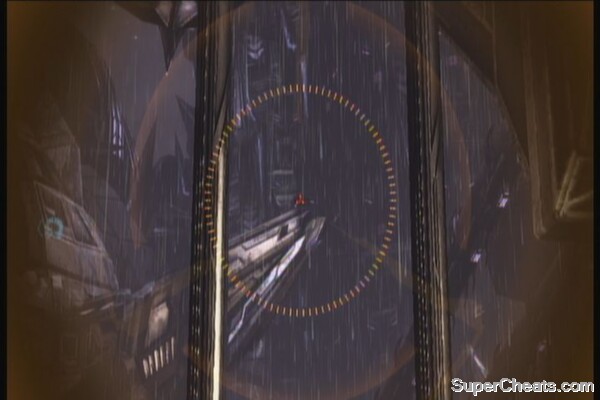
Continue flying towards the large pipes then land on the platform there. Look at the bottom of the large pipe to the left to find an Overshield upgrade. Join your other team mates. Destroy the probe on the next room to avoid detection. Fly around the place until you reach the hatch. Go through there and another hatch to find a closed door at the end of the hallway. Open the door, then shoot the red circle in the middle of the path to deactivate the trap.


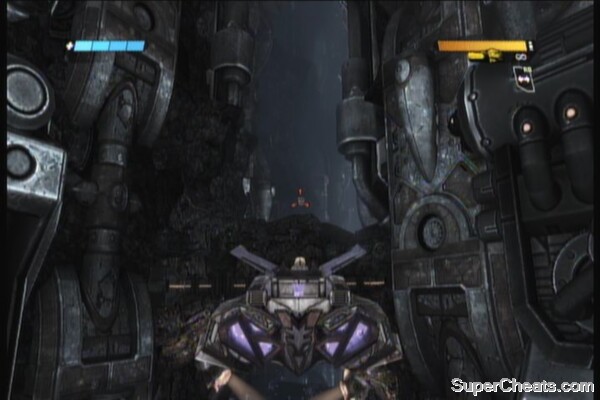
There is another trap that will halt your progress on the next turn. Transform into flyer mode then fly through the narrow corridor to the right. This will lead you into another trap but the power core should be visible. Shoot it to deactivate the traps.
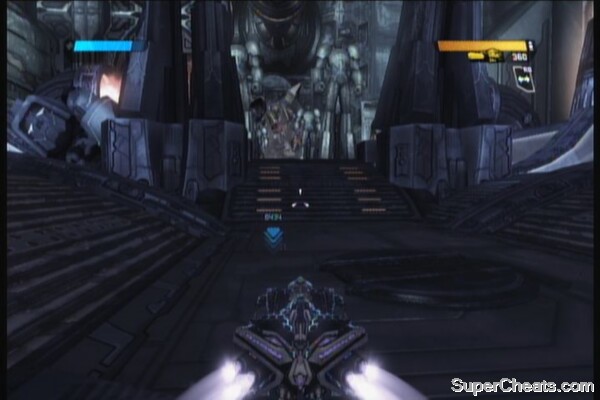
Continue along, grab the ammo cache and energon cube at the end of the ramp. At the end of the hallway, you'll find some autobots being briefed by Zeta Prime. Use your elevated position to your advantage; I suggest using a grenade to destroy all of them at once to unlock the “There are Parts Everywhere” achievement. There will be another trip-wire trap here so fly up to find a large door. Shoot the hinges to open it, then shoot the core inside.
Follow the path in the bottom floor then engage the autobots along the way. Continue along this straightforward path until you reach a locked door. Open it, and take out the charging, overshielded autobot. You'll be locked out from the main path so look for a small shaft to your right. Fall through it to find a new path.
Energon Reservoir
AUTOBOT symbol: Transform into flyer mode and immediately look for the fall to the left. Follow the narrow path as it leads to an symbol and two Overshield pickups. If you don't need the Overshield upgrades, you can just shoot the symbol from this angle.
Energon Reservoir Autobot Symbol
Follow your teammates until you reach a checkpoint guarded by several missile-launcher wielding autobots. Destroy them all.
AUTOBOT symbol: After destroying the missile defenders, turn around then follow the narrow valley. The symbol should be on the platform at the end.
Autobot Symbol
Canyon Cruiser
Objective: Destroy the Shield Generator
Proceed to the main path continue forward until you encounter the autobot dropship. You need to take out the mortar launchers but you should always prioritize taking out the jets since they're more agile and can be an annoyance in the long run. Just avoid hovering in the same place to avoid getting hit by the mortars.
After destroying the mortars, get rid of the additional flyers the cruiser will launch to open its launch bay. Fight your way inside to reach the ship's core and interact with it to destroy it.
Objective: Escape the autobot dropship
You'll be trapped inside so make your way to the ship's second level and wait for an opening to appear. Fly your way out of the crashing ship and regroup with your team mates.
Cruiser Battle
Autobot Menace
Objective: Continue your search for the underground
Grab the ammo caches and grenades, then turn right to find an Overshield in the hallway. Follow the path and you'll see a new type of enemy here; the Cloaker. Just jump to the shaft then continue to the next room. There will be multiple cloakers here so take cover and look for the shimmering movements. You should also see their charging plasma cannons to mark their locations.
If you managed to land a headshot to a cloaker while its invisible, you'll unlock the achievement “That’s No Mirage”. Activate the console next and proceed to the next area. There are two very useful weapons here, the Null Ray and the missile launcher. The Null Ray is a very powerful sniper rifle while the missile launcher is very useful for its lock-on ability against jets.

Entrance to the Underground
Objective: Deactivate the forcefield
After clearing the enemies, follow the hallway to the left to find another trip-wire trap. Shoot the energy core then proceed. This will lead you to one of the main platforms. Destroy the autobots inside and activate the console to reveal the shield batteries. More autobots will appear so get rid of them as well.
Return to your starting point in this stage then take the hallway to the right this time. Destroy the core to deactivate the trip-wire. This should be enough to unlock the achievement “Thief in the Night” - that is, if you destroyed all the energy cores powering the traps you've encountered so far (total of 5). Continue along this platform and do the same thing; clear the enemies, activate the console and destroy the shield batteries.
Objective: Destroy the Armor Plating
More autobots will appear. Just get rid of them and finally, shoot at the gate to destroy the armor plating. Go through the gate.
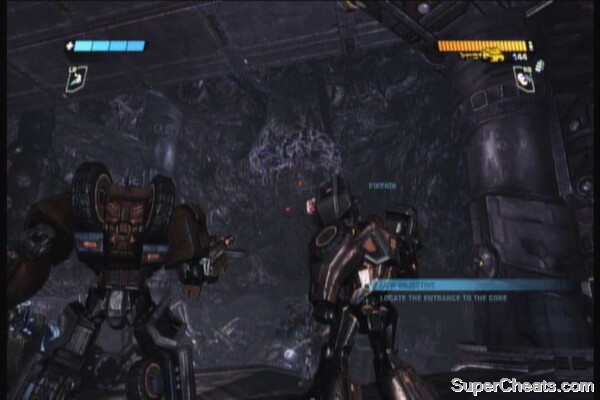
Deeper into the Core / Sublevel Access Controls
Objective: Re-route the power to the Energon Bridge
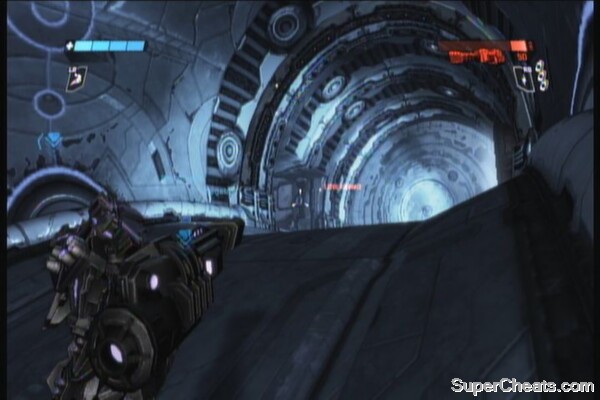
Just follow the long tunnel and shoot any alien-looking lifeforms you encounter. You'll eventually reach the core. Approach it from any side; as long as you take out the missile turrets and probes. Continue inside the core and go to the lower level. Fight some more cloakers inside then activate the console. More autobots will appear so fight your way through the upper level and activate another switch.
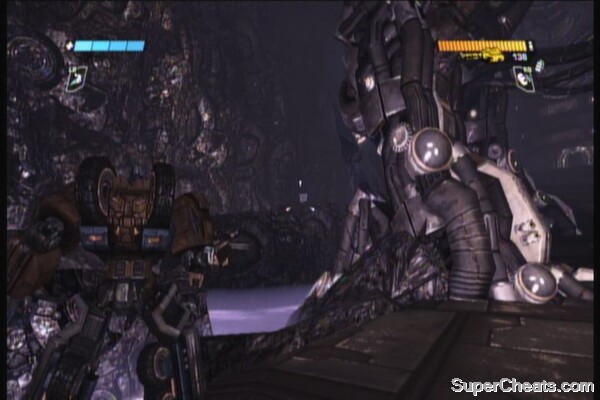
Nearing the Energon Bridge
Transform and fly through another tunnel. Continue along and fight through several autobot resistance. There is a Null Ray and Thermo Rocket Launcher on the first platform that you can use to take out the enemies. Or you can just remain in jet-form and kill the enemies using your trusty machine gun.
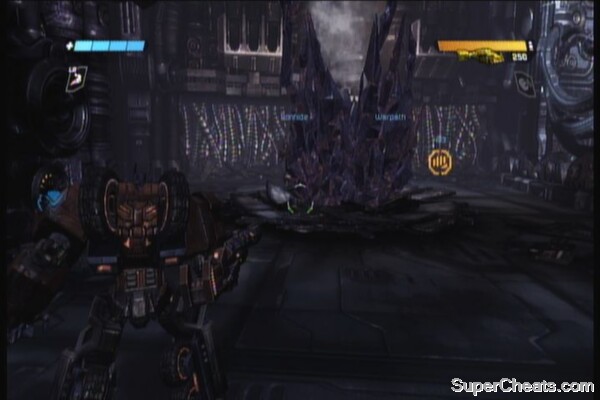
AUTOBOT symbol: You'll find a large waterfall at the end of this tunnel. Just go through there to find the symbol, along with two Overshield pickups.

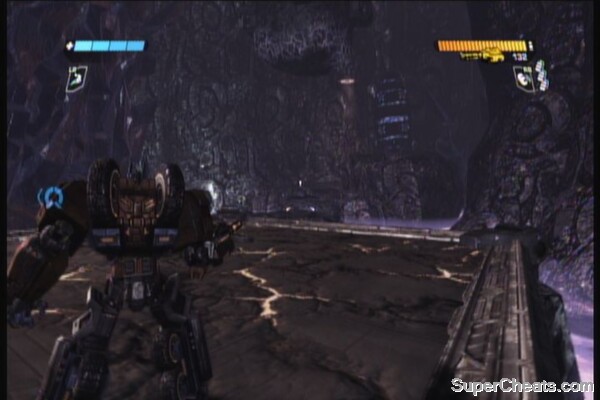
Just follow the path and land on the next platform. There will be a console that needs to be activated; before doing it, you can find an EMP shotgun, Neutron Assault rifle, some mortars and an energon cube beside the console. Activate the console to open the door.
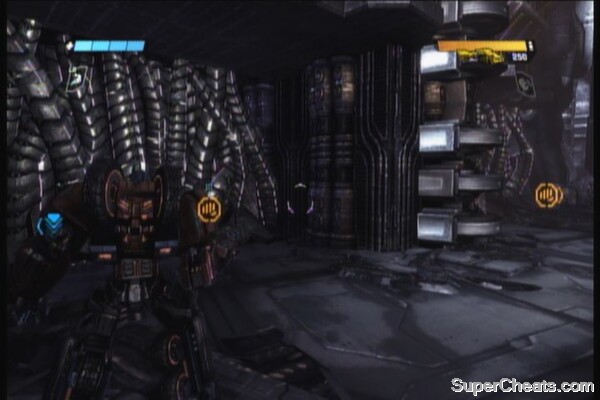
Kill the autobot that's standing behind the door and take cover. Thin out the resistance by killing as much as you can. If you want, you can just kill one of the turret gunners, commandeer the turret and use it against the autobots. You can also detach it and carry it with you for some heavy firepower.
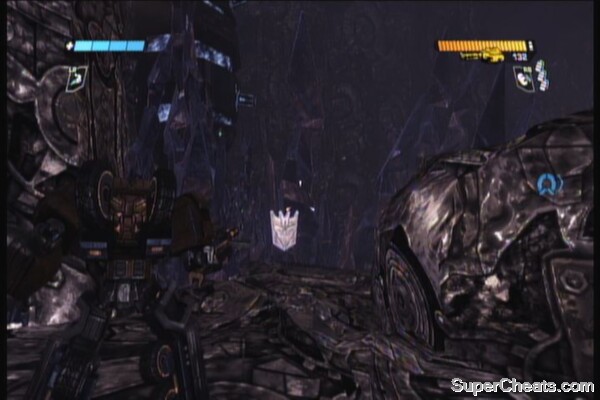
Autobot Command Station
Open the central room and clear it. Then, destroy the lock to open the gate and jump down to reach the power control panel.
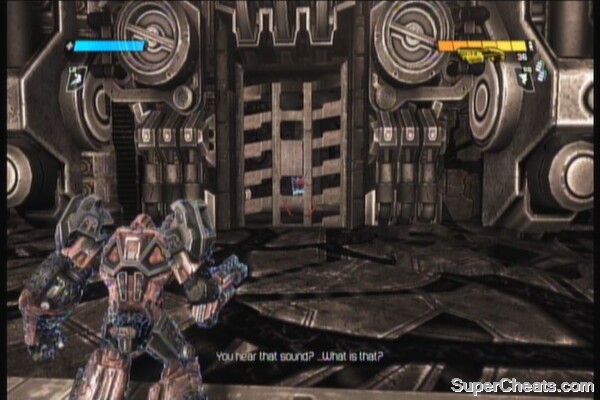
AUTOBOT symbol: Before doing anything else, transform into jet mode then face the door where you jumped from. Fly to the right and you should find the symbol in the middle of some crates in the upper platform.

Activate the control panel. Another console will be brought up. Destroy the locks on each side of the canisters up front then activate the panel. Next, you'll need to find three power cores. Just fly around the place to destroy all three of them. They'll be marked automatically so you shouldn't have any problems locating them. You should also find an Overshield upgrade in one of the corners of this room as well. Finally, activate the central control panel in the middle again to power up the place and to open the next gate.
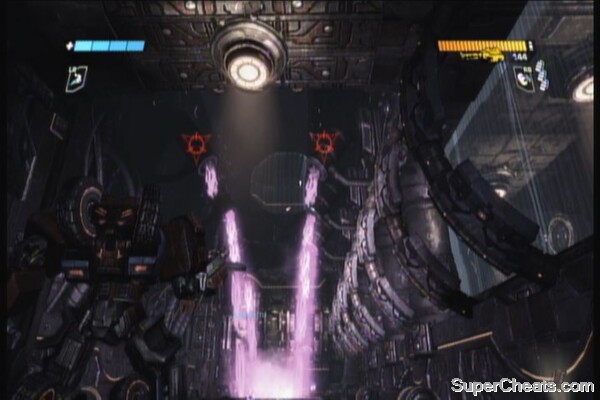
Fly through the gate and land on the platform with the mission marker. Take note of the energon cube here as you'll probably need it in the upcoming boss battle. Activate the switch and face the final boss of this chapter.
Cybertron's Sentinel
Objective: Destroy the Energon Bridge Guardian
Destroy the Energon Bridge Guardian
For its normal attack, it will release a volley of homing projectiles, which can be easily evaded with barrel rolls or just simply keeping on the move. You can shoot and destroy the launchers to ease your burden. After a while, it will retract its guns and start shooting lasers in two directions. You can avoid it by flying along the direction of the laser sweep. After those two cycle of attacks, the guardian will reveal its vulnerable core. Use this chance to unload everything and damage it. You need to repeat the process two more times after this to defeat it. During this time, the only change would be the pattern of its laser sweeps and additional volleys of fiery projectiles during the last phase.
Objective: Escape to the surface
Just fly through the shaft and the chapter will end after your climactic escape.
Infiltrating Iacon
Objective: Enter the Stellar Galleries
Fight through the only path, past the fountains and to the next gate. Enter the gate to reach the plaza. There will be several cloakers here so take cover and destroy them all as soon as they start attacking. Continue along the path, grab the weapon and pickups along the way until you reach another open area with snipers. Dig in and clear the place. Continue forward and follow your teammates until you reach the walkway leading to the Stellar Galleries. 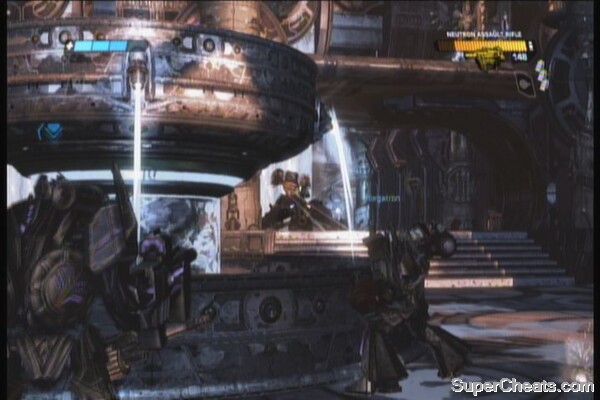
AUTOBOT symbol: Take note of the two large status and the circle in the middle. You should see the symbol there. 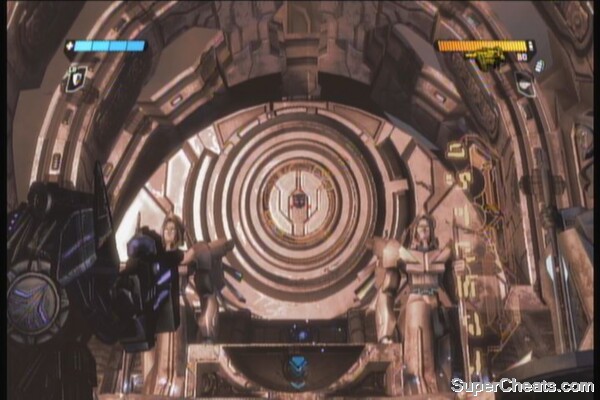
After Megatron opens the door, head inside and grab the energon cube and ammo cache if you need them.
Security Station
Objective: Disable the Security System
Continue to the next room and the security system will trigger, shooting rotating lasers across the room. Just use the platforms on either side of the room to reach the switch. After disabling the laser pillar, jump down to the bottom and engage the autobots beyond the hallway. There is also a trio of missile sentries so it will be a great idea to fall back to the hallway and have the autobots chase you there. Once cleared, destroy the three sentries to open the gate. Before heading there, find some new weapons, grenades, ammo cache and an Overshield upgrade around the room. 
The Stellar Galleries
Objective: Find the Omega Key
Enter the room the find a planetarium. Destroy all planets to “corrupt” Cybertron and to unlock the achievement “Chaos Bringer”. 
Grab the Rocket Launcher behind the planetary model then go up the ramp and activate the console. After the scene, you'll have several ambushers.
Objective: Defeat Autobot Ambushers
Find cover quickly, preferably behind one of those pillars along the ramp. Kill the flyers first then the remaining enemies. Two heavily armored autobots will break through the door so use the pillars as cover and route them.
Objective: Proceed to the Lower City
Iacon City Subsystems
After destroying them, break through the next door and collect the energon cubes and ammo as you need. Break the hinges in the next door and smash it open with a melee attack.
AUTOBOT symbol: Carefully jump down on the first moving fan blade and face the central pillar. Just ride it while facing the pillar and you'll see the symbol there.
Jump down the fan blades cautiously and make your way to the next hallway. Continue along and kill the autobot there. Grab the Overshield upgrade behind. Transform into vehicle mode and dash through the tracks. Use the ramps to increase the distance and height of your jump. Continue boosting your way until you reach cross-rail. Follow your allies and you'll be inside a hallway.
Grab the grenades at the fork and proceed further by following your team mates to the right path. You'll then need to break the locks behind the door so return to the fork and take the other path this time. Find a Scatter Blaster and some rockets, then destroy the locks.

Jump down and engage the cloakers. While you're at it, activate the consoles. Finally, activate the last terminal and go down the ramp. You'll need to boost your way through the train tracks. Jump off the ramps while boosting to get a higher jump and avoid the crossing trains.
Upon reaching the end of the tunnel, you'll find a train wreck. Check out the path to the left for a weapon chest, and an Energon Repair Ray down the ramp. Regroup with your teammates and move forward. If you need health, there is an energon vendo on the left side. Go up the ramp to reach the next area.
Autobot Transit Center
Objective: Pass through the lower city
There will be a squad of autobots waiting here so use the covers and slowly push them back. There will be multiple weapons and ammo here so make sure you use them wisely. The second wave will consist of Overshield autobots. EMP shotgun and stun grenades will be greatly effective against them. Finally, the last wave of heavier armed autobots will engage you. Like before, use some cover and take them out one by one. Continue up the ramp.
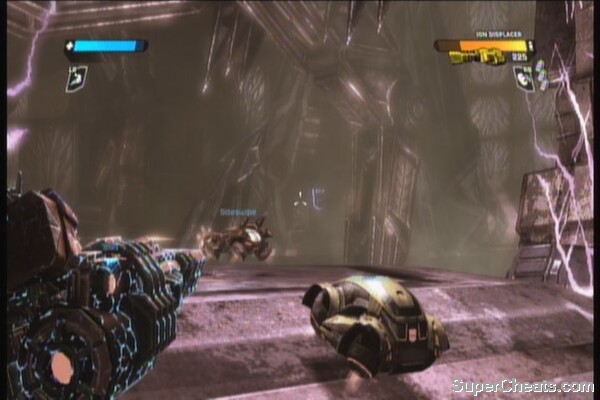
Follow the path and you'll find a fortified autobot position. Just stand still and wait for them to be bombed. Climb up the newly created walkway. There is an Ion Displacement Turret on the ledge to the left if you want. After getting it, you can carry it to the other side by jumping on the piece of debris between the broken bridge. Follow your allies and head to the end of the tunnel.

You'll find another trainyard with tons of autobots. Clear them all then jump down, grab the pick-em-ups then go up the ramp.
AUTOBOT ICON: After going up the ramp, turn around to the other side of the exit to find the symbol hanging on the ceiling of the train tunnel.
Follow the mission marker and go through the train tunnel. There will be a train passing here every few seconds so use the bays on the sides of the tunnels to avoid getting crushed. Head to the platform and hit it with a melee attack to fall down.
War in the Streets
Objective: Approach the Iacon Vaults
Activate the console and go up the ramp. Fight your way through until you reach a room with a Brute and several Overshield autobots. If you have the stun grenades, this is the best time to use them. Kill the Overshield soldiers first then finally gang up on the Brute to destroy it.
Follow the next path and continue clearing the place. Once done, jump down and enter the two arcs to find an Overshield upgrade. Continue to the mission marker to proceed with the story. After Brawl calls in the bombers, head to the next mission marker and activate the console to open the door. Enter the door and watch the scenes.

Assault the Anti-Air Gun
Objective: Destroy the AA guns
Snipe the enemies then move forward with your allies. There will be energon cubes and ammo caches scattered in the area; just scour for if you need to. Push forward until you meet a heavy fortified autobot position. Don't bother wasting your ammo to clear the turrets; there will be infinite replacement gunners that will just occupy them. Instead, head to the next mission marker.
AUTOBOT symbol: Your marker will be the large, silver debris. Behind that is the symbol you're looking for. You can jump over the large metal chunk to the left or walk around it.
If you approach the door near the autobot symbol, a Brute will burst out and attack you so be careful. After dealing with it, enter the nearby building and go up the ramp to reach the turrets. Kill the gunners, detach one and use it to clear the area. Continue moving up the ramp, open the door to finally reach the gun controls. Examine the console to deactivate the guns. The guns will overload so jump down and head to the next mission marker.
Defend the Anti-Air Gun
Objective: Defend the AA guns
There will waves of autobots that will start to flood in. You have the turrets nearby for your convenience so make sure to use them. After the initial wave, the autobots will start pouring in from the building to the left. Find a suitable cover and take out the snipers first. Finally, flyers will start coming in, as well as heavy gunners on the bridge. Dispatch them quickly using a mounted or detached turret. The final wave will be a combination of all the previous waves and they will attack from all directions. The best way to deal with them is to occupy the last turret near the stairs leading to the gun controls (unless you've detached it earlier). Just keep your position and survive until the bombers arrive during a scene. 

Tank Battle
Objective: Enter the Iacon Vaults
Make your way to the next marker and pickup items along the way. Upon reaching the marker, you'll face a huge obstacle.
First, while in tank form, flank around it and shoot the energy cell behind it. Once it transforms into its normal form, run around while shooting its chest or back. Don't come to close or you'll get blown by its shockwave. Be careful of its powerful beam attack that can take out ¾ of your HP.
After the battle, examine the console in the vault's entrance and proceed inside.
Inside the Iacon Vaults
Objective: Find the Omega Key
Shoot the hanging debris to create a hole on the floor. Jump down, grab the items if you want then continue down the ramp. 
AUTOBOT symbol: After witnessing one of your guys get crushed by the large pistons, go through the door and immediately look up behind. You should find the chapter's last symbol on top of the arc. Shoot it immediately then get out of the way to avoid getting crushed.
Carefully cross the pistons. Have Megatron open the door then continue to the next room for the boss battle.
Objective: Defeat Zeta Prime
The room is filled with giant pistons ready to crush you anytime. Not only that you have to worry about the giant chunks of metal overhead but also his destructive energon clones. These guys only have melee weapons but they hit hard and create a shockwave that will restrict your movement and disrupt your targeting. As much as possible, avoid getting trapped in the middle of these guys. Transform into vehicle mode to gain distance and to shoot them safely.
After surviving Zeta's string of attacks, he'll reveal his core as he charges up. Unload everything you got to that core until you damage it considerably. There are three phases in this battle, all marked by auto-saves. As you progress, Zetas attack will become more frequent, aggressive and erratic. Just apply the same strategies you used in the beginning of the fight but of course, you need to be extra careful as well.
Boss Battle
The Omega Key is Angry
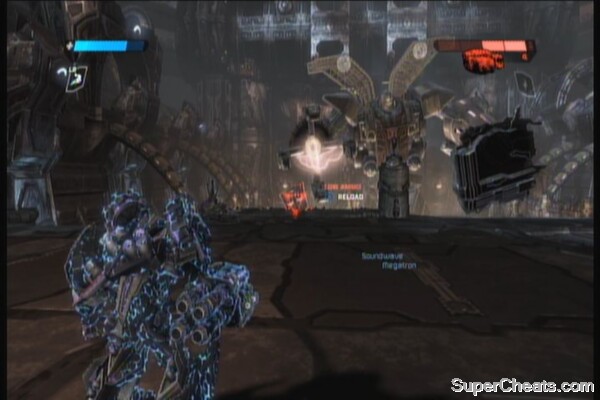
Objective: Rendezvous with the drop ship
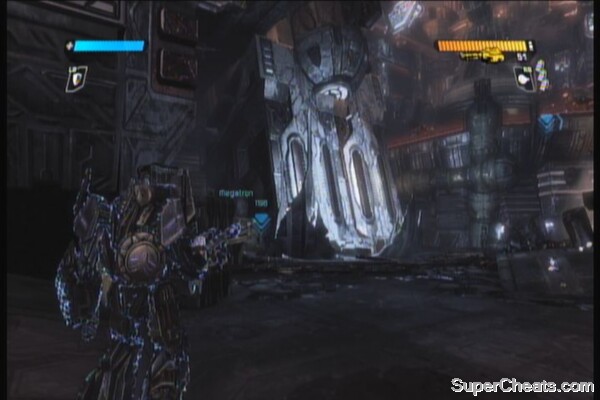
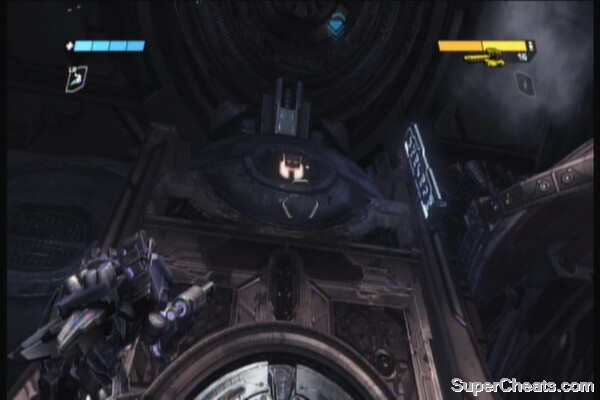
Once in control, get out of the wrecked ship and grab an energon cube and choose from the EMP shotgun or battle pistol. Once ready, follow your allies and jump down to the bridge.
AUTOBOT symbol: As soon as you land on the bridge, turn around and look up. You should find the symbol above the tunnel entrance.
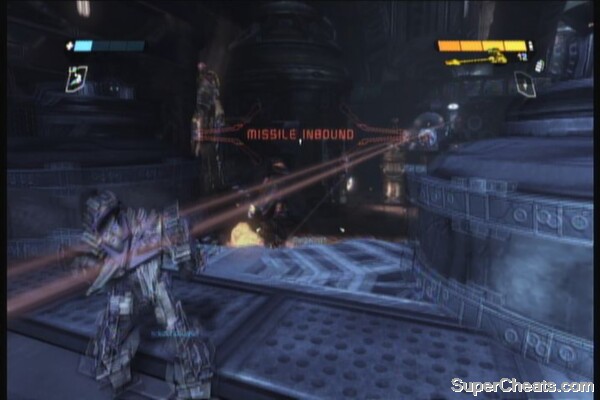
Continue along the bridge and Omega Supreme will appear. Evade its volley of missiles, then destroy the bridge supports as commanded.
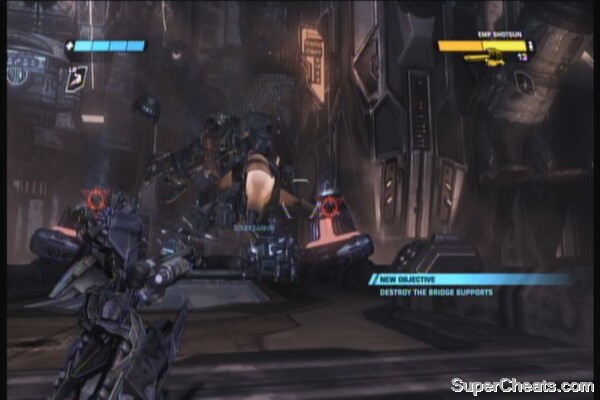
Objective: Fall back to the interior
Enemies Within
Run back to the tunnel. Megatron can only open it with Dark Energon so just wait for him to do so. Once inside, grab the grenades, ammo and energon cubes as you need. After a short while, a brute and an overshield autobot will come out from the door to the right. Another heavy autobot will appear on the otherside. Take out the overshield autobot then take out the heavy autobot while the brute is distracted by your allies. There is also an Overshield upgrade inside the room where the brute came from so pick it up for additional protection. Once done, follow your allies and take the lift.
Cargo Lift
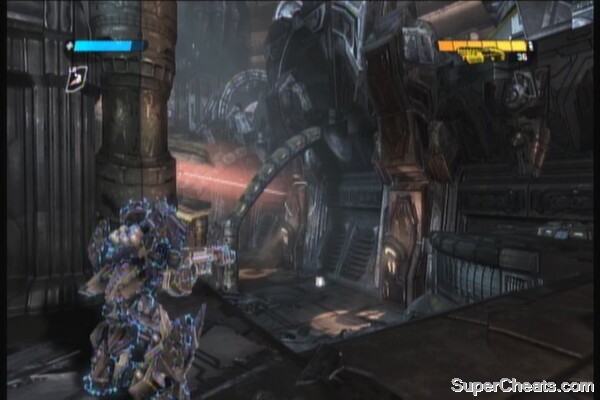
Objective: Ascend the chasm wall
Follow the path until you reach the lift. Destroy the locks when prompted and enjoy the ride... for a few seconds. Omega Supreme will start attacking again. Destroy the emergency locks again to fall down.
Objective: Escape the elevator
Destroy more emergency locks then follow the mission marker. Keep moving across all platforms until you reach a tunnel. The tunnel opens with a trio of autobots. Kill them all and grab the weapons/ energon cubes if you need them. Go through the tunnel and Omega Supreme will tear open the other end. Shoot its hand before you get completely sucked.

AUTOTBOT symbol: After destroying Omega's magnetic vacuum grab, follow your allies to another path that leads to an elevator shaft. Before jumping, look at the odd-looking elevator car. The symbol should be behind it.

Jump down the shaft and grab whatever item you need. Follow the hallway and destroy the door locks.
Storming the Control Dome
Objective: Go to the Bridge Terminal
After opening the door, kill all enemies inside. You can just stay near the entrance to have an easy cover and access to ammo caches. After clearing the enemies, go to the central terminal and activate it. A couple of brutes will appear on the other door. Shoot the explosive canisters beside the doors to damage them, then take them out.
Exit through the door where the brutes emerged from, then follow the tunnel until you find the locked door that can only be blasted away by Megatron's dark energon. There will be electric sentries that will appear; just destroy them and proceed forward.
You need to cross the highway section in vehicle form while avoiding the mines and Omega Supreme's attacks. In the other, there will be a couple of autobots waiting so just blast them out of the way and grab whatever supplies you need. Go up the ramp.
Heavy Resistance
A scene will trigger and you'll have to face a Tank and a large force of Autobots. First, take out the repair turrets, then the smaller minions. There will be snipers that will appear in a short while so make sure you take them out using the Null Ray that can be found near the stairs to the left.
AUTOBOT symbol: After destroying all enemies in the plaza, make your way to the upper platform on the otherside, where the snipers and missile defenders spawned. Check the open room there to find the symbol.
Maintenance Tunnels
Objective: Find another way to the bridge
Regroup with your team mates and follow the path. Upon reaching the dead-end, break the door open and press forward. You'll encounter more autobot forces, including some snipers. Destroy them all, including the sentry behind them then press forward. After clearing them all, follow the path again and it will lead you to the large tube. Go inside, destroy the lone sentry then continue along the power conduit.
You need to quickly reach the other side before the next flow of energy fries you. Transform into vehicle mode and dash your way to the next door. Break it open and destroy the flyers waiting for you on the other side.
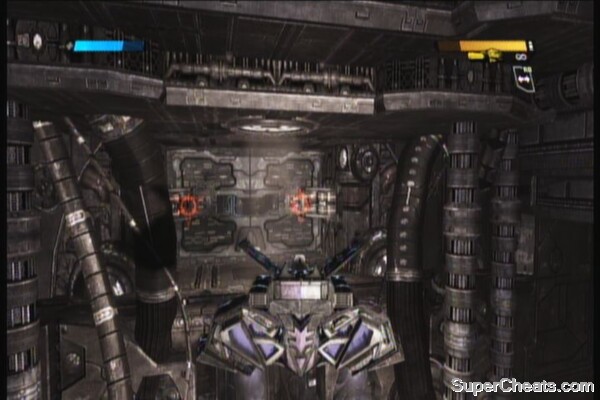
AUTOBOT symbol: Stand in the middle of this bridge and you should see the small red dot at the far end of the large conduit.
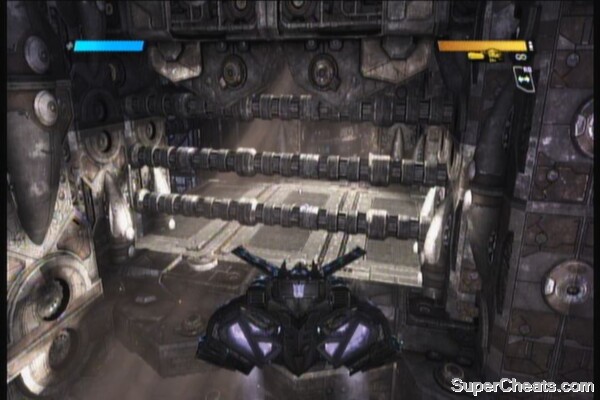
Break another door, but be careful not to rush inside. This is another power conduit where energy bursts flow at an increased rate. Quickly dash to the nearby room.
In the next room, grab the items you need then open the door using the nearby console. The next door is just a few steps to the right so there's no need to change into vehicle mode. As soon as the burst dissipates, run to the door and smash it open.
Objective: Activate the bridge
Go down the ramp. Before heading to the next mission marker, you can break down the door to the left to find a couple of weapons and some grenades. Proceed to the marker and enter the room full of cloakers. Use the explosive canisters nearby to damage them and reveal their positions. After clearing the room, activate the console and proceed to the next area.
Terminal Ambush
In the next room, get rid of the sentries and take out the autobots. Before moving to the bridge, check out the room to the south for an Overshield and a chest containing a Plasma Cannon.
Guardian on the Bridge
Activate the console to extend the bridge. You need to cross this bridge in less than 33 seconds to unlock the “Motormaster!” achievement. Remember that this is not a straight path so you need to keep an eye out from debris and mines. Also, Soundwave is the best character for the job since he's the only one that can use an additional boost ability while in vehicle form.
AUTOBOT symbol: Right after crossing the bridge, check out the other side of the platform for the symbol. Its protected by a barrier so you can just stand on the nearby crates and lob a grenade inside.
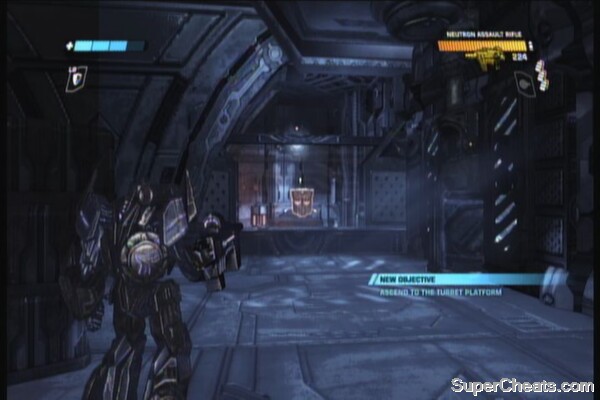

Objective: Ascend to the Turret Platform
Don't forget to grab the Overshield upgrade behind the crate along the main road. Regroup with your teammates, then proceed to the hallway, encountering more cloakers. After getting rid of them, a brute and a couple of autobots will go down the lift. Take them out then ride the lift.
Across the Bridge
Objective: Clear the turret platform
After reaching the turret platform, grab whatever items you need then press forward and mop the enemy forces. There is a tank in the middle and some repair sentries. Make sure to take those out. Use the covers and try to take as much enemies as possible from the ramps. This serves as a very effective cover. After clearing one side, run towards the turret platforms on the side and clear it. You should have a good view from there. Clear all the autobots to trigger the boss battle against Omega Supreme.

Battle on the Terrace
Objective: Use the turrets against Omega Supreme
This boss isn't that hard compared to the previous ones you've faced. The best position to take him out will be using the turrets on the side platforms. Aside from his massive beam, Omega Supreme will also release a volley of energy projectiles and homing rockets. These don't deal that much damage individually but avoid eating up too much of them. Omega supreme will then release flyers that you can easily take out if you have a thermo rocket launcher. After all flyers are destroyed, he'll make an appearance again, repeating the same pattern.
One thing to note is that the turrets CAN be detached since they respawn. Also, during the animation where your character is equipping the turret, you'll have a couple of seconds of invulnerability. Use this tactic to avoid taking damage or just simply be aggressive enough to man the turrets while there are several projectiles heading towards you. You need to constantly adjust your firing angle since the projectiles from the turrets are slow. Omega Supreme just moves from side to side so just anticipate his next direction and fire there.
Megatron vs. The Omega Key
Objective: Destroy Omega Supreme's Turrets
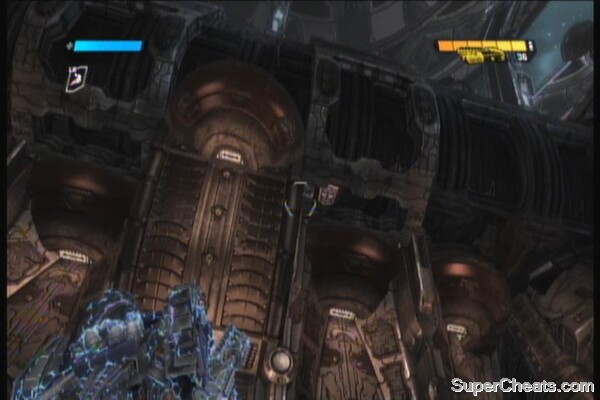
AUTOBOT symbol: At the start of this battle, there should be 3 Autobot symbols that can easily spotted. The easiest one to locate is the one in the “pit” where Omega Supreme is standing. It is beside an Overshield upgrade. Make sure to destroy it quickly and get the Overshield before the guardian hits you hard.
AUTOBOT symbol: For the second symbol, head to the highest platform in the area and turn around. You should see the symbol under an arc overhead.
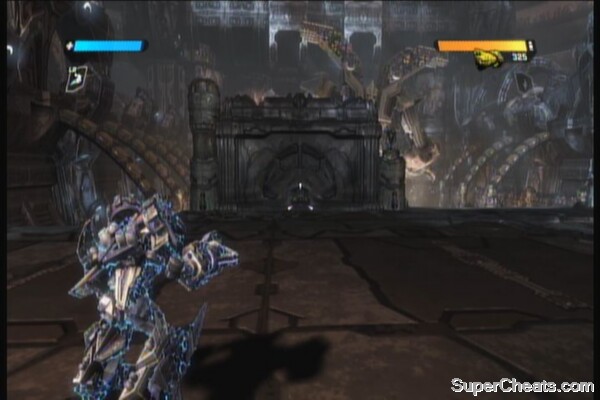
AUTOBOT symbol: As for the third, you'll need a scoped weapon, preferably the photon burst rifle found in the same platform. If you're facing Omega Supreme, look to the left to find a different structure as shown in the screenshot. The symbol should be in the middle of it.,


There are six turrets in total; two turrets on O.S's shoulders (front and back) and two in his torso. Use the walls for cover while you take those turrets out.
Objective: Corrupt the batteries to defeat Omega Supreme
After taking out the turrets, the second phase of the battle will start. O.S will routinely absorb energon batteries that are supplied by fixed terminals in the battlefield. The task at this point should be easy; inject dark energon into the batteries to corrupt O.S and render him vulnerable. O.S will turn purple while he attempts to purge the dark energon. During this point, unload all your ordnance unto him. Exhaust both weapon ammos or better yet, pummel him with your cannon in vehicle mode. He will occasionally release flyers to annoy and distract you. Just remember that you should prioritize injecting the dark energon into the battery when its up. Repeat this process until he falls and to start the final phase of the battle.
Omega Supreme's Last Stand
Objective: Destroy armor protecting Omega Supreme's chest
He'll be more aggressive and will continuously attack you. As much as possible, stay away from your teammates as they'll serve cannon fodder and distraction while you do your stuff. He can easily destroy objects during this form so you can easily get the last two remaining symbols. Also, you can have him destroy all cover/ barricades in the arena to unlock the “Devastator!” achievement.
AUTOBOT symbol: On the highest platform, have him destroy the barrier to the left. The fourth symbol is hidden inside.
AUTOBOT symbol: As for the last symbol, you need to have him destroy one of the arcs in the hallway to the right. The symbol is affixed up in the wall.,
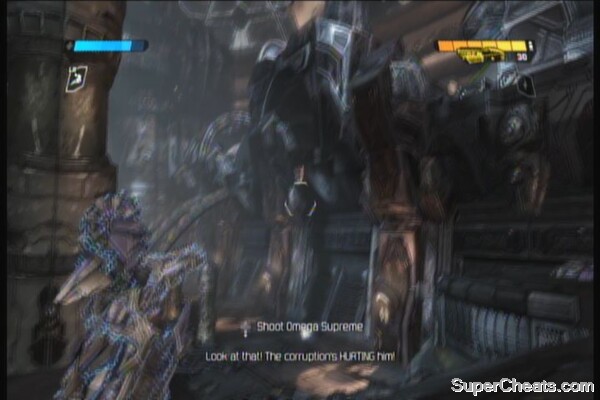
There is a turret platform in the highest point of the combat area. Be careful not to detach this unless its really necessary since this is one of your best tools to deal considerable damage to O.S armor plate. Alternatively, you can also attack using your vehicle cannon. Keep doing this until he ultimately falls down and for you to officially complete the Decepticon campaign.
Iacon Under Siege
DECEPTICON symbol: After getting out of the elevator and while Optimus is talking with Jetfire, look at the catwalk ahead. The symbol should be immediately visible there. 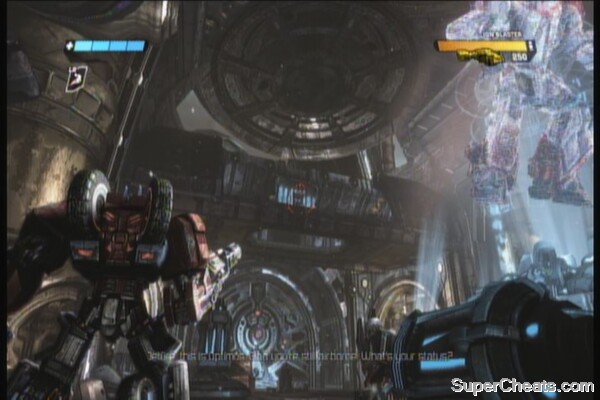
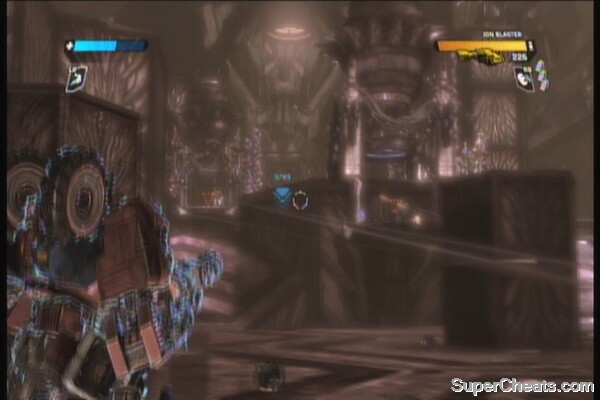
Objective: Activate the Planetary Guns
Exit the base and wait until a decepticon warship crashes down. Press on and get rid of any survivors.
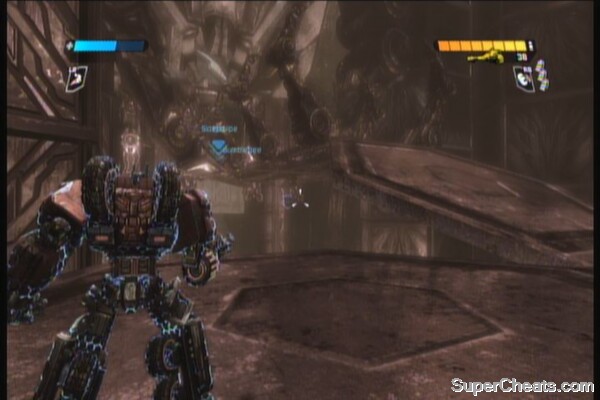
(PR-1) As you continue forth, you'll see a health marker. This leads to a downed autobot soldier. Revive downed soldiers by pressing X. Don't leave them too long or they'll die after a few seconds. Reviving 5 fallen soldiers will unlock the “Paging Ratchet” achievement.
Press forward and turn left to the a closed off road to find a weapon chest and a canister that has energon shards. Continue forth and defeat all decepticon soldiers. Grab the ammo and energon cubes scattered along the way, and clear the elevator. Take the elevator up, defeat the two guards and activate the planetary guns.
Objective: Reach Iacon Speedway
Jump down to the street below and kill the surviving decepticons to obtain shards. Proceed to the next mission marker. Don't go in there yet; decepticon jets will appear and attack. Get rid of them then proceed to the next building.
Broken Lift
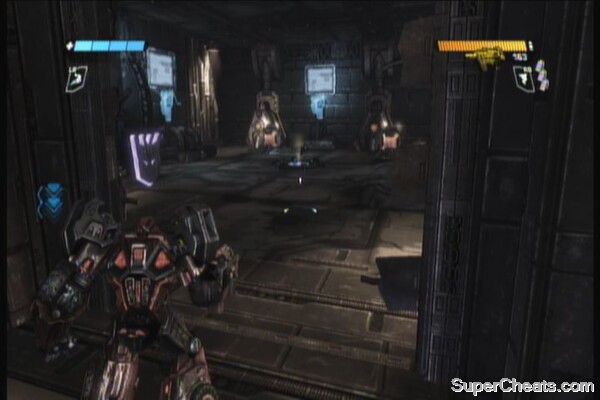
Once inside, a decepticon Brute will appear.

You should already know by now how to deal with them. Defeat it and take the lift. Exit the lift, transform into vehicle mode and jump over the bridge. Get inside the next building and fight your way through the hallway. There will be jets waiting outside; kill them all but don't follow your allies yet.
(PR-2) Turn to the right and follow the road until you find a soldier fighting a jet. Kill the jet then revive him immediately. There is also a couple of weapon chests containing Energon Battle Pistol near him. 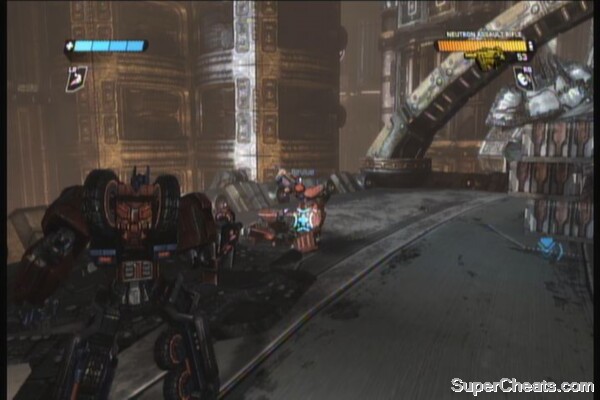
Regroup with your team and proceed until you reach a firefight. Go past them and go upstairs.
DECEPTICON symbol: Take another flight of stairs to reach the turret at the top. From there, look to the left to find the symbol on top of a pipe.

Man the turrets and clear the enemies, especially the missile-launchers and jets. Finally, a warship will appear. Its barrage of missiles will hurt a lot of you may want to detach one of the turrets there then move around. Just destroy all the marked targets and you'll be good to go.
The Road to the Decagon
Objective: Get to the Decagon
Transform into vehicle mode and travel to the speed way. You'll find a split along the way but it doesn't matter which one you choose; just clear the enemies along the way and grab the weapons, e-cubes and ammo as needed. You'll encounter gunners along the way; just snipe them using your battle pistol. Just follow the road and you'll eventually meet up with your team mates. Watch the following scenes. 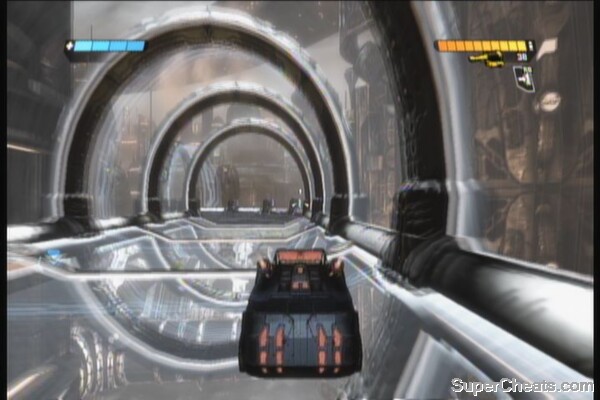
(PR-3) Follow your teammates after falling down and head outside. There will snipers here and a soldier that needs to be revived. If you're at full HP, prioritize getting the soldier up and endure a few sniper shots. He should be revived fast enough without endangering your HP. 
Take out the snipers as you move up the ramps. Keep clearing the area until you reach the command post.
False Propaganda
Take out whatever supplies you can find here. The shield will go down and you'll need to clear the path ahead. After killing a bunch of regular fodders, a heavy gunner will appear. Just take cover and shoot it when its distracted. Grab ammo and the Ion Displacer machine gun then follow your allies.
Corrupted Halls
Fall down to the first platform and grab the Overshield behind. Press on and destroy the crystals that blocks your path. Continue along the hallway to find a large machine.
Objective: Defeat the decepticon war machine
Iacon Speedway
Head to the next path and transform to vehicle mode. This is a long road to travel with some occasional checkpoints where you need to clear the enemies. At the end of the straight road, decepticon flyers will attack. There is an energon cube and a thermo missile launcher behind in the other end of the road in case you need it. Continue forth and deal with another fleet of enemy jets. After taking them out, ride a few more distance until you see the end of the speedway.
DECEPTICON symbol: Before jumping down, walk at the edge of the road to see the symbol ahead., 

Jump down to the courtyard and assist the heavy gunner autobot in breaking through the enemy forces. If you're using Optimus, you'll breeze through the enemy forces using your AoE support skill. Keep pushing forward until you're halted by a large gate. Jump to the upper platform and activate the console to open the gate. (PR-4) Go through the gate and you'll find some of your allies fighting another war machine. There will be a soldier that will be downed to the right so rush over there and revive him.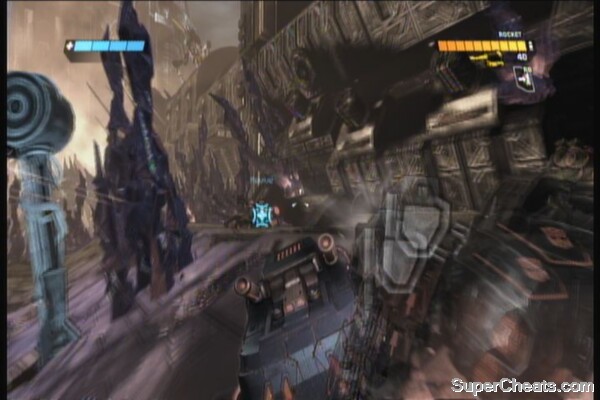
Deal with the war machine, using the covers here. 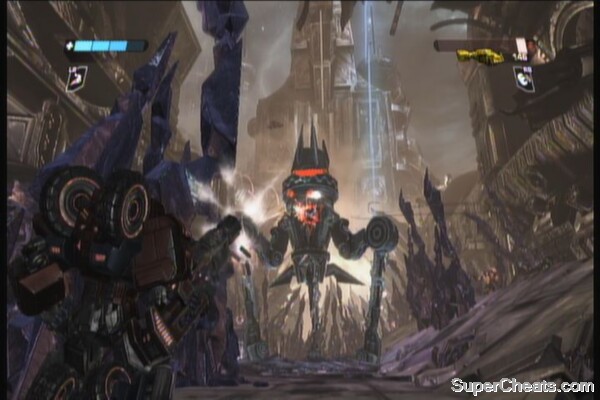
There is also a room to the left that contains a Scatter Gun and an energon cube should you need it. There is also a room near where you came from that has an Overshield and two canisters containing shards. Past the war machine to the left is another room with some ammo, a weapon chest and a shard canister. After defeating the war machine, head through the door and take the lift up.
Central Ventilation System
Get out of the lift and proceed to the open area. Several enemy flyers will attack you here; you can grab the missile launcher on the floor and deal with them with ease.. 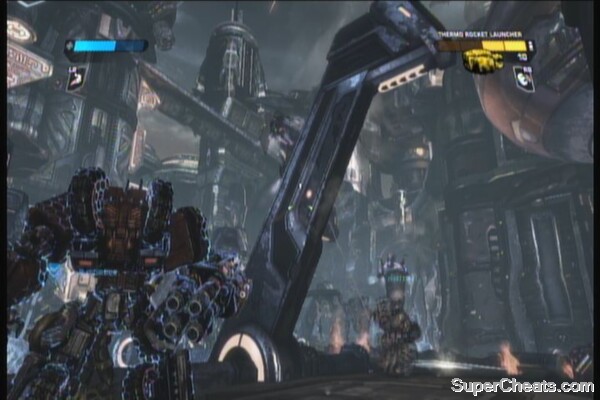
DECEPTICON symbol: Head to the right a bit and snipe the symbol in the middle of those fluorescent, blue wirings. 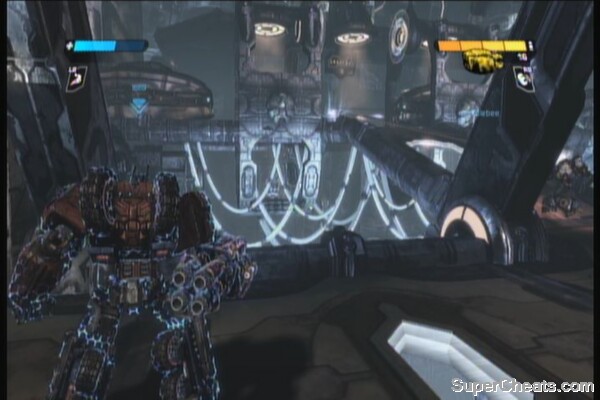
Continue forth and get rid of the enemies. Follow the path and you'll reach a large room with turbines that you must ride in order to proceed forward. Ride the first turbine, then land on the platform where some friendlies are standing. Ride the second turbine and kill the jets that will attack you. (PR-5) Wait until the turbines head to the right to find a soldier on a platform. He'll go down so make sure to carefully and immediately tend to him and revive him. This can be a bit tricky since this soldier goes down as soon as you have him in sight. Not to mention that the turbine is moving too slow for you to reach him in time. 
The trick is to stay on the second turbine and wait at the last possible moment to jump on the third. If done correctly, you should be at least in jumping range. Having a character like Optimus or Bumblebee that has the Dash skill will increase the distance as well.
If you're still having problems, you may want to select Optimus as your character and refer to the video below on how to get to the soldier. This soldier should make it your fifth and the achievement should be unlocked. Grab the grenades and Null Ray behind the door that will open.
Get rid of the enemies below and grab the energon bar and ammo cache just outside the road. Transform and drive along the road until you reach an allied command station.
The Decagon Plaza
Grab the supplies and weapons you need. You may want to take the battle pistol to snipe enemies as you push through. Also, you can activate a console in the middle to reveal an Overshield. Head out and fight your way through to the stairs and Ironhide will make his appearance. Proceed inside.
Objective: Restore the Communication Grid
Once inside, a handful of jets and foot soldiers will attack you. Get rid of them then continue to the next room. There is an overshield to your immediate right and grenades to the left. 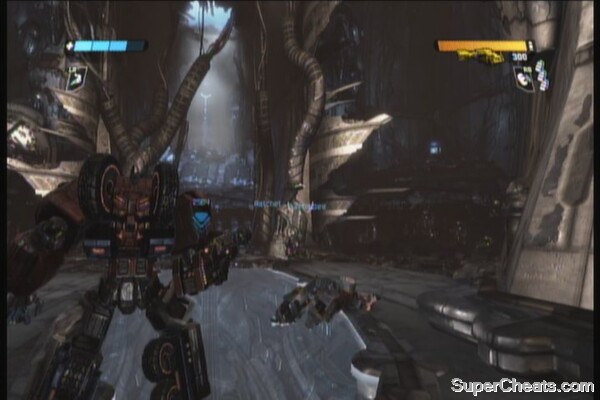
Inside the Decagon
Continue up the ramp. Your teammates will be fighting a brute below so join the fray and get rid of it. Grab the ammo then head to the next room. You ned to align the data stream to the sockets below. Do this by using either side to rotate the calipers. Once they're aligned, activate the console in the middle. If you need to refill your skill bar, there are four canisters here containing energon shards. 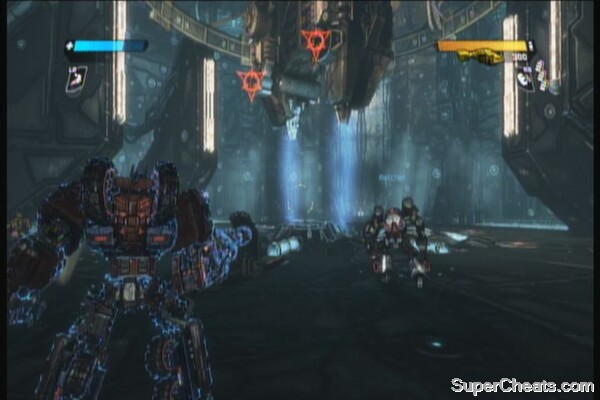
Objective: Get to the Broadcast Room
Follow your teammates and ride the giant energon blocks to the upper platform. Get through the middle; watch out for the electricity; wait for them to disappear before moving forward. After reaching the other end of the platform, ride another energon block to reach the upper level. Decepticons will engage you here. Just fight your way through the platform, up the ramp and finally to the other energon block ride at the end. There will be a couple of snipers and Overshield soldiers waiting for you here.
DECEPTICON symbol: Before riding the energon block, look up in the middle tower and find symbol in one of the bracks holding the transparent part of the tower.
Ride the energon cube up and more enemy flyers will engage you. Shoot them down, then take the lift to reach the broadcast room. Grab the supplies and replace your energon pistol/ secondary weapon with a rocket launcher. Enter the room to fight the boss.
Communication Room
Starscream isn't that bad for this campaign's first boss. He'll start off in his jet form which you can quickly pummel down with your missile launcher. Just be careful of his homing laser beams and bombing runs. After his HP goes down to half, he'll transform into his normal form and will use a scatter gun. Avoid facing him up close since the scatter gun is the game's shotgun. If you're using Optimus then this is the best time to activate your buff skill. Starscream is rather vulnerable when he's releasing beams in all directions. Keep your distance while he's doing this then pummel him with everything you have. The battle will end soon after.
Watch the scenes and this chapter will come to a close.
Objective: Infiltrate the Kaon Prison
Prison Entrance
Watch as you get escorted by the decepticon guards and taken to the firing squad. After getting released with Air Raid's help, jump down the service tunnels. You don't have any guns but you still have your melee weapon. There will spiderbots in this tunnel. Just whack them away with your weapon. Note: Killing 100 of these spider bots will unlock an achievement. Jump down again and kill two decepticons. Unlock the door, kill the two enemies inside and pick up the photon burst rifle. (Laserbeak-1) Before heading out, look through the window to the right. Look for a small bird drone perched on top of the spike. It is called Laserbeak and taking out three of these spy drones will give you the “Beak Breaker” achievement.

Courtyard
Head out and take out some enemies. Follow the path and take out the snipers waiting after the bend.
DECEPTICON symbol: after the bend, look to the left. The symbol should be on top of the wires.
Take out more snipers along the way and head to the mission marker. Activate the console there and more decepticon reinforcements will start to pour in. Snipe them using your rifle then go through the gate. A large crawler machine will attack you next; get rid of the four external turrets first, then the missile soldiers will emerge from the inside. Take them out as well then activate the console to use the crawler as transport.

Megatron's Ambush
Exit the transport and initiate a scene with faux-Megatron. The first wave of enemies he'll throw at you will be the agile vehicle mode enemies. Next are the spiders which you should whack to pieces. Finally, he'll a final wave consisting of ground vehicles and jets. Grab the energon cubes as needed and take them out.

To the Dungeons
Objective: Escape your jail cell
Interact with the wall to smash it open. Grab the assault rifle and some ammo.
DECEPTICON symbol: Follow the corridor straight ahead then look right to find the symbol inside the cell.

Regroup with your team mates and grab the EMP shotgun. Go through the door and get rid of the enemies and sentries in the other side.
Objective: Locate Air Raid
You'll fight three waves of enemy reinforcements here. The first wave will consist of missile soldiers, then some foot soldiers with a brute and finally a brute with a heavy gunner. If you're using Optimus, you should be able to use your buff/boost skill in every wave, with is invaluable in this tight battle. There will be supplies inside the hallways where the enemies emerged so make sure to grab them.
After getting rid of the enemies, smash the next door open to reach the grinders. There is an overshield and energon repair ray on the other side which you can reach by just jumping quickly across the stream. The current shouldn't be that strong to carry you to the grinder unless you stay there long enough.
Air Raid's Rescue
Continue up the ramp, then open the door to find Air Raid. Decepticon counterparts of Cloakers will appear herel; just blast them off. Head through the door to reach the console; fight off some spiders and cloakers along the way. Grab the supplies you need then proceed to the next door. Do the same thing; fight through the same enemies and activate the console to free Air Raid.
Prison Command Room
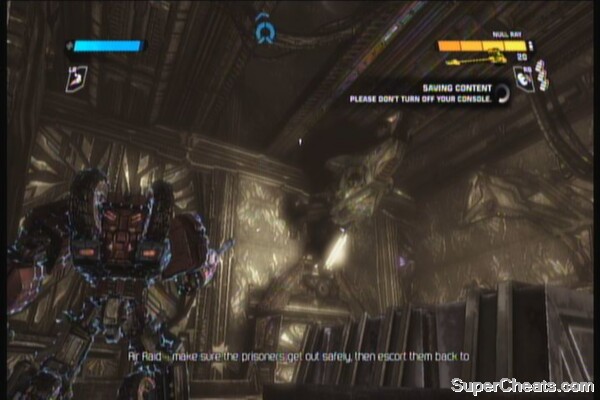
Objective: Rescue the other prisoners
Ride the lift that Air Raid will activate then open the door in the upper level. There will be a large enemy force waiting in the other room so prepare for a battle. There will also be a brute that will appear afterward; avoid getting trapped in the middle since the area is narrow and small. Activate the console to open all prisoner cells and exit the room.

Objective: Escort the prisoners to safety
Head out and fight your way through multiple enemies. There are supplies along the way so make sure you grab them as you go. There is also an overshield behind the hallway in the large room.
There will a couple of brutes that will stand your way before reaching the last door. Take them out then regroup with your allies.
Hangar
On this room, you'll need to fight seekers or enemy flyers. Just get rid of them. Before heading through the next door, turn around and look to the top right as shown in the screenshot. You'll find the bird drone (Laserbeak-2) perched beside the ceiling support.

Note: Even if you shoot this bird and didn't destroy it, as long as the achievement progress bar to your lower right screen appears, it will count to towards getting the achievement.
DECEPTICON symbol: Look out from the two large windows and look to the left. You should find the symbol there.
Descent into Madness
Head to through the hallways, grab the Missile Launcher then ride the wall crawler to the lower levels.
Objective: Locate Zeta Prime
Use the turrets to take out enemy crawlers and flyers. Just keep blasting them away until you reach the lower level. Don't forget to grab a turret gun and detach it for some extra firepower.
The Final Approach
The next room has a missile soldier that can destroy the floor so you can just towards his platform and deal with him there. There will be ammo caches here and a weapon cache. There is also an Overshield on the floor to the right of that platform should you want to the get it.

Head to the next room, kill both missile soldiers.
DECEPTICON symbol: Past the pair of missile soldiers, look to the open area to your right. You should find the symbol there.
Continue through the room and make your way to the mission marker. Go up the ramp and a wall crawler will fall down in front, disembarking more enemy soldiers. (Laserbeak-3) Go past the crawler and you should find a platform right in front of you. On top is the last laserbeak that you can shoot and get the achievement.
Continue forth and cross the bridge. There will be another missile platform here; go past it and grab the Overshield behind the platform; if you want to kill the missile soldier on top and grab the weapon/ ammo chests, you can use the smaller platform beside it and use it as leverage.
Continue following the mission markers and you'll finally reach a heavily defended position up the ramps. Fight your way through and you'll reach the last bridge in this area.
DECEPTICON symbol: It is found under the last bridge with claw-like features. You can view it before crossing the bridge itself.
Cross the bridge and before activating the console, grab all the supplies you can. There is a boss battle right after this door.
Zeta Prime's Rescue
Objective: Defeat Soundwave
This battle isn't that hard if you know the tricks. The ammo pickup in the middle of the room respawns after a few seconds so take note of it. At the start of the battle, Soundwave will stay behind his impenetrable shield. Destroy the two sentries beside him and the other two to the right. These sentries drop energon shards and occasionally, energon cubes. This battle is divided into three phases. Read on.
Soundwave will not fight you directly; instead, he'll send out his minions to fight for him. The first one is called Frenzy. This guy is agile and can jump and lob projectiles at you. If you have stun grenades, they're really effective in stopping this bugger on his tracks before hitting him hard. Soundwave will use a repair ray to heal his minions. If you manage to bring Frenzy's HP down to zero, Soundwave will leave his barrier and will repair his minions back to his feet. This is the time that you should unload everything to damage Soundwave.
He'll call off Frenzy and release yet another minion of his, called Rumble. You must destroy the turrets again before he will send Rumble off. You can apply the same strategy as dealing with him. As much as possible to try avoid melee damage from this pipsqueak since it does considerable damage. Try to use the platform in the middle of the room as platform. Deal enough damage and Soundwave will come out to heal him. Continue attacking until he retracts him and sends his final minion.
Soundwave's last minion is the bird, Laserbeak. It is the same spy bird that we kept hunting in three different locations. Its main attacks is the devastating, rapid-fire laser attack and the typical bombing runs done by jets. The best thing to do to shoot down this bird is to stay put behind a cover and wait for it to change its LoS (line of sight) to your ally then shoot it. Repeat the process until Laserbeak goes down and finally Soundwave.
Omega's Holding Cell
Blast the locks of the door to open it. After getting a view of the captured Omega Supreme, blast the next door open and grab some weapon. Follow your allies until you get your new objective.
Objective: Disrupt power to the facility
Shoot down the three generators.

Objective: Restore full security access
Defeat the enemies that will emerge from the door. Follow the path and clear the next enemy position. Go up the ramp but don't go near the fake Overshield pick-em-ups since these are rigged. Cloakers will appear as well so get rid of them. Grab the supplies you need then continue forth. Destroy the locks on the next door and destroy the guards inside. Activate the console next.
Objective: Release Omega Supreme's restraints
Entrance to the Omega Gate
Go through the door and you'll find a junction. Take the left path first but beware of the enemy forces that will ambush you right before you enter the room.
DECEPTICON symbol: In this room, you should find a destructible gate in front of the ramp. You'll find the symbol there along with some orange canisters that drop energon shards and a free Energon Repair Ray.
Go up the ramp and activate the console to release the restrains. Head back and take out the cloakers along the way. Continue ahead and more enemies will blast the walls open. Destroy them, and take the lift up to reach the second restraint control. Backtrack to the junction and two more enemies will appear. The door will open and you'll need to defend Omega Supreme as it starts to power up.
Objective: Defeat Omega Supreme's captors
There are just a handful of missile defenders. Jump down and destroy them. Grab the supplies/ weapons found in both sides of the area. After getting rid of the enemies and talking to Omega Supreme, more reinforcements will appear.
Stopped at the Gate
Objective: Activate the defenses
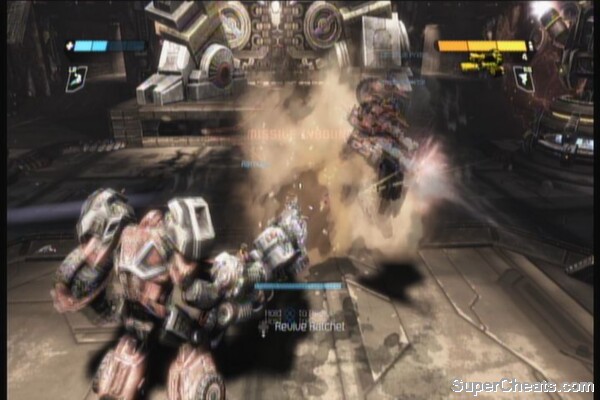
Activate the two switches in front of Omega Supreme to activate the repair bays. Get rid of the first wave of enemies until Ratchet arrives.
Objective: Protect Ratchet
More enemies will arrive and you'll need to hold your position and defend Ratchet. There is a hallway behind Omega Supreme that has three Overshields and a hidden repair turret. Grab one and save the others later.
After clearing the first wave, you'll need to activate two more consoles in both sides of Omega Supreme. Do so and grab the supplies you need before the next wave arrives. The next wave will drop snipers, more foot soldiers, missile defenders and finally a heavy gunner. Ratchet will go down if he sustained too much damage so stick close to him so you can easily revive him. The final wave will consist of everything plus flyers so grab the Ion Displacer machine gun left behind by the heavy gunner a while ago. This will allow you to sweep enemy forces quicker. The final wave will consists of a considerable number of enemy foot soldiers as well as heavy gunners. They'll be more aggressive now and will concentrate on Ratchet. Get rid of the nearby enemies and don't stick with your other teammates so you can cover both sides. When low on health, quickly grab an Overshield since it also restores your HP to full in addition to the shield it provides. Get rid of this last wave to trigger the arrival of the next enemy.

Objective: Defeat the Decepticon Tank
You've faced a tank before so this one should be a piece of cake. Use the pillars on either side to flank it and hit its rear to change it to humanoid form. The Ion Displacer heavy guns left behind by heavy gunners earlier can really help in making this battle a lot easier.
Into the Core
Objective: Find a way to the core
Grab the supplies you need and head to the core. Take a long jump down the shaft. After meeting the slug the first time, you'll come across two tentacle-blocked paths.
DECEPTICON symbol: You need to destroy the obstacle to the left. Take note that you can only do this when using Optimus Prime. Using any of the other two characters will just prompt the AI controlled Optimus to destroy the obstacle to the right. Approach the obstacle so the fist icon appears. Follow the hallway and you'll find the symbol along the way.
Follow the path until you reach a room where you'll be ambushed by enemy forces.
A Plague of Corruption
Continue fighting them until the friendly slug appears. Follow the slug as it breaks through the wall to find two Overshield pickups. Grab the other supplies you need then continue forth. Jump down the shaft.
DECEPTICON symbol: You must immediately look to your left to find a destructible gate. Destroy it QUICKLY and grab the symbol BEFORE the cutscene triggers.
Cybertron Slugs
Objective: Escort the Slugs
After the scene, you'll be riding some slugs with turrets on their backs. Your job is to sweep all the enemy forces along the way. Just concentrate on taking out the enemies above and to your sides. After a short distance, your team will stop and face a corrupted worm and it will start lobbing homing balls at you. Flyers will be appearing as well so make sure you concentrate on shooting down the worm's projectiles first since they deal a lot more damage. Just continue doing that until the worm gives up.

As you move forth, you'll find a heavy gunnner/ destroyer on a bridge ahead. Destroy the bridge support to take it down instantly and continue mopping down enemies. Finally the worm will appear again. Destroy the projectiles it shoots as your team charges through. Watch the following scenes and you'll be separated.
Energon Floodgates
Objective: Regroup with your squad
Follow the straightforward path until you reach your teammates. Activate the necessary consoles to open the paths and continue forth. You'll find a large room with dark energon pipes. Shoot them to create a safe path across. In the next room, you'll be attacked by several spiders followed by more decepticons and flyers. After clearing them, go to where the enemies appeared and find a corridor leading to the next console to open the floodate.
Objective: Locate the entrance to the core
As soon as you exit, you'll find a slug walking from the left and a decepticon destroyer to the right. Look at the large stalactite, wait for the destroyer to go underneath it and shoot its glowing base for it to fall down and crush the destroyer. You'll unlock the achievement “Slugfest“ for saving the slug.
Follow the path and take the lift to the lower level.
Sea of Corruption
Transform and ride until you reach the first curve going left.
DECEPTICON symbol: Stop and look at the energon river to the side .The symbol is on top of one of the rocks there.
Follow your teammates and shoot the stalactite above to create a path. Jump across. You cab shoot the stalactites to your right to create a path. It leads to two energon shard canisters and an Energon Repair Ray. Continue following the mission marker.
DECEPTICON symbol: From there, jump to the next platform to the right and look for a slug clinging on the wall. Shoot the stalactite again to get across. The symbol is right under the slug itself.
Activate the console and proceed inside for a boss fight.
Heart of Cybertron
Objective: Defeat the menace on the core
The area is too small for you to move around much. First, the boss will scrape its claws on the floor, leaving a trail of dark energon crystals behind. Destroy these crystals immediately since the boss will soon smash its claws, detonating the energon crystals. Next, it will lob some projectiles at you which you can easily evade. It will leave you temporarily afterward and thrown down some spawners where spiders will appear. Destroying these guys will drop energon shards and later on, energon cubes.
After getting rid of the critters, the boss will climb back down and this time sweep the floor using a high-powered laser beam. Jump over it if it sweeps the floor and stay put if it sweeps overhead. You just need to repeat the process until it goes down.
Attack on the Relay Station
Objective: Enter the Relay Station
Follow the beam until you reach the opening of the station.
DECEPTICON symbol: As soon as you enter the station, look down to find a large chunk of debris blocking the straight path. The symbol should be there.
Fly through the mines; you can destroy them with your guns. Continue following the path and dodging obstacles until you reach the other end of the tunnel. Here's you'll need to take out a wave of enemy jets. After clearing the skies, the station defender will appear. Just keep on your toes to avoid the missiles while shooting at its marked parts. You need to take out its fighter escorts first then concentrate on firing on the weapon systems, one at a time. The missiles aren't that agile so its possible to just normally strafe without barrel-rolling and still evade the missiles. 
After destroying its weapon systems, it will start firing a large laser, as well as sending more missile barrages. You can only damage it when its charging its weapon so make sure you're out of the laser's path and evade all the missiles its throwing at you. If you need healing, there are two orange platforms behind you where energon cubes spawn; use them as you need. 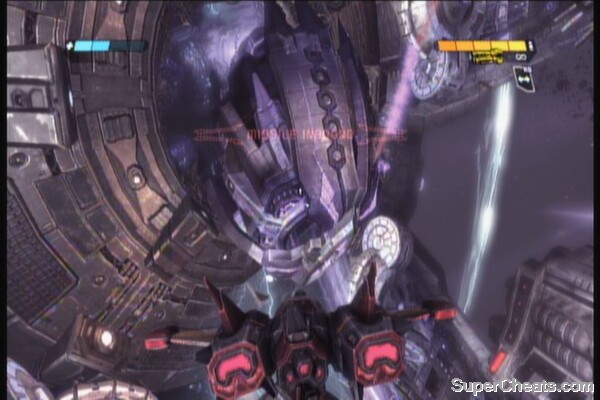
After disabling the defender, fly inside it, activate the console and shoot the node. Fly out there immediately then head to the vents.
Coolant Chamber
Objective: Infiltrate the coolant room
Destroy the first two energy cylinders to reveal the console. Defeat the decepticons guarding it and activate the console. More enemies will appear just get rid of them. In a short distance, you'll need to take out three sentries and the door.
DECEPTICON symbol: There is a destructible door to the left. The symbol is right behind it. 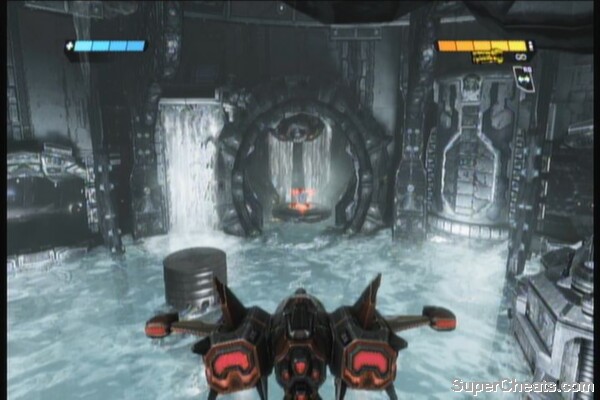
Continue forth and follow your allies. Fly until you reach a platform. There will be a couple of missile soldiers that will ambush you from the another platform above. There is also an overshield behind the large tube to the left, from where you landed.
Into the Belly of the Machine
Objective: Destroy the coolant pump
Fly a bit then you'll find the cooling pump. There will be sentry guns here and a small number of enemy forces. Destroy them all then proceed on destroying the marked parts of the coolant to disable it.
Objective: Lower the relay station coolant
Proceed to the large area next and wait for the control bubble to appear. Destroy the missile defenders inside and activate the console. 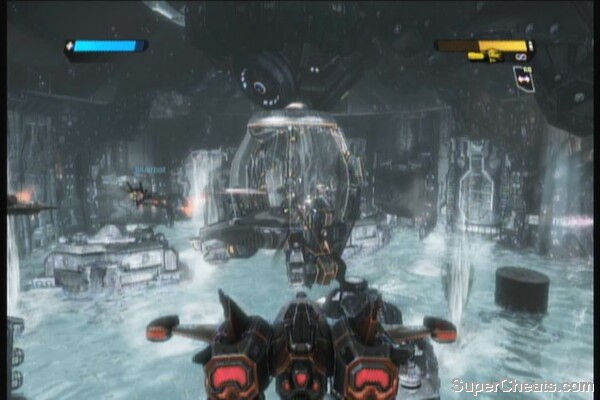
Go through the next gate. There will be a bunch of cloakers here to be prepared. Clear the area and the gate with the lift opens. Use it to go down to the lower level.
Coolant Control Room
Grab the supplies you need and head to the next room. Approach the console but a shield will cover it and after a few seconds, enemies will start to pour in. The best position is the platform up the ramps just across the console. You can safely snipe enemies here without drawing too much fire yourself. 
Just fight through the waves of enemies, including the final wave that consists of two heavy gunners and a brute.
Activate the console after killing them.
Coolant Tunnels
Objective: Overload the pulse regulator
This is the part where you need to fly through the tunnel within 22 seconds to unlock the achievement “Powerglide Performer”. It may take a few runs but you should be able to do it. At the end of the tunnel, grab all the supplies you need then activate the platform. You need to defeat all enemies here; be careful of the snipers on the other end of the area. Use covers efficiently to avoid too much damage from the destroyer. After killing the destroyer, a couple of missile defenders will break through the door. Get rid of them and follow the path. 
Fly through the long corridor until you reach the next room with enemy forces. Quickly land and deal with them in normal mode since missiles easily lock on vehicle/ jet modes. After clearing the area, resupply and take any of the two paths outside. In the next room, you'll find more enemies and turrets.
The Nerve Center
DECEPTICON symbol: Transform and fly so you can reach the top of the large tube in the middle. The symbol should be there alongside an Overshield. 
The overhead tube where you found the symbol is a great place to take out the gunners below. Once cleared, your allies will move to occupy them. The last line of defense of the enemies here would be a couple of missile launchers which you can dispatch easily. Clear the enemies in the area and finally, activate the two consoles on each side to overload the regulator. More enemies will arrive from the direction you came from so you can either man the turrets or take them out one by one from the higher platforms. Remember that snipers will also make an appearance in addition to overshielded soldiers. Hold your ground until a scene triggers.
Approaching Trypticon
Objective: Enter the Orbital Gun
Fly ahead and avoid the massive mines that shoots missiles. You'll encounter turrets and enemy jets along the way; take them out and the lift will be activated. Cloakers will appear so mop the area and resupply. Before going down, you'll need to find the Decepticon symbol here. 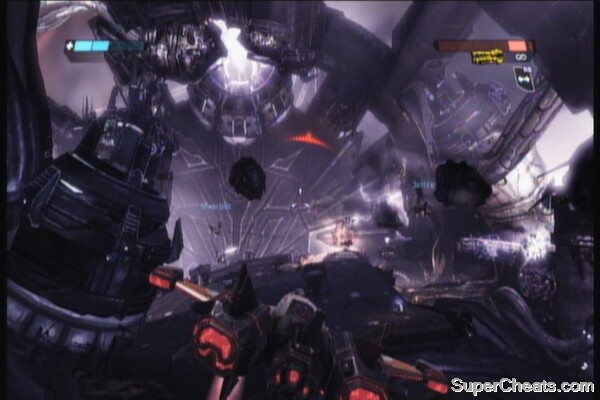
DECEPTICON symbol: From the lift, look at the left to find some crates at the far end, by the separated platform. Approach it and look behind the crate to find the symbol. 

Grab the overshield behind the console then proceed to activate it. Fly through the new opening.
Decepticon Destroyers
Objective: Disable Trypticon
DECEPTICON symbol: Boost towards the gun's opening and follow the straight line in the middle. You'll eventually reach the symbol between the two platforms. 
Land in one of the platforms and take cover. There are two tanks in both platforms, accompanied by snipers and two heavy gunners. Take out the snipers first then the heavy gunners. It is safer to fly through the trenches below and flank the enemies. The sniper platforms have several weapons and supplies in them so make sure you put them to good use. 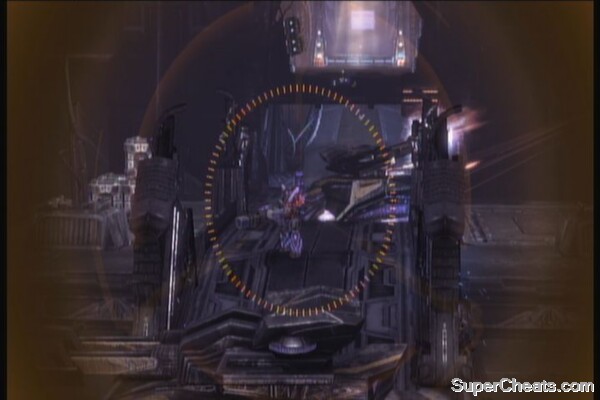
There is also an overshield under the platform; this is probably the best place to deal with the tank in its humanoid form since you can exploit the cover to your advantage. 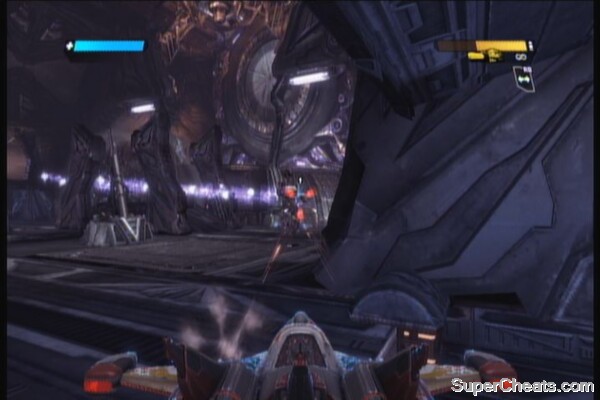
Destroying the first tank will bring it jet reinforcements so be aware. Just keep blasting away until all enemies are defeated and the next path is opened.
Inside Trypticon
Fly through the tunnel, avoiding the crushing walls and other traps. You'll finally reach the boss itself: Trypticon. This is just his first form. Just keep shooting the marked targets while evading all projectiles. Finally, you'll need to boost your way out of here to trigger the next phase of the battle.
A Titan Falls
Objective: Destroy Trypticon's Jetpack
This battle is relatively simple. You need to destroy Trypticon's jetpack. Remember that you can switch between your missiles and machine gun by pressing triangle. While in this form, the boss will has three types of attacks: homing missiles, laser beam and a quick jab. These are very easy to evade. Just throw everything you have at the boss when its jetpack is exposed and he'll go down in no time.
The Threat Emerges
Objective: Inspect the crash site
DECEPTICON symbol: From the starting point, go through the first archway then turn around to find this chapter's first symbol.
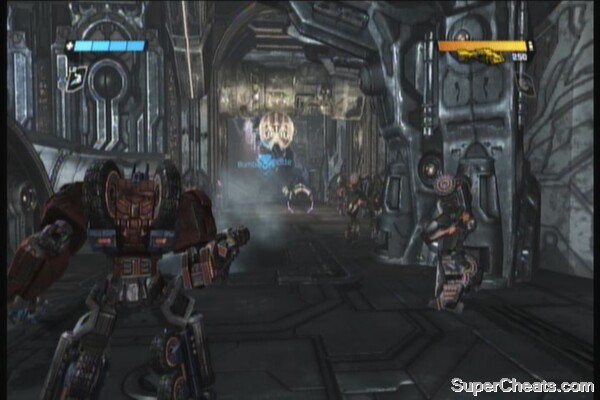

Before heading out, approach Ratchet and he'll open a supply dock for you containing an Overshield, some energon grenades (healing aura) and an Energon repair ray.

Head outside and follow the road until you find an energon battery and it will be marked. Destroy it to clear the path.
DECEPTICON symbol: As soon as you cleared the debris, look to your right to find an energon shard canister. Stand beside it and look to the upper left to find the hidden symbol.
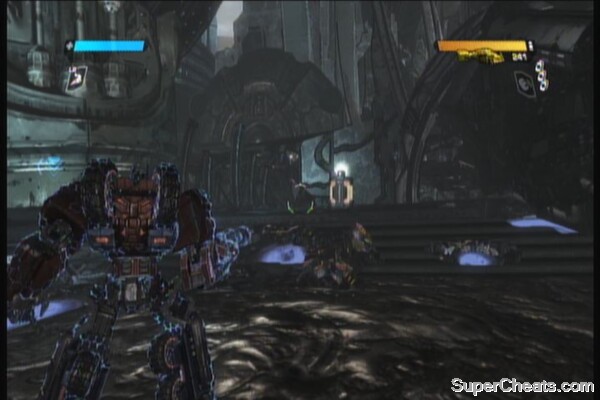

Continue along the path until Trypticon opens the floor and you crash down.
DECEPTICON symbol: As soon as you land, look behind and look for an opening. Go there and you'll find the symbol to the left.
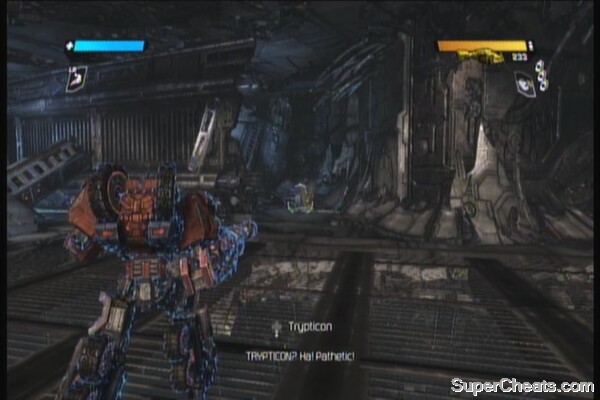

DECEPTICON symbol: Dash towards the pillar in the middle. You'll find the symbol behind it.
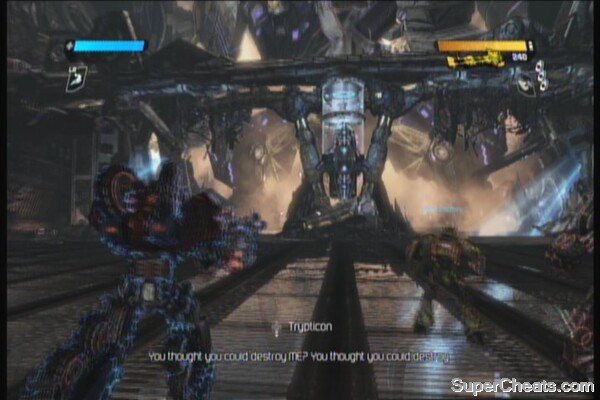

Objective: Find a way to overload the shoulder cannons
Stay behind the central pillar since this is the best cover you have at the moment. You can't do anything yet to hurt him so just stay put. When the mission marker appears, drive as fast as you can there and activate the console. Take note of the now moving conveyors carrying canisters. Shoot those canisters so that they'll explode near the shoulders of the boss and overload them. Repeat the process for the right shoulder.
Objective: Damage Trypticon's chest coils
If you need ammo, there is one behind you. Grab the overshield that will be revealed after Trypticon smashes the bridge up front. In this phase, you need to evade its barrage of missiles and projectiles to overheat its weapon systems and reveal its chest coils to cooldown – shoot the red coils; its his weakness. The boss will also slam its tail. Just stay on the side/direction its facing to avoid getting smashed. Destroy the two chest coils to end this phase.
The Battle Continues
Objective: Destroy Tripticon's power source
DECEPTICON symbol: After Trypticon destroys the area, turn to the left and look for the mini-gun (Scrapmaker). Look through the hole behind it to find the last symbol.
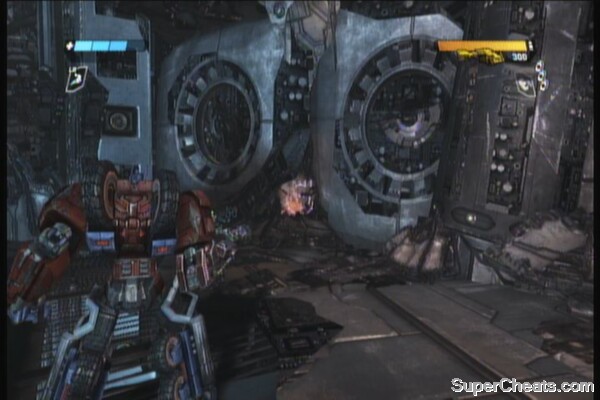
Trypticon's attacks got more damaging and annoying. Start off by grabbing to the Scrapmaker mini-gun to the left, where you'll find the last symbol. There is also ammo replenishment at the base of both ramps so take note of those. Your targets this time are the dorsal power cores of the boss. There are three in all and taking them all out will end the battle.
As for the attacks, Trypticon will still unleash a barrage of deadly projectiles which you can barely evade by transforming into vehicle mode and dashing around the place. It will also create dark energon crystals on the ground which it detonates later on, damaging anybody around it. Detonating the crystals also releases spiders that you must kill first. These buggers drop shards needed to activate your skill.
After destroying the last power core, Trypticon will start sprouting its death throes. Stand in the middle of the platform so you'll get smashed (while he's saying “You'll suffer for this... autobots!”) and unlock the “First we Crack the Shell” achievement.
This section is the rundown or checklist of all the Autobot symbols that can be found during the Decepticon campaign. Please refer back to the chapters in the guide for info on how to acquire eash symbol.
Chapter 1
The Ambush
Ventilation Shafts
Laboratory
Detritus
Dark Energon
Chapter 2
Kaon Cliffs
Energon Reservoir (1)
Energon Reservoir (2)
Nearing the Energon Bridge
Autobot Command Station
Chapter 3
Infiltrating Iacon
Iacon City Subsystems
Autobot Transit Center
Assault the Anti-Air Gun
Inside the Iacon Vaults
Chapter 4
The Omega Key is Angry
Cargo Lift
Heavy Resistance
Maintenance Tunnels
Guardian on the Bridge
Chapter 5
Megatron vs. The Omega Key (1)
Megatron vs. The Omega Key (2)
Megatron vs. The Omega Key (3)
Omega Supreme's Last Stand (1)
Omega Supreme's Last Stand (2)
This section is the rundown or checklist of all the Decepticon symbols that can be found during the Autobot campaign. Please refer back to the guide section for full details on how to get them.
Chapter 6
Iacon Under Siege
Broken Lift
Iacon Speedway
Central Ventilation System
Inside the Decagon
Chapter 7
Courtyard
To the Dungeons
Hangar
The Final Approach (1)
The Final Approach (2)
Chapter 8
Entrance to the Omega Gate
Into the Core
A Plague of Corruption
Sea of Corruption (1)
Sea of Corruption (2)
Chapter 9
Attack on the Relay Station
Coolant Chamber
The Nerve Center
Approaching Trypticon
Decepticon Destroyers
Chapter 10
The Threat Emerges (1)
The Threat Emerges (2)
The Threat Emerges (3)
The Threat Emerges (4)
The Battle Continues
Below you wll find all the current achievements for this game. Where it is appropriate we have added some hints and tips on how to complete each achievement.
A Prime Problem (10 points)
Complete Defend Iacon on any difficulty.
The Last Prime (10 points)
Complete Kaon Prison Break on any difficulty.
You Got the Touch (10 points)
Complete To the Core on any difficulty.
The War Within (10 points)
Complete Aerial Assault on any difficulty.
The Harder They Fall (10 points)
Complete One Shall Stand on any difficulty.
Paging Ratchet (15 points)
Revive 5 Autobot soldiers in Defend Iacon.
Revive downed soldiers by pressing X. Don't leave them too long or they'll die after a few seconds. Reviving 5 fallen soldiers will unlock the “Paging Ratchet” achievement. The soldiers are found in the following checkpoints. Click the links to know their exact locations.
1)Iacon Under Siege
2)Broken Lift
3)The Road to the Decagon
4)Iacon Speedway
5)Central Ventilation System
Beak Breaker (15 points)
Shoot the 3 Hidden Laserbeaks throughout Kaon Prison Break.
In chapter 7, there are 3 hidden Laserbeaks that you can shoot down. Click the checkpoint links below to know their exact locations.
1.Prison Entrance
2.Hangar
3.The Final Approach
Slugfest (15 points)
Save the Slug before it is executed in To the Core.
In chapter 8, after the slug ride and regrouping with your allies, make your way to the floodgate console to open it. After exiting you'll find a decepticon destroyer approaching the slug on the other side of the walkway you're in. Shoot the stalactite to crush the destroyer and save the bug.
Powerglide Performer (15 points)
Fly through the coolant tunnels in 23 seconds in Aerial Assault.
There isn't really an easy way of getting this achievement except for retrying and mastering the path. The timer starts as soon as you enter the tunnel and stops as soon as you reach the other end.
First We Crack the Shell (15 points)
Get smashed by Trypticon's hand as he falls into the energon goo in One Shall Stand.
After destroying the last power core, Trypticon will start sprouting its death throes. Stand in the middle of the platform so you'll get smashed (while he's saying “You'll suffer for this... autobots!”) and unlock the achievement.
Autobot Recruit (15 points)
Autobot Campaign Complete (Easy).
Autobot Commander (30 points)
Autobot Campaign Complete (Medium).
Autobot Prime (45 points)
Autobot Campaign Complete (Hard).
Dark Awakening (10 points)
Complete Dark Energon on any difficulty.
Starscream's Brigade (10 points)
Complete Fuel of War on any difficulty.
The Fall of Iacon (10 points)
Complete Iacon Destroyed on any difficulty.
The Secret of Omega Supreme (10 points)
Complete Death of Hope on any difficulty.
Victory is Mine (10 points)
Complete The Final Guardian on any difficulty.
Your Lucky Day (15 points)
Kill all but 1 of the neutral prisoners in Dark Energon.
During the Decepticon's first campaign, you'll eventually encounter several captured autobots (bound in energy rings). To get the achievement, kill ALL but ONE of the prisoners. It doesn't matter which prisoner you leave alone then take the lift. If done correctly, you'll get the achievement as the lift ascends.
Thief in the Night (15 points)
Find and disable all security trip-wire switches in Fuel of War.
You need to shut down five tripwire traps scattered in the decepticon campaign “Fuel of War”. You'll encounter the first two automatically. The third one is found in the room where you'll ambush a group of soldiers briefed by Zeta Prime. (Link) The other two tripwires are located in the area where you need to bring down the forcefield in the Entrance to the Underground checkpoint.
Chaos Bringer (15 points)
Destroy the planets in the Stellar Galleries in Iacon Destroyed.
After reaching the The Stellar Galleries checkpoint, you'll come across a planetarium. Before activating the switch, shoot all the planets in orbit to get the achievement.
Motormaster! (15 points)
Race across the Chasm Bridge in 33 seconds in Death of Hope.
There isn't really an easy way of getting this achievement except for retrying and mastering the road. The main obstacle will be the split in the middle of road. The timer starts as soon as you enter the tunnel and stops as soon as you reach the other end. The best choice for attempting this achievement is Soundwave since he has an extra boost ability while in vehicle mode.
Devastator! (15 points)
Destroy all cover in the arena in The Final Guardian.
This is easily done during the last phase of fighting Omega Supreme. Find all the covers that are left standing and force him to destroy it for you. Remember that the covers must be completely destroyed for them to count.
Decepticon Grunt (15 points)
Decepticon Campaign Complete (Easy).
Decepticon Seeker (30 points)
Decepticon Campaign Complete (Medium).
Decepticon Warlord (45 points)
Decepticon Campaign Complete (Hard).
Till All Are One (30 points)
Complete both Campaigns (Any Difficulty).
Brute-a-kiss! (15 points)
Ignite a Brute's back 5 times in Campaign or Escalation.
Brutes are those large soldiers wielding a shield and mace. To defeat them, you need to ignite and destroy their backpacks. Do this to 5 different brutes to get the achievement.
Footloose and Fancy Free (15 points)
Destroy a Jet Soldier's foot thruster 5 times in Campaign or Escalation.
Shoot the leg thrusters of the jet soldiers to destroy them. You may want to do this on sequences where there are a lot of jet soldiers since it takes time for them to transform into humanoid (normal) mode. They are quite agile in this mode so you may want automatic weapons like the Scrapper, turret or Neutron Assault rifle and fire away while aiming their legs. Do this five times to get the achievement.
That's No Mirage (15 points)
Headshot a Cloaker when it is invisible in Campaign or Escalation.
Cloakers can only be spotted by following the light emanating from their plasma cannons. Its best to use the scatter gun at close range or spray heavy turret/ mini-gun fire until you land a headshot. Take note that cloakers are smaller compared to your average transformer.
Targetmaster! (15 points)
Kill 2 Snipers in 5 seconds in Campaign.
For this achievement, you'll need to take down two snipers within 5 seconds. The best spot to do this is during the Ventilation Shafts checkpoint of the decepticon campaign Dark Energon.
There Are Parts Everywhere (15 points)
Multi-Kill 3 car soldiers at once using an explosive weapon in Campaign or Escalation.
The best place to get this achievement is during the first checkpoint of Chapter 2: Fuel of War where you'll find a group of soldiers briefed by Zeta Prime. (Link) You'll be standing on a ledge above them and they won't notice you immediately. Grab the grenades to your immediate left if you don't have any then lob one at them to destroy them all at once.
Blast-arachnia! (15 points)
Destroy 100 Spiders in Campaign or Escalation.
There are a lot of these purple spiders in Chapter 7, Autobot campaign. You'll get this achievement before you end the entire autobot campaign; if you're still short and you need more spiders to kill, replay the checkpoint Air Raid's Rescue in Chapter 7 until you get enough.
Fire in the Sky (15 points)
Melee-kill a Jet Vehicle in the air in Campaign or Escalation.
You must kill a jet soldier in flyer mode/ jet form with a melee attack. One of the best places to do this is in the space area after getting off the lift in Chapter 1's Laboratory checkpoint. Several flyers will attack you there and there's a ramp where you can rush in vehicle mode then swat a nearby jet from the bridge.
Friends to the End (15 points)
Finish any level in Co-Op.
Unlikely Allies (15 points)
Finish any level in Competitive Co-Op.
More Than Meets the Eye (15 points)
Earn a 1st Place MVP award in any Multiplayer mode.
You Got Spark, Kid (5 points)
Reach level 5 in any single class in Multiplayer.
Spike's BFF (15 points)
Reach level 25 in any single class in Multiplayer.
The Kup's Half Full (25 points)
Reach a combined class level of 50 in Multiplayer.
Only the Strong Survive (50 points)
Reach a combined class level of 75 in Multiplayer.
Top of the Scrap Heap (75 points)
Reach a combined class level of 100 in Multiplayer.
Prime Directive (30 points)
Unlock Prime Mode.
This is unlocked after all four classes reach LV25.
Powermaster! (30 points)
Spend 25,000 Power in Escalation mode.
Heavy Metal War (50 points)
Complete the 15th wave in Escalation.
Scavenger Would Be Proud! (25 points)
Destroy all hidden Autobot symbols in the Decepticon Campaign.
See the Collectibles: Autobot symbols section for detailed locations of the symbols.
Grimlock Smash! (25 points)
Destroy all hidden Decepticon symbols in the Autobot Campaign.
See the Collectibles: Decepticon symbols section for detailed locations of the symbols.
Action Master (15 points)
Get 10 kills with a single detached turret in any mode.
Can be easily done as early as chapter 1 in Moving Forward checkpoint. Once you reach the bottom floor, there will be multiple enemies that will start pouring in this room. Mount the turret by pressing X then detach it by pressing B. Score 10 kills while carrying the detached turret to unlock the achievement. Make sure you make every shot count since the turret has limited ammo.
Wait! I Still Function! (30 points)
Get 3 kills while downed in a Co-Op Campaign or Escalation mode.
You need to do this during co-op since you can't go down during the campaign. Its best done with multiple enemies nearby while your partner damages them and you take them down.
Ramhorn (15 points)
Ram-kill against an enemy who is stunned by an EMP grenade in Campaign or Multiplayer.
To get this achievement, you need to stun an enemy using an EMP grenade and while its floating, transform into vehicle mode and use RB to ram the enemy and destroy him. Soundwave and Optimus have this skill in vehicle mode. The ideal place to attempt getting this achievement is during the To the Dungeons checkpoint of Chapter 7: Kaon Prisonbreak. Grab the EMP grenades then head out. There will be a couple of soldiers there. Throw one emp grenade, transform and boost through him to get the achievement.


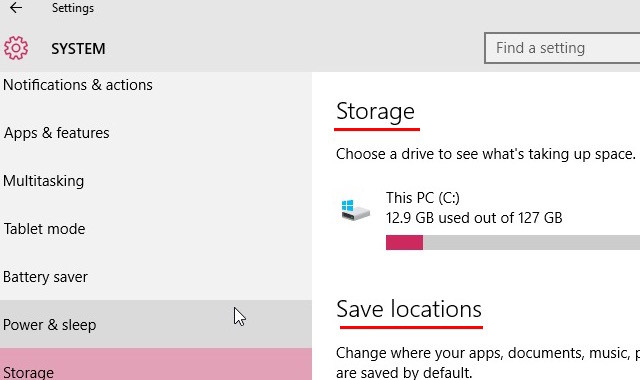
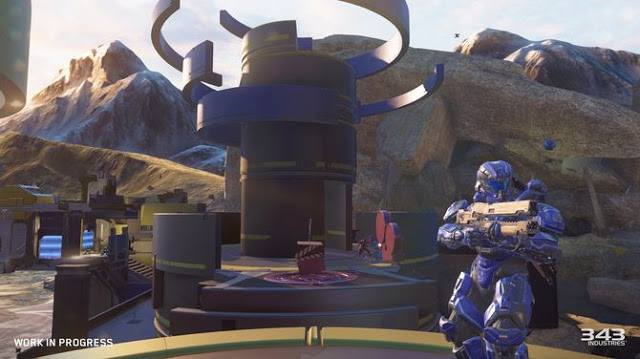
 Top 25 FPS Games of All Time: Just the Classics
 Video Games: Subject to Debate
 Fallout 4 Guide: PC Performance INI Tweaks
 Naruto Shippuden: Ultimate Ninja Storm 4 Wiki – Everything you need to know about the game .
 GTA V Online Level Unlocks