
A long time ago, in a galaxy far far away...
The Force Unleashed
The galaxy is on the brink of total darkness. The evil Galactic Empire has overthrown the Old Republic and now holds countless worlds in the grip of fear.
The Jedi Knights have been all but destroyed. Only a handful have escaped Imperial forces, disappearing into hiding across the galaxy.
The Emperor’s spies have located a lone Jedi Knight on the Wookiee homeword of Kashyyyk. The Sith Lord Darth Vader has been sent to destroy him...

Start
You ready to unleash the full furry of a Force Master? Not if you’re reading this you’re not. But that’s ok, it’s why I’m here. :)
Fortunately, the whole point of the game is to make a simple way to destroy things in unique real-time ways with massively overpowered Force powers, so there’s really not much to understand.

Xbox 360
Left joystick – Movement
Right joystick - Camera
A – Jump (tap twice to double jump)
X – Lightsaber swing (tap multiple times to combo)
Y – Force Lightning (not used at start) (Force Choke with Vader)
B – Force Push
LB – Dash
LT – Force Grip (use the joystick to move around gripped objects)
RB – Lock On (focus on one target)
RT – Bring up Secondary Force Power Menu
R3 (click right joystick) – Center camera
Playstation 3
Left joystick – Movement
Right joystick - Camera
X – Jump (tap twice to double jump)
[] – Lightsaber swing (tap multiple times to combo)
Triangle – Force Lightning (not used at start) (Force Choke with Vader)
O – Force Push
L1 – Dash
L2 – Force Grip (use the joystick to move around gripped objects)
R1 – Lock On (focus on one target)
R2 – Bring up Secondary Force Power Menu
R3 (click right joystick) – Center camera

Heads-Up Display
1) Health bar. If this depletes completely, you die.
2) Force bar. If this bar does not have any blue in it, you cant use Force powers. Wait a few seconds for it to recharge.
3) Enemy/bonus text. This shows the name of the enemy you just killed, and any bonus points you got while doing it.
4) Mini-map. This shows a map of the immediate area. The arrow in the center is you, and you always face north. Yellow arrows/dots show objectives.
5) Health sphere. Ever enemy you kill releases these. They are automatically brought to you and absorbed, refilling your health bar.
6) Enemy Health. Shows the health of the enemy it’s head is over.
7) Additional Information. This shows additional information relevant to... something.
Fight!
--== General Combat ==--
Battles are in real-time. You can use any power on any opponent at any time, provided they don’t have a way to block or null said attack and you have bought the attack to use.
- Bring a knife to a gun fight. Your Lightsaber is your basic weapon, don’t forget about it! It never runs out of energy and can be pretty devastating.
- The Flash. Dashing allows you to get the jump on enemies in the far back first, use it often to take out snipers or turrets.
- Kill it with Lightning! Force Lightning can be used to kill most all enemies pretty fast. Don’t be afraid to spam it.
- The Rock Strategy. Blocking is pretty vital on the higher difficulties. It blocks most things, including force powers. If you time your block perfectly, you get a block break, or a block that sets your opponent off guard for a second.
--== Creativity ==--
Be creative in your attack. This game uses the Havok (very advanced physics engine), Euphoria (advanced AI system, giving characters human-like instincts) and Digital Molecular Matter (DMM, it calculates the forces enacted on an object in real-time, so something like a dent appears not as a pre-set animation, but dents exactly where you hit it). The combination of these three this game a very real feel to it, but the design keeps it from being annoyingly real.
You can do all sorts of things, like throwing exploding containers into more exploding container and watching the fireworks, remember that 90% of the objects in this game are explosive in nature. Or throw extremely large objects into small areas and watch as your opponents are crushed. Windows on starships can be broken out and create a vacuum that sucks in all nearby enemies (but not you).
--== Quick-Time Events ==--
Quick-Time Events, or QTEs, appear after you take a large enemies health down to near death. They are a fancy way of killing something that generally gets you more points, as well as a good cutscene. If you miss a button, the fight goes back to normal and you’ll have to damage it again before starting another QTE.
On boss fights, they are not optional. You have to use a QTE to end it, but they are much more forgiving. Once one is started, it will go on forever in a loop, generally resetting to the last button press, until you get the next button right.
--== Clashing ==--
There are three types of clashes: Saber, Saber Lock, and Force.
A Saber clash is simply your and your opponent attacking at the same time. You’ll both do a preset animation and back off from each other.
A Saber Lock is where you both use a specific melee attack at the same time, and you lock weapons. Repeatedly press X to win and break the lock, throwing your opponent off guard.
Force Blocks come in several types. Grip requires you to tilt the left joy stick back and force repeatedly, Push requires the rapid pressing of the Push button, and Lightning requires that you press the Lightning button whenever the spinning button is aligned with the red lines.

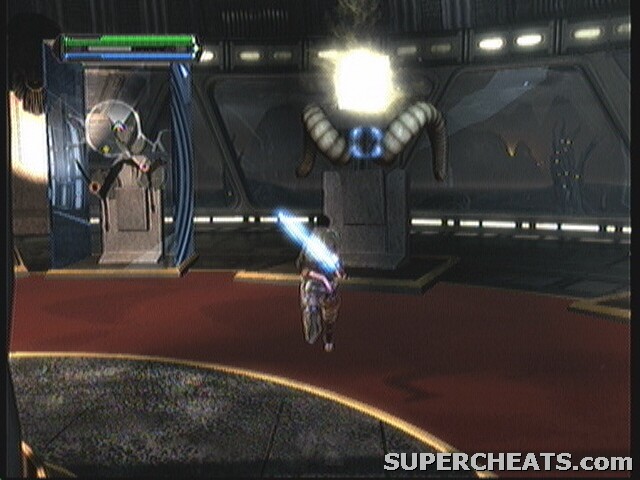
Level Up!
Leveling system in The Force Unleashed is more part RPG. When you gain a level, you don’t actually get any more powerful, faster, ect. Rather, you get points that you can use to buy stat upgrades.
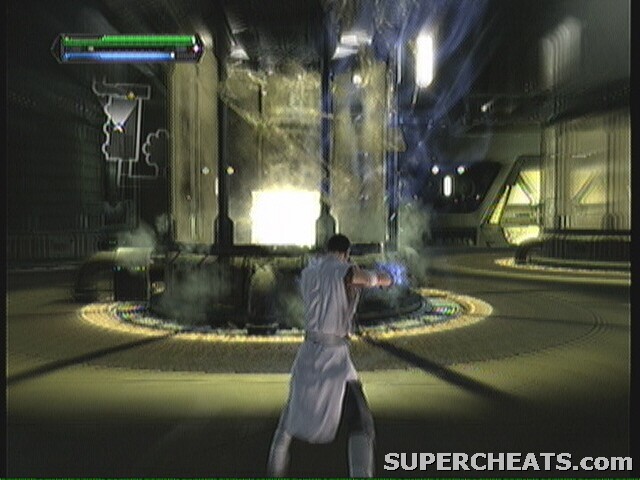
When you level up, you’ll get a flash of light (above) and 1 Force Talent Point, 1 Force Power Point, and 1 Force Combo Point. You can pause your game and go into Force Upgrades to spend these points on new abilities! Your full choices are listed in the Force Upgrades section.
The power of the Force is limitless... until it’s put into a video game, cus that would be kind of cheap. The blue bar under the green bar represents your Force power. When you use the Force, this bar goes down. Once your stop for a second, the bar will recharge automatically. How fast it recharges and how long it takes to start recharging depends on your Force Talents.
If you use too much Force power, the bar will drain down from blue, and start to fill up yellow. You cannot use any power when it is in yellow, but this is just a fail-safe so you can use Force power even if you barely have any blue bar left, so the game doesn’t have to tell you “oops, you’re 1 force point short of being able to use that! Haha!”
Jedi Holocron 
Sith Holocron
Throughout the game, you’ll find two types of ancient Holocrons. These Holocrons were used to store massive amounts of information. This information can make you more powerful.
Jedi Holocrons are collectable, and a side-quest in the game to collect them all (even an achievement for it). They’ll give you either Force Upgrade points, new Lightsaber crystals, new outfits to wear, or just 10000 generic level points.
Sith Holocrons give you a temporary power up like temporary invincibly, unlimited Force power use, or increased damage. They are not counted in any way.
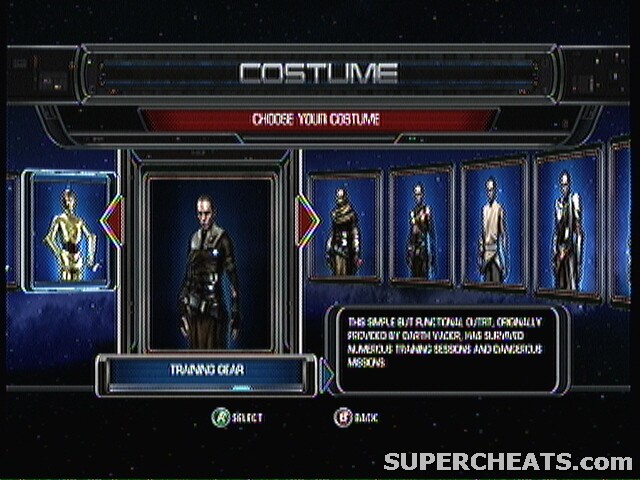
Costumes
Costumes are either unlocked through cheat codes, collection Jedi Holocrons, or reaching a new world.
Let me say this up front: Alternate costumes do NOT give you any special power ups or advantages, nor do they give you any new combos.
Remember that putting on a new costume will set you back at the last past checkpoint. It warns you of this several times, and for a reason. Costumes will only stay unlocked if you SAVE AT A CHECKPOINT after you get them. If you put them on AS SOON as you collect the Holocron, it will reset you back at the last checkpoint, which is, surprise, back BEFORE you picked up the Holocron that gave you the costume. You’ll be able to use it for the rest of the level, but it wont count toward your Holocron count, nor will you keep the costume during the next level.
Force Grip is the most exemplified move in the game, yet also the most complicated. The game will auto-target the nearest object in view, and this is EXTREMELY annoying, but it does a relatively good job of actually picking the thing you want to pick up (key word: not perfectly). Press and hold RT (R2) to pick up that object.
Once you have it in tow, your Force power will not regenerate, and you cannot move. Any large blaster or concussion shot will make you loose your grip.
Use the left joystick to control the Z and X plain, that is, right, left, in, and out. The right joystick controls the Y and X plain, up, down, left, and right.
The hard thing to remember here is how the joysticks are inverted. One is, one isn’t. Kind of. You just have to memorize it, it’s hard to explain.
To throw an object, grip it, and start pushing it toward the object, and, while it is still moving and you’re still holding the joy sticks, release the grip button. It will go hurdling toward what the game thinks you wanted to throw it at. Sometimes it’s right, sometimes it’s wrong, sometimes it really doesn’t matter because a wall is a wall.
As you level up Force Grip, you can pick up multiple objects with LT (L2) then pressing RT (R2) a couple times. This is very hard to do and to get it to pick up what you want it to.
Now for some fireworks. While in the air, you can hit them with other Force powers, provided you’ve unlocked them. Those include Lightning, Push, and Saber Throw (Impale). But remember that while gripping your Force power doesn’t regenerate, so use this sparingly.
After you complete a level, you can go back and replay it through Mission Select. When replaying a level, any Jedi Holocrons you already collected will stay collected, so you don’t have to get them again. Your metagame score doesn’t reset either, which means the metagame is a cumulative score, making that much easier to get. Sadly, bonus objectives must be carried out in one playthrough.
This game seemed a bit rushed. It was full of bugs when it was first released. None of them game-breaking, but they are annoying.
- Default Text Glitch. When this glitch occurs, your Holocrons and bonus objectives are no longer tracked in the pause menu. It normally acknowledges that you picked them up (you get to keep any prize you get from them) but it doesn’t officially track them, meaning you cant get the Holocron Collector Achievement. Some people think this glitch is triggered whenever you first start doing the optional Training Room Modules, and it’s possible. To fix this glitch, you must download an update for the game that patches it.
- Star Destroyer Glitch. This glitch happens randomly on Imperial Raxus Prime when fighting the Star Destroyer. When you line up the Destroyer perfectly as the joy sticks said, the aura around them doest turn green and it doesn’t allow you to pull it down any further. You have to re-load the last checkpoint and hope it doesn’t happen again.
- Wall Detection Glitch. Sometimes, in areas where there are invisible walls, something will hit you while your dashing toward it and propel you even faster, and you can get stuck inside the wall. You’ll have to re-load. It can also happen for intermittent invisible walls like the Destroyer fight on Imperial Raxus Prime.
- Costume Change Glitch. Whenever you get a new costume in a Holocron, DON’T immediately put it on. It will reset you back to the save point BEFORE you got it and it wont actually count that you have it, and you’ll have to re-collect it. Sometimes, however, the Holocron will never re-appear after that, and you’ll actually have to start a new game to get it again.

Objectives:
Find the Jedi Master and eliminate him
Enemies:
Wookiee Berserker, Wookiee Infantry, Stormtroopers
Boss: Rogue Jedi
Holocrons:
None
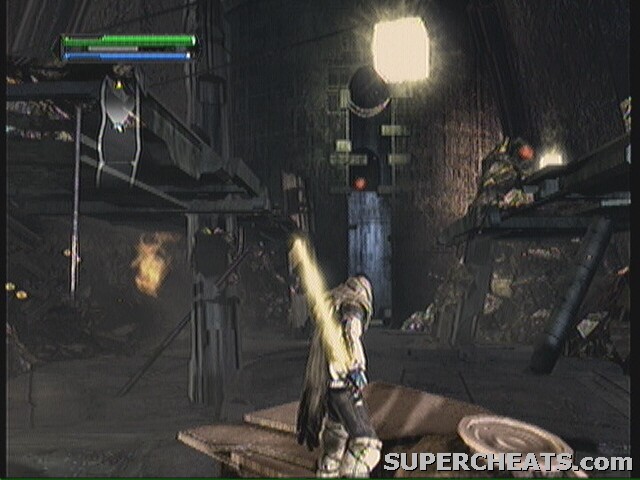
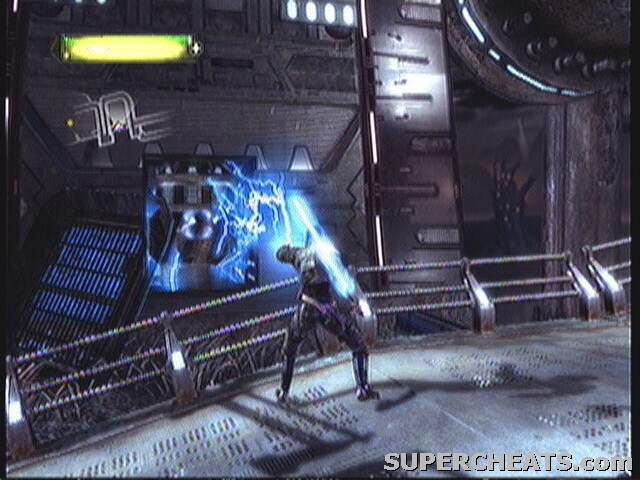
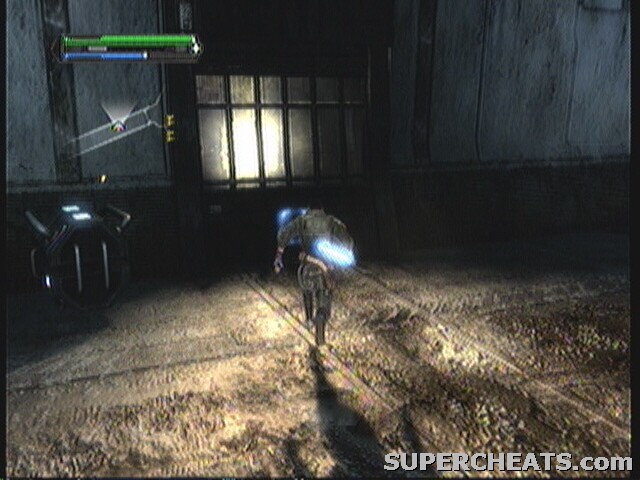
During this one level, you gain control of the Dark Lord of the Sith: Darth Vader. His abilities are far better then the base-level Apprentice you'll be using in a minute, so don't get used to this.
His combos are also a bit different. He cant Dash, cant double-jump, and cant use Lightning, but the Y (Triangle) button is replaced with Force Choke, which is highly effective at close range. He also have both Repel and Saber Throw, abilities you wont have for a while.
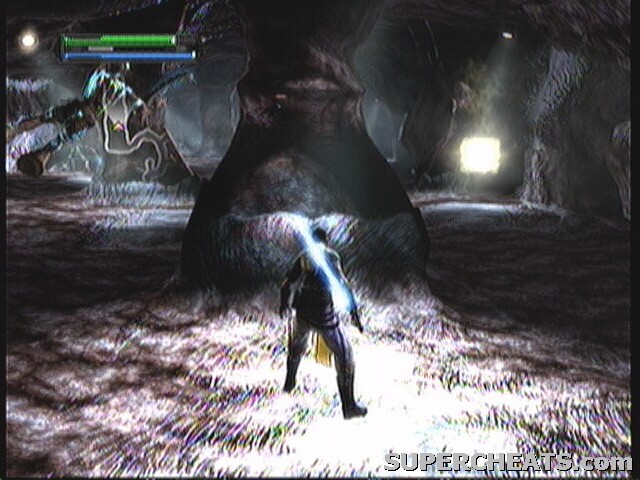
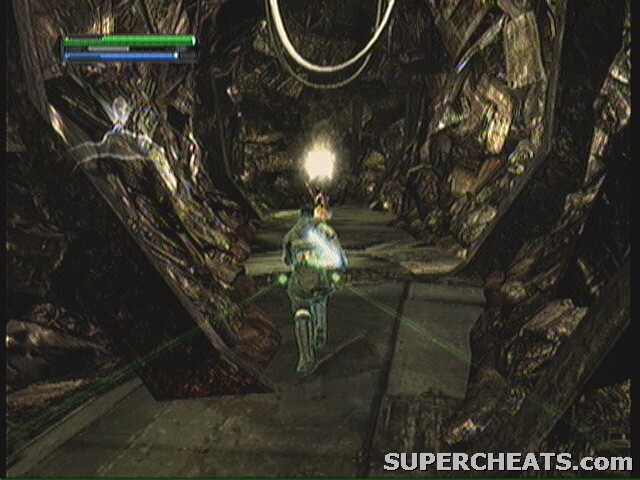
Well, lets get started. There is nothing to collect, so everything is very straight-forward. Walking down the path, watch for Stormtroopers to kill to get your Achievement. Further, there are plenty of rocks and barricades around with which to throw at your opponents.
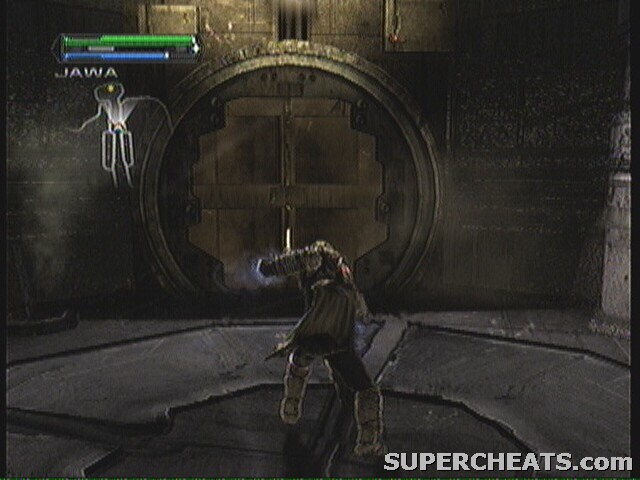
Not far in you'll come to a gate. You have to break this down by charging your Force Push.
Right on the other side is an excellent place to get the Dayshift Manager achievement, as so long as you don't go too far, Stormtroopers spawn endlessly here. Just walk in circles and wait.
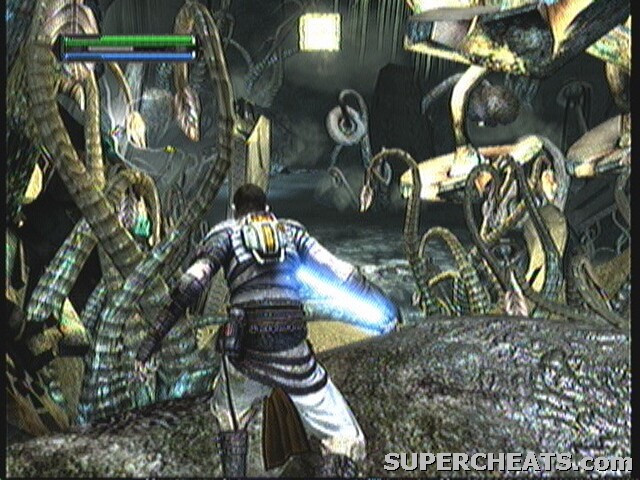
As the path starts to narrow, watch out for Wookiee Berserkers jumping out of the trees. They have a long jump and can seem to come out of nowhere.
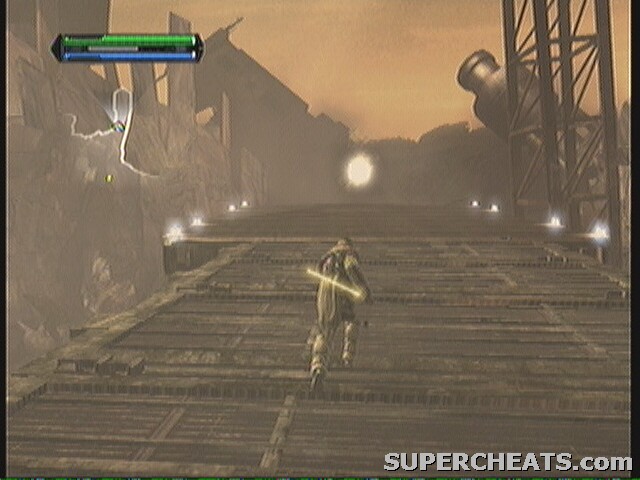
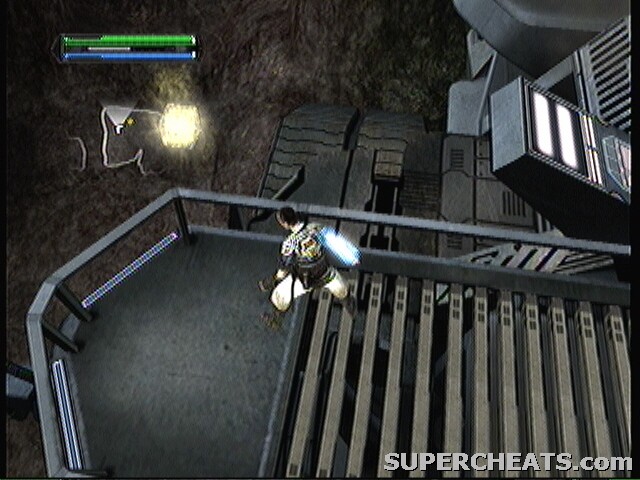
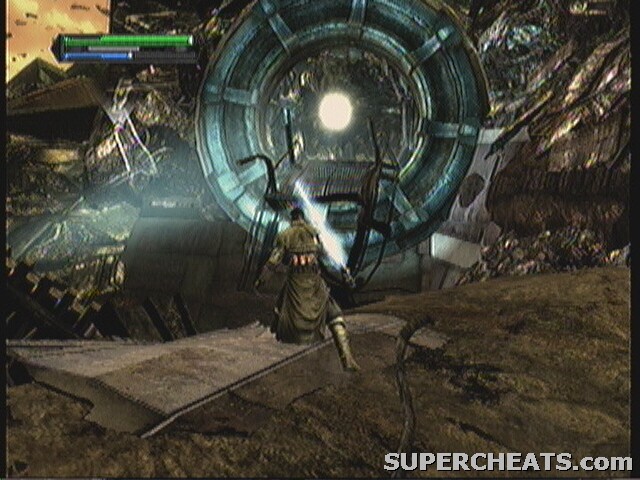
You'll eventually come to a bridge area. The bridge can be torn appear and all but destroyed by Force Push, so try it out! At the end of the bridge, turn and make your way up the ramp. Wookiees will spawn on the high platforms on the left and right and jump down.
At the top is an elevator that takes you to a higher level. It is guarded by two Berserkers.

Walking on it will trigger it to raise up. Be prepared at the top, as the bridge is crawling with Wookiees, but not right off, so don't charge up anything yet.
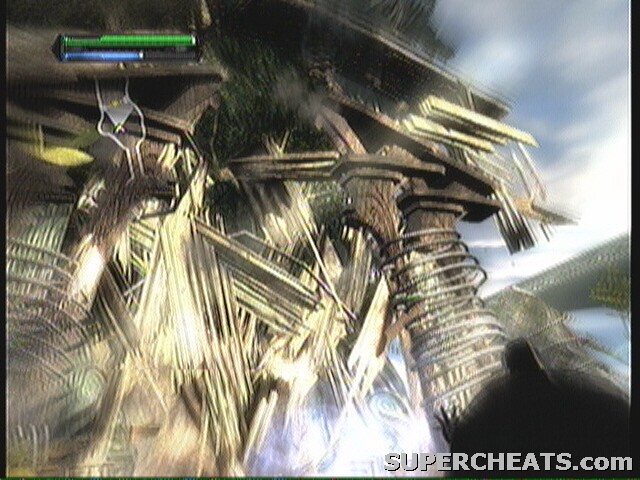
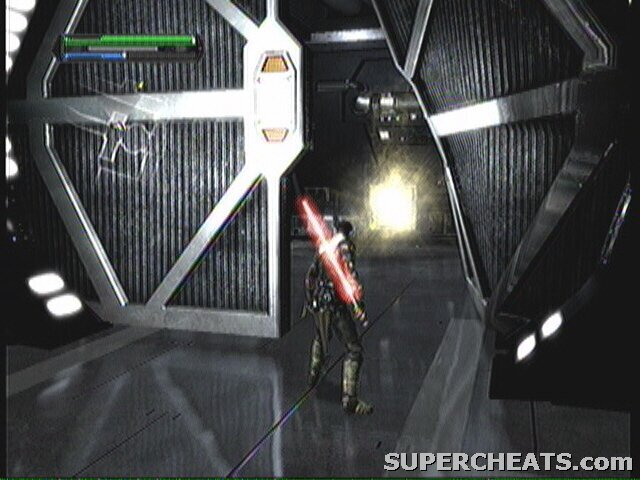
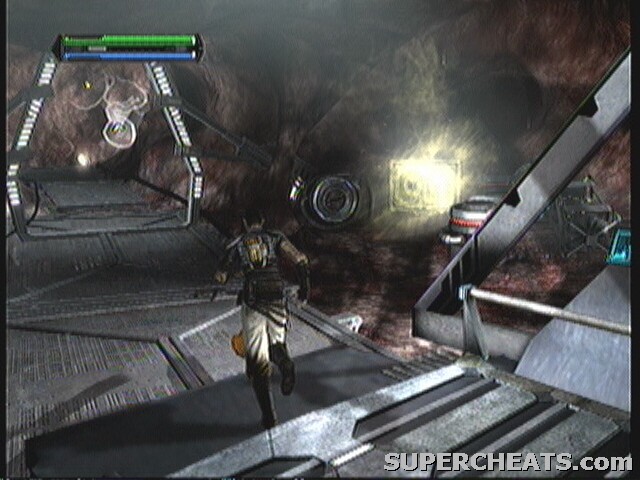
Past the bridge, walk along the tree. The first bridge gets taken out by a Tie Fighter, so you'll have to work around at the second bridge.
Assuming the Wookiees don't jump off the bridges into the pit between, this is a great place to get the Frenzy achievements. Just continually charge and release Force Push as you go to kill countless Wookiees on the two bridges.
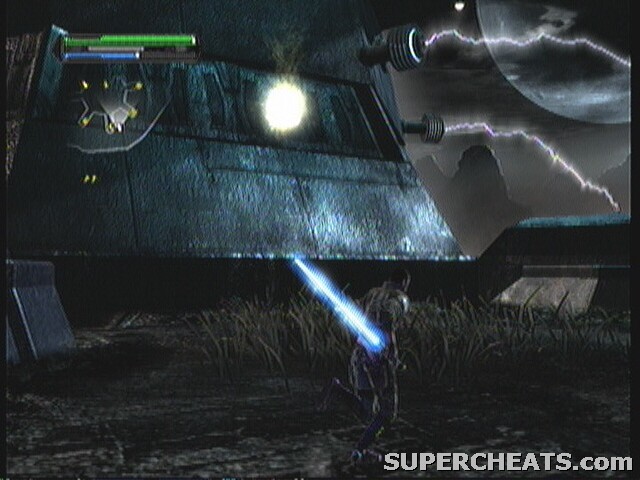
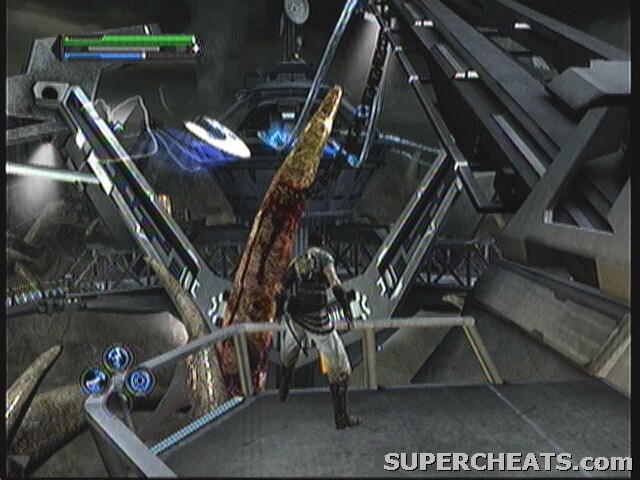
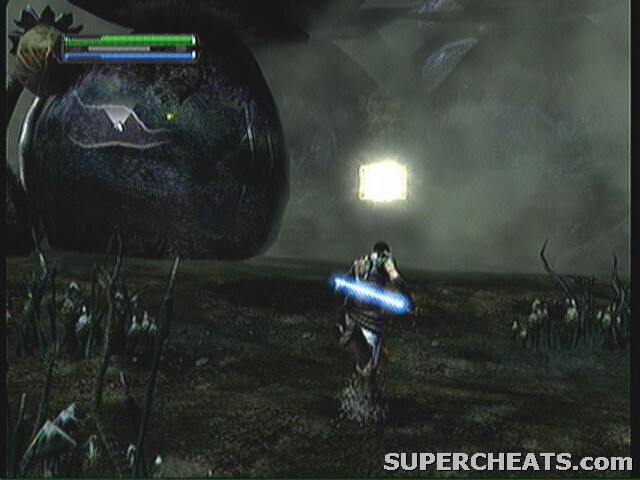
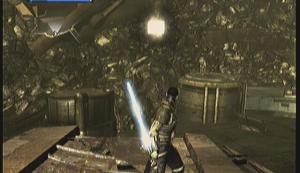
Finally off the bridges and the area opens up, you find the Rogue Jedi.

Force Choke does nothing against him. Push and Repulse however seem to be his weaknesses. You can easily toss him across the area, walk over to him, and get some good stabs in before he gets back up.
He likes to counter with Saber Throw and a Sephiroth-type attack where he brings down a Tie Fighter on top of you. The trick is to stay near him for the most part, as the fighter never lands on him.
Once his health bottoms out, be ready for the Quick-Time Event.
360: X, B, B, B
PS3: [], O, O, O

Tie Fighter Factory
Objectives:
- Find and eliminate General Kota
Bonus Objectives:
- Destroy 5 Tie Fighters
- Attain 90000 Force Points
- Collect 15 Holocrons
Enemies:
Militia Saboteur, Militia Trooper, Militia Elite,
Imperial Stormtrooper, Imperial Officer, AT-CT
Boss: Rahm Kota
--== Hanger Bay ==--
You'll start the level with the Force Grip tutorial. Follow their instructions to complete the training.
Back aboard the Rogue Shadow, you get the details of your target: an old Jedi Master who escaped order 66.
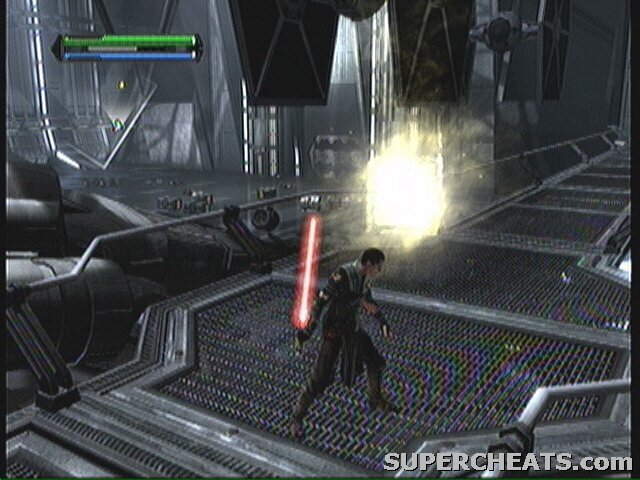
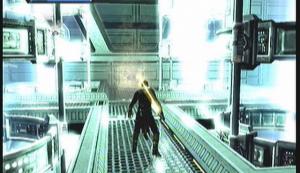
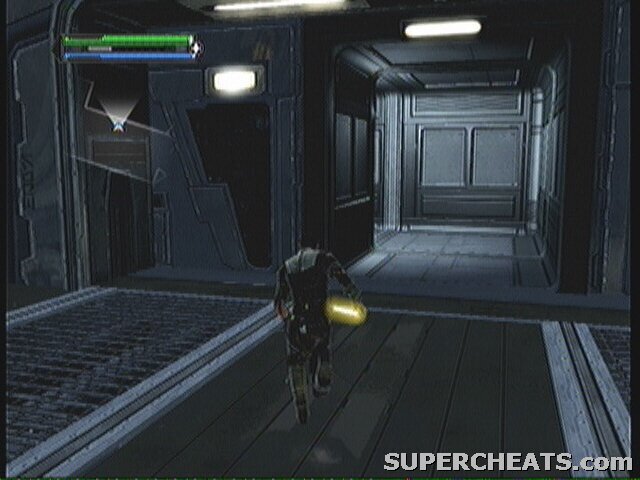
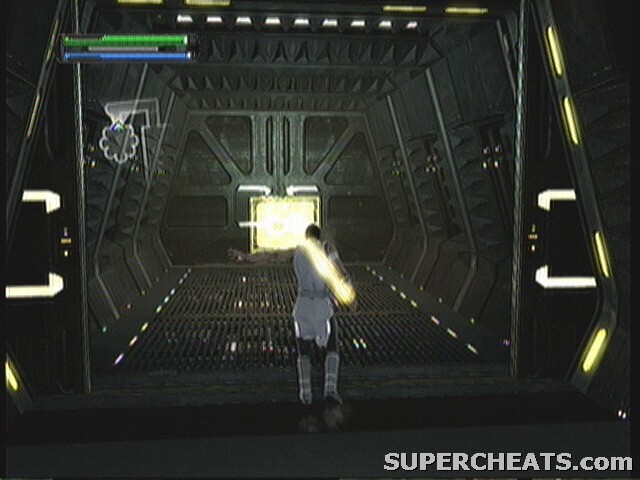
Upon landing at the Factory, you have a brief hallway where you can get accustomed to your current Force powers. You'll notice right off that the Apprentice is vastly different from Vader. When you're ready, head down the long hall and use Push to burst through the door at the end (you'll have to use it a couple times since you cant charge it up).
This is the Hanger Bay. There are Militia Men and Stormtroopers everywhere. Stormtroopers even continuously spawn in the center via a lift. They aren't infinite, but there are a lot of them.
Watch for the E-WEB turrets near the door. They pack a punch, but getting behind them should be a problem.
This is also the best place to get your bonus objective. The Ties on the racks above are easily moved by a Force Grip. Grab on and you can just drop it or toss it at your opponents! The ultimate Tie Bomber!
It shouldn't take long to get 5.
Holocron 1/15, 10000 Force Points
- Once you clear out the remaining enemies, look for the crashed shuttle in the middle of the room. Jump up on it to reach the walkway opposite the side you came in. There should be your first Holocron right in front of you!

Holocron 2/15, Yellow Crystal
- The next one is actually nearby. It's on the catwalk over the center of the room. You have to get up on the tail wing of shuttle, and use that to get to the catwalk.
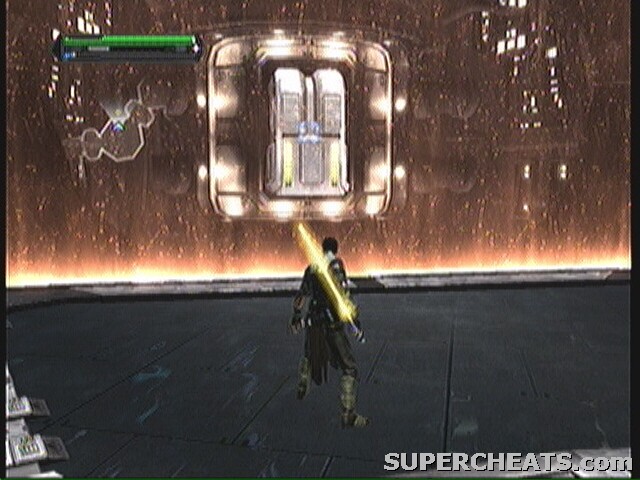
With both of those gone, the only thing left to do is open the door. Grab it with Grip and move it the direction of the arrow to open the two doors.
--== Final Assembly Area ==--
Down the hallway, and they slam the door in your face. Burst through with Push and be ready to fight the six Militia on the other side.
Holocron 3/25, 10000 Force Points
- As you approach the next locked door, there is a Holocron in a locked door on the right hand side.
Break down the next door and continue. As soon as you get through, pick up an explosive barrel and throw it down the hall. Just as you do, several Militia men will come around the corner and run into it. At the end of the hall, look for a group of Stormtroopers on the left side, while the path continues right.
Use your new charged Force Push (well, that's what I bought anyway) to break down the door. You're now getting inside the factory.
This area is great for dropping or pushing people off the edge and getting the Long Way Down bonus. You don't have time to admire that too much, as there is a Militia group coming at you. They're a long way off, so pick up a barrel or two and throw it at them. You should be able to detonate them all before they get remotely close.
Also on just this walkway here, you can grab the side rail things and bend them out, causing a Tie Fighter to crash into them.
Fun stuff. It only seems to work sometimes though :/
Well continue down the walkway and across the gap to the center. Take out the wave of Militia and Stormtroopers, then enter the door on the left, near where the Stormtroopers were.
Inside the small room you'll face Stormtroopers to the left and ahead, and a few Militia on the right that come up the lift.

Holocron 4/15, Talent Sphere
- Take them out and continue through the room and out the other side. There is a Holocron behind some boxes. Go back into the control room and step on the lift the Militia men took up.
Right off the lift you're attacked by a couple E-WEB turrets. Unfortunately they chose explosives as a barricade.

Holocron 5/15, Combo Sphere
- Break through the right hand door and look for some more boxes on the left. Therein lies another Holocron. Back in the lower control room and break down the other door.
Another walkway and more people to throw off. At the end, you may remember an AT-ST being here in the demo, and there was, but now there's just some Stormtroopers. Throw them off and continue across the gap on the left, toward the Militia.

Holocron 6/15, 10000 Force Points
- Along this walkway, Militia spawn from three doors in the wall. You'll usually see them coming. But, in the second doorway, there is another Holocron.
--== Control Bridge ==--
At the end, enter the door on the right. Now you're in a REAL control room of some kind. Watch the two Militia Troopers right inside the doorway on either side. They like to ambush you. During your fight in this room, Stormtroopers come in behind you and start randomly firing. This is all made much easier by the Sith Holocron in the center of the computers.
As soon as you enter the next hall, a cutscene starts marking the appearance of the Militia Elite. They use Rotary Cannons, and can eat your health away pretty fast. Luckily they chose a poor spot to attack. Pick up an explosive barrel and throw it to knock them down, then finish up with your Lightsaber. As you approach the corner, though, a door opens with another Elite. Pick him up and throw him behind you. He should hit the window and suck any remaining forces out into space.
Entering the next large room, you can hear Ackbar saying “It's a Trap!” (figuratively speaking). The alarm sounds, and you get rushed by many Militia Men of all types. However, they do make it easy for you by putting up a laser shield that wont really hurt you, but kills them in one touch. Utilize Push and Grip to it's fullest!
Shield Module
- Once they are all down, look for the above module to pull out of the wall. This lowers the shield. Took me forever to find the first time I played the game!
The next room looks to be a little side security room. You can see the camera images on the wall. I like to throw the Militia here into the windows and watching everything get sucked out. Moving on.
This area is like before, but no force field. There is however a Sith Holocron in the corner that may help. The main way is blocked, so you'll have to take another corridor. Stormtroops wait at the end, so get that Push charged up as you come around the corner.
To get across the gap, you must pull the red thing out of the wall with Grip, jump on it, then grip the folding thing ahead and pull it down. Use that to get out. Drop down the vent shaft to the other side of the wreckage.
--== Wing Assembly ==--
Breaking through the next door takes a lot of effort, and rightly so, there is an AT-CT on the other side. CTs are probably the least deadly of the AT series. The only thing they can do is pick up boxes and throw them at you. For now, it is distracted by the Militia around it, as are the Militia it. Try to keep it that way for now. Chuck boxes at it for as long as you can, and get it's health down really low. You usually cant do it all with boxes, at which point jump over to it and slash it's head in mid-air.
Once it's health is low, you can start a Quick Time Event.
360: X, A, B
PS3: [], X, O
After he comes crashing down, kill off the remaining Militia Elite. Use the Tie Fighter wing assembly lift to reach the upper level. Jump off at the first scaffolding and destroy the E-WEB turrets and Militia up here (the scaffolding itself is very destructible, so be careful), then jump back down.
Holocron 7/15, 10000 Force Points

Holocron 8/15, 10000 Force Points
- Ride the lift back up, but this time choose the far right side (perspective from the entrance). Ride it up past the first set of scaffolding to the second set. There are TWO Holocrons up here! One on the scaffolding and one on top of the control window. Jump down one level onto the lower scaffolding and enter the control window.
Around the corner are more enemies that insist on using explosives for cover. This is also the first Officer you see, not that it matters. Down the hall and around the corner and you're in another wing assembly.
DO NOT use Force Powers in this area. There is a very delicate set of Holocrons to get, and the wrong power in the wrong place will mess it up. This time, the area is flooded with Imperials and Militia that can put their differences aside to gang up on you. Isn't that nice? Work your way around the room, securing the path in front of you before moving on.
Holocron 9/15, 10000 Force Points
Holocron 10/15, Rubat Crystal
- The Holocrons in this room are up on the broken wing assembly lift. You have to use Grip to grab one of the fallen wings and carefully lift it straight up and slide it back into place (above). This will allow you to use it as a step to get up higher and reach the Holocron at the top, followed by the Holocron on the scaffolding.
Well with that done, drop down and enter the blinking doorway. This hall is PACKED with low level enemies. You can go bowling here if you want. The important thing is to clear them all, and wait for the Militia Elite to come down the lift, then seal their lift and ride it up.
--== Cockpit Assembly ==--
Amazingly there are no enemies in this short hall. At the end, however, is the Cockpit assembly, and it is crawling with enemies of ALL types you've seen so far. Watch for the ones on the side platforms; they like to camp E-WEBs up there. The Tie Cockpits can be taken off their rails and thrown for a massive explosion, you can also grab and rotate the lasers, but that rarely does anything.
Holocron 11/15, 10000 Force Points
- Along the way in, in this first area there is a Holocron in a hidden dead-end passage along the left wall, by the second laser assembly.
Anyway, continue to the end of the section to be blocked by a laser field again and be ambushed by a Militia Elite, Troopers, and Saboteur. They do show you where to go next, however: up the ramp where they came from.
Holocron 12/15, 10000 Force Points

Holocron 13/15, 10000 Force Points
- The generator is behind the orange field, cant miss it. But first you'll have to fight through the Militia guards. There are also two Holocrons here, one inside the Generators on the left, careful getting to it. The other is in the hall where the Militia spawned on the right side.
With that done, pull out the generator and continue into the next section of the assembly. It's exactly like before.

Holocron 14/15, 10000 Force Points

Holocron 15/15, 10000 Force Points
- The last two Holocrons are in this area as well. The first is hidden just like #11 only on the right side of the room near the final laser assembly. The other is at the end of the room, to the right of the doorway, by the place where the Cockpits are coming from.
Through the door at the end. Prepare for the boss fight (I wouldn't spend too many Force Spheres, you'll need them for Lightning, and would use Talent Spheres on Fortitude or Force Focus) and enter the lift!

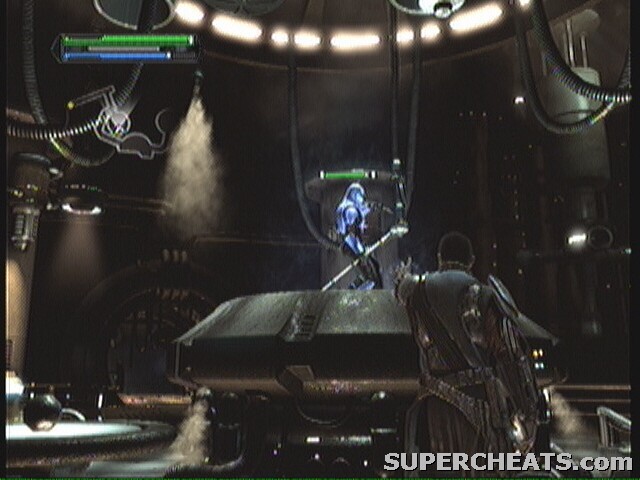
--== Boss: Rahm Kota ==--
Kota isn't very resistant to the Force, for the most part. He will block Grip completely, and can block Push sometimes, but rarely, especially if you mix it in with combos.
His attacks consist of basic Lightsaber swings mostly, but a couple can be pretty tough, like when he flies up and drops down in the center of the room, creating a shockwave that's hard to even jump over. The other is when he picks up a lot of debris around the area and floats it around him. He'll throw it at you in chucks, and the only way to dodge is either good dash timing or hiding behind something.
He is vulnerable after every special attack he does, so don't waist that time. Keep him off balance with Force Push, and watch for when he forms a Force bubble around himself, and use Push to pop it.
Near the end of the fight, the station will start the feel the burn of reentry, and the floor will become damaging to walk on. You must seek higher ground at that point.
The ending QTE is:
360: X, X, A, B
PS3: [], [], X, O
Raxus Prime
Objectives:
Seek out and destroy Kazdan Paratus.
Bonus Objectives:
- Destroy 10 scavenger skiffs
- Attain 1500000 Force Points
- Collect 15 Holocrons
Enemies:
Rodian Ripper, Rodian Heavy Defender, Jawa, Scrap Guardian, Scrap Drone, Junk Titan
Boss: Kazdan Paratus
--== Sludge Pool ==--
Welcome to Raxus Prime, the galaxies garbage bin. You have a new Force power: Force Lightning! Take a second to upgrade if you can.
Drop off the ledge and shock the glowing Hyperdrive to make a crack in the wall across the sludge. Hang left. You cant cross the gap as is, you'll have to use Grip arbitrarily facing the gab to grab hold of a piston under the sludge. Pull it up and jump to the other side quick to shock the landing skiff before it flies off.
Holocron 1/15, 10000 Force Points
- Now jump back down to the piston and grab the Holocron under the platform. Jump back up to the platform and continue down. If you're lucky, you'll catch another Skiff at the end. Turn right, facing the sludge again, and lift up another piston. This one doesn't stay up, so you'll have to jump across quickly.
Once on the stable, broken piston, you'll have to get through those wires sticking out of the sludge. You can sometimes push them over with Push, but I normally just jump through them. On the other side, another skiff should fly down. Shock it and jump up the ledge to level ground.
You'll find the second Hyperdrive here. Zap it to open the hole completely. Jump down to the hole and wait for the final skiff in this area to follow you down. Shock it for your next one, and go in the hole.
--== Refinery ==--
Holocron 2/15, Power Sphere
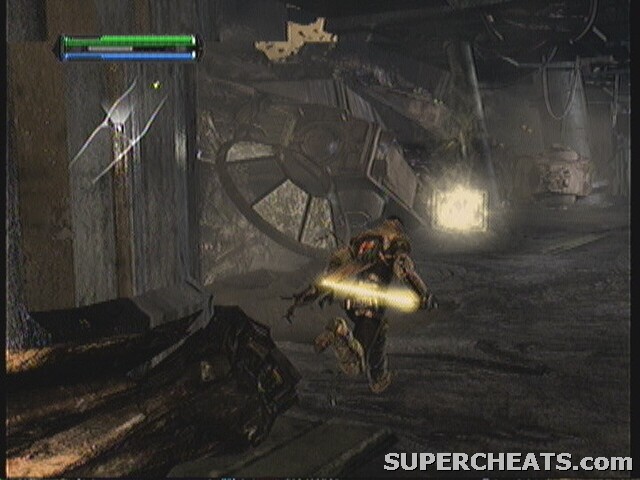
- There are a lot of Jawas in this area, as well as some Rodians up near the top. It's hard to explain this area, so I just made a video. Basically, you want to work your way up to the spinning thing, jump on it, and ride it around to a higher ledge, and use that to reach the Holocron, then jump out of the hole.
--== Acid Rain ==--
This next valley area is crawling with Rodians. There's not much I can do about that, keep your eye out for them, especially on higher ledges on the left and right.
When you reach the bend, there will be acid rain coming down over the path. To get through it, grab the glowing metal on the sides and bend it down till you automatically let go.

Holocron 3/15, 10000 Force Points
- Just past the rain, as the area opens up, there is a Holocron on the left side.
--== Blockade Runner ==--
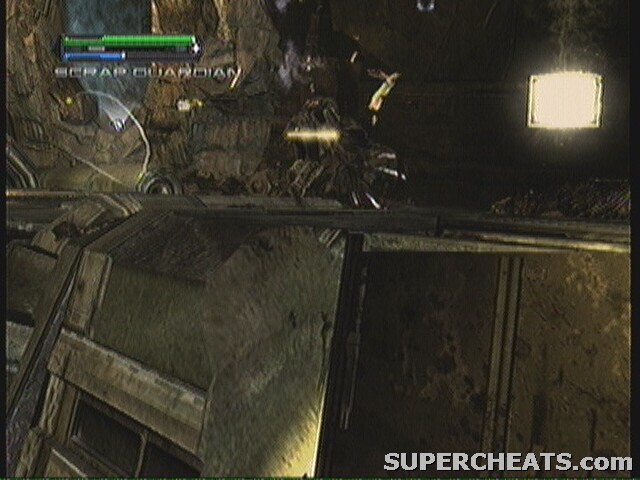
In this area, you'll find your first Force powered robots. They are HIGHLY susceptible to Lightning. Take out as many of the Rodians as you can, but leave a few Guardians, for as long as there is a Guardian in the area, skiffs will bring in more Rodians via the cliff on the far side. There is a limit, but it's like 3 or 4, which is almost enough for you get your Bonus Objective.
Holocron 4/15, Compressed Red Crystal
- When you're done, look for a cracked escape pod on the side of the Blockade Runner near the cliff. Use Push to break in the wall and grab the Holocron on the other side.
At the back of the area, opposite the cliff, there is a glowing Star Destroyer hull. Use Grip to lift it up till it locks in place. Jump on top and look across at the Blockade Runner. The gun turret is glowing blue. Jump and shock it to blow it out, then jump back up and through the hole.
Inside the Runner, take out the Rodians and look for a hole opposite where you came in. Drop down to enter the other side. More Rodians and Guardians are fighting in this area, which gives you a couple more chances to get some skiffs at the cliffs edge.
Holocron 5/15, 10000 Force Points
- You have to go to the cliff edge anyway, as there's a Holocron hidden in plain sight.
Once you have the Holocron, turn about and go to the right side of the Blockade Runner. There is a ramp that leads into the back of an escape pod. Be sure to knock first. The hall is cramped and flooded with Jawas, perfect for Push or Lightning.
Holocron 6/15, 10000 Force Points
- When you get to the end, you're suppose to jump up to where the Jawa is, but there is a crack in the wall beneath that hides a Holocron.
Keep going till you reach a load point and end up outside the ship.
--== Jedi and Bridges ==--
The have several mounted E-WEB blasters in this area. The best thing you can do is pick up random things and throw them across the bridge. With any luck they should home in and hit the turret.
Once on the other side of the makeshift bridge, you'll be attacked by several waves of Rodians. Use Grip on the large doors in the back and pull them toward you to get through.
--== Base Camp ==--
This is their home base. As such, it is swarming with Rodians and Jawas. Keep focused and don't get lost.
Holocron 7/15, Gold Crystal
- As soon as you enter head left (clockwise) to the cliffs and look for a Holocron on the landing dock. Turn about and face the tower in the center of the area.

Holocron 8/15, Combo Sphere
- Cut straight across till you hit the wall on the other side. There should be a small hole on the right where the junk is flying through. By that hole is a Holocron behind the ramp.

Elevator
- Going back counterclockwise toward the force field, you should see an elevator on the right.
--== Junk Sorting ==--
Fight past the Rodians to get out of the little tunnel. If you still need skiffs, rush to the cliff at the end of the area and wait. One should come soon.

Holocron 9/15, Talent Sphere
- From there, you can drop down under the platform and grab a Holocron. Back up on the platform, grab hold of the glowing box lever thing and push/pull it along the rail to shift the garbage flow. This will blow out the force field. It also trigger the LAST skiff to fly in behind you.

Holocron 10/15, Compressed Yellow Crystal
- As you head back to the tunnel to take the elevator up, look up and to the left. High on a ledge in the corner is the next Holocron.
--== Base Camp ==--
Back here, most of the enemies have respawned since last time. Fight them off while working counterclockwise to where the force field used to be. Continue down the valley till it starts to open up.
--== Junk Canyon ==--
You are greeted to this area by two Junk Scavengers. These little drones will suck your Force power right out of you. Well if they want it so much, why don't you give them some? Make it a shocking experience.
As you enter the large area, stay on the left hand ledge till you reach the glowing Hyperdrive unit. Shock it to start a cutscene. When you start to walk back away, a Junk Titan appears in the center.
If you have Force Lighting on level 2, you can easily spam that to finish this fight fast. If not, you'll have to resort to throwing things at it while dodging it's hammer and shockwave attacks. The ending QTE varies.
Holocron 11/15, 10000 Force Points
- With that out of the way, jump up on the ledge opposite the one you were on. There is a Holocron right in front of you. Climb up the ledges, making your way to the metal chunk that was burnt by the engine. Grip it and start pulling it in all directions till a cutscene brings it in for a ten-point landing.
Jump down onto it. Follow it into the next area. This place has several Guardians in it, and as you know they can warp in near you and use their spear to push you around. This is very deadly in this area. Use lightning for the greatest effect and keep your wits about you. If you see one, try to kill it from a distance.

Metal
- Once you reach the a dead end cliff, you'll have to pull down a piece of metal from the wall using Grip. It wont stay down permanently, so you'll have to jump across quickly.
Holocron 12/15, Sith Robes
- On the other side, look for some metal bars on the left. Bend them down with Push, then use Grip on the metal petals to make pedestals with which to reach the Holocron. Having Dashing Blast isn't required, but it does help. DO NOT PUT THE COSTUME ON TILL THE NEXT SAVE POINT! See costume section for details.
With that done, you can get back across and continue down the path, fighting Guardians along the way.
--== Junk Palace ==--
When the area opens up again, another Junk Titan will form. Use the same strategy you did last time. Push on the large doors behind it to enter the next area.
Holocron 13/15, 10000 Force Points
Holocron 14/15, Firkrann Power Crystal

Holocron 15/15, 10000 Force Points
- The first Holocron is on the left, cant miss it. The second is floating over the center. Grab an AT-ST head and use it to reach the Holocron. While you're at it, use it to reach the ledge on the right side. There's a Holocron at the end.
The boss fight is ahead. When you're ready, enter the lift at the end.

--== Boss: Kazdan Paratus ==--
Paratus rarely uses Force powers, instead opting for is fast and powerful Lightsaber style. To get a hit in, you'll have to knock him off his feet or stun him. Lightning works well by just using it, as does it infusing it in your Lightsaber. Push will work sometimes, but is better in a combo.
Once his health goes down a bit, he'll jump out of the room and latch onto a pillar. He'll then summon a Junk Titan to the middle of the room. You don't have much room to fight, so I'd quickly shock it to death. The good thing about this is Titans often give you enough health to fully heal up.
Paratus, sill outside the room, will then start throwing things at you. The only way to dodge this is pretty much jumping around and hoping they don't hit.
He'll repeat this a few times before you get to start the QTE:
360: X, B, X, Y, A
PS3: [], O, [], Triangle, X

Felucia
Objectives:
Hunt down and destroy Shaak Ti
Bonus Objectives:
- Destroy 4 Rancors
- Attain 250000 Force Points
- Collect 15 Holocrons
Enemies:
Felucian Warrior, Felucian Shaman, Felucian Chieftain, Felucian Slug, Yerdua Poison Spitter, Rancor
Boss: Shaak Ti
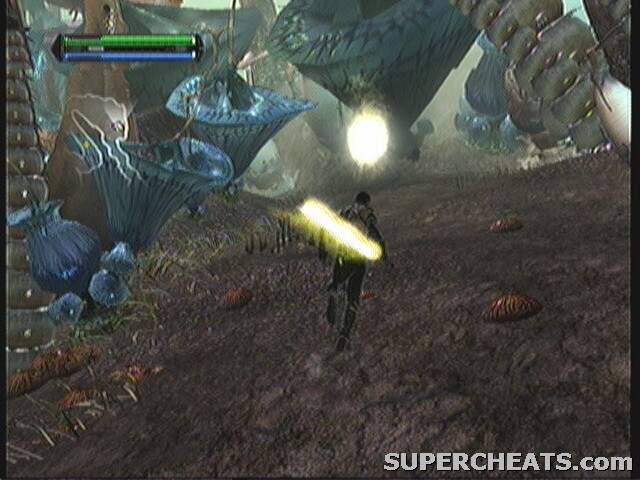
--== Landing Site ==--
Start out with a new Force power, Repulse. It will come in handy here, as the Warriors like to swarm you. You'll also make much use of Lightning here, so don't forget about that. Warriors are most sustainable to Push and Repulse. You'll have to use Push twice to break through their shield and send them flying.
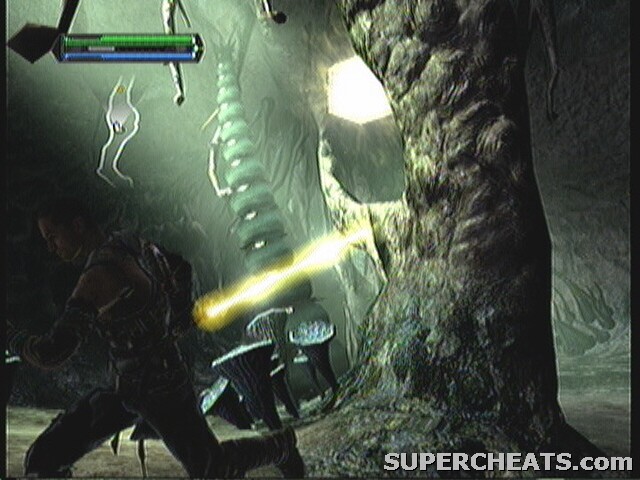
Walk down the platforms. A cutscene starts with more Warriors coming down a large tree. You'll soon be overrun by them if you don't try to take them one at a time.
Holocron 1/15, 10000 Force Points
- During (or after) your battle, veer to the right side of the area to find a Holocron on a mushroom. Work your way into the cave ahead.
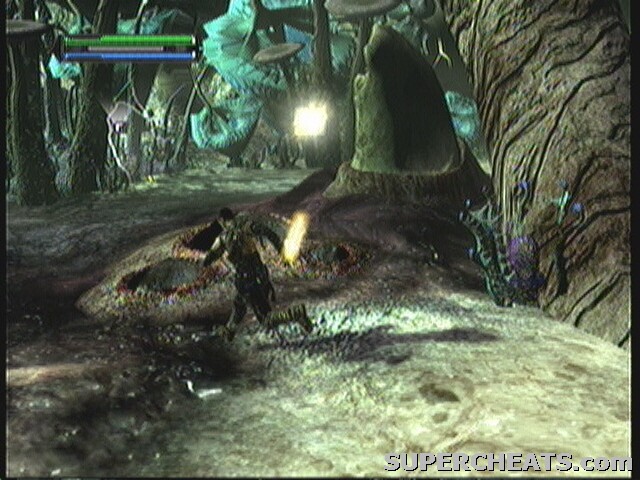
--== Cave ==--
As soon as you enter, take note of where the 3 Holocrons are in the cutscene. In this area, Warriors spawn almost infinitely, there are Slugs, and Yerdua Plants. If things get to be too much, use Repulse and run to a corner to regroup.

Holocron 2/15, 10000 Force Points
- Right as you enter, drop off the ledge. The first Holocron is on the lowest platform.

Bridge
- Use a mushroom to get back on the first level, and find a bridge that leads up to a higher level.

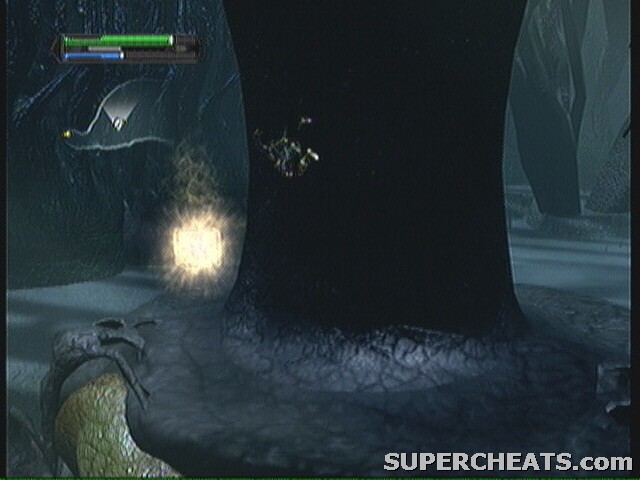
Holocron 3/15, 10000 Force Points
- From the top of the bridge, go all the way counterclockwise till you reach the Holocron. Backtrack to the bridge you past that had the Sith Holocron on it (you can see it above). Jump on it and follow it up.

Holocron 4/15, 10000 Force Points
- At the top, jump on the ledge on the right and continue clockwise till you find another short bridge. From the bridge, jump to the Holocron. Jump back to the bridge and follow it all the way up this time.
Holocron 5/15, Unstable Red Crystal
- Turn left and go counterclockwise through the Sith Holocron. Keep going till you see a platform off on the left. Jump to it, then the one above it, ect. till you reach the Holocron. Jump back down to the platform and keep going counterclockwise till you find the exit.
--== Forest Overworld ==--
Back in the daylight, you're now attacked by Shaman. These red Felucians can empower other Felucians and make them practically invincible. You must hunt down the Shaman first to get rid of the red glow around the others in order to kill them. Shaman can teleport if you get too close, so you might want to use Dashing Blast or at least Grip to catch them off guard.
Holocron 6/15, 10000 Force Points
- Regardless, head right out of the tunnel, toward the first Shaman you see. Around behind the trees behind him is a Holocron. Head back into the center of the area.

Holocron 7/15, 10000 Force Points
- You will face at least two more Shaman in this area. Watch for the bubbles on the ground, as they explode when touched. During the fighting, look for a glowing Sarlacc tooth. Pick it up to reveal a Holocron under it.

Holocron 8/15, Compressed Gold Crystal
- Near the entrance to the next cavern, backtrack while following the wall. You'll find a passage that isn't on the map. Follow it to the back to find a Holocron.
Go back out and into the tunnel where you yellow arrow indicates.
--== Tunnel ==--
This is not a very big area, but that only helps the Warriors surround you. Use Repulse when necessary and watch your back.
Holocron 9/15, Combo Sphere
- About halfway through, when the area opens, look for a Holocron in the center, over some brush. Continue out the other side of the tunnel.
--== Hunting Grounds ==--
You apparently came at a bad time. There are some Felucians fighting on the bridge. Your focus should go on the Shaman first, then the Chieftain. While taking out the Chieftain, the Warriors should fall.
When you come to the open area, get ready. A Rancor will come out of the brush ahead. You'll also be swarmed with Warriors, which I'd use to supplement my health while fighting the Rancor.

Holocron 10/15, 10000 Force Points
- Before, during, or after the fight, there is a Holocron in the side corner of the area, right in the open.
This area doesn't have much to throw at the Rancor, at least noting big. You're probably going to have to run around jumping up and Lightning him when you get a chance. You can use your Lightsaber, but it can get painful. I would also make use of the Damage Increase Sith Holocron in the center. In the end, the QTE finishes him with Lightning anyway.
He did carve a nice path for you through the weeds. The next open area has a Shaman at the end, so you'll have to dash past the weeds to reach him before getting overrun by Warriors.
--== Tunnel 2 ==--

Holocron 11/15, 10000 Force Points
- This is exactly the same as last time. Watch your back, and wait for the Holocron at the midpoint, in the center of the open area.
--== Rancor Training Grounds ==--

Holocron 12/15, 10000 Force Points
- Right as you enter the area, jump to the platform on the right side to get the next Holocron.

Holocron 13/15, Talent Sphere
- From the last one, you can see the next on the platform past it.
Fall down. I'd probably take care of some of the Felucians first, particularly the Rancors if you can. The purple ones are larger, and have more HP. It'll take longer to weaken them, and since you're fighting more the one things can get hard. Worst comes to worse, you can usually separate one from the pack, lure it over to a platform, and shock it from the safety of the platform. If things really get too much, rush around using Repulse to take out the Felucians first, and save the Rancors for last.
Oh, and when you near the back of the area, there is a Shaman lurking about.
Holocron 14/15, Power Sphere
- On the left side of the area, opposite the other two, is a Holocron up on a ledge.
Holocron 15/15, 10000 Force Points
- The last Holocron is at the back of the area, behind the last pillar-tree thing. It's hard to miss from a distance, but when you get close you might lose track.
With all the Holocrons collected and the Rancors defeated, continue out of the area, to the boss fight.
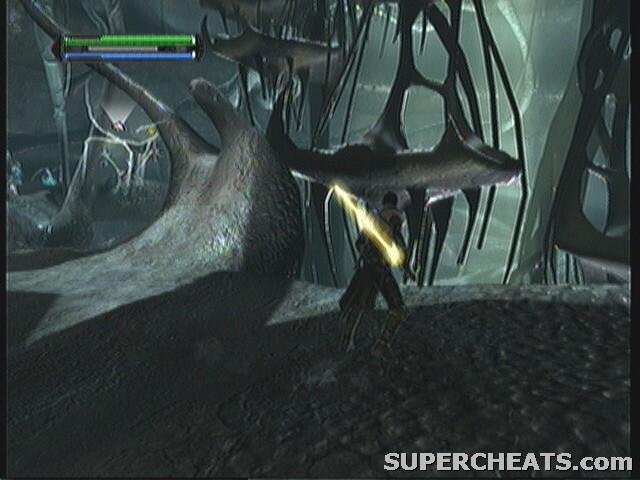
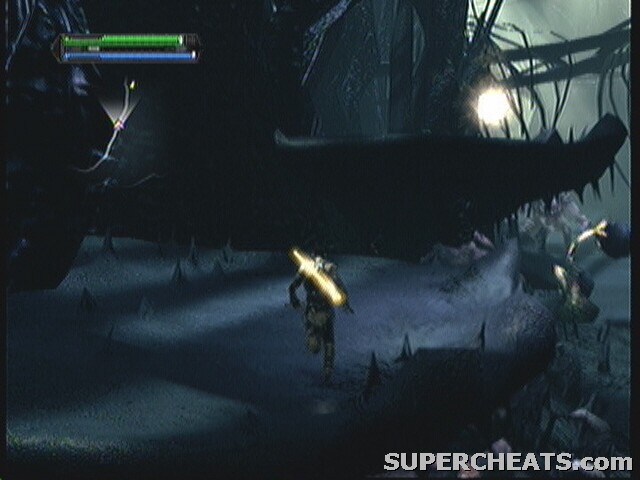
--== Abyss ==--

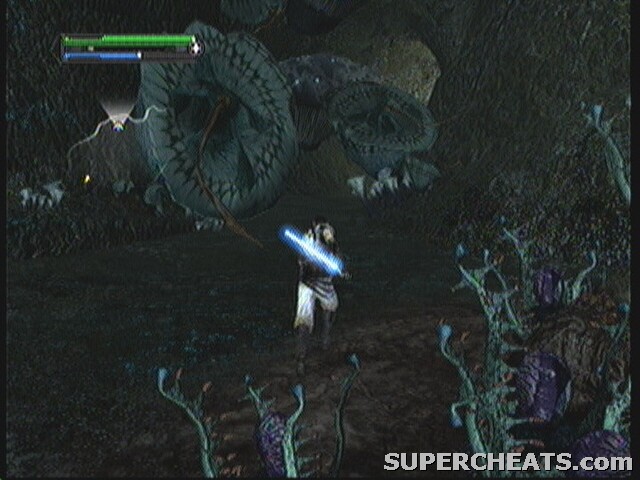
--== Boss: Shaak Ti ==--
Shaak Ti relies on the terrain more then anything. The camera angle is weird, and there are explosive bubbles everywhere. Her attacks really leave much to be desired, comparatively. She even has really weak defense against Force powers, so much so that you can even pick her up with Grip and throw her! She has a particular weakness against the Saber Slam (lighting-infused strike) and Repulse, however. She also likes to dash around the field and sometimes uses Push at the end, so try to keep up.
Her main “attack” seems to be turning invincible and summoning Warriors from below. You wont really be able to hurt her till after you kill the Warriors.
That's just part 1 though. The second part starts after she jumps off the cliff.
This battle plays out almost exactly like the first part, except the area is smaller and Shaak Ti will now call on the Sarlacc to crush you with it's tentacles, and attack that's easily dodged by dashing at the right time (stand under the center one, and dash to the side when it starts coming down).
The QTE finally ends the fight.
360: X, X, X, A, A, B, Y
PS3: [], [], [], X, X, O, Triangle
The Empirical
Objectives:
Escape the ISS Empirical
Bonus Objectives:
- Destroy all 6 escape pods
- Attain 150000 Force Points
- Collect 5 Holocrons
Enemies:
Imperial Stormtrooper, Imperial Officer, Imperial EVO Trooper, Imperial Interrogation Droid, Stormtrooper Commander, Shadow Trooper, Imperial Purge Trooper
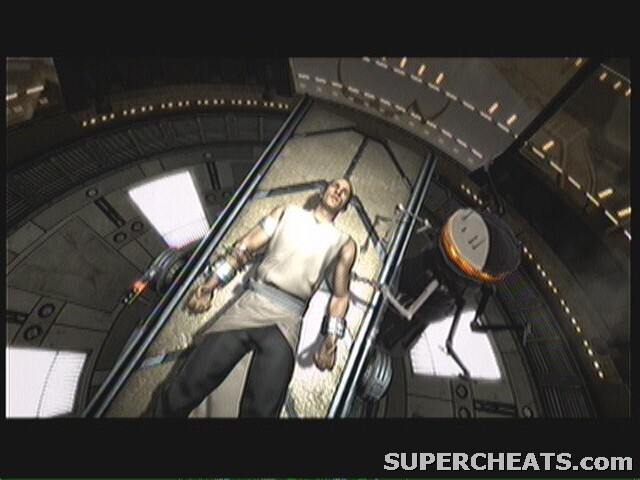
--== Medical Room ==--
Kind of sucks being betrayed by your master. But come on, don't tell me you didn't see it coming.

Piston
- Well, break down the chamber with a Push or Repulse. The room will start to fill with gas. Look for a piston in one of the alcoves along that wall that you can grip. Pull it up till it stops to release the gas from the room.
The door will unlock and allow you out into the hall.
--== Hallway 1 ==--
Holocron 1/5, Blue Crystal
- Right between the two doors as you exit is the first Holocron. They do this to ENSURE that you have the Blue Crystal before the next level. Lots of Stormtroopers, so few windows. Get creative while walking down the hall.
--== Research Room ==--
Follow the ledge around to take out the Officer and Troopers in the room, then jump off. Watch out for the Interrogation Droids, as they come out of nowhere and are hard to hit with most attacks. The EVO Troopers don't have shields at this point, so you don't have to worry about them so much now.

Holocron 2/5, Combo Sphere
- Back under the entrance door is a lower door. The room contains the second Holocron.
Holocron 3/5, Talent Sphere
- The next is inside one of the specimen tanks. Look for it on the left side. Break the glass with Push.
The door to the next area requires quite a Push to get started.
--== Hall 2 ==--
This corridor is again filled with Stromtroopers.
--== Escape Pod Bay ==--
Before you do anything in this room, hunt down anyone that has a shield up with a blue shoulder. These are the Commanders, and they'll call in Shadow Troopers if you don't take them out fast. They also have a type of electro gun that paralyzes you, it gets very annoying. You have to use standard attacks to kill them.

Holocron 4/5, Power Sphere
- Once they are taken care of, look for a Holocron in the back of the room under the last escape pod. For your Bonus Objective, use Lightning on all the escape pods in this room. They'll rocket forward and explode. Once the last one blows, you get your objective complete.
The door is sealed pretty tight again.
--== Hall 3 ==--
Holocron 5/5, Lorrdian Power Crystal
- The final hall. Rush in and use Repulse if you want. There's not much to get creative with here. At the end, past the door out, are some barrels surrounding the last Holocron. Break down the door before it with SEVERAL Pushes.
--== Power Conduit ==--
Purge Trooper
- Breaking through lands you face to face with a Purge Trooper. These things are tough. Don't even try to get close, it's armor is made of Cortosis, a Lightsaber-resistant metal. It has a large cannon mounted on it's shoulder, a wrist blaster, and can both pound the ground and pick you up and slam you down. Pretty much the only way to kill these is to throw things at them from a distance, or, they being robots, shock them to death.
After the fight, you'll have to break down the door.
--== Holding Room ==--
Alright, the final room. There are Commanders, Troopers, EVOs and Officers on the walkway. You'll have to kill them all to start with. You cant save Juno till you deactivate the force field around her though. To do that, drop under the walkway and lift the two pistons.
But, there are even more enemies down here. By more, I mean better. Two Troopers and TWO Purge Troopers. Hopefully your Lightning is up to par. If it gets to much, retreat up to the walkway that you should have cleared to recharge.
Upon Gripping and lifting the two pistons, go back up to Juno. The level ends on a happy note.

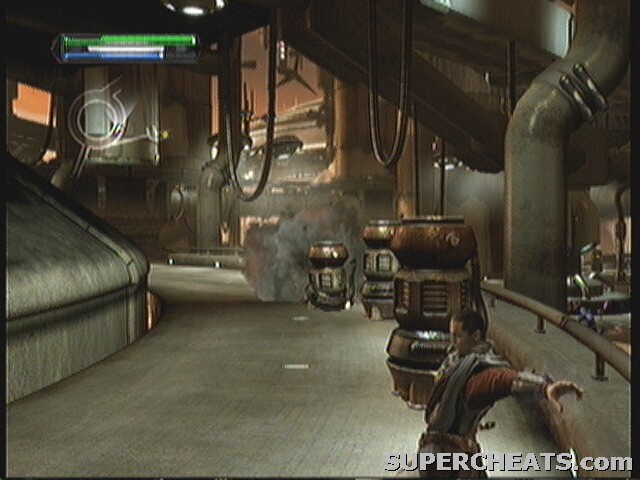
Cloud City
Objectives:
Escape Cloud City with General Kota
Bonus Objectives:
- Freeze 10 Imperials in Carbonite
- Attain 200000 Force Points
- Collect 5 Holocrons
Enemies:
Imperial Senate Guard, Ugnaught, Imperial Stormtrooper, Imperial Jumptrooper, Scout Trooper, Uggernaught
Boss: Shadow Guard
--== Bar Fight ==--
This is your first and only escort mission. I've only every actually had Kota die once, and that was because I kept accidently targeting him. In general, he can take care of himself.
The problem a lot of people have the Bonus Objective. If you know how to do it, it's not that hard. But there are tricks to it I'll highlight as we go through.
This is an excellent place to get the Bully achievement, with all the Ugnaughts running around. The first stormtroopers come at you down the ramp, from the bar. Follow their bodies up the ramp. You'll find your first Senate Guard here. There guys look harder then they are. Unlike the higher-level guards, these cant block or use Force powers, so they're basically a Militia Trooper with more health.

Holocron 1/5, Ruusan Power Crystal
- Overtop of the bar is your first Holocron. You can reach it simply by jumping. Keep heading up.
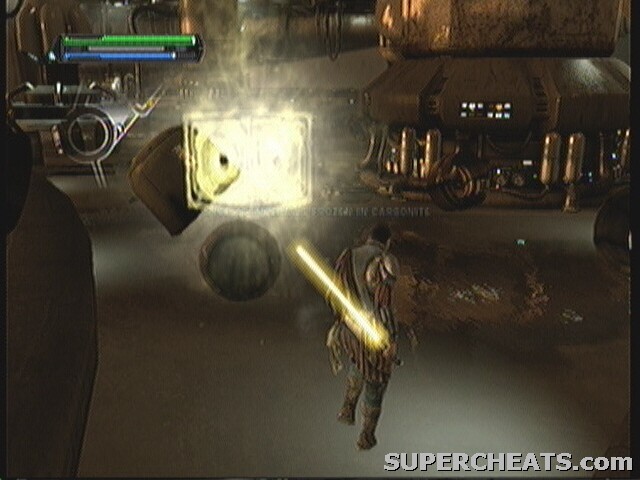
Carbonite Freezer
- On the second seating platform, there is a Carbonite freezer in the center. This is the first trick to getting your Bonus Objective. You can lift troopers into it and watch them freeze. There are even more Imperials down the hall, including a Senate Guard, that you can lure into here and lift them in as well. Makes you wonder why they have something like this in the middle of a bar....

Holocron 2/5, Unstable Gold Crystal
- In the same freezer, there is the second Holocron. Just don't stick around too long.
--== Landing Platform 1 ==--
Barrel
- Continuing outside, the ramp is full of Senate Guards with more on the way. This is a perfect time to get more frozen Imperials. Those barrels on the side? They contain Carbonite. Throw them at any Imperial you see to freeze them.
Holocron 3/5, 10000 Force Points
- If you jump off the side of the ramp, there is a Holocron in the corner of the platform.
- There are a lot of Carbonite barrels in this area, and a lot of Imperials to throw them at. Make best use of this. If you run out of barrels, there are feeder tubes here as well. Use Grip to pull them out of the ground and direct them around at the nearest enemy. Take care in killing the Scout Troopers in the area first, however. They'll make you lose your grip.
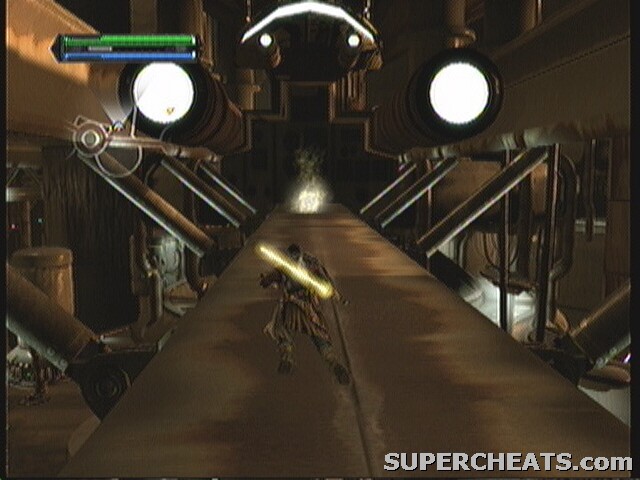
Find the ramp (pictured in the video above) and use that to start on the way to the next platform.
--== Walkway ==--

Holocron 4/5, Combo Sphere
- A lot happens on this walkway. You'll have to fight past some Stormtroopers and Scouts before making it to the first pillar. Take the left path and look over the edge, looking toward the platform below. There is a Holocron floating in mid-air. You'll have to time your jumps perfectly to get it.
(you're suppose to zap the fan things below on the platform, and ride the current up, but that DOES NOT work, you don't have enough momentum or reach to get to the Holocron).
Get back up on the walkway and continue to the auto-save point under the rail overhead.
You'll be faced with Jumptroopers for the first time here. Grip and Lightning go a long way, as does Impale and Lightning Bomb if you have the skills. There will also be Scouts on the other side near the second pillar that you should also take care off.
Holocron 5/5, Unstable Yellow Crystal
- Return to the save point by the rail overhead. Jump up onto behind the train and wait for the train to move back on the rail. It is hiding a Holocron.
Finally, finish your stroll down the walkway, to the next platform. You will probably run across some Senate Guards if you take too long.
--== Landing Platform 2 ==--
You will fight Stormtroopers, Scouts, Jumptroopers, and Senate Guards here, all at once. There are also 2 Uggernaughts here. They act much like AT-CTs, throwing boxes is pretty much their only weapon. They do have this laser thing they use when they get close however. Since they are mechanical, they are very susceptible to Lightning. Besides them, the Jumptroopers should be a priority for now.
Once you clear most of the platform out and approach the final landing pad at the back of the area, an Imperial Shuttle lands and releases some Stromtroopers and a Shadow Guard.
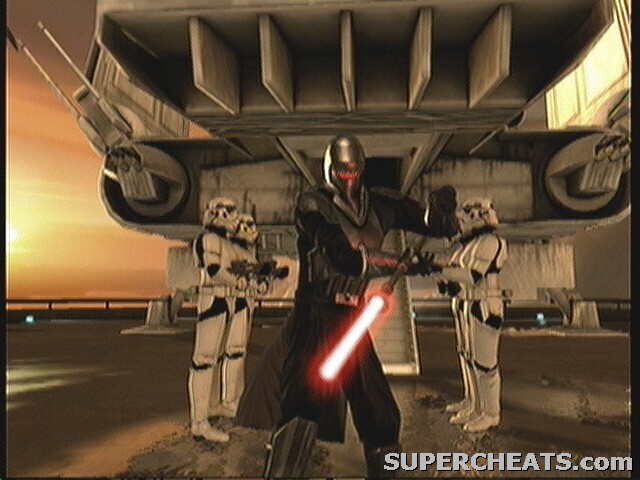
--== Boss: Shadow Guard ==--
Shadow Guards are much more fearsome then the Senate Guards you've been facing. For one, they have mastery of the Force, unlike even some of the Jedi you've faced so far. They can use Push, Lightning, and even Grip.
The lightning isn't so much painful as it just slows you down. When they pick you up with Grip, rapidly press B [O] to escape. Push is just Push, but you get close to him is almost acts like Repulse.
Put him aside for a moment. Your focus now should be on the Jumptroopers that came out of nowhere. Quickly lightning them to death so they don't interrupt your combos.
With only the Shadow Guard remaining, this fight isn't TOO bad. Lightning, Push, and Grip have almost no effect on him unless you can catch him off guard. The best thing you can do is start a saber combo WITHOUT touching him, then use Saber Slam or another Force-based combo and hit him with that swing. It usually works.
His health isn't much, so if you can just knock him down you can rush over and stab him on the ground a couple times. It's usually enough to kill him.
If you really get pressed, there is a Sith Holocron (Unlimited Energy) in one of the bays the Uggernaughts spawned from.
A QTE ends it:
360: X, Y
PS3: [], Triangle

Imperial Kashyyyk
Objectives:
Prove yourself to Kota's Senate contract by retrieving a mysterious object on Kashyyyk.
Bonus Objectives:
- Destory the Imperial Communications Tower
- Attain 300,000 Force Points
- Collect 15 Holocrons
Enemies:
Imperial Stormtrooper, Imperial Incinerator Trooper, Shadow Trooper, Stormtrooper Commander, Scout Trooper, Imperial EVO Trooper,
Imperial Jumptroper, Imperial Senate Guard, Imperial Royal Guard, Imperial Purge Trooper, Interrogation Droid, AT-KT
Boss: Captain Ozzik Sturn
--== Landing Site ==--

Holocron 1/15, Compressed Blue Crystal
- Back on Kashyyyk, things look darker now. Tilt the camera left to see the first Holocron right behind a rock. Walk up to the wreckage of the hut to start a cutscene and be taken to the other side.

Holocron 2/15, Kento's Robes
- On the other side, turn around and look for a small hut thing still standing. Behind it is the Holocron.
Go up the path to meet with the Incinerator Troopers. These guys are resistant to Force powers, and getting close can land you in hot water. The best thing you can probably do is either stand back and throw things at them, or dash in and attack with your saber.

Holocron 3/15, 10000 Force Points
- Beside where the Troopers were, there is a Holocron floating in the air. You have to get on the stump beside it to reach it.
A little more down the path is an AT-KT. These are supped-up AT-STs, and luckily the only one you'll ever have to face. It can launch Detonators out one side, the other has a blue paralysis gun, and the obligatory large blaster cannons on the front. The best way to deal with it is by throwing explosive barrels at it from a distance. It's health is often too much for simple Lighting.
Once it goes down, you'll have to take out the E-WEB turrets on either side of the door. Either throw stuff at them or jump up and shock them.
The door is very resistant, you cant just push or pull it, rather you'll have to throw a large rock or something to burst it open.
--== Comm Tower ==--
This first ramp is always a pain. It isn't as wide as it appears. There is a Commander down at the bottom and a Scout on the ledge to the left. These should be your two main targets. If you cant kill them quickly, you will be overwhelmed by sniper fire and Shadow Troopers.

Holocron 4/15, 10000 Force Points
- The first thing you'll probably notice on the left is a Holocron on a ledge. Don't even try this till you've cleared out the enemies. At the top of the ramp, near the Sith Holocron, you can jump to the ledge and walk over to the Holocron.
There is a break in the path at the bottom of the ramp. One left, and one straight. Take the left (lower) path for now.
Holocron 5/15, 10000 Force Points
- Partway down the lower path is a beam overhead. Jump up onto it and follow it left onto another ledge. Turning right, you should be able to see the Holocron.
Generator 1
- Jump back down to the ramp below. Proxy will say something about a Comm Tower. As you near the end of the ramp, look on the right side to see a grate covering a generator thing. Grip off the grate and shock the generator for 1/2.
E-WEM
- Out on the grass, beware the E-WEM Turrets on either side of the door! Dash over under them, then jump up and shock them. If you don't, their rockets will probably be the end of you.

Holocron 6/15, Combo Sphere
- Look around for the ramp that leads up. There will be Jumptroopers at the top. At the first bend, look across toward a pipe. There is a Holocron floating right there. You'll have to jump and dash to reach it, while still landing on the platform below.

Generator 2
- Climb back up the ramp and around the bend. At the top, look for another grate with a generator inside. Grip the gate again and shock the generator to complete the Bonus Objective.

Holocron 7/15, 10000 Force Points
- Behind you is another Holocron floating in the air behind a large pipe. Jump and dash to reach it. We are now finally finished with this area. Get back to the grassy area and throw a rock through the door to open it.
--== Trophy Room ==--
There isn't much resistance on the other side of the door. Just some Troopers and an Officer. Through the control area, there is a room filled with glass cases. These cases are Ozzik's trophies.
An Imperial Royal Guard will jump out and attack. They are one step above a Senate Guard, but well below Shadow Guards. They have moderate Force powers, usually just Push, and are easily shocked, gripped, and pushed around. You can even free the Wookiee in the cage and have the two fight each other.
Holocron 8/15, 10000 Force Points
- In one of the cases is a Holocron. To exit the area, walk to the glowing door.
--== Snipers Nests ==--
So, you were actually sent here to capture Leia Organa, the Senators daughter. And she wants you to save the Wookiees. Well fighting the Empire has to start somewhere.
Sniper Nest
- Around the next bend is a Scout haven. There are at least 3 Scouts placed in 3 vantage points around the area. I highly recommend grabbing the Invincibility Holocron, going to all three nests (two on the left, one on the right), jumping up and zapping them before doing anything else.
Elsewhere in the area, there is a Commander, an Incinerator, and a Senate Guard or two. Once all the enemies have been cleared, a Shadow Guard comes through the doors ahead.
During your fighting, you can slash the Wookiee cages around the area to free the Wookiees. They don't normally do much, but they may draw some fire.

Holocron 9/15, Power Sphere
- There are three Holocrons in the area. The first is inside the first sniper nest. You can easily jump inside and grab it.

Holocron 10/15, 10000 Force Points
- The second is inside the final Wookiee cage near the door the Shadow Guard comes through.

Holocron 11/15, 10000 Force Points
- The final one is inside the last sniper nest on the left side. You can jump and dash to it from the top of the final Wookiee cage that housed the last Holocron.
With all that done, you can enter the door to the next area.
--== Detention Hall ==--
This area gets cordoned off in segments by force fields. To lower a field, pull the cord on the left side with Grip. Oh, and you cant hurt anyone with the sparks flying out of it.
The first two barriers just have some Stormtroopers.

Holocron 12/15, Talent Sphere
- The third has some Troopers, an EVO Trooper, and a Commander.
It also has a Holocron in one of the cells. Use Grip to bend the cell door up.
Holocron 13/15, 10000 Force Points
- The fourth barrier has a Purge Trooper and E-WEM Turret. Dash past the Trooper and take out the E-WEM first. It also has a Holocron in one of the cells. The final barrier has a Purge Trooper and that's it. Exit out the door behind him.
--== Skyhook ==--
Call this a Skyhook? Prince Xizor's was way better.

Holocron 14/15, Purple Crystal
- Immediately on the right is a tree. On one of the branches is a Holocron in easy jumping distance.
The key to this area is to ignore the power couplings for now. Focus on taking out the E-WEB turret, the Purge Trooper, and the Scout that guards each and every coupling first, because once you start pulling couplings, Ozzik comes out in his tricked-out AT-KT. Traditionally, I go clockwise around the Skyhook. It gives you the best angle to take out the guards in one swoop. If you go counterclockwise, the Scouts will be behind you as you round the corner.
Holocron 15/15, 10000 Force Points
- In your travels around the Skyhook, look for a Holocron between two of the couplings up near the structure.
With all the guards gone, start pulling couplings. Grip them and pull them straight up till the sparks fly. Toss them aside and start on the next one.
--== Boss: Captain Ozzik Sturn ==--
Ozzik Sturn comes out in a custom AT-KT after around the second coupling is pulled. This version has a sniper rifle mounted on the right side, a stun rocket on the left side (that is more powerful then the standard version), a detonator launcher on top, and all in addition to the standard blaster cannons.
It is a formidable foe, except that it is STILL a machine, and therefore weak against electricity. It's large size also makes it fairly slow and easy to circle-strife.
Once his health goes down, a QTE ends it:
360: X, A, Y, B
PS3: [], X, Triangle, O

Imperial Felucia
Objectives:
Find and rescue Senator Bail Organa
Bonus Objectives:
- Release the Sarlacc
- Attain 375000 Force Points
- Collect 15 Holocrons
Enemies:
Imperial Stormtrooper, Imperial EVO Trooper, Imperial Purge Trooper, Imperial Incinerator Trooper, AT-ST, Dark Felucian Warrior, Dark Felucian Shaman, Dark Felucian Chieftain, Rancor, Yerdua Poison Spitter
Boss: Bull Rancor / Maris Brood
--== Landing Site ==--
You rescued the Senators daughter, now you have to rescue him. Must run in the family. The entire planet is a warzone between the Empire and the Felucians, and now you.
You land in a hotspot where the Empire has Troopers, EVO (with shields), Purge, and Incinerator Troopers. Thankfully the only Felucians you have to worry about are Warriors.
I would focus on the Imperials first, they pose more of a threat. Use the debris around the area as both shields and projectiles.
Holocron 1/15, Green Crystal
- The first Holocorn is also here, but it's not the one you see right off. From where you started after jumping off the ledge, turn back around to the right to find a secret passage. At the end is an Incinerator Trooper, but the prize is a Green Lightsaber.

Holocron 2/15, Talent Sphere
- The second is probably the one you saw right off. It hovers above a large Sarlacc tooth. You'll have to use the debris in the area to build a platform to reach it (3 boxes should suffice).

Holocron 3/15, 10000 Force Points
- The final Holocron is at the back of the area. Keep going past the bridge. It's inside the last Sarlacc tooth.
With all the Holocrons gotten, go back to the bridge. There are turrets mounted at the mouth, dash past them and shock the operators.
On the bridge, use the shields for covers to hide from the WEB at the end, EVOs in the center, and two Purge scattered in. The Imperials often cant seem to find their way around them, and try to shoot through them, so using them to hide while charging your next Lightning works well.

Holocron 4/15, Compressed Purple Crystal
- At the other side of the bridge, DON'T JUMP DOWN! There is a Holocron on a mushroom on the right side. You have to jump to the ledge under it to reach it.
--== Canyon ==--
This area has some EVO troopers on the ground level, mixed with an Incinerator. Up on the ledge on the right side are two E-WEB turrets. Be sure to jump up and shock them.
As you near the back end of the area, a transport comes down and releases an AT-ST, the shock of the landing triggers an avalanche. AT-STs are exactly the same to take down as their counterparts. Any strategy you used on them will work here. There are even the exploding flowers in the area to help.

Holocron 5/15, 10000 Force Points
- When you're done, look for a ledge on one side (a ledge you can jump to) follow it to the avalanched area and look right for another ledge you can jump to. The Holocron is right in there.
Holocron 6/15, Power Sphere
- The next Holocron is on the same ledge. It leads around to where the E-WEBs where. Once you have the Holocron, drop back down and use Push to clear the rocks.
Not far in, another AT-ST drops down, but this time it has Felucians and Imperials to back it up. The Imperials are the same you have been facing, a couple throws should take them out. The AT-ST on the other hand, you have no cover from and virtually nothing to throw at it. Lighting is pretty much your only hope.
Continuing down the canyon, drop off the ledge at the end.
--== Sarlacc Pit ==--
For some reason, the Imperials saw fit to set up main camp INSIDE a Sarlacc. I cant even begin to imagine what they were thinking. In any case, you have to get inside as well, AND while you're at it, free it a bit (for the Bonus Objective).
Take a right, and go toward the cable car thing. EVOs guard it on the ground, but there are only lowly Troopers up top. They do have E-WEB but don't normally use them. Jump up on top of it.

Holocron 7/15, Vexxtal Power Crystal
- Be careful not to cut the cables on the top! You have to use them to reach the Holocron. With that in hand, lighting the glowing power box.
Chain
- For the bonus, you have to get out on the edge of the platform and look out into the pit. You'll lock on to the chain in the distance. Use Saber Throw to break it. You'll need to do this at the other stations as well.
Holocron 8/15, 10000 Force Points
- There is another Holocron behind the cable car. Jump down and grab it.
Follow the bank back toward where you jumped down and keep going till you find a bridge that connects to the tower. The bridge is guarded by EVOs and has a full staff of EVOs, Troopers, and a Purge on it. I like to jet across, use Repulse, then dash around the corner and wait to recharge before using Lightning on the rest.
Take the left hand bridge to the next car. This car is identical to the other one. The area is pretty slim though, so watch out. Once on top, zap the box and cut the chain, just like before.

Holocron 9/15, 10000 Force Points
- On your way back to the tower, look above the overhang for another Holocron. One last bridge, one last box, and one last chain. Once you have finally zapped all three, the elevator in the tower becomes functional. Get on and ride it inside.
--== Sarlacc Stomach ==--
Holocron 10/15, 10000 Force Points
- Right off, there is a Holocron staring you in the face. Make your way deeper in. Don't worry about the pointy things, they don't hurt you. However, when you reach an area with a lantern, DON'T go any further. Zap the lantern a few times with lighting to light it up (you'll know when it's lit. If you THINK it's lit, it's not lit). This will prevent the mouth from sucking you in.
Holocron 11/15, 10000 Force Points
- You'll come to a large storage area with nothing in it. When your pilot gets on the radio and says you're entering... somewhere... and it's a large round room, look in the area above to spot a Holocron. To get to this one, you must use Dashing Blast. Double-jump, dash, and tap Push. You have to line it up perfectly to reach it. If you don't make it, quickly pause and to Level Select. Reload the last save point and try again.
After you have the Holocron in hand, look for a hole at the bottom of the room and drop in. These next corridors have more lanterns that you need to light before proceeding.
At the end is a lung-like room with strong gusts of wind. The wind will shoot you back to the start of the room, and picks up at random intervals. You have to use the pillars in the area for protection. Stand right behind one to not get blown away.
Holocron 12/15, 10000 Force Points
- Stay on the right side of the area to collect a Holocron beside one of the pillars. At the end of the tunnel, you get expelled out.
--== Battlegrounds ==--
This area is good sized. You'll want to use that to your advantage while fighting the Rancor, but the one Shaman in the area also uses the space well. Hunt down the Shaman first, as avoiding the Rancor is an easy feat with so much space.
Near the center you'll probably spot a Holocron floating in the air. You cant reach it yet (well, you can use mushrooms to sometimes get to it, but I find that a pain). You'll have to haul over an object from later in the level to get it.
Once the Rancor goes down, look for a well lit area with Troopers up top on turrets. Jump up after them.
Holocron 13/15, Unstable Blue Crystal
- When you're level or slightly above the turrets, turn about and look for a Holocron floating in the air.
At the top of the cliff, beware the Chieftains hunting around. There is also another Rancor in the back of the area. Be careful not to go TOO far to the back, as you'll trigger the boss fight. DO NOT use Grip to throw around any objects in this area.
Holocron 14/15, 10000 Force Points
- Kill off all the enemies in this area. During the fighting you'll probably stumble across this Holocron on the left side of the path, behind a rock.

Spider Droid Head
- Once all the enemies are dead, look around for a large round metal object. Grip this object and carefully take it back to the large round area earlier. I don't recommend throwing it, as you might lose it. Just lift, move, set, repeat.

Holocron 15/15, Combo Sphere
- When you reach the area, set it under the Holocron we past earlier and use the extra height to reach it. With the last Holocron, go all the way back and into the cave to enter the next area.
--== Graveyard ==--
--== Boss: Bull Rancor / Maris Brood ==--
Stage 1: Bull Rancor
The first stage of this fight has you fighting the Rancor. Unlike other Rancor, this one is pretty impervious to Lightning. It's only real attacks however consist of pounding the ground when you're near it or charging at you like a bull.
Get a good distance away, with your back up against a wall. Look and wait for him to charge at you. At the last second, Dashing Blast away. The attack has a lot of recovery time, giving you enough time to get back to him and use a Sith Saber Smash. Boost away quickly before he pounds the ground and repeat.
Maris will randomly appear from time to time and try to attack, but it's negligible. If you really fell threatened, you can stop what you're doing and run away.
QTE:
360: X, Y, X, B, A
PS3: [], Triangle, [], O, X
Stage 2: Maris Brood
You're now fighting Maris in a rather cramped space, which of course SEEMS to work well for her, but you'll find it works better for you. Maris has the ability to turn invisible. This ability is not complete, however, as you can see when she first disappears and you can lock on to her just before she appears.
Her general attacks consists of appearing behind you, using a combo that knocks you down, then throwing her sabers at you a couple times before disappearing again. Any use of Force powers on your part will result in her blocking, then following with Push and a Saber Throw.
The trick to this fight is when she disappears, starts a Sith Saber Slam. Try to guess where she is going to appear, or better yet be in a corner where there is really only one way she can come from. On the final stroke, you slam your Lightsaber and shock the ground. This will knock her out of invisibly and stun her long enough to get at least one more combo in.
QTE:
360: X, A, B, X, X
PS3: [], X, O, [], []

Imperial Raxus Prime
Objectives:
Destroy the Orbital Shipyard
Bonus Objecties:
- Destroy the Imperial Tractor Beam Tower
- Attain 430000 Force Points
- Collect 15 Holocrons
Enemies:
Rodian Heavy Defender, Rodian Ripper, Jawa, Imperial Purge Trooper,
AT-ST, Imperial Stormtrooper, Scout Trooper, GNK Power Droid, Imperial Officer, imperial EVO Trooper, imperial Jumptrooper, Stormtrooper Commander
Sub-Boss: Proxy
Boss: Imperial Star Destroyer / Tie Fighers
--== Canyon ==--
This place... hasn't really changed much at all. Jump over the ledge ahead and take out the Rodians scattered on the other side.
Holocron 1/15, Sigil Power Crystal
- Look for a ledge on the right side. Use it to get to a ledge on the left. The ledge leads to a cave, and down below is the Holocron. Back out in the canyon, keep working forward.
Holocron 2/15, 10000 Force Points
- On the left side is a little nook with a couple Jawas. They guard the second Holocron. There are more Heavy Rodians on the ledges that complete the canyon. At the top, the path is blocked by steel girders. Use Push and Repulse to bend them out.
--== Junk Bridge ==--
Work your way around the pass, clearing the Rodians as you go. Long Way Down bonuses are plenty here. You'll come to a broken bridge you'll have to jump over. Don't let the Rippers on the other side push you back down. Past that is the girder bridge. It's long and thin, but there isn't anything to push you off for the most part.

Holocron 3/15, Power Sphere
- On the other side of the bridge, look for a broken door-like thing. Push it down to reveal a Holocron. Exit out and take a right. Fall down the ledge(s) and push the Rodian off the edge.
Holocron 4/15, 10000 Force Points
- Jump across the gap here to continue, and grab the Holocron in the path. Keep through the tunnel till it opens up.
--== Battleground ==--
Rodians face off against the Empire here. Grab the Sith Holocron on the left before jumping down. Use it to destroy the Purge Troopers (all 3) first. A landing craft will come down and release more Imperial Troops, as well as an AT-ST. Focus everything on the AT-ST for now. Around this time, a wall will break away and reveal more Rodians to. So now it's a party. Finish off the AT-ST and try to get on one side of the battlefield, then work your way to the other so you don't have to rush back and forth.

Holocron 5/15, 10000 Force Points

Holocron 6/15, Compressed Green Crystal
Holocron 7/15, 10000 Force Points
- There are three Holocrons in the area to boot. One is in the tunnel where the Rodians spawned. Another is on a high cylinder platform on the right hand side near the ledge (jump to it to land on a small ledge half way up). The final one hangs over the top of the area. Jump up on the platforms on the left side, as if leaving the area, then turn Dashing Blast to it.
Once you've collected everything, jump back put the platforms and continue to the next area.
--== Imperial Hanger ==--

Holocron 8/15, 10000 Force Points
- In the transition tunnel is the next Holocron. You also get a message from Juno saying Proxy has left the ship.
Drop down into the next area. This area has 3 Scouts, 3 Purge Troopers, and several Stromtroopers. This area is, however, very large, so you only have to fight them one at a time. After defeating one, wait for your Force to recharge before going after another, just in case. The Scouts are all on the tall towers lined in the center. The doors to the hanger that Juno is working on will not open until you've defeated everyone in this area first.

Holocron 9/15, 10000 Force Points
- The Scouts being where the are actually help you notice this Holocron. It's over the third tower almost dead center in the area.
The hanger doors open, revealing a massive armada (maybe they heard you coming?). An AT-ST, Purge Trooper, Commander, several EVOs, and Scouts in the catwalks. Listed in order of importance. You can try to lure them out into the junk area, giving you more space, but there are plenty of things to hide behind within the hanger.

Holocron 10/15, Talents Sphere
- The next Holocron fools a lot of people. They try to get on the elevator in the back of the room, and jump off at the catwalks to reach it. Problem is the elevator travels to fast for this to work. The catwalk is held up with pillars, and these pillars have ledges on them large enough for you to jump off of. This is how you get up there. Now you can ride the elevator in the back to the next area.
Note that the elevator starts out at the top, and has to come down before you can get on. Standing in the pit where the elevator lands will cause it to stall above you till you move.
--== Tractor Beam Tower ==--
On this platform is just a bunch of Stormtroopers and Officers (re-armored Stormtroopers). Ride the elevator in the back up.

Holocron 11/15, 10000 Force Points
- At the top of the elevator, take a right and follow the ledge down. This Holocron is at the end. Go back and enter the doors to the next area.

Holocron 12/15, Unstable Purple Crystal
- Before doing anything here, take a right and go up the ramp. At the top, there is an EVO Trooper guarding some boxes. Kill him and move the boxes, then push/slash the wall behind them to reveal a path. Go all the way to the end to claim your prize.
Ok, that out of the way, Bonus Objective time! Jump down to the lower walkway. Kill all the EVO troopers (aren't many) and the E-WEBs at the end near the door. Climb back up the ramp and jump to the tower in the center of the room. Push off all the Imperials. There are little conduits on the side of the structure. Lighting all of them to bring it down.
Back at the bottom, go behind the tower. Inside the force fields to the left and right of the door are two generators you can lift up. Pull them both up to lower the field and enter the door.
--== Precarious Bridge ==--
This area is a PAIN. There are two Jumptroopers right in front of you, E-WEBs at the far back, E-WEBs at the far back on the left and right sides, and 1 Scout on both the left and right, perched on a far off walkway with clear shots to the entire bridge. Oh, and did I mention that on either side of the main platform is a gap between there and next platform down?
Immediately jump up and shock both the Jumptroopers before they consider flying off. Dash to the end and take out the E-WEBs. Choose a side, and jump down to the platform below. Kill the Stormtroopers there, while hiding behind a force field. Pick up one of the barrels and toss it at the Scout. Jump back up and do the same for the other side.
Holocron 13/15, Combo Sphere]
- Go back to the door you came in from and turn around, facing back to the exit. The Holocron is on the Scout's ledge on the left side. To get there, you have to get on the lower left ledge near the exit, double-jump and Dashing Blast. You can overshoot, so be careful. Also remember to do it next to the exit door, because the gap is the smallest there.
So, how many times have you fallen off? Well we're not done yet. On the lower platforms on the left and right side of the exit are these gear things. You have to grip them and pull them up till they stop to open the door.
--== Processing ==--
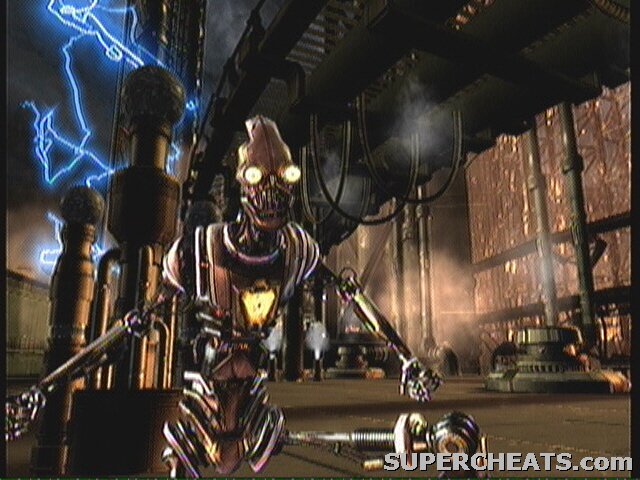
--== Sub-boss: Proxy ==--
You may think “what can Proxy do?” But you forget at the start of the game where he was Obi-Wan. He can shape-shift and take on the appearance and battle style of another warrior. For this fight, that means every human-sized boss you've fought so far, Shadow Guard, Kota, Shaak-Ti, Maris Brood, and Kazdan Paratus.
The strategies for those don't change any. In fact, it's easier, as he's not a perfect copy, and he also cant copy their special attacks.
However, after you get his health down, he pulls an ace out of his sleeve.
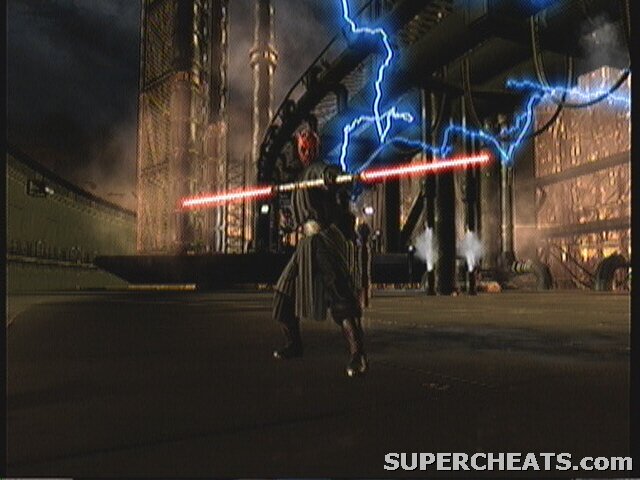
*Duel of Fate plays*
Now the fight really starts. Darth Maul focused heavily on his Saber techniques. He isn't much of a Force user, but he can absorb and counter the Force pretty well. One of his favorite attacks is a mid-air saber throw, that puts him a distance from you. Attacking him with regular saber attacks is also useless, as he can easily break your stance mid-combo. Don't bother trying to throw stuff at him either, he is way too fast.
You're only hope here is to mix in Sith Saber Slams and Saber Slings, hoping to knock him down. Once he hits the ground, you can stab him a few times before he gets up.
QTE:
360: X, X, A, X, X
PS3: [], [], A, [], []
--== Oval Corridor ==--
This area has just about every form of Trooper except Purge and Jump. Enjoy this, as even if you stay still they'll run up and find you.

Holocron 14/15, 10000 Force Points

Holocron 15/15, 10000 Force Points
- There is also two Holocrons in the area. One on the left side and one of the right. Exit the area through the door opposite the one you came through (watch for the yellow dot).
--== Rail Cannon ==--
Use Push to get out of this room. Turn around and jump on top of the structure. There should be a Commander, EVO, Shadow EVO, Shadow, Jump, Storm, and E-WEB guarding the top side, with a Scout on the side of the building. Push works well on almost all these, no? Once you blow them off, shock the glowing thing in the center.
There are a total of 4 of these on this bridge. All of the are identical to this one.
With all four shocked, a shot goes up and destroys the shipyard, but not before a vengeful Star Destroyer gets loose.
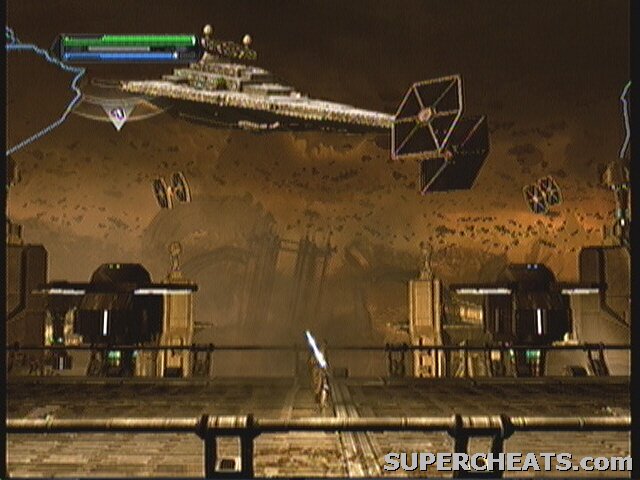
--== Boss: Star Destroyer ==--
The Star Destroyer itself isn't really the boss so much as it's weak point. The Tie Fighters are the ones that put up a fight.
This fight consists of Destroying Ties -> Gripping and aligning the Destroyer -> Pulling it down a bit -> Repeat once more Ties show up.
I'll start with the Ties. There are multiple ways to deal with the Ties. One is to stand back and wait for them to pass overhead, then jump up and shock them, another is to Grip them as they fly by (they'll fall out of the sky with just a tap), or finally to throw the explosive barrels that float by at them.
Throwing the barrels works the best, if you know how to do it. Don't just grip and throw, you have to push it out there a ways first. If you don't, it will to flying off at one of the pylons on the left or fight. Besides that, Lighting works the second best, and is a little faster.
After all the Ties are down, Kota will tell you to do something related to pulling down the Destroyer. Run up to the edge of the platform and Grip. You'll see two thumb sticks at the bottom of the screen with a red aura around them. Tilt the sticks in the direction indicated till the aura turns green, then hold the ship there. After a second, the aura will disappear and Kota will say something again. At this point, pull both sticks down to start moving the Destroyer down.
You'll see Ties start to fly in from the distance. Don't let go of the Destroyer immediately or you'll never get anywhere. You'll almost have to take a few hits from the Ties while still pulling the Destroyer. Once your health hits red, then let go and focus on the Ties.
This continues to repeat, as the Destroyer will start to turn to one side while you fight the Ties, meaning you'll have to line it back up again. The faster you fend off the Ties, the less time it takes to line up the Destroyer.
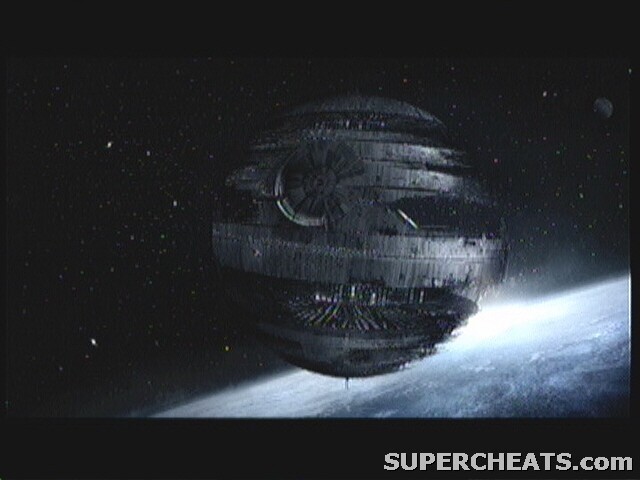
Death Star
Objectives:
Find Gernal Kota and the Founders of the Rebel Alliance
Bonus Objectives:
- Attain 450000 Force Points
- Collect 15 Holocrons
Enemies:
Imperial Stormtrooper, Scout Trooper, Imperial Purge Trooper, Imperial EVO Trooper, Shadow Guard, Imperial Royal Guard, Imperial Jumptrooper, Imperial Incinerator Trooper, AT-CT, AT-ST
Boss: Darth Vader / Emperor
--== Hanger Bay ==--
Welcome to the Death Star 1 during it's fully-operational stage.
Start off in the bay. This area has: Scouts in the rafters, Purge Troopers, Commanders, Stormtroopers, Jumptroopers, and an AT-ST. And that's only the first wave. Killing all or most of them will first trigger another AT-ST to come up the lift near the force field. After that, several waves will come out the doors to the left and right of lift, followed by at least one wave on the lift itself. These waves will have all the above, minus the AT-ST.
To start with, dash left or right and look for a lift in the corner. Ride it up to the rafters and kill the Scouts. No more of them will spawn up here.
Holocron 1/15, Katak Power Crystal
Holocron 2/15, 10000 Force Points
- While you're here, grab the Holocrons on either side.
Back on the floor, I would take out the big guys first. There isn't much to throw at them, so it comes down to a lightning match really.
Note that you do not have to fight any of these people. In the center of the room are some glowing floor tiles. This is the exit. Stand on top and use Repulse to open a gap. Fall through to the next area.
--== Firing Chamber ==--
This area is the Death Star's main cannon. Er, one of the 64 beams that make up the main cannon at least. All you need to know is, if you touch this beam, you die.
The beam does not fire without warning. There is plenty of time to get down the shaft to another safe spot between firings. After little ways, you'll come to a giant lens. Use Push to break it down and continue to the other side.
This new section has spawn points in it. There is one on the left just as you come out. It's rather easy to get behind them and push them into the beam.

Holocron 3/15, 10000 Force Points
- The next is a little ways up on the right. Same deal, only this time there's a Holocron inside. Break through the next set of glass and enter the left side door.
There are Engineers in this area. They act like regular Stormtroopers though. Continue down the corridor and out the door. In this control area you'll fight some Incinerator Troopers, depending on what side they decide to be on. There are also these annoying turrets in the lasers path. You'll have to lightning them from a distance.
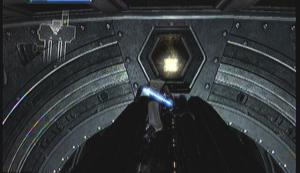
Holocron 4/15, Unstable Green Crystal

Holocron 5/15, 10000 Force Points
- Look around on the left side for a lift. This will take you up to the rafters. Walk around to the laser's side and look for a beam over where the laser fires. Jump up on top of it. There is a Holocron to the left, and a Holocron to the right.
Now to continue. On the right side is a door with a glowing lock. Grip it and pull it up to open.
--== Amplification Chambers ==--

Shield
- This hall contains 2 Purge Troopers that assault you the second you walk in. Counter by picking up a box and using it to block the rockets, then throw it at them.
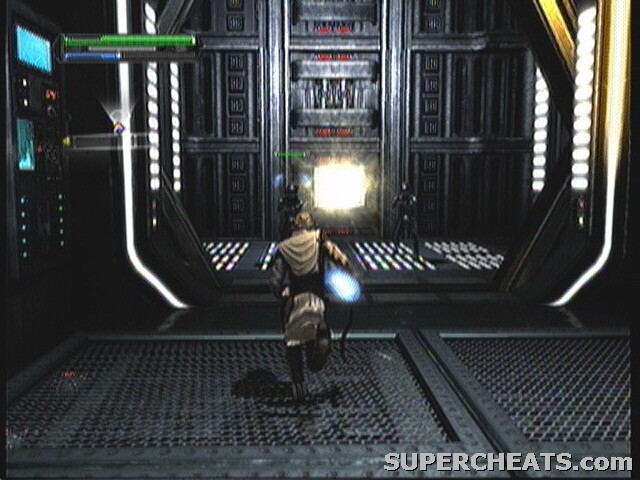
Holocron 6/15, Talent Sphere
- On the right side is a door that leads to the next Holocron. Might want to get it AFTER the Purge Troopers though. Either case, keep going down the hall through the door.

Holocron 7/15, 10000 Force Points
- Two E-WEBs on the other side, but nothing you cant deal with. On the right is another door with another Holocron. Through the door on the left into the next chamber.
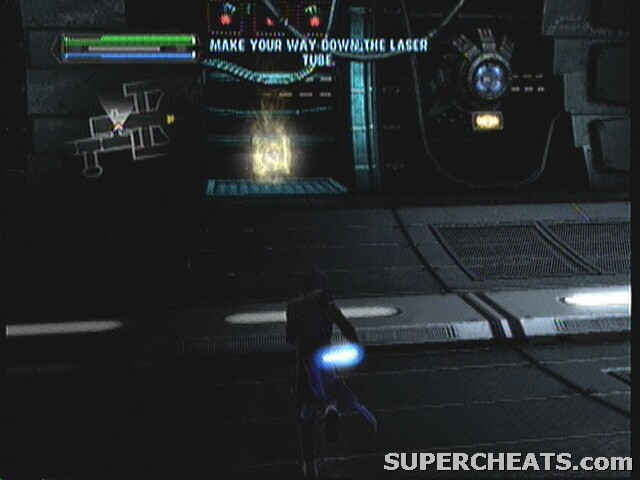
Holocron 8/15, 10000 Force Points
- Dash across the chamber and grab the Holocron. Wait for the laser to fire and die down, the go to the edge. Juno will tell you where you are. Enter the door on the left and take the elevator down.

Holocron 9/15, Power Sphere
- Exit out the door at the bottom, take a right, and in the large chamber go counterclockwise and get the next Holocron. On your way out, an EVO Trooper and some friends will attack from the elevator. Push them aside and ride the elevator back up.
- To get through the spinning disks, you have to extend the bridge. To do this, AS SOON AS the laser dies down, rush to the edge, Grip one of the rings, and spin it till it's dead vertical (it'll lock in place). Do this to all three. The bridge will extent and you can get to the middle platform.
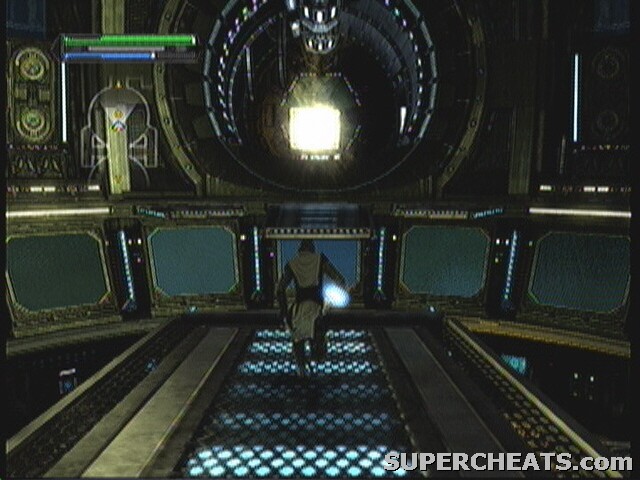
Holocron 10/15, 10000 Force Points
- Do this to the next set of rings to extent the next bridge. Over the gap is the Holocron. If you miss, you can drop down to the chamber below and take the elevators up to the central platform.
Finally across, enter the door on the right before the laser fires.
--== Convergence Chamber ==--
How many times do they have to test this blasted laser?! What are they testing it on?
Well that aside, there aren't any enemies in this room yet. Even when there are, it's just a few scattered Jump and Scout troopers, and in a room like this they cant do much.
You need to first fall all the way down to the ground level. There are two AT-STs down here and nothing to hid behind or throw at them. You're only hope is to at least get beside one so that when the second one tries to shoot you, it hits the first.
Once they both go down, look for the glowing box in the center of the wall. Grip it and push it in. It activates the anti-gravity lifts. Get in one and ride it all the way up.
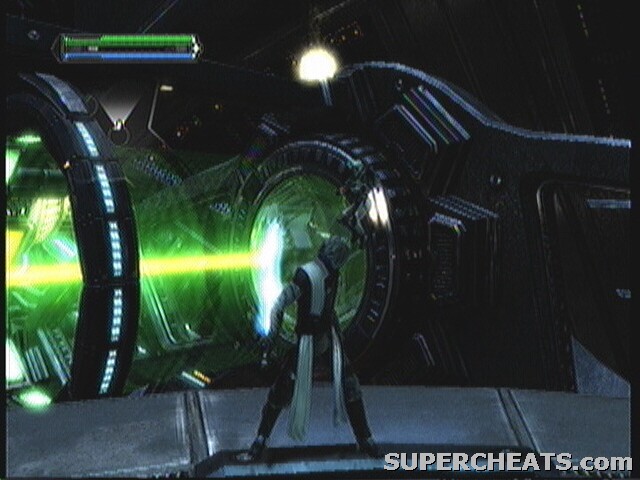
Holocron 11/15, Black Crystal
- At the top, look at the laser in the center of the two lifts. On the top of it is the Holocron. You have to ride the lift up, then Dashing Blast over to the top at just the right angle to avoid overshooting. Needless to say, I wouldn't try this while the laser is firing.

Holocron 12/15, 10000 Force Points
- Drop back down to the bottom, and raise up by one gravity ring. Stop off and look for a Holocron within one of the lowest level laser rings.
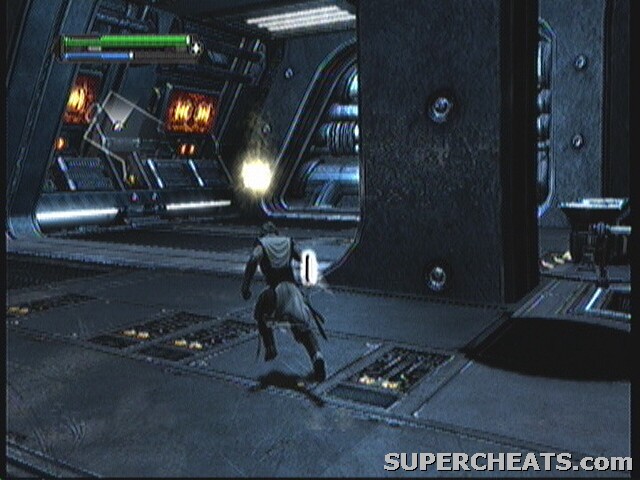
Holocron 13/15, 10000 Force Points
- Next Holocron is three rings up on the side you originally came in the room from. That is, facing the power box for the lifts, the gravity lift to your right.

Holocron 14/15, 10000 Force Points
- Next one is on the opposite side of the room. On the uppermost platform. Ride the lift all the way up and jump off toward the wall. It's inside a door.

Holocron 15/15, Combo Sphere
- The final one is on the main platform that leads to the Emperors chamber. It's very easy to find, but you'll have to fight for it.
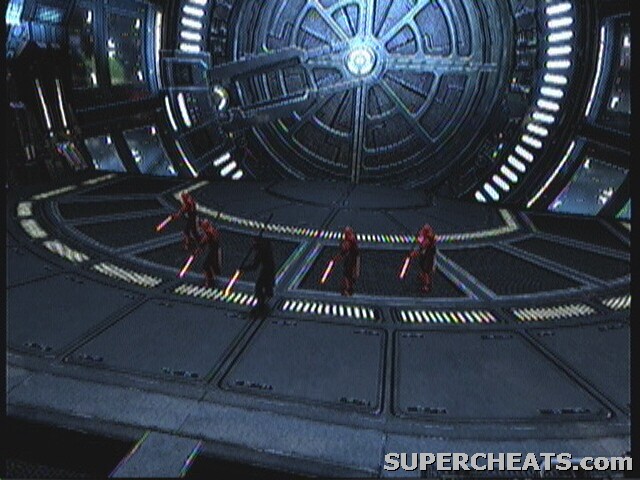
Shadow Guard
This wave of Royal and Shadow Guards is quick fierce. Just like the training module however, single out the Royal Guards and pick on one at a time. Once they are gone, the Shadow Guard is nothing special.
To open the door, Grip the hand and swing it clockwise around the circle.
--== Emperors Observation Deck ==--

--== Boss: Darth Vader ==--
Stage 1:
This stage, Vader loves using Push. He also likes to use Grip, but not as much. Jam B [O
Stage 2:
Bursting into the next room, Vader takes a stand on the central platform. The red field around it hurts if you touch it, and if you get to close to him he'll repulse you off, so stay on the sidelines. Vaders main attack here is picking up barrels and throwing them at you. And I say let him do it. Whenever he picks up a barrel, he's using the arm he would otherwise use to block Force attack, particularly Saber Throw. Pretty much just spam this attack for the rest of the stage. He will occasionally bend the platform you're standing on, in which case just find another. Don't bother trying Push or anything to knock him off, as he'll always block that.
Stage 3:
This is an extension of stage 2. After his health goes down a ways, he'll jump off the center platform onto the platform in the back of the room. This stage plays out a lot like stage 1, only his saber blocks are even worse. Spam Sith Saber Slam and watch when he picks you up.
QTE:
360: X, B, B, X, X, X
PS3: [], O, O, X, X, X
After breaking through into the main room, you have a choice. You can either continue down the walkway to fight the Emperor (Light Side) or jump over the rail and kill Darth Vader (Dark Side). The choice is yours.
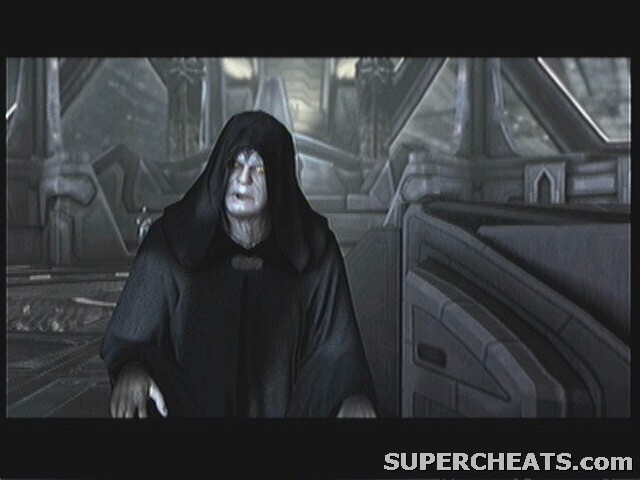
--== Final Boss: Emperor Palpatine ==--
The Emperor is an obscenely easy fight. His only main attack is creating an orb around himself, floating into the air, and pelting you with canisters. This is easily avoided by standing behind one of the raised control modules at the front of the room. The canisters will bounce off the top and completely miss you. You have to be RIGHT up against them though.
He then floats to the ground and becomes vulnerable. Any direct assault results in him dashing back and away. So, kill him like we killed almost everything else in this game: kill it with lightning! As soon as he lands, unload on him till he floats back up. He will lightning you in return, but the damage is negligible.
When he first floats up, he'll summon some Guards to come in from the sides. The later in the battle it gets, the more there will be and the higher rank they'll be. You'll have to kill all of them to start the next phase of him throwing canisters, and repeat the entire process till he goes down.
Final QTE:
360: X, A, B, X, B
PS3: [], X, O, [], O
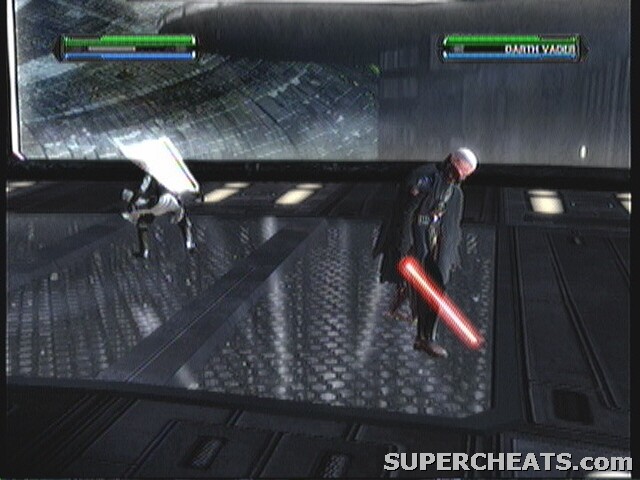
--== Final Boss: Darth Vader ==--
The last fight with Vader is very much like the first, only Vader is way more aggressive. He will come after you with Lightsaber combos, almost all of which will knock you down. A mastery of the perfect block will come in handy here, as he'll be knocked off balance long enough for you to get a combo in. Besides that, I'd block and hold off till he charges up a push. Get behind him and combo during the recovery, and repeat.
Final QTE:
360: X, B, B, X
PS3: [

Jedi Temple
This is a totally self-contained section! No new enemies, bosses, or Holocrons from this section appear anywhere else in the guide!
To access this content, you must download it from Xbox Live Marketplace or Playstation Network. After downloading, you must choose New Game and select Jedi Temple instead of Campaign.
You start the game with all the Lightsaber crystals you collected so far in your best playthrough (it actually keeps track of those), most of your Force Powers maxed except Shield and Saber Throw, most of your talents are also maxed except for the last few, and all the combos are bought except for some of the Aerial strikes at the bottom.
Objectives:
Discover the secrets of the Jedi Temple
Bonus Objectives:
- Attain 60000 Force Points
- Collect 10 Holocrons
Enemies:
Shadow EVO Trooper, Stormtrooper, Stormtrooper Commander, Shadow Trooper, Purge Trooper, Jumptrooper, Lightsaber Training Droid, Combat Training Droid, Imperial Interrogation Droid
Boss: Dark Apprentice
Achievement Note:
- Difficulty Achievements are NOT retro-active. Completing the level on Sith Lord will not give you all the Achievements before it. You must complete the level on all difficulties to get them.
--== Landing ==--
Jump out of the back of the ship. Line yourself up with the platform. As soon as you land, you're attacked by every type of Trooper but Incinerator. Fighting them off is very hard in these tight quarters. Use Repulse for maximum effect.
The door into the temple is locked with a puzzle. Use Grip and lift the two stone Lightsabers up to unlock the door.
--== Entry Hall ==--
This is the main room of the temple. There are Shadow Troopers scattered all over the foyer in front of you, and the chasm in the center is full of Jumptroopers. Again, use Repulse to it's maximum.
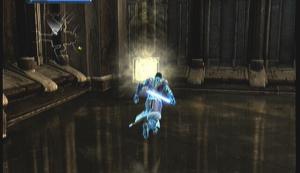
Holocron 1/10, Power Sphere
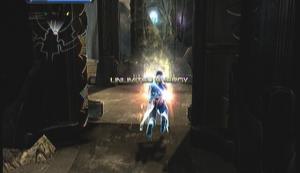
Holocron 2/10, Talent Sphere
- The first two Holocrons are in plain site in this room. One directly on your left as you enter, the other on the right side of the pit straight ahead.
On the left, there is a door blocked by some debris. Use Push to clear the debris and enter the hall. Jump through the broken pillers till you reach another door on the right. Use Grip to lift it up, but it wont stay up so you'll have to dash under.
--== Library ==--
This area is overrun with Shadow and Shadow EVO troopers. There are also 3 Scouts in the ledges on the right side of the room. The best thing to do here is to ignore the people on the ground at first and take out the snipers along the right wall.
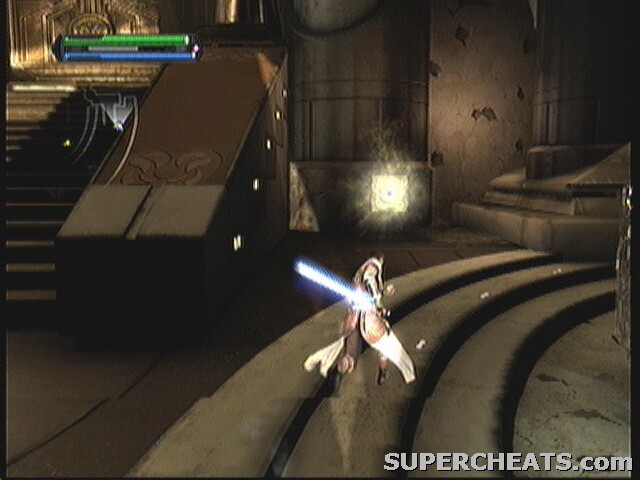
Holocron 3/10, Talent Sphere
- Right down the stairs, take a left. In this little nook is the next Holocron.
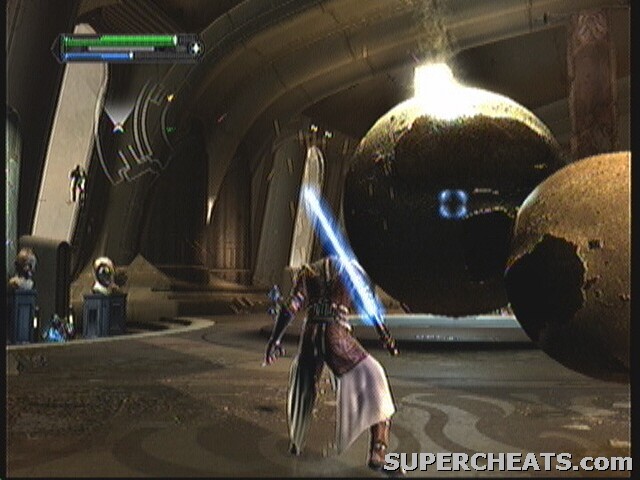
Holocron 4/10, Power Sphere
- Once they are down, look in the center of the room for a giant globe. Use Grip on it to not only reveal the next Holocron, but it allows you to throw this ball around and get the As The World Turns Achievement.
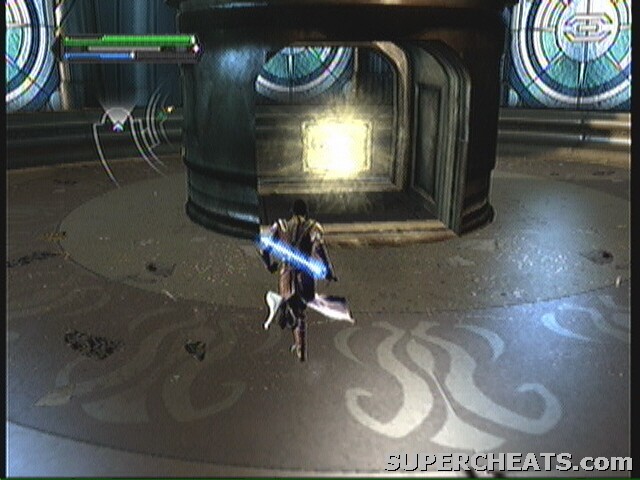
Holocron 5/10, Combo Sphere
- The next Holocron is at the back of the room. Grip the statue and lift it up till it locks in place. The Holocron is hidden under it.

Holocron 6/10, Power Sphere
- When you're done, enter a destroyed hallway on the right. A little ways down is a gap. Jump across to grab the next Holocron. Fall down the hole and go out onto the ledge below. You are looking at the side of the large statue that blocks the gap across. Use Push several times into the side of it to dislodge it and make it fall. Jump back up into the Library.
Back in the main Library, the Imperials have called in several Purge Troopers to assist. They also have Scouts stationed at the door on the far side. If you want to kill the Purge Troopers, that's fine, though you can just blow past them, at least dash ahead and kill the Scouts first.
Lift open the door and go back to the Entry Hall.
--== Entry Hall ==--
Back in here, across the way is another door. Lift it up and go under.
--== Padawan Training Room ==--
This room infinitely spawns Padawan Training Droids. They are very resilient and great for finishing up some of your Force Mastery Achievements. If you want the Robot Parts Achievement however, lingering here for too long isn't a good idea.
The Force droids are the hardest, they can teleport and use both Push and Lighting. They are easily the most annoying. The Lightsaber droids aren't so bad, but someone turned up the difficulty because their skills are unlike even some bosses you faced in the main campaign. Spamming Lightning and Repulse works against everything though.
To actually complete the room and move on, there are eight statues in the area that spawn the droids. The four on the ground are easily spotted. The ones on the upper platform are the things that look like Gargoyles. You have to destroy all eight to complete the room.

Holocron 7/10, Talent Sphere
- This Holocron is on the upper walkway. It's really hard to miss. Grab it and enter the door that opened when you destroyed the last spawner. You'll be back in the chasm on the other side. The bridge is hanging down and glowing. Use Grip and lift it up into place. Watch out for the Jumptroopers.

Holocron 8/10, Power Sphere
- On your way back into the training room, the floor will open up. Under it is the next Holocron. Jump out and continue through the door into the Entry Hall.
--== Entry Hall ==--
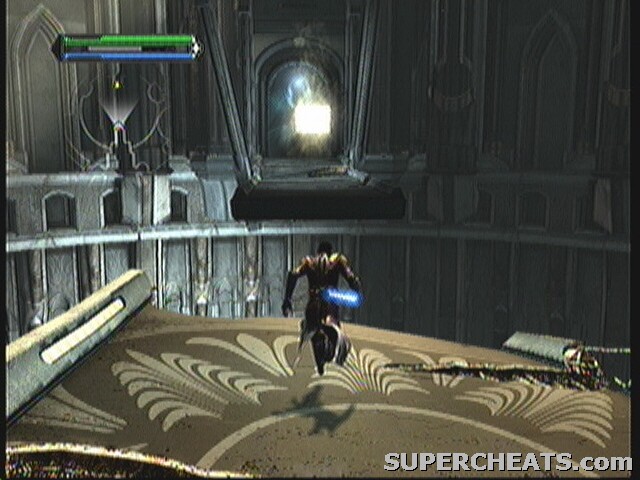
Holocron 9/10, Combo Sphere
- Here we go. Jump and do a Dashing Blast to get over the gap. Be sure to grab the Holocron on your way.
--== Sanctuary ==--
This is the inner room of the Temple. Walk down the hall to start a cutscene with the Holocron.
... curses, I reminded myself of the KHII theme song. So catchy >_<
--== Jedi Trials ==--
For this first trial, you have to grab the glowing sphere and guide it across the glowing track. This is harder then it sounds, especially on the last one with that one part of disappearing track.
To get the Get A Grip Achievement, you have to have to guide it across without the orb turning red for even a millisecond. This takes a lot of practice and patients, but it cant be done. SAVE before you start the trial, and if you mess up, pause and change your costume. This will set you back at the start of the trial.
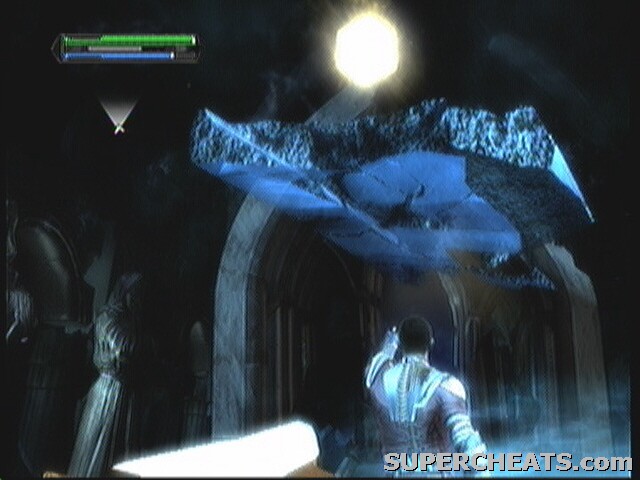
Holocron 10/10, Combo Sphere
- At the end, a platform comes up to you, and you start the second trial. Here, you have to Grip and lift the platforms overtop of the glowing path to make them solid. They will slowly fall down, however, so you have to jump across at least slightly fast. For the Holocron, lift the platform under it a little higher then you normally would.
You have to do this for the next path as well. There aren't quite enough platform in plain sight to make it across, but remember you can use Dashing Blast, so you can set the platform a fair distance apart.
Falling down to the final round platform, you start the final fight.

--== Boss: Dark Apprentice ==--
This fight symbolizes the dark side of the Padawans heart (remember, these are Jedi Trials). The strength of your opponent is the strength of the dark side in your heart... so Galen has a lot to fear from this fight.
Your dark double will sometimes transform into Jedi robes. DO NOT attack him when he is wearing these, or you'll damage yourself.
Stage 1:
The first stage is pretty straight forward. He likes to use Repulse a lot, he'll also use basic Lightsaber attacks and Lightning from time to time. He does have one attack where the screen gets a little blurry and all the controls are messed up for a short time. During this time, just run away. Other then that, use standard Sith Saber Smashes to beat him.
QTE:
360: X, X, A
PS3: [], [], X
Stage 2:
Stage 2 starts, you're on a more breakable platform. He will float off platform and throw giant rocks at you. If they hit you, they hurt. If they hit the platform, it breaks a piece off. After he throws four, he'll teleport down beside you and use Repulse to try and push you off.
The only way to “win” this stage is to Grip the rock he's going to throw next, and throw it at him first. He will eventually break most of the platform, however, and you'll be sent to the next stage.
Stage 3:
This is exactly the same as Stage 1, only he is more aggressive.
Ending QTE:
360: X, X, A
PS3: [], [], X

Jedi Holocron Locations
Jedi Holocron Locations
Traditionally, Holocrons held the knowledge of those who held them. They analyzed the nerves in the brain, and were able to copy everything from the persons memory, and even their personality.
In THIS game, they hold goodies like costumes, Lightsaber crystals, and bonus points.
--== Hanger Bay ==--
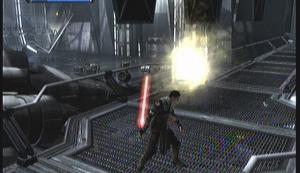
Holocron 1/15, 10000 Force Points
- Once you clear out the remaining enemies, look for the crashed shuttle in the middle of the room. Jump up on it to reach the walkway opposite the side you came in. There should be your first Holocron right in front of you!
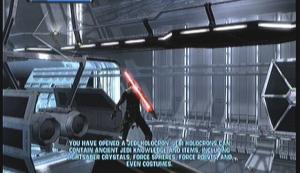
Holocron 2/15, Yellow Crystal
- The next one is actually nearby. It's on the catwalk over the center of the room. You have to get up on the tail wing of shuttle, and use that to get to the catwalk.
--== Final Assembly Area ==--

Holocron 3/25, 10000 Force Points
- After dealing with the Militia in the area, as you approach the next locked door, there is a Holocron in a locked door on the right hand side.
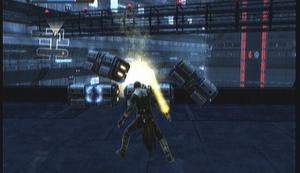
Holocron 4/15, Talent Sphere
- In the first level of the Control Room, kill the Imperials and burst though the doors on the other side. There is a Holocron behind some boxes.
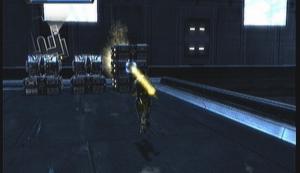
Holocron 5/15, Combo Sphere
- on the upper level of the Control Room, break through the right hand door and look for some more boxes on the left. Therein lies another Holocron.
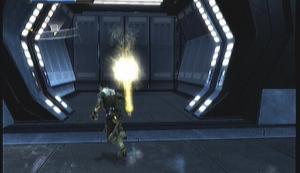
Holocron 6/15, 10000 Force Points
- Along this walkway, Militia spawn from three doors in the wall. You'll usually see them coming. But, in the second doorway, there is another Holocron.
--== Wing Assembly ==--
Holocron 7/15, 10000 Force Points
Holocron 8/15, 10000 Force Points
- Choose the far right lift (perspective from the entrance). Ride it up past the first set of scaffolding to the second set. There are TWO Holocrons up here! One on the scaffolding and one on top of the control window. Jump down one level onto the lower scaffolding and enter the control window.
Holocron 9/15, 10000 Force Points
Holocron 10/15, Rubat Crystal
- The Holocrons in this room are up on the broken wing assembly lift. You have to use Grip to grab one of the fallen wings and carefully lift it straight up and slide it back into place (above). This will allow you to use it as a step to get up higher and reach the Holocron at the top, followed by the Holocron on the scaffolding.
--== Cockpit Assembly ==--
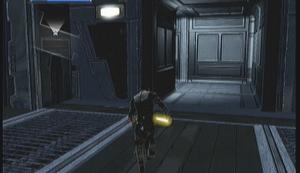
Holocron 11/15, 10000 Force Points
- In the first area there is a Holocron in a hidden dead-end passage along the left wall, by the second laser assembly.

Holocron 12/15, 10000 Force Points

Holocron 13/15, 10000 Force Points
- After they raise the field in the first area, the generator is behind the orange field, cant miss it. But first you'll have to fight through the Militia guards. There are also two Holocrons here, one inside the Generators on the left, careful getting to it. The other is in the hall where the Militia spawned on the right side.
Holocron 14/15, 10000 Force Points

Holocron 15/15, 10000 Force Points
- The last two Holocrons are in the second assembly area. The first is hidden just like #11 only on the right side of the room near the final laser assembly. The other is at the end of the room, to the right of the doorway, by the place where the Cockpits are coming from.
--== Sludge Pool ==--
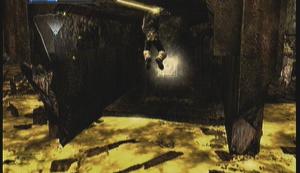
Holocron 1/15, 10000 Force Points
- Right at start, turn left. Its under the platform across the sludge.
--== Refinery ==--
Holocron 2/15, Power Sphere
--== Acid Rain ==--
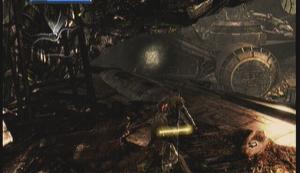
Holocron 3/15, 10000 Force Points
- Just past the rain, as the area opens up, there is a Holocron on the left side.
--== Blockade Runner ==--
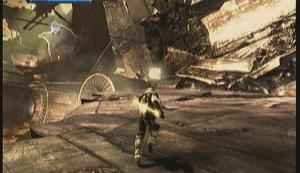
Holocron 4/15, Compressed Red Crystal
- Before entering the Runner, look for a cracked escape pod on the side of the Blockade Runner near the cliff. Use Push to break in the wall and grab the Holocron on the other side.
Holocron 5/15, 10000 Force Points
- On the other side of the Runner, on the cliff edge.

Holocron 6/15, 10000 Force Points
- Inside the Runner, past the Jawas. When you get to the end, you're suppose to jump up to where the Jawa is, but there is a crack in the wall beneath that hides a Holocron.
--== Base Camp ==--

Holocron 7/15, Gold Crystal
- As soon as you enter head left (clockwise) to the cliffs and look for a Holocron on the landing dock. Turn about and face the tower in the center of the area.
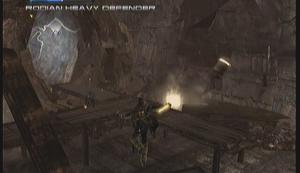
Holocron 8/15, Combo Sphere
- Cut straight across till you hit the wall on the other side. There should be a small hole on the right where the junk is flying through. By that hole is a Holocron behind the ramp.
--== Junk Sorting ==--

Holocron 9/15, Talent Sphere
- Under the platform with the rail switcher on it.
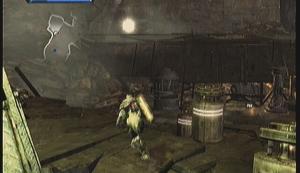
Holocron 10/15, Compressed Yellow Crystal
- As you head back to the tunnel to take the elevator up, look up and to the left. High on a ledge in the corner is the next Holocron.
--== Junk Canyon ==--

Holocron 11/15, 10000 Force Points
- Jump up on the ledge opposite the Hyperdrive. There is a Holocron right in front of you.
Holocron 12/15, Sith Robes
- Across the canyon on solid ground again, look for some metal bars on the left. Bend them down with Push, then use Grip on the metal petals to make pedestals with which to reach the Holocron. Having Dashing Blast isn't required, but it does help.
--== Junk Palace ==--
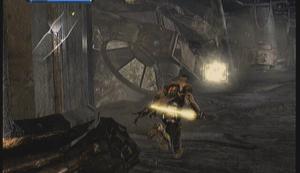
Holocron 13/15, 10000 Force Points
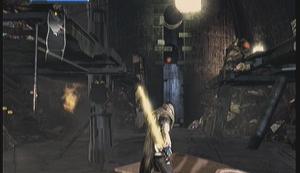
Holocron 14/15, Firkrann Power Crystal

Holocron 15/15, 10000 Force Points
- Past the second Junk Titan, behind the door. The first Holocron is on the left, cant miss it. The second is floating over the center. Grab an AT-ST head and use it to reach the Holocron. While you're at it, use it to reach the ledge on the right side. There's a Holocron at the end.
--== Landing Site ==--
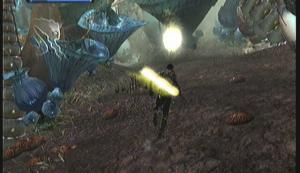
Holocron 1/15, 10000 Force Points
- Walk down the platforms. A cutscene starts with more Warriors coming down a large tree. During (or after) your battle, veer to the right side of the area to find a Holocron on a mushroom. Work your way into the cave ahead.
--== Cave ==--

Holocron 2/15, 10000 Force Points
- Right as you enter, drop off the ledge. The first Holocron is on the lowest platform.

Bridge
- Use a mushroom to get back on the first level, and find a bridge that leads up to a higher level.
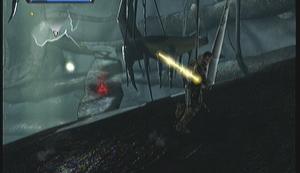
Holocron 3/15, 10000 Force Points
- From the top of the bridge, go all the way counterclockwise till you reach the Holocron. Backtrack to the bridge you past that had the Sith Holocron on it (you can see it above). Jump on it and follow it up.

Holocron 4/15, 10000 Force Points
- At the top, jump on the ledge on the right and continue clockwise till you find another short bridge. From the bridge, jump to the Holocron. Jump back to the bridge and follow it all the way up this time.

Holocron 5/15, Unstable Red Crystal
- Turn left and go counterclockwise through the Sith Holocron. Keep going till you see a platform off on the left. Jump to it, then the one above it, ect. till you reach the Holocron. Jump back down to the platform and keep going counterclockwise till you find the exit.
--== Forest Overworld ==--
Holocron 6/15, 10000 Force Points
- Head right out of the tunnel, toward the first Shaman you see. Around behind the trees behind him is a Holocron. Head back into the center of the area.
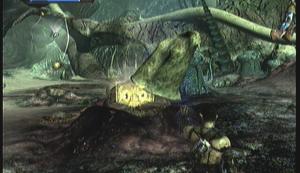
Holocron 7/15, 10000 Force Points
- You will face at least two more Shaman in this area. Watch for the bubbles on the ground, as they explode when touched. During the fighting, look for a glowing Sarlacc tooth. Pick it up to reveal a Holocron under it.
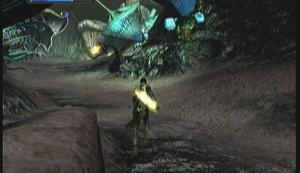
Holocron 8/15, Compressed Gold Crystal
- Near the entrance to the next cavern, backtrack while following the wall. You'll find a passage that isn't on the map. Follow it to the back to find a Holocron.
--== Tunnel ==--
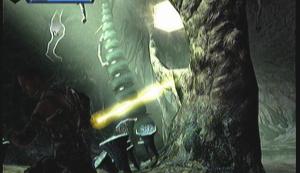
Holocron 9/15, Combo Sphere
- About halfway through, when the area opens, look for a Holocron in the center, over some brush. Continue out the other side of the tunnel.
--== Hunting Grounds ==--
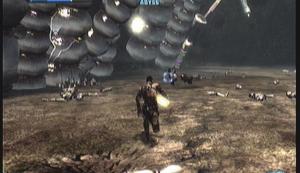
Holocron 10/15, 10000 Force Points
- Before, during, or after the fight with the Rancor, there is a Holocron in the side corner of the area, right in the open.
--== Tunnel 2 ==--
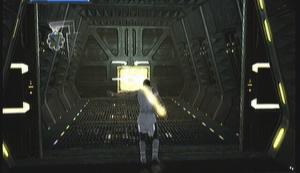
Holocron 11/15, 10000 Force Points
- This is exactly the same as last time. Watch your back, and wait for the Holocron at the midpoint, in the center of the open area.
--== Rancor Training Grounds ==--
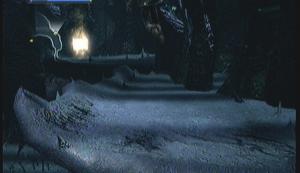
Holocron 12/15, 10000 Force Points
- Right as you enter the area, jump to the platform on the right side to get the next Holocron.
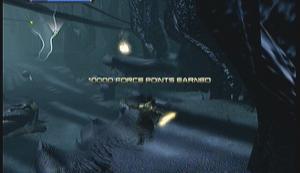
Holocron 13/15, Talent Sphere
- From the last one, you can see the next on the platform past it.
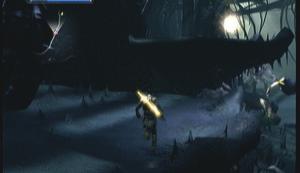
Holocron 14/15, Power Sphere
- On the left side of the area, opposite the other two, is a Holocron up on a ledge.

Holocron 15/15, 10000 Force Points
- The last Holocron is at the back of the area, behind the last pillar-tree thing. It's hard to miss from a distance, but when you get close you might lose track.
--== Hallway 1 ==--
Holocron 1/5, Blue Crystal
- Right between the two doors as you exit is the first Holocron. They do this to ENSURE that you have the Blue Crystal before the next level.
--== Research Room ==--

Holocron 2/5, Combo Sphere
- Back under the entrance door is a lower door. The room contains the second Holocron.
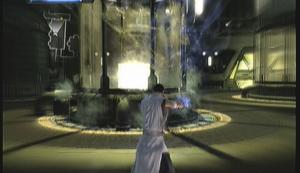
Holocron 3/5, Talent Sphere
- The next is inside one of the specimen tanks. Look for it on the left side. Break the glass with Push.
--== Hall 2 ==--
This corridor is again filled with Stromtroopers.
--== Escape Pod Bay ==--

Holocron 4/5, Power Sphere
- Look for a Holocron in the back of the room under the last escape pod.
--== Hall 3 ==--

Holocron 5/5, Lorrdian Power Crystal
- The final hall. At the end, past the door out, are some barrels surrounding the last Holocron. Break down the door before it with SEVERAL Pushes.
--== Bar Fight ==--
Holocron 1/5, Ruusan Power Crystal
- Overtop of the bar is your first Holocron. You can reach it simply by jumping. Keep heading up.

Holocron 2/5, Unstable Gold Crystal
- On the second seating platform, there is a Carbonite freezer in the center with a Holocron inside.
--== Landing Platform 1 ==--

Holocron 3/5, 10000 Force Points
- If you jump off the side of the ramp, there is a Holocron in the corner of the platform.
--== Walkway ==--

Holocron 4/5, Combo Sphere
- Walk to the first round pillar. Take the left path and look over the edge, looking toward the platform below. There is a Holocron floating in mid-air. You'll have to time your jumps perfectly to get it.
(you're suppose to zap the fan things below on the platform, and ride the current up, but that DOES NOT work, you don't have enough momentum or reach to get to the Holocron).
Holocron 5/5, Unstable Yellow Crystal
- Return to the save point by the rail overhead in the center of the walkway. Jump up onto behind the train and wait for the train to move back on the rail. It is hiding a Holocron.
--== Landing Site ==--
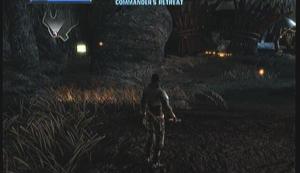
Holocron 1/15, Compressed Blue Crystal
- Back on Kashyyyk, things look darker now. Tilt the camera left to see the first Holocron right behind a rock. Walk up to the wreckage of the hut to start a cutscene and be taken to the other side.

Holocron 2/15, Kento's Robes
- On the other side, turn around and look for a small hut thing still standing. Behind it is the Holocron.
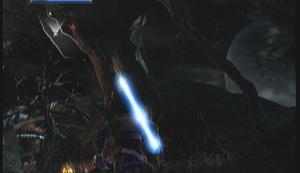
Holocron 3/15, 10000 Force Points
- Beside where the Incinerator Troopers were, there is a Holocron floating in the air. You have to get on the stump beside it to reach it.
--== Comm Tower ==--

Holocron 4/15, 10000 Force Points
- The first thing you'll probably notice on the left is a Holocron on a ledge. Don't even try this till you've cleared out the enemies. At the top of the ramp, near the Sith Holocron, you can jump to the ledge and walk over to the Holocron.
Holocron 5/15, 10000 Force Points
- Partway down the lower path is a beam overhead. Jump up onto it and follow it left onto another ledge. Turning right, you should be able to see the Holocron.
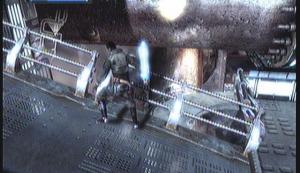
Holocron 6/15, Combo Sphere
- Look around for the ramp that leads up. There will be Jumptroopers at the top. At the first bend, look across toward a pipe. There is a Holocron floating right there. You'll have to jump and dash to reach it, while still landing on the platform below.

Holocron 7/15, 10000 Force Points
- while facing the upper generator, behind you is another Holocron floating in the air behind a large pipe. Jump and dash to reach it. We are now finally finished with this area. Get back to the grassy area and throw a rock through the door to open it.
--== Trophy Room ==--

Holocron 8/15, 10000 Force Points
- In one of the cases is a Holocron. To exit the area, walk to the glowing door.
--== Snipers Nests ==--

Holocron 9/15, Power Sphere
- There are three Holocrons in the area. The first is inside the first sniper nest. You can easily jump inside and grab it.
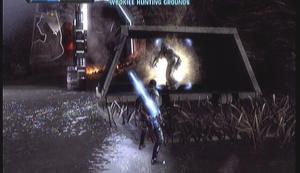
Holocron 10/15, 10000 Force Points
- The second is inside the final Wookiee cage near the door the Shadow Guard comes through.
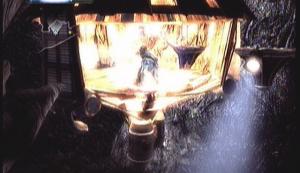
Holocron 11/15, 10000 Force Points
- The final one is inside the last sniper nest on the left side. You can jump and dash to it from the top of the final Wookiee cage that housed the last Holocron.
--== Detention Hall ==--

Holocron 12/15, Talent Sphere
- The third has some Troopers, an EVO Trooper, and a Commander.
It also has a Holocron in one of the cells. Use Grip to bend the cell door up.
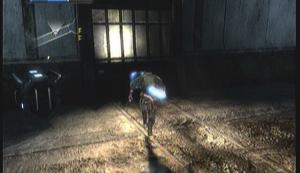
Holocron 13/15, 10000 Force Points
- The fourth barrier has a Purge Trooper and E-WEM Turret. Dash past the Trooper and take out the E-WEM first. It also has a Holocron in one of the cells. The final barrier has a Purge Trooper and that's it. Exit out the door behind him.
--== Skyhook ==--

Holocron 14/15, Purple Crystal
- Immediately on the right is a tree. On one of the branches is a Holocron in easy jumping distance.

Holocron 15/15, 10000 Force Points
- In your travels around the Skyhook, look for a Holocron between two of the couplings up near the structure.
--== Landing Site ==--
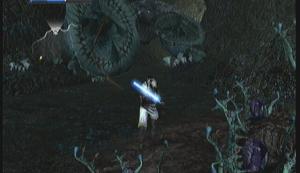
Holocron 1/15, Green Crystal
- The first Holocorn is also here, but it's not the one you see right off. From where you started after jumping off the ledge, turn back around to the right to find a secret passage. At the end is an Incinerator Trooper, but the prize is a Green Lightsaber.

Holocron 2/15, Talent Sphere
- The second is probably the one you saw right off. It hovers above a large Sarlacc tooth. You'll have to use the debris in the area to build a platform to reach it (3 boxes should suffice).
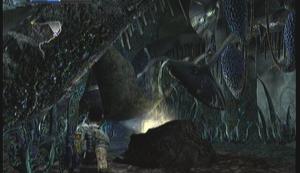
Holocron 3/15, 10000 Force Points
- The final Holocron is at the back of the area. Keep going past the bridge. It's inside the last Sarlacc tooth.
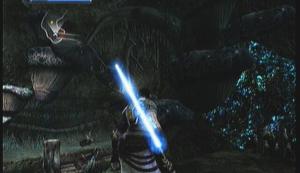
Holocron 4/15, Compressed Purple Crystal
- At the other side of the bridge, DON'T JUMP DOWN! There is a Holocron on a mushroom on the right side. You have to jump to the ledge under it to reach it.
--== Canyon ==--

Holocron 5/15, 10000 Force Points
- When you're done with the AT-ST, look for a ledge on one side (a ledge you can jump to) follow it to the avalanched area and look right for another ledge you can jump to. The Holocron is right in there.
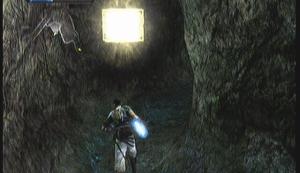
Holocron 6/15, Power Sphere
- The next Holocron is on the same ledge. It leads around to where the E-WEBs where. Once you have the Holocron, drop back down and use Push to clear the rocks.
--== Sarlacc Pit ==--

Holocron 7/15, Vexxtal Power Crystal
- Be careful not to cut the cables on the top of the first cable car! You have to use them to reach the Holocron. With that in hand, lighting the glowing power box.
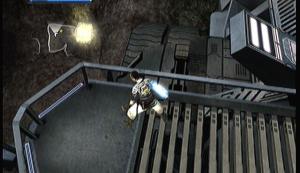
Holocron 8/15, 10000 Force Points
- There is another Holocron behind the first cable car. Jump down and grab it.

Holocron 9/15, 10000 Force Points
- Look above the overhang on the side of the tower over one of the bridges that lead to the cable cars for another Holocron. One last bridge, one last box, and one last chain. Once you have finally zapped all three, the elevator in the tower becomes functional. Get on and ride it inside.
--== Sarlacc Stomach ==--

Holocron 10/15, 10000 Force Points
Holocron 11/15, 10000 Force Points
- You'll come to a large storage area with nothing in it. When your pilot gets on the radio and says you're entering... somewhere... and it's a large round room, look in the area above to spot a Holocron. To get to this one, you must use Dashing Blast. Double-jump, dash, and tap Push. You have to line it up perfectly to reach it. If you don't make it, quickly pause and to Level Select. Reload the last save point and try again.
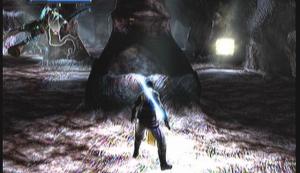
Holocron 12/15, 10000 Force Points
- In the lung room, stay on the right side of the area to collect a Holocron beside one of the pillars. At the end of the tunnel, you get expelled out.
--== Battlegrounds ==--

Holocron 13/15, Unstable Blue Crystal
- When you're level or slightly above the turrets where the Imperials were, turn about and look for a Holocron floating in the air.

Holocron 14/15, 10000 Force Points
- Kill off all the enemies in this area. During the fighting you'll probably stumble across this Holocron on the left side of the path, behind a rock.
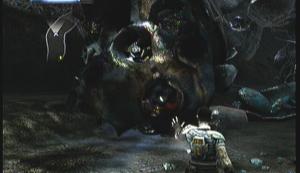
Spider Droid Head
- Once all the enemies are dead, look around for a large round metal object. Grip this object and carefully take it back to the large round area earlier. I don't recommend throwing it, as you might lose it. Just lift, move, set, repeat.
Holocron 15/15, Combo Sphere
- When you reach the area, set it under the Holocron we past earlier and use the extra height to reach it.
--== Canyon ==--
Holocron 1/15, Sigil Power Crystal
- Jump over the ledge at start. Look for a ledge on the right side. Use it to get to a ledge on the left. The ledge leads to a cave, and down below is the Holocron.

Holocron 2/15, 10000 Force Points
- On the left side is a little nook with a couple Jawas. They guard the second Holocron.
--== Junk Bridge ==--

Holocron 3/15, Power Sphere
- On the other side of the steel girder bridge, look for a broken door-like thing. Push it down to reveal a Holocron.

Holocron 4/15, 10000 Force Points
- Jump across the gap here to continue, and grab the Holocron in the path. You cant miss this one.
--== Battleground ==--
Holocron 5/15, 10000 Force Points
Holocron 6/15, Compressed Green Crystal
Holocron 7/15, 10000 Force Points
- There are three Holocrons in the area where the Rodians and Imperials were fighting. One is in the tunnel where the Rodians spawned. Another is on a high cylinder platform on the right hand side near the ledge (jump to it to land on a small ledge half way up). The final one hangs over the top of the area. Jump up on the platforms on the left side, as if leaving the area, then turn Dashing Blast to it.
--== Imperial Hanger ==--

Holocron 8/15, 10000 Force Points
- In the transition tunnel is the next Holocron. You also get a message from Juno saying Proxy has left the ship.
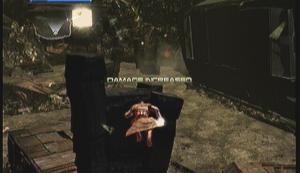
Holocron 9/15, 10000 Force Points
- The Scouts being where the are actually help you notice this Holocron. It's over the third tower almost dead center in the area.
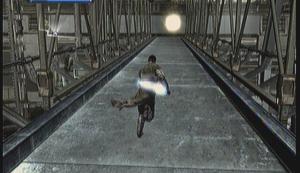
Holocron 10/15, Talents Sphere
- The next Holocron fools a lot of people. They try to get on the elevator in the back of the room, and jump off at the catwalks to reach it. Problem is the elevator travels to fast for this to work. The catwalk is held up with pillars, and these pillars have ledges on them large enough for you to jump off of. This is how you get up there.
--== Tractor Beam Tower ==--

Holocron 11/15, 10000 Force Points
- At the top of the elevator, take a right and follow the left ledge down. This Holocron is at the end.
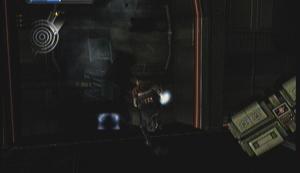
Holocron 12/15, Unstable Purple Crystal
- Before doing anything here, take a right and go up the ramp. At the top, there is an EVO Trooper guarding some boxes. Kill him and move the boxes, then push/slash the wall behind them to reveal a path. Go all the way to the end to claim your prize.
--== Precarious Bridge ==--
Holocron 13/15, Combo Sphere]
- Go back to the door you came in from and turn around, facing back to the exit. The Holocron is on the Scout's ledge on the left side. To get there, you have to get on the lower left ledge near the exit, double-jump and Dashing Blast. You can overshoot, so be careful. Also remember to do it next to the exit door, because the gap is the smallest there.
--== Oval Corridor ==--
Holocron 14/15, 10000 Force Points
Holocron 15/15, 10000 Force Points
- There is also two Holocrons in the area. One on the left side and one of the right.
--== Hanger Bay ==--
Holocron 1/15, Katak Power Crystal
Holocron 2/15, 10000 Force Points
- On the left and right side of the hanger are lifts that take you to the rafters. Grab the Holocrons on either side.
--== Firing Chamber ==--
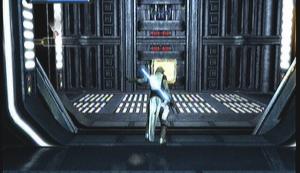
Holocron 3/15, 10000 Force Points
- Past the first set of lenses, there is an enemy spawn points on the left. The next is a little ways up on the right. Same deal, only this time there's a Holocron inside.
Holocron 4/15, Unstable Green Crystal
Holocron 5/15, 10000 Force Points
- In the Control Room area, look around on the left side for a lift. This will take you up to the rafters. Walk around to the laser's side and look for a beam over where the laser fires. Jump up on top of it. There is a Holocron to the left, and a Holocron to the right.
--== Amplification Chambers ==--

Holocron 6/15, Talent Sphere
- On the right side is a door that leads to the next Holocron. Might want to get it AFTER the Purge Troopers though.

Holocron 7/15, 10000 Force Points
- Two E-WEBs on the other side of this room. On the right is another door with another Holocron.

Holocron 8/15, 10000 Force Points
- Past the last hall above, Dash across the chamber and grab the Holocron.

Holocron 9/15, Power Sphere
- Right before the first gyro is a door on the left that leads to an elevator. Exit out the door at the bottom, take a right, and in the large chamber go counterclockwise and get the next Holocron.

Holocron 10/15, 10000 Force Points
- Over the second gap is the Holocron. If you miss, you can drop down to the chamber below and take the elevators up to the central platform.
--== Convergence Chamber ==--
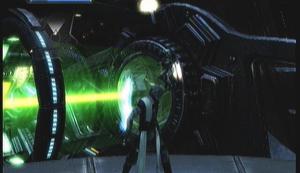
Holocron 11/15, Black Crystal
- At the top of the gravity lifts, look at the laser in the center of the two lifts. On the top of it is the Holocron. You have to ride the lift up, then Dashing Blast over to the top at just the right angle to avoid overshooting. Needless to say, I wouldn't try this while the laser is firing.

Holocron 12/15, 10000 Force Points
- Drop back down to the bottom, and raise up by one gravity ring. Stop off and look for a Holocron within one of the lowest level laser rings.
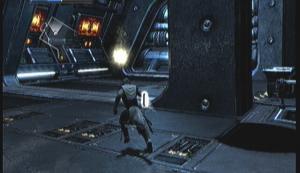
Holocron 13/15, 10000 Force Points
- Next Holocron is three rings up on the side you originally came in the room from. That is, facing the power box for the lifts, the gravity lift to your right.
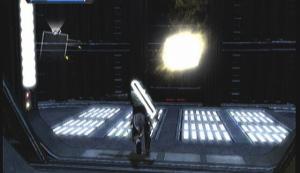
Holocron 14/15, 10000 Force Points
- Next one is on the opposite side of the room. On the uppermost platform. Ride the lift all the way up and jump off toward the wall. It's inside a door.

Holocron 15/15, Combo Sphere
- The final one is on the main platform that leads to the Emperors chamber. It's very easy to find, but you'll have to fight for it.
Almost every level has a bonus objective. Just a fun thing you can do that gets you points and otherwise allows some Imperial Engineer to keep his job and try to build a better mousetrap.
I'll list all the objectives and a how-to for every level. Note that the Prologue, Death Star, and Jedi Temple do not have bonus objectives.
--== Tie Fighter Factory ==--
Objective: Destroy 5 Tie Fighters
In the hanger, Ties spawn infinitely on the ceiling. Use grip to grab them off the rack and throw them down. Easy one.
--== Raxus Prime ==--
Objective: Destroy 10 Scavenger Skiffs
The key is knowing that you can destroy the Skiffs with one shot of Lightning. Just make sure you're targeting the Skiff. There are about 12 Skiffs total in the level.
~4 at the start in the landing area. Rush around the area properly and you should run into all of them as you go.
~4 in the area where you first meet the Junk Guardians. They land near the cliff
~2 on the cliff outside the Blockade Runner
~2 on the cliff near the switcher box in their camp. One before you switch the rail, and one after.
--== Felucia ==--
Objective: Kill 4 Rancors
There are four total Rancors in the level. The first in the Battlegrounds, and three more in the Rancor Training Grounds just before the boss fight.
--== The Empirical ==--
Objective: Launch 6 Escape Pods
In the Escape Pod room right after the Research Lab, there are Escape Pods on the left side. Hit them with Lighting to start them up, and they'll explode a second later.
--== Cloud City ==--
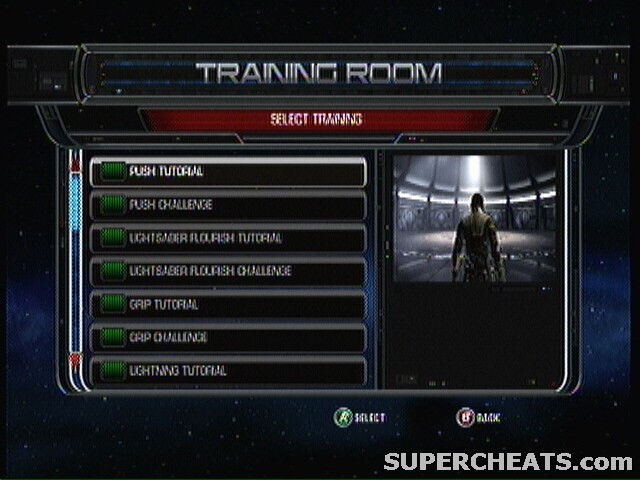
Barrel
Objective: Freeze 10 Imperials in Carbonite
In the bar, there are Carbonite chambers in the center of the chairs. You can pick up Imperials and set them in it. Next are the Carbonite barrels in the open areas that you can throw at the Imperials. Finally, the ace in the hole are the Carbonite hoses that you can pick up and manipulate around to spray the Imperials with it.
--== Imperial Kashyyyk ==--

Lower Generator
Objective: Destroy the Imperial Communications Tower
Just past the AT-KT, there is a series of walkways. At the end is a tower before the door. On the bottom walkway is a grate with a generator behind it. Remove the grate and shock the generator. Do the same with the second generator on the upper walkway.
--== Imperial Felucia ==--
Objective: Release the Sarlacc
On the cable cars that you have to zap the boxes, go out to the edge of the car facing the pit. You should auto-target a chain hanging in the air. Throw your Lightsaber at it to break it. Do this on the other two cars, and presto.
--== Imperial Raxus Prime ==--
Objective: Destroy the Imperial Tractor Beam Tower
Past the lift that takes you to a new area, ride the next lift up and through the doors. On the inside is a large room with a tower in the center. Walk up the ramps on the sides of the room and use this point to jump to the walkway on the tower. Push off the Imperials and use Lightning on the conduits sticking out the sides.
Like all 360 games, the Xbox version of The Force Unleashed has an achievement system. Most of these are fairly easy, but will take some time. A lot of people also get confused on what the exact parameters of some achievements are, and I’ll cover those as well.
- Apprentice (75)
Description: Complete Game - Apprentice difficulty. Do not change the difficulty after the game has started.
- As The World Turns (30)
Description: Use the large globe to kill 10 enemies in the museum
Note: The globe floats in the center of the room. It’s a large gold sphere. Use Grip to pick it up and throw it around. Jedi Temple Downloadable Content only.
- Bossk (15)
Description: Defeat 200 Wookiees on Kashyyyk Prologue
Note: You can play the Prologue over and over by constantly selecting New Game. You do not have to do this in one run.
- Bully (15)
Description: Defeat 25 Ugnaughts or Jawas
- Cannon Fodder (15)
Description: Defeat 150 Stormtroopers
- Corellian Star (10)
Description: Complete all bonus objectives on one level
Note: This means the bonus objective, the metagame score, and all the Holocrons in one level.
- Destroyer (10)
Description: Complete Level - Raxus Prime, act 2
- Empirical (10)
Description: Complete Level - Empirical, act 2
- Expert (10)
Description: Earn 500,000 Force Points on a single level
Note: You can play a level multiple times, and your score is ADDED to your current total, you do not need to get this many in ONE play of one level.
- Force Grip Mastery (20)
Description: Defeat 500 enemies with Force Grip
Note: This includes throwing them into things.
- Force Lightning Mastery (20)
Description: Defeat 500 enemies with Force Lightning
- Force Push Mastery (20)
Description: Defeat 500 enemies with Force Push
- Force Repulse Mastery (20)
Description: Defeat 500 enemies with Repulse
- Sith Frenzy (10)
Description: Get a Frenzy x8 bonus
Note: Kill 8 things within 3 seconds of each other.
- Frenzy (5)
Description: Get a Frenzy x4 bonus
Note: Kill 4 things within 3 seconds of each other.
- Get A Grip (30)
Description: Defeat the trials without the sphere turning red
Notes: This is extremely hard. You cannot move off the track at all. Jedi Temple Downloadable Content only.
- Grappled (15)
Description: Defeat 100 enemies with a grapple move
Notes: X A or Y B
- Gripped (5)
Description: Defeat 100 enemies with Force Grip
Note: This includes throwing them into things.
- Holocron Collector (75)
Description: Collect all Jedi holocrons in the game
- Impaled (5)
Description: Defeat 100 enemies with Saber Throw
- Infestation (10)
Description: Complete Level - Felucia, act 2
- Insurrection (10)
Description: Complete Level - TIE Factory, act 1
- Invasion (10)
Description: Complete Level - Prologue
- Jedi Hunt (10)
Description: Complete Level - Felucia, act 1
- Jedi Knight (30)
Description: Complete Jedi Temple – Sith Lord difficulty.
Note: Downloadable content only.
- Jedi Master (40)
Description: Complete Jedi Temple – Sith Master difficulty.
Note: Downloadable content only.
- Junkyard (10)
Description: Complete Level - Raxus Prime, act 1
- Launched (20)
Description: Defeat 100 enemies with Aerial Ambush juggle combos
Note: X, X, X, B (hold). That starts the ambush. After that you can use any combo you want and it counts, so long as you kill them WITH WHATEVER YOU PRESS NEXT, and not as you send them into the air. Later in the game, the Incinerator Troopers are pretty much the only ones that can withstand the full combo.
- Legend (25)
Description: Earn 600,000 Force Points on a single level
Note: You can play a level multiple times, and your score is ADDED to your current total, you do not need to get this many in ONE play of one level.
- Lightning Shield Mastery (20)
Description: Defeat 500 enemies with Lightning Shield
Note: You have to have Lightning Shield on at least level 2 to damage people.
- Lightsaber Throw Mastery (20)
Description: Defeat 500 enemies with Saber Throw
- Padawan (30)
Description: Complete Jedi Temple – Sith Warrior difficulty.
Note: Downloadable content only.
- PROXY Won't Be Happy (15)
Description: Destroy 35 droids
Note: I’m not sure if Purge Troopers count. The only thing I know for sure is the Astromech Droids do.
- Pushed (5)
Description: Defeat 100 enemies with Force Push
- Rebel Leader (15)
Description: Defeat 500 Imperials
- Redemption (20)
Description: Complete Game - Light Side
Note: You do NOT have to play through the entire game again. Simply re-play the Death Star level and choose the other ending.
- Repulsed (5)
Description: Defeat 100 enemies with Force Repulse
- Revenge (20)
Description: Complete Game - Dark Side
Note: You do NOT have to play through the entire game again. Simply re-play the Death Star level and choose the other ending.
- Robot Parts (30)
Description: Defeat the training room in less then 2 minutes
Note: The room with the robots. Destroy all the spawn points in 2 minutes. Downloadable content only.
- Shocked (5)
Description: Defeat 100 enemies with Force Lightning
- Sith Lord (100)
Description: Complete Game - Sith Lord difficulty. Do not change the difficulty - after the game has started.
- Sith Lord Frenzy (15)
Description: Get a Frenzy x12 bonus
Note: Kill 12 things within 3 seconds of each other.
- Sith Master (100)
Description: Complete Game - Sith Master difficulty. Do not change the difficulty after the game has started.
- Sith Training (20)
Description: Complete all Training Room lessons
- Sith Trials (20)
Description: Complete all Training Room challenges and Combat Modules
- Sith Warrior (100)
Description: Complete Game - Sith Warrior difficulty. Do not change the difficulty after the game has started.
- Skilled (5)
Description: Earn 250,000 Force Points on a single level
Note: You can play a level multiple times, and your score is ADDED to your current total, you do not need to get this many in ONE play of one level.
- Skyhook (10)
Description: Complete Level - Kashyyyk, act 2
- Stormed (5)
Description: Defeat 100 enemies with Lightning Shield
Note: Your shield has to be on at least level 2 to damage people.
- The Bigger They Are (15)
Description: Defeat 6 Rancors
- The Harder They Fall (15)
Description: Defeat 10 AT-STs or AT-KTs
- Vapor Room (10)
Description: Complete Level - Cloud City, act 2
- Worst Day-Shift Manager Ever (10)
Description: Kill 12 Stormtroopers as Vader during the Prologue
Note: You can play the prologue over and over again to get this. You don’t have to do it in one run.
- Youngling (30)
Description: Complete Jedi Temple – Apprentice difficulty
Note: Downloadable content only
Training Room
Here you can practice your new skills, both Force Powers and real combat. Really, this is quite unnecessary, you learn pretty much everything you need to over the course of the game.
The Tutorials are just that, and they walk you through it step-by-step. The Challenges pose more of a problem, for some. Combat Modules would be hard if they had any kind of restriction, but they don’t. It’s a free-for-all.
I HIGHLY recommend that you do not attempt either the Challenge or Combat Modules until after you have all your Force powers and Talents reasonably maxed. It’ll make things flow way better and faster.
Rather then type these, I got some video for you. I will post some minor explanation, especially for the Combat Modules, but you really should be able to figure it out for yourself.
--== Push Tutorial/Push Challenge ==--
- Unlocked: Start
--== Lightsaber Flourish Tutorial/Lightsaber Flourish Challenge ==--
- Unlocked: Buy Sith Saber Flurry
- Notes:
The trick to this is the timing. Focus on only your Lightsaber, not the enemy or else you’ll get distracted. Be patient, the window for the Flurry attack is long, but you have to wait till AFTER your swing finishes. Most people press it too early.
--== Grip Tutorial/Grip Challenge ==--
- Unlocked: Start
- Notes:
There will always be some debris left behind to smash the windows with.
--== Lightning Tutorial/Lightning Challenge ==--
- Unlocked: Complete Mission 1 – The Fighter Factory
- Notes:
Having level 2 or higher lightning really helps here, as does having a large amount of Force power.
--== Repulse Tutorial/Repulse Challenge ==--
- Unlocked: Complete Mission 2 – Raxus Prime
--== Stormtrooper Combat Module ==--
- Unlocked: Start
- Notes:
You can almost defeat them by standing still if your Defense Mastery is high enough.
--== Rodian Scavengers Combat Module ==--
- Unlocked: Complete Mission 2 – Raxus Prime
--== Felucian Combat Module ==--
- Unlocked: Complete Mission 3 – Felucia
- Notes:
Take out the yellow Chieftains first. They cause the biggest problem.
--== Imperial Assault Squad Combat Module ==--
- Unlocked: Complete Mission 4 – The Empirical
- Notes:
Be wary of using Force powers, as many of the enemies have shields.
--== Imperial Armed Recon Squad Combat Module ==--
- Unlocked: Complete Mission 6 – Imperial Kashyyyk
- Notes:
Go around the room one way or the other, and take out the Scouts and Jumptroopers first. The Incinerator Troops will greatly eat away your health as is, you don’t want your combo interrupted when near them.
--== Imperial Royal Guard Combat Module ==--
- Unlocked: Complete Mission 5 – Cloud City
- Notes:
You are going to fall down, A LOT. The key is to focus on one of them (not the Senate Guard!) and beat on that one till he goes down. Taking them on all at once is crazy.
--== ATST Combat Module ==--
- Unlocked: Complete Mission 6 – Imperial Kashyyyk
- Notes:
Hopefully, you have maxed lightning and Force power by now. Jump up and unload on the AT-ST, worry about the troops second.
--== Junk Titan Combat Module ==--
- Unlocked: Complete Mission 2 – Raxus Prime
- Notes:
There aren’t many of the droids here, just a couple, so if you want to you can take them out first.
--== Kota’s Militia Combat Module ==--
- Unlocked: Complete Mission 1 – The Fighter Factory
- Notes:
Repulse works wonders.
--== Rancor Combat Module ==--
- Unlocked: Complete Mission 3 – Felucia
- Notes:
Unload with Lightning on the Rancor first. The warriors then just become a nuisance that Repulse can take care of.
--== Raxus Droids Combat Module ==--
- Unlocked: Complete Mission 2 – Raxus Prime
- Notes:
Lightning. Lightning. Lightning. It takes their health down really fast. On top of that, make use of your Dash to keep from being surrounded.
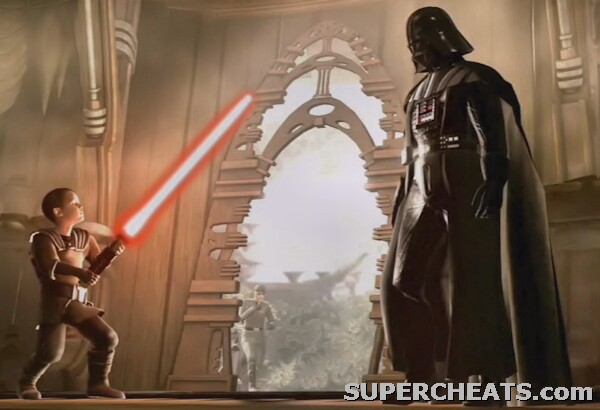
Boss Guide
You always have to have someone at the end of a level that's in control of that level. Someone moderately more challenging then the peons you were facing before.
Here we'll take a look at the few that call themselves bosses, listing strategies and tips for each.
=======================================================================

--== Boss: Rogue Jedi ==--
Force Choke does nothing against him. Push and Repulse however seem to be his weaknesses. You can easily toss him across the area, walk over to him, and get some good stabs in before he gets back up.
He likes to counter with Saber Throw and a Sephiroth-type attack where he brings down a Tie Fighter on top of you. The trick is to stay near him for the most part, as the fighter never lands on him.
Once his health bottoms out, be ready for the Quick-Time Event.
360: X, B, B, B
PS3: [], O, O, O

--== Boss: Rahm Kota ==--
Kota isn't very resistant to the Force, for the most part. He will block Grip completely, and can block Push sometimes, but rarely, especially if you mix it in with combos.
His attacks consist of basic Lightsaber swings mostly, but a couple can be pretty tough, like when he flies up and drops down in the center of the room, creating a shockwave that's hard to even jump over. The other is when he picks up a lot of debris around the area and floats it around him. He'll throw it at you in chucks, and the only way to dodge is either good dash timing or hiding behind something.
He is vulnerable after every special attack he does, so don't waist that time. Keep him off balance with Force Push, and watch for when he forms a Force bubble around himself, and use Push to pop it.
Near the end of the fight, the station will start the feel the burn of reentry, and the floor will become damaging to walk on. You must seek higher ground at that point.
The ending QTE is:
360: X, X, A, B
PS3: [], [], X, O

--== Boss: Kazdan Paratus ==--
Paratus rarely uses Force powers, instead opting for is fast and powerful Lightsaber style. To get a hit in, you'll have to knock him off his feet or stun him. Lightning works well by just using it, as does it infusing it in your Lightsaber. Push will work sometimes, but is better in a combo.
Once his health goes down a bit, he'll jump out of the room and latch onto a pillar. He'll then summon a Junk Titan to the middle of the room. You don't have much room to fight, so I'd quickly shock it to death. The good thing about this is Titans often give you enough health to fully heal up.
Paratus, sill outside the room, will then start throwing things at you. The only way to dodge this is pretty much jumping around and hoping they don't hit.
He'll repeat this a few times before you get to start the QTE:
360: X, B, X, Y, A
PS3: [], O, [], Triangle, X

--== Boss: Shaak Ti ==--
Shaak Ti relies on the terrain more then anything. The camera angle is weird, and there are explosive bubbles everywhere. Her attacks really leave much to be desired, comparatively. She even has really weak defense against Force powers, so much so that you can even pick her up with Grip and throw her! She has a particular weakness against the Saber Slam (lighting-infused strike) and Repulse, however. She also likes to dash around the field and sometimes uses Push at the end, so try to keep up.
Her main “attack” seems to be turning invincible and summoning Warriors from below. You wont really be able to hurt her till after you kill the Warriors.
That's just part 1 though. The second part starts after she jumps off the cliff.
This battle plays out almost exactly like the first part, except the area is smaller and Shaak Ti will now call on the Sarlacc to crush you with it's tentacles, and attack that's easily dodged by dashing at the right time (stand under the center one, and dash to the side when it starts coming down).
The QTE finally ends the fight.
360: X, X, X, A, A, B, Y
PS3: [], [], [], X, X, O, Triangle

--== Boss: Shadow Guard ==--
Shadow Guards are much more fearsome then the Senate Guards you've been facing. For one, they have mastery of the Force, unlike even some of the Jedi you've faced so far. They can use Push, Lightning, and even Grip.
The lightning isn't so much painful as it just slows you down. When they pick you up with Grip, rapidly press B [O] to escape. Push is just Push, but you get close to him is almost acts like Repulse.
Always kill anyone in the room other then the Shadow Guard first. With only the Shadow Guard remaining, this fight isn't TOO bad. Lightning, Push, and Grip have almost no effect on him unless you can catch him off guard. The best thing you can do is start a saber combo WITHOUT touching him, then use Saber Slam or another Force-based combo and hit him with that swing. It usually works.
His health isn't much, so if you can just knock him down you can rush over and stab him on the ground a couple times. It's usually enough to kill him.
A QTE ends it:
360: X, Y
PS3: [], Triangle

--== Boss: Captain Ozzik Sturn ==--
Ozzik Sturn comes out in a custom AT-KT after around the second coupling is pulled. This version has a sniper rifle mounted on the right side, a stun rocket on the left side (that is more powerful then the standard version), a detonator launcher on top, and all in addition to the standard blaster cannons.
It is a formidable foe, except that it is STILL a machine, and therefore weak against electricity. It's large size also makes it fairly slow and easy to circle-strife.
Once his health goes down, a QTE ends it:
360: X, A, Y, B
PS3: [], X, Triangle, O

--== Boss: Bull Rancor ==--
The first stage of this fight has you fighting the Rancor. Unlike other Rancor, this one is pretty impervious to Lightning. It's only real attacks however consist of pounding the ground when you're near it or charging at you like a bull.
Get a good distance away, with your back up against a wall. Look and wait for him to charge at you. At the last second, Dashing Blast away. The attack has a lot of recovery time, giving you enough time to get back to him and use a Sith Saber Smash. Boost away quickly before he pounds the ground and repeat.
Maris will randomly appear from time to time and try to attack, but it's negligible. If you really fell threatened, you can stop what you're doing and run away.
QTE:
360: X, Y, X, B, A
PS3: [], Triangle, [], O, X
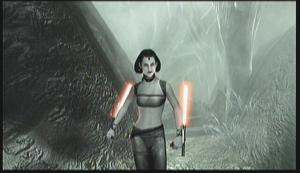
--== Boss: Maris Brood ==--
You're now fighting Maris in a rather cramped space, which of course SEEMS to work well for her, but you'll find it works better for you. Maris has the ability to turn invisible. This ability is not complete, however, as you can see when she first disappears and you can lock on to her just before she appears.
Her general attacks consists of appearing behind you, using a combo that knocks you down, then throwing her sabers at you a couple times before disappearing again. Any use of Force powers on your part will result in her blocking, then following with Push and a Saber Throw.
The trick to this fight is when she disappears, starts a Sith Saber Slam. Try to guess where she is going to appear, or better yet be in a corner where there is really only one way she can come from. On the final stroke, you slam your Lightsaber and shock the ground. This will knock her out of invisibly and stun her long enough to get at least one more combo in.
QTE:
360: X, A, B, X, X
PS3: [], X, O, [], []

--== Sub-boss: Proxy ==--
You may think “what can Proxy do?” But you forget at the start of the game where he was Obi-Wan. He can shape-shift and take on the appearance and battle style of another warrior. For this fight, that means every human-sized boss you've fought so far, Shadow Guard, Kota, Shaak-Ti, Maris Brood, and Kazdan Paratus.
The strategies for those don't change any. In fact, it's easier, as he's not a perfect copy, and he also cant copy their special attacks.
However, after you get his health down, he pulls an ace out of his sleeve.
*Duel of Fate plays*
Now the fight really starts. Darth Maul focused heavily on his Saber techniques. He isn't much of a Force user, but he can absorb and counter the Force pretty well. One of his favorite attacks is a mid-air saber throw, that puts him a distance from you. Attacking him with regular saber attacks is also useless, as he can easily break your stance mid-combo. Don't bother trying to throw stuff at him either, he is way too fast.
You're only hope here is to mix in Sith Saber Slams and Saber Slings, hoping to knock him down. Once he hits the ground, you can stab him a few times before he gets up.
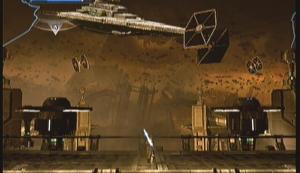
--== Boss: Star Destroyer ==--
The Star Destroyer itself isn't really the boss so much as it's weak point. The Tie Fighters are the ones that put up a fight.
This fight consists of Destroying Ties -> Gripping and aligning the Destroyer -> Pulling it down a bit -> Repeat once more Ties show up.
I'll start with the Ties. There are multiple ways to deal with the Ties. One is to stand back and wait for them to pass overhead, then jump up and shock them, another is to Grip them as they fly by (they'll fall out of the sky with just a tap), or finally to throw the explosive barrels that float by at them.
Throwing the barrels works the best, if you know how to do it. Don't just grip and throw, you have to push it out there a ways first. If you don't, it will to flying off at one of the pylons on the left or fight. Besides that, Lighting works the second best, and is a little faster.
After all the Ties are down, Kota will tell you to do something related to pulling down the Destroyer. Run up to the edge of the platform and Grip. You'll see two thumb sticks at the bottom of the screen with a red aura around them. Tilt the sticks in the direction indicated till the aura turns green, then hold the ship there. After a second, the aura will disappear and Kota will say something again. At this point, pull both sticks down to start moving the Destroyer down.
You'll see Ties start to fly in from the distance. Don't let go of the Destroyer immediately or you'll never get anywhere. You'll almost have to take a few hits from the Ties while still pulling the Destroyer. Once your health hits red, then let go and focus on the Ties.
This continues to repeat, as the Destroyer will start to turn to one side while you fight the Ties, meaning you'll have to line it back up again. The faster you fend off the Ties, the less time it takes to line up the Destroyer.
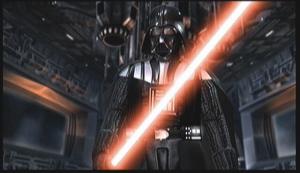
--== Boss: Darth Vader ==--
Stage 1:
This stage, Vader loves using Push. He also likes to use Grip, but not as much. Jam B [O
Stage 2:
Bursting into the next room, Vader takes a stand on the central platform. The red field around it hurts if you touch it, and if you get to close to him he'll repulse you off, so stay on the sidelines. Vaders main attack here is picking up barrels and throwing them at you. And I say let him do it. Whenever he picks up a barrel, he's using the arm he would otherwise use to block Force attack, particularly Saber Throw. Pretty much just spam this attack for the rest of the stage. He will occasionally bend the platform you're standing on, in which case just find another. Don't bother trying Push or anything to knock him off, as he'll always block that.
Stage 3:
This is an extension of stage 2. After his health goes down a ways, he'll jump off the center platform onto the platform in the back of the room. This stage plays out a lot like stage 1, only his saber blocks are even worse. Spam Sith Saber Slam and watch when he picks you up.
QTE:
360: X, B, B, X, X, X
PS3: [], O, O, X, X, X

--== Final Boss: Darth Vader ==--
The last fight with Vader is very much like the first, only Vader is way more aggressive. He will come after you with Lightsaber combos, almost all of which will knock you down. A mastery of the perfect block will come in handy here, as he'll be knocked off balance long enough for you to get a combo in. Besides that, I'd block and hold off till he charges up a push. Get behind him and combo during the recovery, and repeat.
Final QTE:
360: X, B, B, X
PS3: [

--== Final Boss: Emperor Palpatine ==--
The Emperor is an obscenely easy fight. His only main attack is creating an orb around himself, floating into the air, and pelting you with canisters. This is easily avoided by standing behind one of the raised control modules at the front of the room. The canisters will bounce off the top and completely miss you. You have to be RIGHT up against them though.
He then floats to the ground and becomes vulnerable. Any direct assault results in him dashing back and away. So, kill him like we killed almost everything else in this game: kill it with lightning! As soon as he lands, unload on him till he floats back up. He will lightning you in return, but the damage is negligible.
When he first floats up, he'll summon some Guards to come in from the sides. The later in the battle it gets, the more there will be and the higher rank they'll be. You'll have to kill all of them to start the next phase of him throwing canisters, and repeat the entire process till he goes down.
Final QTE:
360: X, A, B, X, B
PS3: [], X, O, [], O

Enemy Guide
Enemies play an important roll in The Force Unleashed, for without them, who you would you release the Force on? Friends? That wouldn't be very nice. So remember to honor their commitment to you have fun as you throw them out a window into cold, dark, space.
Most enemies in the game are pretty basic, attacking with either ranged or melee attacks in basic patterns. Some do have some quirks however, like force shields. I'll go through them all in detail.
Note that some of their weapons I was able to get very specific about, while others I wasn't. This is because some of them are known figures in the Star Wars universe, so information about them is well know, while others are not.
Also note that many Imperials use the E-11 blaster. This is two fold: 1, the E-11 is a very powerful and feared weapon in the “real” Star Wars, but it is used SO much and is such standard equipment that in most video games it is downplayed as “standard” and “base-level”, meaning it has the worst stats. 2, there are several variants of the E-11, including the E-11a, E-11b, and even the E-11 Sniper Rifle. Telling the variants apart is pretty hard, but I'd be willing to bet that they are in this game.

Felucian Chieftain
Found:
Felucia, Imperial Felucia
Weapons:
Felucian Skullblade
Felucian Chieftains are the leaders of the Felucians. They are fairly resistant to Force powers, and have an energy shield to block Lightsaber attacks. Your best chance against them is to use Push or Repulse. Lightning works ok, but doesn't deal full damage.
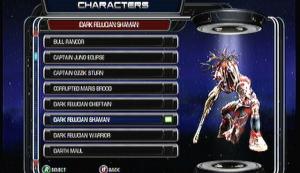
Felucian Shaman
Found:
Felucia, Imperial Felucia
Weapons:
Felucian Skullblade
Shaman can empower nearby Felucians to get them extra strength. You'll know when one's near, as all the Felucians nearby will have a red aura. This aura makes them practically invincible. You'll have to kill the Shaman to deactivate it. This isn't easy, however, as Shaman teleport away when you get close. The best attack is to do a Dashing Blast into them and knock them over, then stab them before they get up.
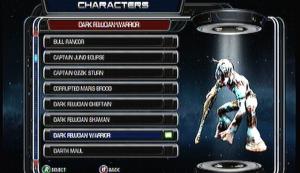
Felucian Warrior
Found:
Felucia, Imperial Felucia
Weapons:
Felucian Skullblade
Warriors are the infantry of the Felucian army. They attack at close range with quick unorthodox melee attacks. Some do have an energy shield to block against some attacks, and their fast melee makes it hard to get a saber attack in without it resulting in a clash. Push and Repulse works best, especially if you're surrounded.

Imperial EVO Trooper
Found:
Empirical, Imperial Kashyyyk, Imperial Felucia, Imperial Raxus Prime, Death Star
Weapons:
FA-3 flechette launchers / T-21 light repeating blasters
EVO troopers are dispatched to areas that have environmental hazards, be it extreme temperatures, poisons gases, or radiation. They have heavy armor to survive in these conditions, and they also have EVO shielding for further protection. Apparently the Force is considered an environmental threat, as the shield also protects against it. You'll have to get in close with your Lightsaber. When you face them early on, most don't raise their shields, meaning you can attack with anything.

Imperial Incinerator Trooper
Found:
Imperial Kashyyyk, Imperial Felucia, Imperial Raxus Prime, Death Star
Weapons:
Flame Projector
Incinerators are called in to subjugate large worlds as a scorched-earth tactic. They are often fitted with more then just the flamethrower, but not in this game. Like the EVO troopers, they have to survive in harsh conditions not just from the planet but from their weapons as well, so they'll always have their shield up. They also have the heaviest armor of all the Imperials. This makes them the only soldier that can withstand till the end of an Aerial Assault combo later in the game, making them great for that achievement. Other then that, be aware that if you attack from behind you might detonate their pack.

Imperial Interrogation Droid
Found:
Empirical, Imperial Kashyyyk, Death Star
Weapons:
Buzzsaw
These droids aren't exactly at the forefront of combat, but they do have the tools to kill someone. They'll only attack with their buzzsaw, but the small size and black color makes them very hard to see coming before they start ripping through you. A good Repulse should shake them off.

Imperial Jumptrooper
Found:
Cloud City, Imperial Kashyyyk, Imperial Felucia, Imperial Raxus Prime, Death Star
Weapons:
Plasma Caster
Being fitted with the AJP-400 Hush-About personal jet pack, they can fly through the air pretty liberally. The plasma caster can knock you off your feet if it hits, luckily it doesn't home in. The best thing you can do detonate their back by overloading it with Lightning. Bare in mind that Push and Grip aren't really going to do much to them. Lightning Bomb, however, does.

Imperial Officer
Found:
Tie Factory, Empirical, Imperial Kashyyyk, Imperial Felucia, Imperial Raxus Prime, Death Star
Weapons:
E-11 Blaster
A Stormtrooper that proves themselves in combat can be promoted to the rank of Officer, meaning these guys are really just palette-swapped Stormtrooper. They act just like Stormtrooper but wear no armor. Easily killed with anything you want.
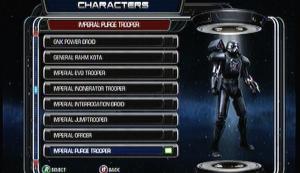
Imperial Purge Trooper
Found:
Empirical, Imperial Kashyyyk, Imperial Felucia, Imperial Raxus Prime, Death Star
Weapons:
Shoulder-mounted Rocket Launcher
These lumbering robots are made of Cortosis and are equipped with magnetic tractor boots. Cortosis is a metal that is very resistant to Lightsabers, and the tractor boots keep them firmly on the ground, so they cant be pushed around. The combination nulls all of your attacks except Lightning, which is highly effective, them being robots and all. Don't even try to get close, in addition to the armor, they have energy shields to totally block Lightsabers, and they have immense strength and love to pick you up and throw you. Keep your distance, but don't get so far out that they can use their rockets.

Imperial Royal Guard
Found:
Death Star
Weapons: Saber Pike
Royal Guards are between Senate and Shadow Guards in rank. They do have mild Force powers, but don't use them much. They can absorb some of your powers, but not consistently. They block a little, but it can be broken. They only have melee attacks, so keeping them at a distance and using any Force power a couple times normally does it.
QTE:
360: X, B
PS3: [], O

Imperial Senate Guard
Found:
Cloud City, Death Star
Weapons: Saber Pike
Senate Guards are lowest of the Guard ranks. They have no mastery of the Force, but are skilled enough to wield a Lightsaber. It's very easy to simply pick them up and toss them.

Imperial Stormtrooper
Found:
Tie Factory, Empirical, Cloud City, Imperial Kashyyyk, Imperial Felucia, Imperial Raxus Prime, Death Star
Weapons:
E-11 Blaster
The ultimate bantha fodder, so much so they have an illness named after them: Stormtrooper Syndrome: The ineffectiveness of large hordes of unnamed minor characters to be able to kill, wound, hit, or even drive back main characters.

Jawa
Found:
Raxus Prime, Imperial Raxus Prime
Weapons:
Torch
A more or less peaceful species, Jawas aren't much of an enemy. They are small, have low health, and only attack with a soldering torch.

Junk Titan
Found:
Raxus Prime
Weapons:
Glowing Arm
Junk Titans are the pinnacle of Kazdan Paratus's junk army. Held together by the Force itself, these Titans have long reaching attacks, normally centered around it's large arm. It does have the ability to create shockwaves around itself, and to thrust it's arm into the ground and make a plasma spike near your location. Get in close and use Lightning to lower it's health down.
QTEs:
360:
- 1) X, Y, X
- 2) X, Y, B
PS3:
- 1) [], Triangle, []
- 2) [], Triangle, O
Militia Elite
Found:
Tie Factory
Weapons:
Z-6 Rotary Blaster Cannon
The Elite are the top of Kota's army. They are armed with a Rotary Cannon, but no side-arms. They are tasked with keeping heavy fire on opponents and guarding the flanks of Militia formations. The cannon, essentially a dismounted E-WEB, is a fierce weapon to go up against. When in a group, charge them first and take them out, or throw something at them (possibly a teammate).

Militia Saboteur
Found:
Tie Factory
Weapons:
DH-17 Blaster Rifle, Thermal Detonators
Saboteurs are the standard infantry of Kota's Militia. The blaster isn't much to be afraid of, but they seem to have an excess of grenades. If you want to have some fun, you can Grip the grenade and throw it back at them. :)
Militia Trooper
Found:
Tie Factory
Weapons:
Stun Baton
I never figured out why the armed them with Stun Batons instead of something more deadly. I mean, sure, swords aren't effective against armor or droids, and Vibroblades are rare and expensive, but there has to be some other alternative. These guys are easy to see coming, as they are the only ones that will charge right at you. If you let them surround you, they can be a pain, but otherwise you can usually Push them away.
Rancor
Found:
Felucia, Imperial Felucia
Weapons:
Size
Rancors are one of the most recognizable beasts in Star Wars. These lumbering giants love ripping their prey limb from limb with their massive claws. They can create large shockwaves around them as well, do don't get too close. The only really thing you can do without endangering yourself is throwing things or lightning it to death.
QTEs:
360:
- 1) X, Y, X, B
- 2) X, Y, X, B, X
PS3:
- 1) [], Triangle, [], O
- 2) [], Triangle, [], O, []
Rodian Heavy Defender
Found:
Raxus Prime, Imperial Raxus Prime
Weapons:
Rotary Cannon
Rodians are a war-bent species, and nothing exemplifies that more then the Heavy Defender. Wielding a Rotary Cannon, they'll blast away pretty much anything that moves. Direct assaults are pretty much the only way to ensure success.

Rodian Ripper
Found:
Raxus Prime, Imperial Raxus Prime
Weapons:
Drill Arm
Rippers have large drill-arm like things. They'll run at you in a rampage and either stab you with it or jam it in the ground and create a shockwave. Use Repulse if they get close, and otherwise Lightning to keep them away.

Scout Trooper
Found:
Cloud City, Imperial Kashyyyk, Imperial Felucia, Imperial Raxus Prime, Death Star
Weapons:
E-11 Sniper Rifle
Scouts are the best shot in the Imperial Army. Having a sniper rifle, they can pick you off from quite a distance. You'll see the yellow line following you around, and when that turns red you have about a second to dash away. The reload time is pretty slow after every shot though, it seems, giving you time to get close.
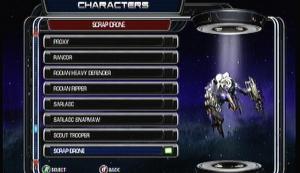
Scrap Drone
Found:
Raxus Prime
Weapons:
???
Scrap Drones are annoying little things. They'll suck the Force energy right out of your bar using a laser thingy. Give them a taste of it unleashed in a more shocking form.

Scrap Guardian
Found:
Raxus Prime
Weapons:
Plasma Pike
Guardians are the standard troopers in Kazdan Paratus's junk army. They use massive plasma spears that they can throw at you or strike with. They also have the ability to disassemble themselves into the ground, and reappear in front of you. Like all metal things, they have little defense against electricity.

Shadow EVO Trooper
Found:
Imperial Raxus Prime, Death Star
Weapons:
FA-3 flechette launchers / T-21 light repeating blasters.
These are an elite sect of EVO Troopers. They are sent to hazard worlds when something thereon really needs to die. They have all the same traits of standard EVO Troopers, including the extra armor and force field, but they can also turn invisible using a cloaking armor.
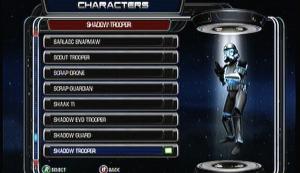
Shadow Trooper
Found:
Empirical, Imperial Kashyyyk, Imperial Felucia, Imperial Raxus Prime, Death Star
Weapons:
E-11 Blaster
Shadow Troopers like to play hide and seek. They have the ability to completely cloak themselves, but the power it consumes means they can only attack when not cloaked. They wont stay visible for long, so when you see one, rush over and attack quickly with standard attacks, or push them against the wall from a distance.
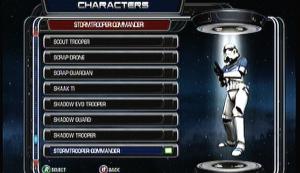
Stormtrooper Commander
Found:
Empirical, Imperial Kashyyyk, Imperial Felucia, Imperial Raxus Prime, Death Star
Weapons:
E-11 Blaster
Commanders have the ability to lead other Troopers. When a Commander is present, everyone seems a lot more accurate and organized. They also have the ability to call for help from an unlimited number of Shadow Troopers, who always seem to be lurking nearby like ninjas. When a Commander is near, take him out first to avoid being overrun. Force powers are completely ineffective, however, as they have shielding to protect against it.

Wookiee Berserker
Found:
Imperial Kashyyyk
Weapons:
Ryyk Blade
Wookiees are actually your friends during Imperial Kashyyyk. Release their cages by attacking them, and watch them tear through the Imperials in the area. On the Prologue, however, watch for the Berserkers to come flying out of trees. They also have a long jump ability that will take them to you in no time. Use push to knock them out of the air.

Wookiee Infantry
Found:
Imperial Kashyyyk
Weapons:
Bowcaster
Wookiees are actually your friends during Imperial Kashyyyk. Release their cages by attacking them, and watch them tear through the Imperials in the area. On the Prologue, however, these are the only ranged enemy you'll fight. They are very basic, and despite their size, easy to kill.

Wookiee Slave
Found:
Imperial Kashyyyk
Weapons:
Fists
Wookiees are actually your friends during Imperial Kashyyyk. Release their cages by attacking them, and watch them tear through the Imperials in the area. Slaves do not appear in the Prologue.

Yerdua Poison-Spitter
Found:
Felucia, Imperial Felucia
Weapons:
Poison Needles
These little toxic plants grow wild on Felucia. They spit out little shotgun needles at you that can hit from quite the distance. One does of Lightning does them in though.
=======================================================================
Vehicles
=======================================================================

AT-KT
Found:
Imperial Kashyyyk
Weapons:
Taim & Bak MS-4 twin blaster cannon, Heavy Paralysis Cannon
AT-KTs (All-Terrain-Kashyyyk-Transports, also called AT-STh [All-Terrain-Scout-Transport-Hunter]) are mainly used to keep local species in check, most are fitted with some sort of net launcher or something. This model is fitted with a paralysis cannon of some kind that can immobilize the target if hit. The does is high enough that it also causes intense pain. In the area you face it, there are plenty of exploding things to throw at it.
QTE:
360: X, A, Y
PS3: [], X, Triangle

AT-ST
Found:
Imperial Felucia, Imperial Raxus Prime, Death Star
Weapons:
Taim & Bak MS-4 twin blaster cannon, Light E-web twin blaster cannon, Dymek DW-3 concussion grenade launcher
The backbone an Imperial landing fleet, AT-STs (All-Terrain-Scout-Transport)are often used in the front lines of heavy combat situations. It has a formidable armament, including the two heavy guns, one rapid fire turret, and a grenade launcher. The only sure fired way to bring one down is a constant does of Lightning.
QTE:
360: X, A, X
PS3: [], X, []
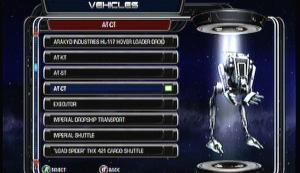
AT-CT
Found:
Tie Factory, Death Star
Weapons:
Tractor Beam Generator
AT-CTs (All-Terrain-Construction-Transport were built not for combat, but to haul heavy equipment and boxes around, which you why they don't have any actually armament. They can, however, throw the boxes at you, much like your Grip. They can also catch things mid-air, meaning you cant throw stuff at it. Because it has no real armament, you can jump up in it's face and slash away, or just keep your distance and use Lightning.
QTE:
360: X, A, B
PS3: [], X, O

Uggernaught
Found:
Cloud City
Weapons:
Tractor Beam Generator, Point Laser, Rocket Launcher
Uggernaughts where built for basic defense and for moving heavy cargo by the Ugnaughts. They serve both purposes well with a light armament of a point laser and a small rocket launcher, and a tractor beam for moving or throwing small boxes. They aren't that much of a threat, but can get annoying with all the things they have to throw at you.
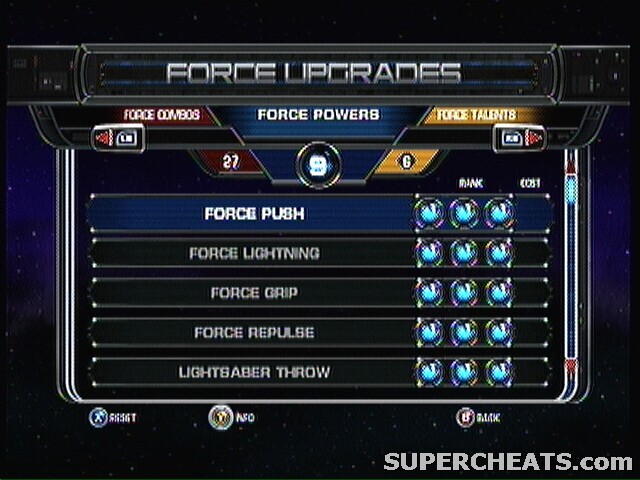
Force Upgrades
This is the Force Unleashed way of leveling up. Per every level, you get 1 Talent Point, 1 Force Point, and 1 Combo Point. You also get points from Jedi Holocrons. Once you have enough points, you can choose what ability you want to make stronger. The higher the rank, the more powerful/farther reaching/better the ability/bonus.
Force Powers and Force Combos you cant even use until you buy them. Choose wisely, as it may decide your fate for the next level.
--== FORCE PUSH ==--
Activation:
- 360:
B
- PS3:
O
Available: Default Force Power
Rank 1: Press B [O] to blast enemies and objects away from you.
Cost: N/A
Rank 2: Press and hold B [O] to charge Force Push.
Cost: 1 Power Sphere
Rank 3: Enemies take significantly more damage when pushed
Cost: 4 Power Spheres
--== FORCE LIGHTNING ==--
Activation:
- 360:
Y
- PS3:
Triangle
Available: Mission Two - Raxus Prime
Rank 1: Press Y (Triangle) to shoot lightning from your hands, damaging and stunning a single victim for a short time.
Cost: N/A
Rank 2: Press and hold Y (Triangle) to charge lightning for a wider, more devastating attack.
Cost: 4 Power Spheres
Rank 3: Force Lightning and charged Force Lightning arc out to multiple enemies.
Cost: 6 Power Spheres
--== FORCE GRIP ==--
Activation:
- 360:
RT
- PS3:
R2
Available: Default Force Power
Rank 1: Press and hold RT (R2) to grab, throw, and slam your enemies with the Force.
Cost: N/A
Rank 2: Hold LT (L2) then hold RT (R2) to lift up to two enemies.
Cost: 3 Power Spheres
Rank 3: Hold LT (L2) then hold RT (R2) to lift up to three enemies.
Cost: 5 Power Spheres
--== FORCE REPULSE ==--
Activation:
- 360:
RT (hold), B
- PS3:
L2 (hold), O
Available: Mission 3 - Felucia
Rank 1: Hold LT (L2) then press B [O] to release a powerful shockwave that repels all nearby enemies and objects.
Cost: N/A
Rank 2: Hold LT (L2) then hold B [O] to charge your Force Repulse to increase damage and impact.
Cost: 3 Power Spheres
Rank 3: The strength of the shockwave is greatly increased when using either repulse or charged Repulse
Cost: 5 Power Spheres
--== LIGHTSABER THROW ==--
Activation:
- 360:
RT (hold), A
- PS3:
L2 (hold), []
Available: Mission 5 - Cloud City
Rank 1: Hold LT (R2) then press X (X) to hurl your Lightsaber at distant enemies.
Cost: N/A
Rank 2: Hold LT (L2) then hold X ([]) to charge and throw your Lightsaber directly towards your target.
Cost: 4 Power Spheres
Rank 3: Each time your thrown Lightsaber impacts a target, it releases a burst of deadly energy.
Cost: 6 Power Spheres
--== LIGHTNING SHIELD ==--
Activation:
- 360:
RT (hold), Y
- PS3:
L2 (hold), Triangle
Available: Mission 6 – Imperial Kashyyyk
Rank 1: Hold LT (L2) then press Y (Triangle) to surround yourself with in a protective shield that also increases your Lightsaber damage.
Cost: N/A
Rank 2: Hold LT then hold Y to charge Lightning Shield, causing it to arc out and damage nearby enemies.
Cost: 4 Power Spheres
Rank 3: Lightning Shield and charged Lightning Shield further reduce the damage you take.
Cost: 6 Power Spheres
--== FORTITUDE ==--
Description: Each rank increases your maximum Health
Rank 1 Cost: 2 Talent Spheres
Rank 2 Cost: 2 Talent Spheres
Rank 3 Cost: 3 Talent Spheres
Notes: Doesn’t really increase your health bar so much that it makes it lower slower.
--== FORCE FOCUS ==--
Description: Each rank increases your maximum force energy
Rank 1 Cost: 1 Talent Sphere
Rank 2 Cost: 2 Talent Spheres
Rank 3 Cost: 2 Talent Spheres
Notes: Doesn’t increase your force energy, but more so makes it deplete slower overall.
--== FORCE AFFINITY ==--
Description: Each rank increases the speed you recover force energy
Rank 1 Cost: 1 Talent Sphere
Rank 2 Cost: 2 Talent Spheres
Rank 3 Cost: 3 Talent Spheres
--== VITALITY ==--
Description: Each rank increases the amount of health you regain by defeating your enemies
Rank 1 Cost: 2 Talent Spheres
Rank 2 Cost: 2 Talent Spheres
Rank 3 Cost: 3 Talent Spheres
--== RESILIENCE ==--
Description: Each rank reduces the amount of damage you take
Rank 1 Cost: 2 Talent Spheres
Rank 2 Cost: 3 Talent Spheres
Rank 3 Cost: 4 Talent Spheres
--== BATTLE MEDITATION ==--
Description: Each rank reduces the amount of time it takes to charge your force powers
Rank 1 Cost: 1 Talent Sphere
Rank 2 Cost: 2 Talent Spheres
Rank 3 Cost: 3 Talent Spheres
Notes: Charge as in “hold down the button for a more powerful attack”
--== SABER MASTERY ==--
Description: Each rank increases the amount of damage you deal with your lightsaber in melee combat
Rank 1 Cost: 1 Talent Sphere
Rank 2 Cost: 2 Talent Spheres
Rank 3 Cost: 3 Talent Spheres
--== DEFENSE MASTERY ==--
Description: Each rank increases your ability to deflect and reflect blaster fire
Rank 1 Cost: 1 Talent Sphere
Rank 2 Cost: 1 Talent Sphere
Rank 3 Cost: 2 Talent Spheres
--== COMBO MASTERY ==--
Description: Each rank decreases the amount of force energy it takes to use force combos
Rank 1 Cost: 1 Talent Sphere
Rank 2 Cost: 1 Talent Sphere
Rank 3 Cost: 2 Talent Spheres
--== SITH SHIEN ==--
Activation:
- 360:
X, X, X, X
- PS3:
[], [], [], []
Description: An ancient Sith variation of a classic Lightsaber fighting style, Sith Shien focuses on quick and aggressive attacks.
Available: Default Combo
Cost: N/A
--== SITH SABER FLURRY ==--
Activation:
- 360:
X (pause), X (pause), X (pause), X (pause)
- PS3:
[] (pause), [] (pause), [] (pause), [] (pause)
Description: One of the most difficult Lightsaber styles, the Saber Flurry allows you to land multiple blows.
Available: Mission One
Cost: 2 Combo Spheres
--== DASHING SLASH ==--
Activation:
- 360:
LB, X
- PS3:
L1, X
Description: Your Dash culminates with a deadly Lightsaber slash causing severe damage.
Available: Default Combo
Cost: N/A
--== LEAPING SLASH ==--
Activation:
- 360:
A, X
A, X, X
A, X, X, X
A, X, X, X, X
- PS3:
X, []
X, [], []
X, [], [], []
X, [], [], [], []
Description: An aerial attack with vicious Lightsaber strikes.
Available: Default Combo
Cost: N/A
--== LEAPING SLAM ==--
Activation:
- 360:
A, X (hold)
A, X, X (hold)
A, X, X, X (hold)
A, X, X, X, X (hold)
- PS3:
X, [] (hold)
X, [], [] (hold)
X, [], [], [] (hold)
X, [], [], [], [], [] (hold)
Description: A powerful aerial attack that drives your saber downward, impacting the ground with great force.
Available: Default Combo
Cost: N/A
--== SABER BLAST ==--
Activation:
- 360:
X, B
- PS3:
[], O
Description: a Lightsaber attack followed by a powerful force push that blasts your opponent away from you.
Available: Default Combo
Cost: N/A
--== CANNONBALL ==--
Activation:
- 360:
RT, B
- PS3:
R2, O
Description: Blasts your opponent away from you with a powerful slash.
Available: Default Combo
Cost: N/A
--== SITH FLURRY ==--
Activation:
- 360:
[X A]
- PS3:
([] X)
Description: A flurry of Lightsaber strikes inflict severe damage on your opponent.
Available: Default Combo
Cost: N/A
--== SITH PUNT ==--
Activation:
- 360:
[X A]
- PS3:
([] X)
Description: A secret Sith technique that sends smaller floes flying through the air.
Available: Default Combo
Cost: N/A
--== Lightning Grenade ==--
Activation:
- 360:
RT, Y
- PS3:
R2, Triangle
Description: Envelops the gripped enemy with force lightning, the lightning field then explodes when the enemy is slammed into something.
Available: Mission Two
Cost: N/A
--== AERIAL STRIKE ==--
Activation:
- 360:
RB (hold) [A, LB]
- PS3:
R1 (hold) [X, L1]
Description: While locked onto your enemy, you leap into the air and dash towards them with your Lightsaber!
Available: Mission One
Cost: 3 Combo Spheres
--== SABER SLING ==--
Activation:
- 360:
X, X, B
- PS3:
[], [], O
Description: Generates a high damage Lightsaber swing that sends your enemy flying.
Available: Mission One
Cost: 1 Combo Sphere
--== DASHING BLAST ==--
Activation:
- 360:
LB, B
- PS3:
L1, O
Description: all nearby enemies are blasted away with a powerful shockwave.
Available: Mission One
Cost: 1 Combo Sphere
--== SITH THROW ==--
Activation:
- 360:
[Y B]
- PS3:
[Triangle O]
Description: A grapple maneuver that launches the enemy into the air.
Available: Mission One
Cost: 2 Combo Spheres
--== SITH STRIKE ==--
Activation:
- 360:
X, Y
- PS3:
[], Triangle
Description: A quick Lightsaber slash that is infused with force lightning.
Available: Mission Two
Cost: N/A
--== SITH SLASH ==--
Activation:
- 360:
X, Y, Y
- PS3:
[], Triangle, Triangle
Description: A lightning infused Lightsaber attack that ends with an upward sweep.
Available: Mission Two
Cost: 2 Combo Spheres
--== SITH SABER SMASH ==--
Activation:
- 360:
X, X, Y
X, X, Y, Y
X, Y, X, Y
X, X, X, Y
- PS3:
[], [], Triangle
[], [], Triangle, Triangle
[], Triangle, [], Triangle
[], [], [], Triangle
Description: Your Lightsaber is infused with force lightning as you execute a devastating overhand smash.
Available: Mission Two
Cost: 3 Combo Spheres
--== LIGHTNING BOMB ==--
Activation:
- 360:
Y, RT
- PS3:
Triangle, R1
Description: The force lightning coursing through the opponent is amplified, son reaching a critical point which causes the electricity to burst out in an explosion.
Available: Mission Two
Cost: 2 Combo Spheres
--== DASHING SHOCK ==--
Activation:
- 360:
LB, Y
- PS3:
L2, Triangle
Description: Releases a wave of force lightning, damaging all enemies in it’s path.
Available
Description: Mission Two
Cost: 2 Combo Spheres
--== IMPALE ==--
Activation:
- 360:
RT (hold), X
- PS3:
R2 (hold), X
Description: Your Lightsaber is thrown at the gripped enemy, impaling him for severe damage.
Available: Mission Five
Cost: 2 Combo Spheres
--== SABER SLAM ==--
Activation:
- 360:
X, X, X, B
- PS3:
[], [], [], O
Description: A slam to the ground that throws your opponent and all nearby enemies into the air.
Available: Mission One
Cost: 2 Combo Spheres
--== AERIAL AMBUSH ==--
Activation:
- 360:
X, X, X, B (hold)
- PS3:
[], [], [], O (hold)
Description: After launching your opponent, you jump into the air, ready to continue the attack.
Available: Buy Saber Slam
Cost: 2 Combo Spheres
--== AERIAL ASSAULT ==--
Activation:
- 360:
X, X, X, B (hold), X
X, X, X, B (hold), X, X
- PS3:
[], [], [], O (hold), []
[], [], [], O (hold), [], []
Description: Slashes your mid-air opponent, causing severe damage.
Available: Buy Saber Slam
Cost: 1 Combo Sphere
--== AERIAL BLAST ==--
Activation:
- 360:
X, X, X, B (hold), B
X, X, X, B (hold), X, B
- PS3:
[], [], [], O (hold), O
[], [], [], O (hold), [], O
Description: Blasts your opponent mid-air with powerful push attacks.
Available: Buy Saber Slam
Cost: 2 Combo Spheres
--== AERIAL SHOCK ==--
Activation:
- 360:
X, X, X, B (hold), Y
X, X, X, B (hold), X, Y
- PS3:
[], [], [], O (hold), Triangle
[], [], [], O (hold), [], Triangle
Description: Shocks your mid-air opponent.
Available: Buy Saber Slam
Cost: 2 Combo Spheres
--== AERIAL THROW ==--
Activation:
- 360:
X, X, X, B (hold), [X A]
X, X, X, B (hold), X, [X A]
- PS3:
[], [], [], O (hold), ([] X]
[], [], [], O (hold), [], ([] X)
Description: Grapples and throws your mid-air opponent.
Available: Buy Saber Slam
Cost: 2 Combo Spheres
--== AERIAL SLAM ==--
Activation:
- 360:
X, X, X, B (hold), [Y B]
X, X, X, B (hold), Y, [Y B]
- PS3:
[], [], [], O (hold), [Triangle O]
[], [], [], O (hold), Triangle, [Triangle O]
Description: Slams your opponent back to the ground.
Available: Buy Saber Slam
Cost: 2 Combo Spheres
Lightsaber Crystals
An elegant weapon for a more civilized age.
Lightsaber Crystals focus the light of emitter matrix into a tangible beam of energy. They technically come in a rainbow of colors (including one blade with several colors) but here you’re a little more limited.
The differences between Standard, Compressed, and Unstable is purely visual. They do not give any advantage over another.
In addition to the light crystals, you also have Power Crystals. Power Crystals augment the beam and widen/shorten it/act as a capacitor/ect. In other words they make the beam more powerful in some aspect.
To cycle between Light and Power, use RB (R1)/LB (L1).
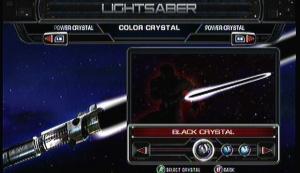
--== Black ==--
- Standard
Unlocked: Holocron #11 on Death Star
*This crystal does not have any variants*
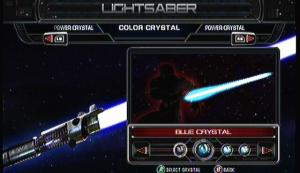
--== Blue ==--
- Standard
Unlocked: Holocron #1 on The Empirical
- Compressed
Unlocked: Holocron #1 on Imperial Kashyyyk
- Unstable
Unlocked: Holocron #13 on Imperial Felucia
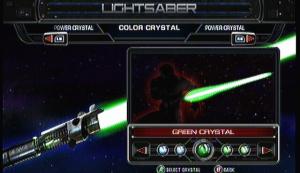
--== Green ==--
- Standard
Unlocked: Holocron #1 on Imperial Felucia
- Compressed
Unlocked: Holocron #6 on Imperial Raxus Prime
- Unstable
Unlocked: Holocron #4 on Death Star

--== Gold ==--
- Standard
Unlocked: Holocron #7 on Raxus Prime
- Compressed
Unlocked: Holocron #8 on Felucia
- Unstable
Unlocked: Holocron #2 on Cloud City
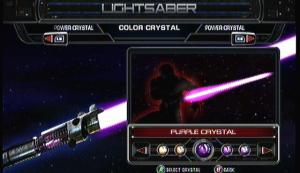
--== Purple ==--
- Standard
Unlocked: Holocron #14 on Imperial Kashyyyk
- Compressed
Unlocked: Holocron #4 on Imperial Felucia
- Unstable
Unlocked: Holocron #12 on Imperial Raxus Prime
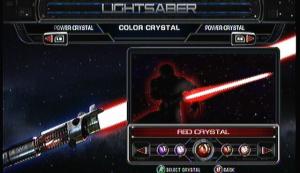
--== Red ==--
- Standard
Unlocked: Default crystal
- Compressed
Unlocked: Holocron #4 on Raxus Prime
- Unstable
Unlocked: Holocron #5 on Felucia

--== Yellow ==--
- Standard
Unlocked: Holocron #2 on TIE Fighter Factory
- Compressed
Unlocked: Holocron #10 on Raxus Prime
- Unstable
Unlocked: Holocron #5 on Cloud City
Ilum
- Unlocked: Default
- Augment: None
Rubat
- Unlocked: Holocron #10 on Tie Fighter Factory
- Augment: Lightsaber attacks deal extra damage
Ruusan
- Unlocked: Holocron #1 on Cloud City
- Augment: Force Powers cost less Force energy to use
Lorrdian
- Unlocked: Holocron #5 on The Empirical
- Augment: Increased ability to deflect and reflect blaster bolts
Sigil
- Unlocked: Holocron #1 on Imperial Raxus Prime
- Augment: Lightning based attacks deal extra damage
Vexxtal
- Unlocked: Holocron #7 on Imperial Felucia
- Augment: Lightsaber attacks have a chance to corrupt opponents with a damaging aura (similar to the Sith Drain Holocrons)
Firkrann
- Unlocked: Holocron #14 on Raxus Prime
- Augment: Lightsaber attacks have a chance to deal extra electrical damage
Katak
- Unlocked: Holocron #1 on Death Star
- Augment: Lightsaber attacks have a chance to siphon health from opponents
Star Wars: The Force Unleashed Guide - Appendix
Costumes
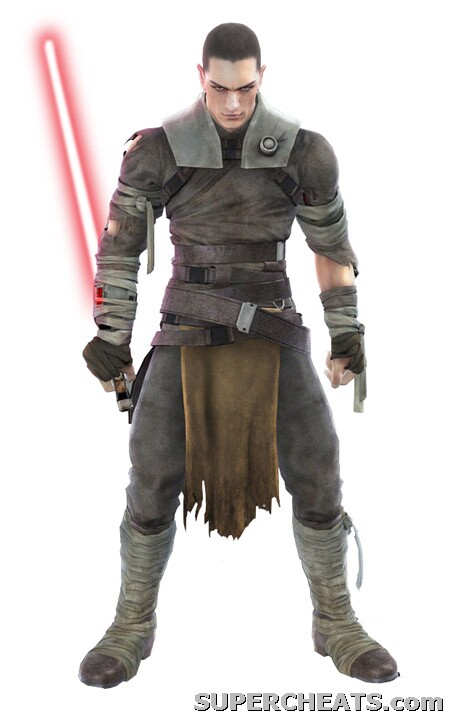
Costumes
For once, a hero that actually changes his cloths! You will find 13 new outfits over the course of the game, and 64 total with cheat codes and the downloadable content.
Galen will obtain and automatically change into new cloths depending on the planet you’re on to better suit the environment. These cloths do NOT give a bonus to any of your stats or make you immune or resistant to anything, nor do they alter your attacks. It’s just a simple costume change, so don’t get excited about using Jango’s blaster pistol.

Training Gear
Description: This simple but functional outfit, originally provided by Darth Vader, has survived numerous training sessions and dangerous missions.
Worn On: Tie Fighter Factory
Found: Mission 1 – Tie Fighter Factory

Heavy Training Gear
Description: A homemade outfit that provides basic protection in polluted or caustic environments, such as the poisoned surface of Raxus Prime.
Worn On: Raxus Prime
Found: Mission 2 – Raxus Prime
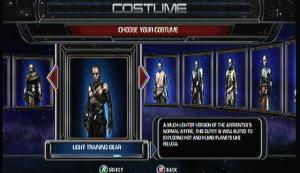
Light Training Gear
Description: A much lighter version of the Apprentice’s normal attire, this outfit is well-suited to exploring hot and humid planets like Felucia.
Worn On: Felucia
Found: Mission 3 - Felucia

Medical Robe
Description: This loose garment, standard issue aboard all Imperial medical frigates and science vessels, is worn by patients and test subjects alike.
Worn On: The Empirical
Found: Mission 4 – The Empirical
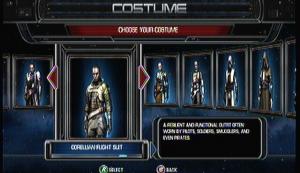
Bounty Hunter Disguise
Description: an armored suit that allows the apprentice to escape notice while searching the galactic underworld for General Kota.
Worn On: Cloud City
Found: Mission 5 – Cloud City
Corellian Flight Suit
Description: A resilient and functional outfit often worn by pilots, soldiers, smugglers, and even pirates.
Worn On: Imperial Kashyyyk
Found: Mission 6 – Imperial Kashyyyk

Jungle Combat Gear
Description: an outfit inspired by ancient Sith warriors from Yavin 4, this flexible outfit is well-suited to acrobatic fighting on Felucia and other dense jungle worlds.
Worn On: Imperial Felucia
Found: Mission 7 – Imperial Felucia

Industrial Explorer Outfit
Description: A unique suit designed specifically for traversing industrial wastelands, from the sewers of Coruscant to the massive junkyards of Raxus Prime.
Worn On: Imperial Raxus Prime
Found: Mission 8 – Imperial Raxus Prime
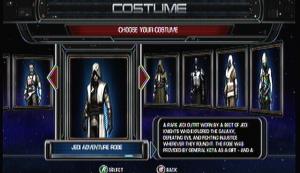
Jedi Adventure Robe
Description: A rare Jedi outfit worn by a sect of Jedi Knights who explored the galaxy, defeating evil and fighting injustice wherever they found it. The robe was provided by General Kota as a gift - and a symbol of Kota’s faith in the Apprentice’s growing connection to the force.
Worn On: Death Star
Found: Mission 9 – Death Star
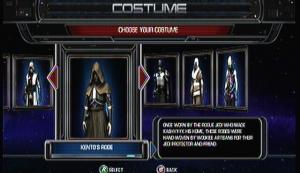
Kento’s Robe
Description: Once worn by the rogue Jedi who made Kashyyyk his home, these robes were hand-woven by Wookiee artisans for their Jedi protector and friend.
Worn On: N/A
Found: Holocron #2 on Kashyyyk

Sith Robe
Description: A suit worn by Sith warriors, combining a hooded robe with basic armor.
Worn On: N/A
Found: Holocron #12 on Raxus Prime

Ceremonial Jedi Robes
Description: Since time immemorial, these white Jedi robes have been worn by only the most honorable Jedi masters – or given posthumously to those Jedi who sacrificed everything to protect and defend the galaxy.
Worn On: N/A
Found: Fight the Emperor and obtain the Light Side Ending.
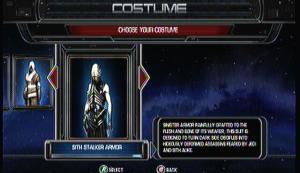
Sith Stalker Armor
Description: Sinister armor painfully grafted to the flesh and bone of it’s wearer, this suit is designed to turn dark side disciples into hideously deformed assassins feared by Jedi and Sith alike.
Worn On: N/A
Found: Fight Darth Vader and obtain the Dark Side Ending.
=======================================================================
Downloadable Content
=======================================================================
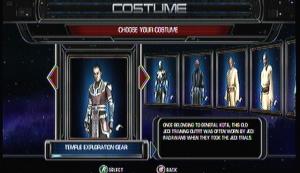
Temple Exploration Gear
Description: Once belonging to General Kota, this old Jedi training outfit was often worn by Jedi Padawans when they took the Jedi Trials.
Worn On: Jedi Temple
Found: Jedi Temple Mission Pack

Cybernetic Reconstruction
Description: An even more extreme version of the Sith Stalker armor, this is the Apprentice almost completely transformed into a bio-mechanical nightmare.
Worn On: N/A
Found: Jedi Temple Mission Pack

Darth Maul
Description: The Sith warrior featured in Star Wars Episode 1: The Phantom Menace.
Worn On: N/A
Found: Jedi Temple Mission Pack

Mace Windu
Description: Master Mace Windu was a respected learder on the Jedi Council during the Clone Wars.
Worn On: N/A
Found: Jedi Temple Mission Pack
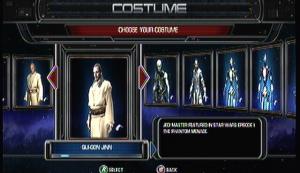
Qui-Gon Jinn
Description: Jedi Master featured in Star Wars Episode 1: The Phantom Menace
Worn On: N/A
Found: Jedi Temple Mission Pack

Dark Stalker
Description: A variation of the Sith Stalker without a helmet, this armor is painfully grafted to the flesh and bone of its wearer, designed to transform the wearer into a hideously deformed assassin.
Worn On: N/A
Found: Jedi Temple Mission Pack
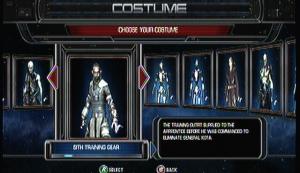
Sith Training Gear
Description: The training outfit supplied to the Apprentice before he was commanded to eliminate General Kota.
Worn On: N/A
Found: Jedi Temple Mission Pack
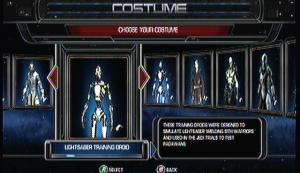
Lightsaber Training Droid
Description: These training droids were designed to simulate lightsaber wielding Sith warriors and used in the Jedi Trials to test Padawans.
Worn On: N/A
Found: Jedi Temple Mission Pack
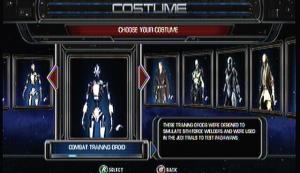
Combat Training Droid
Description: These training droids were designed to simulate Sith force wielders and were used in the Jedi Trials to test Padawans.
Worn On: N/A
Found: Jedi Temple Mission Pack

Jedi Knight Anakin Skywalker
Description: Anakin Skywalker from Star Wars Episode III: Revenge of the Sith.
Worn On: N/A
Found: Character Pack 2
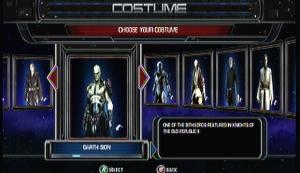
Darth Sion
Description: One of the Sith Lords featured in Knights of the Old Republic II.
Worn On: N/A
Found: Character Pack 2

Imperial Commando
Description: Clone Trooper armor featured in Star Wars: Republic Commando.
Worn On: N/A
Found: Character Pack 2

Kit Fisto
Description: Jedi Master and member of the Jedi Council.
Worn On: N/A
Found: Character Pack 2
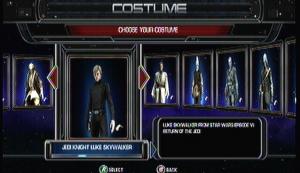
Jedi Knight Luke Skywalker
Description: Luke Skywalker from Star Wars Episode VI: Return of the Jedi.
Worn On: N/A
Found: Character Pack 2

Jedi Knight Obi-Wan Kenobi
Description: Obi-Wan Kenobi from Star Wars Episode III: Revenge of the Sith.
Worn On: N/A
Found: Character Pack 2

Ki-Adi-Mundi
Description: Jedi Master and member of the Jedi Council.
Worn On: N/A
Found: Character Pack 2

General Starkiller
Description: The Apprentice envisioned as a General in the Rebel Alliance.
Worn On: N/A
Found: Character Pack 2
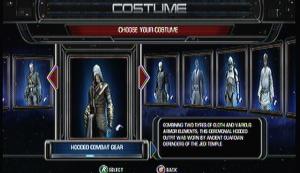
Hooded Combat Gear
Description: Combining two types of cloth and various armor elements, this ceremonial hooded outfit was worn by ancient guardian defenders of the Jedi Temple.
Worn On: N/A
Found: Character Pack 2
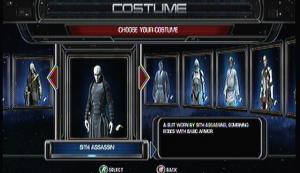
Sith Assassin
Description: A suit worn by Sith Assassins, combining robes with basic armor.
Worn On: N/A
Found: Character Pack 2
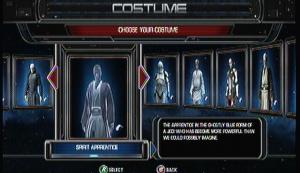
Spirit Apprentice
Description: The Apprentice in the ghostly blue form of a Jedi who has become more powerful then we could possibly imagine.
Worn On: N/A
Found: Character Pack 1
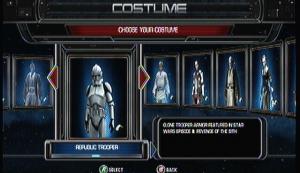
Republic Trooper
Description: Clone Trooper armor featured in Star Wars Episode III: Revenge of the Sith.
Worn On: N/A
Found: Character Pack 1

Tatooine Luke
Description: Luke Skywalker from Star Wars Episode IV: A New Hope.
Worn On: N/A
Found: Character Pack 1

Utility Combat Suit
Description: Worn by the Jedi Knights during the Clone Wars, this sleek battle armor was used in intense combat situations throughout the outer rim.
Worn On: N/A
Found: Character Pack 1

Ben Kenobi
Description: Ben Kenobi from Star Wars Episode IV: A New Hope.
Worn On: N/A
Found: Character Pack 1
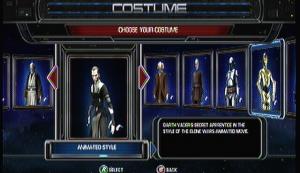
Animated Style
Description: Darth Vader’s Secret Apprentice in the style of the Clone Wars animated movie.
Worn On: N/A
Found: Character Pack 1
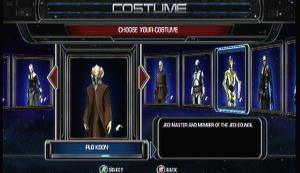
Plo Koon
Description: Jedi Master and member of the Jedi Council.
Worn On: N/A
Found: Character Pack 1

Count Dooku
Description: Ex-Jedi Master and Sith Lord, featured in Star Wars Episode II: Attack of the Clones.
Worn On: N/A
Found: Character Pack 1

Jango Fett
Description: The galaxy’s most notorious bounty hunter, featured in Star Wars Episode II: Attack of the Clones.
Worn On: N/A
Found: Character Pack 1

C-3PO
Description: The protocol droid built by Anakin Skywalker and featured in every episode of the Star Wars saga.
Worn On: N/A
Found: Character Pack 1
=======================================================================
Cheat Code Costumes
=======================================================================
All of these have to be unlocked through Pause -> Input Code. All of these can be unlocked using the master code: SOHNDANN. Every time you turn the game off, you must re-enter the code and re-select the costume.
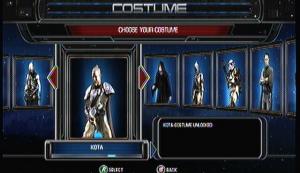
Kota
Description: Kota Costume Unlocked
Worn On: N/A
Found: MANDALORE

Emperor
Description: Emperor Costume Unlocked
Worn On: N/A
Found: MASTERMIND
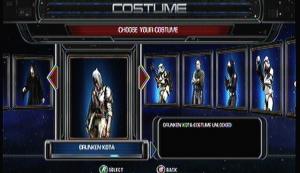
Drunken Kota
Description: Drunken Kota Costume Unlocked
Worn On: N/A
Found: HARDBOILED
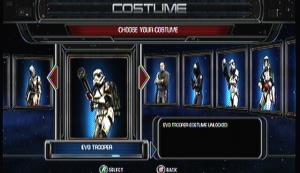
Evo Trooper
Description: Evo Trooper Costume Unlocked
Worn On: N/A
Found: SOHNDANN
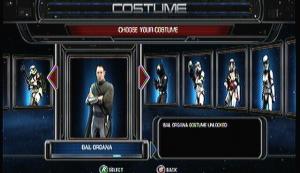
Bail Organa
Description: Bail Organa Costume Unlocked
Worn On: N/A
Found: VICEROY

Imperial Gunner
Description: Imperial Gunner Costume Unlocked
Worn On: N/A
Found: SOHNDANN

Incinerator Trooper
Description: Incinerator Trooper Costume Unlocked
Worn On: N/A
Found: PHOENIX

Jump Trooper
Description: Jump Trooper Costume Unlocked
Worn On: N/A
Found: SOHNDANN
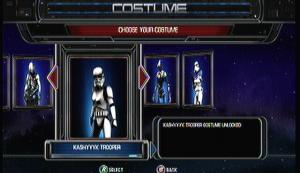
Kashyyyk Trooper
Description: Kashyyyk Trooper Costume Unlocked
Worn On: N/A
Found: TK421GREEN

Ozzik Sturn
Description: Ozzik Sturn Costume Unlocked
Worn On: N/A
Found: SOHNDANN

Militia Trooper
Description: Militia Trooper Costume Unlocked
Worn On: N/A
Found: SOHNDANN

Militia Elite
Description: Militia Elite Costume Unlocked
Worn On: N/A
Found: SOHNDANN
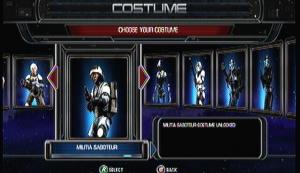
Militia Saboteur
Description: Militia Saboteur Costume Unlocked
Worn On: N/A
Found: SOHNDANN
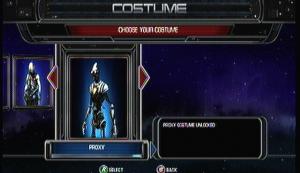
Proxy
Description: Proxy Costume Unlocked
Worn On: N/A
Found: PROTOTYPE

Scout Trooper
Description: Scout Trooper Costume Unlocked
Worn On: N/A
Found: FERRAL

Shadow Evo Trooper
Description: Shadow Evo Trooper Costume Unlocked
Worn On: N/A
Found: SOHNDANN

Shadow Trooper
Description: Shadow Trooper Costume Unlocked
Worn On: N/A
Found: BLACKHOLE
Snow Trooper
Description: Snow Trooper Costume Unlocked
Worn On: N/A
Found: SNOWMAN
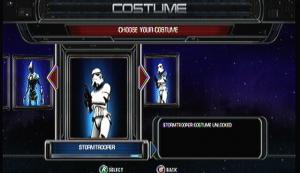
Stormtrooper
Description: Stormtrooper Costume Unlocked
Worn On: N/A
Found: TK421WHITE
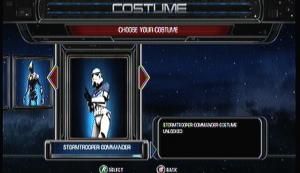
Stormtrooper Commander
Description: Stormtrooper Commander Costume Unlocked
Worn On: N/A
Found: TK421BLUE
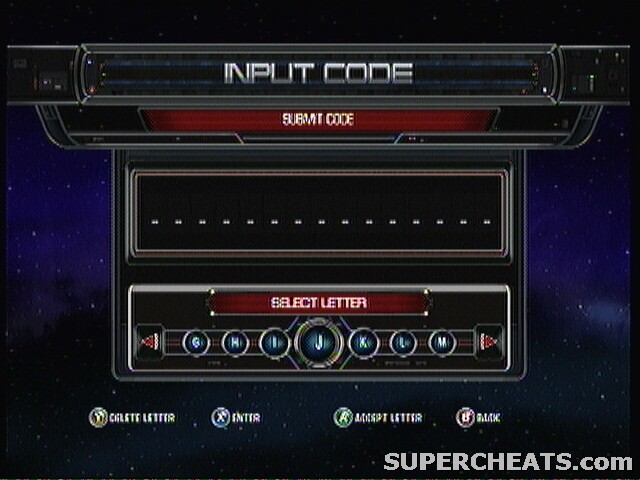
Cheat Codes
I remember the good old days were EVERY game had a code option... and the things they unlocked were actually fun and useful. Oh well. Press the start button in game and select Input Code. Use the joy stick to cycle letters and numbers, A to select, and X to input the code.
- Combos (Disables Achievements and saving):
MOLDYCROW – All Force Combos
KITFISTO – Saber Sling
LUMIYA – Sith Saber Flurry
MASSASSI – Lightning Bomb
SAZEN – Sith Throw
YADDLE – Aerial Blast
RAGNOS – Lightning Grenade
BRUTALSTAB – Lightsaber Impale
DARAGON – Sith Slash
PLOKOON – Saber Slam
VENTRESS – Aerial Ambush
EETHKOTH – Aerial Assault
FREEDON – Unknown
MARAJADE – Unknown
- Costumes:
SOHNDANN – All 32 (non-downloaded) costumes
HARDBOILED – Drunken Kota
KORRIBAN – Sith Stalker Armor
SNOWMAN – Snowtrooper
TK421WHITE – Stormtrooper
MASTERMIND – Emperor
MANDALORE – Kota
PROTOTYPE – Proxy
BLACKHOLE – Shadow Trooper
TK421BLUE – Storm Trooper Commander
VICEROY – Bail Organa
DANTOOINE – Ceremonial Jedi Robes
PHOENIX – Incinerator Trooper
HOLOCRON – Jedi Adventure Robes
WOOKIEE – Kento's Robes
FERRAL – Scout Trooper Costume
- Other (* = disables Achievements and saving):
OSSUS – All databank entries unlocked
SITHSPAWN - Unlock Sith Master Difficulty
HURRIKANE – All Lightsaber Crystals
KATARN - All Force Powers Unlocked and Maxed*
ADEGAN - Saber Throw Maxed*
JOCASTA - All Talents Maxed*
LIGHTSABER - Amplified Damage*
MINDTRICK - Makes levels mirrored*
EXARKUN - Force Push Maxed*
VERGENCE - Unlimited Force energy*

Easter Eggs
Ah easter eggs, if it wasn't for these, what would people with WAY to much time on their hands do? Most game programmers still like to hide little things around the game that serve no purpose and have no meaning other then being there.
=======================================================================
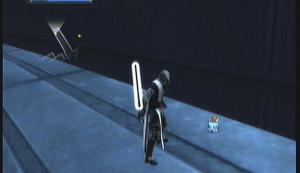
Republic Commando Helmet
- Location: Tie Fighter Factory, inside the first Final Assembly area.
- How-to:
Build up at least 5 boxes using Grip to reach the overhang.
- Notes:
This helmet is very clearly a Commando helmet from another LucasArts game, Republic Commando.

Bridge of a Start Destroyer
- Location: Raxus Prime
- How-to:
As soon as the level starts, turn about and go to the edge of the platform and look down. You can see the shield generators of the Destroyer, which are completely disproportionate in size when compared to you.
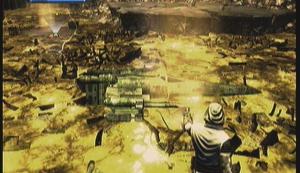
X-wing
- Location: Raxus Prime, in the sludge at the start
- How-to:
Near the crack you're forming in the wall, look in the sludge for something to target. Grip and pull up.
Notes:
It is NOT a Z-95 Headhunter! The wings and cockpit are totally different! This most likely represents Yoda pulling Luke's X-wing out of the swamp.

Subject 1138
- Location: The Emperical, as you enter the Research Room
- How-to:
Walk in the room and have your speakers on.
- Notes:
The hidden number 1138 is in many of George Lucas's movies and games, it's nod to the first film he ever made, THX-1138. The letters THX also appear in many of his films as well, but aren't as prolific as the numbers.

Jar-Jar Binks Frozen in Carbonite
- Location: Imperial Kashyyyk, Trophy Room
- How-to:
Look on the wall beside the door.
- Notes:
George Lucas does have a heart! For those of you who actually LIKED Jar-Jar, I suppose you can make the case of “it's just a generic Gungan”

Gorax
- Location: Imperial Kashyyyk, Trophy Room
- How-to:
Look on a high pedestal near the Krayt Dragon head. You can barely see it, you'll have to use Grip to get it in better light.
- Notes:
Gorax make their home on Endor (though it may not be their homeworld) and are a living terror that hunt Ewoks. They made their first appearance in the kids show Caravan of Courage: An Ewok Adventure, where he plays the main antagonist.

The Millenium Falcon
- Location: Imperial Raxus Prime, after crossing the small broken bridge, but before the bridge made out of a piece of steel girder
- How-to:
Go over to the edge of the area, past the girder bridge, and look in the junk pile.
- Notes:
Unlike the X-wing before it, this one you can argue is a YT-1300 Corellian Freighter, the original model of the Falcon before all of it's customizations.

Wilhelm Scream
- Location: Imperial Raxus Prime, when you steal the Dropship
- How-to:
Activate the cutscene and turn on your speakers
- Notes:
The Wilhelm Scream is one of the most recognizable clichéd sound effects in the film industry. It got it's start in 1951 in the movie Distant Drums. It was first put into Star Wars by the sound designer Ben Burtt, who found the original reel (labled “man getting eaten by alligator”). It's named after the person who emitted the scream in the movie The Charge at Feather River. It has made an appearance in almost every Star Wars media since.


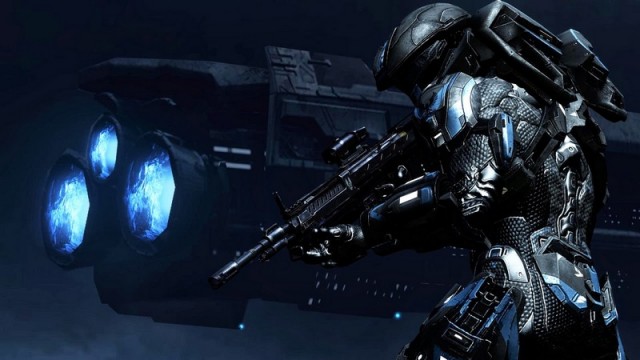
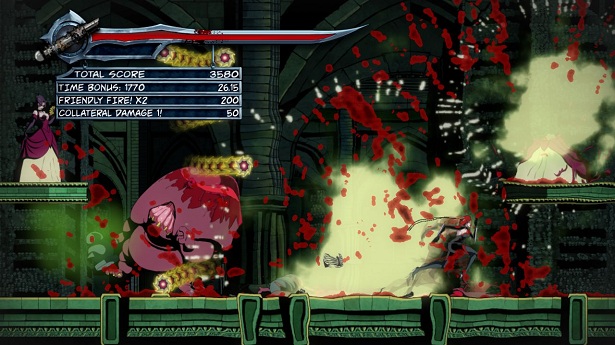
 5 Gaming Achievements That Are Close To Impossible
 8 Most Useful Tips, Tricks and Cheats for FIFA 16
 How to get The Evil Within A la Corvo Trophy, Achievement for PC, PlayStation and Xbox
 5 Sites With Tips and Tools for Creating Presentations
 Metal Gear Solid V: TPP Music Tapes Locations - Where to Find Them All