The debut title of the Soulcalibur series, “Soul Edge,” first appeared in arcades back in 1996, and was later ported to the Sony PlayStation home console where it was renamed “Soul Blade.” This weapon-based fighter featured a small cast of characters, most of whom remain a part of the series today. Each character wielded a different weapon, making for greater diversity between them. In 1999, the Soul series reappeared in arcades with “Soulcalibur,” which was later ported to the Sega Dreamcast console. With an expanded roster of nineteen characters and plenty of new features, this release marked the series' inception into mainstream popularity, as it received positive criticism across the board and was widely renowned as one of the greatest fighting games of all time.
The follow-up title, “Soulcalibur II,” first appeared in arcades in 2002, and later on the Xbox, PlayStation 2, and Gamecube home consoles in 2003. The inclusion of console-exclusive guest characters—Spawn on the Xbox, Heihachi Mishima of the Tekken series on the PS2, and Link of the Zelda series on the Gamecube—as well as its multi-platform availability, served to widen the series' popularity even further. Soulcalibur III was released a couple of years later, this time exclusive to the PlayStation 2 home console, but an arcade edition was later released. Considered by many as the most disappointing title in the series, the console edition of Soulcalibur III was wrought with game breaking glitches, featured seemingly psychic AI opponents, and the highly exploitable “variable cancel” technique lowered the quality of competitive play.
The soul swords clash once again with the release of Soulcalibur IV for the PS3 and Xbox 360 consoles. With this latest iteration comes the introduction of two new characters; Hilde, the armor-clad princess of the Wolfkrone Kingdom, and the legendary Hero King Algol, who serves as the game's main boss character. Console-exclusive guest characters return this time around with two very unlikely combatants; Darth Vader on the PlayStation, and Yoda on the Xbox 360. Also making an appearance is the protagonist of the upcoming “Star Wars: The Force Unleashed” video game, known only as “The Apprentice.” In addition to the new Tower of Lost Souls and online multiplayer modes, the Character Customization feature first introduced in Soulcalibur III returns with a bevy of new features, including equipment stats and skills.
As with the other titles in the series, the story revolves around the cursed sword Soul Edge and the legendary spirit sword Soul Calibur. Both soul swords are in direct opposition, and each character in the roster seeks one or both of the swords for their own cause.
If you're new to the series and in search of strategies and tips then look no further. This guide contains an overview of the single player modes, character customization, and the basics of the fighting engine. You'll also find strategies and explanations for each character, as well as a list of unlockables and Honor requirements.
Note: This guide uses directional notation when discussing directional input. If you aren't familiar with this numerical convention, refer to the Basics section under “Understanding Directional Notation” for an explanation.
As this guide was written using the Xbox 360 version of the game, Darth Vader, the PlayStation 3 exclusive guest character, is not covered.
A Button - Guard (G)
B Button - Kick (K)
X Button - Horizontal Attack (A)
Y Button - Vertical Attack (B)
LB - Perform Critical Finish (after Soul Crush)
LT - Alternate Throw (B G)
RB - Switch Between Party Members (Story Mode and Tower of Lost Souls only)
RT - Perform Taunt (K G) or Trigger Manual Skill (Story Mode and Tower of Lost Souls only)
Start - Enter Pause Menu
X Button - Guard (G)
Circle Button - Kick (K)
Square Button - Horizontal Attack (A)
Triangle Button - Vertical Attack (B)
L1 Button- Perform Critical Finish (after Soul Crush)
L2 Button - Alternate Throw (B G)
R1 Button - Switch Between Party Members (Story Mode and Tower of Lost Souls only)
R2 Button - Perform Taunt (K G) or Trigger Manual Skill (Story Mode and Tower of Lost Souls only)
Start - Enter Pause Menu

The basis of each character's move list is comprised of the following: Horizontal Attack (A), Vertical Attack (B), Kick (K), and Guard (G). When discussing moves, button inputs are referred to by the letter that corresponds to the action. For the Xbox 360 default control scheme; the X button is A, the Y button is B, the B button is K, and the A button is G. For the PlayStation 3 default control scheme; the Square button is A, the Triangle button is B, the Circle button is K, and the X button is G. Keep in mind that these actions can be assigned to different buttons by modifying the default control scheme, or by selecting an alternate one. So:
A = Horizontal Attack (X360 = X, PS3 = Square)
B = Vertical Attack (X360 = Y, PS3 = Triangle)
K = Kick (X360 = B, PS3 = Circle)
G = Guard (X360 = A, PS3 = X)
This setup can be a bit confusing at first, but it will become second-nature as you become more experienced. It essentially ensures that any Soulcalibur player—despite having only one version of the game or a modified control scheme—can discuss moves with any other player.
Being a 3D fighter, characters are able to move in eight different directions. Holding the control stick or D-pad in one direction will cause the character being controlled to run in that direction. This is known as 8-Way Run. If you take a look at a move list, you'll notice that directional arrows accompany the button inputs. When one or more attack buttons are pressed in conjunction with one or more directions, the character will act differently. It's important to remember that all move listings apply to a character that is facing to the right. This means that, if your character is on the right side of the screen, you must then input the directions opposite as you would if the character were on the left side of the screen (as they appear on the in-game move lists and in this guide).
It's worth mentioning that Soulcalibur players have their own way of discussing directional movement. If you ever browse a Soulcalibur forum or visit a fan site, you'll likely notice other players expressing directional inputs as numbers. These numbers refer to the possible directions that a character can move in. For example, you may see 4B to refer to an attack in which the player must press back on the d-pad and tap the vertical attack button. Take a look at the number pad on the right end of your keyboard. Each of the numbers—one through nine—is used to denote one of the possible eight directions that a character can move in. Compare the numpad on your keyboard to the D-pad on your controller: 1 is Back Down, 2 is Down, 3 is Forward Down, and so on. The number 5 indicates no directional input—the character's neutral stance—also referred to as N. So:
789
4N6
123
7 = Back Up
8 = Up
9 = Forward Up
4 = Back
5 = Neutral
6 = Forward
1 = Down Back
2 = Down
3 = Forward Down
The above convention is mostly used between players. This guide also uses numbers when discussing moves, so make sure you're familiar with this method. Directional commands are sometimes signified by letters (ex., db = down back). Again, note that all directional input is from the character's point of view. So, if your character is on the right side of the screen, facing the opponent on the left side of the screen, 4 (Back) would then be 6 (Forward) if you were to move towards the opponent.
_ = Or (ex., 2_8).
N = Neutral. (No directional input.)
aB = Slide input (second input must be entered very quickly).
Hold = Keep button pressed down; usually denoted with square brackets, but “hold” in this guide.
This guide uses a basic form of the above convention. There is further notation that isn't used here, but would be beneficial to familiarize yourself with if you plan to actively discuss the game within in Soulcalibur community.
Another important aspect is hit levels. Each move has a height and a range, and whether or not the move hits is dependent on the opponent's position and whether he or she is blocking low or high. A character whom is guarding while standing can block high, mid, s-mid, and s-low attacks, but low attacks can still make it through. To guard against low attacks, then, the character must crouch and guard. While guarding low, however, the character is then vulnerable to mid attacks. Unblockable moves (moves with the “U” property) can break through a character's guard and generally deal a large amount of damage.

Guarding characters may also be thrown (A G, B G) if they fail to Grapple Break. A Grapple Break can be performed by pressing either A (to break an A G throw) or B (to break a B G throw) when the other character makes the grab. The standard A G and B G throws have high hit levels, but some characters have throws designed to target crouching opponents.
Another important part of a good defense is Guard Impacts and Just Impacts. To attempt a repel, press 6G or 3G just before an opponent's attack hits. To attempt a parry, press 4G or 1G just before an opponent's attack hits. If done successfully, the opponent's attack will be deflected, leaving them momentarily vulnerable. As with guarding, you must choose to parry or repel high or low depending on the opponent's attacks. Furthermore, a character stunned by a repel cannot attack, but they can perform a Reverse Impact back.
If an impact occurs at the last possible moment, this is called a Just Impact. A Just Impact is evident by the red flash effect that accompanies it as opposed to the green flash that accompanies a normal repel, or the blue flash that accompanies a parry. Following a Just Impact, all attacks are given Counter Hit properties, which means that the attack will deal more damage and may stun or knockback an opponent. Just Impacts will stun an opponent for a longer period of time, and cannot be reverse impacted. They do require precise timing, however.
A character's positioning—referred to as “stance”—also determines the moves available to him or her. All characters have the standard standing, crouching, and back turned stances, but others have their own, unique stances that change the moves available to them. Since this is merely a discussion on the basics, let's keep it simple and stick to the universal stances. Holding 2 and tapping G will cause your character to crouch; each character has certain moves available to him or her while in this position. Furthermore, blocking while crouched is the only way to guard against low attacks. Most characters are especially vulnerable while their back is turned; attacks from an enemy and even certain moves can put a character in this position, so be careful.
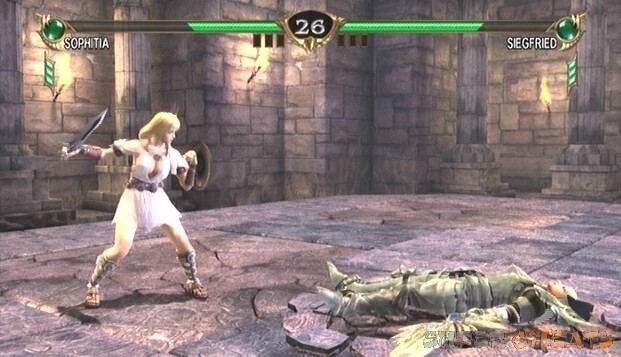
The worst position for any fighter to be in is lying on the ground. While on the ground, the fighter is at the mercy of their opponent. Pressing the Guard button just as the character hits the ground causes him or her to perform an Ukemi, thereby greatly minimizing their downtime. Performing an Ukemi is not a downed player's only option, however; one may roll around their opponent with 8-Way Run. After dodging an attack, the player then may be able to emerge behind their opponent to get the upper hand. A player's mode of rising from the downed position is referred to as their “wakeup game,” while the opposing character's attempt to keep their enemy floored is called an “anti-wakeup game.”
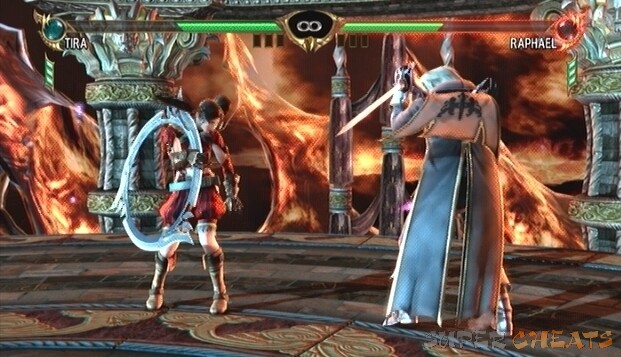
Next to each players' health bar is the Soul Gauge. At the start of a match, both players' Soul Gauge is green. As the battle wears on, depending on each player's actions, the globe will be in a different state. Attacking frequently and hitting a guarding opponent increases the Soul Gauge and will gradually shift the globe's color to blue. A blue Soul Gauge indicates that the player is in good form, having been sufficiently mixing offensive play with defensive play (or no defensive play at all!).
A player who holds down the guard button for extended periods of time without attacking will see their Soul Gauge decrease and shift to red. If their blocking continues, that player's health bar will soon start flashing red. If they continue to block even after this point, they leave themselves open to a Soul Crush, and then subsequently a Critical Finish if their opponent so chooses. As you can tell, this feature was implemented to punish those who play too defensively (referred to as “turtling”).
Along with the Soul Gauge, another new feature introduced in this iteration of Soulcalibur is the Critical Finish. To put it briefly, a Critical Finish is a move that allows one to put an end to their opponent regardless of remaining health. Getting an opponent to a state in which they are susceptible to such an abrupt end is not exactly easy or commonplace, however. To execute a Critical Finish, first your opponent's Soul Gauge and health bar must be flashing red, at which point subsequent blocks put them at risk of a Soul Crush.
Hit a guarding opponent whose Soul Gauge is in the red until a Soul Crush occurs; their guard will be broken and you'll see them reel back (you can also look for the Soul Crush battle message below your health bar). Right after the Soul Crush, press all of the face buttons (A B K G) simultaneously (the button combination can be set to one of the shoulder buttons for ease of use, and is initially on the default control scheme (LB on X360, L1 on PS3)) to trigger the finisher. After a short video sequence, the initiator will win the round.
Be especially careful when going for a Critical Finish though, because if you hit the opponent after the Soul Crush you'll miss your chance. Even if the finisher is not performed, the player still gains an advantage because a Soul Crush stuns the target, leaving them completely vulnerable to a further attack. After a Soul Crush, the player's Soul Gauge returns to its neutral state (green).

Below each player's Soul Gauge is an armor indicator. Characters begin each battle equipped with a high, mid, and low armor piece. These sections of armor can be broken off after repeated attacks to that area (ex., the player is hit by a barrage of mid attacks and their mid armor piece is destroyed) or after a Soul Crush. Once a piece of equipment is broken, repeated attacks to that area will deal more damage.
Choose your Character - With a cast of 28 unique fighters, it's nigh impossible to excel with every one of them. For this reason, it is best to pick a character that suits your play style and stick with them until you feel you have mastered their fighting style. Take your time before deciding on a character, and don't be afraid to abandon them if things aren't working out. Once you are competent enough with one character, branch out and pick another to keep things fresh.
Practice, Practice, Practice - Be sure to spend some time in Training Mode with your character of choice. Take a look at their move list and practice each move; be sure to make note of moves with unique properties, such as moves that put the character into a crouching animation or moves that duck under high attacks/jump over low attacks.
High and Low - Take advantage of any high-to-low (or mid-to-low) strings available to your character, as such moves can be difficult for your opponent to block if they're not familiar with that character's fighting style.
Seamless Link - Most characters with more than one stance have several moves that can link to that stance, usually when the last input of a move is held. Use such attacks—especially those with hitstun properties—to perform combos. A combo is a string of two or more attacks in which it is impossible for the player to escape from until the combo's conclusion. To perform extensive combos, you'll have to make use of moves that stun on a normal or counter-hit, or moves that can launch your foe up into the air.
Brutal Evasion - Make use of attacks that cause your character to duck under high attacks or jump over low attacks. Such moves are especially useful as they can serve as an offensive opening against an overbearing attacker. Furthermore, some moves change a character's stance, such as moves that put the character into a crouching animation, effectively ducking under high attacks and allowing a follow up “While Rising” move. A character is “rising” when he or she is between crouching and standing. Many While Rising moves come out quite fast, so take advantage if you ever find yourself crouching after performing an attack.
Stay Down - It isn't always best to immediately rise after being knocked to ground. Take advantage of 8-Way Run and roll to avoid follow-up attacks from your opponent. Getting up and immediately guarding high is something to be avoided too, since your foe can then hit you with a low attack or a throw.
Long-range and Close-range - Generally, vertical attacks are best used when an opponent is further away, as they tend to be slower and sometimes linear. Horizontal attacks and kicks tend to come out faster and have shorter reach, and are therefore best used during mid-range or close-range combat. When fighting at close-range, both fighters must use their quickest attacks to win out. Note that certain attacks are “unsafe” if blocked, meaning the character is put at a disadvantage when the attack is guarded against and their next attack will come out slower.
Style or Substance - With the addition of armor and weapon stats in the character customization mode it becomes essential to select armor pieces that offer the biggest stat boost rather than what looks best. Equipment stats and skills are only active in the Tower of Lost Souls, Story Mode, and special versus mode. For this reason, it's a good idea to design a character with the intention of using him or her exclusively in the aforementioned modes so you can focus on their stats and skills rather than trying to balance stats and aesthetics.
Know your Foe - When facing a human opponent, mind games become a big part of the combat in Soulcalibur. Knowing how your opponent tends to act is difficult if you're playing the game online, though you may be able to get a sense of their general routine after the first couple of rounds. You can attempt to “condition” your foe as well, which is to use a certain move on them until they adapt to it, and then start using an entirely different attack. A basic example of this is a player who frequently runs at their opponent and performs a low sweep, knocking them to the ground. Player two is wary of this the next time his opponent is running towards him, so he crouches and guards low. Player one, however, hits player two with a mid-hitting attack instead, breaking through player two's guard and knocking him to the ground.
Control Scheme - If you're using the default Xbox 360 or PlayStation 3 control, certain moves can be difficult to perform due to button placement. For example, many characters have moves that require the input of A K, which is equal to the X and B buttons on the Xbox 360, and the Square and Circle buttons on the PlayStation 3. These buttons are difficult to press at the same time, so it would be a good idea to alter the default control scheme to suit your needs. Enter the “Control Settings” menu from the Options or pause menu to change the controls. Leave the standard A B G K inputs as they are, but setting either A or B to one of the shoulder buttons can make things much easier.
8-Way Run: Holding the D-pad or Control Stick to move in the designated direction.
Air Control: Moving while airborne in an attempt to avoid further damage from an opponent (juggling).
Attack Priority: Refers to the speed or amount of frames of an attack. If both players attack at the exact same time, the character with the quicker attack will win out. Certain moves can put the player at a frame disadvantage after being blocked, meaning the defender can then follow up with a quick move before the attacker can attack again. A player is at an advantage after guarding an attack, or after performing certain moves. In the event that both attacks have the same priority, a weapon clash will result.
Attack Throw: A type of attack that turns into a throw either on a normal hit or on a counter-hit. Attack Throws are marked by an “AT” in the in-game move list.
Cancel: Deliberately ending a move before its conclusion in an attempt to deceive opponents. Only certain moves can be canceled; a cancelable move's name is followed by (Cancel) in the move lists.
Combo: A string of two or more attacks in which it is impossible for the player to escape from until the combo's conclusion.
Counter-Hit: Striking an attacking, backing up, or sidestepping character results in a counter-hit. A move with counter-hit properties deals more damage than a normal attack, and may also stun or stagger.
Critical Finish: A round-ending move that can be performed by pressing A B G K (or the designated button on the default control scheme) after a Soul Crush. A Critical Finish ends the round in favor of the initiator, regardless of the opponent's remaining health. Each character has their own unique Critical Finish.
Crouch: Entered by pressing 2G. A crouched character will duck under high attacks, can guard against low attacks and s-mid attacks, but is vulnerable to mid attacks. Certain moves can only be executed while crouched.
Delay: Deliberately slowing down an attack in order to trick the opponent. Only certain moves can be delayed; a delayable move's name is followed by (Delay) in the move lists.
Guard Break: A move with Guard Break properties can knock down an opponent's guard and possibly serve as an opening for a quick attack. Attacks with the Guard Break property typically take some time to charge, and are accompanied by a blue electricity effect. A guarding character will not take damage from a Guard Break attack, but they will be left open to attack for a moment and their Soul Gauge will take heavy damage. Moves with the Guard Break property are marked by a “GB” in the move lists.
Guard Impact: Either a Repel (6G or 3G) or Parry (4G or 1G) performed just before an opponent's attack connects, giving the defender a temporary advantage against the attacker. Successful Repels may be subject to Reverse Impacts.
Just Impact: A Repel (6G or 3G) performed at the very last moment. A Just Impact is evident by the red flash effect that accompanies it. After a successful Just Impact, the player's next move is given counter-hit properties.
Just: Refers to a move or input that must be entered with precision (Just Frame).
Neutral: The default character stance (no directional input). A standing character can guard against high attacks, mid attacks, s-mid attacks, and s-low attacks, but is vulnerable to low attacks. Usually referred to as “N,” but denoted by a star in the move lists.
Range: How close or far away a character is from their opponent; either long-range, mid-range, or close-range. Can also refer to a move's reach.
Reverse Impact: A counter-Repel that deflects the move that follows the initial Repel. Reverse Impacts can only counter repels; there is no countering a parry.
Ring Out: When a character is knocked out of the stage. A Ring Out ends the round in favor of the outer. Due to the possibility of Ring Outs, terrain awareness is an important part of combat.
Sidestep: Tapping a directional button to quickly move in that direction. Sidestepping is a good way to evade slow attacks (especially Unblockables) and gain the upper hand. Tapping Forward or Back twice results in a dash or backdash.
Slide Input: An input that must be entered very quickly. Slide Inputs are denoted by smaller letter boxes (ex., aB) in the move lists.
Soul Crush: Occurs when a guarding player blocks an opponent's attack while their Soul Gauge is empty. Upon being soul crushed, the player's guard is broken, a piece of armor corresponding to the hit level (if applicable) is broken, and they are vulnerable to a Critical Finish if their opponent so chooses.
Soul Gauge: The globe next to each player's HP Gauge. Attacking and performing Guard Impacts gradually turns the Soul Gauge blue (full), while defending and being repelled or parried gradually turn the Soul Gauge red (empty). A player with a flashing red Soul Gauge is vulnerable to a Critical Finish following a Soul Crush if they continue to guard.
Special Low: A low attack that can be guarded by a standing character and can also be jumped over. Condensed form is “s-low.”
Special Medium: A medium attack that can be guarded by a crouching character. Condensed form is “s-mid.”
Stance: A character's positioning. Common stances are crouched, back turned, or lying down. Many character's have more than one attack stance that effects the moves available to them. Moves that change a character's stance are marked by “ST” in the move lists.
Stun: A hit property in which a character is left vulnerable after an attack, allowing for a follow-up attack or continuation of a combo.
Throw: A type of attack that supersedes an opponent's guard. Basic throws can be accomplished by pressing either A G or B G while standing in front of, behind, or to the side of an opponent. If the grab is successful, the throw performed will depend on where the opponent was grabbed (i.e, front, back, right side, or left side). A Grapple Break can be performed to negate a grab by pressing the A button to break an A G throw, or by pressing the B button to break a B G throw. Some characters have one or more unique throws that are can be executed differently.
Ukemi: The act of quickly rising after being knocked to the ground by tapping the G button. A Just Ukemi—rising immediately after a grounding attack—is performed by pressing the G button at the exact moment the character hits the ground.
Unblockable: A special type of attack that can pierce through an opponent's guard and typically take a few seconds to execute but can deal a large amount of damage. While an Unblockable is being executed, the background darkens and fire surrounds the initiators weapon. Striking the initiator during charge up cancels the move, otherwise sidestepping and being out of range is the only way to avoid taking damage. Moves with this property are marked by a “U” in the move lists.
Wall Hit: Hitting an opponent into a wall, allowing for extended combos and added damage.
Whiff: A missed attack.
While Rising: While the character is emerging from the crouched position. The moment in-between the crouched and standing stance; may also be referred to as “While Standing.”
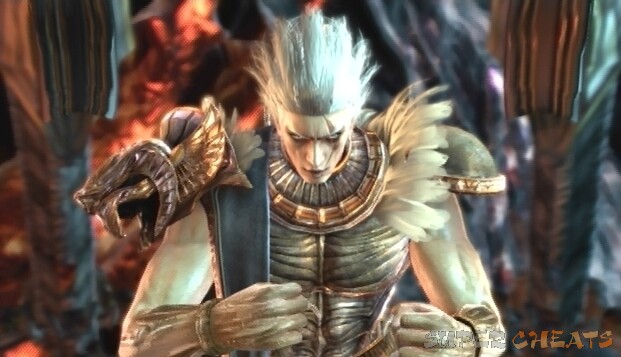
The Hero King Algol
Age: Frozen in time
Birthplace: An ancient dynasty whose name has been lost to history
Height: Whatever he wills it to be
Weight: Whatever he wills it to be
Birth Date: Meaningless now
Blood Type: Only pure power courses through him
Weapon: Assimilated Soul Calibur & Soul Edge
Weapon Name: Soul Calibur & Soul Edge
Discipline: Command of the Flow of Power
Family: All in the past
Unlocked: Defeat in Story Mode (using Astaroth, Cassandra, Cervantes, Darth Vader, Kilik, Mitsurugi, Rock, Setsuka, Sophitia, Talim, The Apprentice, Xianghua, Yoda, Yoshimitsu, Zasalamel, Angol Fear, Ashlotte, Kamikirmusi, Scheherazade, or Shura).
Legend tells of The Hero King Algol who sacrificed his life to create the legendary spirit sword Soul Calibur. In truth, the goal had been to create a spirit sword to combat the evil within Soul Edge, but after many failed rituals, including one that claimed Algol's life, the result was a sword similar in nature to the cursed sword. This failure was due to Algol's personal ambitions, namely his thirst for power. As a result, the Hero King's soul was sealed away by his subordinates, whom later brought about the true spirit sword, Soul Calibur, through his failings. Now, centuries later, the curse is ready to be broken, and the Hero King will rise again.

Algol boasts a suitable move list for title's main boss character. With an array of quick and damaging attacks, as well as some long-range moves for added versatility, Algol is a formidable opponent at almost any range. He isn't exactly the overpowered monster one would expect as far as playable boss characters go, however, but those who take the time to master him will be able stand up to even the most battle-hardened of foes.
The video below shows the following combinations. The directional notation system is used to describe each move.
Combo 1: WR hold B, 3B
Combo 2: 33_99B, 8B K
Combo 3: 4 hold K~623A, B, K
Combo 4: Against backtracking opponent 4B K
Please read through 'The Basics' and 'Fighting Terms' for an explanation of the 'directional notation' and the fighting terms used to explain strategy.
Algol's unique “Eltanin Nath” projectile attacks allow him to apply pressure at long-range. Menancing Eye (6A B for a fast projectile, or 6 hold A B for a slow projectile) is a linear projectile attack that can catch opponents who aren't paying attention (especially the fast variation), dealing decent damage per hit. Perform Heavenly Gaze (2A B) and Algol will fire a projectile at the ground; since these projectiles bounce, Heavenly Gaze can be used to deter rushing. Call of Earth (while crouching A B for a fast projectile, or hold A B for a slow projectile) is a good punisher for whiffed high attacks. Perform Rastaban Nath (Dual Wings) (4A B for fast projectiles, or 4 hold A B for slower projectiles) and Algol will fire two projectiles on either side of him, possibly catching sidesteppers. There are several more variations of Algol's projectile attack, but you'll have to look into them yourself.
The projectile orbs can be Guard Impacted by savvy opponents, causing the deflected orb to propel back to Algol at a faster rate, dealing damage if it hits. Though the projectiles are handy, there are several more options at long-range. Algol's high-flying acrobatic front flip, Qamar I'klil (41236) can send him sailing over or towards his opponent. Certain attacks can be performed during Qamar I'klil, such as the horizontal high attack I'klil Akrab (duing Qamar I'klil A), the vertical med slash I'klil Uf”uwan (during B), or the low-slide kick I'klil Shams (during K). Sabik Sheratan (A K) teleports Algol to the other side of his opponent; it's good for a quick escape or to simply confuse your foe. Sabik Sheratan, followed by Shams Qadam (8A K, K) is an impressive maneuver.
At mid-range, make heavy use of 8-Way Run and punish whiffs with Alderamin Lesuth (hold 6_3_9, A) or Awwal Qarn (1B), a long-range mid attack that stuns on a normal or counter-hit. Use Saiph Caph (1A), a quick, long-range low attack, or Theemin Lesuth (3A, A) followed by Heavenly Gaze (2A B), to counter sidestepping. If your opponent is trying to move back to long-range, use Sadalsuud Markab (4A B), an attack throw intended to trap back stepping opponents. Sadalsuud Markab offers surprising range too, so use it whenever your enemy is trying to back off.
Algol is also quite powerful at close-range too, with combos such as Alnilam Wezen (6A, A, B) and Fil Qadam (1K) offering fast attack speed useful for interrupting attackers. Alaraph Anchentenar (2B K) is quite brutal, and can be used again to cut down the opponent while they're rising. If you're enemy is standing by the edge, Ras Algethi (3B, B) is good for Ring Outs. Ras Algethi is a little slow, but you can accomplish nearly the same with Haris Shaula (while rising B) after Fil Qadam (1K) or after ducking under a high attack, followed by Beemin Acubens (B, B).
Haris Shaula itself is a good launcher; Alnair Alterf (B K) may be good for a couple of mid-air hits if the opponent doesn't air control. Take advantage of downed opponents with a quick Heavenly Gaze (2A B). Alphecca I'klil Nath (214A B) is an Unblockable that can be effective against downed opponents; it requires a certain amount of precision, but it'll deal a ton of damage if it hits. Use 2A K to trip opponents who immediately guard high when they rise.
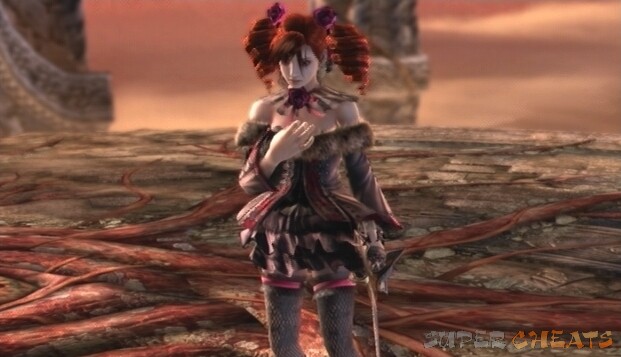
Amy
Age: Unknown
Birthplace: Rouen, French Empire
Height: Unknown
Weight: Unknown
Birth Date: Unknown
Blood Type: Unknown
Weapon: English Sword Rapier
Weapon Name: Albion
Discipline: La Rapière des Sorel
Family: Foster father/Raphael. Her real parents are unknown.
Unlocked: Purchase for 4000 Gold on the fighter select screen.
As an orphan living on the streets of Rouen, Amy hid Raphael Sorel as from local authorities pursued. Appreciative of what Amy had done for him, Raphael took her in to raise her as his daughter. Later, after a fierce battle against Nightmare, Raphael returns to Amy dreadfully injured. He had been infected by the Evil Seed, and while Amy nursed him back to health, she also came to be infected. Both soon transformed into vampires, and now seek the legendary spirit sword Soul Calibur to create a world of their own.
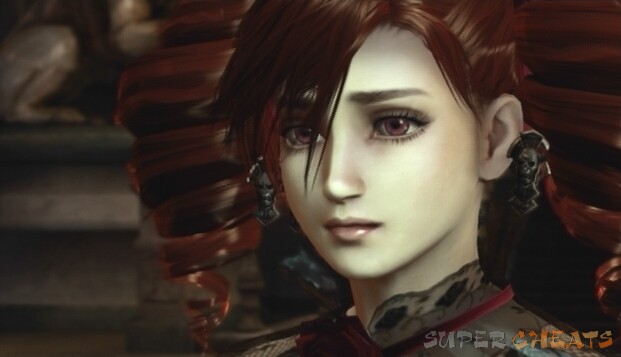
Amy's fighting style closely resembles Raphael's, but with a somewhat balletic quality to it. She is more agile than he, though she is noticeably lacking in the damage department. Amy's speed and decent range make her a strong character, and players who take the time to familiarize themselves with her Amaryllis Spin (236), Biondetta Parry (A B), Crest Form (A K), and Lilith Parry (B K) techniques will find her even more effective.
The video below shows the following combinations. The directional notation system is used to describe each move.
Combo 1: 6B K, 4B K, B
Combo 2: 66A B, facing away B K, 66A B
Combo 3: 44K, 6B K
Please read through 'The Basics' and 'Fighting Terms' for an explanation of the 'directional notation' and the fighting terms used to explain strategy.
Amy doesn't have much to offer in the way of long-range attacks. Focus on moving into mid or close range where she can attack more comfortably. Use 8-Way Run to avoid your opponent's attacks, and High Arc (during 8-Way Run A B) to dash in should they miss. An effective combo at this range is High Arc (66A B) into Circular Blitz (facing away B K) and then High Arc once more.When you've managed to get a bit closer, you can use Amaryllis Spin (236) and then Stocatta Slicer (during Amaryllis Spin press B repeatedly) to move in to close range and score a few hits.
At mid-range, use Silent Saber (hold 2_8, A) or Heavy Mandritti (4A) to swat sidesteppers. There are several effective maneuvers at this range, but you'll have to wait for the right opportunity to use them, lest they be countered. For one thing, Amy's low attacks are relatively quick, such as Silent Impale (2B K)—which is also good for striking downed opponents—and Graceful Cutter (1A) with its deceptive range. Falling Prayer (6B K) ducks under high attacks and stuns on a normal or counter-hit, and can then be followed by Stocatta Rampage Crescendo (4B K, B) for a 10-hit combo. Dread Coffin into Stocatta Rampage Crescendo (hold 4_1_7, B, 4B K, B) is another option and accomplishes the same, though it doesn't duck under high attacks.
If your opponent is a staunch defender, Amy's Crest Form (A K) can lead into a quick Unblockable, Vermillion Fang (during Crest Form B). Descussate Strike (3B, A) is a quick mid to low string that stuns after the first strike hits and will down the opponent if the second hits. Amy's Lilith Parry (B K) and Biondetta Parry (A B) can be used to Repel attacks, and can then be followed by a quick strike. Lilith Parry into Night Toe Kick (during Lilith Parry K) will launch your foe into the air, allowing you to follow up with another attack for an aerial combo.
There are a number of quick attacks that are effective at close-range. Triple Botta in Tempo (6B, B, B) is one, but you may want to only input 6B, B because the final strike will leave you at a disadvantage if blocked. Several of Amy's moves carry the stun property too, and at this range Frigid Tap (while rising B) can be quickly executed after ducking under a high attack. Falling Prayer (6B K) into Stocatta Rampage Crescendo (4B K, B) can be effective at close-range too, as the first move stuns and ducks under high attacks. (1B) is a quick low poke good against defenders. Mix-up low pokes and kicks with Dui Montante (B, B) and Botta in Tempo (6B, B, B) to keep your foe guessing.
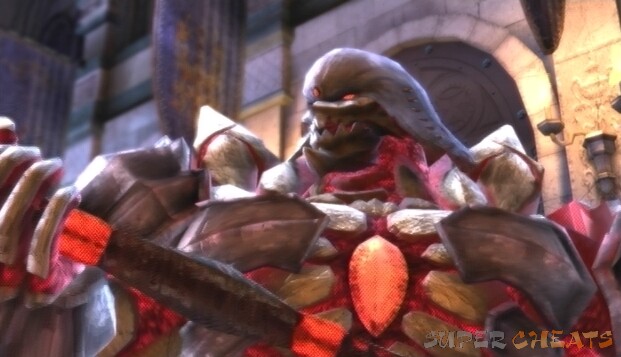
Astaroth
Age: Seven years since initial creation
Birthplace: Unknown
Height: 6'8”
Weight: 287 lbs.
Birth Date: September 3
Blood Type: None
Weapon: Giant Axe
Weapon Name: Kulutues
Discipline: Gyulkus
Family: None
Unlocked: Initially available.
Having learned the truth of his origins—that he had been modeled after a weak human—Astaroth, though furious he may be, gained a new perspective of himself. All along he had been at the mercy of his master, the god of destruction, and that realization brought about feelings of intense rage. Tira, servant of Soul Edge, convinces the raging golem to join Nightmare in Ostrheinsburg so that he may use Soul Edge's powers to exact revenge on his former master. Though wise to Tira's intention to use him, Astaroth sets out to Ostrheinsburg with intentions of his own; to consume all of the souls himself.
Though slow and lumbering, Astaroth's ferocious arsenal of moves can stir fear in even the most battle-hardened warrior. The golem's high damage output makes up for his slow movement and attack speed, however he can face significant difficulty when matched up against speedy characters. Astaroth is most effective at long-range for this reason, as he can comfortably dish out large amounts of damage with his long reach and crush incoming foes with well-timed attacks. He remains effective at mid-range, but you'll definitely want to keep him out of close-range.
The video below shows the following combinations. The directional notation system is used to describe each move.
Combo 1: 66 hold K, 22B
Combo 2: 66A, B~A G
Combo 3: 4 hold B, 28B G
Burial: Against downed opponent 2A K
Please read through 'The Basics' and 'Fighting Terms' for an explanation of the 'directional notation' and the fighting terms used to explain strategy.
Astaroth's most effective long-range moves are Discus (1A), Double Discus (1 hold A, A), or Discus Breaker (1 hold A, B) depending on the situation. Discus is a good, fairly quick attack that can push back rushing enemies, while Discus Breaker can deal a massive amount of damage if both strikes hit. All three forms of Discus are low attacks and offer significant horizontal coverage, meaning opponents will most likely be forced to block low if they are in range. You can set up a guessing game with the three variations of Discus at your disposal, as an opponent may continue to block low expecting a Double Discus, only to be crushed by Discus Breaker's mid hit (though it can be impacted rather easily).
Titan Axe (A B) can be used to swat sidestepping foes, and Bull Rush (66K)—a mid attack, that can also be delayed and strengthened by holding K—can surprise those who have wizened to Discus. Hades Hammer (22B) is another mid long-range attack that launches opponents high up into the air when it connects.

Discus Breaker
There are a few quick moves at mid-range that can deter foes who are looking to move up closer to Astaroth. Hades Divide (44A) will set your opponent spinning, and can then be followed by a quick Bull Rush (66K). Use Hades Control (4A) to interrupt your enemy's attacks An effective combo at mid-range is Ares Spiral Charge (66A, B) into Titan Bomb (28B G), a mid-air throw; time this correctly to deal massive damage. Guard Crusher (B K) can be used to spin your foe around, giving you a chance at a scoring a back throw. 4 hold A G is a chargeable grab in which Astaroth lunges at his opponent, allowing it to be executed from mid-range. Use with caution, however, as an interrupted grab means your foe's attack will carry counter-hit properties.
Astaroth also has a few grabs that can be used on downed foes to deal further damage, such as Burial (against downed opponent 2A K). Astaroth also has several attacks in his arsenal that can be used to stop an opponent's wakeup game; Hades (2B) or Ax Volcano (3B)—both of which can be charged by holding down the second input, turning the latter into an Unblockable—or Stamp of Hades (22 hold K), which can stagger an opponent should they rise and step back, or launch them if it connects.
If you're an Astaroth player, you do not want to be fighting at close-range. At this range, speedy characters can quickly diminish Astaroth's health bar once they get started. You'll have to rely on the few quick moves in your arsenal to push your foe back to mid-range. The quickest move at your disposal is Hades' Knee (6K), which knocks back a short distance. Hades' Knee is still slower than most characters' moves, so you'll have to wait until your opponent is at the disadvantage. Reverse Tamer (1K, A) is another option, but it comes with a slow start up. Astaroth also has several low grabs, such as Bludgeoning Crush (2A G) and Flood of Lava (3B G), which can be used to get through a low guard or to prevent low attacks.
Cassandra Alexandra
Age: 21
Birthplace: Athens, Ottoman Empire
Height: 5'5”
Weight: Insists she's lost weight recently
Birth Date: July 20
Blood Type: B
Weapon: Short Sword & Small Shield
Weapon Name: Digamma Sword & Nemea Shield (Reforged)
Discipline: Athenian Style
Family: Father/Achelous, Mother/Nike, Brother/Lucius, Sister/Sophitia
Unlocked: Purchase for 4000 Gold on the fighter select screen.
While in search of clues as to the whereabouts of the cursed sword, Cassandra is attacked by a strange man. After the fight, the assailant makes off with the Soul Edge fragment she had been carrying with her. Upon returning to the town, Cassandra spots Siegfried Schtauffen, wielder of the legendary spirit sword Soul Calibur. Assuming he was on his way to smite some great evil, Cassandra follows him to Ostrheinsburg, reasoning that Soul Edge must surely lie there.

Cassandra, while faster than her sister, does not deal as much damage as Sophitia. Her quickness means she'll have an edge against heavier combatants, and her Angel Step allows her to dash in to close-range with the possibility of repelling incoming attacks. Like Sophitia, Cassandra is a good choice for first-time players.
The video below shows the following combinations. The directional notation system is used to describe each move.
Combo 1: 33_99B, B K
Combo 2: 33_99B, A B, 66A B
Combo 3: Angel Step hold B~4B, B, A (Just)
Combo 4: WR hold A~6A, A, A~4B, B, A (Just)
Please read through 'The Basics' and 'Fighting Terms' for an explanation of the 'directional notation' and the fighting terms used to explain strategy.
At long-range, Angel Step (236) can get you close to your enemy, and can Guard Impact high attacks too. While in the middle of Angel Step, you can quickly sidestep by tapping up or down. Other than that, make heavy use of 8-Way Run and punish missed attacks with Divine Fall (hold 2_8, B K) or Seraphim Sault (hold 2_8, K, K).
Cassandra fares best at close-range, so try to move in and remain where she can more comfortably attack. Use Cross Blitz (4A, B) as your primary counter against 8-Way Run and mix-up with Undertow (1A), a low strike that ducks under high attacks. Punish missed attacks with Stardust Strike (hold 6, A B), a quick mid attack dealing decent damage, or Artemis Dart (6B), a high attack that crouching opponents can duck under. Make use of Angel Step (236) both to get closer to your enemy and to repel incoming attacks; after a successful repel, follow up with Angel's Exile (during Angel Step B) or Angelic Gust (during Angel Step hold B). Pure Stinger (while crouching 1B) is a good low poke with impressive range.
At close-range, Cassandra's A, A string can be used to deter sidestepping and comes out pretty fast. Make use of Undertow (1A) to strike standing opponents. Undertow puts Cassandra in a crouching animation, so if it hits, use Heaven's Wing (while rising B) to launch your opponent. Angelic Twirl (214) deflects mid attacks, which is likely what your opponent will be throwing at you at close-range. Use Angelic Twirl after guarding an attack to hopefully repel the attacker's next strike. Upon a successful Repel, follow up with Angel's Exile (during Angelic Twirl B).
Cassandra's basic kicks come out pretty quick as well, so make use of them to interrupt your opponent's attacks. Elfin Thrust (2B, B during hit K) is a good punisher that can lead to an attack throw with precise timing. Throughout the battle, mix-up Undertow (1A) with Cassandra's basic vertical and horizontal strings to keep your foe guessing.

Cervantes de Leon
Age: 48 (Aging has stopped)
Birthplace: Valencia, Spanish empire
Height: 5'10”
Weight: 176 lbs.
Birth Date: January 1
Blood Type: None
Weapon: Longsword & Pistol Sword
Weapon Name: Acheron & Nirvana
Discipline: Memories of Soul Edge
Family: Father/Killed in battle, Mother/Deceased. He slaughtered his whole crew when he claimed Soul Edge, although he remembers none of it.
Unlocked: Purchase for 4000 Gold on the fighter select screen.
Having wielded the cursed sword Soul Edge, the dread pirate Cervantes de Leon became a ruthless monster, killing off his entire crew and most of the population of his home port town. He was at one time defeated, but was later inadvertently resurrected by Nightmare, the new host of Soul Edge, who used the cursed sword's fragments still embedded in Cervantes' body. With some fragments of the cursed sword, he later created a lesser form of Soul Edge. The dimensional warp caused by the clash between Soul Edge and Soul Calibur resulted in Cervantes' sword pulling away from him to return to its other half. Now, he travels to Ostrheinsburg to claim the recently restored Soul Edge.

The maniacal pirate returns with most of his moves intact, though with some changes longtime Cervantes users will notice. With high damage output and decent range, Cervantes is a popular choice, and rightfully so, as he boasts a number of effective and easy-to-execute moves. His weakness lies in the fact that many of his moves can be easily avoided by players who are familiar with Cervantes' fighting style.
The video below shows the following combinations. The directional notation system is used to describe each move.
Combo 1: 3B~B2
Throw: While Crouching 323B G
Combo 2: A (CH), 2A B, WR A
Combo 3: 44A B, 213, B K
Please read through 'The Basics' and 'Fighting Terms' for an explanation of the 'directional notation' and the fighting terms used to explain strategy.
There are several options at long-range. One commonly used move is Dread Charge into Geo De Ray (214B) which sends Cervantes flying straight towards his opponent and deals a decent amount of damage. Be very careful with Geo De Ray unless you're playing on a walled stage, however, because if your foe is standing near the edge of the ring, he or she will be launched if it hits, but Cervantes will keep going and possibly ring himself out. Genocidal Culverin (6A K) is an Unblockable, long-range attack that deals a ton of damage, and can catch those who aren't paying attention. Dark Geo Da Ray into Dread Charge (4A B) can lead to a brutal combo if it connects, but can be easily avoided by those who have witnessed the move before, and the Ring Out risk is still there. Another possibility is Shadow Flare (4B K), an overhead Guard Break move.
Cervantes has safer options at mid-range. Fregata Slicer (2A B) is a quick mid-attack that puts Cervantes into a crouched stance and can be followed by Cursed Blow (while Rising A) which stuns on hit, or Flying Dutchman (while crouching A B), a 7-hit combo. Scissor Lifter (3A, B) is an effective low to mid string that leads into a high attack if the B button is pressed just as the first strike connects. Follow through with B K while Cervantes' back is turned to strike your rising opponent). Use Wave Break (1A), Merciless Wave (hold 4, A) or Gibbering Torpedo (hold 1_7, A, A), a low combo, to deter sidestepping.
Close-range attacks such as Wild Storm (B, B, B) and Soul Swing (A, A) are actually fairly quick, so use them when you are at an advantage. Fregata Slicer (2A B) into Cursed Blow (while Rising A) or Flying Dutchman (while crouching A B) works too, but you can mix it up with Anchor Marooned Kick (1K) at this range. While your opponent is stunned, use quick kicks and horizontal slashes to deal some more damage. Full Sail Hoist (A B) also stuns on a normal or counter-hit, so use it to punish whiffs or missed grabs. If Anchor Marooned Kick (1K) connects, follow with Anchor Knee Kick (6K) which is then uninterruptable.
Even at close-range, Wave Break (1A), Merciless Wave (hold 4, A) or Gibbering Torpedo (hold 1_7, A, A) are an effective sidestepping deterrent. Pirate's Scheme (A K) and Pirate's Tactics (B K) can be used to slip through incoming horizontal attacks and vertical attacks respectively, with Cervantes reappearing behind his opponent. These moves are useful for escaping after a string of blocked attacks; go for a back throw or use Shadow Flare (4B K) while your opponent is confused. Use Storm Nest (hold 2_8, B) or High Tide Anchoring (2B K)—which can be charged too—to strike downed opponents.
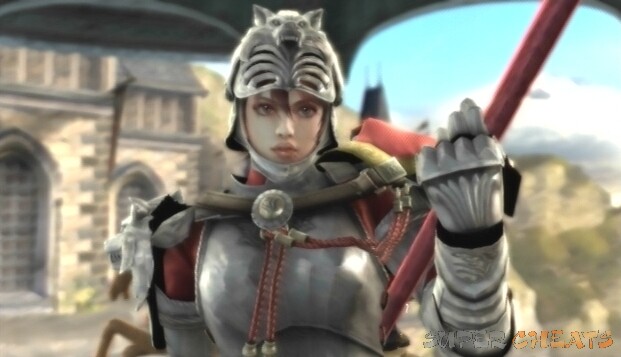
Hildegard von Krone
Age: 18
Birthplace: Wolfkrone Kingdom
Height: 5'3”
Weight: 110 lbs.
Birth Date: August 13
Blood Type: AB
Weapon: Sword & Lance
Weapon Name: Glänzende Nova & Frischer Himmel
Discipline: Groß Erbschaft
Family: Father, the king (victim of malfestation, now imprisoned).
Unlocked: Initially available.
After falling victim to an Evil Seed-induced insanity and being forced into necessary imprisonment, the king of Wolfkrone left his daughter, Hildegard, to lead the country and defend its people. Upon hearing word of a man named Siegfried who had entered Ostrheinsburg Castle, Hilde sets out in hopes of joining forces with him to accomplish their common goal; to take the cursed city and defeat the Azure Knight.

This armor-clad newcomer has a lot to offer; with powerful long-range and solid close-range attacks, Hilde can be an extremely efficient fighter in experienced hands. With that said, Hilde is most definitely not a pick-up-and-play character. A good understanding of her range and charge techniques is needed to compete against skilled fighters.
Hilde is unique in that her horizontal and vertical attacks can be charged by holding down either A or B respectively for a set amount of time. There are four different charge moves that Hilde can pull off: Mystic Star (hold A), Moonlit Dance (hold B), Dragon Breath (while crouching hold A), and Siren's Call (while crouching hold B). The form and damage dealt by each of the aforementioned moves changes depending on its “Stage” (or, the amount of time the button is held). Both horizontal and vertical charge techniques have three stages in regards to the amount of time a button is held. For example, to pull off a Stage 2 Moonlit Dance, one would have to hold down the B button for about two seconds, then release and press the B button during the attack. A charge can be started at any time; even while guarding.

Mystic Star (Stage 3)
Due to the need to comfortably hold down buttons for extended periods of time, an altered control configuration (such as setting the horizontal and vertical attack buttons to the two shoulder buttons, or Guard to one of the shoulder buttons) would benefit anyone who plans to use Hilde regularly. Attacks other than the type being charged can still be executed without canceling the charge, but be wary of performing alike attacks if more than one button is set to a single command.
There are two secret Stage 4 versions of Mystic Star and Moonlit Dance, but both require about 30 seconds worth of charging, making using either move regularly in battle unfeasible. The payoff is worth it, however, as both can knock off over half of an opponent's total HP. Furthermore, Mystic Star and Moonlit Dance can be charged at the same time (though you limits yourself to kicks in the meantime), so combos such as a Stage 2 Moonlit Dance into a Stage 3 Mystic Star are possible.

Moonlit Dance (Stage 4)
The video below shows the following combinations. The directional notation system is used to describe each move.
Combo 1: Hold B release (Stage3)~B K
Combo 2: 44K~hold B release (Stage2)~hold A release(Stage2)
Dragon Breath: WC hold B release (Stage3)
Moonlit Dance 4: Hold B approx. 30 seconds release (Stage4)
Mystic Star 4: Hold B approx. 30 seconds release (Stage4)
Please read through 'The Basics' and 'Fighting Terms' for an explanation of the 'directional notation' and the fighting terms used to explain strategy.
Due to the limited range of her sword, you'll have to limit yourself to vertical attacks while attacking long-range. Hilde's long-range attacks leave her especially vulnerable to sidestepping, though, as she lacks a strong horizontal sweep. Double Avalanche (6B K) and Pulverize (4A B) are good for a jump in, but can be easily evaded. Double Falcon (6A B) can be used to close some of the distance between you and your opponent as well. Moonlit Dance (charge B ~three seconds) into Iron Tower (B K) is a quick combo that may catch opponents off guard. After knocking down a foe with Lightning Horn (6BBB) or Double Avalanche (6B K), attempt to thwart their wakeup game with Pulverize (4A B).
At mid-range, use attacks such as Glorious Hammer (2B), White Impale (3B, B), Iron Heel (hold 4, K), Peregrine Falcon (1B), and Tornado Kick (8K or 7K) to keep your opponents at bay while charging Mystic Star or Dragon Breath. Lightning Horn (6BBB) is worth a few good hits if the opponent can be caught on the first strike. Use Mystic Star (Stage 3) to knock away sidestepping opponents. You can also try to pull off Siren's Call (while crouching hold B, release (Stage 3), B during hit A). Moonlit Dance (Stage 2) can be used to hit up downed opponents too. A K is a lunging sword slash that jumps over low attacks, so use it often. Fire Strike (2A K) is Hilde's best low attack; it ducks under high attacks, some horizontals, and offers surprising range.
At close-range, Moonlit Dance or Dragon Breath (any stage) charge moves are great for getting hits in on overbearing opponents, as is Fire Flash (6A K). Work on getting kicks and sword slashes in while attacking at close-range, alternating between high and low attacks to keep your opponent guessing. Knight Heel (4K) causes a spin out when it hits, so follow through with Tornado Kick to after it connects to down your dazed foe. Use Eagle Talon (2A B, K), a low to mid string, to poke through a standing opponent's guard; the first hit stuns, and the second floors them.
Fighting at close-range is not Hilde's strong suit, so what you really want to work on at is getting back to mid or long range with attacks like Wind Horn (while rising B) and Tornado Kick (7K). Use Tornado Kick when your foe's back is to a wall to score a wall hit for added damage. Throws are also an option at close-range; try March of Triumph (B G) while Hilde has her back to the edge of the level to perform a nifty Ring Out.
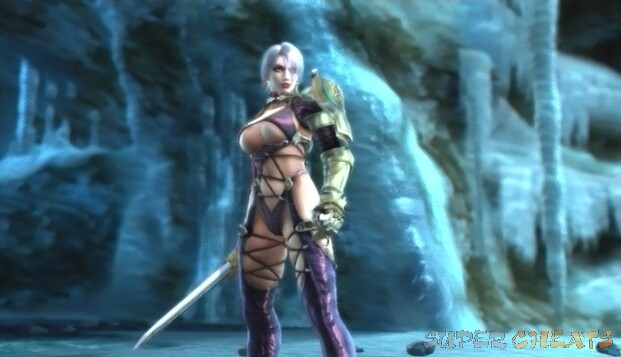
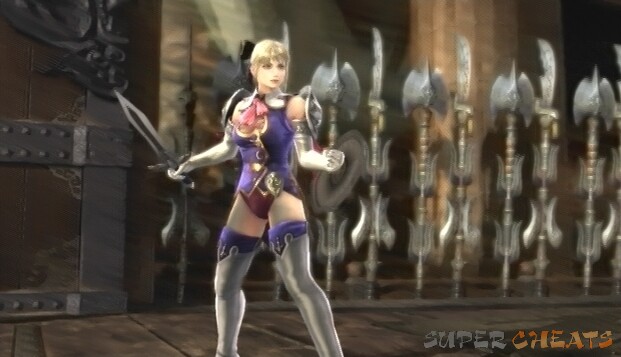
Ivy (Isabella Valentine)
Age: 32
Birthplace: London, British Empire
Height: 5'10”
Weight: 128 lbs.
Birth Date: December 10
Blood Type: Unknown
Weapon: Snake Sword
Weapon Name: Valentine (Ivy Blade)
Discipline: Unrelated Link
Family: Adoptive parents/Deceased, Father/Cervantes, Mother/Deceased
Unlocked: Initially available.
Following the path set by her adoptive father, Ivy took up alchemy in search of Soul Edge. During her research, Ivy discovered the fabled sword's true nature, and vowed to destroy it. Through her travels she later learns that Cervantes de Leon, the previous wielder of Soul Edge, had sired her. This realization led to her self-isolation for a time, after which she emerged more determined than ever to destroy the cursed sword. The evil blood coursing through her veins prevents her from wielding the spirit sword Soul Calibur, but after suffering a near death at the hands of Cervantes and using an artificial soul to save herself, she sets out to destroy Soul Edge once and for all.

Ivy is without a doubt one of the tougher characters to master. Each of her four stances, Coiled (default), Sword (during Coiled State A B), Whip (during Coiled State A K), and Serpent's Embrace (during Sword State B K) offer a different selection of moves, making her a difficult character to excel with. This complexity makes her an extremely versatile fighter, however, as she boasts attacks suitable for attacking at any range. Don't let her appearance fool you; Ivy's ridiculous outfit and proportions do nothing to hinder her performance in battle.
The video below shows the following combinations. The directional notation system is used to describe each move.
Combo 1: Whip 1B, 2B K
Combo 2: Coiled 3B~236B, B
Combo 3: Whip 3B~Serpent’s Embrace 66K~Sword 1K, B
Combo 4: Coiled 1A, A K~Whip 3B K
Please read through 'The Basics' and 'Fighting Terms' for an explanation of the 'directional notation' and the fighting terms used to explain strategy.
Though not particularly suited for long-range combat, Ivy does have a few tools to use from a great distance. Serpent's Embrace (during Sword State B K, Ivy wraps the sword around her left shoulder) opens up Stinging Souls (B K for long-range, 6B K for great ranges, 4B K mid-range), a mid-attack that stuns on hit, but is very easy to avoid if the opponent is familiar with Ivy's fighting style.
Know Thyself (during Coiled State A K) switches Ivy's weapon to its Whip state, which offers the best long-range options. Note that Coiled is the weapon's default state, and can be switched back to from Whip with B K and from Sword with A K. Rushing Raven (during Whip State 6B) is a long-range high attack that stuns on a normal or counter-hit. Though easy to avoid by crouching or sidestepping, Rushing Raven offers incredible range. Ivy Masquerade (during Whip State while crouching 3B) is a low poke that links to Suppressed Exile if B is held. Suppressed Exile is an Unblockable move that launches on hit and deals substantial damage; it can be canceled with A B to immediately launch the target.
Ancient Wheel (during Whip State 1A, A) is a long-range low attack that can be used to thwart sidestepping. Since Ancient Wheel puts Ivy into a crouch animation, follow up with Asylum (during Whip State while rising A B), a series of mid-hitting strikes that circle around Ivy, to catch opponents who are intent on rushing in. Cage Master (during Whip State while rising B, B) a quick mid-strike into a mid-air attack throw, is another option. Insanity Light (during Whip State hold 2_8, A) is a good 8-Way Run counter; it shifts into an attack throw if used close enough, after which the foe ends up with their back to Ivy.
Dancing Gnome (during Whip State 6A B) is a linear long-range attack that stuns on a normal or counter-hit, and can be turned into an Unblockable if A B is held. Though Dancing Gnome doesn't deal a great amount of damage, its Unblockable variation is very difficult for your opponent to avoid unless they strike before it comes out. You can release A B at any time to perform the normal variation if your enemy is charging.
Reveal Thyself (during Coiled State B K) changes Ivy's weapon to its Sword State, which is best used during close-range combat. Royal Huntress (hold 2_8, K) is a low sweep that ducks under high attacks and downs the opponent. Use Asylum (during Sword State while rising A B) to catch foes who tend to rise immediately after being grounded. Gnome Huntress (during Sword State 3 hold B K) is a high-hitting Unblockable that comes at the opponent from behind. You have to be at mid-range to use Gnome Huntress, but it is good for catching rising opponents after a knockdown. Use Pride (during Sword State while rising B), a mid-hitting launcher that can lead to a damaging juggle, after ducking under a high attack or grab, or after using a move that puts Ivy into a crouching animation (ex., Charmer Silhouette (during Coiled State 2K)).
Ivy's Serpent's Embrace stance offers a few good moves, but it is often difficult to switch to in the heat of battle as it can't be switched to while performing attacks. The stances highlights are Lamenting Tail (during Serpent's Embrace A K), a low-hitting attack throw, Mistress' Justice (during Serpent's Embrace B, B, B), which can be used to whip a downed enemy, and Wind Embrace (A during hit 236A), a surprisingly quick Unblockable combo (can be avoided by crouching).

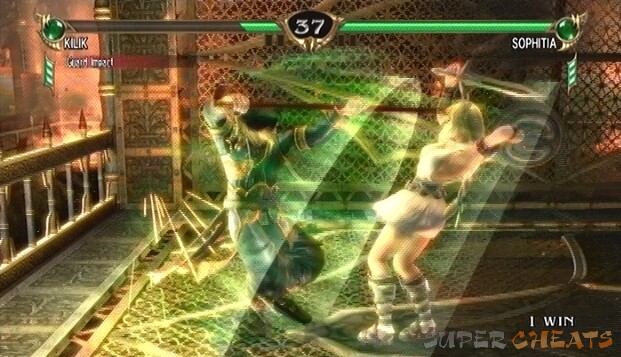
Kilik
Age: 23
Birthplace: Unknown (Raised in Ling-Shen Su Temple, Ming Empire)
Height: 5'6”
Weight: 139 lbs.
Birth Date: February 9
Blood Type: A
Weapon: Rod
Weapon Name: Kali-Yuga
Discipline: Ling-Shen Su Secret Arts of the Rod
Family: Raised in Ling-Sheng Su Temple, but he murdered everyone there, including Xianglian, who was like a sister to him. Master/Edge Master (True name unknown)
Unlocked: Initially available.
Having been driven mad by the Evil Seed, Kilik ended up killing many of his order members, including a woman named Xianglian who was very dear to him. After this event, he dedicated his life to purging evil and swore to one day purify the cursed sword as atonement for the lives he took that day. Kilik, along with his traveling companion Xianghua, set out to the cursed city of Ostrheinsburg where his oath can be fulfilled.
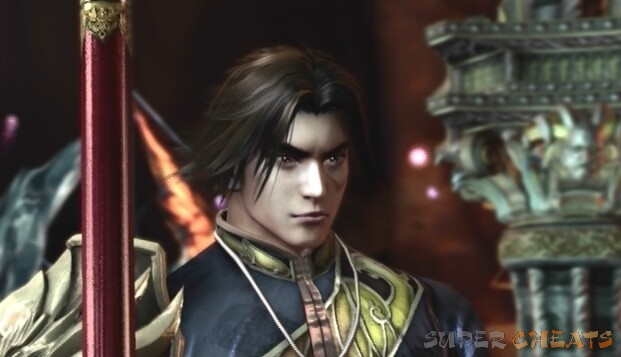
Recognized by many as the designated “starting” character of the Soulcalibur series, the bo staff-wielding Kilik retains many of the traits that made him a popular character in previous iterations. Besting the majority of characters in the range department, coupled with a host of easy-to-execute yet effective moves, Kilik is a good choice for series newcomers and veterans alike. Added range makes for slower attack speed, however, providing faster characters with an advantage during close-range combat. His strong horizontal sweeps and a good mix of high and low moves can keep opponents away, though.
The video below shows the following combinations. The directional notation system is used to describe each move.
Combo 1: CH A, A, B~6A, A, A
Combo 2: WR B, 66B
Combo 3: Monument A, 46B~6A, A, A
Combo 4: 3B (Counter), 22B~A, A
Please read through 'The Basics' and 'Fighting Terms' for an explanation of the 'directional notation' and the fighting terms used to explain strategy.
Kilik's long-range moves may leave him vulnerable when matched up against experienced players. Fang Thrust (6B) and Phoenix Thrust (4B) may seem to be obvious choices, but both can be easily avoided with 8-Way Run. Dragon Glide Bow (hold 6, A, A) is an effective high to low string that can be used to catch sidesteppers. Use Waterfall (2B) and Phoenix Thrust (4B) to hinder approaching foes. Be especially careful when using Kilik's linear vertical moves while your enemy draws near, as an evasion can leave you open to a back or side throw.
Fang Thrust
Tip Shock (46B) is a great move for interrupting attacking opponents at medium range. It will also stun on a counter-hit, allowing you to follow up with a quick string such as Raging Phoenix Combo (6A, A, A) or Twin Phoenix (aB, B). Reverse Bo Thrust (while Rising B) can duck under high attacks and stuns on a normal or counter-hit, allowing you to then follow through with Heavy Bo (66B), which is an attack throw. Use Raven Slaughter (hold 2, B) during 8-Way Run to launch your opponent and then move juggle with Raging Phoenix Combo (6A, A, A) or a similar move. Biting Phoenix (6A B), a series of mid-hitting attacks, offers great range and can hit and push back crouching foes. Lower Bo Smackdown (2A B) is good for hitting standing opponents, but it does move Kilik forward, so be sure to follow through with a quick horizontal string immediately after.
Reverse Bo Thrust (while Rising B) into Heavy Bo (66B) will help you while fighting at close-range, otherwise focus on quick horizontal strikes to prevent sidestepping. Monument (236) and Back Parry (214) can be used to Repel horizontal and vertical attacks respectively. After a successful Repel, follow through with Scythe (during Monument K) or Retreating Hilt (during Monument B) if you wish to fallback. Hit downed opponent's with Lower Bo Smackdown (2A B), Playful Phoenix (3A B) or one of Kilik's two attack throws; Trick Bo (3A B) or Dirty Bo (1A B) to catch them if they quickly rise to their feet.

Monument (236)
Back Parry (214)
There are also several moves that can be executed while Kilik is down; Heaven Monument (while down A B) lifts Kilik up over his opponent, followed by an Unblockable vertical attack. The move can also be canceled mid-animation (while down A B, G), pushing Kilik back to long-range.
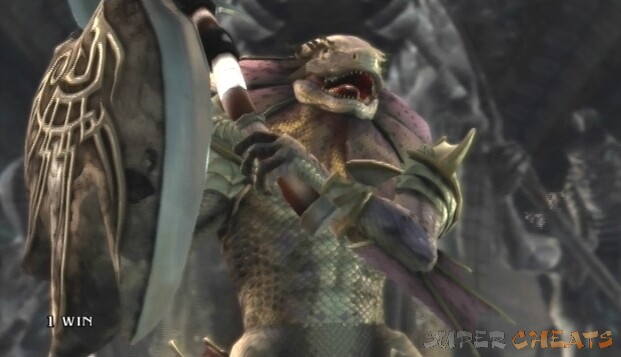
Lizardman (Aeon Calcos)
Age: 36 (the last 7 years of which were spent in this form)
Birthplace: Sparta, Ottoman Empire
Height: 5'11”
Weight: 190 lbs.
Birth Date: June 23
Blood Type: None
Weapon: Single-Handed Ax & Small Shield
Weapon Name: Grudge Ax & Aya Shield
Discipline: Rapid Ares Style
Family: He must have one, waiting in his homeland, but…
Unlocked: Purchase for 4000 Gold on the fighter select screen.
Aeon Calcos, once a Spartan soldier serving under the god Hephaestus, was used in an experiment by the cult order Fygul Cestemus, causing him to take on the form of a grotesque monster. His human identity soon faded, and he became known as Lizardman. Years have passed since then, and though his human memories are fleeting, Lizardman is convinced that the cursed sword holds his soul. Intent on finding it, he sets out to Ostrheinsburg where Soul Edge lies.

The aptly named Lizardman can be a difficult character to use due to his slow attack speed, but his axe swipes and kicks do deal a fair amount of damage. Furthermore, his crawl stance—which can be switched to in a number of ways—keeps him safe from high attacks and most horizontal attacks. His slow movement and short attack range means an inexperienced Lizardman user can face great difficulty against even fairly slow fighters. Putting his Crawling stance (236) to good use is an integral part of competing with this character.
The video below shows the following combinations. The directional notation system is used to describe each move.
Combo 1: 3B, 66K
Camilla Style Romper Twister: WR K, K, K
Combo 2: A B, 66A B
Combo 3: 236~A K, B~66K
Please read through 'The Basics' and 'Fighting Terms' for an explanation of the 'directional notation' and the fighting terms used to explain strategy.
You won't be able to accomplish much of anything at long-range due to a lack of appropriate moves, so focus on getting into mid or close range where Lizardman fares better. Utilize 8-Way Run to avoid any long-range, linear attacks your foe sends your way. Use Grit Draft (66A) to close the gap between you and your opponent if they're recovering from a missed attack, or Rumbling Axe (44B) and then another move to juggle.
Turning Style Screw Shot (66A B) provides decent range, and causes knockback too. Grit Draft (66A) stuns on a counter-hit, giving you a free combo (such as 11A, K), or a throw. Lizardman's two Unblockable moves can be used effectively from long-range too; Mezentius Style Sand Roll (1B K) is a rolling Unblockable that launches when it hits, though it is linear and quite easy to sidestep. Mezentius Style Desert Threat (8 hold B K) staggers if it lands close enough.
At mid-range Lizardman sports surprising ferocity. Camilla Style Romper Twister (while rising K, K, K) is a 6-hit combo that may catch your opponent off guard. You can also use Sand Revenger (4B K) to lunge at your foe and move into close-range. Lizardman will shift to his Crawling stance if the input is held, allowing you follow through with Sidewinder (during Crawling A). Strike with Sidewinder until your opponent block low, and then use Scale Ram (during Crawling K) instead. Lizardman is safe from most horizontal attacks while crawling, but he can also Repel vertical attacks with Scale Shield (during Crawling A B).
There are some risky moves while Lizardman is crawling such as Rising Revenge (during Crawling B), as you may end up leaping over your opponent, leaving Lizardman with his back turned. If you do end up behind your opponent, you can remedy the situation with Rolling Revenge (during Crawling B K), a move that causes knockback. While at mid-range, make use of Grit Draft (66A) and Spiral Draft (hold 3_9, hold A) to deter 8-Way Run.
Lizardman is at his best when brawling at close-range. Refrain Axe (A, A) is quite fast, but is best used for interrupting an attacker because it—being a pair of high-hitting attacks—can be avoided by crouching. Camilla Style Romper Twister (while rising K, K, K) is especially effective at this range when coupled with Lower Celtis (2A) because the latter puts Lizardman into a crouching animation, allowing the use of Camilla Style Romper Twister while rising to the standing position. Extrusive Head Butt (1A, K) as a low-to-mid string good for hitting a guarding opponent.

Maxi
Age: 28
Birthplace: Shuri, Ryukyu Kingdom
Height: 5'8”
Weight: 126 lbs.
Birth Date: May 1
Blood Type: O
Weapon: Nunchuk
Weapon Name: Soryuju
Discipline: Shissen Karihadi
Family: Parents/Deceased. His crew, who were like family, were slain by Astaroth.
Unlocked: Initially available.
Having reunited with his friends, Kilik and Xianghua, at a trading port in India, Maxi discovers that the Soul Edge fragment lodged in his body prevents him from venturing with Kilik, who holds an opposing artifact. Having vowed to slay Astaroth, the monster who killed off his entire crew, Maxi is forced to leave them behind. During his travels, he is approached by a mysterious girl. Using his seething hatred of the golem Astaroth to manipulate him, she points him towards the cursed city of Ostrheinsburg, telling him that there he could find both Soul Edge and his revenge.
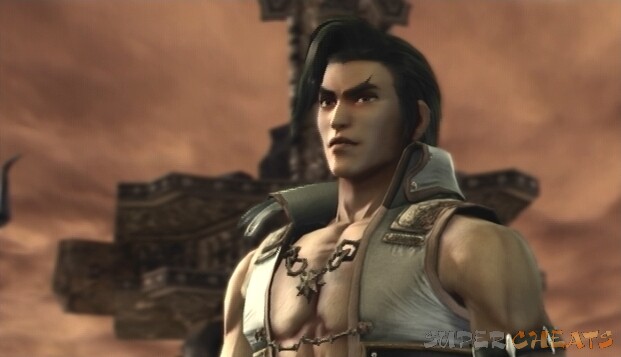
Like Kilik, Maxi is a popular choice among newcomers to the series. His fast-paced fighting style and difficult to predict maneuvers make him especially adept at performing combos. Maxi suffers in the range department, however, meaning that he'll have to move in to close-rangeto get the job done. Furthermore, Maxi can be difficult to control; button mashing can lead to a lengthy combo that he's unable to get out of until its conclusion, leaving him wide open should the initial strike be sidestepped. Maxi also has many different stances that he shifts into rapidly while attacking, making truly mastering this character a difficult task.
Please read through 'The Basics' and 'Fighting Terms' for an explanation of the 'directional notation' and the fighting terms used to explain strategy.
There is little Maxi can do at long-range. Your focus here is to move up to mid or close-range where you'll have more options. Make use of 8-Way Run to avoid any linear vertical moves thrown your way; you can retaliate with Dragon Roar (66K) which is a good move for punishing a missed, slow recovery attack. Reverse Snake Cross (hold 1_7, B) is another option, which is a mid-hitting attack that can be used to punish missed lows.
At mid-range you can take advantage of moves such as 4B, B, K, K and 4B, B, B (which ends with a Guard Break). Use horizontal moves like Twin Snakes (A, A) and Snake Scythe (1A) to counter sidestepping and focus on moving in to close-range where Maxi excels. 4B, K ends with a Guard Break and a knockdown when it hits, allowing you to move in to close-range. Quick Slice (1K) and Snap Kick (3K) are both quick kicks that can be used to interrupt overbearing opponents. Tongue (2A) is a quick move that ducks under high attacks, and it can be followed by one of Maxi's while rising moves such as Dragon Scream (while rising K, K) or Purity Cross (while rising A) since it puts Maxi into a crouched animation. Other than that, be sure to alternate between high and low attacks to keep your opponent guessing and avoid simply mashing buttons, otherwise you may find yourself being punished after a missed attack.
This character's many stances (Left Outer, Right Outer, Right Cross, Back Lower, and Left Inner) are difficult to get the hang of, since he is constantly switching between them while on the offensive. Pure Soul Loop can be used to cycle between each stance indefinitely; there are five different Pure Soul Loop moves, each referring to a different directional input. Becoming familiar with each stance what moves they can lead into will require plenty of observation and time in the game's Training Mode.

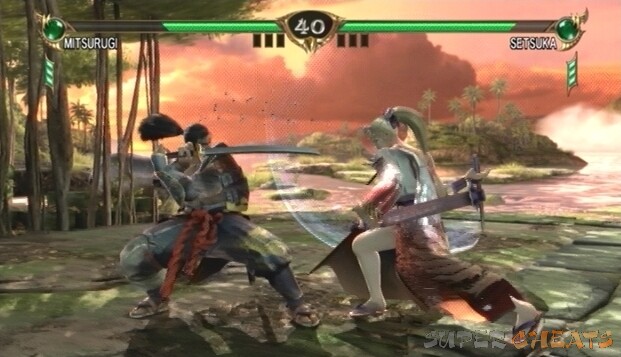
Heishiro Mitsurugi
Age: 29
Birthplace: Bizen, Japan
Height: 5'7”
Weight: 143 lbs.
Birth Date: June 8
Blood Type: AB
Weapon: Katana
Weapon Name: Shishi-Oh
Discipline: Tenpu-Kosai-Ryu Kai
Family: Immediate Family/All taken by sickness
Unlocked: Initially available.
Years of living in the war-torn province of Bizen led Misturugi to take up the sword. He soon become very proficient in his discipline, and, after leaving his clan, became a mercenary. After attempting to throw away a fragment of the fabled sword Soul Edge he had acquired in his travels, the shard suddenly shone brightly and flew westward. Always in search of a worthy opponent, Mitsurugi is drawn to Ostrheinsburg in anticipation of a battle with the Azure Knight and Soul Edge.

The staple samurai character of the Soulcalibur series hasn't changed much from previous iterations. Mitsurugi boasts an assortment of easily executable attacks with decent range, making him an ideal choice for the beginner. Knowledge of his two stances, Mist (6B K) and Relic (4B K), are needed to compete against advanced players, however.
The video below shows the following combinations. The directional notation system is used to describe each move.
Combo 1: During Mist A B~3A, 66A B
Combo 2: During Relic A, B, 33B
Korefuji: During Mist B G
Please read through 'The Basics' and 'Fighting Terms' for an explanation of the 'directional notation' and the fighting terms used to explain strategy.
Focus on moving into mid or close-range where Mitsurugi fares best. He does not have any effective long-range moves, so you'll have to rely on 8-Way Run when up against a more long-range able character. If your opponent misses an attack, move in and strike with quick attacks such as Lantern Divide (hold 6, B, B) or Phoenix Tail (during 8-Way Run A B).
Mid-range, you'll want to focus on Mitsurugi's horizontal attacks such as Twin Splinters (A, A), Sudden Gale (hold 6, A) or Shin Slicer (1A) to counter sidestepping. Stalk Reaper (2K, B) is a quick low move that can be used to poke through the defense of a high guarding opponent. Conversely, Heaven Cannon (3B) can be used to launch crouching foes and can then be followed by a vertical strike or two while they are airborne. Mask (b6) is a fast move that can be used to interrupt an attacker.
Use Divine Tale (hold 3_9, B) to take opportunity of missed strikes and to thwart your opponent's wakeup game. Wind Hole Vortex (4B) is a highly effective move at either mid or close-range, as it may trick your foe into letting their guard down. Wind Hole Vortex into Mist (4 hold B) may confuse your opponent even further, allowing you to follow up with Wind Stitch (during Mist B, B, B) if they move in, and Heavenly Dance (during Mist 6B, B) if they stay put.
Mist Stance (6B K)
His Relic Stance (4B K) is good for pulling off quick vertical and horizontal strikes, like Fire Brand (during Relic B) and Parting Arc (during Relic A). Parting Act links to Mist if the A button is held down. Relic is also a good evasive stance, allowing Misturgi to back up, crouch, jump and dash quickly. False Purification (A B K) can be used to Repel incoming attacks, but it is a little tricky to pull off without a modified control setup (such as setting A or B to one of the right shoulder buttons).
Mitsurugi excels at close-range combat. Wind Hole Vortex (4B) is still effective at this range, and is good for tricking guarding opponents into attacking when things are at a standstill. Unfortunately Mitsurugi's selection of low striking attacks is extremely limited, so you will have to primarily rely on his quick-striking kick Hem Stitch (1K, or K while crouching) to get hits in on standing enemies.
Use Knee Slice (2A) to intercept attacking opponents or to counter sidestepping. Drawn Breath (4A) can be used to shift Mitsurugi into Relic—which can then be followed by Wind Stitch (during Mist B, B, B) to possibly score a counter-hit—if A is held down, while Reaver (6 hold A) switches to his Mist stance. Hit downed or rising enemies with Cold Stitch (2A B)
Relic Stance (4B K)
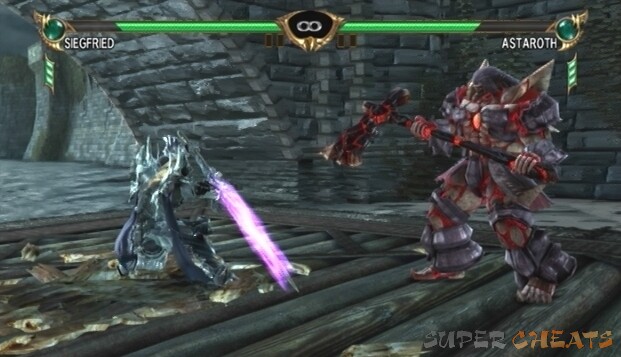
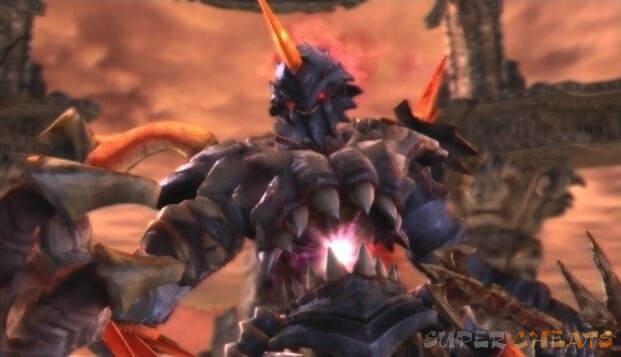
Nightmare
Age: Existed since ancient times as Soul Edge
Birthplace: Unknown
Height: 5'6”
Weight: 212 lbs.
Birth Date: Unknown
Blood Type: None
Weapon: Soul Edge (Zweihander type)
Weapon Name: Soul Edge
Discipline: The Memories that Stain his Armor
Family: All life is but prey to satiate his hunger
Unlocked: Initially available.
Nightmare, once the alter ego of Siegfried Schtauffen, continues his search for souls to restore the cursed sword Soul Edge. After the dimensional warp that served to restore Soul Edge to its former glory, the evil sword now resides in the cursed city of Ostrerheinsburg where it waits for its next confrontation with the legendary spirit sword. If Nightmare should succeed in destroying Soul Calibur, the cursed sword will then be able to fulfill its malicious plan and consume the world.
The Azure Knight is back and more ruthless than ever. Following the path set by Soulcalibur III, Nightmare's fighting style has been even further distanced from Siegfried's. Nightmare retains his considerable range from previous iterations of the series, but his slower move execution can mean trouble when matched up against quick characters.
The video below shows the following combinations. The directional notation system is used to describe each move.
Combo 1: 66 hold B~Night Side Stance bA
Combo 2: 3 hold B (Counter)~Night Side Stance A B~2A B
Combo 3: WR hold B~Night Side Stance A B~2A B
Combo 4: 66B, A K
Please read through 'The Basics' and 'Fighting Terms' for an explanation of the 'directional notation' and the fighting terms used to explain strategy.
There are a good number of effective long-range attacks at Nightmare's disposal. Similar to Siegfried's Piercing Strike, Nightmare's Quick Revenge (6B during hit B) provides good range and damage, but its weakness lies in the fact that it is quite easily evaded. Other high-damage long-range attacks are Dark Soul Impact (3A B) and Cannonball Splitter (hold 6, B K). Since most of Nightmare's attacks at this range can be easily evaded by seasoned fighters, you're main focus here is to get into mid-range. Grim Stride into Soul Wave (236~A B), for example, is an effective combo for closing the gap between you and your opponent, hopefully leaving them downed and therefore open to a subsequent attack.
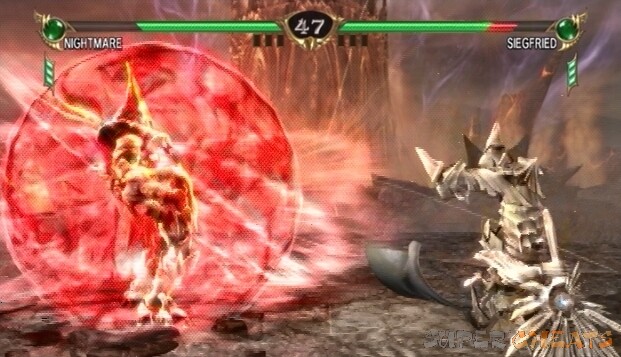
Soul Wave
Nightmare's horizontal attacks provide good coverage at mid-range, though the majority are a little slow to execute. Triple Ground (A, 2A, A) is a high attack into two low attacks and can be used to floor a guarding opponent, and can then be followed up by Soul Smasher (6A B), which turns into an attack throw on a downed opponent. Use Quick Temple Buster (6A), Shadow Cross Divide (hold 2_8, A, B), or Death Rage (while rising A, A) to combat sidestepping. Nightmare's quickest attack is Jade Strike (6K), which cause knockdown and can then be followed up with Cannonball Splitter (hold 6, B K) or a similar attack. Shadow Slicer (1A, or hold 1A for Guard Break and/or delay) is a low attack that provides decent range with considerable damage, and Jade Crusher (1aK) can be used to fake out wary opponents.
Slash Cross (hold A) switches into the Night Side Stance which offers several options, notably Phantom Impact (during Night Side Stance B), a low attack that can poke through a guarding opponent's defense, and Skull Chopper (during Night Side Stance bA), a quick high slash that knockdowns if it hits. Grim Roundhouse (236~K, K) can surprise and knock edge-hugging foes out of the ring.
As previously mentioned, Nightmare is especially vulnerable at close-range due to his slow attack speed. For this reason, you will have to rely on the few quick moves in his arsenal to knock your enemy back to mid or long-range. Jade Strike (6K) is Nightmare's quickest move, and is good for knocking an overbearing opponent back to mid-range. Upper Claw (while rising B) will also knock back to mid-range, and can then be followed up by Soul Wave (A B) to push the rising foe back even further. Use Backspin Temple Buster (bA), which is a quick high slash that will cause Nightmare to move back a bit. Back Blade (4A), while a bit slow, stuns on a counter-hit, so use it to hinder sidestepping.

Jade Strike
There are also numerous ways in which Nightmare can take advantage of the terrain. Flap Jack (while crouching A G) may be used to throw back a high attacking enemy or even ring them out if they're standing at the edge of the ring, and Over Toss (while crouching B G), an over the back throw, can save Nightmare from being knocked out of the ring himself.

Raphael Sorel
Age: 32
Birthplace: Rouen, French Empire
Height: 5'10”
Weight: 159 lbs.
Birth Date: November 27
Blood Type: A
Weapon: English Sword Rapier
Weapon Name: Flambert
Discipline: La Rapière des Sorel
Family: Foster daughter/Amy
Unlocked: Initially available.
Raphael, a member of the wealthy Sorel family, was cast out of his home when he murdered a prominent noble. While fleeing from the local authorities, Amy, an orphan living on the streets of Rouen, hid Raphael. Appreciative of what Amy had done for him, Raphael took her in to raise her as his daughter. Later, after a fierce battle against Nightmare, Raphael returns to Amy dreadfully injured. He had been infected by the Evil Seed, and while Amy nursed him back to health, she also came to be infected. Both soon transformed into vampires, and now seek the legendary spirit sword Soul Calibur to create a world of their own.
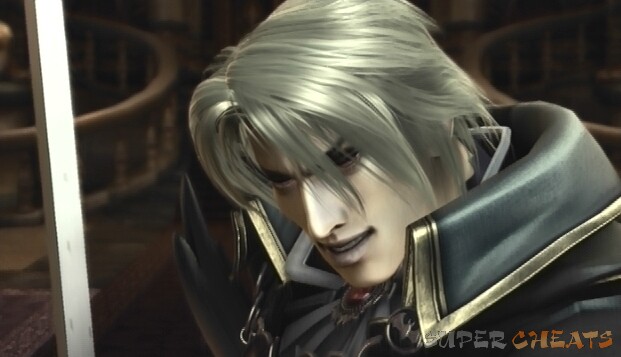
With decent range and quick attack speed, this rapier-wielding vampire can be very effective if used correctly. Though he lacks attack power and many of his attacks are linear—making it difficult to face opponents who make heavy use of 8-Way Run—his considerable range and speedy moves make for a strong offense once he gets started. Raphael's Preparation stance allows him to pull off subsequent attacks in quick succession, or dodge attacks with Shadow Evade.
The video below shows the following combinations. The directional notation system is used to describe each move.
Combo 1: 4 hold B~B, B, B, B (Just)
Combo 2: 66 hold B~K, K (Just)
Combo 3: 66A B, B K
Combo 4: B K, A G_B G
Please read through 'The Basics' and 'Fighting Terms' for an explanation of the 'directional notation' and the fighting terms used to explain strategy.
At long-range, use Wicked Thrust (4B), a high poke that stuns on a normal or counter-hit and ducks under high-hitting attacks, to interrupt attacks, and 8-Way Run coupled with Dread Coffin (hold 6, B) to punish missed attacks. Wicked Thrust also links to Raphael's Preparation stance if the last input is held (4 hold B); so if it hits, follow with Rapid Assault (during Preparation B, B, B, B (Just)) to score a four or five hit combo. Dark Stinger Crescendo (during Preparation K, K (Just)) is a pair of low kicks that knockback if the second strike hits, allowing you to move into mid or close range where Raphael is more efficient. Many of Raphael's moves can link to his Preparation stance, usually by holding the last input.
Quick Botta (6B, B, B), as its name implies, is a very quick attack, good for interrupting your enemy. Only input the last B on a counter-hit, otherwise it can be blocked, putting you at a disadvantage. Use Roaring Stocatta (B, B), a pair of mid-hitting verticals, and Heel Snipe (1A), a low-hitting horizontal poke, to counter 8-Way Run. Keep Cleaving Talon (2A), an s-low swipe, in mind as alternate sidestepping counter, as it can be followed by one of Raphael's While Rising moves like Advance Slicer (while rising B). Raphael has a lot of decent low pokes too, especially Grave Needle (1B, B), Sweep Kick (2K), and Death Guise (hold 3_9, B). Bloody Funeral (44_11_77A B) comes out pretty fast for an Unblockable and has decent range and substantial damage output; make use of it if you're facing a staunch defender.
Fully employ Raphael's Preparation stance while fighting at close-range. Preparation allows Raphael to pull off subsequent attacks in quick succession, so wait for an opening before using an attack that links to the stance. Quick Botta (6B, hold B) links to Preparation, but is a linear attack and therefore easy to avoid with 8-Way Run. If your opponent makes heavy use of 8-Way Run, your best bet would be to use Squalambrato Concierto (44_11_77A, hold B), as its initial hit is a horizontal slash, followed by a quick vertical and then into Preparation. Squalambrato Concierto isn't as precise as say, Attack au Fer (A, A), but it's the only horizontal that links to Preparation. Use Wicked Thrust (4 hold B) frequently, as it ducks under high attacks, stuns on a normal or counter-hit, and links to Preparation. Follow up with Rapid Assault (during Preparation B, B, B, B (Just)) to score a four or five hit combo. Make use of Vurkolak Envelopment (B K), an evasive sidestep, to dodge incoming vertical attacks.
Shadow Evade Alpha (during Preparation 2) and Shadow Evade Beta add to the usefulness of Raphael's preparation stance. Shadow Evade Alpha ducks under high attacks and can then be followed by Assault Blade (during Shadow Evade Alpha B), a quick mid poke; B can also be held to link back to Preparation. Shadow Evade Beta (during Shadow Evade Alpha 2) ducks high attacks and can lead to Bloody Terror (during Shadow Evade Beta B), a mid-hitting stab that stuns on a normal or counter-hit. Ebony Shock (during Preparation A) is a quick close-range attack that stuns on a normal or counter-hit and can be used to interrupt attacks. There are plenty of other moves that stem from Preparation, so make use of them to keep your opponent guessing. Keep Raphael's B G throw in mind if you ever have your opponent against the edge of the ring because it can Ring Out from a fair distance.
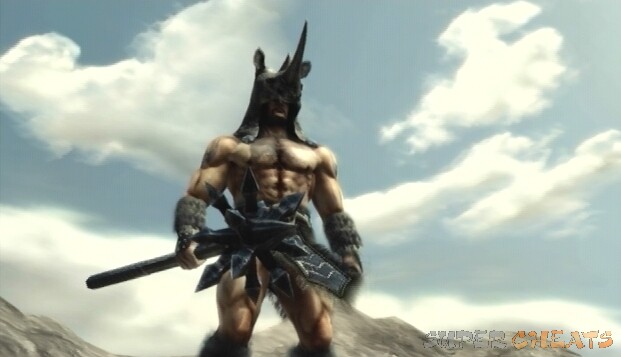
Rock (Nathaniel ‘Rock' Adams)
Age: 42
Birthplace: London, British Empire (Raised in the New World)
Height: 5'9”
Weight: 187 lbs.
Birth Date: December 14
Blood Type: Unknown
Weapon: Giant Mace
Weapon Name: Onslaught
Discipline: Self-Taught
Family: Parents/Whereabouts unknown. The Native American boy he was raising, Bangoo, just recently came of age.
Unlocked: Purchase for 4000 Gold on the fighter select screen.
While on his quest for Soul Edge, a personal test of strength, Rock is ambushed by a raging golem and nearly defeated. Rock narrowly escapes by throwing himself off of a cliff and into the river below. After seeking refuge in a nearby hot spring, he begins to ponder his assailant. He later learns that his attacker's name is “Astaroth,” and that the golem now serves Nightmare, wielder of the cursed sword. Thinking that this must be fate, Rock journey's to Ostrheinsburg where the Azure Knight—and Soul Edge—reside.
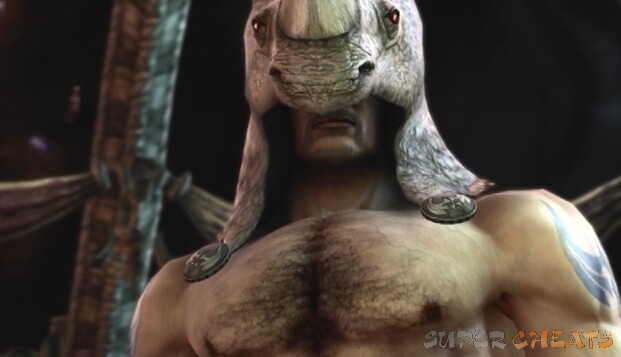
Though at first Rock's fighting style may appear to be identical to Astaroth's, the two characters are very much different. Rock relies on grabs and ground throws to get the job done, meaning he'll have a hard time besting experienced players who are familiar with the grab system and are able to grapple break. His arsenal sports several ground throws, so becoming familiar with the moves that knock down opponents is a must.
The video below shows the following combinations. The directional notation system is used to describe each move.
Combo 1: 1B, 1B G, 9B
Combo 2: 3B, 1A G
Combo 3: CH 66B, 2B G, B K
Combo 4: 2A K, 1B G, 6B K
Please read through 'The Basics' and 'Fighting Terms' for an explanation of the 'directional notation' and the fighting terms used to explain strategy.
Like Astaroth, Rock has several options at long-range. Avalanche Press (6B K) sends Rock hurtling towards his opponent from long-range, stunning them on impact. If Avalanche Press connects, quickly follow up with Rock Eruption (against downed opponent (leg side) 3A G) or Double Slam (against downed opponent (leg side) 3B G). Cyclone Hammer (1A) is much like Astaroth's Discus move, but unfortunately Rock doesn't have his own versions of Double Discus or Discus Breaker. Cyclone Hammer is a low attack and provides good range, however, and is good for deterring 8-Way Run. Storm Gust (A B or 8A B) is a quick attack that is useful for swatting sidesteppers.
While Rock can't perform normal throws at mid-range, several of his moves stun on a normal hit or a counter-hit, allowing him to then move in for a ground throw. Raging Volcano (3B) provides decent range, stuns on a normal hit, and sends the opponent to the ground, so afterwards try for Tri-Horn Stampede (against downed opponent (Head Side) 1A G) or Gigantic Eruption (against downed opponent (Head Side) 1B G). Rock Knuckle (4A) downs the enemy when it connects, giving you the chance to try for Rock's 3B G or 3A G ground throw. At mid-range, use Rock Tomahawk (4A) to thwart sidestepping. Rock's basic A, A and B, B moves are rather slow, but they do provide decent range and can be used to punish missed attacks.
Rock faces many problems when battling a speedy character at close-range. Rock Knee (6K) is one of the quickest moves in his arsenal, and good for interrupting frequent attackers. Rock Knee knocks down on a counter-hit too, so attempt a follow up with his 3B G or 3A G ground throw. Wild Tusk (4B) is another quick attack and also knocks down on a counter-hit, so again, try for a ground throw. Don't ignore Rock's crouched throws, either; if it ever comes up, grab a crouched opponent with Maximum Bone Crusher (2A G) or Slam Vortex (2B G). Rock can normal throw at close-range too, so go for one when you see an opportunity.
Unfortunately Rock's low attacks are all fairly slow; rely on Horizontal Sweep Kick (2A K) to trip staunch defenders and then attempt Rock's 1A G or 1B G ground throw. If at any time your opponent is quick to rise, knock them back down with Rock Fall (B K) and go for a ground throw.
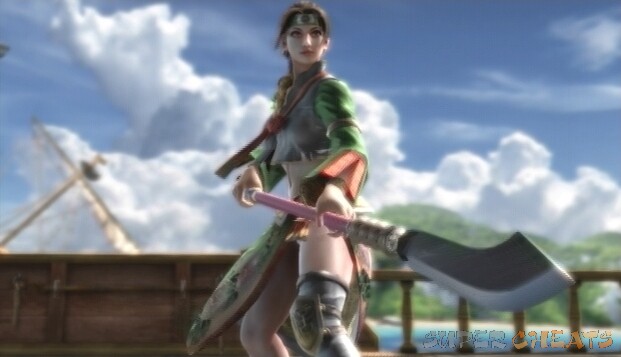
Seong Mi-na
Age: 23
Birthplace: Jirisan, Korea
Height: 5'4”
Weight: 106 lbs.
Birth Date: November 3
Blood Type: A
Weapon: Zanbatou (Halberd)
Weapon Name: Scarlet Thunder
Discipline: Seong Style Longsword Rod Arrangement
Family: Father/Seong Han Myong, Mother & Brother/Deceased
Unlocked: Purchase for 4000 Gold on the fighter select screen.
When Seong Mi-na learns of the cursed sword's corrupting power, she realizes Yun-seong—who is like a younger brother to her—must be stopped in his quest to acquire Soul Edge. Though his intention to use the sword to protect his country is admirable, he simply does not understand the true nature of the weapon he seeks. Upon confronting Yun-seong with this, he does not comply and instead presses on. So, Seong Mi-na sets out to Ostrheinsburg, where the Azure Knight and Soul Edge lie, to find Yun-seong before he makes a dire mistake.
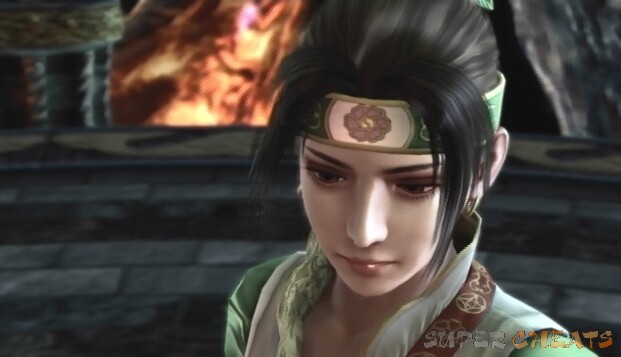
Seong Mi-na offers range similar to Kilik and shares several of the bo staff-wielders moves, however the two characters are very much different. Many of her attacks are slower than Kilik's for one thing, and may be a tougher character for newcomers to pick up. Seong Mi-na is definitely a long-range fighter; she won't fare well during close-range battling, so her strong long-range attacks must be used to keep her opponent at bay.
The video below shows the following combinations. The directional notation system is used to describe each move.
Combo 1: 6K~6A, K
Combo 2: 6B, B~3B~6B, B
Combo 3: CH 4K, B~3K, K~2K
Combo 4: CH WR B~66B~WC 1B
Please read through 'The Basics' and 'Fighting Terms' for an explanation of the 'directional notation' and the fighting terms used to explain strategy.
Since Seong Mi-na is more effective at long-range or mid-range, use moves such as Fang Sweep (1A) and Shadow Step Slice (4A) to back away from your opponent. Counter 8-Way Run with Sweeping Blade (2A B) and Sparrow Sweep (hold 1_7, A), both quick low sweeps. Your opponent can easily avoid Mi-na's linear verticals by sidestepping, so mix-up horizontal slashes with verticals Lightning Thrust (6B) followed by Lightning Fang (while crouching 1B), or Thrusting Fang (6B, B) to keep them guessing. Punish whiffs with Spinning Divide (hold 6, A B) or her Holding Treasure (1A B) and Opening Treasure (3A B) attack throws if you're close enough.
Celestial Kick (6K) has Guard Impact properties and can repel incoming vertical attacks, making it quite useful during close-range combat. Check Mate (4K, B) can be used to repel horizontal attacks and stuns on strike. There are a couple of quick moves in Seong Mi-na's arsenal; many of her kicks are quite fast, as is Hilt Kick (6A, K). Twin Fang Strike (while rising A, A) into Back Step Fang (1B, B) is a good way to gain some distance from your foe if they're too close.
Dancing Blade Kick (1B, K) is good for punishing, and the Back Step Fang (1B, B) variation can be used to gain some distance from your enemy. If Mi-na ever has her back to the edge of the ring, Holding Treasure (1A B) can Ring Out careless opponents. Mi-na's two attack throws are good for hitting foes while they're rising or if they immediately guard high after rising. Seong's Crushing Long Blade (9A B) is an Unblockable attack that deals massive damage, however it has a slow-start up animation and can therefore be easily sidestepped by opponents. It is best used immediately after downing an opponent.
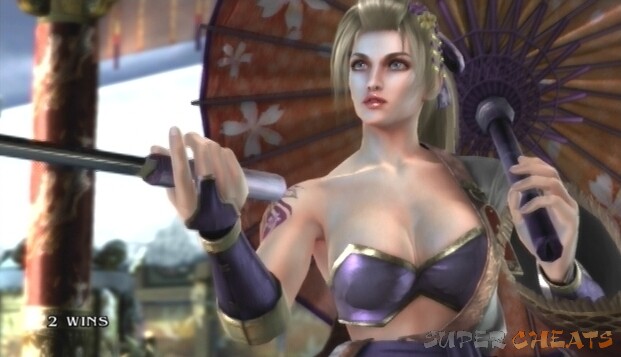
Setsuka
Age: 24
Birthplace: Unknown (Raised in Japan)
Height: 5'6”
Weight: 115 lbs.
Birth Date: Unknown
Blood Type: A
Weapon: Lai Sword hidden in an umbrella
Weapon Name: Ugetsu Kageuchi
Discipline: Shinden Tsushima-ryu Battoujyutsu
Family: No family. Master who raised her/Deceased
Unlocked: Purchase for 4000 Gold on the fighter select screen.
Heishiro Mitsurugi, the unbested warrior and valued mercenary, is the target of Setsuka's quest for vengeance. When others hear of her quest, they advise against it, stating that none could ever match the strength and skill of Mitsurugi. Setsuka must surpass her master's skill to best his killer, and therefore trains endlessly. Due to the ronin's widespread reputation, Setsuka easily picks up the trail of her master's killer, and is ready to follow him to Ostrheinsburg if she must.

Setsuka is a decidedly difficult character to use and not recommended for the beginner. Her lack of options at long-range make her a strictly close-ranged fighter, where her speed and combos can make up for what she lacks. Many of her most powerful moves require precise timing (Just Frame) to pull off, so Setsuka is substantially less effective when used online without a flawless connection. Furthermore, her difficult combos will require a lot of time to master, making her a character best used by experienced players looking for a challenge.
The video below shows the following combinations. The directional notation system is used to describe each move.
Combo 1: 1B, B (Just)~66B, A
Combo 2: CH 22_88A~B K, B (Just)
Combo 3: CH 4A, 3B, 44B K
Mirror Blade: A B (Final Stage)
Please read through 'The Basics' and 'Fighting Terms' for an explanation of the 'directional notation' and the fighting terms used to explain strategy.
At long or mid ranges, focus on moving into close-range while avoiding your foe's attacks. Make heavy use of 8-Way Run to avoid your enemy's initial strikes and punish missed attacks with Blind Heaven (66B K) or use the opportunity to move into close-range with Ring of Heaven (A K, A). Rising Crescent (hold 3_1, B) launches on a normal hit—allowing for a combo with Winter Funeral (bA)—but stuns on a counter-hit; if it connects on a counter-hit, follow with a guaranteed 236aB. Setuska's Unblockable move Blazing Moon (44A B) merits mention, as it offers surprising range and can catch those unfamiliar with the fighting style off-guard.
While running aB is a mid to high hitting attack that can be used to trick opponents who are expecting a grab. The second strike comes out quick, so players unfamiliar with Setsuka not know to block the second part. Take advantage of knockbacks to close the gap between you and your foe.
Setsuka's speedy attacks and maneuvers make her an exceptionally effective character when used at close-range. Dawn Haze (236) quickly puts Setsuka into a crouching animation where she can then immediately use one of her Crouching or While Rising attacks. Cresent Blade (while rising B) and Rising Moon (while crouching 3A B) are both mid-hitting strikes that stun on a normal or counter-hit, and can both be speedily executed when preceded by Dawn Haze. Use her Twilight Haze stance (236) to quickly pull off any of her double forward moves such as Sakura Twister (66B, A) or Shade Roundhouse (66K), which can Repel incoming attacks.
Setsuka Stomp (4K) is a relatively quick high-hitting kick that stuns on a normal or counter-hit; if it connects, follow with Rising Crescent (33_11B) into Winter Funeral (bA) to deal some decent damage. Mirror Blade (A B) is an interesting move; it can repel mid-hitting attacks and its automatic follow up move becomes progressively more effective each time it is used successfully. Use Mirror Blade enough and you will be able to pull off a brutal 3-hit combo with each Repel.
Half Moon Shadow (2A B) is a low attack that stuns on a normal or counter-hit. This move puts Setsuka into a crouching animation, so follow with Crescent Blade (while rising B) for a guaranteed hit. Backspin Snow Sweeper (11_77K) is a low-hitting kick that ducks under high attacks and some horizontals. Though Setsuka lacks effective low moves, take full advantage of her speed and quick strings to overpower your opponent.
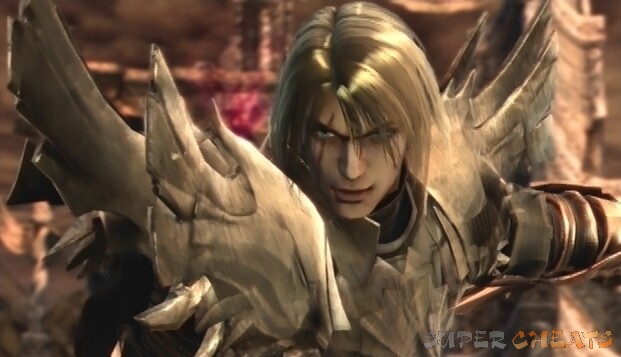
Siegfried Schtauffen
Age: 23
Birthplace: Ober-Getzenberg, Holy Roman Empire
Height: 5'6”
Weight: 110 lbs.
Birth Date: February 6
Blood Type: A
Weapon: Soul Calibur (Zweihander type)
Weapon Name: Soul Calibur
Discipline: Self-Taught
Family: Mother/Margaret, Father/Frederick (murdered by Siegfried)
Unlocked: Initially available.
Siegfried, once a vessel for the cursed sword Soul Edge, seeks repentance for his past deeds by destroying the evil that he brought into the world. As the wielder of the legendary spirit sword Soul Calibur, Siegfried sets out to the cursed city of Ostrheinsburg where Nightmare, the Azure Knight, resides. Once there, he must defeat Nightmare and destroy both soul swords for the good of all.

Wielding an impossibly large sword with the finesse of a toothpick, Siegfried is a thoroughly versatile fighter both at mid-range and at close-range. A giant sword and hulking armor mask this deceptively quick character. With strong vertical and horizontal coverage, Siegfried is a worthy choice for first-time players and veterans alike.
The video below shows the following combinations. The directional notation system is used to describe each move.
Combo 1: CH 3 hold B~Chief Hold A B
Combo 2: 88 hold B, B, 3B
Combo 3: A K, A, A, A
Combo 4: A K, A, A, B
Please read through 'The Basics' and 'Fighting Terms' for an explanation of the 'directional notation' and the fighting terms used to explain strategy.
As with most characters, Siegfried does not have a lot of options at long-range. Generally, his long-range attacks can be easily avoided by simply sidestepping, so if you aren't careful you may leave yourself open. If you're willing to risk it, Piercing Strike (6B) provides acceptable range (enough to hit your opponent from the starting position) and ducks under high attacks, but you leave yourself open if your opponent sidesteps. To counter evaders, it would be best to move in and start off with one of Siegfried's horizontal attacks such as Assault Slap (hold 6, A) or Backspin Slash (hold 4, A). Dark Soul Impact (6A B) can also be used to keep dashing opponents at bay.
Siegfried is definitely at his best mid-range. Being at this range allows you to fully exercise Siegfried's various stances. The Base Hold stance can be entered by pressing B K, Chief Hold can be entered by pressing 2B K, 4B K to switch to Side Hold and 6B K to switch to Reverse Side Hold. Take note of attacks that can link to his stances, such as Sky Splitter into Chief Hold (3 hold B), Rising Hilt into Chief Hold (while rising hold B) and Shadow Buster into Base Hold (2 hold B). There are several quick and powerful attacks that can be utilized while Siegfried is in the Chief Hold stance, such as Terror Slap (A B) and Terror Circular (hold A). His while rising A, A is a great mid-to-low string as well.
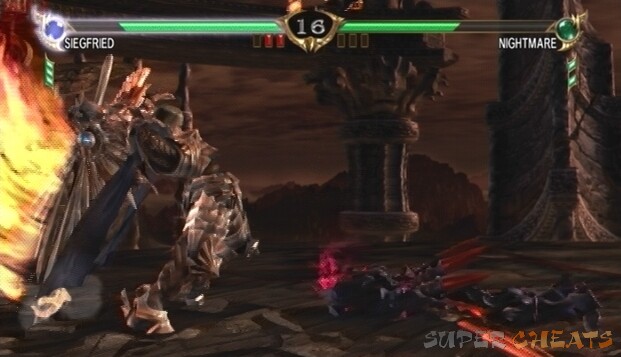
Chief Hold Stance
The highlights of the Reverse Side Hold are Geist Spinning Low Kick into Reverse Side Hold (hold K) for its stun property which can then be followed up by Fiend Shatter (in Reverse Side Hold A B). While in the Base Hold stance, Reborn Kaiser (B) is a fairly slow, but powerful mid-range attack that will knock an opponent up into the air. Reborn Basher (hold K while in Base Hold Stance) can be used to push a guarding opponent towards the edge of the ring if so desired, or move the fight back towards the center of the ring to minimize the risk of a Ring Out.
Surprisingly, Siegfried has a number of quickly executable attacks that can thwart overbearing opponents at close-range. However for the most part you will want to concentrate on knocking your opponent back to mid-range. Dark Toe Kick (6K) is great for interrupting attacks as it has stun properties on a counter-hit (which would most likely be the case if used immediately after blocking an attack). While the opponent is stunned, you can follow up with another quick attack such as Armor Breaker (B, B, B) or Fatal Brave Kick (jump K) to knock the stunned opponent to mid-range. Piercing Hilt (4A) will also stun on a counter-hit, but it is not executed as quickly as Fatal Brave Kick. Piercing Hilt into the Reverse Side Hold stance (4 hold A) can then follow up a stun with a more powerful attack.
Earth Divide (236B)
Furthermore, Siegfried's short-range horizontal attacks such as Quick Backspin Slash (aG, A) can be used to sweep sidestepping opponents. While crouching, Siegfried's Flap Jack attack throw (while crouching A B) can be used to throw the opponent off, or even throw them out of the ring if they are at the edge. Over Toss (while crouching B G) is an attack throw that launches opponents over Siegfried's shoulders, so make use of it if your back is to the edge of the ring and things are looking grim.

Sophitia Alexandra
Age: 25
Birthplace: Athens, Ottoman Empire
Height: 5'6”
Weight: Refuses to say
Birth Date: March 12
Blood Type: B
Weapon: Short Sword & Small Shield
Weapon Name: Omega Sword & Elk Shield
Discipline: Athenian Style
Family: Husband/Rothion, Daughter/Pyrrha, Son/Patroklos, Sister/Cassandra
Unlocked: Purchase for 4000 Gold on the fighter select screen.
While pursuing Soul Edge, Sophitia learns that her daughter, Pyrrha, had been abducted by one of the cursed sword's minions while she was away from home. In her current state, Pyrrha would die without Soul Edge's evil energy to sustain her. This puts Sophitia at odds, as the destruction of Soul Edge means the loss of her child. She ultimately decides to preserve her daughter's life by battling any warrior who comes to Ostrheinsburg intending to destroy Soul Edge. Though her actions go against her very nature, Sophitia continues to fight.
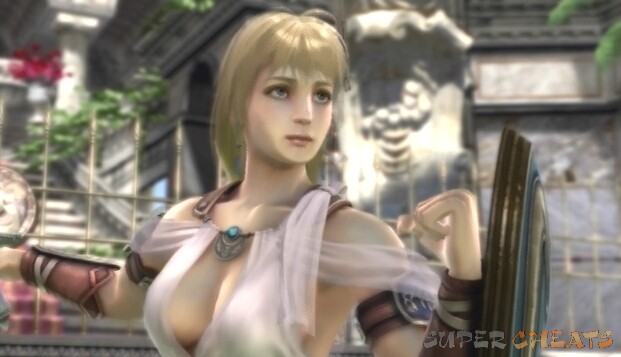
Though not as fast as her sister, Sophitia offers greater damage output with acceptable attack speed. While not proficient at long-rang combat, she does possess a couple of evasive maneuvers that allow her to quickly move into close-range where she can more comfortably attack. Sophitia is a good character for newcomers to pickup, but also offers several advanced techniques for experienced players.
The video below shows the following combinations. The directional notation system is used to describe each move.
Combo 1: CH 4K, 236~B
Combo 2: 33_99B, B K
Combo 3: WR hold A B, 66B
Combo 4: B G, 2A_2B
Please read through 'The Basics' and 'Fighting Terms' for an explanation of the 'directional notation' and the fighting terms used to explain strategy.
Since Sophitia lacks any long-range attacks, focus on moving into mid or close range where she can get the job done. Angel Step (236) is your main tool at this range; this move ducks under high attacks, allowing you to punish whiffs with Angel Strike (during Angel Step B) or a similar move. Make heavy use of 8-Way Run to avoid your foe's long-range attacks and punish whiffs with Angel Strike (during Angel Step B) or Jet Stream Rush (66B K, A, B). Mix-up with Twin Angel Step (236236) into Seraphim Blade (during Angel Step A, A) and then into Angel Strike (236A) if both hits connect.
At mid-range, Cutlass Europa (4A, A, A) is a good high-to-low string. Use Iron Butterfly (1A, A) to break through the guard of staunch defenders. Also, make use of Sword Shower (4B); this move is not very quick, but it will put a guarding opponent into a crouched animation, and since many while rising moves have slower animations, quickly follow up with Angel Strike (during Angel Step B). Use Reverse Mirage (hold 4, A) to prevent 8-Way Run. During 8-Way Run, hit your opponent with Silent Stream (hold 1, A, A) and mix-up with its Unblockable version by holding the last input.
At close-range, Sophitia's standard A, A attack comes out very quick, and can be used to interrupt overbearing attackers after a guard. Guardian Strike (2B, B) is an alternative, and it ends the same as 236B. It is important to note that you can still perform Angel Step while guarding, so Angel Strike can still be effective at this range. Sophitia's El Fortuna (A B) has Guard Impact properties and can be used to Repel incoming attacks. Cutlass Europa (4A, A, A) and Iron Butterfly (1A, A) are good high-to low-strings, and the latter ducks under high attacks, so use it often. When you're faced with a downed opponent, hit them with Iron Butterfly (1A, A) or Tornado Low Kick (1K), which can be charged and possibly used to trick your opponent as they're rising.

Taki
Age: 29
Birthplace: Fu-Ma No Sato, Japan
Height: 5'7”
Weight: 116 lbs.
Birth Date: Unknown
Blood Type: A
Weapon: Ninja Sword x 2
Weapon Name: Rekki-Maru & Mekki-Marum
Discipline: Musoh-Battoh-Ryu
Family: Immediate family/All taken by sickness, Master/Toki (Taki has opposed him since she left the clan).
Unlocked: Initially available.
While in search of Soul Edge, the sword that robbed her master of his humanity, Taki witnesses a battle between Siegfried and Nightmare, the wielders of Soul Calibur and Soul Edge. Having witnessed the frightening power that was unleashed as the two swords' met, Taki must prevent Siegfried from entering Ostrheinsburg to do battle with Nightmare once more; it could mean disaster if the two swords were to clash together again.

Taki's arsenal of quickly executable moves and decent damage output make her a formidable opponent, especially when matched up against less agile fighters. Though she fares poorly at long-range, she is agile enough to move into close-range where she can usually dominate heavier foes. Taki may face trouble against long-range characters, however, as she'll constantly have to rely on jump in moves to stay close.
The video below shows the following combinations. The directional notation system is used to describe each move.
Combo 1: Possession 236~ Hover B~WR B, B~1A
Combo 2: A B, A K, B G
Combo 3: 4A BB, A K, B G
Please read through 'The Basics' and 'Fighting Terms' for an explanation of the 'directional notation' and the fighting terms used to explain strategy.
At long-range, focus on moving into close-range while avoiding any attacks thrown your way. Make use of 8-Way Run and wait for an opportunity to jump in with Assassin's Revenge (hold 6, B during hit A). Assassin's Revenge knocks down on a normal or counter-hit, so quickly move up with Hurricane Punishment (hold 6, K) so you can be in your opponent's face once they rise. Another option is Wind Roll 1 (B K) into Wind Dance (during Wind Roll 1 A). Wind Roll 1 (B K) into Wind Sealing Rush (during Wind Roll B, K during hit B) deals massive damage, but as with Wind Roll~Wind Dance it is risky unless you catch your opponent off guard.
At mid-range, make heavy use of 8-Way Run to avoid your opponent's attacks, and punish whiffs with Assassin's Strike (hold 3_9, B). Reaping Hook (1A) ducks under high attacks and is good for preventing sidestepping. Ninja Cannon (A B) deals minimal damage and is fairly slow, and it can be followed by Stalker (A K) into her mid-air throw (B G). This combo requires precise timing, however; note that Ninja Cannon (along with her other cannon moves) puts Taki into a crouched animation; use Stalker the moment she is standing and then press B G. It may be useful to map Stalker (A K) to one of the shoulder buttons if you plan to use Taki often.
Taki excels at close-range; even her basic A, A and B, B strings are pretty quick. She has a couple of quick high-to-low strings as well which can confuse opponents who are unfamiliar with her fighting style. Haste Alternate (Jump K, K, K) is a quick series of kicks, the second strike hitting low, ensuring the third strike if it isn't guarded. Haste Alternate is also good for a Ring Out if your opponent is standing at the edge. Shadow Scroll (B, A, A) is another good string, the last strike hitting low.
Her Possession stance (214) offers many options, and can be linked to through several moves. Possession Step (during Possession 2 or 1) quickly moves Taki to the side, meaning you may be able to avoid retaliation from your enemy. Possession Quake (during Possession A). Scroll (During Possession B) and Strike (during Possession K) are all fast attacks, with the latter causing a stun on a normal or counter-hit, allowing you to follow up with a combo such as Ninja Cannon (A B) into Stalker (A K) followed by her mid-air throw (B G).

Talim
Age: 15
Birthplace: Village of the Wind Deity, Southeast Asia
Height: 4'9”
Weight: 93 lbs.
Birth Date: June 15
Blood Type: Unknown
Weapon: Elbow Blade x 2
Weapon Name: Loka Luha & Syi Salika
Discipline: Wind Dance
Family: Father/Sanput, Mother/Lidi, Grandmother & Village Elder/Kalana, Bird/Alun
Unlocked: Purchase for 4000 Gold on the fighter select screen.
Familiar with the cursed sword's evil nature, Talim tries to persuade Yun-seong to give up on his dangerous quest to claim Soul Edge, but to no avail. After meeting up with Seong Mi-na, Yun-seong still cannot be convinced, and leaves in pursuit of Soul Edge. One night, after parting ways with Mi-na, Talim observes the fragments of Soul Edge heading west. Though it is a beautiful sight, she could sense the evil within those shards. Talim now must journey to Ostrheinsburg to put a stop to it.

The exceptionally quick Talim hasn't improved much from her Soul Calibur III iteration; her damage output is still pretty abysmal, meaning she has to work much harder than most other characters to get the job done. What she lacks in range she makes up with her speed; Talim is the quickest character of the cast, making it difficult for heavier characters to match up during close-range combat.
The video below shows the following combinations. The directional notation system is used to describe each move.
Combo 1: 66B, 44B
Combo 2: WR A B, 4A B
Combo 3: 3B, hold A~B, 3B~2A B
Combo 4: 4B K, A B~2A B
Please read through 'The Basics' and 'Fighting Terms' for an explanation of the 'directional notation' and the fighting terms used to explain strategy.
Talim is a definite close-range fighter, so your main focus at long-range is to get closer to the opposition. Wind Sault (6B K) can quickly close the gap between you and your opponent and avoid low attacks and some horizontals. During Wind Sault you can perform offensive moves such as Double Inwardi (during Wind Sault A), a low slash, and Layout (during Wind Sault K), a swift high kick that knocks back on a normal or counter-hit. Rolling Thunder (during Wind Sault A B) makes a good punisher and leads to a 3-hit combo.
Wind Charmer (2_8B K) is an evasive move that can avoid vertical attacks, and automatically links into Wind Sault if a command is not inputted during its execution. As with Wind Sault, offensive moves can be used during Wind Charmer, such as Baraw Strikes (during Wind Charmer B, B), a pair of quick mid strikes, the second of which can be delayed to add Guard Break properties, and Turning Kali Strikes (during Wind Charmer A, A, 2_8) two high slashes that link back to Wind Charmer.
Wind Leap (4B K) is a jump back move that automatically links to Wind Sault unless a command is inputted during its execution. Wind Leap can be used to back away from overbearing attackers or to trick staunch defenders into attacking, only to be struck by one of the lunge moves that the maneuver allows such as Paayon Thrust (during Wind Leap B). Swooping Blade (during Wind Leap A) is a low attack that stuns on a normal or counter-hit and ducks under high attacks and can lead to a combo with Rising Baraw (while crouching 3B, B).
Talim's strength comes from her speed which is outmatched by the other characters in the cast. Remain in close-range, pummel your foe with attacks, and make use of Talim's evasive maneuvers to stay close if your opponent is knocked back.

Darth Vader's Secret Apprentice
Age: Unknown
Birthplace: Planet Kashyyyk
Height: 6'1”
Weight: 178 lbs.
Birth Date: Unknown
Blood Type: Unknown
Weapon: Lightsaber
Weapon Name: Unknown
Discipline: Self-Taught
Family: Father/Deceased, Master/Darth Vader
Unlocked: Beat Arcade Mode with Yoda (X360) or Darth Vader (PS3).
He is the son of a Jedi Knight, brought up in secret as Darth Vader's apprentice. The Apprentice sets out to complete secret missions when his master commands it. When a wave of power is detected in space, the Apprentice is sent to identify it. Discovering a dimensional portal, he immediately enters and finds himself in another galaxy.
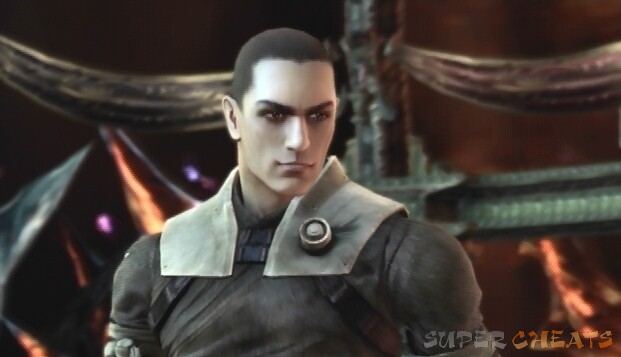
Darth Vader's secret apprentice, known simply as “The Apprentice,” is the cross-platform Star Wars guest character. Though he didn't appear in any of the movies, he is main character of the upcoming Star Wars: The Force Unleashed video game. Like Vader and Yoda, The Apprentice sports a Force Meter—an element exclusive to the Star Wars characters—below his HP Gauge. Certain moves require Force power. Attempts to use Force moves while the gauge is empty will result in a momentary stun. While several Force moves allow him to attack at long-range, his lightsaber moves are best suited for mid or close range combat. Though he has many quick and powerful moves, The Apprentice's lack of fast low attacks can be an issue, especially when fighting up close.
The video below shows the following combinations. The directional notation system is used to describe each move.
Combo 1: 3B, 8~A, A, B, B
Combo 2: 2B~WC 8K, A
Force Lightning: 44A B
Combo 3: 66B~A B~6B, B, K
Please read through 'The Basics' and 'Fighting Terms' for an explanation of the 'directional notation' and the fighting terms used to explain strategy.
The Apprentice's Force powers give him an edge that many characters lack at long-range, but pay attention to the Force Meter below your HP Gauge, as attempts to use Force powers while the meter is empty will result in a momentary stun. Force Wave (236B) is a low, linear attack that can reach your enemy from any range, though it can be blocked while crouching and is easy enough to sidestep. Force Lightning (44A B) is an Unblockable mid attack, so your opponent must sidestep it to avoid taking damage. Make use of The Apprentice's Force Flips (direction A K) and Force Levitation (A K) to dodge linear verticals or to simply confuse your foe.
Hit your foe with Mist Cutter (hold 6, B) if they miss an attack, or pull them towards you with Force Grab (A B). Note that Force Grab will only work on standing opponents, even if they are guarding. After Force Grab, follow up with a grab or Star Divide into Force Levitation (3B, 8) and then A, A, B, B or A, A, A B. Galactic Breaker (hold 6, A B, B) is a quick stun move that can be followed by the Star Divide combo above. Force Blast (2A B) is best used against a rising opponent, as it will launch them and is difficult to avoid. Keep Star Raid Lighting (during Force Levitation (A K) B K) in mind too.
At close-range, make use of Apprentice's quick moves such as Mist Splitter (B, B), Apprentice Combo (A, A, B) and Side Saber (1B). Knee Drive (3K) is a quick jab that can be used to interrupt attacks and it will stun on a counter-hit. Mist Slicer (2B) puts the Apprentice into a crouching animation, so quickly follow with Flipping Saber Throw (while crouching 8K, A) to perform a nifty combo.
Your biggest problem at close-range will undoubtedly be the Apprentice's lack of good low attacks. Orbital Thrust (2K, B) is your best bet, as it is a low to med string that ducks under high attacks. Keep Flipping Saber Throw (while crouching 8K, A) in mind if you're crouching to block a low attack, or if one of your opponent's attacks sets you crouching. If you find yourself with your back to the edge, Apprentice's B G throw can score a Ring Out with ease; if your opponent is far enough, try Force Grab (A B) as they approach, and then go for the throw.
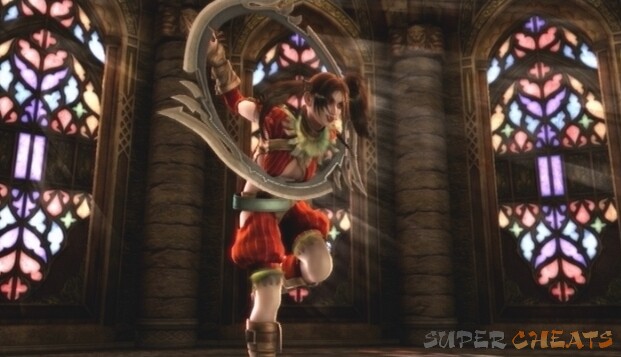
Tira
Age: 17
Birthplace: Unknown
Height: 5'3”
Weight: 95 lbs.
Birth Date: Unknown
Blood Type: AB
Weapon: Ring Blade
Weapon Name: Eiserne Drossel
Discipline: Dance of Death
Family: No family, but now accompanied by a flock of Watchers
Unlocked: Initially available.
Tira, the DID-suffering, ring blade-wielding servant of Soul Edge, returns to the evil sword's dwelling in Ostrheinsburg after its restoration. As Soul Edge's current body is only a temporal shell, Tira must find a new host for her master. First, however, the spirit sword Soul Calibur must be destroyed to shatter the seal that binds Soul Edge's body.
Wielding a razor sharp ring-blade and sporting two equally intense personalities, Tira can pummel her opponents with quick attacks while creeping them out at the same time. The thing that sets Tira apart from the other fighters is her split personality; Jolly and Gloomy. Her stance and move set differs depending on her personality which randomly changes when she takes damage, performs certain moves, or when her HP Gauge surpasses the halfway point. Those unfamiliar with this aspect may have a hard time controlling Tira, but conversely her inconsistency can baffle her foes.
Gestopft Madness (A K, or hold A K) can switch Tira's current personality, but it does not come with any guarantee. Tira's Jolly side offers a more flexible attack range, while her Gloomy side packs more of a punch, but some moves bear a small health penalty with each use. When her personality shifts to the opposite end of the spectrum, a purple or yellow smoke effect accompanies the change. While in her neutral stance, Jolly Tira stands upright and sways back and forth, while Gloomy Tira remains slouched over with her head hung low.

Gloomy Tira
The video below shows the following combinations. The directional notation system is used to describe each move.
Combo 1: Jolly 1A, 22B
Combo 2: Gloomy 3B, 66B
Combo 3: Gloomy WR K (Counter), 88B, 66K
Uplift Neb: Gloomy/Jolly WR B
Please read through 'The Basics' and 'Fighting Terms' for an explanation of the 'directional notation' and the fighting terms used to explain strategy.
Since your long-range options are limited, your main focus is to get into mid-range. While Jolly, Wild Beat Neb (hold 6, B), Flageolette Fin (hold 6_3_9, A, A), Grove Step (hold 2
_8, A), or can be used to floor your opponent, allowing you to then move in and follow up with another attack such as Low Swoop (1A K) or Break Toss (3B). You may also attempt to switch to Gloomy with Gestopft Madness (A K), which can cause damage to nearby foes. Use Flageolette Fin (hold 6, A, A) and Low Swoop (1A K) to counter sidestepping. Wild Beat Neb (in Jolly Side hold 6, B) followed by Cross Wing Legato (in Jolly Side A B) can make for an effective combo. You may also be able to catch foes in Shredding Vibato (in either side 4A B, or 4 hold A B for GB properties, release to perform).
Tira is a much better mid-range fighter. While Jolly, circle around your foe and use horizontal sweeps such as Groove Step (in Jolly Side hold 2_8, A), Low Swoop (1A K) and Menuett Dance (4A during hit A (Just)). You can move back if need be with Back Step Pizzicato (in Jolly Side 4B) and perhaps follow it up with Flageolette Fin (hold 6, A, A) or Wild Beat Neb (in Jolly Side hold 6, B) into Cross Wing Legato (A B). Fear Pecker (6K) stuns on hit, allowing you to then follow up with another kick or low attack. Ptarmigan Polka (in Jolly Side 2A, B) is a good mid-range combo if you manage to score a counter-hit.

Shredding Vibato
While Gloomy, attacks such as Chattering Pinion (in Gloomy Side hold 4, A), Low Swoop (1A K), Menuett Dance (4A during hit A (Just)), and Snare Clap (in Gloomy Side while rising A) can be used to counter sidestepping enemies. Hell's Barnacle (hold 6K) is a quick attack that can catch unwary opponents off guard, and it turns into an attack throw on a counter-hit. Wailing Minerva (666A) offers considerable range and can be quickly executed. Elegy Claw (6B, K) hits mid and low and can trip up a guarding fighter, while Quick Elegy Claw (6b, K) can cause confusion.
Tira's Gloomy side attacks are most effective at close-range. You can score some hits on stunned foes with Hiisi Baroque (in Gloomy Side 666B) and Shriek Noise (in Gloomy Side 6A, A (press repeatedly)). After crouching to avoid a high attack, use Uplift Nebula (while rising B), which stuns normally, but will turn into a damaging combo on a counter-hit. As usual, use quick horizontal sweeps such as Harmonic Wing (A, A), Low Swoop (1A K) and Menuett Dance (4A during hit A (Just)) to counter sidestepping. Use 8-Way Run to avoid vertical strikes and use moves such as Harmonic Wing (A, A), Cross Wing Legato (A B), Groove Step (in Jolly Side hold 2_8, A) or and Peregrine Rhythm (in Gloomy Side hold 8, B).
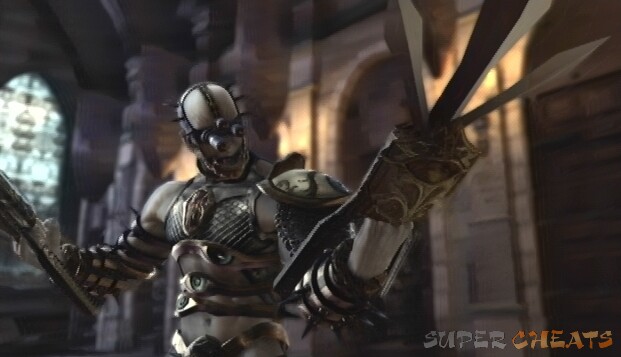
Voldo
Age: 50
Birthplace: Palermo, Kingdom of Naples
Height: 6'0”
Weight: 185 lbs.
Birth Date: August 25
Blood Type: A
Weapon: Katar (Jamadhar) x2
Weapon Name: Manas & Ayus
Discipline: Self-Taught
Family: Parents/Deceased, Four brothers/Killed through warfare, Master/Vercci (long deceased).
Unlocked: Initially available.
It was his master's wish to obtain Soul Edge, the fabled soul sword. At one time acting as the guardian of his master's tomb, Voldo's former master, the late Vercci, spoke to him seemingly from beyond the grave. This apparition was in fact the work of Soul Edge, masquerading as Voldo's dead master in order to manipulate him. The voice commanded Voldo to continue the search for Soul Edge, prompting him to leave the tomb. After a couple of failed attempts to acquire the cursed sword, Voldo then finds himself in Ostrheinsburg where Soul Edge lies. As he is about to claim the sword for his master, he again hears his voice, this time instructing him to protect the sword at all costs.
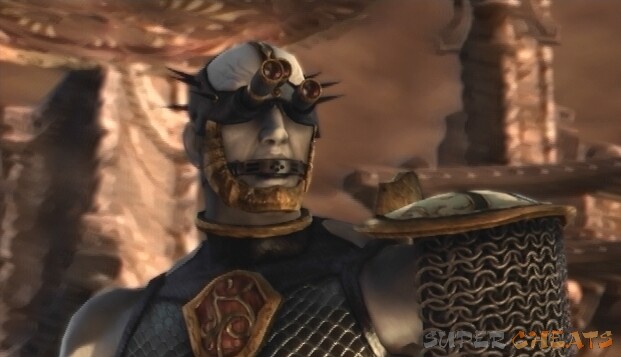
The disturbingly flexible Voldo returns yet again and is as creepy as ever. Voldo's unorthodox fighting style and general unpredictability ensure that his opponents will have a tough time predicting his next move, and his bizarre stances only add to the confusion. He can even block attacks while his back is turned, though the downside to this is that he is left open to back throws which are generally more damaging. Voldo is not the easiest character to control either, but those who take the time to familiarize themselves with his move list will find him to be an extremely effective fighter.
The video below shows the following combinations. The directional notation system is used to describe each move.
Combo 1: CH 66B, 1A
Combo 2: 4 hold K, 2B K~K
Combo 3: 236 A, 3K, A B
Combo 4: CH 3A, 2A B, 1 hold B
Please read through 'The Basics' and 'Fighting Terms' for an explanation of the 'directional notation' and the fighting terms used to explain strategy.
Voldo is not particularly well-suited for long-range combat, but there are several options that can get him up close and jabbing his enemy with katars. Your main tool at long-range is Caliostra Rush (236), a quick crawl forward that ducks under high attacks and can link to several different moves. Snake Eater (during Caliostro Rush B) is a long-range low slide that is best for punishing or catching your foe off-guard. Use Katar Slap (during Caliostro Rush A) to prevent your opponent from sidestepping. Otherwise, Evil Bow (1A) is good for punishing whiffs, as is Blind Dive (during Caliostro Rush A B) if your opponent is standing.
Since Voldo is most lethal at close-range, work on getting there. His Mantis Crawl Stance (2B K) can be used as an evasive stance, but several powerful moves can also be linked to from it. Super Freak Lunge (6A K) can link to Mantis Crawl if A K is held. Tap up or down twice during Mantis Crawl and Voldo quickly moves over to the side; tap up or down once and Voldo ends up in his Death Roll stance. Tap forward or back during Mantis Crawl and Voldo will rapdily crawl towards his opponent; if head side is toward the enemy, he can barrel right through them.
Death Roll ducks under high attacks and many horizontal attacks. Superwyrm A (during Death Roll A) and Superwyrm B (during Death Roll B) are low and mid attacks that link back to Death Roll, possibly allowing for multiple hits on confused opponents. At mid-range, Despair (A B) is another good attack; it causes knockdown on a normal or counter-hit, and it can duck under high attacks.
At close range, Voldo's ability to block and attack his enemy with his back turned will prove useful. Be wary, however, because with his back turned Voldo leaves himself open to back throws which generally deal large amounts of damage. Several moves link to his back turned stance, such as Blind Crescent (6B, B), Hell Claw (4B, A), Lunatic Flip (236K), or Jolly Ripper (4A). While facing away, Faceless Wheel (facing away 2B, K) is a low to mid move that ducks under high attacks and has Guard Break properties if the last input is held. Blind Double Claw (facing away 236A) stuns on a normal or counter-hit, and can then be followed by Faceless Flap (facing away 2B, K) or Wyrm Break Dance (facing away 22K, K). Stop your enemy's sidestepping attempts with Scissor Claw (A, A) or Reverse Evil Bow (facing away 1A).

Chai Xianghua
Age: 20
Birthplace: Peking, Ming Empire
Height: 5'0”
Weight: 101 lbs.
Birth Date: April 2
Blood Type: B
Weapon: Chinese Sword
Weapon Name: No Name
Discipline: Sword style passed down from her mother
Family: Mother/Deceased, Father/Deceased, according to her mother.
Unlocked: Initially available.
Having crossed paths their former friend, Xianghua and her traveling companion Kilik are distraught to learn that he would not journey with them. Suspecting that he may intend to claim Soul Edge and use its power to exact his revenge on the golem Astaroth, Kilik and Xianghua make their way to Ostrheinsburg to destroy Soul Edge and stop their friend Maxi from making a rash mistake.

The video below shows the following combinations. The directional notation system is used to describe each move.
Combo 1: 33A~A B~66B K
Combo 2: CH 22_88B, 66A B
Combo 3: WR B, 2A G
Combo 4: 22_88B, 66B K
Please read through 'The Basics' and 'Fighting Terms' for an explanation of the 'directional notation' and the fighting terms used to explain strategy.
Since Xianghua is most effective at mid or close range, make heavy use of 8-Way to advance. Her best attacks at long-range are Muu Jiann Retreat (4A B), which has Guard Impact properties, and Lower Great Wall Punishment (A K, B K). Lian Hua Cannon (hold 2_8, B) is a great mid-hitting launcher that can avoid vertical attacks. If it connects on a counter-hit, follow with Great Wall (66_33_99A B) to deal substantial damage.
Most of Xianghua's effectiveness comes from her mix-up possibilities. Many of her moves link to the Silent Xia Sheng stance which can be used to cancel or change up combos to keep your foe guessing. Keep in mind that the effectiveness of this stance depends on your opponent; players that tend to attack as often as possible may not even notice your attempts to fake them out with the stance. Furthermore, any lag present during online matches can severely lessen the stance's effectiveness.
Aside from Silent Xia Sheng, Xianghua's speedy attacks can give her an edge at close-range. Vengeful Lian Hua (44B) is similar to Mitsurugi's Wind Hole Vortex; Xianghua quickly takes a step back and dashes back towards her opponent with a mid-hitting stab, knocking them back. Hwu Dye (1B K) dodges vertical attacks and offers decent range. Yan Divide (2A B) is a low sweep that ducks under high attacks. Since Yan Divide puts Xianghua into a crouching animation, you can use one of her While Rising moves such as Rising Shui Shian (while rising K) or Mei Hua Carve (while rising A B2B). Fluttering Lan Se Ren (while rising B) is another option; it's a delayed, mid-hitting slash that stuns on a normal or counter-hit and has Guard Impact properties. Muu Jian (A B) is a quick pair of slashes that launches on the second hit, allowing for a short juggle.
Other than that, Xianghua has a nice variety of low attacks and strings that include low attacks. Her quick and deceptive low game can be tough for players unfamiliar with her fighting style to adapt to.

Yoda
Age: 900 years old
Birthplace: Unknown
Height: 2'2”
Weight: Unknown
Birth Date: Unknown
Blood Type: Unknown (Mid-chlorian Count: approx. 20, 000)
Weapon: Lightsaber
Weapon Name: Unknown
Discipline: Ataru
Family: Unknown
Unlocked: Initially available.
While living on the planet Dagobah, Yoda sensed a faint wave of power. The wave was fairly weak and passed quickly. He did not give it another thought until the waves became stronger, making it apparent that a dimensional tear lie somewhere in space. Sensing that Darth Vader had become involved with the disturbance, Yoda knew he must go through the portal as well to thwart the Empire's scheme, whatever it may be.

The miniature Jedi Master Yoda is the Xbox 360's exclusive guest character. His short stature means he'll duck under high attacks while standing, and many horizontal attacks will miss completely too. He can't be grabbed either, but can leap up and grab opponents himself. Yoda boasts many quick moves, aerial strikes and sports a Force Meter—an element exclusive to the Star Wars characters—below his HP Gauge. Certain moves require Force power, and attempts to use Force moves while the gauge is empty results in a momentary stun, leaving the Jedi Master vulnerable. With his short legs, Yoda's running speed is incredibly slow, but his many aerial moves can get him up close to his enemy with little difficulty.
The video below shows the following combinations. The directional notation system is used to describe each move.
Combo 1: 22_88A~6A K, A
Force Parry: B K (after successful Impact A B for additional attack)
Combo 2: 3B K, 2_8A K, 2_8A K, 2_8A K
Dagobah Roll: 236 hold K, K, B
Please read through 'The Basics' and 'Fighting Terms' for an explanation of the 'directional notation' and the fighting terms used to explain strategy.
Yoda's movement is so slow it's almost painful, so at long-range you'll have to rely on his quick aerials to move into close-range. His short stature makes up for his lack of speed somewhat, as many horizontal moves will fly right over his head. Yoda seems to be vulnerable to quick, linear verticals due to his slow 8-Way Run and inability to sidestep, so it's best to start a match by moving to the side or backwards to avoid an immediate vertical from your opponent. You can use Jedi Master Combo (hold 4_1_7, A, B) afterwards, which has Guard Break properties and launches.
Since Yoda can't sidestep or dash, you'll have to use his jumps (tap 2, 4, 6, or 8 twice to jump) to evade your foe's attacks. Use Spiral Attack (A K) or Charge Slash (6A K) to punish whiffs at long-range. Charge Strike (6B) is a quick lunge with Guard Break properties. Dagobah Roll (236 hold K, K, B) will send Yoda rolling towards his opponent, followed by a couple of kicks and then a vertical slash. There are plenty of options while Yoda is in the air too, such as Aerial Kick (66A B) and either Ataru Combo (B, B) a mid-mid string, or Ataru Combo (A, A), a mid-to-low string.
At close-range, try to mix-up Yoda's throws and basic strings to confuse opponents. His Double Split (B, B) move and either of his throws start off with similar animations; alternating between these attacks can trick your opponent into blocking high where he or she can then be grabbed, or crouching to avoid a grab attempt, only to be hit by two mid slashes. Use Droid Buster (4A) and Jedi Slash (3A) to swat sidesteppers. Force Parry (B K) can Repel incoming attacks, and if successful can be followed up with A B to knock the attacker back. Force Parry uses up some of Yoda's Force Meter, so keep an eye on the gauge below his health bar to avoid leaving yourself open to an attack due to a failed Force move. The meter refills automatically, so be sure to glance at it before making another attempt.
Force Cancel (direction A K) can be used to cancel attacks while in mid-air and keep Yoda afloat, confusing his enemy and allowing for a subsequent attack. This drains Yoda's Force Meter quite quickly, so use it sparingly. Force Cancel opens up many possibilities that would be worth discovering in Training Mode. Yoda's aerials can lead to problems when playing on a small stage as you may accidentally ring yourself out; if not on a completely walled stage, try to keep to the middle of the level and avoid jumping about when near the edge of the ring.

Yoshimitsu
Age: Unknown
Birthplace: He does not speak of it (Base of Mt. Fuji, Japan)
Height: Unknown
Weight: Unknown
Birth Date: Unknown
Blood Type: Unknown
Weapon: Katana x 2
Weapon Name: Yoshimitsu
Discipline: Manji Ninjitsu
Family: Entire clan/Massacred by a man of influence. Now belongs to a clan of chivalrous thieves called the Manjitou.
Unlocked: Purchase for 4000 Gold on the fighter select screen.
Yoshimitsu is part of a chivalrous band of thieves called the Manjitou which he spearheaded after acquiring a fragment of Soul Edge. It is his goal to destroy every fragment of the cursed sword for the good of all. The shard he had acquired later vanished, however. After some investigation, Yoshimitsu learns of its whereabouts, prompting the Manjitou to begin their righteous campaign against Soul Edge's minions in Ostrheinsburg.

As one of the more unique characters, Yoshimitsu's fighting style can be difficult to grasp. He definitely is not a character intended for newcomers, and players intent on mashing buttons will likely find themselves K.O.'d by way of Standing Suicide or a similar move. Yoshimitsu's quirky fighting style and odd mannerisms can confuse opponents too, but his multiple stances and his high-risk maneuvers also make him a difficult character to control. A deep familiarity with Yoshimitsu's move set is the key to success.
The video below shows the following combinations. The directional notation system is used to describe each move.
Combo 1: A K~Flea K~against midair opponent A B
Combo 2: 3B, 4A, A, A, A, A
Combo 3: 8A K~ Manji Dragonfly A (Counter)~B~3B~6K
Suicide Recovery: 66A K~A (press repeatedly)
Please read through 'The Basics' and 'Fighting Terms' for an explanation of the 'directional notation' and the fighting terms used to explain strategy.
Though Yoshimitsu doesn't fare best at long-range, he does have several lunge moves in his arsenal, and his general unpredictability will certainly confuse those unfamiliar with his unique fighting style. Deathcopter (8A B) is an Unblockable long-range attack; tap Down or G during flight to land the attack, or press B K to switch to the Manji Dragonfly stance. If you want to go the more traditional route, use 8-Way Run and wait for an opportunity to attack, at which point use Bullet Cutter (4K, B), a lunging kick followed by a mid vertical slash, or Ninja Sun Flare (hold 4_2_8, B K) a roll into a mid jab that knocks the opponent back. Death Slash (1B) is also a useful move; it can be delayed if held, and will eventually turn into an Unblockable if held long enough. You can use Death Slash to lure your opponent into attacking to prevent an Unblockable, but simply release the move when they get within striking range.
During close-range battling, use Sweep Kick (K) as your primary means of countering 8-Way Run. Mid Kick (3K) is a fast kick that can be useful for interrupting attacks. Clansmen (3B) is a quick close-range launcher, and can lead to several different combos. Stone Backhands (4A, A, A, A, A) can make for a 6-hit juggle, but Yoshimitsu will end up downed afterwards if the move is followed through to its completion. Stone Fist (1A, A, A, A, A) is the mid variation and can work for mid-air combos as well. Keep Spinning Low Kick (while crouching 1K, K, K, K, K) in mind too, as many inexperienced players tend to not block low. If you don't want to deal with the downtime caused by any of the above strings, don't input the move completely.
Manji Dragonfly (8B K) offers many different options; press A, B or K to perform basic attacks; a high attack with Guard Break Properties (links back to Manji Dragonfly), a quick vertical mid slash that stuns on a normal or counter-hit, and a low sweeping kick respectively. Furthermore, you can shift to Flea (B K) or to Super Dragonfly (during Manji Dragonfly 8B K). Note that Yoshimitsu will constantly lose health during Super Dragonfly. During Flea, tap Up or Down to spin to the side to evade incoming attacks, or tap forward twice to perform three low attacks. Punish whiffs with Rising Flea (during Flea K) which links into Manji Dragonfly and can then be followed by Spirit Away (during Manji Dragonfly against midair opponent A B), a flashy mid-air grab.
The Meditation (2B K, during Flea 2BK) stance is best used at close-range, though your opponent may try to take advantage if they notice you aren't attacking. Mediation ducks under high attacks and many horizontal attacks, and offers several options. Warp Kangaroo Kick (during Meditation K) can teleport Yoshimitsu behind the opposing character if used close enough, hitting them with a mid kick and launching them up into the air. Warp Moon Slayer (during Meditation B) is a quick Unblockable, particularly effective if used near the enemy. If used at long-range, Yoshi can recover some of his HP Gauge with Healing (during Meditation hold 2, B K).
His other stances, Reflection (4B K) and Intimidation (6B K), have their uses too. Dark Cross (during Intimidation A) is similar to Mitsurugi's Wind Hole Vortex move, though Yoshimitsu moves in for a low horizontal sweep. Ashura Blade (during Intimidation B) is a series of mid slashes, good if your foe was expecting a grab. Most of Yoshi's other stances can be linked to from Intimidation as well.
Yoshimitsu's suicide moves can prove useful in certain situations, but they can mean a loss if used improperly. Turning Suicide (hold 6, hold A K) and Standing Suicide (facing away 2A K) are quick Unblockable moves that will remove half of an opponent's health bar, but not without equal damage to your own. These moves can be used to end games quickly; for example, if you're up by two rounds in a three round game, you can go for a Double KO if both you and your opponent's health are below the halfway point which would result in a Draw, giving both players the win for the round and you the match. There are a couple of other suicide moves—such as the self-healing Manji Blood Petals—but they are especially difficult to use advantageously.
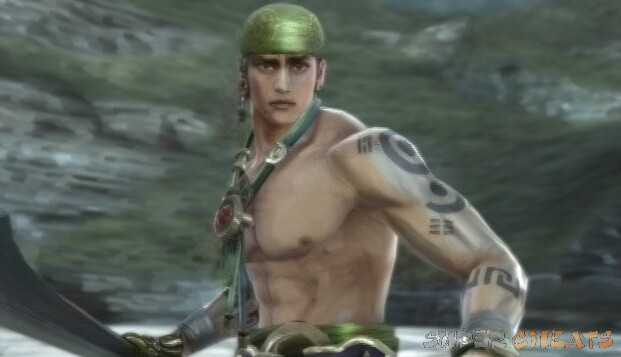
Hong Yun-seong
Age: 18
Birthplace: Jirisan, Korea
Height: 5'9”
Weight: 159 lbs.
Birth Date: April 16
Blood Type: O
Weapon: Chinese Sword
Weapon Name: White Storm
Discipline: Seong Style Long Sword (with some personal style mixed in)
Family: Father/Died from illness, Mother/Whereabouts unknown, Master/Seong Han Myong
Unlocked: Purchase for 4000 Gold on the fighter select screen.
Yun-seong wishes to claim Soul Edge so that he may use its power to protect his country. Unbeknownst to him, however, is the sword's evil and corrupting nature. When he crosses paths with Seong Mi-na, she explains the dangers of the cursed sword but is unable to sway the young man from his path. After leaving for the Azure Knight's stronghold in Ostrheinsburg while his companions slept, Yun-seong crosses paths with his idol, Hwang, an immensely skilled swordsman. Hwang details his attempts to destroy Soul Edge, confirming its evil nature. Even still not persuaded, Yun-seong continues his quest for the cursed sword.
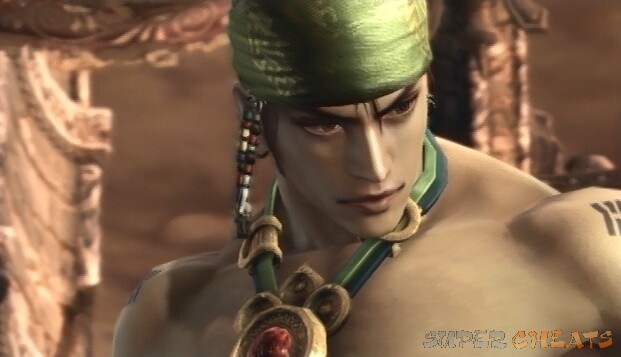
The video below shows the following combinations. The directional notation system is used to describe each move.
Combo 1: 236K, Jump K, K, K
Combo 2: Crane A~Crane K~Crane A B
Combo 3: Crane A~Crane K~Crane 8K
Combo 4: 33 hold B, 8K
Please read through 'The Basics' and 'Fighting Terms' for an explanation of the 'directional notation' and the fighting terms used to explain strategy.
Yun-seong is very much a close-range fighter, so at long-range make heavy use of 8-Way Run and punish missed attacks with Eclipse Blade (hold 2_8, B) or Tempest Blade (66B). At mid-range, Avenging Claws (6B, B) is a damaging pair of vertical strikes that ends on a Guard Break; this move is actually useful against staunch defenders, as it can rapidly deplete their Soul Gauge and lead to a Critical Finish from your end. Use Opening Void Thrust (hold 1_7, B) or Tempest Blade (66B) to punish whiffs and Burning Ember (44A) or Diving Viper (66A) to prevent sidestepping.
Rising Claws (236K, K) leads to a damaging combo with Phoenix Ascension (jump K, K, K). Yun-seong's Ragged Fangs (K, K, B) is his quickest attack, so make heavy use of this string while at close-range to interrupt attacks and score counter-hits. Rising Hook Heel (while rising K) stuns on a normal or counter-hit. Viper Lunge (while rising B) is a high poke that comes out quickly, and is also useful for interrupting attacks. Sweeping Wave (A K) is a good mid to low string that ducks under high attacks. Use Sweeping Wave (A K) and Torso Cutter (1A) to prevent sidestepping.
The evasive Crane Stance (B K) offers several different options. While in the stance, Yun-seong will automatically side step linear attacks and deliver a mid kick in retaliation. Horizontal attacks and kicks will still hit, however. The most effective close-range moves during this stance are Leg Sweep (A K), a low sweeping kick that ducks under high attacks and links back to Crane Stance, and Crane Shredder (2K, K), a quick low poke followed by a high kick. At mid or long range, Stone Cleaver (during Crane A B) and Coiling Viper Thrust (during Crane B K) are effective, but both are linear and easy to avoid.
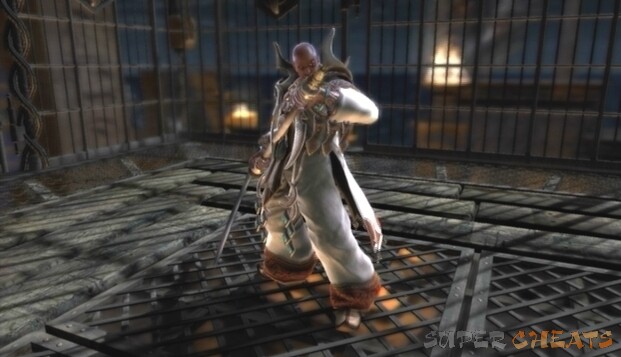
Zasalamel
Age: Unknown, for he has lived many lives
Birthplace: More than one, for he has lived many lives
Height: 5'11” (in this life)
Weight: 170 lbs. (in this life)
Birth Date: May 5 (in this life)
Blood Type: B (in this life)
Weapon: Death Scythe
Weapon Name: Kafziel
Discipline: Self-Taught
Family: Long since deceased
Unlocked: Purchase for 4000 Gold on the fighter select screen.
Zasalamel, a man of many lifetimes, sought after the power of Soul Edge to end his cycle of reincarnation, having lost the joy of living long ago. After witnessing the clash of Soul Edge and Soul Calibur, however, he received a vision, depicting the many technological advances that the future held. Now, wanting to be there to witness such events, Zasalamel abandons his quest to end his existence. With a renewed sense of purpose, he instead sets his sights on protecting the soul swords, as their destruction could mean the end of his reincarnation.
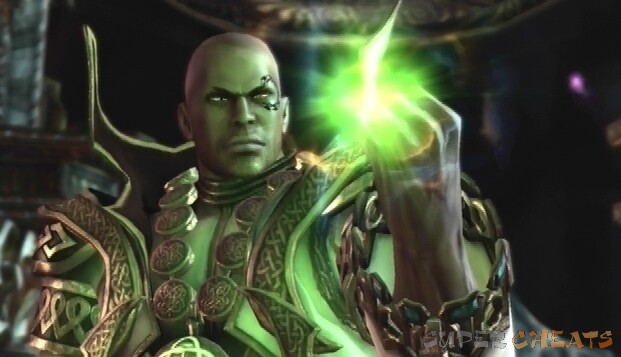
The scythe-wielding immortal Zasalamel offers high damage output and fairly quick attack speed. He has a new useful draw technique this time around which he can use to drag his opponent towards him.
The video below shows the following combinations. The directional notation system is used to describe each move.
Combo 1: 66B K, 4A B
Combo 2: 4B K, facing away B K
Combo 3: WC 3B, 4A B
Combo 4: WC 3B, 66A B
Please read through 'The Basics' and 'Fighting Terms' for an explanation of the 'directional notation' and the fighting terms used to explain strategy.
While not particularly proficient at long-range combat, Zasalamel does have a number of attacks that can be effective if used properly. Make heavy use of 8-Way Run in an attempt to reach mid-range, and punish missed attacks with Ea's Judgement (hold 3_9, B, 4) or Wrath of Tiamat (66A B). Wrath of Tiamat is a good running mid attack at long-range, as opponents may expect you to perform a running slide or grab and block low only to be hit by the attack. Use Talon of Zu (1A, B) as a means of countering 8-Way Run. Anshar's Halberd (A K) is a high horizontal attack with great range and Guard Break properties, and can be used to deter sidestepping. Zasalamel's other options are fairly linear, so your main focus should be moving into mid-range where he can more easily attack.
Confession to Lahamu (4B K) is a great launcher; if it hits, link to Adad's Great Shears (facing away hold B K) to deal significant damage. Many of Zasalamel's moves have “draw” properties, which means he can drag his enemy closer to him by holding a directional button. Though he doesn't fare best at close-range, drawing your foe closer is good for setting up throws. Make use of Anshar's Halberd (A K) to catch your opponent sidestepping, though Ilabrat's Sapara (4A) is a quicker option. 66B K is a good launcher; press 4A B to perform a mid-air attack throw, or use 6B K for a short juggle.
During close-range combat, make Command of Tiamat (B K)—one Zasalamel's fastest moves—your primary means of interrupting frequent attackers. The only issue with Command of Tiamat is the fact that Zasalamel automatically taunts if it connects on a counter-hit. You can prevent this by tapping G or attacking immediately afterwards, however. Adoration of Gilgamesh (bK) is another good option, and though not quite as fast, it isn't followed by a taunt if it connects on a counter-hit. Keep Zasalamel's while rising attack throw, Belit-Sheri's Spear (while rising B) in mind, as it is quick to execute and useful for punishing whiffs.
The Ark of Utnapishtim (hold 2_8, K, K) is a quick pair of high kicks, and the second strike stuns on a normal or counter-hit. Ark puts Zasalamel into a crouching animation, so it can be followed by Belit-Sheri's spear if your foe rises and guards high, or if they managed to avoid your attack by crouching. Zasalamel's basic K, K string is a high then low kick and is actually quite fast, but it does put your enemy in the crouched position so be ready for quick attacks like Siegfried's rising horizontal string.

Angol Fear
Age: About 14, 800
Birthplace: Core of the Macrocosm
Height: 5'10” (variable)
Weight: 1.44 tons (variable) *Adaptation to Earth incomplete
Birth Date: Beyond reckoning on the Earth's calendar
Blood Type: None
Weapon: Planet
Weapon Name: Lucifer's Spear Black
Discipline: Seung Mi-na (Clone)
Family: Psycho-familial unit (her kind is not communal by nature)
Unlocked: Defeat in Story Mode (using Algol, Darth Vader, Kilik, The Apprentice, Zasalamel, or Scheherazade).
After forming a pact with a hateful man, the Will of the Cosmos decided that Earth was to be destroyed in five hundred years, during which its inhabitants could change their ways to save themselves. And so Angol Fear, in direct service to the Will of the Cosmos, travels to the planet to determine its fate. How will planet Earth fare?
Angol Fear is a bonus character and uses Seung Mi-na's fighting style. Please refer to Seung Mi-na's section for tips.

Ashlotte Maedel
Age: Recently born
Birthplace: Unknown (Ruins of a nameless, hidden shrine of the Heretical Order Fygul Cestemus).
Height: 4'9”
Weight: 439 lbs.
Birth Date: March 9
Blood Type: Sacred oil blessed by incantation
Weapon: Ax
Weapon Name: Krnielk
Discipline: Astaroth (Clone)
Family: The two priests of the heathen cult are her creators
Unlocked: Defeat in Story Mode (using Lizardman, Maxi, Rock, Sophitia, Talim, or Angol Fear)
Two cult fanatics set out to construct a soldier devoid of a soul; the end result is Ashlotte, a technical marvel and emotionless assassin. Created by the cult group Fygul Cestemus after their failure to control the golem Astaroth resulted in their near decimation, the “Iron Maiden” Ashlotte is tasked with assassinating the treacherous golem.
Ashlotte is a bonus character and uses Astaroth's fighting style. Please refer to Astaroth's section for tips.
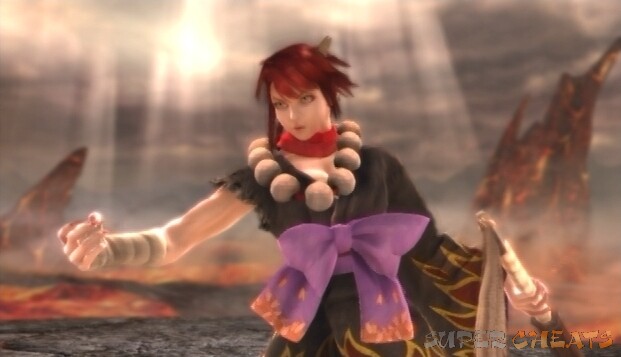
Kamikirimusi
Age: Over 600
Birthplace: Kyoto, Japan
Height: 5'0”
Weight: Unknown
Birth Date: Unknown
Blood Type: Unknown
Weapon: Kanabo
Weapon Name: Denryu Bakuha
Discipline: Nightmare (Clone)
Family: The spirits she once ran wild with have already been purified. Now she is all alone.
Unlocked: Defeat in Story Mode (using Amy, Cassandra, Mitsurugi, Tira, Xianghua, Yun-seong, or Shura).
At once restrained due to her demonic nature, Kamikirimusi emerges after nearly 600 years of confinement while the country of Japan is in a state of civil war. Her friends—who were of similar nature—had left the pit they were confined to before the appointed time had come, leaving Kamikirimusi utterly alone at the time of her own emergence. Sensing a power far greater than any human's irradiating from a being more similar to herself, the demon girl sets out in search of new friends.
Kamikirimusi is a bonus character and uses Nightmare's fighting style. Please refer to Nightmare's section for tips.
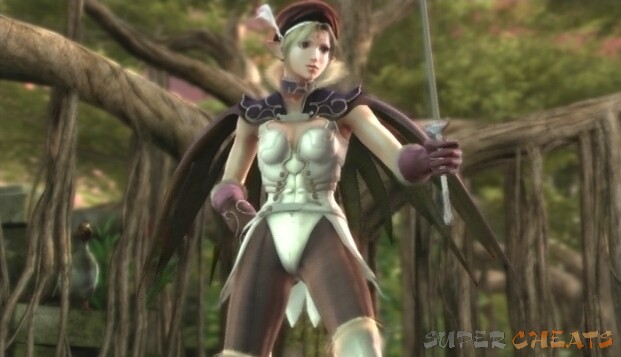
Scheherazade
Age: She does not keep count, but young among her people
Birthplace: Reclusive village
Height: 5'2”
Weight: 93 lbs.
Birth Date: 12th day under the Chanting moon
Blood Type: Unknown
Weapon: Rapier
Weapon Name: Alf Layla Wa Layla
Discipline: Amy (Clone)
Family: The stubborn elders in the woods
Unlocked: Defeat in Story Mode (using Hilde, Nightmare, Siegfried, Voldo, Yoda, Yoshimitsu, or Ashlotte).
As the storyteller of her people, Scheherazade is drawn to the eternal battle between the two soul swords. After sneaking away from her village, she finds herself in the outside world. While there, she gains an outside love interest—a crime that would normally result in death—and is imprisoned. After spending an eternity in confinement reflecting on the man she loved, Scheherazade is released. Rather than remaining in the reclusive village, however, she immediately journeys to the outside world once again.
Scheherazade is a bonus character and uses Amy's fighting style. Please refer to Amy's section for tips.

Shura
Age: She has forgotten
Birthplace: Suwa, Japan
Height: She has never measured herself
Weight: Or weighed herself
Birth Date: She can't remember
Blood Type: AB
Weapon: Samurai Sword x 2
Weapon Name: Raijin-Maru, Fujin-Maru
Discipline: Cervantes (Clone)
Family: She is possessed by the vengeful spirit of a demon she once slew. Any other family, she has forgotten.
Unlocked: Defeat in Story Mode (using Cervantes, Ivy, Raphael, Seong Mi-Na, Setsuka, Taki, or Kamikirmusi).
During her endless search for a worthy opponent, Shura, a ruthless killer, is at one time possessed by the vengeful spirit of a slain demon. The demon spirit is in search of a powerful body so that it may be resurrected, while Shura seeks warriors worth killing.
Shura is a bonus character and uses Cervantes' fighting style. Please refer to Cervantes' section for tips.
Sixty floors of hurt await you in the Tower of Lost Souls single player mode. Those looking for a challenge will definitely find one here. Skills, equipment, and weapon stats are in full effect here. Before setting out be sure to outfit your character of choice (or create a whole new one) with equipment and skills, as they play a large part in this mode. For more information on character creation, equipment and skills, check out the “Character Customization” section of this guide. There are two options: “Ascend” and “Descend.” The ascend option is available from the get go, but descend is only unlocked once floor 20 is completed. Descend is much like the Survival mode in the past Soulcalibur games in that you are pitted against an endless wave of enemies to see how many battles you can survive. You are permitted to select two characters here, however, and as with Ascend, weapon and equipment effects are active.

The floors are separated into “ranges,” and your party must survive to the end of the last floor in the range to unlock the next set of floors. If one of your characters is KO'd before the end of the set, that's it, they're done until you either reattempt or clear the last floor. Should you lose your entire party, you must then reattempt the set starting at the first floor. There are 1-4 enemies on each floor, and each set allows you to choose 1-3 characters. Furthermore, the status of a character's health bar carries over from one floor to the next. The only way to recover health, besides certain skills, is to switch out an injured character for awhile. For all of these reasons, the skills you equip your characters with are very important (ex., the HP Drain A skill would greatly aid a character who must face nine characters by him or herself).
If you are permitted to bring along more than one character, you can swap them on the fly by pressing the “SWT” button. By default, the switch button is set to RB on the Xbox 360 version, and the R1 button on the PS3 version. This configuration can be altered if you wish; pause the game, enter the “Control Settings” menu, then allocate the command to a button of your choosing. Characters cannot be switched in and out without restraint however; the status box in the bottom-left corner of the screen displays the status of the HP Gauge and Soul Gauge of the character next in line, as well as the switch gauge that empties whenever a character is swapped. The only way to refill a switch bar is to attack your enemies. Any character in reserve will regenerate health gradually, so it's best to swap out injured characters to preserve them for later use.
There is also a hidden item on every floor. At the start of each floor, a clue as to how to earn that floor's treasure chest appears on screen. When the requirement for the treasure chest is met, an equipment piece is awarded to the player. While every piece of equipment can be purchased in the character customization mode, unlocking the pieces this way means that you won't have to spend any gold on it. If you happen to earn a treasure chest that contains an item you previously unlocked or purchased, you will be given gold instead. Once the “Acquired a Treasure Chest” message appears, the floor does not need to be won to earn the treasure.
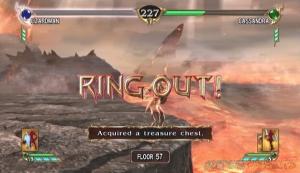
The next two pages will give you the ascending and descending treasure chest requirements for each floor.
Floors 1 to 2: Law of the Earth
1F: Soldier's Hat - Clear the stage without taking damage
2F: Warrior Trousers - Clear the stage with no Ring Out from either party.
Floors 3 to 4: Blade Piercing Wall
3F: Pauldrons - Switch with an ally more than 2 times.
4F: Warlord's Belt - Perform 3 attack throws.
Floors 5 to 7: Predator's Feast
5F: Clergy Clothes - Defeat an enemy by Ring Out.
6F: Wonder Jacket - Throw an opponent.
7F: Warrior Trousers - Clear the stage without missing any attacks.
Floors 8 to 10: Awakening Disaster
8F: Armor Ring: Ice Mirror - Switch with an ally more than 2 times.
9F: Scarlett Blossoms - Guard the opponent's attack 3 times in a row.
Floor 11: Threatening Mirror
11F: Grim Horn - Defeat all enemies with Critical Finish.
Floors 12 to 14: Life on Sand
12F: Magus Cloth - Defeat all enemies by Ring Out.
13F: Pegasus Sallet - Destroy all walls within the stage.
14F: Phantom Pavilion - Seesaw (Stage) - Perform Guard Impact more than 3 times.
Floors 15 to 17: Life to Entertain
15F: Submissions Belt - Clear the stage with only A and G.
16F: Warlord's Pauldrons - Clear the stage with time remaining at 0.
17F: Arm Bandages - Execute a 5 combo.
Floors 18 to 20: No Man's Land
18F: Kouchu Kabuto - Stand on all corners of the stage.
19F: Longhua Qipao - Switch with an ally more than 5 times.
20F: Life Gem: Sun - Clear the stage with a Critical Finish.
Floors 21 to 23: Über Airhead
21F: Longhua Qipao - Voluntarily perform a Ring Out.
22F: Honor Boots - Perform more than 4 counter-hits.
23F: Frilled Skit - Guard the opponent's attack 3 times in a row.
Floors 24 to 26: Iron Sword
24F: Protect Gem: Cardinal Direction - Perform a combo with a total damage over 240.
25F: Zhuque Changpao: Throw 5 times.
26F: Warthog Cuirass: Execute a 10 Combo.
Floors 27 to 29: Unbinding Wave
27F: Clear the stage with no damage taken.
28F: Aculeus Suit - Opponent must guard a Guard Break attack at least twice.
29F: Menghu Boots - Switch with an ally more than 5 times.
Floors 30 to 32: Unfailing Tower
30F: Spirit Gem: Nonuple Heads - Clear the stage without guarding.
31F: Longming Qipao - Perform 5 or more Just Inputs.
32F: Vane Mask - Perform a low throw.
Floors 33 to 35: Mind-Reading Shield
33F: Battle Dress - Perform 3 attack throws.
34F: Power Gem: Warrior Princess - Perform Guard Impact more than 3 times.
35F: Warthog Pauldrons - Clear the stage without switching characters.
Floors 36 to 38: Time to Trifle
36F: Parlor Blouse - Clear the stage with time remaining at 0.
37F: Siren's Helm - Defeat all enemies with Critical Finish.
38F: Gorgon Fauld - Defeat all enemies by Ring Out.
Floors 39 to 41: Irritation to Ruin
39F: Kingfisher Greaves - Clear the stage without changing position.
40F: Deer Head - Execute a 5 combo.
41F: Minotaur - Perform 5 or more Just Inputs.
Floors 42 to 44: Avaricious Life
42F: Demonic Gloves - Clear the stage without letting the opponent invoke a skill.
43F: Repel Gem: Iron Shell - Perform an over-the-back throw.
44F: Clear the stage with no Ring Outs from either party.
Floors 45 to 46: King of the Physical Realm
45F: Tiger Lily Kabut - Defeat all enemies without equipping any skills.
46F: Butterfly Sallet - Defeat all enemies without equipping any skills.
Floors 47 to 49: Unseen Sickle
47F: Succubus Boots - Throw 5 times.
48F: Life Gem: Jade - Clear the stage with a character equipped with the skill “Invisible.”
49F: Horns of Calamity - Clear the stage without missing any attacks.
Floors 50 to 52: Solitary Princess
50F: Tiger Lily Breastplate - Execute a 10 combo.
51F: Tiger Lily Fauld - Perform more than 4 counter-hits.
52F: Feathered Wings - Clear the stage with a Critical Finish.
Floors 53 to 56: Worshipped Sacrifice
53F: Blade Ring: Demon Lord - Defeat all enemies by Ring Out.
54F: Leviathan Pauldrons - Destroy all the walls within the stage.
55F: Priestess Kimono - Perform 3 attack throws.
56F: Leviathan Burgonet - Perform a combo with total damage over 240.
Floors 57 to 59: Envoy of Destruction
57F: Voodoo Armlets - Voluntarily perform a Ring Out.
58F: Tiger Pauldrons - Defeat all enemies without equipping any skills.
59F: Voodoo Greaves - Guard the opponent's attack 10 times in a row.
Floor 60: Last Judgment
60F: Voodoo Breastplate - Clear the stage without switching characters.
A treasure chest will be acquired at each fifth floor until floor 40. You will be given gold instead if you previously purchased the piece of equipment.
Floor 05: Dark Knight's Cloak: Reach
Floor 10: Blade Ring: Raging Thunder
Floor 15: Lapin Chapeau
Floor 20: Repel Gem: Fox Demon
Floor 25: Succubus Gauntlets
Floor 30: Demonic Armor
Floor 35: Demonic Pauldrons
Floor 40: Voodoo Crown
The Story Mode consists of five stages; three battles against multiple enemies, a battle against one of the game's five bonus characters, and the final battle against a boss character. Once the boss character has been defeated, the selected character's unique ending cinematic will be shown, and made available for later viewing in the “Event Theater” section of the Museum.

Unlike in the Arcade mode, skills and weapon stats are in full effect here. For this reason, it would be a good idea to equip your character of choice with an accessory and perhaps select some more beneficial skills or a more powerful weapon for them. There are two difficulty levels: Normal and Hard. Completing story mode on these difficulty levels unlocks the “Pursuer of the Secret” and “Mystery of the Sword” Honors/achievements respectively. Hard mode offers a greater challenge, but also more gold once you reach the finish. Furthermore, after completing a character's story mode, their ultimate weapon becomes available for purchase in Character Customization mode.

Story Mode is the key to unlocking Soul Calibur IV's five bonus characters and Algol by defeating them in battle. Each character follows a predetermined path, so if you want to unlock a certain bonus character you will have to use a character that faces her. Below is a list of each character, the bonus character they fight, as well as the boss character they face at the final stage.
Algol
Bonus: Angol Fear
Boss: Siegfried
Amy
Bonus: Kamikirimusi
Boss: Nightmare
Astaroth
Bonus: Ashlotte
Boss: Algol
Cassandra
Bonus: Kamikirimusi
Boss: Algol
Cervantes
Bonus: Shura
Boss: Algol
Darth Vader
Bonus: Angol Fear
Boss: Algol
Hilde
Bonus: Scheherazade
Boss: Nightmare
Ivy
Bonus: Shura
Boss: Nightmare
Kilik
Bonus: Angol Fear
Boss: Algol
Lizardman
Bonus: Ashlotte
Boss: Nightmare
Maxi
Bonus: Ashlotte
Boss: Nightmare
Mitsurugi
Bonus: Kamikirimusi
Boss: Algol
Nightmare
Bonus: Scheherazade
Boss: Siegfried
Raphael
Bonus: Shura
Boss: Siegfried
Rock
Bonus: Ashlotte
Boss: Algol
Seong Mi-Na
Bonus: Shura
Boss: Algol
Setsuka
Bonus: Shura
Boss: Algol
Siegfried
Bonus: Scheherazade
Boss: Nightmare
Sophitia
Bonus: Ashlotte
Boss: Algol
Taki
Bonus: Shura
Boss: Siegfried
Talim
Bonus: Ashlotte
Boss: Algol
The Apprentice
Bonus: Angol Fear
Boss: Algol
Tira
Bonus: Kamikirimusi
Boss: Siegfried
Voldo
Bonus: Scheherazade
Boss: Nightmare
Xianghua
Bonus: Kamikirimusi
Boss: Algol
Yoda
Bonus: Scheherazade
Boss: Algol
Yoshimitsu
Bonus: Scheherazade
Boss: Algol
Yun-Seong
Bonus: Kamikirimusi
Boss: Nightmare
Zasalamel
Bonus: Angol Fear
Boss: Agol
Angol Fear
Bonus: Ashlotte
Boss: Agol
Ashlotte
Bonus: Scheherazade
Boss: Algol
Kamikirmusi
Bonus: Shura
Boss: Agol
Scheherazade
Bonus: Angol Fear
Boss: Algol
Shura
Bonus: Kamikirimusi
Boss: Algol
The ability to create original fighters—a feature first introduced in Soulcalibur III—returns in this iteration of the series. The character creation mode comes with a bevy of new features this time around such as weapon and equipment effects, and the ability to customize standard characters. To create an original character, select the created character slot on the fighter select screen. After selecting the new character's gender and fighting style, you are taken to the trait selection screen. Assigning the new character an Equipment or Battle trait only affects the auto-generation of the character. The alignment chosen only effects the “Alignment” skill.

If you don't plan to use the character in Story Mode, the Tower of Lost Souls, or special versus matches, disregard the stats on the right side of the screen and focus on making your character as flashy as possible. Otherwise, explanation is in order. Each character has five skill point categories: Power, Impact, Boost, Gauge, and Special. Each piece of equipment contributes a certain amount of points to one or two of these categories, and may also alter the character's attack, defense, and HP stats. There is a minimal variety of equipment from the get go, but more equipment becomes available for purchase as you unlock Honors (see the “Unlockables” section of this guide for details).
If you shift over to the Skill Settings tab, you'll notice that there are slots for four different skills. Each skill bears certain point requirements. For example, Hysterical Strength requires that the character have at least 50 Boost points to equip, while Soul Gauge Vamp requires that the character have 100 points available in Gauge, 30 points available in Special, and also have a style level of at least 9. The panel on the right side of the screen indicates the number of points available to work with.
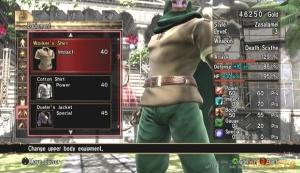

Style levels are gained as a character with using that participates in battle. There is no need to “grind” for these levels; they'll come naturally as you play. As you can see, equipment plays a big part in determining the strength of your created character. For this reason you may be forced to sacrifice aesthetics for stats, therefore it's best to create characters specifically for use in the modes where stats are in effect. Once you're done designing the character, give him or her a name and select “Finish” to save.
As previously mentioned, standard character's can also be customized. Choose one of the standard characters from the fighter select menu, and then select one of the empty data slots next to that character's two default costumes. You can also alter the color of the standard characters' default costumes. To do so, from a character's equipment menu, select the first option and then the costume you wish to customize. You can then use the equipment color menu to change the color of that character's costume. The character's default weapon may also be changed in the Style/Weapon tab. When customizing a character's default costume, you can add a piece of “Special Equipment” to greatly boost their skill points. These accessories are only available to standard characters, so no equipping them on originals or altered standards.

Check out the “Skills” section of this guide for descriptions of every skill in the game.
Note: “S” class skills are not available to player characters.
Shave Damage C
Point Requirement: 50 Power, 20 Gauge
Style Level: 1
Description: Shave small amount of HP from opponent even if the attack was blocked.
Shave Damage B
Point Requirement: 70 Power, 30 Gauge
Style Level: 3
Description: Shave HP from opponent even if the attack was blocked.
Shave Damage A
Point Requirement: 100 Power, 40 Gauge
Style Level: 7
Description: Shave large amount of HP from opponent even if the attack was blocked.
Auto Counter C
Point Requirement: 60 Power
Style Level: 2
Description: Has a slight chance of turning an attack that lands on the opponent into Counter Hit.
Auto Counter B
Point Requirement: 90 Power
Style Level: 4
Description: Has a chance of turning an attack that lands on the opponent into Counter Hit.
Auto Counter A
Point Requirement: 130 Power
Style Level: 8
Description: Has a high chance of turning an attack that lands on the opponent into Counter Hit.
Auto Unblockable Attack C
Point Requirement: 80 Power
Style Level: 2
Description: Has a slight chance of turning the next high damage attack into Unblockable Attack.
Auto Unblockable Attack B
Point Requirement: 110 Power
Style Level: 5
Description: Has a chance of turning the next high damage attack into Unblockable Attack.
Auto Unblockable Attack A
Point Requirement: 140 Power
Style Level: 9
Description: Has a high chance of turning the next high damage attack into Unblockable Attack.
Knock Down
Point Requirement: Power 80, Special 30
Style Level: 5
Description: Increase Knock Down power.
Nullify Aerial Control
Point Requirement: 100 Power
Style Level: 6
Description: Opponent is unable to gain aerial control until after being attacked three times in the air.
Guard Breaker
Point Requirement: 90 Power, 40 Boost
Style Level: 3
Description: All high damage attacks are Guard Breaks for a set time by pressing A B K simultaneously during battle.
Nullify Counter C
Point Requirement: 50 Impact
Style Level: 1
Description: Has a slight chance of turning the opponent's Counter Hit into a normal hit.
Nullify Counter B
Point Requirement: 70 Impact
Style Level: 3
Description: Has a chance of turning the opponent's Counter Hit into a normal hit.
Nullify Counter A
Point Requirement: 100 Impact
Style Level: 6
Description: Has a high chance of turning the opponent's Counter Hit into a normal hit.
Auto Impact C
Point Requirement: 60 Impact
Style Level: 2
Description: Has a slight chance of performing an Impact when an attack is blocked.
Auto Impact B
Point Requirement: 90 Impact
Style Level: 4
Description: Has a chance of performing an Impact when an attack is blocked.
Auto Impact A
Point Requirement: 120 Impact
Style Level: 8
Description: Has a high chance of performing an Impact when an attack is blocked.
Impact Heal
Point Requirement: 50 Impact, 30 Gauge
Style Level: 3
Description: When an impact is performed, HP is recovered proportional to the strength of the impact.
Impact Edge
Point Requirement: 80 Impact
Style Level: 4
Description: When an impact is performed, damage proportional to the strength of the Impact is inflicted on the opponent.
Strong Impact
Point Requirement: 90 Impact, 40 Power
Style Level: 5
Description: When an Impact is performed, the next attack will turn into a Counter Hit.
Master Impact
Point Requirement: 130 Impact
Style Level: 7
Description: All Impacts will be Just Impacts,but it must be executed within a shorter timeframe.
Soul Repel
Point Requirement: 110 Impact
Style Level: 9
Description: Repel any attacks at any time except when in air by pressing A B K simultaneously during battle.
Hysterical Strength
Point Requirement: 50 Boost
Style Level: 1
Description: Stats increase inversely to the amount of Soul Gauge remaining.
Start Dash C
Point Requirement: 50 Boost
Style Level: 1
Description: At the start of battle, all stats are slightly higher for a set time.
Start Dash B
Point Requirement: 60 Boost
Style Level: 5
Description: At the start of battle, all stats are higher for a set time.
Start Dash A
Point Requirement: 80 Boost
Style Level: 8
Description: At the start of battle, all stats are much higher for a set time.
Will Power
Point Requirement: 90 Boost
Style Level: 2
Description: All stats increase when HP decreases to a set amount.
Soul Gauge Recovery C
Point Requirement: 30 Boost, 20 Gauge
Style Level: 2
Description: Increase the rate at which the Soul Gauge recovers by a small amount.
Soul Gauge Recovery B
Point Requirement: 40 Boost, 30 Gauge
Style Level: 4
Description: Increase in the rate at which Soul Gauge recovers
Soul Gauge Recovery A
Point Requirement: 50 Boost, 40 Gauge
Style Level: 7
Description: Large increase in the rate at which Soul Gauge recovers.
Alignment
Point Requirement: 50 Boost
Style Level: 3
Description: Stats increase or decrease depending on the opponent's alignment (Good/Evil/None).
Strengthen Horizontal
Point Requirement: 70 Boost
Style Level: 4
Description: Strengthen Horizontal Attacks while weakening other attacks.
Appeal
Point Requirement: 50 Boost
Style Level: 6
Description: Stats increase when fighting against the opposite gender and decrease when fighting against the same gender.
Hyper Mode
Point Requirement: 70 Boost, 30 Power
Style Level: 6
Description: All stats increase for a set time by pressing A B K simultaneously during battle.
Strengthen Vertical
Point Requirement: 60 Boost
Style Level: 7
Description: Strengthen Vertical Attacks while weakening other attacks.
Skill Ability Up
Point Requirement: 80 Boost
Style Level: 9
Description: Enhance the effects of a random skill by pressing A B K simultaneously during battle.
Soul Gauge Boost C
Point Requirement: 70 Gauge, 40 Boost
Style Level: 1
Description: Start with the Soul Gauge full.
Soul Gauge Boost B
Point Requirement: 80 Gauge, 50 Boost
Style Level: 3
Description: Start with the Soul Gauge full and slightly decrease the amount of damage to the Soul Gauge when blocking opponent's attacks.
Soul Gauge Boost A
Point Requirement: 100 Gauge, 50 Boost
Style Level: 5
Description: Start with the Soul Gauge full and decrease the amount of damage to the Soul Gauge when blocking opponent's attacks.
Soul Gauge Damage C
Point Requirement: 40 Gauge
Style Level: 1
Description: Small increase in the amount of damage on the opponent's Soul Gauge when an attack is blocked.
Soul Gauge Damage B
Point Requirement: 60 Gauge
Style Level: 4
Description: Increase the amount of damage on the opponent's Soul Gauge when an attack is blocked.
Soul Gauge Damage A
Point Requirement: 90 Gauge
Style Level: 6
Description: Large increase in the amount of damage on the opponent's Soul Gauge when an attack is blocked.
HP Drain C
Point Requirement: 60 Gauge
Style Level: 1
Description: When an attack lands on the opponent, HP recovers a small amount (proportional to the damage on the opponent).
HP Drain B
Point Requirement: 90 Gauge
Style Level: 3
Description: When an attack lands on the opponent, HP recovers a medium amount (proportional to the damage on the opponent).
HP Drain A
Point Requirement: 120 Gauge
Style Level: 8
Description: When an attack lands on the opponent, HP recovers a large amount (proportional to the damage on the opponent).
Soul Gauge Rate Up C
Point Requirement: 30 Gauge
Style Level: 2
Description: Small increase in the amount Soul Gauge recovers when attacking.
Soul Gauge Rate Up B
Point Requirement: 50 Gauge
Style Level: 4
Description: Increase in the amount Soul Gauge recovers when attacking.
Soul Gauge Rate Up A
Point Requirement: 80 Gauge
Style Level: 7
Description: Large increase in the amount Soul Gauge recovers when attacking.
HP Recovery C
Point Requirement: 50 Gauge
Style Level: 2
Description: When hit with a combo of 4 or more, HP recovers a small amount (proportional to the total damage of the combo).
HP Recovery B
Point Requirement: 70 Gauge
Style Level: 2
Description: When hit with a combo of 3 or more, HP recovers a medium amount (proportional to the total damage of the combo).
HP Recovery A
Point Requirement: 100 Gauge
Style Level: 8
Description: When hit with a combo of 3 or more, HP recovers a large amount (proportional to the total damage of the combo).
HP Burst
Point Requirement: 130 Gauge
Style Level: 6
Description: Recover HP by pressing A B K simultaneously during battle. Soul Gauge will gradually decrease after a set time.
Soul Gauge Vamp
Point Requirement: 100 Gauge, 30 Special
Style Level: 9
Description: Randomly decrease the opponent's Soul Gauge and absorb part of it by pressing A B K simultaneously during battle.
Switch Speed Up
Point Requirement: 80 Special
Style Level: 1
Description: Increase the rate at which Switch Gauge increases during AMB.
Auto Grapple Break C
Point Requirement: 30 Special, 30 Impact
Style Level: 1
Description: Has a slight chance of performing a Grapple Break when thrown.
Auto Grapple Break B
Point Requirement: 50 Special, 30 Impact
Style Level: 3
Description: Has a chance of performing a Grapple Break when thrown.
Auto Grapple Break A
Point Requirement: 70 Special, 40 Impact
Style Level: 7
Description: Has a high chance of performing a Grapple Break when thrown.
Double-Edged Sword
Point Requirement: 60 Special
Style Level: 2
Description: Increase the rate at which Soul Gauge gains and loses.
Nullify Ring Out C
Point Requirement: 40 Special
Style Level: 2
Description: Has a slight chance of preventing a Ring Out
Nullify Ring Out B
Point Requirement: 70 Special
Style Level: 4
Description: Has a chance of preventing a Ring Out.
Nullify Ring Out A
Point Requirement: 100 Special
Style Level: 6
Description: Has a high chance of preventing a Ring Out.
Venom Fang C
Point Requirement: 50 Special, 20 Power
Style Level: 3
Description: Additional small poison damage to a downed opponent. The poisoned state will stop when the opponent lands an attack or after a set amount of time.
Venom Fang B
Point Requirement: 70 Special, 30 Power
Style Level: 5
Description: Additional poison damage o a downed opponent. The poisoned state will stop when the opponent lands an attack or after a set amount of time.
Venom Fang A
Point Requirement: 100 Special, 40 Power
Style Level: 8
Description: Additional large poison damage to a downed opponent. The poisoned state will stop when the opponent lands an attack or after a set amount of time.
Magnet
Point Requirement: 75 Special
Style Level: 4
Description: Reduce Knock Down power on both sides.
Run Speed Up
Point Requirement: 70 Special
Style Level: 6
Description: Increase running speed.
Invisible
Point Requirement: 130 Special
Style Level: 7
Description: Become invisible for a set amount of time by pressing A B K simultaneously during battle.
Step Speed Up
Point Requirement: 70 Special
Style Level: 8
Description: Increase stepping speed.
Charge Cancel
Point Requirement: 150 Special
Style Level: 9
Description: Cancel the move when used while attacking the opponent by pressing A B K simultaneously during battle.
Algol - Defeat in Story Mode (using Astaroth, Cassandra, Cervantes, Darth Vader, Kilik, Mitsurugi, Rock, Setsuka, Sophitia, Talim, The Apprentice, Xianghua, Yoda, Yoshimitsu, Zasalamel, Angol Fear, Ashlotte, Kamikirmusi, Scheherazade, or Shura).
Amy - Purchase for 4000 Gold.
Cervantes - Purchase for 4000 Gold.
Lizardman - Purchase for 4000 Gold.
Rock - Purchase for 4000 Gold.
Seong Mi-na - Purchase for 4000 Gold.
Setsuka - Purchase for 4000 Gold.
Sophitia - Purchase for 4000 Gold.
Talim - Purchase for 4000 Gold.
The Apprentice - Beat Arcade Mode with Yoda (X360) or Darth Vader (PS3)
Yoshimitsu - Purchase for 4000 Gold.
Yun-Seong - Purchase for 4000 Gold.
Zasalamel - Purchase for 4000 Gold.
Angol Fear - Defeat in Story Mode (using Algol, Darth Vader, Kilik, The Apprentice, Zasalamel, or Scheherazade).
Ashlotte - Defeat in Story Mode (using Lizardman, Maxi, Rock, Sophitia, Talim, or Angol Fear)
Kamikirmusi - Defeat in Story Mode (using Amy, Cassandra, Mitsurugi, Tira, Xianghua, Yun-Seong, or Shura).
Scheherazade - Defeat in Story Mode (using Hilde, Nightmare, Siegfried, Voldo, Yoda, Yoshimitsu, or Ashlotte).
Shura - Defeat in Story Mode (using Cervantes, Ivy, Raphael, Seong Mi-Na, Setsuka, Taki, or Kamikirmusi).
Phantom Pavilion ~ See Saw - Acquire the Floor 14 treasure chest in the Tower of Lost Souls mode (perform 3 Guard Breaks).
Other Stages - Complete the Story Mode multiple times.
Equipment Set 1 - Acquire 5 Honors.
Equipment Set 2 - Acquire 10 Honors.
Equipment Set 3 - Acquire 15 Honors.
Equipment Set 4 - Acquire 20 Honors.
Equipment Set 5 - Acquire 25 Honors.
Leviathan and Voodoo Sets - Acquire 30 Honors.
Note: All equipment (and that includes equipment found in the ToLS treasure chests) are available for purchase once 30 Honors have been acquired.
Soulcalibur IV features a total of 50 honors/achievements. You can view the list of Honors under the Battle Records section of the Museum. On the Xbox 360 version, the Honors act as achievements, and each one that you unlock contributes a certain amount of points to your overall gamerscore. You can acquire a grand total of 1000 points by playing Soulcalibur IV.
 1. Start of a New Era
 2. Encounter with the Unknown
 3. Pursuer of the Secret
 4. Mystery of the Swords
 5. May the Force be with You
 6. War Veteran
 7. Hero on the Battlefield
 8. Legendary Hidden Treasures
 9. Never Ending Advance
 10. Tower's New Guardian
 11. Scorpion's Sting
 12. Smasher
 13. Iron Hammer
 14. Death on the Battlefield
 15. Like a Flowing Stream
 16. Lost in the Moment
 17. Quick Strike
 18. Swift Strike
 19. Mad Destroyer
 20. Violent Storm
 21. 10,000 Strikes of Proof
 22. Endure 1,000
 23. Water Moon
 24. Distance will not Betray
 25. First Step as an Artist
 26. Chosen by History
 27. Sharpened Teeth
 28. Equal Skill and Power
 29. Engraved into History
 30. World Class Fighter
 31. World Traveler
 32. Gladiator
 33. Unknown Swordsman
 34. Hero King
 35. Divine Punishment
 36. Reversal Wizard
 37. Phoenix
 38. Wandering Assassin
 39. Repel All Blades
 40. Numeric God
 41. Two Cannot Exist Together
 42. Gathering of the Best
 43. Observer of Souls
 44. Sword Hunter
 45. The Controller
 46. Wild Run to Tragedy
 47. Looter of the Battlefield
 48. Wandering Weapon Merchant
 49. Tower of Gold
 50. Transcend History and the World


 CoD Advanced Warfare Reckoning Exo Survival guide
 Axton Commando Head Locations- Borderlands 2
 Sequence 3 - Freedom of the Press: Assassin's Creed: Syndicate Walkthrough
 Review: Kentucky Route Zero
 Epic Mickey 2 Walkthrough