Unofficial Pokemon Black Guide by CM Boots-Faubert for
The massive Pokemon media empire that exists today began with a simple game that was based upon the childhood bug collecting hobby of a young Japanese boy. That boy -- Satoshi Tajiri -- began the journey towards empire building by founding a simple gaming fanzine (magazine) called Game Freak that celebrated the world of electronic and arcade gaming with the enthusiasm and heart of the true fan. Game Freak appealed to an entire generation of teenagers and young adults in the late 1980's who felt trapped within the iron-grip of a society that stubbornly clung to the rigid conformity-based social structures created by the reconstruction movement of post-war Japan. Despite intense pressure from family and friends, Tajiri chose to eschew the corporate path in favor of his own creative projects, the first of which being to self-publish his own magazine celebrating the two topics that gave him intense joy: electronic gaming and manga. It was through his magazine that Tajiri met and became close friends – and eventually business partners – with an artist and neophyte game designer named Ken Sugimori, a kindred spirit who shared the same vision and desires, and together the pair founded the video game development studio that they named after their magazine – Game Freak. Their new studio participated in creating games for established publishers Nintendo and Sega with some success – among these games were licensed titles such as Yoshi and Mario & Wario, but it wasn't until the pair created an early version of Pokemon – called Capsule Monsters – and shopped it to Nintendo, that the seeds were planted that would grow into the Pokemon empire. The first few times that Game Freak pitched Capsule Monsters to Nintendo the game was declined – although they saw the concept as interesting, Nintendo did not see commercial potential in it. It was not until new friend and eventual partner Shigeru Miyamoto re-pitched the game under its new name, Pocket Monsters, that the massive gaming giant finally took notice. With the project green-lighted and with plans to export it outside of Japan, Tajiri decided that a less confusing name was needed, and eventually settled on Pokemon. The word 'Pokemon' is an abbreviation of the words 'Pocket Monster,' from the English translation of the original Japanese words Poketto Monsuta, and represents in just three syllables what has become one of the most successful (if not the most successful) media franchises created in Japan. Any long-time fan of the series can tell you that the game started as a distinct and unique role-playing package, and while each successive generation was built around the unique image of the game that has been its legacy, each new generation was given graphical and image improvements that set it apart from the games it followed. With each successive generation new elements were added to the game, and each generation saw the launch of additional titles for the dominant console for their generation, with Pokemon games for the Nintendo 64, Nintendo Game Cube, and the Wii quickly following. Some of these games directly interfaced with the traditional portable versions, and some did not, but the one thing that they shared in common was the inclusion of the improvements introduced in the main series as visible elements, even if that was just the new types of Pokemon. When the fourth generation of games that released on the new Nintendo DS platform was in its PR flux long before the release of the games, there was talk about Internet connectivity, and a massive and meaningful expansion of the capabilities of the player-vs-player battling that has always been a core element of the series, but when Diamond and Pearl finally launched, that broad and open world was simply not present in the games. They did present the new Global Trade Station, sure, and never before had it been so easy to complete your Pokedex through trades – you could even trade with people you did not know and never would know via the anonymous and automated system of the GTS. But serious Trainers and fans longed for that open connection that would allow them to battle opponents from all over the world from the comfort of wherever they happened to be themselves. – The Culmination of Pokemon Black and White -- Pokemon Black and Pokemon White represent the culmination of everything that Pokemon fans have been waiting for, and even exceed expectations in so many ways. So much has been added to the games that it would take three times as much space to tell you about it as has been allotted for this section of the guide, but that will not keep me from telling you about the really important additions and changes, starting with the open battle system. Random Match The open battle system that we have been waiting for has arrived, and it is called Random Match. Part of the expanded GTS system – access to which is now available at any Pokemon Center rather than requiring the player to go to a specific building in a specific city – Random Match battles via the Internet and the built-in WiFi connectivity of the games is found on the second level of Pokemon Centers, the traditional destination for connectivity access in the games. Players can take their Pokemon and step into the special capsule and, with the help of the GTS system, participate in any one of a wide selection of battle types, including Single Battle (uses 3 Pokemon), Double Battle (uses 4 Pokemon), Triple Battle (uses 6 Pokemon), Rotation Battle (used 3 Pokemon), and Shooter Battle (uses 6 Pokemon in a Triple Battle scheme). The rules are simple: Pokemon Level 51 or above are lowered to Level 50 for battles, while those under Level 50 remain their current level; Trainers cannot have two of the same Pokemon or item in their team, and their Pokemon can only know 5th generation moves. Items that are not available in 5th generation (including certain berries) can't be used, and certain moves – like Sky Drop – are banned from play. Trainers have just two minutes to decide upon the moves that they will use in their matches, and the matches themselves can last no more than one hour. There are two modes available at present for Random Match battling – Rating Mode, which is the ranked mode of the game and as a result your battle stats are recoded by the server and included in the ranking system, thus establishing your rank over time, and Free Mode, which tracks your win/lose stat just for your Trainer Card, and does not retain the stat for the servers. The Global Battle Union is the official entity to which your stats in ranked battles are applied, and it is the GBU that will show the world – and you – just how you stack up. Each player starts off with a point value of 1500, and when they win or lose in a Random Match battle that score goes up and down accordingly depending on how well you have done. Alternate Forms The system of alternate forms for special Pokemon – most notably Deoxys and Rotom from the previous games – now includes a total of 9 Pokemon in its numbers. Although this is not exactly of core importance to the game or the story mode, it was so popular in the previous generations that expansion was thought to be inevitable. In Black and White Pokemon with alternate forms include Basculin, Darmanitan, Deerling, Deoxys, Giratina, Meloette, Rotom, Sawsbuck, and Shaymin. The method for changing to their alternate form varies with each of the Pokemon, and can be as simple as a move, or key item, or an item encountered in the game world. Of course all skilled Trainers will know what the mechanism is for their Pokemon, because that is part of what being a Trainer is all about! The Dream World It would be easy to tell you all about the Dream World, but it is so profound a new element of the game and the experience of it for the first time for any Trainer so intensely entertaining and satisfying that to do so would be a disservice to you! It appears in several different levels, and offers the Trainer not just the chance to level up their Pokemon in an alternate world, but also to do so as part of an adventure scheme that is at once familiar and yet strange! Still there is one element of the Dream World that I feel I am compelled to share with you now, because it is so important an element to the game, and because you will be relieved to hear of it after not encountering the expected Berry Patches in the Unova Region... Berries, as you likely have discovered, do not grow in Unova, and yet Trainers in the region have them, so where did they come from? The answer – as I am sure you have started to suspect – is the Dream World! You will have many reasons and many excuses for spending time in the Dream World, but perhaps the best reason of all is so that you can grow and find the berries you will want for your team. Special Events Events have always been an important part of the Pokemon series, though for the first three generations of games they were largely the domain of Trainers lucky enough to either live in Japan, or to live close to one of the key cities in the world where events tended to happen. The importance of being able to obtain the Pokemon that are traditionally obtained from events caused the folks at Nintendo to rethink this strategy, and over the course of the last two generations a new philosophy developed. The 3rd generation games saw the events taking place at easier to reach locations – like video game stores, movie theaters and special traveling events that appeared at Toys 'R Us stores and Walmarts, while the 4th generation games were the true equalizers, having been largely WiFi based. Pokemon Black & White start the 5th generation off with a plan similar to the last generation, with an emphasis upon WiFi distributed Wonder Cards, but this time around Nintendo is being proactive – so much so that the first event started with the release of the game! If you obtained your copy between March 6th, 2011 and April 10th, 2011 you could connect via the Nintendo WiFi Club/Connection (WFC) and obtain the Wonder Card for the Liberty Pass – which is your only way to obtain the Legendary Pokemon Victini! Nintendo has hinted that there will be at least ten WiFi events and perhaps more, but based upon the Japanese games we only know about five events so far – starting with the Liberty Pass event to obtain Victini, and followed by events to obtain the rare Pokemon Cubchoo, an egg that will hatch into one of three special Pokemon, an event to give Ash's Scraggy, and the one everyone is waiting for – the event to give Zoroark. Too Much to Cover You'll Have to Discover The changes and additions to the game are so many and varied that there is simply too many to cover here. But the joy in that is that you will discover each and every one as you play the game, from the Xtransceiver and the huge number of daily and weekly in-game events, to the Battle Subway and the new Combination Attack, there is so much to experience and so many surprises in store for you. Pokemon Black and Pokemon White are already being called the best and greatest Pokemon games ever – and there is good reason for that. Certainly they are the best in the main series, no question about it, though the example we have received here tells us that we can expect more innovation and expansion in the next game in the series, so best ever is perhaps premature. The fact that there are actually significant differences between Black and White – specifically geographical differences in addition to the expected population differences in version-specific Pokemon – means that for the first time in the history of the series, this generation is likely to be one that most Trainers feel the need to own both versions of, which means that battling and trading will never be easier than with these. Before we wish you happy adventures in this new region called Unova, we thought you might like to know a secret – if you look at the map of the region you get from your Mum in the game, and pay particular attention to the layout of the routes and towns, you may be shocked when you recognize that Unova is laid out like a city area that should be easily identifiable... If you cannot see it, go ahead and Google Unova Region... And now, happy adventures mate! You are about to embark upon the deepest and most satisfying Pokemon adventure in the series so far! If you have played any of the previous games in the series you have a pretty good idea about what is coming up -- but if you have not then this is all new to you, and despite all the great fun that we have had in playing all of the previous games -- it may sound odd -- but we actually envy you! You who are about to discover the world of Pokemon for the very first time, we salute you! Now that we have that out of the way it is time to get started, so do the following in this order: Step 1 -- Insert the cartridge Step 2 -- Turn on the Power Step 3 -- Watch the intro screens and, at the Start Screen . . . Hit Start! – An Official Welcome to the Unova Region -- The woman who has appeared on your screen is Professor Juniper -- the very first female hosting Professor of a Pokemon game from the main series. She's kinda cute for an old lady, but still, she gives you the traditional greeting of her name -- Professor Juniper -- and then tells you the same thing that they all say: 'Everyone calls me the Pokemon Professor!' Sit back and relax as the Prof walks you through the basic orientation speech, giving you just enough information to keep you grounded before she starts asking you for information -- like your name and sex. Once you provide that, it's Katy bar the Door time! First though she introduces you to your two best mates in the whole world -- Cheren and Bianca -- and tells you a very little about them. I can tell you more -- for instance Cheren is a level-headed and honest boy who tries to do the right thing but can be stubborn, while Bianca is a bit ditsy and is prone to acting rashly and impulsively without considering the consequences. They are both loyal and good mates, and you could do worse, that's all I am saying. Appreciate what you have then, right? Warming up to her subject, the Professor warns you that the moment you choose your Pokemon your adventure truly begins; if you do not grasp the significance of that yet, well, that is okay -- you will soon enough. The Choices We Make. . . The Professor sits you down in the darkened study, turns her back and closes the door to the other room. Rubbing her hands together she slowly walks towards you. 'I imagine that right now you are feeling a bit like Alice, tumbling down the rabbit hole,' she observes. 'I can see it in your eyes,' she nods. 'You have the look of a man who accepts what he sees, because he's expecting to wake up. Ironic that this is not far from the truth,' she smiles. 'This is your last chance,' the Professor warns, sitting in the chair opposite you. In each hand are two small objects that she now shows you; opening first one hand and then the other, as she leans closer to you, and shows you what she has on each palm. 'You take the Blue Pill, the story ends -- you wake up in your bed and believe whatever you want to believe,' she explains, holding the pill out to you in her left hand. 'You take the red pill, you stay in Wonderland, and I show you how deep the rabbit hole goes,' she admits, holding it out to you in her right hand. Naaaaah! Just kidding! You appear in the bedroom of your parents house in Nuvema Town, and your best mate Cheren comes barging in all excited because the Professor sent a gift package that contains a Pokemon for the three of you -- Cheren, Bianca, and you! Before we get too far into this, check out your room, mate! Nice! Bloody huge tele there, a flat screen no less, and a Wii, very nice. How long do you think you can keep it squared away like that mate? As that thought rolls off your brainpan in comes your other best mate, Bianca. She comes in all apology for being late, but I wouldn't get excited on that account -- I've known a zillion blondes in my life and I even married one, and I can tell ya fair dinkum mate, they're never on time. Ever. While you are all calm and easy Cheren gets on her, riding Bianca pretty hard. What's that all about mate? Ya think he likes her? That's how it looks to me, that's all I'm saying... Despite being something of a ditsy blonde Bianca is what you call an Alpha Sheila mate -- a real take-charge girl that one! She decides that you get first dibs on the Pokemon and hey, that's how it is! Works the same way in real life, though I don't know why... Still no complaints, it may be late but supper is on the table and it tastes good! You step over to that big box of Poke Balls and open her up -- inside as promised are three balls, each with a different type of Pokemon inside it. If you are new to the games this is pretty much standard -- they find a different way to present this choosing to you in each game but in the end the mechanism is the same -- though we've never had three new Trainers before, it has always been either you and a rival or you and a mate, not you and two mates, but hey, Black & White are the games of change, mate! So which one are you going to pick? The choices are: # 001/495 -- Snivy, a very intelligent Grass-type. Exposure to sunlight makes it faster. The numbers here may be a bit confusing at first, so while you make up your mind on which of the starters you are going to pick I'll explain them to you! Oh, but before I do that there is something that you need to be aware of -- you can only pick ONE of the three starters, and you will not encounter ANY of them as wild Pokemon that you can capture in this game. No, to obtain the other two for your Dex and your Pokemon Collection, you are going to need to find two mates (or strangers) who are willing to trade one of each of them to you. Your best approach to making that happen is to breed up some of the one you chose to offer in trade -- but more on that much later in the game. Right now we have other details to talk about! The Poke Dex Duty. . . One of the primary tasks of being a Pokemon Trainer besides capturing and training Pokemon is to assist the region's Professor in completing their Pokedex. The Pokedex is an encyclopedia of details and information about the Pokemon encountered in this and other regions of the world. You see mate, despite the fact that they know an awful lot about Pokemon there are still some aspects that they don't know, so they encourage every Trainer to independently build a Pokedex entry for each Pokemon they see. That way they can take all of the entries from every Trainer and compare them, looking for new information. Pretty cool system, right? The Pokedex is usually an electronic device that in addition to accepting notes from the Trainer, automagically scans every Pokemon you encounter -- and scans in great detail every one you capture -- recording the information it discovers. This data can be dumped by the Professor when they examine your dex, or uploaded by you via the regional Internet from PC's found in Poke Centers and other buildings. Ir is also a very useful tool for you as a Trained, allowing you to look up Pokemon you battle to see what their types are, along with other information that can help you choose the strategy you will use in battling them! The two numbers that start off each of the listings are the Unova (local) Region Pokedex number, and the National Pokedex number -- so conversely Sinvy is the first Pokemon in the Unova Pokedex, but the 495th in the National Dex. You do not actually have access to the National Dex data right now -- and you will not have it until you have beaten the Pokemon League Champion and completed a few other minor tasks -- but the thing is, because having both numbers is really important at different points in the game, as it makes the guide more valuable and useful to you, we will be listing them both for each Pokemon you encounter in the game just like we did above. Something you should remember about this -- the numbering scheme for the National Dex can actually tell you what region that a specific Pokemon is from. Try to memorize this simple table and you will always know what the origin region is for a particular Pokemon without having to look it up! * The game key for the listing above is found in Appendix B near the end of this Guide. Now you already know that Snivy is numbers 001 and 495 respectively, which means it is in fact NOT the first Pokemon in the Unova Region after all! No indeed, the true 'first' Pokemon in the region is actually a Legendary Pokemon called Victini, who oddly enough is recorded as #000 in the local Dex. But you are not supposed to know that -- or anything about Victini yet mate, though I am telling you about him now for a reason. If you acquired the games between the official release date (March 6th 2011) and the official cut-off date (April 10th, 2011) you can obtain Victini right away as part of the Early-Adopters Program put on by Nintendo. Look inside the game case your game came in and you will see, on top of the manual and a flier for Club Nintendo, an insert that tells you how to obtain Victini. If this is missing or you lost it, no worries mate! In a little while I will direct you to skip ahead to one of the Appendixes to manage getting this done, but for now, just keep reading this section of the guide! Note that when you begin the game, the current real life month will effect what season you start playing the game in -- it is not a one-to-one match, meaning if it is Winter outside the window of your home in the real world that does not necessarily mean it will be winter in the game! So if you start the game and the game season does not match the real world eseason, nothing is wrong, it is supposed to be that way. The Choice is Made . . . Congratulations mate -- you have chosen your starter, and that is all that is required to officially make you a Pokemon Trainer in the Unova Region. As to which one you chose, well, there are no 'wrong' choices here. Each of the three is about equal in its powers and effect, and each has its own unique strengths and weaknesses. Each will make an excellent mate and partner, and each will win or lose based upon the combination of their abilities and your abilities. If you make the right decisions in battle and outside of battle, properly train your Pokemon, and see to their health, you cannot have made a bad decision -- it is as simple as that! Now that you have all chosen your starter Pokemon, Bianca immediately insists that you must have a Pokemon Battle -- after all, you are now Pokemon Trainers right? And what do Pokemon Trainers do with each other? Why, they Battle of course! You cannot argue with that logic though Cheren tries to, cautioning you that battling inside of a house is never a good idea. Convinced that the Pokemon are too weak to actually cause damage to your room, Bianca eggs you on, and hey, be honest mate, this is not all on B -- you *want* to battle! And so you do. You should win this battle pretty easily if you stay on the offensive as Bianca likes to go for weakening your defense level. That this is to her detriment never crops up in the conversation I am afraid. The new Battle System in Black & White is different than that of the previous games at leasts in appearance -- though the basic mechanism is unchanged. What was surprising was the amount of motion that is part of the process -- in the previous games this extra animation was absent! The controls emphasize use of the touch screen over the traditional buttons -- but that is not a big surprise really. You can still use the buttons combined with the D-Pad to fight the battles though, and in fact while you are battling why don't you select the 'Pokemon' option, and then your Pokemon snf 'Summary' to get an early look at its Dex information. You can also check out its moves -- why not? It turns out that Cheren was right, and after the battle you discover that your room has been hard done-by in the process. Well, since it is wrecked anyway, you may as well battle Cheren next, right? After the battle ends you have picked up some XP and some prize money, you are back in full control of the game, and now would be an excellent time to save! You can save anytime, anywhere, you do not have to be at a save point to do it -- just hit the Good on ya mate! Your first pair of battles are now behind you, you have gained a level or two on your first Pokemon, you should be feeling pretty good about now! You could hang around looking at your destroyed room all day long but no, the Professor mentioned that she wanted to chat you three up, so you really should be headed towards her Lab now, right? Having torn up your room right proper it is time to head downstairs and face the music -- but your mates are ahead of you there, and like any good mates, they are willing to fall upon their own swords to deflect the blame off of you! It turns out though that this is not really necessary -- your Mum and Da were both young Pokemon Trainers once, and your Mum remembers what that was like. It turns out that she pretty much was expecting you to trash your room and have your first battle right there, inside, like clockwork. Why it would not surprise me to learn that she did the very same thing when she was your age! Your mates apologize and leave, telling you they'll meet you outside of the Lab, and you are left alone to chat with your Mum, and after sharing her pride in you your Mum heals your Pokemon, and then reminds you to bring your 'cross-transceiver' -- or Xtransceiver -- with you before you leave. We will call it your XT for short from here on -- and your XT is a wristwatch-like device whose function we have yet to learn. In fact this is the first we have heard of the tiny device! -- The XT -- If you thought this was the in-game phone, well, you are close on, because it IS an in-game phone of sorts, but it is not a phone your character uses to call other characters like the Professor or their Mum -- it is a phone that you use to call your real life mates who play the games! Using it and the DSi's mic (the XT requires you to be using a DSi not a DS) you can have a conference call of up to four local Trainers, or a single call with one remote Trainer via the Internet. Now how cool is that?! -- Back to the Game -- After we drop the XT into the Key Items pocket of our bag, Mum reminds you that you need to thank Professor Juniper for her generous gift of a Pokemon. Before you take off look around this level of your home -- see the glowing TV? If you check it you will discover that today's episode of Koukan Talk is showing! This show teaches you basic phrases so why not broaden your language ability and learn some Japanese? Today's phrase is 'Ichiban suki na Pokemon wa?' -- Ii-chee-ban su-kee nah po-kay-mo-n wah? -- and how about that? You can now ask a question in Japanese! -- Before You Leave -- Before you leave there are a few minor things we should do, starting with pulling up the Main Menu by hitting the X-Button now! You have five selections available to you -- Pokemon, Your Name, Options, Bag, and Save. Start with Save -- you will be prompted to confirm that yes, indeed, you want to save -- and shown information about your current game state including your current location (Nuvema Town), the number of Gym Badges you have (Zero), The date and time, and icons representing your current team members. Go ahead and save now! Pokemon -- takes you to the Party Menu, at which you can select the members of your party to read their stats and condition, change their order in the party, give and take Items, and via the Summery Screen alter the position of their moves. At the moment you only have the one Pokemon, and no changes are required, but have a look at the different screens anyway! Your Name -- Selecting this first shows you a graphical screen that depicts the Gym Leaders you have fought, and the Gym badges you have won! Hit the A-Button to view your Pokemon Trainer Card -- literally your license to be a Pokemon Trainer! There are actually two sides to this card -- front and back -- and you change between them by pressing left or right on the D-Pad. On the front of the card is your Name and Nature, wallet balance, and your Greeting Phrase. To change the phrase simply tap it on the touch screen and you will be shown the different words and phrases that you can pick from. Hitting left and right on the D-Pad loads sample phrases that you can then complete the details for to make this easier for you -- check some out, maybe one of these is more appropriate for you than the bog-standard greeting that is there now? The back of the card contains your Trainer ID Number, The elapsed time that you have been playing, and the date that your Adventure began! The large white box is there for you to sign your name to the ID using your DS stylus -- if you do not like your signature, tapping the pencil icon will change it to the eraser icon, and you can delete what you wrote and try again! Options -- Allows you to alter the game settings. The only thing that I needed to change was the Text Speed, which by default was set to MID but I wanted it set to FAST -- so I changed it. You can also turn battle animations on and off, set the battle style, change the sound fidelity, and the IR save setting but I suggest you leave that last one alone. Bag -- The last option on the menu, and though there is nothing much to see there, go ahead and choose it anyway. The main (Items) pocket of the bag is empty, as are the Medicine, TM & HM, and Berries pockets, but the Key Items pocket has the XT in it! One last matter -- if the date is between March 6th and April 10th 2011 go to Appendix A now! -- Out and About -- You should notice that as the game loads you are told what the season is -- there are seasons! That is a new feature! In fact the land looks different and you often see different effects depending upon the season -- also very spiffy! You step outside of your house and see the large sign below and to the right... It is the official Welcome Sign. After you read that go ahead and chat up the people that you meet as you walk around. The building to the northwest (the one Cheren is standing in front of) is Professor Juniper's Lab -- why not go and have a chat with him now? It seems Bianca has not arrived, and Cheren suggests that you head over to her house to see what is keeping her? Why not? Bianca lives in the house on the southwest end of town -- Cheren lives in the house on the southeast side -- so head over to Bianca's and go inside. She is having an argument with her Da that clearly you are not meant to witness, but there you have it. He does not want her going on this Pokemon Adventure with you and Cheren it seems -- but when you chat up Bianca's Mum you get a different story... As you have finished all that you need to do here, go ahead and walk back to the Lab, where you find that both of your mates are now waiting for you. When you talk to Bianca she asks you to keep what happened at her house a secret. Clearly her Dad is frequently abusive in that fashion, and equally clear we were not supposed to know about it. Cheren probably does not, so let's keep it that way.

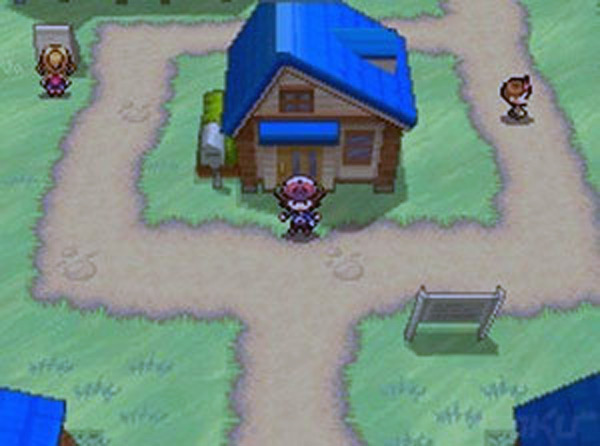
Your journey begins from a 3D-centric Home 
The Dreamworld is where berries come from 
The Region is based upon a real world city
01: The Adventure Begins

The Three Starter Pokemon
# 004/498 -- Tepig, a classic Fire-type who can bring on the heat.
# 007/501 -- Oshawott, a typical Water-type prone to defensive slashing.The National Dex Numbering Scheme
- - - - - - - - - - - - - - - - - - - - - - - - - - -
001 - 151 = Kanto Region (GR, RD, BL, YL, GL, SL, CR, FR, LG)*
152 - 251 = Johto Region (GL, SL, CR, HG, SS)
252 - 386 = Hoenn Region (RU, SA, EM)
387 - 493 = Sinnoh Region (DI, PR, PL)
494 - 649 = Unova Region (BK, WH)
02: Exploring Nuvema Town
The Official Mission Assignment Ceremony
-- Juniper Pokemon Labs --
We enter the Lab together and find Professor Juniper waiting for us in the back. As we approach she launches into a very formal speech about herself and this very important event. She tells you her name again -- confusing Bianca for a moment -- and then tells you what it is she does, which is the study of how, when, and why Pokemon exist.
Next she asks you if you would like to give your new Pokemon a name -- and of course you do! After you decide on the name and enter it, Cheren guesses that the next thing that the Professor wants to tell us about is the Pokedex. This surprises the Professor -- but if she really knew Cheren, she would not be all that surprised now, would she?
Professor Juniper explains in some detail the situation with Pokemon and the Pokedex, and your part in all of it, and then asks the big question: will you three endeavor to adventure throughout the region, and in the process, each complete your Pokedex?
Of course the answer is yes! Even if Bianca's Dad is being a total knob, you have to go -- it is a rite of passage after all for all young kids in the lands of Pokemon! If you did not go your friends and neighbors would forever point at you in the street when you passed by, saying 'Weirdo!' Just kidding...
With your agreement, a very happy Professor passes out brand new Pokedex units to each of you, and then requests that you meet her at Route 1, where she will show you how to capture a Pokemon properly!
Route 1 is the major north-south route out of town, and its entrance can be found in the northeast side.
- - - - - - - - - - - - - - - - - - - -
Route 1 Area Pokemon Report
Dex No.     Pokemon Rarity   Season   Capture Note
#010/504   Patrat                  (C)        All         Grass
#012/506   Lillipup                 (C)        All         Grass
#013/507   Herdier                 (U)        All        Grass (Past Water)
#037/531   Audino                 (C)        All         Shaking Grass
#056/550   Basculin               (C)        All          Surf/Surf Spots
- - - - - - - - - - - - - - - - - - - -
Note: At the start of each new section where there are wild Pokemon you will see the Pokemon Report (like the one above). This lists the Unova Dex Number, the National Dex Number, name, rarity, the season that the Pokemon is active in, and the method required for trolling it up. Because you will be using this guide after you complete the story mode and obtain the National Dex to finish that off, the Report often contains Pokemon that you actually cannot obtain during the story run -- only after you have the National Dex. I list them here anyway so that you have the complete list to assist you later when you are filling in your Dex.
Capturing Pokemon Explained
After leaving the Lab your Mum is waiting for you outside -- she has a present for each of you in the form of a Region Map that shows all of the towns, routes, and special areas. This is of particular value to you mate, you will use it a lot -- so tell your Mum thanks!
You follow Bianca and Cheren to the start of Route 1, where Bianca and Cheren are waiting for you. As you approach Cheren tells you that Bianca wants to symbolically begin your journey with all of you taking that first step onto Route 1 together -- that actually sounds pretty cool, doesn't it?
After you take your first step together, you take the next twenty or so and arrive at the tall grass where the Professor is waiting for you. After the greetings are over, the Professor provides you with a practical demonstration of the capture of a Pokemon -- trolling the tall grass to scare one up, battling it to weaken it, and then finally, using a Poke Ball to capture it and make it your own!
I should point out that while some Pokemon do have to be weakened -- mostly Legendary ones -- for the most part whether or not you capture one is purely luck. 99% of the time I capture them without bothering to weaken them or apply a stat down to them, I just start the battle by throwing a ball. You can do it either way, though statistically I think my way uses up more balls. I am just saying.
Professor Juniper gifts each of you with 5 Poke Balls, and then tells you that she will wait for you in the next town ahead -- which if you check your map you will see is actually Accumula Town! Before you can even take a step to follow the Prof Bianca announces that she has an idea...
A contest between you three to see who can capture the most Pokemon on the way to the next town! Whoever has the most Pokemon when you reach Accumula Town is the winner.
-- The Grasses of Unova --
One of the differences between this and the previous generation of games is in the grass -- specifically there are two types of grass that can be found on some routes -- normal tall grass (or 'short' tall grass) and high tall grass (or 'tall-tall' grass). When both are present, the taller of the tall grass contains higher level wild Pokemon, and the two grasses can contain different Pokemon types even though they are in the same place, on the same route. Often to obtain a specific Pokemon you have to go to one or the other types of grass.
multiple-opponent battles can be encountered in the second type of grass, and in addition you can encounter special spots in the grass that contain 'shaking' grass. The shaking grass is the only place you can obtain certain Pokemon -- that is indicated in the Pokemon Report for that area, so check that. The shaking grass areas are a random spawn -- which means that they may not be there or in that spot when you come back.
The special shaking grass spots are part of a spawn system in the game, and there are similar spots on the other types of ground and water -- specifically you can encounter dark patches of water, dust clouds in caves, and shadows in caves, on bridges, and in other areas -- each of these special spots (including shaking grass) can contain an item, or a harder to find Pokemon. As a general rule when you see one of these spots it should be exploited.
Wild Double Battles are possible in the special plots -- and if you have one, and you want to capture one of the Pokemon in it, you will need to KO the other first, otherwise you cannot capture.
-- Back on the Route --
You can troll the tall grass here and the next patch ahead for wild encounters to capture some Pokemon -- if you end up needing yours healed, remember that your Mom can heal them -- simply return to your house and talk to your Mum to have her heal our team!
At a minimum you should be able to capture a Lillipup and a Patrat even if you lose a ball or two but try not to waste balls right?
Just past the first patch of tall grass is a boy who confirms that the tall grass is where you want to be for wild encounters -- and in the next patch of grass on the right is a girl who will ask after your Pokemon's HP and then gift you with a healing Potion!
Make sure you save after each capture -- that way if you lose too many balls you can load up and start over. Once you have captured your two new types of Pokemon and added them to your team you may want to level your entire team to Level 7 or 8 now to save some time... At least level your starter until they get their first Level Move -- which is Ember in the case of Tepig, which unlocks at Level 7.
Past the first patch on the left is a water section of the route -- but you cannot go there yet, you need the HM for Surf first.
If you decide to level your team up you may notice that the higher you are above the Pokemon you battle the less XP you acquire for winning. That is not an accident! Each Pokemon you battle has a base level of XP it can give, but the amount of that you get has everything to do with the level of the Pokemon you are using for the battle. An opponent that has a base XP rate of say 200 may only give up 15 XP to you if you are four levels higher than it, but it may give you the entire 200 XP if you were four levels below it. Those numbers are just an example, not the actual ratio -- just to give you an idea of how it works in this generation.
Past the third patch of tall grass Cheren and Bianca are waiting for you -- so once you have captured the Pokemon you want to, and leveled your team up if you plan to, hook back up with them and continue the journey!
-- The Contest Results --
When you hook back up with Cheren and Bianca she will ask if you want to compare numbers -- you do and you probably win too. Either way it leads to Cheren giving you a mini-tute on your Dex and then the XT rings! Yeah, it turns out that it not only functions as an external comm device, it works as the in-game camera phone as well...
The person calling is of course Professor Juniper -- and you now have your first four-way call! How about that?
The Professor tells you that she is in front of the Pokemon Center in town and urges you to hurry up so she can show you around town. Well? What are you waiting for?! Hurry up!
If the scenery change was not indication enough, the change in background music should tell you that you have entered a town. There is a sign on the raised area to the right as you head north that says 'Accumula Town -- The Fast-Growing Town!' and just past that is the Pokemon Center and Professor Juniper.
She takes you inside for a tour of the Pokemon Center -- and man does the inside of this place look different from those of the previous games or what?! I was really surprised at the change of perspective, but then I remembered that this game is 3DS enhanced, so it only makes sense to give some depth to the interiors, right?
Bianca joins you at the counter where Professor Juniper introduces you to Nurse Joy, and you learn that you can have your team healed here. The Prof has you hand your team over to be healed as part of the tour -- you do that and then you get the nickel tour of the Pokemon Center PC.
Part of the PC orientation includes the fact that at the moment you do not know who invented the Pokemon Storage System -- traditionally that is something you discover in the game as part of your adventure, and it is nice to see that the old traditions are being maintained in the new game.
The next stop is the counter on the right -- and shock! It is the Poke Mart Counter?! In the new game the Pokemon Center is also the Poke Mart?! Well heck I guess that is cool, it will save us time I suppose.
The Prof tells you that you can sell any unneeded items to the clerk, and of course you can purchase kit and supplies as well. She tells you to look up an inventor named Fennel when you make it to Striaton City -- make a mental note of that, right?
That concludes the tour, and Professor Juniper departs. Now on to a special item...
If you received the Wonder Card called the Liberty Pass -- or you have a different Wonder Card in your case, you will see on the left a bloke in a special uniform, holding a package. That is the delivery bloke -- and you should step over and chat him up now! Watch the video for this section of the guide to see what I am talking about!
The Five Cent Tour
-- The Poke Mart Counter --
As with the previous games there can be more than one clerk, and when there is, they each sell a different stock of items. In this case the bloke closest to the entrance sells a variety of mail items, while the other bloke sells regular Poke Ball and Potions.
Obviously we can use gobs gobs of both -- but right now we do not have the scratch to buy gobs, we only have enough to buy a few. You should have around $4000 on you now if you have been following the guide -- that is enough to purchase 10 Poke Balls ($2000) and 6 Potions ($1800) leaving $200 left over for just in case money!
Note that I suggest that you buy 10 Poke Balls -- as with the previous games, if you buy your regular Poke Balls ten at a go, you get a free Premier Ball as a bonus. The Premier ball is somewhat rare ball that has been specially made to commemorate an event of some sort according to its description -- it pretty much functions the same as a regular Poke Ball, so look at it as buy 10 get 1 free!
So we now have 13 Poke Balls, 1 Premier Ball, and 7 Potions. Good for us! That is a great start on building up our kit!
If you have the Liberty Pass you will notice that its description makes clear that it is a pass for access to a ship that will take you to Liberty Garden -- a special area you can only reach by ship from Castelia City -- but to use it you also need to have two Gym Badges and a load of Poke Balls, because the Legendary Pokemon it will take you to is not going to be caught easily! More on that later...
-- The Pokemon Center PC --
Now that we have finished with our shopping why not take a better look at the PC?
Switching it on gives us the main menu -- Someone's PC, Our PC, the Professor's PC, Help, and the Off Button are our options. Let's go with selection one -- Someone's PC.
– Someone's PC --
This is where we will store our extra Pokemon -- basically every one but the six we have on our party. It has its own menu -- Deposit, Withdraw, Move, Battle Box, and Move Items.
Whenever I am manipulating my Pokemon I tend to use the Move Pokemon selection since it pretty much allows you to do both deposit and withdraw at the same time. Move Items is just what it sounds like, the means for taking and giving items to the Pokemon stored in the boxes. And speaking of the boxes...
If you select Move you will go into Box view and see that there are presently 8 boxes here named Box # -- for now we should better organize this by designating the box functions -- so first thing you may want to do is select Box 1 and change its name to 'A-Team' (minus the quotes). You can change its wallpaper if you like, but strictly speaking that is not really required.
Next change to Box 8 and change its name to 'Incoming' and then Box 7 to 'Outgoing' so you now have the three important boxes defined. You can name the others as you like -- I just leave them as is myself, as they are where my extras and collection will go.
A-Team is where the Pokemon will go that represent my active team and its alternates, while Incoming is the box I always exit the PC on, so that any Pokemon that are sent to the PC are in that box, and I know they are new. Outgoing is where I put the Pokemon I plan to trade with other trainers or other game versions that I own.
The other selection from the main menu is Battle Box -- if you select that you will get the view of the main boxes but with the Battle Box Tab in the lower left corner. Selecting that gives you six slots to place your Battle Team -- the team of Pokemon that you will use to battle other real life Trainers.
Since we do not have a team to put there, this is fur future reference -- but it is good to know, right?
When you exit the boxes be sure that you were on the Incoming Box so that any new Pokemon beyond the six in your party go there!
-- Pokemon Center Second Level --
Up here are the desks for the Union Room, the Arena and the Lobby, as well as the globe that allows you to interact with the Nintendo Global Trade Station -- but none of these actually work at the moment. There are a few things you have to do before they will work -- but we will return to this subject later in the guide to cover it in working detail, alright then?
Now would be a great time to save your game mate!
-- The City Proper --
Now that we are done in the Pokemon Center, head outside and you will overhear two Trainers commenting that something is happening in the Plaza -- go ahead and follow them!
You hook up with Cheren there -- and you see a group of costumed people are lined up in the Plaza! Their leader -- Ghetsis -- begins to talk to the crowd: he tells you he is from Team Plasma and that he is there to speak with you about Pokemon Liberation.
As you watch he begins to spout his rhetoric about the Liberation of Pokemon, about how they are the same as humans, and that Trainers are enslaving them. After he delivers his message they gather into ranks and march off, banners in hand.
After the crowd disperses a bloke names N comes to you to ask if you can hear the Pokemon talking -- you give him the bug eye, and he introduces himself. N seems to be slightly bent mate, and before you know it, he has forced you into a battle!
He has a Level 7 Purrloin, and he knows how to use it. Still you should be able to beat him anyway mate, plus you have potions now. If you win that is around 100XP and $700 reward, so not too bad.
Cheren tells you he is going to go on ahead, as he aims to battle the Gym Leader in the next town as soon as he can. His plan is to become the League Champion -- but then that is our plan too so he has some competition...
Head back to the Pokemon Center to heal and save, and then explore the rest of the town.
-- The Rest of Town --
Back near where we entered the town there is a set of stairs leading down to a building - inside there are a bunch of Trainers you can talk to, and upstairs there is a pair of newlyweds you can say hello to. Check out the program on their TV before you leave and head back up the stairs to the street.
Just past the Pokemon Center is a set of stairs leading up to a scenic overlook, and in the distance you can see what looks like a pair of treasure balls! Up here is a Trainer you can chat with, and another building, this one has some musicians who will play music for you.
Back down in the street you can chat up the old man -- who shares his wisdom -- then check out the next building, which has Trainers who will give you pointers and advice. Next door is another building, and the other Trainer out front will tell you about Love and Affection. Inside this building is more of the same, except upstairs is a bloke who will give you a Poke Ball!
There is also a little girl up there who will play Rock-Paper-Scissors with you... Except this is a game that teaches you which Pokemon types are strong and weak in relation to each other -- and if you do not know what those are, this is a good game for you to spend some time playing so you can learn it!
-- Accumula Gate --
At the end of the road is the city gate, and inside is a large information board that you should spend some time gawking at now! It will tell you things like:
-- Striation City is nestled in the forest and the breeze smells like trees.
-- Next to the City is a Day Care, which many Trainers visit.
You will get other information like the weather and news, and the suggestion that the Pokemon School is a good place to learn the basics -- and it is!
The exit on the other side leads to Route 2 -- if you are ready to go there (and you are) why, go ahead! It is a great chance for us to catch some new Pokemon!
Route 2 is a north - south route that connects Accumula Town to Striation City and Dreamyard.

- - - - - - - - - - - - - - - - - - - -
Route 2 Area Pokemon Report
Dex No.     Pokemon       Rarity     Season     Capture Note
#010/504    Patrat       (U)         All        Grass
#012/506    Lillipup     (C)         All        Grass
#015/509    Purrloin     (U)         All        Grass
#037/531    Audino       (R)         All        Shaking Grass
- - - - - - - - - - - - - - - - - - - -
As you exit the gate you will see some Trainers ahead -- why not say hello to them and ... Wait... You are getting a phone call! Answer it! It is Mum!
Her call is brief because she just did it to get a GPS fix on you mate -- turn around! There is Mum! Whoa she is good!
Oh lovely wonderful and good Mum! She has a prezzie for us! Running Shoes! Oh how did she know that was just what I wanted?! Good old Mum!
The Trainer to the north is on the other side of a ledge so we cannot get to them -- the one to the west has some sage advice for us -- I don;t know about you but Mum saying we were all alone ans all made me rather sad... Sigh. Ah well, it is our adventure after all! So what do you say we hit the tall grass and maybe grab the treasure ball hidden up there in the grass? Yeah! Good idea!
Being able to run now means that we can actually find shaking grass -- as it appears most often when you are running past the grass and sometimes through it. There are a few Pokemon we do not have here, so let's make a point of capturing them now, shall we? Come see me when you have them all and are ready to move on to the north again, right?
Did you get a Potion from that treasure ball? Yeah, me too!
Trolling for Shaking Grass
As you exit the tall grass above the Trainer there attacks! Youngster Jimmy has a Level 7 Patrat which I am sure you made short work of, and the Trainer above him tells you how to avoid battles. The bloke by the ledge below teaches you about ledges -- awful nice of him that. On the road east tho is a girl Trainer who wants to battle!
Lass Mali has a Level 7 Purrloin that is not too big a challenge for you. Besides you can use the XP and money mate, so don't feel bad about stomping that girl's kitty!
More ledges ahead force you into the tall grass -- and another Trainer Battle!
Youngster Roland has a Level 7 Lillipup, but the battle feels like taking candy from a baby...
The grass here is a good place to catch your own Purrloin tho, so do that. Head back to town to heal and save as needed, right?
Catching the Purrloin is pretty easy, but to get an Audino you have to get Shaking Grass to spawn. You do that by running near tall grass... But as you cannot actually make him appear until after you get the first Gym Badge... Now is not the time :)
Head for the Town when you are ready -- but when you get to the other side of the second grass patch look to the east -- see the path around the grass here? Remember the pair of treasure balls we saw from the scenic overlook? Yes sir, this is where they are! And since they contain a Potion and a Poke Ball what do you say we grab them now? Excellent!
Just as we approach the end of the route Bianca shows up -- and she wants to Battle!
It's OK though, her team is Level 6-7 so no hoohoo here mate. She pays off decent XP and another $700 so it is all good. After the battle the entrance to Striation City is just ahead...
As you enter the city pop in to the first building on the right -- a bloke here will give you a Great Ball, which is an improved version of the standard Poke Ball. You can chat up the other Trainers and watch TV upstairs. When you leave pop into the building next door to chat and learn from the kid blocking the stairs that you have found the house that Fennel -- the Professor's friend -- lives in. Sadly you cannot pay your respects just now.
Head outside and south to the corner of the building across the street and walk along the back side of the fence here to find a treasure ball with an X-Speed hidden among the trees.
Back to the street and north and you will see ahead and to the right is the entrance to the Dreamyard -- more on that in a bit -- and the building across the street with the bloke out front is the Gym -- more on that in a bit as well!
Head west past the Gym and visit the Pokemon Center to heal and save, and chat up the Trainers here to learn important things -- like the more badges you have the more items shops will have in stock! The clerk closer to the door sells mail AND Heal Balls -- a special Poke Ball that instantly heals the Pokemon you caught it with, allowing you to battle with them without having to heal at a Poke Center first. Sweet!
The other Clerk has just Potions and Poke Balls at the moment, so when you are done shopping leave and then visit the Trainer's School next door to learn all about stat issues by reading the blackboard in the rear of the school.
Cheren is here at the board, and tells you that you just missed the leader -- then asks you to battle. Why not? His Oshawott is Level 8, and it has an Oran Berry to heal itself in battle! His Purrloin is Level 8 as well, and at the end he pays $800 so not bad indeed. Cheren gives you some Oran Berries as an extra reward -- cool of him but where did he get them from?
Take a quiz on stat items from the bloke on the right to win a Full Heal -- nice!
After you leave chat up the people in the street as some important info is gained that way... The Trainers in the house to the south tell you about the GTS, Badges, and give training advice. So far all of the trash cans have been empty --- just saying...
The nearby welcome sign reads 'Striation City -- Three Stand Together as One!' and the west exit of town loads to a park with topiary and a fountain. Your way north out of the park is blocked by a guard who requires you to have a Gym Badge to pass by.
A Trainer in the park tells you about TM's -- there is a second Trainer but you need Surf to reach them mate. That is all there is to see here so head back into the City. You are going to want your entire team trained to around Level 10 before you face the Gym Leader, so why don't we check out the Dreamyard now? I hear that some Trainers use that to level their teams...
-- The Dreamyard --
As you enter the Dreamyard the first thing you encounter is a trainer battle – auspicious beginnings!
Your battle with Lass Eri features a pair of Level 8 Purrloins, while Youngster Joey has a pair of Level 7 Patrats and a Level 7 Lillipup.
The third Trainer by the entrance gate is not there to battle – instead he asks what Pokemon you started with – and then offers you a Pokemon of an opposing type to make your team a bit more effective. In my case as I chose Tepig he offered me a Pansage, a Grass-type Pokemon. If you started with the
Oshawott you'll receive a Pansear, which is a Fire-type, and with Snivy a Panpour, which is a Water-type. These are a trio of elemental monkeys – a diverse set as they say in the trades. No matter which you get they make a decent addition to your team, though to be honest their attacks at Level 10 are not as high as the those of the rest of your party – though as this little guy levels up that changes.
Inside the gate you will see that the buildings here are practically falling down, and there is a treasure ball nearby on the ground that you will find an X-Defend in. Through a hole in the wall you will glimpse another treasure ball, but it is out of reach at the moment.
This is as far as we can go at the moment, as we need Cut to remove the tree blocking another hole in the wall near the entrance, and the path to the south is blocked by a pit.
You now have a team of five Pokemon – or you should – and you should have them all leveled to a minimum of 10 by now, and as the highest you'll face in the Town Gym is Level 14 you should probably train your team up a few more levels – but you do not actually have to.
The reason I say that is that the free Pokemon you got in the Dreamyard will be resistant to their designated type, and also have a strong attack versus it, so if you use the rest of your team to take out their non-type Pokemon, your free one should make really short work of their Level 14 strong-type. The one thing you absolutely must NOT do is use your starter against it!
So either do it that way, using the free Pokemon from the Dreamyard, or go ahead and level your team to a uniform Level 14, it is your call. Personally I see it as a coin toss since you are going to need to level the team to 15 or 16 after the Gym Battle anyway – but after you will have Cut outside of battle so you will be able to get into the Dreamyard back area, where leveling is a lot faster.
The Three Leader Gym Battle
– Striation City Gym –
The City Gym is right next door to the Pokemon Center, and as you approach you will see the Gym Leader waiting outside. Chat him up and he will inspect your team, note your starter, and then head inside to await your battle.
As you enter the gym you will be approached by a cool dude named Clyde who is wearing black shades and who gives you a free bottle of Fresh Water – which if you played the previous games you know is a healing item! Free healing items! Say yeah! There is one of this bloke in every Gym so be sure to take advantage of that later, right?
Anecdote: In all of the previous games there is a bloke at the entrance to each Gym who old school Trainers call the Gym Greeter – though he did not always greet you. In most of the games he actually does and provides useful information, like the type of Pokemon favored by the Gym Leader. These guys and their free healing item though are much better than a simple greeting... I am just saying.
The inside of the Gym is decorated like some sort of twisted cafe – and the girl behind the counter will tell you that they decorate for the Trainer but what she really means is that curtain in the back, which has a Pokemon Type symbol on it. The trick here is to choose the most effective opposing symbol on the floor, but you already figured that out, right?
If you read the sign on the pillars you will learn that the Gym Leaders are Cress, Chili, and Cilan, and that there are no Certified Trainers – yet. Wonder where your two mates are? Clearly they have not completed this Gym Battle yet...
– Into the Gym Proper --
Picking the correct symbol causes the large curtain to open, which gives you access to the first area and Assistant Gym Leader (AGL) Battle. If you are confused or do not know the opposing types, water over fire, fire over grass, grass over water will work for you.
Your first AGL Battle is with Waiter Maxwell, who has a Level 11 Lillipup. If you run into trouble here remember that you want to use a Pokemon that does good physical damage (not bite) or elemental damage and you should take it down easily.
After the battle if you took casualties or are low on health, do a quick run to the Pokemon Center and get your team healed up, then save before returning to face the next AGL.
Waitress Tia is your next AGL Battle, and she comes with a Level 10 Patrat who will use Bide to KO you. Her second Pokemon is a Level 10 Purrloin that uses Sand Attack and Assist (which gives her access to any move known by a party member, so you may be facing Bide again). Their third attack is Growl, and she uses them in combination pretty well. Her last attack is Scratch of course, but you should be able to take a few of those no trouble...
Again after the battle if you took some hurt, head next door to heal and save.
Inside the final area is the main stage, where the Gym Leaders await – the gimmick here is that each of the Leaders specializes in one of the three main types, so you are going to face the one that is strong versus your starter. Pretty cool, eh?
Once they choose who you battle (the one in the center closest to you) walk up and begin the fight. Regardless of who you face, there will be a Level 12 Pokemon that is NOT their main-type sort, and a Level
You need to be careful to follow the 25% Rule in Gym Leader Battles – never damage their Pokemon below 25% health, or they will automatically use a potion to heal it. You want to get it as close as you can to 25% but not under, then use your strongest move to KO it in one go.
The next Pokemon is going to be their designated type, and will be Level 14. Simply change over to the free Pokemon Monkey you picked up in the Dreamyard, and you should easily beat it.
After the battle ends you receive your very first Gym Badge – the Trio Badge – possession of which will allow you to fully control Pokemon up to Level 20, including ones you received in trade. He also gives you TM83, Workup as a reward.
On thing you should be aware of about TM's in this game – they USED to be destroyed when you used them, but they are now treated like HM's, and can be used over and over!
– Doctor Fennel --
When you exit the Gym Fennel is waiting for you – follow her to her lab where she will give you HM01 Cut – thought you would get that from the Gym Leader, didn't you? Nope, works a bit different in this game.
After she gives you Cut, she asks you for a favor – if you will obtain something called Dream Mist from a Pokemon called Munna in the Dreamyard. Well, as we are going there to level and explore anyway, why not?
The little girl by the bed is Amanita, the tech who maintains the Pokemon Storage System, and she will explain the Battle Box to you in some detail if you ask her and tell her that you are not familiar with it...
The PC next to the bed is a Pokemon Center Unit, so you can access all three of the PC's from it, and you now know who the person is that controls the Storage System, so now you will see her name when you access the PC's! That was way faster than the same quest in the previous games, let me tell ya!
Another new feature in the game are the special bookshelves that will give you a tip if you “read” them – the yellow pair behind Amanita is that sort, so go click on them and you will learn about the C-Gear, and the name of the scientist in the Kanto Region who invented the Pokemon Storage System!
After your visit with Dr. Fennel head back to the Pokemon Center to heal and save, then check out the new and expanded selection at the Poke Mart counter! While regular Poke Balls should be sufficient for most captures it would be an idea to have 5 Great Balls just in case you run into a more powerful and difficult to capture Pokemon... Now is a good time to grab those and maybe a few stat-correcting utility sprays as well.
Before we head over to the Dreamyard there is a short side-trip we are going to take. You should have already visited the Pokemon Center to heal and save and stock up on some kit – so your team should be rested and ready! You should have five members on your team now – and now that you have obtained your first Gym Badge, you have unlocked the ability to spawn special tiles like shaking grass, shadow tiles, and the like.
These spawn randomly as the result of you running in or near the areas that they can spawn in – and for use, at the moment, that means tall grass! So head south back to the top of Route 2, where as you can see there is plenty of tall grass, and run along the edge of it back and forth until you spawn a shaking grass tile. This tile will only disappear if you end up in a battle, so try to approach it by the shortest route to it as possible to limit the possibility of a wild battle on the way to it – and walk, don't run.
When you step on to the shaking grass tile you will automatically trigger the encounter with a special Pokemon! In this case at the top of Route 2 that will be a Audino – what looks like a cross between a teddy bear and a pig to me. Our goal here is to catch it – so battle to weaken it and then capture it!
That completes all of the wild Pokemon that we can have captured up to this point, so there will be no backtracking to Route 1 as it is not necessary.
Collecting Treasure Balls
– On to the Dreamyard --
When we were here before all that we could do was battle one Trainer, and get the free Monkey Pokemon from the other, but now that we have Cut we can actually enter the back and main sections of the yard! So if you have not already done so, teach Cut to your designated HM Mule.
A Note on HM Mule Use: Because HM's have so poor an impact compared to other moves, it is generally a good idea to stick as many of the most-often used ones as you can on a single party member, like Cut, Strength, etc., so that you are not mucking up the move sets of your battling members. Surf and the other Water-type HM's are the exception to this rule, as they are actually useful in battle, so just teach those to your Water-type.
- - - - - - - - - - - - - - - - - - - -
Dreamyard Area Pokemon Report
Dex No.     Pokemon      Rarity     Season    Capture Note
#010/504    Patrat       (U)        All       Grass
#015/509    Purrloin     (C)        All       Grass
#023/517    Munna        (R)        All       Grass
#024.518    Musharna     (R)        All       Shaking Grass
#037/531    Audino       (C)        All       Shaking Grass
- - - - - - - - - - - - - - - - - - - -
After you enter the Dreamyard and use Cut on the tree your mate Bianca appears, asking you if you are looking for mysterious Pokemon as well? She heads through the hole in the wall that you just cleared open, As you walk past her she hears a sound – and suggests that you two investigate it.
This is something of an area on a rail as there are not a lot of options for pathing here – head inside the broken down warehouse and you will see a pink Pokemon ahead – that is a Munna – and as you approach it starts to run away and is accosted by some baddies – you know that they are baddies because baddie music starts playing!
They want the Munna to produce Dream Mist – and as you watch Bianca asks who they are, and you learn that the are goons from Team Plasma. Of course they are! They reveal all of the details of their nefarious plan to use the Dream Mist to convince Trainers to release their Pokemon, and then comes the battle – you knew there was going to be one right? Oh, and Team Plasma steals Pokemon from Trainers they defeat, I am just saying.
– Team Plasma Goon Battle --
The first goon leads with their Level 10 Patrat – the second with their Level 10 Purrloin – really? One Pokemon each and it is low level? Umkay.
If you lost to them I am no longer speaking to you, are we clear on that?
After the battle their leader Ghetsis appears, the two grunts panic and run away, and then Ghetsis disappears. At which point a Musharna appears, and Dr. Fennel runs up! Man this place is really Grand Central Station today!
The two Pokemon drop Dream Mist in a treasure ball, the Doc takes the ball, tells you to drop by later and leaves, and you are no worse off than you were before and likely a Pokemon Level up, so cheers!
Now you can see that there are treasure balls around here, and several directions that you can go in, so first head west (left) and grab the ball on the ground that contains a Poke Ball, then head back to the east (right) and up the stairs on to the shattered roof, to grab the treasure ball with the Potion in it. Now head past the stairs staying on the roof to the east and gran the treasure ball with the Repel in it, and then back to the ground and directly south to the wall where there is a treasure ball with a Paralyze Heal in it.
– Musharna and Munna --
You now have all of the treasure balls in this area of the Dreamyard. If you run around in the tall grass here you can capture a Munna, then run next to the grass to trigger a shaking grass in order to get a Mushama as well, nicely wrapping up the wild captures for this area! Good on ya mate! It may take way more than a few tries though, as Audino is the more common spawn. I counted my troll and I ended up battling 18 Audino before I got my first Musharna
I should note that the Audino you face while looking for Musharna are worth fighting as they give substantial amounts of XP and you can level off of those alone pretty well! Bearing in mind that the next Gym includes Pokemon that push our limit of control – there are Level 18 and 20 Pokemon in it – so we will need to get our entire team close to Level 20 before we arrive there and now is as good a time to begin training as any.
Once you have trolled up your Musharna from the shaking grass it is time to troll up a Munna from the tall grass. There is no need to train your team to close to 20 right here, as there are other Routes we have to travel down to get to the next Gym so don't look at it as a pressure point – anything around Level 15 as you leave is perfectly acceptable.
– Dr. Fennel --
Right then, you've captured the pair of rare dream Pokemon so at this point there is nothing left to keep you in the Dreamyard for now – you cannot get to the other area of it, so now it is time to head back to town, hit the Pokemon Center to heal and save, and then pay another visit to Dr. Fennel's Lab!
While you are at the Center, if you used up a lot of kit and particularly Poke Balls, go ahead and replace them now.
When you talk to the Doc she is very happy – the Dream Mist you got for her allowed her to complete her experiment and as she can now collect save files from other Trainers (really?) she rewards you with a set of C-Gear, which finally enables all of the WiFi and Communications functions of the game.
Note: C-Gear is active WiFi, which means that it does have a hit on the battery in your console and should be treated like any active cellular and wireless connection – meaning that in hospitals and on airplanes it should be disabled. They do tell you that in the game...
The Doc explains Game Sync to you – an interesting feature – and then Amanita gifts you with a Pal Pad, so not only does the WiFi link now function, you can actually add your mates and trade and battle with them as well!
You may as well try out the Game Sync feature by tapping the Online section and following the instructions now. Next time you visit the Pokemon Center the Union Room, WiFi Club, Global Terminal, and Geonet will now be available and functioning! Next time you start the game you'll notice that two new options are present on the Start Menu: Battle Competition and Game Sync Settings.
– Quick Side-Trip --
From Dr. Fennels Lab head south around the bed and you will see that tree that blocked the side path that we could do nothing about before – but now we can Cut it! So why not?
Head in and grab the Super Potion from the treasure ball in the first area to the south, then continue west to grab a Great Ball from the treasure ball there – and you are done for now! How cool is that? Two free balls just for cutting down a tree! Wait, was this a union job? Oh man, we don't have a union card, we better get outta here!
Heading west out of town you find yourself in a park – in the south section over the bridge you will find a Great Ball inside a treasure ball. The Trainer running around the fountain will tell you about TM's, The guard at the gate to the north will block you from entering Route 3 if you have not yet obtained the Gym Badge – but as you have, he will not stop you, and you enter Route 3!
- - - - - - - - - - - - - - - - - - - -
Route 3 Area Pokemon Report
Dex No.      Pokemon     Rarity   Season   Capture Note
#012/506     Lillipup   (R)       All      Grass
#015/509     Purrloin   (R)       All      Grass
#025/519     Pidove     (U)       All      Grass
#028/522     Blitzle    (C)       All      Grass
#037/531     Audino     (C)       All      Shaking Grass
- - - - - - - - - - - - - - - - - - - -
As you head north and reach the turn in the road you'll see Trainers and buildings up a short flight of stairs. First thing first, stick with the road and head west to battle the two Trainers here – a Twins Battle with Trainers Kumi & Amy, who have a pair of Level 10 Purrloin. This should be a cake walk for you, as your team should be around Level 15 at this point if you are following the guide.
Continue west until the road splits, at which point you will be stopped by Cheren, who will engage you in battle as you both have now obtained your first Gym Badge! Cheren has a Level 14 Oshawott, which is a Water-type so you should use your Monkey to battle it. He follows with his Level 12 Purrloin, and the battle is over. It is a good idea to use two different Pokemon for this so you spread out the XP.
After the battle a pair of Team Plasma Grunts run past you being chased by Bianca and another Trainer – they have stolen the other Trainer's Pokemon it seems. Cheren runs ahead to the cave entrance – you do not follow him though, as we have a few things to do here first.
In the tall grass above where you and Cheren fought is a treasure ball with a Super Potion – grab that now. You should be able to quickly capture a Pidove here – and as you want a flying type to add to your team, that works out well! Go ahead and troll up a Blitzle while we are here and capture that, and you have obtained all of the Pokemon we can get on Route 3!
Backtrack to the stairs and head up to the cluster of buildings – this is the Pokemon Daycare Center – and outside there are some Trainers to battle. First you fight Nursery Aide Autumn, who has a Level 10 Lillipup, followed by a Level 10 Munna. Next is Preschooler Doyle with a Level 10 Panpour, followed by his mate Preschooler Wendy who has a Level 10 Pansear. In the far corner is Preschooler Tully who has a Level 10 Pansage.
Inside the red roofed building is a girl who will heal your team – do that – and then talk to the girl to the right if you want to learn about doubles battles.
The building with the dark green roof next door is the Day Care Center – inside you will find a networked PC to use, and of you want, you can drop off a Pokemon to be leveled here. Basically any Pokemon you leave here will gain levels for x number of steps you take in the world. When you return to claim them you pay a fee based upon the number of levels they gained. For now we do not need to do this, but it will come in handy later when you want to level up some of your lower level Pokemon to get their other forms, or you want to breed.
Breeding Pokemon is a whole other matter – read the Appendix entry on breeding later to learn about it if you do not already know how it works!
Right now though we want to access the PC – which is why we came in here. This will save us a trip to town basically, as there is something we want to do, that being alter our team. At the moment you have a bunch of Normal-type Pokemon, your starter and the opposite type Monkey. We have picked up some better team members though, so why not rotate them in now so we can quickly level them to the team level by using the shaking grass method?
So, we access the PC, and our new team is something like this:
(1) Your Starter
(2) Your Monkey Pokemon
(3) Pidove (Normal/Flying)
(4) Purrloin (Dark) HM Mule
(5) Blitzle (Electric)
(6) Some Other Pokemon
The 6th Pokemon could be Audino or one of the other Normal-type that you have – which does not really matter as they are basically the place-holder for your other archetype. In my case, that will be a Water-type, as I have a Grass-type Pokemon (my Monkey was the Pansage), and of course I started with the Fire-type Starter, Tepig.
Obviously we are missing the third archetype, but the important thing is that our team is now better balanced! You could use one of the Pyschic-type that we captured in the Dreamyard, but the thing about those is that they are inherently slow, which means they hardly ever hit first, which means they start battles by taking damage. They can be effective once you level them up, but it is your call if you want to try to complete the process while you are building your main team. I chose not.
With the new team in place, head to the tall grass above where we had our battle with Cheren and troll up shaking grass to quickly level your new team members to Level 15 (or whatever your current team level is). AFTER you complete that process, return to the Red Roof building and heal up, then save, and THEN join Cheren at the entrance to the cave!
Before you talk to Cheren and go inside, head north then east where you will encounter Pokemon Breeder Adelaide, who has a Level 9 Patrat, and Level 9 Lillipup, and a level 9 Pidove. After you beat her she gives you an Oran Berry, and then you head south to the treasure ball in the tall grass and grab the Repel from it.
Now it is time to join Cheren and enter the cave!
– Wellspring Cave --
As you enter you will notice two things – a treasure ball to the south, and the pair of Team Plasma Grunts to the west. Chances are very good that within the first few steps you will trigger a wild encounter – and it will be a wild Pokemon you do not have :)
- - - - - - - - - - - - - - - - - - - -
Wellspring Cave Area Pokemon Report
Dex No.    Pokemon      Rarity     Season     Capture Note
#033/527   Woobat       (C)        All        Cave
#030/524   Roggenrola   (C)        All        Cave
#035/529   Drilbur      (C)        All        Shaking Dirt
- - - - - - - - - - - - - - - - - - - -
I find that the Roggenrola and the Woobat are about equally as common – and while they are not necessarily Pokemon we want for our team – you may I don't know – they are ones we need to add to our Pokedex and collection, so we may as well get them before leaving the cave. I replaced my 6th with Roggenrola because I feel it is a better place-holder, as it is a Rock-type.
It is a bit hard to spot but the treasure ball is actually on the wrong side of a ledge, so you cannot get it right now. Go ahead and battle the grunts – they have the Level 12 Patrat they took from the Trainer girl, and you defeat that easily. After that though another pair of grunts appear, and you have the Doubles Battle that I thought we would have with the first two.
You and Cheren face the two new Grunts, who each have a Level 12 Patrat. During Doubles Battles remember that AOE (Area of Effect) moves like Air Cutter and some stat-impacting moves will actually effect both of the opposing Pokemon, so this is a good place to use those types of moves.
They lose, and so they give back the stolen Pokemon – and Cheren takes it and heads back to return it to the girl, leaving you on your own in the cave. Now that is OK, because we have some stuff to do here, but if you took serious hurt in the battles you may want to return to the Daycare Center to heal and save...
Either way, we have to do two things – troll for the Pokemon here, and for the special Shaking Dirt spots. The thing about that is, to get the Shaking Dirt spots we have to run, which will naturally troll up wild encounters faster. You can fight them all if you like, but once you have the two Pokemon from the wild encounters, running from them makes more sense. Your call either way. You should be aware though that in addition to the shaking dirt spots you spawn through running, you can also find shaking spots while walking that have special items in them rather than Pokemon – like Dark Gems.
Trolling for Shaking Dirt
If you return to the Daycare Center to heal up, you will be stopped at the branch in the road by Bianca and the girl, and she will give you some Heal Balls as a reward for helping her.
Heal Balls are a special Poke Ball that automagically heals the Pokemon you capture with it and are really only useful if you do not have a full team, since if you do, the Pokemon you capture is sent to the PC, where is heals as a routine part of that process. That being the case, save these for when you plan to go out with a smaller team and want to be able to field the Pokemon you capture in the process.
After you capture the three Pokemon in the cave head back to the Daycare Center to heal and save, and then use the PC to once again adjust your team if you want to... Wither Roggenrola or Drillbur can become the 6th team member for now – at least until we find a dual-type to replace them.
You can also replace your Pidove if you like, as the Woobat is Flying and Psychic types, while the Pidove is Normal and Flying – personally I kept the Pidove as I am not real wild about Psychic-types to begin with, but this is your call. Either way if you swap in a new member or members, you will need to use the Shaking Grass trick to level them to the current team level, so go do that now if you need to, and once you are done, head back into the cave.
Back in the cave head west to the pool of water then south and up the stairs, continuing east where you will grab TM46, Thief, from the Treasure Ball we could not get to earlier. This wraps up everything that we can presently do in the cave, so head back to the junction in the road where we fought Cheren earlier – if you need to heal, do that before we head south at this junction in the road.
– Back on Route 3 --
You'll encounter School Kid Al who has a Level 13 Blitzle, then grab the Antidote from the treasure ball in the Tall Grass.
As you round the corner Cheren is waiting to tell you about the special Dark Tall Grass spots that spawn wild doubles battles – something new for the game in this gen. You don't actually have to do one right now, but if you do and there is a Pokemon that you want to capture in it, be aware that you have to KO one of the pair of them first in order to capture it.
Standing in the center of the road to the south is School Kid Marsha who has a Level 13 Woobat. On the bridge ahead is School Kid Gina who has a Level 12 Patrat, and a Level 12 Purrloin.
Backtrack to the start of the bridge and go into the tall grass south then west to find a treasure ball with a Great Ball, then head across the bridge and south into the grass for another treasure ball that has an Awakening in it.
Around the corner is School Kid Edgar, who has a Level 12 Pidove, and a Level 12 Roggerola. A few steps further along the path and you enter the gate to town – inside you can pause a few moments to watch the news ticker to catch the weather and a brief about your victory in the Gym Battle! If you chat up the people here you will get some advice and a short but rather pointless quiz, and that wraps up the gate and this section, as you have arrived!
As you enter town Cheren is waiting for you – and asks you to come with him. He shows you where the Pokemon Center is and gives you some Chesto Berries – what a mate! He tips you that the Gym Leader here uses Normal-type Pokemon and suggests you use Fighting-types against it... And that is actually really good advice that we will be following!
So first thing first, hit the Pokemon Center to heal and save, and then chat up the Trainers here for some tips. Drop by the Poke Mart Counter to re-supply (the Mail Clerk has Net Balls if you can afford them), being sure to restock any kit you used and get more Poke Balls. After that it is time to explore the town!
From the gate the first warehouse is Loblolly's, an interior decorator. The second warehouse has a pair of Trainers on the ground level who will offer observations, and up one level is a Trainer who will trade a Petilil for a Cottonee – which we don't have right now but mark this down for future reference.
The first warehouse past the Pokemon Center is a shop that sells X-Items and Battle Utilities. There are TV's in some of the warehouses that you can watch if you like, just to keep current, right? On the second level are a pair of Trainers who will offer comment on trading with items.
The next (and last) warehouse on the main street is a good stop for you – the Trainer on the left as you enter will give you a hold item for your Starter that will help boost its power. Just talk to her and answer her question to get it.
Heading back to the first cross street and then north, check the east warehouse to meet a bard and a poet, then head down the street past the Gym/Museum (the marble building) and drop into the Cafe Warehouse for a moment, and chat up the Trainers and staff inside for more tips. Outside on the patio is an accordion player – sadly he does not take requests.
Now head over to the Gym/Museum just to take a quick look around and get a minor task out of the way.
– N Battle Number Two --
As you go to enter the Gym you run into N, who wants to battle you again!
He leads with is Level 13 Pidove, then his Level 13 Tympole, and finally his Level 13 Timburr. If you use your Blitzle it is three one-hit battles. By the way, Blitzle is an Electric-type Pokemon, and those work pretty good vs. Normal-types too. I am just saying.
After the battle N talks about needing the Legendary Pokemon Zekrom – which is the first we are hearing of it... Hmmm...
At this point you have to decide how you are going to proceed – whether you are going to face the Gym Leader now (your team should be a mix of Levels 16 and 17 at this point) or whether you are going to take my advice and properly prepare yourself for this battle. You can do it either way, but if you run in and try now you are going to get wiped.
OK, so now let us prepare for this battle by adding a Fighting-type or two to our team, shall we?
Take the upper road to the west and you will leave town for the Pinwheel Forest!
– Pinwheel Forest --
As you progress up the road you will see a Trainer by the side – stop and talk to her to get TM94, Rock Smash, and then chat up the next Trainer for a hint. Read the nearby sign – you do have Antidotes right?
South of you is another Trainer and, when you chat them up, they ask if you are going deeper into the Forest or to the challenge rock? Then we battle them! Nurse Shery has a Level 15 Munna, and it is actually a pretty strong opponent! After the battle she heals our team – and though we cannot answer her question, the answer is no to both as we are where we want to be – at the first patch of Tall Grass on the Route!
- - - - - - - - - - - - - - - - - - - -
Pinwheel Forest Outside Area Pokemon Report
Dex No.     Pokemon     Rarity     Season     Capture Note
#025/519    Pidove      (U)        All        Grass
#037/531    Audino      (C)        All        Shaking Grass
#038/532    Timburr     (U)        All        Grass
#041/535    Tympole     (C)        All        Grass
#044/538    Throh       (R)        All        Shaking Grass
#045/539    Sawk        (R)        All        Grass
#050/544    Whilipede   (R)        All        Dark Grass
- - - - - - - - - - - - - - - - - - - -
It would be easy to simply grab one of the Pokemon from the wild and then head for the Gym, but hey, since when is easy important? We are here, they are here, so why not catch 'em all? Come on! We gotta! Catch 'em... All! So don't stop until you have them all – see you in a bit mate!
Remember that Nurse Shert can heal and revive so if you get your peepee slapped go see her!
After you catch a Timburr, Rtmpole, Throh, and Sawk, follow the inside of the fence east to grab the Ether from the treasure ball hidden by the fence there. Backtrack out and head to town to use the PC in the Poke Center to swap out your place-holder for one of the Fighting-type you just captured – or two if you like (that would be a bit of insurance) – before returning to the tall grass to level it/them up to your team's level.
What I did was to swap my Audino out for the new Tympole – which is a Water-type – because that is the final major archetype that I needed for my team – if you did not choose the Water-type starter than you may want to do this as well. Finally I temporarily swapped out my Pidove for the Throh just for the upcoming Gym Battle.
Now head back to the tall grass and level up!
Instead of trolling head further into the grass to battle Preschooler Juliet, who has a Level 13 Cottonee, and a Level 13 Petilil. Preschooler Homer has a Level 14 Roggenrola. At the east end of the tracks is the treasure ball we saw earlier – grab the Great Ball from it now.
Take the south path and battle Youngster Keita, who has a trio of Level 13 Tympole. Head all the way south then west to grab the treasure ball with a Super Potion, then grab the Antidote from the treasure ball northeast, then battle Youngster Zachary who has a Level 14 Venipede, and a Level 14 Lillipup.
Head up the stairs to the east and battle Battle Girl Lee who has a Level 16 Timburr, then Black Belt Kentaro who has a Level 16 Timburr. Head down the stairs and grab the Net Ball from the treasure ball before jumping the ledge and returning to the first patch of grass where you can finish leveling up.
Once you have that managed it is finally time to head over to the Gym and win your next Gym Badge!
A Trail of Bookshelves
– Nacrene City Gym --
Right then, as you enter you will notice that this does not look much like a Gym – but that is because this part is actually a Museum! Talk to the clerks at the left counter to learn that and where the Gym proper is, and the clerk at the right counter to learn that this is where you should bring any Fossils you find in the game.
The Assistant Director gives you a very brief tour of the Museum – he only hits the high points so you may want to check out each exhibit before heading into the Gym proper. In addition to the tour he tells you that he is the husband of the Gym Leader as well – good to know?
After you take in the sights return to the rear and enter the Gym area you'll be surprised to see it consists of a large collection of Pokemon books! After the Gym Greeter gives you a Fresh Water – gotta love that – he tells you that all of the Trainers use Normal-type Pokemon, that they are weak versus Fighting-type Pokemon, and you can obtain those in Pinwheel Forest!
We already knew that, but hey, way to betray your Gym Leader mate!
He goes on to explain that this Gym features a sort of puzzle based upon answering questions from the books found in it – and that the first book you will need to read is one called Nice to Meet You, Pokemon.
As you step forward thinking you will be reading a book soon School Kid Carter (AKA Bookworm) steps up to you and pulls a knife, grabbing your arm and screaming 'Die Nazi Scum!' God, wouldn't that make this so much more exciting? Sigh. But no, what he does is challenge you to your first AGL battle – with his Level 17 Patrat.
After you handily beat him with one of your regular team members, you should head over to the first shelf on the left and go up the ladder to read the book that the Greeter mentioned, Nice to Meet You, Pokemon! It is a fairy tale about a little boy who met a Pokemon for the first time in his life. Just as the story starts to get good you notice a memo page sticking out of the back of the book, and sure, you could have finished the story mate, but oh no! Not you! You had to go and read the bloody memo, didn't you?!
It reads: 'Pokemon Trainers! I am the Gym Leader, Lenora! I hid four memos in this Library. Each of them has a question. Can you solve the questions and come find me?
'Now this is the first question!
'Q: What is the first Pokemon you met in this Gym?
'The hint is... on a bookshelf in the middle row! Now try to find it!'
Right then, cannot be any clearer than that can she?
The next shelf on the left has a book called The Biology of a Patrat. And what do you know, that is the first Pokemon we met in the Gym thanks to Bookworm! So we should read that book, right mate? And on the back is another memo!
'As I thought, that question was easy. Well, this is the second question!
'Q: Flame burns inside its body, and it gives off smoke from its head while it runs... What is this book?
'The hint is... Somebody may be reading it.'
Right, well we have been following the left side of the Gym since we started, and the blokes who come up with this stuff tend to be consistent fellows, so next we should chat up the AGL in the last shelf on the left – who fires back with the clue we are following and tells us that she is reading a book called The Structure of a Locomotive.
Fits the clue just fine, so yeah, I believe that book is the best answer to the question – and it is!
Of course you know what this means, right? Our next AGL battle, that is what!
Scientist Satomi has a Level 17 Herdier, which actually is not a bad Pokemon for a Normal-type...
After the battle she climbs down to allow us to access the book – and reading it reveals another memo! You were not expecting anything else were you?
'It's impressive you found this place! That's what I'd expect from a challenger like you! Well, this is the third question!
'Q: If you heat it up in a pot, it'll be delicious. What is it?
'The hint is on a bookshelf closer to the entrance than here.'
That would be the first bookshelf on the right as we enter – but if you took a beating at all from her it may be an idea to go heal up and replace any kit you used – I am just saying, you have a battle coming up and if your team is down a few members you should fix that.
As you climb the ladder and read the book you find the book Sweets for a Pokemon – and that sounds about right! The next memo says:
'Did you manage to get here without being tricked by the questions? Now this is the last question!
'Q: From this bookshelf... Move two backward, move one to the left, move two forward, move one to the right, and move one backward... Now, where is it?
'The hint is... Find it yourself!'
Right – you can try to decipher that but they are not telling you what to move, are they? Well, the things you are moving are shelves – and she is using the ones on the wall as part of that to add to the confusion – but if you follow those directions you end up at the second shelf on the right side, where the next AGL – a little girl – occupies the ladder!
She asks you a simple question – Can you challenge the Gym Leader if you win against me? The answer is Yes.
Your next and last AGL Battle is with School Kid Lydia – the girl on the ladder – who has a trio of Level 15 Lillipup for you to put the beat-down upon!
After the battle ends you climb the ladder to read the book, triggering a hidden switch that causes the shelf to slide to the side and reveal a set of stairs leading down to the actual battle area and the Gym Leader's office.
If you need to heal up head to the Pokemon Center and do that now, because this Gym Leader Battle is not going to be as easy as you think – sure her first Pokemon will be a decent match, but the move set and abilities of her clean-up Pokemon might give you some trouble...
When you are ready head down to face her, and you will find Lenora waiting for you.
She has a Level 18 Herdier that should not be too hard to handle, but it is her Level 20 Watchog that will give you the most trouble if you did not take my advice and grab a Fighting-type Pokemon from the Forest and level it up.
If you did, you may find that the move Vital Throw can be a one-hit kill on this one. I am just saying...
For beating her you get $2400 and the Basic Badge. Now all Pokemon up to Level 30 will obey, even those obtained by trade. She gifts you with TM67, Retaliate, and just when everything seems settled her husband Hawes comes running in!
It seems that Team Plasma is upstairs and trying to steal bones form the Museum!
It seems that they want the skull from the large dragon exhibit – and they steal it right before your eyes, as promised!
You run outside to find Lenora talking to Burgh, Castelia City's Gym Leader. About then Bianca and Cheren put in an appearance – was wondering where they were – and everyone is pressed into service to capture Team Plasma.
You follow Burgh into the Forest while Bianca and Cheren stay there to guard the Museum and Lenora searches the town. Bianca gives you a Dowsing Machine as you are about to leave – a key item that reveals hidden things.
Burgh leads you inside the Forest – not the part we were at before mind you – and asks you to take the twisting path while he follows the road and blocks the exit. Before you do that – there are Trainer Battles ahead – step back outside of the Forest and chat up the Nurse from before to heal your team, and then save the game, right? Now that you have taken care of that small chore, step back in the Forest and begin to follow the path.
Before we head along the path, there are some Trainers ahead on the road that are conveniently close at hand, so why not deal with them now?
School Kid Sammy has a level 17 Munna, and Lass Eva has a trio of Level 15 Woobat, and both give some nice XP to start off our adventure on!
A Theft in the Museum
-- The Twisted Path --
The path begins to the west of the road, so after you take on the pair of Trainers at the bridge take a few steps south and then west on to it.
A sign at the head of the trail tips you that there are hidden items in here – so perhaps opening your bag and setting the Dowsing Machine to be the second of your Registered items (the Town Map should be the other one) would be a good idea! In fact keep it open to that to make this easier to spot the hidden items as it is a passive device anyway!
Inside the path is your first Trainer Battle – a doubles battle with Twins Mayo & May who have Level 16 Sewaddles. Just beyond then on the south path is a Team Plasma Grunt – so why not go say hello?
When you get close he attacks – using his Level 16 Sandile, so use your Water-type for a one-hit kill.
As we round the corner we reach our first section of Tall Grass – so it is time for the Area Pokemon Report!
- - - - - - - - - - - - - - - - - - - -
Pinwheel Forest Inside Area Pokemon Report
Dex No.    Pokemon     Rarity    Season    Capture Note
#017/511   Pansage      (R)      All       Shaking Grass
#019/513   Pansear      (R)      All       Shaking Grass
#021/515   Panpour      (R)      All       Shaking Grass
#025/519   Pidove       (U)      All       Grass
#037/531   Audino       (C)      All       Shaking Grass
#046/540   Sewaddle     (C)      All       Grass
#049/543   Venipede     (U)      All       Grass
#052/546   Cottonee     (C)      All       Grass
#053/547   Whimiscott   (R)      All       Shaking Grass
- - - - - - - - - - - - - - - - - - - -
-- Expanding Your Dex and Collection --
Yes indeed there are some nice ones to be found in here! And as we already have one of the Monkey trio, it would be nice to have the whole set, right mate? The thing is they are rare ones, so our work is going to be cut out for us... You can continue with the adventure from here if you like, but why not go ahead and capture all of these now? That is what I did – and I suggest you do the same!
So if you decide to spend some time here grabbing the new Pokemon bear in mind that the Nurse is just outside of the zone to heal up at, and this is an excellent opportunity for you to do some team leveling in the process. What am I talking about?
Simple enough really – set a target level in your mind – Level 25 sounds good to me as that will give us a nice leg up at the next Gym Battle won't it? Not too close to the Level 30 Control Cap to make us nervous about proceeding from here, but high enough so that it gives us a decided advantage at the next Gym.
Start by trolling the grass for the regular sort rather than the Shaking Grass ones, and while you are at that, go ahead and grab the treasure ball below that has a Big Root in it – if you are not familiar with it, the Big Root is a hold item that allows Pokemon who use HP-Stealing moves like Leech Seed to gain more HP from the move. A very nice find indeed!
The treasure ball above the path contains a Super Potion, and if you have been keeping the Dowsing Machine open as suggested, you should find a TinyMushroom along that narrow stretch of grass to the west.
You can battle with Pokemon Ranger Forrest in the Tall Grass – he has a Level 18 Herdier, and he pays off with a reward of $1080 which is quite nice! He also gifts you with a Chesto Berry when you beat him.
Considering that three of the new Pokemon we will be getting here must be obtained from Shaking Grass you will not have any trouble leveling up fairly quickly either, as there will of course be more Audino than the other types, that is just the way that it is.
That being the case, best tactic here is to use your team one by one, taking each to Level 25 while you capture them. As you will capture all three prior to actually getting the entire team to Level 25 it would be an idea to spend the extra time to cap them all off at 25 anyway. It is not time wasted mate, you need to level up before the next phase anyway!
And speaking of your team – you have your current ones which I call the A-Team on you, but there are the alternate members of your A-Team to be trained as well, because you do not want them falling too far behind. Keeping them all at or close to team level is a good idea as you never know when you will need to swap them in for a Gym Battle, and we do not know what we will want to use for the Victory Road / Elite 4 stage of the game, do we?
A few of your team will have evolved by now – pretty cool process isn't it? Makes me think of Tron for some reason.
-- Back on the Adventure Trail --
Done? You got them all too? Good on ya mate! Well done! I am proud of you!
Now back on the Adventure Trail, we follow the path to another Team Plasma Grunt who has a Level 16 Purrloin, but not the Dragon head. Shortly after this encounter you run into Youngster Nicholas, with his Level 16 Venipede, and Level 16 Timburr.
As you progress along the path you find an Antidote inside a tree stump, and you are jumped by a Pokemon Ranger when you try to cross the gap using hollow tree – Pokemon Ranger Audra has a Level 16 Pansage. Beating her scores you another Chesto Berry.
Continuing along the twisting path you discover that not all of the grass piles are as they seem! Pokemon Ranger Irene pops out of one, and attacks with her Level 18 Panpour, rewarding you with a Pecha Berry for defeating her. Then it is around the corner and up the log to the next Team Plasma encounter – another Grunt, with another Level 16 Patrat.
Just ahead grab the Paralyze Heal from the treasure ball in another stump, then have another grass pile encounter with Pokemon Ranger Miguel and his Level 18 Pansear, gaining another Pecha Berry for your victory.
At this point the path splits into to directions, north and south – to the south and then east is a set of grassy terraces at the bottom of which is a lake. Down one level is a treasure ball with TM86, Grass Knot, so that is worth the effort to retrieve. Across from it is another treasure ball that we can spot, but that we cannot actually reach yet. Mark a mental note on that for later.
Backtrack to the Ranger and head north through the hollow tree to face another Team Plasma Grunt, who has a pair of Level 14 Patrat -- they are big on those yeah? He also has a level 14 Sandile – and the Skull! Woot! You did it mate, you recovered the skull!
At this point Gorm of the Seven Sages appears, speaks to the Grunt, telling them that the skull turned out not to be the one that they were looking for – Plot Point Warning.
Burgh and Lenora show up as Gorm is threatening you, and the Plasma lot disappears. You give the skull back to Lenora, Burgh heads off to his Gym, and you get rewarded by Lenora with a Moon Stone. Good job that!
Following them east you spot a treasure ball with a Miracle Seed just at the ledge ahead – jumping the ledge takes you to the main road through the woods, and you have a choice to make – north or south. South will take you back to Nacrene City, north will take you to Castelia City, and to the south are also the Trainers on the bridge you have not chatted up previously. May as well chat them up now!
Two just chat, but School Kid Mille has a Level 16 Pidove and Level 16 Purrloin – interesting combination – and then a very short walk north leads you to Castelia City and a change in the POV that is rather interesting.
As you enter the gatehouse stop and chat up the Hiker in the corner to receive a Quick Claw hold item, then check out the news ticker to see the blert about you! All that is left is to chat up the other two people here and then hit the door out to the Skyarrow Bridge, which leads you into Castelia City!
Right off the bat I should point out that there is a lot to do here, and more than a few surprises – and while normally I just have you run about exploring a new city when I do these guides, this city is a bit different than the ones you will have experienced in the previous games. In fact they have really come a long way with depth and content in the game, and I know I have not said this already, but this is an amazing new generation of the games!
So, as we are standing at the gate entrance our first order of business is to head south from here to the battery where we will see a bloke standing on the south side of the battery who has something rather special for us – an evolution stone for our Monkey Pokemon. Actually it is for whatever Monkey Pokemon you want it for, as the bloke will ask you which you want – but he only gives you one so pick wisely!
The next spoke out of the wheel is the dock where the ferry ship is located – but as it is not ready yet you can just have a look at it now. Next is the pier with a few blokes you can chat up, and next is another dock with a smaller boat tied up at it. Finally there is the last – and most special of the docks, as this one has the ferry tied to it that will take you to a very special Pokemon – assuming you possess the Liberty Pass that is.
– Passerby Analytics HQ --
Heading back onto the main street you'll notice the brown building with a sign in front of it on the corner – this is Passerby Analytics HQ – and you have to head inside to see what goes on here, right?
The kid on the right as you enter will ask you how you like to greet people you meet – so tell him! The girl in the upper right corner gives you a Poke Ball and asks how you thank people?
Talk to the bloke at the table to be appointed a Statistician, and learn about the Survey Rader, and asked to accept a Survey assignment. Unless you are in an area where you know you will encounter a lot of people playing Black or White you may as well not bother with this for now...
The girl on the left gives you a survey of her own – and completing it results in a new survey called Details About People to the Radar. Take a few minutes to answer her other surveys – Pokemon Favorites, Ideals and Values, Likable People, Preferences, Entertainment, School Life, Sports and Pastimes, and More about Pokemon, adding each to your Radar after you complete each. All that effort does not go unrewarded – she gives you a Soda Pop!
– Battle Company --
On the next block is the headquarters for Battle Company – and when you enter you are greeted by a man who fills you in with a warning. Check out what's on TV and chat up the folks here before hitting the lift to Floor 47F, where you have some battles!
Clerk Ingrid has a Level 19 Herdier, and the bloke on the right gifts you with Quick Balls and Timer Balls, and how cool is that? Clerk Clemens has a Level 19 Timburr, and Clerk Alberta has a Level 18 Petilil, a Level 18 Cottonee.
Grab the Revive from the treasure ball in the corner, then battle Scientist Randall who has a Level 19 Roggenrola. Clerk Warren has a trio of Level 17 Basculin – the first of this type that we have seen! The Scientist near the server rack on the right gives you a Scope Lens when you chat him up, a hold item that increases critical hits.
That wraps up this floor, so hit the lift to 55F now.
Clerk Ivan has a Level 20 Woobat. After you take care of him grab the Hyper Potion from the treasure ball on the floor, then battle Scientist Samantha who has a Level 20 Munna, while Scientist Steve has a Level 20 Sewaddle, and Clerk Wade has a Level 19 Pansear, a Level 19 Panpour, and a Level 19 Pansage.
The last Trainer in the room is the bloke behind the desk in the upper right corner who, if you recall, is the bloke who greeted us when we entered from the street. It turns out he is the Chairman of the company and its toughest Trainer – and we now get to battle him!
The Chairman has a Level 20 Trubbish, and a Level 20 Minccino, and pays off $4000 and the uber useful Experience Share hold item (this is an item we have been patiently looking for!) when you beat him. The Experience Share is an important item as it will make leveling up lower level Pokemon so much easier! This is especially useful for leveling Pokemon you hatch from eggs.
That wraps up the activities here – so head downstairs and exit the building.
– Pokemon Center --
Off of the main street on the next block is the Pokemon Center, and when you approach the counter inside you will meet another Trainer who asks you if you know about Geonet? Say no and she will fill you in.
After you heal and save head upstairs to the Geonet Globe and register your location, then step over to the GTS Counter and check it out. Chances are pretty good that if you do not own all of the previous games, a lot of the Pokemon you will need to complete your collection and Dex will come from trades you make here.
Once you have some mates registered in your Pal Pad, you can use the WiFi Club – and the Union Room is available if you are in an area with a lot of other real world Trainers around. There is a bloke standing in the left corner who will give you a gift after you complete some trades.
When you are done upstairs head down to the Poke Mart Counter and refill your kit – then back on to the street so we can finish our tour of the city.
– Castelia Street --
The first street and spoke on the wheel that is the city street layout is Castelia Street – and as you enter you will see lots of foot traffic and some buildings you can enter. The first building on the right is the home of Game Freak – the studio that created the games!
Inside Game Freak a girl is reading a book to her friend and, when you chat her up, reads to you as well, showing you a photo of the rare Pokemon Zorua – mind this encounter if you have one of the Fateful Encounter Pokemon to trade into the game, right?
– IF You Own a Fateful Encounter Pokemon --
This is a side-trip that you only need to follow IF you own a Fateful Encounter Pokemon – if you do not, skip this section and start back up at the section below, labeled 'Back On Track' to continue.
So, you are a Pokemon Veteran and you not only own some of the previous Generation IV games, but you attended one of the events that granted Fateful Encounter Pokemon? Good on ya! So that being the case, we should take advantage of that now!
So, exit Game Freak and head north on the street until you zone into the next area, then follow the road north towards Route 4 and zone to the next street area, then enter the building on the left, and take the lift to floor 11F, where you will find a Scientist on the right side in the middle of the room.
Chat him up and he asks you for the password for his special machine – called the Relocator Machine – that will allow you to transfer the special event Pokemon that are called Fateful Encounter Pokemon. The password for this is 'Everyone Happy Simple Connection' and you enter that as follows:
People > Everyone
Feelings > Happy
Stats > Simple
Connection > Connection
Confirming these passwords enables his 'machine' – in reality it adds a new option to the Start Menu that will allow you to transfer the Fateful Encounter Pokemon, which we will go ahead and do right now!
Note: This requires a second DS system.
Save your game and restart your DS, and when you get to the Start Menu, go to the very bottom where there is a new selection, RELOCATOR. After you select that, you will be shown the instructions on how to proceed – but for your convenience here they are:
Please insert a Pokemon Diamond, Pearl, Platinum, HeartGold, or SoulSilver Version Game Card in the other DS system and turn it on.
Then select
'Relocator ID: XXXXX'
from 'DS Download Play.'
(XXXXX will be the number that corresponds to your specific game cartridge).
When you start the second DS, rather than selecting the Pokemon game you have inserted, select the Download Play option, and it will scan for your Black or White game and show you it as a selection. Pick that, then confirm that you want to download that software.
After it downloads the mini-app, it will search your cartridge for a Pokemon that is eligible for transfer using the Relocator Machine – if the app fails to detect the special Pokemon it means you left it in your party instead of in a box – so you will need to log into the game and move the Fateful Encounter Pokemon into a box before you can complete the process.
When the app scans you will be prompted on the DS that has Black or White to transfer the Pokemon, and instructed that held items will be placed in the bag on the other DS, as you cannot transfer items between generations.
There are two groups you can transfer in this manner:
Group I – Entei, Raikou, and Suicine (Zoroark)
Transferring any of the three will open access to the Lostlorn Forest area of the game, and going there will cause you to have an encounter with what at first appears to be one of the trio of special dog Pokemon, but is in reality the Legendary Pokemon Zoroark!
You can only do this event one time, though you can transfer all three of the special Pokemon over if you like.
Lostlorn Forest is east of Nimbasa City and we will cover that and obtaining Zoroark at the appropriate point in the guide!
Group II – Celebi (Zorua)
Transferring the Fateful Encounter Celebi over to your game enables you to get Zorua from one of a couple in the city gate at Castelia City.
Group III – TM95 Lock Capsule
You can obtain this from Pokemon HeartGold and SoulSilver, or from special events (that have not taken place as of press time for this guide).
The Pokemon you have just moved to your Generation V game will appear in your PC Storage Box, but will NOT have a Dex entry until you unlock the National Dex, and when you read their Summary data you will note that their number is simply '???' until you have the National Dex.
Note that it is possible to have a Pokemon of the type that is part of the above groups that is NOT a Fateful Encounter version, which means it will not transfer using this mechanism, and will not trigger the special event in Black or White – you can still transfer that Legendary Pokemon to your game, but only after you finish the story mode, unlock the National Dex, and then make use of the Pal Park to transfer it over!
With the Celebi it is possible to have the correct Fateful Encounter Pokemon and still have the app fail to recognize that. This is a known bug, and if you get hit with it, there is nothing that you can do. You will have to obtain the Zorua from another Trainer in real life, but as it is not a Legendary and CAN be bred that is not as big a deal as it is for Zoroark...
Bianca has her Pokemon Stolen
– Back on Track --
Right then, if you do not have the Fateful Encounter Pokemon you do not need to do the above section, so you are in the right place now! Let us continue our adventure, shall we?
After the girl finishes reading you the story – and shows you the photo of Zorua – head to the lift and go to Floor 22F, where you will chat up all of the people who make the game. When you have completed your Pokedex be certain to return here and speak with the Game Director at the desk in the upper left corner of the room here!
Right then, use the lift to head back down and exit the building, and then cross the street to the building on the left side. Outside near the entrance is a lit machine that turns out to be a drink machine! This is a very good thing to find as it offers you discounted healing beverages, including:
– Fresh Water $200 (Heals up to 50 HP)
– Soda Pop $300 (Heals up to 60 HP)
– Lemonade $350 Heals up to 80 HP)
Compare the prices of these items to what you can purchase at the Poke Mart Counter in any Pokemon Center – a Potion for $300 that only heals 20 HP and a Super Potion for $700 that only heals 50 HP and you can easily see that these drinks machines are a Godsend! This is not the only one in the game – there are some in the square ahead, and elsewhere in the game, but remember where these are when you find them as this is a more economical source of healing potions, right?
I suggest that you purchase around 5 of each type if you can afford it – later you may want to keep more of them as the basic elements of your kit, but for now if you need more than 5 of each you are doing something wrong!
– Inside the Building --
At the lobby level you will see three people – the counter man, a Hiker, and a girl. The Hiker will tell you that he is happy when Pokemon are happy, the bloke at the counter will say that it is hard to watch the TV from where he is standing, and the girl? Ah, the girl! She is a Pokemon Massage Therapist and having her massage your Pokemon will make them happier!
Well? Yeah then, go ahead! Have her give your Pokemon a massage mate! She will do that for you one time each day, and getting a massage makes your Pokemon happier and more friendly towards you, so take advantage of this whenever you can, right then?
Now head to the lift and take it to Floor 11F, where you will find a pair of Trainers – a boy who will give you advice, and a Hiker who will give you TM44, Rest! Take that TM for sure, and then hit the lift and leave the building.
Head back to the south to the main street and then west to the next street – Mode Street – going north to zone onto it.
– Mode Street --
On the right as you head down the street is Studio Castelia, inside of which you will find an art studio with a clown-artist who will ask you to show him a specific type of Pokemon and then paint it. You can look at each of the paintings to learn its name, though you cannot actually look at the paintings in detail – what a pity. Sigh.
Outside and across the street is the Cateliacone Stand – it has a long line and it is closed in the Winter, but mostly you will find that they are sold out when you want to get in queue and have one.
That wraps up the stuff here so head back to the main street and then west to the entrance to Narrow Street.
– Narrow Street --
As you head up the street you hear a bloke yell from behind one of the bins on the left, and then he jumps out and gives you TM70, Flash, a very useful move for lighting up dark places!
Cafe Sonata is the first door on the right – going inside you find a musician providing live entertainment and, when you talk to the bartender, you obtain a free Lemonade – and how cool is that?
Further up the street is a dancer and a mysterious pair of Trainers, but as they have nothing for us at the moment, go ahead and return to the main street and west past Passerby Analytics to the last street off of main street – the one that leads to the Pokemon Gym!
As you approach the Gym Cheren comes running out, and you learn that he just challenged – and defeated – Burgh for the Castelia City Gym Badge! Well, good for Cheren! As your mate runs off down the street Burgh pops out of the Gym, and recognizing you, he yells that Team Plasma is at Prime Pier and asks you to help!
– Prime Pier --
You run after him – Prime Pier is the one off of the center street in the spoke, which is third down from where you are – and when you arrive you find Bianca, Iris, and Burgh waiting for you! It seems that Team Plasma has stolen Bianca's Munna!
As Burgh is explaining how futile the quest really is, the offending Grunt reappears, realizes that they are over-matched, and runs away again! You and Burgh give chase,
Zone back on to main street and run west to Gym Street, where you will catch up with Burgh, who will head north onto Gym Street and you will follow. Midway up the street at a building on the left you catch up with Burgh – and Team Plasma!
A battle ensues in which you face off against a Grunt with a pair of Level 17 Sandile, and after you defeat him (you did, right?) Bianca and Iris run up to you and Burgh, and you all run inside to kick some Plasma Butt!
Two of the Sages you have already met, but there is a third here and the Grunts – Ghetsis and Bronius spill some details of the Plasma plan to you, then Burgh has a rather long conversation with them all, the result of which is that Ghetsis orders Bianca's Pokemon returned to her, and then vow to revive the Legend of Unova before disappearing.
Iris vows to look after Bianca while she plays the tourist, and gifts you with a Yache Berry for helping get Bianca's Munna back. Burgh tells you he will await you at the Gym, and leaves, and now you are once again on your own!
On the floor ahead is a treasure ball that contains a Smoke Ball – so grab that – and then use the lift to go to Floor 2F, where you will find that it is deserted. There are no hidden items to find here either, more is the pity, so head back down and outside now!
After you exit the building you may as well make a quick trip to the Pokemon Center to heal and save and to restock any kit you have used up, as it is time to win another Gym Badge – which means it is time to experience battling another set of AGL's and a Gym Leader!
Talk to the Greeter to obtain your free Fresh Water, and to learn some important facts like the theme of the Gym – walking through walls – and that the switches on the floor can help.
When you read the statues in the entrance foyer you will see your mate Cheren is listed as a Certified Trainer – and when you enter the next room you will have to push your way through the honey wall to reach the floor switch that opens the next area to the left!
Head right to find the first AGL – Harlequin Jack – who has a Level 20 Sewaddle, and a Level 20 Venipede. The switch to his right opens the door he is standing at, and when you head in there you will find four more switches.
The switch directly ahead summons Harlequin Terry (the next AGL) who has a Level 20 Sewaddle, and a Level 20 Dwebble. The switch to the right unlocks the right-side lock of the door ahead, and the switch to the left unlocks the left-side lock, opening the door as well as unlocking the left-side lock of the next door to the left! The far-left switch unlocks the second lock of the first door in the other area, opening it up as well.
Head back to the right and push through the wall above AGL Terry, and then use the switch inside to unlock the right-side lock of the door to the left. Head left and down to push through the wall here, then to the switch on the left to summon the next AGL – Harlequin Rick – who has a Level 21 Sewaddle for an easy and brief battle.
Push your way through the door above and trigger the switch inside to unlock the left-side lock of the door to the right. Backtrack to that door, go inside by pushing through the wall, and you will face the next AGL in the series, Harlequin Louis, who has a Level 20 Venipede, and a Level 20 Sewaddle.
The switch in this room unlocks the left-side and second lock of the final door to the right that leads to the inner sanctum – so go ahead and step on it now, right? If you have been knocked about, it would be an idea to head back to the Pokemon Center to heal and save.
Battling Gym Leader Burgh
– Gym Leader Burgh --
As the battle begins, Burgh calls out his Level 21 Whirlipede, then his Level 23 Leavanny, and finally his Level 21 Dwebble.
I don't know about you but this battle was something of a disappointment as it did not feel like a genuine Gym Leader Battle...
Burgh awards you with the Insect Badge, which you put into your Badge Case, and then he gifts you with TM76, Stuggle Bug. Now that you have your third badge you can control Pokemon up to Level 40 – including those you obtained in trades!
As you exit the Gym your Xtranceiver rings – it is Bianca – she tells you that she has been training with Iris and that she wants to have a battle with you, so will you meet her at the gate to Route 4? Of course we will – we are headed that way anyway!
Before we do that though we should hit the Pokemon Center to heal and save, and restock our kit.
– Battling Bianca --
On the way to battling Bianca we pass through the square where there are a couple of drinks machines, and the zone point to the north road that leads to the gate to Route 4. On the left side is a building that
we need to visit now!
In the lobby you will find:
– The Name Rater: an old gentleman using his cell phone who happens to be something of an expert in rating the names of Pokemon. If you have him 'rate' the name of your Pokemon he will give his opinion and, if you like, offer to change the name of the Pokemon he is rating. Basically he is here so that if you messed up a name, or want to change it, you can!
– The Feeling Reader: A woman who tells you that you can use the C-Gear for checking feelings.
In addition to this pair, there is a Hiker who will explain why you cannot change the name of any of the Pokemon you received in trades – and of course the ever-present desk clerk, who in this building tips you that doing Feeling Checks can score you Sweet Hearts!
On Floor 11F upstairs is the Scientist who has a Relocator Machine that allows you to move special Pokemon obtained from events into the game to trigger special events in the game – see the previous section for more information. There is also a clown here named Mr. Lock who tips you that he is a magical clown who can open anything... Hmm.. Might want to remember he is here later.
Across the street on Floor 47F there is a party going on, and after security pats you down and you take the lift up, you can chat up the Trainers at the party, some of whom speak languages other than English – and from the little girl in the blue dress you can obtain TM45, Attract!
The building next door on the same side of the street has some Trainers in it that will chat about abilities, and one who is so impressed by your Pokedex that he gifts you an Eviolite – a hold item that increases both standard and special defense for the Pokemon you give it to.
Upstairs there is a bloke who will tell you all about the badges in case you do not know what each one does for you. They are:
Trio Badge – Pokemon up to Level 20 obey you.
Basic Badge --- Pokemon up to Level 30 obey you.
Insect Badge – Pokemon up to Level 40 obey you.
Bolt Badge – Pokemon up to Level 50 obey you.
Quake Badge – Pokemon up to Level 60 obey you.
Jet Badge – Pokemon up to Level 70 obey you.
Freeze Badge – Pokemon up to Level 80 obey you.
Legend Badge – All Pokemon no matter the Level obey you.
That is all of it, so head down the lift and back into the street then north to the gate, where you will meet up with Bianca after you enter in order to have your battle!
Bianca has a Level 18 Herdier, Level 20 Servine, Level 18 Panpour, and Level 18 Munna. It was not a bad battle really, but Bianca clearly lacks confidence in her own abilities based on what she says after it is over.
– Wrapping Castelia City Up --
Now that you are done with the Bianca battle AND before you head on to Route 4 and begin the journey to the next city there are a few things we need to wrap up here. May seem strange but getting this done is actually a good idea and you should be in a position to get started on it...
So head back to the Pokemon Center to heal and save. Once you have done that, remember the bloke upstairs in the left-side corner? He rewards you for trading with other Trainers via Geonet and we need to talk about that now...
How this works is actually very simple – for every X number of Pokemon you trade you get a reward. The reward table is:
? 05 Trades = Wide Lens
? 10 Trades = Everstone
? 20 Trades = Zoom Lens
? 30 Trades = Choice Scarf
? 40 Trades = PP Max
? 50 Trades = Master Ball
Of these items the Master Ball and the Everstone are probably the most useful, as the one allows you to capture ANY Pokemon with zero failure chance, and the other is a held item that you can give to a Pokemon that you never want to evolve, that will prevent that from happening.
You are going to want that Master Ball because the Title Legendary for your game is a tough one to capture, and having the Master Ball will make that oh so much easier! So let us speak about the strategy you need for making this happen, shall we?
First let us get familiar with the whole trading process – go over to the Global Trade Counter (closest to the Geonet Globe) and enter it selecting Global Trade > GTS > Trade and say Yes to saving the game. You will then go inside, where you can use the GTS System.
There are two choices available to you: Deposit Pokemon, and Seek Pokemon.
Right now we want to Seek Pokemon so we can get an idea of how it works, right? Leaving all of the settings to default, select Audino from the list of Pokemon – note that you can ONLY search for Pokemon you actually already have a Dex entry for. That keeps you from completing your Dex by simply searching for and trading for Pokemon you have never seen!
When you complete the search the spots above will be filled by real Trainers who have deposited an Audino and are looking to trade it for another Pokemon! To see what the conditions are for these trades, select the individual trainer and hit the action button.
Hitting the Select button will put you in the review mode, and you can then see what Pokemon it is that they want to trade theirs for. Make a mental note of the most popular requested Pokemon, then do a few more searches for different Pokemon so you can decide what sort you will want to farm in order to begin trading and building credits towards obtaining that Master Ball!
Whenever you trade with a Trainer that has registered their location in the world, a dot is placed upon the Geonet Globe to show that you have traded with someone in that location. A lot of Trainers will only trade with Trainers who have registered their location as a result, because they want to collect dots. You do not have to do that, but it is rather fun in a way, so perhaps you will want to!
If you decide that you want to collect pin dots on the globe, you will want to do targeted searches using OT Location as an element, so you know you will get a list of only those Trainers who have trades up from the area you desire. Doing that you can quickly span the globe and, in addition to getting the locations you want, collect a bunch of Pokemon from foreign versions of the games that will make obtaining Shiny Pokemon while breeding so much easier – more on that in the Appendix on Shiny Pokemon!
Right, so you now know what you need to know about the last element of Castelia City that we had yet to cover. With that out of the way, you are free to head on to Route 4 and continue our adventure – or pause for a while and farm up Pokemon to trade with! It is your call. Either way, when you are ready to continue the adventure and head on to Route 4 meet me in the next section!
On your way to the gate to exit the city you may notice that on the street near the gate is a pedestrian who does not behave quite the same as all of the other people on the street – she stops and stands still, and walks sideways as well – so why not chat her up? Doing so will get you a tip: 'Pokemon Trainers on Route 4 show combinations with Pokemon even during road construction!'
That is a rather odd tip.. We will have to see if it makes sense later after we have some experience with the Route.
As you exit the city and enter Route 4 the first thing that you are likely to notice is that this side of the city is a roaring desert whereas the south side is green forest, an oddly disturbing change. On the Route ahead are Trainers – you should chat them all up as they have interesting observations to offer – like the Hiker who calls your attention to the dark spots in the sand that are the special tiles for this environment being where the wild encounters can occur.
Off to the left you will see a treasure ball – the sand is a wild encounter zone, but that is OK because there are some Pokemon here that we want to capture! Before we take our leisure and hike along Route 4 what do you say we step off to the left here, now, and do that?
- - - - - - - - - - - - - - - - - - - -
Route 4 Area Pokemon Report
Dex No.    Pokemon     Rarity     Season     Capture Note
#057/551   Sandile     (C)        All        Sand
#060/554   Darumaka    (C)        All        Sand
#065/559   Scraggy     (R)        All        Sand
- - - - - - - - - - - - - - - - - - - -
We can start by grabbing the X Accuracy from the treasure ball here, then trolling for standard encounters in the sand! Obviously the Duramaka and Sandile will be easy and quick captures – the Scraggy not so much, but it is worth the effort to add these three to our collection.
You do not really see the difference in the two types of sand until you head west through that narrow passage past the cones and onto the lighter sand – and the lack of any of the special item or Pokemon tiles here is something of a disappointment – but what can you do?
If you keep your Dowsing Machine open and active as you work your way around the area trolling for wild encounters you will notice that near the cones to the west along the edge you get a ding! Following the arrows will take you down the flight of stairs and back south, where you will find a Pearl – nice one!
In this same area are two Fisherman/Trainers to battle – Fisherman Andrew who has a team of four Level 16 Basculin, and Fisherman Hubert who has a pair of Level 18 Basculin, which are collectively worth a nice chunk of XP!
Coming up the stairs head north towards the fences and you will pick up another Dowsing signal – that takes you to the small fenced in area where you find an Ultra Ball. You should have noticed two treasure balls in the process – one to the north of where you found the Ultra Ball and one we passed getting here – so head back west to grab the first one, and grab the Great Ball from it.
Now backtrack to the gate and you will encounter Parasol Lady April, who has a pair of Level 18 Tympole. Inside the fencing to the right (east) is the treasure ball we saw that has a Hyper Potion – and I should point out that you really do not have to troll much to get the three Pokemon from the sand here, as moving between the various objects is more than enough traveling to troll them up!
Moving north through the construction area triggers another ding on the Dowsing Machine, but first you get to battle Worker Gus, who has a pair of Level 17 Roggenrola, and a Level 17 Timburr. A sign just past Gus tells you that 'Tired workers should head to the prefab house by Castelia City' which we can take it to mean that the shed-like structure just off of the road to the south is a resting spot!
After you have captured all three – or if you need to now – you may want to hit the Prefab House to heal and save now, depending on how much PP you burned through in the doing of it. Once you do that, head back to the sign so we can work our way deeper into the construction site.
Hidden Treasure in the Route 4 Construction Site
– The Construction Site --
Past the sign is a wild-encounter area that leads down a flight of stairs, north, and then up another flight of stairs – and while you are working your way along here and having your battles, remember not to allow any member of your team individually to get too close to Level 40, as we do not want to have control issues when we go into the next Gym Battle! If any of your A-Team is getting close – say around Level 38 – it might be an idea to hit the Pokemon Center and swap in some of your alternates so you can level them as well, right?
Following the Dowser you can grab a Burn Heal near the pile of steel, and you will then notice another hit on the Dowser, so head back east and along the ledge here before going back down the stairs to grab an Ether – nice one!
Now head down the stairs and battle Worker Shelby who has a Level 19 Timburr, and then make your way up the nearby stairs to the treasure ball by the barricades to grab TM41, Torment – a move that when used prevents your opponent from using the same move twice in a row!
– Back on Route 4 --
Now we need to backtrack all the way to the road by the Prefab House – and you may as well duck in there to heal and save, right? Exit the House and head south along the barrier to get back on Route 4, and have another friends battle with Cheren, who is standing in the middle of Route 4 waiting for you to appear with your Insect Badge!
Oh, and speaking of badges, did you know that you can polish them up in your badge case just like in the previous games? Well, you can, so be sure that you do!
This time around Cheren has a Level 20 Pidove, Level 22 Dewott, Level 20 Pansear, and Level 20 Liepard, paying off $2200 for the privilege of being beaten by you. It is nice to see that he is not only increasing his team size but also evolving them as well as training them up!
As you are wrapping up the post-fight chat your XT rings – it is the Professor – who tells you that she will be waiting for you at the gate to Nimbasa City, but does not tell you why. Cheren takes off north up the Route, which of course leads to the city gates, and you follow... Sort of.
At the end of the paved surface is some barricades and a bloke who tells you that 'Deep in the desert ahead of here, at the Desert Resort, there are some ruins that have become a little tourist destination!' Interesting bit of news isn't it? Before you step into the desert to continue the adventure, take a few moments to check your kit – did you use up any of the healing items we got from the vending machine? If you did, now is a convenient time to dodge back and replace those. Do you have an adequate supply of Poke Balls? If not, stock up on those as well!
While this is still technically part of Route 4, it gets its own section in the guide for several reasons – first, there is a lot to cover here, and second, it is worth giving this area some close attention because in addition to some useful items, there is a unique Pokemon to be had here, and you should get it!
So once you have restocked your kit and done a heal and save, head back up Route 4 to the end of the paved road and step into the desert proper – are you starting to feel like a character in Men Who Stare at Goats? Yeah, me too... But be sure to keep your Dowser loaded the whole time we are here, right?
Straight ahead on the right by the Backpacker is a treasure ball that has a Burn Heal in it – grab that then chat up Backpacker Keane who has a Level 19 Darumaka. Follow the barricades north to battle Backpacker Jill just after you get a ding on your Dowser – Jill has a Level 18 Petilil, and just to her north on the ground is a treasure ball with a Super Potion in it.
Battle Backpacker Waylon, who has a Level 19 Blitzle, which should not give you any trouble at all!
Following the Dowser you will find a Hyper Potion at the top of the Jersey Barriers here. Now rather than continue north we head back to the southwest following the trail if light sand to find Backpacker Anna patrolling up and down, and we battle her! Anna has a Level 19 Cottonee, and after you beat her, directly west of her by the fence is a treasure ball with another Ether in it – nice one!
If you need to go ahead and hit the Prefab House to heal and save now, then head back into the desert and follow the fence north to where Worker Scott is spinning around! Scott has a Level 18 Roggenrola, and a Level 18 Timburr, and after you beat him head west on the paved road to your next battle with Worker Zack and his Level 19 Timburr.
Directly to the west is another Prefab House, only inside this one there is a pair of Workers – one of whom will gift you with TM28, Dig, when you chat him up! Dig is useful in several ways, but the most obvious is that it functions like an Escape Rope when you use it in a cave!
The other Worker tells you 'Sandstorms are terrible! But Rock-type, Ground-type, and Steel-type Pokemon can weather a Sandstorm without damage.' Sadly you cannot rest here, but with the very convenient drinks machine outside you can heal up with those :)
After you finish up in the House, and have a nice drink of water, head north to chat up the girl standing above the overpass to learn that 'Ruins buried in the desert... It's like a grand adventure in a story.' Walk past her to the north along the road and, on the other side, enter the Desert Resort!
Checking the News in the Ticker
– The Desert Resort --
Your first indication that you are no longer on Route 4 should be the new Pokemon that pop up in the encounter sand – bonus! So before we do anything else, why not take advantage of the two patches of encounter sand to add those to your collection now?
- - - - - - - - - - - - - - - - - - - -
Desert Resort Area Pokemon Report
Dex No.    Pokemon     Rarity     Season     Capture Note
#057/551   Sandile     (C)         All           Sand
#060/554   Darumaka    (C)         All           Sand
#062/556   Maractus    (R)         All           Sand
#063/557   Dwebble     (R)         All           Sand
#065/559   Scraggy     (U)         All           Sand
#067/561   Sigilyph    (R)         All           Sand
- - - - - - - - - - - - - - - - - - - -
Now, by my math you should already own a Sandile, a Darumaka, and a Scraggy, you should have seen but NOT own a Dwebble, and the Maractus and Sigilyph should be total mysteries to you... So we will want to capture a Maractus, a Dwebble, and a Sigilyph.
I don't know about you but when I saw my first Maractus I was like, Whhuuuuaaaaahhhhh?! Dwebble on the other hand we saw before, so no surprises there... The only one here that you will likely have trouble catching is the Sigilyph, and only because it is the least likely to appear. If you have one pop up right away consider yourself very very lucky! Otherwise just keep slogging away and eventually it will pop up, and when it does chances are you will have about the same reaction to it as you did to Maractus... Man this is one odd-looking pair of Pokemon!
Some small advice about capturing the Sigilyph – this is a Psychic Flying type so if you happen to be using a Normal-type that is significantly stronger than it, there is a good chance you will one-shot it, which will suck because these things are so bloody rare! That is what happened to me I am sad to say, so I spent another hour(!) trolling one up again, but this time I never touched it. I just threw a Poke Ball at it and captured it without even damaging it a bit and I suggest you do the same out of care and concern that you will have to waste hours getting another to appear!
A pair of Trainers are standing by the side of the path here and will offer you some advice about the path ahead, and as you approach the gate to the Desert Resort – there is a sign if you are lost – you will see that there is also a path south here. It is not really a path, just an open area below the gate, but it is a large swath of dark sand so if you did not use the previous patches you can troll here for the Pokemon for this Route as well.
– The Desert Resort --
Inside the gate you will find a respite from that darn sandstorm! Talk to the guard at the counter and you will learn that the Resort is known for its Relic Castle – good to know – and the young lad here tells you what you already know, that in the desert you find wild encounters in the dark sand not the light!
Check out the news ticker for the most recent news – lots of warnings about desert sandstorms and a hint about the Battle Subway in Nimbasa (this should be the first we are officially hearing about that right?) as well as a note that the researchers are looking into the ruins.
Outside the gate you are back in the sandstorm but this time you are in an area where there are Trainers to battle. A word of warning – it would be an idea to save now because these guys are a lot stronger than the random Trainers you have been facing up to now... If you have been leveling your team as I suggested then you have nothing to worry on, but if you have not, then you do... So you will want the option of restarting if everything goes to hell. I am just saying...
Doctor Jerry is standing by the far wall to the north – he has a Level 23 Solosis – first one of those we have encountered – and after you beat him you can go to him to have your team healed, which is a good thing since the Rest House is a haul from here! That Solosis is strange looking, cannot wait to catch one to see what it can really do!
The Trainer to the south of the Doc is a talker not a battler, so we have to head further west for our next battle. This area is filled with indentations that have dark sand in them, so if you follow the south wall all the way west you will have some wild encounters. Be an idea to keep your Dowsing Machine active the entire time you are in the Desert Resort, bit of free advice...
Psychic Gaven is in a small protected area... If that name sounds familiar you will recall that we battled him in Pokemon Ruby and Sapphire as well. Gavin has a Level 23 Solosis, and a Level 23 Woobat, and he pays off a nice reward in cash for schooling him with a beating!
Following the wall north from here will take you to your battle with Pokemon Ranger Mylene, who has a Level 24 Ducklett (another first encounter for us and it is cute!) and pays off a whopping $1440! She also gives you a Rawst Berry for beating her – I wish that they all did that.
Heading west in the narrow pass here takes you to Pokemon Ranger Jaden and his Level 23 Darumaka, Level 23 Blitzle, and hands you another Rawst Berry – love those Pokemon Rangers!
This area to the south in the far southwest corner includes a treasure ball worth going out of your way to recover – it has TM39, Rock Tomb, in it!
The path to the north leads out of this secluded area. Your next battle is above that spot, with Psychic Low, who has a Level 22 Yamask, and a Level 22 Munna. This is another first contact for us, but what is cool is that we will shortly be capturing one of those in the Ruins!
– Wrapping up the Trainers --
Before we head on to the Ruins why don't we finish off the Trainers here? Working your way east and north you can battle them easy and quick!
Backpacker Elaine has a Level 23 Maractus.
Psychic Cybil has a Level 24 Gothita (another first encounter and a cute one!).
Backpacker Liz has a Level 23 Watchog.
Backpacker Kelsey has a Level 23 Tranquil.
A bloke standing in a small depression will gift you with a held item called Soft Sand, which boosts the power of Ground-type Pokemon and is well worth braving the sandstorms to obtain!
– Treasure Balls --
In addition to battles and gifts there are treasure balls scattered about the desert here that contain:
? Black Glasses
? Fire Stone
? Fresh Water
? Heart Scale
? Stardust
? Super Potion
? TM39 Rock Tomb
– Dowsing Machine in the Desert --
In addition to the gifts from Trainers and the treasure balls, keeping your Dowsing Machine turned on as you explore the Desert is really a great idea, as you will find:
? Ether
? Heart Scale
? Hyper Potion
? Rare Candy
? Stardust
– Wrapping up the Desert --
First thing is your team – if you are following the guide (and I expect you would be as how would you be reading this otherwise?) at this point your entire team should be at or near Level 30. You may have one or two members of the team that are above that if you have been using the same two for battles as their types are easier – completely understandable and, while you should be spreading out the XP it does happen. Either way though, by the time you get to this point keep in mind that getting the entire team to Level 30 is the partial plan here!
With Doctor Jerry so convenient you should be leveling up without having to use any of your kit to heal. If for whatever reason you did not have your Dowsing Machine loaded, go ahead and load it up and run through to grab the items in the list above – well, at minimum grab the Rare Candy, the Ether, and the Heart Scale right?
When you have finished that, assuming you got all of the treasure balls and have completed the battles, all that is left is for you to do is the Relic Castle. There are actually two entrances to this area – a low set of ruins to the eastern end of the central open space that is surrounded by a group of blue and white egg-shaped statues of Pokemon, and a bastion-like tower with an entrance to the western edge of the open space of the central area.
Before we head into the Relic Castle visit with the Doc to heal and then save, and then head inside using the closer entrance – the one with the egg-shaped statues around it.
As you enter the underground area here be aware that this whole area is a wild-encounter area, so you can troll up battles with wild Pokemon – but that is OK because we actually came here in part to do just that!
- - - - - - - - - - - - - - - - - - - -
Relic Castle Area Pokemon Report
Dex No.    Pokemon     Rarity     Season         Capture Note
#057/551   Sandile     (C)        All                 Sand
#068/562   Yamask      (C)        All                 Sand
- - - - - - - - - - - - - - - - - - - -
First thing you should do upon entering is go ahead and capture a Yamask – and once you have done that, save the game. Don't worry over finding one, you will find lots of them as they are completely common.
The first bloke you see and chat with in here – wearing a lab coat – explains how you deal with quicksand, which is to walk, not run. You also avoid the hole in the middle unless you actually want to fall in.
Psychic Perry has a Level 24 Sigilyph that is a fairly easy battle.
Psychic Dua has a Level 23 Woobat, and a Level 23 Munna, and while you will not have much trouble with the Woobat, the Munna has a wicked combination of moves like Moonlight that heals it, and the ability to lock down some of your moves, and put your Pokemon to sleep, making it a particularly annoying one to battle in this configuration, so you may want to blitz attack it just to get it over with...
On the other side of the wall is a Backpacker girl who tells you that she has been carrying around a pair of fossils – and that you can have one if you want. Obviously you want – so you have to choose between a Cover Fossil and a Plume Fossil.
The Cover Fossil will give you a Tirtouga, the Plume Fossil an Archen when you trade them to the assistant at the Musem back in Nacrene – remember the person at the counter of the Museum who mentioned fossil research when we first entered?
The choice you make here is entirely yours – the Tirtouga is a Water/Rock-type, while Archen is a Flying/Rock-type, so the decision here mostly comes down to whether you want a Flying or Water type? Both have weaknesses and strengths to them which makes which one you choose pretty much a coin toss... To help you make that decision, here are the stats for each:
#070 Tirtouga – Level 25 – Water/Rock-type
Very slow but has a strong Defence.
At Level 37 Tirtouga evolves into its final form, #71 Carracosta.
Carracosta cannot be one-hit killed which is its special trait.
#072 Archen – Level 25 – Rock/Flying-type
Very fast but also very weak, having a low Defence.
At Level 37 Archen evolves into its final form, #73 Archeops.
Archeops is fast and is an excellent blitzing Pokemon, which is its strength.
As you level both up these weaknesses improve but never entirely go away.
Once you have made your choice and pocketed the fossil, you can chat with the bloke near the stairs, but he is there to prevent you from actually using the stairs, he refuses to let you pass. Drop down the nearby quicksand trap – trust me on this. Once you drop down to the lower level you will see a treasure ball with a Revive – grab that – and then there is only one way for you to go – which is up the stairs to the northeast.
Right now there is nothing else that you can do here, so head outside and back to the gate. In theory you are ready to head to Nimbasa, but we are going to do a detour first, and run all the way back to Nacrene City and turn this fossil over to the Museum to get it revived first, because that is how we think, right? Yeah! Besides you gotta see your newest Pokemon don't you?? Yeah!!
Reviving a Fossil into a Rare Pokemon
– Briefly Back to Nacrene --
Just run as fast as you can back to the city – as you can see in the video above, the magic of Pokemon allows us to simply exit the ruins and be at the Museum just like that! Pretty cool, eh?
Before you actually enter the Museum you will want to pop on into the Poke Center, as you will need to free up a slot on your team before you attempt to get your fossil revitalized. Naturally you have to have an open slot to accept the Pokemon that is revived from the fossil – in my case that was Archen, the Flying/Rock-type, which is the one I chose because I want to replace my current Flying-type, my Tranquill – which I evolved from my Pidove earlier.
The reason that I chose to replace my Tranquill with the Archen is largely due to my dual-type scheme that I have been working out all along. My current Flyer is Tranquill, which is a Normal/Flying-type, but as there are some much stronger Normal/Other-type combinations a little deeper into the game, it makes sense to replace him with a Flying/Rock-type now, and that gives me the opportunity to level my newest team member up to the team level before the next Gym Battle as well!
Eventually I want my entire team to be made up of multiple-type Pokemon, and I have a good start towards that goal now! My current team consists of:
#005 Pignite (Spyderpig) Fire/Fight-type
#016 Liepard (Kit) Dark-type
#017 Pansage (Freebie) Grass-type
#029 Zebstrika (Coalhoof) Electric-type
#042 Palpitoad (Flip) Water/Ground-type
#072 Archen (Rocky) Rock/Flying-type
As you can see I already have half of my A-Team selections for the dual-type scheme – you do not have to follow this plan, doing so is strictly optional, but a case can be made that having a wider variety of types in your team makes it much more effective, so it is something to think about, right?
– Nacrene Museum --
When you arrive at the Museum – having opened a slot in your team – you simply need to approach the girl behind the right-hand counter and chat her up. She will be surprised to see that you actually paid attention to her from before and have brought her a fossil of course, but will happily take the fossil from you nonetheless!
In the previous generation of games you would have needed to drop the fossil off and then return one game-day later to get your new revived Pokemon, or you would have had to exit the building/zone and then return in order to get the new Pokemon, but in the 5th Generation of games we have moved beyond the need to reload the zone to make this happen!
No indeed, the young lady takes your fossil and, ducking into the back room, does something magic and scientific to it, and then returns with your revived Pokemon! As mentioned above, in my case that is Archen – watch the video to see that wonderful Flying/Rock-type in all its colorful glory.
Colorful birds are a part of nature that I grew up with in Australia – it was very common to see Galahs, Lorikeets, and Rosellas in our back yard, with the occasional Firetail, King Parrot, and Spinebills putting in an appearance – but having lived in North America and Europe over the course of the last two decades I understand that colorful birds like those outside of the pet shop or zoo are mostly unheard of, so hey, take your colorful birds where you can find them, right?
– Visiting the Professor in her Lab --
After you finish up in the Museum, exit and head to the main street (the one the Pokemon Center is on) and then head east to the gate and through it. We are going to make a quick run back to Nuvema Town! That is right, we are going home!
When you arrive, stop by and say hello to Mum, and check out the really great job she did repairing your room! Nice one! When you are done here, head to the Professor's Lab, and chat her up. When she asks to examine your Pokedex let her – she will note that you have seen X number of Pokemon – and give you a special reward! The reward is based on the number of Pokemon you have seen, and right now she gives you TM54, False Swipe!
The gifts that she will give you include:
? 30 Pokemon in Dex: TM54, False Swipe.
? 60 Pokemon in Dex: TM17 Protect
? 100 Pokemon in Dex: TM10 Hidden Power.
Of the three reward TM's you can obtain in this way, the most valuable is False Swipe – a move that when used by a strong enough Pokemon can reduce your foe to just 1 HP with the guarantee of not KO'ing it! Obviously this move is incredibly valuable for capturing Pokemon, and in particular for capturing Legendary Pokemon, as using it to bring them down to 1HP maximizes your chances for a single-throw capture, so be sure that you get this one!
For a complete guide to the TM locations in the game please consult the appropriate Appendix.
– Preparing for the next Gym Battle --
Now that we have the brief detour to the Museum and we have checked in with Mum and the Professor back in Nuvema Town, backtrack all the way to just before the south gate of Castelia City, where we need to pause to think for a moment... What is the level of your team? Are all of the team members at or near the same level?
We have a Gym Battle coming up soon, and we will want to be at our best for it. The highest levels we should face from the Gym Leader and AGL's is Level 27 – and that will be the level of the Gym Leader's best Pokemon, so that is what we need to prepare for.
Getting your team anywhere between Levels 30 and 33 should be more than adequate in preparing you for this battle. Remember that with the three badges we possess we can control any Pokemon up to Level 40 – and after this battle that will climb to Level 50! Depending on your personality and your philosophy as a Trainer, you may want to spend the extra time that it takes to get your team closer to the limit break – that is how I operate, so I am going in with a well-advanced team. You don't have to do that to stay in focus with this guide, I want you to know that.
If you do need to level up some of your team, your best approach is to use the tall grass just before the city gates.. You will notice that you get the best XP from Audino – the other Shaking Grass Pokemon do not give anywhere near the XP that Audino does or as consistently. So concentrate on pulling up Shaking Grass tiles, and level up to whatever you think is best for you!
When you enter the City you should probably stop to visit the Poke Center to heal and save, and restock your kit as you are sure to have used some of it up. Check your Poke Ball supply in case that needs topping-off, and if you have picked up any Pokemon you want to trade drop in to the Global Trade Center while you are here – there is nothing so cool as getting your first few dots on the GeoNet Globe! Now is a good time to organize your boxes as well, moving your newly acquired Pokemon to their proper type boxes.
When you have completed whatever you decide to do here, continue to the north and Route 4, but this time instead of heading all the way to the west and going under the far overpass to reach the entrance to the Desert Resort, use the eastern path that passes beneath the highway – the one with the three orange traffic cones on the left side, but really as it is the only other route to the north it is rather obvious...
There is plenty of opportunity coming up for you to put the finishing touches on your team before the next Gym Battle, getting the last few levels in, and picking up the odd bit of kit while exploring this new city and its surrounding zones, so no worries mate, she'll be right if you take your time.
Nimbasa City is a very unique place – a sort of anachronism in the world as its basic reason for existing is all about pleasure and recreation. Thinking of it as Sydney makes total sense to me – the amusement park is Luna Park, the Musical Theater the Sydney Opera House, and the Institute and the other buildings are the CBD. A lot of the opportunities for training and the like are not really available to us right now – so mark in your mind that this is one of the cities that you will be returning to later in the game, and in particular after you beat the Elite Four, right?
But we are not quite there yet, are we? No, so standing in the Desert facing the eastern-most road that leads north-south, pass beneath the overpass and you will see that the weather clears slightly, and you notice a Backpacker standing in the center of the road ahead... It is almost as if they are waiting for you.
Backpacker Jerome is his name, and while his Level 19 Pidove will not be all that much of a challenge to you, he is there to provide you with some XP, so I say take it!
After your battle with Jerome, a short hike down the road is the gate entrance – inside you will easily spot the Professor and Cheren waiting for you. She gifts the two of you with some Ultra Balls – nice one! Then she warns you that there are Pokemon you will encounter as you adventure that you may only ever encounter once -- suggesting that you use the best Poke Ball you own in these cases to help ensure that you do capture it...
She takes her leave then, explaining that she has an appointment with Bianca, and you are once again on your own as Cheren heads back onto Route 4 to finish catching the Pokemon from that Route. About that...
– A Subtle Message to You --
Cheren's heading back to get the rest of the Pokemon is meant to communicate a subtle message to you about the wisdom of capturing all of the Pokemon that a given area has to offer – but we have been doing that all along haven't we? So it is good advice but advice we do not really need :)
You have been doing it tho, right? Because honestly while it does add to the time you spend in each area, in the end this is the best way to be sure that you have gotten all that there is to be had from each area. That, and as you see, following this guide brings you to points in the collecting process that we sort of keep track of, so the more you deviate from it the less sense things will make later...
After Cheren and the Professor depart, take a few seconds to check the News Ticker on the wall here for some useful information – you will get the weather report for the surrounding areas as well as a blurb about the famous Roller Coaster and Ferris Wheel located in Nimbasa, and the fact that you can reach Anville Town from the Gear Station – the first real indication that we have that those old train tracks we saw are a hint that there are functional trains as well... That wraps up the Ticker Report!
Hint: After we wrap up Nimbasa City and all that is related to it, you will find a section that consists of a 'Status Check' of your game. There are a total of three of these in this guide, and each one provides a detailed list of Accomplishments, Kit, Pokemon and other items that you should have acquired at that point. This is structured in the form of a ticklist, so that you can actually be certain that you have everything before you proceed from that point!
– Leveling Up Your Team --
If you have any Pokemon that are not at the team level you may be tempted to head back to the other side of Castelia City and use the Shaking Grass to level up – that may seem like a good idea right now, but trust me, it is not. The reason for that is very simple – ahead of you there are several places and opportunities for you to progress, topping off your team levels and even leveling up your alternate members as well!
Getting the team level to anywhere north of Level 35 would be an excellent idea, as you have a Gym Battle coming up mate! The thing is, backtracking and using the grass behind you will put you in an area where the Audino you pull in the Shaking Grass will be a lower level than your Pokemon pretty much consistently – and as the XP you receive for these battles is on a sliding scale that is based upon the level of your Pokemon, that is not a productive proposition, right?
The grass off of Route 16 ahead – we will shortly be visiting that Route – contains Audino that will be a higher level that the ones before Castelia City, and as there is a short list of new Pokemon that we will want to capture, and one of them is very very rare, we will be accomplish a lot of leveling in the process, so again, no worries there mate!
With that in mind, and assuming that you have obtained all of the Pokemon on the way here that you can have obtained (if not go do that now, we will wait for you), step through the north side of the gate and into Nimbasa!
– Nimbasa City --
As you step through the gate and on the streets of Nimbasa City directly ahead you see another pair of Team Plasma Grunts up to no good! They have the old man who runs the Pokemon Day Care Center cornered, and they want the Pokemon he is raising!
The old man runs to you for help – and the Grunts warn you that if you get involved, why, they will just take your Pokemon too! Now it is one thing to say that – doing it? That is a Pokemon of a different color entirely!
The Grunt has a Level 18 Watchog, and a Level 18 Trubbish, and pays off $720 for being taught this lesson. Not too bad!
As a token of his appreciation for what you have done in defending him, the Day Care Man gifts you with a new bike! Excellent! I wondered how we would end up scoring a bike in this game, and here we are! He points out that the Day Care Center on Route 3 is his – we have actually been there already, so cool, we now have a tight connection there!
As he departs, Bianca appears, says hello, and then heads off to take in a Musical, leaving you once again on your own. There is a lot to do in the city – if you check your map you will see that among the points of interest there is the Gym of course, and the Battle Subway, the Pokemon Center, the Big Stadium. Small Court, and Music Theater. There is actually quite a bit more here we want to do, it is just that most of it is not part of the map...
So from here head to the north and read the sign ahead that proclaims 'Nimbasa City: Lit by the Flash of Lightning!' I hope that is not foreshadowing!
The Mystery of N Partially Solved
– The Nimbassa N-Battle --
From the sign head directly east over the short bridge to find N waiting for us! He asks if you are looking for Team Plasma and then leads you to the Amusement Park where they ran to. As he cannot find the Team Plasma Grunts he convinces you to ride the Ferris Wheel with him, and during the ride he reveals that he is in fact the King of Team Plasma! Gasp!
He makes a rather silly observation, and then when the ride ends you find yourself in front of the Ferris Wheel with that ominous music playing, and the Plasma Grunts show up and confirm what N told you by addressing him as 'My Lord N!'
I don't know about you but I certainly did not follow the gobbledygook he calls logic, so I said 'No' to his question – and the battle ensued! He makes it plain that this battle is intended to cover the retreat of his troops – so be it!
N has a Level 22 Sandile, Level 22 Darumaka, Level 22 Scraggy, and a Level 22 Sigilyph. His Sigilyph is by far the more challenging if his team, if just due to its Psybeam that can confuse your Pokemon.
When you have beaten him you get a nice close-up and learn that his plan is to become the Regional Champ and then force all Trainers to release their Pokemon. Is this guy a nutter or what?? With that revelation he runs away and you are once again free to wander!
Nearby there are some vending machines if you need to re-stock your kit – and of course there is the Ferris Wheel here but you cannot actually ride it again, which is too bad as I like Ferris Wheels! In the southwest corner of the park here is a treasure ball that contains an X Atttack, so grab that now. If you have the Dowsing Machine turned on you will see that there is a Super Repel in the southeast corner.
Back to the west is a clown who likes to spin, and north of the clown is the entrance to the City Gym, but we are not ready for that at the moment... To the west you will see a couple of Trainers to chat with and a clown promoting the Roller Coaster – and a very large statue of a yellow Pikachu is here that is very similar to the one in the real life Poke Park in Japan (which is what this park is loosely modeled upon).
Head back over the bridge to the west and continue past the Battle Subway to chat up the clown ahead who provides a tip. Now pop into the Pokemon Center ahead and heal and save, then chat up the Trainers here. There is a girl with a Minccino, and at the top of the stairs a bloke who tells you that he was given the HM for Strength for free from a man near the Pokemon Center.
– The Poke Mart Counter --
As you expect to, you find a Poke Mart Counter in the Nimbasa Pokemon Center, but what you may not be expecting to find is a very wide selection of TM's for same there! There are the standard pair of countermen...
The left-hand counterman has the usual items for same, but it is the right-hand counterman who has a rather stand-out difference in stock this time! Checking his list of items for sale reveals that in place of the usual selection of mail and odd Poke Balls, he has instead:
Frustration (TM21) $10,000
Gyro Ball (TM74) $10,000
Light Screen (TM16) $30,000
Reflect (TM33) $30,000
Return (TM27) $10,000
Safeguard (TM20) $30,000
Thunder Wave (TM73) $10,000
Obviously we do not have the money at the moment to take advantage of this treasure trove of TM's but at least we know where they are now – so when we do have the extra money we can return here to grab them as we need them! Of these TM's, the ones that strike me as being the most useful at the moment are Reflect and Return – though the others are useful as well!
– Pokemon Battle Institute --
Directly to the west is the Pokemon Battle Institute, where you can go to test your Trainer Skills by taking tests. You take the tests by using three Pokemon for Singles Battles and four Pokemon for Doubles Battles. You cannot use duplicate Pokemon or held items, and all of the Pokemon you use must be Level 50. You battle five trainers in a row, and the bloke in the lab coat is the judge of the battles.
When you read the menu you will notice that there is a selection marked 'Download' that you can pick now – though when it connects it just says it cannot locate any items to download at the moment – which is because there are none. That is supposed to change though, with different downloadable scenarios planned to be available later in the year. When that happens we will edit this section to reflect them.
As this requires Level 50 Pokemon that means we cannot do this right now anyway – but what the bloke in the lab coat fails to tell you is that the Institute does not become functional until AFTER we beat the Elite Four! When it does become available you should be aware that the same restrictions that apply to the Battle Subway apply here – no Legendary Pokemon allowed, in other words.
The scoring system in use at the Institute is pretty simple – after you complete a test by fighting all of the Trainers that are part of it, you step out of the ring and are given your assessment based upon your total performance, which includes:
? The success of your strategies
? How many times yor Pokemon were KO'd
? How many of their Pokemon you KO'd
This is all translated into points, and the points are then used to determine your Rank results:
1-Star Beginner Rank (0 to 999 Points)
2-Stars Novice Rank (1000 to 1999 Points)
3-Stars Normal Rank (2000 to 2999 Points)
4-Stars Super Rank (3000 to 3999 Points)
5-Stars Hyper Rank (4000 top 4999 Points)
6-Stars Elite Rank (5000 to 5999 Points)
If this all sounds sort of familiar you will recall that some of the contests in the previous generations games used a similar system of ranking, and if you are getting the idea that the Institute is past of the translation of contests into the new game, well...
That pretty much wraps up the details for here – and while we cannot use these facilities right now, we should remember it for later, right?
To the right of the bloke in the lab coat is a Pokemon Storage System PC, and to the right of that is a display you can use to review the test results in case you wondered what that was all about!.
– Back on the Town --
North of the Institute are a pair of buildings – enter the left-hand one to chat with Trainers and learn about some of what the city has to offer, like the Musicals and the fact that while Castelia City is the heart of business in the region, Nimbasa is the heart of leisure and recreation! Obtain a free copy of HM04, Strength from the Trainer at the table in the upper left corner – and how cool is that?
Upstairs is a woman who gifts you the hold item Soothe Bell because your Pokemon likes you – that hold item will increase the amount that Pokemon on your team like you, which will come in handy later. One of the Trainers here tells you about the Small Court – where you can find tennis and basketball, while the other tells you about Big Stadium, which features football and baseball naturally.
In the building next door you will find a young girl Trainer who comments on the fact that Shiny Pokemon look as if they are gleaming when they come out of the grass. If this is the first you are hearing about Shiny Pokemon be sure to read the Appendix entry on those!
Upstairs is a bloke who gifts you a Sun Stone, and after you leave it, cross the short bridge to the north and head west so that as you approach the gate it triggers another encounter with Bianca, who takes you to the Musical Theater, where you meet the owner, who gifts you both with Prop Cases so you can play Pokemon dress-up! You are then prompted to pick a Pokemon and you get the dress-up tutorial.
– Pokemon Musical Theater --
Like the contests in the previous version, the Musical is an opportunity for you to participate in an activity with your Pokemon. This can actually be fun!
Pokemon wearing props (hence the case and tutorial) perform on stage, and anyone can participate. An audience is present to help you learn how well you did, and you can join in the production from the reception area in front.
The center slot is for participating alone, the left slot is for putting on a production with your mates, and the right slot is for dress-up play only. You can only use the Pokemon in your party to dress-up and perform, and if you have any doubts about whether they can wear the props you want to use, there is a dressing room you can use to try them out.
Props are collected as you adventure, and how well you use them and how well they fit the particular Pokemon you are using has a lot to do with how well you score in the process.
The girl to the right of the Pokemon Storage System Computer will gift you with TM49, Echoed Voice, when you chat her up, which nicely wraps up the Musical Theater portion of our tour of the city!
When you exit you will spot Bianca outside and oh my God! Is that her father?! Oh, this will not be good... He is there to bring her home – and Bianca is having nothing to do with that idea! Just when it looks like things are going to go from bad to worse, Elesa shows up – in case you are confused, Elesa is the Pokemon Gym Leader for the Nimbasa City Gym.
With Elesa's help Bianca and her Da have a heart-to-heart and her Da finally gets it... He asks you to take care of his little girl and then he goes home. Thank God! I thought he would NEVER leave! Elesa is now Bianca's new hero – which makes sense, you know, empowered woman and young girl looking for her place and all that...
– A Brief Look at Route 16 --
Now head east and enter the gatehouse here – this is the gatehouse to Route 16 – and chat with the bloke in the judo outfit to score the hold item Macho Brace.
We are actually not going to go very far on this Route because we cannot – still we are going to pick up some convenient XP and a few Pokemon in the process because it is here, and because we can use the boost to get ready for the Gym Battle we will fight shortly...
Policeman Daniel is waiting just outside of the gate entrance, with a Level 24 Herdier. This will not be a bad battle for you, as you should be well experienced with these by now and know exactly how to deal with them.
Cyclist Krissa is riding on the road ahead, and ready to face you with her Level 22 Ducklett, and her Level 22 Liepard for a quick rumble.
Backpacker Peter and his Level 23 Scraggy are waiting impatiently for you by the side of the road ahead.
Cyclist Hector is patrolling the road at the corner, and his pair of Level 22 Whirlipede should give you a nice battle even if they are a rather odd-looking pair.
This is as far as we can go on the Route at the moment, as there are a pair of workers blocking the gate entrance to the Marvelous Bridge, which is the continuation of the Route.
So double back to the entrance of the Route 16 Park (note that this is actually a park off of Route 16 and, despite the proximity is NOT the beginning of Lostlorn Forest) and hit the tall grass here, to capture some new Pokemon!
Backpacker Stephen is just inside the park entrance, and he has a Level 23 Drilbur, and once you beat him into the turf, head over to the tall grass and get started trolling up some awesome Pokemon here!
- - - - - - - - - - - - - - - - - - - -
Route 16 Area Pokemon Report
Dex No.    Pokemon     Rarity     Season     Capture Note
#016/510   Liepard     (C)        All         Grass
#037/531   Audino      (C)        All         Shaking Grass
#074/568   Trubbbish   (U)        All         Grass
#078/572   Minccino    (U)        All         Grass
#079/573   Cinccino    (R)        All         Shaking Grass
#080/574   Gothita     (C)        All         Grass
#093/587   Emolga      (UR)       All         Shaking Grass
- - - - - - - - - - - - - - - - - - - -
About the Pokemon here...
Minccino is a rather cute Pokemon, and Trubbish can be hard to keep in the regular Poke ball long enough to capture so you may want to use a Great or Ultra Ball for them. Capturing a Cinccino is a very good idea as normally to have one of them you have to evolve it, and to do that you would need to use a Shiny Stone on a Minccino – so getting one without having to do all of that is a good thing. The one Pokemon of the bunch that will give you the most trouble is Emolga.
Unless you are really lucky and get it to pop right away, you may spend several hours trolling the tall grass before you see one of these – there is a good reason why it is one of the few Pokemon to receive the UR (Ultra Rare) Rarity tag!
In a cup-half-full world you can choose to view the pursuit of Emolga as a chance to level your team, right? That is how we chose to view it, and that made us feel better about the long and drawn-out process. More than a few times we almost gave up, nearly convincing ourselves that we could come back for it later – but in the end we stuck to it, and when we finally saw this flying mouse of a Pokemon we were glad that we did!
Once you have obtained the new Pokemon – and before we return to town – there are some odds and ends for us to look to here... First head to the back of the park here and cut the tree down to gain access to the treasure ball with the Rare Candy in it – you should be holding on to all of the Rare Candy that you find in the game, as they will be particularly useful for when we are facing the Elite Four later in the game.
Note that further along the path here is the entrance to Lostlorn Forest – but as we do not want to go here just yet, ignore that for now won't you?
Now it is time to teach one of your Pokemon the HM Strength, and then head back to Route 16 and a little to the east and the opening in the fence that is blocked by that huge boulder. Using Strength you will push the boulder forward, and it will fall into the large hole here. Note that unlike in the previous games where you would need to push the boulder out of the way any time you return to the area having changed zones, in Black and White these have a persistent state to them – meaning once you push is into the hole is will always be in that hole.
The Darker Grass Contains Doubles Battles
Walk over the boulder – which is now part of the path – into this other section of the park, and follow the path here north.
Backpacker Lora has a Level 23 Swadloon that you will make short work of.
Further along the path is a treasure ball with TM66, Payback, inside. Obviously this is worth the extra effort of pushing a boulder out of the way to obtain :)
Along the gray steel fence you all the way to the east is another treasure ball with a hold item – Charcoal – in it. We already have one of those, but a spare will never hurt, so grab that as well why don't you?
Notice the odd color of the grass here? This is the dark tall grass and it is in this sort of grass that you will find doubles battles – and I will be shocked if you do not end up in one of those while you are here! Remember that in a double battle, if there is one of the Pokemon you are facing that you want to capture, you have to KO the other first.
I was surprised that the Dowsing Machine never plipped while we were here... Anyway, now that we have the two treasure balls picked up, and that battle out of the way, return to the first path and all the way to the end, and enter the Lostlorn Forest now!
– The Lostlorn Forest --
Before we step into the Lostlorn Forest I need to ask you – did you attend any of the pre-release events at which the special Fateful Encounter Shiny Entei, Suicune, or Raikou were given away? Depending upon where in the world you are, this either happened at a GameStop Store or via the WFC Mystery Gift program with Pokemon Diamond, Pearl, Platinum, HeartGold or SoulSilver – or any combination of those depending on which you own.
If the answer to this question is yes, then keep reading this part of the section – if the answer is no, then skip to the next subsection header labled 'Into the Forest' now.
Still here? Excellent! We are about to obtain a rather special Pokemon called Zoroark – the Illusion Pokemon. Note that Zoroark is NOT a Legendary – which means that you CAN breed them, so if you did not obtain the Fateful Encounter Celebi for whatever reason, all is not lost. Simply move a Ditto into the game after you get the National Dex and breed one up! But we are getting ahead of ourselves here!
In the grand scheme of things this is not a very powerful Pokemon and you will likely not be adding them as a regular member of your A-Team for that very reason. But it is one that we need to capture, and this is where we do that, so before you set off for the Forest grab your special Pokemon that you transferred into the game earlier.
Capturing the rare and special Illusion Pokemon
WARNING: You can only do this event ONE TIME. So do not mess up on this mate!
With one of the Fateful Encounter Pokemon in your party, head into the Forest now, ignoring all of the stuff here and making your way to the north where you will find a caravan parked in the forest.
We say to ignore all of the other stuff – the treasure ball and wild encounters to be sure, and do not bother turning on the Dowsing Machine, because right now our focus is simply to obtain this special Pokemon. Later in the next subsection we will address doing this area proper, so for now just head to the caravan...
As you approach there is no chance to chat with the woman who lives in the caravan – instead she bursts out and attacks you, becoming a Pokemon!
In my battle I used Entei and the Pokemon I initially faced appeared to be Suicune – but as soon as I hurt it, it lost its illusion form, revealing itself to be Zoroark!
After you capture it, the backpacker approaches and observer: 'So this is Zoroark's home then.
'Zoroark was using its illusion to trick people and Pokemon. It wanted to keep people away from its lair.
'I heard this place was suspicious, so I came to have a look, but it looks like I was tricked as well.
'Zoroark reacted strongly to the Pokemon you have with you... There must be some history there. A quarrel, or something. Such a beautiful field, in a place like this... It's almost as if this lovely scenery is the illusion!'
With that last observation, the backpacker departs, leaving you to contemplate the fact that you approached a caravan in the woods, and a woman came screaming out and attacked you, turning into one Pokemon before becoming another!
That wraps up capturing Zoroark, so on with our adventure!
– Into the Forest --
As we enter the Forest and cross the small plank bridge we immediately spot the treasure ball in the hollow stump – heading over we find that it contains a Big Mushroom, which is a large and rare mushroom that is sought after by collectors...
The Dowsing Machine immediately shows a hidden object to the northeast, and when we find that to actually reach it we will need the moves Surf and Waterfall to get up to the area above where the tall grass is, which is where it is located. We will have to return later for that then, won't we?
For now though we concentrate upon obtaining the Pokemon in this area that we need for our Dex and collection!
- - - - - - - - - - - - - - - - - - - -
Lostlorn Forest Area Pokemon Report
Dex No.    Pokemon     Rarity     Season     Capture Note
#017/511   Pansage      (R)       All        Shaking Grass
#019/513   Pansear      (R)       All        Shaking Grass
#021/515   Panpour      (R)       All        Shaking Grass
#025/519   Pidove       (U)       All        Grass
#026/520   Tranquill    (U)       All        Grass
#027/521   Unfezant     (UR)      All        Shaking Grass
#037/531   Audino       (C)       All        Shaking Grass
#047/541   Swadloon     (U)       All        Grass/Tall Grass
#048/542   Leavanny     (UR)      All        Shaking Grass
#049/543   Venipede     (U)       All        Grass/Tall Grass
#052/546   Cottonee     (U)       All        Grass/Tall Grass
#053/547   Whimiscott   (UR)      All        Shaking Grass
#056/550   Basculin     (C)       All        Water/Dark Water
#093/587   Emolga       (UR)      All        Shaking Grass
- - - - - - - - - - - - - - - - - - - -
Obviously with the high number of UR-Rarity Pokemon you are going to be spending significant time here in capturing these, but on the bright side, by the time you leave the Forest your team will be ready to take on the Gym Battle and then some!
The open space to the right of the hollow stump is the perfect runway tract for trolling for Shaking Grass, so we may as well start there, and wrap up the Shaking Grass Pokemon first... Then go for the Grass to grab the rest of them. Obviously as we do not have Surf or a fishing pole we will not be capturing all of the Pokemon here – just get what you can and then move on!
If you do not have a Fateful Encounter Pokemon on your party when you approach the caravan in the middle of the forest you will find a backpacker standing in front of the caravan who, when you walk up to them and chat them up will talk to you, saying: 'You know, there are people in the world with many different values. Some people enjoy things you might not think are fun... Having a lot of different values in the world makes it a richer place. That's what I think anyway,' they tell you.
They start to walk away, and then come back and say: 'I really enjoy traveling around the world and talking with different people, but the woman who lives here seems to think living quietly by herself is important.'
The backpacker then hikes off, leaving you alone before the caravan. If you go inside – you can – all that happens is that the woman there says '...' when you try to chat her up. Nothing more, nothing less – unless of course you have a Fateful Encounter Pokemon, then none of this actually happened!
If you are having trouble trolling up a Unfezant bear in mind that it is the final evolution of Pidove's line, and you can always take your Pidove/Tranquill and simply level it up if you like. I chose to troll one up and capture it because it was here and because I wanted to have a reason for all the leveling I was doing – I actually took my entire team to 34/35 in the process of obtaining this one.
After passing through the gate head west past the Musical Theater and head into the Big Stadium, where you can chat up the Trainers here in the lobby and the upper level. Use the teleporter to head out onto the field, where you will find a battle to be done.
Linebacker Dan has a Level 24 Darumaka, and a Level 24 Timburr.
Sadly despite the number of other footballers none actually want to fight you.
Further down on to the end of the street is the Small Court, with a similar setup, so chat up the Trainers and then use the teleporter and have a battle.
Smasher Elana has a Level 25 Blitzle that should be no bother.
Wrapping up the single battle here,
– Battle Subway --
All that is left is to head over to the Battle Subway – and when you approach the entrance a girl will come out and gift you with a Vs. Recorder, which allows you to record your battles if you like. After you enter you discover that this is Gear Station – and if you check the signs on the wall you will see the Platform for Wi-Fi Trains, Multi-Trains, Super Multi-Trains, the Train to Anville Town, Super Double-Trains, Double Trains, Super Single Trains, and Single Trains. There is a computer kiosk that is under construction. You can enter each of the platforms, where you will find a counter where you can trade in BP (Battle Points) for prizes, a Pokemon Storage System PC, and a conductor to put you onto the train.
At the moment the only lines that you can actually use are the Single, Double, and Multi-Trains and the Train to Anville Town... There is a bloke in the center of the main area that will allow you to record your greeting and your win/lose feelings – that is strictly optional of course.
Right now we do not want to take the Anville Town Express – but if you have a Level 50 or higher Pokemon you can do the battle trains now if you like – any Pokemon higher than Level 50 will temporarily have its Level lowered to 50 for the battles.
As we do not have any Pokemon eligible for battle, and as we do not want to head to Anville Town at the mo, we may as well exit the station back into town!
– Nimbasa City Gym –
Yes, it is that time! Head over the bridge towards the amusement park and pop into the Gym, where you will find a Gym that looks like an amusement park ride!
As you step in be sure to chat up the Greeter for a free bottle of Fresh Water – and the word that the Gym is built into a Roller Coaster Ride. The Greeter explains that you ride the coasters to each platform, changing trains along the way to battle different opponents. He reminds you that when facing Normal-types, Electric-types do not do so well...
The platform to the left just takes you in a circle on the red line for now, while the blue line straight ahead takes you to the next platform and your first AGL battle!
Lady Magnolia has a pair of Level 24 Emolga.
The nearby blue square tile is a switch – using it changes the route that the coasters follow. Go ahead and us it now, then get back on the coaster getting off at the next platform.
Rich Boy Cody has a Level 25 Blitzle, and pays you $4000 for the lesson you give him.
Pressing the green switch changes the next line, and when it arrives an AGL hops off to battle.
Rich Boy Rolan has a pair of Level 24 Blitzle.
Your ride to the next platform does not take you to another battle, just another switch – this one a purple switch, and when you use it the Orange Line is activated, and another AGL pops out to battle you!
Lady Colette has a Level 25 Emolga,
Battling the Nimbasa City Gym Leader
– Gym Leader Elesa --
The battle begins with her pair of Level 25 Emolga, followed by her Level 27 Zebstrika.
Elesa grants you the Bolt Badge for beating her, which has the effect of causing Pokemon up to Level 50 to obey you, including those obtained in trades. She gifts you with TM72, Volt Switch. In addition to all of this, she tells you that she will fix it so you can continue through Route 5 towards the next city, which is blocked.
That victory concludes the Nimbasa portion of the game – and nicely wraps up the first third of the game as well, so open your badge case, polish-up your badges, and then have a look at your bag and your Pokedex in the next section to see that you are on track and have everything that you should have up to this point!
At this point you are now roughly one-third of the way through the game and there are some minimum accomplishments that you should have achieved. Not having achieved these could be a problem later on in the game, which is why we pause for this Status Check. There will be two more of these checks as you progress in the game, one at the 2/3 Point of play, and one at the end of the game.
This is pretty simple – all you need to do is check to be sure that you have obtained the following in your game regardless of which starter you chose. The basic items include Pokemon and Items, so just follow along below, and check off the items listed. If ANY are missing, you will want to backtrack and obtain them BEFORE you proceed from here, because it will be more inconvenient to do this after this point in the game.
You should have seen 50 Pokemon, and Own 35, and possess three Gym Badges – the Trio Badge, the Basic Badge, and the Insect Badge..
– Pokemon --
At this point in the game you should have the following Dex Entries in your Pokedex, and you should OWN the following Pokemon in your collection. Note that in the case of evolved Pokemon, you do not have to have all of the types from that evolutionary set in your box, just the highest one – and besides there really is not going to be room to have one of each Pokemon in your collection anyway once you start moving Pokemon from the previous generations into the game later.
If you plan on breeding Pokemon stick with the standard two Pokemon per evolutionary line (a male and female) as appropriate. In the listing below there is no distinction between a Pokemon from an evolutionary line that you should have owned at one point or now, so for instance your Tepig may now have evolved into a Pignite, so you no longer own a Tepig, but it will still be listed as Owned in the list so that you know you are supposed to have the full dex entry rather than a partial entry for a Pokemon that you never owned.
Sample listing and key:
#001 – D – Snivy << This shows that Snivy should be a Dex Entry ONLY and not Owned.
#004 – O – Tepig << This shows that Tepig should be Owned and not just a Dex Entry.
Pokemon marked with an X indicate that the entry is subject to the choice you made either with the Starter Pokemon or with Gift Pokemon, meaning that it will vary depending on what you took and is thus a special case.
Dex # – D or O – Pokemon
- - - - - - - - - - - - - - - - - - - - - - - - - - - - - -
#001 – X – Snivy
#002 – X – Servine
#004 – X – Tepig
#005 – X – Pignite
#007 – X – Oshawott
#008 – X – Dewott
#010 – O – Patrat
#011 – D – Watchog
#012 – O – Lillipup
#013 – D – Herdier
#015 – O – Purrloin
#016 – O – Liepard
#017 – X – Pansage
#018 – X – Simisage (Leaf Stone)
#019 – X – Pansear
#020 – X – Simisear (Fire Stone)
#021 – X – Panpour
#022 – X – Simipour (Water Stone)
#023 – O – Munna
#024 – O – Musharna
#025 – O – Pidove
#026 – O – Tranquill
#027 – O – Unfezant
#028 – O – Blitzle
#029 – O – Zebstrika
#030 – O – Roggenrola
#033 – O – Woobat
#035 – O – Drilbur
#037 – O – Audino
#038 – O – Timburr
#041 – O – Tympole
#042 – O – Palpitoad
#044 – O – Throh
#045 – O – Sawk
#046 – O – Sewaddle
#048 – O – Leavanny
#049 – O – Venipede
#050 – D – Whirlipede
#052 – O – Cottonee
#053 – O – Whimsicott
#054 – D – Petlil
#056 – D – Basculin
#057 – O – Sandile
#060 – O – Darumaka
#062 – O – Maractus
#063 – O – Dwebble
#065 – O – Scraggy
#067 – O – Sigilyph
#068 – O – Yamask
#072 – O – Archen
#074 – O – Trubbish
#077 – X – Zoroark
#078 – O – Minccino
#079 – O – Cinccino
#080 – O – Gothita
#083 – D – Solosis
#086 – D – Ducklett
#093 – O – Emolga
With respect to the Items and kit you should have the following but you may have more or additional items that are not action-dependent like potions/balls etc. We only list the items you should have acquired through play.
– Key Items Pocket --
-- Bicycle
-- Dowsing MCHN
-- Town Map
-- Vs. Recorder
-- Pal Pad
-- Xtransceiver
-- Prop Case
-- Liberty Pass *
– Items Pocket
-- Big Mushroom
-- Big Root **
-- Black Glasses **
-- Charcoal **
-- Dark Gem **
-- Eviolite **
-- Exp. Share (Experience Share) **
-- Fire Stone @
-- Heart Scale
-- Leaf Stone @
-- Macho Brace **
-- Miracle Seed **
-- Moon Stone @
-- Quick Claw **
-- Scope Lens **
-- Smoke Ball **
-- Soft Sand **
-- Soothe Bell **
-- Sun Stone @
-- Tiny Mushroom
– Medicine
-- Ether x5
-- Rare Candy x2
– TM's & HM's
-- No. 28 Dig
-- No. 39 Rock Tomb
-- No. 41 Torment
-- No. 44 Rest
-- No. 45 Attract
-- No. 46 Thief
-- No. 49 Echoed Voice
-- No. 54 False Swipe
-- No. 66 Payback
-- No. 67 Retaliate
-- No. 70 Flash
-- No. 72 Volt Switch
-- No. 76 Struggle Bug
-- No. 83 Work Up
-- No. 86 Grass Knot
-- No. 94 Rock Smash
-- HM01 Cut
-- HM04 Strength
– Berries
-- Cheri Berry x1
-- Chesto Berry x5
-- Pecha Berry x2
-- Rawst Berry x2
-- Oran Berry x4
-- Yache Berry x1
* Optional – depends on whether you obtained the game in the first month of its release.
** Pokemon Hold Item.
@ Evolution Item used by specific Pokemon to evolve.
Pausing in the Gatehouse to check the ticker reveals the weather on Route 5 and in Driftveil City as well as a headline referencing your recent victory over Elesa! As you exit onto Route 5 who should show up chasing after you? Why Cheren of course! As you both have the Bolt Badge he thinks you should see who is the better Trainer – and the battle ensues!
Cheren opens with his Level 24 Liepard, Level 26 Dewott, Level 24 Pansear, and Level 24 Tranquill.
Elesa shows up after the battle and leads you along the Route until you are stopped by Alder, who you quickly learn is the Unova Regional Champion! Alder teaches Cheren that there is more to being the Champion than Cheren thought – and then drafts you both into a battle with a nearby pair of Trainers, healing your team first!
Preschooler Sarah and Preschooler Billy have Level 26 Herdiers, and after the battle Alder shows what a gentleman he is to the pair, before giving Cheren some parting advice and then Cheren chases off after Elesa.
Now, you could do the same – or you could chat up all of the Trainers here! Yes, you chose the Trainers! Good on ya!
First there is the nearby caravan, inside of which you will find the humble Maid who has a master that likes all things nummy! She will offer to buy specific items from you – not all of which it is a good idea to sell her!
The list includes:
Berries $20
Big Mushroom $5000
BalmMushroom $25000
Castelia Cone $2000
Fresh Water $200
*Leftovers $200
Lemonade $350
*Lucky Egg $200
Old Gateau $4000
*Rare Candy $10000
Shoal Salt $7000
Soda Pop $300
TinyMushroom $500
Items marked by an asterisk are not ones you should sell... They are worth way more as part of your kit.
Harlequin Paul has a pair of Level 22 Whirlipede,
Musician Preston has a Level 22 Blitzle – and defeating him gets you a prop item, the Electric Guitar.
Dancer Brian has a pair of Level 22 Darumaka
Artist Horton has a Level 23 Sigilyph.
Double back now to the grass strip on the north edge near the gate – and head up!
- - - - - - - - - - - - - - - - - - - -
Route 5  Area Pokemon Report
Dex No.    Pokemon     Rarity     Season     Capture Note
#016/510   Liepard     (U)        All        Grass/Dark Grass
#037/531   Audino      (C)        All        Shaking Grass
#074/568   Trubbish    (U)        All        Grass/Dark Grass
#078/572   Minccino    (C)        All        Grass/Dark Grass
#079/573   Cinccino    (UR)       All        Shaking Grass
#080/574   Gothita     (U)        All        Grass/Dark Grass
#093/587   Emolga      (R)        All        Shaking Grass
- - - - - - - - - - - - - - - - - - - -
Backpacker Lois has a Level 23 Munna, and behind her there is a treasure ball with a Great Ball inside for you to collect.
The Pokemon Report above is mostly for form – you already have these so there is no need to capture any of them... But while you are here capture a spare Mincino right? Trust me, it will come in handy! Now follow the grass west to your next battle.
Backpacker Michael has a Level 23 Palpitoad.
Grab the Revive from the nearby treasure ball, and the Zinc from the treasure ball all the way to the west, before returning to the Route and running along the path on the other side of the road to grab the Hyper Potion from the treasure ball there. Now head onto the bridge!
As you approach the drawbridge Elesa convinces the keeper to lower it, which he does in a cinematic fashion – and then Cheren takes off over the bridge. As you make your way over the bridge you chat up a bloke who tells you about the bird Pokemon that haunts the bridge, and about its feathers.
Chasing Shadows
- - - - - - - - - - - - - - - - - - - -
Driftveil Drawbridge Area Pokemon Report
Dex No.    Pokemon     Rarity       Season   Capture Note
#086/580   Ducklett    (C)          All      Shadow Dots
- - - - - - - - - - - - - - - - - - - -
Run along the bridge until you hear the fluttering wings then mind the odd shadow spots as you can grab the odd special item:
Clever Wing – Increases base Special Defense stat.
Genius Wing – Increases base Special Attack stat.
Health Wing – Increases base HP.
Muscle Wing – Increases base Attack stat.
Pretty Wing – A Pretty Feather with no effect.
Resist Wing – Increases base Defense stat.
Swift Wing – Increases base Speed stat.
The bird Pokemon is a Ducklett – and you find yours by chasing down the shadows on the bridge until one of them contains a Ducklett.
– Driftveil City --
After you cross the bridge you find yourself in Driftveil City – and quickly encounter Cheren talking to Clay, the Gym Leader here! It turns you that lowering the bridge let some Team Plasma Grunts escape, and you are catching the blame here for that. The Gym Leader is adamant – in order to face them you have to find Team Plasma!
Inside the first house you get some advice, while in the second you run into a Move Tutor who will teach your Starter Pokemon a different Pledge Move depending upon the Starter. They are:
Oshawott = starter Water Pledge
Snivy = Grass Pledge
Tepig = Fire Pledge
The cool thing about these moves is that when you use them in combination they have a joined effect!
In the next line of houses behind the first, starting on the right, there is an old mean who will evaluate your Dex and as you have more than 50 entries, give you a hold item called a Shell Bell – which restores a little HP each time you do damage. He also asks if you showed it to the Professor?
The other Trainer here will trade you a Basculin for your Minccino – you did capture an extra when I suggested it, right? Well, hit the Pokemon Center and put it in your party and then do the trade!
After you stick your new Pokemon in the box and grab your team member then talk to the two Trainers in the house next door and chat up the Trainers there, then head over to the Market where the man at the counter in the black suit will give you an Expert Belt when you show him a Pokemon that is Level 30 or higher.
At the other counter is a woman who will sell you Moo Moo Milk if you like, and a couple selling Powder and Herbs. Exit the building and re-enter from the left to grab the Big Pearl from the treasure ball there!
In the house above is a woman who wants to see a Pokemon who knows Rock Tomb – if you have one and show it to her and she'll give you a Heart Scale as a reward.
A bloke on a motorbike who is riding behind the market will teach you about Rotation Battle, and then demonstrate with you.
Motorcyclist Charles has a Level 27 Basculin, Level 27 Krokorok, and a Level 27 Zebstrika. As you battle you use one Pokemon, and he gets to rotate his in, choosing the best type against you. You can rotate yours as well.
To the north is the Gym on the right, in the center a building much like a Pokemon Fan Club. Route 6 is to the left. The Backpacker out front will tip you to an old man on Route 6 who is looking for Legendary Pokemon.
– Cold Storage --
To the right as you enter the Cold Storage area, there is a Trainer for you to battle.
Youngster Kenneth has a Level 24 Whirlipede, and a Level 24 Karrablast. You will notice the Dowsing Machine ding after the battle. Ignore it for now and head to the right for another battle.
Youngster Albert has a Level 24 Joltik, and a Level 24 Dwebble.
After the battle follow the DM to grab a Hyper Potion, then go between the two warehouses to the left to get a Rocky Helmet from the worker there. Get the PP Up from the trash basket inside the gate, and then look ahead and you will see grass.
 - - - - - - - - - - - - - - - - - - - -
Cold Storage Area Pokemon Report
Dex No.    Pokemon     Rarity     Season     Capture Note
#013/507   Herdier     (U)        All         Grass/Shaking Grass
#037/531   Audino      (C)        All         Grass
#038/532   Timburr     (R)        All         Grass
#078/572   Minccino    (U)        All         Grass
#079/573   Cinccino    (UR)       All         Shaking Grass
#088/582   Vanillite   (U)        All         Grass
- - - - - - - - - - - - - - - - - - - -
If you examine your Pokedex you will see that what you need from the list above is a Herdier, and a Vanillite – which is fortunate because while Uncommon they are not as hard to find as some – so before we continue on our adventure how about we go ahead and capture these two now?
To the right of the grass is a treasure ball with an Ether – good one! Keep heading past where the treasure ball was to get to a back areas of the yard, where you will find a DM item (Dive Ball) and the Tall Grass of the sort you get double battles in. As you can see there is another treasure ball there with a Protein in it, so grab that now.
Worker Eddie has a Level 24 Pansage, and that wraps up this small area assuming you have captured the two Pokemon?
Back near the gate is a vending machine – this game is filthy with them and you have to love that! So restock any of the drinks you used up, and then head around the corner so Cheren can catch up with you and ask a stupid question – do we think that Team Plasma might be hiding in the Cold Storage? Well, we have looked everywhere else, right? And the process of elimination dictates that... Why do we bother explaining these things to him? Isn't HE supposed to be the smart one???
The bloke standing guard outside tips you that Gym Leader Clay is really just testing you – and when you get inside Cheren starts to doubt himself. That Clay really did a number on him...
Bearing in mind that parts of the floor are covered by ice – that you will slide on – and assuming you have played some of the previous games and so already know what is coming, climb the nearby stairs on the left to get the Net Ball form the treasure ball there, and then ignore the ice blocks up here as that is the exit and not the entrance, which you can work out by looking at how they are laid out.
First slide along the left edge o f the ice area to the block stack, then slide to the right and down to get TM55, Scald, from the treasure ball here. Now slide back to the left and then back down to where you started from and slide up through the middle of the ice field to the container wall and then right to the area that is free of ice. Good!
Worker Victor has a Level 24 Pansear, and a Level 24 Timburr.
As you can see there is only one way to go from here – right – and then up the stairs for a battle.
Worker Glenn has a Level 24 Panpour, and a Level 24 Timburr, and pays $960 for the lesson you just taught him.
The blocks ahead are a simple puzzle for you to work out – head right, up, left, and down – then up the ladder for your next battle.
Worker Filipe has a Level 25 Gurdurr – which is a new Dex entry for us – and pays a cool $1K for his lesson.
Now down two flights of stairs and another battle!
Worker Patton has a Level 24 Vanillite – which is a very good Pokemon by the way and a nice example of an Ice-type – and a Level 24 Timburr. You may need to heal up after this, so be sure to do so if you do need to. That is what the drinks are for. Grab the Ice Heal from the nearby treasure ball and then continue north.
Worker Ryan has a Level 23 Timburr and a Level 23 Vanillite, followed with another Level 23 Timburr.
I don't know about you but this string of battles allowed me to level up one of my team :) To his right is a treasure ball with a Hyper Potion in it so grab that and then head left.
Heading up the ladder here clearly leads to the exit, so instead head down and around the corner of the open container to provoke an update with Cheren, who asks if someone is in there? Yes, Cheren, this is clearly where they are!
– Team Plasma --
Not only are there Grunts inside, but there is also Zinzolin, one of the Plasma Captains and member of the Seven Sages! She of course puts the Grunts on to you. Good Grunts!
Working to your right, Grunt One has a Level 24 Liepard, Grunt 2 a Level 24 Trubbish, Grunt 3 a Level 23 Sandile and a Level 23 Watchog. The Grunts to Cheren's left and the one in front of him will decline to battle you, but the one in the center will fight!
Center Grunt has a Level 23 Watchog, and a Level 23 Scraggy, and after you beat them, Clay shows up with his crew – a crew of workers who actually served to weaken you for this confrontation, which means they are not really your mates...
The Workers take custody of the Team Plasma Grunts and their Sage, and Clay tells you that you may now challenge his Gym. I should point out that what he has done here could get him kicked out of the League in a heartbeat if you turn him in! The League rules are clear on this – ANY Trainer can challenge a Gym, and a Gym Leader may not put any conditions on the ability to challenge – if they do, they lose their license and are removed as Gym Leader!
Cheren leaves and you gran the NeverMeltIce from the treasure ball in the corner – this is a hold item that boosts Ice-type moves, so you may want to give it to your new Ice-type Pokemon, Vanillite, as you will certainly want to add them to your A-Team as an alternate!
The way out is dead simple, so follow that and head to the Poke Center to heal and save and restock your kit. When you are ready all that is left for here is to battle Clay at the Gym!

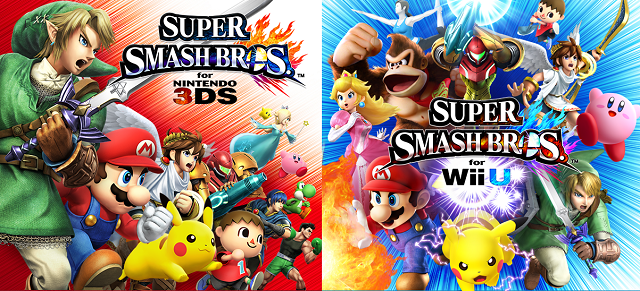
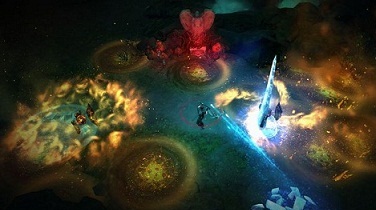 Victor Vran (PC) - walkthrough
 Fallout 4 Mission Guide: Taking Point: Sunshine...
 Street Fighter V Wiki – Everything you need to know about the game .
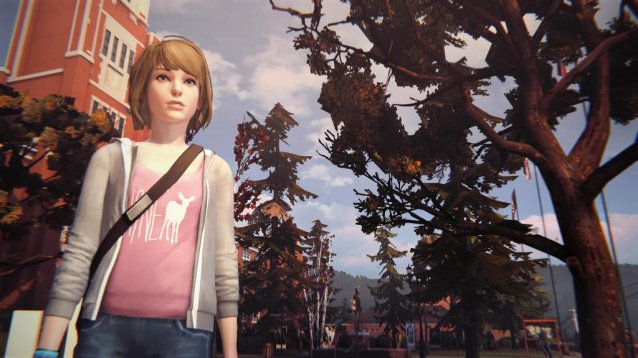 Review: Life is Strange
 Destiny: How To Farm And Get Weapon Parts Quickly