Having outlawed magic, the Empire is now actively hunting all magic creatures to cleanse the land. As the Overlord, you possess a dark tower in the Netherworld, and a horde of rowdy Minions who exist only to carry out your evil bidding. Your goal? To bring down the Empire and impose your evil rule.
Being an Overlord has its perks, but it’s no cakewalk. Our complete guide to Overlord II will help you make the most of your time in power. In this guide, you’ll find a walkthrough covering each and every quest, text descriptions and pictures of the locations of every treasure, as well as a complete listing of Xbox 360 achievements and PlayStation 3 trophies.
Note: This guide was written based on the Xbox 360 version of the game, but all strategies contained within are applicable to the PlayStation 3 and PC versions, as they differ only in control scheme.
Left Trigger - Target Lock.
Left Bumper - Centre Camera. (Hold and use Right Thumbstick for Manual Camera).
Right Trigger - Send Minions.
Right Bumper - Hold to select Minion type (A = Green, B = Red, X = Blue, and Y = Minion. Tap button twice to select mounted Minions only, and a third time to select unmounted Minions only.) Tap to select all Minions.
Left Stick - Move Overlord.
Right Stick - Sweep Minions/Camera (hold LB for manual camera). Click to switch default view.
Y Button - Plant Guard Flag.
B Button - Call back Minions. Hold for two seconds to call Minions off of Guard Flag(s).
A Button - Swing Weapon. Execute three attacks in a row to perform a Power Strike.
X Button - Cast Magic.
Back Button - Status Screen/Quest Screen
Start Button - Pause.
A X - Perform 360 degree spin attack.
Left Stick A - Pull back on Left Stick and press A to perform 180 degree strike.
L2 Button - Hold to target.
L1 Button - Centre Camera. (Hold and use Right Stick for Manual Camera).
R2 Button - Send Minions.
R1 Button - Hold to select Minion type (A = Green, B = Red, X = Blue, and Y = Minion. Tap button twice to select mounted Minions only, and a third time to select unmounted Minions only.) Tap to select all Minions.
Left Stick - Move Overlord.
Right Stick - Sweep Minions/Camera (hold LB for manual camera). Click to switch default view.
Triangle Button - Plant Guard Flag.
Circle Button - Call back Minions. Hold for two seconds to call Minions off of Guard Flag(s).
X Button - Swing Weapon. Execute three attacks in a row to perform a Power Strike.
Square Button - Cast Magic.
Select Button - Status Screen/Quest Screen
Start Button - Pause.
X Square - Perform 360 degree spin attack.
Left Stick X - Pull back on Left Stick and press X to perform 180 degree strike.
There are four Minion colours, each with their own attacks and specialities. Below is an overview of each Minion type.
Minion
Browns: The Fighters. The backbone of your horde. The hardiest of the Minions, and able to hold their own in melee. Keep these guys on the frontlines to protect your less vigorous Minions. Browns can pick up weapons and armour dropped on the battlefield and equip them, increasing their power. When placed on a Guard Flag, Brown Minions gain an offensive boost, and are able to hold back enemies.
Reds: The Archers. Their ranged attack makes them an asset in battle, but keep them out of melee, as they are very weak in that regard. Reds are immune to fire, and can extinguish flames surrounding fire barriers. They can be used to light explosive barrels, or hit out-of-reach enemies. When placed on a Guard Flag, Reds will automatically target nearby enemies with thrown fireballs.
Greens: The Assassins. Greens can cloak and attack enemies from behind, but are not nearly as proficient in melee as Browns, nor as vigorous. Use them to attack an enemy from behind, however, for exceptional damage output. Greens are immune to poison, and can remove poison surrounding barriers. When placed on a Guard Flag, Green Minions will cloak on the spot. Try leading an unwitting enemy back to the Guard Flag, and the cloaked Minions will latch onto the enemy’s back and make short work of him.
Blues: The Healers. Blues are the only Minions that can swim, making them invaluable as treasure hunters. As fighters, Blue Minions surely fall short, but they can be used efficiently as support units. Blues have the ability to Blink through enemies, allowing them to be swept past undetected to hit a switch, or to carry a bomb into the middle of a legion formation. When set on a Guard Flag, these Minions will automatically revive fallen Minions within range. So, when in battle, set these guys on a Guard Flag somewhere safe to support the Minions on the frontlines.
There are several events that will affect your tyranny rating, all of which involve either killing or dominating a single target or multiple targets. It is best to play Overlord II making either all Destruction choices or all Domination choices if you are interested in earning achievements/trophies, as several are unlocked by being consistent.
The Dominator and The Destructor are achievements/trophies associated with tyranny rating. Both are worth 40 gamerpoints on the Xbox 360, or a Silver trophy on the PS3, and require that you achieve a 100% Domination rating, or a 100% Destruction rating respectively. So, to unlock both of these achievements/trophies, you’ll have to play through the game twice. Because of this, it is best to go either full Destruction or full Domination by making all of the appropriate choices if you’re after achievements/trophies.
Killing and subduing involves the use of the Target spell. To kill a villager, you can lock-on and hit him or her with your weapon, or overcharge your Target spell. To enslave a villager, lock-on and hold down the X/Square button until the villager begins to get down on his or her knees (likely as soon as he or she begins to lose health), at which point immediately release the button to avoid overcharging the spell and killing them. Keep an eye on the villager’s health bar if you’re planning to enslave them, as they may not fall to their knees in time; if their health falls to the half-way point, release the spell, as they have surely been subdued by then.
Targeted villagers will attempt to escape, so you can use your Brown Minions to pin them down; simply lock onto the fleeing villager and hold down the RT/R2 button to send them in.
Refer to the “Destruction/Domination Choices” section of this guide for a complete listing of each choice to be made, as well as how they affect tyranny rating. Note however, that this section contains spoilers, so don’t read too far down the list.
During this short sequence, you'll learn some basic controls and cause a bit of mayhem. Start by following the children to the end of the path, and press the A/X button to smash the snowman blocking the way. With the path clear, continue chasing the other children until you come to two firework cannons. Use the Lighting Whip spell (tap the X/Square button) to light the wicks of both cannons to set them off, successfully demonstrating your magic capabilities.
Continue down the path and use Lightning Whip to set off the two firework bundles by the crates. Swing your weapon using the A/X button to clear the crates in your path, and then continue on to gain some Minions. Follow the instructions onscreen to send the Minions after the children. You can set one or more Minions to task by tapping or holding the RT/R2 button, or you can control them directly using the Right Stick. When controlling your Minions directly, which is referred to as “sweeping,” they will automatically complete any task you would expect of them (ex., pick up objects, smash crates, attack hostile targets, etc.).
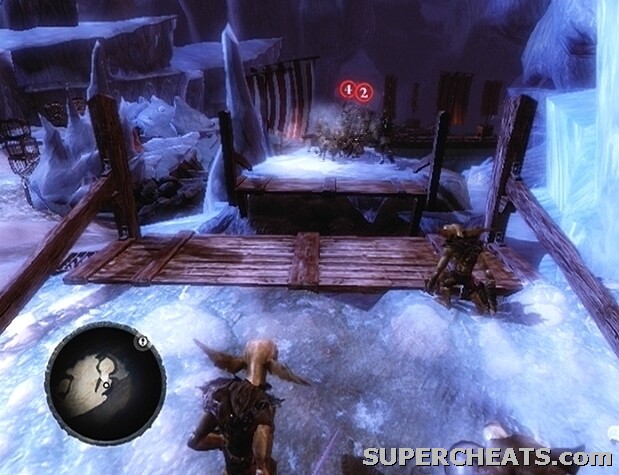
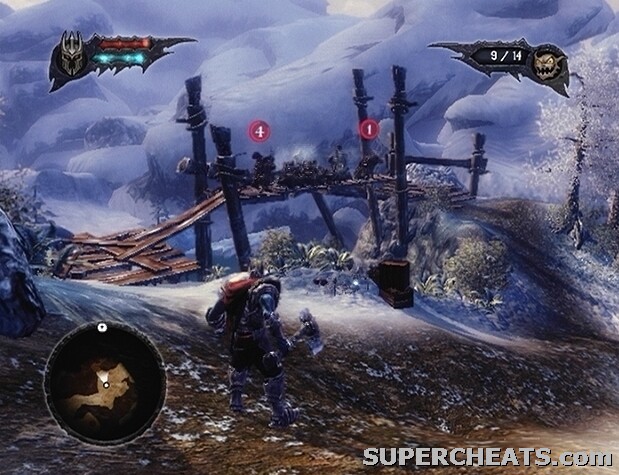
Approach the town gate, where you will be swiftly denied entry. Turn back around and follow Kelda through the ruined house to reach the childrens' impressive snow fort. Though you can't reach the fort directly, your Minions can; use the Right Stick to sweep the Minions along the trail across from the firework cannon. Use your Minions to chase away the children on the wall, and then follow the instructions onscreen to call your Minions back over. Pressing the B button once will call one minion over, while pressing and holding the B button will call all of them over.
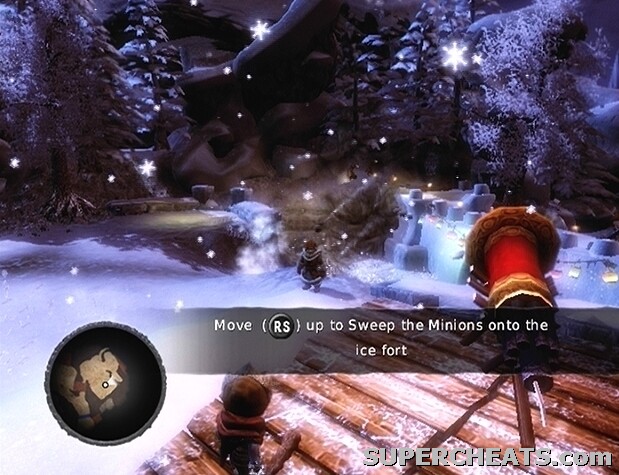
Sweep your Minions along the narrow trail to reach the children along the snow fort wall.
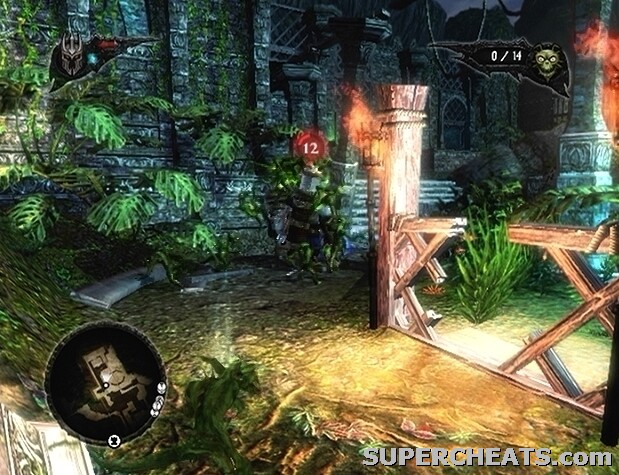
Use the Lightning Whip spell to set off the fireworks cannon, effectively destroying the snow fort and clearing the path. Make your way to the end of the path beyond the snow fort to locate the children's secret hideout. Hold down LT/L2 to lock onto the hideout and then hold down RT/R2 to send the Minions in. The Minions will outfit themselves with the children's clothing; with the Minions disguised, you can trick the drunken villager at the gate to gain entry to Nordberg Town.
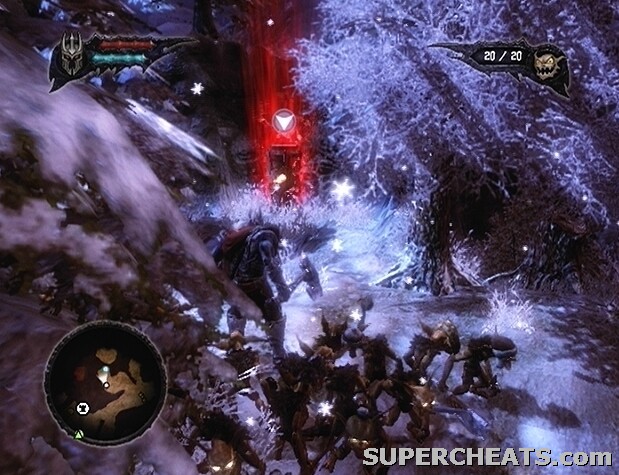
Ensure that all of your Minions are disguised, and then backtrack to the town gate to be immediately ushered through. Follow the exclamation marker on the mini-map to reach the town square. Make your way over to the platform along the west side of the square and use the Lightning Whip spell to set off the firework cannon and bundles.
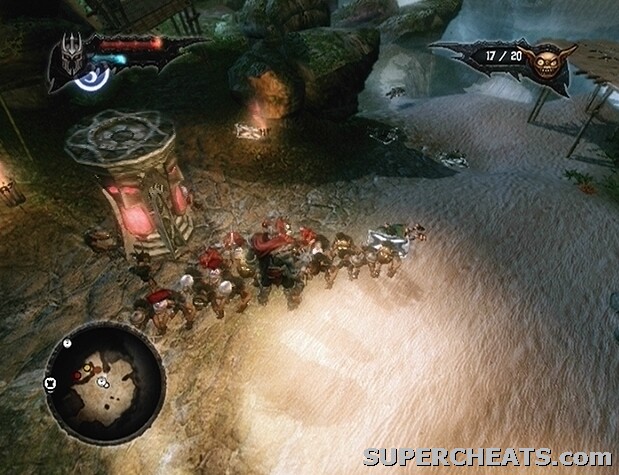
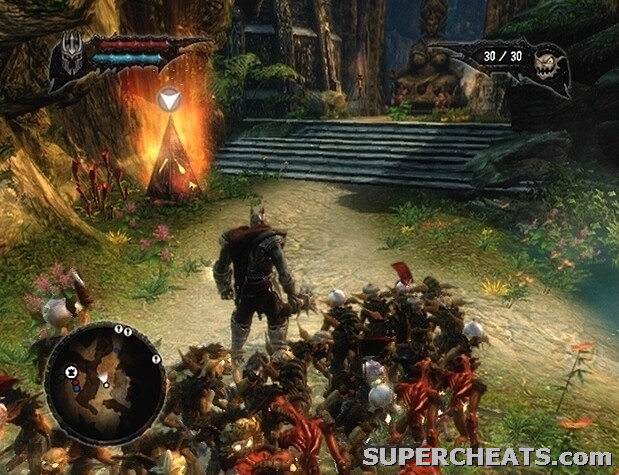
Follow Kelda to the village wall to trigger a cutscene. Afterward, follow the marker on the mini-map and ignore the soldiers along the path. You'll eventually come to a rock wall; the enemy Catapult can be used to clear the way. Start toward the Catapult and sweep your Minions to the enemies in the area. When the area is clear, sweep your Minions into the blue and white troop tent in the southwest corner of the area to have them destroy it. Enemies will continue to spawn from this tent until it's destroyed, so get to it.
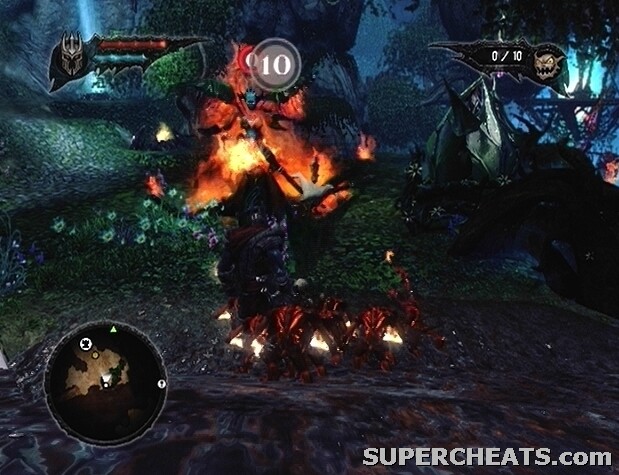
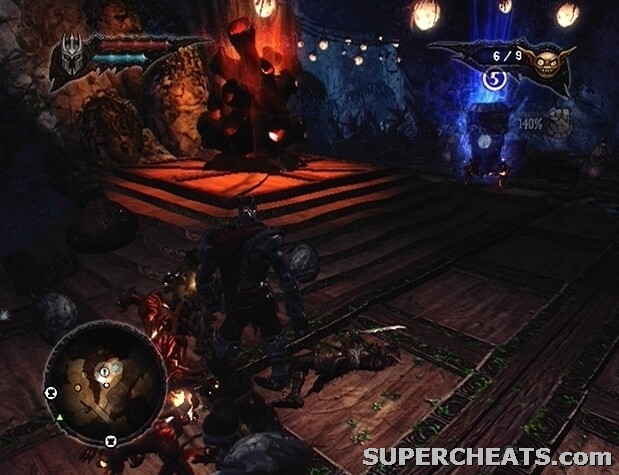
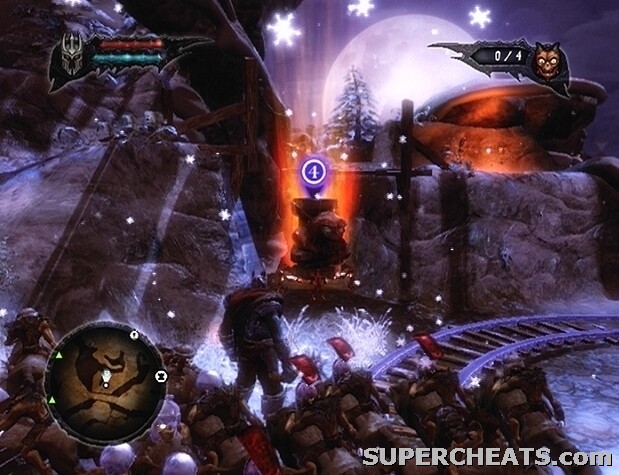
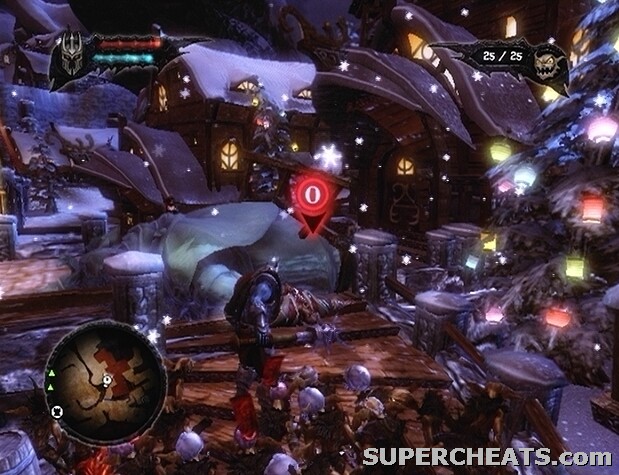
When the area is completely clear, sweep your Minions up to the steering platform to power the Catapult. Ten Minions are needed to power the Catapult; the current number on the task is indicated by the numbered marker hovering above the Catapult. When you have ten Minions on the task, walk to the steering platform and press the A/X button to take control.
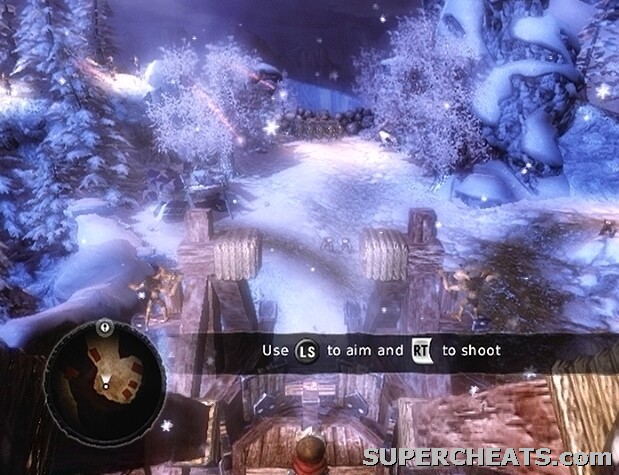
Use the Catapult to destroy the barrier and crush the enemy troops.
Use the Left Stick to steer the Catapult, and RT/R2 to fire. Hold down RT/R2 to launch the boulder farther. First and foremost, use the Catapult to squash the groups of soldiers marching down the trail directly ahead of you. Then, turn the Catapult to the barrier and launch a boulder to crush the group of soldiers and clear the path. You don't need to hold down the RT/R2 button for long; just a couple of seconds, and the boulder should land near the barrier, roll over the soldiers, and clear the way.
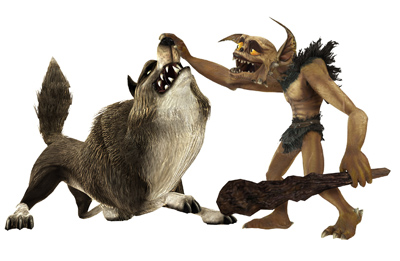
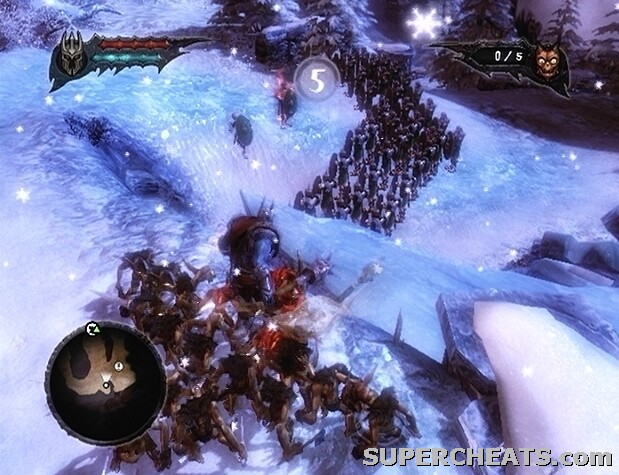
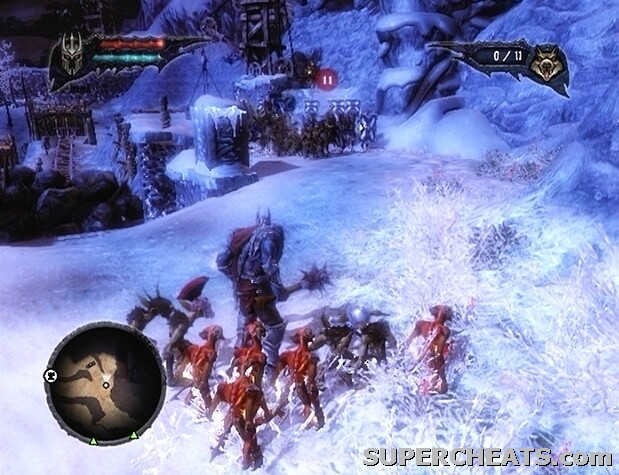
The soldiers will likely enter a state of panic, so stop the Catapult and start down the trail. You'll soon encounter some Wolves; Brown Minions can use Wolves as mounts, giving them an attack boost and the ability to leap across larger gaps than usual. To use a Wolf as a mount, lock-on with the LT/L2 button and tap RT/R2 to send a Minion over to it. Alternatively (and more efficiently if there are multiple mounts), you can simply hold the RT/R2 button while facing the Wolves to have the Minions you send to them automatically hop on.
Down the path, you'll encounter several groups of soldiers, as well as a few archers. Immediately send the mounted Browns over the gap to tear into the archers on the hill. There are two groups of archers, both of which can be reached using mounted Browns. Kill the archers first, and then take to the groups of soldiers along the trail. Sweeping mounted Browns gives them an attack boost, allowing them to easily barrel through legion formations
Mounted Browns can leap across gaps Minions can't normally. Use your mounted Browns to tear up the archers on the hills.
When the soldiers have been dealt with, you'll need to find a way to destroy the barrier. Look for a small enclosure nearby; there should be several cages, with a trapped Yeti among them. Smash the cage to free the Yeti, who will automatically move to smash the barrier. Sweep your Minions to the soldiers beyond the barrier to clear the area, and the Yeti will destroy the second barrier. Proceed into the next area to trigger a cutscene.
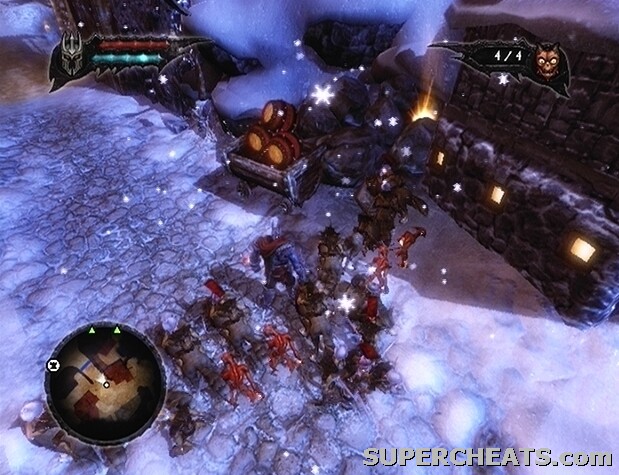
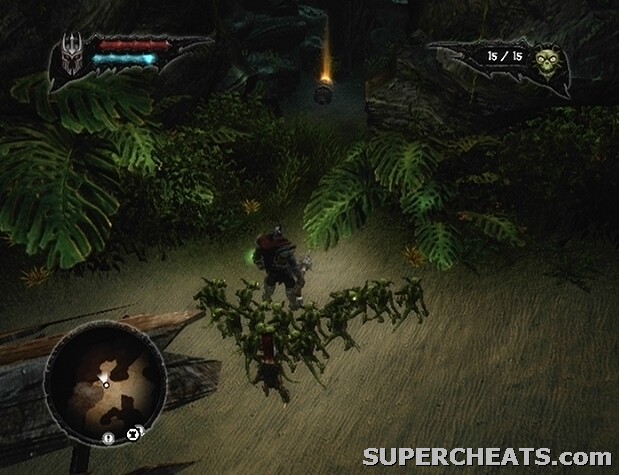
Follow the Minions over to the tattered bridge and press the A/X button to use the Overlord's axe to clear the barrels blocking your path. Continue following the Minions to discover the frozen Yeti. Use your weapon to free the Yeti from his icy enclosure. Once the Yeti is loose, a Minion Gate will appear.
To call Minions forth from the Minion Gate, lock-on using the LT/L2 button and press the B/Circle button. Holding the B/Circle button will continuously recruit Minions until you have either reached the maximum horde size or depleted the barracks. At this point you only have a few Brown Minions in the barracks, and a maximum horde size of 15. Call forth all five of the Minions, and set them to attacking the Yeti. Use your weapon to attack the Yeti yourself.
The Yeti will eventually hop over the gap, where he is out of reach of both you and your Minions. Hit the structure at the far end of the gap to set up a makeshift bridge. Sweep your Minions over the bridge and to the supports holding up the platform that the Yeti is sitting upon. When the platform falls, the Yeti will jump back over the gap and smash a barrier, allowing you to proceed out of the cavern.
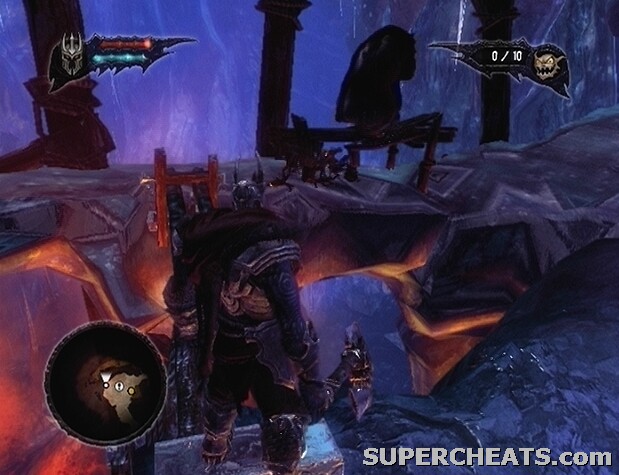
Set your Minions to attacking the supports of the platform that the Yeti is sitting upon to chase him back across the gap.
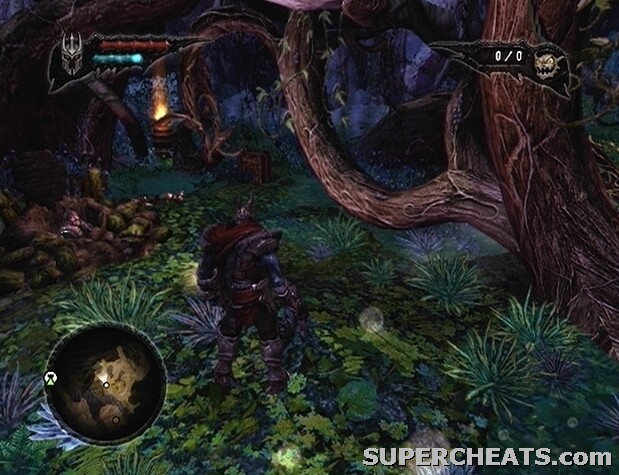
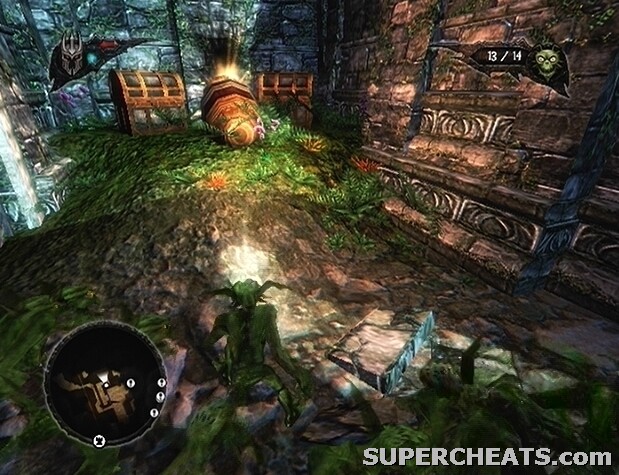
Start down the path west of the Minion Gate. At the very start of the path, look for a structure to the right. There's a treasure chest below this structure that only your Minions can reach, so sweep them over to the chest to have them automatically open it and collect the bags of gold inside. Continue down the path to exit the cavern. Follow the mountainside path and you will eventually encounter a group of baby seals.
Task: Collect 30 Lifeforce Orbs
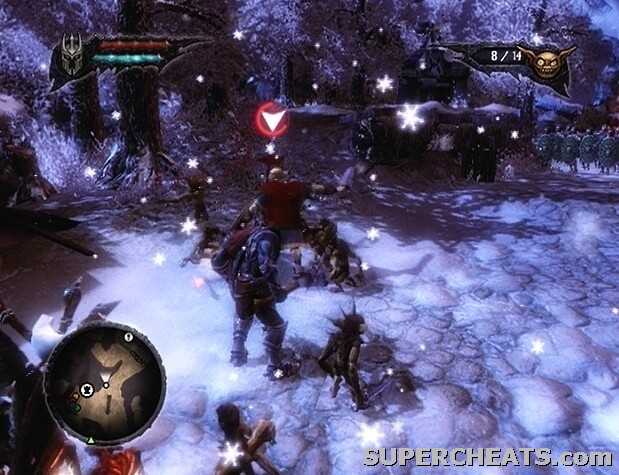
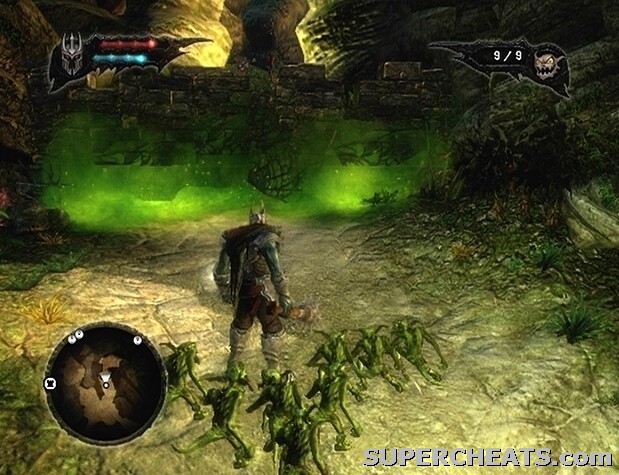
Your first task is to collect 30 Lifeforce Orbs. Each Lifeforce Orb is another Minion that can be called forth via a Minion Gate. There are four different Minion types, but you currently only have access to Browns, so you'll only see Brown Lifeforce Orbs for the time being. Baby seals yield Lifeforce Orbs when killed, so set your Minions to task. Brown Minions cannot swim, and are exceedingly prone to drowning, so take care when sweeping them near water.
Kill the seals that your Minions can reach and then continue down the path. Another Brown Minion Gate will appear just before the next batch of baby seals, so consider recruiting as many more Browns as are available at this time. There are plenty of baby seals in this next area, so quickly sweep your Browns through before they can retreat to the waters. You needn't walk over and collect the dropped Lifeforce Orbs yourself; just sweep your Minions over and one should pick it up and carry it back to you.
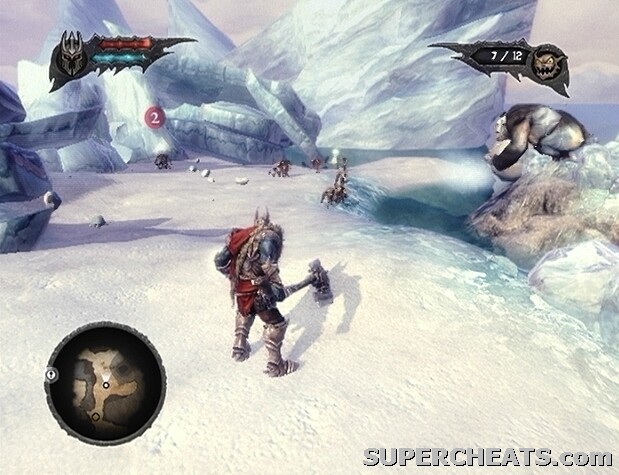
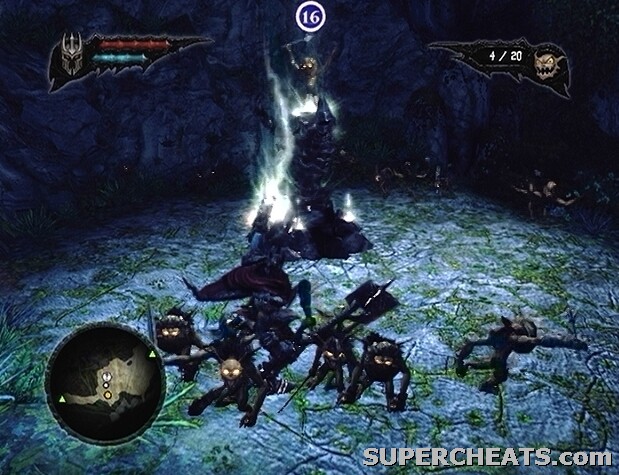
Gather 30 Lifeforce Orbs by commanding your Minions to kill baby seals.
When the Yeti appears, he will take position on an ice formation, where he is out of reach. Ignore the Yeti and continue collecting Lifeforce Orbs. Be careful, however, as he will continuously throw large snowballs in an attempt to squash your Minions. To avoid losing Minions, be ready to sweep them out of the way if a snowball is headed for them. Eventually, the Yeti will hop back to land and smash the barrier blocking your path.
Start down the path cleared by the Yeti and keep an eye on your right; when you come to a dock, sweep your Minions there to open the two treasure chests and have them carry the gold back to you. Continue heading north to encounter a couple of manatees. Tap the B/Circle button to cast the Lightning Whip spell to flip one of the manatees over on its back, then use the A/X button to hack away and quickly kill it. Do the same to the second manatee, and then continue down the path. You'll soon encounter an untamed Wolf; lock-on with LT/L2 and press RT/R2 to send one of your Minions over to it.
There are many more Wolves in the camp further ahead. When you reach the camp, sweep your Minions over to one of the igloos and take to the Hunters yourself. Hunters will continue to spawn as long as an intact igloo remains in the camp, so clear them out as quickly as possible. The barrels and crates in the camp likely contain weapons and armour for your Minions, so sweep them through to have them break the containers open and then equip themselves with whatever happens to be inside. Several Wolves are being kept in igloos, so sweep your Minions over to them to have them hop on.
Head to the patch of land at the east end of the camp to spot a number of caged Wolves, as well as another igloo. Sweep your current minions over to the igloo to have it destroyed, and then smash the cages to set the Wolves free.
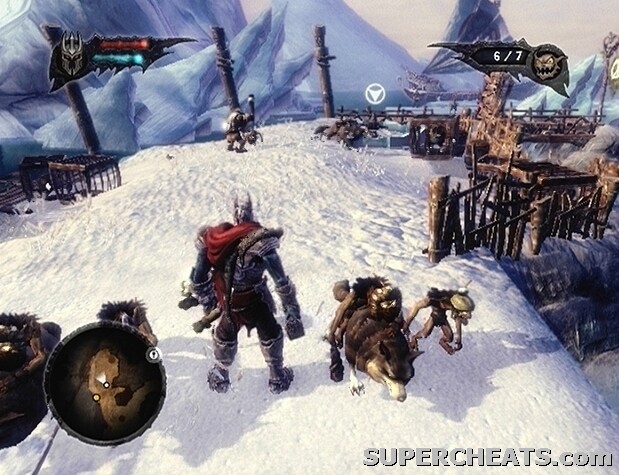
Free the caged Wolves and use them as mounts for your Browns.
Destroy the igloo at the end of this section to uncover a wheel, which can be turned if enough Minions are set to the task. Turning the wheel will raise the bridge, allowing you to cross over to the next area, so send four Minions over to the wheel to have them turn it. Cross the bridge into the next area to trigger a cutscene.
Some Elves have taken issue with the killing of baby seals; so inevitably, you'll have to kill them, too. The Elves are sparsely placed and quite weak, so your horde should be able to kill them with little difficulty. There is a large number of seals on the hill here, as well as a couple of manatees. Set your Minions to attacking the seals, and take out the manatees using the Lighting Whip spell and a few whacks from your axe. The Yeti is again present here, so sweep your Minions to avoid having them squashed by the large snowballs he tosses over.
There are more than enough baby seals in this area to make reaching the target of 30 Lifeforce Orbs possible. Even once you have attained the amount of orbs needed to complete the current task, sticking around and continuing to kill the seals is worth your while, since Lifeforce Orbs are an important commodity. Furthermore, killing 100 baby seals will unlock the Seal Slayer achievement/trophy.
When the area is completely clear of seals, cross the bridge back to the other area and make your way over to the barrier that was demolished by the Yeti. Sweep your Minions through the camp that you come to and be sure to destroy each igloo. Continue up the slope at the north end of this camp to reach another igloo. Don't slide down the icy patch here, as you'll fall back to the path below and have to walk back around. Continue down the path to encounter several harpoon throwers. Kill the Hunter along the path, and then sweep your minions over to the platform along the north side of this area to have them tear through the Hunters positioned there.
Sweep your Minions to reach the harpoon-wielding Hunters on the platform along the trail.
Task: Enter the Sanctuary Cave/Locate a Spell Stone
Continue down the trail to reach yet another camp. This camp is quite large, so immediately set your Minions to demolishing the igloos there. When the camp is clear, follow the Yeti over to the platform at the east end.
The Yeti has turned hostile, so sweep your Minions over to him to have them start chipping away at his health bar. The creature will leap over to the boat hanging alongside the platform, forcing the two Elves stationed there to hop over to the main platform. Kill the two Elves, and then sweep your Minions over to one of the supports alongside the boat. Have your Minions destroy both of the supports to chase the Yeti over to the boat on the other side of the platform
Kill the two Elves that hop over to the platform, and then sweep your Minions over to one of the supports to have them break it. Do the same to the other support to force the Yeti back onto the main platform. Command your Minions to attack the Yeti, and join the fray yourself. When the Yeti's health bar has been completely depleted, he will flee the area with the Elves.
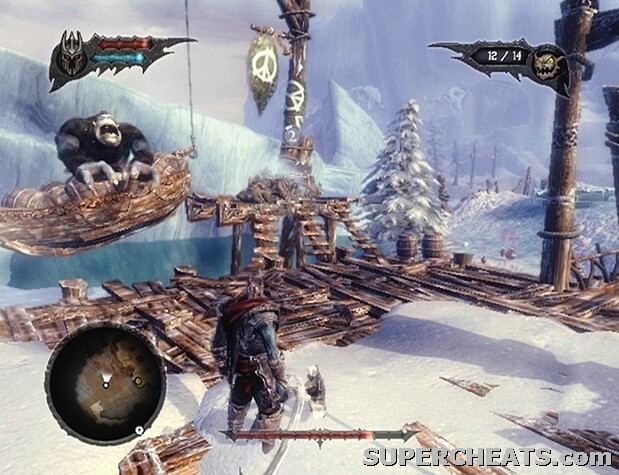
Use your Minions to destroy the support columns on either side of the hanging boat to force the Yeti off.
The entrance to the Nordberg Sanctuary is at the northeast end of the Hunting Grounds. Cross over to the land on the east side of the platform where you faced the Yeti and start down the trail. You'll encounter some Hunters and militia, so sweep your Minions through to set them to attacking. At the end of this path is the entrance to the Sanctuary Cave; unfortunately, your Browns will have to abandon their mounts here.
Task: Take the Spell Stone to Nordberg
A group of soldiers have made off with the Spell Stone, so you're going to have to follow them through the cave to get it back. Start down the path and sweep your Minions to the oblivious soldiers at the bottom of the slope. Continue on into the next area, kill the soldiers standing by the barrier, and then smash the barrier to clear the way. Continue moving forward to trigger a cutscene.
It seems that the troupe of soldiers tasked with carrying off the Spell Stone have been bested by a group of Gnomes, leaving the artifact unattended. Send five minions to carry the Spell Stone, and continue down the path.
The Spell Stone immediately changes hands once you set foot into the next area; at this point, a new quest, entitled “Kill a thousand gnomes,” becomes available. This is a rather tedious side quest that entails exactly what its title suggests. Aside from the load of Lifeforce Orbs and Fairy Gems you are sure to collect by killing such a large number of these creatures, completing this quest will also yield the Gnome Grinder achievement/trophy. Don't bother undertaking this quest now, as it can be completed quite effortlessly at a later stage in the game. Refer to the “Kill a Thousand Gnomes” section of this guide for more info.
Kill the Gnomes and take back the Spell Stone!
With the Spell Stone back in your possession, continue down the path. You are sure to encounter more Gnomes, as well as a couple of soldiers. There is a Command Upgrade nearby, so don't move on too quickly. When you reach the bridge, before crossing, head south and follow the path as it curves west to find a Command Upgrade at its end. Order four Minions to carry the Command Upgrade, and be on your way.
Collect the Command Upgrade before moving on.
You need to find a Netherworld Gate to transport this stuff to the Netherworld. Delivering a Spell Stone to the Netherworld will unlock a new spell that the Overlord can then use, while delivering a Command Upgrade increases the maximum horde size by five. A Netherworld Gate will appear once you reach the area beyond the bridge, so make your way over there and allow your minions to transport the Spell Stone and Command Upgrade.
There is a Health Upgrade near the Netherworld Gate as well. Head west from the Netherworld Gate until you come to a fire barrier. While facing the barrier, turn left and step onto the hill there. Smash the wooden barrier here to reveal the Health Upgrade.
Have your Minions carry the Health Upgrade to the Netherworld Gate to extend your health bar.
Task: Subdue (3) and kill (3) villagers using the Target spell
The Spell Stone unlocks the Target spell, which can be used to kill or subdue villagers. To perform the Target spell, first lock onto a character, and then, while within range, hold down the X/Square button. Villagers can be subdued or killed using the Target spell; to subdue, release the X/Square button right as soon as the villager starts to get down on his or her knees; to kill, keep the X/Square button held down until the target's health wheel is completely depleted.
To complete the current task, you must use the Target spell to subdue three villagers, and kill three villagers. There should be a group of villagers just south of the Netherworld Gate. You can pin down a villager by locking-on and holding RT/R2 to have your Browns swarm him or her. Since they are a great deal faster than the Overlord and will often attempt to run, this is a good tactic to employ here.
Task: Travel back to the Netherworld
Once you have subdued three villagers and killed three villagers, return to the Netherworld Gate and teleport to the Netherworld Tower.
The Netherworld Tower is where the administrative side of Overlording takes place. From the Throne interface, you can accept pending quests and teleport to regions that contain uncovered Waypoint Gates. It might be worth your time to take the tours of each section of the Netherworld to better familiarize yourself with the locale. Call up the Throne interface and select one of the quests from the list. While you can get started on the next quest immediately, it would be a good idea to explore your tower first.
In the Foundations, you can visit Giblet's forge to put turn resources into weapons and armour, as well as upgrade your Minion barracks. Both of these activities require Gold and in many cases, Fairy Gems, Dark Crystals, and Minion sacrifices as well. Before any equipment can be created, you first must retrieve the Red Hive. Collect Forge Stones to unlock new recipes. There are only three Forge Stones; refer to the “Forge Stone Locations” section of this guide for more info.
Visit the Forge in the Foundations to create new weapons and armour.
In the Minion Burrows, you can view individual Minions in the barracks, as well as revive dead Minions at the Graveyard. Reviving a dead Minion requires the sacrifice of lesser Minions of the same colour; the number of Minions required to bring a dead one back to life is dependent on that Minion's level. If no new born Minions are available, equipped ones will be used, so make sure you've amassed a decent amount of Lifeforce Orbs before reviving a dead Minion.
In the Private Quarters, you can upgrade your spells in the Magic Room using collected Spell Catalysts (refer to the “Spell Catalyst Locations” section for more information), and decorate the Netherworld Tower. Decorating the tower requires that you first have a Mistress, so there aren't many options to choose from at this point.
Before getting started with the next quest, consider collecting the five Dark Crystals hidden in the Netherworld Tower. Dark Crystals are the rarest of treasures, and used to forge weapons and armour, as well as upgrade your Minion barracks. Furthermore, acquiring 15 Dark Crystals will unlock the Crystal Collector achievement/trophy, and acquiring all 30 will unlock the Ultimate Collector achievement/trophy. Refer to the Dark Crystal Locations section for a complete listing of these.
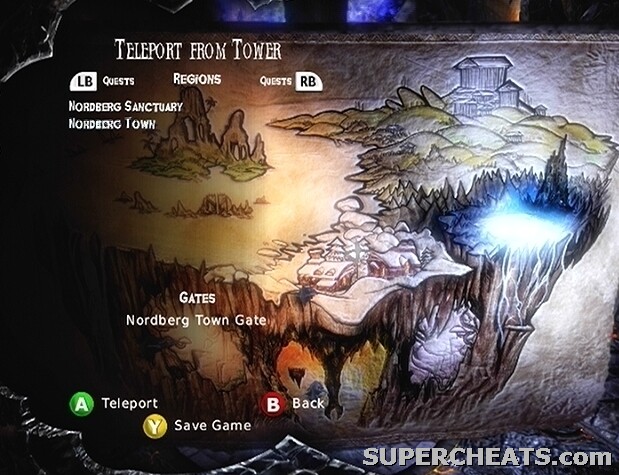
Use the Throne interface to accept quests and teleport to different regions using uncovered Waypoints and Netherworld Gates.
When you're ready to get started, pull up the Throne interface and select “A Nordbergian requests an audience” from the quest list. Accept the villager's quest to automatically be teleported back to Nordberg.
Task: Find the Red Minions
You can't get through the fire barriers without Red Minions, so you must find the Red Hive and deliver it to the Netherworld before you can enter Nordberg Town. The Reds are somewhere within the Nordberg Sanctuary Cave, so backtrack there.
Upon entering the Sanctuary Cave, examine the Netherworld Shard, which is right across from the Brown Minion Gate. Send at least 10 of your Minions to the gate, and then press the X/Square button to take direct control of the Minion atop the Possession Stone. While possessing a Minion, you can walk across narrow bridges or through narrow passageways that you cannot as the Overlord. The possessed Minion is rather weak, and the possession range is limited, so you'll have to be more cautious than usual. If you die as a Minion, you'll be taken back to the Possession Stone; you can possess another Minion here, and then retrace your steps.
Use the Possession Stone to possess one of your Minions, allowing you to sneak past the Dryad.
Head south from the Netherworld Shard and start across the tree bridge. The way is blocked, but there is a narrow attachment that Minions can cross. Cross the bridge and follow the path beyond it. Slash the plants to clear the way to the Dryad. The Dryad is quite powerful, so avoid engaging her yourself. Instead, lock-on and hold down RT/R2 to command all of your Minions to attack. When the Dryad falls, destroy the plant that opens up to remove the vines blocking the way into the Sanctuary.
When the way is clear, hold the X/Square button for three seconds to end the possession. Then, as the Overlord, cross the bridge to enter the Sanctuary. Start down the path beyond the bridge and you will soon reach a Waypoint Gate. A few paces from the Waypoint Gate, you'll encounter another Dryad. Send your Minions in and hack away at the Dryad yourself. The vines can't be removed just yet, as there is a second Dryad in the area that can't be reached. When the first Dryad has been taken care of, look for a mudslide along the north side of the area and slide down to the area below.
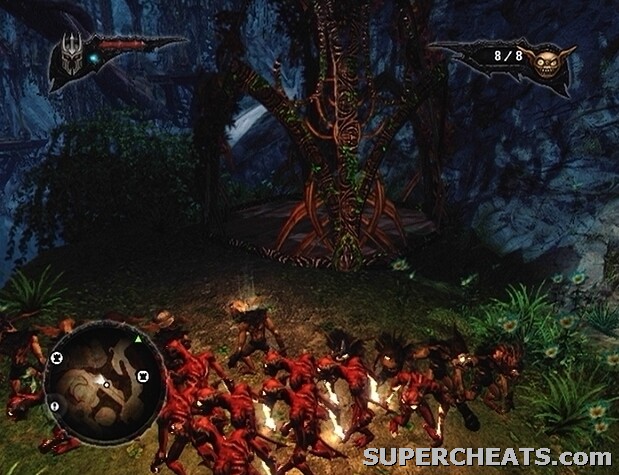
There are plenty of Gnomes down here, and each will yield a Lifeforce Orb when killed, so be sure to send your Minions after them.
Though the water in this area is shallow enough for the Overlord to trudge through, your Brown Minions will immediately drown, so take care when sweeping them around bodies of water. Brown, Red, and Green Minions will avoid water if left to their own devices, but will go to their deaths if you sweep them through. Walk through the first pond of water and the Browns will follow you across using the narrow log bridge. A Brown Minion Gate will appear on the other side; your Brown Minions can't follow you through the second pond, so you may as well send them back to the Netherworld.
There's a Dark Crystal tucked away nearby; once you're through the water and to the other side, turn into the area to the left. The Dark Crystal container is in the corner here, beyond the trapped man.
Collect this Dark Crystal before moving on.
When you have the Dark Crystal, continue heading west to find a batch of Red Minions. Follow the Minions up the hill to find more. Ten of the Red Minions will automatically begin to follow you; use them to destroy the thorny barricade at the bottom of the slope.
Task: Find the Red Hive
As soon as you're through the first barricade, turn left and order your Reds to burn down the identical barricade there. You'll find a considerable amount of treasure in the area beyond the barrier, as well as some breakable objects. There are a couple snapper plants here, but your Reds can make short work of them.
Once you have collected all of the treasure, return to the previous area and command your Reds to burn down the third thorny barrier. Send your Minions after the Gnomes up ahead and collect the Lifeforce Orbs that they drop. Continue down the path to spot the Red Hive in the distance. There are fairies in the next area; though fairies are not hostile, they can be a problem if one gets too close to your Minions, as any Minion within a certain range will cease fighting to gawk at her. Because of this, you'll likely be forced to kill the creature yourself to return your love-struck Minions to their normal, pliable state.
With the area clear, step onto the lift and slide down the mudslide to reach the second Dryad. At the bottom of the slide, press the Y/Triangle button to put your Reds on Guard. While on Guard, Reds will automatically throw fireballs at enemies within range. Provided the Dryad is close by, the Reds on the Guard Flag should automatically begin attacking her.
When the first Dryad has been weakened, usher your Reds over to the wooden platform near the vine barrier and place a Guard Flag there. To call your Minions away from the Guard Flag, hold the B/Circle button until you hear a second horn call (about two seconds). The Reds should be able to down the second Dryad quickly enough. With both Dryads in a weakened state, immediately begin attacking the open flower to kill the both of them. If you aren't quick enough, the first Dryad may completely heal; if this is the case, just set your Reds to attacking her and stand by the closed pod so you can quickly attack it when it opens.
Red Minions can make short work of Dryads.
Once the way is clear, cross the bridge to the Brown Minion Gate. Lock onto the Minion Gate and call forth as many Brown Minions as you can before proceeding. Red Minions are not as hardy as Browns, and as such you'll want to keep them out of melee. Reds excel as ranged units, so it's a good idea to keep your Browns selected for sweeping. To select all Minions of a certain colour, hold down the RB/R1 and press the corresponding face button. Simply tap the RB/R1 button to select all of your Minions.
Engage the two Elves by the lift at the south end of this area. Remember to keep your Reds out of close-range; often just setting all of your Reds on a Guard Flag is enough. When the Elves have been taken care of, step onto the lift to reach the upper level of the Sanctuary. Engage the Elves and then start down the walkway. There are several enclosures that contain a number of breakable objects and treasure chest, so consider taking the time to clear these areas as you move through.
A Harp can be found beyond the walkway overlooking the statue of the Fay. This object is needed to unlock the Treasure Hunter achievement/trophy, which is worth 50 gamerpoints (X360), or a Gold trophy (PS3). It can be carried by your Minions to a Netherworld Gate and teleported back to the Netherworld. There's a Waypoint Gate right by the Harp, so be sure to pick it up.
Continue down the path beyond the Waypoint Gate to find a Possession Stone. Use the stone to take direct control of one of your Minions. As a Minion, head through the low branch across from the Possession Stone and slide down the mudslide there. Step onto the lift in this area to call it back up to the walkway. Then, hold down the X/Square button for three seconds to end the possession.
Possess a Minion and use him to call the lift back up to the walkway.
As the Overlord, return to the walkway and take the lift that you just raised back down to the area below. Walk down to the tall grass and set your Red Minions on a Guard Flag. There are three Dryads at the other end of this area; together, they can quickly cut down your Brown Minions, so keep them off the front lines. The tall grass can be set aflame by the Red Minions' fire, so keep your Minions back to avoid losing them.
With all three Dryads weakened, call your Reds back and make your way to the vine barrier blocking the way; lock onto the out-of-reach, open flower, and hold down the RT/R2 button to command your Reds to start throwing fireballs at it. With the way clear, command your Reds to burn down the thorny barrier around the statue of Fay. Then, with all of your Minions selected, sweep them to the base of the statue to have them start chipping away at it. When statue of Queen Fay has been destroyed, smash the large, blue crystal that the statue was holding to reveal a Mana Upgrade.
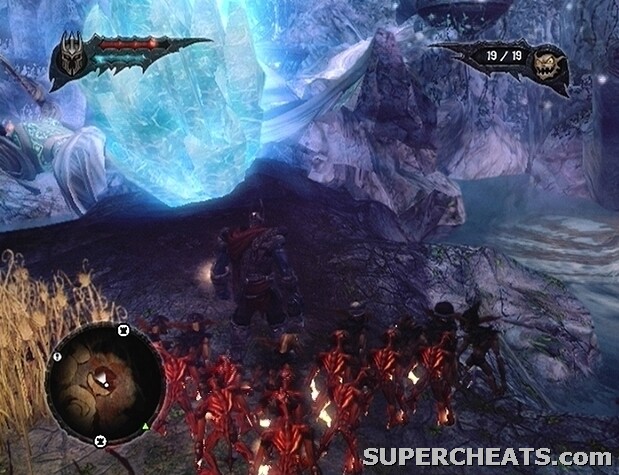
Collect this Mana Upgrade before moving on.
Command at least four of your Minions to pick up the Mana Upgrade and then walk across the overturned statue to reach the other side of the stream. The Red Hive is through here, and is guarded by several Elves. Sweep your Browns in to engage the Elves, and hack away at them yourself as well.
When the platform is clear, command any available Minions to pick up the Red Hive here. Then, command your available Red Minions to burn down the thorny barrier in the southwest corner of the platform. There's a Waypoint Gate beyond the barrier, so allow your Minions to carry the Red Hive and Mana Upgrade over to it before teleporting back to the Netherworld Tower.
Return the Red Hive to the Netherworld.
Task: Remove the fire barriers
Once back in Nordberg, use the Red Minion Gate to call forth at least five Reds, and then fill however many spots there are left with Brown Minions. Command your Reds to extinguish the fire barrier closest to the Netherworld Gate, and then strike the barrier a few times to remove it.
Task: Find a way to flank the Ballista
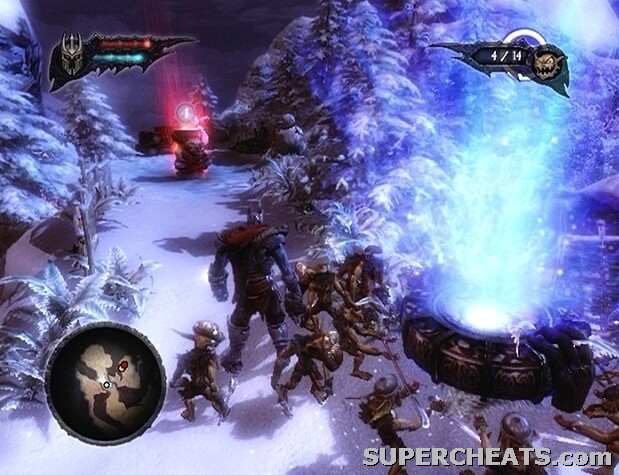
There's another fire barrier east of the Netherworld Gate, which you'll need to remove in order to complete this task. A group of soldiers, headed by a Centurion, is standing before this barrier. As a group, the soldiers gain a defensive boost, but if the Centurion is killed, their formation will falter, allowing you to easily pick off the individual soldiers. The Centurion is standing in front of the group, so set your Red Minions on a Guard Flag nearby, and then send your Brown Minions in to tear him apart. Help your Brown Minions hack away at the Centurion until he falls.
Kill the Centurion to weaken the formation.
With the group of soldiers demoralized, plant your Reds on a Guard Flag nearby and sweep your Browns in to make short work of them. Destroy the tent on the hill to prevent more soldiers from appearing, and then set your Reds to work extinguishing the flames that surround the barrier. When the fire has been removed, hit the barrier to clear the way.
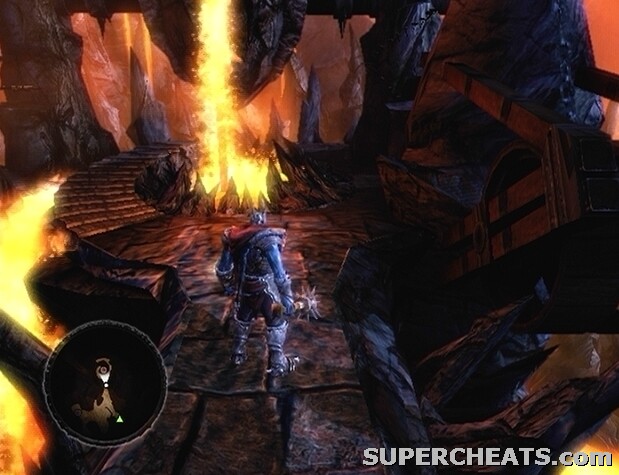
There's a Forge Stone just beyond the fire barrier; send some Minions in to pick it up and they will automatically carry it over to the nearby Netherworld Gate. Forge Stones are used to unlock new forge recipes; be sure to check out the new weapon and armour options at the forge when you next visit the Netherworld Tower.
Another Centurion and legion formation are positioned along the northeast trail beyond the barrier. Take out the Centurion first, and then sweep in your Browns to dismantle the shaky formation. When the way is clear, continue down the path to reach another formation. This time, the Centurion is standing in an enclosure that is blocked off by a span of soldiers. There's a hill along the eastern side of the enclosure; head up there, and plant your Reds on a Guard Flag. The Reds should begin launching fireballs at the guarding soldiers, eventually scattering the formation.
Use your Reds to scatter the formation.
When the Reds have created a sizeable gap in the formation, sweep your Browns in to the enclosure to attack the Centurion. Ignore the soldiers that are left in the formation, as they won't attack unless you get too close. Move in yourself and hack away at the Centurion. When the Centurion falls, sweep your Minions into the tent to prevent more soldiers from appearing. Sweep your Browns into the formation to take out the demoralized soldiers that remain.
Head west to encounter yet another legion formation. The soldiers along the path are patrolling the area, and the Centurion is standing nearby. A curved path along the left side of the road leads right behind the Centurion. The formation is mobile, so if you get too close, they are likely to chase after you; try your best to take out the Centurion quickly, or try to lead away the formation away and then move back in to take out their leader.
Continue heading west to reach the Ballista and complete the task.
Task: Clear the blockades on the main road
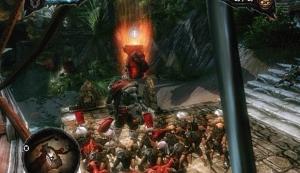
Do not engage the legion formation blocking the way into Nordberg with your Minions, as they can be easily dealt with using the Ballista. Clear away the few soldiers around the Ballista and then send five Minions in to power it. Stand on the marker on the steering platform and press the A/X button to take control. Use the Left Stick to aim and the RT/R2 button to fire. Click the Left Stick to zoom in and out.
Immediately destroy the tent next to the formation furthest north to prevent more soldiers from appearing. Then, fire at the blockades to break them up. There are three blockades; once enough of the soldiers in the formation have been killed, those who remain will scatter. When the blockades have been broken up, step off of the Ballista, call your Minions back, and clear away the scattered soldiers.
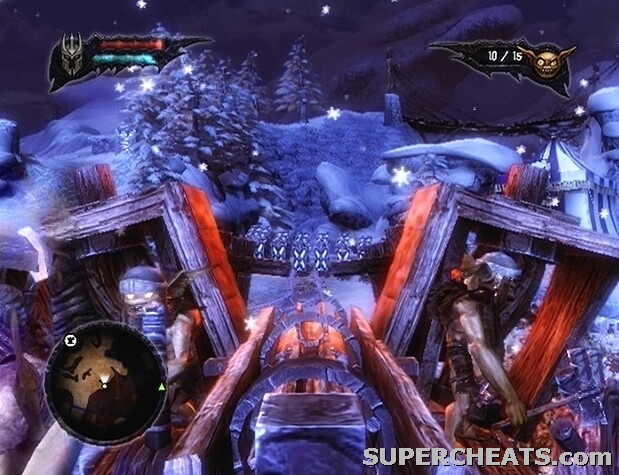
Use the enemy Ballista to break through the blockades.
Task: Find a way to get into the Town
The Nordberg Town gate is quite sturdy, so you need to find some way to push through. Start by following the track south to the nearby dig site. There are two rubble barricades by the entrance to the dig site; have your Reds target the stacked explosive barrels by the eastern barricade to destroy it. Start down the trail beyond the barricade and turn right at the split.
There are two caged Wolves being guarded by some soldiers here; have your Brown Minions barrel over the soldiers, and then release the Wolves. There's a Wolf spawn point at the top of the hill, so have your Browns hop on the Wolves there as well. Mounted Browns can barrel over blockades when swept through. To select only mounted Browns, hold RB/R1 and press Y/Triangle twice. Then, sweep the mounted Minions into the soldiers that are blocking your path. If they managed to create a gap in the formation, sweep them over to the Centurion and move in to take him out.
When the way is clear, return to the dig site. Sweep your mounted Minions in to barrel through the blockade. The Centurion is standing by the platform behind the barricade, so if your Minions manage to create a gap in the formation, sweep them further in to engage the Centurion. Call your Minions back if they didn't manage to create a gap in the barricade, and try sweeping them through again.
Use your mounted Minions to break through the blockade in the dig site.
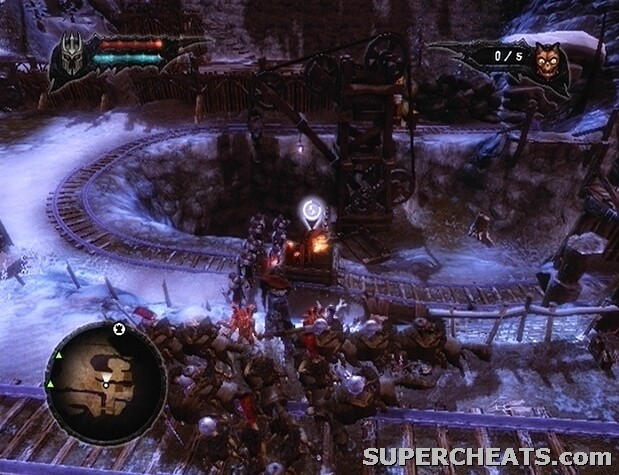
Clear away the demoralized troops once the Centurion has fallen, and then move to the end of the platform. There is a wheel on an isolated platform across from the barrier blocking the way into the dig site. Another platform is connected to the platform you are currently standing on by a narrow beam that can be crossed by your Minions. Sweep your mounted Minions across the beam, and then over the gap to the platform with the wheel; you'll need at least four Wolves to push the wheel.
Once the mounted Minions have turned the wheel, the door below will open, and a mine cart packed with explosive barrels will roll down the tracks to the barrier. Walk back along the wall, overlooking the mine cart, and plant your Reds on a Guard Flag there. The Reds should automatically target the explosive barrels in the mine cart, eventually setting them off and destroying the barrier.
With the barrier destroyed, move down to the dig site entrance and head in. Some soldiers are positioned along a curved track within the dig site. Head up to the end of the straight track next to this one and turn into the area to the right. Send your mounted Minions across the gap to the wheel, and have them turn it to release another mine cart full of explosives. The mine cart will come to a stop at the legion formation, so have your Reds target the explosives in the cart from the track overlooking the soldiers. The explosives will soon go off, clearing away the group of soldiers. Another cart full of explosive barrels will come through the gate.
Use your Red Minions to ignite the explosive barrels in the mine cart.
Command four of your Minions to begin pushing the mine cart down the track. Follow behind the Minions as they push the cart to another rock barrier. When the mine cart is in place, from a safe distance, have your Reds set off the explosive barrels in the mine cart to destroy the barrier. Kill the Centurion on the platform beyond the barrier, then head up the steps and command your Minions to turn the wheel there.
Task: Blow up the Town Gate
When the third mine cart has been released, leave the dig site and start north toward Nordberg Town. Sweep your mounted Minions up the hill along the left side of the road and across the gap to rip apart the archers stationed there. Then, command four of your Minions to begin pushing the mine cart.
A Command Upgrade is hidden away nearby, so don't set your sights on the town gate just yet. As you walk behind the Minions that are pushing the mine cart, look for some rubble along the left side of the track. It's not far from the starting point; just where the track begins to curve. When the Minions pass by here, press the B/Circle button to call them away from the cart. Then, set your Red Minions on a Guard Flag a safe distance away from the cart, and they should automatically target the explosive barrels with fireballs. When the explosives go off, command at least four of your Minions to pick up the totem and they will automatically carry it to the nearest Netherworld Gate.
Be sure to collect this hidden Command Upgrade before moving on.
Once you've uncovered the Command Upgrade, backtrack to find another mine cart, and have four of your Minions begin to push it down the track toward the town gate. If the archers along the town wall manage to ignite the explosive barrels in the cart, immediately call your Minions back to avoid losing them when the explosives go off. The archers will most likely miss, however, so allow your Minions to press on unless they are explicitly in danger.
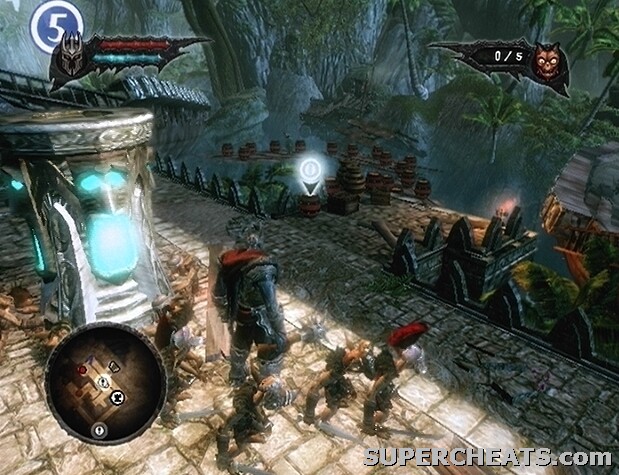
When your Minions have managed to push the mine cart down the hill and to the town gate, approach the gate and put your Reds on a Guard Flag at the top of the decline. The Reds should automatically target the explosives in the cart, and when they go off, the town gate will crumble.
Two groups of soldiers are waiting on the other side of the gate. Do not engage them, and instead step onto the platform outside of the town. Send in five Minions to power the Ballista on the platform, and then step onto the steering platform and take control. Spin the Ballista around and use it to break up the formations that come through the gate. When the soldiers scatter, get off of the Ballista, call your Minions to you, have your Browns get back onto their mounts, and enter the town.
Task: Find Borius
As soon as you're through the gate, turn right and head up the stairs there to reach the wall. Clear away the archers along the wall, and then head back down. There's a Dark Crystal hidden right by the town gate; you can backtrack to fetch another mine cart, and use it to clear away the boulders surrounding the container.
Use another mine cart to clear away the boulders surrounding the Dark Crystal container by the town gate.
From the town gate, head up the hill to the east. A villager is throwing explosives at the top of the slope, seemingly blocking your path. Set your Reds on a Guard Flag just short of blockage and they should automatically begin throwing fireballs at the villager. When the way is clear, proceed down the road. You'll encounter several more hostile villagers at the end of the path; use your Red Minions to remove them and clear the way.
Once the villagers blocking your path have been dealt with, head up the hill and make your way over to the temple to trigger a cutscene.
Task: Destroy the Temple
Sweep your Minions in to clear away the soldiers guarding the temple, and then target the columns that are holding up the statue of Borius. When the temple has collapsed, send your Minions in to topple the statue of Borius down the hill, destroying the barricade on the bridge below.
Task: Find a way to reach the Town Hall
With the temple in ruins, return to the bridge at the top of the hill east of the town gate. Cross the bridge, and start following the marker on your mini-map to reach the town square. There's an enemy Ballista in the northeast corner of the town. This weapon is a very big threat to you and your Minions, as its projectiles can spear through multiple Minions and quickly deplete your health bar.
The Ballista is just beyond the stairs east of the town square. When you move forward beyond the stairs, the camera should focus on the Ballista; immediately duck behind the railing on the right. After the Ballista has fired, move up behind the stack of logs on the left. Then, sweep all of your Minions up the steps and place them on a Guard Flag right by the Ballista. The Minions should automatically kill the soldiers manning the Ballista.
Sweep your Minions up the steps to have them kill the crew operating the Ballista.
Task: Defeat Borius
When the Ballista crew has been taken care of, head up the steps yourself, call your Minions off of the Guard Marker, and sweep them up to the archers along the walkway. On the walkway, sweep your Minions across the narrow plank of wood and to the statue on the platform there. The Minions will push the statue onto Borius, pinning him to the ground in front of Town Hall.
Have one of your Minions flip the lever at the far end of the walkway to take the lift down to Town Hall.
You have the choice to kill or subdue Borius. Killing Borius will raise your Destruction rating, while subduing him will raise your Domination rating. The Dominator and The Destructor are achievements/trophies associated with tyranny rating. Both achievements are worth 40 gamerpoints on the Xbox 360, or Silver trophies on the PS3, and require that you achieve a 100% Domination rating, or a 100% Destruction rating respectively. So, to unlock both of these achievements/trophies, you'll have to play through the game twice. Because of this, it is best to go either full Destruction or full Domination by making all of the appropriate choices if you're after achievements/trophies.
There are several events that will affect your tyranny rating, all of which involve either killing or dominating a single target or multiple targets. If you're playing for achievements/trophies and choose to kill or dominate Borius, just be consistent when deciding between destruction and domination in the future.
To kill Borius, simply lock-on and strike him a few times with your weapon, or overcharge your Target spell. To Dominate Borius, lock-on and use the Target spell long enough to shatter the statue that has Borius pinned down. Immediately release the spell when the statue shatters to enslave him.
Kill or Dominate Borius using the Target spell.
Task: Take over Nordberg Town
When Borius has been dealt with, collect the Lifeforce Orbs that appear on the platform, then approach the Town Hall door and press the A/X button to open the Town Hall interface. Taking over Nordberg requires 50 Brown Minions. You should have enough to spare at this point; if not, return to the Hunting Ground and kill baby seals until you have enough Brown Minions to spare.
Purchase the Nordberg Town Hall to complete the quest.
Select “A Nordbergian Requests an Audience” from the Quests section of the Throne interface and accept the villager's quest to be teleported to Nordberg.
Task: Go to Nordhaven
The entrance to Nordhaven is at the north end of Nordberg, so begin following the marker on the mini-map. Avoid killing or enslaving any of the Nordberg villagers as you make your way through town unless you know what you're doing; refer to the “Control Nordberg Town” section of this guide for more information.
Task: Find a way to melt the river ice
When you reach Nordhaven, use the Minion Gates at the start of the area to call forth at least five Red Minions, and then fill the rest of the spots with Brown Minions. Start down the trail and sweep your Browns into the Hunter camp. Have your Browns destroy the igloos to prevent more Hunters from spawning. Also, be sure to take out the harpoon throwers on the platform along the south side of the camp, and those on the hill at the north end of the camp.
Task: Set fire to the tar pits
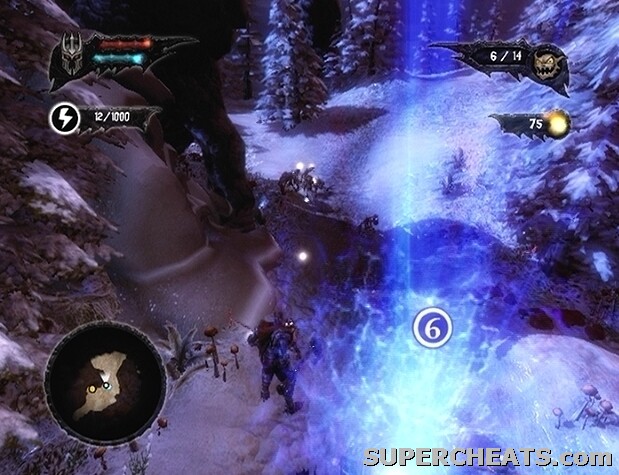
Continue down the trail until you reach the first tar pit. Have your Reds target the Gnomes trapped in the tar to set the pit aflame, melting the ice barrier nearby. Proceed down the path beyond the melted ice barrier. Quickly command your Reds to begin extinguishing the fire barrier that you come to. There are several unreachable harpoon throwers on the platform beyond the barrier, so as soon as the flames have been extinguished, smash the barrier and sweep your Browns up to the Hunters to take them out.
Have your Reds target the Gnomes stuck in the tar to set the pit aflame.
Replenish your supply of Red Minions using the nearby Red Minion Gate if necessary, and then continue heading west down the trail. There's another Hunter camp beyond the wooden bridge, as well as another ice barrier. Cross the bridge, set your Reds on a Guard Flag at the top of the steps that lead down to the Hunter camp, and sweep your Brown Minions in.
When the Hunters are dead and all of the igloos have been destroyed, send your Minions up to the wheel on the platform at the west end of the camp. Doing so will open the floodgate, creating a pool of tar leading to the ice barrier. Stand on the platform overlooking the tar pit and have your Reds target the Gnome stuck in the tar to set it aflame and melt the ice barrier.
Start down the trail toward the final tar pit. You'll be ambushed by a group of Hunters along the way, so have your Brown Minions selected so they can be swept in. When you reach the third tar pit, begin by walking around the pit and clearing away the Hunters and harpoon throwers there. Then, return to the ledge overlooking the pit and break the railing. Command your Reds to target the Gnome stuck in the tar to set the pit aflame.
Task: Deal with the ship thieves in Nordhaven
After setting fire to the third tar pit, follow the marker on the mini-map to reach Nordhaven. At this point, you are faced with a choice; set fire to the giant tar pit—ultimately destroying Nordhaven—or subdue 10 villagers using the Target spell to have them remove the ice for you. Clearly, setting fire to the giant tar pit is a destructive act, and would thus influence your Destruction tyranny rating. Then, subduing 10 villagers to do the job for you, thus sparring Nordhaven, is an act of domination, and would influence your Domination rating. If you're unsure how to go about completing this task, consider following the same course of action you took with Borius. So, if you killed Borius back in Nordberg Town, set fire to the giant tar pit; if you enslaved him, use your Target spell to subdue 10 villagers and have them remove the ice for you.

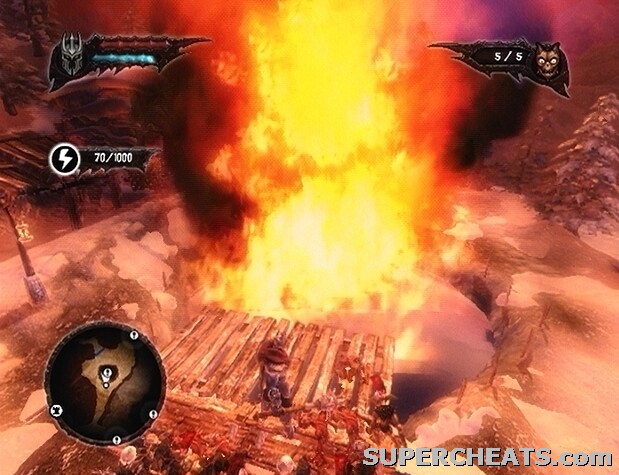
Setting fire to the giant tar pit will affect your Destruction tyranny rating.
If you plan to set the giant tar pit aflame, simply enter the town and continue east past the barrier. Clear away the Hunters and Elves guarding the area, and then make your way around the railing surrounding the pit. Some Hunters will ignite a couple of explosive barrels in your path, so take your time and avoid sweeping your Minions too far ahead. Then, climb up the ramp to the top of the platform and have your Reds target the explosive barrels on the tower. When the barrel goes off, it will set fire to the giant tar pit, effectively rendering Nordhaven uninhabitable—but you'll get your ship.
On the Domination side of things, you'll have to use your Target spell to subdue 10 villagers in Nordhaven. To subdue a villager, use the LT/L2 button to lock-on and press and hold the X/Square button. Keep the button held down until the villager begins to get down on his or her knees, at which point immediately release the button to avoid overcharging the spell and killing them. There are plenty of villagers to subdue beyond the barrier at the east end of the town, however there are many Hunters and harpoon throwers in the area as well, so be careful.
Subduing 10 villagers to have them to remove the ice for you will affect your Domination tyranny rating.
Task: Set sail to Everlight
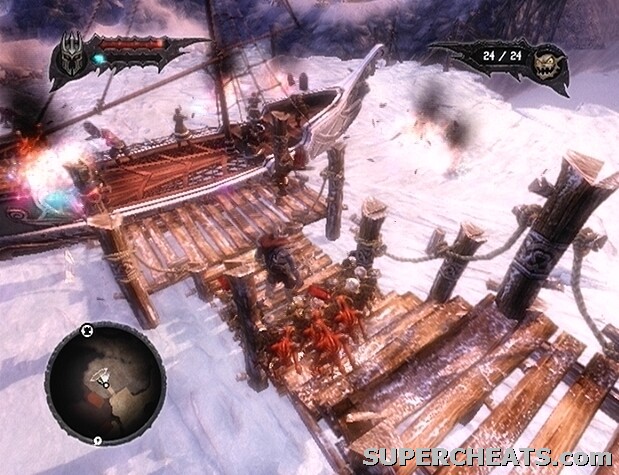
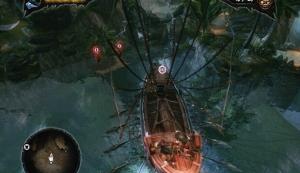
Once you have either set fire to the giant tar pit or subdued 10 villagers, follow the marker on the mini-map to reach your ship. Sweep 10 Minions into the ship, and then walk onto the steering platform and press the A/X button to take control. Hold down RT/R2 to move forward, and tap the A/X button to make your Minions row faster. The green meter in the top-right corner of the screen indicates the condition of the ship, and the yellow meter below indicates boost. The LT/L2 buttons are used to decelerate and row backward.
Task: Destroy the Ship Blockade
Sail toward the marker on the mini-map. You'll encounter some Elves on platforms in the middle of the water; unless you can speed past them or into the platform to send them into the water, they will most likely hop onboard. If one of the Elves manages to board the ship, hold the B/Circle button to cease steering the ship and help the Minions on deck take him out.
When you reach the ship blockade, make your way over to the dock that is marked on your mini-map. Orient the ship alongside the dock until a prompt appears, at which point press the B/Circle button to dock it. Step off of the ship, kill the Elves and manatees on land, and then make your way over to the baby seals on the connected piece of land. The seals will flee, setting off the mines in the water and destroying the ship blockade.
Task: Get to open sea
With the barricade out of the way, return to your ship and sail south to Everlight.
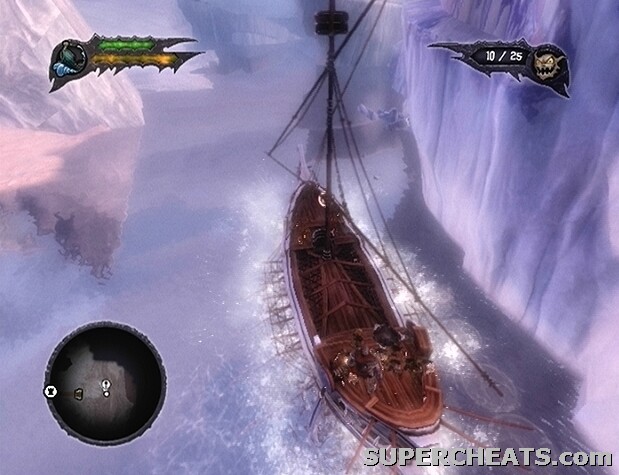
Use your ship to sail to Everlight.
Task: Sail on to Everlight
Follow the marker on the mini-map to reach the waterway gate into Everlight.
Task: Return the four Gate Keys to their slots (Red)
As you approach the waterway gate into Everlight, it is promptly closed. There are four Gate Keys that must be set back into place to open the gate. Start by sailing west, and curve north when you can. Sail to the dock along the north side of the large, northwest-most island. Orient the ship alongside the dock until a prompt appears, at which point press the B/Circle button to station it there.
The Red Gate Key is on this island. Head up the steps and follow the trail to reach a cove. Sweep your Brown Minions in to engage the Elves, and then command at least three of your Minions to pick up the Red Gate Key. Break the supports of the platform south of Red Gate Key to clear the way. You'll soon come to Brown and Red Minion Gates. There are Elves throwing poison gas bombs southwest of these gates; your Minions can't kill these Elves and will die if sent into the poisonous gas cloud, so ignore them for now.
Collect the Red Gate Key on the northwest-most island in the Everlight Reef.
Lead your Minions down the steps and through the tunnel south of the Brown and Red Minion Gates to reach the Red Gate Key slot. The Minions carrying the Red Gate Key will automatically set it in place.
Task: Return the four Gate Keys to their slots (Blue)
Walk along the path east of the set Red Gate Key to reach some steps that lead up to a platform. Engage the Elves at the top of the stairs, and cross the bridge to reach another platform. There are more Elves on the other side of the bridge, so sweep your Brown Minions in to destroy the raised wooden platform to prevent more from appearing.
A lift powered by the Blue Gate Key will rise up at the far end of the south end of the platform. Kill the Elves, and then step onto the lift and take it down to the lower level. As soon as the lift reaches the bottom, command at least three of your Minions to remove the Blue Gate Key from the slot on the lift.
Use your Reds to set off the explosive barrel on the lower walkway to set off a chain reaction, eventually destroying the ship barricade. Collect the Lifeforce Orbs that appear on the lower walkway and then head south to reach a Waypoint Gate. The Blue Gate Key slot is just beyond the Waypoint Gate.
Command your Reds to target the explosive barrel on the lower walkway to destroy the ship barricade.
Task: Return the four Gate Keys to their slots (Yellow)
Some Elves have made off with the Yellow Gate Key and are attempting to escape with it by sea. Proceed through the tunnel across from the Blue Gate Key slot and follow the path around to the platform that the Elves are throwing poisonous bombs from. Break one of the supports to destroy the platform, and then immediately start attacking the downed Elves. Kill them quickly, as they may be able to stand back up and throw a bomb, potentially choking any Minions caught by the poisonous gas.
You'll need Red Minions to stop the fleeing Elves, so cross the bridge and use the Red Minion Gate on the other side to call forth at least 10 Red Minions; switch out some Browns if necessary.
Return your docked ship and send 10 Brown Minions in to power it. Henceforth, mermaids may grab on to the side of your ship and spray the Minions on deck. When this happens, hold the B/Circle button to stop steering the ship, and walk onto the deck and hit the mermaid once to knock it aside. Before setting sail, walk to the front of the ship and set your Red Minions on a Guard Flag there.
Follow the marker on the mini-map to reach a rock barricade. Steer clear of this barricade, as the Elven Ship will soon break through, and may hit yours with its ram. Try your best to avoid getting hit by the ram, but it seems almost impossible to avoid. The enemy ship is much faster than yours, so you'll have to use your Reds to burn the sails. If you have at least 10 Red Minions set on a Guard Flag at the front of the ship, they should be able to burn both flags before the Elven Ship can surpass you. The fabric on the sails must be completely burnt away; even if the sails are tattered, they are still considered functional.
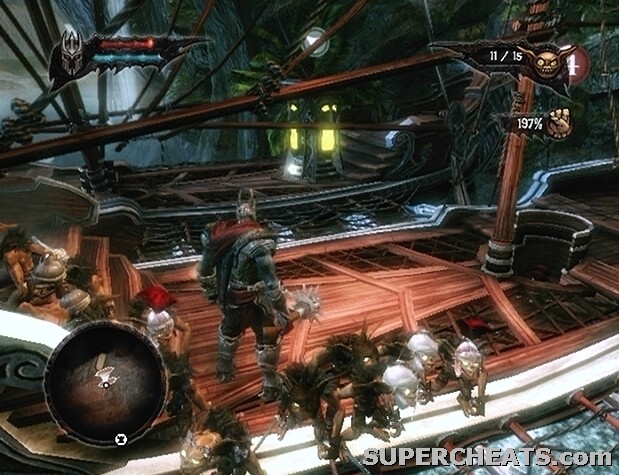
Burn the sails of the Elven Ship and kill the crew onboard. Then, move in and take control.
If the Elven Ship manages to get away from you, don't bother sailing after it, as you are unlikely to catch up to it, and your Reds won't be accurate while the ship is traveling at full speed. Instead, wait for the enemy ship to come back around. The Elves will just continuously circle the northwest-most island, so if you wait for them, your Reds should be able to burn the sails as their ship sails by. Just be sure that the front of your ship is pointed toward the front of the approaching Elven Ship.
When your Red Minions have burned the sails of the Elven Ship, pull up alongside the ship and kill the crew that comes onboard. Then, call your Red Minions off of the Guard Flag and send 10 of your Brown Minions to power the Elven Ship. Then, step onto the highlighted steering platform and sail west through the pass that the Elves broke through.
Dock your ship on the island at the southwest end of the map and command at least three of your Minions to carry the Yellow Gate Key. Follow the path west and you'll encounter several mermaids. Sweep your Browns in to kill the mermaids, and then follow the path north. Keep an eye on your right as you follow this path; instead of heading up the slope, turn right up the steps to reach a lift. Your minions will automatically place the Yellow Gate Key on the slot to activate the lift. When the lift reaches the top, immediately order at least three of your Minions to remove the Yellow Gate Key
When you reach the Brown and Red Minion Gates, head down the tunnel east of the gates to reach the Yellow Gate Key slot. Return to the Brown and Red Minion Gates and head down the steps north of them. Kill the mermaids up ahead, and then make your way to the other end of the path. Look for a group of explosive barrels on a raft by the two ruined Empire ships. Target one of the barrels with your Reds; when they go off, they'll destroy the ship barricade, allowing you to return to your docked ship.
Collect this Dark Crystal before leaving the island with the Yellow Gate Key slot.
Before heading back to the dock, be sure to collect the Dark Crystal nearby. Head down the steps north of the Brown and Red Minions; at the bottom of the first set of steps, turn right and sweep your Minions over to the container that holds the Dark Crystal.
Task: Return the four Gate Keys to their slots (Green)
Return to your docked ship at the southeast end of the island and set your Minions to work powering it. Before setting sail to the island that contains the Green Gate Key, there's an obtainable Command Upgrade nearby that you'll want to collect. Sail along the north side of the large, northwest-most island. Look for a rock barrier behind the north-most, outer dock. The rock barrier is blocking the way to another dock, so break through the rock barrier using the ram on the front of the Elven Ship by tapping the A/X button to speed up. When the way is clear, dock your ship and command at least four of your Minions to pick up the Command Upgrade. The Minions will carry the totem onto the ship. You'll have to dock the ship somewhere near a Netherworld or Waypoint Gate so the Minions can carry the Command Upgrade over to it.
There's also a Health Upgrade on the island at the north end of the map. Dock your boat there, and order your Minions to pick up the Health Upgrade to have them carry it back onto the boat.
Once you've collected the Command Upgrade, sail toward the west end of the map. You'll come to a rock barrier; tap the A/X button to reach full speed and use the ram on the front of the ship to break through. Dock your ship, and head up the first set of steps. There are two raised platforms along the walkway at the top of the second set of stairs where Elves are throwing poisonous bombs. To avoid losing any Minions to the poisonous gas, set them all on a Guard Flag at the bottom of the steps, and then head up and use your weapon to destroy the two raised platforms along the walkway.
Hold the B/Circle button to call your Minions off of the Guard Flag when the walkway is clear and make your way to the steps at the end. Fight your way up the steps and sweep your Minions to the elevated platforms to destroy them. There's another elevated platform across the bridge, and a couple more at the top of the stairs beyond it, so until each one is destroyed, Elves will continuously appear. Fight your way across the bridge and destroy the platform, and then start up the stairs. Destroy the two platforms here, and clear away the Elves.
Command at least three of your Minions to pick up the Green Gate Key and start down the tunnel to the east to reach the slot. The Minions will automatically place the Green Gate Key in the slot. With all four Gate Keys in place, the gate to Everlight will open.
Return to your docked ship, send 10 of your Minions in to power it, take control from the highlighted steering platform, and sail through the gate.
Task: Find your missing crew
Press the Back/Select button and select “Find your missing crew” from the quest list. While tracking this quest, the location of all 10 missing crew members will be marked on the mini-map. Finding and releasing all 10 crew members in the Everlight Jungle will unlock the Minion Captain achievement/trophy, which is worth 10 points on the Xbox 360, or a Bronze trophy on the PlayStation 3.
Task: Venture further into the jungle
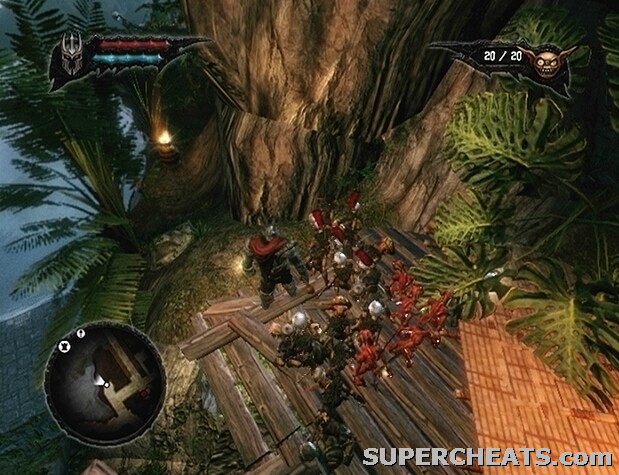
Strike the Minion hanging from the tree up ahead to drop him to the ground, and then strike him again to remove the web that's binding him. Spiders of various sizes will descend from the tree, so use your weapon to squash them. Continue heading east, kill the Spiders that appear, and then head up the steps that you come to. There are several treasure chests along the way, so keep an eye out. Another bound Minion is hanging at the top of the second set of steps, so free him as well.
Cross the bridge at the top of the stairs. Turn right at the split to reach two more bound Minions. When the large, red, dappled plants are broken, they will release a chemical that Spiders are attracted to. So, free one of the bound Minions, and then immediately destroy one of the plants to draw the Spiders to it. If there aren't any of these plants nearby, you'll just have to deal with the Spiders normally.
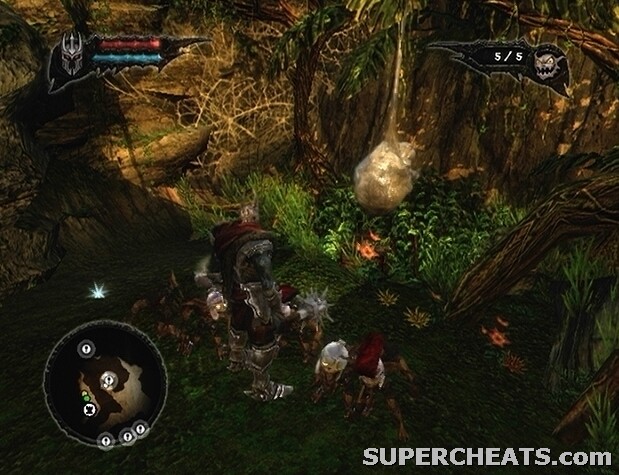
Free the Minions from the Spider webs.
When both of the Minions have been freed, head east and follow the path south. Clear away the bamboo trees, and continue heading south. There are two more Minions in the area down the slope, as well as plenty of Spiders. After freeing the two Minions, follow the southern path out of the area. Kill the Elves that appear, and turn left at the split to find yet another bound Minion.
Continue heading south to reach a gate that is magically locked by an Elven Priestess. The Priestess will be on one of the platforms on either side of the area. To force her down from the platform, hit her with the Lightning Whip spell. When she hits the ground, immediately send all of your Minions in and begin hacking away at her. She'll only stay down for a few seconds, and will soon stand up and jump back onto one of the platforms. Spiders and Elves will appear and attack between rounds, so take care of them before using Lighting Whip to force the Elven Priestess down again.
When the Priestess has been dealt with, proceed through the gate. Follow this path north and you will eventually reach a Netherworld Gate. Call forth some Minions from the Minion Gates near the Netherworld Gate if you have less than four with you, and then head down the unblocked path east from the gate.
Look for this Forge Stone near the Netherworld Gate.
You'll come to some steps, next to which is a Forge Stone; can't miss it. Command at least four of your Minions to pick up the Forge Stone, and they will automatically carry it over to the Netherworld Gate.
There's a pool of water along the east side of this area that you can tread through, but your Minions won't be able to follow. Your Minions won't follow your to their deaths, so just cross to the other side and they will eventually return to the Netherworld. Follow the path until you reach some bamboo trees. Destroying these trees will upset the giant panda bear nearby, but the trees are in your path, so you have no choice but to cut them down.
The giant panda is easy enough to defeat, as it is quite slow. Just stay behind it, hit it a few times, and then run back behind it as it turns to swipe at you. You can use the Target spell to slow the panda down. When the panda has been dealt with, take the eastern path out of the area to trigger a brief cutscene. Make your way to the other end of this area. There's another giant panda sitting in front of some bamboo trees; you have no choice but to destroy the trees, angering the bear in the process. Try to reach the Green Minions behind the bamboo so they can aid you in battle. The Green Minion's pen is full of poison gas, so stay out of there.
Green Minions are assassins; while not nearly as vigorous as the Browns, they have a handy backstab attack, which deals a large amount of damage. If you can sweep your Greens behind an enemy, they should latch on and deal as much damage as they can until they are shaken off.
Use the Green Minions to remove the poison surrounding the barrier.
Return to the previous area and clear away the bamboo trees blocking the poison barrier. Target the barrier and press and hold the RT/R2 button to set your Green Minions to removing the poisonous gas surrounding it. Smash the barrier once the poison has been removed and proceed forward. There is another trapped Minion crew member on the hill here; free him, kill the Spiders that appear, and then head down the western path below the hill.
Follow the path until you reach another magically sealed gate, this one guarded by two Elven Priestesses. Target one of the Priestesses and use Lightning Whip to force her off of the platform. As soon as she hits the ground, hold down RT/R2 to send your Green Minions in to attack her. They should latch onto her back, and deal a significant amount of damage. The first Priestess you damage will leap onto a platform that is seemingly out of reach, so turn your attention to the second Priestess and hit her with a Lightning Whip. This one has nowhere to go but onto the platform opposite the one she was initially on, so hit her again with a Lightning Whip and finish her off when she hits the ground.
Though the Priestess on the isolated platform can't be reached with Lightning Whip, there is a narrow path leading onto the platform that you can sweep your Greens through. Her back is turned, so they'll jump and latch onto her, forcing her off of the platform.
When the last Elven Priestess has been taken care of, head through the gate at the west end of the area. There's a Dark Crystal nearby, so follow these next instructions carefully. Keep an eye on your right as you walk down the path beyond the gate. When you can turn right, do so. Walk straight to the edge of the water and turn right to spot the Dark Crystal container.
Collect this Dark Crystal before moving on.
There's another bound crew member at the southeast end of this area; free him, kill the Spiders that appear, and return to the path. Follow the path south; the last crew member is along the right side of the road, so keep an eye out and free him to unlock the Minion Captain achievement/trophy if you've been following along.
Continue heading south down the path to reach the backside of the statue that was blocking your way before. Order at least five of your Minions to pull the statue out of the way, allowing you to return to the Netherworld Gate.
Task: Find the guarded Empire building
Now that you have some Green Minions, you can use them to get past poison barriers. There are two poison barriers near the Netherworld Gate in the Everlight Jungle. The Halo Spell Stone can be found beyond the barrier southeast of the Netherworld Gate; select your Green Minions exclusively and command them to remove the poison surrounding the barrier. Command at least seven of your Minions to pick up the Spell Stone, and they will automatically carry it over to the nearby Netherworld Gate.
Look for the Halo Spell Stone beyond the poison barrier southeast of the Netherworld Gate in the Everlight Jungle.
When you have the Halo Spell Stone, approach the poison barrier south of the Netherworld Gate and have the Green Minions remove the poison. When the poison is clear, break the barrier and continue south into the next area.
The Green Hive is being held in the Everlight Facility. It is heavily guarded, and the main entrance is firmly shut. Make your way over to the front entrance and head south. As you walk down the path, look to the right side of the road for another trail. Follow this trail when you come to it to reach a Possession Statue. The statue is shrouded in a thick cloud of poisonous gas, so select your Greens and send them through to it. With the Minions in place, tap the A/X button to possess the Green Minion atop the statue.
Cross the narrow beam north of the statue and follow the path to find a way into the facility. This is where the Green Minions' stealth abilities really shine. The facility is heavily guarded, but with the cloaking abilities that the Greens possess, you can sneak your way through. Make your way to the end of the narrow corridor, lock onto the soldier on the other side of the doorway, and hold the RT/R2 button to send your Minions in to make short work of him.
Task: Destroy the Sentinel towers
There are five Sentinel towers at various locations in the Everlight Facility. Sentinels are able to detect magic creatures, so keep out of the red tracking light they employ. The Eradicators are the biggest threat here, as their laser cannon can quickly cut down your ranks if you're spotted.
Head through the opening and turn left to spot the Green Hive. Command six of your Minions to pick it up. Stand on the pressure switch in the corner with the rest of your Minions to open up the gate. Make your way to the end of this corridor to discover a Dark Crystal container and a couple of Treasure Chests.
Look for this Dark Crystal at the end of the corridor by the Green Hive.
Call your Minions away from the Green Hive and head through the doorway along the wall adjacent to the gate. Head down the walkway and cross the narrow, wooden boards over to the other side. Go through the doorway on the left and open the treasure chests there. Continue down the corridor, down the ramp, and you'll come to another opening. There's an Eradicator patrolling the area on the other side; wait until he passes by, then step through the doorway, lock onto him, and hold the RT/R2 button to send all of your Greens in to attack while his back is turned.
Green Minions can make short work of an Eradicator if they hit him while his back is turned, however they are at great risk if the Eradicator spots them. Another Eradicator is patrolling the walkway at the north end of this area. You can free the Gnomes from the cage in the northeast corner of this area by sending five Minions onto the pressure switch. The released Gnomes can serve as a distraction, giving you a chance to catch an Eradicator while his back is turned.
If an Eradicator spots you, retreat through one of the small openings so he can't reach you and wait for him to lose interest. Then, while his back is turned as he makes his way back to his post, send your Minions in to tear him apart. When the second Eradicator has been dealt with, head to the other end of the walkway at the north end of the area to spot a wheel. Have your minions turn the wheel to open the adjacent gate.
Send your Greens in to attack an Eradicator while his back is turned to make short work of him.
There's another Eradicator along the walkway at the end of the corridor beyond the gate; if you spot him with his back turned, immediately send your Minions in to attack. If the Eradicator turns around by the time your Minions get there, hold the B/Circle button to call them back. Command four of your Minions to turn the wheel to open the gate, and then have at least six of them carry the Green Hive to the next obstruction.
When the Minions carrying the Hive reach the gate, call them back and head through the opening at the bottom of the steps. Make your way to the other end of this path to trigger a cutscene. After the cutscene, follow the walkway around to the east side of this area. There should be some containers in the middle of this area that hold extra Green Minions if you've suffered casualties up until this point; keep this area in mind, as you can return here to replenish your ranks anytime.
Make your way over to the opening at the east end of the walkway. There is another Eradicator through here; he should have his back turned at the opening, so target him and command your Minions to take him out. Turn the wheel to open the gate, and command six of your Minions to pick up the Green Hive. The first Sentry tower is along this walkway, so duck under the mesh cover to avoid being spotted.
When the Minions carrying the Green Hive have reached the next obstruction, head through the opening right next to the gate. Turn left once through the opening and head up the steps there. Sweep your Minions to the Sentry tower to have them latch on and bring it down. The Sentry in the tower will fall to the ground and should die on impact.
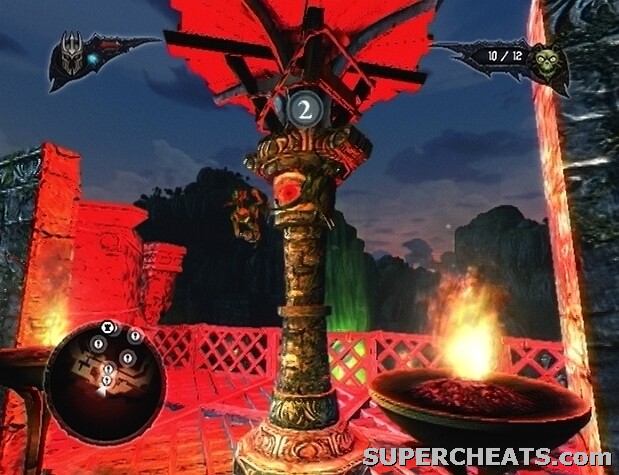
Attack the base of the tower to kill the Sentry.
With the Sentry out of the way, head down the two sets of steps and through the opening on the opposite side of the gate. Command your Minions to turn the wheel, and then send six over to carry the Green Hive to the next gate. When the Minions drop the Hive in front of the next gate, proceed through the adjacent opening. Follow the trail down to another opening and head through. You may see another Eradicator through the gates along this corridor. Wait by the opening at the other end of the corridor until you see the Eradicator turn around, at which point sweep your Minions over to him to take him out.
Once you have removed the Eradicator, make your way to the other end of the walkway and stand on the pressure switch to release the Gnomes in the cage. There's another Eradicator patrolling the area at the bottom of the steps, so send your Minions in while he is distracted by the Gnomes. With the Eradicator out of the way, head to the bottom of the steps and have your Minions turn the wheel to open the gate.
There are two soldiers along the walkway at the end of this corridor; they should have their backs turned, so hit them with your Greens. Have your Minions turn the wheel to open the gate, and then command six of them to carry the Green Hive onto the lift. Cross the narrow, wooden bridge near the lift and continue down the walkway. You will soon reach a pressure switch and another gate; if you've lost any of your Green Minions so far, there should be more beyond the gate opened by the pressure switch.
Head through the gate opened by the pressure switch and turn through the opening on the left. Move to the end of the wall, and go down the two sets of steps there. Proceed through the opening at the bottom of the steps and move to the end of the corridor. An Eradicator is patrolling the walkway beyond the doorway at the end of the corridor, so wait until he turns his back to walk down to the other side before sweeping your Minions in to attack. There is also a group of soldiers at the bottom of the steps, but they should be easy enough to deal with.
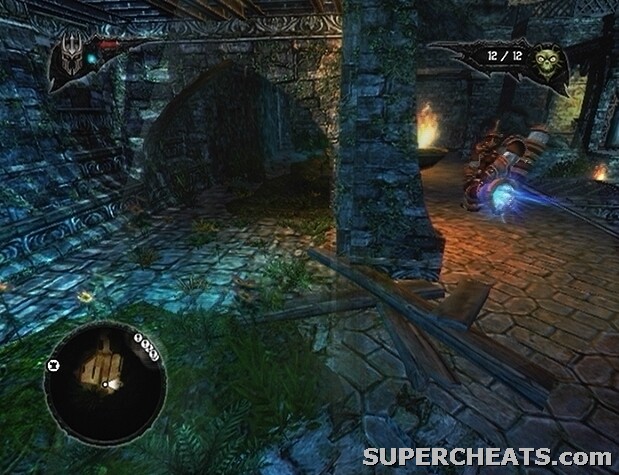
Wait until the Eradicator turns around to walk to the other end of the walkway before sweeping your Minions in to attack.
Another Eradicator is patrolling the walkway at the other end of this area, so wait until he turns his back before heading up there to send your Minions in to strike. On the walkway at the north end of the area, head through the opening at the east end and turn left. Turn right again once through the second opening to reach an outside area. You'll see some jugs and containers; smash these up, and cross the narrow, wooden bridge over to a Dark Crystal container.
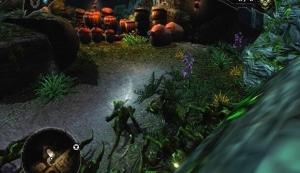
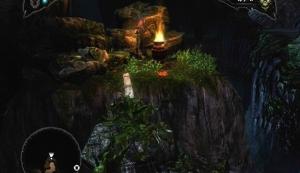
Once you have acquired the Dark Crystal, return to the previous area and have your Minions turn the wheel by the gate in the southeast corner. As soon as you step through the tunnel, stand on the pressure switch on the right to open the gate there. Head up the slope, proceed through the opening, and lock onto the base of the Sentry tower. Hold the RT/R2 button to send your Minions in to demolish the tower.
Head back through the opening at the bottom of the slope. There are several Eradicators in this area, so be careful. If you spot an Eradicator with his back turned and there aren't any other Eradicators nearby, lock-on and send your Minions in to take him out. Again, if an Eradicator spots you and begins to pursue, duck through one of the small openings and wait there until he loses interest.
The center of the facility is much more of a hazard, as there are three Sentry towers around the area, and several Eradicators patrolling the garden as well. You can release a couple of giant pandas by standing on the pressure switch on the walkway along the north end of the area. Avoid the red sentry lights and move through the opening in the garden; wait until the way is clear, and then exit through the northeast opening and head up the steps to reach the walkway. Destroy the Sentry tower along this side of the walkway while you're at it.
There's another Dark Crystal container behind the gate that held the pandas, so after activating the pressure switch and destroying the Sentry tower, enter the cage to collect it.
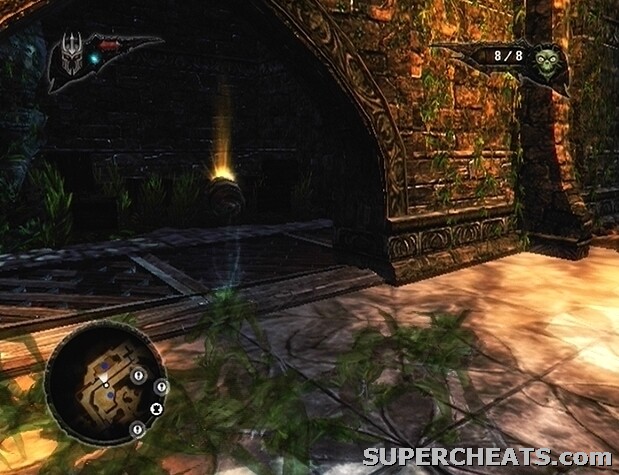
Collect this Dark Crystal after releasing the pandas at the north end of the facility.
Once you have the Dark Crystal, continue east along the north side of the walkway to reach another Sentry tower. Have your Minions destroy the tower, and then command them to turn the wheel to lower the lift where the Green Minion Hive is placed. Before moving to collect the Hive, destroy the remaining Sentry tower first. Activate the pressure switch in the southwest corner of the area and head up the steps there to reach the final tower.
Task: Retrieve the Green Hive from the guarded Empire building
When the final Sentry tower falls, make your way over to the lift at the west end of the area and have six of your Minions pick it up. Follow the Hive through the front entrance and to the Netherworld Gate to complete the task.
Task: Leave the guarded Empire building
Hold the X/Square button for three seconds to end the possession, and then make your way over to the Netherworld Gate and use the Minion Gates there to send your Minions back to the Netherworld. Then, follow the marker on the mini-map to reach a poison barrier and a Green Minion Gate. Call forth some Green Minions and command them to remove the poison surrounding the barrier. Smash through the barrier when the poison clears and exit to the Everlight Jungle to complete the quest.
If you warp back to the Netherworld Tower, there are a couple of side quests available that you can complete to gather resources. If you venture into the Wasteland area, which you can access by selecting “A Mysterious Lady Appears” from the quests list on the Throne interface, you can collect a Mana Upgrade and a Spell Catalyst. However, you won't be able to complete this quest until you have rescued the Blue Minion Hive, but you can collect the aforementioned upgrades without them.
When you're ready to get started, from the Throne interface or a Netherworld Gate, select Everlight Town from the quests list to teleport to the Everlight Temple Outskirts.
Task: Explore the Everlight Temple Outskirts
Provided you have acquired all of the Command Upgrades available at this point, you should have a maximum horde size of 30. Call forth 15 Brown Minions, 10 Green Minions, and 5 Red Minions from the Minion Gates and head north.
The legion soldiers in the area at the bottom of the steps that you come to are without a Centurion leader, so they're easy prey. Sweep your Browns in to engage them, and then move in and smack them around yourself. There's an Eradicator at the start of the path in the southwest corner of this area; he should have his back turned by default, so send your Greens in to attack him from behind.
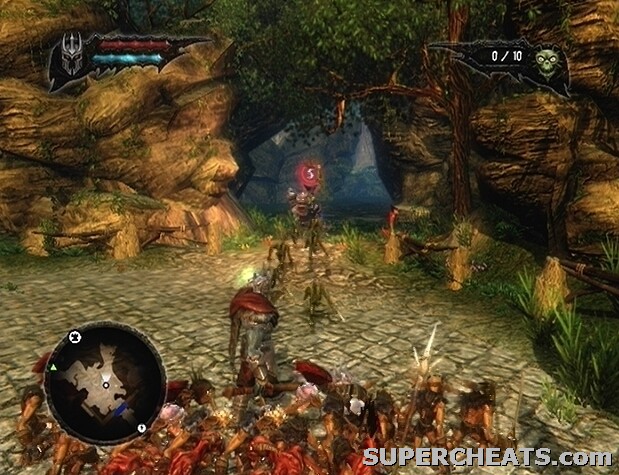
Send your Greens in to attack the Eradicator while his back is turned.
Continue west down the path. There's another Eradicator in this area, so wait until his back is turned, and then command your Greens to move in and attack him. Deeper into the area, a ridiculous number of Spiders will appear and attack the Legionnaires. Kill the Spiders, and then look for a Spell Catalyst at the top of some steps in the northwest corner of the area. Command three of your Minions to pick up the Spell Catalyst and they will automatically pick it up and carry it back to the Netherworld Gate.
Task: Find a way into the Temple
Raising the bridge to Everlight Temple requires a Red and Blue Gate Key. The Red Gate Key is already set in place, but the Blue Gate Key is missing. You'll need the Red Gate Key, so have three of your Brown Minions pick it up.
Head down the path at the south end of this area. Clear the bamboo trees, and command four of your Minions to pull back the statue blocking your path. Clear away the bamboo trees beyond the statue to reach Brown, Red, and Green Minion Gates. Send all of your Green and Red Minions back to the Netherworld, and call forth as many Brown Minions as you can.
Your Minions will automatically place the Red Gate Key on the slot in front of the gate, which will lower it. Move through the gate to encounter Fay, who summons a guardian to defend the Blue Gate Key.
The guardian has a lot of health, but taking him down is simple. Remain in place, lock onto the creature, and hold down the RT/R2 button to send your Browns in to attack. Keep an eye on the guardian; when he raises his arms, immediately begin holding down the B/Circle button to call your Minions back. When the guardian raises his arms, he is preparing to jump up into the air to hit the ground with his stomach, which will likely crush any Minions that don't manage to get out of the way.

Use your Brown Minions to attack the Guardian.
As soon as the guardian hits the ground, send your Browns back in to continue attacking. You needn't move from your position at all; just continue sending your Minions in and calling them back when the guardian raises his arms until they manage to completely deplete his health.
When the creature falls, command three of your Minions to pick up the Blue Gate Key. At the Minion Gates, call the Minions away from the Gate Key and send all of your Browns back to the Netherworld. Call forth as many Greens as you can, and head back down the path toward the bridge.
A group of Legionnaires will appear and block your path. There's a large rock to the right of them, with a small gap that your Greens can be swept through. Sweep your Greens through the gap and behind the formation. Your Minions should be able to tear them apart with relative ease and minor casualties. Attack the archers along the platform across the way, and then engage the Centurion. Kill the Centurion, and then return to the Minion Gates and Gate Keys.
At the Minion Gates, send all of your Greens back to the Netherworld, and call forth as many Brown Minions as you can. Command your Minions to pick up the Red and Blue Gate Keys, and start back down the path toward the bridge.

Sweep your Greens behind the legion formation to tear them apart.
Task: Enter the Temple
Start down the bridge until you spot a group of Spiders headed your way. Set all of your Brown Minions on a Guard Flag in the middle of the bridge to give them an offensive boost. Help your Minions defeat the waves of Spiders, and then make your way to the end of the bridge and enter the temple.
Task: Defeat the Spider Queen
Stepping on the pressure switch in the middle of the temple will cause water to pour in from the vents on two sides of the temple. You need to lure the Spider Queen over to one of the vents so you can hit the switch and force her off of the wall. She is attracted to the pollen released by Flower Bombs; lock onto the Flower Bomb below the Spider Queen and tap the RT/R2 button to send one of your Minions over to pick it up.
When your Minion has plucked up the Flower Bomb, use the Right Stick to move the Minion below one of the vents along the adjacent wall. Tap the B/Circle button to call the Minion back, and wait for the Flower Bomb to go off. The Spider Queen will crawl over to the pollen released by the flower; hit the pressure switch in the middle of the temple when she is over the vent to force her off of the wall. Lock onto the Spider Queen and hold the RT/R2 button to send your Minions over. You should have a Horde of just Brown Minions; if not, there are Brown, Red, and Green Minion Gates along the walls that you can use to send all but your Browns back to the Netherworld. Hack away at the Spider Queen yourself, and continue to do so until she flips back onto her legs and climbs back onto the wall.
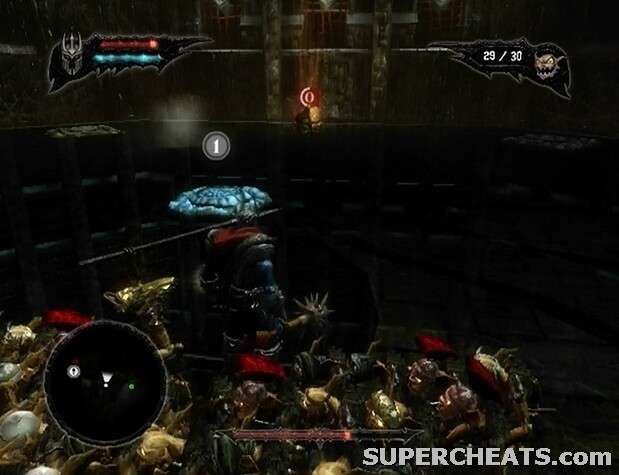
Use a Flower Bomb to lure the Spider Queen to the vents.
The Spider Queen will send Spiders in to attack, so take care of them, and then shift your sights to the queen once more. Things are a bit different the second time; the four pressure switches—one in each corner of the temple—must be activated before the switch in the middle of the temple will trigger the water from the vents. If you take too long, the Spider Queen may crawl down to attack; avoid her, and she will eventually return to the walls.
Sweep your Minions around to each of the pressure switches, and then use a Flower Bomb to lure the Spider Queen back to one of the vents. Hit the pressure switch in the middle of the temple when she reaches the vent, then lock-on, send your Minions in, and move in to attack.
When the Spider Queen returns to the walls a second time, she will instead take position above one of the four switches in the corners of the temple. Sweeping your Minions onto the switch she is hanging over is a sure-fire way to lose them. You'll have to lure her away from the switch so your Minions can press it, but first, use your Minions to hit the three switches in the other corners of the temple.
Once all three switches have been pressed, use one of your Minions to move a Flower Bomb over to the vent closest to the Spider Queen. When the bomb goes off, sweep your Minions onto the last switch, and then step onto the switch in the middle of the temple to trigger the water and force the Spider Queen off of the wall. Send your Minions in and hack away at her until she returns to the walls.
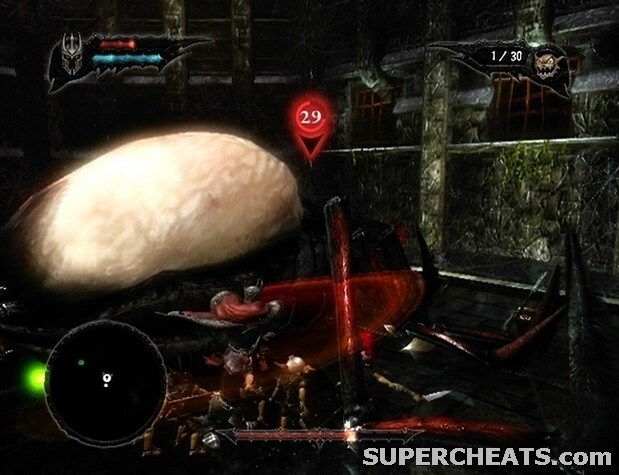
Attack the Spider Queen once she has been forced off of the wall.
Do the same as you did the previous time to get the Spider Queen off of the wall, and move in to finish her off. Be sure to collect the mass of Green Orbs she leaves behind.
Task: Find a way out of the Temple
Killing the Spider Queen has tamed the Spiders in Everlight, making them useable as mounts for your Greens. Mounted Greens can be swept along webbing on walls. To get out of the temple, you'll need to send a mounted Green along the wall to hit the pressure switches before the lift reaches that switch. If the lift reaches the switch before the Green Minion hits it, the lift will fall back down and you will be forced to start the sequence again.
Call forth just one Green Minion from the Green Minion Gate and sweep it over to one of the Spiders. With the mounted Green selected, sweep him up the ramp and onto the web-covered wall. There are a couple of stops along the way, and they usually lead to areas full of treasure. After completing the first sequence of switches, call the mounted Green off of the wall and enter the large room. Open all of the treasure chests and smash all of the crates in this room, and then return to the lift.
This next portion can be a bit of a pain due to the shakiness of the sweeping system. To alleviate this, you can send one mounted Green up at a time and set them on Guard Flags while on top of the switches after the first in the sequence. Then, send one more up to hit the first switch, and those on the Guard Flags will automatically press down on the switches to complete the sequence.
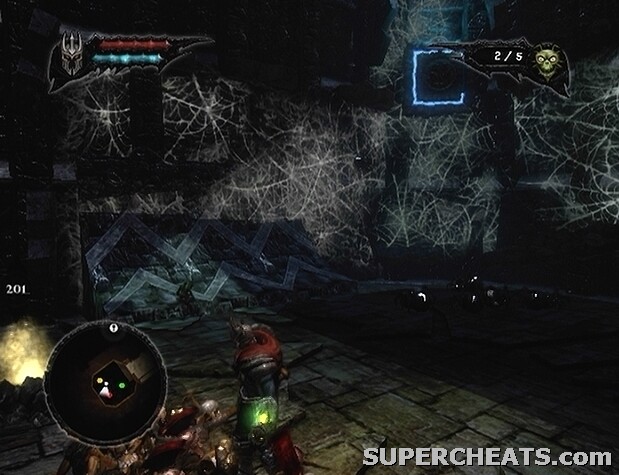
Use mounted Greens to hit the switches on the web-covered walls of the temple to raise the lift.
First, with your Green Minions selected, lock onto one of the Spiders and tap the RT/R2 button to have one of them hop on. Then, to select only mounted Greens, hold the RB/R1 button and tap the A/X button twice. Use the Right Stick to move the single mounted Green Minion over to the second switch in the sequence, and press the Y/Triangle button to set him on a Guard Flag. Have another Green mount one of the Spiders, send him up to the third switch in the sequence, and plant him on a Guard Flag there. Do the same for the forth, and then finally, send another mounted Green to hit the first switch in the sequence.
When you reach the second stop, enter the area, open all of the treasure chests, and then return to the lift. This time, you won't be able to see all of the switches along the wall to set a mounted Green on each one, but you can preset the first, second, and third. Then, when you send the another mounted Green up to hit the first switch, you can sweep him over to the fourth without having to move down to hit the second and third, making reaching the fourth in time easy enough.
Once you've managed to raise the lift to the final stop, head into the next area and up the curved steps. Stand on the pressure switch at the top of the steps to open a door along the walkway. There's a Mana Upgrade up on the walkway near the Waypoint Gate, so command your Minions to pick it up and they will automatically carry it over to the gate. Head through the doorway at the north end of the walkway to find a Dark Crystal and a bunch of treasure chests.
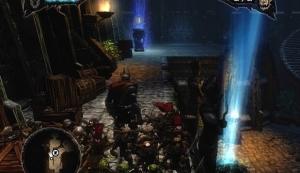
Mana Upgrade
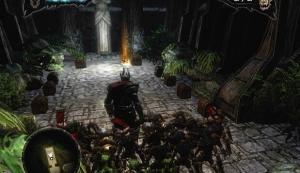
Dark Crystal
You can return to the Everlight Temple Waypoint Gate, re-open the door at the end of the walkway using the pressure switch at the top of the curved steps, and open the treasure chests along the walkway and in the room again. Repeat this process and with time, you can amass a large amount of gold.
Task: Gain entrance to Everlight Town
Teleport to the Everlight Temple Outskirts gate. Now that you have the Green Minion Hive and access to Spider mounts, you can reach a Dark Crystal near the Netherworld Gate. Call forth some Greens from the Green Minion Gate, and look to the map (press the Back/Select button) and locate the nearby Spider nest. There are three Eradicators between the Netherworld Gate and the Spider nest; the first is likely facing the steps, so set your Greens on a Guard Flag and lure the Eradicator over to the Guard Flag to cause them to attack.
When you have a mounted Green, return to the Netherworld Gate. Head up the steps north of the Netherworld Gate and look to the right. Send your mounted Green up the web-covered wall to retrieve the Dark Crystal.
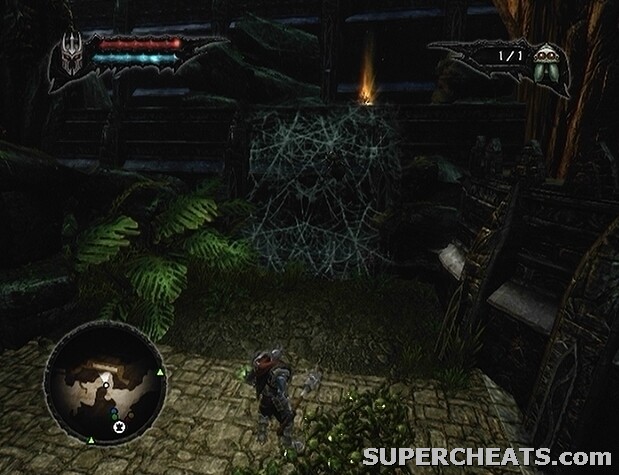
Use a mounted Green to reach this Dark Crystal.
Head north from the Netherworld Gate and send a mounted Green up the web-covered wall surrounding the gate. Use the Right Stick to activate the pressure switch on the right side of the gate, and then move the Minion over to the switch at the other side. You have to activate the second switch before the sides of the first switch fill back in to lower the gate. Cross the bridge to enter the next area and complete the task.
Task: Get into Everlight Town
Call forth as many Brown Minions as you can from the Minion Gate and start down the path. There are soldiers and archers along the way; they are without a Centurion leader, so they should be easily dealt with. Sweep your Browns up the hills to kill the archers, and then pick off the soldiers.
Continue down the path and you will eventually reach a second set of Minion Gates. Recruit some Greens and have them mount the Spiders here. Then, send the mounted Greens up to the top of the hill further south from the Minion Gates and set them on a Guard Flag. When the Spiders jump down to attack and break up the formation, move in and start attacking the soldiers.
When the way is clear, press on with a mix of Brown and Green Minions. When you reach the next area, send some mounted Greens up the web along the west side of the area over to the perched Centurion. When the Centurion has fallen, sweep your Browns in to kill the scattered soldiers, and then send them up to the end of walkway along the east side of the area to take out the archers.
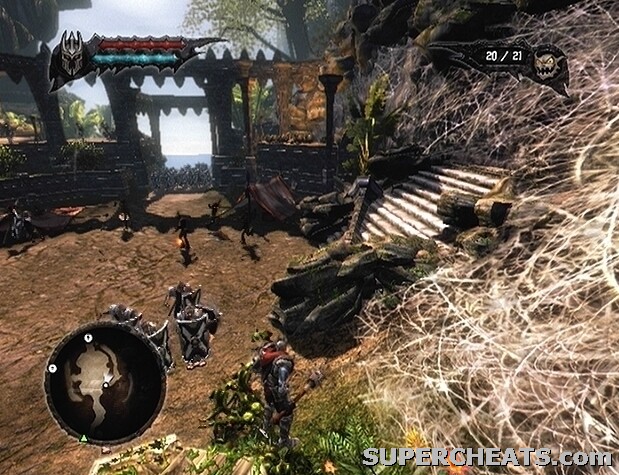
Use mounted Greens to kill the Centurion on the platform at the other end of the web-covered wall.
Sweep your Browns in to attack the demoralized formation below the archway, and then continue south to a Waypoint and Minion Gates. The gate into Everlight is shut tight, so you'll have to find another way in. Head south from the Everlight gate to reach a Possession Stone. Use the Possession Stone to take direct control of one of your Minions, and then head down the narrow trail nearby.
Task: Destroy the Temple
When you reach the town, make your way over to the gate and command your Minions to turn the wheel. When the gate is open, hold the X/Square button for three seconds to return to the Overlord. Walk straight through the gate, and continue heading east until you reach a closed gate. Head up the stairs nearby, and sweep your Brown Minions up to engage the Legionnaires. Once the Legionnaires have been taken care of, sweep your Browns to the top of the steps to take out the archers.
When you reach the top of the stairs, fight your way onto the platform up ahead. Have your Minions turn the wheel to open the gate in the northeast corner of the platform. Head through the gate and fight your way to the other end of the walkway. The totem is in front of a closed gate by some Spiders. Order your Minions to pick up the Command Upgrade, and they will automatically carry it over to the nearby Waypoint Gate.
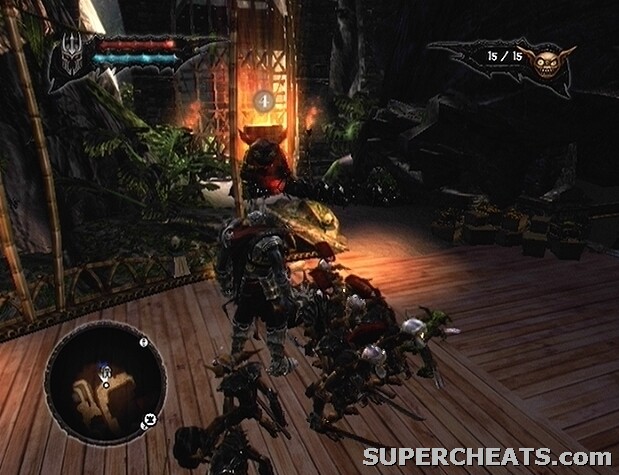
Collect this Command Upgrade by the Waypoint Gate in Everlight Town.
Use the Minion Gates by the Waypoint to recruit at least 10 Greens, and then as many Browns as you can. From the Waypoint Gate, head south down the steps and sweep your Browns to the soldiers. Send them into the tent to have them destroy it, preventing more soldiers from spawning. Continue south, engaging the soldiers along the way, and follow the marker on the mini-map to reach the temple.
After the cutscene, a few waves of Legionnaires will approach. Set your Browns on a Guard Flag at the top of the steps and help them fight off the Legionnaires. When enemies stop approaching, select your Greens and head right from the stairs. Sweep your Greens to the other end of the narrow beam over the water and have them attack the archers behind the group of soldiers. Then, when the Greens return, sweep them back across the beam and into the tent near the explosive barrels. When your Greens return once more, sweep them back across the beam and behind the formation. Call your Browns over, and attack the stunned soldiers.
When the soldiers have been dealt with, set your Brown Minions on a Guard Flag between the two rocks on this section of the area. Select your Greens, and target the explosive barrel closest to the curved beam. Press the RT/R2 button to command one of your Greens to pick up the explosive barrel, and then use the Right Stick to move the Minion to the top of the curved beam below the balcony. The Centurion should be standing on the balcony above the beam; when the barrel goes off, it should damage him. Repeat this as many times as necessary to kill the Centurion.
Send a Minion over to the other side of the beam with an explosive barrel to kill the group of archers there as well.
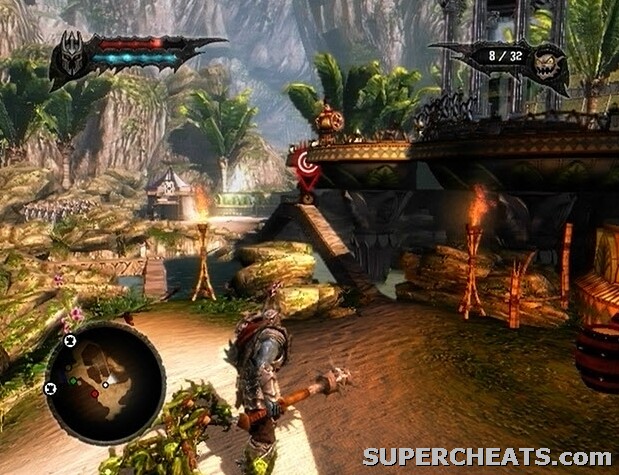
Use explosive barrels to kill the Centurion on the platform.
With the Centurion and archers dead, make your way over to the other side of the area with your Brown Minions and attack the demoralized formation. Then, head up the steps to confront the Governess of Everlight. As with Borius, you can either kill or enslave the Governess. Killing her, of course, will affect your Destruction tyranny rating, while subduing her will affect your Domination tyranny rating.
Once you've dealt with the Governess, sweep your Minions to the supports of the temple to raze it. Then, approach the Town Hall, press the A/X button to open the interface, and purchase Everlight Town for 50 Brown Minions to complete the quest.
Select “Travel to the Empire” from the quest list on the Throne interface to get started.
Task: Get past the Harbor Fort
Use the Brown Minion Gate to call forth as many Brown Minions as you can. Head up onto the walkway and send your Browns to attack the two soldiers standing there. Continue south to encounter a couple more. A formation of soldiers is blocking the path to the Harbor Fort; sweep your Browns in, and help them tear the soldiers down. With the soldiers out of the way, sweep your Minions up to the archers on either side to take them out.
Continue south to trigger a cutscene. The bridge into the Harbor Fort is drawn, and the Catapult team has set its sights on the Overlord and his Minions. As soon as you regain control, head west to the rock barrier. You need to trick the catapult team to destroy the barrier for you. Just keep heading west and don't stop until you are right at the rock barrier. By the time you reach the barrier, the catapult team should have fired and missed, and be ready with another boulder. So, just a moment after you reach the rock barrier, spin the camera around, sweep your Minions east and use the Left Stick at the same time to walk the Overlord over to them. If done correctly, the second boulder should smash the barrier, and no causalities should have been suffered.
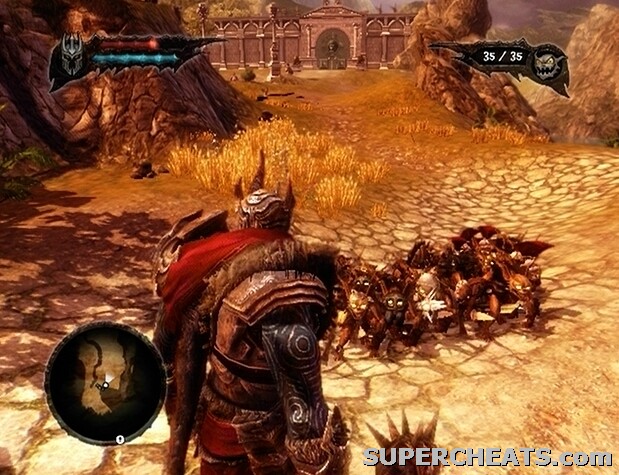
Stand by the rock barrier west of the Harbor Fort to prompt the catapult operators to launch in that direction. With any luck, the boulder will destroy the barrier.
Immediately start up the slope and sweep your Minions ahead of you. Smash the cart in your path, continue to the legion formation, and sweep your Browns to them. Try to muscle your way through the formation to get beyond the large boulder along the path. Even if some of the soldiers remain standing, if you manage to get behind the formation, call your Minions to you and command them to start turning the wheel there to lower the bridge. Leave the remnants of the formation alone, and proceed across the bridge.
Head up the hill southeast of the Netherworld Gate to spot a Command Upgrade.
Task: Dress up 16 Minions as Legionaries to fool the Catapult guards
Start down the path south of the Netherworld Gate and you will eventually encounter a group of bathing soldiers. Ignore them, and instead lock onto the nearby tent and hold down RT/R2 to send your Minions in. The Minions will don the Legionary costumes inside, allowing you to then sneak them into the fort.
Walk up the hill north of the tent to uncover a Possession Statue. Use the statue to possess one of your costumed Minions, and then head through the low archway by the rock barrier up ahead. When you reach the bridge, command four of your Minions to turn the wheel behind the crates to connect the two sides. Walk around to the bridge into fort and it will be promptly raised to provide you entry.
Task: Take control of the Catapult
Head up the steps beyond the gate and up to the Catapult. Lock onto the Catapult and send 10 Minions in to power it. Then, stand on the highlighted steering platform and press the A/X button to take control. To use the Catapult, hold down the RT/R2 button to increase distance. Use the Left Stick to steer, and click the Right Stick button to zoom in and out. Use the Catapult to crush the Legionnaires just outside of the fort, and then the formation coming from the north.
When the two formations have been scattered, aim the Catapult toward the gate northwest of the fort and hold RT/R2 until the Catapult is completely charged. Then, release RT/R2 to send the boulder to the gate to smash it.
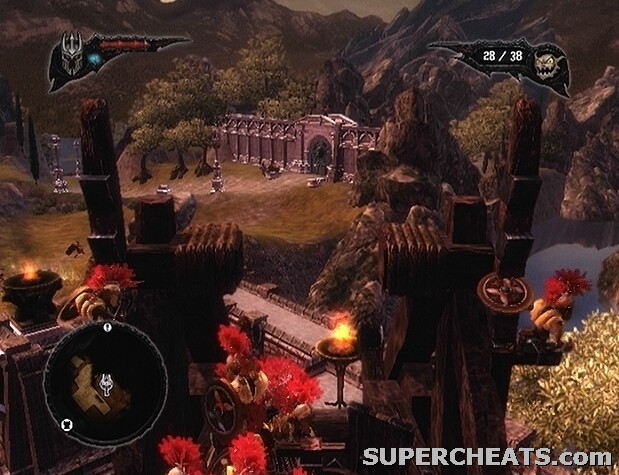
Use the hijacked Catapult to smash the gate.
There's a Forge Stone at the bottom of the steps that lead up to the Catapult. Order at least four of your Minions to pick it up, and they will automatically carry it back to the Netherworld Gate. Look next to the steps near the front gate for a Dark Crystal container.
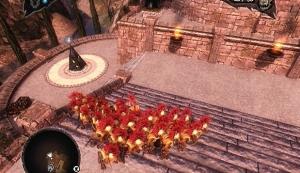
Forge Stone
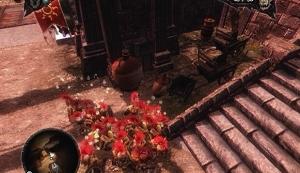
Dark Crystal
Task: Explore further into the Empire Heartlands
Hold the X/Square button for three seconds to return to the Overlord. Walk back down to the fields and make your way over to the broken gate. Head through the opening to enter the Empire Heartlands.
Task: Take down the Sentinel on the main road
Follow the path to trigger a cutscene. Afterward, continue down the path to trigger another cutscene, depicting a Sentinel in his tower. The Sentinel has the main road covered, so continue up the hill at the end of the path instead. You'll reach a Netherworld Gate; use the Minion Gates nearby and recruit as many Greens as you can.
Head up the steps north of the Netherworld Gate and turn right. Smash the Sentinel tower along the wall here, and then head west to uncover a Possession Statue. Use the statue to possess one of your Minions, and then cross the ruined beam north of the Netherworld Gate. Follow the path on the left to reach a couple of tents containing Legionary gear. Send your Minions in, and walk in yourself to put on the costumes.
Walk around to the Gargantuan to trigger a cutscene. When you regain control, stand in front of the gate at the east end of the path to lure the Gargantuan into charging through it. The Sentinel in the tower above the gate is sweeping a red light over the path; getting caught in the light will blow your cover, so wait until the light is off to the left before sending your Minions in to bring down the tower.
When the Sentinel has been dealt with, start down the eastern path. Duck into the grassy area along the left side of the road to encounter the Gargantuan again. To remove the Sentinel tower blocking the main road, you have to stand behind the base to trick the Gargantuan into charging into it.
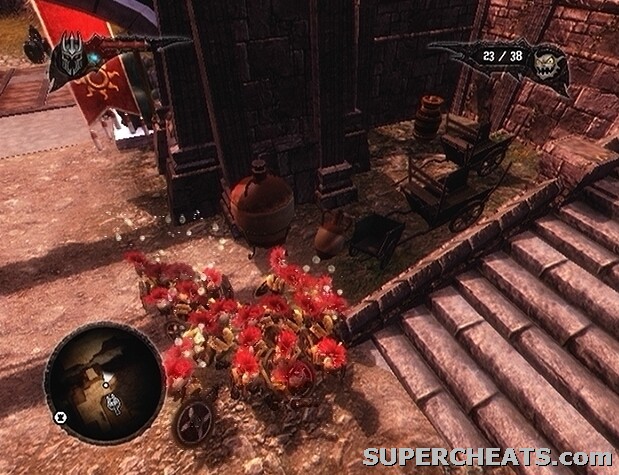
Trick the Gargantuan into charging into the base of the tower to kill the Sentinel.
Killing the Gargantuan here will yield a Dark Crystal. To kill the brute, stand behind the broken tower base and trick him into charging into it. Then, while the Gargantuan is stunned, sweep your Greens behind him to have them latch on to his back and begin chipping away at his health. Do this a few times to drain the Gargantuan's health completely, and then pick up the Dark Crystal he drops.
Task: Destroy the Villa and take down Senator Drearius
After destroying the Sentry tower on the main road and collecting the Dark Crystal by killing the Gargantuan, hold the X/Square button for three seconds to return to the Overlord. Use the Minion Gates near the Possession Statue to call forth a mix of Brown and Green Minions. Return to the main road and follow the marker on your mini-map to confront Senator Drearius.
Sweep your Browns in to engage the soldiers that Drearius sends at you, and then sweep them to the columns on the north and south sides of his villa. Head up the steps behind the north section of the villa to reach the second level. Kill the archers at the top of the stairs, and then sweep your Minions through the small hole and to the short columns to bring the place down.
You can either kill Senator Drearius and his wife, or enslave the both of them. If you've been consistent with your actions thus far, you'll know what to do. Once you've made your choice, return to the previous area and head to the west end to spot a Spell Catalyst. Command three of your Minions to pick up the Spell Catalyst and they will automatically carry it over to the nearest Netherworld Gate.
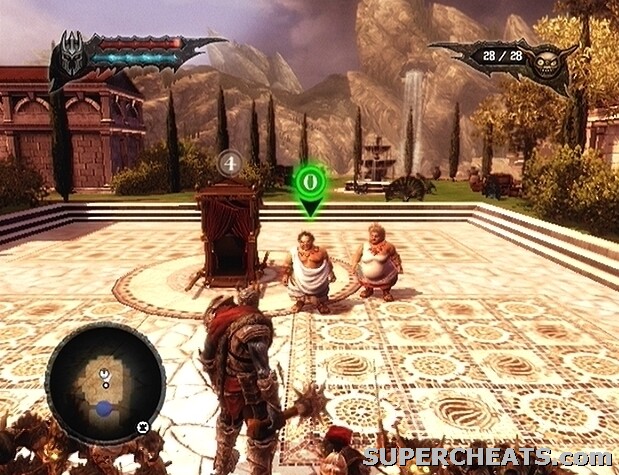
Kill both Senator Drearius and his wife to raise your Destruction tyranny rating, or enslave them to raise your Domination tyranny rating.
Task: Get yourself a Sedan Chair
Order four of your Minions to pick up the Sedan Chair, and walk in to it to complete the quest.
Task: Find the Arena Dungeons
Walk to the house at the southeast end of the starting area, break the door down, and send your Minions in to destroy it. Destroying the house reveals a wheel; command your Minions to turn the wheel to open the grate into the Empire Sewers.
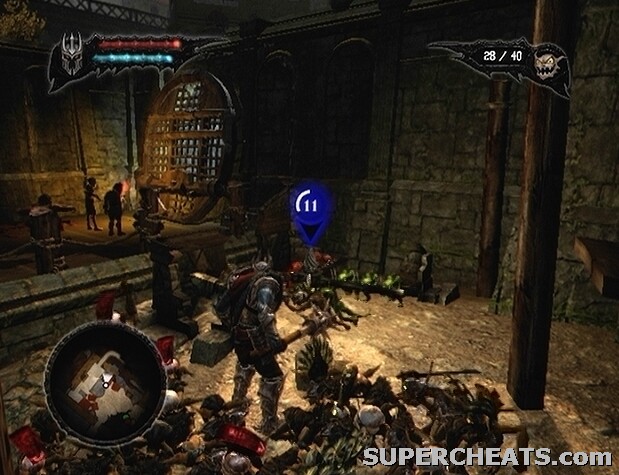
Destroy the house by the sewers entrance to uncover a wheel.
Enter the sewers and walk to the end of the tunnel. Hit the grate at the end of the tunnel to throw it open. The giant frogs are coming from the open tunnel in the southeast corner of this room, and more will continue to appear from here until it is closed. Kill the first frog, and then cross the bridge and turn left. Walk onto the platform and hit the grate to shut it.
Command your Minions to begin turning the wheel to open up the nearby tunnel. The heavy grate will crush your Minions if it falls on them, so make sure your other Minions are out of the way while the wheel is being turned. Kill the giant frogs down this tunnel, and then whack the grate at the end to throw it open. Destroy the house across from the Minion Gates, and then the second house in front of the walkway.
Task: Enter the Arena Dungeons
Head up onto the walkway, and destroy the house blocking the steps to the bridge. After the cutscene, cross the bridge and take the steps to the lower level. At the bottom of the stairs, go south and shut the grate by the switch to stop giant frogs from coming through. Stand by the pressure switch and wait for the raft to approach from the north. As the raft nears, stand on the switch to bring up a spiked gate in its course.
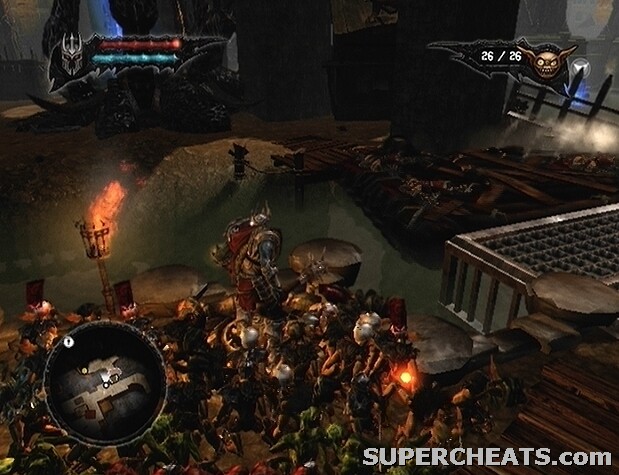
Use the pressure switch to stop the raft in its course.
When the raft crashes into the gate, kill the Legionaries onboard, and then walk across the raft to reach the other side of the stream. Use the Minion Gates to summon as many Browns as you can. There are three crossbow Legionaries standing by the entrance to the Arena Dungeons; sweep your Brown Minions in to engage them, and then enter the dungeons.
There should be three Legionaries standing with their backs turned on a raft just beyond the entrance, so sweep your Browns Minions in and help them take them down. The bouncing containers hold Blue Lifeforce Orbs and magic creatures, so be sure to break them open. After dealing with the Legionaries, look for a wheel at the west end of the walkway just past the entrance. Have your Minions turn the wheel to open the tunnel that leads deeper into the arena dungeons.
Task: Free the 12 Blue Minions
Your Minions can't follow you into the tunnel due to the pool of water in front of it, but they won't follow you to their deaths either; just move on without them and they will soon return to the Netherworld. Hit the grate at the end of the tunnel to throw it open, and then wade through the knee-deep water and walk up the ramp.
Kill the two Legionaries at the top of the second ramp, and then proceed to the other end of the walkway. Take out the Legionaries here as well, and then make your way over to the pressure switch. Stand on the pressure switch to drop one of the hanging containers onto the walkway, and the others into the water below. With the one Blue Minion by your side, head back down the ramp and break open the containers that are bobbing in the waters.
Two of the containers hold a Blue Minion, and there is another beyond a broken fence that you can send your Blues through to break open. When you have freed all four of the Blue Minions, sweep them all through the gap in the fence and over to the wheel at the east end of this area. When the wheel has been turned, the gate blocking the way into the next section will fall.
[ol-66.jpg title=Stand on the pressure switch just as a blue container reaches the gap to rescue the Blue Minion inside.]
Make your way into the next section and head up the ramp across from the conveyor belt and Eradicator platforms. Standing on the pressure switch here will cause the visible containers to drop from the belt. It takes a moment or so for a press on the switch to register, so stand on it as soon as a blue container reaches the gap to ensure that it doesn't land on one of the platforms. You can rescue four more Blue Minions this way.
Once you have eight Blue Minions with you, head down the connected ramp and send all eight of them onto the pressure switch to activate it and lower a nearby gate. Continue east to the next area
Standing on the pressure switch here will cause the claw above the platform on the left to grab hold of whatever is beneath it, while the wheel to the right controls the claw's position along the belt. Start by standing on the pressure switch to have the claw pick up the Blue Minions below it, and then sweep your Minions down to the wheel. When the claw reaches the gap, immediately step off of the pressure switch to drop the Blue Minion to the ground below. Though the Minion cannot survive such a drop, Blue Minions possess a handy ability that allows them to revive dead Minions. As soon as the Minion hits the ground, call your Minions off of the wheel and sweep them over to him. One of the swept Minions is sure to pick up the dead Minion and revive him.
There are two Minions on each of the platforms, and you'll need to use the claw to get them all down. As the number of Minions on the wheel increases, so too does the speed at which it is turned, so set all but six of your Blues on a Guard Flag and leave the rest to turn the wheel. To do so, sweep your Minions down the ramp and press the Y/Triangle button to set the Guard Flag. Then, tap the B/Circle button until all but six are back by your side. Blue Minions set on a Guard Flag will auto-revive downed Minions, which will surely speed things up.
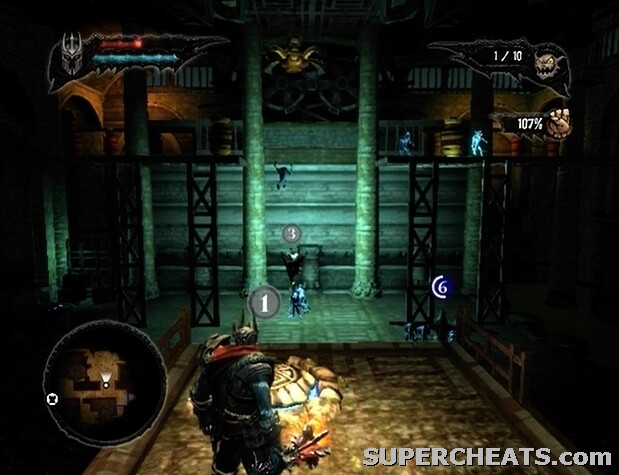
Use the claw arm, pressure switch, and wheel to rescue the Blue Minions on the platforms. Use your other Blue Minions to revive them when they go splat.
To get the next three, have your Minions begin by turning the wheel while you are not standing on the pressure switch; wait until the claw is above the next Minion in line before stepping onto the switch to pick him up. To get the Minions on the platform on the right, pick one of them up with the claw arm, then continue standing on the pressure switch and call your Minions off of the wheel to return the claw arm to the platform on the left. Set your Minions back to turning the wheel once the claw is back in its initial position and step off of the pressure switch when the claw reaches the gap. You can also step off of the pressure switch as the claw passes the gap on its way back to the first platform, but you'll have to be quick.
Task: Use the Raft to reach the Blue Hive
Continue on to the next area once you have freed all 12 Blue Minions and sweep all of them onto the pressure switch to open up a Blue Minion prison. Smash the containers in the prison to gain some Blues, and then head down the ramp and look to the Legionaries across the water.
Blue Minions, as the onscreen pop-up explains, can Blink through enemies and remain unseen while being swept. So, sweep your Minions through the water, up the ramp, through the Legionaries standing there, and onto the pressure switch to the right. Keep your Minions moving and sweep them back over to you once the switch has been pressed.
Head back west down the walkway and cross over to the other side. There's no need to disturb the Legionaries standing there; they are quite tough, so it would be best to just leave them be. Continue on into the next area and make your way over to the west end of the walkway. There are several Legionaries and an Eradicator in the area below; try your best not to disturb them, and sweep your Blues through the opening in the southeast corner of the area and onto the pressure switch. Doing so will drop a bunch of containers onto the Legionaries and Eradicator. Continue sweeping your Blues over to the second pressure switch across the bridge to lower the gate at the west end of the area.
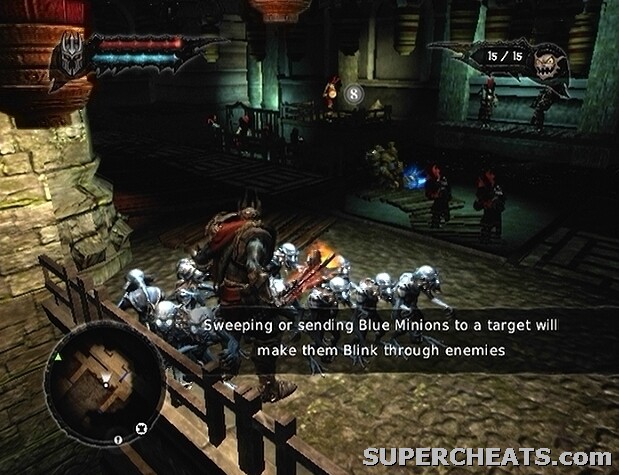
Sweep your Blues over to the two pressure switches along the south side of the room.
If any enemies remain in the area below, take them out while they're distracted by the fairies that were in the containers. When the room is clear, cross over to the walkway and smash the containers there. There should be fairies inside of these containers, which will distract the Legionaries nearby. Kill the Legionaries while they're distracted, and then take out the fairies. Continue west down the walkway and send your Minions onto the pressure switch. If you don't have enough Minions (12) to activate the pressure switch, you can return to the previous area and look for blue containers along the walkway that you swept your Blues from.
After activating the switch, walk past the gate to return to the start of the arena dungeons. Walk onto the raft and sweep your Blues over the side to the push bar to power it. Stand on the marker on the raft and press the A/X button to take control. Follow the marker on the mini-map and you will soon be stopped by a Legionary. Dock the raft, kill the Legionary, and continue on into the next area.
Follow the straightforward path to reach the palace's magic room and trigger a cutscene. After the cutscene, smash the blue containers to free the Blue Minions inside. Use four of the Minions to turn the wheel nearby and smash the crates to find some health potions.
Sweep your Blues through the Legionaries to turn the wheel at the east end of the room. When the wheel has been turned, some slaves will be released from the nearby cage. The peasants will attack the Legionaries; just stand by and watch the brawl, and kill any Legionaries that survive.
Once you have freed all 15 Blue Minions, head up the steps at the north end of the room to enter the arena.
Quest: Survive the Arena Games
The Arena Games consists of five rounds: a slave round, a Unicorn round, a Gargantuan round, an all-out round, and a Yeti round. At the very start, some Legionaries will smash the containers in the middle of the arena and kill the minions inside. Sweep your Blues to the dead Minions when the Legionaries move on to the next set to revive them. Do not engage the Legionaries; just let them take position by the doors at the other end of the arena. They'll only attack if you get too close, so keep your distance for the duration of the event.
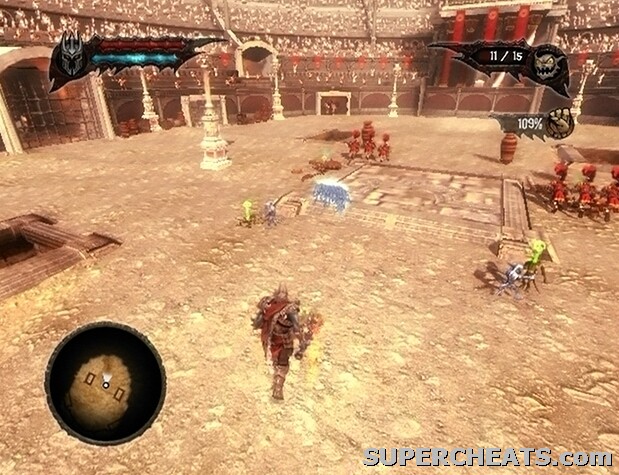
Sweep your Blues in to revive the dead Minions.
Task: Survive the slave round
The slaves are very weak, so this is a simple task. Rather than eliminating all of the slaves immediately, you can walk around the sides of the arena and destroy the containers to release more Minions. To get to the containers on the platform, stand directly below the explosive barrels and hit them once. When the barrels explode, the door at the top of the steps will be blasted open.
Once you have strengthened your horde, take to attacking the slaves. They are very weak, so a swing or two should be enough.
Task: Survive the Unicorn round
This round, you're facing two Unicorns. Unicorns are deadly to both you and your Minions; their charge attack is the biggest threat, as it can kill several Minions at once. It is quite likely that you will lose some Minions this round, however it seems that all of the Minions available during the Arena Games are newborns, so unless you were low on Lifeforce Orbs to begin with, you aren't likely to lose any of your veterans.
The best way to bring down a Unicorn is to wait until it is charging toward you, and then sweep your Minions out of the way and follow them. Then, immediately turn around and begin attacking the Unicorn. If your Destruction tyranny rating is high and you have upgraded the Target spell with Spell Catalysts, you can likely drain a Unicorn's health quite quickly with the spell. Don't approach a Unicorn while it is rearing back, as it can damage you this way too.
Task: Survive the Gargantuan round
Stand behind one of the columns in the middle of the arena and sweep your Minions to the Gargantuan to get his attention. Then, call your Minions back, wait for the Gargantuan to charge into the column, and attack while he is stunned. Repeat as many times as needed to kill him.
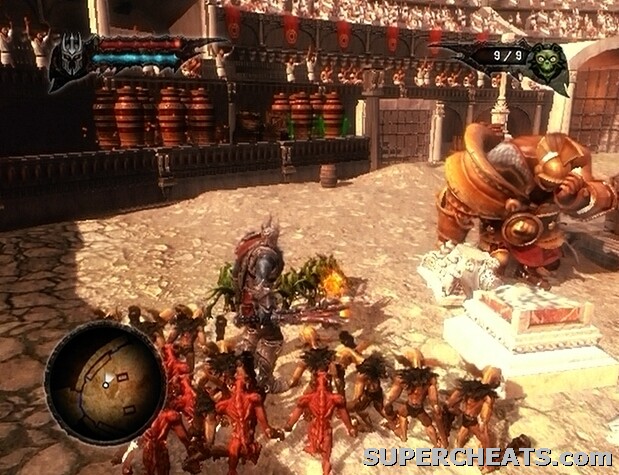
Attack the Gargantuan while he is stunned.
Task: Survive the all-out round
You're up against two Unicorns and one Gargantuan in the all-out round. Things are a bit more hectic, but since you made it through the previous two rounds, surviving here shouldn't be overly difficult. It would be best to take out the two Unicorns first, as you can then focus on stunning the Gargantuan. If there aren't any columns standing, the walls of the arena might work as well.
Task: Survive the Yeti round
The Yeti will continuously throw explosive barrels your way. You can't reach him on the platform, but you can use him another way. At the start of the round, turn around and approach one of the double-doors with two Legionaries standing in front. Don't get too close to the Legionaries, as they will attack both you and your Minions. The goal here is to get the Yeti to throw an explosive barrel at the double-door to blow it up.
Stand a few feet from the Legionaries and spin the camera to face the Yeti. When the Yeti throws an explosive barrel your way, sweep your Minions away and follow them to avoid the blast. If the barrel did destroy the door, immediately sweep your Minions through the doorway and follow them up the stairs. If not, stand a bit closer and try again.
At the top of the stairs, step out into the audience and push your way through to the columns holding up the Imperial Lodge. Smash the containers in the stands, and sweep your Minions through the gap to destroy the columns.
When the first two columns have been destroyed, return to the arena and have the Yeti destroy the second double-door. Then, make your way up to the stands and destroy the columns on the other side of the Imperial Lodge to bring it down.
Task: Retrieve the Blue Hive
After the cutscene, you can subdue the Yeti with the Target spell, or kill him. First, move back down to the Arena, collect the copious amount of Gold before it disappears, and take out the Legionaries.
Killing the Yeti will increase your Destruction tyranny rating, and subduing him will increase your Domination tyranny rating. To subdue the Yeti, lock onto him and hold the X/Square button until he shrinks down to size. To kill the Yeti, simply lock-on and overcharge the Target spell once he has shrunk.
Send 10 of your Minions up the ramp to pick up the Blue Hive and they will automatically carry it over to the nearby Waypoint Gate. Now that you have the Blue Minion Hive, there are treasures in previous regions that are now attainable. Refer to the Dark Crystal Locations, Health Upgrade Locations, and Spell Catalyst Locations sections of this guide and pursue the treasures that have “Blue Minions” listed as a requirement.
This quest is listed as “A Mysterious Lady Appears” on the Throne interface quest list. Though this quest is available much earlier on, you'll need Blue Minions to fully explore the Wasteland, as only they can clear away the bright goo that permeates the region.
Task: Gather all 12 Tower Heart shards
Use the Minion Gates to call forth some Blues (at least 10), Reds (at least 5), Greens (three), and Browns. Start down the path and pick up the first Tower Heart shard. Keep all but your Blue Minions out of the bright goo that is found throughout the region, as only they can clear it away. Brown, Red, or Green Minions that touch the goo are likely to mutate into hostile creatures, so be especially careful to avoid losing your veterans. If you continue down the eastern path past the first Tower Heart shard, you will eventually come across the Minion Spell Stone, unless you visited the Wasteland to collect it earlier. Look for another Tower Heart shard in a small pool of goo along the east side of the path.

Minion Spell Stone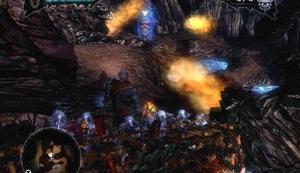
Mana Upgrade
There's also a Mana Upgrade in the area just west of the Spell Stone. You'll need to send Red Minions through the fire to pick it up; try your best to avoid sweeping them into the bright goo. Also, look for a Dark Crystal tucked away by some rocks in the nook north of the Minion Gates as they appear on the map. Finally, you can find a Spell Catalyst in the area east of the end of the eastern path from the Netherworld Gate; you'll need to sweep three Green Minions through the poison to pick it up. Follow the Greens back to the Netherworld Gate and exchange them for some Blues or Browns.
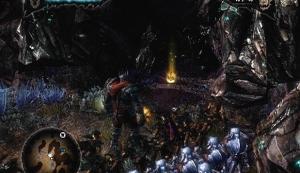
Dark Crystal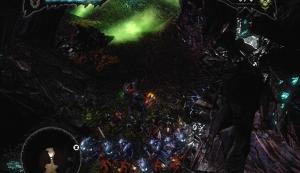
Spell Catalyst
Look for a wheel across the puddle of goo at the north end of the portion of Wasteland that can be explored without Blue Minions; sweep your Blues through to turn the wheel, and then wait for them to return before crossing yourself. The goo will return after a few seconds, so sweep your Blue Minions through a second time to ensure that the other Minions trailing behind you aren't trapped when the patch reappears.
Continue north to reach a small village. There isn't much to see here, so exit via the path in the northeast corner of the village. Smash the barrier and kill the batch of giant slugs on the other side.
Look for a patch of goo along the left side of the path. There's a wheel up the hill and past the flames beyond this patch, so you'll need to use Red and Blue Minions to get to it. If you don't have at least four Red Minions with you, a Red Minion Gate can be found at the barrier further down the path; you'll have to sweep your Blues through the muck to reach it. Sweep your Blue Minions through the goo to clear it away, and then plant them on a Guard Flag in the middle of the patch. Then, sweep your Reds across to the hill and past the flames to turn the wheel.
When the wheel has been turned, call your Blues off of the Guard Flag and continue down the path. Smash the barrier at the end of the path and continue into the village. The villagers here have been warped by magic and are hostile, so waste no time in taking them out.
There are two treasures to collect in this village. Stand on the platform overlooking the large pool of goo along the south side of the village; you should be able to see a Health Upgrade beyond the two sunken houses across from here. Slugs will continuously emerge from this area, though you should be able to sweep your Blues past them. When your Blues cross back over with the Health Upgrade, turn around and head up the steps at the north end of the village. Look for the unmistakable glow of a Dark Crystal container in the ruined house on the right.
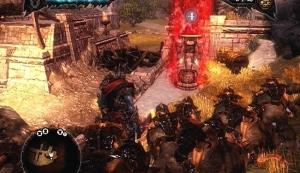
Health Upgrade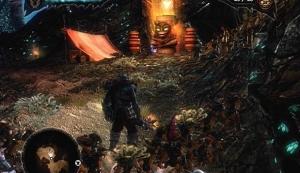
Dark Crystal
To raise the gate at the east end of the village, sweep your Blues through to the wheel in the middle of the large pool of goo along the south side of the village. Wait for the rock platform to reach the ledge you are standing on, and then move onto it and kill the slugs. The platform will take you to another Tower Heart shard, so step off of the platform and collect the shard when you reach it. Wait for the platform to return and walk back on. Get off when it reaches the Waypoint Gate.
Follow the path west to reach another village. Mutants will continue to spawn from the houses in this village if you don't put a stop to it. To stop the mutants from spawning, sweep your Minions into a house when the doorway is clear and wait until a dust cloud appears outside the door. A dust cloud indicates that enemies will no longer spawn from there.
There isn't a way to raise the gate at the south end of the village, so once the mutants have been dealt with, head up the slope at the north end of the village. There's a Command Upgrade at the top of the slope, so be sure to send some Minions in to pick it up. Also, collect the Dark Crystal beneath the tent right across from the Command Upgrade.
Command Upgrade
Dark Crystal
Continue along the path and take out any soldiers you encounter. You will soon encounter Florian, who orders you to follow him to the Wasteland Sanctuary. Follow Florian to Fay to trigger a cutscene.
Task: Follow Florian to find the Tower Heart shards
You should have four Tower Heart shards at this point. Florian will point you to the remaining eight shards. If you've missed any, the locations of the Tower Heart shards in the previous area will be marked on your mini-map. Take the rock platform back to the other side and collect those shards if that is the case.
You'll encounter a large slug beyond the gate that Florian opens. After killing the creature, before continuing down to the lake of goo, return to the nearby Waypoint Gate, send all of your Brown and Green Minions back to the Netherworld, have at least three Reds and three Greens with you, and then call forth as many Blue Minions as you can.
Return to the lake of goo and sweep your Blues through the first patch to cross to the other side. Keep your Blues selected, and follow closely behind as you sweep them through the goo. Make your way to the northeast end of the lake and around to the back of the rock with poison emitting from it to discover a Dark Crystal.
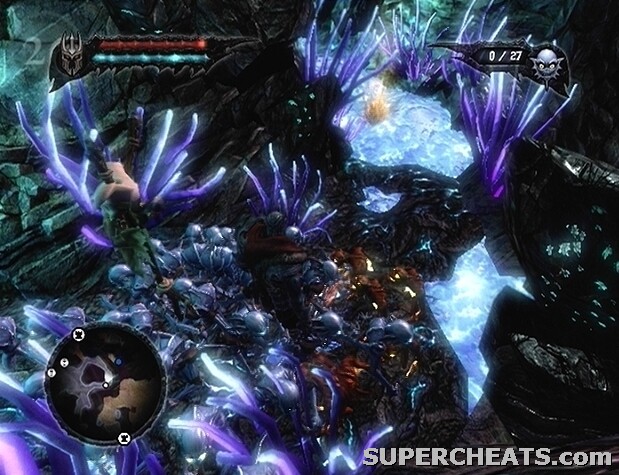
Use your Blue Minions to reach this Dark Crystal in the lake of goo.
Just follow Florian around using your Blue Minions to clear away the goo and pick up the Tower Heart shards he points out. In one instance, you'll have to sweep Green Minions through poison to pick up the shard that Florian is pointing to. For another one of the shards, you'll need to use Blue and Red Minions together; just place your Blue Minions on a Guard Flag in the middle of the patch of goo further up the slope, and then sweep your Red Minions through the flames and up to the Tower Heart shard.
You can find a Spell Catalyst at the top of some curved steps at the south end of the lake. Have your Blue Minions pick up the Spell Catalyst, and they will automatically carry it over to the nearby Waypoint Gate.
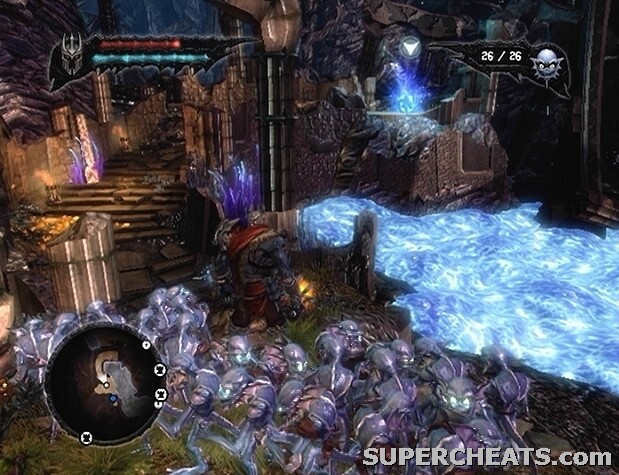
Look for this Spell Catalyst at the top of some curved steps at the south end of the lake.
The last Tower Heart shard is being guarded by a gigantic slug. The slug is easy enough to defeat, even by yourself if you have a decent weapon. You can use your Target spell to slow the creature down while your Minions attack, but be careful, as a pool of goo will appear when it dies. Sweep your Blue Minions through the goo to uncover the Tower Heart shard.
After collecting the final Tower Heart shard, you will be ambushed by a ridiculous amount of soldiers. Even an all-powerful Overlord has to know when it's time to turn tail and run. Start back down the path and sweep your Blues through the goo to continue on. A Gargantuan will smash through a rock barrier along the left side of the road—this is your out. Run past the brute while he is stunned and smash the barrier further up the slope.
Sweep your Minions to the wheel to have them turn it to raise the gate. Continue down the trail beyond the gate, and run past the group of soldiers that you come to. Run up the curved slope and keep moving to avoid the onslaught of flaming arrows.
There is a Dark Crystal that you can grab during your escape; keep an eye on your left when you reach the end of the slope. If you encounter three soldiers, you've gone too far; head back down to the start of the decline and look along the trail there. The Dark Crystal is just before the mudslide that leads back down to the Sanctuary. You'll have to sweep a Minion in to grab it. Don't fret if you miss grabbing the crystal during your escape, as you can always return for it at a later time.
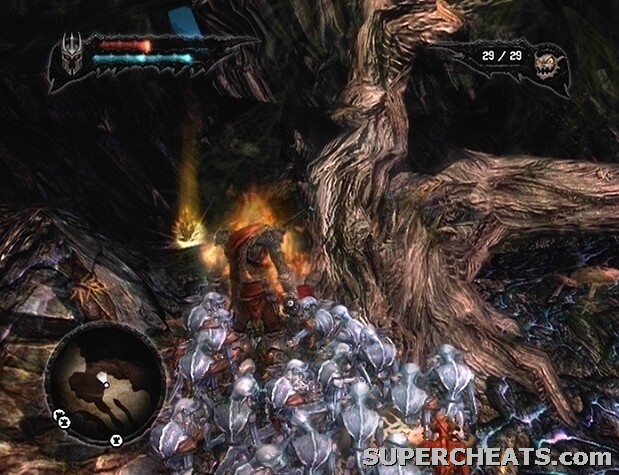
Collect this Dark Crystal before taking the mudslide down to the Sanctuary.
Follow the path to reach the Tower Heart.
Task: Go to the Sanctuary Depths
Command five of your Minions to pick up the Tower Heart and follow the marker on the mini-map to reach a lift. Stand on the lift with the Tower Heart to take it down to the Sanctuary Depths.
Task: Charge up the Tower Heart at the Shrines (3/4)
Have five of your Minions pick up the Tower Heart, and then follow the marker on the mini-map nearest to you and wait for the Minions carrying the Tower Heart to catch up. When the Minions drop the Tower Heart next to the shrine, face the shrine and hold the X/Square button to sap its power. When the platform collapses, look for a Spell Catalyst nearby.
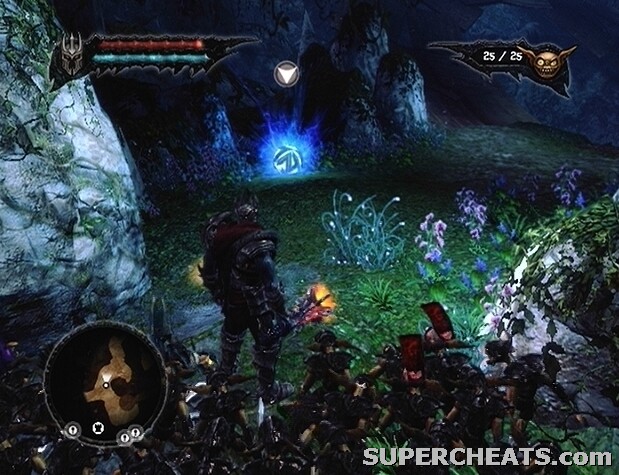
Collect this Spell Catalyst after charging the Tower Heart at the first shrine.
Continue east to find a Netherworld Gate. Use the Minion Gates to summon at least 10 Blues, and then fill the rest of the spots with Browns. A colony of Gnomes has taken the Tower Heart, and it is currently sitting atop a Gnome hole in the middle of the area east of the Netherworld Gate.
Removing the Tower Heart from the hole will unplug it, unleashing a never-ending tide of suicidal Gnomes. These Gnomes will latch onto you and explode; they deal a small amount of damage individually, but it can turn lethal if multiple Gnomes are involved. You'll need to plug the hole back up with something else; lead your Blue Minions to the body of water at the south end of the area, and order them to grab hold of the statue in the middle of it. The Blues will automatically push the statue over the hole to seal it.
When the Gnomes have been dealt with, order five of your Minions to pick up the Tower Heart, make your way to the other end of the colony, and turn left at the top of the slope to reach the second shrine. With the Tower Heart in its place, hold the X/Square button to charge it. When the platform falls, you'll find yourself in a pit surrounded by flames. Set your Blues on a Guard Flag at the back of the pit and kill the Salamanders as they roll down the ramp.
After dealing with the Salamanders, follow the marker on the mini-map to spot the Tower Heart. Two Elves have taken the Tower Heart onto a lift; to force them back down, both of the switches on either side must remain pressed until the lift returns. Salamanders will continuously spawn from the holes across from each switch, so keeping your Minions on the pressure switch while dealing with the Salamanders can be a challenge.
Stand on one of the pressure switches; it might be a good idea to set your Blues on a Guard Flag right on top of the pressure switch, as they will only move to resurrect fallen minions or to attack an enemy that's right by them. If the Guard Flag isn't placed exactly on the switch, lock-on and use the Right Stick to move it. Sweep your Brown Minions to the switch on the other side; if you set them on a Guard Flag, they are likely to all run off as soon as a Salamander appears, so just continue to slightly move the Right Stick back and forth to keep them on the switch long enough to call the lift back down.
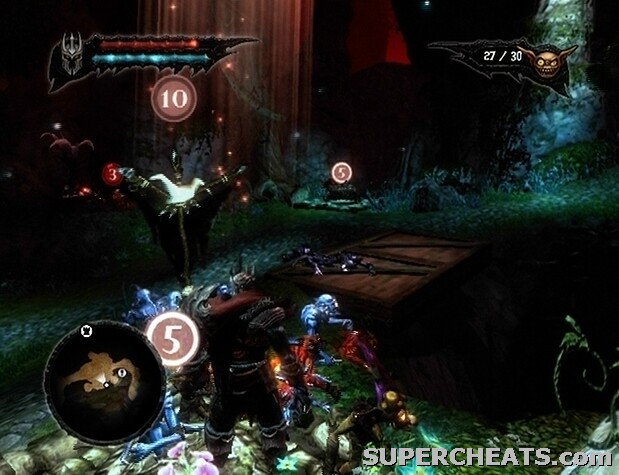
Activate both pressure switches to call the lift back down.
Kill the Elves once you've forced them off the lift. If the lift doesn't remain in place, you'll have to use the switches again. Before getting onto the lift, head north to uncover a Waypoint Gate. Since the boss you're about to face can crush your Minions like ants, it would be best to send most of your horde back to the Netherworld using the Minion Gates near the Waypoint to avoid losing your veterans. Summon a small group of Red Minions (at least 20), and then make your way back to the lift.
When the lift reaches the third shrine, command five of your Minions to pick up the Tower Heart and they will set it in place. Use your magic to sap the power from the shrine.
Task: Defeat the Salamander King
The Salamander King is by far the deadliest foe in the game. His massive size and ability to spit fire make taking down this beast a considerably difficult task, if only because he can halve your horde in an instant if you aren't careful.
After falling onto the half-pipe at the start, immediately sweep your Minions down the ramp to your left. Wait at the foot of the ramp for the Salamander King to jump down, and then move past him and walk around to the other end of the pool of water. When the Salamander King lands in the pool of water, move in and attack him until he gets up and leaps away.
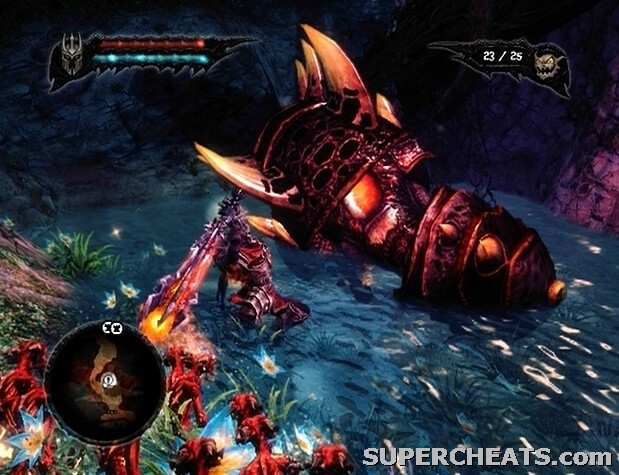
Lure the Salamander King into the water and then move in to attack while he's vulnerable.
Follow the Salamander King into the next area. He will roll around the track a few times, and then hop onto the ridge at the other end of the area and spit fire onto the platform in the middle of the area. Wait until he's sitting on the ridge and then hit the pressure switch to raise the bridge to the center platform. Step onto the bridge and remain there until the Salamander King starts rolling around the track again. Quickly sweep your Minions ahead and cross to the center platform, because the bridge will collapse when the Salamander King rolls through it. If you're standing on the bridge when he rolls through, you'll die, and the same goes for any Minions there.
The Salamander King leaves flames in his wake as he rolls around the track, so this next part will be tricky if you don't have Red Minions with you, as only they can move through fire without being set aflame. Wait until the Salamander King rolls by the steps leading down to the track, then quickly sweep your Red Minions down the steps, up onto the ridge, and over to the pressure switch. Have your Minions wait by the switch until the Salamander King hops onto the ridge, and have them press it again if need be. He'll spit fire at the bridge while it's up, but just run through the flames and take the bit of damage.
Make your way down to the pressure switch and hit it to raise the bridge. Walk across the bridge, and then wait for the Salamander King to land in the pool of water. Wade over to the beast and attack him until he flees.
Continue down the path to reach a Netherworld Gate. Send your Red Minions back to the Netherworld, and summon some Blues (at least 10). Make your way to the next area to encounter the Salamander King once more. After he hits the ramp and flies to the other side, wait for the flames to clear before crossing to the steps at the other side. Walk over to the curved stairs at the other end of the walkway and wait on the last few steps.
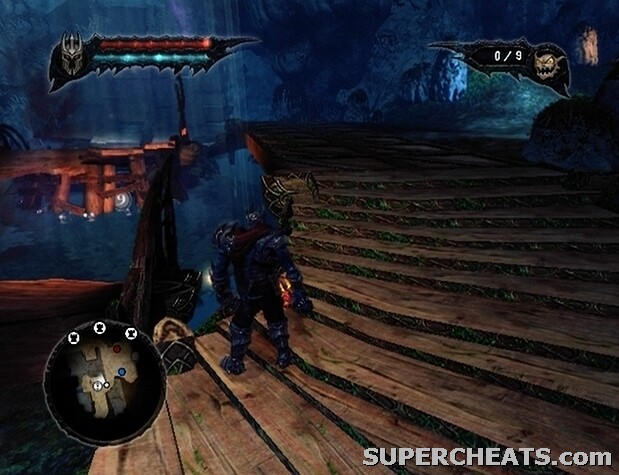
Use your Blue Minions to destroy the ramp supports.
When the Salamander King hits the ramp and flies to the other side, wait until the flames clear, and then sweep your Blue Minions over to the other side and into the water. Further sweep the Minions over to the supports of the ramp on the other side to have them start attacking it. When the ramp dips into the water, walk over to the ramp and hit the Salamander King's tail a few times to finish him off.
When the dust clears, hit the Salamander King's head to uncover the Tower Heart. Since you've defeated the Salamander King, Salamanders can now be used as mounts by your Reds. Use the nearby Red Minion Gate to summon some Reds, and sweep them over to the Salamanders. Order five of your Blue Minions to pick up the Tower Heart before moving on.
Task: Charge up the Tower Heart at the Shrines (4/4)
Walk back over to the bottom of the steps at the east end of the area. Select your mounted Reds by holding RB/R1 and tapping B/Circle twice, and then use the Right Stick to roll them up the ramp and over to the pressure switch. Cross the bridge and keep your mounted Reds selected. Swept Salamanders will spit fire at targets, so send them along the ramp to the right to roast the Empire bombers there.
Move across the bridge and sweep your mounted Reds around the ramp on the left to take out the bomb-throwers below. Continue heading east to reach some Minion Gates and the last shrine. With the Tower Heart in place, hold down the X/Square button while standing by the shrine to sap its power.
Task: Go back to Sanctuary Town
When the shrine collapses, order five of your Minions to pick up the Tower Heart. There's a Mana Upgrade in a pool of water nearby, so have at least four Blues pick it up. If you don't currently have enough Blue Minions with you, there's a Netherworld Gate nearby, so you can move on ahead, summon some Blues from the Minion Gate, and return to this point.
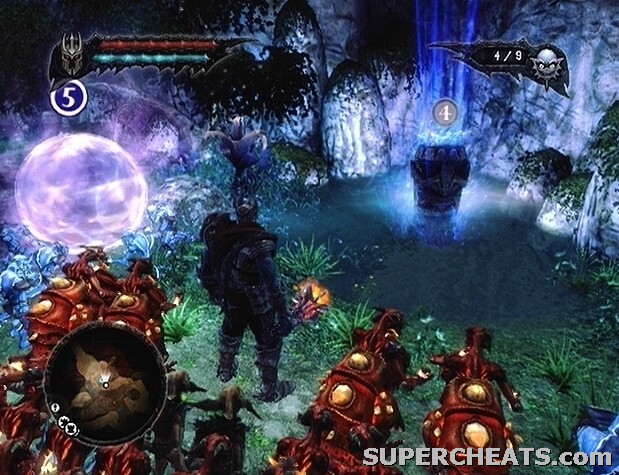
Use Blue Minions to collect this Mana Upgrade after charging the Tower Heart at the final shrine.
Make your way into the next area and hit the pressure switch to raise the bridge. Sweep your mounted Reds across the bridge to kill the Empire archers, cross both of the bridges, and then start up the slope. Bombs are likely to be thrown your way, so be careful with your Minions. Stop by the Waypoint Gate to heal and restore mana if need be, and then continue into the next area.
Wait for the bombs that drop to go off, and then sweep your mounted Reds to roast the archers. There is a group of archers and soldiers in the middle of the pit in the next area, so roll your Salamanders around to burn them up. Try to keep out of range of the archers, as they can quickly deplete your health. When the pit is clear, smash the barrels and crates to find health potions if needed.
Look for a Dark Crystal container at the end of the path in the southeast corner of the circular room.
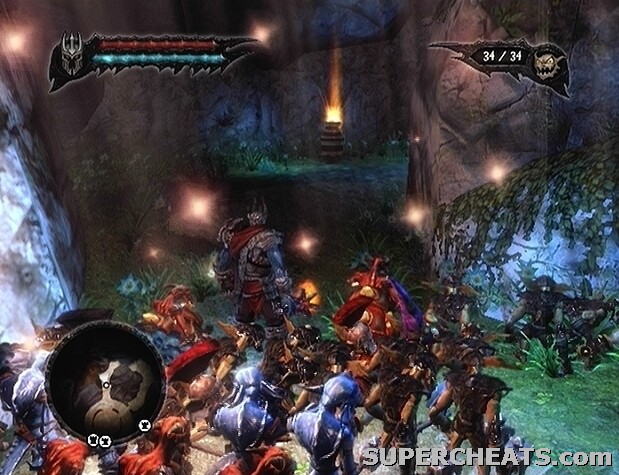
Collect this Dark Crystal before moving on.
Continue walking all the way back to the first Netherworld Gate, and head west from there to reach a ramp. Sweep your mounted Reds along the ramp and over to the pressure switch on the other side of the gap. Cross the bridge when it has been raised, and press the second pressure switch to raise another. Head up the spiral steps and onto the lift with the Tower Heart to return to Sanctuary Town.
Task: Bring the Tower Heart back to Queen Fay
Once up the lift, order five of your Minions to pick up the Tower Heart and start down the walkway. Take the curved steps down to the lower level of the town. A group of archers are stationed across the gap; walk behind the two statues, and order your Minions to push the statues up to crush the legion formation and shield yourself from a slew of flaming arrows.
Continue up the curved steps once the Minions have pushed the statues in place. There's a Dark Crystal nearby, and this one cannot be acquired after completing this quest, so follow these instructions carefully to ensure you don't miss it. At the top of the curved steps, head straight across to a second set of curved steps leading up. Take the steps up to reach a platform that is covered with baskets and other objects. Break open the barrel by the pillars at the back of the platform to find a Dark Crystal.
Unfortunately, if you're reading this after having completed the “Revive the Tower Heart” quest and missed the Dark Crystal on your way through, there is no way to return to Sanctuary Town to acquire it.
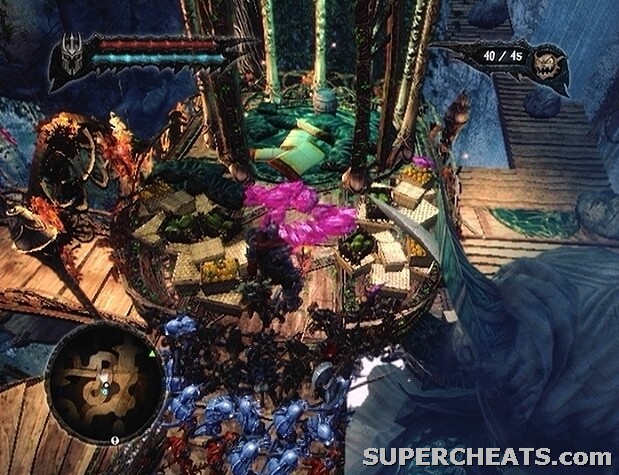
Break the barrel on this platform to find a Dark Crystal.
At the bottom of the curved steps, turn right to spot a Centurion. Kill the Centurion, and then help the Elves take out the legion formation to the east. Continue east and head up the steps. Follow the trail beyond the steps to reach Queen Fay. When your Minions set the Tower Heart in place, approach Fay to trigger a cutscene.
Task: Drain Queen Fay to recharge the Tower Heart
After the cutscene, set your Brown Minions and Blue Minions on separate Guard Flags, then stand in front of Fay and hold the X/Square button to begin draining her power. Elves will attack you during this process, but your Browns should be able to fend them off. A couple of fairies will appear and carry Fay away. Call your Minions off of their Guard Flags, have five of your Minions pick up the Tower Heart, and start following the marker on your mini-map.
When you reach the Minion Gates, make sure you have at least 10 Red Minions with you before entering the next area. There are three Dryads that you need to kill to remove the vines blocking your progression. Use your Red Minions to set them into a recovery state, and then quickly destroy the flower that opens up to kill them and clear the way.
Once you have dealt with the Dryads, approach Fay, set your Browns and Blues on separate Guard Flags, and then start draining her power. When the fairies carry her away again, call your Minions off of their Guard Flags, have five of them pick up the Tower Heart, and start following the marker on the mini-map. Send however many Red Minions you have with you to mount the Salamanders that you come to, and then exit via the north path.
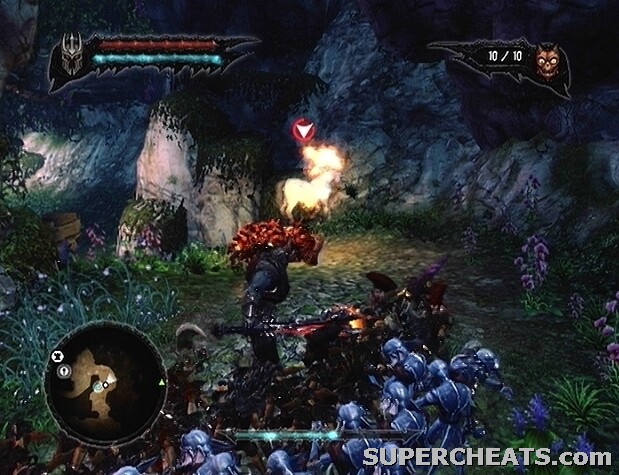
Use mounted Reds to roast the Unicorns guarding Fay.
Fay is in the middle of the next area, guarded by a couple of Unicorns. Use the Right Stick to sweep your mounted Reds around the Unicorns. Avoid the Unicorn's charge and continue sweeping the mounted Reds around to hit it with fire. When the Unicorns have been dealt with, approach Fay, set your Brown and Blue Minions on separate Guard Flags, and begin draining her power.
Start following the marker on the mini-map when the fairies swoop in to carry Fay away. When you reach the final platform, wait until your Minions set the Tower Heart in place, and then set each colour on different Guard Flags. Start draining Fay's power and continue to do so until the bar at the bottom of the screen has been depleted.
After the cutscene, you have the choice to leave Evil Fay as she is to increase your Domination tyranny rating, or cast the Evil Prescence spell again to overcharge it and kill Fay, which would increase your Destruction tyranny rating.
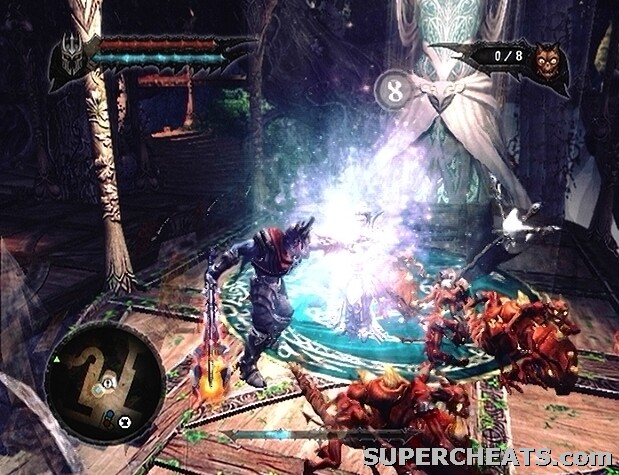
Deplete the bar at the bottom of the screen to corrupt Fay (Domination), or overcharge the Evil Prescence spell after the cutscene to kill her (Destruction).
Each Mistress offers a different Minion mount, which become available at various points during this quest. With Kelda set as your First Mistress, she will provide Wolves for your Brown Minions, while Juno provides Spiders for your Green Minions, and Fay provides Salamanders for your Red Minions.
Your choice won't have too much of an impact on the quest, but Kelda's Wolves or Fay's Salamanders are the better of the choices due to their utility in battle. Wolves are needed to reach the Dark Crystal in the Empire Hills area, but even if you don't choose Kelda to start with, you can always return to the Netherworld and change your First Mistress mid-quest. You can find your Mistresses in the tower at the northeast end of the Private Quarters. For the sake of following this walkthrough, consider choosing Fay's Salamanders to start with.
Also, if you have any free Spell Catalysts kicking around in the Magic Room of the Private Quarters, upgrade the Target spell as much as possible, as doing so will make the final battle much less tedious.
Task: Take the first hill
Use the Minion Gates at the starting point to create a horde consisting of Browns, Reds, and Blues. If you chose Kelda as your First Mistress and thus have access to Wolves, most of your Horde should consist of Browns. If you chose Fay as your First Mistress and thus have access to Salamanders, call forth more Reds than you normally would (at least 15). If you chose Juno as your First Mistress, you may want to consider returning to the Netherworld for a swap, because the Spiders she provides don't seem to be the least bit useful.
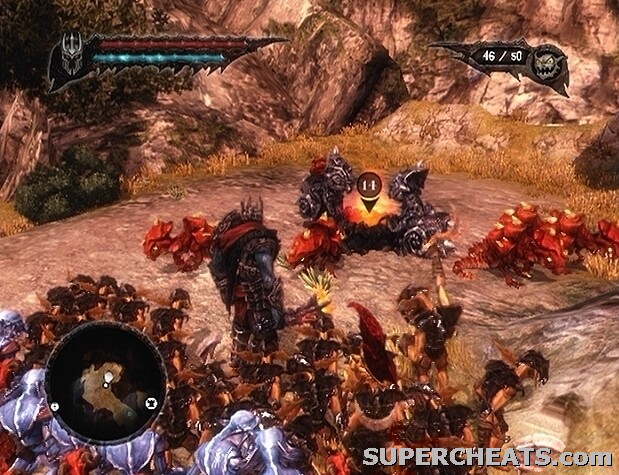
The Minion mounts available during this quest depend on who you have set as your First Mistress back in the Netherworld.
You'll find a Minion mount gate along the path east of the Netherworld Gate. Summon some mounts, have your Minions of the corresponding colour hop on, and continue down the path. When you reach the pit with the working slave, kill the Legionnaires there, and then sweep your Browns into the tent at the top of the slope at the other end. There are some archers positioned along the side of the pit, so take them out as well.
The first hill is just beyond the slave dig site. There are some archers on the hill equipped with fire arrows, so be especially careful. Throughout this quest, try to avoid having your Minions stand in tall grass, as archers can set fire to the grass and roast them.
If you chose Fay's Salamanders, use the Right Stick to roll them below the archers on the hill and with any luck, they'll soon be taken care. You can disrupt the legion formation by sweeping your Browns in, but keep your mounted Reds on the sidelines to spit fire at the soldiers. If you have Kelda's Wolves, you can sweep them into the legion formation to hopefully create a gap, and then sweep those Wolves over to the archers to tear them up before they can cause more damage.
Task: Shoot boulders to repel the attacking waves
Once your Minions have set the Tower Heart in place, a Netherworld Catapult will appear. Use the Catapult to prevent the legions approaching from the north from reaching the hill. If one of the legions manages to cross the bridge and reach the hill, you will have to fight them up close. Be sure to destroy the archer towers to the north and east. Continue to launch boulders and crush the approaching troops until the task clear message appears onscreen.
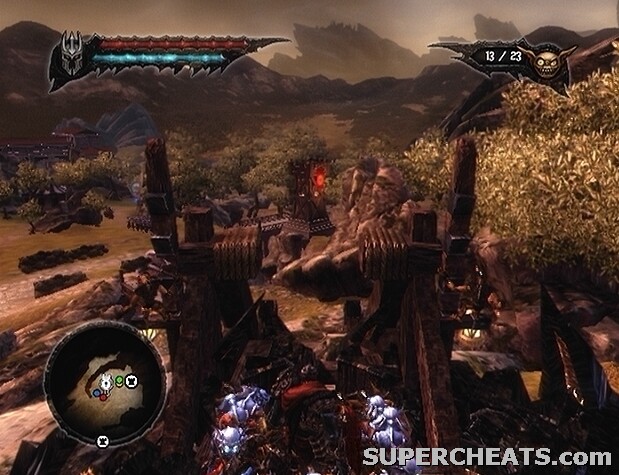
Use the Netherworld Catapult to destroy the archer towers to the north and east.
Task: Get a Catapult onto the second hill
There is another Minion mount gate by the bridge beyond the hill, so use it to summon more mounts if you lost any while taking the first hill. There's a Spell Catalyst in the northeast corner of this field guarded by a Gargantuan, so be sure to collect it on your way to the second hill. Individual soldiers will continuously spawn from the tent near the Spell Catalyst, so sweep your Minions in to destroy it.
Cross the bridge below the eastern archer tower. There are bombers on the hill in the middle of this area; the ramp up onto this hill is on the other side, so quickly make your way around the hill, up the ramp, and onto the hill to attack the bombers. Keep an eye out for thrown bombs while on the hill, and sweep your Minions away to avoid losing them.
Proceed up the steps beyond the Minion Gates. There's a legion formation blocking the way out of this area. Set all of your Minions on a Guard Flag, select your Blue Minions, and tap the B/Circle button to call one Blue Minion to your side. Stand on the platform to the right of the legion formation, and lock onto one of the bombs in the pile behind the formation. While locked-on to the bomb, press the RT/R2 button to send your Blue Minion through the formation to pick it up. Blues have the ability to Blink through enemy units, so he shouldn't be attacked. When the Blue Minion picks up the bomb, use the Right Stick to drop it behind the formation. Repeat if necessary.
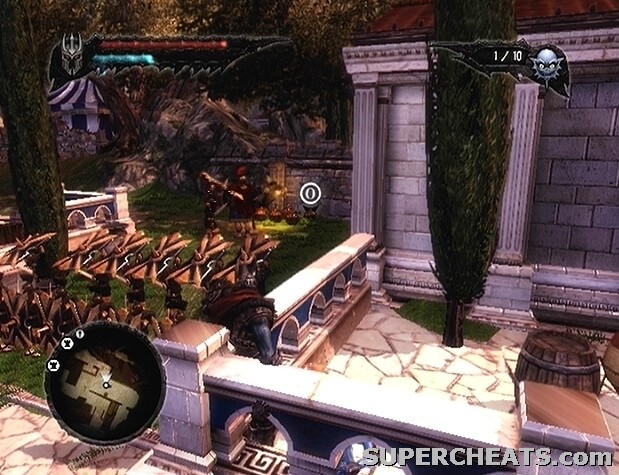
Send a Blue Minion through the legion formation to pick up a bomb, and use the Right Stick to drop it behind the soldiers.
Fight your way to the second hill and send your Minions into the tent there to stop the soldiers from spawning. A Netherworld Catapult will appear on the hill once the Tower Heart has been set in place.
Task: Flatten the opposition
Send some Minions in to power the Catapult, then make your way up onto the highlighted steering platform and take control. First, use the Catapult to crush the archers behind the rock barriers. The Empire will then send three war machines toward the hill. Each siege tower requires two or three hits to destroy. Just don't charge each launch for too long, because even if the boulder lands a bit in front of the target, it will most likely roll and still do damage.
Once the three siege towers have been levelled, before leaving the Catapult, turn toward the grassy field to the north, fully-charge the Catapult, and release to kill the archers along the wall there. These archers are equipped with flaming arrows, and can set fire to the grass and roast your Minions if you aren't careful. It is best to take them out with the Catapult to avoid this loss.
The Dark Crystal nearby requires Wolves to reach. If you don't have Kelda set as your First Mistress, use the Waypoint Gate by the second Catapult to return to the Netherworld Tower. Once in the Netherworld, set Kelda as your First Mistress; you can find her in the tower in the northeast corner of the Private Quarters with the other Mistresses.
Use the Minion mount gate in the grassy field to summon some Wolves. Destroy the barrier to the east; be extremely careful here, as there are bombers along the walls. Set all but your mounted Browns (press the RB/R1 button and tap Y/Triangle twice) on a Guard Flag and sweep them to the legion formation by the rock wall. When the bombers throw bombs at your Minions, immediately call them back. With any luck, the bombs will go off and wipe out the soldiers.
With the formation out of the way, sweep your mounted Browns to the rock barrier at the top of the steps and wait for the bombers to throw some bombs nearby before calling them back. When the rock barrier has been demolished, kill the bombers along the wall, and then send your mounted Browns across the gap to attack the bombers there. The Dark Crystal is by the rocks on the platform across the gap; send one of your mounted Browns over to collect it.
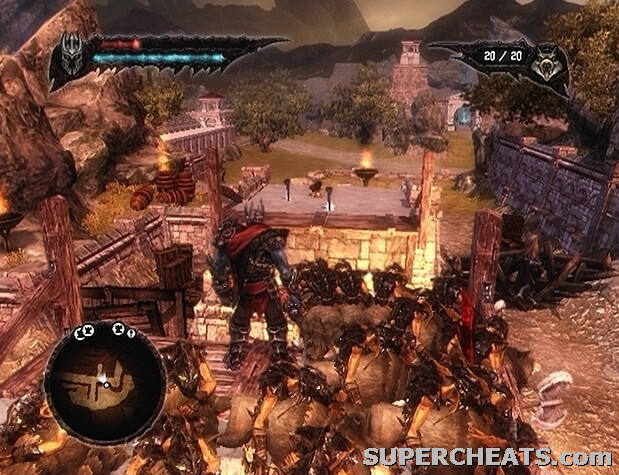
Use Kelda's Wolves to reach the Dark Crystal on the platform across the gap.
Collect the Health Upgrade along the wall as well.
Task: Get a Catapult onto the third hill
Smash the barrier at the east end of the area and start south toward the third hill. There's a rock barrier by the fort in the southwest corner of the field; you'll need to tempt the Catapult stationed in the fort to launch an explosive projectile at the barrier to blow it up.
It is best to designate just one of your Minions as bait to avoid putting yourself and the rest of your horde in danger. While standing at the front door of the fort, set all of your Minions on a Guard Flag, lock onto the flag, and press the B/Circle button to call one back to your side. Then, sweep that Minion around the corner to the rock barrier and set him on a Guard Flag. When you hear the Catapult launch and the projectile explode, call your Minions off of the Guard Flag, have five of them pick up the Tower Heart, and head down the steps beyond the ruined barrier to reach the back door of the fort.
Use one of your Minions to carry one of the bombs at the bottom of the steps up to the door to blow it open. Once in the fort, kill the soldiers around the Catapult to complete the task.
Task: Use the Tower Heart to breach the city wall
Send 10 of your Minions into the Netherworld Catapult to power it, walk up to the steering platform, and take control. Launch the Tower Heart at the Empire City gate to blast it open.
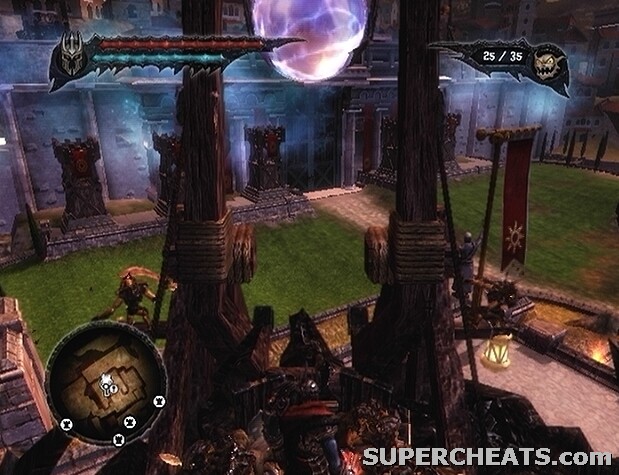
Use the Netherworld Catapult to launch the Tower Heart at the city wall.
Task: Deal with the last of the defenders
Use the Catapult to launch explosive projectiles at the legions marching out of the ruined gate, as well as the archer towers along the walls. If any of the troops reach the platform, you'll have to fight them off at close range, so try to kill them before they reach the fort.
Fay's Salamanders are of the most use here, so return to the Netherworld Tower and set Fay as your First Mistress if she isn't currently.
Task: Get into the City
Approach the Empire City gate to trigger a cutscene. Don't bother fighting the Gargantuans; just move past them and enter the city.
Task: Destroy the four Temples to remove the shield around the Palace
Upon entering the city, turn left and destroy the house there to uncover a Minion mount gate. Head down the steps, past the Minion Gates, and start down the street beyond the doorway. At the top of the stairs, set all of your Minions on a Guard Flag, and call just one Blue Minion to your side. Then, lock onto one of the unlit bombs along the left side of the street and press the RT/R2 button to have the Minion to pick it up. Use the Right Stick to move the bomb behind the legion formation further down the street. If done correctly, the bomb will go off, and the soldiers will fall.
Ignore the bomber on the platform, call your Minions off of the Guard Flag, and sweep them to the other end of the street. Walk down the steps and approach the first temple to trigger a cutscene. After the cutscene, kill the two mutants, and then sweep your Minions to the support columns to flatten the temple.
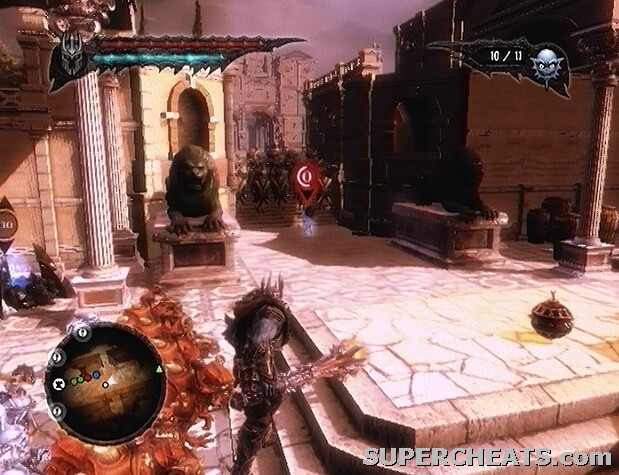
Blink a bomb-carrying Blue Minion into the middle of a legion formation to clear away the soldiers.
Continue east down the street to uncover a Netherworld Gate. Destroy the barrier along the east side of the street, and then order a Blue Minion to pick up one of the bombs in the pile across from the legion formation. Once the Minion is holding the bomb, use the Right Stick to move him to the middle of the formation to devastate the soldiers.
Once the formation has been dealt with, head up the steps to reach the second temple. There are two Gargantuans and three bombers guarding the temple. The bombers are likely the biggest threat and, when coupled with the Gargantuans, can make for a difficult time. Try to use a Minion to lure the Gargantuans away from the temple and back to the previous area where you can more easily deal with them. Just bait the Gargantuan into charging into a wall, and then hack away at him until he falls. You can sweep mounted Reds around the temple and roast the Gargantuans as well as the bombers, but they do have a fair bit of health so this can take awhile.
When the area is clear, smash the support columns to bring the temple down. Then, continue east through the archways, and sweep your mounted Reds around to take out the bombers. Further north, there are a couple of bombers on an unreachable platform; just run up the steps past them when the way is clear and sweep your mounted Reds to roast the archers at the top. Smash the barriers in your path and follow the marker on the mini-map to reach the third temple.
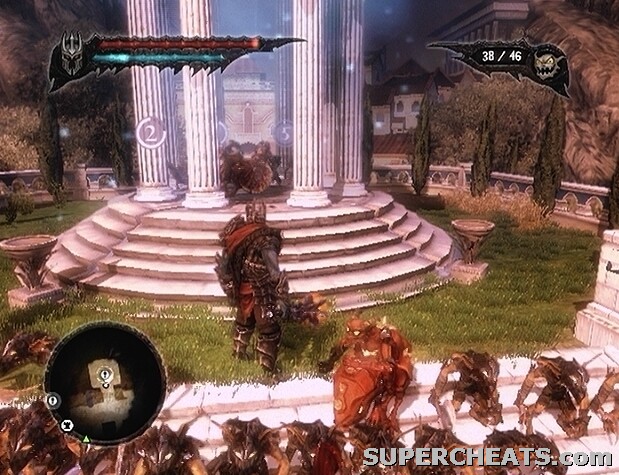
Destroy the four temples to lower the shield that surrounds Solarius' Palace.
After levelling the third temple, head back down the steps and destroy the house at the west end of the walkway. Proceed down the steps and head to the other end of the walkway. Order a Minion to pick up one of the bombs at the top of the steps, and use the Right Stick to move the bomb over to the rubble in the middle of the stairs to clear the way. Head down the steps, and use one of the bombs behind the lion statue to destroy the rubble at the bottom of the stairs.
When you're ready to move on, kill off the group of mutants when they make a beeline for you, and then move in to destroy the final temple.
Task: Get into the Emperor's Palace
Before entering the palace, head up the steps west of the temple doors to spot a Dark Crystal container. Once you have the Dark Crystal, enter the palace to complete the task.
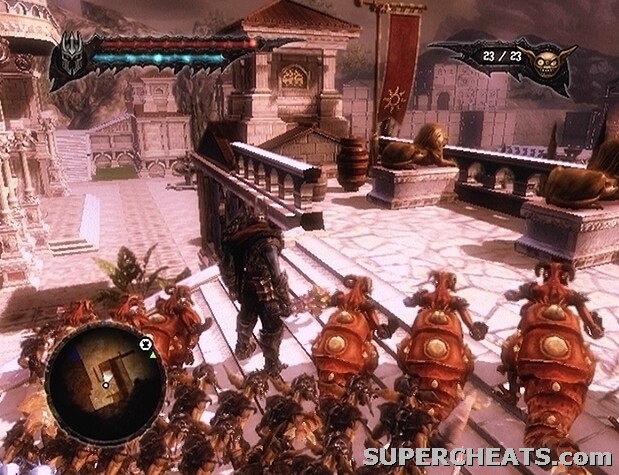
Collect this Dark Crystal before entering the palace.
Task: Find the Magic Containment Room
Follow the marker on the mini-map and take out the soldiers and Legionaries encountered along the way. Eventually, you'll reach the Magic Containment Room, where you'll face the final boss.
Task: Destroy the Devourer
After the cutscene, select your Blues and use them to sweep up the trail of goo left by the Devourer. Follow the creature into the courtyard to trigger another cutscene. You'll only need Red and Blue Minions for the entirety of this battle, so use the Minion Gates around the courtyard to send any Brown or Green Minions in your party back to Netherworld. Keep a small number of Blues (at least 10) and then summon as many Red Minions as you can.
The blue, pulsating bulbs all over the creature's body are the key. Have your Red Minions target these bulbs; pop enough of them, and the creature will flee into the next area. Since goo will constantly ooze out from the Devourer, you'll need to use your Blue Minions to sweep it up. The goo is not only a threat to your Minions, but also the villagers, as those caught in it will turn into mutants. The mutants will most likely make a beeline for you, so quickly take them out to prevent them from attacking your Minions.
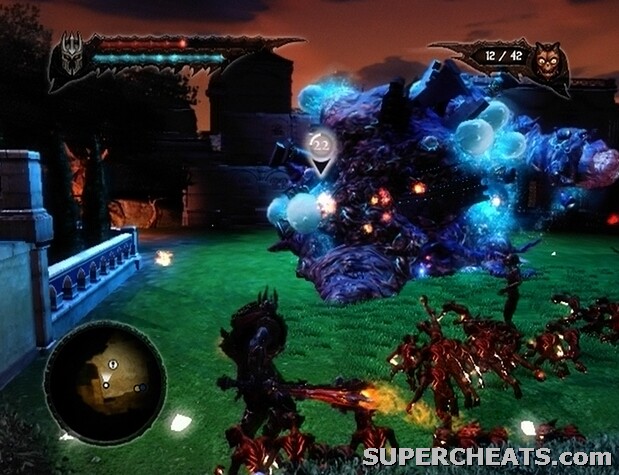
Use your Red Minions to target the blue, pulsating bulbs protruding from the Devourer's body.
With your Red Minions selected, hold down the LT/L2 button to lock onto one of the bulbs, and then hold down RT/R2 to order your Minions to target it. While locking on, you can switch between targets by flicking the Right Stick. Just keep the LT/L2 button held down, use the Left Stick to circle around the Devourer—holding down the RT/R2 button to set your Reds to attacking the next bulb—and the creature will soon smash through a wall and flee into the next area.
Use your Blue Minions to sweep up the trail of goo left by the Devourer as you follow him into the next area. There are some soldiers by the entrance to this area, so set all of your Minions on a Guard Flag, and head up the steps to face them. When the soldiers have been dealt with, hold down the B/Circle button to call your Minions to you. Head up the steps to the right, and sweep your Reds through the gap to kill the archers. There are also archers along the walkway at the other end of the arena, so sweep some Blues in to clear away some of the goo, and then sweep your Reds over to the stairs in the bottom-left corner of the walkway. Continue to sweep your Reds along the walkway and set them on a Guard Flag once there to roast the archers.
Once the archers have been dealt with, move in with your Reds to continue popping the bulbs on the Devourer's body. Keep up the same routine as in the previous area, and eventually the creature will retreat to the next.
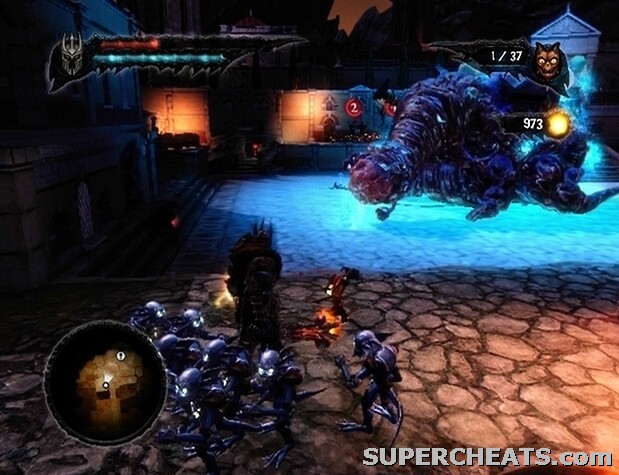
Sweep your Reds onto the walkway at the far end of the area to roast the archers.
The third phase is a bit different. The Devourer will remain in place here, but will periodically spit up magic creatures or a group of soldiers. Things can very quickly get out of hand if you don't keep up with the enemies that the Devourer spawns. There should be just two bulbs left on the Devourer's body, and a single bulb on its head. To get to the bulb on its head, you first must destroy the two bulbs on its body.
Position yourself by the Devourer's front end; this way, you can quickly kill the enemies it spits out. Use your Blue Minions to sweep up any goo in the area. Immediately after the Devourer spits out an enemy or group of enemies, kill what was spawned, and then set all of your Red Minions on a Guard Flag. Lock onto the Guard Flag and tap the B/Circle button until you have called back half of the group. Then, lock onto the Guard Flag again and use the Right Stick to move the team around to the Devourer's back side, or by any visible bulb on the creature's body. Set the Red Minions with you on a second Guard Flag, and place sweep them over to the other side of the Devourer's torso.
Red Minions set on a Guard Flag will automatically target bulbs in range. Throughout the entirety of this fight, remain by the creatures head so you can quickly kill the enemies it spits out. Between spawn times, however, lock onto the groups of Red Minions and move them around the Devourer's body to try and position them within range of the bulbs if they haven't managed to hit them. You'll know both of the bulbs have been destroyed when the creature slams its head and neck down, and slowly lifts it back up. At this point, move in and slash the bulb on its head to pop it.
When the bulb on the Devourer's head has been destroyed, it will spit up Solarius. Immediately lock onto Solarius and hold down the X/Square button to begin draining his health. The Devourer will soon retrieve Solarius, after which three new bulbs will pop up on the creature's body.
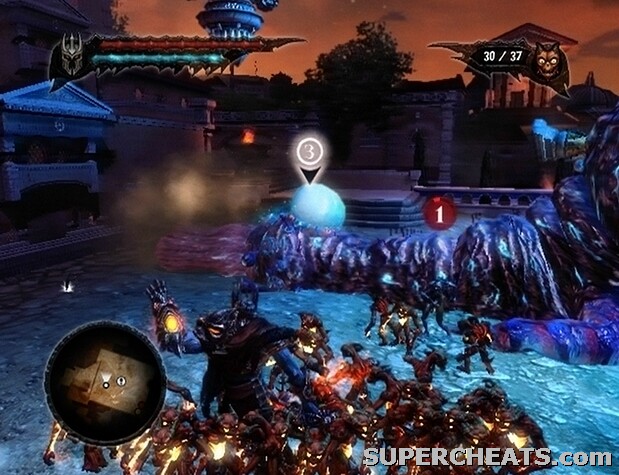
Destroy the bulbs on the Devourer's body and the creature will lower its head to the ground.
Repeat the strategy outlined above as many times as necessary to completely drain Solarius' health. How much you can drain Solarius' health each time he appears depends on how many Spell Catalysts you've used to upgrade the Target spell. If you've upgraded Target to level five, you should be able to kill Solarius in just two sessions. If you haven't upgraded the spell at all, however, you will likely have to go through the process of popping the bulbs on the Devourer's body to force Solarius out four or five times.
Once Solarius' health bar has been completely depleted, he will fall, and the end video and credits will roll. You've just completed Overlord II! Congratulations on a job well done.
This quest is unlocked just shortly after the start of the game, but it can be easily completed after the Green Hive has been rescued from the Everlight Facility. Return to the Everlight Facility as the Overlord via the Throne interface or a Netherworld Gate, and use the Brown Minion Gate there to call forth as many Browns as you can.
Head through the front gate, and down the steps. Walk across the grassy patch, and turn left at the top of the steps. Sending five Minions onto the pressure switch will open the Gnome cage; Gnomes will continuously pour out of this cage every few seconds, provided that at least some of the Gnomes in the last batch that came through have been killed.
Open this cage in the Everlight Facility to find a steady supply of Gnomes.
If you stand at the bottom of the steps that lead up to the cage and keep the RT/R2 button held down, you can continuously send your Minions in to both kill the Gnomes and pick up the treasure they drop. Consequently, this is a great place to harvest Brown, Red, and Green Lifeforce Orbs, as well as Fairy Gems. Make your time spent here even more effective by having the Evil Eye helmet equipped, which has the effect of doubling the worth of picked up Lifeforce Orbs.
After conquering Nordberg Town, you can either kill or enslave the villagers. There are 100 villagers in the town, but you won't be able to reach all of them until you have acquired the Green and Blue Minion Hives. With Brown and Red Minions, you can reach 66 of them. After rescuing the Green Hive, you can remove the poison barrier on the southwest side of town to reach 20 more. You'll need Blue Minions to power the raft at the northeast end of the town to reach the last 14 villagers.
To complete this quest, you need to either kill all 100, or enslave all 100. To kill a villager, you need to lock-on and either hit him or her with your weapon, or overcharge your Target spell. To enslave a villager, lock-on and hold down the X/Square button until the villager begins to get down on his or her knees (likely as soon as he or she begins to lose health), at which point immediately release the button to avoid overcharging the spell and killing them. Keep an eye on the villager's health bar if you're planning to enslave them, as they may not fall to their knees in time; if their health falls to the half-way point, release the spell, as they have surely been subdued by then.
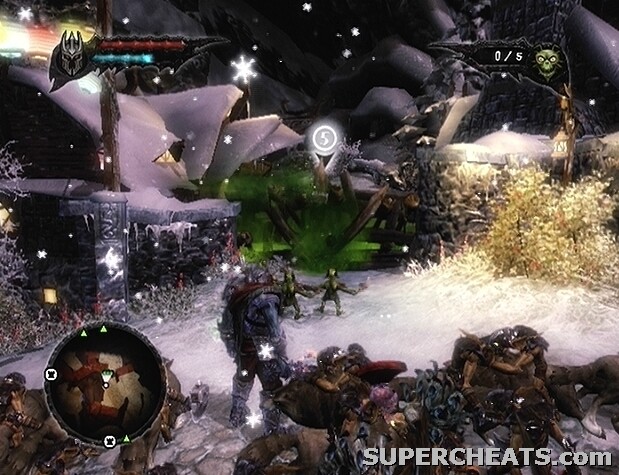
Return to Nordberg with Green Minions to remove the poison surrounding the barrier at the southwest end of town.
The villagers will attempt to escape, so you can use your Brown Minions to pin them down; simply lock onto the fleeing villager and hold down the RT/R2 button to send them in.
The destruction path yields quick gold and Lifeforce Orbs, but enslaving the town yields gradual Gold, as well as weapons and armour for your Minions. There are one or two villagers hiding in each of the houses in the town; you can force them out by breaking the door down. You can sweep your Minions into the house once the door is down to destroy it; doing so will yield some gold as well.
If you've enslaved some villagers, you can collect Gold from the mining sites around town, and you can also find equipment for your Minions at the anvils around town. Furthermore, you can find a patch of respawning baby seals by the dock in the northwest corner of the town, and kill them to harvest Lifeforce Orbs of every color.
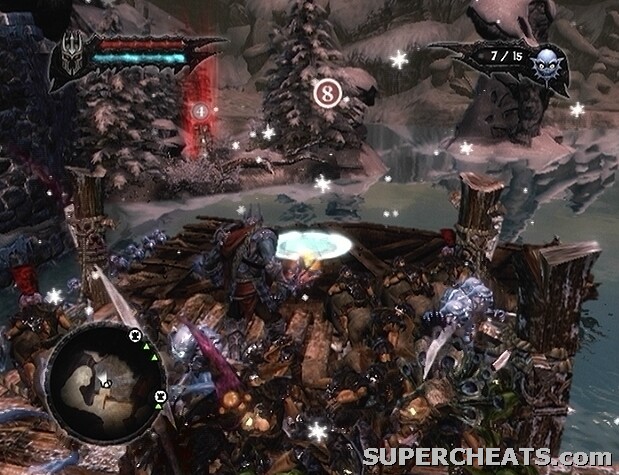
Use Blue Minions to power the raft in the northeast corner of Nordberg Town.
Destroying the entire town will increase your Destruction tyranny rating, while enslaving the population will increase your Domination tyranny rating. It's best to play Overlord II making either all Destruction choices or all Domination choices if you are interested in earning achievements/trophies, as several are unlocked by being consistent.
This side quest becomes available shortly after the Everlight Jungle quest. The quest is listed as “A Nordbergian Requests an Audience” in the Throne interface. Accept the villager's quest to automatically be teleported to the Nordberg Commune.
Task: Find your Wolves
When you reach the commune, use the Minion Gates to call forth at least five Red Minions and fill the rest of the spots with Browns. The bridge to the commune is raised, and only mounted Browns can reach the wheel to lower it. Start following the path and command your Reds to burn down the thorny barrier that you come to. Follow the trail here and keep an eye your right for another thorny barrier; have your Reds remove this barrier as well, and then proceed along the water to reach a fire barrier.
Command your Reds to remove the fire surrounding the barrier, and then break through to the caged Wolves. There are some harpoon throwers at the top of the hill just past the barrier, so sweep your Browns up to take them out. There are several more harpoon throwers across the gap, but only mounted Browns can reach them. Sweep your Browns in to destroy the igloos and engage the Hunters, and then smash the cages to free the Wolves.
Send your mounted Browns up the hill and across the gap to the harpoon throwers. Afterward, remove the thorny barrier to uncover some treasure.
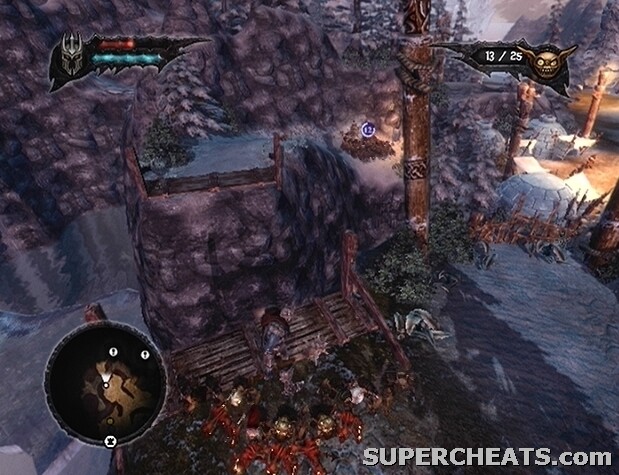
Use Wolves to cross the gap and reach the wheel to lower the drawbridge.
Task: Open the Gate to the Commune
Make your way back to the Netherworld Gate and head down the trail east of there. Have your Reds diffuse the fire barrier, and then smash the barrier and send your mounted Browns across the gap. Sweep them over to the wheel and use it to lower the drawbridge.
Task: Destroy or Enslave the commune
When the drawbridge has been lowered, cross it to enter the commune. Kill the Elves that engage you, and then decide what to do with the villagers; you can either enslave or destroy the commune. Destroying the commune will increase your Destruction tyranny rating, while enslaving all of the villagers will increase your Domination tyranny rating.
To destroy the commune, simply kill all of the villagers, then follow the marker on the mini-map to reach the Elven Priestess and kill her, too.
If you choose to enslave the commune, be sure to keep your Minions away from the villagers, as they will automatically target the villagers because they are considered hostile. Set all of your Minions on a Guard Flag outside of the commune, and then continue south to the crop fields. To enslave a villager, lock-on and hold the X/Square button until he or she begins to get on his or her knees, at which point immediately release the button. Villagers that have yet to be enslaved will have a red marker when targeted, so you can easily differentiate between subdued villagers and those who still need to be turned.

Collect the Spell Catalyst before leaving the Commune!
Once you've complete the task, before leaving the commune, be sure to collect the Spell Catalyst at the top of the hill in the northeast corner of the crop fields.
After conquering Everlight Town, you can either kill or enslave the population to fully control it. There are 100 villagers in the town, but you are only able to reach 80 of them initially. To get to the last 20 villagers, you'll need to complete the “Rebels in Everlight Town” quest, which will appear as “An Everlightian Requests an Audience” in the quest list on the Throne interface after you've completed “Into the Depths.”
To complete this quest, you need to either kill all 100, or enslave all 100. To kill a villager, you need to lock-on and either hit him or her with your weapon, or overcharge your Target spell. To enslave a villager, lock-on and hold down the X/Square button until the villager begins to get down on his or her knees (likely as soon as he or she begins to lose health), at which point immediately release the button to avoid overcharging the spell and killing him or her. Keep an eye on the villager's health bar if you're planning to enslave them, as they may not fall to their knees in time; if their health falls to the half-way point, release the spell, as they have surely been subdued by then.
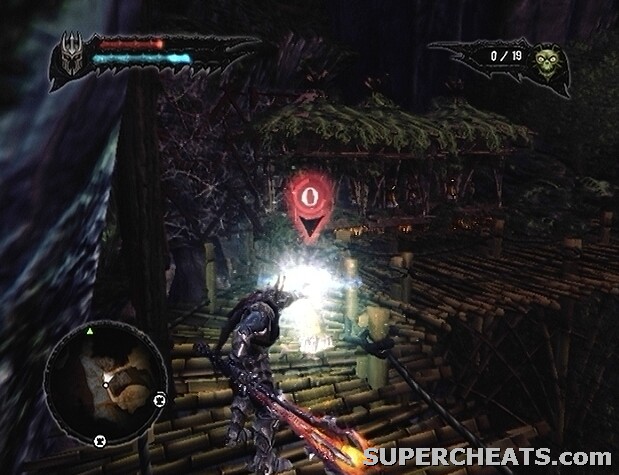
Enslave or destroy the population of Everlight Town.
Targeted villagers will attempt to escape, so you can use your Brown Minions to pin them down; simply lock onto the fleeing villager and hold down the RT/R2 button to send them in.
The destruction path yields quick Gold and Lifeforce Orbs, but enslaving the town yields gradual Gold, Lifeforce Orbs, and equipment for your Minions. There are three or four villagers hiding in each of the houses in the town; you can force them out by breaking the door down. You can sweep your Minions into the house once the door is down to destroy it; doing so will yield some more gold.
If you've enslaved some villagers, you can collect Gold from the mining spots around town at, and you can also find equipment for your Minions by working slaves at anvils. Furthermore, look for Lifeforce bar counters to find villagers producing Lifeforce Orbs and wine.
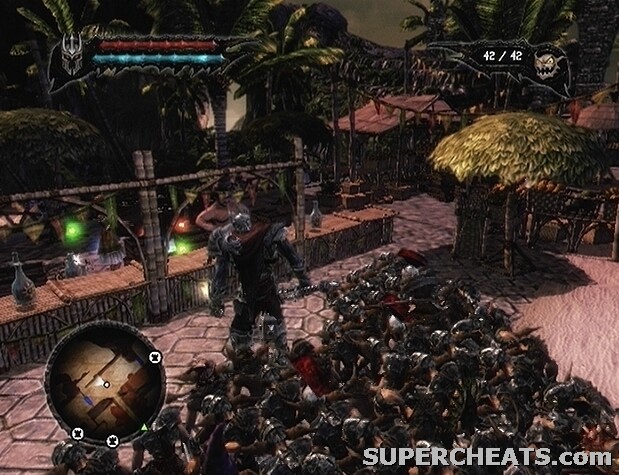
Visit Lifeforce bars to collect orbs produced by enslaved villagers.
Destroying the entire village will increase your Destruction tyranny rating, while enslaving the population will increase your Domination tyranny rating. It's best to play Overlord II making either all Destruction choices or all Domination choices if you have interest in earning achievements/trophies, as several are unlocked by being consistent.
If you're planning to enslave Everlight Town, refer to the “Rebels in Everlight Town” section of this guide for important info.
This quest will appear in the quest list as “An Everlightian Requests an Audience” once you have defeated the Salamander King during “Into the Depths.” This quest opens up the Elf village at the north end of Everlight Town, allowing you to reach the 20 villagers there to fully complete the “Control Everlight Town” quest.
If you're planning to dominate Everlight, ensure that you have enslaved the 80 villagers that are initially reachable before triggering this quest. You have to be very careful not to kill any of the rebels, as they count as villagers and may botch your attempt to enslave the entire town. To be safe, create a separate save file before starting this quest, in case you or your Minions kill one of the rebels. Be sure to create two save files, since Overlord II will automatically designate your latest manual save as an auto-save slot. Alternatively, you can change the auto-save slot in the Options section of the pause menu.
Task: Find a way into the Elf village
Leave your Minions in the Netherworld, and make your way to the north-most Waypoint Gate in the town. Hit one of the explosive barrels in front of the rock barrier near the Waypoint Gate, then stand back and wait until it sets off the others to level the barrier.
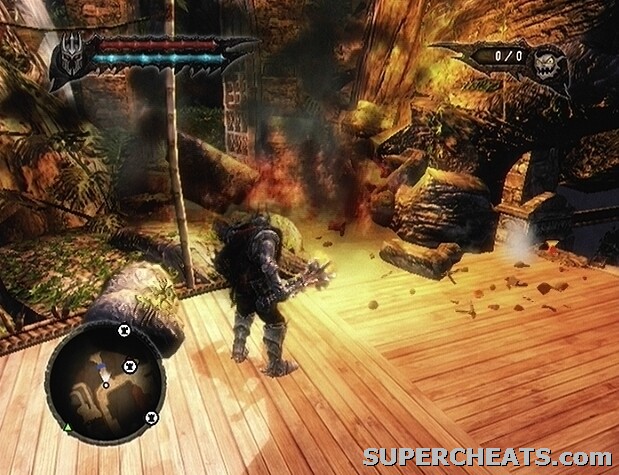
Destroy the rock barriers by the north-most Waypoint Gate to gain entrance to the Elf village.
If you're planning to destroy Everlight Town, call forth as many Green Minions as you please, and continue up the steps. If you're planning to dominate Everlight Town, just summon a small team of 20 Greens; your Minions will automatically attack hostile villagers, so it's best to keep your horde small so you can keep track of them. Whatever your plan, continue up the steps and hit one of the explosive barrels on the other side of the railing by the second rock barrier to destroy it.
Task: Find and stop the rebels in Everlight Town
As you walk down the path to the Elf Village, have any Greens with you mount the Spiders you come to. After crossing the bridge, smash the supports to bring down the Elves that are throwing poison bombs. You can kill these guys, even if you are dominating the town. There are some villagers on an out-of-reach platform throwing explosive bombs. When a bomb lands nearby, lock onto it and press the RT/R2 button to have one of your Minions pick it up. Then, use the Right Stick to move the Minion over to the nearby rock barrier. Continue to the next bridge when the bomb goes off.
At the end of the bridge, destroy the platform to the left and kill the Elves that were throwing poison bombs from it. Again, you can kill these Elves even if you plan to dominate Everlight. Use one of your Minions to carry a thrown bomb over to the rock barrier to destroy it. The villagers throwing bombs from the platform are hostile, so set your Minions on a Guard Flag in the middle of the bridge if you plan to enslave them, and then break the platform.
Use one of your Minions to carry a bomb over to the rock barrier along the walkway to destroy it. Kill or enslave the bomb-throwing villagers, and then continue down the walkway.
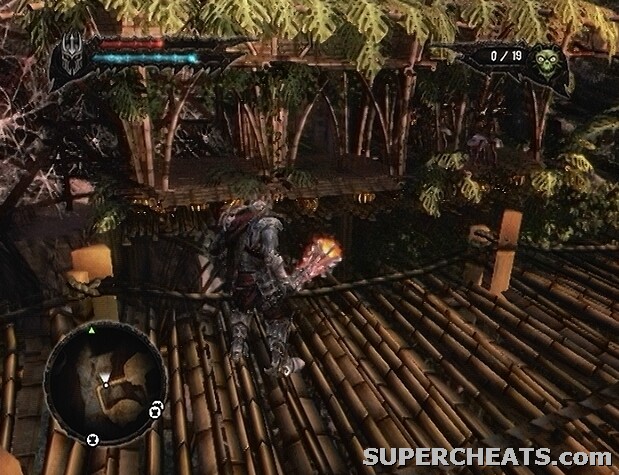
Use mounted Greens to chase the rebels off of the platform to raise your Domination tyranny rating, or use Reds to kill them from the walkway to raise your Destruction tyranny rating.
How you deal with the group of bomb-throwing rebels on the platform across from the walkway will directly influence your tyranny rating. For Destruction, use Red Minions to kill them from the walkway. For Domination, send a single mounted Green along the web-covered rock wall and onto the platform to chase them off. Even if you kill the rebels once you've chased them off the platform, your Domination rating will increase, and not Destruction.
The rest of the villagers are in the mining area at the end of the walkway, so deal with them as you see fit.
Spell Stones unlock new spells when delivered to the Netherworld.
Target Spell Stone
Region: Nordberg Town
Requires: None.
Location: Found on the way to Nordberg Town during the main storyline; part of a quest, so it can't be missed.
Target Spell Stone
Halo Spell Stone
Region: Everlight Jungle.
Requires: Green Minions.
Location: Found beyond the barrier southeast of the region's Netherworld Gate. Select your Green Minions exclusively and command them to remove the poison surrounding the barrier there.
Halo Spell Stone
Minion Spell Stone
Region: Wasteland Main.
Requires: None.
Location: Continue down the eastern path, past the first Tower Heart shard, and you will eventually come across the Minion Spell Stone.
[Image=ol-73.jpg title=Minion Spell Stone]
Health Upgrade 1
Region: Nordberg Town
Requires: None.
Location: Head west from the region's Netherworld Gate until you come to a fire barrier. While facing the barrier, turn left and step onto the hill there. Smash the wooden barrier here to reveal the Health Upgrade.
Health Upgrade 2
Region: Everlight Reef
Requires: None.
Location: On the north-most island. Dock your boat there, and order your Minions to pick up the Health Upgrade to have them carry it back onto the boat. Then, dock on an island that has a Waypoint or Netherworld Gate and have your Minions lug the totem over to it.
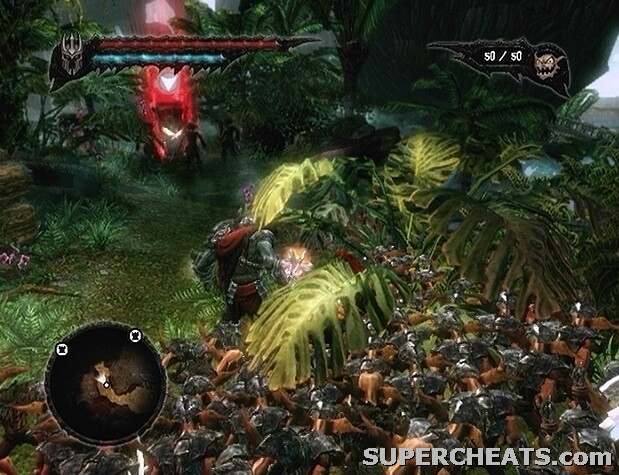
Health Upgrade 3
Region: Nordberg Town
Requires: Blue Minions.
Location: Use Blue Minions to power the raft by the dock at the northeast end of town. Take control of the raft and dock it along the island to the south. Have your Minions move the Health Upgrade onto the raft, and then return to one of the docks along Nordberg Town so they can carry it to the Netherworld Gate.
Health Upgrade 4
Region: Wasteland Main
Requires: Blue Minions.
Location: In the north-eastern mutant village. Stand on the platform overlooking the large pool of goo along the south side of the village; you should be able to see a Health Upgrade beyond the two sunken houses across from here. Slugs will continuously emerge from this area, though you should be able to sweep your Blues past them to pick up the totem.
Health Upgrade 5
Region: Empire Hills
Requires: None.
Location: You'll reach this one shortly after the second hill and Catapult. It's along the wall beyond the grassy field, where you must use thrown bombs to destroy the barriers and flatten the legion formation. Use one of the thrown bombs to destroy the barrier at the top of the stairs that lead up onto the wall, so you can reach the bombers and take them out. The Health Upgrade is clearly visible.
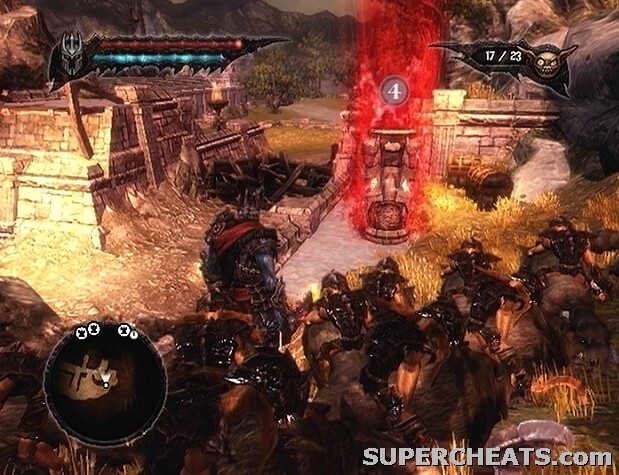
Mana Upgrade 1
Region: Nordberg Sanctuary
Requires: None.
Location: When the statue of Queen Fay has been destroyed, smash the large, blue crystal that the statue was holding to reveal a Mana Upgrade.
Mana Upgrade 2
Region: Wasteland Main
Requires: Red Minions.
Location: In the area just west of the Spell Stone (northwest of the Netherworld Gate). You'll need to send Red Minions through the fire to pick it up; try your best to avoid sweeping them into the bright goo.
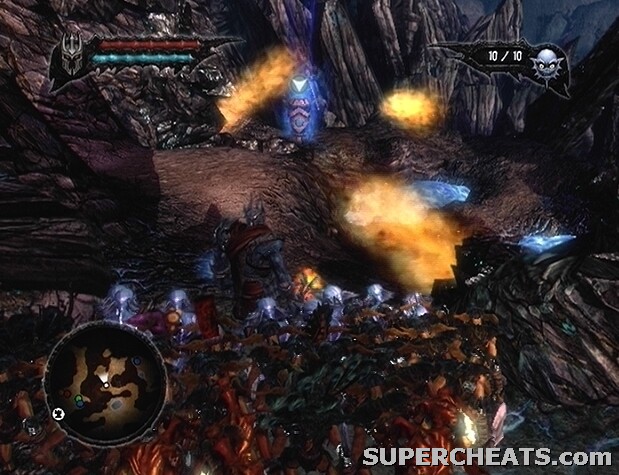
Mana Upgrade 3
Region: Everlight Temple
Requires: None.
Location: After the pressure switch lift trip to the top of the Spider Queen Temple, you'll find this upgrade up on the walkway near the Waypoint Gate.
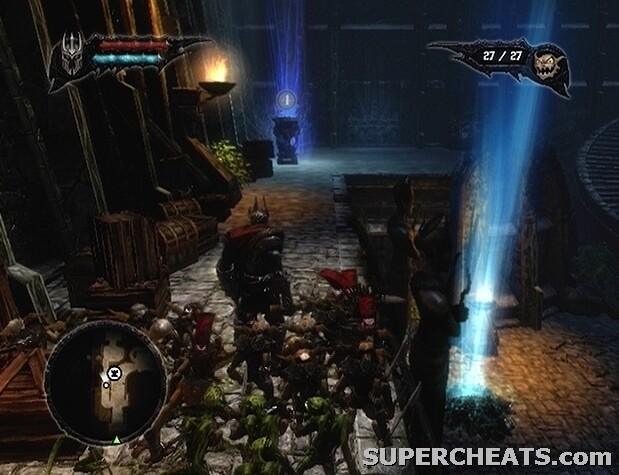
Mana Upgrade 4
Region: Nordberg Town
Requires: Green Minions.
Location: Beyond the poison barrier on the southwest side of town. Use Green Minions to remove the poison surrounding the barrier, and then smash it to gain access to that part of the town.
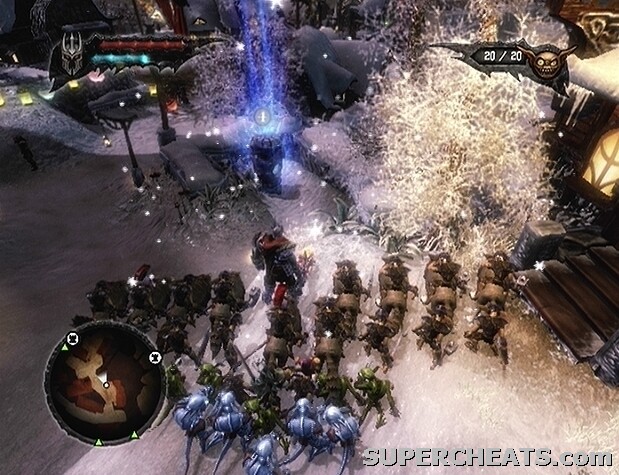
Mana Upgrade 5
Region: Wasteland Sanctuary Depths
Requires: Blue Minions.
Location: Near Gate 2, the area reached after charging the Tower Heart at the fourth shrine. When the shrine collapses, look around for the Mana Upgrade in the middle of a pool of water; you need at least four Blues with you to pick it up.
.
Each Command Upgrade will increase your maximum horde size by five when delivered to the Netherworld. The maximum possible horde size is fifty, but you'll need to forge the Infernal Commander helmet to attain that.
Command Upgrade 1
Region: Nordberg Town
Requires: None.
Location: Shortly after retrieving the Spell Stone, you'll reach a bridge. When you reach the bridge, before crossing, head south and follow the path as it curves west to find the Command Upgrade at its end.
Command Upgrade 2
Region: Nordberg Town
Requires: Red Minions.
Location: Once you're through the dig site, while pushing the mine cart toward the Nordberg Town Gate to blow it up. As you walk behind the Minions who are pushing the mine cart, keep an eye on the left side of the track for some rubble. It's not far from the starting point; just where the track begins to curve. When the Minions pass by here, press the B/Circle button to call them away from the cart. Then, set your Red Minions on a Guard Flag a safe distance away from the cart, and they should automatically target the explosive barrels with fireballs. The explosives will destroy the rubble, allowing your Minions to collect the Command Upgrade.
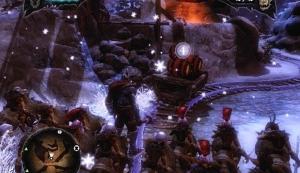
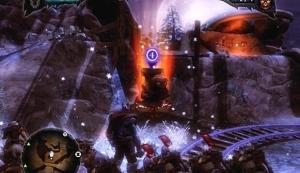
Command Upgrade 3
Region: Everlight Reef
Requires: Commandeered Elven Ship.
Location: Sail along the north side of the large, northwest-most island. Look for a rock barrier behind the north-most, outer dock. The rock barrier is blocking the way to another dock, so break through the rock barrier using the ram on the front of the Elven Ship by tapping the A/X button to speed up. When the way is clear, dock your ship and command at least four of your Minions to pick up the Command Upgrade. The Minions will carry the totem back onto the ship. You'll have to dock the ship on an island with a Netherworld or Waypoint Gate so your Minions can carry the Command Upgrade over to it.
Command Upgrade 4
Region: Everlight Town
Requires: None.
Location: Near Gate 2, by the Spider mount icon as it appears on the mini-map.
Command Upgrade 5
Region: Empire Harbor
Requires: None.
Location: After making it past the rock barrier by tricking the Catapult team in the harbour fort to destroy it, cross the bridge, and head up the hill southeast of the Netherworld Gate there to spot the totem.
Command Upgrade 6
Region: Wasteland Main
Requires: Blue Minions.
Location: In the northern mutant village, head up the slope at the north end of the village to spot the totem.
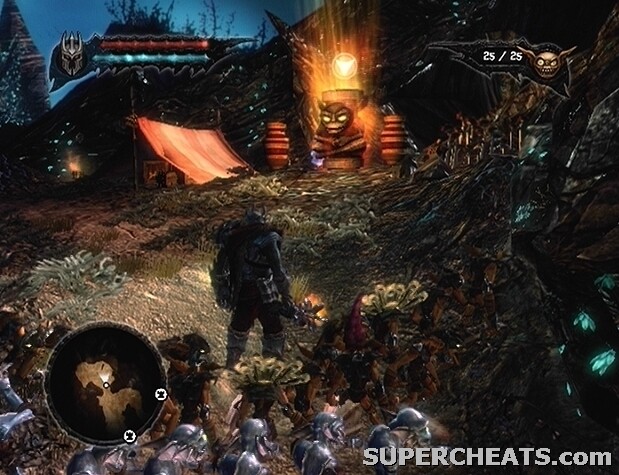
Command Upgrade
The Infernal Commander Helmet
Requires: Empire Harbor Forge Stone.
Resources: 75 Browns, 50 Reds, 50 Greens, 25 Blues, 6000 Gold, 40 Fairy Gems, 2 Dark Crystals.
Description: Increases Horde size by five.
Forge Stone 1
Region: Nordberg Town
Requires: Red Minions.
Unlocks: The Executioner (Axe), The Scorcher (Sword), Elemental Armor, The Evil Eye (Helmet).
Location: Beyond the fire barrier east of the Netherworld Gate outside of town.
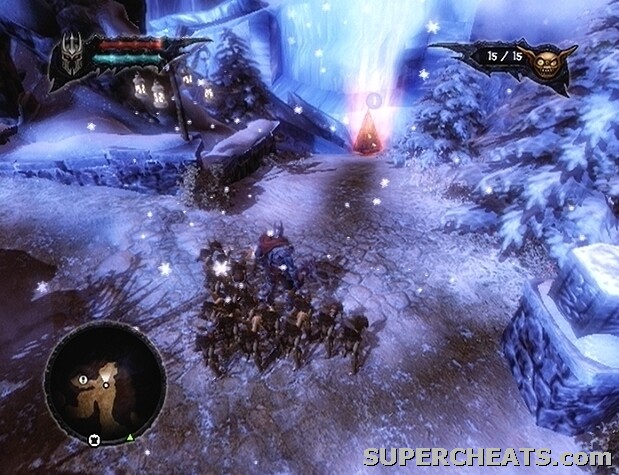
Forge Stone 2
Region: Everlight Jungle
Requires: None.
Unlocks: The Warlock (Sword), The Berserker (Axe), The Beast Master (Mace).
Location: By the statue East of the region's Netherworld Gate.
Forge Stone 3
Region: Empire Harbor
Requires: None.
Unlocks: The Reaper (Axe), The Apocalyptor (Mace), Infernal Armor, the Infernal Commander (Helmet).
Location: At the bottom of some steps near the Catapult in the harbour fort.
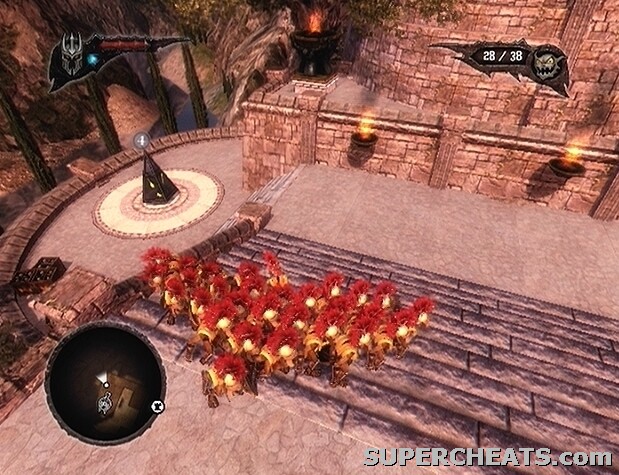
Collected Spell Catalysts can be used to upgrade your spells. Visit the Magic Room in the Private Quarters of the Netherworld Tower to assign the Spell Catalysts to the Spell Stones. There are three spells, all of which can be upgraded to level five, so only two of the spells can be fully upgraded. Furthermore, the Spell Catalysts cannot be redistributed, so decide which spell to upgrade based on which you find most useful in battle. Both the Target and Halo spells are good choices.
Spell Catalyst 1
Region: Wasteland Main
Requires: Green Minions.
Location: In the area east of the end of the eastern path from the Netherworld Gate (1). You'll need to sweep three Green Minions through the poison to pick it up.
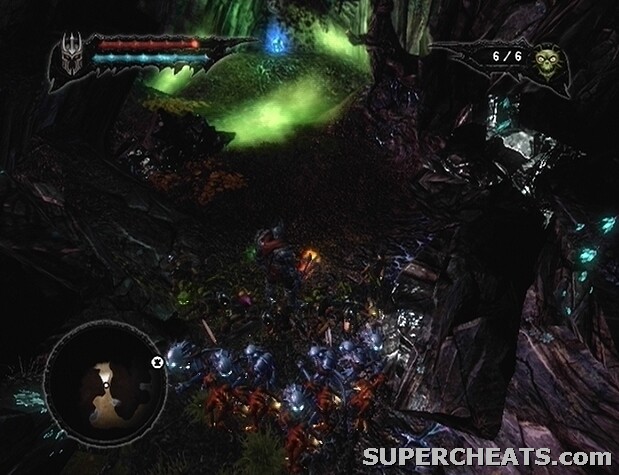
Spell Catalyst 2
Region: Nordberg Commune
Requires: Red Minions.
Location: At the top of the hill in the northeast corner of the crop fields behind the Nordberg Commune.
Spell Catalyst 3
Region: Everlight Temple Outskirts
Requires: None.
Location: On a platform in the area just before the Gate Key slots used to span a bridge across the gap to the Spider Queen Temple.
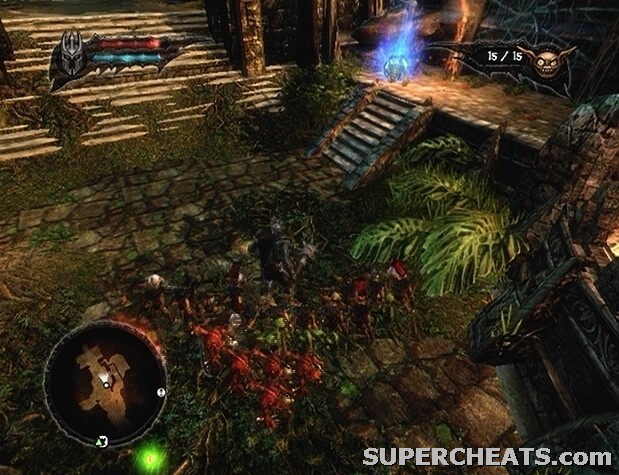
Spell Catalyst 4
Region: Empire Harbor
Requires: None.
Location: In the western corner of the grounds surrounding Senator Drearius' villa.
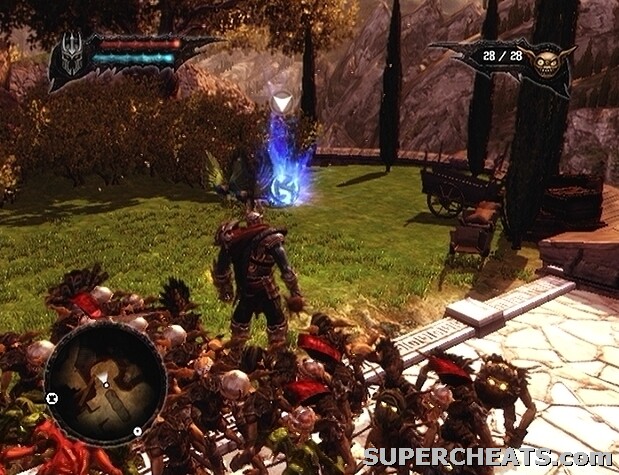
Spell Catalyst 5
Region: Everlight Town
Requires: Blue Minions.
Location: Make your way to the beach at the south end of Everlight Town. Cross the shallow water to reach the small island with your Blue Minions. Look around here to find the Spell Catalyst.
[thumb=ol-sc2.jpg title]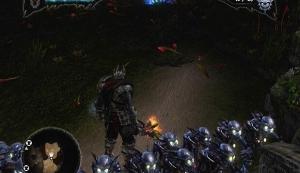
Spell Catalyst 6
Region: Empire Sewers
Requires: Blue Minions.
Locations: On a small patch of land in the shallow water south of the region's Netherworld Gate. Sweep some Blues over to it to pick it up.
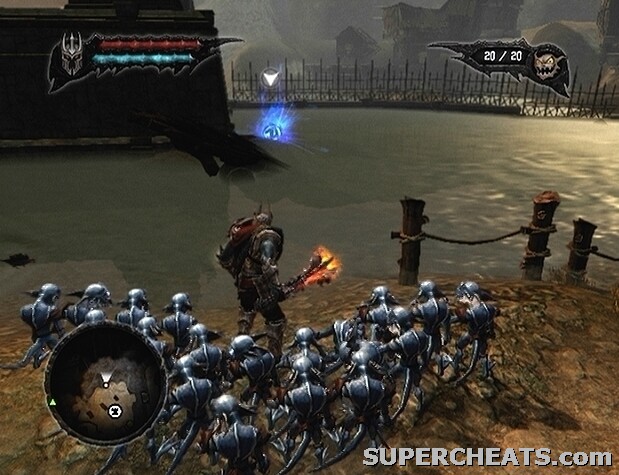
Spell Catalyst 7
Region: Wasteland Main
Requires: Blue Minions.
Locations: At the top of some curved steps at the south end of the giant lake of magic goo. Take the time to grab this one with some Blue Minions while Florian is pointing out Tower Heart shards.
Spell Catalyst 8
Region: Wasteland Sanctuary Depths
Requires: None.
Locations: After charging the Tower Heart at the first shrine, the tower will collapse and you'll fall into the Wasteland Sanctuary Depths. The Spell Catalyst is in plain sight.
Spell Catalyst 9
Region: Empire Hills
Requires: None.
Locations: In the northeast corner of the field beyond the first Catapult hill, guarded by a Gargantuan.

There are 30 Dark Crystals in the world; some hidden and others in plain sight. Dark Crystals are the rarest of treasures, and used to forge weapons and armour, as well as upgrade your Minion barracks. Furthermore, acquiring 15 Dark Crystals will unlock the Crystal Collector achievement/trophy, and acquiring all 30 will unlock the Ultimate Collector achievement/trophy.
Dark Crystal 1
Region: Netherworld Tower (Throne Room)
Requires: None.
Location: Start up the steps west of your throne and keep an eye on your left. When you are about mid-way up the steps, you'll be able to turn left and follow some attached steps down to a walkway. At the bottom of these steps, turn right to spot the urn that holds the Dark Crystal.
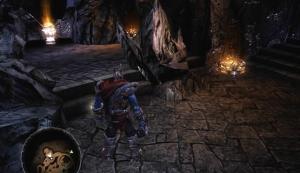
Dark Crystal 2
Region: Netherworld Tower (Private Quarters)
Requires: None.
Location: On the balcony at the south end of the Private Quarters. Upon entering the Private Quarters, follow the passage off to the right, through the Magic Room, and you'll reach the balcony.
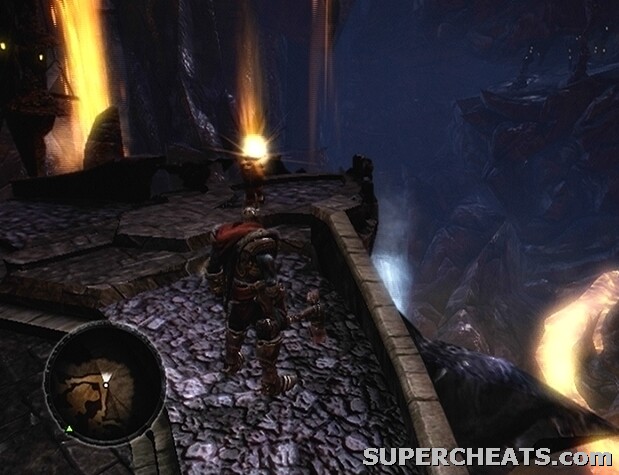
Dark Crystal 3
Region: Netherworld Tower (Minion Burrows)
Requires: None.
Location: Follow the path to the right of the Brown Hive; it's in the small area just before the bridge.
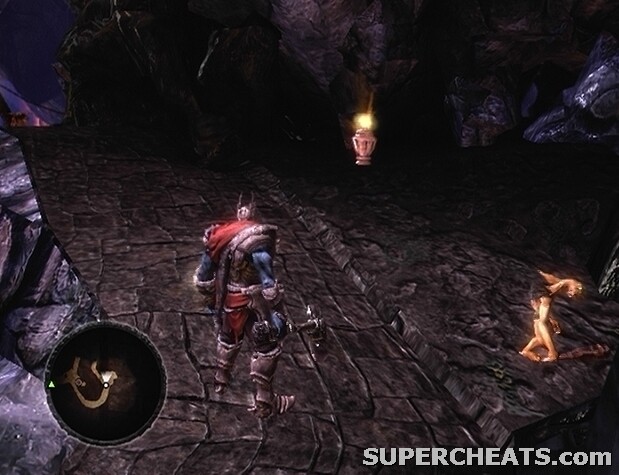
Dark Crystal 4
Region: Netherworld Tower (Minion Burrows)
Requires: None.
Location: At the edge of the broken bridge between the Graveyard and Red Hive (the south-most point on the map).
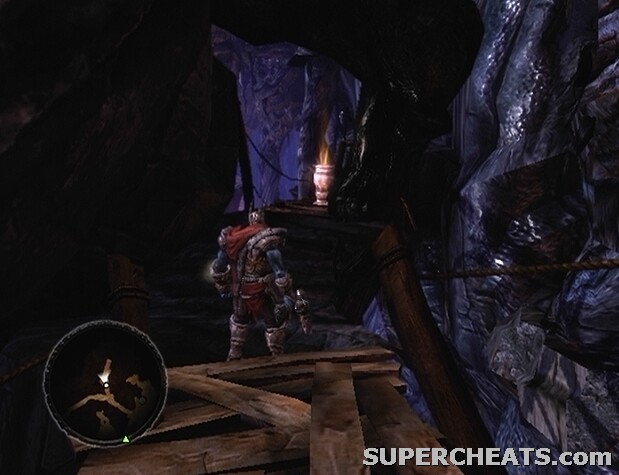
Dark Crystal 5
Region: Netherworld Tower (Foundations)
Requires: None.
Location: Along the path left of the machinery used to upgrade the Minion barracks
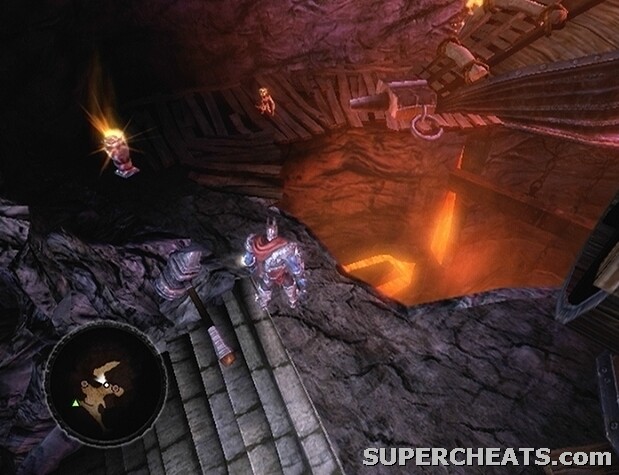
Dark Crystal 6
Region: Nordberg Sanctuary
Requires: Overlord status.
Location: In the area where the Red Minions are first found, which is reached by sliding down a mudslide. There's a body of water that only Blue Minions can cross; trudge through and once on the other side, turn left. The Dark Crystal container is in the corner here, beyond the trapped man.
Dark Crystal 7
Region: Nordberg Town
Requires: Red Minions.
Location: Inside the town, surrounded by some boulders near the town gate (across from the steps that lead up to the town wall). After destroying the town gate, head back down the tracks to fetch another mine cart. When your Minions push the cart down the hill, it will roll through the gate and come to a stop near the boulders. Have your Reds set off the explosive barrels in the mine cart to clear away the boulders surrounding the container.
Dark Crystal 8
Region: Nordberg Town
Requires: Conquer Nordberg Town quest completed.
Location: At the end of the trail at the very north end of town.
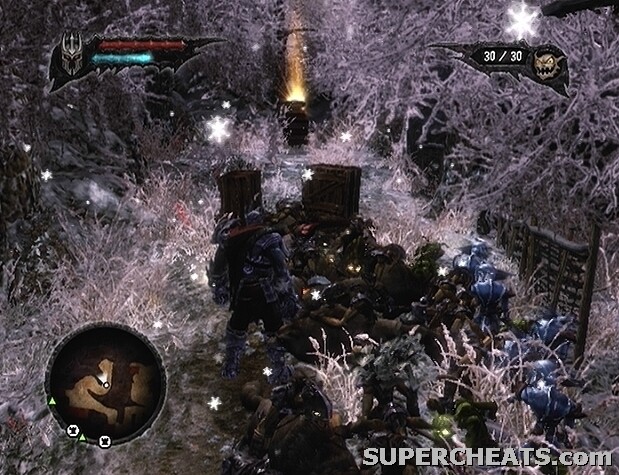
Dark Crystal 9
Region: Everlight Reef
Requires: None.
Location: On the island with the Yellow Gate Key slot (southwest corner of the map). Head down the steps north of the Brown and Red Minions. At the bottom of the first set of steps, turn right and sweep your Minions over to the container that holds the Dark Crystal.
Dark Crystal 10
Region: Everlight Jungle
Requires: None.
Location: Beyond the area where you must kill two Elven Priestesses (the fat elven women). When the second Elven Priestess has been taken care of, head through the gate at the west end of the area. Keep an eye on your right as you walk down the path beyond the gate. When you can turn right, do so. Walk straight to the edge of the water and turn right to spot the Dark Crystal container.
Dark Crystal 11
Region: Everlight Facility
Requires: Possessed Minion.
Location: Near the Green Hive's initial location (at the west end of the facility, just beyond the opening used to enter). Stand on the pressure switch in the corner with the rest of your Minions to open up the nearby gate. Make your way to the end of this corridor to discover a Dark Crystal container and a couple of Treasure Chests.
Dark Crystal 12
Region: Everlight Facility
Requires: Possessed Minion.
Location: In the northeast quarter of the facility, on the walkway at the north end of the area, head through the opening at the east end of the walkway and turn left. Turn right once through the second opening to reach an outside area. You'll see some jugs and containers; smash these up, and cross the narrow, wooden bridge over to a Dark Crystal container.
Dark Crystal 13
Region: Everlight Facility
Requires: Possessed Minion.
Location: In the cage that can be entered after releasing the pandas at the north end of the facility. Send your Minions onto the nearby pressure switch to open the cage.
Dark Crystal 14
Region: Everlight Temple
Requires: None.
Location: Once you've managed to use the pressure switches to power the lift to the very top of the Spider Queen Temple (after two stops), head into the next area and up the curved steps. Stand on the pressure switch at the top of the steps to open a door along the walkway. Head through the doorway at the north end of the walkway to find a Dark Crystal and a bunch of treasure chests.
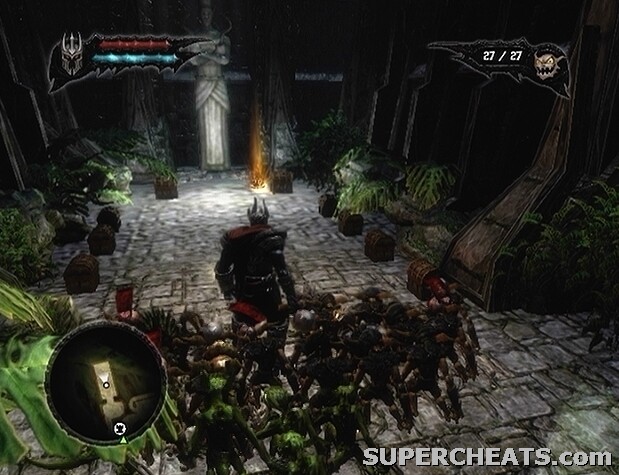
Dark Crystal 15
Region: Everlight Temple Outskirts
Requires: Mounted Green.
Location: Teleport to the Everlight Temple Outskirts gate. If you have access to Spider mounts for your Green Minions (after defeating the Spider Queen), you can reach a Dark Crystal near the Netherworld Gate. Call forth some Greens from the Green Minion Gate, and look to the map (press the Back/Select button) and locate the nearby Spider nest. There are three Eradicators between the Netherworld Gate and the Spider nest; the first is likely facing the steps, so set your Greens on a Guard Flag and lure the Eradicator over to it and they will attack.
When you have a mounted Green, return to the Netherworld Gate. Head up the steps north of the Netherworld Gate and look to the right. Send your mounted Green up the web-covered wall to retrieve the Dark Crystal.
Dark Crystal 16
Region: Empire Harbor
Requires: None.
Location: After taking over the Catapult in the Harbor Fort and using it to crush the approaching waves, look next to the steps near the front gate for a Dark Crystal container.
Dark Crystal 17
Region: Empire Harbor
Requires: None.
Location: The Gargantuan used to destroy the Sentinel tower on the main road will yield a Dark Crystal when killed. To kill the brute, stand behind the broken tower base to trick him into charging into it. Then, while the Gargantuan is stunned, sweep your Greens behind him to have them latch on to his back and begin chipping away at his health. Do this a few times to drain the Gargantuan's health completely, and then pick up the Dark Crystal he drops.
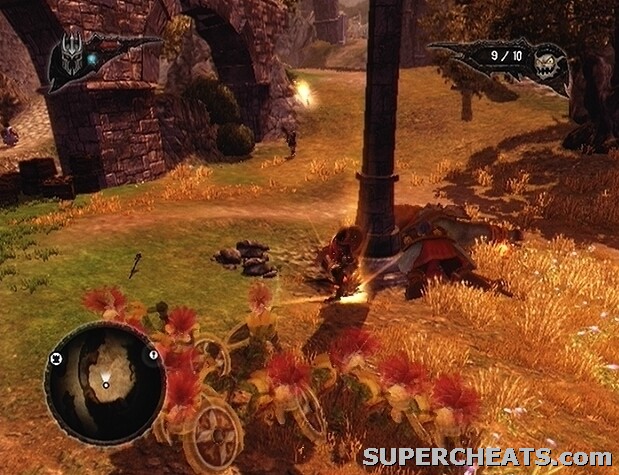
Dark Crystal 18
Region: Everlight Reef
Requires: Blue Minions.
Location: Walk west from the Brown and Red Minion Gates on the large island near the center of the map. Sweep your Blues through the water to the Dark Crystal container by the rocks.
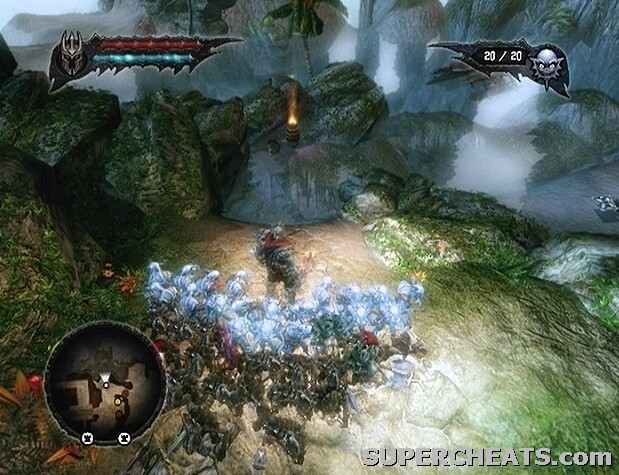
Dark Crystal 19
Region: Empire Sewers
Requires: Blue Minions.
Location: Below the grating west of the Netherworld Gate. If there is a raft there, use your Blue Minions to power it and move it over to the dock on the north side of the Netherworld Gate. Sweep your Blues through the water to destroy the container below the grating and retrieve the Dark Crystal.
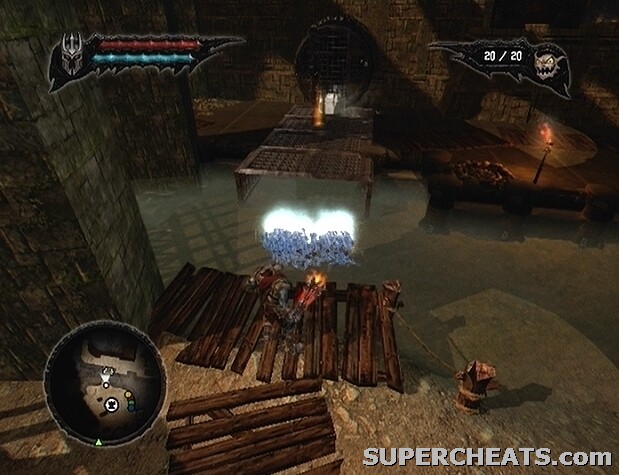
Dark Crystal 20
Region: Empire Sewers (Arena Dungeons)
Requires: Blue Minion Hive.
Location: Return to the wheel that can be used by your Minions to control the crane-arm (the northwest room on the map), and send 20 Minions onto the pressure switch in the northwest corner of room to lower the gate. Head up the ramp beyond the gate and kill the two Eradicators along the walkway. You'll find the Dark Crystal container at the end of the walkway.

Dark Crystal 21
Region: Everlight Town
Requires: Blue Minions.
Location: Make your way to the beach at the south end of Everlight Town. Cross the shallow water to reach the small island with your Blue Minions. Send the Minions through the narrow passage along the rock wall to reach the Dark Crystal there.
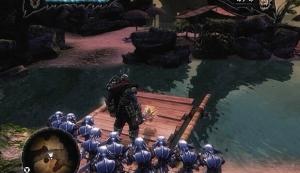

Dark Crystal 22
Region: Wasteland Main
Requires: None.
Location: Tucked away by some rocks in the nook north of the Minion Gates as they appear on the map.
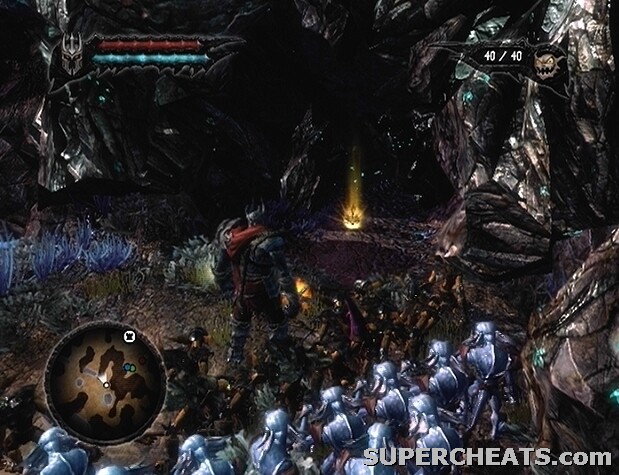
Dark Crystal 23
Region: Wasteland Main
Requires: Blue Minions.
Location: In the north-eastern mutant village, head up the steps at the north end of the village. Look for the unmistakable glow of a Dark Crystal container in the ruined house on the right.
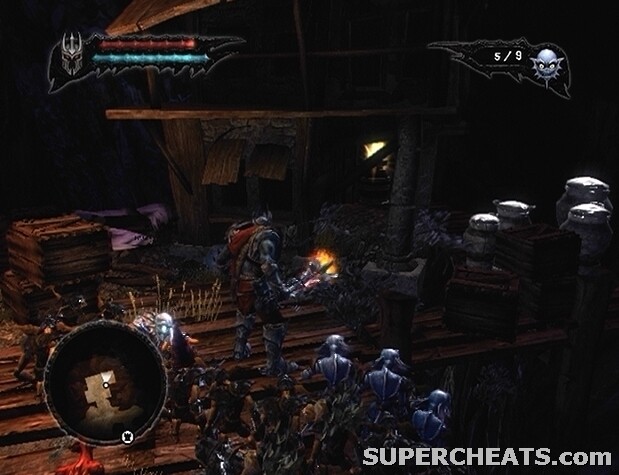
Dark Crystal 24
Region: Wasteland Main
Requires: Blue Minions.
Location: In the northern mutant village, head up the slope at the north end; look for the Dark Crystal container under the tent across from the Command Upgrade. If you've collected the Command Upgrade already, the glow of the crystal will be clearly visible if you inspect the tents.
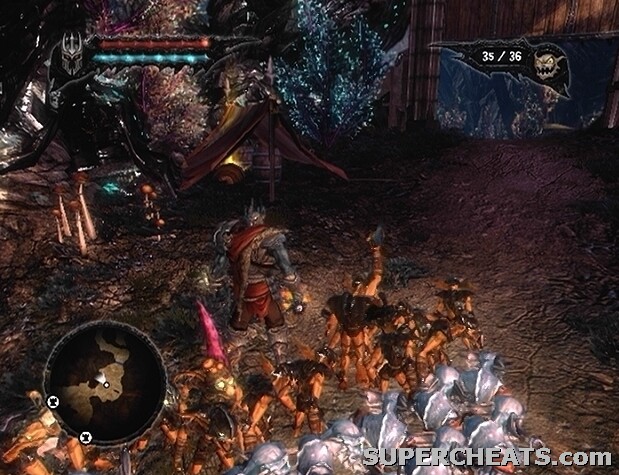
Dark Crystal 25
Region: Wasteland Main
Requires: Blue Minions.
Location: Grab this one while Florian is pointing out the Tower Heart shards stuck in the giant lake of magic goo. Make your way to the northeast end of the lake, and around to the back of the rock that has poison emitting from it to discover a Dark Crystal.
Dark Crystal 26
Region: Wasteland Main
Requires: Blue Minions.
Location: This one can be grabbed while fleeing from the Empire after collecting the final Tower Heart shard. When you reach the curved mountain slope and are the target of many archers equipped with flaming arrows, keep an eye on your left when you reach the end of the slope. If you come to three soldiers, you've gone too far; head back down to the start of the decline and look along the trail there. The Dark Crystal is just before the mudslide that leads back down to the Sanctuary. You'll have to sweep a Minion in to grab it. Don't fret if you miss grabbing the crystal during your escape, as you can always return for it at a later time.
Dark Crystal 27
Region: Wasteland Sanctuary Depths.
Requires: None.
Location: This one is only reachable on your way back to Sanctuary Town, after having charged the Tower Heart at the fourth and final shrine. The room with the Dark Crystal is connected to the same room where you first faced the Salamanders in the fire-encircled pit, but you'll have to wait until the Tower Heart has been fully charged and there are Empire archers and soldiers in the pit instead. The container is at the end of the path in the southeast corner of the circular room.
Dark Crystal 28
Region: Wasteland Sanctuary Town
Requires: None.
Location: This Dark Crystal can only be acquired during the quest to revive the Tower Heart. If you complete the quest (by sapping Fay's power to conclude the revival process) and you don't grab this Dark Crystal, it is then unattainable, as you can no longer return to the Sanctuary Town area.
At one point, while on your way to see Fay, you'll reach two statues that your Minions can push to shield you from a barrage of flaming arrows. Continue up the curved steps once the Minions have pushed the statues in place. At the top of the curved steps, head straight across to a second set of curved steps leading up. Take the steps up to reach a platform that is covered with baskets and other objects. Break open the barrel by the pillars at the back of the platform to find the Dark Crystal.
Dark Crystal 29
Region: Empire Hills
Requires: Mounted Brown.
Location: Found shortly after the second hill and Catapult. If you don't have Kelda set as your First Mistress, use the Waypoint Gate by the second Catapult to return to the Netherworld Tower. Once in the Netherworld, set Kelda as your First Mistress; you can find her in the tower in the northeast corner of the Private Quarters with the others.
The Dark Crystal is on a platform beyond the grassy field, where you must use thrown bombs to destroy the barrier and flatten the legion formation. Use one of the thrown bombs to destroy the barrier at the top of the stairs that lead up onto the wall so you can reach the bombers and take them out. Then, send the Wolves across the gap to attack the bombers there. The Dark Crystal is by the rocks on the platform across the gap; send one of your mounted Browns over to collect it.
Dark Crystal 30
Region: Empire City
Requires: None.
Location: Before entering Solarius' palace (which is only possible after having destroyed the four temples to lower the magic barrier surrounding it), head up the steps west of the temple doors to spot a Dark Crystal container.
The Smooth Slicer
Description: A decent sword early on. Fairly cheap, so if you have the Fairy Gems, consider having it forged.
Requires: Red Minion Hive.
Resources: 10 Browns, 10 Fairy Gems, 500 Gold.
The Mad Batter
Description: Standard mace. No bonuses, but very cheap.
Requires: Red Minion Hive.
Resources: 15 Browns, 750 Gold.
The Executioner
Description: A decent axe early on. Cheap, so it makes a good first weapon.
Requires: Nordberg Forge Stone.
Resources: 100 Browns, 5000 Gold, 5 Fairy Gems.
The Scorcher
Description: Sword with fire damage on strike.
Requires: Nordberg Forge Stone.
Resources: 50 Reds, 3000 Gold, 15 Fairy Gems.
Elemental Armor
Description: Armor with elemental resistance.
Requires: Nordberg Forge Stone.
Resources: 25 Browns, 25 Reds, 25 Greens, 7500 Gold, 25 Fairy Gems, 1 Dark Crystal.
The Evil Eye
Description: Lifeforce Orbs absorbed count as two while this helm is worn.
Requires: Nordberg Forge Stone.
Resources: 25 Browns, 25 Reds, 25 Greens, 4000 Gold, 20 Fairy Gems.
The Warlock
Description: Sword that restores Mana on a successful kill.
Requires: Everlight Jungle Forge Stone.
Resources: 25 Greens, 4000 Gold, 35 Fairy Gems, 1 Dark Crystal.
The Berserker
Description: A decent axe, but it would be best to save your resources.
Requires: Everlight Jungle Forge Stone.
Resources: 125 Browns, 6000 Gold, 10 Fairy Gems, 1 Dark Crystal.
The Beast Master
Description: Mace with poison damage on strike.
Requires: Everlight Jungle Forge Stone.
Resources: 50 Greens, 5000 Gold, 25 Fairy Gems, 1 Dark Crystal.
The Reaper
Description: This axe steals health from enemies.
Requires: Empire Harbor Forge Stone.
Resources: 50 Browns, 50 Reds, 50 Greens, 50 Blues, 2000 Gold, 10 Fairy Gems, 3 Dark Crystals.
The Apocalyptor
Description: Does not steal health or grant mana upon a successful kill, but offers the highest damage output. Fire damage on strike.
Requires: Empire Harbor Forge Stone.
Resources: 50 Browns, 75 Reds, 7000 Gold, 15 Fairy Gems, 2 Dark Crystals.
Infernal Armor
Description: Armor that extends health bar.
Requires: Empire Harbor Forge Stone.
Resources: 100 Browns, 50 Reds, 50 Greens, 50 Blues, 10000 Gold, 50 Fairy Gems, 3 Dark Crystals.
The Infernal Commander
Description: Helmet that increases horde size and defence.
Requires: Empire Harbor Forge Stone.
Resources: 75 Browns, 50 Reds, 50 Greens, 25 Blues, 6000 Gold, 40 Fairy gems, 2 Dark Crystals.
Below is a list of all of the events that affect tyranny rating based on the choice made. It is best to play Overlord II making either all Destruction choices or all Domination choices if you are interested in earning achievements/trophies, as several are unlocked by being consistent.
- Kill (Destruction) or subdue Borius using the Target spell (Domination) at the end of the “Conquer Nordberg Town” quest.
- Set fire to the final tar pit in Nordhaven (Destruction), or subdue 10 villagers to have them remove the ice for you (Domination).
- Kill (Destruction) or subdue the Empress of Everlight using the Target spell (Domination) at the end of the “Everlight Town” quest.
- Kill the villagers in the Nordberg Commune (Destruction) or enslave them using the Target spell (Domination).
- Kill (Destruction) or subdue both Senator Drearius and his fat wife using the Target spell (Domination) at the end of the “Find a way into Empire City” quest.
- Overcharge the Target spell (Destruction) to kill the Yeti at the end of the Arena Games, or use the spell just long enough to downsize him (Domination).
- Destroy Nordberg Town by killing all 100 villagers (Destruction), or enslave Nordberg Town by subduing all 100 villagers using the Target spell (Domination).
- Kill (Destruction) the bomb-throwing rebels or subdue them using the Target spell (Domination) during the “Rebels in Everlight Town” quest. How you deal with the group of bomb-throwing rebels on the platform at the far end of the Elf Village may directly influence your tyranny rating. For Destruction, use Red Minions to kill them from the walkway. For Domination, send a single mounted Green along the web-covered rock wall and onto the platform to chase them off. Even if you kill the rebels once you've chased them off the platform, your Domination rating may increase, rather than Destruction.
- Destroy Everlight Town by killing all 100 villagers (Destruction), or enslave Everlight Town by subduing all 100 villagers using the Target spell (Domination).
- Kill Queen Fay (Destruction) by overcharging the Target spell after using her to charge the Tower Heart (use the Target spell while she approaches the Netherworld Gate as Dark Fay), or leave her as Dark Fay (Domination).
There are four different Multiplayer maps, each offering a different mode of play. There are two 1v1 competitive maps, and two co-op maps. Below are explanations of the objective of each map.
Pirate Plunder: Use your ship to collect treasure chests at sea. The player with the most Gold at the end of the match wins. Use the ram at the front of the ship to destroy your opponent's ship and send them into the drink. Loot the other player's vault by docking your ship at their island, and using your Minions to turn the large wheel outside. You can steal some of their gold if you manage to get the vault open. Killing your opponent will send more of their gold to their vault.
Dominate: Capture territories to gain points over time. The player with the most points at the end of the match wins. Minions placed on captured zone flags gain an offensive and defensive boost.
Arena: A co-operative map. Face wave after wave of enemies of increasing strength in the arena. Survive for as long as possible. If one of the players dies, it's over, so work together.
Invasion: A co-operative map. Work together to defeat the Centurion leader at the heart of the Nordberg settlement as quickly as possible.
 1. Rescuer of Kelda
 2. Tyrant of Nordberg
 3. Industrious Magic
4. Big Chopper
3. Industrious Magic
4. Big Chopper 5. Red Rescuer
 6. Green Grabber
 7. Blue Bringer
 8. The Dominator
 9. The Destructor
 10. Scrooge
 11. Juno's Special Friend
 12. Dark Fay's Special Friend
 13. Ghost Fay's Special Friend
14. Snatcher
15. Pillager
13. Ghost Fay's Special Friend
14. Snatcher
15. Pillager 16. Conqueror
 17. The Big D
 18. Adversary
 19. Armed and Dangerous
 20. Blue Steel Look
 21. Minion Captain
 22. Weapons Nut
 23. Kitted Out
 24. Mayhem Maker
 25. Minion Harvester
 26. Minion Gatherer
 27. Minion Hoarder
 28. Minion Lover
 29. Town Razer
 30. Walking Apocalypse
31. Slaver
30. Walking Apocalypse
31. Slaver 32. New World Order
 34. Corruptor of the Queen (Secret)
 35. Kelda's Special Friend (Secret)
 37. Seal Slayer (Secret)
 38. Dark Emperor (Secret)
 39. Perfect Horde (Secret)
 40. Master Builder (Secret)
41. Tyrant of the Tower (Secret)
40. Master Builder (Secret)
41. Tyrant of the Tower (Secret) 42. Treasure Hunter (Secret)
 43. Crystal Collector (Secret)
44. Ultimate Collector (Secret)
43. Crystal Collector (Secret)
44. Ultimate Collector (Secret) 45. Mount Master (Secret)
 46. Gnome Grinder (Secret)
 47. Rock On (Secret)
 48. Ladies' Man (Secret)
 49. Ghost Bringer (Secret)
Overlord II features a total of 50 unlockable trophies. There are 37 Bronze trophies, 11 Silver trophies, two Gold trophies, and a Platinum trophy unlocked by earning every other trophy available in Overlord II.
Note: Secret trophies listed from 33 on.
1. Rescuer of Kelda
Rescue Kelda from Nordberg.
Bronze
2. Tyrant of Nordberg
Complete full Tyranny over Nordberg through either Domination or Destruction.
Bronze
3. Industrious Magic
Achieve 50 kills by overcharging your Target Spell.
Bronze
4. Big Chopper
Achieve 50 melee kills.
Bronze
5. Red Rescuer
Find the Red Minions.
Bronze
6. Green Grabber
Find the Green Minions
Bronze
7. Blue Bringer
Find the Blue Minions.
Bronze
8. The Dominator
Achieve a 100% Domination Tyranny rating.
Silver
9. The Destructor
Achieve a 100% Destruction Tyranny rating.
Silver
10. Scrooge
Collect 50,000 gold.
Silver
11. Juno's Special Friend
Buy gifts for Juno and woo her into becoming your 'special' friend.
Bronze
12. Dark Fay's Special Friend
Buy gifts for Dark Fay and woo her into becoming your 'special' friend.
Bronze
13. Ghost Fay's Special Friend
Buy gifts for Ghost Fay and woo her into becoming your 'special' friend.
Bronze
14. Snatcher
Win one Pirate Plunder map.
Bronze
15. Pillager
Win ten Pirate Plunder maps.
Bronze
16. Conqueror
Win one Dominate map.
Bronze
17. The Big D
Win ten Dominate maps.
Bronze
18. Adversary
Kill an opposing Overlord 20 times in ranked versus matches.
Bronze
19. Armed and Dangerous
Forge one weapon.
Bronze
20. Blue Steel Look
Forged the Elemental helmet and armor.
Bronze
21. Minion Captain
Rescue all the Minion crew from the Spider webs.
Bronze
22. Weapons Nut
Forge three weapons.
Bronze
23. Kitted Out
Forge the Infernal helmet and armor.
Bronze
24. Mayhem Maker
Cause mayhem during the Prelude.
Bronze
25. Minion Harvester
Gather 10 Lifeforce orbs.
Bronze
26. Minion Gatherer
Gather 250 Lifeforce orbs.
Bronze
27. Minion Hoarder
Gather 1000 Lifeforce orbs.
Bronze
28. Minion Lover
Gather 5000 Lifeforce orbs.
Silver
29. Town Razer
Destroy one Town.
Bronze
30. Walking Apocalypse
Destroy both Nordberg and Everlight.
Silver
31. Slaver
Enslave one Town.
Bronze
32. New World Order
Enslave both Nordberg and Everlight.
Silver
33. Juno's Champion (Secret)
Gain Juno as a Mistress.
Bronze
34. Corruptor of the Queen (Secret)
Gain Dark Fay as a Mistress.
Bronze
35. Kelda's Special Friend (Secret)
Become Kelda's 'special' friend.
Bronze
36. Tyrant of Everlight (Secret)
Become Tyrant of Everlight through Domination or Destruction.
Bronze
37. Seal Slayer (Secret)
Kill 100 baby seals.
Bronze
38. Dark Emperor (Secret)
Kill Solarius.
Silver
39. Perfect Horde (Secret)
Have a fully upgraded Minion Horde (50 Horde size, 400% power).
Silver
40. Master Builder (Secret)
Build 50% of the Tower buildables.
Bronze
41. Tyrant of the Tower (Secret)
Build 100% of the Tower buildables.
Silver
42. Treasure Hunter (Secret)
Obtain all the Tower Objects in the game.
Gold
43. Crystal Collector (Secret)
Collect 15 Dark Crystals.
Bronze
44. Ultimate Collector (Secret)
Collect all 30 Dark Crystals
Silver
45. Mount Master (Secret)
Discover and use all Minion Mounts in the game.
Bronze
46. Gnome Grinder (Secret)
Kill 1000 Gnomes.
Bronze
47. Rock On (Secret)
Kill 15 or more enemies with a single Catapult boulder.
Bronze
48. Ladies' Man (Secret)
Decorate your Tower in such a way that all three of your Mistresses have one furnishing in the Throne Room and Private Quarters. An example: Juno's Rug and Juno's Alcoves; Fay's Bed and Fay's Throne; Kelda's Candles, Kelda's Statue, and Overlord Banners.
Gold
49. Ghost Bringer (Secret)
Gain Ghost Fay as a Mistress.
Bronze
50. 100% Clear
Unlock every other trophy available in Overlord II.
Platinum
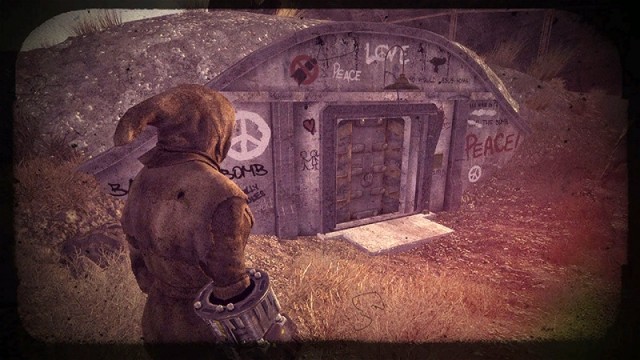
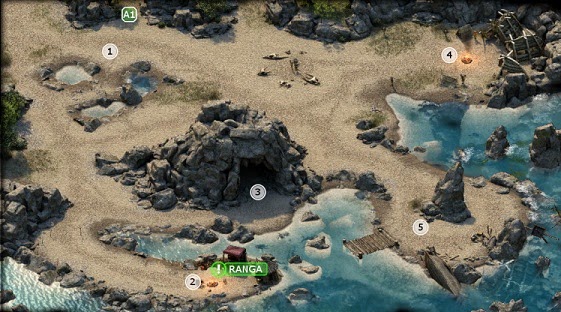

 The Missed Opportunity of Duke Nukem Forever
 10 Times Fallout 4’s Dogmeat Was Too Weird For Words
 Top 10 Best First Person Shooters for Mac OSX
 Borderlands 2 Basic and Legendary Relics Guide
 5 Reasons Why You Should be Playing Binary Domain