
Operation Flashpoint: Dragon Rising is the successor to the hugely popular original. While developed by a different team, the ethos behind the game is much the same. One shot can kill you, and, if on the higher difficulties, it will send you all the way back to the start of what may have been a one-hour-plus length mission. Codemasters' game features a large map, Skira, and tons of vehicles and weaponry to use in accomplishing your objectives. It also boasts a full co-operative mode and adversarial multiplayer.
This guide offers a full walkthrough of every level in the game, complete with a list of all the achievements and trophies and details on how to get them. It also provides an 'Extras' section for each mission, which gives you ideas on alternative ways to play each level, as well as providing vehicle and special weapon locations if they can alter your way of playing.
[img=opflashs37.jpg]
The island of Skira, a fictional location north of Japan, is hotly contested in the 21st century for its oil supplies. China moves in to dominate it as the current economic crisis takes hold and Russia mobilises to defend its territory. The US are asked to intervene, which is the reason we end up in the North Pacific with the USMC in Dragon Rising.
[img=opflashs253.jpg]
There are two types of team you can play as, USMC Infantry (Dagger) and Spec Ops (Saber). The former is an assault-based line-up where mid-range weaponry and anti-tank equipment often come as standard. The latter is a stealth-orientated set, frequently equipped with night-vision, infra-red cameras and high-range rifles. There are a variety of classes for your squad mates, including Medic, Sniper, Machinegunner and Engineer.
The game picks a weapon set for you at the start of the mission (although co-op partners can pick between the remaining three classes), and frequently you will have to ditch your starting weapon for something more suitable. The game has ammunition dumps for you to get additional armaments from, while enemy corpses can also be searched to acquire their weaponry and equipment. Should a member of your team be incapacitated, you can also make the most of their loadout.
It is nearly always advisable to have a Marksman weapon with you. You can make shots over 400 metres with these weapons, though you need to account for the dip of the bullet. Sometimes explosive weaponry are also needed, such as to take down helicopters or enemy tanks.
Missions vary from search and destroy and defending territory to extracting hostages. Missions always have a primary objective, most of which are set to some sort of timer. You are nearly always relying on other squads in missions either to extract you or provide you with support during the game, so you can't dawdle exploring the large (though often mostly inaccessible) island. Secondary objectives do not have to be completed, but often make getting the primary objective easier (such as, for example, flanking the enemy undetected, before taking them out). The missions are generally very open ended, and you can requisition vehicles to make life easier. It should be remembered, however, that Dragon Rising is a military simulator, and joy-riding around the island will not only annoy your superiors, but will undoubtedly get you killed!
On Normal difficulty, the game features objective markers, showing you the location and current distance from the next objective. It also includes RV markers, which guide you through the recommended route through the level if you follow them, and checkpoints, which are usually (but not always) found near these markers.
On Normal, the game provides many helpful tweaks to make the game easier, though the enemy placements and ability are identical across all three modes. On Hardcore, you have very few HUD elements, for example no cross-hair or information on your team's health. On Normal, as soon as you or your team see an enemy they are added to your map and on-screen compass, on Hardcore, you will never know where the enemy are until you can actually see them.
[img=opflashs50.jpg]
On the Normal difficulty and in single player, if you hit a checkpoint then you can restart the level from that point if you die or fail the mission, rather than the beginning of the level. You can do this on Experienced too, but there are fewer checkpoints. In co-op, checkpoints only serve to add an additional two lives to your team's counter on Normal, and you begin with six lives. Experienced has you start with two, and Hardcore one death is game over for that player.
[img=opflashs82.jpg]
As a squad shooter, you need to be able to command your team and order them around the game map. On Hardcore this is made far more difficult by the fact that you may not know exactly where they are, what their health is, or even whether they are still alive. The game uses a Radial system, whereby you pick a topic and then a specific command to order.
The command radial is activated with R1/RB, and you then use the control stick to select a command. (note this only works when you are in the open and not looking at a context sensitive object like a building [this not applies to all the common commands – use the respective part of the radial menu to access these commands manually]).
Move: Press Up on the left stick with the radial activated and your team will go to that location.
Move Fast: This isn't an essential command, but often your team will get slowed down behind you and you need them to catch up without being bogged down in bounding tactics (where two members move, and then cover the next one, halving movement speed). To order a fast move, press Right, Right, and then Up.
Follow Me: This is the basic command as it will set your AI team mates to permanently follow you around the map, covering you and moving like a team. While holding the radial button, press down
Change Roe: This alters whether you want your team to Fire at Will, Return Fire Only, Fire on My Lead or Hold Fire. This is especially useful for stealth missions where you don't want them to give your position away. To access the Roe settings, press Left, then Up (Tactical, then Roe). You can then pick the option you want. Note that if you choose Fire on My Lead, as soon as you open fire your team go weapons free, so remember to set them back to it again if you don't want them giving your position away.
Medic: You'll be needing this. It is located at Left (tactical) then down. If you happen to be injured, you can just push Up or Down.
Context Commands:
When you are looking at certain objects, the command radial will change. This can be annoying, for example if you just want to order your squad to follow you, once you are inside a building, but mainly it's a useful feature. The key ones to know are below:
Assault (Building): When looking at an enemy on your map (very useful) or in open play, or a building, you can order your team to assault. If it is an enemy, they'll employ real tactics to flank and attempt to take it out. If you order them to assault a certain enemy and ignore another though, they may be left open to attack. With buildings they will slowly move up to them and then enter and clear it. Push up to give the order.
Treat Wounded (Medic): When looking at an injured team mate, push up to order one of your squad to help them out.
Additional Commands:
Other commands to use in general play include Suppress, which will keep an enemy pinned down allowing another player to flank; Flank Left/Right, which works similarly but you will need to do the suppressing as your team moves; Formation, where you can change from a Vee to a Wedge to a Line to a Column and Spreads, which keep these formations Normal, Combat or Tight. Fall Back will get your squad to lay smoke grenades and leave the immediate area, and Defend will have them hold position and stop any threats on the area. More commands will be covered as they are needed throughout the game, but it's worth spending some time in Mission One just to get used to them.
Summary:
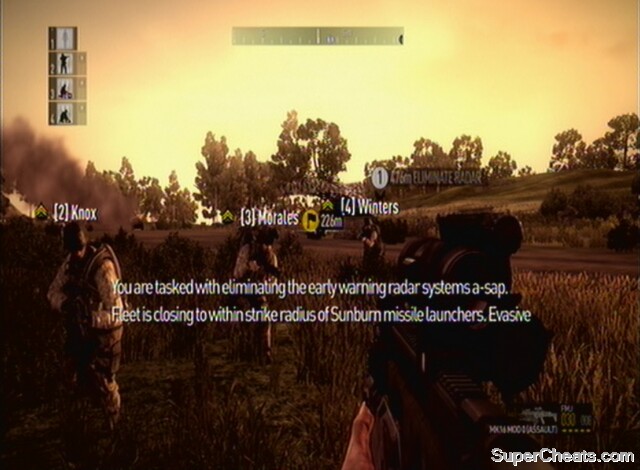
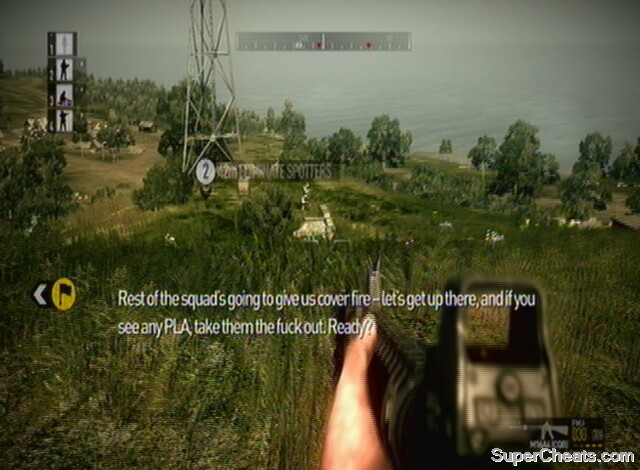
As the first mission in the game, this is an easy one to complete – if you are only going for the primary objective that is. You have to climb a hill, destroy a RADAR system and clear out a village, before heading back to extraction. You can complete these objectives with only a few enemy encounters. The secondary objectives include destroying various enemy defence systems around the island. It allows you to explore most of Skirinka (the small island), and even includes a helicopter near the final secondary objective for that all-important achievement/trophy on consoles.
Walkthrough:
Primary Objective 1: Destroy the Early Warning RADAR
After listening to the briefing from HQ take a moment to familiarise yourself with the controls and squad commands before setting off. You should be able to move around the opening valley without drawing enemy fire, but don't stray too far.
Use this opportunity to get used to the game
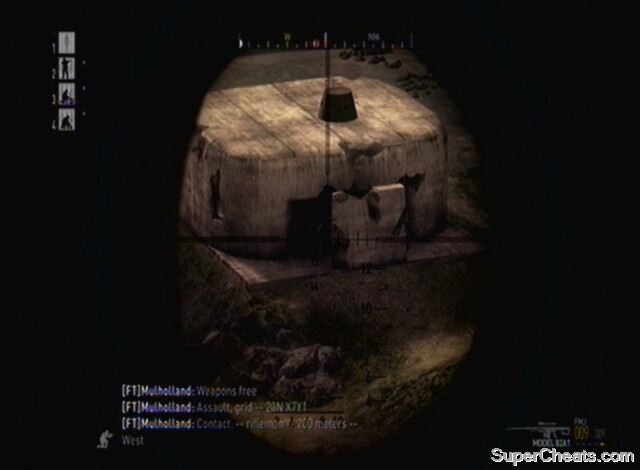
Once you are happy, move up to the sandbag emplacement ahead (southwest). Inside are the first ammunition crates in the game, which you will be seeing plenty more of in the future. It is recommended that you pick up a Marksman weapon at this point, as most of the engagements in this early stage will take place over a good distance. Press the action button when the hand icon is show over the crates, and pick up the QB295 (Marksman). You shouldn't have to drop any other weapons at this stage, as you can carry one special weapon (i.e. this sniper rifle) in addition to a regular one. There is also a checkpoint here, which is relatively pointless at this stage – it is much more useful later on.
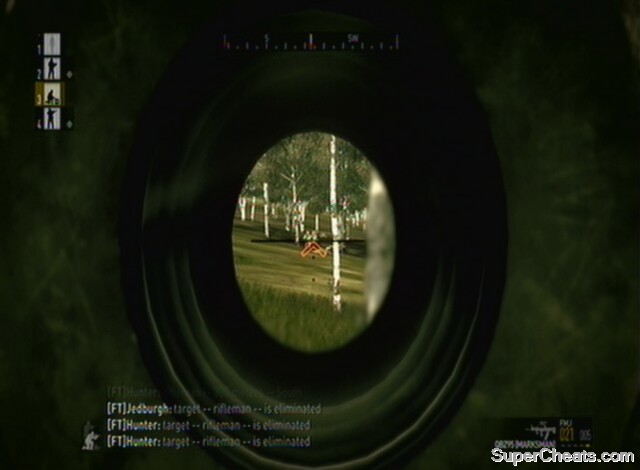
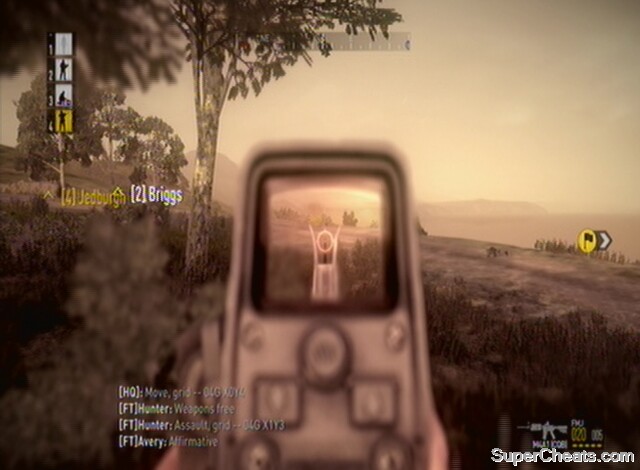
With that done, head south-west towards the first RV Marker (see above for more info on these). It is located over a broken wall which provides a good defensive position for the next engagement. As soon as you trigger the marker, turn to the southwest and move your team up to the wall ahead. Ensure you have your marksman weapon out and ready, and aim your sights on the building at the top of the hill. A pair of enemy soldiers will appear and open fire. If you are having trouble getting a shot on them, use your team to draw their fire and suppress them (see Orders section above). You can also move up to the next set of wall, alongside the woods, if you want to try and get closer, but make sure the enemy are pinned down before hand. Ordering your team to Assault the enemies on the hill will also alleviate some of the pressure on you at this early stage in the game – your squad are very accurate with mid-range shooting.
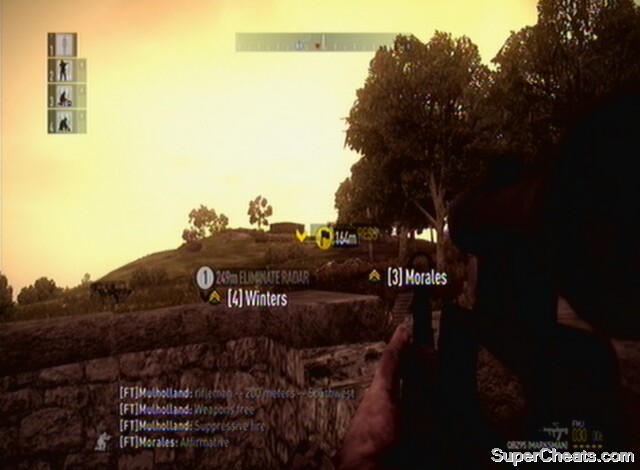
Assault the hill and eliminate the two enemy soldiers
When it has been confirmed that the enemy have been eliminated, move up through the woods to the right (just in case you did miss someone, this will provide you with ample cover). The top of this hill should be clear, but stay away from the edges as you will draw fire from the village to the south and the enemies guarding the RADAR (a stealthy approach is always best!). There is an ammunition crate here if you need to stock up. A marksman weapon and an assault rifle is a good combination for the rest of this mission. You should now have activated a checkpoint up here as well, allowing you to respawn here should the mission go awry. I recommend setting your team to ‘Fire on My Lead’ so that they don’t engage the enemies in the village below and alert them to your presence. Move around the side of the building and skirt the edge of the cliff, arcing round towards the objective. You should come upon it at a decent angle to take out any enemies remaining. There are usually a couple guarding the RADAR, but your team may have dealt with them already. Once you move up to the RADAR, equip the C4 using the equipment menu, and press the usual fire to place some on the structure. Fall back (make sure your team are with you) and press fire again to blow up the RADAR. I suggest getting back so you are on top of the hill, just to avoid any possibility of a suicide here!
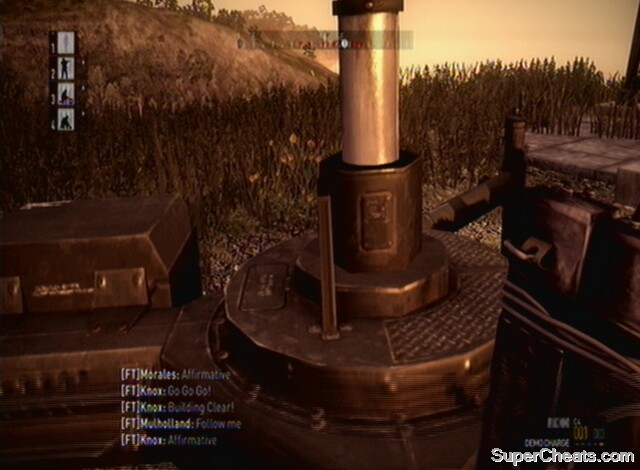
Plant some C4 on the RADAR
Achievemen/Trophy: Without Warning (Destroy the RADAR installation) Bronze/20G
Primary Objective 2: Secure Landing Zone/Extract:
With this done you will be told to help out some incoming USMC forces that are assaulting the village below. Command has also given you access to an artillery strike. Using it on the village makes short work of this objective, but makes completing the secondary objectives later on in the mission harder. Make a decision about whether you plan to play through the whole level or bail out after completing the primary objectives, and then either use you binoculars or weapon scope to designate a cluster of buildings in the village for an artillery strike, or head back down the hill to the road you began the mission on. Without using the artillery strike, you need to attack the village on foot. Once you have defeated enough of the enemy (20), the objective will be completed. Turn right at the bottom of the hill and set your squad to attack the enemy emplacement guarding the village. You may also encounter enemy jeeps in the area, so make sure your squad don’t get flanked by these. If you go prone on the side of the hill we were just on, you can get a great angle on the enemies on the other side of the valley and in the village itself. Pick as many off as you can with your marksman rifle. You shouldn’t have to go into the village itself, as there are plenty of enemies taking external sentry positions to pick off.
Once you’ve taken out enough PLA, you will be told to secure the extraction zone and get out of there! This is quite a heated encounter. You can either get in the jeep that is in the vicinity of the bottom of our hill, ride it to the extraction zone and take out the enemies in the area, or, preferably, do so on foot. If completing the secondary objectives the jeep is very useful, but you can always backtrack for it and they are pitiful in combat. As you approach the area, use the trees for cover (if on foot) and set your squad to assault or suppress the nearest enemy, allowing you to flank. With your marksman rifle you should be able to snipe any enemies in jeeps (there may be two vehicles to deal with) or just those swarming the extraction point and clear the landing zone for the helicopter. Stay in cover and concealed so that they don’t engage up close. The jeeps should stop when they can’t see you, giving you the chance to pick off their gunners and drivers. With all this done, the helicopter will come in for landing. At this point you can either board it and leave the area, completing the mission, or go for the secondary objectives (which offer achievement points).
Eliminate enough PLA to allow your allies into the area
Secondary Objective 1: Destroy SAM Site #1:
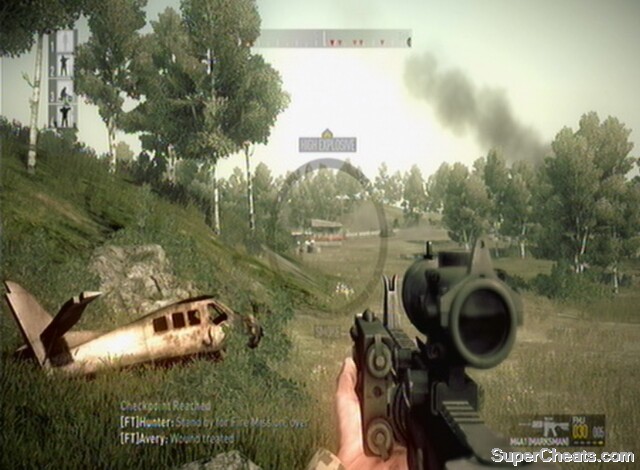
If it is the latter, either head back for the jeep you ignored earlier, or secure one in the vicinity of the landing zone. The first secondary objective to deal with should be to destroy the SAM site located near the lighthouse at the northern end of Skrinka. Once in the driver position of your jeep, take it all the way along the road heading north, ignoring any infantry along the way, until you get to the checkpoint on the coastal bend in the road. You should just come into sight of a large hill with a ruin on top. Disembark as soon as you see it. There are enemies on top of the hill as well as some patrols doing circuits of the area. We need to get to the top to secure a Javelin which makes the next objective a breeze. Leave the road to the right and assault the enemies on top of the hill.
You shouldn’t be flanked by the patrolling soldiers, as they are far more likely to engage you from the hill with their associates. Use your team’s accurate fire to push up the hill and access the ammunition crate nestled in the ruined building. Swap out your marksman for the Javelin, and set your team to Fire on My Lead. Continuing north-east, move down the slope towards the lighthouse base. As soon as it is in sight, order the artillery strike on the marked objective of the SAM launcher. The PLA in the base may open fire on you at this stage, though unless you or your squad open fire you should be in a concealed location. Before the artillery strike hits head back the way you came towards your jeep.
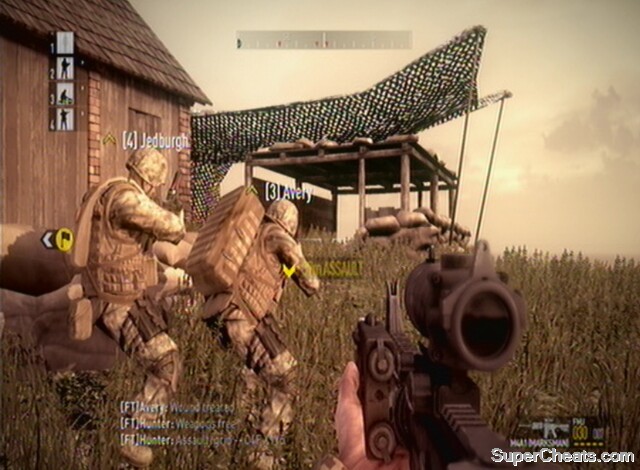
Assault the hill with your squad
Secondary Objective 2: Destroy Sunburn Anti-Ship System:
With the Javelin, you can actually shoot the next objective from the eastern side of this area, near where we disembarked the jeep. Get towards the edge so you can see south along the coast, and equip the Javelin. Looking down its sight, the next target should be brightly illuminated in white. This is the Sunburn missile launcher. With the Javelin locked on (you don’t need a clear trajectory from your position to the target, as it fires up in air), fire it and head back to the jeep. If all went well the next secondary objective should be ticked off. If not, you will need to head south in the jeep and disembark on the road in line with the objective and infiltrate the base yourself. Move into the base, dealing with the PLA inside it, and place some C4 onto Sunburn and blow it up on your way back to the road.
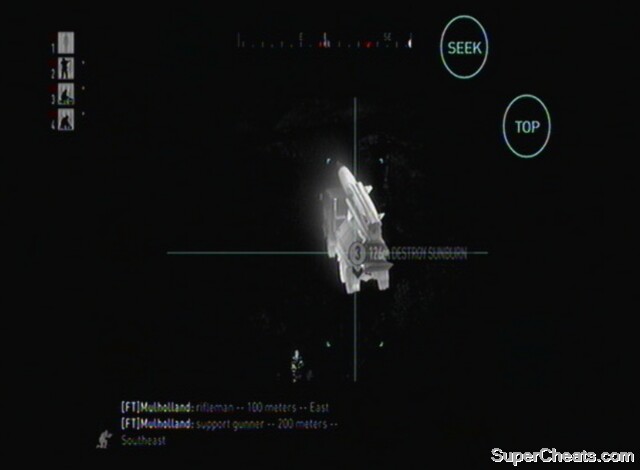
Destroy Sunburn from a distance
Secondary Objective 3: Destroy SAM Site #2:
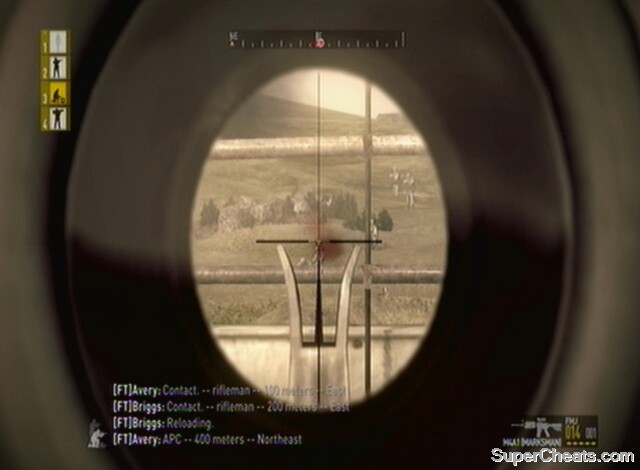
If you did this from a distance with the Javelin, get back in the jeep and follow the road south until you are roughly in line with the last objective. If you went in close, then head back to the road and cross the other side into the trees towards the last objective. There is a checkpoint en route, which you should head for (check your map). There are patrols on the ridge which looks down over the last objective. The ridge itself provides a great angle onto the base below, but you should be careful of getting flanked, and position your men appropriately. There is an excellent sniper rifle in the ammunition crate south of the objective, and it is worth picking up. With that done, head along the ridge in a northern direction until you can see the SAM site and base below you. Using your rifle, take out as many enemies as you can, and set your squad to assault the PLA guarding the base. There are not a great amount of enemy personnel here, so move your squad in close once the fighting dies down. With the all clear, you can head down and plant some C4 on the SAM. From here, if this is the first time you have played this level, I recommend you go west and down onto the beach. There is a helicopter here which allows you to get an otherwise obscure achievement. Once on the beach you can blow the C4 and complete the final secondary objective (make sure also that you trigger the objective in the base, as flying a helicopter can be a trial on your first go!). If you want to end the mission as soon as possible, head back to the road, blowing the SAM on the way. Use your jeep to head south to the extraction helicopter, which has kindly waited for the last forty-five minutes for you to finish.
Assault the base from
Getting in the pilot seat of the helicopter can be tricky. Look at the door and change your viewing angle up, down, left and right until the Pilot selection is highlighted. Pressing the embark button should then see you take control. To fly around the island and unlock the achievement you need to skirt the coastline, making sure not to cut any corners or go too far out. If you go too far out to sea you are warned about leaving the engagement zone. If you fly all the way round and no achievement comes up, keep going until it does. You don’t need to fly around the southern island off the coast of Skrinka. With the achievement/trophy in the bag, head back to the extraction chopper and land nearby. Order your team aboard to complete the mission. Flying this helicopter is pretty much like any other in videogaming, unlike the one in Mission Eleven!
Achievement/Trophy: Skirinka Island Tour (Complete a circuit of the island) Silver/30G
Extras:
There are a few alternative ways of doing this mission. You have the entire island of Skirinka to explore with no constraints (though you can't go out to sea), and there are a selection of vehicles to the south near where you start. Once you get hold of one of these, you can feel free to explore Skirinka at your leisure. There is only one main road through the island, which is the one we use in the guide above, but that doesn't mean it's not worth exploring the island. Try some of the coastal hills to get a great overview of the island.
The empty helicopter is to the west by one of the secondary SAM objectives. As this is the only level set on Skirinka, the ammo crates tend to be located by the objectives. There are two to the south by the primary objective, one to the west at the helicopter SAM site, one to the east by the Sunburn site, and one north on the hill by the lighthouse – this is where the Javelin is located.
How to find the helicopter
The variables in this are the fire mission, which you can save and use on anything you like, and the Javelin, which you could collect by the lighthouse and then save for another purpose. If you want to prolong the mission, ignore the fire mission and Javelin and go to both the lighthouse and Sunburn to tackle the PLA their up close.
Note also, that by the end of the mission the level will be getting dark. Thankfully we have night vision, but remember that once it's dark you can start to employ some stealth tactics!
Summary:
This is the first mission playing as Saber, the Spec Ops variant in Operation Flashpoint. They are focused on stealth and night-time operations, usually as a lone team. In this instance there is another Saber team to help us take out the Sunburn Missile Launcher. Being spotted by the PLA will fail the secondary objective, which runs for the first few stages of the mission. Once the Missile Launcher is destroyed, there is an achievement to be had for taking out the PLA commander, before destroying the anti-aircraft site and allowing friendly air support to arrive.
Walkthrough:
Primary Objective 1: Destroy Sunburn Site :
Secondary Objective 1: Remain Undetected by PLA Forces:
Secondary Objective 2: Reach Flanking Position:
There are a lot of different ways to play this mission, though completing the secondary objectives makes it all easier and is the advised way of doing things. You begin by the beach at night, and need to move up the hill to the east and cross the road ahead. A PLA convoy will drive past early on, but you can safely cross the road, following the RV markers to avoid contact with no additional stealth required. Your team is automatically set to Return Fire Only, and with your superior night-orientated equipment, you shouldn’t be spotted by the enemy at any stage until Sunburn.
Having crossed the road, follow the RV markers. Saber 3 will hold position and take up an ‘overwatch position’. If you look to the right in this field you can see an enemy base, which again can just be ignored.
Ignore the soldiers you can see
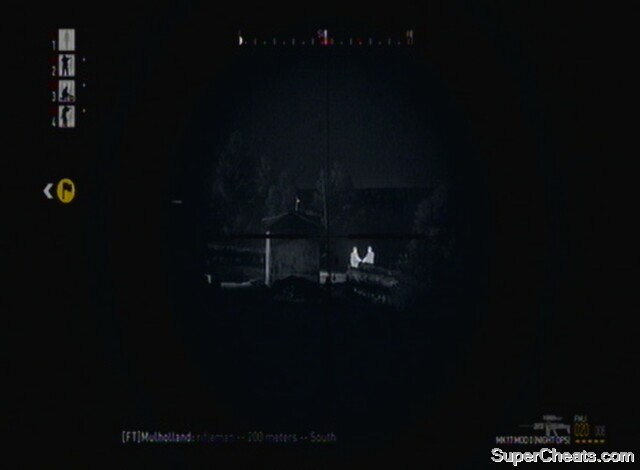
Remember that if you open fire you will fail the secondary objective and trigger an enemy search for you. After a short time following the RV markers you will reach a hill and valley. The RV marker is up the left hand side of the valley, but it is best to ignore it and head up the right hand side hill instead. The reason for this is that at the end of the valley is a lookout post manned by a couple of PLA soldiers. With your primary weapon’s scope you will be able to see them clearly. Even if you go to this RV, you can still safely move across the valley to the other side and the next RV marker, just be sure to do it carefully. Saber 3 should radio in about now to tell you where to head for a good flanking spot on Sunburn.
Once on the correct side of the valley, move around, remembering to avoid the lookout post, and continue to follow the RV markers. It is worth checking for enemies in the area using your scope, but there shouldn’t be any as long as you follow the suggested path all the way to Sunburn. You may also be aware of a patrolling enemy helicopter flying overhead.
Avoid the guards at the lookout post
As long as you're not firing it shouldn't really see you at this stage, but go prone if it comes too near just in case. Before too long you will see a two-storey house in the distance, which is just adjacent to Sunburn. If you look down your scope you will see that the launcher is guarded by a squad of PLA infantry. Near the house there is a checkpoint, when Saber 3 should radio you and tell you they are in position and ready to help out.
I had a lot of problems with this house, most notably with enemies spawning inside. Also, if you ask your squad to enter it, they may open fire on any inhabitants (who appear to sometimes be there and other times not) and alert the Sunburn crew. Therefore I recommend ignoring the house and just taking cover outside the farm buildings. When Saber 3 let you know they are ready, they will begin the assault on the site. Once this happens, you can flank them from your southern side and plant the C4 on the launcher. It is important to do this quickly, because as soon as it comes under fire an enemy helicopter will come in to search the area for both Saber teams. As well as packing a lethal punch, if it spots you more reinforcements will also come after you. With that in mind, you can either fall back to the house (at this stage making too much noise isn't so much of an issue, though the spawning enemies is), go prone if the helicopters come overhead, or move on with your next objective quickly, attempting to lose your pursuers on route. It is very possible to take down one of these choppers with your team, but it is equally possible that they will blow you off the ground first.
An example of how you can (luckily) do the Sunburn objective even if you've been detected beforehand
Should you handle the Sunburn situation badly and alert its guards, get your team to keep them busy (hopefully Saber 3 will also be engaging). You can run to the launcher using the dip in terrain as cover, and quickly plant C4 before retreating back to your squad. It is very possible to do so while under fire, as you only need to spend a few seconds on level terrain on the road.
Once the helicopter has lost interest, or if you are expediting to the next objective, blow the C4. Following the RV markers to the east, you will come upon a settlement. This houses the PLA Commander, who acts as a bonus objective and will reward you with an achievement if taken out. Note that if you have already done this once, you will not be notified when the Commander is taken out. The best tactic with this base is to simply engage in long range combat. The Commander should be in quite a prominent position, and either you or your squad should be able to pick him off. There is also an ammunition crate in this base, so ordering your team to assault up close and personal does have its benefits. Be aware that hostile forces from the west may be alerted to your presence after this assault.
Eliminate the PLA Commander in this base
Achievement/Trophy: Ghost Ops (Eliminate the PLA Commander) Silver/30G
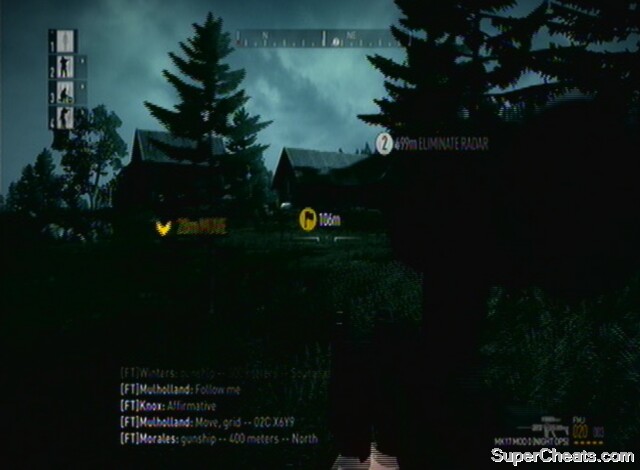
Primary Objective 2: Disable Air Defences:
You will be aware that HQ gave your squad access to an artillery strike after completing the Sunburn objective. This can be used to eliminate the PLA Commander by bombarding the village, but is much better for the second primary objective. This objective is to Disable Air Defences. Continue to the east, and you will notice PLA forces skirting the treeline above you (if you use your scope to spot them). They are equipped with long range weaponry, so it is advisable to take as many out as possible. You can set your team to suppress them or directly assault, but proceed either on your own or with a teammate (unless the PLA forces are not engaging you), and head towards the objective. Use the dip in the terrain to stay out of enemy sight. You will be able to see the target, or at least buildings surrounding it, allowing you to aim an artillery strike at it. Ensure you use a scattered method, allowing for any inaccuracies in targeting.
Use the fire-mission from distance on the air defences
Primary Objective 3: Proceed to Overwatch:
Once the strike hits, call your team to you and proceed to the overwatch position. If all went well, confirmation should be given. If the strike missed, you will be forced to move into the base and manually C4 the target.
With the target burning, be aware of the patrols that engaged from the treeline earlier, but the walk to the overwatch position should be quiet, particularly if you used the artillery strike to decimate the enemy forces. You may take fire from the valley, now a long way below, but any PLA soldiers should be too far away to be accurate.
Move through the mountains and down to the overwatch position.
Achievement/Trophy: Saber Beats SAM (Destroy the Anti-Aircraft Sites [Sunburn and SAM Defence]) Bronze/20G
Extras:
This level allows you to really use two completely different strategies to complete the objectives, but you are more constrained with where you can go and what you can do than in Mission One. From the start, if you fancy trying a quick combat encounter you can take on the convoy which drives past. Remain undetected is only the secondary objective, so you can, in theory, take out the PLA with loud tactics. Once you have a vehicle in the convoy the map is your oyster! Unfortunately Saber Three won't wait for you forever, and you can't afford to dawdle too much if completing the mission is on your mind. If you want a vehicle without talking the convoy, there is a truck up the road to the north (away from the convoy) which, though guarded, can be taken and commandeered.
Taking out a helicopter
The enemies in the valley before Sunburn can be taken out, indeed, even without alerting other PLA. Just remember that when they are searching for you, that means you need to stay out of sight for 25 seconds before you can safely resume. The PLA will remain on the alert, too. Feel free to tackle the Sunburn launcher without Saber Three, you won't fail if you start without them, as Reach Flanking Position is only a secondary objective. From then on it's pretty much straightforward, though you can take your time to get to the overwatch if you desire it (once you've dealt with the SAM site). You can also take out the SAM site manually, if you want to use the fire-mission on the PLA commander or just to blow some of the landscape up. To do this, you'll have to drop C4 on the RADAR in the SAM base. If you're going exploring, the helicopters will pose a problem, but that's all part of the fun of tackling a level from another angle!
Summary:
This is one of the most popular missions in the entire campaign of Operation Flashpoint. Back in the feet of Dagger team, you take part in a large USMC assault on the region. Weapons are mid-range, but a smattering of vehicles make things a little more spicy. After the initial move towards the target village, you must hold and defend it from an advancing PLA counter attack.
Walkthrough:
Secondary Objective 1: Eliminate PLA Anti-Tank Teams
You begin on a beach as part of a large force moving forwards. The first objective is to eliminate enemy anti-tank teams, which are taking out your allied AAVPs. Move east into the forest. This is potentially a dangerous confrontation, so order your team into a dispersed formation, or to assault from the centre while you flank left. The first anti-tank team has the advantage of higher terrain blocking your view. Use the tactical map to spot the target, as it is marked on from the very start of the mission. Once you reach the pile of logs in the woods, you should be able to get shots on the targets. Note that there are two soldiers per team. If you plan on completing the bonus objective and getting the achievement, you need to pick up the anti-tank team's RPG, in this case a Queen Bee, to use shortly. Note that there is a Queen Bee in the ammo crate by the farmhouse too, but by the time you have cleared the area and picked it up, it may well be too late to get the achievement.

Remember where the body of the AT soldiers are so you can get their Queen Bee
The second anti-tank team is further through the trees, by a flaming vehicle towards the farmhouse. If you want to do the bonus objective, just set your team to assault the anti-tank PLA soldiers and head off to the left/east. If you look at the map, you will see an enemy AAVP marked on in red. Head for it down the hill, staying far enough away from the farmhouse to avoid taking fire. Equip the Queen Bee and take out the AAVP. It should be noted that your friendly troops will take it out themselves if you don't, but clearly you won't get the achievement for that. It also reduces the risk to your own vehicles if you do this nice and quickly.
Regardless of whether you or your team take it out, head for the farmhouse and mop up the remaining forces there.
Achievement/Trophy: Get Creative (Destroy the PLA APC by the farmhouse) Silver/30G
Note: Keeping your AAVPs alive is essential for defending the village at the end of this level. The anti-tank units, enemy AAVP and mortar fire can all really hurt your chances, so speed in dealing with the enemies of the essence. With the anti-tank teams dealt with, you will be ordered to regroup with your allies on the road just outside it. Ignore this, and head up the hill to the south, as enemy mortars will rain down on the road.
Get up the hill quickly!
Primary Objective 1: Eliminate PLA Spotter Team
After the first volley, the second will take out one of your allied AAVPs, so time is crucial. Every four minutes after this, another AAVP will be taken out and, once three are down, you will fail. Sprint through the trees, heading to the left of the antenna you can see at the top of the hill. If you flank around this left hand side, you will arrive on the antenna, where the first three enemies are, and can flank them before they even know you are there. Two will be standing unaware of you, while the third is usually hiding behind the wall behind the antenna. If you can't see him, head to the right to the second part of the spotter team. They are covering in a bunker overlooking the road, so move up and deal with them. They will know you are there following your attack on the antenna, so make sure your squad are with you to provide support. Grenades are good for this, but take longer to use, and you cannot afford to lose additional AAVPs. With this done, head back for the third soldier and deal with him if not already done. Order your team in his direction and it should flush him out.
Flank the spotters up on the hill
I recommend you take the marksman rifle from the third soldier by the antenna, as this is a great help with the next section.
Primary Objective 2: Eliminate PLA Anti-Air Teams
You will be informed that around the village are anti-aircraft teams which are preventing your allied Hydra gunship from entering the area. There are three, in fact, and you are given ten minutes to deal with them. Head down the hill to the south-east. You may take fire from the village, but should be able to reach the bottom and the ditch which provides ample cover for the next stage. Order your team to engage the anti-aircraft team by the building to the east, while you can flank round to the left – through the trees. You should be able to come upon the building completely undetected and pick off all those guarding it with your marksman rifle. Once this is done, or your team has done the job for you, fall back to the ditch. Enemy reinforcements are likely to be moving to engage you, so it is important to get away from where they think you are.
Flank the first AA team
Back at the ditch, head to the south, across the field and towards the village. The first anti-tank team is by a building overlooking the expanse to the east. Get your team to move up and assault the building. Do the same with the final location, at the western end of the village. Your team are very skilled at building-entry, so letting them take charge is not a bad idea. It is worth bearing in mind, if there are lots of PLA still guarding the village, that your AAVPs will move up and deal with them given enough time. Obviously you don't want to leave it too long or the objective to deal with the anti-aircraft teams will fail, but playing this conservatively certainly makes things easier.
Primary Objective 3: Secure Beachhead
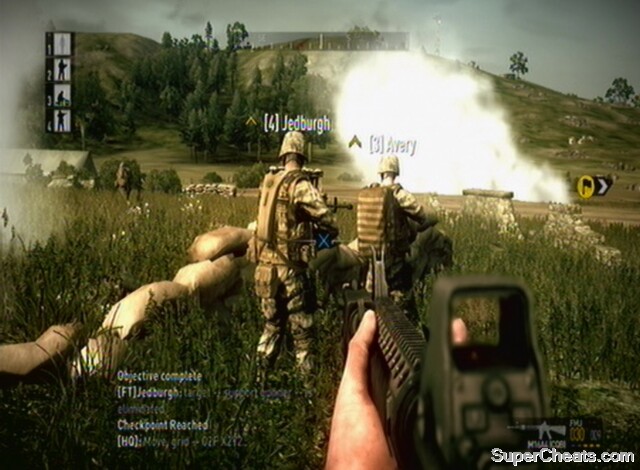
With all this done, you will be informed of a counter-attack on the village by lots of PLA forces. Red smoke will mark the area you need to defend, but it's basically right next to the building occupied by the final anti-tank team. There are many ways of doing this, but the key areas to defend are as follows. The barn, if it hasn't been destroyed, has an upstairs which gives you a height advantage over incoming forces from the south. There is the mounted gun just outside this barn, which packs a punch but should be preferred manned by an AI teammate both because they are more accurate, but also because the mobility of a human player is needed to deal with any flanking manoeuvres. There is another gun emplacement to the east, and this can be staffed by another of your team mates. The chances are, however, that the eastern side of the village will be overrun, leaving your squad member surrounded. You can easily cope with three soldiers defending the south, and the extra skilled man to the east may tip the balance and protect your flank, but he will probably be the first of your team to fall once things start to get hectic.
The ideal place for a human player is to the west of the road we are defending, overlooking the forested area by the coast. From here you can see the road, the hills and the forest. The latter area is heavily assaulted during the counter-attack, and your marksman rifle is essential for dealing with these flanking PLA soldiers. Whatever your plan, ensure this area is guarded. You can try and lay some claymores in the area, but frequently these are spotted and blown up beforehand. Order any remaining team mates (this may well be all those except the one on the mounted gun) to defend the road. With any luck, one will take station inside the barn and use its ample cover. Be sure to restock your ammunition at the crate by your position before the enemy arrives.
Ensure you keep an eye on the trees by the coast
Your gunship will deal with the first wave pretty well, but frustratingly will soon have to return to base. From this stage you will have to deal with enemies from the hill and through the forest to the west. Depending on how well your allies and AAVPs are faring (it is worth regularly checking your map for this info), HQ will inform you of breaches in the perimeter. If the eastern side falls, you will need to keep a good eye out in case any jeeps or infantrymen get a flanking manoeuvre on you. The top priority should certainly be to keep your sector protected. Hold your ground, falling towards the coast and using the landscape for cover if things go really bad. Eventually (the time depends on how well your allies in the village are doing) HQ will radio in that the enemy are fleeing the area, and the mission is complete.
Note that if you are struggling with this section, consider replaying what is a fairly short mission by Flashpoint's standards to ensure you get a better complement of allies with you for the final showdown. It is also just worth retrying the last section repeatedly, as there is a large degree of randomness involved with how well the allies you do have alive perform.
Defend the beachhead village successfully
Achievement/Trophy: Tide's Out (Successfully defend the beachhead) Bronze/20G
Extras:
There is a lot of potential in this level, mainly because you can get in one of the AAVPs at the start of the mission. You can then joy-ride around the island, but of course, the other AAVPs are unlikely to survive with an entire squad less of soldiers supporting them. It is also risky to attempt to follow the other AAVPs, as you are likely to get hit by anti-tank soldiers. The mortars will rain down and take the others out if you don't deal with the spotters, and eliminating both the spotter teams and the AA teams are primary objectives, so cannot be ignored.
The easiest way is to follow the default structure, but this will be the first (and only) time you can drive an AAVP, so it's not a bad idea to have some fun in them on a repeat playthrough. Also, if you are struggling to get the achievement for taking out the PLA APC, start the level and focus on that goal solely. As soon as you get the Queen Bee from the first AT team, head for the APC and take it out as soon as you have the shot.
Summary:
This is similar to mission three in its difficulty and epic climax. You play as Dagger One Bravo and are tasked with taking out enemy armour to allow your own vehicles through, removing an infantry threat for the same result, and finally assaulting an airfield and defending it. This is quite a short mission, but gets very tricky towards the end.
Walkthrough:
Primary Objective 1: Destroy or Incapacitate two PLA Type 97 APCs
Time is important in this mission, as your convoy of vehicles and men are moving up at the same time as you – if they get too far forward before the area is clear, they will be taken out. To begin, sprint to the right of the concrete bunker ahead of where you spawn. Edge around it and look directly ahead down the scope of your rifle. You will see a single PLA manning a gun emplacement. Take him out from range and then sprint to the next RV marker, to the left of the emplacement and burning vehicle, and through the trees. There are no enemies in this sector. As you get to the burnt out jeep by the RV point, equip your SMAW Rocket Launcher with HEAT rounds. It takes quite some time to set up, and you also need to bear in mind that it takes just as long to reload or swap out for another weapon – so ensure you are in cover when you do it. With the SMAW equipped, edge towards the top of the ridge towards the (1) objective marker. On Normal this moves with the vehicles we need to destroy, so you can get a good idea of their location even while blind behind the hill.
Bear in mind here that you also have an anti-tank soldier with you, and it may be worth setting him to follow you or engage one of the vehicles himself so that you are not forced to reload and cost precious seconds. It is still very possible and indeed easy to take both out on your own, however. Pop your head up and use the infra-red scope of the SMAW to quickly spot and fire at the enemy Type 97s. They are likely to be very close to the ridge at this point, but you should be able to get your shot away and then back off down the hill to reload before they can hit you. Take out both tanks and then select your marksman rifle again. Be aware that sometimes a direct hit won't take them out, but keep plugging away and use your anti-tank team mate should you run out of ammo. As a rule, however, one hit should be enough.
Take out the emplaced gunner and then the enemy vehicles
This will complete the primary objective.
At this stage a helicopter will come flying overhead, and there is an achievement to be had for taking it out.
Achievement/Trophy: Hip Shooter (Destroy the PLA helicopter after taking out the vehicles) Silver/30G
Head for the next RV marker. Before you get to the small ridge just blocking the RV marker, prepare yourself for combat. From just behind the hill scan the buildings in the distance.
Secondary Objective: Fire Mortars on PLA Position in Ruins
You should then be radioed to confirm a mortar strike on the area. If not, move over the hill and down into the gun emplacement (it's probably best to leave your squad behind, as this is an exposed position). Either from here or behind the hill, designate the building call in a strike.
Note: Keep the mortar strike away from the main road, as it is not infrequent for your allies to move up while a barrage is raining down. Not clever.
Call in the mortar strike
This will complete the secondary objective.
Primary Objective 2: Take Control of the Control Tower
After this your vehicles will move in and head towards the airfield. You can now join them by following the RV markers. Once you get to the main road, be on the lookout for PLA soldiers. You will be told that we need to take out PLA spotter teams and head for the control tower, as they are calling in mortars on our troops. Once the assault starts you will have around five minutes to reach the tower before you will start losing vehicles. From the main road just north of the airfield (ensure you hit the checkpoint here), head south to a little concrete shack just inside the boundaries of the base. You can use this as limited cover. Shoot the explosive barrels by the long building further south, clear out any infantry who are exposed by this, and then flank west, keeping well clear of the open ground.
Here you should see allied troops moving in too. They are competent but slow, so it's worth ordering your squad in to take the brunt of the fire. Use the tents to the west as cover, and arc round towards the building we just made a hole in. There will be lots of PLA, many who may be prone on the runways or still inside the buildings, so proceed with caution. The wimpy route, if you fancy avoiding the burden of combat, is to head south, almost outside the boundary of the airfield and along a small bump in the ground towards the tower. You won't see many PLA here and your allies will push up rapidly to keep up with you. Continue to check your map to keep an eye on your allies' progress, and for the regular route, head south east towards the tents by the control tower. These provide ample cover for dealing with the PLA by the tower, and allow you to get a sight on it. There will be PLA in the windows and possibly some in the ground floor. Clear as many as you can see from range, and then send your team to assault the building.
Call in the mortar strike
Watch over them from the tents and pick off any PLA who show themselves. AI is not great in close-quarters, so you should have the chance to pick anyone off who surprises your squad. Of course, you may want to do the dirty work yourself, in which case break in the front door with your team in support.
Primary Objective 3: Hold the Control Tower Against Oncoming PLA Reinforcements:
With the tower clear you will be told to defend it from an impending PLA counter-attack. On the ground floor is an ammo stash which you should immediately raid for the Javelin missile launcher. Ensuring you hold onto your scoped M4A1 Marksman, pick up the Javelin and then head up stairs. On the first floor you will have a vantage point out of the windows of the road into the airfield from the north-east. Use your scope to examine the troops moving down the road and HQ will radio you with instructions.
Secondary Objective 2: Fire CAS on Incoming PLA Reinforcement Vehicles:
Make sure you hit the checkpoint in the tower, and order your men to defend it. Potentially six PLA APCs can enter the airfield and drop off troops, so this section is vital for ensuring the balance of forces stays on your side. The first vehicle comes in alone, and you will be told that you have fire missions to use on them. Keep watch on it, and when it stops as it creeps over the hill near the airfield to let its troops out, designate it for a fire mission. Not all of the APCs do this, but it's worth watching them. If they don't stop, do not waste a fire mission on them, as it does not track vehicles, just aims at the location you designate. They will stop later in the mission and we will have a second chance then. There is also an achievement for calling in your first air-strike.
Order a CAS mission on the incoming PLA vehicles
Achievement: Shock and Awe (Call in your first air strike) 20G
Secondary Objective 3: Destroy or Incapacitate PLA Attack Helicopter
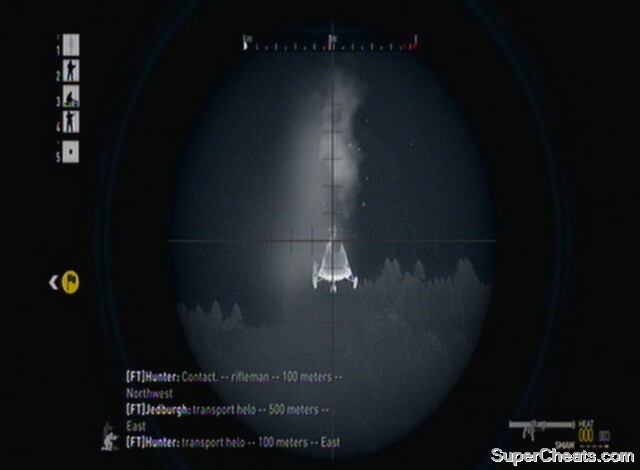
Soon, HQ will radio in that a PLA helicopter is coming to help out its buddies. This presents a very real threat, and the tower can be destroyed by its heavy weapons (in this situation you will usually survive, but your team will die and you will have lost a lot of blood and be surrounded by PLA – not ideal!). It takes a while to come in, but an objective marker will appear on your screen showing its distance. You can target it with the Javelin from extreme range, so get to the top of the tower early on and look north east to see it come in. Use your map if you can't find it. Scope the Javelin and wait for the square to be joined by a diamond around the helicopter, and let her rip.
Take out the PLA Helicopter
Destroying the helicopter will complete this secondary objective. As a secondary objective, you can in theory ignore the helicopter, but if it destroys the tower you will have lost all cover from the PLA. Once too many of the enemy come into the sector, the mission will fail. With the helicopter down, head back to the first floor and continue to pick off incoming infantry (restock your ammunition from the crate on the ground floor if your M4A1 is out of ammo). Also, use your remaining fire missions on any APCs left in the area, as the objective will not end if they are remaining in certain locations. An allied helicopter will join the fray to help out, if you completed the secondary objective of eliminating the enemy helicopter. The PLA will begin to fall back, and the mission will be completed.
If you start to get overrun, fall back to the extremities of the airfield to the south-east. As long as you snipe any PLA entering the tower-area, you should be OK and be able to complete the mission from here. If the Javelin ammo crate gets destroyed, you will have to miss the secondary objective and just stay out of sight of the helicopter.
Achievement/Trophy: Runway Relief (Capture the airfield) Bronze/20G
Extras:
You don't have a lot of freedom on this level until you get to the airfield. If you choose to save the mortars and not to use them on the PLA in the ruins before the airfield, not only will they take out some of your allied troops, but the game takes the fire mission away from you too – so you can't use it on the enemies in the airfield. You don't have to use the fire-missions on the reinforcements once you are in the tower, but clearly there's no point in saving them as there's no one else to attack! You get four fire missions, so use them wisely (there are naturally usually more APCs than fire-missions).
Defend the tower until the all clear is given
There are lots of gun emplacements in the base (as you will have noticed when you were assaulting it). These can be used to defend the area, but certainly as the human player you should be in the control tower, not least to trigger the checkpoint and collect the Javelin.
This is a level heavily reliant on vehicles and will be your first time driving one if you did the short version of Mission One and ignored them on Mission Three. The main priority is to assist Dagger One Echo who are pinned down by the PLA, then rendezvous with them to search for a missing helicopter crew. Once found, we are to extract them to safety. Unfortunately, it doesn't all go to plan, as you will discover during the course of the mission. This is a longer mission than Mission Three and Mission Four.
Secondary Objective 1: Support Recon Team Dagger One Echo:
From the start you need to be quick and act before Dagger One Echo and their pair of HMMWVs are taken out by the enemy. They are pinned down so we need to get there fast. You have two options. You can head up the hill and directly towards Dagger One Echo, joining their position and helping them to defend the jeeps. This is problematic in that the enemy are concentrating on Echo and their full attention is in one place. If you head along the road, to the left of the hill, you can flank the PLA, split their focus and get some easy kills while they are concentrating on Echo.
From the start head left along the road, and once around the bend, veer off and head diagonally north-east. Look at your map to spot the enemy, and engage them as early as possible. This draws the fire away from Echo and should delay any attempts by the PLA to fire RPGs at the jeeps. While it costs you the element of surprise, it may save the entirety of Echo. I recommend setting your team to 'move fast' to a position not far away from the enemy, just so they get their quickly enough. If you just ask them to 'move' or even 'follow', they may end up taking far too long to support you. Once close enough, set your squad to 'assault' any targets in range.
Assault the PLA attacking Echo
There should be three PLA in the first group. Once they are dealt with, target the team across the road to the east. There is a third team, further north across the road, but you don't want Echo to get taken out, so prioritise the closest enemies. With them down, head to the RV point and rendezvous with Echo. Pilfer the M4A1 (Marksman) from the ammunition crate, and man the jeep. Tell your squad to join you, as HQ let you know where the helicopter crew may be found.
Primary Objective 1: Search for Downed Crew:
Wait for Echo to move out, and follow them at a decent distance. The dust makes it hard to see them, but just follow them as best you can. Click the right stick to change the camera (you can't move it around). Once you get into the large field (you'll see some tracer fire in the distance) and see some buildings and gun emplacements, head for the left hand side of them as fast as you can. They shouldn't be able to fire down the hill at you too accurately, and the AI on the guns is fairly woeful. Once you get behind them, you'll be free to disembark and flank the soldiers for easy kills (they tend not to get off the guns to engage you, especially if you overtook Echo and the guns are firing at them still in the field). Watch out for soldiers in the buildings and on the road to the south east. Don't get complacent that the area is clear, and keep your team with you. Ensure you hit the checkpoint in the centre of this small hamlet. Echo will join you to provide assistance.
Get behind the gun emplacements in the village
Secondary Objective 2: Search Last Known Position of Helicopter:
There is also an attack helicopter, which makes it vital that you don't attract unnecessary attention, as it will take your squad and vehicle out in one volley. When you are happy, either get back in your original vehicle, or, if it has been destroyed, get in the PLA jeep parked across the road at the northern side of the village. Head to the next RV point from here. You shouldn't be engaged by any enemies. Once you get close to the two wooden buildings, stop and walk the rest of the way. Activate the checkpoint here, and use the scope on your rifle to examine the house to the north-east. You should spot a good deal of enemies, and HQ will radio you with more information.
They have some intel on a possible crash site, and you are also given permission to engage an AA site nearby, complete with an additional fire mission. It comes in more useful later, so you are better off to save it for then. If you lie prone you may be able to take out some enemies at the house with your long range weapon, but before long you will need to move up closer. Take your jeep to try and flank the guns if you couldn't remove the gunner. If you are having problems, disembark and engage them on foot – moving through the trees to the west is a good direction, though one of the guns will be facing you. Look at the map and try to move up with Echo team.
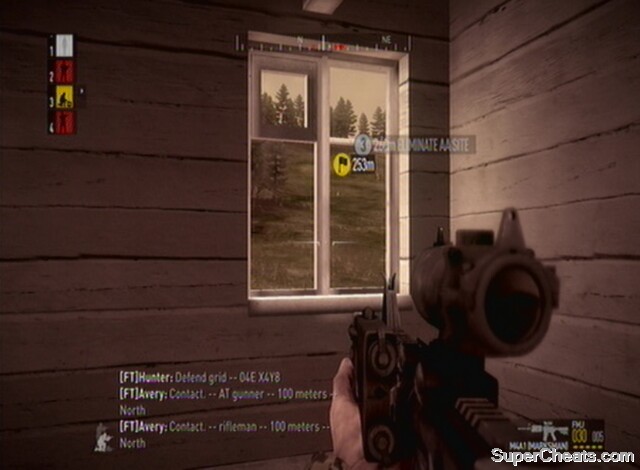
Use the house as cover from the helicopter and PLA infantry
As soon as you can, get in the house with your squad. Echo will push straight up the hill, but it's imperative that you get out of the open as soon as possible, as by this stage the enemy helicopter will almost certainly be bearing down on you. It can destroy the house, but as long as you keep your head down it is unlikely to spot you inside. After one barrage it will make another pass, and give you a little respite to find somewhere to hide. Ensure your men are inside the building as well, or they'll give your position away. Shoot out of the window at the enemies on the hill to the north, helping out Echo team. Order your team to move up once the hill looks clear (note also that if they will not stay inside the building, or the helicopter is coming down on you, it's best to split up and send them to assault, or you'll all be killed in one). There is an ammo crate by the house where you can restock. Remember to take you vehicle if you want, but it's pretty much exhausted its usefulness now.
Secondary Objective 3: Destroy AA Site
Eliminate any enemies on top of the hill, where the enemy AA site is, and the objective to destroy it will be completed (you only need to clear it of PLA, not destroy it). This means the PLA helicopter will withdraw, making things considerably easier. Activate the checkpoint on top and restock at the ammo crate if you need to. Head to the eastern side of the hill once this is done, and use your binoculars to spot the helicopter wreckage in the distance (at around 99 degrees). You'll be radioed concerning it.
Try and spot as many PLA as you can amongst the trees as you listen, and keep an eye out for a truck on its way to your position. Open fire on any enemies you can see as soon as possible, and hold position, prone on the hill, to increase your accuracy.
Fight down the hill to the helicopter wreckage
You should get assistance from Echo at this point, and it's a good idea to move down the hill if they begin to engage the enemy up close. Engage the troops in the truck and clear the area of PLA. With that done, move up to the crash site, which should now be clear. Once there, the objective will be completed, and a checkpoint will be activated.
Primary Objective 2: Rescue Helicopter Crew:
HQ will tell you that the helicopter team are engaged in a shootout in a nearby village. You have 50 minutes to reach them. From your position, you should be able to see a gun emplacement ahead, just to the left hand side of the road and due east. Take out the gunner from here (approximately 200 metres away). There is another emplacement on the right hand side of the road, and you should snipe that too as soon as possible. Engage the other troops at this checkpoint, and move in yourself. There is also a virtual checkpoint here that you can activate. Use the ammo crate to stock up, specifically getting the QBZ95 Marksman if you need more Marksman ammo.
From here, head directly east along the road, slightly away from the next RV marker. Before long a PLA squad will come into view near the road. Take them out from range and continue. Once you get to the entrance to the village, move down the right hand side of the buildings (west). Send your team to engage any targets in the centre of the village as you flank down the western side towards the helicopter crew. Pick off any that you can see, but concentrate on getting to the building. You shouldn't encounter too many soldiers, with most engaged in fighting your squad. Most of the enemy forces will be to the east of the village, so stay on your side and use your squad to divert attention and suppress. Once you get to the fence, hop it, and begin to move diagonally towards the RV marker and helicopter team. They have armed themselves and, if you have got there early, will have the PLA at bay. Once you get to the building, enter the door and remember to call your team back to follow you.

Secure the house and the helicopter crew will join your squad
Primary Objective 3: Sagely Extract Helicopter Crew
A checkpoint will hit once you get in, and make sure to equip the SMAW that you have been keeping for just this stage of the mission. Ensure the helicopter crew, added as a fifth team member, are following you, and head out of the building, moving to the south-west. Sprint as much as possible, but keep an eye out for enemy helicopter transports, which will now be arriving to drop off troops ready to engage you. The first will probably drop off its troops too early for you to engage, but the second is a relatively easy shot. Bear in mind that the absolute main priority should be moving as quickly as possible to the extraction point. Don't spend too long trying to shoot these helicopters down, but if you get the chance, certainly do it while you are near the village. Send your team on ahead to the next RV marker and extraction if you want to (the 'move fast' order is probably best here), as there shouldn't be anything more en route from here than they can handle.
Take out the transport helicopters if you get the chance
There will also be two enemy vehicles that come into the village, with a bonus achievement available for taking them out. Check your map and use the artillery strike and any SMAW rockets you have left to do it (ensure your team has been ordered to run to the extraction point), but unless you want the achievement, don't engage, as they should remain in the village and not follow you very far if you leave quickly.
Achievemen/Trophy: Hitchhiker (Destroy the vehicles that enter the village area) Silver/30G
Extract the crew safely
On the way to the extraction keep the pace at a sprint, and only turn around to suppress the enemies following you if you get into real trouble. You can stop and fight of course, but there shouldn't be any need if you do this all quickly enough. Once the helicopters enters your sector, it's objective and mission complete.
Achievement/Trophy: Sandman's Saviors (Successfully extract the helicopter crew) Bronze/20G
Extras:
With the length of this mission there are chances to go off exploring and attacking it from new angles. Specifically, you have a large area at the start of the map after having helped Echo team to explore. As well as the two jeeps that Echo guard at the start of the mission, there is the PLA truck in the first village you come to, and the truck that engages near the helicopter wreckage. You can snipe the driver and force the rest to disembark and then use this truck to assault the village, but without any weaponry it's pretty weak. One idea (untested) would be to attack the village from the back, where you eventually extract to, and leave the truck there. You could then, in theory, use it to extract the helicopter crew much faster. Of course, if you get hit then the whole mission is over, but it's a new possible take on the climax of this level.
Your initial jeep on the other hand has a mounted gun, and wouldn't be a bad choice to use to engage those at the bottom of the hill near the helicopter wreckage. You can send the helicopter crew running to the extraction point, as there are no enemies en route, and keep everyone busy in the village with perhaps 3/4 members of your squad. This will also allow you to take out the enemy vehicles for the achievement much easier.
Summary:
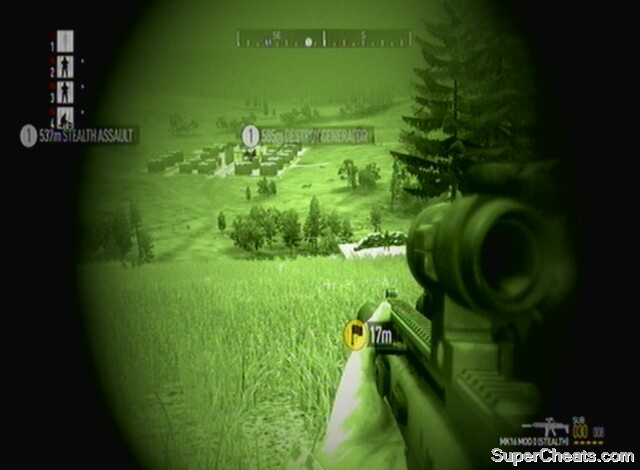
This is a very tough stealth level that culminates in a smash and grab assault on a fuel depot. As it is a sneaky stealth level, we are playing as Saber Two once more. There is only really one objective, to destroy the generator powering the depot, and then retreat to extraction. You do, however, have to get in position before hand so your allies can create a diversion, allowing you to sneak in undetected. If you don't the level becomes even harder.
Walkthrough:
Secondary Objective 1: Get in Position for Diversionary Strike:
The level takes place at midnight, so it's night vision primarily, though once you get to the fuel depot its light sources help out somewhat. From the start, head south-east towards the RV marker down the shallow gulley. As you come to a crest in the hill, crouch and ensure your team are set to Return Fire Only. You will be able to see a jeep's crew and an infantryman sharing a conversation. Once you can see it, the jeep will drive off and the infantryman walk in the other direction. Ignore them for now, but just bear in mind the activity of the enemy. You could take the soldier out once the jeep leaves, but it is imperative that the PLA do not raise the alarm, and firing any shots unnecessarily is a definite no-no. Move into the RV marker for a checkpoint, then head left up the hill towards the next one, remembering that the infantryman is patrolling the road below. Skirt slightly east just to make extra-sure you are not spotted from the west.
Watch the emplacement, but don’t go too near it!
You will be able to see an emplacement surrounded by sandbags overlooking the valley to the west as you approach the RV point. You will see a guard at this outpost looking out on the basin below. Ignore him, and continue on (albeit quietly), past the RV point (you don't have to get it if it will risk going too close to the guard, just continue on). If you switch to binoculars you can examine the enemy placements in the depot below. On the way to the next RV point you shouldn't see any enemies. You will, however, receive a note from HQ telling you of the need to destroy the generator before some fuel trucks can leave the depot. About 120 metres away from the RV point, look over at the radio tower to the south-east. Underneath it you will see two PLA soldiers. You can ignore this pair too, as they will be facing the depot. Rather than go for this RV point (unless you really want to engage the pair) head into the hills to the east, through the trees, then across the open ground into the next bunch of trees and finally towards the next RV point, which should now have appeared. As you hit it, you'll come upon a wooden shack. Inside is a single guard facing the depot. He's an easy kill as you can get within about 20 metres of him if crouched, but you may want to set your squad to 'Fire on My Lead' just in case you make a mess of it – just be sure to set them back to 'Return Fire Only' afterwards, as they revert to 'Weapons Free' once you open fire otherwise. With the lookout taken down, HQ will radio in and a checkpoint activated.
Stealth your way to the hut overlooking the depot, and take out the enemy inside
Move just to the left of the building and scan the depot. We'll be going in shortly. As you face the depot, look to the left – that is the route we'll be taking, through the eastern gate. The most important people to take not of are two patrols, one going south, past our gate and then into the field, and the other heading north, round the corner and towards the western gate. It is absolutely imperative that you wait until both are walking away from your position up on the hill before moving. First of all though, Saber Three have to make the diversionary strike. Once Saber Three radios in to say "The enemy is engaged and we're pulling as many away as we can…" the objective, to get into position for the diversionary strike, will be completed, and a checkpoint activated.
Primary Objective 1: Destroy Fuel Depot Generator:
You are now free to enter the fuel depot. Wait for the patrols to go into the distance, about 100 metres is fine in this light if they are facing away from you and you're crouch walking. A jeep to the south will drive off, signalling that you are clear to go.
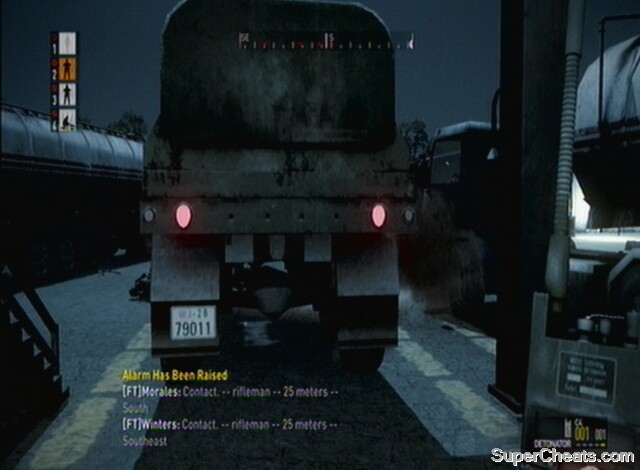
As you enter the eastern gate, stay low and head for the RV marker. Directly ahead (west) will be a guard facing away from you. You need to take him out. Go for a head shot and ensure your men are not on 'Fire on My Lead' (Return Fire Only is ideal), or else they'll shoot everyone in the depot at this point. Once you get to his body, there will be guards to the right (north) but who shouldn't see you if you are crouched. To the left (south) are the fuel trucks. If you plant C4 on the ones marked on the map (they are the active ones, with drivers in, so watch for their exhaust to pick them out), you will activate a bonus achievement. Use LT/L2 after you have planted the first lot of C4 to switch back to the explosive rather than the detonator – allowing you to plant more that will all detonate together. If the alarm has been raised, there will be guards around them, so watch out. If you don't want to bother with this, head for the generator inside the wire fence, just behind the guard we killed.
Plant C4 on the two fuel trucks that look like this to and detonate (later!) to get the achievement
It may be best to plant C4 on the fuel trucks first, as you are less likely to be spotted by the guards to the north doing this, leaving you more time to escape. Otherwise, plant C4 on the generator. At this point, you want your team to be following you. Exit the generator enclosure, turn left, and then left again. After the first left you will be looking straight at the northern guards, but ignore them and, if they haven't spotted you, crouch walk out of the depot. You could try doing this prone for extra security, but in the time it will take you to get out someone is bound to have looked in your direction. If the alarm has been raised, you just need to sprint out of the gate, as the entire PLA army is heading your way. Note, the video for the entry, escape and extraction can be found below.
I personally found it nigh on impossible to avoid raising the alarm (as you'll see in the movie below) but it is certainly doable. It will depend on the positions of the guards at your checkpoint in the diversionary position, so you may want to hang back up there a little for them to change locations if you want a different angle on it. There are patrols, for example, circling the depot, and if one happens to be timed on your exit, things can get hairy. Be aware though, the fuel trucks are on a time limit.

Plant C4 on the generator and get out of there!
Once you have made the second left, sprint/crouch walk depending on your alarm status until you are nearly at the edge of the depot. In the field to the right there may be a guard (depending on patrol routes). If the alarm is still silent you may be able to sneak all the way out, but just be aware that you are not home-free just because you've left the depot. Note also that when your team is under fire, they move a lot more slowly. If you want them to hurry you'll have to ask them to move fast, but it will greatly risk their health.
Once out in the field, about 50 metres from the depot (you need to be heading directly north-west), blow the generator and fuel trucks (it will all go at once) if you C4'd them.
Achievement/Trophy: Fuel the Fire (Destroy the Fuel Trucks) Silver/30G
Primary Objective 2: Rendezvous with Team at Extraction Point
Here you get a blissful checkpoint, meaning the depot will forever be behind you (depending on your difficulty setting). Sprint for all your life directly north-west. Be aware though, unlike the last mission, we are not out of the woods yet. If you didn't have the alarm raised before, it certainly is now! As such, it is best to take a circuitous route to the next RV marker, flanking away from the depot. Try to stay out of enemy sight, but ensure you at least crouch-sprint or the extraction chopper will get shot down before we get there. Unfortunately, an enemy Spec-Ops team is now en route to your last know location too. You can avoid them, but in all the aggro of getting out of the depot, they're probably already looking straight at you. Other enemies may come in dribs and drabs (ensure you are moving quickly enough that those in the depot can't get to you) from the extraction point to engage you, or from their original patrol routes around the depot, if you're making too much noise. You will really need to take out anyone in your path, if they've spotted you, and you do have a little time to do so.
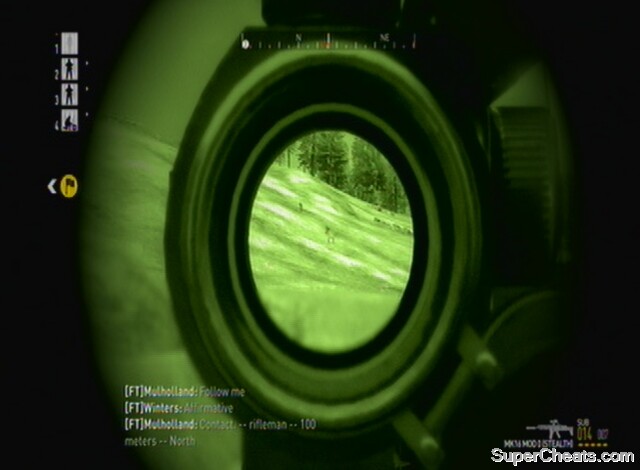
Take out or avoid the Spec-Ops team
As you approach the hill towards the extraction, deal with enemies at range. Enemies may be coming from both sides of the hill, so use the rocks in the field for cover, and order your men to engage one side while you take the other. Once it seems clear (ignore any enemies behind you as long as they're over 100 metres away – remember unless they're spec-ops they won't have specialist night equipment) head up the hill and a checkpoint will activate. At this point I lay some smoke grenades behind me (use X/Square to change grenade types) to prevent us getting sniped from the soldiers chasing us. If the area ahead looks clear so you have some time, it's not a bad idea. Continue on.
It is worth flanking to the left (west), up the hill and come down onto the extraction from above. In the recorded playthrough below, all the soldiers at the extraction ruins came to engage us on the hill. However, depending on your speed and stealth, the extraction may well have enemies in it, and it would not be a nice place to die (particularly in co-op or Hardcore with no checkpoints!!)
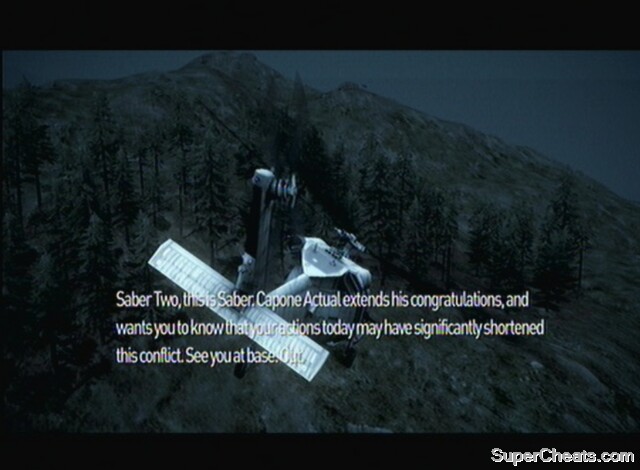
Proceed into the extraction zone with care (consider sending your team in first) and once it says LZ secured in yellow writing at the bottom, you should be fine (though watch for anyone coming from the depot direction [south]). Hit the RV point and once the helicopter lands order your squad on board. Join them to complete the mission.
A complete video walkthrough from the diversionary strike location to the extraction point
Achievement/Trophy: Fly Away Peter, Fly Away Paul (Safely extract from the area) Bronze/20G
Extras:
Despite being a stealth-mission on paper, it is very possible to complete the entire level without sneaking past a single guard. From the start you can engage the jeep and guard, and continue on in this vein. Obviously if you do this you will have all the PLA in the map on you as soon as the alarm is raised, including the Spec-Ops team. An upside of this is that you're not going to get surprised by the alarm suddenly being raised. Indeed, the enemies will thin out before too long. You will have to encounter enemies in vehicles who will attack you from the depot, too.
Another positive of a heavy-assault mentality means you can take the unoccupied vehicle from inside the depot to make your escape (remember to blow the generator though) or find one in the surrounding area and not have to worry about burdensome stealth. You can drive all the way to the extraction, but remember to watch out for the enemies by the ruins. One nifty idea is to raise the alarm early and quickly enter the depot. The sooner you do this and requisition a vehicle, the higher the chances are that the Spec-Ops team, and indeed most of the enemy force, will be caught in the middle as you speed out. The problem with not killing most/all of the PLA is that they may take out your vehicle and kill your entire team.
Get to extraction, using any means necessary!
It's also a good idea to follow the RV markers even when using aggressive tactics. This will allow you to hit the checkpoints as normal and provide you with a backup.
Summary:
This is a fun all-out attack level after the last stealthy affair. We are supported by a large force of US Marines and vehicles against an even larger force of PLA and emplaced guns. The aim is to break through their defensive lines and secure the fuel depot.
Walkthrough:
Primary Objective 1: Eliminate AT teams covering the road
As with some of the earlier missions, we need to prevent the enemy from taking out our allied vehicles, which will move up just behind us. So it's us against lots of anti-tank soldiers. From the start, run to the first RV marker, and then on towards the second one. Stop behind the white car in the road en route. From here you should be able to pick off the PLA in the distance with your scoped weapon, they will be by the RV marker. Watch out for the AT gunner specifically, as you need to remember where he falls. Once the horizon looks clear, move up to the next car (in the middle of the field). Do the same to the next one, by the barn, and finally progress into the trees if all is clear. Allied troops should move up with you at this stage. Ensure you try to locate the downed AT gunner and pick up his Queen Bee, as this will come in handy later. There is also an ammo crate here.
Secondary Objective 1: Eliminate MG nests
Hit the RV marker and move up the hill, out of the trees. Bear slightly right away from the next RV marker. In the distance you should be able to see an objective marked as MG Nest, approximately 280 metres away and directly east. You can snipe the gunner from here – take your time and don't be afraid to keep plugging away until he drops. At this range you need to aim at least one marker above his head to make the shot. Just to the left of this first emplacement (north) is another soldier dug in at an emplaced gun. Use your long-range tactics to take him out.
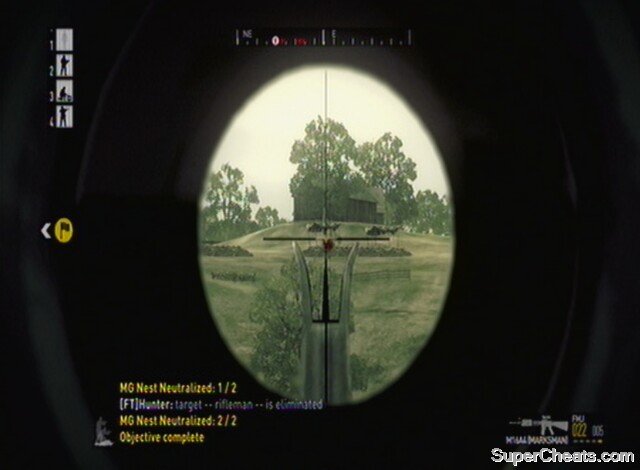
Take out the MG nests
Good, that's the second MG nest done, and the secondary objective ticked off. Now head for the next RV marker, by a small emplacement. Once you get there, edge over the crest of the hill and scan in the distance for PLA. This is the front of their first defensive line. Move through the trees and more and more enemies will come into sight on the horizon, including an anti-tank team behind some sandbags. Once HQ tells you the assault is beginning, you need to hurry it up and find the next anti-tank team. Move down into the gulley and then up the other side to the RV marker. To the left (east) you should see a sandbag emplacement. You are now in a good position to flank the AT team in place there. Take it out, and then backtrack somewhat (use the map) to get the checkpoint in the trees near where the RV marker was. The next RV marker is also in this direction, so proceed towards it through the trees. Watch out for PLA in the forest.
Primary Objective 2: Locate and eliminate PLA spotter team:
Proceed through the next RV marker, and then get to within about 50 metres of the following one. From here, you should be a little over 200 metres away from the PLA spotter teams as indicated by the objective marker. Use the trees and terrain to attempt to take them out. Move up to the stone wall ruins if you need to get closer. You should be able to hit both the first spotter team and any other PLA on the ridge from below, just be patient and wait for them to show themselves. Move up the slope if you have to.
Secondary Objective 2: Locate and eliminate PLA AA team:
There are also AA teams in the area causing problems. These should be taken out too, but you'll probably have to get right to the top to be able to engage. The first are quite deep in the woods, so it may be worth sending half your squad to engage them, while you go and deal with the next lot further along the ridge.
Head along the treeline to the north-east, and take out the AA soldiers at the emplacement there. Hopefully by now your team will have dealt with the others, and you can call them back to follow you. You should also now be able to see the third AA team, even further along the ridge. Move up to the emplacement where the PLA were and you should see the next spotter team (combining two into one), directly north, and the AA team, north east. HQ will radio in confirming you have a fire mission to use, so call it in on the spotters. Aim it in between the soldiers there to take them all out in one. This will complete the objective of taking out all the spotter teams, unlock a checkpoint, and give you an achievement, if you took all four soldiers out in one, that is. Note, the best type of fire-mission to use is a barrage for this.
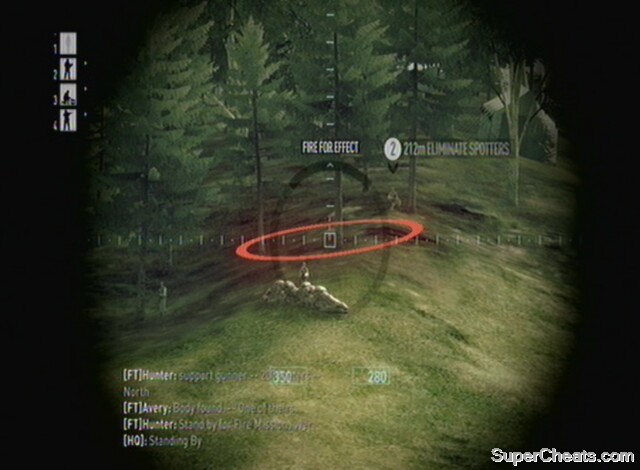
Use a fire-mission to finish off the spotters
Achievement/Trophy: Ruthless Efficiency (Take out all the soldiers on the hill with one fire-mission) Silver/30G
Now you can head down to the next RV marker and checkpoint. There is a jeep in the road which we'll need shortly, but first engage the AA team in the trees to the east. With them down, the final AA team will be highlighted with an objective marker. Engage this group of PLA, who should be in the trees to the north. With that, the objective will be complete and confirmation that air support is now inbound will be received. Now head back to the road and jeep. Order your team to repair it, then climb on board and head along the road. Speed along onto the dirt track and up to the next RV point.
Primary Objective 3: Destroy key defences around the fuel depot
Get out around this area, near where the two structures are. We are now right up on the fuel depot. HQ will give the all clear and a checkpoint will activate. You need to watch your fire in this area because, as you may expect, the fuel is highly flammable. Smoke grenades will be popped between you and the depot, but if you picked up the Queen Bee from earlier, this has a sight which allows it to see through. Head around to the right (east) to the area where all the PLA are dug in. Use your Queen Bee to blow up any emplacements or groups of soldiers you can see. You will have to fire above them in order to hit, by a couple of lines on your scope.
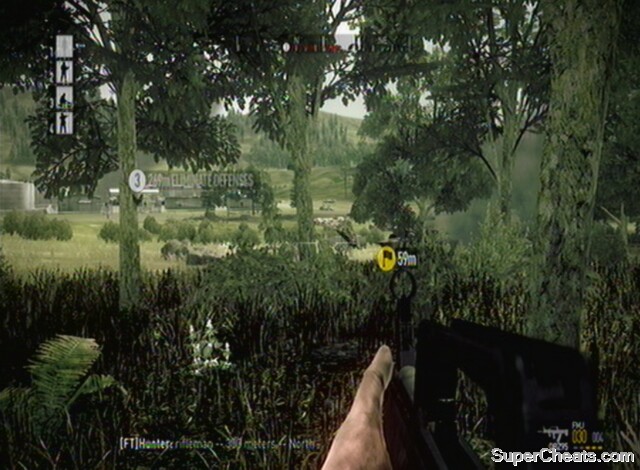
Head around the side, following the RV markers
With your ammo gone, head east, through the trees, to the burnt out vehicle and your next RV marker. There is a long overdue ammo crate in this area too, against some concrete blocks. The QBZ95 Marksman is a good choice. From these blocks you have a decent position to pick off the PLA in the field ahead. As you take out the PLA you will see the PLA Defences Neutralised counter increasing. With all five targets down, move into the field and mop up any stragglers as you head for the RV marker. Stay in the trees until the field looks clear, keep a particular eye on the buildings, as there will be PLA in the windows there. Order your team in to assault the nearest building, and use the map to locate any PLA left over. Once the last PLA in the depot is down, the level will be completed.
Attack and secure the fuel depot
Achievement/Trophy: Resource Management (Secure the fuel depot) Bronze/20G
Extras:
The only vehicle on this map is the one we will be using to join up with our convoy and head on over to the fuel depot. As such, there are not many different ways to play it. You need to eliminate the spotters and AT soldiers or the convoy will be destroyed, and you can't take your vehicle all the way into the fuel depot as there are AT soldiers all over the place, not to mention emplaced guns, and so you really do have to disembark before hand. The map is still quite large, however, so it's worth taking advantage of your time in the jeep to explore the area on repeat play through.
Summary:
This is a beast of a level whereby we, as Saber Two, have to extract a USMC team taken prisoner by the PLA. We have to locate and then break the POWs out of a convoy as they are being moved away from the front line in this conflict. From there we need to get to the extraction point safely.
Walkthrough:
Primary Objective 1: Rendezvous with POWs:
First off, set your team to Fire on My Lead. Next, move towards the RV point. Once you get within about 70 metres of it, someone in your squad should have spotted the two snipers, holding position right on the RV point. At about 40 metres you should be able to see them yourself. They are facing the other way, so you can get this close without being spotted. Ensure you are crouched and, once you have a clear shot, pick off whichever sniper is easiest. You could use a grenade from your rifle's launcher, as this will clear out both enemies, but it also blows up the ammo crate within. If you choose the explosive option, flank round so you can fire it through the door. If not, take out the first sniper, and your team will then go weapons free and take out the other.
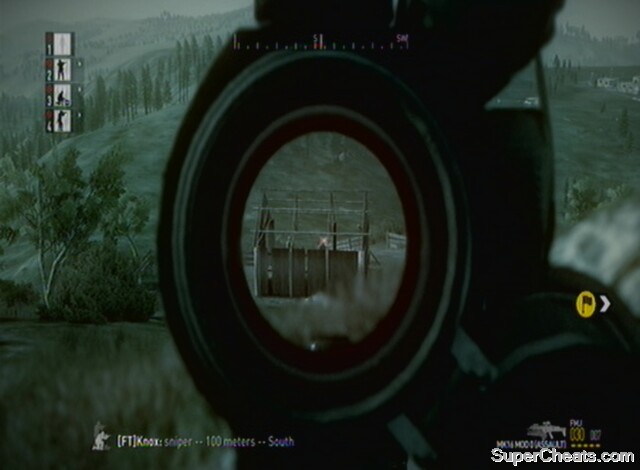
Take out both snipers
Scavenge the QBZ95 Marksman from one of the snipers, and then get even more ammo for it from the ammo crate inside the hut, if you didn't destroy it. This will be more than enough ammo for the rest of the mission. From here, sprint to the next RV point. Ignore the activity at the base to the south-west, as we won't be going in that direction. Continue on to the RV point as well. This is where the POWs are. They have armed themselves, ever resourceful as the USMC are, so get into a flanking position and go and help your allies out. The PLA are pretty low to the ground, using the ruins for cover, so make sure you don't walk on them as you are searching. Move in and take them out, using your squad to assault them.
Help out the POWs and integrate them into your squad
Primary Objective 2: Extract POWs
Secondary Objective 1: Remain undetected until the end of the valley
As before, with the helicopter crew, the POWs are now your fifth team member. Set them to follow you. Also, put your team to Return Fire Only so they don't draw unnecessary attention. This is a difficult period of the game, where we are basically running away from the PLA as fast as we can. Unfortunately, they will be dropping in Spec Ops teams via helicopter to chase you down. Once you pass through the next RV point, you will see a helicopter landing. Curve away from it to the west, while still heading for the next RV point. They can't sprint any more than you, so as long as you get a bit of a head-start and don't stop for too long at once, you can outrun them. Just be aware when fighting enemies ahead, that you may have to deal with some behind too. You could engage them as soon as they land (or try to shoot them down), but more teams are en route, and time is of the essence. Also, there is a secondary objective for remaining undetected, which you may well want to get. You should be able to make it the long distance to the next RV marker without having to fire a shot. Once there though, proceed onwards with caution.
Ahead is an emplacement staffed by a pair of enemy rifleman (one may be out of sight). Once close enough, pick the first off with a headshot, and the other will come into range. Do the same to him. If you managed to remain undetected throughout this valley up to this point, you will complete a secondary objective. This makes everything easier, as you now have a good head start on the PLA teams.
Towards the next RV marker, about 100 metres out, you'll see a farmhouse and get a checkpoint activated. There are two guards out of sight to the northern end, and, if you managed to remain undetected, the will be unaware of you sneaking up on them and so are facing out onto the valley. Head to the left (west) of the farmhouse. To the right around the corner of the building are the enemy, so ready your weapon (a grenade from your under-rifle launcher is good here) and take them both out on sight.
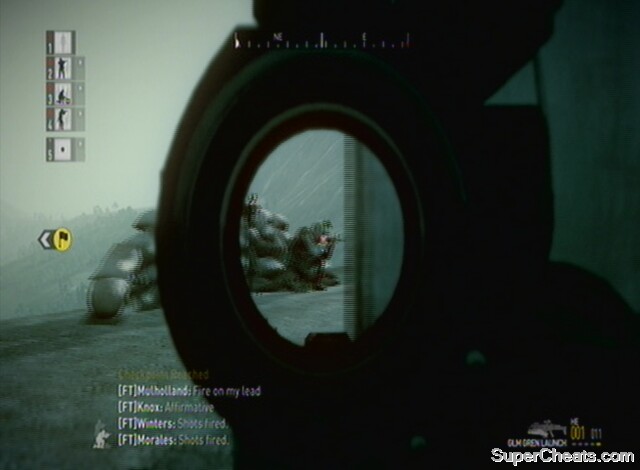
Deal with these guards, and prepare to be hit from both sides by PLA squad
By this stage the PLA Spec-Ops team are probably pretty close to you. It is worth defending this location until you clear the immediate area. Set half your squad to defend the rear of the building (keep the POWs safe, but they can look after themselves to some degree) and the others to mount the gun emplacement heading north and defend that end. An enemy squad is inbound from that direction too. Use the map to keep an eye on both sides of your position. Once both sides are clear, sprint to the next RV marker. You can make it all the way there without seeing any PLA, so do this to activate a checkpoint. Remember to make sure your entire squad are following you, including the POWs!
The end of the level is near now, but it's no walk in the park. Head up the hill towards the next RV marker, and you'll come in sight of the base. Unfortunately, rather than using the empty ruins that we just passed for extraction, HQ have decided to use an enemy base. So we need to clear it, keep the POWs alive, and then extract. Once at the top of the hill, survey the scene and check your map. You have two real options here. You can either assault the base with your entire squad, including the POWs for their extra firepower, but will almost certainly lose some of them as a result, or, if you want the achievement for rescuing every one of the POWs, you are advised to put them in the woods somewhere safe, and head into the base supported by your squad members alone. This is what I recommend for this section. Note that there is a video for the move to the base, dealing with the PLA and securing the area for extraction below.
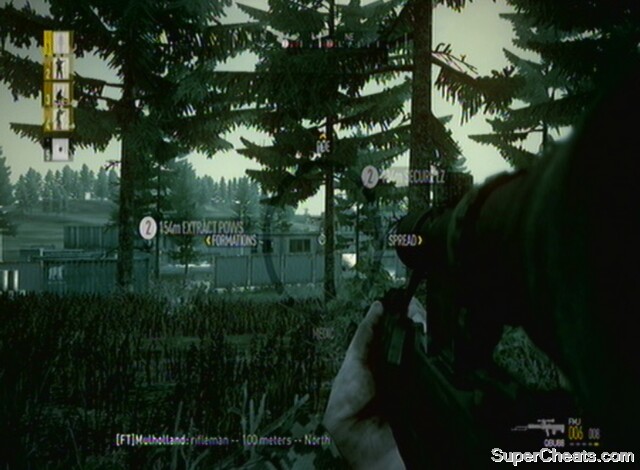
Move up to the base stealthily
Secondary Objective 2: Clear the landing zone before further reinforcements arrive:
Ensure your entire team is set to Return Fire Only, or Fire On My Lead, as we're going for a stealthy approach here. Gather everyone near the RV point. Stick to the trees and you can comfortably get within around 100 metres of it without being spotted. Leave the POWs here, in the dip in terrain so out of sight. In the example video below I had them come in a couple of minutes later to the holding position, just in case it was too hot around the base. Move forward so you are within range of the PLA you can see in the base, and set your team (that is your usual three squad members, not the POWs) to weapons free. Now all hell will break loose. Use your map to direct your squad into the base as you pick off anyone you can see from range. Time is important here, as enemy reinforcements will arrive if you take too long. You don't need to rush, necessarily, just don't dawdle.
Keep a particular eye out in the upper windows of buildings, as there are enemy snipers in the base. Once near the centre of the depot, order your squad to assault the main building. The AI are far better at assaulting buildings than human players, though you may lose a couple of your team in this encounter. Cover your team's backs from enemy riflemen as they assault the building, and once the text 'LZ Secured' appears at the bottom of the screen, feel free to order the POWs to 'Move Fast' to the extraction point. The helicopter will now arrive, and you can order everyone left surviving on board.
Attack and secure the base, and extract the POWs
Achievement/Trophy: Heroic Rescue (Successfully extract the hostages) Bronze/20G
Achievement: Perfect Rescue (Successfully extract all the hostages – note that you also get the Heroic Rescue achievement for this) Silver/30G
Extras:
This level again, has no vehicles in (except helicopters that you can't get a hold of). The only section where you really have free reign is in the choice whether to remain undetected in the valley or not. You can feel free to shoot down the Spec-Ops helicopters as they come in, and hold up at the farmhouse to have a stand-off with the PLA. Once you get to the base at the end, you can try to snipe the inhabitants from range, but it will take you longer to get there after the alarm is raised, meaning there is a greater chance of reinforcements coming in.
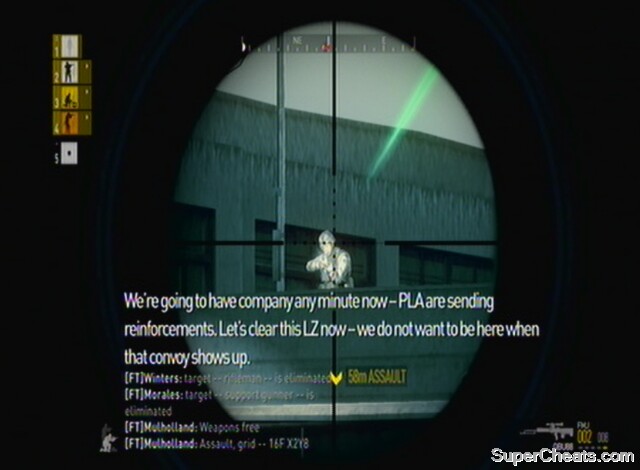
Pick off the snipers before they do the same to you!
You can have some fun with the reinforcements though. Try laying mines and setting an ambush for them.
Summary:
Not for the first, time, we have a fun, aggressive mission after that stealth 'em up one at Mission Eight. It's a long one, however. Back in the shoes of Dagger One Bravo, we take on the familiar task of ensuring our vehicles make it through various anti-tank defences, culminating in an assault on a monastery where the PLA are penned in.
Walkthrough:
Primary Objective 1: Ensure M1A2s clear the first checkpoint:
Unusually we start with a vehicle, but before you embark and get your squad to do the same, get a M4A1 Marksman from the ammo crate by the sandbags once the dialogue has played out. Once in the humvee, drive up the road and past the tank convoy, codenamed Gridiron, that we are protecting in this mission. Pass through the distant RV marker, and then disembark at the next one, just ahead by the bushes. From here, you need to run forwards to the logs at the next RV marker. It may be worth leaving your team behind for this bit. You should activate a checkpoint en route. Direct fire-support on the enemy anti-tank vehicles on the hill in the distance. There will be two in plain sight, and another to the right which you may have to move to see clearly. Thankfully we have plenty of fire missions (nine), so don't worry about taking multiple targets out a once. Designate these targets and then take cover. They can kill you in one shot if you're too careless!

Order fire-missions on the PLA vehicles
There are also enemy AT teams on the hill. You'll have to leave your cover to get a clear shot on these targets. Scan the hillside and order in three more fire missions to take out the three AT teams (south, north and near the vehicles we destroyed earlier). If you get the message that Gridiron is rolling and you haven't taken out the AT teams, it may be an idea to get back in your vehicle and drive around to take them out quickly using the emplaced gun. You run the risk of being blown off the ground, but it's worth it for the sake of keeping the tanks alive. Objective markers should also help point you towards your next target.
When all are taken out, drive through the next two RV points. You will hit a checkpoint at the second, as you come into view of a depot ahead. Head up to the off-road RV marker and disembark. From here, use your scoped weapon to pick off any enemies you can see in the depot and the hills nearby. You can take your humvee in closer, but there are anti-tank soldiers in the vicinity and they will be able to take it out. High priority targets include gun emplacements guarding the entry to the depot, and any AT soldiers you can spot. Gridiron will roll on past, and you should remember that it will be moving along the road into an area full of enemies – time is important here to avoid them getting destroyed (there is an achievement for keeping all members of Gridiron alive). Move up through the area with your allied forces (check your map to spot them). Head through the RV markers and then up into the trees.
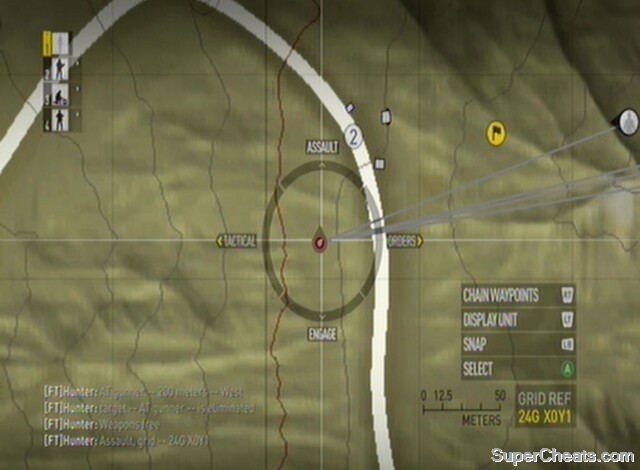
Push up the hill to get to Gridiron
Primary Objective 2: Destroy PLA AT defences:
You can proceed into the hills using the foliage for cover. Continue until you are about 120 metres from the RV marker that is at the top of the hill. You should be able to see the gun emplacement ahead. Snipe the two soldiers taking cover inside it. Move up with good haste, and pick off the PLA around the road above. There will also be a team moving in to reinforce from the hills even higher up. Order your squad to engage any PLA further south, as these are the ones that will present the initial threat to Gridiron. It's a good idea for you to flank north away from danger, but use your ranged weapon to hit the PLA in their sides. Once Gridiron make it through, you'll receive your reward.
Fight through the fuel depot and keep Gridiron alive
Achievement/Trophy: Keep 'em Rolling (ensure the entire tank convoy survives the first checkpoint) Silver/30G
Now you can head up the road to the north through the next RV marker and a checkpoint. You may be concerned to hear that we are now entering an enemy mortar zone, which means if you stay still or slow down for too long, you will be blown off the ground. Once the 'Oorah' rings out and you hit the next RV marker, you need to watch out in the skies! Ahead and to the west of the second RV marker is a small hut with a guard inside and another two nearby. Take out the occupant and his allies.
Tip: You can use previous PLA positions to avoid mortar fire as even the enemy regime won't bomb their own men.
There is also an ammo crate inside the hut with a M4A1 Marksman. Sprint towards the next RV marker. When you are about 210 metres out, look down your scope and pick off the enemies holding position by the RV marker. Remember, keep on the move to avoid the mortars. The enemy will be covering by some logs. Clear the area and hit the RV marker and checkpoint. Rather than heading straight for the monastery, it is advisable to go for the AAA vehicles which are preventing us from being able to use air support. Move down the road to the next marker and an ammo crate, and then on to the next one to the north-west. En route to this one, there will be enemies in the road at this next marker, so stay on your guard. With them taken out, hit the marker but rather than heading up the hill to the next one, continue along the road to the north.
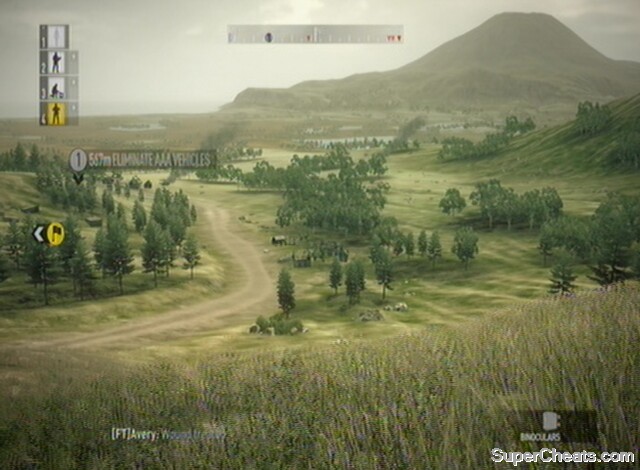
Head to the village and its ammo crate
Secondary Objective 1: Destroy AAA vehicles for CAS mission:
This is the way to take out the AAA vehicles. In the village ahead, just off the road to the right, is an ammo crate with a Queen Bee that we need to take out the vehicles (if you haven't picked one up already). The village is also guarded by a few PLA soldiers. Once in the base, locate the ammo crate by the road, and get the Queen Bee. Continue on along the road to the north. There are enemies guarding the AAA vehicles, so cut the corner just before them by heading up into the hills on the left and use the height to your advantage to take out the pair of PLA guarding them. From here, you will also be able to get a good angle on the first AAA vehicle.
You will probably need more than three Queen Bee rounds to take out both vehicles, but there is more ammo for it in the ammo crate by the unoccupied jeep in the village. Once the first one has been destroyed, do the same to the second, just behind the buildings in a field to the north-east. Use your map if you're struggling to locate it. Remember too that the mortars are still trying to get us, so as soon as this is done and the objective is ticked off, get in the jeep. This will unlock a checkpoint and allow fire support (automatically called in by the AI) to reduce PLA numbers in the mountains above.
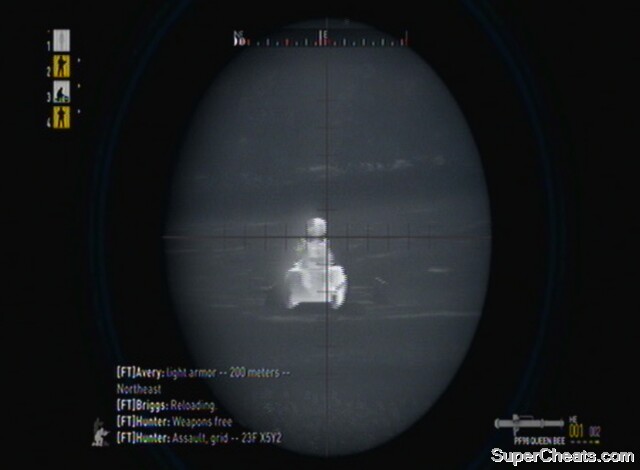
Take out the AAA vehicles
Primary Objective 3: Eliminate PLA mortar site:
HQ will inform you that in 15 minutes the assault on the monastery will begin. We need to eliminate the enemy spotters to render the mortar team useless, before our tanks get taken out. Drive the vehicle up the hill, off-road to the west. Be very careful not to get stuck on any rocks, as not only will the mortars train in on your location, but it will dramatically reduce the speed with which you can get to the monastery if you lose your vehicle. Meet up with the RV marker near the stone building, and then head up further on to the next one, which is back onto a road. Drive between the ruins that flank it, heading west. On the corner before the next RV marker will be PLA, who your allies may be fighting on foot, and a checkpoint. You can run a few of them down on your way to the next RV if you want, though if you want to be certain that you don't get any nasty surprises you should disembark and take them out on foot. On the next straight of road is an enemy jeep and PLA, so either disembark and fight them or drive straight past. It is not a bad place to resume on foot, in fairness, as you can use the edge of the mountain, to the right of the road, to protect you from enemy fire from further above. There is also an ammo crate here with a Marksman rifle in. Carry on through the next two RV points. At the second, get low and look up towards where should be an objective marker designating a spotter team.
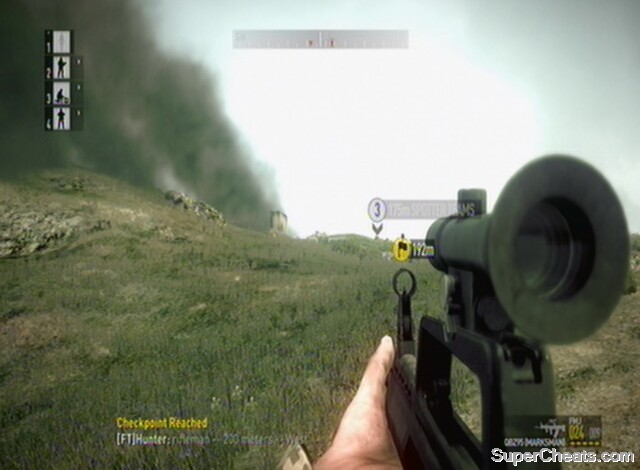
Move up towards the monastery
The monastery assault is now beginning. Proceed very slowly, picking off one PLA at a time from range. As well as enemies further above, including a spotter team, once you move up slightly to where the road bends round, you will also be engaged with enemies to the south-west. These guys should, if your allies made it, be fighting some USMC soldiers, and you can continue directly up to the west. Don't be afraid to help out your buddies though. Once you get to the top of the hill at the RV marker you will be told to prioritise the spotter teams, meaning pretty much all the other PLA that can threaten you are now eliminated. Be careful though, without the undulating terrain you are a much more open target.
Continue west and head around the back of the monastery, along the cliff-edge. The final RV marker thankfully isn't that far away, and once you have rounded the edge of the monastery you will have eyes on it in the distance. Use your Marksman rifle to take them out to complete the mission and allow the siege of the monastery to go ahead.
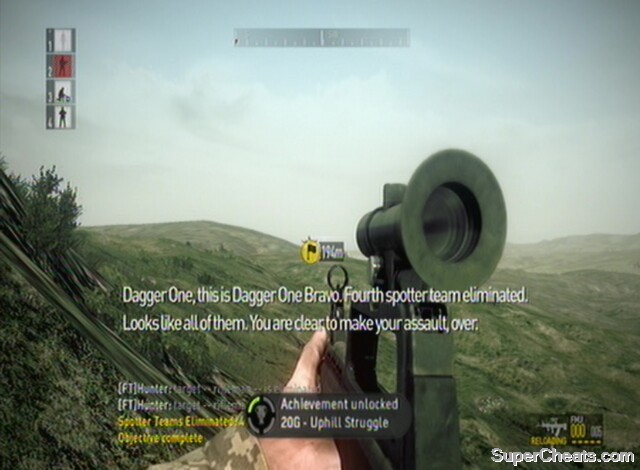
Pick off the final position
Achievement/Trophy: Uphill Struggle (Kill all the spotters to render the mortar team useless) Bronze/20G
Extras:
This is a huge map focused on the large hill, and you can, at certain times, go off the beaten track to explore on your own. You can choose to tackle the fuel depot in numerous ways, for example driving around the road in your fast jeep and attacking it from above, though clearly you risk losing members of Gridiron.
Once the final push towards the monastery begins, you can take literally any path up to the monastery. Try fighting alongside your USMC allies for a different take on the level, as they battle against the other side of the monastery than recommended above. Once you get the vehicle near the AAA units you have a lot more freedom for exploration, so make the most of it! Following the roads is ideal, but it is certainly more fun to go off exploring.
The basic map of the area, with road layouts
Summary:
This is an absolutely stunning, though short, level, which I personally completed using only firing five bullets (and one of the missed). So, there are four enemies to (directly) kill. It is also pretty much my favourite mission in the game. It is a stealth level and we are back in the shoes of Saber Two. You could do it in a much more gung-ho manner, but it's clear that this is the way the level is designed to be played. Indeed, you could probably do it without killing these four PLA soldiers. The mission is to destroy a vital radio station for PLA communications, but it escalates to involve observing and eventually eliminating a PLA VIP. We then high-tail it out of there.
Walkthrough:
Primary Objective 1: Neutralise the radio station by any means:
From the landing on the beach (remember this location, as it is also our extraction later), head to the RV marker nearby. Up on the hill, by the next RV point, you can spot a PLA soldier with your scope. He is on his own, and this is the first of the four kills. If you aim to line his head up around three lines below centre on your scope, at 400 metres out, you can make the shot in one. This is one of the coolest shots in videogaming, if you make it. It's a pretty high powered rifle, so any shot to the head or neck will take him out in one.
Make the shot
With the PLA down, head on all the way up to the next RV point and ensure your team are set to 'Return Fire Only'. If you don't feel confident enough to snipe the guard, just use the stealth tactics we've covered before to get within around 200 metres of him, and the shot is much easier. Your squad mates can also help you out if you put them on 'Fire on My Lead' at this short of range. Remember, we have night-vision and Spec-Ops guns, and the PLA generally don't, so you can get pretty close (though there is some light on this level).
On your way to the high RV point you will be radioed and informed that HQ believe General Han, the second in command of the PLA forces, is in the area. We need to go and check his identity from range. Get all the way up to the shack by the RV marker. From this point, look to the south-east and you will see General Han's helicopter coming in. Keep your binoculars trained on him. Remain crouched as Han flies overhead and then lands in the valley below as a truck drives past. Han will then enter discussions with other PLA on foot. Keep monitoring them, and HQ will radio for confirmation of the VIP's identity. We do have permission to engage, if the situation deteriorates, and you can complete this mission by taking Han out at this stage and skipping to the radio station section. It's a hard way to do it though and is not recommended.
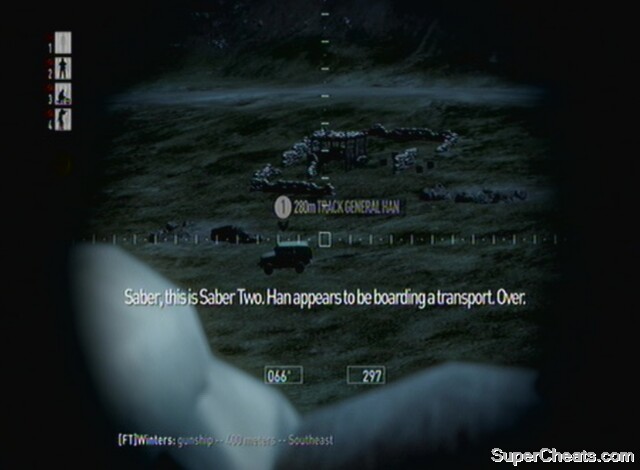
Keep watch over Han
Secondary Objective 1: Observe General Han's movements:
Han will now get in a truck and drive off. Keep an eye on him, and remember that the objective marker will follow him across the map if you lose site of him. Leave your emplacement and head north-west along the ridge. It helps to have some idea of the PLA in the valley below, but we won't be engaging them so it's best to ignore any enemies at this stage. Follow the ridge up into the hills to the next RV marker. Activate it and get the checkpoint in the ruins. Move to the eastern end of this outlook and spot Han with your binoculars. You need to train your binoculars on him while he is stationary here and get confirmation from HQ before he will move on (unless a timer elapses, in which case you fail, but it's set at five minutes so you should have plenty of time). Stay trained on him as he moves on foot – you will have to move around your position a little to see him get in a jeep and leave. HQ will confirm it. You don't need a good line of sight to trigger his movements.
Han will drive down the road and turn left at the fork ahead. He will then stop at a building and disembark. You need to spot him again with your binoculars here, and follow him as he gets back in his vehicle and drives off again (quite odd movements, admittedly). Begin to move down the hill towards the next RV point, but bear in mind that this is the trickiest section of the whole level. As you get within about 100 metres of the road you should be able to spot a few PLA soldiers in the area. There should be a pair standing in the road, who will move out once you get near the road. Move into the trees so you are about 50 metres or less from the road. Watch the patrol cross paths with another one, made up of three soldiers, which will then walk off to the west and rejoin the road. Once they are about 100 metres away, crouch walk across the road and up towards the next RV marker.
Avoid the guards patrolling the road
Once there you should be safe enough to stand and move on in the direction of the next RV. Move into the trees on the right of this road for additional cover, paying particular attention to the bunker ahead. You should be able to spot Han from your position on this flank and force him to move on. Be aware, there are PLA by the bunker, but you can avoid them easily. Han will travel down the road to the east right underneath your position, followed by PLA backup, so be careful not to draw attention to yourself. The treeline will then merge into a path that curves up past the bunker. Follow this path at a crouch walk, but stay on the side of the RV marker. The track turns into a grassy path, which then joins up with the road below towards the next RV marker (east). You will see Han in a convoy travelling in the same direction in the distance. Continue along your road. You can move all the way up to the RV marker under the bridge without enemy contact.
Head on towards the next one as well, directly up the hill, but once 100 metres away, turn around and look south. You should be able to see Han and tonnes of PLA entering the radio station. That's handy as we were supposed to destroy that as well! When you track him at the radio station the objective to follow him will be completed.
Primary Objective 2: Eliminate General Han:
We are given clearance to take out the radio station with Han inside using a JDAM strike. When we take it out the PLA will be alerted, however, and there are soldiers just above us at the next RV marker who will alter their behaviour if we do it straightaway. Save the strike, and creep up the steep slope towards the RV marker. Set your team to 'Fire On My Lead' so they can give you some help, and at about 30 metres as you near the top (there are a couple of 'false' tops, it's not until you get to 25 metres on the same height as the farmhouse that the enemies are in view), get ready for a very close encounter. The first enemy is a sniper as well, so can't exactly react quickly either – and we have the element of surprise (though these guys do have night vision). At 22 metres and facing one line to the left of north on the compass, you should be able to see the top of his head. He's facing west, so is completely unaware of you. Take him out. The other sniper is around the side of the farmhouse to the left. Move up with your team and eliminate him.
Take out the sniper team
If you want a less risky strategy, flank around the other side of the house (west) and you should have a line of sight on both snipers. The problem of a close quarters encounter will remain, however. Once both are down, a checkpoint will activate. You can now head up the hill above for a vantage point and turn around and use the fire-mission radial to designate the radio station for a JDAM strike. Aim at the structures in the centre, and then turn tail and run up the hill. Once it hits, the PLA will be on the alert, so sprint back down to the house and move fast! If you successfully took both targets out with the JDAM strike, an achievement will unlock and your two primary objectives completed.
Achievement/Trophy: Two Birds, One Stone (Kill Han and destroy the radio station with one fire mission) Silver/30G
If you didn't kill both targets, you're in trouble. It's worth reloading the checkpoint we just hit to try again. If you don't have the luxury of checkpoints, Han will probably leave the base before you can get there, but you need to snipe him as he's on the move. To destroy the radio station, you'll have to fight your way inside and plant C4 on the antenna! The JDAM is a pretty big strike however, and if you miss then you probably deserve to fail really…
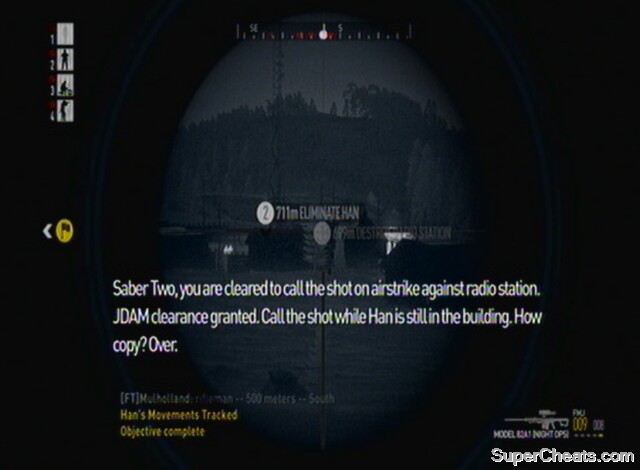
Take out General Han and the radio station
Primary Objective 3: Rendezvous with team at extraction point:
You want to head directly west now. Ensure your squad are set to 'Return Fire Only', as your position still shouldn't be known to the PLA, they are just on the alert. Look at the map and locate the empty truck parked in the valley below. Follow the gulley in the hill as you move west. Spot the truck with your scope. It is by some camouflage netting. Ignore all the enemies to the south-west, there is just one enemy we need to worry about here, and he is looking in your direction behind a rock straight to the west. Pick him off while you are still in the gulley on the hill. You can then move down to the truck. There is a checkpoint here too. Set your team to 'Weapons Free' on the way, just in case there are any PLA in the area. We're throwing the stealth out of the window now, as everyone gets on board the truck. Note, there is a video below for getting to the truck and safely extracting.
It is possible to drive all the way to the beach without being shot at by the PLA, but you have to ignore the RV markers somewhat. Head straight for the first one until you are about 660 metres away. At this point, head directly west. Watch out for rocks in the field, as if you flip the truck you'll have to stealth your way to the extraction (or go all out and take out the PLA en route). Note that you can, however, find another truck on the road to the west too. It's not timed, so it isn't the end of the world, but it's much more fun to do it in the truck. With such last minute turns due to the low visibility and plethora of rocks, drive slowly at this stage. Drive towards the western field boundary marked by trees (and a road on the map) and then turn south-west towards the extraction objective marker – bypassing the RV point completely. This was all to avoid PLA patrols which block the direct route. You'll have to drive through some trees to get there, but keep it slow and it's not too difficult. Cross the road and back onto the grass again.
From here you can get the speed up as the number of rocks is greatly reduced, and race directly to extraction on the beach where Saber Three are waiting to take us back to base.
Take the truck to extraction
Achievement/Trophy: Bug Out (Successfully extract from the area) Bronze/20G
Extras:
There are lots of possibilities on this map, with by far the most interesting being to engage Han as soon as HQ says it's ok 'if the situation deteriorates'. You will have a lot of enemies on you, but it's brilliant to see how differently the mission could play out. You do still need to neutralise the radio station, however, so you'll have to make your way there. Once there, plant C4 on the mast and extract using the vehicle in the base. You can then tear down the hill and back towards the extraction beach. It's great fun.
There are no secondary objectives for using stealth, so don't feel constrained by it. Han may alter his movements if he knows there is an elite Spec-Ops team in the area though, so bear that in mind if you go around making too much noise.
Summary:
This is the last level in the single-player campaign, and features play over a huge area of the map, complete with a helicopter ride in the middle. We need to wipe out the final remnants of PLA resistance, those willing to fight to the last man, before heading to eliminate or capture General Zheng, the ring-leader of this whole operation. We are back in the shoes of Dagger One Bravo, despite the low-light levels (though thankfully we have the awesome Night Ops weapons).
Walkthrough:
Primary Objective 1: Eliminate PLA armour in valley:
From your starting position on the beach, go to the first RV marker in the trees. Once you are about 90 metres away from the next one, use your Night Ops scope to scan the horizon and spot the enemies behind sandbag emplacements ahead. Time is important, as Longsword, our vehicle convoy, are moving up alongside us. There is a mounted gun here, and removing that PLA should be your top priority. Pick off as many as you can, but watch for friendlies. Move up to the RV marker when you feel you need to get closer to see more enemies. Use the map to keep an eye on enemy troop movements. Move up to the gun emplacement at the next RV marker when you're happy, and scavenge the ammo crate in the building for a Queen Bee.
We need to take out PLA armour in the area, and if you look west from the house you should be able to see an APC. Use a HEAT round on the APC, aiming slightly higher than the vehicle to ensure a direct hit. The PLA tank, which we also need to destroy, is visible from the road. Use another HEAT round or your Javelin (you can go back to the ammo crate and pick it up) to take it out, ensuring you fire suitably above it (the Javelin doesn't need to be aimed in this manner). The Javelin is easiest, as its range is so great and you don't have to manually aim.
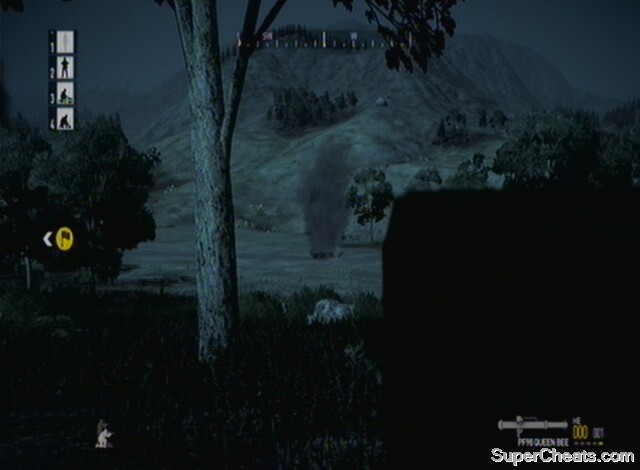
Eliminate the enemy APC and tank
Secondary Objective 1: Eliminate PLA defensive position:
With the first primary objective completed, get back on the RV trail, and make haste. Soon, you'll come upon a wooden house with an emplaced gunner outside and a few PLA. Use your Spec-Ops equipment to take them out before they see you, and you will have eliminated the first defensive position. Activate the checkpoint and continue on to the next RV marker. You should be able to use your scope here to see the PLA (including AT gunners who can hurt Longsword) amongst the trees nice and early. Pick them off, and be aware of enemies to the south. Move through the next RV marker, and about 170 metres away from the second, scope to take out an emplaced gunner ahead. He will have allies with him, including an AT gunner and Spec-Ops soldier, so watch out.
Primary Objective 2: Capture Skoje village
Move up to the gun emplacement to reach a checkpoint and begin one of the hardest sections in the game. You need to move quickly here as there is a limited amount of time for us to take out the AAA units before the helicopters we need to cross the island will be destroyed. If you dawdled earlier then you may hit this checkpoint with very limited time indeed. Move quickly directly to the next RV marker to the south, watching the gaps beside the building and the windows (there are two PLA inside). You can see one through the left-most window in the centre of the building. Peer inside and look left, and you should see him facing out of the window on the other side. If you take him out now, the other PLA inside will be on the alert, however. If it's your team assaulting the building, you may not care. As they assault, enter in the other door or cover their backs. Note that there is a video below showing the assault on the village complete with the two AAA vehicle kills.
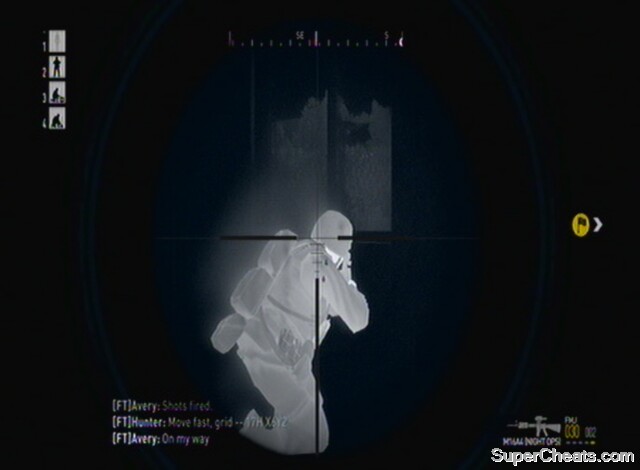
Use the window of the building to surprise one of the PLA inside
Once this room is clear, get the Queen Bee from the ammo crate and quickly move outside via the back door that you came in through. It may be worth equipping it now (with HEAT rounds, although see note below) so that you're not fiddling with it in the middle of the street, but ensure your team are following you if this is your plan. You need to watch all the angles here, as there are tonnes of PLA in this base. Hopefully by this stage your allies will have moved up too to take some of the flak. There are plenty of Spec-Ops soldiers in the village, meaning they can see you from long distances, whenever you can see them. Move west to the edge of the farthest building. From here, turn left along the main road, heading south. The next RV marker indicates where the first AAA unit is. Follow this road and look at the corner of the warehouse ahead, near the marker. You will be able to see the edge of the AAA unit with the Queen Bee's scope. Once you can see enough of it, ensure you are on HEAT rounds (though see note below), and fire at the AAA vehicle.
Note: If you only have three rounds in the Queen Bee, one HEAT and two HE, you need to try and hit the back of the AAA vehicle. The first one is easier to do this on, especially from the angle we are coming at, but both AAA vehicles are lethal if they spot you, so be careful.
Once it's taken out, continue down the street, watching the market square where the AAA vehicle was in particular for enemies. If HQ hurry you up, that means one of the helicopters is just about to be taken out. Once you clear the market square on the main street, turn left towards the RV marker. Head south-east, to the left of the house with the RV marker in, readying your Queen Bee as you begin to see round the corner. The second and final AAA vehicle is just round here. Take it out with your HEAT round, and then defend your section of the street until your allies arrive. There is an ammo crate with a new Marksman rifle in and the last ammo before the end of the level in the RV marker building, if it wasn't destroyed in the carnage.
Assault the village and destroy the AAA units within
You now need to board the helicopter, either as pilot or with one of your team mates in this high-risk role. It's best and more fun if you do it, and there is an achievement for it.
If you want to fly, get in at the right hand side when the Pilot icon is lit up. This helicopter is very odd to fly, but is also robust, so you can scrape it along the ground a bit without it blowing up! Take your time to get used to the power and x axis movement being on the right stick (so push up for power, down to slow, left to move left and right to move right) and pitch and roll on the left stick (so up to decrease flight angle with inverted controls, down to increase flight angle and left and right to tip the helicopter). Start by getting plenty of height, just by pushing up on the right stick, and then get used to moving it side to side, and finally controlling height and movement together. A vital button to know is to press X/Square for auto-pilot. This will hover the helicopter for you if you let go of the sticks, which is very helpful if you're struggling to level it out.
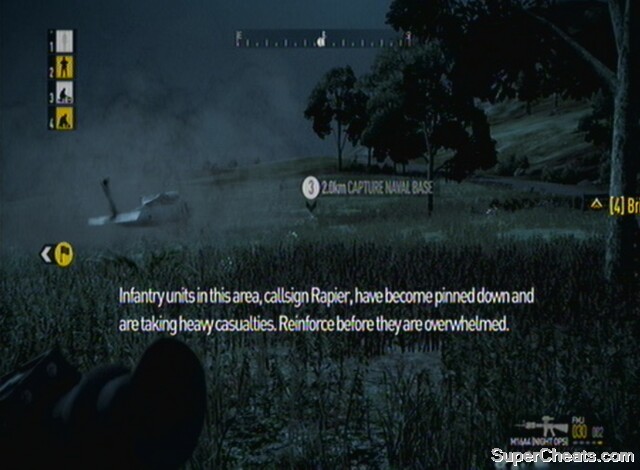
Get aboard the helicopter
If a squadmate is flying, get in and then give them a move order. RV markers will appear en route that you either need to fly to or order your team to. Once you get to the final one (marked by purple smoke), you need to land. If no RV markers are appearing, start flying south and hover not too far from the village, and HQ should sort you out. If you saved both helicopters at the village, an allied helicopter will also be airborne. Note too that if you get too close to the naval base they'll shoot you down.
Land with a careful bump in the hills by the smoke, and you'll get an achievement (only if you were pilot).
Achievement/Trophy: Vertical Envelopment (Fly the helicopter from Skoje village to the landing zone) Silver/30G
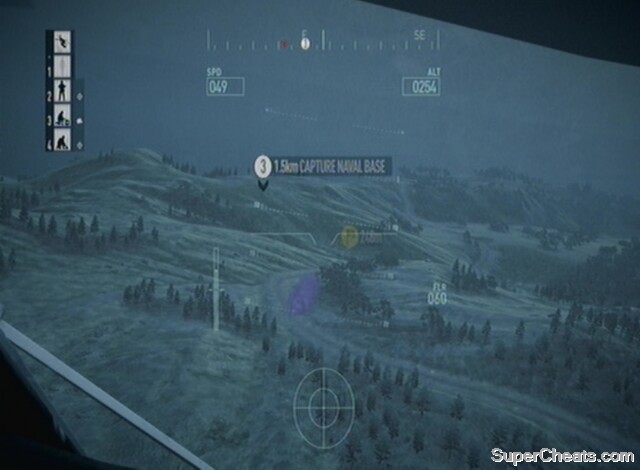
Land at the purple smoke
Primary Objective 3: Eliminate PLA resistance at Naval base:
Secondary Objective 1: Capture General Zheng alive:
Once you disembark, head across country to the next RV marker. As you are about 60 metres away and just about to go over the crest of a hill, ready yourself for a single PLA soldier looking towards the road. Kill him and move up. Once you hit the RV marker, look to the east and you'll see two PLA soldiers at the next marker. This is a long shot, but you can take them out from this range. Reinforcements will also arrive, however, and to conserve your ammo it may be a better idea to get closer. Your allies from Skoje should also be lending a hand at this point. Move over the crest at the top of the hill so you are about 150 metres away and finish off the remnants. Head on up to the flat area where the RV marker is.
You are now directly west of the naval base, but our task is to go in the opposite entrance and get the PLA in a pincer movement while our allies go through the northern end. So head to the next RV down the hill. On your way you will be able to see a PLA soldier at the marker on an emplaced gun, and one more further behind him. Take out the closest one, and move up to his position at the RV marker to engage the next one along. He will be in a bunker.
Now move directly to the next RV marker, stopping about 70 metres short of it. In the road below (check your map) is an emplaced gunner, so edge over the top of the crest and take him out.
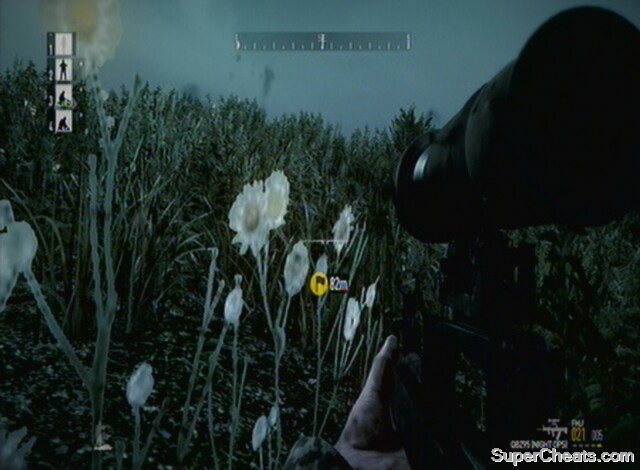
Edge up and take out the emplaced gunner
Move down into the road, and then head across the hill diagonally towards the next RV marker. You'll come out right on top of a PLA checkpoint, so use your rifle to take out the guards around it. To play it safe, you will want to go back up the road (heading uphill) to activate a checkpoint, as the next one is right in the centre of the naval base and doing this will save you some time. So drop down onto the PLA checkpoint and head south-west. Once you get the confirmation that you've activated it, turn around and go back down.
Follow the road curving towards the naval base. Don't cut across country, as the AI struggle to get down the cliff. You should be able to see PLA through your scope as soon as you round the corner. Watch out in particular for an emplaced gunner. This is one section where the realism goes out of the window, as there are respawning enemies in the area. They seem to emerge from an indent in the cliffs, shown below. You have to push past this area to stop the respawning – this is presumably to stop you from just sniping everyone in the base from distance.
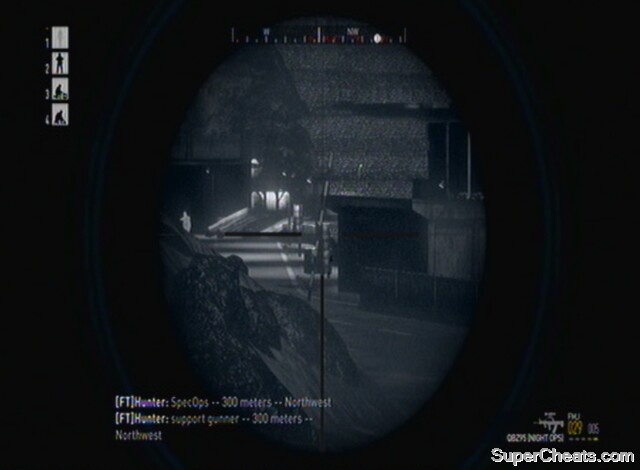
Deal with those guards at the front of the base
As you push towards the centre of the base taking out scores of enemies, you may see General Zheng. There is a tricky secondary objective for capturing him alive, but he is intent on killing you, which makes this difficult. He won't pro-actively look for you, like his cronies, but if he does see you, he will probably give chase. Once you cross the small bridge you should be able to see him, and activate a checkpoint just beyond it. If you are intent on keeping him alive, you'll have to set your team to 'Hold Fire' (as such it's worth sending them back across the bridge to relative safety). If Zheng sees you, duck behind some cover and fire at other enemies, the ones on the dock, for example. He should stop chasing you. He only has a pistol, so can't exactly snipe you. The remaining PLA in this area, however, are aggressive, so once Zheng loses interest and gets in cover, edge out and pick out his last few soldiers – let them come to you in your hidden position and take them out when they come into your sights.
There are Spec-Ops soldiers in the base, so they can see you from distance too. You may still have a fire-mission from earlier, and now may be a good time to use it, though be careful if you are hoping to keep Zheng captive. Keep Zheng about 80 metres away, and if he appears to be moving towards you (check the objective indicator distance), fall back yourself. You should be able to get him to hide behind a building which he will only move from if he sees you. As long as you don't move forwards into the main area (around 150 metres from the Capture Naval Base objective) you should be ok. You have a vastly superior weapon, and should be able to pick off his followers without taking any damage even if he's walking towards you. Note that you can't just shoot him in the leg and incapacitate him either, as he'll just die after a few shots.
Capture General Zheng alive
Once all the die-hard PLA are down, if Zheng is alive then you'll radio HQ confirming that you have him surrounded and are ready to extract him. If not, then you'll merely confirm the base is secure. Whatever the outcome, congratulations, as you've completed Operation Flashpoint: Dragon Rising.
Achievement/Trophy: Ship It (Secure the naval base and General Zheng, alive or dead) Bronze/20G
Extras:
This level takes place near the radio station in Mission 11, and you cover a lot of terrain in it. It is quite restricted with what you can do for the first half of the mission though. You have to take out the PLA armour at the start, though you don't need to worry too much about the convoy getting through – it just makes capturing Skoje village much more difficult.
Once you get to Skoje and secure the area, you have access to a helicopter. With it, you can pretty much do what you like in the AO. There is no defined point that you have to be at before you can attack the base and take out Zheng, so you are able to use the helicopter to come up with your own attack plan. The problem is that there is a lot of AA cover in the vicinity of the naval base, but if you could deal with this, you would have free reign. There are no unoccupied ground vehicles to use, so you are pretty limited to the helicopter with getting around.
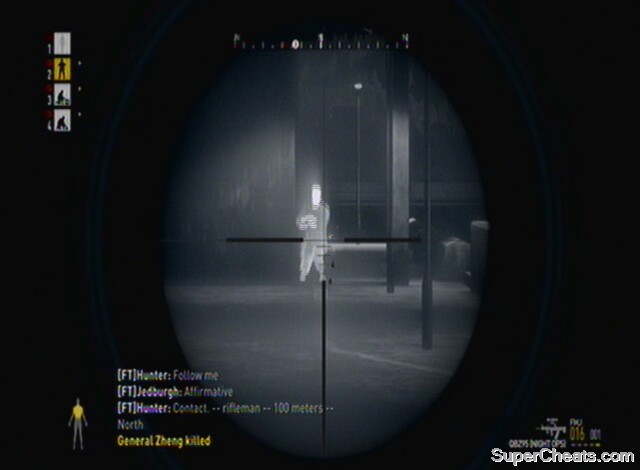
Whether to kill Zheng or not is in your hands
One extra idea is to assault the naval base from the other end, where you allied team in the other helicopter initiate their assault from. The chances are they will be eliminated if you attack from the other end, so you would be helping them out! Once you begin the assault on the naval base you are given access to a fire-mission, which you can use on the brunt of the forces within. Try different methods of attack, such as from the cliffs above, or sending some of your team in one way and covering from another – there are quite a few alternate strategies to finish off the game.
When it is easy to get an achievement during gameplay, they are mentioned in the respective level walkthroughs on the previous pages of this guide.
Without Warning: Destroy Radar site on Mission One (Bronze/20G)
Saber Beats SAM: Destroy the SAM sites on Mission Two (Bronze/20G)
Tide’s Out: Hold the village at the beachhead on Mission Three (Bronze/20G)
Runway Relief: Defend the airfield successfully on Mission Four (Bronze/20G)
Sandman’s Saviors: Safely extract the helicopter crew on Mission Five (Bronze/20G)
Fly Away Peter, Fly Away Paul: Extract your team safely on Mission Six (Bronze/20G)
Resource Management: Secure the fuel depot on Mission Seven (Bronze/20G)
Heroic Rescue: Safely extract the POWs on Mission Eight (Bronze/20G)
Uphill Struggle: Destroy the spotters and render the mortars useless on Mission Nine (Bronze/20G)
Bug Out: Extract your team safely on Mission Ten (Bronze/20G)
Ship It: Secure the naval base and General Zheng on Mission Eleven (Bronze/20G)
Skirinka Island Tour: Fly the helicopter around Skirinka Island on Mission One (Silver/30G)
Ghost Ops: Take out the PLA Commander in Mission Two (Silver/30G)
Get Creative: Take out the APC near the farmhouse at the start of Mission Three (Silver/30G)
Hip Shooter: Destroy the helicopter near the start of Mission Four (Silver/30G)
Hitchhiker: Destroy the vehicles in the village that arrive when you release the helicopter crew in Mission Five (Silver/30G)
Fuel the Fire: Take out the fuel trucks in the depot in Mission Six (Silver/30G)
Ruthless Efficiency: Kill all four spotter troops with the fire-mission on Mission Seven (Silver/30G)
Perfect Rescue: Extract all hostages in Mission Eight (Silver/30G)
Keep ‘em Rolling: Protect all the tanks in the opening stages of Mission Nine (Silver/30G)
Two Birds, One Stone: Take out General Han and the radio station with the fire-mission in Mission Ten (Silver/30G)
Vertical Envelopment: Fly the helicopter from Skoje village to the landing zone in Mission Eleven (Silver/30G)
Dragon Rising: Complete the game on any difficulty (Gold/70G)
Dragon Rising – Hardcore: Complete the game on Hardcore difficulty (Gold/100G)
Shock and Awe: Use your first air strike fire-mission (Bronze/20G)
Hard Rain: Use your first air strike fire-mission (Bronze/20G)
Low Blow: Kill an enemy vehicle with an AT mine (Silver/20G)
Scrap Metal: Kill an enemy vehicle with an AT weapon (Silver/20G)
Clear Skies: Kill an enemy vehicle with an AA weapon (Silver/20G)
The Sky is Falling: Kill an enemy with a helicopter without using its weapons (Silver/20G) [Note: This means you effectively need to crash into an enemy. Use the helicopter in Mission Eleven to hit one of the enemies that you would otherwise fight after landing]
Squad Slayer: Kill or incapacitate 25 enemies (Bronze/20G)
Platoon Pounder: Kill or incapacitate 50 enemies (Silver/30G)
Company Killer: Kill or incapacitate 100 enemies (Gold/50G)
Unbloodied Hands: Complete a mission without directly killing anyone yourself (Silver/20G) (Note: Any of the Spec-Ops missions are good for these, with Mission Six and Mission Ten in particular effective options – just order your team or co-op partner to do all the shooting)
All Patched Up: Apply a field dressing to an injured friend in Co-op (Silver/20G)
Florence Nightingale Award: Apply the field dressing to other wounded soldiers 20 times (Silver/20G)
In addition the PS3 version has the usual Platinum Trophy for getting all the others.


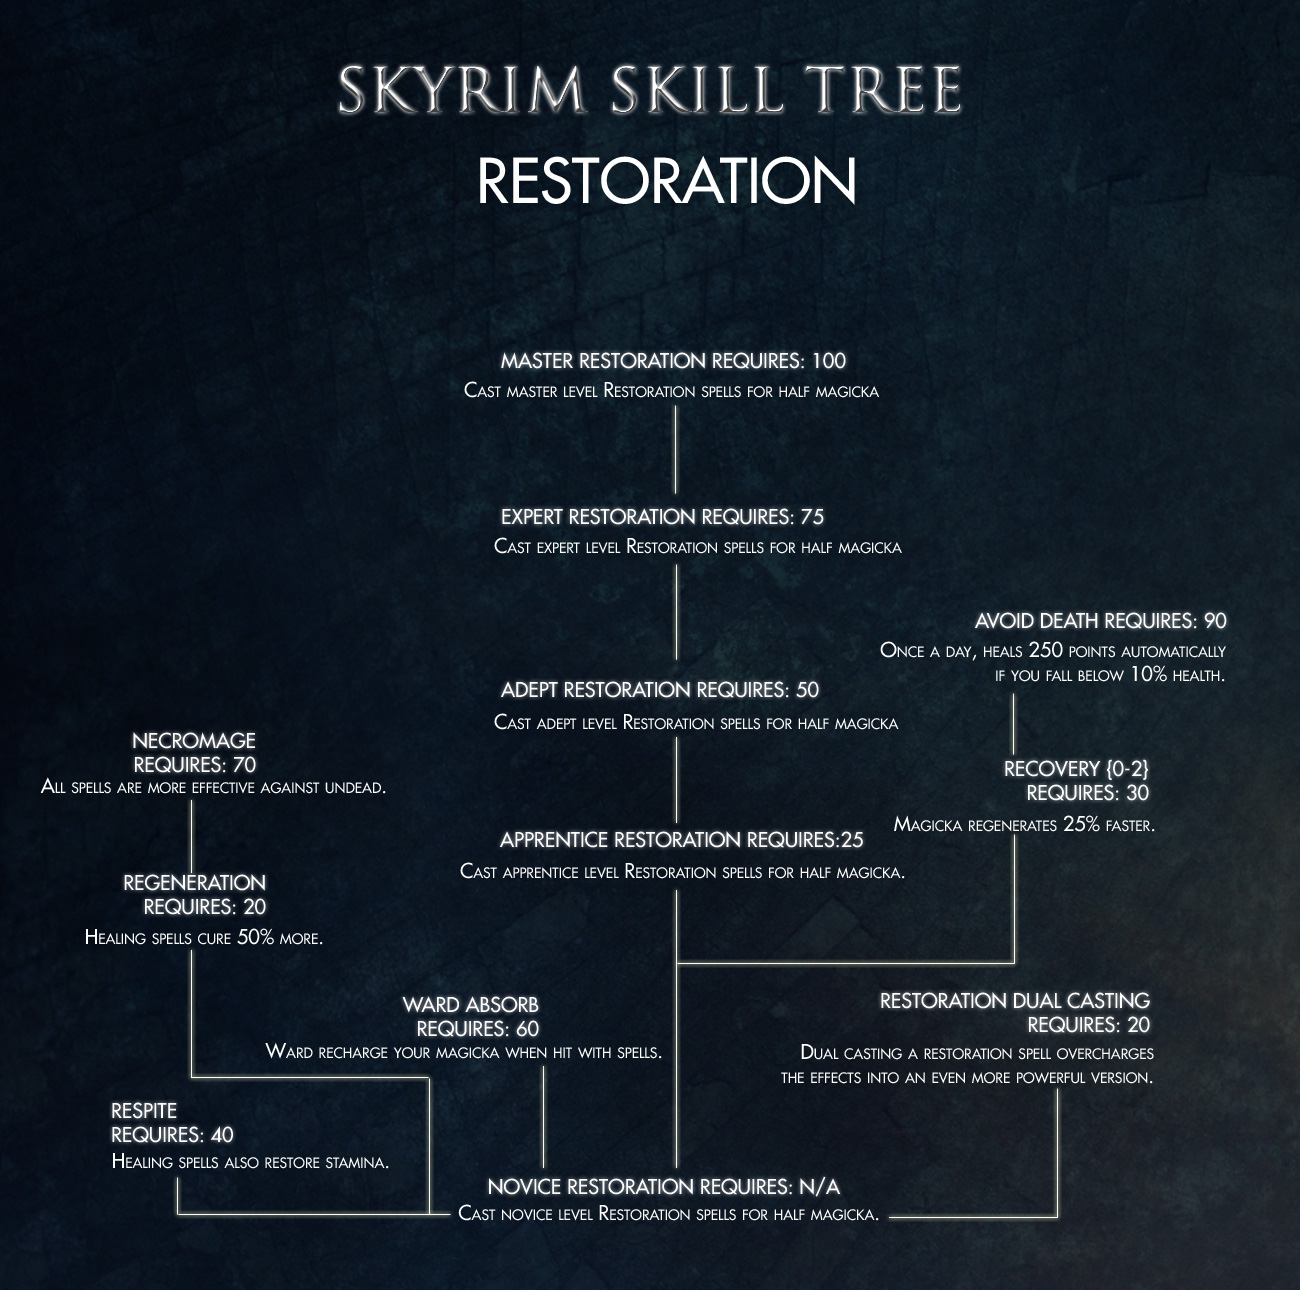
 How to record Gameplay Videos in 1080p 60fps on PlayStation 4 or Xbox One
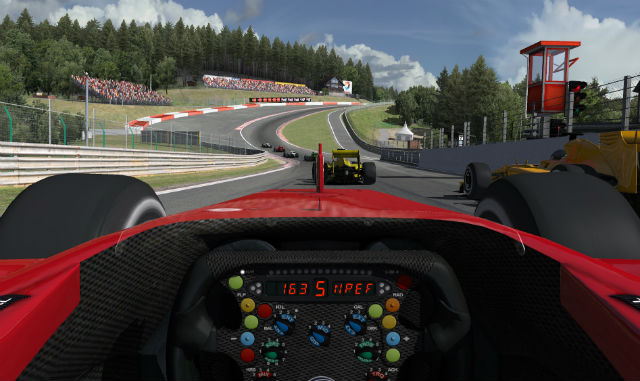 4 Of The Most Hardcore Racing Simulators You Can Play On PC Right Now
 How to Unlock Zombies Mode in Call of Duty: Advanced Warfare
 Benji Madden of Good Charlotte, marries actress Cameron Diaz
 Persona 5 Wiki – Everything you need to know about the game .