Unofficial Medal of Honor: Warfighter Guide by vhayste for
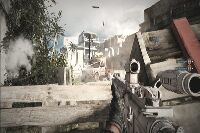
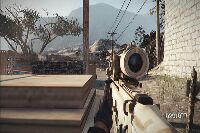
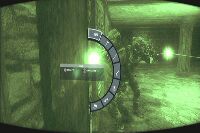
Welcome to Supercheat's unofficial guide to Danger Close/ EA game's direct sequel to 2010's Medal of Honor title. The story picks up where the first game left off and players will take control one of the two main Tier 1 operators as they race against time and different parts of the globe to thwart a major terrorist threat. The guide is compact but will surely assist you in completing the campaign, introduce you to its engaging multiplayer system and a trophy guide as well. Execute the guard then continue upstairs. Take out another guard there then plant the charge at the back of the trailer truck. Stand by then kill the guard when Mother tells you so. Next, stand behind the barricade to detonate the truck. This will serve as your training session for the game. The controls are pretty conventional so you just need to follow the prompts as they appear in your screen. After learning the basics, you have to make a timed run through the simulated airplane and destroy the targets until you breach the makeshift cockpit. You can retry the stage or just leave through the door to complete the stage. After disembarking, find cover and dig in while taking out the hostiles up ahead. Just don't expose yourself too much and take your time picking the enemy off one at a time. As you move forward, be careful of the Light Machine Gun (LMG)-wielding enemies inside the building. After clearing the area outside, continue inside the building then go upstairs. Breach the door open then kill the guards inside. Next, you have to help your allies pinned by sniper fire from the building far ahead your location. Equip the LTLM then “paint” the target to call an artillery barrage and destroy the sniper nest. Once done, follow your allies until you get to operate a remote bot. Explore the building and take out the hostiles that you encounter along the way. Follow the straightforward path the bot can navigate until you finally find the marines ahead. Provide covering support to them until your bot is destroyed.
Unintended Consequences
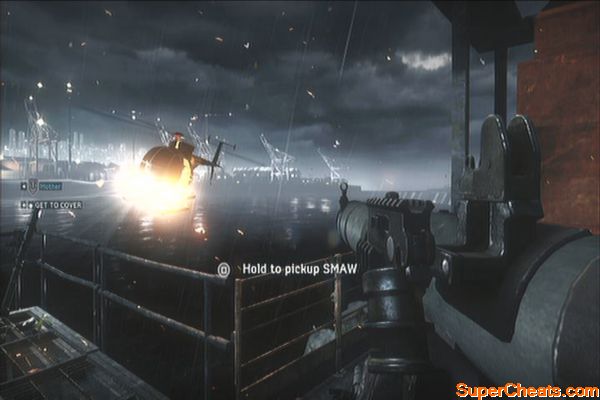
After detonating, you have to head to the extraction point. All hell breaks loose but you'll still need to keep an eye off enemies that you'll encounter along the way. Follow Mother as you make your way through the containers until eventually, a hostile armed helicopter halts your advance. Pick up one of the SMAW launchers near the railings then take the helicopter out.
Through the Eyes of Evil

Shore Leave

Remote Bot
After losing the bot, continue to the next door and breach it. Kill the hostiles inside then take out the hostiles in the other building across the street. After clearing the building, go downstairs then carefully exit. An enemy technical will appear so take cover and take out the gunner. If possible, try to get inside the other building to get a more clear shot. 

As you proceed forth, more enemies will appear ahead. You can use the mounted machine gun at the back of the technical earlier to easily and quickly take out these reinforcements. Your allies will move forth as soon as its clear so just follow them afterward and continue upstairs. Another technical will arrive so dig in and take out the gunner. Breach the next door then continue upstairs. 
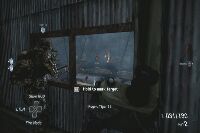
Once you reached higher ground, you'll set up an impromptu sniper nest. Take out all the marked targets; take note that you have to adjust your fire accordingly as the bullets won't follow a straight trajectory. The last two targets will be a bit tricky since they're farther and you have to take them out quickly. 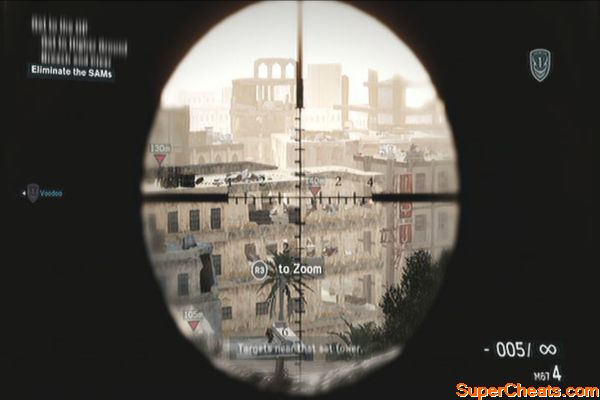
If you're after a trophy, you have to hit the marked targets without missing a shot. Don't bother with the smaller fries; just concentrate on taking out the marked targets. Just aim your reticule above their heads to ensure that they get hit. For the last to targets, adjust your target so that the vertical “2” is above their heads.
Leftover Lead
After successfully taking them out the last targets, the chapter will be complete.
This chapter is all about catching up with the target and taking him out. Just keep chasing him until you reach an alley where you can close the distance and take the target out. Just ram the target's vehicle to complete this chapter.
Hot Pursuit
If you're after a trophy (Vender Bender), you have to smash 90 vendor stalls along the way. There are more than 90 stalls here so just run over and destroy the ones whenever you can. Restarting the checkpoint won't reset the count but it is cumulative instead.
Vender Bender
Sneak behind the first target and take him out. Continue following the straightforward path and sneak behind the enemies as you take them out. Don't worry about shooting your targets as your guns are silenced.

You'll eventually run into two guards patrolling. Mother will tell you to line up and take them out with one shot. Do so and you'll unlock a trophy. (Double Header)
Two heads, one bullet
Continue taking out the guards until you reach a locked door you'll need to breach. 
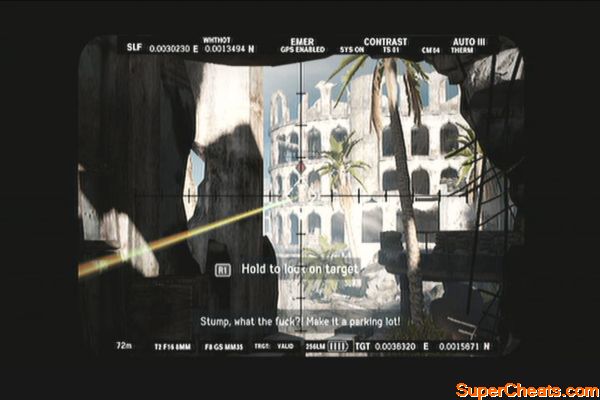
After clearing the room, continue outside and take out the enemy snipers. Take cover and pick them off one by one or if you want to it the easy way, paint the tower using your LTLM and blast them to bits. More enemies will appear so move forth and dig in as you make your way to the bell tower. 
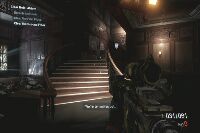
Breach the door and move forth. This is a very straightforward path but has lots of hostiles so take cover and pick them off as you continue. Keep heading forward until you finally reach another locked door. Breach it and watch the whole room clear itself. Head to the next building and go upstairs. Follow Mother as he opens the door and head outside to complete the mission. 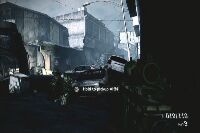

Regroup with the friendlies then clear the next warehouse. Head outside and take cover. More enemies will appear from 10 o'clock. Be careful of the sniper on the top of the destroyed overpass. Clear the streets as you make your way to the next building where Tiger 12 is located.

After regrouping with Tiger 12, stand by until more enemies pour in outside. Use the LTLM to paint the entrance then manually control the gunner seat and take out as much enemies below.
Rip them up!
Once done, continue outside and head to the entrance to trigger a scene. After the scene, follow Mother as you make your way inside the capitol building. Clear the next hallways and room until you reach a dead end. Breach it by placing an explosive then clear the next area.
Take out the two guards and the MG placement in the upper floor, 12 o'clock. Take cover and carefully clear the first floor. Head to the second floor and carefully move as you take out more targets. 
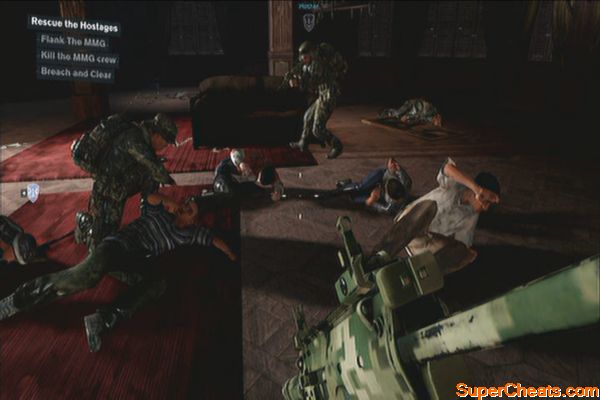
You'll eventually encounter an MG in the hallway. Wait for the other door to open and kill the enemy that will come out. Enter the door and flank the MG. Take out the gunner and the remaining enemies then breach the red door to the mayor's office. Kill all the guards to save the hostages and start the next phase of the mission. 

In this phase, you have to keep shooting at the marked targets to avoid getting damaged to much. The mounted weapon launches explosive rounds so use this to your advantage.
Escape from flood and bullets
If you're after a trophy, you have to kill 20 enemies with the grenade launcher. Refer to the video below.
Release the Kraken!
After the scene, you'll have to take the wheel and drive the speed boat before the hostages get fatally injured. The path is pretty straightforward but you still need to do some careful maneuvers to avoid enemy attacks. Keep doing this until you reach the open sea.
Torrential rains and lead
Once your character has taken position, stay put and don't fire a shot. You need to wait until you the guy in the middle who is holding the captain gets marked. Take aim and fire to take out all enemies. 

For the first part, you have to close the distance and catch up with Faraz. As you catch up to him, the first batch of his guards will engage you. Take cover and eliminate them. 

Continue your pursuit deeper in his compound and eliminate all hostile forces along the way. Take note that these guys wield high-powered rifles as well so don't expect to survive very long if you keep taking damage. The path is very straightforward so don't afraid about getting lost. Take your time eliminating the targets as Faraz will only move once you get near. Follow him until you reach a dead end past the wide, open area of the compound. Turn left and go through some broken walls until you see him again. 
Give chase and take out more targets. He'll eventually cross a wooden bridge to the next area. Be careful as you move since there are tangos inside the guard house along the way. Head to the next area to find a heavily guarded entrance. Dig in and eliminate more targets. Once done, position by the door to proceed. 
Continue inside the main compound and clear all enemies before moving forth. Be careful of the ones who appear by the rooftop. If Faraz starts to escape as you slowly proceed, don't give chase immediately; stay in cover and continue taking out more enemies. Continue your pursuit through the narrow alley. Take out the guy in the technical then fight your way through the gate to the next area. 

Pursue him along the straightforward passageway. There are more enemies here as well so carefully proceed and take them out as necessary. Continue and take out the last remainder of his forces and catch up to him as he attempts to climb over the wall. 
In the next phase, you have to get to the marked building as fast as you can. After reaching the slope leading to the building, take cover as there are more enemies waiting inside. Clear them out then enter the building. Breach the next door to complete the mission. 
Once in control, support the ground forces by providing covering fire as well as eliminating the RPGs as well. You have unlimited ammo but your machine gun overheats so don't be so hard on the trigger. Aim for the explosive barrels to take out multiple enemies at once. As you make your pass, enemy technicals will also appear; just keep shooting at them to destroy them.
Off to the mountains
After the sequence, you'll have to continue on foot. Move from cover to cover as you proceed. Be careful as well since there are armored terrorists here who are more resilient against gun fire. Continue clearing the village until you get the prompt to breach a door. 

Head outside then clear more enemies. The area's packed with hostiles so just dig in and defend the area until the allied airstrike arrives. Once things quieted down, follow Voodoo inside the building then clear the area outside. Continue forth until you find the underground entrance leading to the training facility. 
Continue inside and use the covers as you clear the area. In the wide training room, destroy all targets to get a trophy.
Target Practice
After reaching the part where you took cover from a grenade blast, take out the guys in front of you then continue upstairs. You should have a better view of the enemies on the ground. After taking them out, breach the next door and follow Voodoo. 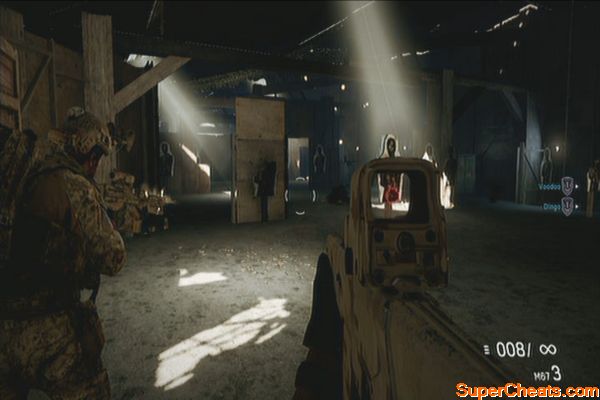
Head outside the facility then explore the cave system. Clear the tangos with a well-placed grenade then shoot the generator. After equipping your night-vision gear, proceed deeper in the cave and take out the enemies without too much resistance. Stack up on the next door and proceed to the next area. 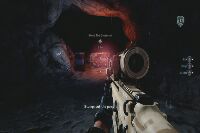
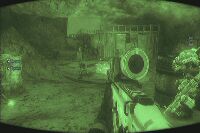
Lights will light up, making your darkness cover useless. After taking off your NODS, take cover and continue taking out more enemies. Make your way to the train station and carefully push your way through more heavily armed terrorists until you reach the blue door at the end. Breach it to complete the mission. 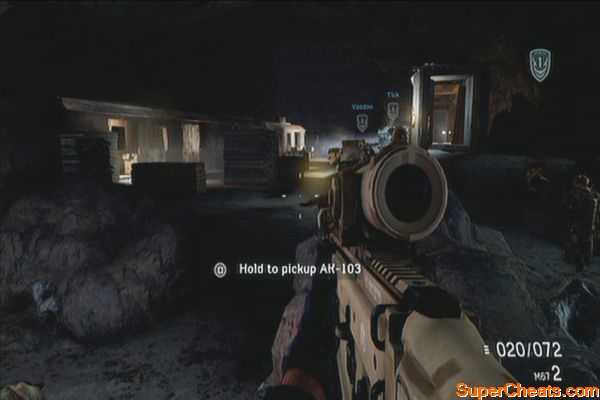
This is another driving sequence which is divided into three phases. For the first part, you have to keep running and evading your pursuers.
Afternoon chase
For the second part, you have to evade the patrols by using the hiding spots. There are patterns that these patrols follow so take a few seconds studying the nearby ones before making a move. Continue heading to the exit until you successfully leave the area.
Hide and seek
For the final part, you have to continue to the expressway. The security chief's SUV will pursue and ram you whenever it has a chance so drive carefully in the counterflow and through the dust storm. After losing your pursuer, keep driving to the extraction point until a scene triggers. There's also a trophy to be unlocked here, by not hitting any of the incoming vehicles in the sandstorm.
Escape
Storm Watch
Once ready, follow your team mates to the next building then continue upstairs. Peek through the opening on the wall and pick off the ground targets. Once done, you have to take out the snipers in the building up ahead. 

After taking them out, go back downstairs and rally up with the others. Continue outside and clear the enemies there. Don't proceed too far ahead as the enemies tend to reinforce themselves quickly. After clearing the courtyard, continue with your team mates and breach the building's door.
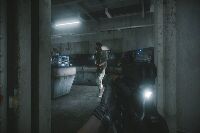
Once inside the building, continue upstairs and clear the floors. Be careful of the activated IED spots on the floor as well. Continue to the upper floor and fight your way inside until you exit the building. Continue forth until you spot friendlies on the ground being pinned down by sniper fire. 

Breach the nearby door and clear the room. Kill the sniper in the balcony then pick off the enemies ahead so your ground friendlies can proceed. In the next large room, engage a large group of hostiles. You can take the stairs to the left and clear the enemies in the balcony so you can flank the enemies in the lower floor or shoot them from above. 

After clearing the area, regroup with Voodoo as he makes it to the next door. Head outside and carefully avoid the marked IED spots on the ground. Regroup with Dingo for a scene. After the scene, proceed to the ice rink. There will be a lot of enemies here so immediately find cover since they'll start flooding in once the smokes are out. Their flashlights should make most of them easy targets while the others can be seen through their silhouette in the smoke. 
Head to the exit for a scene. Chase after Bosic and carefully move from cover to cover as the fog limits your visibility. Keep chasing after Bosic until you finally catch up with him. Watch the following scenes. 

After landing, take out the enemies then continue to the bridge. The controls will switch over to Preacher. Melee the first two guards then sneak behind the other two to find a silenced pistol. Continue forth and once you killed an enemy with a shotgun, pick it up and use it as you make your way to the cargo hold. 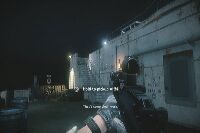
More enemies will converge here so move carefully since they just appear and start firing at you. Once you cleared the cargo hold, continue to the door leading to the engine room. Kill the two guards in the immediate room then proceed to the engine room. 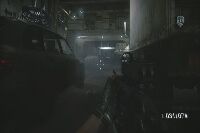
Once there, you have to fight your way to the lever you must pull to disable the ship. The whole room is narrow so you have to keep your weapon ready as you check the corners. After disabling the ship, you have to make your way to the top deck. 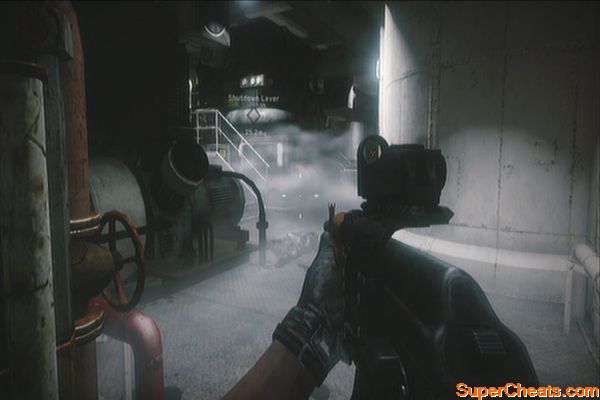
Once you've reached the top deck, you can go silent and melee kill the guards. If your cover is blown, just go loud by picking up any of the weapons dropped by the guards you killed. 
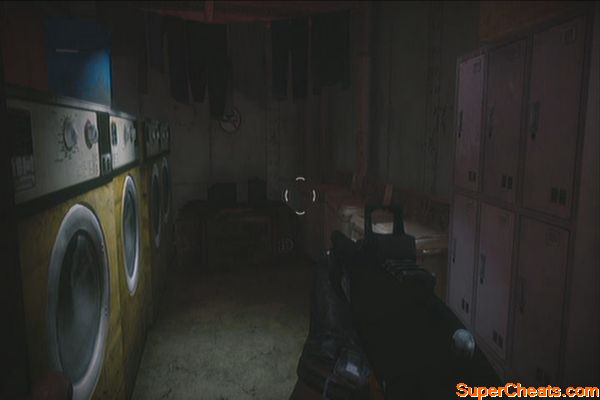
Once inside, go through the kitchen and just shoot through the boxes since they won't be able to cover the enemies behind them. Continue upstairs to the cabin and carefully clear each room. Open the door to the laundromat and collect the grenades inside as well. (This unlocks the trophy “Dirty Laundry”)

The recreation room ahead has a lot of enemies so use the grenades you acquired earlier to clear it without too much difficulty. Exit through the door and continue to the bridge to catch up with the target and beat the crap out of him. 

Continue along the path to encounter an enemy patrol. Stay put and let them pass, except for the last two men who stopped for a piss. Take them out then follow the trail that will lead you to another group of targets you must take out. Let the other unmarked groups to leave then eliminate the ones by the bonfire. 

Continue forth until you reach the gate. Let the truck to leave then take out the lone guard. Head inside the compound and shoot the fuse box to cut the power. Kill the hostile who will open the door then clear the house. Breach the next door and kill all the guards to clear the first floor. Continue upstairs and fight your way through more enemies until you get to engage the enemy forces outside.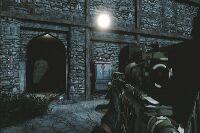
Once you've taken out most of the enemies outside, follow Voodoo as he exits the house. Head to the left and carefully take out the enemies uphill. Keep left and enter the barn. Kill all enemies outside then wait for Voodoo to breach the door. 

Continue to the next house and take out the group of enemies that will go running from the stairs. Continue upstairs and immediately find cover. Take out the remaining forces there then move to breach the next door. There are six enemies inside so you have to take them out as quickly as you can. 

After clearing the door, head outside and regroup with your squad. There's heavy resistance up ahead so you'll have to drive a bot to clear the path.
Clearing the path
Once the path is cleared, regroup with your squad by the gate then move forth. Take cover as more enemies appear then proceed to the bridge. Take cover as an enemy technical appears. Take out the gunner then mount the vehicle to clear the gate ahead. 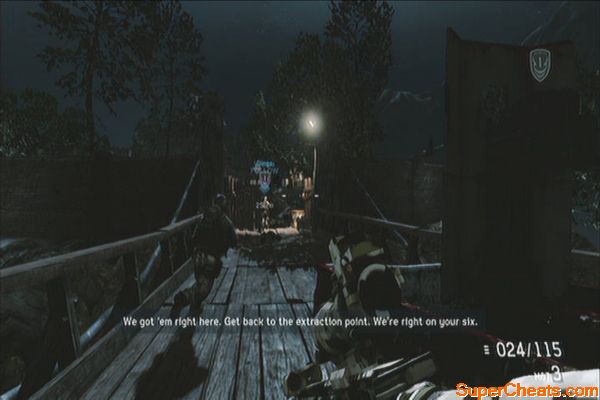
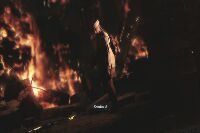
Fight your way inside the burning palace, eliminating the slight resistance until you find the Preacher. After the scene, shoot him in the head to end everything and to complete the game. 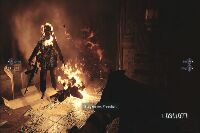
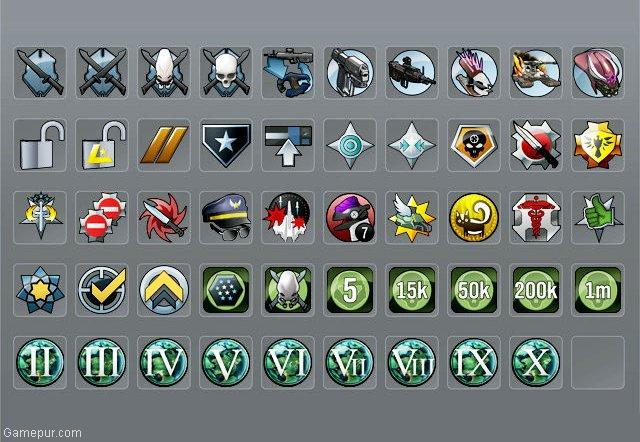
The game has 51 trophies, 39 of which can be acquired offline while the remaining 12 must be done online. There are no collectibles in the game so you can freely play without any worries of missing anything.
Bronze
The following trophies are story related, thus can't missed.
Rain of Terror
Completed Changing Tides
Monsoon Lagoon
Completed Rip Current
Unexpected Cargo
Completed Unintended Consequences
One Shot, Three Kills
Completed Hat Trick
Hit the Beach
Completed Shore Leave
Know the Enemy
Completed Through the Eyes of Evil
Non-Official Cover
Completed Finding Faraz
Class Dismissed
Completed Connect the Dots
Pedal to the Medal
Completed Hello and Dubai
Closing Ceremony
Completed Old Friends
One Man Mutiny
Completed Bump in the Night
Pit and Pin
Completed Hot Pursuit
Let Him Rot
Completed Shut It Down
Double Header
Killed two enemies with one bullet in the Changing Tides mission
Near the start of the mission Changing Tides, you'll have to sneak and stealthily kill enemies along the way. You'll eventually find two enemies walking side by side. You have to line them up and kill them with one shot.
Two heads, one bullet
Release the Kraken!
Killed 20 enemies during the boat exfil in Rip Current
During the boat sequence, just keep holding the fire button and go crazy by killing all marked enemies. There are more than 20 enemies. You should be able to unlock this trophy before your path gets blocked by another boat. If you haven't unlocked the trophy by then, restart the checkpoint. Refer to the video below for more information. It may take a few runs to memorize where the enemies will appear.
Release the Kraken!
Tag, You're It
Caught Faraz within 15 minutes in Finding Faraz
During the mission, you have to catch Faraz within 15 minutes. To save time, you must quickly and efficiently kill the group of enemies that will halt your advance.
Leftover Lead
Completed the sniping section in Shore Leave without missing a shot
Near the end of the mission where you'll have to snipe enemies from a distance, you'll unlock this trophy by not missing a shot.
Leftover Lead
Vender Bender
Destroyed 90 market stalls in Hot Pursuit
Take note that the number stalls you destroyed is cumulative even if you restart checkpoints. If you're just after the trophy, simply concentrate smashing the stalls you find along the way, especially the ones in the market place.
Vender Bender
On the Clock
Completed the training in Through the Eyes of Evil in under 18 seconds
This is during the airplane mockup course in the second mission. To get the 18 seconds, you must destroy all targets (missed targets have a 3 second penalty) with headshots. There are 16 targets and placing headshots will reduce your time by 32 seconds.
Target Practice
Shot down the targets in the training camp caves in Connect the Dots
After reaching the cave with a training camp, you'll have to run clear the area from enemies. Find the targets and shoot all 16 of them once to get this trophy. Take note that you must shoot even the half-destroyed ones.
Target Practice
Storm Watch
Got through the sandstorm without hitting any vehicles in Hello and Dubai
In the last part of the mission, the security chief's vehicle will chase you in the freeway as the sandstorm rolls in. You have to make sure not to hit any incoming vehicles. After you turn left, stay put and wait until the trophy unlocks. If not, restart the checkpoint. Refer to the video below for more details.
Storm Watch
Dirty Laundry
Found the grenades in the laundry room in Bump in the Night
Near the end of the mission when you're on your way to the bridge, you'll come across crew cabins. This is right after clearing the kitchen area. There's a slightly opened door to the left. Grab the grenades inside to get this trophy. This room is found before you reach the heavily guarded recreational area of the ship.
Room Service
Unlocked all door breach options
Refer to Master Locksmith trophy
Master Locksmith
Used each breaching option at least once
The first breach option you have is the “kick”. As you rack up 4 breach headshots (this is the slow motion sequence right after breaching the door), you'll unlock the next breach option. You should be able to unlock all of these as you play the campaign.
Kick (starting option)
Tomahawk
Crowbar
Breaching Shotgun
Door Knob Charge
Flex Linear Charge
Sheet Charge (a.k.a Knock Knock)
Extreme Realism
Recovered from near-death 5 times without dying
You'll know when you're in this state when your screen turns red and there are blood stains around your vision; your heartbeat will also increase and the controller will vibrate. You'll probably unlock this during the main campaign. If you're so good not to reach this state normally, deliberately let the enemies shoot you until you enter this state.
Tier 1 Imports
Got 50 kills while holding enemy weapons
When enemies are killed, they drop their weapons. You can use this weapons without exchanging your standard issued rifle. To resupply the ammo of the picked up weapons, you have to get them from fallen enemies using the same weapon.
The dropped weapons in the game are as follows:
AKM (Standard AK-47)
AKS-74U (scoped AK-47)
AK-103 (red dot scoped AK-47)
870 (shotgun)
PKM (light machine gun)
Peek-a-Boo
Killed an enemy while using peek and lean in the Campaign
Take cover by pressing circle. Press and hold L2 then “peek” through any direction using your movement stick. Kill an enemy using this method.
Lean With It
Killed 25 enemies while using peek and lean during the Campaign
Take cover by pressing circle. Press and hold L2 then “peek” through any direction using your movement stick. Kill the required number of enemies using this method.
It's Dangerous to go Alone!
Requested ammo from an Ally in the Campaign
When low in ammo or grenades, simply get close to your ally and press and hold square to resupply.
Lead Farmer
Requested ammo from an Ally 25 times in Campaign
Resupply via your team mates 25 times to unlock.
Tactical Toggler
Killed 25 enemies while using Combat Toggle
When using weapons with dual scopes, aim then press R3 to enable short and long distance scopes. Kill enemies using this until you unlock the trophy.
The Axeman
Killed 25 enemies with melee during the Campaign
Just get close to an enemy and execute him using your melee attack.
Silver
Warfighter
Completed the campaign
The campaign has 13 missions, which is covered in the walkthrough section of the guide.
Tier 1
Completed the campaign on Tier 1 difficulty
Tier 1 mode is unlocked after completing the campaign in Hard difficulty. It is practically the same level of difficulty without the HUD to assist you.
Exploit: Finish the game in Hardcore difficulty then load the last mission (Shut it Down) in Tier 1. Complete the last mission to unlock this trophy without playing through the whole campaign.
(credits to BlackDevil990 of PS3Trophies.org)
Preacher's Path
Finished all the Preacher Missions
This is story-related and will unlock after completing the last mission. (Shut it Down)
Stump's No Chump
Finished all the Stump Missions
This is story-related and will unlock after completing the second to the last mission. (Bump in the Night)
Unstoppable
Completed Shore Leave on Hardcore difficulty
Story-related; just play in Hardcore and complete this mission.
Gold
Hardcore
Completed the campaign on Hardcore difficulty
Hardcore mode removes checkpoints and the option to lower the difficulty. If you die, you have to start again from the beginning of the story (1st mission). To overcome this, you have to save your game manually by quitting the game to the main menu. From the main menu, quit to your XMB then back up your game save to a USB flash drive or HDD. This will allow you to restart from the last point you've saved in case you die.
Take note that if you are taking fire or when you're on a red-out (almost dying) state and you save the game, it will be treated as death and the game will restart. Make sure to save and backup often if you're after this trophy.
Some of these trophies can “boosted” with friends or other willing players.
Bronze
There IS an I in Fire Team
Finished a round as part of the top Fire Team
To get this trophy, you and squad mate's total combined score should be highest in the match.
Brothers in Arms
Won a round with a friend as a Fire Team Buddy
You should win a match with a Fire Team Buddy that's on your PSN friends list.
Honey Badger
Used your Fire Team buddy to re-arm or heal
This can be unlocked as you play online. Simply stick close to your fire team buddy and heal/ re-arm when needed.
Squad Leader
Unlocked a soldier of each class
Refer to Warchief
Downrange
Played online for 15 minutes
Self-explanatory
Job done
Complete 3 Combat Mission objectives
Your goal in this mission mode is to plant explosives and protect it until it detonates. You don't have to do all three of these in a single match.
Silver
MVP
Finished in first place in any online match
You must have the overall highest score at the end of an online match. Take note that your personal score should be highest among your team and the opposing team. This is available in any game mode and will unlock as soon as the session ends.
All In
Called in Apache support
In a single life, you must max out the support bar to LV4. Experience is gained by completing objectives, healing your allies, providing ammo and killing enemies. The latter gives the most experience. Melee kills rack more exp.
Warchief
Unlocked all soldiers in multiplayer
The only way to unlock soldiers is by ranking up. Ranking up requires experience earned from completing objectives, killing enemies or assisting your team mates. There are 72 soldiers in the game so you'll have to reach rank 73 (871000 exp) to unlock them all. You can check the status via Battelog.
Jack of all Guns
Earn the Marksman Badge for all Weapons
You must earn a marksman pin for all 72 weapons in the game. Marksman pins are acquired when you rack 20 kills using the same weapon. Take note that weapons are available per class so you have to play all classes to use all weapons.
Sniper Class:
McMillan CS5 OGA
McMillan TAC-50 Winter
McMillan TAC-300 ROKN
McMillan CS5 FSK/HJK
McMillan TAC-300 SEAL
McMillan TAC-300 SPETSNAZ
McMillan TAC-50 GROM
LaRue OBR 7.62 SFOD-D
McMillan TAC-50 KSK
McMillan CS5 SAS
LaRue OBR 7.62 SAS-R
McMillan TAC-300 SOG
Assaulter Class:
Daniel Defense M4V1 OGA
EBR JTF-2
Daniel Defense M4V1 ROKN
Heckler & Koch AG3
Heckler & Koch 416 DEVGRU
HK G3 SPECTSNAZ
Heckler & Koch 416 GREKO'S
Heckler & Koch 416 SFOD-D
Heckler & Koch G3KA4
Daniel Defense M4V1 SAS
EBR SAS-R
Heckler & Koch AK4
Demolitions Class:
Mk16 PDW OGA
Heckler & Koch 416C JTF-2
AA-12 ROKN
Mk16 PDW FSK/HJK
AA-12 SEAL
AKS-74U SUCHKA
Heckler & Koch 416C GROM
Mk16 PDW SFOD-D
Heckler & Koch 416C KSK
Heckler & Koch 416C SAS
AA-12 SAS-R
AA-12 SOG
Heavy Gunner Class:
M249 MK 46 MOD 1
M249 JTF-2
K3 SAW
M240 FSK/HJK
M240L
PKP SPETSNAZ
M249 GROM
M240 Mk43 MOD1
Heckler & Koch MG4KE
M240B
Heckler & Koch MG4 SAS-R
KSP 90
Point Man Class:
AK-103 OGA
LaRue OBR 5.56 JTF-2
LaRue OBR 5.56 ROKN
F88 FSK/HJK
LaRue OBR 5.56 SEAL
AK-103 SPETSNAZ
AK-103 GROM
LaRue OBR 5.56 SFOD-D
LaRue OBR 5.56 KSK
F88 SAS
F88 Austeyr
AK5C
Spec Ops Class:
Heckler & Koch MP7 OGA
Daniel Defense MK18 JTF-2
Heckler & Koch MP7 ROKN
Heckler & Koch G36 FSK/HJK
Heckler & Koch MP7 SEAL
AK-103 Bullpup SPETSNAZ
AK-103 Bullpup GROM
Daniel Defense MK18 SFOD-D
Heckler & Koch G36 KSK
Daniel Defense MK18 SAS
Heckler & Koch G36 SAS-R
DD MK 18 SOG
Global Warfighters
Unlocked a soldier from each unit
Continue playing online matches to earn exp and increase your rank. This should be unlocked after reaching rank/level 13.
US OGA
Canadian JTF-2
ROKN UDT/SEAL
Norwegian FSK/HJK
US Navy SEAL
RU Spetsgruppa Alfa
Polish GROM
US Army SFOD-D
German KSK
British SAS
Australian SAS-R
Swedish SOG
Gold
Back in the Fight
Completed one tour with all classes.
To get this trophy, you have to gain 50000 exp with each of the 6 classes below:
Sniper
Assaulter
Demolitions
Heavy Gunner
Point Man
Spec Ops
This section of the guide will cover the basics of the game's Multiplayer section. This will cover the various classes, support actions and other helpful information that will at least get you ready in the competitive arena.
The game can support a maximum of 20 players at a time, down from 24 from the last title. Players will get to choose the respective country want to play as. Each country has their own class that has their own set of perks, weapons and grenades. Support actions also make a come back from the last installment, with more improvements and options.
The new feature in the game is called "Fire Team". This allows two players to work together as partners or buddies. Both players can also replenish health and ammo with the help of their partners.
Players are allowed to modify their weapons. More weapons and customization options become available as players rank up. Players can modify / attach the following parts: optics, barrel, muzzle, stocks, magazines and even paint jobs.
Support actions are special perks or rewards players can activate manually or automatically after obtaining a set number of points. Points are acquired by completing objectives, healing buddies, killing enemies etc.
There are two types of support actions; offensive and defensive. These can be either offensive or defensive. Support actions differ from class and improve as you increase your tiers.
Assaulter
Tier 1
Offensive: 60mm Mortar
Defensive: Smoke Screen
Tier 2
Offensive: Guided Missile
Defensive: Fire Team Replenish
Tier 3
Offensive: Cluster Bomb
Defensive: RQ-7 Shadow
Tier 4
Apache Pilot
Heavy Gunner
Tier 1
Offensive: Blackhawk Transport
Defensive: Smoke Screen
Tier 2
Offensive: Mk19 Grenade Launcher
Defensive: Fire Team Replenish
Tier 3
Offensive: MH-60 DAP Blackhawk
Defensive: RQ-7 Shadow
Tier 4
Apache Pilot
Demolitions
Tier 1
Offensive: M32 Grenade Launcher
Defensive: Smoke Screen
Tier 2
Offensive: SMAW
Defensive: Fire Team Replenish
Tier 3
Offensive: MUSA Robot
Defensive: RQ-7 Shadow
Tier 4
Apache Pilot
Pointman
Tier 1
Offensive: RQ-11 Raven
Defensive: Smoke Screen
Tier 2
Offensive: Airburst Mortar
Defensive: Fire Team Replenish
Tier 3
Offensive: AH-6J Little Bird
Defensive: RQ-7 Shadow
Tier 4
Apache Pilot
Sniper
Tier 1
Offensive: Switchblade UAV
Defensive: Smoke Screen
Tier 2
Offensive: 81mm Mortar
Defensive: Fire Team Replenish
Tier 3
Offensive: Rocket Artillery
Defensive: RQ-7 Shadow
Tier 4
Apache Pilot
Spec Ops
Tier 1
Offensive: Radar Jammer
Defensive: Smoke Screen
Tier 2
Offensive: 120mm Dragon Fire
Defensive: Fire Team Replenish
Tier 3
Offensive: A10 Warthog
Defensice: RQ-7 Shadow
Tier 4
Apache Pilot
The game features 50 unlockable weapons which are listed below.
Handguns
Glock 18
Glock 23
HK 45CT
SIG-Sauer P226
Vickers 1911
Assault Rifles
AK-103
AK-103 Bullpup
AK5
EBR
F88
HK 416
HK G3
HK G36C
LaRue OBR 5.56
FN SCAR
Carbine Rifles
AKS-74U
DD MK18
DD M4V1
HK 416C
HK MP7
MK16 PDW
Light Machine Guns
FN M249
HK MG4
M60
M240
PKP
Shotguns
AA-12
Remington 870 MCS
Sniper Rifles
LaRue OBR 7.62
M40A3
McMillian TAC-300
McMillian CS5
TAC50 Sniper
Explosives / Launchers
C4
Flashbang
MK19
M32
M320
M40 Minifrag
M67
M79
M83 Smoke Grenade
PDM 86
Remote Charge
RPG-7
SMAW
Melee/Misc:
Combat Knife
Minigun
SOFLAM
Tomahawk
Players can select their class before the game starts. Each class unlocks differently and has their own set of unique traits and abilities. Each class is tactically balanced as different classes tend to excel in different game modes.
Assaulter
Class Ability: Grenade Launcher
Grenade Type: Frag
Assaulters are medium speed operators who holds a secondary grenade launcher. He excels in raking multiple kills if the enemies are clustered together. Grenade launchers can be fitted to the player's weapon or can be used as a stand alone weapon. Using a grenade launcher attachment however will lower your mobility while you have your primary weapon equipped. You'll have access to assault rifles and battle rifles.
Weapons:
DD M4V1
HK 416
HK G3
EBR
Progression:
GROM - Unlocked at Rank 7
SEALs - Rank 13
SAS - Rank 19
KSK - Rank 25
OGA - Rank 31
JTF2 - Rank 37
SFOD-D - Rank 43
UDT - Rank 49
SASR - Rank 56
SOG - Rank 60
FSK/HJK - Rank 66
Alfa Group - Rank 72
Demolition
Class Ability: Ballistic Armor
Grenade Type: Remote Charge
While being the slowest operator, the demolition class is heavily armored and can resist blasts that would kill weaker classes. Explosives are planted and disarmed faster. Utilizing the Ballistic Armor will give you significant protection against enemy fire at the cost of limited mobility.
Weapons:
AA-12
PDW
Vickers 1911
Progression:
Alfa Group - Unlocked at Rank 6
FSK/HJK - Rank 12
GROM - Rank 18
SEALs - Rank 24
SAS - Rank 30
KSK - Rank 36
OGA - Rank 42
JTF2 - Rank 48
SFOD-D - Rank 54
UDT - Rank 59
SASR - Rank 65
SOG - Rank 71
Point Man
Class Ability: High Powered Ammunition / Heavy Hitters
Grenade Type: Flashbang
Not only fleet of foot, the Point Man Operator can use "High Powered Ammunition" which can cause extra damage, even capable of dropping a Demolition Class with his Ballistic Armor active. When using his special ability, the Point Man will only be given one 30-bullet clip of special ammo. Aside from the significant damage increase, the recoil produced from every shot is terrible so you may want to fire single controlled shots instead of firing rapidly.
Weapons:
DD M4V1
HK 416
HK G3
EBR
Remington 870 MCS
Progression:
SOG - Unlocked at Rank 5
SASR - Rank 11
Alfa Group - Rank 17
FSK/HJK - Rank 23
GROM - Rank 29
SEALs - Rank 35
SAS - Rank 41
KSK - Rank 47
OGA - Rank 53
JTF2 - Rank 58
SFOD-D - Rank 64
UDT - Rank 70
Heavy Gunner
Class Ability: Support Stance
Grenade Type: Mini-Frags
With high rate of fire and large ammo supply, the Heavy Gunner is a welcome addition to any fire team. Unlike the other classes, his special ability isn't anything special. However, his ability to deploy the bipod in his primary weapon greatly reduces recoil, expands the player's mini-map and gives them infinite ammunition. His cluster grenades also enables him to take care of clustered enemies. The Heavy Gunner is an all-rounder which is capable of both offensive and defensive roles.
Progression:
KSK - Unlocked at Rank 3
SAS - Rank 8
JTF2 - Rank 14
SEALs - Rank 20
UDT - Rank 26
SFOD-D - Rank 32
SOG - Rank 38
SASR - Rank 44
Alfa Group - Rank 50
FSK/HJK - Rank 55
GROM - Rank 61
OGA - Rank 67
Spec Ops
Class Ability: Spec Ops Vision
Grenade Type: Frags
The most notable ability of playing a Spec Ops operative is the ability to see through walls and covers. Overall this class is very mobile and versatile, capable of sneaking behind enemy positions and perform fatal close-range attacks. A lightweight class like the Pointman, this class is perfect for players who loves to rush in and deal with targets up close.
Progression:
JTF2 - Unlocked at Rank 3
OGA - Rank 9
UDT - Rank 15
SFOD-D - Rank 21
SOG - Rank 27
SASR - Rank 33
Alfa Group - Rank 39
FSK/HJK - Rank 45
GROM - Rank 51
SEALs - Rank 56
SAS - Rank 62
KSK - Rank 68
Sniper
Class Ability: Bipod
The sniper class has access to bolt-action or semi-automatic rifles which caters to players who want accuracy and power. Like the heavy gunner, snipers can deploy a bipod which acts as a stabilizer that reduces recoil which is a necessity for any sniper. However, this class won't be as verstatile as the others since snipers tend to excel only at certain game modes and become practically useless in others. You may also consider how small most maps in the game are.
Progression:
UDT - Unlocked at Rank 4
SFOD-D - Rank 10
SOG - Rank 16
SASR - Rank 22
Alfa Group - Rank 28
FSK/HJK - Rank 34
GROM - Rank 40
SEALs - Rank 46
SAS - Rank 52
KSK - Rank 57
OGA - Rank 63
JTF2 - Rank 69
Sector Control – This is a domination-type game mode where your team must capture and hold three flags. Medium/close range combat will be prevalent in this mode as you have to be mobile and able to hold points from the opposing team.
Team Deathmatch
This is just a generic mode where opposing teams are pitted against each other. The match will be concluded once the rival team is wiped out.
Real Ops
This is considered as a hardcore mode where all the useful HUDs such as health bar, ammo count,
mini-map, kill cams, etc are disabled.
Hotspot
There are five available bomb sites in the map where teams must capture/ defend until they get at least three sites.
Combat Mission
Pretty much the same as Hotspot but this time, attackers need to plant five bombs while the defenders need to prevent opponents from planting the bomb to win the mode.
Home Run
Two teams will play as both attackers and defenders. Attackers needs to rush towards the enemy base, grab their team's flag and take it back to the finish line. As defenders, they will do whatever it takes to stop the carrier from reaching/ cross the goal. Capturing the flag gives players 2 points while eliminating all opposition will just give you with a point. To win the game, a team should earn 10 points.
 Is Project CARS the Racing Game You've Been Waiting For?
 Mass Effect Guide
 Rocksmith 2014: The 60 Day Challenge Part 1 - Learning the Basics
 Rack n Ruin (PS4) review
 How to Unlock Call of Duty: Advanced Warfare Zombie Face, Helmet, Exo-skeleton And More