Welcome to Mario Kart Wii!
The sixth game in the Mario Kart franchise, and the fourth console version of series.
Pit all your favorite (and not so much) Mario characters against each other... in a Go-Kart race! Or go head-to-head and battle it out with classic items from the Mario series. Race on classic Mario Kart tracks, as well as ton of new ones. Mario Kart Wii also adds motorcycles in the mix.
Grab hold of the Wii Wheel and head to the finish line!
Mario Kart Wii
Inside you’ll find detailed maps and course strategies, characters stats and strategies, description and list of all the games items, as well as how to unlock all the characters and tracks.
Enjoy :)
Welcome the world of tomorrow!
Er, that is, Mario Kart Wii!
Here I'll explain some of the basics, and give some tips that even the pros might need.
You really should start here if you are unfamiliar with the game.
This section has been divided into:
- Game Types
- HUD
- Controls
- Special Terrain
- Tricks
- Drifting and Snaking
- Hints and Tips
Lets go over the basic game types.
The real single player of the game. Pits you against 11 other computer players in a free-for-all race. You race on four tracks in a row (called a “Cup”) and score points based on what position you finish in each race. Person with the most points wins the gold, second is silver, and third gets bronze.
Here you can set place times. You race against no one, just yourself. There are not items, you only start with three mushrooms. The object here is to set the best time possible on any track you want. You can also race against “ghosts” (other people that have completed the track with a good time) to see how you fair.
Basically the same as Grand Prix, only you get to chose the tracks you want. Four tracks from any cup in any order. You can race alone, or team up with 6 other computers. Team races pools your teams score against the other teams. The team with the most combined points wins.
...
A very fun mode. Your objective is to beat the tar out of the other team using items. You don't play normal tracks, rather they set up a sort of deathmatch arena. After a person loses all three balloons, their team loses a point. If you knock a balloon off of another player, you gain a point. There is no friendly fire, so you cant hurt your team mates. Battles are fought best two out of three. After you win or lose a match, you'll pick another arena and fight again until one of you has two wins.
Pretty much the same as Balloon Battle, only when you hit an opponent they drop a coin. Collect it to get a point. Team with the most points at the end wins. They are still best two out of three.
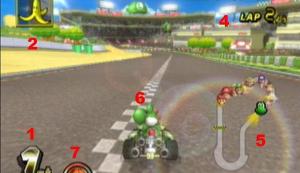
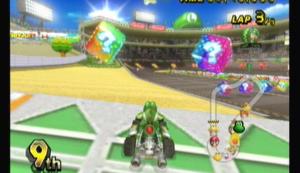
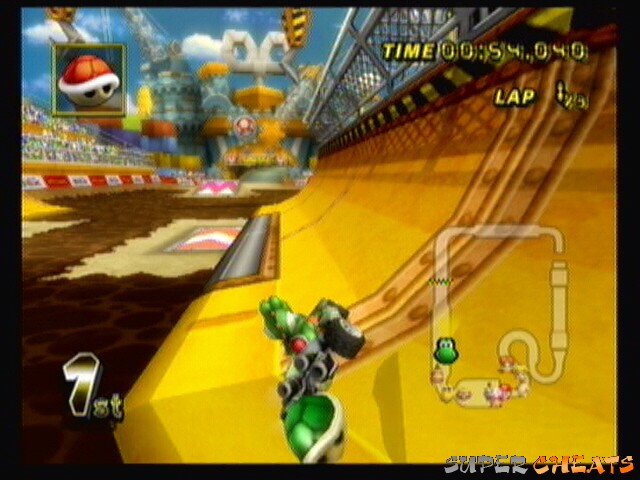
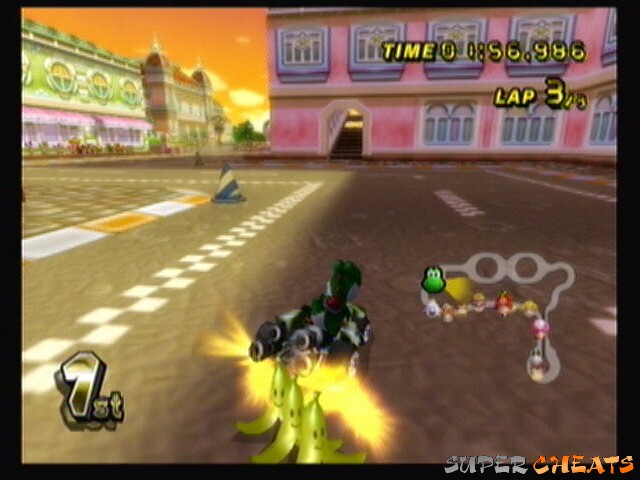
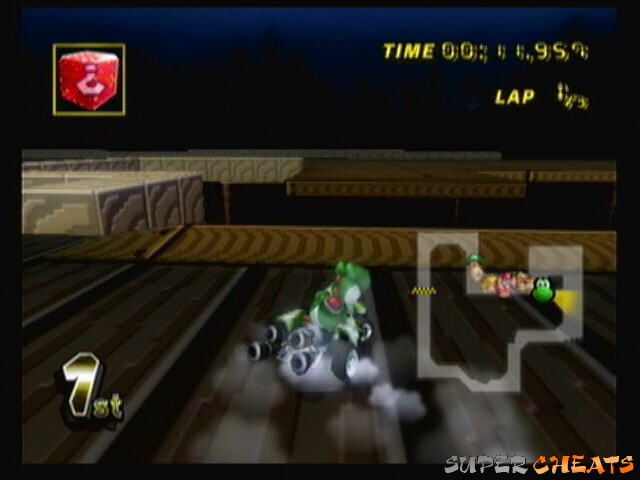
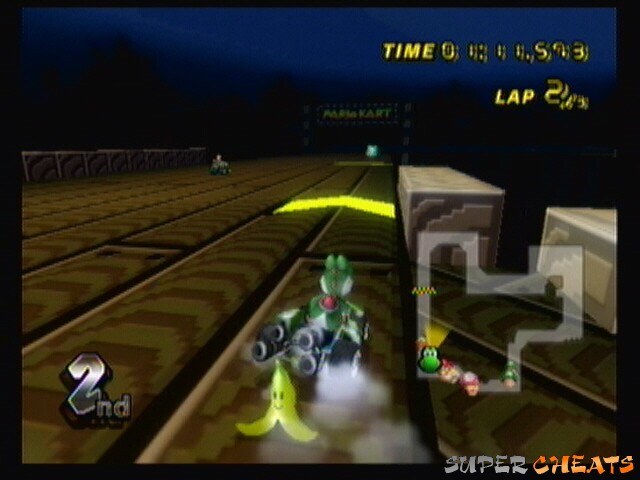
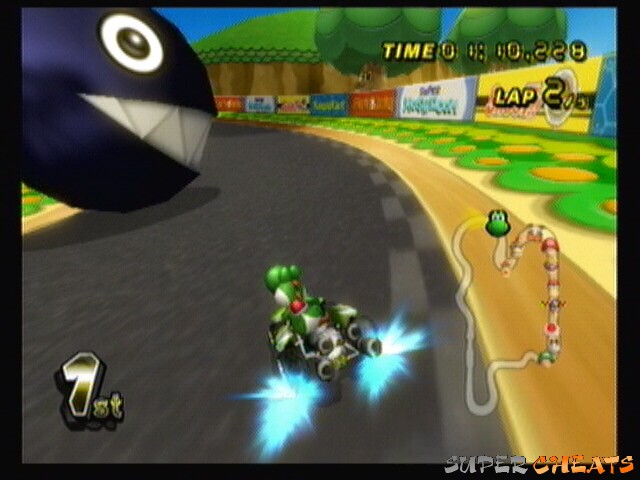
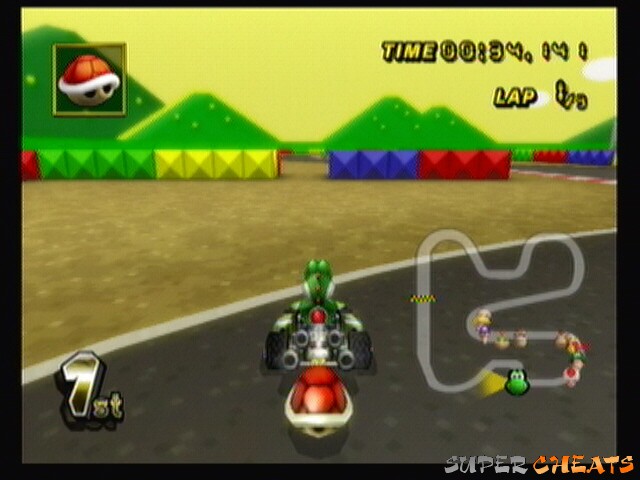
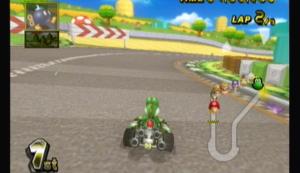
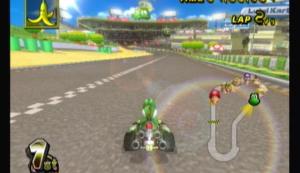
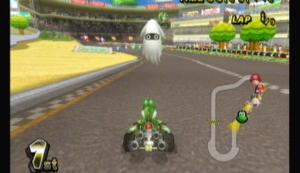
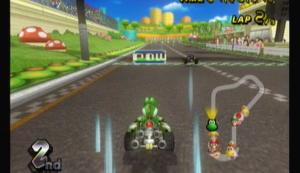
Your HUD.
1 – Position. Where you place currently (I'm in first, yay!)
2 – Inventory. Your current item. You can only carry one item at a time.
3 – Timer. How much time you've spent on the current race.
4 – Lap counter. What lap you're on versus how many laps total.
5 – Map. The layout of the course. You can also see enemy positions.
7 – Your cart.
8 – Projectile indicator. Warns you of incoming threats.
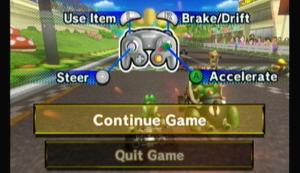
Mario Kart Wii has four types of controls. Classic Controller, Wii Wheel, Gamecube Controller, and Wii Remote Nunchuk. Each controller has it's pros and cons.
Not ALL the buttons are mapped out in the images, so I'll put something under them to further explain.
To change controllers, go to the main menu and unplug/turn off your current controller and plug your new one in. If you're using a Wavebird, you have to unplug the receiver.
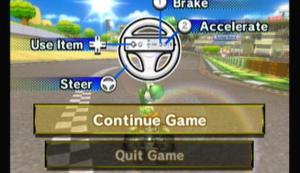
Wii Wheel
Turn the wheel to steer, and the button is pause. You can also use the B button to drag items. Shake in air to trick.
Pros:
- It was build just for this game
- Very fluid, feels very natural to steer.
- Buttons are simple.
- Makes it very easy to toss items forward/backward.
Cons:
- Impossible to snake with or jump with if you set it to Automatic
- If you do turn on Automatic drifting, you can no longer drag items
- Your car may go all over when trying to do a trick.
Overall:
I like this controller. It feels very nice. However, it's also very hard to get good Time Trial times and/or getting a good standing in 150cc. Overall though, this is great to just sit down and play with.
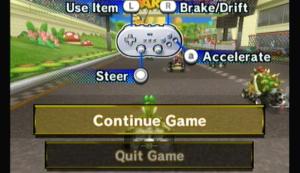
Gamecube Controller
D-pad to trick. B also jumps. X and Z look behind.
Pros:
- The traditional controller. Feels good if you're used to the series.
- Very easy to snake with.
- Well balanced, comfortable.
Cons:
- Not as fun as the Wii Wheel
Overall:
While it's not as fun, it is probably the best control choice. It's comfortable and gives you full control over your cart.
Classic Controller
Z looks back. D-pad tricks. pauses.
Pros:
- Another traditional controller. Feels more standard.
- Easy to snake with.
- Fairly comfortable.
Cons:
- Can be a bit small, the buttons may feel cramped.
- Joy stick doesn't feel as good as the Gamecube controller
Overall:
A good choice if you don't have a Gamecube controller. If you do have a Gamecube controller, there's really no point in using this. This still gives you the same amount of control as the Gamecube controller.
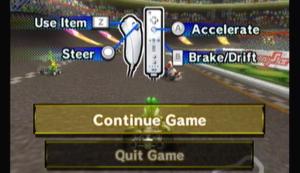
Wii Remote Nunchuk
Flicking the Wii Remote up does tricks. pauses.
Pros:
- Less restrictive then the more traditional controllers
- You don't lose control when doing tricks (like the Wii Wheel)
Cons:
- Joy stick doenst feel right, throws off snaking.
- Can take some getting used to if you've played the old games.
Overall:
My preferred choice for actual races. Feels good, and isn't as awkward as some of the other button placements. It can be hard to snake with, however.
Mario Kart has always had special terrain. Some can be helpful, with others detrimental.
- Road/pavement
This is where you want to stay. I would post a picture, but almost every course has a different look to it.
- Slow ground (grass, deep snow, water)
An area that CAN be traveled over, but will hinder your speed slightly. Best traveled over with a mushroom.
- Out of bounds (darkest colored ground, pits)
Very few tracks have these, but they do exist. Basically, when you go so far off course, the grass will change to a darker shade. If you cross that line, Lakitu will pick you up.
Pits, on the other hand, are quite frequent. Fall into one and the same thing happens.
Speed Boosts
Halfpipe Boosts
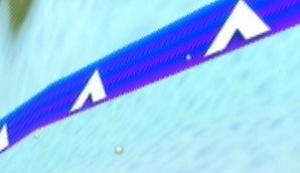
- Speed Boosts (flashing arrows)
These will give you a temporary speed boost, like a mushroom but shorter. If you see the blue ones on a wall, it means you can ride up and do a trick off of them.
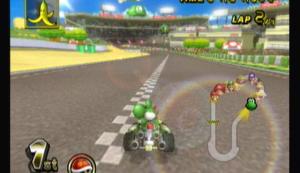
Tricks are new to Mario Kart Wii, but are key to getting good times.
Basically, when you first lift off the ground for whatever reason, press the trick button to do a special trick, then when you land you get a short boost.
The timing is crucial.
Too Early

Right here, just as you lift
Too Late
If you see blue arrows at the top of a wall, it means you can ride up the wall and do a trick then come back down like a halfpipe. You are guaranteed to land it, so don't worry about that. The timing also doenst seem as picky when doing halfpipe tricks.
Very simple. Manual means you'll have to put your car into a drift manually with the jump button. If you don't, you'll lose speed around corners and your turning radius will be huge.
Automatic will automatically put your car into a drift around every corner. Pro here is that you don't have to worry about it. However, it can make it harder to snake. Wii Wheel is pretty much the only controller you should set to automatic.
Drifting is crucial to even the most inexperienced player. If you don't drift at all, you wont win any races. Ever. Drifting means to put your car into a drift around a corner. Doing this saves your speed and tightens your turning radius.
If you have it set to Manual and you drift long enough, you can get a short burst of speed.
Jump
Drifting...
...friction building...
...and release
The longer you hold it, the more of a boost you get (it'll even turn orange).
To get longer boosts, jump and start drifting into the curve, then pull in the opposite direction of the curve while still drifting. Turing with the curve will sharpen the curve, turning against will widen it. Using this, you can control your position on the track and keep from falling off, thereby prolonging your drift and eventual boost.
Remember the above. Snaking is much harder in this game then in the DS version.
The concept of snaking is pretty easy, but it takes a lot of practice to actually see results.
To snake, you basically drift constantly, even on straight-aways. To do this, start on one side of the track (lets say left) and start drifting to the opposite (which would be right). Now pull back towards the left to prevent from pulling a 180 or crashing off the right side. By they time you reach the right side of the track, you should have been able to build up a boost. Let it rip and immediately start on your next drift toward the opposite edge again.
Snaking gets it name from the snake-like movement this technique gives.
As said, snaking is possible, but harder. It also doesn't pay off as big as in the DS version. There is also a fine line between snaking and simple drift boosts. Drift boosts are a standard part of the, and just shows you know your curves. Snaking takes it to an extreme, as you do it even where you're not cornering.
- Boost Start
At the start of a race, press and hold the accelerator just as the 2 starts to disappear to get a boost right out of the gate.
Here.
- Slipstreaming / Drafting
Slipstream isn't new, but it has been made way easier. This is actually used by professional racers. Basically, when a car is moving, it displaces the air in front of it, creating an area of low pressure behind it. This low pressure area means less air resistance and faster top speeds. Just get in line behind another cart and stay there till the boost kicks in.
Get in line...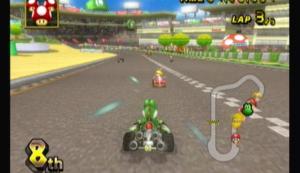
...start the stream...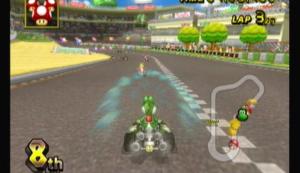
...and boost!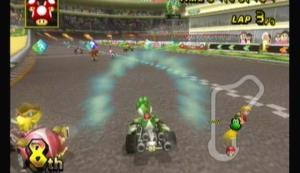
Rush right past them!
- Wheelies
This can only be done on a motorcycle. When going in a straight line, press the trick button. Your front tire will lift up and you'll get a short burst of speed. However, your tire will remain up for around 4 seconds, meaning you cant steer during that time and are very susceptible to being bumped. DON'T try this with the Wii Wheel. Just don't do it.
- Boosting on recovery
If you fall off the track, Lakitu will put you back on. If you press the accelerate button just as your tires touch the ground, you'll get a boots.
- Dragging items
Dragging items has been a part of the Mario Kart series for as long as I can remember. For any item that permits, press and hold the use button. The item will appear behind you and drag behind your cart. What this does it two fold: 1) it opens up your inventory so you can hold another item. 2) it protects you from incoming shells.
Uh Oh... 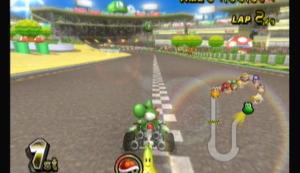
Ah ha!
Haha!
- Throwing items
I've never found much of a use for this in a race, but you can throw certain items forward instead of dropping them back. Can come in handy in Battle Mode.
- Looking Backward
Looking backward can be helpful if you are trying to hit an opponent behind you, or if you hear a shell coming. It can also prove invaluable during Battles. Just don't lose track of what's in front of you.
I see you.
Knowing is half the battle, right? Here you can find all the characters and all the vehicles statistics in the game. Choose the ones that best fit your racing style.
Why I combined these two sections is because of a new mechanic in Mario Kart Wii. Whereas in old MK games every character had different stats, in MKWii, every character within the same weight class as the exact same stats. The stats vary based on your vehicle, not your character. Also, all characters within the same weight class have access to the same vehicles.
Ok, here’s what the stats mean:
- Speed: Higher this stat, the higher the vehicles top speed will be.
- Weight: The higher the stat, the lower you’ll jump but the farther you’ll be able to push
opposing cars.
- Acceleration: Higher this stat, the faster the vehicle will get up to top speed.
- Handling: Higher this stat, the easier it is to turn the car.
- Drift: Higher this stat, the easier it will be to get a drift boost.
- Off-road: Higher this stat, the less effect going off road will have.
- Mini-Turbo: The higher this stat, the longer and more powerful your drift boosts will be
Listed in the order that they appear in game.
Lightweights
Baby Mario
Baby Luigi
Baby Peach
Baby Daisy
Toad
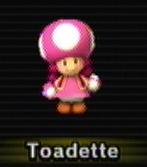
Toadette
Koopa Troopa
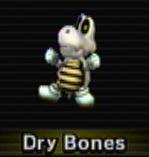
Dry Bones
Pros:
- Acceleration
- Handling
- Mini-turbo
Cons:
- Speed
- Weight
- Off-road
Middleweights
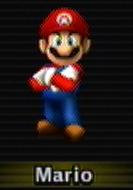
Mario
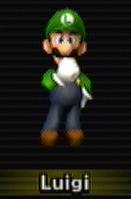
Luigi
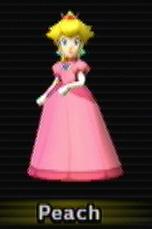
Peach
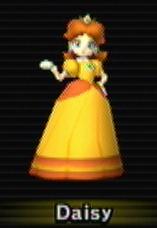
Daisy
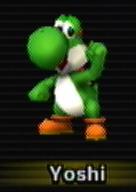
Yoshi
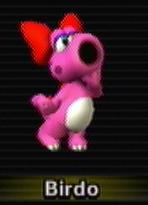
Birdo
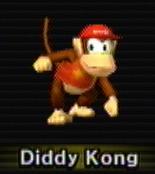
Diddy Kong
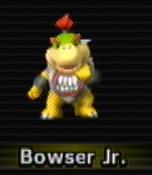
Bowser Jr.
Pros:
- Balanced all-round
Cons:
- Not particularly great at anything
Note:
Bowser Jr. is NOT Baby Bowser. Baby Bowser is Bowser as a baby. Bowser Jr. is Bowser’s son. Some people just can't grasp that concept.
Heavyweights
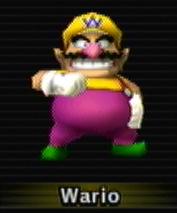
Wario
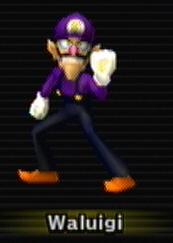
Waluigi
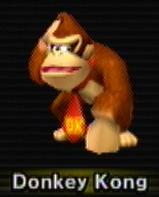
Donkey Kong
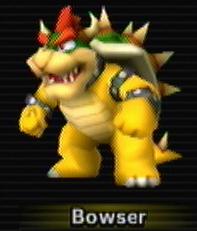
Bowser

King Boo
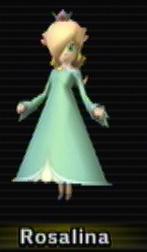
Rosalina
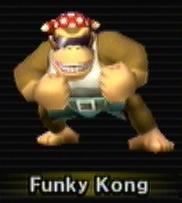
Funky Kong

Dry Bowser
Pros:
- Speed
- Weight
- Off-road
- Drift
Cons:
- Acceleration
- Handling
- Mini-Turbo
Notes:
Dry Bowser is from New Super Mario Bros.
Rosalina is from Super Mario Galaxy. Why she is a heavyweight is unknown.
Misc
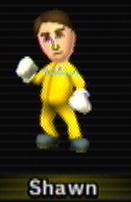
Mii
Notes:
The weight class of your Mii is dependent upon the weight of your Mii.
There is also an alternate costume that makes you Mii wear Mario’s cloths.
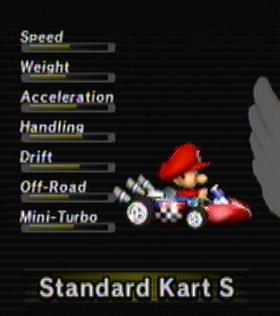
Standard Kart S
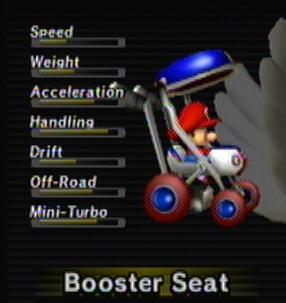
Booster Seat
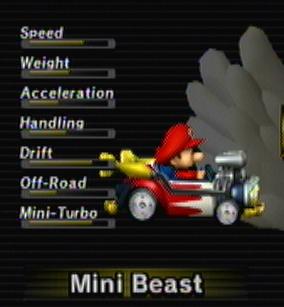
Mini Beast
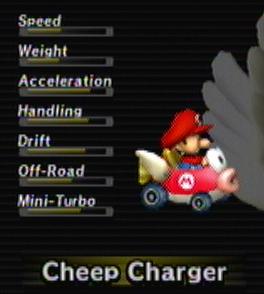
Cheep Charger
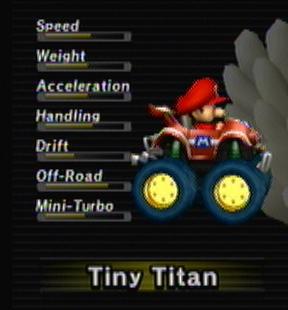
Tiny Titan
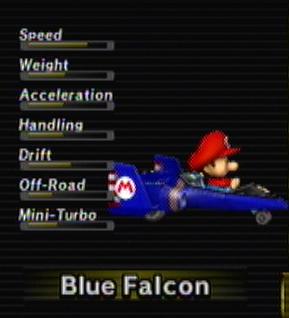
Blue Falcon
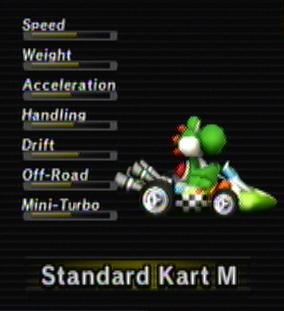
Standard Kart M
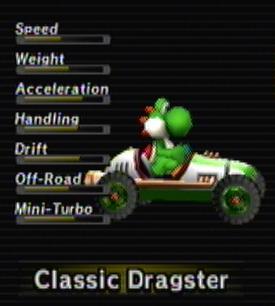
Classic Dragster
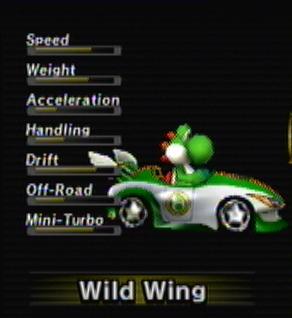
Wild Wing
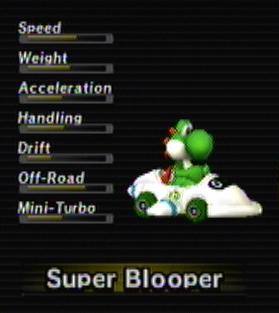
Super Blooper
Daytripper
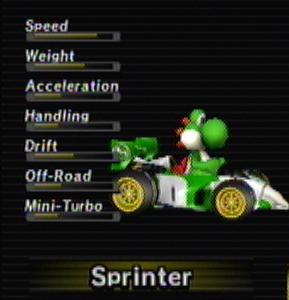
Sprinter
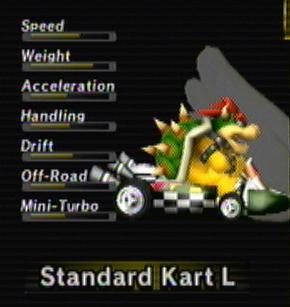
Standard Kart L
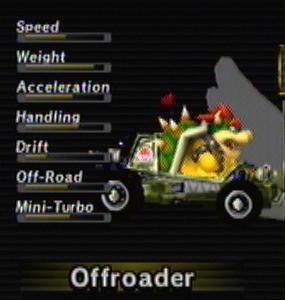
Offroader
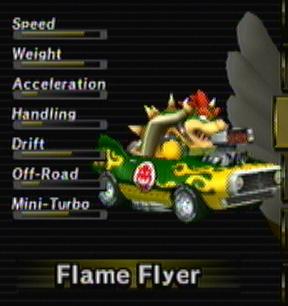
Flame Flyer
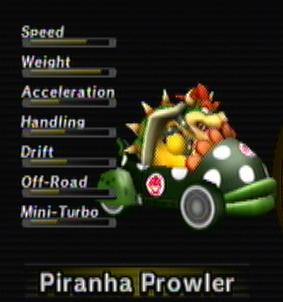
Piranha Prowler
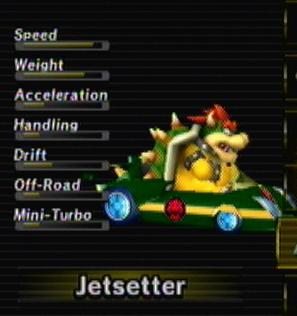
Jetsetter
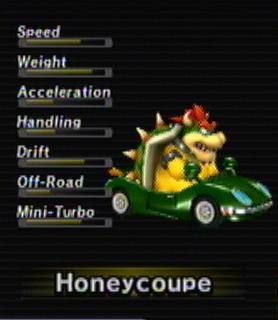
Honeycoupe
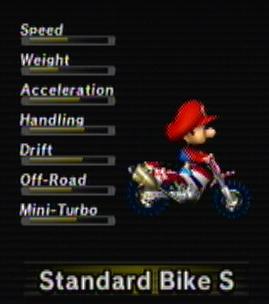
Standard Bike S

Bullet Bike

Bit Bike
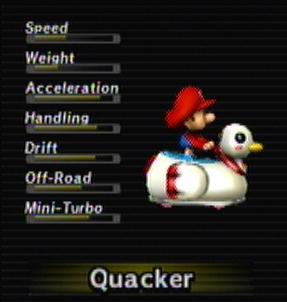
Quacker
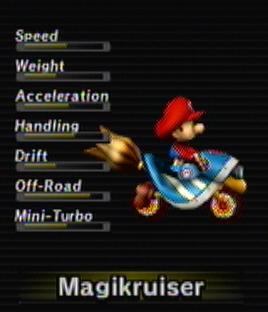
Magikruiser

Jet Bubble
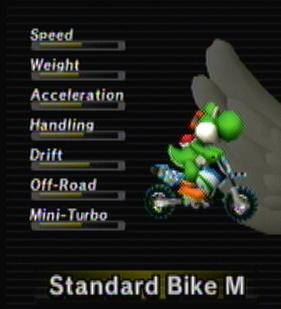
Standard Bike M
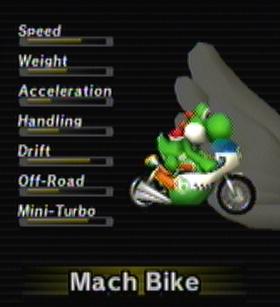
Mach Bike
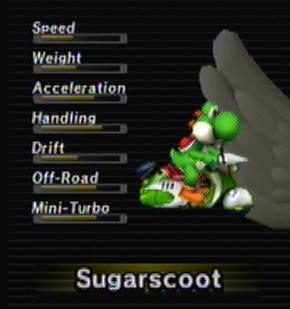
Sugarscoot
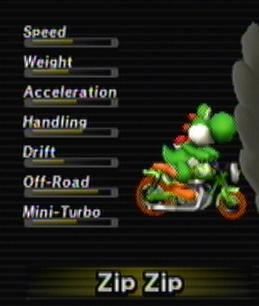
Zip Zip
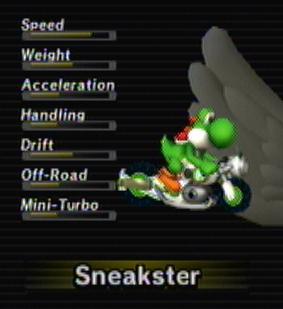
Sneakster
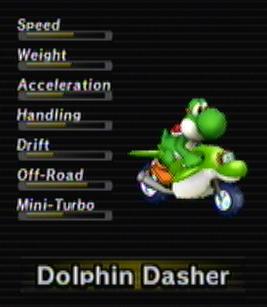
Dolphin Dasher
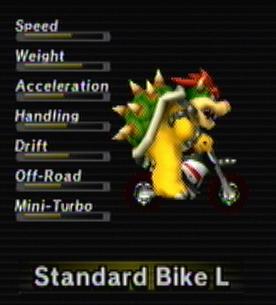
Standard Bike L
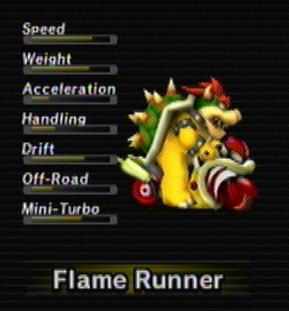
Flame Runner
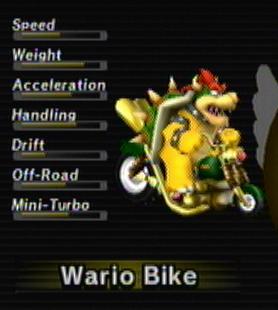
Wario Bike
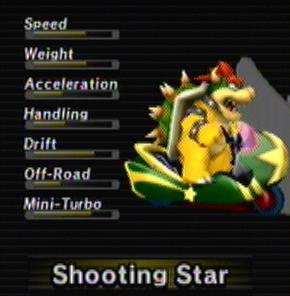
Shooting Star
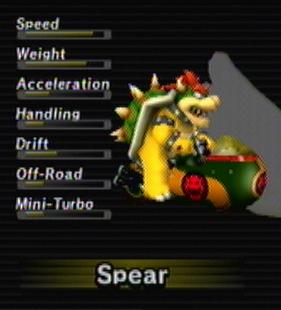
Spear
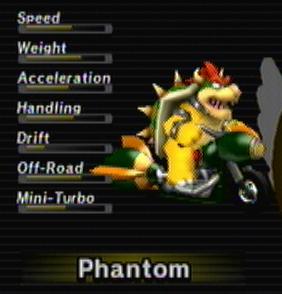
Phantom
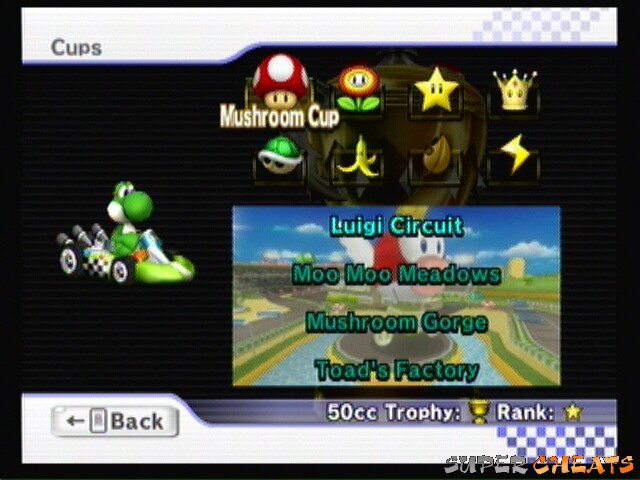
Choose your Cup.
Here, look over the maps and strategies for all the courses in the game. Shortcuts, item boxes, everything is included.
You should really read the getting started section first, so that you'll know what I'm talking about when I say things like “Drift boost.”
Grand Prix mode breaks the tracks down into 4-course cups. Whoever gains the most points within those four races wins the cup. To get points, finish in a high position. First gets the most, obviously, with 15 points. Last gets nothing.
Your position isn't the only thing you should watch, however. If you're going for a good grade at the end of the cup, you also need to avoid hitting things and get a really good overall time. Letter grades are considered to be pretty low, and even if you are terrible at the game, getting an A grade is pretty easy. Now, the star grades are harder to get. You'll get a one star grade by pretty much just coming in first place in all four courses. Two and three stars are even harder, as they account for how long you were in first place (were you in first for the entire race, or did you overtake the lead just at the end), how many times you crashed, and your race time.
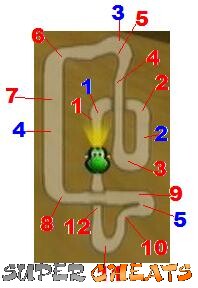
At the beginning of each course, there will be a map. The map will have points on it that I will refer to in the text below. If you cant see all the points on the map, click the image to enlarge it. Also, the large Yoshi head marks the starting line.
Blue numbers are item box locations, Red are strategy points.
Each course is listed in the navigation bar to the left. The letters in brackets correspond to which cup it is in, eg... (MC) would be Mushroom Cup.
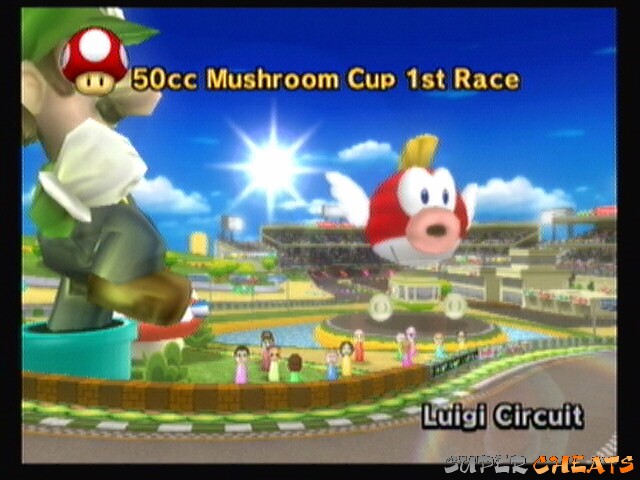
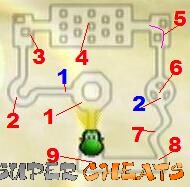
Luigi Circuit
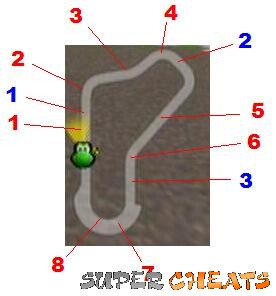
Map
1) Nice straight for a wheelie.
2) Drift-boost around this bend
3) Don't bother with the curves, do a wheelie and go straight though them all.
4) Orange drift boost around this bend
5) Start a wheelie and continue down to the next point
6) If you have a mushroom, you can cut across the sand and jump off the ramp. It's a nice and easy shortcut.
7) Drift into the boost pads here, charging up a boost. At the end of the curve, wait for the pads boost to wear off then unleash your drift-boost. Start the next lap with a wheelie.
8) if you have a mushroom and feel a little more daring, take the corner sharp at point 6 and use the mushroom though the sand behind the pipes, drifting as you go. As soon as the mushroom ends, unleash the boost to get back on the track right behind the finish line.
Miscellaneous:
A very simple course where any kart could win. A nice test track as well, as you can do pretty much everything on it.
Point 7: Drifting
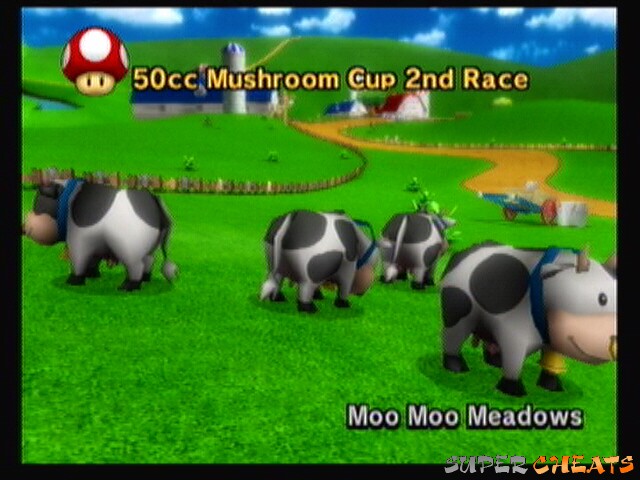
Moo Moo Meadows
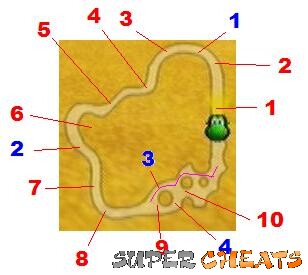
Map
1) Wheelie though this straight
2) Drift boost around the bend
3) Another drift boost
4) Watch for Moo Moos in this area. They often wonder into the road.
5) Wheelie though.
6) If you have a mushroom, drift boost into this section of grass and use the mushroom to cut off the corner.
7) Wheelie though.
8) Drift Boost
9) Don't take this ramp. It's not a shortcut. It'll land you right in the grass in a hard to maneuver though part of this section. The purple line shows the best course though here.
10) Watch for the Monte Moles here. Don't cut through their dirt paths.
Miscellaneous:
Watch the Moo Moo in the first part, as they block the road in later laps. The green mounds at the end also trip people up a lot, so pick a course and stay with it.

Point 4: Moo Moo
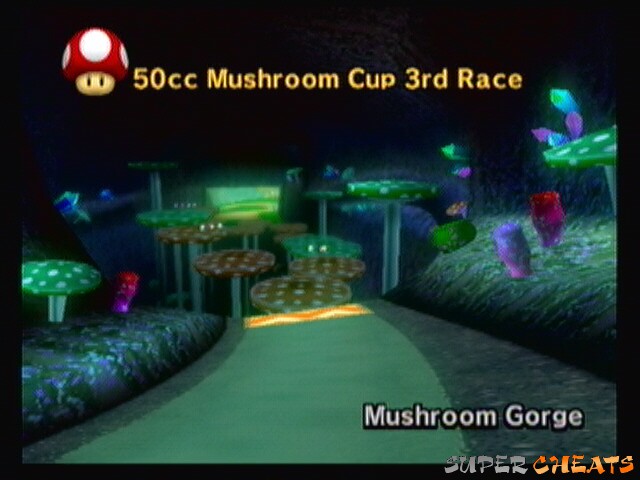
Mushroom Gorge
Map
1) Wheelie though point 1
2) Start a drift-boost here, then use that momentum to cut the corner at point 3 and start another drift-boost before the jump.
3) See 2
4) Your first Jump Mushroom. Land on it to hop across the gap.
5) Drift boost around the corner
6) Wheelie into the low road, cutting the corner with a drift boost. End the route with the boost pads at point 8.
7) this path looks faster as it's shorter, but it's not. Take the lower path at point 6.
8) See 6.
9) Drift boost around the bend and take the lower (right) row of mushrooms.
10) Upon landing, if you have a mushroom, you can cut the grass here and cut out the bend. Also, watch out for the goomba.
11) Start the next lap right with a wheelie.
Miscellaneous:
Be careful when going over the jump mushrooms, as you can be thrown off course pretty easily, especially with the Wii Wheel.
Point 5: Left track
Point 9: Jump Mushroom Gorge
Toad's Factory
Map
1) Drift boost around the bend.
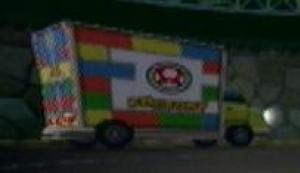
2) Watch for the crushing gumball machines. Wheelie through this area. Note the belts under them, though. Find the one with the green arrows and ride it to the exit, as it will speed you up. The red arrows will slow you down, though, so be warned.
3) Drift boost around the corner.
4) Carefully jump across the moving platforms here.
5) Watch the belts, as they bring boxes with them. Don't try for an item box unless it crosses right in front of you.
6) More moving platforms to jump over.
7) Hug the corner and drift boost around.
8) In this section, the belts change direction ever lap, so stay on the green arrows.
9) Hug the corner again and drift boost through.
10) Don't wheelie in this section.
11) Drift boost around the corner.
12) Here the walls move back and forth, revealing mud and/or boost pads beneath them. If you have a mushroom, don't bother and just boos through. Otherwise, you'll have to time the ramps to either trick off of them or grab a hidden boost pad under them.
Miscellaneous:
Some the corners can be tough, so good handling is a good trait for this course. The mud at the end can also be a pain, and comes down more to luck then anything.

Point 8: Drifting while on the belt
Point 12: Hidden boost pads
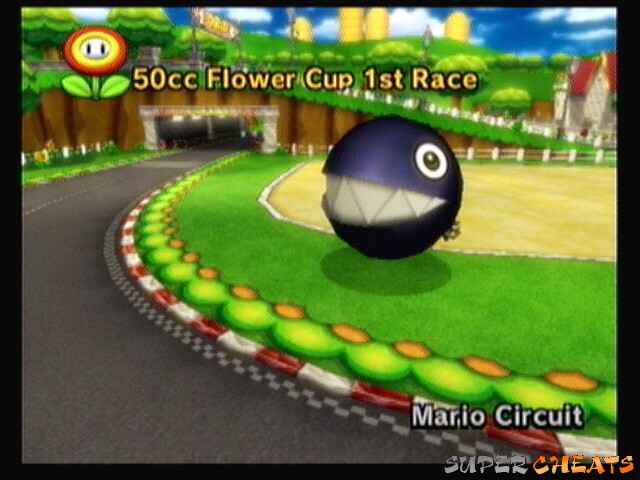
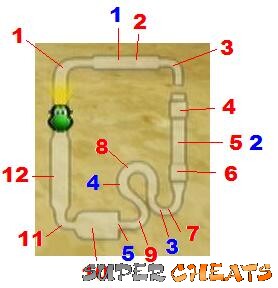
Mario Circuit
Map
1) Wheelie all the way from point 12 to point 2
2) Drift boost
3) Wheelie
4) Drift boost
5) Wheelie down, avoiding the Goomba
6) Chain Chomp. If you are the first one though, stay far to the left, he cant reach you. If not, his head should be extended out into the road already, giving you a chance to take the inside of the track, or, better yet, use a mushroom to go straight through the sand.
7) Wheelie
8) Drift boost
9) Watch for the goomba and wheelie
10) Goomba all the way down this section.
11) Drift boost and hold it to point 12, or release it half way and start another boost at point 12.
12) See 11
13) If you boosted twice, start your wheelie here.
Miscellaneous:
The chain chomp is a wild card, it's hard to predict. Be careful on approach. Overall a very basic track though.
Coconut Mall
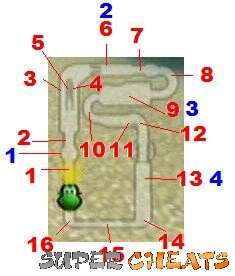
Map
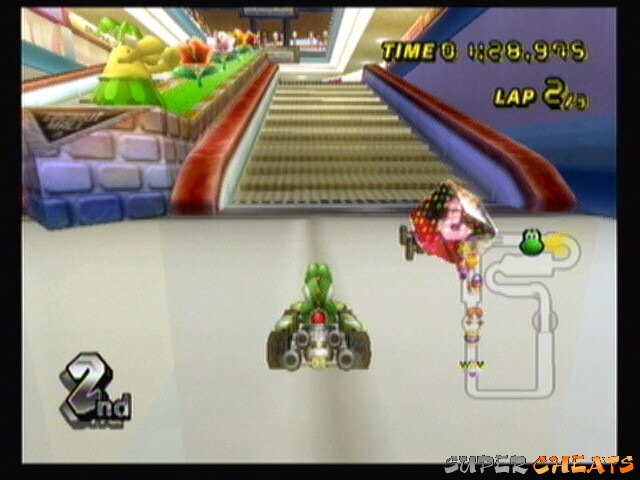
1) Start with a wheelie right up the escalator
2) Here are the escalators. Watch them carefully and take the one that goes up (it changes from lap to lap).
3,4,5) There are three different courses here:
3) The upper path (left or right of the escalator). The best path if you don't have a
mushroom.
4) Down the escalator. Slow path. It's easy, but it is slow.
5) The shortcut. You'll see an open store front on the right. Use a mushroom to boost
through it and out the other side. Even without a mushroom, it's still pretty fast.
6) There is a fountain here that you can trick off of to get an item.
7) More escalators. Choose the up one and continue.
8) Hug the corner and drift boost.
9) Trick off the plant ledges to get mini boosts.
10) Drift boost around
11,12) another split.
11) The lower path. Arguably faster, but not as fun.
12) The upper path. Drift boost around the bend, then use the pads to get a boost and
trick off the edge.
13) Either way, you land here. Do a trick off the ramp.
14) Drift boost
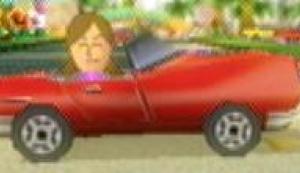
15) Watch for the Mii drivers. The boost pads wont do you any good if you hit a car.
16) Drift boost and start a wheelie.
Miscellaneous:
There are many different courses to take, and many depend on your race style and the kart you're using, so play around with it and find which one you like best.
Point 2: The person points to the right escalator
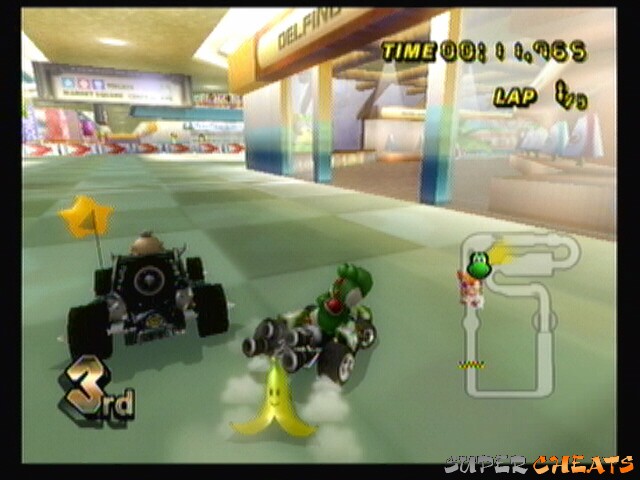
Point 4: The store front shortcut

DK Summit
Map
1) Drift boost
2) Drive into the cannon and it will shoot you to point 3.
3) See 2.
4) Drift boost to the left side quickly. Release the boost just as you come to the crest of the trick pads. Trick off of them to go flying around the corner much faster then simply driving around.
5) Take the left path and trick off the small jumps. Wheelie after.
6) Watch the deep snow and drift boost around the corner.
7) Trick off of all the hills. Take the middle path over the ramp.
8) At landing, swerve right. Drift boost right into the hole on the right. If you angle it right, you should cut the entire corner and land on the other side.
9) Drift boost.
10) In this area, use the ramps on either side to trick over the snow, but don't go back and forth repeatedly as that will actually slow you down.
11) Watch for the Shy Guy snowboarders.
12) Drift boost around and wheelie to point 1.
Miscellaneous:
This is a fun map. If you're not going for a good time or three stars, take some time and just ride those halfpipes as much as possible. Anyway, the shortcut at point 8 will take some practice, so don't expect to land it your first time.
Point 4: Drift, then trick to get around the corner
Point 8: Start drifting
Point 8: Then release to get over the gap
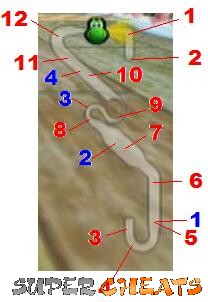
Wario's Gold Mine
Map
1) Wheelie to the bend.
2) Drift boost around the bend, straightening out before the dip. The drop is steep and hard to control your kart on. It also doesn't have any railings and is rather narrow. You can still wheelie down it with practice.
3) Drift boost around the first corner coming in and switch immediately around the next corner.
4) Avoid the Swoop while wheelieing
5) Hug the left side to keep up the wheelie
6) You can drift boost here if you're on the left side. Wheelie to the ramp and trick off it.
7) The mine carts enter here. Watch the track they're on to gauge their moment.
8) Hug the right side, then after the bend cut across the track and head straight right to where the mine carts are headed.
9) Jump the gap where the mine carts leave the track for a shortcut.
10) It's narrow and windy, so don't fall off when you hit a boost.
11) Be very careful of your landing, it's a small target if you're not lined up right.
12) Drift boost around and start a wheelie to point 1
Miscellaneous:
The drop right out of the gate often trips people up, try not to fall off. The shortcut at the end is often forgotten about and can shave a lot of time off.
Point 9: The shortcut
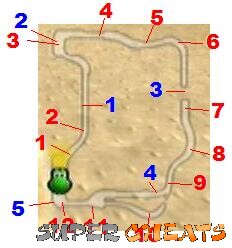
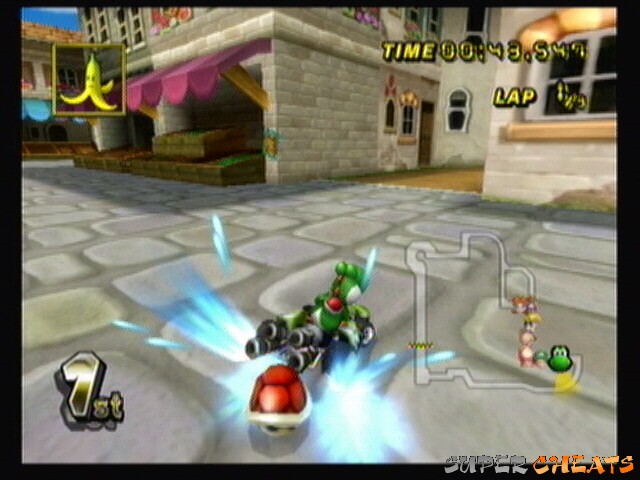
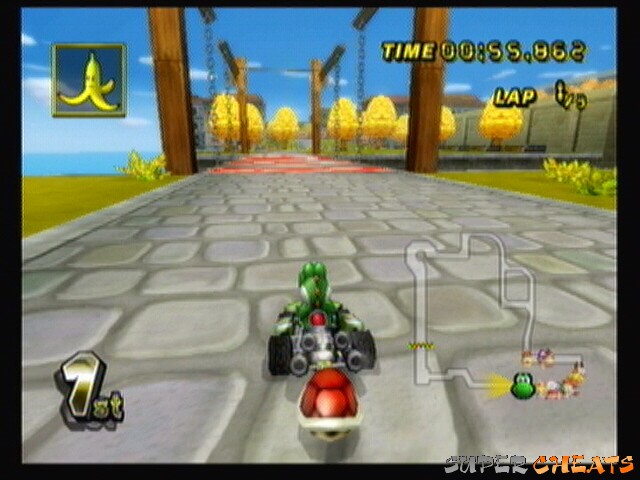
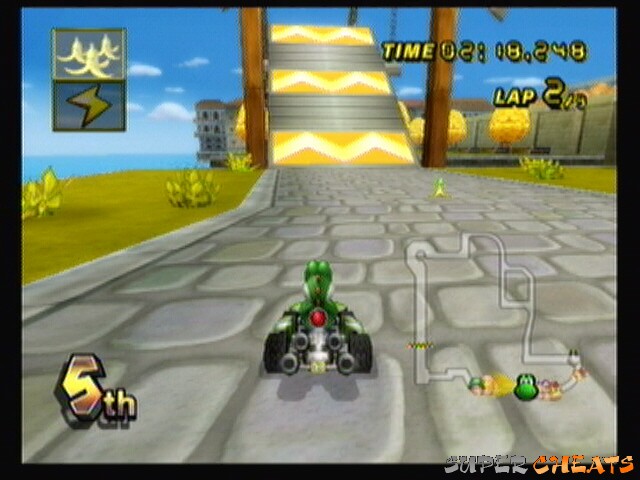
Daisy Circuit
Map
1) Wheelie to point 2
2) Start a drift and hold it to point 3
3) By this point, you should be facing the houses (literally the opposite direction of when you started the drift). You should see a small opening in one of the building with a ramp leading up. It's best if you have a mushroom, but even if you don't going up this ramp is still faster.
4) The quickest way through here is to keep right and make a straight line through right side with a wheelie
5) Drift boost around.
6) Start a wheelie and take it down to point 7
7) Drift boost around the bend then wheelie to point 8
8) Drift boost again and wheelie to point 2
Miscellaneous:
The shortcut at point 3 will take some getting used to, but is well worth it. There are also several points where you can get up on the sidewalk, but it's not really worth it as it slows you down.
Point 3: The shortcut
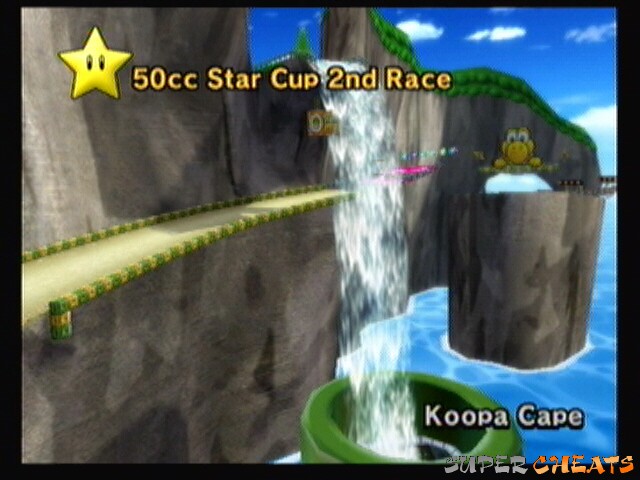
Koopa Cape
Map
1) Wheelie to the jump.
2) Keep left and drift boost around the bend, tricking off the jump.
3) If you have a mushroom, use the boost from the trick and a mushroom to get across the grass.
4) Cut the corner sharp and drift boost around.
5) Off the jump and land in the water. Stay in the water till point 7.
6) Drift boost around the bend.
7) Get out of the water here and go through the cave thing.
8) Back in the water and drift boost around the bend.
9) Drift boost again here.
10) Here you'll fall into an underwater pipe with Koopa Zappers in it. Stay in the running water all the way through.
11) Drift boost around.
12) Drift boost around.
13) Out of the water and cut the corner with a drift boost. Wheelie to point 1.
Miscellaneous:
Another just pure fun map. Some may not see it, but the whole insane-floating-island-water-park thing is awesome. One of the few tracks where staying in the water is actually a good thing. Mind the Koopa Zappers at the end.
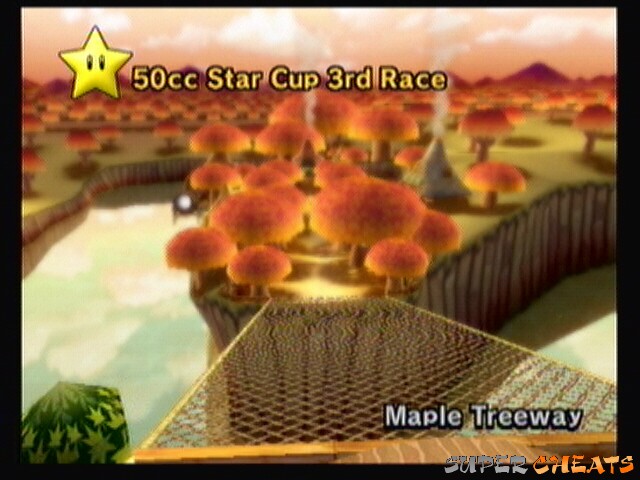
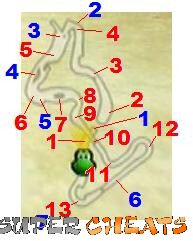
Maple Treeway
Map
Let me explain something right off:
- The first pink line is a shortcut.
- You land on the green line
- After the green line and the corner, you are on the other pink line
- After the next two corners, you're on the grey line.
Now, navigation aside...
1) A shortcut. You'll see a break in the fence. Take it.
2) A cannon will shoot you up to point 3
3) See 2
4) Drift boost around the bend
5) Hug the corner and drift boost
6) Beware the Wigglers. You can wheelie past them.
7) Drift boost onto the branch and use the pads to propel you to point 8
8) Use the trick pads to do a trick and get another boost
9) This path is pretty straight forward, so just do some wheelies till point 10
10) On this swaying rope bridge, you can trick every time it throws you into the air. You can usually get 3-4 boosts in.
11) There are three paths here: Left and right are the same and take you up to a ramp that you can trick off of. The center has some roots that you can trick off of as well. Wheelie to point 1.
Miscellaneous:
A very hard map to draw points on (as you can see), but very tranquil and easy overall. A medium kart or bike will probably fair best.
Point 1: Shortcut
Point 10: Trick when it throws you

Point 11: Take the left or right path
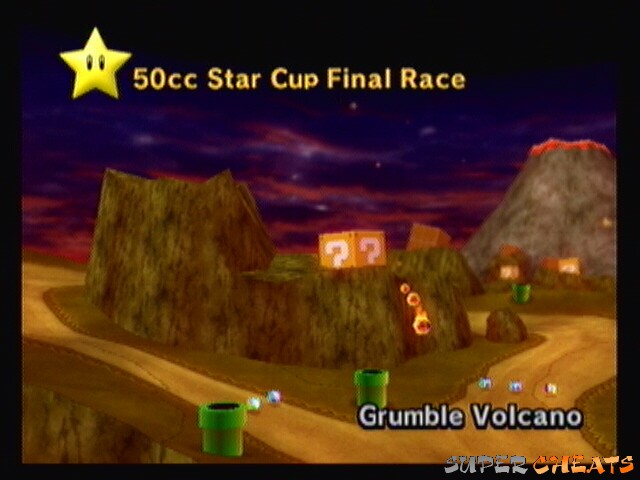
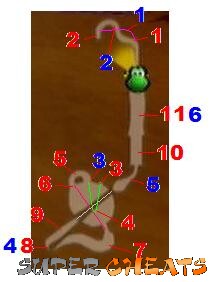
Grumble Volcano
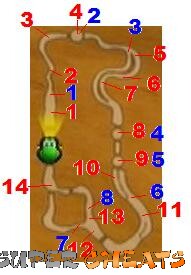
Map
1) Wheelie and trick to point 2
2) You should be able to do a drift boost here
3) Hug the corner and drift boost around
4) The platform moves, so watch your landing
5) Take the upper path on the left. Don't go off into the darker gravel. Drift boost.
6) Drift boost
7) Drift boost
8) The platforms move, so time your jump
9) This platform also moves. This time, veer right and land on the upper right path.
10) Follow this path to the boost pad
11) Land, and hug the corner, doing several drift boosts
12) Watch out for Fire and Fire Snakes in this area. Take the right path
13) Drift boost into the jump around the bend ahead.
14) Drift boost and wheelie to point 2.
Miscellaneous:
A bike is going to fair well here, especially on the tunnel part. Watch the fire enemies, as their numbers increase as the race drags on. Also, parts of the track will become smaller in later laps as the ground is engulfed in lava and begins to crumble.
Dry Dry Ruins
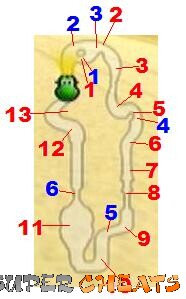
Map
1) Drift boost into the lower path. If you're on lap 2, you can trick off the fallen obelisks.
2) Drift boost around the bend
3) Watch the Pokey and wheelie down to point 4
4) Drift boost one
5) Release and start a second drift boost
6) You might be able to get a third drift boost in here
7) Wheelie down this stretch. If you're on lap 2, you can trick off the fallen obelisks.
8) Avoid the swooper
9) Trick off the first ramp, into the second one and trick off that to land straight.
10) Drift boost all the way to the next room
11) In the first lap, watch for the Pokey and ride through the center with a wheelie. In laps 2 and 3, go around to the left and drift boost through to the bend.
12) Drift boost around the corner and do a second boost around the next, finally with a third boost just before the finish line.
13) If you have a mushroom, you can cut the corner and speed through the sand starting at point 12.
Miscellaneous:
Horridly simple, horridly boring.
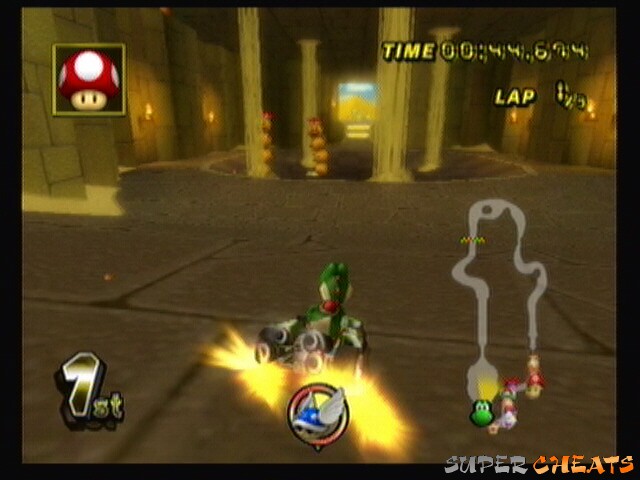
Point 11: Lap 1
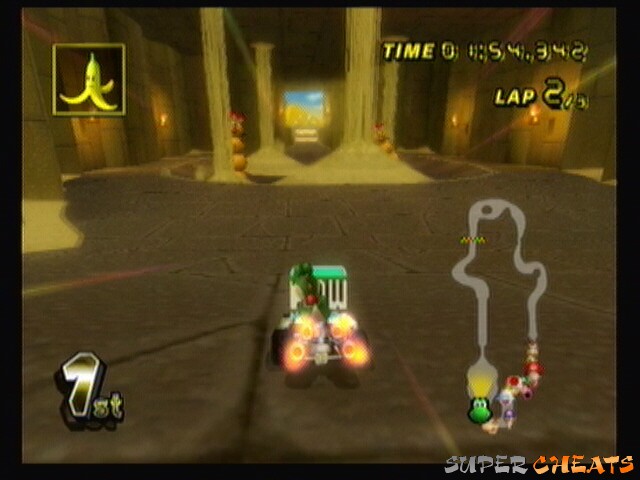
Point 11: Lap 2
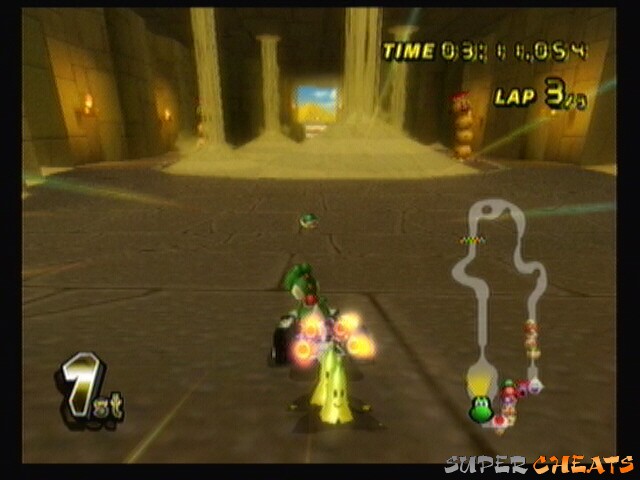
Point 11: Lap 3
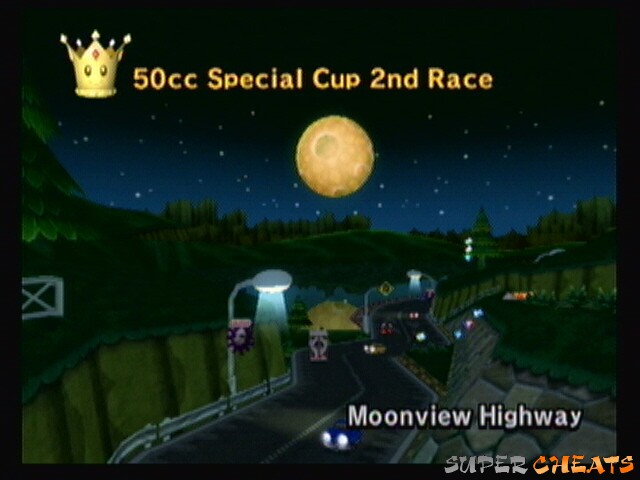
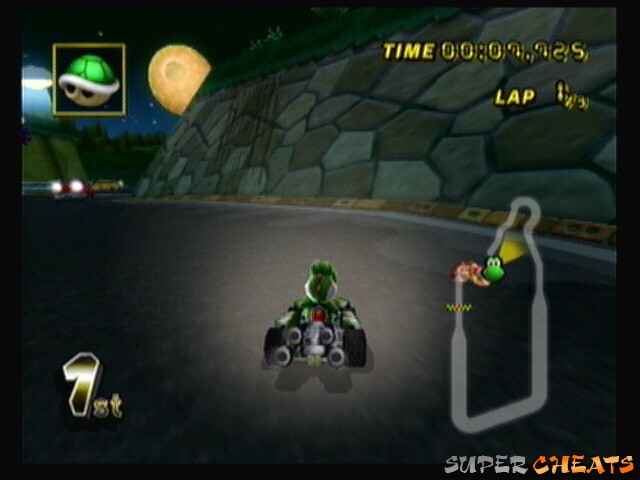
Moonview Highway

Map
1) Wheelie to point 2
2) Drift boost around the corner
3) Drift boost again, but go up the grass embankment on the right at point 4
4) See 3
5) Take this dirt path down to the boost pad and trick off, landing around point 6. If you have a low-handling kart, you'll want to start drifting before going over the jump.
6) See 5
7) Drift boost around the bend and wheelie to point 8, hitting as many boost pads as possible.
8) Hug the corner and drift boost around. Wheelie to point 9
9) Hug the corner again and drift boost around. Wheelie through the tunnel on the right side, hitting the boost pads.
10) This tunnel can be tight and hard to dodge swerving cars in, so be careful.
Miscellaneous:
The new Toad's Turnpike. Unlike Mushroom Bridge from Double Dash, it's actually hard and worthy of being called a new Toad's Turnpike. The cars swerve erratically, especially at the end. The Bob-omb cars can be deadly. Try launching a shell backward at one that is nearing your opponents.
Point 4: The embankment
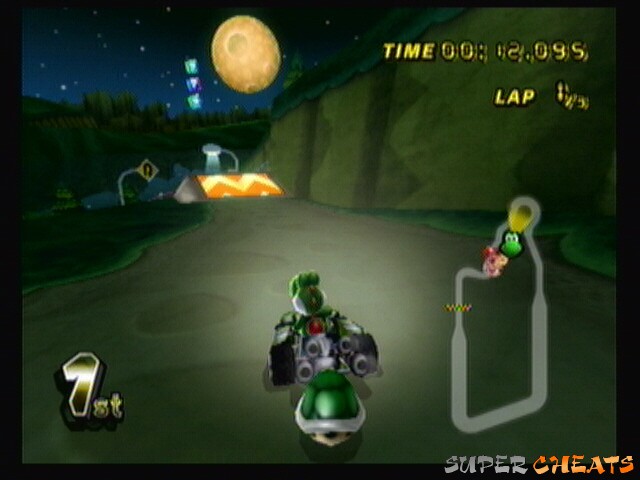
Point 4: The shortcut
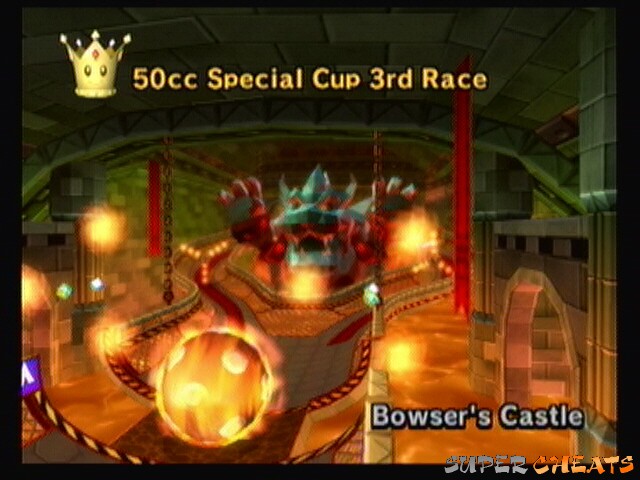
Bowser's Castle
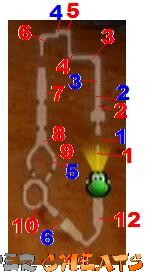
Map
1) Wheelie across the ramp.
2) This room waves up and down, but it doesn't effect you any.
3) Drift boost around the corner
4) Drift boost again
5) Another drift boost
6) You can either hold the boost from point 5, or start another boost here.
7) Watch for Mechanical Bowser at the end. Stay to the right and dodge his fireballs. Use the halfpipe ramps to jump the gaps.
8) Take the right path, it's faster.
9) Drift boost around the bend.
10) Watch the Thwomps. You can either drift boost all the way around this circle or drift boost several times.
11) Drift boost around
12) Watch for the lava geysers I this area. Touching the mounds wont hurt you, only the fire itself will. If you're lucky, you may even be able to trick off a few.
Miscellaneous:
The Mech. Bowser is pretty cool. So is the wavy room. Has a lot of tight turns, though, so be careful.

Point 12: Jump off the geysers
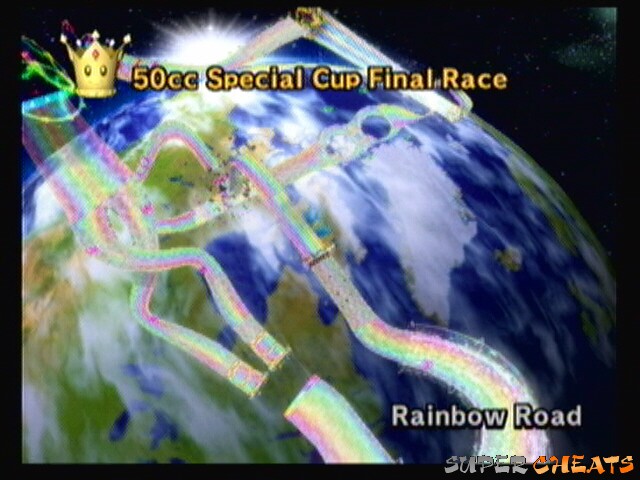
Rainbow Road
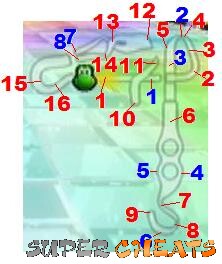
Map
1) Wheelie down
2) Drift boost around the bend
3) Wheelie to poit 4
4) Drift boost around, or use the trick ramp.
5) Trick off all three waves in the ground and the boost pad.
6) Go to the left side, trick, then right, trick, straighten out, and continue down the road.
7) Cut the corner then start a drift boost
8) Continue the boost around the bend till it straightens out.
9) This is a cannon that will shoot you to point 10.
10) See 10
11) Another cannon that shoots you to point 12
12) See 11
13) Take the right (upper) course.
14) Drift boost around the bend.
15) Take the corner sharp. Ignore the boost pads and drift boost around.
16) Wheelie down through point 1.
Miscellaneous:
Every good Mario Kart game has a Rainbow Road. N64 one is still the best, IMO, but this one is pretty good. At least it's not as insanely hard as the Double Dash one. A lot of the sections don't have rails, so bumping other karts can be an effective strategy. Also, the shortcut at point 6 is dangerous and probably the hardest shortcut to get in the game, but it's very worth it.
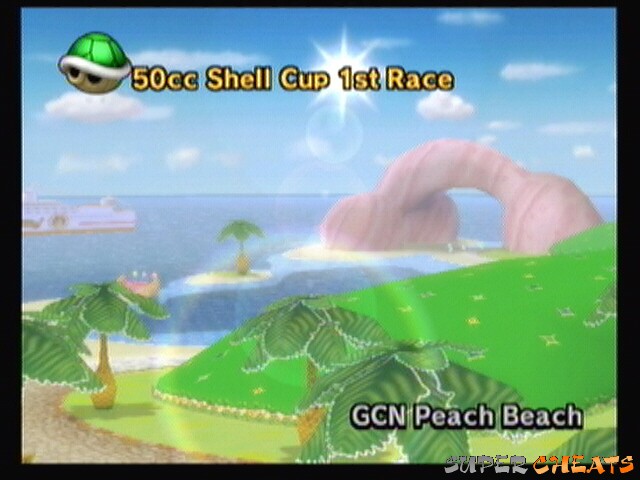
GCN Peach Beach

Map
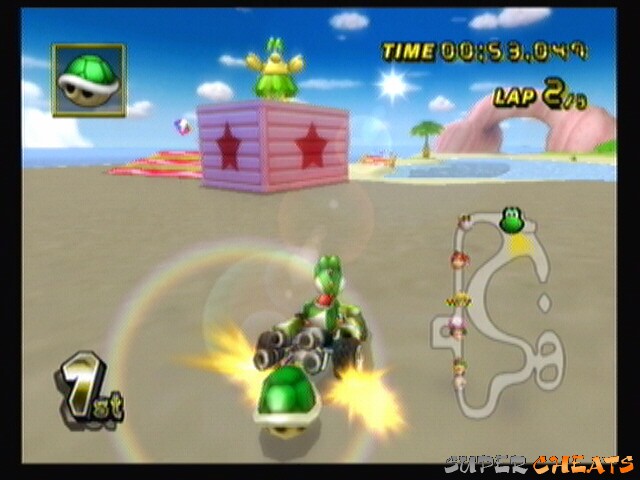
1) Wheelie to the bend.
2) Drift boost around
3) This isn't a shortcut, as it's faster to drift around, but it is fun. You can trick off the ramp behind the boxes, then land and take a hidden left track by the palm tree.
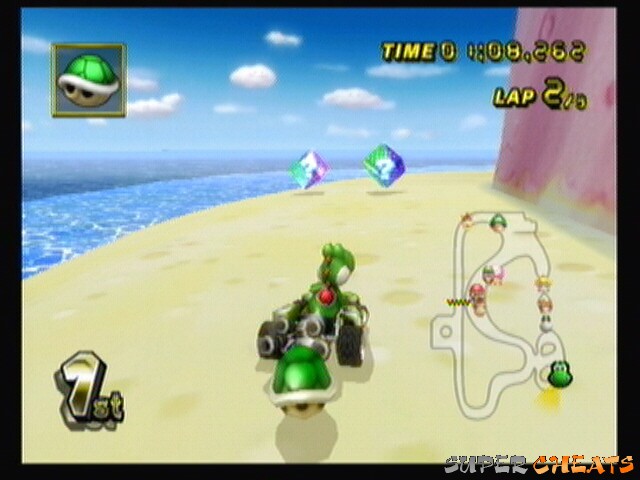
4) Watch for the Cataquacks on the beach. Here you have three options. You can go around on the left, drift boosting around the beach. Or you can cut through the water via a sand bar (only on lap 1). Or you can keep in a straight line and cut through the deep water with a mushroom (only lap 2).
5) Drift boost under the arch.
6) Wheelie down to point 7.
7) Drift boost onto the pavement.
8) Wheelie through point 1.
Miscellaneous:
One of the shortest tracks in the game. The Cataquacks are evil and move quickly, avoid them at all costs.
Point 3: The person will signal if the way is clear
Item box 4: No idea why there is one back here...
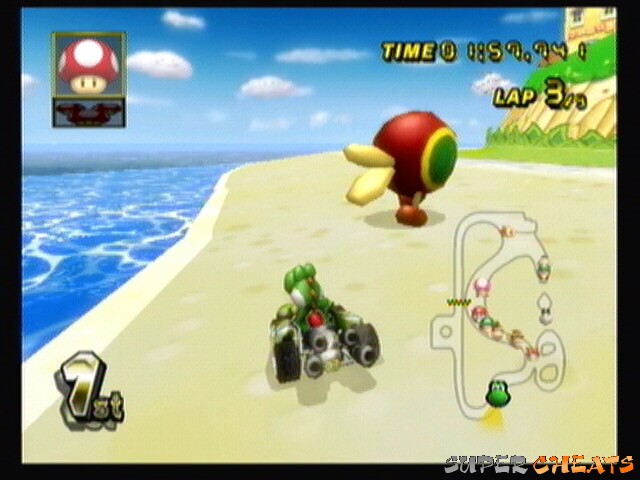
Point 6: Uh oh...
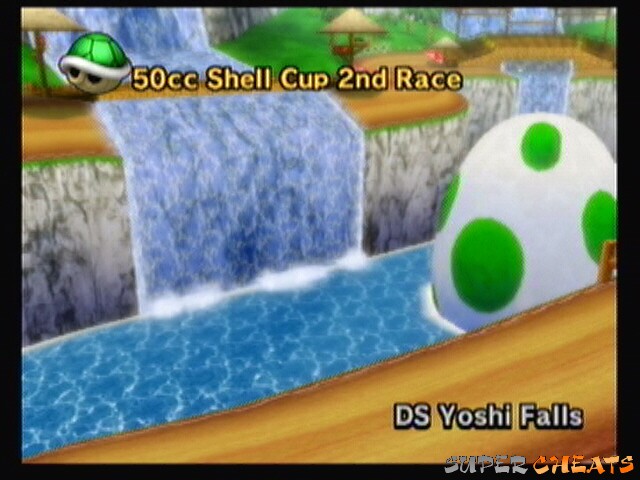
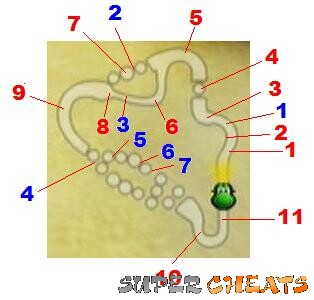
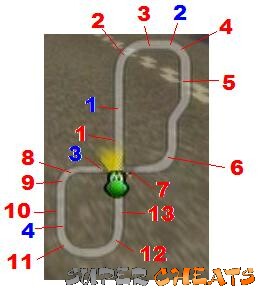
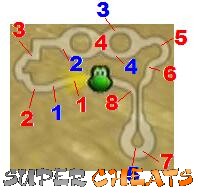
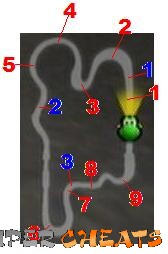
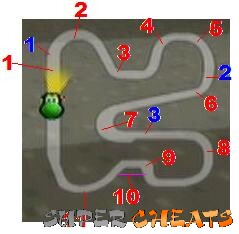
DS Yoshi Falls
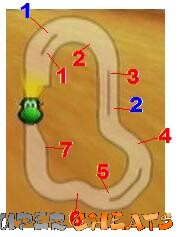
Map
1) Drift boost to point 1, and use the boost to get across the waterfall.
2) Drift boost around the bend, then hop up on the bridge at point 3.
3) Wheelie across the bridge.
4) Touch off on the first boost pad, then drift boos across the waterfall to point 5.
5) Wheelie to the pad at point 6, starting a drift boost as you hit it.
6) Drift boost and wheelie to point 7.
7) It'll be easier for the boost at point 1 to start your drift here.
Miscellaneous:
Why couldn't they use the awesome Yoshi Valley from MK64? Oh well. The thing that kills most people is not knowing whether to take the upper or lower course. The answer is neither and both: you'll be swapping between the two.
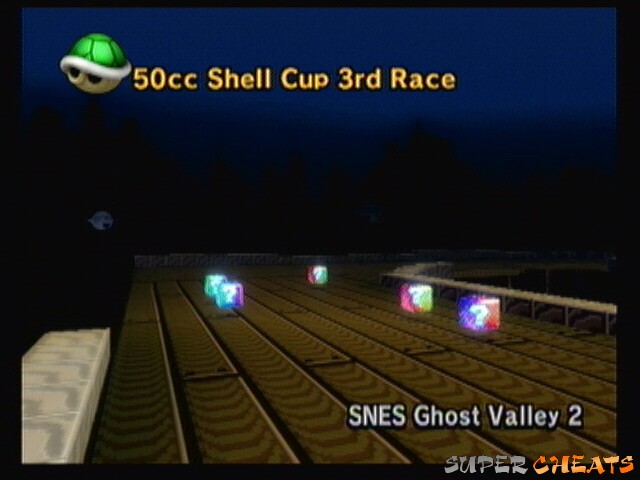
SNES Ghost Valley 2
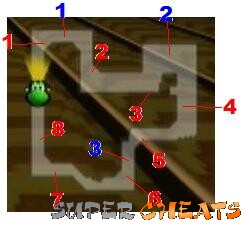
Map
1) Drift boost around the bend to point 2.
2) Hug the corner and drift boost again
3) Shortcut. Start a drift boost before you hit the ramp, or else you'll likely overshoot.
4) Hold the boost till you're around the corner, then let it go to straighten out.
5) Hug the corner and drift boost
6) Hug the corner again and drift boost
7) Start your drift so that you cut the corner very sharp.
8) If you cut the corner sharp enough and straightened out, you'll hit the boost pad, followed by a hidden jump pad that you can trick off of.
Miscellaneous:
A lot of tight curves. Don't let the Boo distract you.
Point 3: Jump the gap
Point 8: Don't miss the boost pad
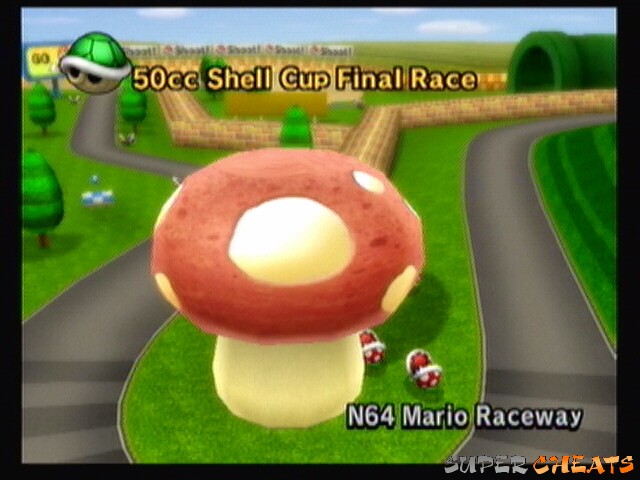
N64 Mario's Raceway
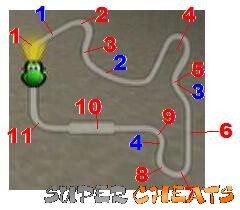
Map
1) Drift boost around the bend and wheelie to point 2
2) Drift boost around
3) Drift boost and wheelie to point 4
4) If you have a mushroom, you can cut the corner behind the large mushroom. If not, drift boost around the corner.
5) If you have a mushroom, you can take the ramp on the left. Otherwise, drift boost around the bend.
6) Wheelie all the way down this stretch.
7) Drift boost around the corner. You can either hold it or do two in a row.
8) Start your second boost here if you choose to do two.
9) Drift boost around the corner
10) Wheelie through this stretch
11) Drift boost around, then wheelie through point 1.
Miscellaneous:
A very simple course, though kind of long. Bike rule here.
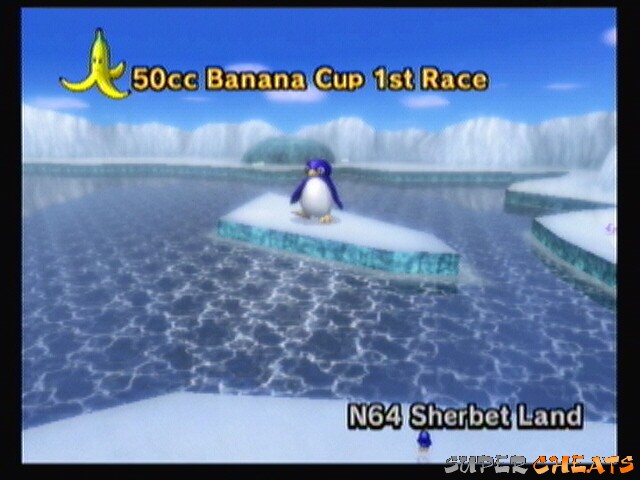
N64 Sherbet Land
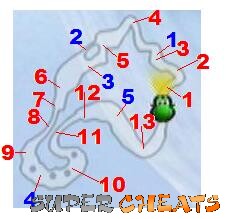
Map
1) Drift boost right, avoiding the penguin
2) Drift boost left, avoiding the second penguin
3) Wheelie through the straight.
4) Drift boost hard, cutting the corner.
5) Take the lower (left) path and wheelie to point 6
6) Start a drift here.
7) Time the penguins and boost through
8) Wheelie into the cave
9) Drift boost around, hugging the corner. You should be able to either hold it through the bend or boost several times. Watch out for the penguins circling the pillars.
10) You'll want to start a new boost here.
11) Wheelie out of the cave with a drift boost at the end.
12) Watch the penguins and hug the right side.
13) Drift boost through the corner and wheelie to point 1.
Miscellaneous:
I love this course. The penguins are so cute ^_^
And no, you cannot get onto the platform with the big penguin.
Despite being on ice, you really don't lose any traction.
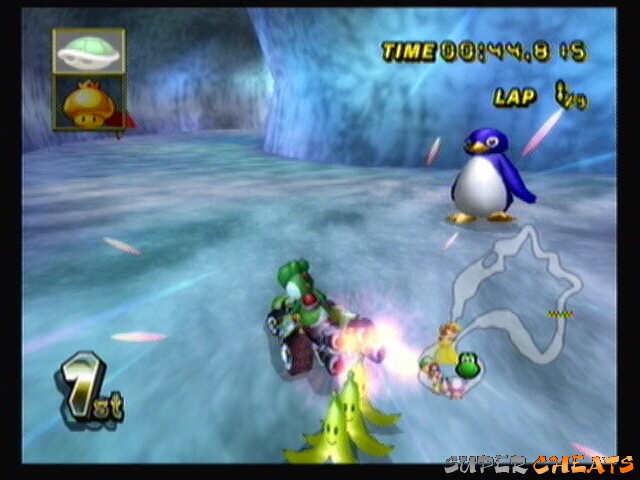
Point 9: Dodge the Penguins as you drift
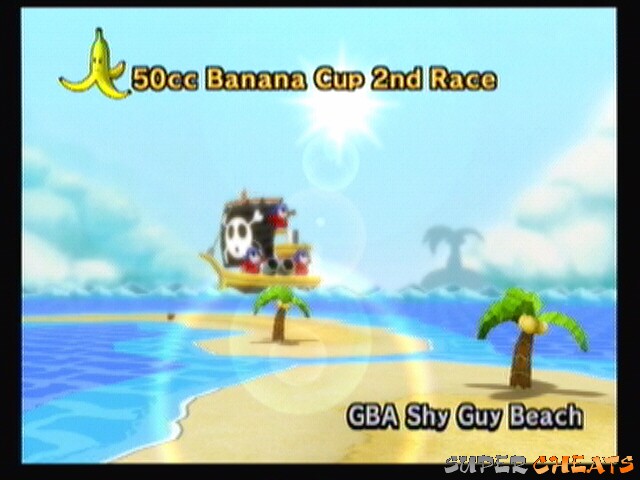
GBA Shy Guy Beach
Map
1) Wheelie up to point 2
2) Cut the corner by going into the water. Don't touch the dark water.
3) Drift boost around this bend
4) Back in the water and make a straight line for the island. Drift boost left through the water and back onto dry land.
6) Wheelie across the island, staying to the right.
7) Drift boost out in the water, touching land just enough to hit the boost pad.
8) Wheelie down the left path.
9) Drift boost through point 9 and wheelie through point 1.
Miscellaneous:
If you take my pink course, you shouldn't have to worry about it, but Shy Guy Pirates launch cannon shells onto the beach that explod like Bob-ombs. If you see one, dodge it. Also, the crabs are evil. Just trust me.
Mario Kart Wii Guide - DS Delfino Square - (Banana Cup)
===============
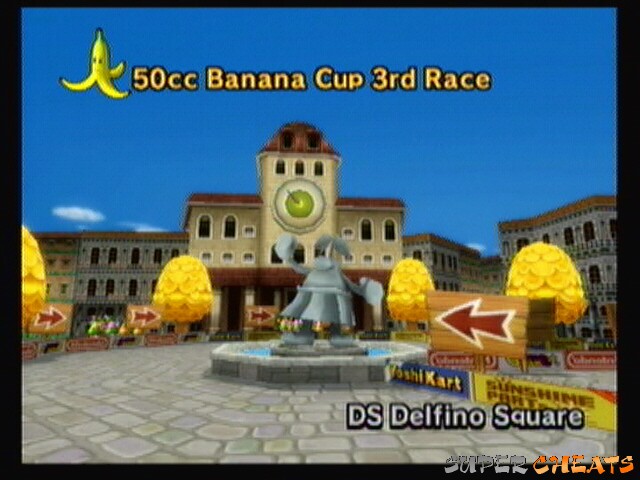
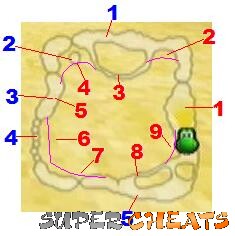
DS Delfino Square
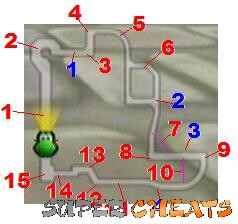
Map
1) Wheelie to point 2.
2) Drift boost around the fountain.
3) Drift boost around the corner
4) Drift boost again.
5) Drift boost a fourth time.
6) Take the left path. Drift boost around the corner and wheelie through the boxes.
7) This is kind of an insane short cut and will take some practice. After coming out of the ally, veer left. You'll see the wooden dock across the river. Use a mushroom and a trick to get across the river and land on the dock, which then leads back up to the track.
8) If you're not crazy enough for point 7, continue your wheelie to point 8 and drift boost around.
9) Drift boost all the way around the corner.
10) This is a good shortcut for good off-road vehicles or if you have a mushroom. Cut into this ally to cut off the corner ahead and shave a few seconds off your time.
11) This is a draw bridge. As such, sometimes the bridge will be up and you can trick off the other side, other times it's down and you can wheelie across.
12) Drift boost.
13) Drift boost.
14) End your boost and start a wheelie up through point 1.
Miscellaneous:
This track has one of the weirdest short cut I think I've ever seen in an MK game. Seriously, who figured that out? Further, who thought it would be a good idea to put it in the game? It'll take some practice.
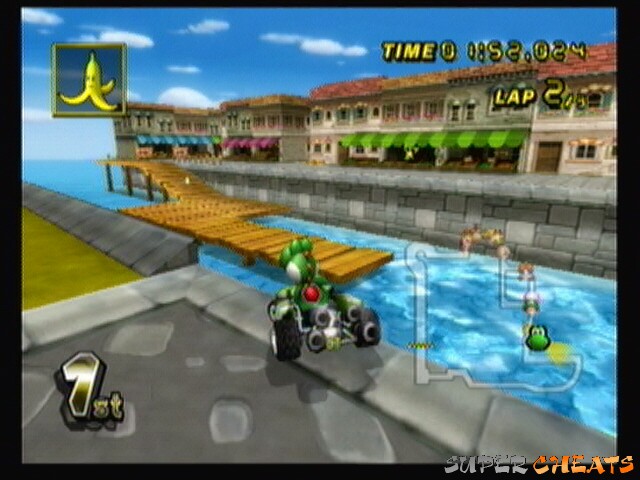
Point 7: I don't have a boost, but if I did, I could have made it
Point 10: Use a boost to get through and cut the corner
Point 11: Bridge down
Point 11: Bridge up
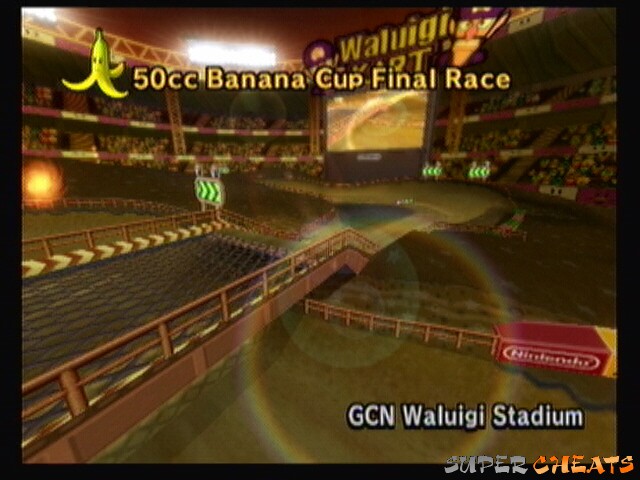
GCN Waluigi Stadium
Map
1) Don't trick on these small bumps. Start drifting right.
2) Boost across the bumps, then start drifting again. Release around the bend. Don't trick off the ramp. Instead, start drifting right.
3) As you hit the ground, you should be able to cut this corner really sharp.
4) Don't trick off of this ramp either.
5) Either land and drift boost around the corner or use a mushroom to cut the corner short.
6) Drift boost around the bend. Watch for the Podoboo and Mechanical Piranha Plants down this next stretch.
7) Stay to the left hand side. Don't trick off the ramps, but rather use them to get over the Piranha Pipes.
8) Drift boost around the corner.
9) Cut this corner sharp and drift boost.
10) Wheelie past point 10.
11) Cut it sharp with a drift boost, but even out before hitting the jump.
12) Wheelie to point 1.
Miscellaneous:
This track fools you. It wants you to trick off of every ramp and halfpipe, but that's not
always the best thing to do.
Point 7: Stay left

Point 7: and use the boosts to get over the Piranha
DS Desert Hills
Map
1) Wheelie to point 2.
2) Drift boost all the way around the corner.
3) Wheelie to point 4.
4) Drift boost again, hugging the left to start then drifting across the field to the right.
5) Drift boost around the bend.
6) Watch out for the Pokey in this section. Drift boost through.
7) More Pokey here. You can trick off the sand dunes.
8) Drift boost around.
9) A shortcut. If you have a mushroom, you can boost right through one of the corners. If you have three or a star, you can get through all of them.
10) Drift boost around the bend.
11) Drift boost
12) Drift boost
13) Drift boost and wheelie back to point 1.
Miscellaneous:
Why are desert tracks always boring? Watch the turns at the end, try not to go off road.
GBA Bowser Castle 3
Map
Note:
The green numbers are Thwomp.
1) Drift boost around the corner.
2) Wheelie to point 2 and drift boost around.
3) Wheelie to point 3 and drift boost around.
4) Wheelie to point 4 and drift boost around.
5) Drift boost around point 5
6) Wheelie to 6 and drift boost around.
7) Each of these platforms has an item box, a boost pad, and a Podoboo on it. Trick off of all the ramps, keeping to the right.
8) Wheelie to point 8 and drift boost around. Hold the boost till item box 3.
9) There is no point 9... I must have miss typed it or something...
10) Drift boost around the corner, under the Thwomp if you can. Don't take the jump ramp before them, it will only slow you down.
11) Wheelie through here. Don't worry about the item boxes.
12) Drift around the corner then wheelie through this section, following the purple line.
13) Drift boost around the corner.
14) Wheelie up this section back to point 1.
Miscellaneous:
Just as with all the GBA and SNES tracks, this is very simple and small. Watch for the Thwomps.
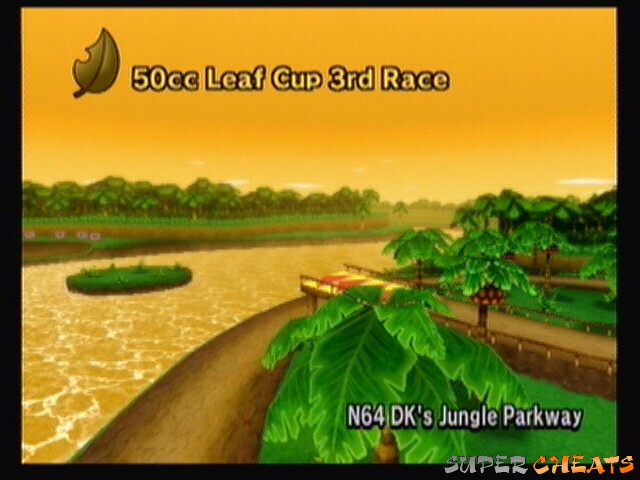
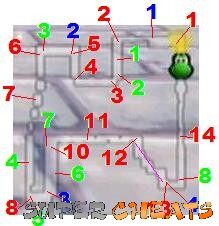
N64 DK's Jungle Parkway
Map
1) Drift boost around the corner and wheelie to point 2.
2) Drift boost all the way to point 3.
3) This will launch you to point 4.
4) Upon landing, drift to the left and use the boost to help speed you back up.
5) Drift boost and wheelie to 6.
6) Drift boost and wheelie to 7.
7) Drift boost and wheelie to 8.
8) Drift boost and wheelie to 9.
9) Drift boost and wheelie to 10.
10) Drift boost and wheelie to 11. Note that the bridge is small, so aim carefully. Also a good place for bombs.
11) If you have a mushroom or star, you can cut up through the center of the cave. If not, drift boost around the bend to 12.
12) Switch and drift boost and wheelie back to point 1.
Miscellaneous:
In porting this, they took out one of the main components: if you go off course, monkeys don't throw rocks at you anymore! Man, that was fun. Oh well. Watch for traps on the bridge and mind the tight corners.
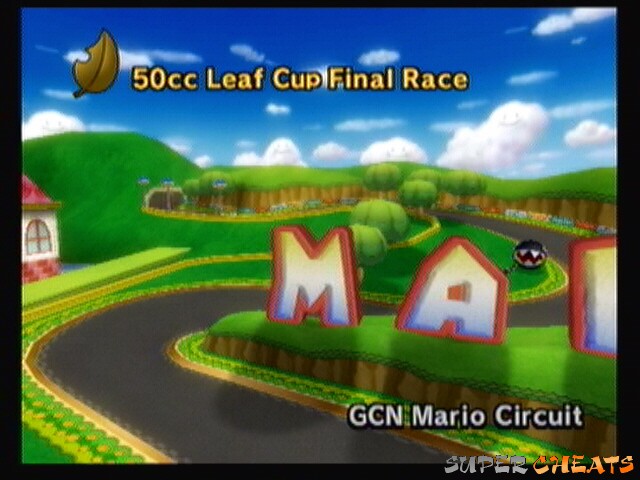
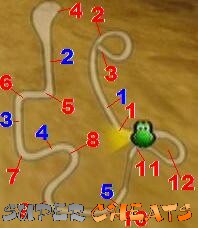
GCN Mario Circuit
Map
1) Wheelie to point 2.
2) Hug the corner and drift boost to point 3.
3) Drift boost around this corner as well.
4) Watch the Chain Chomp. If you have a mushroom, you can boost around in the grass behind him, cutting the corner. If not, keep to the right.
5) Drift boost around the bend, and you should be able to wheelie down to point 6. Watch for the potted Piranha Plants near the end.
6) Drift boost around the bend.
7) Drift boost around the bend and wheelie to point 9.
8) Watch for the Goomba in this area.
9) Drift boost around and wheelie to point 2.
Miscellaneous:
Another Mario course? Tch, you'd think this was a Mario game or something... >.>
The Chain Chomp isn't as vicious in this course as in the Wii version. The Goomba can be a pain at the end though.
Point 4: Dodge the Chain Chomp
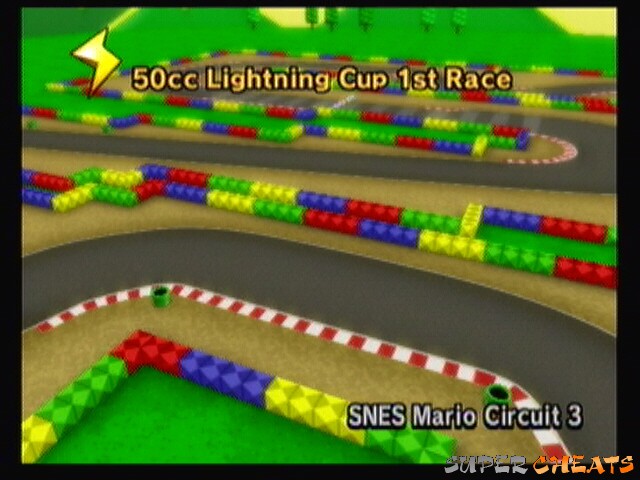
SNES Mario Circuit 3
Map
1) Wheelie to point 2.
2) Drift boost around the bend to point 3.
3) Drift boost around both corners and use the boost to get to 4.
4) Drift boost to point 5.
5) Drift boost all the way around, through the item boxes to point 6.
6) Wheelie to point 7.
7) Drift boost around and wheelie to point 8.
8) Here you can cut the corner with a mushroom (through the sand) or just drift boost around the corner.
9) Drift boost around and hold it till point 11.
10) If you have a mushroom, there is a break in the wall here. Follow the purple path.
11) Drift boost around and wheelie to point 2.
Miscellaneous:
A very straight forward course. Just hug the corners and drift boost every chance you get. Bike are going to rule here, with their high handling and tight turning. A heavy bike would set the best record, but will take a lot of practice to get it around these turns perfectly.
Point 10: The shortcut

DS Peach Gardens
Map
1) Take the left path and drift onto the bridge. Wheelie to point 2.
2) If you have a mushroom, you can cut through the flowers. If not, drift boost around the bend.
3) Stay to the right and use a drift to make the corner.
4) There are three chain chomps wondering around in here. They wont chase you though. Take any path you want, but make it as straight as possible.
5) Use a drift boost to make the purple path.
6) Cut into the center of the Nuke symbol for an item and the shortest time.
7) Watch out for Monty Moles. You should be able to wheelie through here.
8) Drift boost around and wheelie to 9.
9) Drift boost around and wheelie to point 1.
Miscellaneous:
The Chain Chomps are just there for looks. I've never run into one, so don't worry about them. Always remember to take the straightest course through that section.
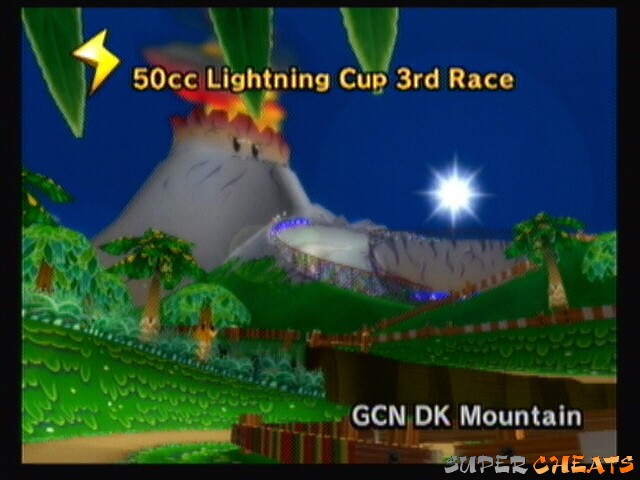
GCN DK Mountain
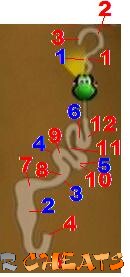
Map
1) If you have a mushroom, you can cut the corner here.
2) Drift boost around the bend.
3) This cannon will shoot you to point 4.
4) See 3.
5) Drift boost around the bend. Wheelie down the next section, tricking off the ramps.
6) Again, I think I missed a number somewhere...
7) Drift boost around the corner.
8) Hug the left corner and drift boost around.
9) Hug the inside and drift boost around.
10) Drift boost around.
11) Cut left, then quickly back right, building up a drift boost as you head to the pit. Use the boost to jump the gap and land near point 12.
12) Wheelie back to point 1.
Miscellaneous:
It's almost an exact copy of DK Summit (well, actually vise-versa since this one came first) only without the snow. The shortcut as point 11 is hard to get used to, but it will save you a ton of time.
Point 11: Jump the gap with a boost
N64 Bowser's Castle
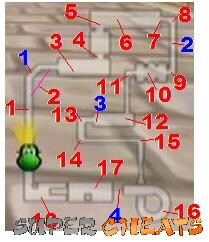
Map
1) Wheelie up.
2) A shortcut here if you have a mushroom. Just cut through the grass. If not, drift boost around the corner.
3) Watch the Thwomps, who move around and randomly drop.
4) Drift boost in the corner.
5) Drift boost again.
6) In this room, some Thwomps come up from the back of the room and float in front of you. They'll drop right in front of you, giving you just enough time to get out of the way. Prepare for that.
7) These Thwomps drop randomly as well. Time their movements to get through.
8) Use a drift boost to make the corner and wheelie to point 9.
9) Drift boost into the next room.
10) Two Thwomps slide side to side here. Don't hit them.
11) Drift boost to make the corner, but straighten out quickly so as not to fall off the bridge.
12) Drift boost into the stairs.
13) Drift outside and release the boost at point 14.
14) Wheelie to point 15.
15) Drift boost onto the bridge.
16) Drift boost all the way around to the top.
17) Wheelie across to the next gap.
18) Drift boost around and wheelie to point 1.
Miscellaneous:
Yay! The final course! A fitting end, though I think an old version of Rainbow Road would have been better (or a secret Retro cup where all the courses were all the old versions of Rainbow Road. That would be awesome.). This is still the best version of Bowser's Castle, IMO. Watch the tight corners, as unlike the N64 version hitting a wall to straighten yourself out will slow you to a crawl.
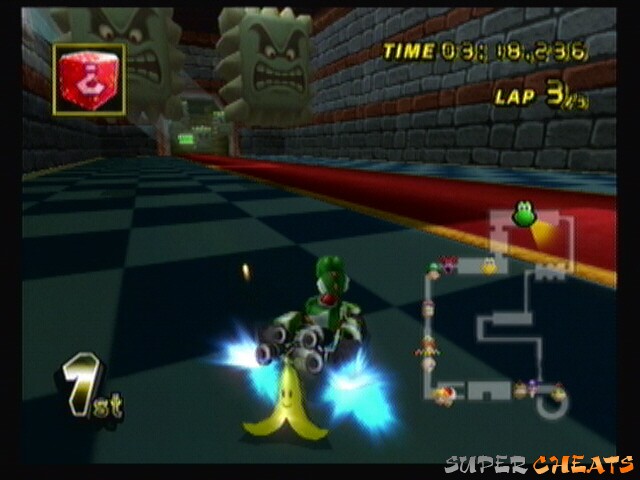
Point 6: Dodge them when they land
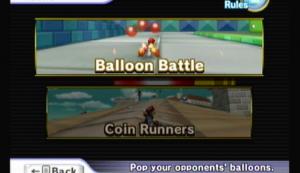
Battle Mode
Battle mode is not a race, as the name implies. Rather, it's a battle. You use items in a deathmatch-type arena to destroy the other players.
There are two modes: Balloon Battle and Coin Runners. Each are basically the same, except in Coin Runners your goal is to collect the most coins (by beating them out of other players with items) and in Balloon Battle you just beat on each other with items to score points.
Both game types are team battles. Six on a side. They are fought in best-two-out-of-three rounds, where in order to win, you must win two matches total. In between each match, you get to choose a new track to battle on.
In Balloon Battle, if you are hit with an item, the other team gets a point. If you loose all three balloons, your team looses a point. In Coin Runners, coins randomly spawn across the map, or if you are hit with an item you drop some coins (therefore your team looses some coins and the opposing team has a chance to pick some up).
I'll put in a small blurb here. Some items have different effect in Battle Mode then they do in races.
- All weapons will NOT harm your team mates. However, your team mate can de-activate an item by running it over, it just wont hurt them.
- Items glowing with your teams color wont hurt you (see above).
- Bullet Bill and Blue Shells are non-existent.
- If you run into an opponent while boosting with a mushroom, you steal one of their balloons.
- Red Shells are much stupider, and will normally lock on to the enemy you aren't aiming for.
- Fake Item Boxes are actually useful as traps.
- Banana Peels (and pretty much everything) wont make for good shields anymore. Shells will now often come from the side.
- Lightning will still shrink everyone, but it wont take away a balloon. You have to run them over while they are shrunk.
On with the courses!
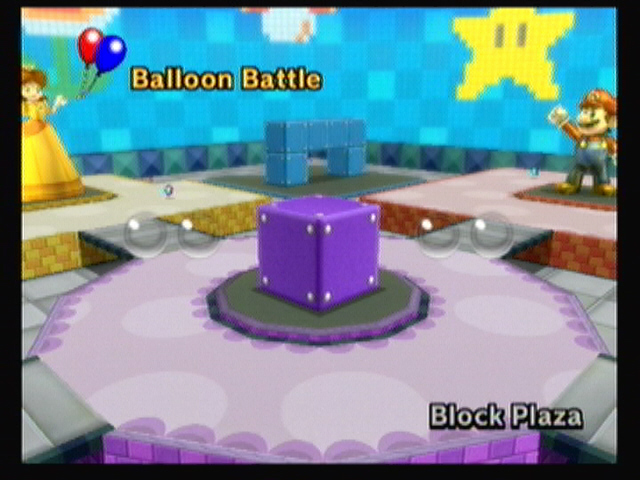
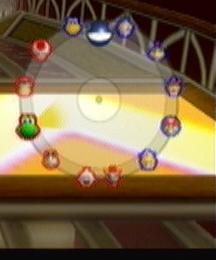
Block Plaza
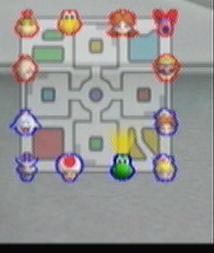
Map
Strategy:
Block Plaza is only really good if you have a lot of players. The top makes for a good drop on everyone, but down below will get you more hits. The items are pretty scarce, relative to the size of the stage. Watch the holes and don't try anything fancy around them. After a bit, the large statues on the upper platforms will lower into the ground, making even more holes.
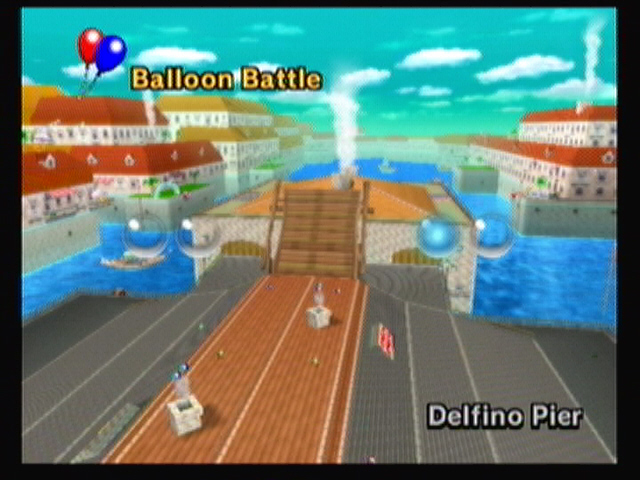
Delfino Pier
Map
Strategy:
A very hard map to accomplish anything, really. Item boxes are really scarce and the rising tide makes the little island get smaller and smaller. After a minute or so in, the bridge to the upper level lowers, and the gates to the lower (northern) area open as well, expanding the field, but there is still a lack of item boxes. If you're in a low area, watch the tide!
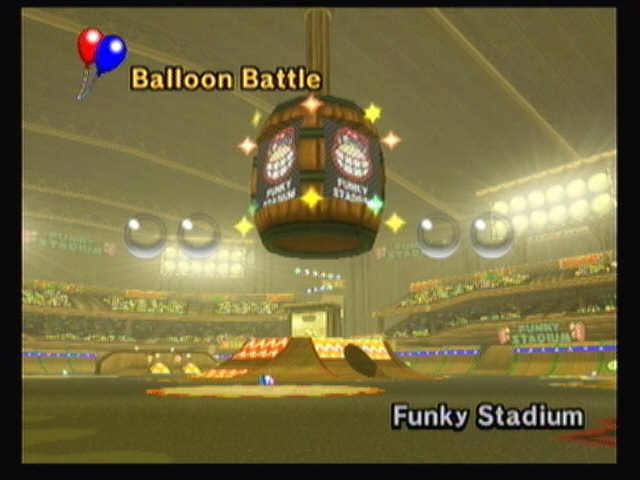
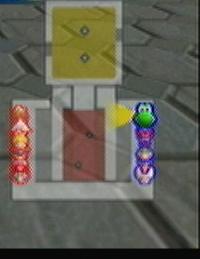
Funky Stadium
Map
Strategy:
I really like this course. It's big, but not too big. It has plenty of item boxes if you can get to them, and all the tricks make it fun. Constantly trick off stuff to avoid being locked on to.
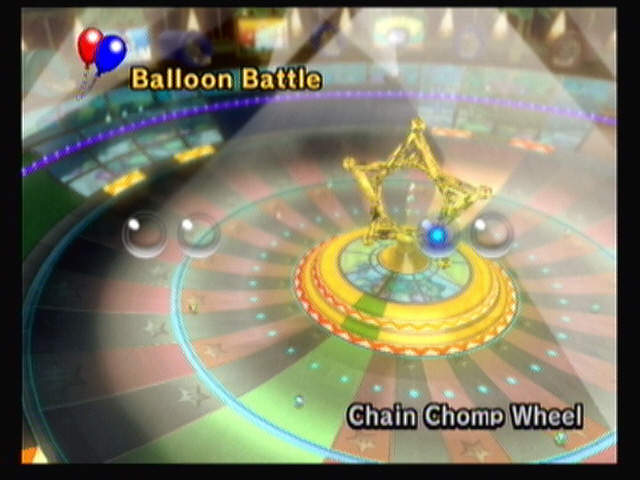
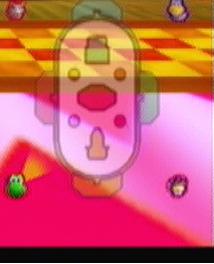
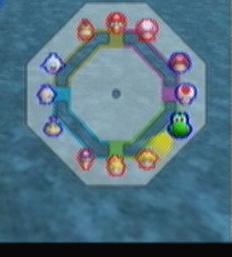
Chain Chomp Wheel
Map
Strategy:
I HATE this map. With very few item boxes and a huge rolling Chain Chomp taking up half the map, it's more of just a contest to see who can dodge the Chain Chomp the longest. If there was a map you could get negative scores on, this would be it.
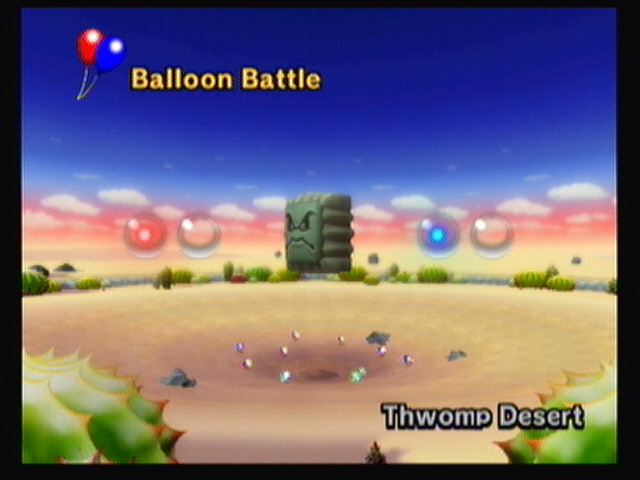
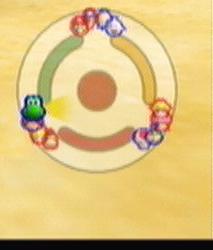
Thomp Desert
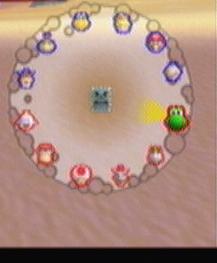
Map
Strategy:
15 seconds in, the Thwomp in the center of the stage drops. If you are under him, you get crushed. If not, the entire field starts the wave like the ocean. He will continue to drop every 45 seconds or so. The sand wants to pull you in, so controlling your kart can be hard. Stay on the outside to launch shells into the center, and fill the center up with traps. Also, you take damage if you touch the cacti on the outer rim.
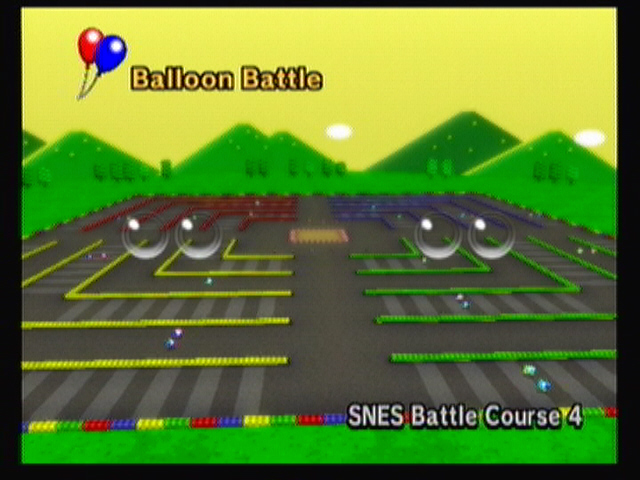
SNES Battle Course 4
Map
Strategy:
This course makes red shells all but useless. Green shells and bananas rule here. Set traps by item boxes. Don't forget that you can launch bananas and Bob-ombs over the walls. Don't fight the map too much, pick a row and go with it for a ways before changing.
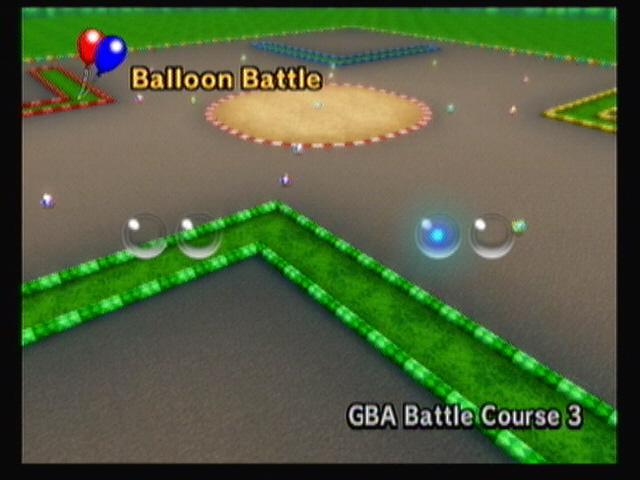
GBA Battle Course 3
Map
Strategy:
A very simple map. You'll use a lot of drifts to continually stay in the center. The walls really don't do much, so don't worry about them getting in your way. The center item box is often trapped, so watch out.
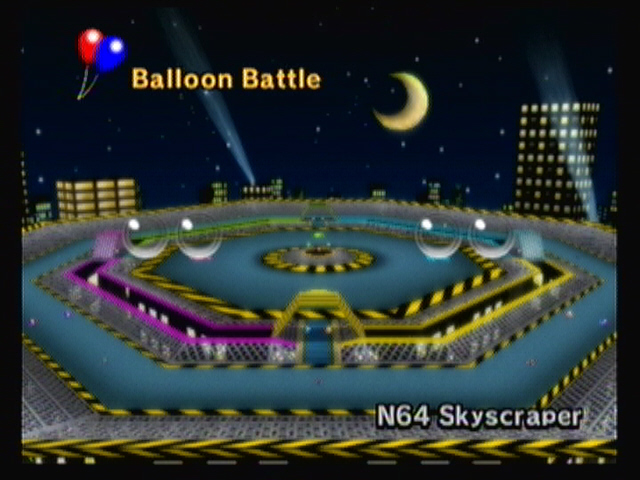
N64 Skyscraper
Map
Strategy:
Don't fall in the holes! You can jump over them, but only if you trick. I like to stay on the outer course going in circles, but you can get in the center and use that to launch attacks on the people in the outer edge.

GCN Cookie Land
Map
Strategy:
The center is always full of death, so stay in the outer rim. Red shells wont do much here, so just dumb fire them if you can. If you get a star or mushroom, make a quick trip to the inner rim where it should be easy to ram people.
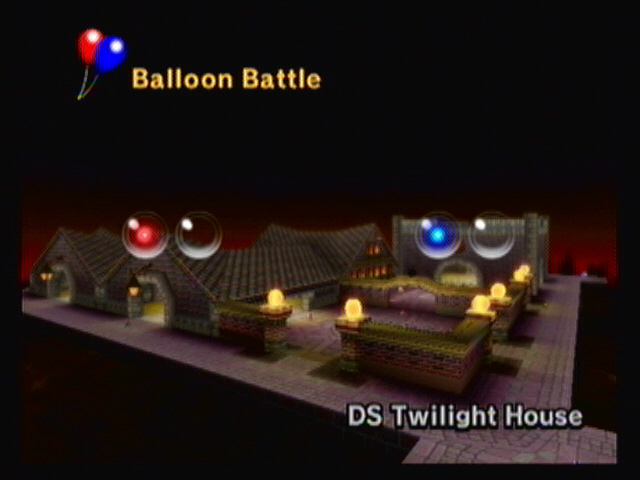
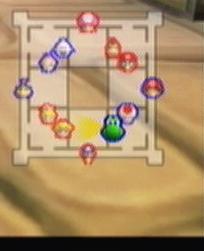
DS Twilight House
Map
Strategy:
This level is much improved from the DS version, as it's easier to control your kart. There also seems to be more item boxes. This is best with large groups of people, as it could be hard to find someone even with a large group. Don't stay on the outer rim for too long, as you're liable to fall off. Use your map to see where everyone is so you don't get ambushed.
Mario Kart Wii has a fully functioning online mode. Pretty much everything you can do in single player you can do online. This includes races and battles. You can even play with up to two people on the same console while online.
You can play with random people from around the world, or you can opt to just play with friends. To register someone as your friend, you need their Mario Kart Wii friend code. Then just go into the Mario Kart Wii Channel and enter it in. Alternately, if said person is already in your Wii friend book, you can send them a friend request from the Mario Kart Wii Channel.
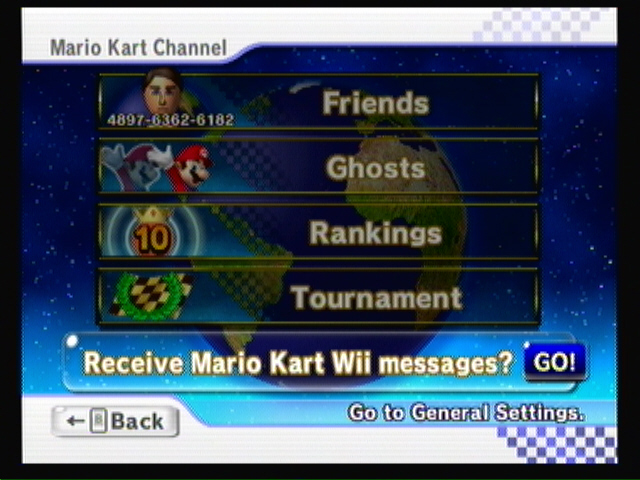
Mario Kart Wii Channel Menu
- Friends: Here you can register new friends or check on the online status of old friends
- Ghosts: Here you can race against ghost data from around the world, or delete ghosts that have downloaded in the past.
- Rankings: Here you can check your Time Trial ghosts against racers world-wide. You can upload your ghosts for others to download and race against, or you can download someone elses.
- Tournament: If a special tournament is held, this is where you'd enter. Go in for more details.
You can download this channel to your Wii Message Board via that banner at the bottom (it cycles around). If you're really into this game, it's well worth it.
You can also use the banner at the bottom to send Mario Kart Wii friend requests to anyone in your Wii friend book. These requests are much easier then using friend codes, as your friend will just get a message and if they select “Yes” then poof, you're now registered MKWii friends. You can only send so many out a day, though.
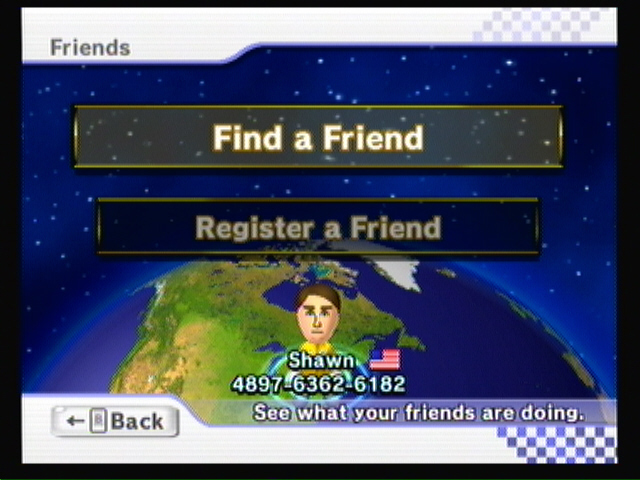
Your friends are displayed on this cool globe.
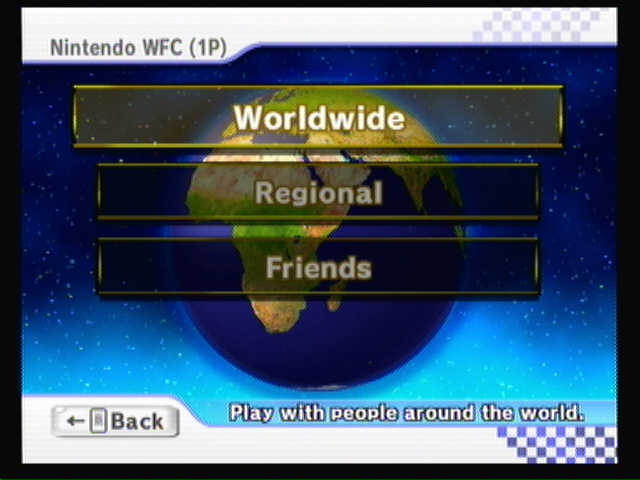
Main Menu
From here, you can choose to play with friends or with random people (world-wide or within your region).
Next you'll have to pick the game type you want (Battle or a race)
Finally you'll be put into your games party, and will then pick your character, vehicle, and track of choice. The game will randomly go between all the characters choice tracks, and pick one of them to play on.
NOTE: Error codes
A lot of times you'll get error codes 91010 or 31010. These are both server issues (IE, the problem is on Nintendo's end). You'll have to try back later to play. If you get a different error code when trying to play, go to Nintendo.com and type in your error code into the search box.
Item Box
Mario Kart takes items from the Mario universe to use as tools for you to win!
Some items attack and hinder your opponents, slowing them down. Others help speed you up. Still others can be used defensively to guard against certain other items.
The above picture is that of an item box. Run through one of those to get an item. It works kind of like a slot machine, in that the item icon will start spinning at the top of your screen for a few seconds before actually giving you your item.
Come on....
Ahh, another Banana Peel?
You can only have one item in your inventory at a time. Therefore, if the item can be drug, you can carry up to two items (one in your inventory and one behind you).
How you use items differs from controller to controller.
Gamecube – L to use, hold to drag. Hold back/forward on the joy stick to throw.
Classic – L to use, hold to drag. Hold back/forward on the joy stick to throw.
Nunchuk – Z to use, hold to drag. Hold back/forward on the joy stick to throw.
Wheel – If Automatic – B to use, hold to drag. D-pad to throw forward or back.
If Manual – D-pad to use (no dragging).
Let me explain some of the above.
Some items are normally just dropped behind you, like Banana Peels. If you press forward when you go to use it, it will be thrown out ahead of you instead of just dropped.
Shells, on the other hand, normally shoot out straight. If you are holding back when you press use, it will go behind you.
Most items can also be drug behind you by holding the use button. Dragging items helps in more ways then one: for starters, it lets you carry two items (one in your inventory and the one being drug). The item being drug will also work as a shield, taking the impact of Shells so you don’t get hit.
Ok, let me show you how this section looks:
[picture]
Effect:
Normal fire: (where this item goes if you just fire it off)
Firing range: (forward, back)
Drag: (yes or no)
Time: (amount of time the item is in effect)
Strategy:
(How to use this item)
Defensive strategy:
(How to defend against this item)
Banana Peel
Effect:
Trap. Puts an opponent into a spin when run over.
Normal fire: Back
Firing range: Can be thrown forward
Drag: Yes
Time: Until it is hit
Strategy:
Utterly useless on its own. The odds of you actually hitting an opponent with this is slim-none. However, they are invaluable when used defensively. Press and hold the fire button and drag it behind you. It will fend off stray shells, and can slip up an opponent if they try to ram you. If you feel lucky, you can look behind you to line up your shot, and let it go like a precision mine. It takes a lot of practice and luck, though.
Defensive strategy:
If you see a banana peel in the road, DON’T HIT IT. It’s that simple. If someone is dragging a peel behind them, don’t get too close. Also, this is the computers favorite weapon when you are near them, so back off if your near an opposing car and you just went through some item boxes.
Bob-omb
Effect:
Explosive. Throw it and wait for the boom.
Normal fire: Forward
Firing range: Can be dropped back.
Drag: Yes.
Time: 2 seconds before exploding.
Strategy:
Pretty useless. It can be drug, but if something hits it, it detonates and gets you in the blast. Throwing it, it’s almost impossible to hit the player you want, and even it you do they’ll be long past it before it explodes. Just drop it back and forget about it. It also makes opponents drop all their items.
Defensive strategy:
Odda are, you'll never even see one of these. But if you do, motor on past it and don’t worry.

Blooper
Effect:
Hindering. Sprays ink on all opponents in front of you, blocking their vision.
Normal fire: Instant.
Firing range: Instant.
Drag: No.
Time: 10 seconds till ink wears off.
Strategy:
Not much of a strategy. Just use it. It coats them in ink, which doesn’t really hurt the computer, and honestly I can still see just fine when I’m hit with it.
Defensive strategy:
Nothing you can do. Just look through the small gaps in the ink and try to anticipate the track.
Uh...
...oh
Fake Item Box. AKA: Bomb
Effect:
Trap. Explodes when run over, sending opponents into the air.
Normal fire: Back
Firing range: Can be thrown
Drag: yes
Time: Until hit.
Strategy:
Even more useless then banana peels. I have yet so actually see someone fall for one of these (the computer does from time to time, but they are on rails, so it’s not hard to guess where they’ll go next lap). Unlike the peels, you cant even use it defensively: it wont block shells when being drug! I guess, if you really want to try to fool someone, lay it down in the mist of other real item boxes. They may not see it... if they’re blind and missing an eye...
Defensive strategy:
They’re red, with an upside down question mark. Seriously, not hard to spot. Just go around it.
Green Shell
Effect:
Projectile. Fires a shell that explodes on impact.
Normal fire: Forward
Firing range: Can be fired backward.
Drag: Yes.
Time: Until it is hit or bounces 10 times
Strategy:
A good all-purpose item. It can be drug to block incoming shells, or it can be thrown to hit enemy vehicles. There’s not much I can say, other then work on your aim. The shell always goes straight until it hits something. One thing to remember is that unlike in pervious games, the shell will not encircle you before firing off.
Defensive strategy:
You can hear them coming. If you look behind you, they are normally easily dodged. Though, a bit of luck never hurt. If you’re out of luck, make sure you’re dragging something behind you.
Lightning
Effect:
Hindering. Zaps all opponents and shrinks them.
Normal fire: Instant.
Firing range: Instant.
Drag: No.
Time: 10 seconds till shrink wears off.
Strategy:
Just use it. Some say to save it, but really it’s better to use it immediately so you don’t lose it. It will shrink all opponents, slowing them down to half their normal speed. You can even run over them. It also makes them drop their items.
Defensive strategy:
Absolutely nothing you can do.
Red Shell
Effect:
Projectile. Locks on to an opponent and hones in, exploding on impact.
Normal fire: Forward.
Firing range: Can be fired backward.
Drag: Yes.
Time: Until hit.
Strategy:
Red shells are different, in that they will lock on to the opponent directly in front of you and chase them down. They are almost impossible to dodge, so said opponent is toast unless they are dragging an item. They don’t go straight for the opponent, they will follow the center of the track and go around corners on the way to the opponent. Truly a great weapon. It can be drug and will block other shells, though it seems like a waist.
Be careful when firing, though. If you are in second and fire the shell just as you pass into first, the shell will backfire and come back to hit you. Also, if you’re in first, the shell wont hone in at all and will just go off and hit a wall.
Defensive strategy:
If you see someone dragging a red shell, DON’T PASS THEM. Simple, right? Otherwise, if the shell warning comes up and it’s red, if you don’t have an item that you can drag real fast, you’re toast. Start looking for a good place to wreck.
Spiny Shell
Effect:
Projectile explosive. Hones in on first place, then explodes.
Normal fire: Automatic.
Firing range: Automatic.
Drag: No.
Time: Until hit.
Strategy:
What strategy? You fire it off and it is guaranteed to take out whoever is in first. It does create a large orb-like blue explosion, so don’t get caught in the blast radius! It also makes opponents drop all their items.
Defensive strategy:
Almost impossible. You can, possibly, rarely, use a mushroom JUST before the shell is about to hit to boost out of the blast before it engulfs you like some action movie.
Triple Bananas
Effect:
Trap. Puts an opponent into a spin when run over.
Normal fire: Back
Firing range: Can be thrown forward
Drag: Yes, automatically on use.
Time: Until it is hit
Strategy:
Utterly useless on its own. The odds of you actually hitting an opponent with this is slim-none. However, they are invaluable when used defensively. Press and hold the fire button and drag it behind you. It will fend off stray shells, and can slip up an opponent if they try to ram you. If you feel lucky, you can look behind you to line up your shot, and let it go like a precision mine. It takes a lot of practice and luck, though.
Yeah, I did just copy that from the Banana Peel section. This only differs in that you have three of them. You don’t need to drag them, rather as soon as you press use they are automatically drug behind you. When being drug, they can protect you from THREE shells, instead of just one.
Defensive strategy:
If you see a banana peel in the road, DON’T HIT IT. It’s that simple. If someone is dragging a peel behind them, don’t get too close.
Triple Green Shells
Effect:
Projectile. Fires a shell that explodes on impact.
Normal fire: Forward
Firing range: Can be fired backward.
Drag: Yes.
Time: Until it is hit or bounces 10 times
Strategy:
Same as the green shell, only it automatically creates a circling wall of shells around you when used, so no need to drag them. While they are circling around you, you can ram opponents to hit them with a shell. The wall is not impenetrable, however. After you lose even just one of the three, there is a gap where projectiles can get through. Other then that, they still fire off in a straight line.
Defensive strategy:
If someone is encircled with shells, common sense should tell you to get as far away from them as possible. The computer will generally fire off all the shells pretty quickly, so don’t worry about having to eat through their shield. Otherwise, just watch your back and listen for the sound effect of a whooshing shell.
Triple Red Shells
Effect:
Projectile. Fires a honing shell that explodes on impact.
Normal fire: Forward
Firing range: Can be fired backward.
Drag: Yes.
Time: Until hit.
Strategy:
Same as the red shell, only it automatically creates a circling wall of shells around you when used, so no need to drag them. While they are circling around you, you can ram opponents to hit them with a shell. The wall is not impenetrable, however. After you lose even just one of the three, there is a gap where projectiles can get through. Other then that, they still fire off and hone in.
Don’t fire them off as fast as possible! Time your firing, as if all three shells hit only a second apart, the opponent will only be damaged once. Rather, fire them off a few seconds apart, so as soon as he lands from the first one, the second one hits and so on.
Defensive strategy:
If someone is encircled with shells, common sense should tell you to get as far away from them as possible. The computer will generally fire off all the shells pretty quickly, so don’t worry about having to eat through their shield. Otherwise, hope you’re dragging something... a lot of something....
Bullet Bill
Effect:
Turns you into a Bullet Bill, increasing your speed exponentially.
Time:
10 seconds
Strategy:
Use and hold on! You have little to no control over Bill, as he rockets you into the lead. It’s insanely fast, and completely invulnerable. So just use and hope you hit as many opponents as you can.
Defensive strategy:
He ALWAYS travels down the middle of the track, so if you see one coming just get off to the side a bit.
Golden Mushroom
Effect:
Gives you an infinite number of boosts for 15 seconds.
Time:
15 seconds after the first boost.
Strategy:
Rapidly tap the item button to use this again and again till it disappears. It gives you constant boost, but time your boosts carefully so as to not fall off the track. Overall, same as the mushroom.
Defensive strategy:
You have no warning, and really the odds of you getting bumped is rare. Overall it’s just not an offensive item, so you don’t have to watch out for it.
Lightning Cloud
Effect:
Increases your speed, turning, and makes you invulnerable to lightning
Normal fire: Instant.
Firing range: Instant.
Drag: No.
Time: 10 seconds till effect wears off.
Strategy:
Ok, there’s something I left out above. After ten seconds, if the cloud is still over you, you get zapped. To negate this, bump into an opponent. The cloud will transfer to them, giving them the increased abilities as well, but also zapping them. Honestly, it’s best to get rid of it as soon as you get it.
Also, the item activates as soon as the slot stops, you don’t even have to press a button.
Defensive strategy:
Don’t bump into someone that has a cloud above them. If you’re the one with the cloud, get rid of it!

Mushroom
Triple Mushroom
Effect:
Gives you a boost
Time:
3 second boost
Strategy:
Ah, the mushroom. The most strategic item in the game. You can use this to ram opponents (making them slow down and drop their items), get over patches of rough ground with impunity, outrun shells, or just get a jump on the next car up. It’s all in the timing, so there’s not much I can tell you. Just remember that it only lasts 3 seconds, so make the most of it.
The triple mushroom is the same as the mushroom, only you have three of them to activate separately.
Defensive strategy:
You have no warning, and really the odds of you getting bumped is rare. Overall it’s just not an offensive item, so you don’t have to watch out for it.
Mega Mushroom
Effect:
Makes you big
Time: 10 seconds till you return to normal.
Strategy:
Upon use, you grow many times your normal height. This gives you a speed boost, makes you more or less invincible, and allows you to crush opponents. Overall I’d just use it to crush any car in my way.
Defensive strategy:
You wont have much warning, but if you do see them, try to get out of the way by getting way from the pack of cars, or getting behind a large non-destructible object.
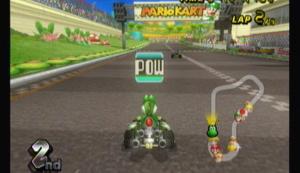
POW Block
Effect:
Crushes everyone in front of you.
Time:
4 second fuse.
Strategy:
Once used, it counts down then crushes everyone in front of you and forces them to drop their items. It gives you a pretty good chance at going up a few ranks.
Defensive strategy:
Just as the POW Block over your head is about to disappear, jump! If you time your jump right, you wont be affected. The POW Block is a rare item, so you wont get much practice, but if you can get the timing right, you wont have to worry about this item any more.
1...
2... 
3...
JUMP!
Star
Effect:
Makes you completely invincible and gives you a boost
Time:
10 seconds
Strategy:
Makes you totally immune to everything, and speeds you up to the speed of a mushroom boost. If you hit an opponent, they go flying. Rough ground is also not a problem for you. Make the best of it, and ram as many cars as possible while speeding into the lead.
Defensive strategy:
If you do manage to see one coming, get out of the way! It’s harder then it sounds....
Mario Kart Wii - Obstacles and Hazards
Sometimes your worst enemy is the track itself. Learn all about everything that tries to get in your way here. Some obstacles are easy to get around, while others will be a constant pain.
I grouped similar enemies together, but overall they’re in no real order.
Bob-omb Car
- A giant Bob-omb on wheels. Probably the scariest thought in a Mario game. Just a slight scratch and these will explode in blazing glory, sometimes taking out an entire section of track, making it so anyone near you also gets hit.
Car
Truck
- Trucks and cars come in several shapes and sizes, but they all do the same thing. Drive straight into them to get crushed, hit them from the sides and you’ll be sent into the air. These people also need to have their licenses revoked...
Mii Car
- These cars will go back and forth, sometimes blocking your dash panel. Time it carefully to get around.
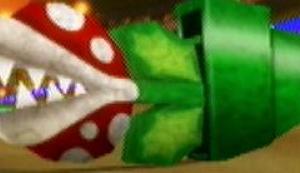
Piranha
- This Piranha is pretty harmless. It wont reach out and grab you, rather it just sits there as an obstacle.
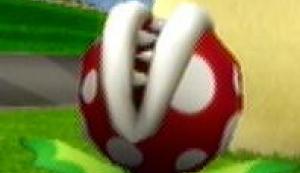
Pipe Piranha
- This version of Piranha is much more vicious. If you get anywhere close to it, it lowers its head and bits you, sending you into the air.
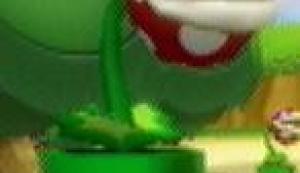
Mechanical Piranha Plant
- Comes out of and retracts into that green pipe. I just acts like a movable wall.
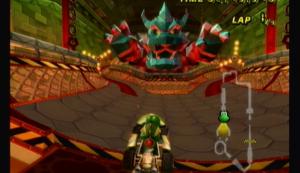
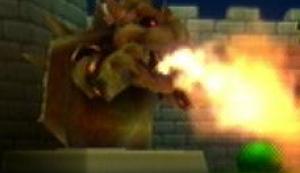
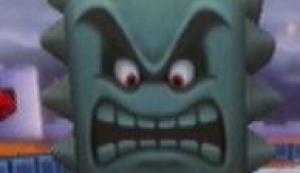
Mechanical Bowser
- This evil form of Bowser shoots huge fireballs at you. You can dodge them using the halfpipes, or just by driving up the center (mostly, it touches ground a few times). You’ll spin out if you hit the fireball.
Bowser Statue
- While cool, they are so far off the track that unless you majorly overshoot the drift they aren’t a threat.
Fire
- It’s fire. You know, the hot kind. Avoid it or be burned.
Fire Snake
- Fire Snakes are weird jumping balls of fire. Definitely from Mars. Go to the opposite side of the track when passing these, as they can jump a long way, and pretty quickly too. They’ll make you spin out.
Boo
- Boos are just a distraction. They wont actually mess with you, but they can hinder your vision slightly.
Chain Chomp
- Chain Chomps are vicious creatures. Watch for it to jet out at the first thing to cross it’s path. If that happens to be you, try to be far enough away that it cant reach you. It that’s not you, drive by between it and the stake holding it in (it wont come back fast enough to hit you). He’ll send you flying into the air.
Moo Moo
- What game would be complete without cows? They’ll aimlessly wonder into the road. They act like moving walls.

Sidestepper
- These annoying little crabs move erratically and quickly back and forth. Watching their movement tells you nothing. Just drive right past them. If you hit them, you hit them; it’s best not to worry about it. They’ll cause you to spin out.
Podoboo
- Podoboo (yes, they have a name) come in several types, but are normally attached like giant spinning arms. Watch the rotation and dodge. You spin out if you hit one.
Cataquack
- Cataquacks are from Super Mario Sunshine. They’ll toss your kart high into the air and make you drop your items. They come in several colors.

Goomba
- Goomba’s are a classic. Hit them and spin out. They don’t move fast, but are often placed in areas where you wont have a chance to dodge them (like around drift turns).
Monty Mole
- Moles can be annoying. While they can pop up and knock you up like a shell, that’s rare. More so the issue is their underground paths tilling up the ground making it rough and slowing you down.

Penguin
- Penguins are awesome. Some will waddle about while other will dive down and slide a ways before getting back up and doing it back again. Hitting a sliding one will cause you to spin out. Larger ones act like walls. You can use a star to go though, but do you really want to hurt a penguin? They’re so cute...
Koopa Zapper
- Koops Zapper is evil. If you touch any of the lighting arms coming out of it, you shrink and lose all your items. Carefully time your approach.
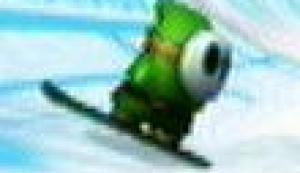
Shy Guy Snowboarder
- There aren’t enough of these to make them much of a threat. Spin out if you hit one.
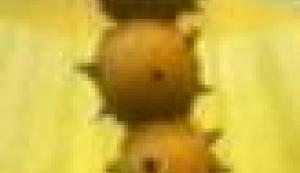
Pokey
- Pokey’s don’t move fast, and they also wont throw things at you or fall on you (like they do in other games) instead they just wiggle about. Very easy to dodge. You spin out if you hit one.
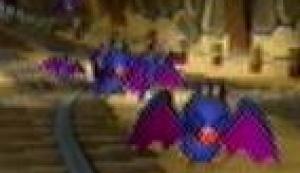
Swooper
- They will ram your kart and push it backward/off the edge. Timing is nearly impossible, so just charge though.
Thwomp
- Thwomps are dangerous. The come down and crush you. Carefully time your kart to go under them. If you cant, you can normally go around.
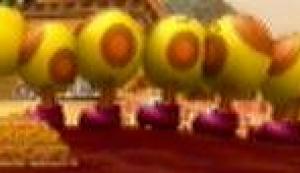
Wiggler
- These clueless creatures wonder around in circles, stopping every so often. Time your kart and go around. If you hit one, its just like hitting a wall.
Cannon Ball
- Cannon balls are launched from the Shy Guys ship out at sea. Their accuracy leaves much to be desired (hey, its hard to see from under that mask...) but the explosion following is nothing to laugh at. Steer clear of these once they land.
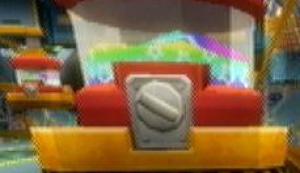
Gumball Machine
- These will come out of the ceiling and crush you. Not exactly without warning, as you can plainly see them, but you should still time your movement to get under them.

Mine Cart
- These are a pain until you realize: They’re on a track! Watch the track and time the movements of the cart to get around.
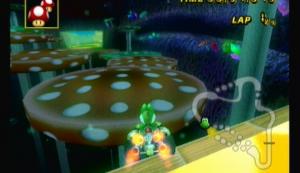
Mushroom Jump Pad
- Jump pads actually help you. They give you a boost and increase your jump as you go flying to the next pad. However, steering on them is nearly impossible, so line your jumps up carefully.
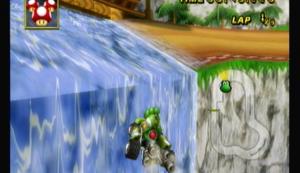
Waterfall
- Waterfalls can swiftly sweep you over the edge if you’re not careful.

Pile of Leaves
- Doest do anything to you directly, but will sometimes be hiding a banana peel. The alterative is that sometimes it’s hiding a mushroom. Drive through at your own risk.
Small Wall
- I know what you’re thinking “luz. wat, wut?” but small (and even large) walls and barriers will be one of your worst foes. Just so much as a scrap or bump against them and you’ll be slowed to a crawl. Beware!
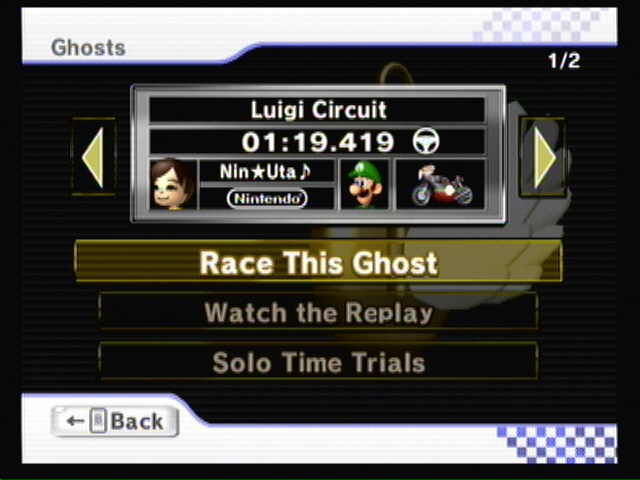
Time Trials
Time Trials allow you to set the best possible time for any given course. You can race alone, or compete against a Ghost to see who scores better.
A Ghost is a recording of a player that has played the course before and got a really good time on it. You can race against it to see who has the better tactic. Ghosts cannot interfere with you, nor can you it.
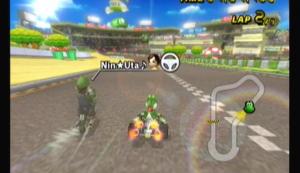
You look like you've seen a ghost...
In Time Trials, there are no item blocks. You start with 3 mushrooms and that's all you get.
You may be wondering “Why would I want to do this? It sounds like a pain...” and you'd be right, it's a pain. However, this is the fastest way to unlock a lot of the characters (this, or play 5,000 Grand Prix races). Plus, you get bragging rights.
Now, in order to unlock characters, you have to get a REALLY good time. Doing this unlocks the “Expert” Staff Ghosts. The Expert Staff Ghosts have times that you wouldn't believe on some tracks. Luckily, you don't have to beat the ESG, just unlock them. Beating them just gives you bragging rights.
- The best vehicles to use are the Heavy class. They have insane top speeds, and since there is nothing to slow you down (unless you go off course), you can reach top speed and hold it for the entire race.
- Perfect the start boost. It can shave a few seconds off your time, and helps off-set the heavy vehicles low acceleration.
- Learn ALL the shortcuts. You'll need them.
- Perfect your drift boosts. It's a little different with heavy vehicles, so if you're not used to them it'll take some time to get just right.
- Practice. Practice. Practice. This isn't something you can do a night before a party in hopes of unlocking all characters. This is going to take time. You'll often have to go over the same track a good 10 times before you even get close to a good time.
Below, you'll find a list of the time requirements to unlock an Expert Staff Ghost. Note that the times could be off by a second in either direction. The exact times are hard to get, obviously.
===============
Mushroom Cup
===============
Luigi Circuit - 1:24.411
Moo Moo Meadows - 1:33.571
Mushroom Gorge - 2:05.494
Toad's Factory - 2:12.784
===============
Flower Cup
===============
Mario Circuit - 1:39.183
Coconut Mall - 2:24.788
DK's Snowboard Cross - 2:24.725
Wario's Gold Mine - 2:14.932
===============
Star Cup
===============
Daisy Circuit - 1:48.791
Koopa Cape - 2:54.897
Maple Treeway - 2:50.229
Grumble Volcano - 2:19.524
===============
Special Cup
===============
Dry Dry Ruins - 2:21.681
Moonview Highway - 2:07.016
Bowser's Castle - 2:55.017
Rainbow Road - 2:59.293
===============
Shell Cup
===============
GCN Peach Beach - 1:30.698
DS Yoshi Falls - 1:12.901
SNES Ghost Valley 2 - 1:03.752
N64 Mario Raceway - 2:07.915
===============
Banana Cup
===============
N64 Sherbet Land - 2:37.784
GBA Shy Guy Beach - 1:39.255
DS Delfino Square - 2:33.107
GCN Waluigi Stadium - 2:24.645
===============
Leaf Cup
===============
DS Desert Hills - 2:01.141
GBA Bowser Castle 3 - 2:50.637
N64 DK's Jungle Parkway - 2:49.028
GCN Mario Circuit - 1:55.267
===============
Lightning Cup
===============
SNES Mario Circuit 3 - 1:34.828
DS Peach Gardens - 2:29.006
GCN DK Mountain - 2:50.248
N64 Bowser's Castle - 3:06.723
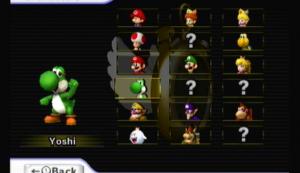
Characters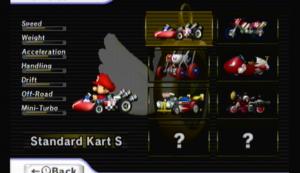
Karts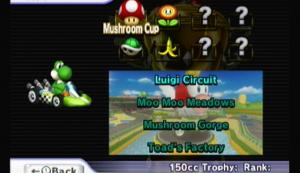
Cups
Tch, yeah, I know what you really came to this guide for... and I aim to please.
Find all the unlockables in this game, as well as how to unlock them.
Note that if more then one condition is listed, you only have to complete one of them.
We have broken this section down into the following pages:
- Characters
- Karts
- Bikes
- Cups
- Everything Else
- Baby Luigi
How to unlock:
1) Unlock 8 Expert Staff Ghosts
2) Win 100 WFC Ghost Races
3) Play 3,150 Grand Prix races
- Baby Daisy
How to unlock:
1) Score (Star) or higher on all 50cc Wii cups
2) Play 1,950 Grand Prix races
- Toadette
How to unlock:
1) Race in all courses in Time Trial Mode
2) Win 1,000 Online Races
3) Play 2,550 Grand Prix Races
- Dry Bones
How to unlock:
1) Complete the Leaf Cup in first place in 100cc
2) Play 1,050 Grand Prix Races
- Daisy
How to unlock:
1) Finish Special cup in first place in 150cc
2) Play 2,850 Grand Prix Races
- Birdo
How to unlock:
1) Complete 16 courses in Time Trials
2) win 250 Online races
3) Play 1,350 Grand Prix Races
- Diddy Kong
How to unlock:
1) Finish the Lightning Cup in first place on 50cc
2) Play 450 Grand Prix Races
- Bowser Jr.
How to unlock:
1) Score (start) or higher on all 100cc Retro cups
2) Play 3,450 Grand Prix Races
- King Boo
How to unlock:
1) Finish the Star Cup in first place in 50cc
2) Play 750 Grand Prix Races
- Rosalina
How to unlock:
1) Score (star) or higher in all cups in Mirror Mode
2) Play 50 Grand Prix Races AND have Super Mario Galaxy save data on your Wii
3) Play 4,950 Grand Prix Races
- Funky Kong
How to unlock:
1) Unlock 4 Expert Staff Ghosts in Time Trials
2) Win 25 WFC Ghost Races
3) Play 2,250 Grand Prix Races
- Dry Bowser
How to unlock:
1) Score (star) or higher on all 150cc Wii cups.
2) Play 4,350 Grand Prix races
- Mii Racer
How to unlock:
1) Finish the Special Cup in first place in 100cc
2) Play 1,650 Grand Prix Races
- Mii Mario Costume
How to unlock:
1) Unlock all 32 Expert Staff Ghosts
2) Win 5,000 WFC Ghost Races
3) Play 5,100 Grand Prix Races
- Cheep Charger
How to unlock:
1) Score (star) or higher on all 50cc Retro cups
2) Play 1,800 Grand Prix Races
- Tiny Titan
How to unlock:
1) Unlock 1 Expert Staff Ghost
2) Win 50 WFC Races
3) Play 1,200 Grand Prix Races
- Blue Falcon
How to unlock:
1) Finish the Lighting cup in first place in Mirror Mode
2) Play 4,200 Grand Prix Races
- Super Blooper
How to unlock:
1) Finish the Leaf Cup in first place in 50cc
2) Play 300 Grand Prix Races
- Daytripper
How to unlock:
1) Finish the Leaf Cup in first place in 150cc
2) Play 2,700 Grand Prix Races
- Sprinter
How to unlock:
1) Unlock 24 Expert Staff Ghosts
2) Win 3,000 WFC Races
3) Play 4.650 Grand Prix Races
- Piranha Prowler
How to unlock:
1) Finish Special Cup in first place in 50cc
2) Play 600 Grand Prix Races
- Jetsetter
How to unlock:
1) Score (star) or higher in all Retro cups in 150cc
2) Play 4,500 Grand Prix Races
- Honeycoupe
How to unlock:
1) Finish the Lightning Cup in first place in 150cc
2) Play 3,000 Grand Prix Races
- Quacker
How to unlock:
1) Finish Star Cup in first place in 150cc
2) Play 2,400 Grand Prix Races
- Magikruiser
How to unlock:
1) Complete 8 courses in Time Trials
2) Win 5 WFC Races
3) Play 900 Grand Prix Races
- Jet Bubble
How to unlock:
1) Finish the Leaf Cup in first place in Mirror Mode
2) Play 3,900 Grand Prix Races
- Zip Zip
How to unlock:
1) Finish the Lightning cup in first place in 100cc
2) Play 2,100 Grand Prix Races
- Sneakster
How to unlock:
1) Score (star) or higher in all Wii cups at 100cc
2) Play 3,300 Grand Prix Races
- Dolphin Dasher
How to unlock:
1) Finish the Star Cup in first place in Mirror Mode
2) Play 3,750 Grand Prix Races
- Shooting Star
How to unlock:
1) Finish the Star Cup in first place in 100cc
2) Play 1,500 Grand Prix Races
- Spear
How to unlock:
1) Unlock 12 Expert Staff Ghosts in Time Trials
2) Win 200 WFC Races
3) Play 3,600 Grand Prix Races
- Phantom
How to unlock:
1) Finish the Special Cup in first place in Mirror Mode
2) Play 4,050 Grand Prix Races
- Star Cup
How to unlock: (Must be unlocked independently in every cc)
1) Finish the Mushroom Cup and Flower Cup in third place or higher
- Special Cup
How to unlock: (Must be unlocked independently in every cc)
1) Finish the Star Cup in third place or higher
- Leaf Cup
How to unlock: (Must be unlocked independently in every cc)
1) Finish the Shell Cup and Banana Cup in third place or higher
- Lightning Cup
How to unlock: (Must be unlocked independently in every cc)
1) Finish the Leaf Cup in third place or higher
- Expert Staff Ghosts
How to unlock:
1) See Expert Staff Ghosts section
- Karts and Bikes in 50cc
How to unlock:
1) Finish all cups in third or higher in 50cc
- Karts and Bikes in 100cc
How to unlock:
1) Finish all cups in third or higher in 100cc
- Mirror Grand Prix Mode
How to unlock:
1) Finish all cups in first place in 150cc
2) Play 4,800 Grand Prix Races
- New Title Screen
How to unlock:
1) Finish all cups in first place in 50, 100, 150, and Mirror Mode
- Normal Ending
How to unlock:
1) Finish both Special and Lightning Cups in 50, 100, or 150cc
- Special Ending
How to unlock:
1) Finish all cups in first place in 50, 100, 150 and Mirror Mode
- (Star) next to your name in WiFi matches
How to unlock:
1) Score (star) or higher in all cups in 50, 100, 150, and Mirror Mode
- (Star x2) next to your name in WiFi matches
How to unlock:
1) Score (star x2) or higher in all cups in 50, 100, 150, and Mirror Mode
- (Star x3) next to your name in WiFi matches
How to unlock:
1) Score (star x3) or higher in all cups in 50, 100, 150, and Mirror Mode
- Gold Wii Wheel next your name in WiFi matches
How to unlock:
1) Play 100 Grand Prix games and have a Wii Wheel usage of over 50%
 Voices In Your Head: 7 Biggest Video Game Voice-Over Stars
 Mass Effect 3: Citadel Review: Its Quite A Party
 Thinking Beyond Difficulty
 How to unlock Stan Lee in Lego Marvel Superheroes
 Leviathan: Warships Review