Unofficial Lost Planet 2 Guide by Michael Monette for
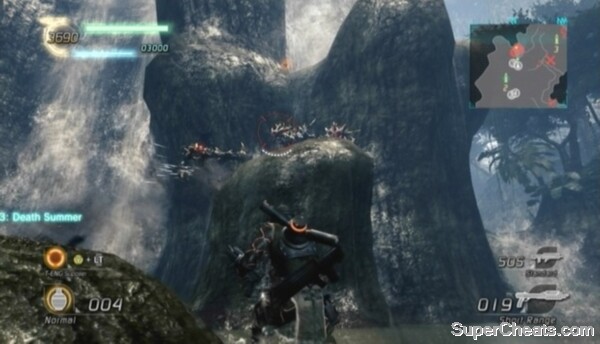
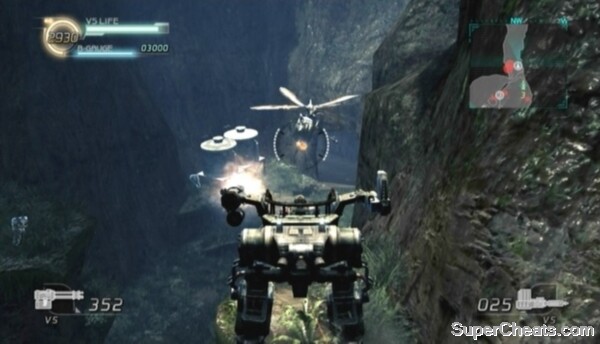
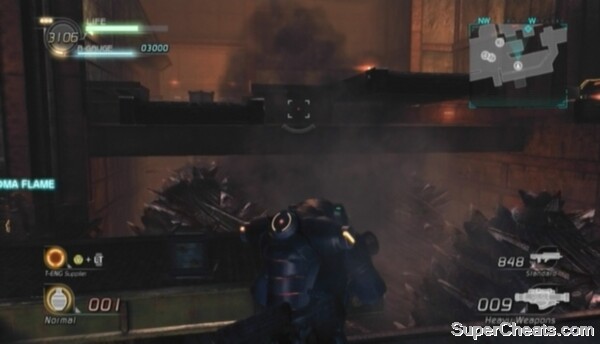
The sequel to the critically acclaimed Lost Planet: Extreme Condition, Lost Planet 2 introduces a number of enhancements to the franchise. There are new weapons, new enemies, new Vital Suits and improved character customization, but perhaps the most prominent new feature is the four player online co-op support for the campaign mode. The new campaign still offers a fun, diverse and action-packed single-player experience, but is made even more enjoyable when played with friends over Xbox Live or the PlayStation Network. The story takes place 10 years after the events of the first game. Much of the snow that covered E.D.N. III's surface has melted, revealing lush jungles, sprawling deserts and other new environments. Though the climate has changed, the planet is still as war-torn as ever. Thermal energy remains the hot commodity on E.D.N. III, with various factions battling each other over the precious substance. Old threats return as well: the nefarious NEVEC organization continues to pursue its shady agenda, and the native akrid still inhabit the planet. This guide covers all six episodes of the campaign mode, with detailed instructions for earning every Gold award in the game. You'll also find a complete list of Good Job awards, faction rewards, unlockable weapons and abilities, as well as every Xbox 360 achievement and PlayStation 3 trophy. Note: This guide was written based on the Normal difficulty level with the default weapon loadout. If you are playing the game on a higher difficulty, most of the strategies and directions contained within will still apply, but the enemies you face will have more health and will deal more damage and the locations of weapons and Vital Suits may differ. Furthermore, this guide was written based on the Xbox 360 version of the game, but effort has been made to include PlayStation 3 controls where applicable. The controls listed below are for Control Pattern A-1 (default). Xbox 360 Controls Left Bumper - Turn 90 degrees left Left Stick - Move, Click to Crouch Y Button - Change weapon, Hold to pick up weapon D-pad UP - Zoom Back Button - PDA menu Left Stick (Click) and A - Dodge (roll) PlayStation 3 Controls L1 Button - Turn 90 degrees left Left Stick - Move, Click to Crouch Triangle Button - Change weapon, Hold to pick up weapon D-pad UP - Zoom Select Button - PDA menu L3 and X - Dodge (roll) In a co-op game, players one and three experience Prologue A, while players two and four experience Prologue B. Each prologue yields a separate achievement or trophy when completed, so make sure you set yourself up to experience the other prologue on a subsequent play through. Prologue B is an on-rails sequence in an Osprey VS. You don't need to do anything here, although you can shoot down the Trilid and attack the Raibees that appear. Your Machine Gun has infinite ammo for the time being, so go crazy. In Prologue A, enter the vacant Nida VS in front of you and then press the X/Square button to activate it. Once in the VS, start moving northeast. This VS is equipped with dual Gatling Guns, which you can use to kill the Sepia akrid and destroy the Genessa pods you'll eventually encounter After the cutscene, activate the nearby Data Post by approaching it and rapidly tapping the B/Circle button. The benefits of activating a Data Post are manifold. For one, activating a Data Post adds 500 points to your team's Battle Gauge, which amounts to one extra respawn for you or one of your (human) teammates. Furthermore, activating a Data Post will reveal the map in the top-right corner of the screen, with nearby enemies appearing as red blips. Once you've activated Data Post 1, approach the cliffside to the north. You must use your anchor to reach the top of this hill. To use the anchor, aim the target reticule at a ledge and press the X/Square button to fire the grapnel. The anchor will only latch on to something when the target reticule is green. If you're aiming at the ledge and the target reticule is white, try moving closer. When you've made it up, use your anchor again to reach the higher ledge. Atop the hill is a T-ENG chest. To open these chests, you must equip your T-ENG Supplier and shoot enough T-ENG at the chest to open it. Equip the T-ENG Supplier by pressing Y/Triangle and LT/L2 at the same time. With the T-ENG Supplier equipped, shoot a couple of globs of T-ENG at the container to open it and take the Rocket Launcher inside. Once you have that, be sure to switch back to your grenades by pressing Y/Triangle and LT/L2 again. A swarm of Trilid will appear as you approach the other end of the hilltop. Gun down as many of the Trilid as you can with your Machine Gun and a couple of [?] Boxes may drop. These mystery boxes usually hold credits, but may also yield Emotes, Noms de Guerre, abilities or weapons. Credits can be used to play the LP2 Slot Machine, which you can access by pressing the Y/Triangle button while on one of the Customization screens in the 'My Page' section of the game's main menu. The LP2 Slot Machine is 2000 credits a go and will yield either an Emote, Nom de Guerre, ability or weapon each time. Continue north to the other end of the hilltop and drop down to the area below. Activate Data Post 2 and then approach the nearby building. There is a mass of Sepia and several Genessa pods on the other side of this building. Use Hand Grenades or a Rocket Launcher to clear them out. There's another T-ENG chest here; open it to find a VS Shotgun. You'll meet up with the other half of your team at this point, and then a large Chryatis akrid will emerge from the ground. One clear disadvantage akrid face is that their weak spots glow orange. The Chryatis's weak spot is its glowing orange abdomen. As well, you can shoot off each of the Chryatis's arms by blasting the mass of orange protrusions near each joint. Sever both of its arms and the Chryatis will fall to the ground, unable to attack. With the powerful VS Shotgun in your hands, the Chryatis will fall in no time. The Chryatis's attacks are damaging, however, so make use of the evasive roll manoeuvre by pressing the A/X button while crouching (click the Left Stick to crouch). Your character is invulnerable during the first part of the roll animation, allowing you to escape almost any enemy attack with the right timing. When the Chryatis is dead it will release a bunch of [?] Boxes. These boxes disappear quite quickly, so get right to collecting and grab as many as you can. You can Dash by holding the B/Circle button. After collecting all of the boxes, step into the red outline around the Osprey VS to complete the prologue.
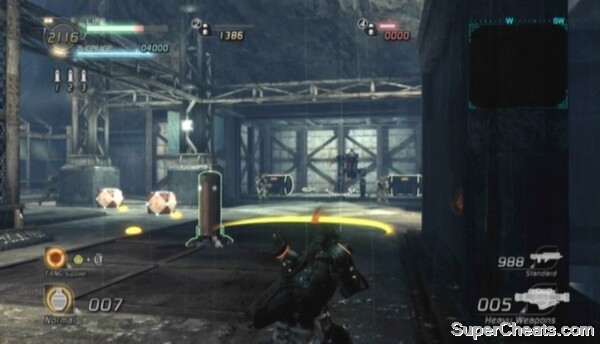
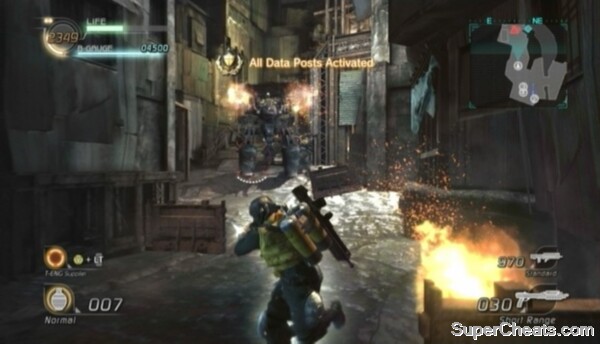
Mission 1 Objective: Activate All the Data Posts! Make your way north to Data Post 1. Use your Machine Gun to shoot down the swarm of Trilid flying up ahead and collect any [?] Boxes the Trilid drop when killed. Activate Data Post 1 to add 500 points to your team's Battle Gauge and then continue heading north. Data Post 2 is a short ways north from Data Post 1. Proceed north after activating Data Post 2 and some Genessa pods will spawn. Throw a Hand Grenade next to the Genessa pods and shoot the grenade to damage the pods and kill any Sepia that have already spawned. Your allies can finish off the weakened pods with their Machine Guns. Continue down the path and your team will soon come to a rendezvous point with some AI allies and an Osprey VS. Objective: Defeat the Akrid!
One clear disadvantage akrid face is that their weak spots glow orange. The Chryatis's weak spot is its glowing orange abdomen. As well, you can shoot off each of the Chryatis's arms by blasting the mass of orange protrusions near each joint. Sever both of its arms and the Chryatis will fall to the ground, unable to attack. The Chryatis's attacks are damaging, so make use of the evasive roll manoeuvre by pressing the A/X button while crouching (click the Left Stick to crouch). Your character is invulnerable during the first part of the roll animation, allowing you to escape almost any enemy attack with the right timing. Akrid Decimated-- Shoot off both of the Chryatis's arms before killing it to earn this award. If you're playing with friends, simply concentrate your collective fire on the mass of orange protrusions near each joint to sever both of the Chryatis's arms, and then take to attacking its orange abdomen to finish it off. This award can be difficult to earn with AI allies because they are more likely to fire at the Chryatis's abdomen. Concentrate your fire on the Chryatis's arms and hopefully you can take them off before your AI partners kill the akrid.
When the Chryatis is dead, activate Data Post 3 in the middle of the area to earn the 'All Data Posts Online' GJ award and then start heading north. Blast the Sepia along the path and burst the T-ENG pods on the trees. Continue down the path and step over the red line to start the area complete countdown. Objective: Strike a Pose! Human teammates aren't required to earn this award, however AI partners aren't always reliable. You may need to perform an Emote a few times to trigger theirs.
Mission 2 There are two routes you can take at the start of this mission. Each route yields its own GJ award, so it's worth taking them both. Objective: Break Through the Enemy Lines! If you intend to run the akrid gauntlet instead, make sure you move past the torches on the other side of the river to trigger the 'Break Through the Enemy Lines!' objective before ending the mission. If you fail to do so, this award will not be given to you upon completion of the level. If you're playing with AI partners and you intend to run the akrid gauntlet, it's best to trigger this objective once you've cleared all of the enemies on the map, as you can then still earn this award even if your team has suffered one or more deaths in the process. Objective: Run the Akrid Gauntlet!
This route is packed with Sepia and lined with Genessa pods. Look for a Shotgun and Gum Grenades at the start of the gauntlet. Pick up the Shotgun and grenades and start down the path. Keep to the left side of the path and head up the slope to Data Post 3. Activate Data Post 3 to add 500 points to your team's battle gauge and reveal all of the enemies' locations on the map in the top-right corner of the screen. There's another Shotgun next to Data Post 3. Use grenades to weaken the Genessa pods and blow apart any Sepia nearby. Shoot the thrown Gum Grenades with your Machine Gun or Shotgun to set them off. Use your Shotgun to fend off Sepia and destroy Genessa pods at point-blank range. When the area is clear, drop down to the ledge at the west end to earn the 'Survived the Akrid Gauntlet' award. Once through the akrid gauntlet, you can end the stage by heading south from Data Post 2, activating the Control Posts and stepping past the red line beyond the gate. Enemies will come down from the hill west of the Control Posts, so be ready with your Shotgun.
If you want to earn more Career Points at the end of this area, head north and clear out all of the enemies there. Be sure to activate Data Posts 1 and 2 as well. Most importantly, if you haven't triggered the 'Break Through the Enemy Lines!' objective, fight your way back to the river to trigger this objective before opening the gate, otherwise you won't be awarded the 'Enemy Lines Crossed' GJ award upon completion of the level. Mission 3 Objective: Destroy the Mine! Start down the path toward the mine, keeping to the left, and stop when you spot a Machine Gun. There's a Sentry Turret at the start of the corridor here. To disable the turret, shoot and destroy the sensor hanging from the ceiling above it. Enter the corridor once the first turret is down. Around the corner is another turret, this one hanging from the ceiling. The sensor tied to this turret is on the ground below it. Destroy the sensor to disable the turret and then continue down the corridor. At the end of the corridor is a room with some enemy soldiers and a turret emplacement attached to the ceiling. Gun down the soldiers with your Machine Gun and use grenades to destroy the turret emplacement. Don't move up to the cover in the middle of this room, as doing so leaves you extremely vulnerable to the snipers outside (unless you're playing co-op; perhaps then your allies have already taken care of them).
If you don't have grenades but have a Shotgun, you can rush the turret instead. There are likely still enemy soldiers on the platform with the turret, so clear them out with your Machine Gun first. Rush the turret with your Shotgun when the way is clear. Get behind or below the turret emplacement so the gunner won't be able to shoot you and then blast the turret at point-blank range to quickly destroy it. Generator 1 is on the platform with the turret. Activate Generator 1 to reveal the map in the top-right corner of the screen. With that, step onto the walkway outside and look northeast to spot two more Sentry Turrets and a sensor on the other side of the mine. Make sure there isn't also an enemy sniper on the ledge at the north end of the mine before doing anything else. If there is a sniper there, take him out with your Machine Gun and then destroy the sensor to disable the two Sentry Turrets. Once the turrets are down, continue east and use your anchor to reach the upper walkway when you come to a ladder. Look for Hand Grenades in the small cave here and then continue down the walkway to Generator 3. Have a look around for snipers on the surrounding ledges before activating the generator. After activating Generator 3, look northwest for a sensor visible through a rectangular window on the other side of the mine. Destroy this sensor before continuing on your way. From Generator 3, proceed north along the mountain trail and through the tunnel to reach Generator 2. There are two Sentry Turrets in the room with Generator 2. The sensor tied to these two turrets is on the other side of the wall to the left of the turret hanging from the ceiling. Unless you want to leave Generator 2 for later and come at it from the other side, you can simply move behind the wall and quickly destroy the sensor to disable the two Sentry Turrets here. Sentry Turrets do not deal much damage on the Normal difficulty level, and the Harmonizer can heal away what little damage you do sustain.
Once you've activated Generators 1, 2 and 3, you need to make your way down to the bottom of the mine where Generators 4 and 5 are. There's a stairwell southwest of Generator 2 that leads down to the second level. This will afford you a good view of the central platform where Generator 4 is. There is a turret emplacement on the platform, which you can take out by throwing grenades down and shooting those grenades when they reach the turret. There might also be an enemy Evax VS in the cave at the southwest end of the mine. If there is one, destroy it with a couple of grenades before dropping down to the bottom level of the mine. There may still be two Sentry Turrets and a sensor below the central platform. Destroy the sensor to silence the two Sentry Turrets if your allies haven't already taken care of it, then anchor up to the central platform and activate Generator 4. After activating Generator 4, climb the ladder on the west side of the central platform to reach the Data Post. There may be an enemy sniper on the same platform, so be careful. One of the T-ENG chests on this platform contains a Rocket Pod and the other contains a Rifle. Neither of these weapons would benefit you at this point, so save your T-ENG. Activate the Data Post before dropping back down to the bottom of the mine. Generator 5 is in the cave at the northeast end of the mine. There is an enemy Evax VS and a group of soldiers in the hallway further northeast of the generator, so clear them out with grenades before doing anything else. There's Rocket Launcher ammo to collect before activating Generator 5. The first Rocket Launcher is on the platform right next to the generator -- collect the Machine Gun ammo here as well. The other Rocket Launcher is through the hallway northeast of the generator (where the enemy Evax was). Collect both of these Rocket Launchers and you'll have 20 Rocket Launcher ammo going into the final sequence.
Activate the fifth and final generator once your team is ready. Objective: Keep the Control Units On! The Rocket Launcher is a must here, so hopefully you followed the instructions above. There is an enemy Evax VS on the third-level platform at the north end of the mine. Before doing anything else, destroy this VS by hitting it with two rockets. With the VS down, activate Control Units 1 and 2 near your starting point. Gun down the Gatling Gun-wielding soldier on the walkway at the northwest end of the mine and then get to activating Control Units 3 and 4 under the central platform. Use your Machine Gun and Hand Grenades to wipe out groups of enemy soldiers. You can find more Hand Grenades between Control Units 3 and 4. An enemy Nida VS will drop into the mine near the 45 second mark. Equip your Rocket Launcher and fire rockets at the VS to destroy it. Destroying this VS on the Normal difficulty level requires three direct hits from a Rocket Launcher.
Perfect Victory -- To earn this award, you must not allow the enemy to deactivate any off the Control Units once you've started the boring poles. This can be a difficult award to earn while playing solo, but is quite simple with three human allies. If you're playing solo, use the map in the top-right corner of the screen to determine if there are enemies near any of the Control Units. If there is one or more red dots next to one of the Control Units on the map, run over to it and kill the enemy soldiers there before they can deactivate the unit. Keep the boring poles going for 90 seconds to complete the objective. The countdown will stop if the enemy manages to deactivate one of the Control Units. If this is the case, get the deactivated Control Units back on to continue the countdown. Be ready for a quick time event during the cutscene that ensues after you've completed the objective. You are given an ample amount of time to press the button that appears on screen during this cutscene, and failing to press the button in time or pressing the wrong button doesn't appear to carry a penalty.
Mission 1 Objective: Find the Hidden Route Crossing the red line at the end of the hidden route will end this mission and ushers you to an optional area. Though this area is optional in the sense that you can skip it and still complete the chapter, you must complete the area to unlock the achievement or trophy awarded for completing the campaign on your chosen difficulty level. If you wish to unlock the achievements or trophies awarded for completing the game on a certain difficulty level, don't pass this area by when playing through Episode 1 on a new difficulty level.

Controls
Left Trigger - Throw Grenade
Right Bumper - Turn 90 degrees right
Right Trigger - Shoot
Right Stick - Aim, Click to Reload
B Button - Melee attack, Hold to Dash
A Button - Jump
X Button - Use Anchor
D-pad LEFT - Toggle night vision
D-pad RIGHT - Toggle night vision
Start Button - Activate Harmonizer (restore health)
L2 Button - Throw Grenade
R1 Button - Turn 90 degrees right
R2 Button - Shoot
Right Stick - Aim, Click to Reload
Circle Button - Melee attack, Hold to Dash
X Button - Jump
Square Button - Use Anchor
D-pad LEFT - Toggle night vision
D-pad RIGHT - Toggle night vision
Start Button - Activate Harmonizer (restore health)
Prologue
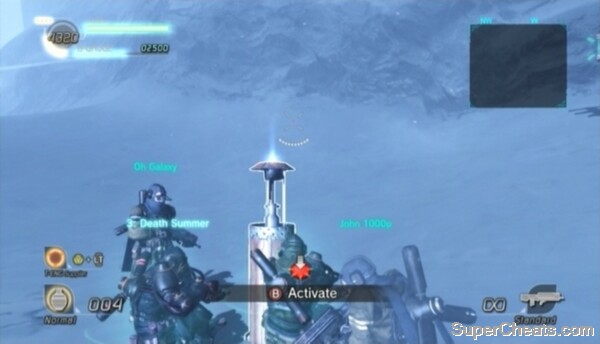
Activate the Data Post to add 500 points to your team's Battle Gauge and reveal the map on the Radar in the top-right corner of the screen.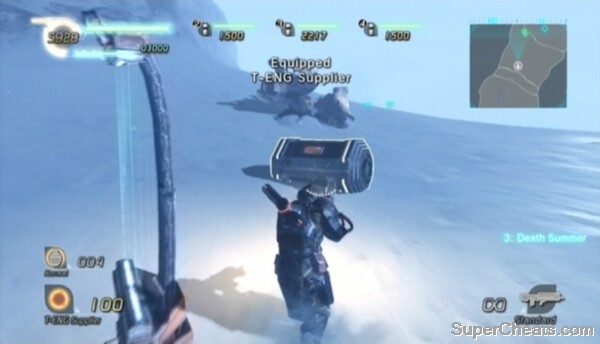
Use the T-ENG Supplier to open T-ENG chests.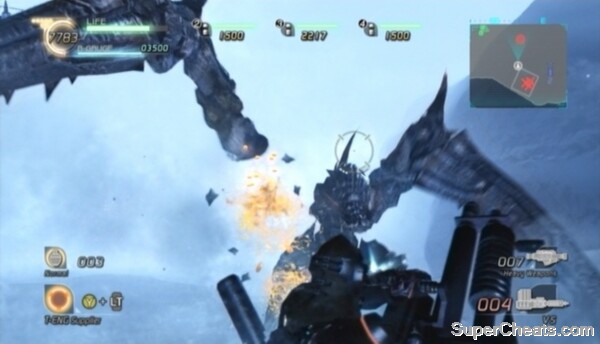
The VS Shotgun will make short work of the Chryatis.
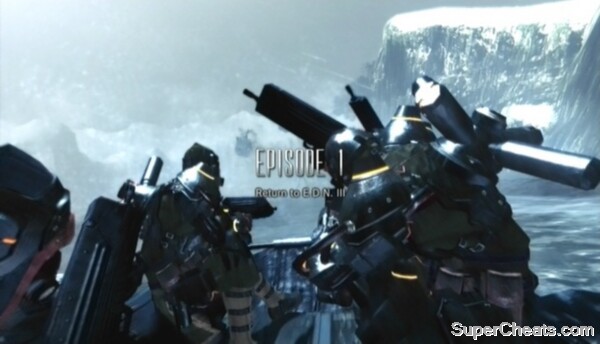
Return to E.D.N. III
Chapter 1
All Data Posts Online -- Activate all three data posts in the level to earn this award.
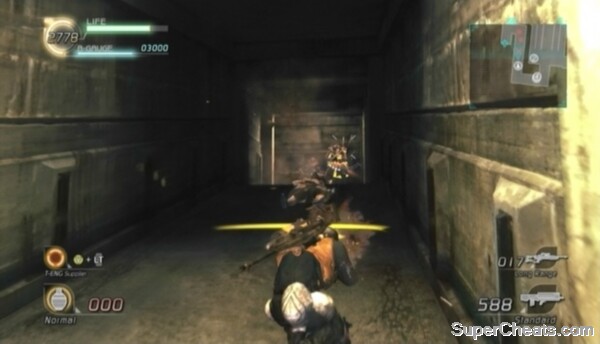
A Chryatis emerges from the ground at the rendezvous site and swipes the Osprey out of the air. There are two weapons nearby that can make short work of this creature: the Gatling Gun attached to the broken-down VS by the large tree to the left and the Shotgun buried in the dirt mound under the same tree. You can dig up the Shotgun by approaching the dirt mound and rapidly pressing the B/Circle button.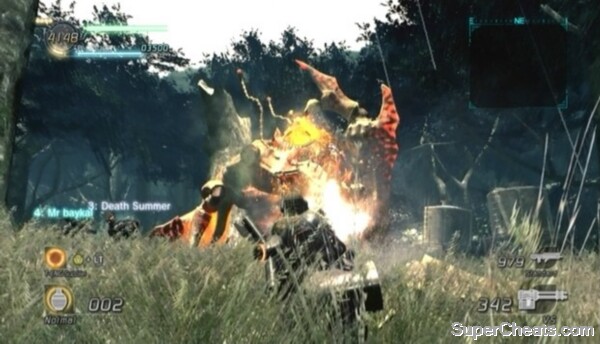
Shoot off both of the Chryatis's arms before killing it to earn the 'Akrid Decimated' GJ award.
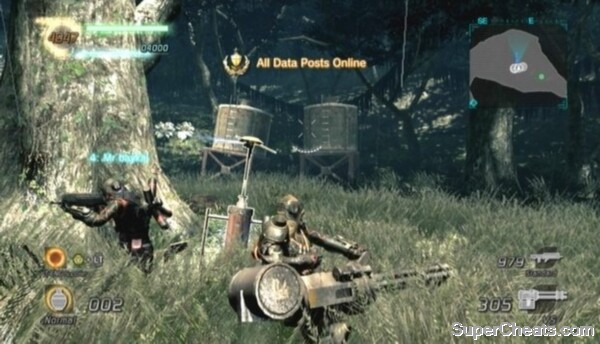
Activate all three Data Posts in the area to earn the 'All Data Posts Online' GJ award.
Emote: All Players -- To earn this award, all four players must be performing an Emote at the same time. To perform an Emote, hold the Start button and press one of the shoulder buttons or one of the buttons on the D-Pad.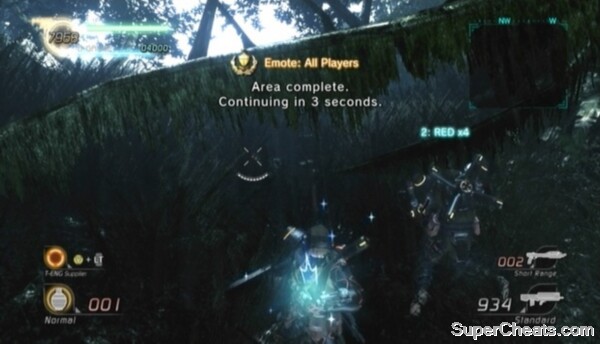
All four players must be performing an Emote at the same time to earn the Gold GJ award.
Enemy Lines Crossed: No Casualties -- Complete the 'Break Through the Enemy Lines!' objective without any deaths on your team to earn this award. AI partner deaths do count, so this is best attempted with human allies.
Survived the Akrid Gauntlet -- When you reach the river at the start of the stage, head north up the river rather than crossing to the other side. Make it to the other end of this route to earn this GJ award.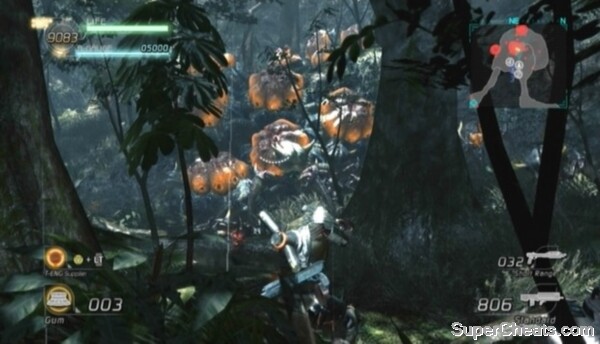
Use the Shotgun and Gum Grenades to clear the Sepia and Genessa in the akrid gauntlet.
Activate the Control Posts and cross the red line to complete the level.
Your first task is to activate all five generators in the mine. There are a ton of Sentry Turrets, enemy soldiers and enemy VSs in the mine, so you'll have to take it slow.
Sentry Turrets self-destruct when the sensor tied to them is destroyed.
Activate all five generators to gain access to the control units.
Collect the Rocket Launcher near Generator 5 before ending the level.
To complete the chapter, you must destroy the mine by keeping the two boring poles attached to the central platform running for 90 seconds. Getting the boring poles going requires activating the four Control Units on the bottom level of the mine. The boring poles will only run while all four Control Units are active.
Keep the boring poles going for 90 seconds to complete the chapter.
Destroying the mine
Return to E.D.N. III
Chapter 2
Hidden Route Found -- Find the hidden route between the two trees along the mountainside at the south end of the starting area to earn this GJ award.
Finding the Hidden Route
Aside from achievements/trophies, this optional area contains a VS you can take with you to the sub-boss battle in Mission 2. Having a VS for this sub-boss makes the fight significantly easier, especially if you're playing solo.
Though it's definitely in your best interest to end this level via the hidden route, there are a couple more GJ awards to earn in this area. As well, ending the level right at the start will earn you an abysmal number of Career Points on the Area Results screen. Thus, it is best to clear the map of enemies, activate all of the Data Posts and then backtrack to the start of the level and end the area via the hidden route.
Objective: Activate All the Data Posts!
All Data Posts Online -- Activate all four Data Posts in the level to earn this award.
Data Post 1 is just outside the starting area; activate it to reveal the map on the Radar in the top-right corner of the screen and add 500 points to your team's Battle Gauge. Marked on the map are the three remaining Data Posts in the area. Activate each Data Post as you come to it.
Activating these Data Posts also has the benefit of marking nearby enemies on the Radar. This proves especially useful when it comes to the second objective of this area.
Kill all of the akrid in the area to earn the 'All Akrid Defeated' GJ award.
Objective: Defeat the Akrid!
All Akrid Defeated -- Clear the map of Akrid to earn this GJ award.
On this map you will encounter Genessa, Trilid, Vodoggs and Dongo. You don't need to kill all of the Trilid that appear to earn this award -- just the medium-sized akrid.
Begin by destroying the Genessa around the starting area. There are a couple of Vodoggs beyond the wall. Vodoggs are bipedal, spiky akrid that move quickly and erratically. The Vodogg's weak spot is its face. A Shotgun or grenades are very effective against Vodoggs, but a Machine Gun can take one down just as well. These akrid are extremely quick and their attacks damaging, especially their charge. When the spikes on a Vodogg's head extend, get ready to roll to the side to avoid the charge that follows. Press the A/X button while crouching (click the Left Stick to crouch) to roll.
Dongo are medium-sized akrid that can curl into a ball and roll. The Dongo's weak spot is its orange tail. The best weapons to use against these akrid are the Machine Gun, Shotgun and grenades. Dongo move slowly, so get behind one by circling around it and unload bullets into its tail. You can also throw a grenade behind the Dongo and detonate the grenade by shooting it while it's near the Dongo's tail. The Shotgun is the most effective weapon against Dongo; just a few shots to its tail at point-blank range will do the job.
The Dongo's claw swipe can be easily avoided by simply circling around the Dongo. The evasive roll can get you out of the way of a rolling Dongo, but you won't always see it coming.
The Dongo's weak spot is its orange tail.
Follow the Data Posts north and eliminate all of the akrid you encounter. Large red blips on the map in the top-right corner of the screen denote akrid, so locating the enemies required to complete this objective is simple.
Data Post 4 and the last few akrid are just before the area end marker at the north end of the map. Activate Data Post 4 and kill these akrid, but be careful not to cross the red line.
When all four Data Posts are online and the map is clear of akrid, backtrack to the starting area and end the level by crossing the red line at the end of the hidden route.
Mission 1a
Objective: Proceed to the Reservoir Area
There's a sniper in the tower behind the building across the bridge, so run-and-gun rather than take your time crossing. Toss a grenade up at the tower behind the building and detonate the grenade by shooting it when it reaches the top to kill the sniper and raze the tower. There's a Rifle on the roof; take it with you, as you'll need it in a moment. Activate Data Post 1 inside the building before continuing on.
The narrow path between the mountains beyond the building are covered with Sepia and Genessa pods. Plow through the Sepia with your Shotgun to the broken-down VS where the path opens up. Remove the VS Rocket Launcher attached to this VS and attach it to the working Evax VS further up. Hop in the Evax and use the VS Rocket Launcher to clear away the Genessa and Sepia covering the mountain side. There are explosive Bolsepia on the top ledge, so it's best to remove the Genessa this way rather than anchoring up and destroying the pods at point-blank range with a Shotgun.
Use the VS Rocket Launcher to destroy the Genessa pods and Bolsepia.
You'll encounter a couple of Dongo here as well, but hop out of the VS and conserve the VS Rocket Launcher ammo by killing the Dongo with a Shotgun instead.
If you still have VS Rocket Launcher ammo left, look north for an enemy Evax VS on the other side of the chasm. Fire whatever ammo at this VS, as it will make your bridge crossing difficult if left intact. Anchor onto the upper bridge and use your Rifle to pick off the enemy snipers across the chasm. These snipers likely won't fire at you from this distance due to dim enemy AI.
Objective: Get Across the Bridge - Now!
Mission Accomplished: No Casualties -- Make your way across the bridge without a single death on your team to earn this award. AI partner deaths do count, so this is best attempted with human allies.
There are two bridges you can cross to the other side. If you weren't able to take down the enemy Evax VS on the other side, dash across whichever bridge that VS isn't standing at the other end of. These bridges are destructible, so get across quickly. Use grenades to destroy the enemy VS once on the other side of the bridge.
Keep moving once across the bridge, as every moment you sit still leaves you vulnerable to sniper fire. Get in the vacant Nida VS parked near Data Post 2 to protect yourself from the enemy snipers, as they can't headshot you while you're in a VS. Use the Gatling Guns on the VS to shred the snipers to the north. Hop out of the VS and activate Data Post 2 once you're sure the area is clear.
Dash across the bridge to avoid sniper fire.
Lost Planet 2 introduces the ability to repair damaged VSs. To do so, hop out of your VS and rapidly tap the X/Square button when the prompt appears. Repairing a damaged VS consumes T-ENG, however T-ENG is much less of a commodity in Lost Planet 2 than it was in the original Lost Planet, and so it is very beneficial to keep your fighting machines in tip-top shape.
Get back in the VS and cross the narrow rock bridge north of Data Post 2 to reach a VS Shotgun. Be sure to attach this Shotgun to your VS, as this weapon will make the upcoming sub-boss a cinch. Pick up the Gatling Gun you swapped out to collect its ammo and then continue northwest along the ledge.
Objective: Defeat the Akrid!
All Akrid Defeated -- You'll encounter a Raibee -- a large, flying bee-like creature -- a couple of Vodoggs and a Chryatis beyond Data Post 3. Kill the Raibee, Vodoggs and Chryatis to earn this GJ award.
Conserve your VS Shotgun ammo and instead use your Gatling Gun to kill these akrid. The Raibee's weak spot is the orange patch on its abdomen. Fire down at the Vodoggs and Chryatis from the ledge until they're both dead.
Activate Data Post 3 if you haven't already to add 500 points to your team's Battle Gauge. Repair your VS if it's damaged and pick up the Gatling Gun ammo next to the T-ENG drums near the tunnel entrance. With that, enter the tunnel and cross the red line to complete the level. Remain seated in the VS and you will spawn with it in the next area.
End the level in a Nida VS with a VS Shotgun and the upcoming sub-boss battle will be a cakewalk.
Mission 2
Objective: Decimate the Category G Akrid!
The Cat-G Akrid you're up against here is a Queen Chryatis. The Queen differs significantly from the smaller Chryatis. For one, she remains stationary for the entirety of the fight. She also has two removable arms, but also the ability to quickly grow new arms if hers are severed. She has six smaller arms -- three on both sides of her body -- and a prominent orange weak spot on the top of her head.
Category G Akrid Decimated -- The orange spot on the Queen's head is her major weak spot, however you must remove both of her arms at least once during the course of the battle to earn this GJ award.
Removing the Queen's arms has the added benefit of leaving her momentarily incapacitated. Her head will fall smack down onto the platform, giving you easy access to her weak spot. If you have the Nida VS with and attached VS Shotgun from Mission 1a, you can likely kill the Queen Chryatis before she even has a chance to attack.
Start by severing one of her arms with the Gatling Gun and Shotgun; a couple of hits should do it. When the first arm comes off, immediately shift your fire to the other arm, as she can regenerate a lost arm very quickly. When her head hits the platform, fire the VS Shotgun at her weak spot at point-blank range to knock down her health. There's a human Shotgun next to the gate at the east end of the platform another player can use for added damage.
Defeating the Queen Chryatis
If all goes well, you should be able to eliminate the Queen Chryatis very quickly. If you're on foot, though, you're in for a considerably more difficult fight. As mentioned above, there's a Shotgun by the gate at the east end of the platform. There's also a Gatling Gun on one of the platforms attached to the mountainside at the south end of the area.
All of the Queen Chryatis's attacks can be dodged with the evasive roll, which can be performed by pressing the A/X button while crouching (click the Left Stick to crouch). Your character is invulnerable during the first part of the roll animation, allowing you to escape almost any enemy attack with the right timing.
Objective: Escape the Breath of Ice
Team Member Rescued -- Rescue a teammate encased in ice by shooting him (or be rescued yourself) to earn this GJ award.
This objective will become active if you or one of your allies is hit by the Queen Chryatis's ice breath. A character hit by this attack will become encased in ice. The player can rapidly move the Left Stick back and forth to break free, but this requires a great deal of effort. A teammate can shoot a trapped ally to instantly free them, earning this GJ award in the process. If the trapped player is forced to free themselves, the bronze 'Team Member Escaped' GJ award will be earned instead.
If you're playing solo, it's unlikely the AI will free you if you're hit by the Queen's ice breath and become encased in ice. You can still earn this GJ award by freeing a trapped AI partner, however.
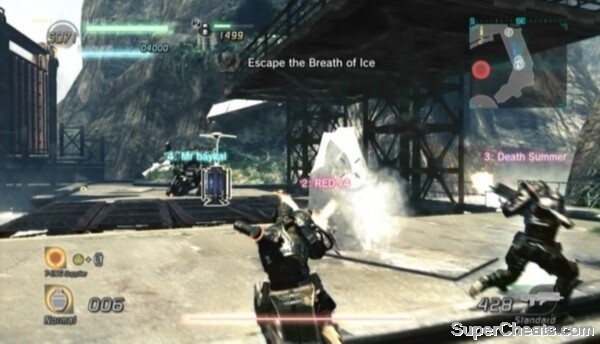
Free a teammate hit by the Queen Chryatis's ice breath to earn the 'Team Member Rescued' GJ award.
Severing both of the Queen's arms is difficult on foot because she can regenerate a single lost arm back very quickly. Thus, to knock the Queen down and make her weak spot accessible to your Shotgun, you must shoot off each arm in quick succession. Doing so requires gradually weakening each arm until both have turned bright red, then knocking one off and immediately concentrating fire on the other.
When both arms are off, move in with your Shotgun and unload into the weak spot on her head to deal a large amount of damage. Repeat until the Queen Chryatis is dead.
Objective: Activate All the Data Posts!
Activate Data Post 1 if you haven't already and then continue through the destroyed gate at the east end of the platform. Activate Data Post 2 beyond the gate and then trade your Nida VS for the Evax VS with the attached Rocket Launcher by the stairs.
Objective: Akrid Extermination Challenge
Akrid Massacre -- Keep killing akrid marked on the Radar. Kill enough and you will earn this GJ award.

Exterminate the akrid and activate the Data Posts on the way to the gate.
Fire a rocket at the mass of Sepia surrounding Data Post 3. Destroy all of the nearby Genessa pods and then activate the third Data Post. There are two Vodoggs surrounding Data Post 4, so be ready with grenades or a Shotgun.
When all four Data Posts are online, head for the door at the north end of the area (follow the blue diamond marker on the Radar) and cross the red line there to complete the chapter.
Mission 1
At the start of the level, head up the slope to your left and walk along the ridge until you encounter an enemy soldier. Gun down the soldier as you approach, then look northeast and kill the enemy soldiers around the bridge and the Shotgun-wielding soldier behind the cover at the other end.
Data Post 1 is under this bridge, so activate it before moving on. The T-ENG chest on this bridge holds a Shield, which is best left there if you're playing single player.
Objective: Break Through the Front Line!
Broke Through: No Casualties -- Complete the level without a single death on your team to earn this award. AI partner deaths do count, so this is best attempted with human allies.
Objective: Destroy the Turrets!
All Turrets Silenced -- Destroy both of the turrets in the enemy base to earn this GJ award.
Use Hand Grenades to destroy the first turret.
You can silence the first turret with a couple of Hand Grenades, but you'll need to get in position first. Continue heading north on the west ridge and pick up the Hand Grenades along the way. Kill the two enemy soldiers through the barred window further up and then stand at the end of the ridge. You have a clear view of the turret from here, so lob a couple of Hand Grenades at the turret and shoot them when they reach the turret to destroy it.
Remain on the ridge and use your Machine Gun to clear away any enemy soldiers still below before dropping down. Pick up the Shotgun by the stairs at the east end of the area and proceed up the stairs. You'll encounter some more enemies at the top of the stairs, so be ready with your Shotgun.
The T-ENG chest at the west end of the middle walkway holds a Rocket Launcher. Collect this Rocket Launcher before anchoring onto the upper walkway. On the upper walkway, gun down the two enemy soldiers near Data Post 2 and then activate the Data Post to add 500 points to your team's Battle Gauge. Pick up the Hand Grenades at the southwest end of the walkway before continuing up the steps across from Data Post 2.
Objective: Destroy the VS!
VS Completely Destroyed -- Destroy the enemy Nida VS on the second level of the enemy's base to earn this GJ award.
Take out the turret and enemy VS from behind cover.
As soon as you're up the stairs, crouch (click and hold the Left Stick) behind the chest-high cover in front of the tree. Take out the enemy soldier standing on the metal box to your right, then equip your Rocket Launcher and fire a rocket at the turret to the north to destroy it. Crouch back down to reload your weapon and then fire a rocket at the enemy VS. Three direct hits from a Rocket Launcher are enough to destroy this VS on the Normal difficulty level.
Before moving out from cover, switch back to your Machine Gun and take out the sniper in the window above the door. Clear away any enemies that remain and then get to activating the Control Posts. Activate the Control Posts and cross the red line around the door to complete the level.
Mission 2
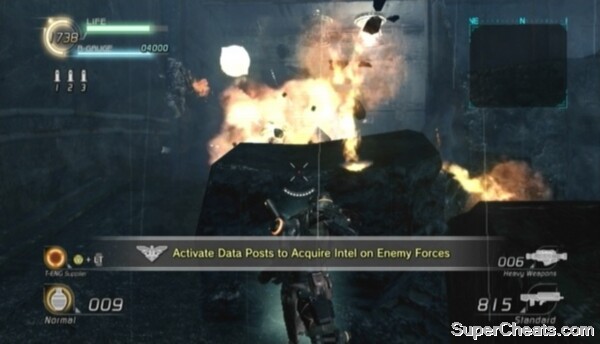
Objective: Activate Data Posts to Acquire Intel on Enemy Forces
Your first task is to activate the three Data Posts in this area. Don't worry about the Data Posts for now; concentrate on clearing out the enemies here first.
Drop down into the trench to your left at the start of the level and proceed through the doorway up ahead. There are two Sentry Turrets attached to the ceiling at the north end of the trench. The sensor tied to these Sentry Turrets is below them, so toss a Hand Grenade over the piece of wall in front of them to destroy the sensor and kill the enemy soldier standing there.
Throw a Hand Grenade to destroy the sensor and kill the enemy soldier at the north end of the trench.
Continue north to the end of the trench once the Sentry Turrets are down. At the end of the trench, turn right to spot some stairs and an enemy Evax VS in the distance. Destroy the Evax VS by throwing Hand Grenades at it and shooting the grenades when they reach the VS. Three well-thrown Hand Grenades should do it.
After destroying the enemy VS, head up the first set of steps and turn left through the doorway at the top. Take cover behind the metal crate to avoid taking fire from the Sentry Turret in this corridor. The sensor for this Sentry Turret -- as well as the two turrets attached to the ceiling further down the corridor -- is just around the corner. Roll past the first Sentry Turret and then move behind the wall to your left to avoid the other two turrets in this corridor. The sensor is visible through the large hole in this wall. Destroy the sensor and then continue to the end of the corridor.
Proceed up the stairs at the end of the corridor and throw a grenade into the group of soldiers beyond the Data Post. Detonate the grenade by shooting it when it lands next to the soldiers. There are two enemy VS in this area: an Evax VS and one Bleed VS -- a lightly armoured and evasive VS armed with a Gatling Gun. The Evax VS will remain sitting at the west end of the area.
The Bleed VS is adept at dodging rockets and grenades, so it's best to attack while the VS is preoccupied with one of your allies. A couple of rockets should do it. Hit the Evax VS with three rockets to destroy it and then use your Machine Gun to clear out the remaining enemy soldiers.
Two enemy VS and a bunch of soldiers guard Data Post 3.
Leave the Data Post alone for now and head to the opening in the southeast corner of this area. There are a couple more Evax VSs left outside, so use a Rocket Launcher or grenades to destroy them.
Clear away the enemy soldiers outside and then activate Data Posts 1 and 2. Return to Data Post 3 and open the T-ENG chest next to the Shotgun at the west end of the area. This T-ENG chest holds a Rocket Launcher, which you'll definitely want to collect for the second part of this mission. Make sure you collect this Rocket Launcher before activating all three Data Posts.
Activate the third and final Data Post once you're ready to move on.
Activating the Data Posts
Objective: Annihilate the Jungle Pirates!
Victory: No Casualties -- Complete the level without a single death on your team to earn this GJ award. AI partner deaths do count, so this is best attempted with human allies.
You must deplete the enemy's Battle Gauge -- visible at the bottom of the screen -- to complete this mission.
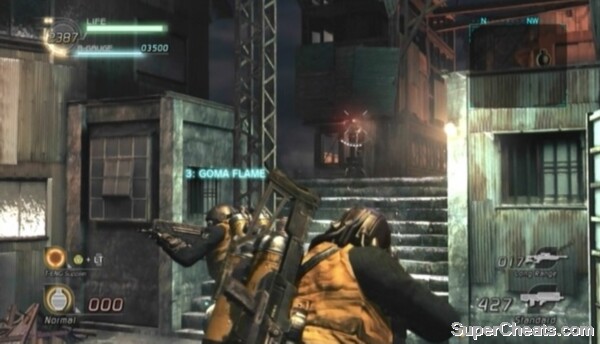
Before hopping into the Bleed VS, anchor onto the eastern wall and look across to the area at the other end of the bridge. Fire a rocket at the turret emplacement at the south end of this road to destroy it. There are two enemy Evax VSs across the bridge as well you can destroy from here. Both are at the south end of the bridge. Zoom in by pressing up on the D-Pad if you are unable to see them. Move a bit closer if you still can't see them.
After destroying the turret emplacement and two VSs across the bridge, look down at the bridge and fire a rocket at the two soldiers by the cover closest to the gate. There are two more soldiers standing on the ramp onto the bridge; kill these two soldiers with a rocket as well before getting into the Bleed VS next to Data Post 3.
Objective: Use a VS in Battle!
VS Strategically Used in Battle -- Kill seven enemies while piloting a VS to earn this GJ award.
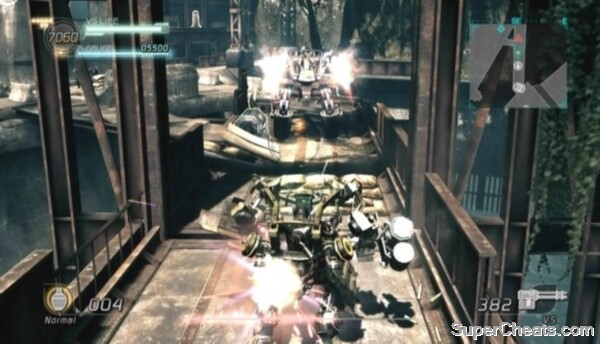
You are provided with a Bleed VS at the start, but don't worry if it gets destroyed before you're able to earn this award, as there's a Nida VS and a Multi-seat VS across the bridge you can use as well. You don't need to kill seven enemies in a single VS; you could kill four enemies in one VS and three in another and still earn the award.
Fight your way across the bridge.
Hop over the wall and move up to the deactivated VS beyond the open gate partway down the bridge. Start firing your Gatling Gun at the enemy Nida VS when the pilot activates it. You can throw grenades while piloting a Bleed VS, so toss a couple of grenades under the Nida VS to damage it severely. Once the VS is destroyed, continue down the bridge to the two T-ENG chests at the other end. The T-ENG chest at the very end of the bridge holds a Gatling Gun, and the chest near the makeshift bridge holds a Rocket Launcher.
There are a couple of snipers and an enemy wielding a Rocket Launcher on the platform along the east end of the road. Take out these soldiers with your Gatling Gun before stepping onto the road. You can dodge incoming rockets while in the Bleed VS by clicking and holding the Left Stick and pressing the A/X button to dash to the side.
Objective: Find the Multi-seat VS
Multi-seat VS Procured -- Drop down from the south end of the road to find the Multi-seat VS parked by a tree.
You don't need to do anything with this VS to earn this award; you just need to approach it. The Nida VS at the south end of the road is a much better choice -- especially if you're playing solo.
The vacant Nida VS at the south end of the road already has a VS Rocket Launcher attached to it. Grab the VS Shotgun under the platform where Data Post 4 is and attach it to the other side of the Nida VS. Try your best to keep this VS intact until the end of the level, as it will prove useful in the boss fight coming up in the next area.
The Multi-seat VS is parked by the north end of the road.
Hop in the VS once you've attached the VS Shotgun to it and start north down the road. Hit groups of enemy soldiers with VS Rocket Launcher and Blast the enemy VSs with your VS Shotgun at point-blank range. A couple of Ospreys will fly in and drop two more enemy VSs into the fray. Damage these VSs with your Rocket Launcher from a distance and then move in and hit them at point-blank range with your VS Shotgun to quickly destroy them.
Deplete the Jungle Pirate's Battle Gauge to complete the mission.
Defeating the Jungle Pirates
Mission 3
If you followed the walkthrough for Area 2, you should be in a Nida VS equipped with a VS Rocket Launcher and a VS Shotgun. Hop out and repair the VS if needed and then start down the path. Remove the VS Rocket Launcher attached to the broken-down VS at the end of the path and add the ammo to the Rocket Launcher attached to your VS.
Objective: Raise the Battle Gauge!
All Data Posts Activated -- Activate the three Data Posts on the map to earn this GJ award. This objective will trigger partway through the battle, but it's best to get it out of the way at the start.
Data Post 1 is just up ahead. The Nida and Bleed VSs have a special function that allow the pilot to activate Data Posts. To activate a Data Post while in a Nida or Bleed VS, click and hold the Left Stick and tap the B/Circle button like you normally would until the Data Post is online. Activating a Data Post is quicker when done while in one of these VSs, but there is one downside: you won't gain any T-ENG this way.
Pick up the human Shotgun near Data Post 1 and then look northeast to spot a broken-down VS on a small hill. Anchor up to this VS and remove the VS Shotgun attached to it. Add this VS Shotgun ammo to the Shotgun attached to your VS. Be sure to pick back up whichever weapon you had to swap out to pick up the VS Shotgun before moving on to Data Post 2.
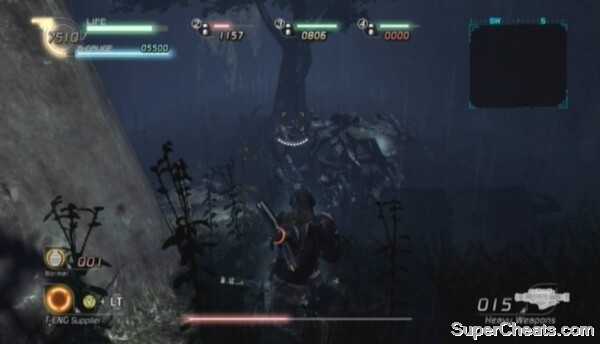
Gordiant is a humongous, salamander-like akrid with six legs, a ridiculous number of tongues and a bulbous tail covered with retractable spikes.
Data Post 2 is on the hill at the north end of the map. Gordiant will emerge from the waters as you approach this Data Post, but this Cat-G akrid is very slow, affording you more than enough time to get Data Post 2 online.
Data Post 3 is on the hill at the west end of the map. You can go and activate Data Post 3 now before starting your attack on Gordiant or just leave it for later.
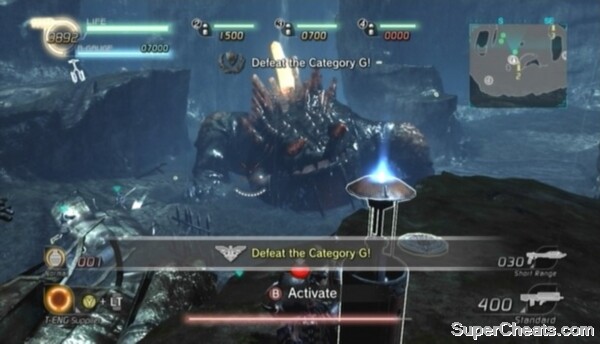
Objective: Defeat the Category G!
Total Victory -- Kill Gordiant without a single death on your team to earn this GJ award. AI partner deaths do count, so this is best attempted with human allies. You must deplete the Category G's life bar -- visible at the bottom of the screen -- to complete this mission.
Gordiant is a humongous, salamander-like akrid with six legs, a ridiculous number of tongues and a bulbous tail covered with retractable spikes. This Cat-G's downfall is the snail's pace at which it moves.
Avoid the deep water in the middle of the map, as falling in will kill you. You can walk on water that has grass sticking up out of it, but steer clear of the area Gordiant emerged from.
Steer clear of the Gordiant's tail.
Though Gordiant is slow, it does take long strides due to its massive size, making it difficult to escape on foot. To avoid being crushed by Gordiant, stay on the hill at the west end of the map or the hill north of Data Post 1. If in a VS, don't get too close to Gordiant's legs, as they can crush your VS with one step. As well, avoid standing below Gordiant's tail, as Gordiant will attempt to squash you with its retractable spikes.
Gordiant's most damaging move is its shockwave. When lightning flashes between Gordiant's horns and it begins to raise its head and its front and middle legs, get ready to jump or anchor to a wall. Gordiant will then hit the ground and create a massive shockwave, severely damaging anything or anyone who happens to be touching the ground. To avoid this attack, you can either jump in a VS just before Gordiant hits the ground or, if on foot, anchor to the side of something by aiming the target reticule and pressing and holding the X/Circle button.
Objective: Aim for the Core!
Core Fighter -- Damage the bright orange spire on Gordiant's back four times to earn this GJ award.

Target the spire on Gordiant's back to deal the most damage.
The spire on Gordiant's back is its major weak spot. Ignore its legs for now and focus on attacking the core. Hit the spire with the VS Rocket Launcher from afar and the VS Shotgun at close range (jump with the A/X button to reach it and then fire). If you're on foot, use a human Rocket Launcher (there's one by Data Post 3 and one on the hill northwest of Data Post 1), Rocket Pod (there's one attached to the broken-down VS near Data Post 3), Gatling Gun, or grenades.
Attack the spire enough and it will retract into Gordiant's body. To get at the retracted spire, you'll have to get inside. To infiltrate Gordiant's body, you must first stun it by destroying several of its legs.
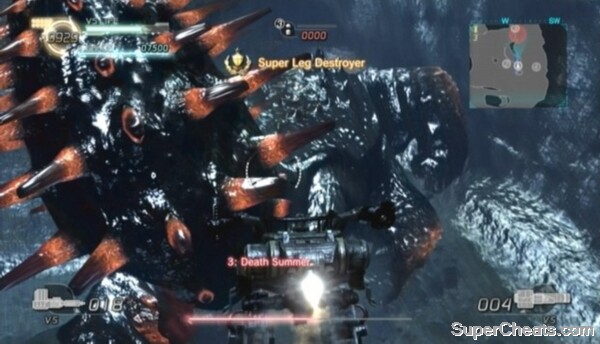
Objective: Take Out the Legs!
Super Leg Destroyer -- Destroy four of Gordiant's legs to earn this GJ award.
The orange patches on each of Gordiant's legs are weak spots. Damage them enough and the leg will break off, releasing T-ENG and a few [?] Boxes. Attacking the legs reduces Gordiant's health bar, but attacking its core deals the most damage. If you've damaged the core so much that it's completely retracted into Gordiant's body, you can get at it by infiltrating Gordiant's body and attacking it from the inside.
Infiltrating Gordiant's body requires first stunning it by destroying several of its legs. The VS Shotgun is great for removing the Gordiant's legs, as is the VS Rocket Launcher. Destroying three legs is usually enough to stun the Cat-G.
Destroy several of Gordiant's legs to stun it.
You'll know Gordiant is stunned when the orange weak spots on its remaining legs turn black and it falls over with its mouth open. You only have a few seconds to infiltrate the Category G while it is stunned, so make your way toward its mouth as soon as you notice the weak spots on its legs turn black.
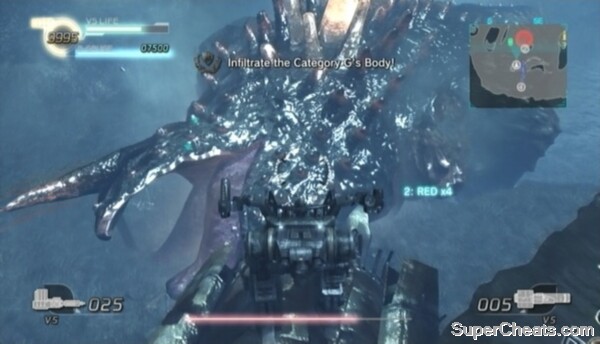
Objective: Infiltrate the Category G
Infiltrated: All Players -- All four players must infiltrate the Category G while it is stunned to earn this GJ award. This award requires three human allies, so unfortunately you're out of luck if you're playing solo. You can still earn the Bronze 'Infiltrated the Category G' GJ award if one player enters Gordiant.
Although entering Gordiant is unnecessary to win this fight, doing so will allow you to attack its retracted core, which will make for a quicker fight. That said, the inside of Gordiant is very hazardous, as it contains Genessa pods, Sepia and Bolsepia. Then there's the matter of getting out.
It's best to go into the Category G with a Shotgun and Machine Gun. Once inside, use your Shotgun to destroy the Genessa pod that spawns and kill any Sepia or Bolsepia that are nearby. Genessa pods will continuously spawn inside Gordiant, so clear away just enough so you won't be killed before you manage to take a few shots at the core. Bolsepia are the red exploding akrid, so be careful when killing those.
Target the Gordiant's retracted core once inside.
The retracted core is the orange, stalactite-like object hanging in the cage in the middle of the Gordiant's innards. Blast the core with your Shotgun to push it back up. You can throw a grenade or two as well, but be careful, as a poorly-thrown grenade can be fatal in the close-quarters of Gordiant's interior.
If you're attacked by a Sepia akrid, fight it off before getting back to attacking the core. Keep attacking the core and fighting off Sepia until the Gordiant begins to flush you out. At this point, if you've sustained any damage, use your Harmonizer to recover while the fluids inside Gordiant pull your toward its backend. There are spiky bulbs at the exit point that will damage you on your way out, so you'll need the health to survive. If you do survive, just hope you don't land in the water.
Infiltrating Gordiant
Continue attacking Gordiant until he starts his death sprint around the map. Gordiant will release a bunch of [?] Boxes when he dies, so chase after him, but be careful not to get trampled.
Objective: Team Cheer
We Did It! -- To earn this GJ award during the 'chapter complete' countdown, all four players must be performing an Emote at the same time. To perform an Emote, hold the Start button and press one of the shoulder buttons or one of the buttons on the D-Pad.
Human teammates aren't required to earn this award, however AI partners aren't always reliable. You may need to perform an Emote a few times to trigger theirs.
Defeating Gordiant
Mission 1
Objective: Infiltrate without Casualties!
Infiltrated: No Casualties -- Complete the level without a single death on your team to earn this GJ award. AI partner deaths do count, so this is best attempted with human allies.
Objective: Stay Out of the Searchlights!
Avoided the Searchlights -- Reach the end of the level without being caught by the searchlights to earn this GJ award.
If you are caught by a searchlight, an alarm will sound. This alarm doesn't seem to do anything in particular, but it will cost you the GJ award. The searchlights only cover the outside area, so you just need to make it as far as Data Post 1 to succeed.
Avoiding the searchlights is easy, and fortunately AI partners are capable enough to not screw this one up for you. At the start of the level, cross the bridge and turn right at the oil drums. Sprint to the other end of the pier and open the T-ENG chest at the other end. This T-ENG chest contains a Rifle. Use this Rifle to kill the two snipers on this map. One of the snipers is on the lighthouse to the west. Shoot this sniper twice in the body to kill him.
When the first sniper is down, backtrack to the flaming barrel and anchor up to the second level. Look north to spot a sniper in a tower on the third level. Shoot this sniper in the head to kill him and then anchor up to the third level.
There are two enemy soldiers standing by Data Post 1 next to the flaming barrel below. A well-thrown grenade can take them both out. When the way is clear, hop down and activate Data Post 1.
Avoiding the Searchlights
Pick up the Machine Gun ammo next to the Data Post and proceed north up the ramp. An enemy will drop down onto the platform to your right, so toss a grenade and detonate it by shooting it when it reaches the soldier to kill him. Four more enemy soldiers will come running through the doorway up ahead, so fallback a bit, toss a grenade up and shoot it to clear them out.
You just need to make it to the end of this hallway to complete the area. Three more soldiers will appear when you approach the doorway, so take them out with a grenade or your Machine Gun. The soldier in black around the corner is armed with a Shotgun, so take him out from afar.
The last few soldiers are by the area end marker at the end of the corridor. There are four or five Shotgun-wielding soldiers and one soldier armed with a Gatling Gun. If you have any grenades left, try bouncing a grenade off the wall and to these soldiers. If you're unable to take them out with a grenade, coax the soldiers out and gun them down with your Machine Gun, or wait for your allies to move in.
When the way is clear, cross the red line at the end of the hall to trigger the area complete countdown.
Fight your way to the end of the corridor.
Objective: Strike a Pose!
Emote: All Players -- To earn this award during the area complete countdown, all four players must be performing an Emote at the same time. To perform an Emote, hold the Start button and press one of the shoulder buttons or one of the buttons on the D-Pad.
Human teammates aren't required to earn this award, however AI partners aren't always reliable. You may need to perform an Emote a few times to trigger theirs.
Mission 2
Move up and turn right at the start of the level. You'll be able to see some enemies through the doorway at the end of this walkway. Toss a grenade in there or shoot the explosive barrels to clear them out.
Objective: Get Past the Security System!
S Rank -- Make it to the end of the level without tripping the security system to earn this GJ award.
The sensors are the tripods with several red lights on top of them. Get too close to one of these sensors and an alarm will sound, sending one or more Battle Armor-wearing soldiers to your location.
To avoid setting off the alarms (and ruining your chance at earning this GJ award), shoot sensors from afar until they explode. The first sensor is up the steps north of the area you just cleared of enemies. Destroy it from afar to avoid tripping the security system. Thankfully, AI partners appear incapable of tripping the security system.
Destroy these sensors to avoid tripping the security system.
Another of this area's GJ awards, 'VS Completely Destroyed,' requires that you trip the security system at least five times and then destroy the enemy VS that appears at the end of the level as a result. Because of this, it is impossible to earn a 100 per cent GJ Success Rate in one run through this mission. If you're playing with human allies, decide as a team which GJ you want to go for, though the choice is easy if one of you screws up and trips the security system.
Objective: Activate All the Data Posts!
All Data Posts Activated -- Activate all three Data Posts in the level to earn this award.
Data Post 1 is just north of the first sensor. Get Data Post 1 online to reveal the map on the Radar in the top-right corner of the screen, marking the locations of Data Posts 2 and 3 on the map as well.
After activating the first Data Post, pick up the Machine Gun and Shotgun ammo nearby and take the left-hand path north. There is another sensor up the steps here; destroy it before heading up. There's an enemy sniper on top of the shack at the top of the steps and a Shotgun-wielding soldier at the other end of the street. Take out these two enemies and then enter the shack to your left. Look through the window on the shack next to Data Post 2 to spot another sensor. Destroy this sensor before moving in and activating the second Data Post.
Continue north after activating Data Post 2. Once up the ramp, toss a grenade next to the enemy standing in front of the tower up ahead, then move up and shoot the grenade when two more soldiers come out from around the corner. Be careful, as there's a sniper posted on the rooftop to your left. Take him out with your Machine Gun or toss a grenade at him before moving up to Data Post 3.
A few more enemy soldiers will appear from the right, one of them armed with a deadly VS Shotgun. Kill them with a thrown grenade or your Machine Gun and then start activating Data Post 3.
When the final Data Post is online, head down the eastern street to the area end marker.
If the security system is tripped more than five times, an enemy VS will appear at the end of the area.
Objective: Destroy the VS!
VS Completely Destroyed -- Trip the security system at least five times and destroy the enemy Nida VS that appears at the end of the level as a result.
If you tripped the security system five or more times, down this eastern street is where you will encounter the enemy Nida VS, as well as two Battle Armor-wearing, VS weapon-wielding soldiers. Destroy the enemy VS to earn this GJ award.
Mission 3
Wait until the bombs drop at the start of the level before moving to Data Post 1 by the stairs up ahead. Ignore the Bleed VSs for now and anchor up to the platform above the T-ENG chest next to Data Post 1 to reach the sewers entrance. Drop down into the sewers and pick up the Shotgun at the start.
Objective: Exterminate the Akrid!
All Akrid Defeated! -- Kill the two Defolma akrid in the sewers to earn this GJ award.
Defolma are medium-sized, octopus-like akrid that have the ability to stun prey with their tentacles and then devour them. These akrid tend to occupy tight spaces, which makes them all the more deadly.
The Machine Gun and Grenades are best against Defolma. The Shotgun is very effective, but it's best to keep your distance when facing a Defolma, as it's close-range devour attack can kill its target immediately.
The Defolma's devour is an instant kill.
Aim your fire at the Defolma's head and mouth. This akrid can protect itself from gunfire using one of its tentacles as a shield. To get around this, toss a grenade over the Defolma and detonate the grenade by shooting it when it reaches the Defolma's head.
The first Defolma you face in the sewers will emerge from the pipe next to an oil drum. Shoot the oil drums to detonate them when the Defolma gets close to damage the creature. Use grenades and your Machine Gun to kill the Defolma from afar.
The second Defolma is deeper into the sewers, beyond the Disc Grenades on the platform. Pick up the Disc Grenades and throw them at the Defolma when it emerges from the pipe. Detonate a thrown Disc Grenade by shooting it when it reaches the Defolma's head.
Once the second Defolma has been dealt with, make your way to the end of the sewers and anchor up to street level. This area of the city is crawling with enemies, including a couple of snipers, so don't stay in one spot for too long.
Fallback southeast and activate Data Post 2 before continuing on.
Objective: Destroy the Bleed VSs!
All Bleed VSs Destroyed -- Destroy the three Bleed VSs in the level to earn this GJ award.
Bleed VSs are lightly-armoured VSs that can be destroyed easily with most weapons. The Shotgun you found in the sewers should do the trick. Enemy VS appear as red triangles on the Radar, so use your Radar to track down the three Bleed VSs and destroy them to complete this objective.
Defeat all three Bleed VSs to earn the Gold GJ award.
Before ending the level be sure to collect the Battle Armor in the T-ENG chest near Data Post 3 and the area end marker. The T-ENG chest is in the corner of the map west of the area end marker. Once you have the Battle Armor, cross the red line to complete the level.
Mission 4
Objective: Beware the Trains!
Not a Scratch -- To earn this GJ award, you and your allies must not be killed by the train that periodically runs through the centre of this map. The team will earn this award at the end of the level as long as none of the deaths on the team (if there were any deaths) were the result of a teammate being run over by the train.
Avoiding being run over by the train is simple. When you hear the clanging of the bell, stay away from the tracks or hurry up off the tracks if you're on them.
Objective: Secure Rail Passage to Target
To complete this mission you must activate the post on the north side of the tracks and maintain control of it for two minutes. Enemy soldiers will appear once the post has been activated and attempt to deactivate it. If the enemies manage to deactivate the post, you'll have to reactivate it for the two-minute countdown to resume.
Stand on the other side of the tracks to defend the control unit.
Before activating the post, activate Data Post 1 in the southeast corner of the map to add 500 points to your team's Battle Gauge and reveal the map on the Radar in the top-right corner of the screen. The map is sparsely populated with enemy soldiers at the start, so clear them out before activating the control post.
Objective: Maintain Control of the Post!
Total Victory -- Do not allow the enemy to deactivate the post once the two-minute countdown starts to earn this GJ award.
The best spot to defend the post from is the platform on the opposite side of the tracks. Most of the enemies will appear on the north side of the tracks where the post is, so you should be safe on this platform.
Pick up the Disc Grenades on the platform and use them to kill Shield-carrying enemies. Aim the Disc Grenade at the wall behind one of these enemies and either wait for the grenade to detonate on its own or detonate it with bullets. There are Plasma Grenades on the platform too, which you can lob at the post to stun any enemies attempting to deactivate it to buy yourself some time.
Don't lose control of the post to earn the Gold GJ award.
Enemies in Battle Armor will eventually appear. It can be difficult to get these enemies away from the post since the Battle Armor prevents Machine Gun fire from staggering them. You should still be wearing Battle Armor from the previous level, and if you're still packing a Shotgun from the Defolma encounter, it might be best to hop across the tracks and clear the post if Plasma Grenades and your Machine Gun prove insufficient.
Objective: Destroy the Cyclops Sentries!
Cyclops Annihilation -- Destroy the three Cyclops Sentries that appear around the one-minute mark to earn this GJ award.
Cyclops are flying robots with machine guns. They can be easily destroyed with a Shotgun at close range or repeated fire from a Machine Gun.
Cyclops appear as red triangles on the map. Sometimes you can count on your AI partners to destroy the three sentries for you, but keep an eye on your Radar and the countdown and kill any Cyclops still intact before time is up.
Maintaining Control of the Post
Mission 1
At the start of the level, approach the pile of scrap metal at the top of the stairs and dig there to uncover two Machine Guns. Collect the Machine Gun ammo and then start down the corridor to the left of the giant conveyor belt. Gun down the two enemy soldiers as you make your way to the other end of the corridor.
Step on to the conveyer belt and kill the enemy soldiers in the windows to your left and right as you pass them. Step off the conveyer belt when a large, open area appears on your right. Take out the Gatling Gun-wielding soldier on the walkway and any other enemy soldiers below before heading down the steps. Data Post 1 is next to the conveyer belt in this area; activate it to reveal the map on the Radar.
Destroy the sensor to disable the turrets.
Objective: Destroy the Sentry Turrets!
All Turrets Silenced -- Disable the three Sentry Turrets.
In the area east of Data Post 1 are three Sentry Turrets attached to the ceiling. These turrets are identical to the Sentry Turrets you encountered in Episode 1. As such, you can destroy all three turrets at once by destroying the sensor tied to them. The sensor for these turrets is on the ground below them, on the left side of the conveyer belt. Continue along the walkway east of Data Post 1 and destroy the sensor from behind cover to disable the three turrets and earn this GJ award.
You might want to grab the Plasma Grenades next to the Shotgun on the right side of the conveyer belt before continuing on. These grenades might help you complete a couple of the GJ awards for this area, but they are far from essential.
Beyond the turrets is a large group of enemy soldiers. Fight your way to the other end of the conveyer belt to reach the Pulverizer. Anchor up to the conveyer belt to your left before you reach the end of the line.
Objective: The Pulverizer is Your Friend!
The Pulverizer is an Ally -- Earning this GJ award requires that an enemy is killed by the Pulverizer -- the large, spinning drills several of the conveyer belts in this area lead to. Most of the time this seems to happen on its own, but you can speed up the process by stunning an enemy with a thrown Plasma Grenade while they are on the conveyer belt. Doing so will most likely not be necessary, however.
If an enemy falls into the Pulverizer pit, this GJ award is yours.
A couple of the enemy soldiers on the upper conveyer belts are armed with Plasma Guns, and one is armed with a Rocket Launcher, so be careful. You can find Battle Armor in the T-ENG chest on the small conveyer belt platform north of the Pulverizer pit.
Start west down the conveyer belt when the way is more or less clear. Keep an eye out for Data Post 2 on the right side of the conveyer belt. There are enemies in the corridors along either side of the conveyer belt, so be ready with a grenade as you continue west.
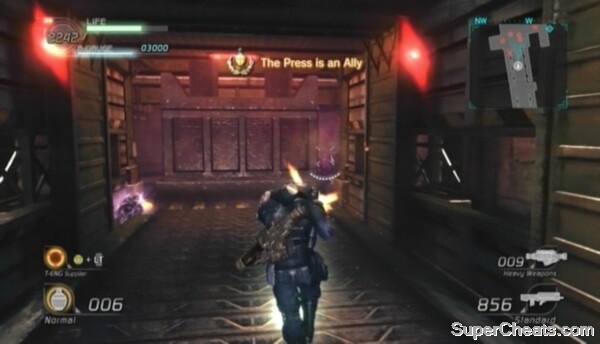
Objective: The Press is Your Friend!
The Press is an Ally -- Like the Pulverizer award, the requirement for this GJ award tends to happen on its own. To earn this award, an enemy must be crushed by the large factory press beyond the two red lights along the conveyer belt. There's a large number of enemies on the other side of the press, so it is likely one will be unwitting enough to get crushed. You can help the process along with a Plasma Grenade if you have one.
Do not enter the area beyond the press until all of the enemies there are dead. There's a Battle Armor-wearing, VS Shotgun-toting soldier among them, and he can be deadly. To avoid being crushed by the press once you're ready to move beyond it, wait until right after it has pressed down and is rising back up before rolling past it (press the A/X button while crouching to roll; click the Left Stick to crouch).
You'll earn this GJ award if the press crushes an enemy.
Three enemies will appear in the corridor through the doorway at the north end of this area, one of them carrying a shield. Toss a grenade behind or next to the Shield user if you have one, otherwise just gun down the other two soldiers, then run around to the other side of the Shield so you or an ally can kill him.
When the way is clear, proceed through the doorway and up the ladder to reach the area end marker. Cross the red line to complete the mission.
Mission 2
Objective: Window Breaker
Window-Breaking Maniac -- Break at least six panes of glass to earn this GJ award. This is an easy award to earn; just shoot the windows in the hallway outside of the control room and you'll have this one in no time.
Objective: Infiltration Time Challenge!
Gold -- Complete the area in seven minutes or less to earn this GJ award. This is a short level, so this award will come easily with a bit of practice.
Objective: Wipe Out the Enemy Forces
Enemy Forces Annihilated -- Kill every single enemy on the map to earn this GJ award. At the time of writing, this award appears to be broken in the single-player game. This problem may stem from the two different paths one can take at the start of the level, causing some enemies to not spawn.
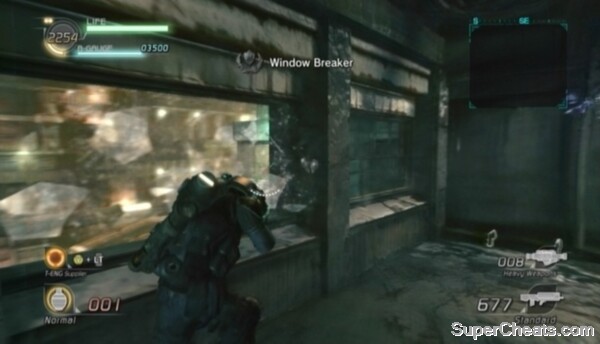
Smash windows to earn the Window-Breaking Maniac award.
The first path is beyond the double-door outside the control room. This double-door can be destroyed with bullets or a grenade. Follow this path and you will encounter enemies and eventually a ladder leading down to the end of the level. The second path is a stairwell filled with enemies leading down to the end of the level. To take this path, ignore the destructible door and continue to the end of the corridor instead.
If you are unable to trigger this GJ award playing solo, try enlisting the help of a friend or another player. If playing with just one other player, make sure you each take a different path. That is, one of you destroys the double-door and climbs down the ladders while the other fights their way down the stairwell.
The ladder path is the safest, as it puts you behind the final batch of enemies of the level. The stairwell path is much more hazardous, as these enemies have their weapons trained on the doorway you would emerge from. For the sake of following this walkthrough (and for the sake of saving yourself from the wait of a respawn), take the ladder path.
Break through the destructible double-door outside of the control room and fight your way to the first ladder at the end of the corridor. Don't anchor down just yet, as there's an enemy armed with a Flamethrower at the bottom of the first ladder. Toss a grenade down or kill him with your Machine Gun from above before climbing down.
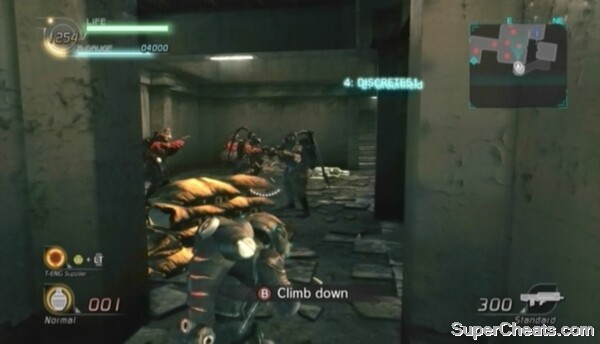
Take the ladder route to wind up behind the group of enemies at the end of the level.
There's another destructible double-door at the bottom of the first ladder; break it down to enter the stairwell and gain access to Data Post 1. If you happen to have taken the stairwell path instead, break through this double-door after activating the Data Post to switch to the ladder path.
Activate the Data Post before dropping down to the bottom of the second ladder. Go through the doorway at the bottom of the ladder and climb up the ladder you come to. Toss a Hand Grenade into the room full of enemies and shoot the grenade to set it off. This room is packed with enemies, and several are heavily armed, so fall back down the ladder to recover your health if necessary.
Kill all of the enemies that appear and then proceed through the doorway at the north end of the room. Climb up one of the ladders at the other end of the corridor and cross the red line to complete the area.
Mission 3
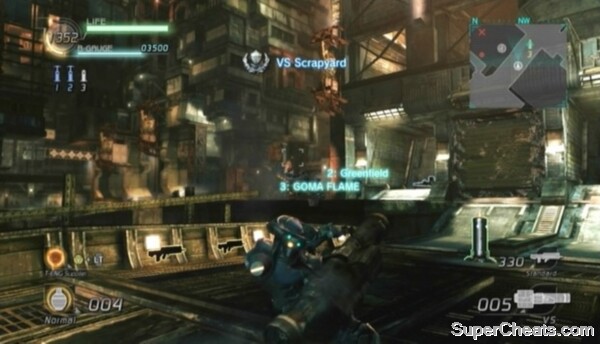
Objective: Destroy the VSs!
Total VS Scrapyard -- Destroy at least nine VSs before the level ends to earn this GJ award.
Drop down to the area below and move up to the sandbags and Shotgun. There is an enemy Nida VS and some soldiers further up. If you're out of grenades, you can use the Shotgun to bring down the VS. Pick off the soldiers with your Machine Gun first, then equip your Shotgun and get close to the VS. Aim for the VS's unarmoured parts, which on the Nida VS means everywhere but the metal plate on each leg.

Open the T-ENG in the elevated tunnel and use the Rifle inside to snipe the enemies below.
Data Post 1 is up ahead. There's a vacant VS in one of the storage units east of the Data Post, but leave it alone for now, as the enemies in the next area can destroy it in record time. Instead, get up onto the walkway north of the Data Post and kill any soldiers there. Then, look up at the elevated tunnel hanging north of the walkway and kill the soldiers visible through the opening. With that, drop down from the walkway and kill any enemy soldiers by the ladder that leads up to the elevated tunnel before climbing up.
Open the T-ENG chest in the tunnel to find a Rifle. Use this Rifle to eliminate the enemy soldiers standing around the VS at the north end of the map -- especially the soldier with the Rocket Launcher and the soldier with the Plasma Gun on top of the VS storage units. Most of the enemies below won't be able to reach you, allowing you to effortlessly pick them off. There is one enemy below wielding an Energy Gun whose attacks can reach you; once he's down, take your time killing the remaining soldiers with headshots to conserve your ammo.
Drop down to the area below when the enemy soldiers below are dead and only the enemy VS remains. Don't go for that VS just yet, as the Grenade Launcher attached to the enemy VS on the other side of the bridge would likely wreck it instantly. To make matters worse, a VS armed with two VS Shotguns will break out of one of the storage units when you cross the bridge.
Rather than face these two VSs in a VS of your own, jump down to the area below the bridge and look for a VS Rocket Launcher at the east end of the tracks. Anchor back up to the end of the bridge opposite the two enemy VSs and fire the VS Rocket Launcher at them from afar. As long as you don't miss, you should be able to destroy both VSs with the six rockets provided.
Activate Data Post 2 on the south side of the bridge before crossing over. Pick up the nearby VS Shotgun as well. Don't forget to activate Data Post three on the bridge.
Destroy the two VSs on the other side of the bridge before crossing.
Objective: Use the VS Weapons!
VS Weapons Strategically Used -- Kill at least 10 enemies with VS weapons to earn this GJ award.
There is a vacant Nida VS armed with a VS Rocket Launcher and Shotgun in the storage unit across the bridge. If you're playing with human allies, one of you can backtrack to Data Post 1 and take the VS in the storage unit there -- this one armed with a Pile Bunker and a VS Shotgun. Additional Pile Bunker ammo can be found in one of the adjacent storage units.
If you picked up the VS Shotgun near Data Post 2, add that ammo to the VS Shotgun already attached to your VS (or ditch the VS Rocket Launcher and go in with dual VS Shotguns).
Objective: Eliminate All Survivors
Once you've crossed the bridge, you then must deplete the Battle Gauge that appears at the bottom of the screen by wiping out the enemy forces that spawn. Enemy soldiers will continuously spawn from the doorway in the small area along the walkway. Ignore these soldiers for now and concern yourself with the two enemy Drio VSs that spawn at the west end of the walkway.
Before moving up to engage the enemy VSs, use your VS Shotgun to break the signs hanging above the walkway, as these signs will fall when you walk under them and likely severely damage or even destroy your VS.
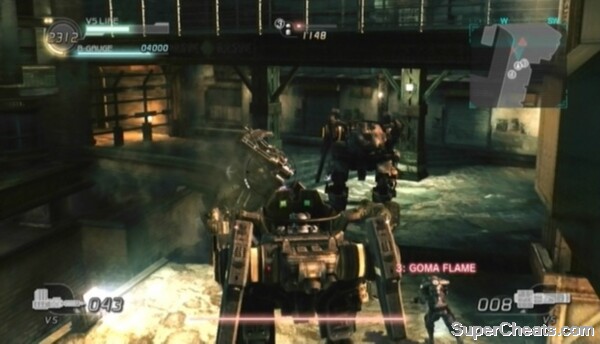
Use the Nida to wreck the enemy VSs.
Blast the two VSs with the Rocket Launcher as you approach and then the Shotgun at point-blank range to quickly destroy them. A cargo train will then stop on the tracks at the west end of the walkway and another enemy Drio VS will appear -- this one armed with a VS Shotgun and a VS Rocket Launcher. This VS is deadly, so hit it with your VS Shotgun and VS Rocket Launcher as soon as it lands and hopefully it will stagger, allowing you to take it out with a couple more Shotgun blasts before the pilot can get a shot off.
When the first three enemy VSs have been destroyed, an Osprey will fly in and drop a Nida VS by Data Post 3. This VS is armed with two Gatling Guns, so nothing you or your allies can't handle. It's best to leave this VS for your allies (even if they are AI), as the two VSs that spawn on the tracks at the west end of the walkway are difficult to get closed to. One of the VSs has a Cannon and the other a Rocket Pod. Damage these two VSs by jumping up and blasting them with your VS Shotgun. Repeat until both VSs are destroyed.
Continue killing enemy soldiers until the Battle Gauge at the bottom of the screen is completely depleted to complete the mission.
Get in the Nida VS parked west of the first bridge you come to and use it to clear out the enemies on and around the railway gun.
You must activate the three Data Posts in the area to move on. Activate the first Data Post across the bridge to mark the locations of the other two Data Posts on the Radar.
The Nida VS has a special function that allows the pilot to activate Data Posts while still in the VS. To activate a Data Post while in a Nida VS (or a Bleed/Baylid VS), click and hold the Left Stick and tap the B/Circle button like you normally would until the Data Post is online. You can activate a Data Post more quickly while in a VS, but there is one downside: you won't gain any T-ENG this way.
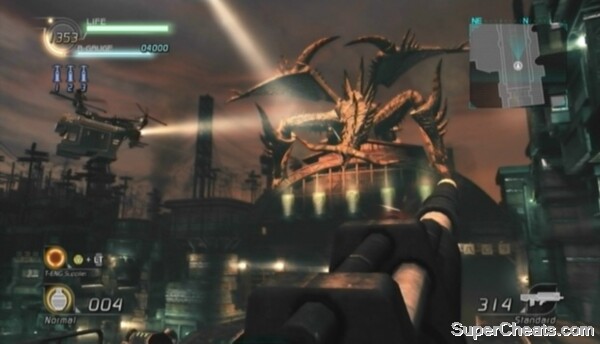
Akrid X
Once all three Data Posts are online, a massive Cat-G Akrid will appear. They call this one Akrid X. To avoid getting killed, head for the railway gun at the east end of the area and jump onto the cannon. Remain on top of the railway gun during this sequence and Akrid X won't be able to damage you.
Objective: Aim for the Core!
Core Fighter -- Severely damage the Category G's weak spots four times to earn this GJ award. Akrid X's weak spots are its orange, regenerated head and the orange bundle of tentacles that make up its right claw. Since attacking these weak spots is the only way to damage Akrid X, you are sure to earn this GJ award before the battle's end.
There are Disc Grenades and Rocket Launchers scattered throughout the area, but the best weapon available to you is the three-seat Drion VS parked at the east end of the area (across from Data Post 2). Attached to the seat on the left side of this VS is a Gatling Gun and an Auxiliary Weapon, and attached to the seat on the right is an Auxiliary Weapon and a Grenade Launcher. The VS body itself is armed with two Auxiliary Weapons.
Although the weapons attached to the Drion VS aren't very powerful, you are relatively safe while in one of its seats, allowing you to lay down a constant stream of fire on Akrid X's weak spots. You won't be entirely free from harm, however you will likely be able to reduce the Cat-G's life bar by a large amount before it turns its attention to you.
Leave the Drion VS parked where it is and hop in the seat on the left side. Concentrate your fire on Akrid X's core and don't stop until you are forced to eject. If Akrid X destroys the seat you were in, only that seat will be destroyed and not the VS body or the seat on the right side. So, if one of the seats is destroyed, hop in the other and continue firing at the Cat-G's weak spots.
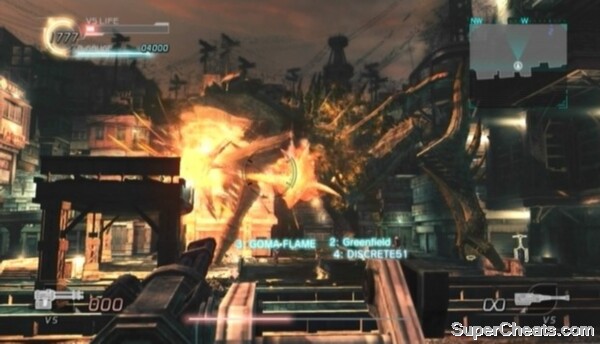
The Drion VS is surprisingly effective against this Cat-G.
Concentrate your fire on Akrid X's head, but shift your fire to its appendage when it lifts it up and is readying an attack. If you can manage to severely damage Akrid X's appendage before it unleashes the attack, you can prevent it from attacking.
Be careful when using the Grenade Launcher attached to the seat on the right side of the Drion VS, as its fire tends to bounce and you could end up doing more damage to your VS than the enemy. When firing the Grenade Launcher, aim under the akrid's neck rather than directly at its head.
If the second seat is destroyed before you are able to deplete Akrid X's life bar for the first time (that's right -- you have to kill him twice), leave the VS body for the second part of the fight and instead use the Rocket Launchers and Disc Grenades scattered about the map or your Machine Gun to finish off the akrid. Akrid X's attacks are much more difficult, if not impossible, to avoid during its second phase, which is why you'll want a VS to hideaway in.
Objective: Use the Pile Bunker
Pile Bunker: 3 Times -- Hit Akrid X's core with the Pile Bunker three times to earn this GJ award.
This objective will trigger when Akrid X is down to about one-third of its first life bar. If you plan to earn this GJ award, definitely attempt it while Akrid X is on its first life bar, as the attack it uses during its second phase is seemingly impossible to dodge.
Look for a Pile Bunker under the bridge between Data Post 1 and Data Post 3.
You can find a Pile Bunker attached to the broken-down VS under the bridge near Data Post 3. Equip the Body Armor that's under the bridge between Data Post 1 and Data Post 3 before going after Akrid X with the Pile Bunker. This Pile Bunker is good for three uses, but if that's not enough, you can find another Pile Bunker attached to the broken-down VS west of Data Post 1.
When you have a Pile Bunker, you can go at Akrid X on foot with Battle Armor equipped, or you can attach the Pile Bunker to the side of the Bleed VS across the tracks from the Drion VS. You have to be quite close for the Pile Bunker to reach, so it's best to aim for the core on Akrid X's appendage.
Objective: Defeat the Category G!
Total Victory -- Deplete Akrid X's second life bar without a single death on your team to earn this GJ award. AI partner deaths do count, so this is best attempted with human allies.
The Cat-G's second life bar will deplete much quicker than the first, so hop back in the Drion VS (or a seat if one is still intact) and fire on its weak spots. As mentioned above, Akrid X's attacks during its second phase are very difficult if not impossible to avoid, so remain in a VS for as long as possible.
Deplete Akrid X's second life bar without any deaths on your team to earn the Total Victory award.
Objective: Team Cheer
We Did It! -- To earn this GJ award during the 'chapter complete' countdown, all four players must be performing an Emote at the same time. To perform an Emote, hold the Start button and press one of the shoulder buttons or one of the buttons on the D-Pad.
Human teammates aren't required to earn this award, however AI partners aren't always reliable. You may need to perform an Emote a few times to trigger theirs.
Defeating Akrid X
Red Eye, a gigantic, wormlike Cat-G Akrid, has appeared in the desert and is intent on devouring the train you're traveling on. The train is carrying a large amount of T-ENG, which the Waysider Leader wants loaded onto flying VSs before the groups makes their escape. You must hold off the Cat-G akrid until all of the T-ENG has been loaded onto the Ospreys (as indicated by the meter below your own life bar and Battle Gauge).
Objective: Hold Off the Cat-G!
Left the Cat-G in the Dust -- Deter Red Eye using the explosive cargo on the train at least seven times to earn this GJ award.
As soon as you gain control over your character, start making your way south to the other end of the train. The train is carrying many stacks of explosive barrels, which might not be the brightest idea, but they serve the purpose of allowing you to keep Red Eye at bay.
To prevent Red Eye from chomping the car at the tail end of the train, you must release one of the stacks of explosive barrels while Red Eye is approaching. Releasing a stack of barrels requires destroying the lock holding them in place. When you reach the second-to-last car on the train, Red Eye will likely be moving in to devour the car at the very end. Release the stack of barrels closest to you by shooting and destroying one of the locks (the pylon-looking things) on either side of the stack. Destroying one of these locks requires quite a bit of effort, but just keep your Machine Gun trained on it and shoot the stem when the casing comes off to release the barrels. The released barrels will fall behind the train and hit Red Eye in the mouth, causing it to retreat momentarily.
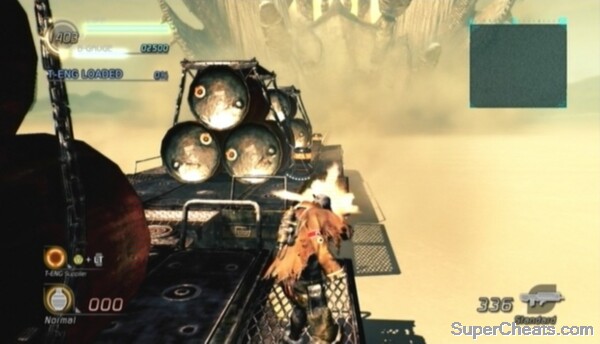
Break the locks to release the explosive barrels.
If you weren't fast enough to save the car at the end of the train, no worries, as there are still plenty of explosive barrels left. If you did manage to save the car, be ready to release the second stack of barrels when the Cat-G reappears and is coming toward the train with its mouth open.
There are two different types of stacks: a stack of three barrels with a lock on either side and a cage filled with 12 barrels, with a lock in each corner of the top of the cage. The three-barrel stacks are to be released when Red Eye is directly behind the train. The explosives in the cages must be used when the track the train is travelling on curves, as Red Eye will then appear over to the left or right rather than behind the train. To release the barrels in one of the cages, you must destroy both of the locks on one side (widthwise) of the cage. The two locks you need to destroy will depend on which side Red Eye is coming from. For example, if Red Eye is coming from the left, you'll have to quickly destroy both locks on the left side of the cage to release the barrels, which will roll out the left side of the cage and hit Red Eye.
When the track curves (which, if you've been quick enough, should happen by the time you've released the two three-barrel stacks at the end of the train), get on top of the cage closest to you and wait for Red Eye to appear. When Red Eye appears, immediately begin firing at one of the locks on the appropriate side. Sometimes Red Eye will appear and then dip back into the sand; if this happens, cease fire and wait for him to reappear, as sometimes he will then appear on the opposite side.
Releasing the barrels from one of these cages may seem a difficult task if you're playing solo, however you'll find you're actually given an ample amount of time before Red Eye reaches the train. If you feel you won't be able to destroy the locks fast enough on your own, you can soften them up by removing the casing on the two locks at the top or bottom of the cage. This way, you'll just have to blast one of the stems on the appropriate side, then turn around and remove the second lock to release the barrels.
If you've been keeping up with this walkthrough (i.e., you've hit Red Eye with two three-barrel stacks and emptied one cage), allow Red Eye to eat the empty car at the very end of the train the next time he appears. After that, the track should straighten out, allowing you to use at least one of the three-barrel stacks now at the end of the train.
Holding off Red Eye
This is an easy mission as long as you remain on the second-to-last car, as Red Eye will only devour the car at the very end if he manages to reach the train.
Start making your way back to the front of the train once about 90 per cent of the T-ENG has been loaded.
Objective: Strike a Pose!
Emote: All Players -- To earn this award, all four players must be performing an Emote at the same time. To perform an Emote, hold the Start button and press one of the shoulder buttons or one of the buttons on the D-Pad.
Human teammates aren't required to earn this award, however AI partners aren't always reliable. You may need to perform an Emote a few times to trigger theirs.
Once you have this award, approach the Osprey at the very front of the train to trigger the chapter complete countdown.
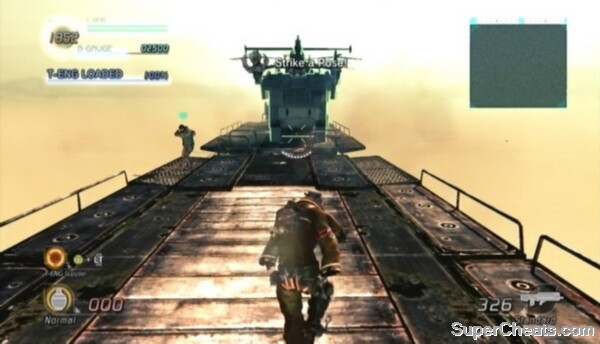
Approach the Osprey at the front of the train to end the level.
Objective: Defeat the Sandraiders!
Snipers occupy this desert town. You must kill these snipers to deplete the enemy's Battle Gauge, which is visible at the bottom of the screen. Exercise caution here; just one shot to the head and your team's Battle Gauge is 500 points fewer.
Head east to Data Post 1 at the start of the level and activate it to reveal the map on the Radar and mark all of the enemies in the near vicinity. There's a Rifle and some Machine Gun ammo in the cylindrical building east of this Data Post. It's best to stick to a Machine Gun here, as taking the time to aim through the scope of a Rifle would leave you vulnerable. Equip the Body Armor in the building just east of the cylindrical building before moving on.
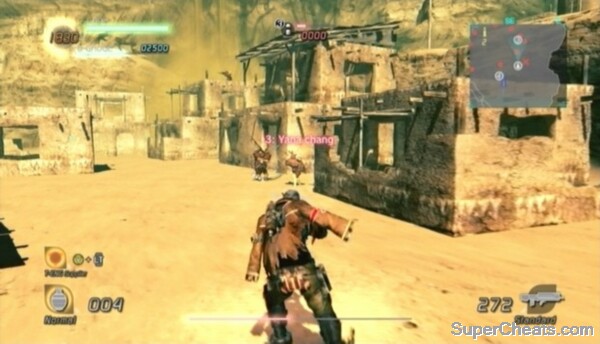
The desert town is full of snipers.
There's an enemy Evax VS near Data Post 2. This VS is armed with a VS Rifle, which is an exceedingly powerful VS weapon that boasts spot-on accuracy. A couple of well-thrown Hand Grenades is all it takes to destroy an Evax VS, but be careful how you approach it. Get behind the VS by walking around the buildings surrounding it and then throw two or three Hand Grenades at it, shooting the grenades to detonate them.
With the enemy VS out of the way, you just need to kill enough snipers to completely deplete the Battle Gauge. Move from cover to cover to get closer to potential targets and gun them down before they can get a shot off. Don't remain out in the open for too long and just keep moving. You have a bit of room for error if you're wearing Battle Armor, but be careful nevertheless; there's one more obstacle to tackle before this mission's end.
Objective: Exterminate the Akrid!
Akrid Exterminated -- Kill the pair of Debouse that appear to earn this GJ award.
Debouse are large, four-legged akrid that compensate for their blindness by using their large ears to track prey. When a Debouse detects movement, it will charge in that direction, bulldozing anything in its path.
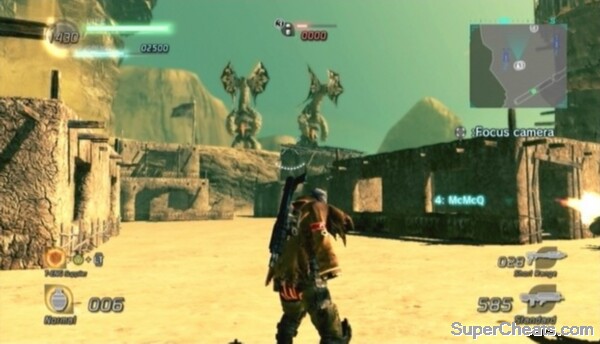
Debouse are blind akrid that use their large ears to track their prey.
This akrid's weak spots are its stomach and the orange skin on its head. The Shotgun, Machine Gun and grenades are best used to take these beasts down. There is a VS Shotgun in the T-ENG chest in the building south of Data Post 2. You might also be able to find a human Shotgun behind the building next to Data Post 1 as well.
Objective: Avoid the Akrid!
Avoided the Akrid -- To earn this GJ award, all four players must avoid being detected by the Debouse while they are scanning the area. The team must avoid detection together at least once.
When the Debouse stand on their hind legs and emit a shrill sound, don't make a sound. In other words, don't move. AI partners are programmed well enough to at least cease movement while the Debouse are scanning, so you can earn this GJ award even if you're playing on your own.
If you are detected by one of the Debouse, get ready to roll out of the way, because it will come charging. Aim for the weak spots on the Debouses's stomachs but avoid standing directly under them, as they'll put you in critical condition if they step on you. If you attack its stomach enough, the Debouse might fall over; if this happens, move up and unload into the weak spot on its head at point-blank range.
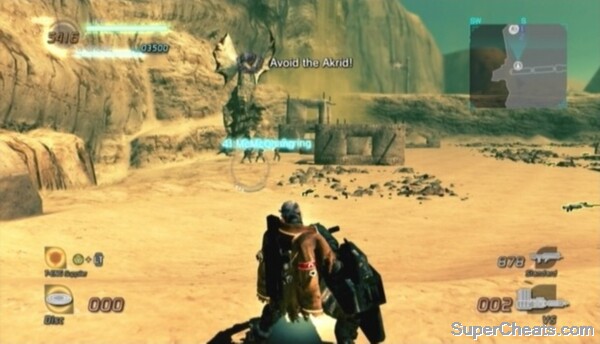
When a Debouse stands on its hind legs and sticks its ears out, don't move.
Defeat the two Debouse to complete the chapter.
If there's one part of the game made much easier with the help of human allies, it's this one. This is entirely due to the boss fight at the end, which requires several different things be attended to at once.
It is strongly advised that you enlist the help of at least one other player for this chapter. It could be a friend, a stranger from Xbox Live or the PlayStation Network, your next door neighbour -- anyone. If you don't have access to the internet, you can make use Lost Planet 2's splitscreen mode. Though the splitscreen option isn't the best (especially if you have a small TV), go that route if it's the only option.
None of this is to suggest this chapter can't be conquered alone, but prepare for frustration if you are playing solo.
Note: If you've downloaded the latest patch from the PlayStation Network (the patch is not up on Xbox Live at the time of this writing), you won't be knocked off the train when Red Eye rams it -- you'll just stumble and lose health, making this chapter much easier if you have no choice but to play solo.
Area 1
Objective: Don't Lose Any Men!
No Casualties -- Complete the level without a single death on your team to earn this GJ award. AI partner deaths do count, so this is best attempted with human allies.
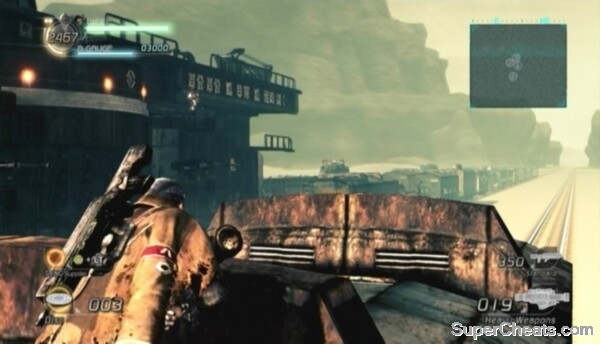
Use a Rocket Launcher to destroy the cannon turrets on the enemy train.
Objective: Destroy the Train's Cannon Turrets!
All Turrets Destroyed -- Destroy the two Cannon Turrets on the enemy train to earn this GJ award.
At the start of the level, enter the train car and activate the Data Post inside. Pick up the two Rocket Launchers among the scattered weapons and anchor up to the roof of the train car through one of the openings in the roof. It is best to destroy the two turrets on the enemy train before too many soldiers come into view, otherwise you'll have a tough time firing the rockets with all of the extra gunfire. If you destroy the two turrets quickly enough, neither will be able to fire a shot.
The first turret is on top of the car behind the railway gun. Fire three rockets directly at the turret to destroy it. The other turret is a couple of cars behind the first. Hit the second turret with three rockets when it is within range to knock it out.
Once both turrets are destroyed, drop back down into the train car and take cover below one of the windows.
Destroying the Two Turrets
This mission is about six minutes long. For the time remaining, all you must do is survive. There is a Shield in the train car you can use to protect yourself from the enemies on the other train. Just stand at the front of the train and hold up the Shield to block their bullets.
If you remain in the train car, be careful; an Carpetbagger wielding a Shotgun will sometimes drop in. Be on the lookout for thrown Disc Grenades as well.
When the mission comes to an end, be ready for a quick time event during the ensuing cutscene. There doesn't seem to be any tangible penalties for failing this.
Area 2
Objective: Get to the Front of the Train!
Front of Train: Under 5 Minutes -- Make it to the front of the train in less than five minutes to earn this GJ award.
Objective: Activate Data Posts to Seize the Railway Gun
Gun down the carpetbagger on the next car before jumping down. Move up to the automatic door on the next car, throw a grenade through and shoot it to clear out the enemies inside. Rather than enter the next train car, look to the train on the parallel track and anchor over to the car with the vacant Nida VS.
Activate the Data Posts to take control.
Hop in the Nida Vs and jump onto the next car. Data Post 1 is on the one car up. The Nida VS has a special function that allows the pilot to activate Data Posts while still in the VS. To activate a Data Post while in a Nida VS (or a Bleed/Baylid VS), click and hold the Left Stick and tap the B/Circle button like you normally would until the Data Post is online. You can activate a Data Post more quickly while in a VS, but there is one downside: you won't gain any T-ENG this way.
After activating the first Data Post, collect the Gatling Gun ammo on top of the next car and then move forward until you encounter an Osprey VS. Attempt to shoot down the Osprey before it unloads the soldiers its transporting. The two enemies in the Osprey are armed with Shotguns, so quickly shred them with your Gatling Guns before they take down your VS.
Keep an eye out for a Cannon Turret as you continue forward. Destroy the turret with your Gatling Guns from afar. If you don't want to risk losing your VS, you can use the Rocket Launcher near Data Post 2 instead. Hop out of the VS while out of range of the turret and anchor over to the other train. Move up to the car with the second Data Post, clear out the enemies inside and pick up the Rocket Launcher. Move back out of range of the turret and hit the turret with three rockets to destroy it.
There is a second turret a couple of cars up from the first. If you destroyed the first turret with your Gatling Guns, pick up the Rocket Launcher after activating Data Post 2 and use that instead. Move a bit further up and an Osprey will attack you from the side of the train; down it with a couple of rockets or hop back in your VS and destroy it with your Gatling Guns.
Fight your way to the front of the train.
Continue moving forward and you will soon come to a parked Osprey with a group of carpetbaggers on top of it. Gun down the sniper at the front of the car on the other train before moving on.
One of the three enemies at the front of the train (the one on the left) is wielding a Rocket Launcher. Another (the one in the middle) is wielding a Rifle, and the third has a Machine Gun. Because you have both a sniper and a Rocket Launcher-wielding soldier to contend with, killing these last three enemies can be difficult if you're playing solo. If you still have your VS, take out the Rocket Launcher user first. If you're on foot, kill the sniper first, but be ready to dodge if the other enemy fires a rocket.
When the sniper is down, anchor up onto the next car and drop through the hole in the roof to find Data Post 3. Activate the final Data Post to trigger a cutscene.
Area 3
This boss fight is much easier (and exponentially more fun) with human allies. Going into this with at least one human teammate is strongly recommended.
Objective: Defeat the Category G
Red Eye is back, and it's after your transport again. With the powerful railway gun now in your possession, it's time to slay this beast.
Operating the railway gun will appear very convoluted at first.
There is a Data Post in the open train car. Activate the Data Post to add 500 points to your team's Battle Gauge and then enter the car below the railway gun platform at the front of the train.
Operating the railway gun will appear very convoluted at first, so a great deal of explanation is in order.
First, about those two bars at the bottom of the screen. The red bar on the bottom is the Cat-G's life bar and the blue bar on top indicates the condition of the train. You must deplete Red Eye's life bar to complete the mission, but if Red Eye damages the train enough to completely deplete the blue bar, you'll fail the mission.
To get onto the railway gun platform, exit through the doorway at the front of the car and then anchor up to the platform. You must be sitting in the seat in the top-left corner of the platform to operate the railway gun. First, you'll need to load shells to fire. To load a shell into the chamber, you must pick up a shell (there should be some on the platform, down below or in the open train car at the back of the train), carry it to the opening near the backend of the chamber and press the Y/Triangle button when prompted.
AI partners generally do a good job of keeping the gun loaded, however this is the only task they'll help with.
There are three types of shells: Cobalt, Devil Roar and Wrath. Stick with Cobalts and Wraths for the most part. Devil Roars are most effective when fired at an exposed weak spot, however.
Use the crane at the back of the platform to load an armour-piercing Wrath shell into the chamber.
The armour-piercing Wrath is the most powerful shell, but the AI only seem to load the chamber with Cobalts. To load a Wrath into the chamber, you must use the crane at the back of the platform. You can only operate the crane while the railway gun is turned more or less to its default position (i.e., facing the tracks). If you want a Wraith loaded into the chamber, unless you're playing with human allies, you'll have to do it yourself, because the AI never will.
To determine if the railway gun is at its 'home position' so a Wrath can be loaded into the chamber, look to the map in the top-right corner of the screen. A crane symbol in the bottom-right corner of the map indicates the crane can be operated.
Objective: Fire the Railway Gun!
Fired Powerful Combo Shot -- Fire at least one charged shell to earn this GJ award.
The chamber holds two shells at once; when a shell is at the front of the chamber, you can charge the shell with T-ENG to increase its damage and firing speed. The shell will charge automatically if it is left at the front of the chamber long enough, but this is a slow process. You can manually charge the shell by interacting with one of the stations near the front of the chamber. Rapidly press the B/Circle button to charge the shell before its loaded into the cannon. Charged shells appear green on the map in the top-right corner of the screen.
Objective: Aim for the Core!
Core Fighter -- Destroy four of the T-ENG deposits on Red Eye's sides to earn this GJ award.
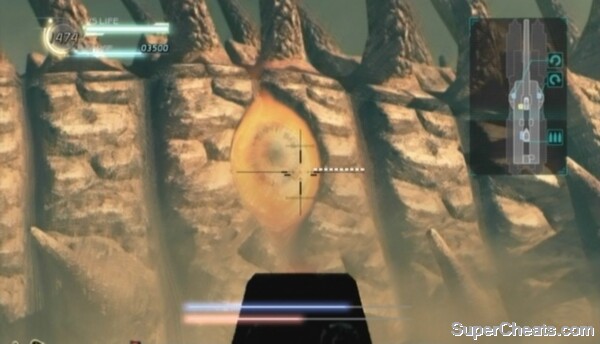
Fire the railway gun at the T-ENG deposits on Red Eye's sides.
To damage Red Eye you must fire the railway gun at the red bulbs on its sides. One Cobalt shell is enough to remove the bulb, revealing a bright orange weak spot. A single Wrath shell can destroy both the bulb and the weak spot, but two Cobalts are usually required to accomplish the same.
When you've managed to destroy all of the weak spots on one side of Red Eye, you'll have to wait until it remerges on the other side of the train to get at the weak spots on its other side.
The railway gun turns very slowly, but you can speed up the process using the mechanisms on either side of the cannon. The mechanism on the left side of the cannon will turn the railway gun 90 degrees to the left, while the mechanism on the right side of the cannon will turn it 90 degrees to the right. If you're playing without human allies, it is probably best to stick to turning the railway gun manually. Though it turns slowly, it isn't slow enough to warrant hopping out of the front seat and putting yourself at risk of being knocked off the train when Red Eye rams it.
Objective: Repair the Railway Gun!
Good as New -- Bring the railway gun from critical status to 50 per cent to earn this GJ award. This objective will only appear if the railway gun's condition falls to around 30 per cent.
As mentioned at the top, if the blue bar at the bottom of the screen is completely depleted, you'll fail the mission. Each time Red Eye rams the train, the blue bar will fall. You can repair the railway gun using the cooling units in the room below the platform.
If you're controlling the railway gun and notice Red Eye coming toward the train with its mouth open, shot it in the mouth to stop it from ramming the train.
There are two cooling units down below. Approach one of the cooling units and rapidly press the B/Circle button to restore the train by about 20 per cent. You won't be able to use the same cooling unit twice in a row, so run over to the unit on the opposite wall and use it to repair the train further.
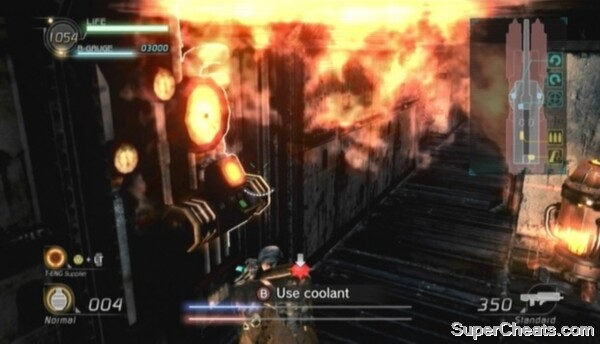
Activate the coolants under the platform to repair the train.
The AI won't attend to this, so you'll have no choice but to repair the train yourself if you're playing solo. This is why having a human on your team can make this boss fight much easier. You're safest while operating the railway gun because you can't be knocked off when Red Eye rams the train. Having to run down to use the coolants puts you at some risk, so it's best to have one player dedicated to repairing the train. This player can operate one of the turrets on either side of the train until repairs aren't needed.
Note: If you've downloaded the latest patch from the PlayStation Network (the patch is not up on Xbox Live at the time of this writing), you won't be knocked off the train if Red Eye rams it -- you'll just stumble and lose health, making this chapter much easier if you're playing solo.
Objective: Shoot Down the Akrid Projectiles!
Anti-air Expert -- Destroy at least three of Red Eye's projectiles to earn this GJ award.
At some point, Red Eye will begin launching large, slow-moving explosive projectiles at the train. It will also send Trilid and Bolsepia onto the platform. It's easy enough to ignore these akrid, but if one of the explosive projectiles is coming toward you and you aren't sitting at the railway gun controls, pop it with your Machine Gun before it hits.
Objective: One More Hit!
Bullseye -- Hit the weak spot in Red Eye's mouth when its life bar is down to about 25 per cent to slay the beast and earn this GJ award.
As soon as the 'One More Hit!' objective appears at the top of the screen, immediately start turning the railway gun toward the back of the train. Shortly after this objective appears, Red Eye will emerge behind the train and begin closing in with its mouth open. You must deliver one last shell to the weak spot in Red Eye's mouth to avoid failing the mission.
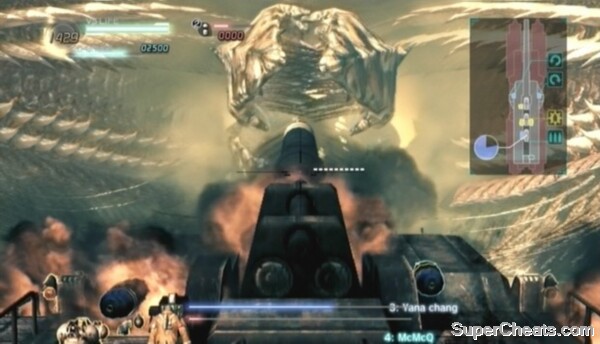
Shoot Red Eye in the maw to finish the job.
Though the cannon turns very slowly, you should still have enough time to turn it fully around to blast Red Eye before it destroys the train. You must be attentive. When Red Eye's life bar is down to about 25 per cent, be ready for this objective to appear. Never leave the railway gun facing the tracks while Red Eye's health is this low; always have it pointed to the side to avoid having to turn it all the way around when this objective appears.
If you're playing with friends, one of the players not on the controls can use the mechanisms on either side of the platform a couple of times to quickly turn the railway gun around. If you're playing solo, you can hop out, use one of the mechanism to turn the gun around, then get back in and deliver the final blow. Don't bother doing this if the railway gun is already pointed to the side when this objective appears.
Fire a shell into the center of Red Eye's open mouth to finish the job and avoid certain death.
Objective: Team Cheer
We Did It! -- To earn this GJ award during the 'chapter complete' countdown, all four players must be performing an Emote at the same time. To perform an Emote, hold the Start button and press one of the shoulder buttons or one of the buttons on the D-Pad.
Human teammates aren't required to earn this award, however AI partners aren't always reliable. You may need to perform an Emote a few times to trigger theirs.
Defeating Red Eye
Mission 1
Objective: Break Through the Enemy Lines Quickly!
Gold -- Complete the level in seven minutes or less to earn this GJ award.
Players one and three spawn downstairs with nothing but a Handgun. Players two and four spawn upstairs with the standard Machine Gun and Hand Grenades.
Players two and four have the relatively easy task of fighting their way downstairs to assist the other half of their team. Players one and three, armed with only a Handgun, are in a much tighter spot. If you're playing with human allies and you are player one or player three, it's easiest to wait for your better-equipped teammates to come to your aid, however you can just as well clear the floor with a bit of patience.
Assuming you are player one (or player three), exit the room you spawn in and turn right. There are two snipers at the other end of the corridor; they can shoot you through the window, so crouch by clicking and holding the Left Stick and move below the window. Be ready for a Shotgun-wielding soldier when you reach the corner. Shoot him in the head a few times and then continue forward.
When you reach the next corner, roll to the cover straight ahead and gun down the crouched soldier by the window. Then, peek out from behind cover and shoot the sensor partway down the corridor until it's destroyed.
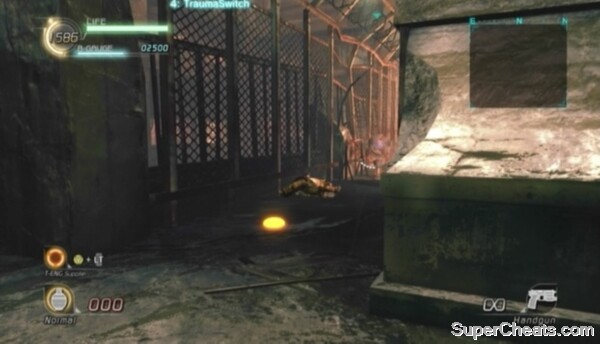
Players one and three start this level off with nothing but a Handgun.
Once you've disabled the Sentry Turrets, you just have the two snipers to contend with. Backtrack to the start of the level and head north instead. When you reach the corner, take out the sniper on the stairs and then the other sniper near the Data Post. The other half of your team should be downstairs by now, so these snipers will likely be distracted.
Objective: Activate All the Data Posts!
All Data Posts Online -- Activate both Data Posts in the level to earn this award.
Activate Data Post 1 after killing the snipers and then head up the stairs north of the post. There is a Machine Gun and a Shotgun through the first door on your right, however there are four enemy soldiers you will have to eliminate beforehand. AI partners will likely hang by the Data Post, leaving you to kill these soldiers by yourself with nothing but a Handgun. Just duck back behind the corner if you're low on health and use your Harmonizer to recover.
Now that you have better weapons, return to the Data Post and proceed down the stairs south of it. Take cover around the corner and gun down the group of soldiers at the north end of the hall. Behind these soldiers are three Sentry Turrets hanging from the ceiling. The sensor visible through the barred window behind this line of turrets is only tied to the middle turret. Another sensor controls the other two turrets, this one behind the stack of breakable boxes to the right of the barred window. Break the boxes and destroy the sensor from the other end of the hall before moving up.
Around the corner up ahead are more soldiers and two more Sensory Turrets. The sensor tied to these turrets is visible through the adjacent window, so destroy this sensor before turning the corner to avoid being shredded.
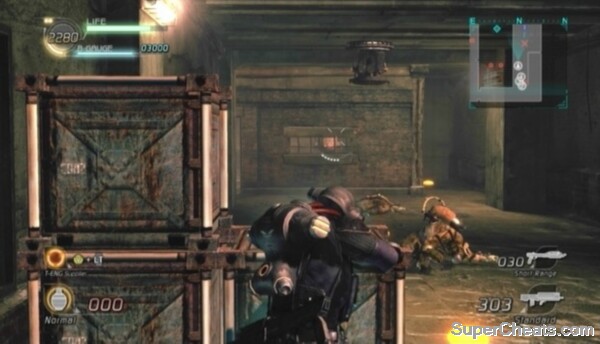
There are Sentry Turrets on every floor.
The second Data Post is at the north end of this corridor. Once the Data Post is online, enter the room through the doorway at the northwest end of the corridor and destroy the crate covering the opening in north wall of the room. Crouch through the opening to find Machine Ammo, a Rifle and some Sticky Grenades in the adjacent room. Pick up the grenades and ammo and then continue down the stairs to the left of Data Post 2.
In the area down the stairs you'll face one Baylid and one Bleed VS, some enemy soldiers and a turret emplacement. Immediately make your way to the platform at the south end of the room and equip the Battle Armor and collect the Gum Grenades on the south side of the platform.
Destroy the two Baylids and the Bleed VS with your Gum Grenades and Shotgun. The Bleed VS is armed with a VS Lance, so hit it with Gum Grenades before it gets too close. If you do end up facing it up close, roll when it swings its weapon and then blast the VS with your Shotgun to stagger it.
Once the enemy VSs have been taken care of, clear the area of soldiers and then move around to the turret emplacement in the middle of the room. Hit the turret emplacement with your Shotgun at point-blank range to destroy it. With that, drop down to the door behind the turret and activate the two locks to open the door. Step past the red line to begin the 'area complete' countdown.
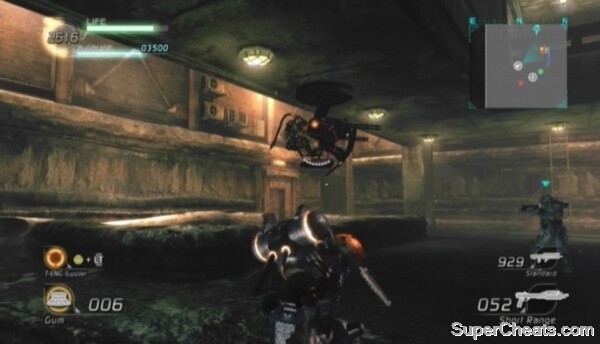
Take out the enemy VSs on the bottom floor.
Objective: Strike a Pose!
Emote: All Players -- To earn this award during the area complete countdown, all four players must be performing an Emote at the same time. To perform an Emote, hold the Start button and press one of the shoulder buttons or one of the buttons on the D-Pad.
Human teammates aren't required to earn this award, however AI partners aren't always reliable. You may need to perform an Emote a few times to trigger theirs.
Mission 2
Move through the sewers and you will soon encounter some Trilid and Genessa pods.
Objective: Akrid Extermination Challenge
Akrid Massacre -- Kill most of the Sepia, Bolsepia and Genessa in this tunnel to earn this GJ award.
Shoot down the Trilid, burst the Genessa pods and then rather than dropping through the hole at the end of the path, turn right and walk around the ledge to the tunnel across the gap. Open the T-ENG chest in this tunnel to find a Shotgun. Pick up the Shotgun and use it (along with grenades) to kill the Sepia and Genessa pods down the adjacent tunnel. Take your time to avoid becoming overwhelmed by these akrid. There are Bolsepia (the exploding ones) at the back of the tunnel, so be careful.

Fight your way through the akrid-infested tunnel.
Objective: Activate All the Data Posts!
All Data Posts Online -- Activate both Data Posts in the level to earn this award.
Data Post 2 is in the middle of the akrid-infested tunnel. Activate the Data Post and equip the Battle Armor next to it if you aren't already wearing some. Continue west to the other end of the tunnel. Don't drop down just yet, as a Defolma will soon emerge from the pipe.
Objective: Exterminate the Akrid!
All Akrid Defeated -- Kill all three Defolma to earn this award.
Fire down at the first Defolma with your Shotgun to take it out. Aim for its mouth and head. Drop down to reach the end of the level once the way is clear. If you want to earn the Gold GJ award for this objective, there are still two more Defolma to defeat in the sewers. There's one more Data Post as well.
Head east down the sewers and destroy the Genessa pod that spawns on the wall. Around the corner, move up and activate Data Post 1 and then pick up the Machine Gun and Shotgun ammo next to it. Two more Genessa pods and the second Defolma should appear. Now that you're on level ground, don't stand directly in front of the Defolma, as doing so leaves you vulnerable to its devour attack.
Burst the pods, kill the Defolma and then head back to the other end of the tunnel. If you haven't defeated a third Defolma yet, you will encounter another one on your way to the lock. Kill the Defolma before activating the lock to start the 'area complete' countdown.
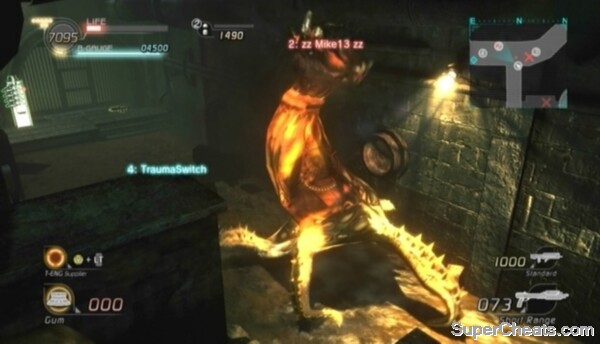
Kill the three Defolma at the end of the level to earn the Gold GJ award.
Mission 3
Objective: Penetrate the Defence Perimeter
Crouch through the opening at the end of the tunnel and drop into the water. Anchor up to the platform and gun down the two soldiers there.
There's an enemy Evax VS on this platform and one across the bridge. If you still have a Shotgun from the previous level, get close and blast the VS nearest to you at point-blank range. If you don't have a Shotgun, there are Dummy Grenades in the T-ENG chest on the platform. Use the Disc Grenades at the north end of the platform to destroy the Evax VS across the bridge.
When the VS is down, sprint across the bridge and take cover behind the stairs south of the Data Post. Pick up the Shotgun and Machine Gun ammo behind the stairs.
There is a row of plasma-firing Sentry Turrets blocking your path. The two sensors tied to these turrets are on the walkway the turrets are hanging from. Anchor onto the walkway across from the line of turrets and destroy the sensors with your Machine Gun. Zoom in by pressing up on the D-Pad if need be. You could also use the Disc Grenades in the T-ENG chest on the same walkway.
Destroy the two sensors on the platform above the line off Sentry Turrets.
There's a Rocket Launcher-wielding enemy by the stairs next to the Data Post and a sniper through the doorway at the top of those stairs, so be careful.
Move up and activate Data Post 1 once the line of Sentry Turrets is disabled. Move through the doorway next to the Data Post to find Dummy Grenades, Plasma Grenades, a Gatling Gun, and a Rifle. Pick up the Rifle and use it to pick off the enemies at the other end of the area. Just be sure to hold on to your Shotgun.
Objective: Fight Off Enemy VSs!
All VSs Destroyed -- Destroy all of the enemy VSs to earn this award.
Look for an overturned Nida VS along the right side of the canal. This VS is armed with a Gatling Gun and VS Rocket Launcher, which you can use to destroy the enemy Evax, Drio and Cakti VSs in this area.
The Evax and Cakti is at the north end of the area and the Drio is on the platform west of where you found the Nida. The Cakti has a Cannon attached to it, so take that one out first. Just make sure you're out of range of the Drio. If your VS is destroyed, there is a vacant Evax armed with a Cannon south of the enemy Cakti and a human Rocket Launcher in the corner of the platform where you found the Nida VS.
Use the Nida to damage the enemy VSs.
Mission 1
Objective: Activate the Data Posts in Order
There are six Data Posts on this map. You must activate these Data Posts in the order they appear on your Radar. The blue diamond marker on the Radar points to the next post you must activate.
Objective: Break Through the Enemy Lines Quickly!
Gold -- Complete the level in seven minutes or less to earn this GJ award.
Head up the ramp in front of you at the start of the level. Head down the walkway and kill the two soldiers you encounter. After killing the soldier around the corner, look northeast to spot the first Data Post below. Pick up the Disc Grenades along the walkway and throw one at the two soldiers by the Data Post. Shoot the grenade when it reaches the soldiers to kill them. With that, jump down, pick up the Shotgun in the corner and then activate Data Post 1.
Objective: Fight Off Enemy VSs!
All VSs Destroyed -- Destroy all of the enemy VSs (three Bleed VSs, one Evax) on the map to earn this award.
Follow the blue diamond blip on the Radar to locate the next Data Post.
After activating the first Data Post, anchor onto the suspended battleship east of the post. Throw a Disc Grenade toward the sensor at the other end of the deck and detonate the grenade by shooting it when it reaches the sensor to destroy the sensor and disable the two Sentry Turrets. Move up and blast the enemy Evax VS with your Shotgun at point-blank range. This VS is armed with a VS Shotgun, so only attempt this if the pilot is distracted by a teammate.
Once you've destroyed the enemy VS, kill the soldiers that jump onboard. Drop down the hole in the middle of the deck to find Data Post 2. Activate the second Data Post and then pick up the two Gum Grenades in the corner. Then, anchor back onto the deck and pick up the Rocket Launcher at the east end.
The third Data Post is on the platform southeast of the battleship. Fire a rocket at the group of soldiers standing by the Data Post and then hop down. Activate Data Post 3 and then start toward Data Post 4, which is in the area beneath the suspended battleship. There is an enemy Bleed VS near this Data Post; hit the VS with two rockets (on the Normal difficulty level) to destroy it.
When Data Post 4 is online, face east and look up. Anchor up to the stairs there and climb up to find some Body Armor. Drop back down and make your way northwest to Data Post 5. Two Bleed VSs and two boats full of enemy soldiers will appear in the water next to the post. There are a couple of snipers and one Rocket Launcher-wielding soldier among these enemies, so be careful. Blast the soldiers with your Rocket Launcher before they scatter and then destroy the two Bleed VSs.
Be ready to face a wave of enemies at Data Post 5.
Activate Data Post 5 and make your way northeast to the sixth and final Data Post. Fight off the enemy soldiers near the post and then activate it to complete the objective. Cross the red line in the doorway along the adjacent wall to start the area complete countdown.
Mission 2
Objective: Time Challenge: Steal a Sub
Lightning Quick -- Complete the level in seven minutes or less to earn this GJ award.
Make your way to the other end of the corridor and gun down the enemy standing outside. Cross the bridge across the doorway once it lowers and open the T-ENG chest on the other side to find Disc Grenades. Throw a Disc Grenade toward the group of three enemies standing around the Data Post across the canal and shoot the grenade when it reaches the enemies to blow them away. With that, cross the bridge and approach Data Post 1.
Objective: Fight Off Enemy VSs!
All VSs Destroyed -- Destroy all of the enemy VSs (two Nida VSs, two Evax VSs, two turret emplacements) on the map to earn this award.
There's a turret emplacement hanging from one of the support beams above the canal. Hit the turret with a Disc Grenade; just one should do it on the Normal difficulty level. Activate the Data Post once the turret is down and then open the T-ENG chest next to it to find a Rocket Launcher. This Rocket Launcher only has two rockets, but you can use it to destroy the enemy Evax VS that's posted on the bridge at the other end of the canal.
Destroy all of the enemy VSs on the map to earn the Gold GJ award.
Stick to the western walkway and you'll soon come across another Rocket Launcher, this one with five rockets. Collect this Rocket Launcher and cross the next bridge you come to.
Objective: Commandeer a Sub!
Not a Scratch -- Steal the sub and escape without any deaths on your team to earn this GJ award.
Activate the Data Post at the north end of the eastern walkway and pick up the Rocket Launcher next to it. There are two enemy Nida VSs, an Evax VS and a turret emplacement in the area east of Data Post 2. Use your Rocket Launcher to destroy these VSs.
Cross to the two T-ENG chests along the northern walkway when the area east of Data Post 2 is clear. Both of these T-ENG chests hold Battle Armor. Open one of the chests, equip the armour inside and proceed west to the sub to the docked sub.
Activate the Data Post on the sub to start a short on-rails sequence. Enemy soldiers will appear on the walkways as the sub moves through the tunnel. You'll also encounter enemies on Fastrey VSs. Use grenades and whatever ammo left in your Rocket Launcher to fight them off. An enemy sub will appear partway down the tunnel; toss a grenade over or fire a rocket when they pile out the door.
All in all, you don't have to worry much if you're outfitted in Body Armor.
Commandeering the sub
The level will end when the sub reaches the exit.
Mission 1
Objective: Break Through the Enemy Lines!
Enemy Lines Crossed: No Casualties -- Complete the level without any deaths on your team to earn this GJ award. AI partner deaths do count, so this is best attempted with human allies.
Objective: Activate Data Posts to Acquire Intel on Enemy Forces
At the start of the level, anchor onto the hill in front of you and gun down the soldier in the bunker. Head northeast to the bunker entrance. Use Hand Grenades to destroy the enemy Bleed VS through the doorway before entering the bunker. Activate the Data Post in the bunker and collect the Rocket Launcher and Machine Gun ammo nearby.
Back outside, get on top of the bunker and face north. There are two enemy turrets, a Cakti VS and a Granseed VS in the area below. Destroy the enemy VSs with your Rocket Launcher. When you run out of rockets, get the VS Rocket Launcher attached to the broken-down VS in front of the sandbags on the hill.
Move down from the hill once the area below is clear. There are two Rocket Launchers to collect before moving on. Look for one inside the bunker south of Data Post 2, and the other in one of the T-ENG chests at the bottom of the hill. As well, there's a VS Rocket Launcher attached to one of the broken-down VSs on the beach at the south end of the area.
Fire rockets at the enemy VSs below.
Objective: Destroy the Bleed VSs!
All Bleed VSs Destroyed -- Destroy the three Bleed VSs that appear to earn this award.
Start toward Data Post 2 after collecting the Rocket Launcher ammo and three Bleed VSs will come out from the doorway up ahead. Blast them with rockets from afar, prioritizing the two VSs equipped with Laser Lances before they get too close.
Move up and activate Data Post 2 once the Bleed VSs have been dealt with. There is a vacant Bleed VS parked through the doorway the enemy Bleed VSs came through. Hop in if you'd like, but it's isn't necessary.
Up the ramp, head west to find a parked Granseed VS in the base. Keep this VS in tip-top shape, as it will come in handy in the next level. You won't need the Granseed VS for the upcoming fight, so leave it parked where it is for now.
Activate Data Posts 3 and 4 to complete the current objective.
Objective: Shoot Down the Ospreys!
All Ospreys Destroyed -- Destroy all of the enemy Ospreys to earn this award.
You must deplete the enemy's Battle Gauge -- visible at the bottom of the screen -- to complete the level. Remember to get in the Granseed VS once the enemy's Battle Gauge is low so the VS will move with you to the next level.
Shoot down the enemy Ospreys!
Look for Rocket Launcher ammo by Data Posts 3 and 4. Anchor up to Data Post 4 on the top level of the base and use your Rocket Launcher to shoot down the incoming Ospreys.
Enemy soldiers dropped by carrier Ospreys will attempt to anchor up to your position. Keep an eye on your Radar, as each red blip on your Radar denotes an enemy soldier. When you see a group of red blips around Data Post 3 below, stand at the ledge, jump up and fire a rocket down at them to blow them away.
A couple of the Ospreys will drop a Granseed VS. There is plenty of Rocket Launcher ammo to go around, so you can destroy these VSs easy enough. Just remain on the same level as Data Post 4 to give yourself a height advantage, jumping down only to grab the Rocket Launcher ammo by Data Post 3.
Mission 2
Objective: Activate All the Data Posts!
All Data Posts Online -- Activate all five Data Posts in the level to earn this award.
Objective: Defeat the Guardian Akrid
Akrid Defeated -- Destroy the Tencale 8.
The Tencale 8 is a large, mechanized akrid being controlled by enemy soldiers. Mounted on the Tencale 8's back are three seats, each with two Homing Lasers attached. Destroy these three seats first to remove this weaponry.
Target the weapons strapped to the Tencale 8's back first.
If you completed the previous level while seated in the Granseed VS, you can destroy the Tencale 8 very quickly. If you aren't in a Granseed, the Homing Lasers strapped to the Tencale 8's back will likely make getting close to it a difficult task. If you at least have a Rocket Launcher from the previous level, you can destroy the seats mounted on the akrid from afar before moving in to hit the weak spots on its legs and back.
If you are without a suitable weapon, there's a Rocket Launcher by one of the pieces of cover up ahead. Getting to this weapon can be difficult due to the Homing Lasers attached to the Tencale 8's back. Your character is invulnerable during the first part of the roll animation, so time a roll just as a laser is about to hit you to avoid taking damage. A quick sprint and a couple of rolls should get you to the Rocket Launcher, but not without some damage. Fallback when you have the Rocket Launcher and blast the seats on the akrid's back to destroy them.
If you have the Granseed VS, your task is much simpler. Jump up and hover (press the A/X button once to jump and again to hover), moving to the side in an attempt to dodge incoming lasers as you approach, and fire rockets at the seats on the Tencale 8's back to quickly destroy them..
After destroying all three seats on the akrid's back, fire at the weak spots on its legs and back until it falls.
Defeating the first Tencale 8
When the Tencale 8 is dead, proceed north and activate the first Data Post. With that, move up to the first Lightning Field. Get onto the tower in the water east of the steps and activate the lock to disable the field.
Objective: Defeat the Akrid Sentries!
All Akrid Sentries Defeated -- Destroy the four Dongo Gears (akrid VSs) in the level to earn this GJ award.
Once the Lightning Field is down, hop back in the Granseed and head up the stairs. You will encounter two Dongo Gear VSs here. These are mechanized Dongos with dual Gatling Guns. Just like the normal Dongo, the Dongo Gear's weak spot is on its tail. However, the Dongo Gear's tail is covered by a metal plate, which must be destroyed before you can get at its weak spot.
The Granseed's weaponry can tear through these enemies. There is a VS Shotgun with 40 ammo at the top of the stairs west of Data Post 2. Swap your VS Rocket Launcher for the Shotgun and use it to quickly kill the sentries. Circle around a sentry to get at its tail or blast it while it's occupied with one of your allies.
Once you've defeated the first two Dongo Gear VSs, activate Data Post 2 and then continue north to encounter a third Dongo Gear. Destroy the Dongo Gear and then activate Data Post 3 at the east end of the second Lightning Field.
Achievement/Trophy Tip -- Let's Go VS Force: There are a couple of enemy soldiers and a parked Cakti VS in the cave west of the second Lightning Field. If have at least one other human on your team and you have the Granseed VS from the previous level, you can merge the Cakti and Granseed VSs to form the powerful Brocakti VS, earning the 'Let's Go VS Force!!' Xbox 360 achievement or PlayStation 3 trophy in the process.
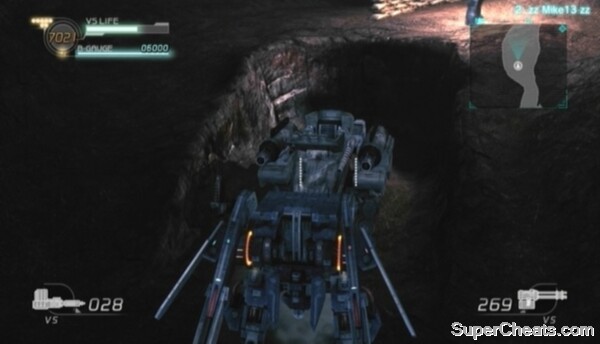
Merge the Cakti and Granseed to form the Brocakti.
To merge the Granseed and Cakti VS, have one player piloting the Granseed and the other in the Cakti. Then, each player must click and hold both the Left Stick and the Right Stick to enter their VS's merge form. With both VSs in merge form, move them close to each other and press the buttons indicated when the prompt appears on screen to form the Brocakti.
After disabling the second Lightning Field, if you have at least one other human on your team and the Granseed from the previous level, form the Brocakti and use it to take down the Tencale 8 on the other side.
If you're playing with AI teammates, don't fret, because there's a vacant Drion VS near the lock. This three-seat VS has a Shotgun attached to both of its seats, as well as two Auxiliary Weapons attached to its body. After disabling the second Lightning Field, hop in the Drion and wait until two of your AI teammates are in the seats before activating it. There are five seats on this Tencale 8 -- some armed with Homing Lasers and others Grenade Launchers. Fly toward the enemy (press the A/X button to jump and then again to hover) and try to dodge incoming lasers by moving to the side as you approach. Once you're close to the akrid, jump and hover around it so you're allies can blast the seats on its back. Fire at the seats with your Auxiliary Weapons as well.
Defeating the second Tencale 8
Once the second Tencale 8 has been dealt with, head east from the third Lightning Field to Data Post 4 and a parked Hardballer VS. Activate Data Post 4 and then hop in the Hardballer.
The switch to disable the third Lightning Field is on the platform in front of it. After disabling the field, activate Data Post 5 across the bridge, then get back in the Hardballer and fly west toward the fort. This fort if occupied by Bug Ranchers, including one wielding an Energy Gun. A fully-charged shot from an Energy Gun will eject you from the seat of your VS, so track down this soldier once you've destroyed the enemy Evax VS.
Shred all of the enemies in the area with your Gatling Guns and then activate the switch on the platform behind the fort to open the gate. With that, drop off the south side of the platform to reach the area end marker. The last Dongo Gear is by the exit, so make sure you destroy it before crossing the red line to end the chapter.
Mission 1
Start down the corridor and take out the four soldiers hiding behind cover further up. An enemy Cakti VS will drop down from above at the other end of the corridor. Use your Hand Grenades to destroy it. When you're out of Hand Grenades, look for Disc Grenades in the corner across from the elevator.
Climb the ladder out of the corridor once the Cakti has been dealt with.
Objective: Track the Experimental Weapon
Activate the Data Post behind the sandbags at the top of the ladder and then gun down the Rocket Launcher-wielding soldier in the tower to the north. When the soldier is down, make your way north to the vacant Nida VS parked by the water. Open the T-ENG chest by the stairs before getting in the VS, then hop in the Nida VS and swap one of its Gatling Guns for the VS Shotgun that was in the chest. With that, turn back to face the enemy Triseed VS.
The Triseed is a powerful VS that can transform into three different forms. Fortunately, you can make short work of it if you're piloting the Nida VS and have a VS Shotgun attached to it. Just get behind the Triseed while the pilot is preoccupied with one of your allies and hit in the back. Keep firing at the Triseed to keep it staggering and it'll go down in no time.
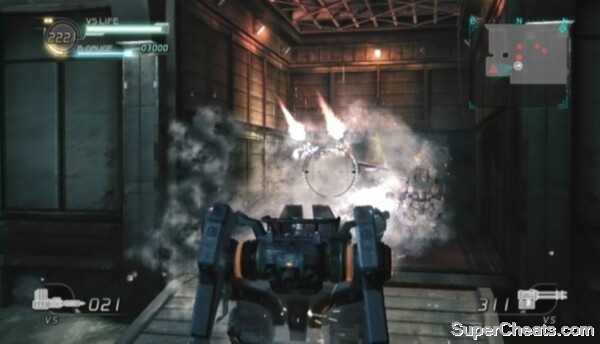
Use the VS Shotgun to quickly take down the enemy Triseed.
Shred the remaining enemy soldiers with your Gatling Gun once the Triseed is down. When the area is clear, look for another VS Shotgun and Gatling Gun through the doorway next to the two parked Bleed VSs in the southeast corner of the area. Add the Gatling Gun and VS Shotgun ammo to your Nida VS and repair the VS if necessary before dropping into the water at the north end of the area.
Underwater, activate the Data Post in front of the gate to lower it. The Nida VS has a special function that allows the pilot to activate Data Posts while still in the VS. To activate a Data Post while in a Nida VS (or a Bleed/Baylid VS), click and hold the Left Stick and tap the B/Circle button like you normally would until the Data Post is online. You can activate a Data Post more quickly while in a VS, but there is one downside: you won't gain any T-ENG this way.
Beyond the first gate, you will encounter several different types of underwater akrid. All of these creatures are particularly dangerous to VSs, so be careful. The Jellons and Jellites (the large and small jellyfish-like akrid) are easy to kill, but there are a lot of them and they explode on impact. The akrid to watch out for here is the squid-like akrid that spins and then propel itself like a missile. These akrid deal heavy damage to VSs, so jump or dash to the side to avoid one if it's coming toward you. Blast the orange tips of these akrid's tentacles with your VS Shotgun and then shoot their weak spot when it sags out from under them.
When the way is clear, pick up the Gatling Gun across from the Data Post and then activate the Data Post to lower the gate. Blast the gelatinous akrid beyond the gate with your VS Shotgun and then step through.
Objective: Exterminate the Akrid!
Akrid Exterminated -- Kill the two Dabulas to earn this GJ award.
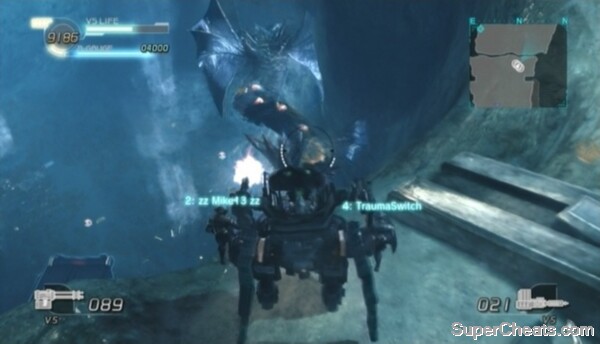
Shoot the T-ENG deposits on the Dabula's back.
Don't drop down just yet once you're through the gate, as two Dabulas will appear. These can trash your VS in record time, so dash to the side (click the Left Stick, push it to the left or right and press A/X) if one is coming toward you. Target the T-ENG deposits on the Dabulas' backs to damage them.
Fire at the Dabulas with your Gatling Gun from afar and with your VS Shotgun when they are close to make short work of them. Keep your distance during the Dabula's death animation, as its flailing can wreck your VS.
When both Dabulas are dead, grab the VS Shotgun on the right before dropping down to the area below. The T-ENG locker here contains a vacant Triseed. Equip your T-ENG Supplier and fire about 800 T-ENG at the T-ENG locker to open it. Before hopping in the Triseed, remove the Gatling Gun and VS Shotguns attached to your Nida VS and place them on the ground. Then, get in the Triseed, swap one of its Gatling Guns for the VS Shotgun and add the swapped Gatling Gun ammo to the Gatling Gun still attached to it.
The Triseed VS can change between three forms: default, a flying form that uses the VS weapons already attached to it (by pressing the X/Square button) and a second flying form that has an infinite number of torpedoes (by pressing the A/X button to jump and then again to transform). Stick to the Triseed's default form for now.
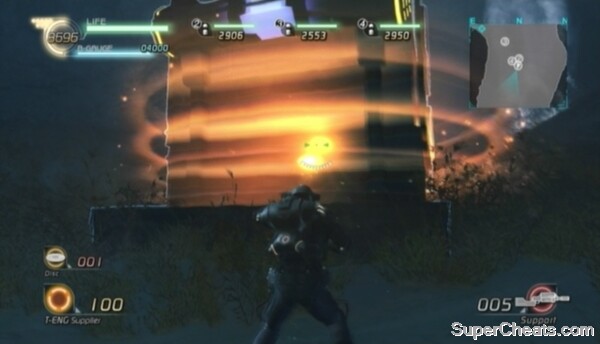
Use your T-ENG Supplier to open the VS locker on the seafloor.
Activate the Data Post by the third gate to open it and then return to the Triseed.
Objective: Fight Off Enemy VSs!
All VSs Destroyed -- Destroy all of the enemy VSs (two Granseeds and two Triseeds) beyond the third underwater gate to earn this award.
Through the third gate are two enemy Granseed VSs and two enemy Triseeds. Step through the gate far enough to trigger this objective (make sure 'Fight Off Enemy VSs!' appears at the top of the screen) and then fallback to Data Post 4 and let the VSs come to you. You can destroy the two Granseeds easily enough with your VS Shotgun. Then it's just about closing in on each Triseed separately and continuously hitting them with your Shotgun to keep them staggering.
Once all four enemy VSs have been destroyed, proceed to the final gate and activate the Data Post in front of it to trigger the area complete countdown.
Mission 2
Objective: Get Across to the Facility
Climb up the ramp and blast the enemy soldiers on the platform. Look for a Rocket Launcher behind the metal crates at the back of the platform and then head down the ramp at the north end. Move up to the Data Post on the bridge to the east and look for another Rocket Launcher, some Machine Gun ammo and Disc Grenades between two pillars nearby.
Activate the Data Post 2 on the bridge, then locate Data Posts 1 and 3 at the northwest end of the platform and bring those online as well. With that, head back to Data Post 2 and blast the enemy soldiers on the other side of the bridge with your Rocket Launcher. There's a Bleed VS armed with a Laser Lance parked by Data Post 2. It's best to leave it where it is, as it is easier to destroy the two enemy VSs in the next area with a Rocket Launcher.
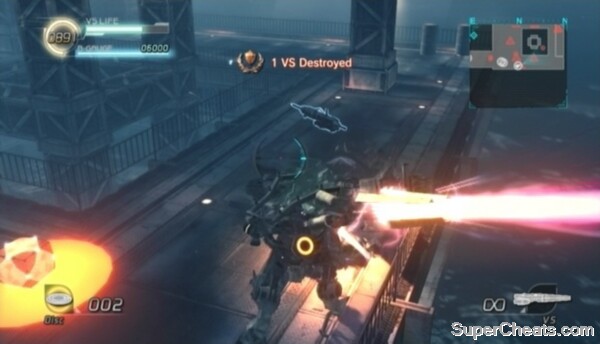
Destroy the enemy VSs across the bridge.
Objective: Fight Off Enemy VSs!
All VSs Destroyed -- Destroy the three enemy VSs (two Bleeds, one Granseed) across the bridge Data Post 2 sits on to earn this award.
Take out the two enemy Bleed VSs and the Granseed with your Rocket Launcher before moving deeper into the area. Once the enemy VSs are down, get in the parked Nida VS on the north side of the platform.
Objective: Get to the Other Side!
Reached the Other Side -- Fly the Osprey or Fastrey to the rig's left block to earn this GJ award.
You must procure the Osprey VS that's on top of the elevated platform at the center of this platform and fly it to the rig's left block. The Osprey is parked on top of the elevated platform in the middle of the platform you are on. It's also surrounded by Sentry Turrets and enemy soldiers, so make sure you have Nida VS before climbing up the ramp.
There are two sensors tied to the Sentry Turrets surrounding the Osprey: one on the northern walkway and the other on the southern walkway. Destroy both of these sensors before approaching the Osprey at the west end of the platform.
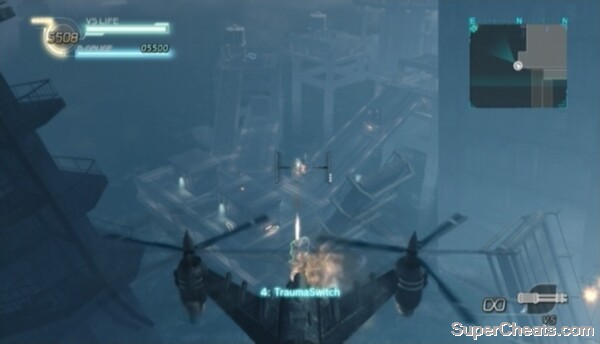
Fly an Osprey to the left block.
The Osprey has room for a pilot and one gunner. Get in the Osprey and wait for another player or an AI teammate to get in before activating it. While piloting the Osprey, use the RB/R1 button to ascend and the LB/L1 button to descend.
Fly west to the left block and fire down at the turret emplacements on the ramp there. Fly to the side to dodge incoming rockets. Shred the sniper on the shed at the east end of the platform and the sniper on the tower to the north before landing the Osprey. When the area is clear, land the Osprey, get out and activate the bridge controls at the east end of the platform to lower the bridge for your teammates to cross.
Objective: Shoot Down the Ospreys!
All Ospreys Destroyed -- Destroy the enemy Ospreys that appear when the bridge is lowered to earn this GJ award.
Get back in the Osprey after lowering the bridge and start firing at the enemy soldiers that appear. Several enemy Ospreys will soon fly in. Shoot down the Ospreys and then land by the facility entrance at the north end of the block. Activate the two locks and cross the red line to end the chapter.
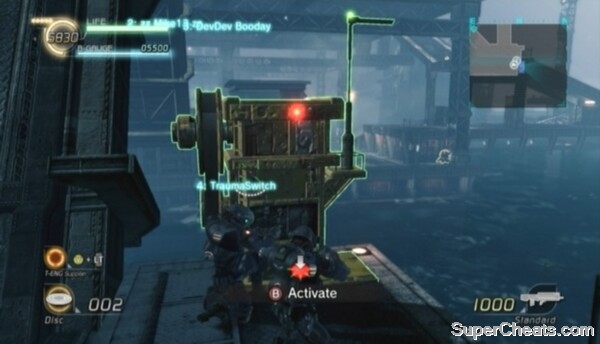
Lower the bridge for your teammates to cross.
Mission 1
Objective: Activate Data Posts and Transmit Intel
All Data Posts Activated -- Activate all five Data Posts in the level to earn this GJ award.
Activate the Data Post in front of you at the start of the level and then head through the automatic door on the left. Approach the door on the south side of this room and be ready with a Hand Grenade. Throw a grenade down at the group of soldiers once both automatic doors are open and shoot the grenade to clear out the soldiers before entering the room.
Approach the unlocked door on the east side of this room. Gun down the two soldiers in the next room and then proceed through the unlocked door at the other end. Kill the three soldiers here and exit through the doorway at the opposite end of the room to find the second Data Post. There are three more soldiers in this room; kill them, activate Data Post 2 and then collect the Shotgun in the southeast corner.
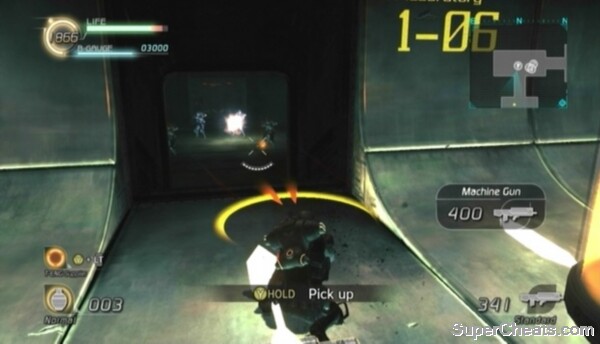
Lob grenades at groups of enemy soldiers.
Once the second Data Post is online, backtrack to the room marked 1-04 and then enter 1-05 via the doorway at the north end of the room. There are six enemy soldiers in the next room. Toss a grenade over the Shield user and hit the soldiers standing by the Data Post. To kill the Shield user, either get behind him and let your allies take him out or bounce a grenade behind him.
Activate Data Post 3 once the room is clear and then exit through the door at the north end of the room. Head through the door marked 1-04 and then the door marked 1-A. Kill the soldier behind the cover at the bottom of the ramp. The door marked 1-B will open, revealing three soldiers (one of whom has a Plasma Gun) and an enemy Baylid VS. It helps if you still have grenades, but if you don't, just take cover by the side of the door and wait for the Baylid to come to you. Blast the VS with your Shotgun to destroy it.
Once the Baylid and enemy soldiers have been dealt with, proceed through the door marked 1-C and head down the ramp to reach the second floor. The ramp down to the storage area is infested with Genessa, Sepia and Bolsepia. Blast your way through with your Shotgun. Bolsepia are the red exploding akrid, so kill those from a distance.
Turn right at the bottom of the ramp and pick up the Shotgun by the doorway to the shuttle launch site. There are Vodoggs roaming this floor, so be careful.
Objective: Beware the Cylinders
All Akrid Defeated -- Kill all of the Vodoggs that break free from the cylinders in rooms 2-B and 2-C to earn this award.
In 2-B, activate Data Post 4 and then fight off the three Vodoggs when they break out of the cylinders (as if you couldn't see that one coming). Shoot these akrid in the head with your Shotgun to make short work of them. There are four more Vodoggs in cylinders in 2-C, as well as some Body Armor.
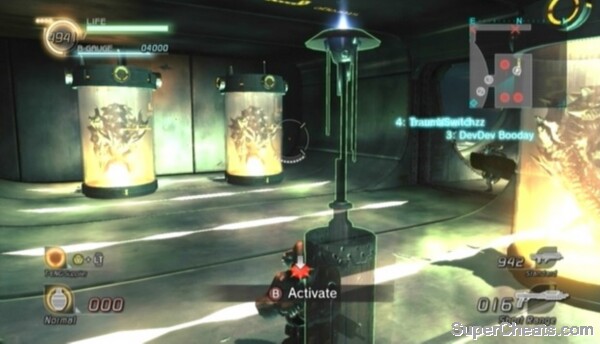
The Vodoggs will break out of their cylinders once the Data Post in 2-B is online.
After activating Data Post 4, proceed through the door marked 2-D at the south end of the main room and head down the ramp to reach the third floor. At the bottom of the ramp, sprint to the automatic door marked 3-B up ahead and enter the room.
Objective: Defeat the Akrid Sentries!
All Sentries Defeated -- Destroy all three of the Dongo Gears in the launch facility to earn this award. Activate Data Post 5 to find the third Dongo Gear.
Blast the enemy soldiers in 3-B and then open the T-ENG chest closest to the door to find a Rocket Launcher. Swap your Machine Gun for the Rocket Launcher and hop in the Baylid VS parked on the other side of the room. The Baylid is armed with a Gatling Gun and a VS Shotgun, which you can use to tear through the two Dongo Gears outside.
Kill the two Dongo Gears and then start down the corridor marked 3-06. Don't turn the corner just yet, as four enemy soldiers wearing Battle Armor will soon appear. Fallback a bit and blast these guys with your VS Shotgun when they come around the corner. One of them is wielding a Shotgun that can paralyze targets, which can make killing this group a bit difficult.
Once those four soldiers are down, turn the corner and take down the enemy Baylid VS at the other end of the corridor. These Baylid is armed with two VS Shotguns, so if it wrecks your VS, eject and use your Rocket Launcher to finish it off.
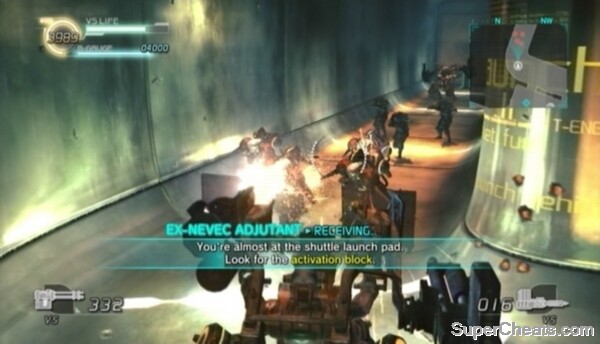
Data Post 5 is heavily guarded, so be careful.
Activate Data Post 5 at the other end of the corridor and head back to 3-A. Leave the Baylid behind and make sure you end this level wearing Battle Armor. You can either re-equip the armour you dropped when you hopped in the Baylid or take the Battle Armor in one of the T-ENG chests in 3-C.
The elevator in the middle of 03-A is accessible now that Data Post 5 is online. The last Dongo Gear is on the elevator, so kill it with your Rocket Launcher before crossing the red line to end the level.
Mission 2
Tap the A/X button while in mid-air to swim while underwater.
Objective: Find the Control Post
Be sure to activate the four Data Posts here before activating the Control Post. To get to the first Data Post, walk out onto the ramp outside the facility and look northwest for a Data Post next to a VS Rifle on the walkway below. Drop down to the Data Post and activate it to reveal the map on your Radar, as well as the locations of the other three Data Posts and the Control Post.
To determine if you're at the same elevation as one of the Data Posts, look at that Data Post's symbol on the Radar. If the symbol is greyed out, this means the Data Post is at a higher or lower elevation. If the symbol is bright yellow, this means you're at the same elevation as that Data Post. Use the large fans (look for turbulence) on the walkways around the facility to propel yourself up one level.
Collect any Rocket Launcher and Shotgun ammo you come across while searching for the other Data Posts, as you'll need plenty for the boss battle coming up. Once you've activated all four Data Posts, make your way to the Control Post and activate it to get started.
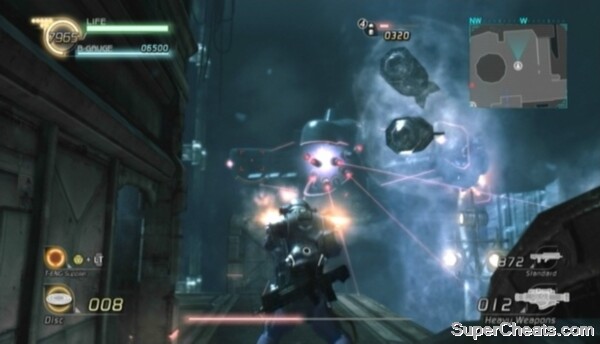
Take down the Experimental Weapon!
Objective: Destroy the Experimental Weapon's Armor
Armor Completely Destroyed -- To earn this GJ award, destroy the two weak spots on the Vital Fortress's wings, the weak spot on its front sensors and the weak spot on its rear thrusters.
The experimental weapon -- dubbed 'Vital Fortress' -- is a large, heavily-armoured submarine craft capable of firing a ridiculous number of torpedoes at once. Throughout the battle, Vital Fortress will circle around the facility, occasionally stopping to fire a barrage of torpedoes at you and your allies.
Vital Fortress has eight pieces of armour: two on each of its wings, two on its front sensors and two on its body. To destroy the armour on its wings, target the stabilizer on the back each wing and the engine on the front of each wing. When a stabilizer is destroyed, it will bend and the light on it will change from red to yellow. The engine and front sensors, when destroyed, will continuously spark. The rear thrusters will fall completely off.
When all of Vital Fortress's armour is destroyed, keep on targeting these weak spots to continue dealing damage.
The Rocket Launcher is most effective against this enemy, as are other explosive weapons such as the Rocket Pod and Grenade Launcher. There is plenty of Rocket Launcher ammo scattered around the facility. It is safest to attack Vital Fortress from above, as doing so gives you ample time to dodge incoming torpedoes.
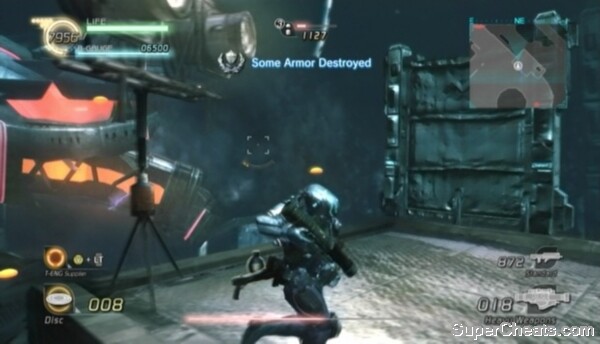
Destroy all of Vital Fortress's armour to earn the Gold GJ award.
Objective: Defeat the Reinforcements!
Reinforcements Routed -- Kill eight of the enemy reinforcements to earn this GJ award.
At some point, enemy reinforcements will drop onto the upper walkways. Kill eight of them to earn the Gold GJ award. Look for red blips on your Radar to track them down.
Objective: Take Out the Torpedoes!
Torpedoes Destroyed -- Destroy at least 20 of the torpedoes fired by Vital Fortress to earn this award.
Vital Fortress has three different types of ammo: standard torpedoes, interdiction torpedoes and mines. Use the Shotgun to destroy incoming torpedoes or mines. The standard torpedoes can be easily avoided if you keep moving. If you do stand in one spot, all of the torpedoes Vital Fortress fires will come at you one after the other, making them difficult to dodge with a roll.
Mines are the large, spiky, slow-moving projectiles fired by Vital Fortress. They have a huge blast radius, so destroy them from afar.
Objective: Escape from the Interdiction Torpedo!
Team Member Rescued -- This objective will become active if you or one of your allies is hit by an interdiction torpedo (the spinning cluster of smaller torpedoes). When hit by one of these torpedoes, the character will be stunned for a short period of time. A stunned player can rapidly move the Left Stick back and forth to escape. Alternatively, a teammate can shoot a trapped ally to instantly free them, earning this GJ award in the process. If the trapped player is forced to free themselves, the bronze 'Team Member Escaped' award will be earned instead.
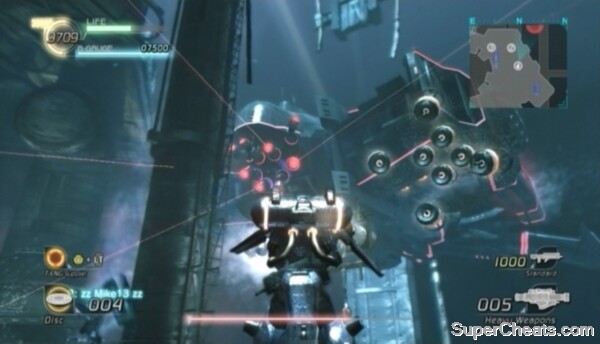
Shoot incoming Interdiction Torpedoes to break them up.
If you're playing solo, it's unlikely the AI will free you if you're hit by one of these torpedoes. Even so, you can still earn this award by freeing a trapped AI partner.
Objective: Get the [?] Boxes!
Completist -- Collect 20 of the [?] Boxes dropped by Vital Fortress when it's destroyed to earn this award.
Once you've depleted Vital Fortress's health bar, it will circle around the facility twice more, spewing [?] Boxes as it goes by. Make sure you're on level with Vital Fortress when it's health is low to give yourself a better chance of grabbing more boxes.
Mission 1
Objective: Storm the Ship!
Super Fast -- Complete the mission in seven minutes or less to earn this GJ award.
Your goal is to land your Fastrey VS on the NEVEC Overland Battleship. It is best to approach the ship from the right. Move out to the right a bit as you approach to avoid taking damage from the wrecked Osprey and Fastreys. Don't waste any Rocket Launcher ammo on the Ospreys flying overhead; just keep moving forward.
Equip your Rocket Launcher once you can see the turret emplacement hanging above the doorway on the right side of the ship. Hit the turret with a single rocket to destroy it. Ignore the two Sentry Turrets on the back of the ship and use the RB/R1 button to ascend. Once you're hovering over the ship, press the B/Circle button to land.
The sensor tied to the two Sentry Turrets is through the doorway at the back of the ship, so be sure to destroy it right after landing.
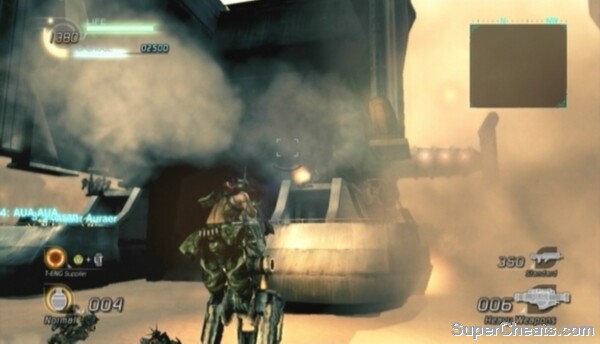
Land your Fastrey on the back of the Overland Battleship.
Objective: Open the Hatch!
Once you've landed on the ship, you need to get inside and then activate the two control units to open the hatch.
There are four more turret emplacements along the right side of the ship; two are hanging above the walkway, and the other two are on the platforms next to the walkway. A single direct hit from a Rocket Launcher can destroy each of these turrets on the Normal difficulty level. Hit each turret with a rocket, starting with the two turrets hanging above the walkway, and then move up and activate the Data Post.
You can enter the ship through the doorway next to the Data Post 2. There might be a Bleed VS in this hallway, however. If there is one, use your Rocket Launcher or Hand Grenades to destroy it. Upon entering the hallway, turn left and gun down the two soldiers by the T-ENG chest. Then, turn back around and climb to the top of the ladder at the north end of the hall.
Open the T-ENG chest at the end of the walkway at the top of the ladder to find a Rocket Launcher. Use the Rocket Launcher to destroy the turret emplacement that's hanging in front of the hatch. There is also an enemy Granseed VS down below, as well as the Bleed VS if you didn't destroy it when you first entered the ship. Kill the Rocket Launcher-wielding soldier standing by the crates on the right, as well as the sniper in front of the hatch.
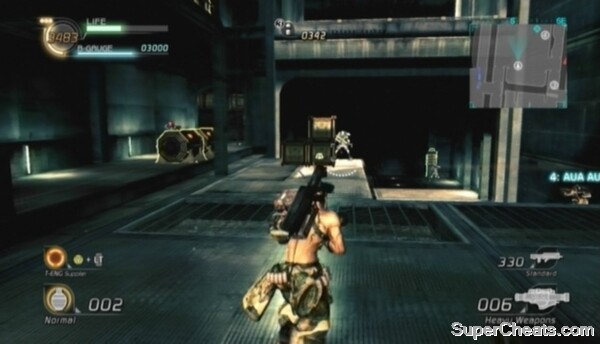
Open the hatch to take control.
Once you've destroyed the enemy VSs and killed the soldiers below, drop down and open the T-ENG chest at the west end of the ship interior to find Battle Armor. Equip the Battle Armor and then approach the control units at the south end of the area. Activate the two control units to open the hatch and complete the mission.
Objective: Fiesta Time!
Emote: All Players -- To earn this award during the area complete countdown, all four players must be performing an Emote at the same time. To perform an Emote, hold the Start button and press one of the shoulder buttons or one of the buttons on the D-Pad.
Human teammates aren't required to earn this award, however AI partners aren't always reliable. You may need to perform an Emote a few times to trigger theirs.
Storming the Overland Battleship
Mission 2
Objective: Hurry Up and Take Control!
Super Fast -- Complete the mission in seven minutes or less to earn this GJ award.
There are two control units onboard the Overland Battleship. Your task is to activate both of these control units and keep control of them for 90 seconds while waves of heavily-armed enemies try to regain control.
Open the T-ENG chest on the second-level walkway in the southeast corner of the hatch area and collect the Rocket Launcher inside. Drop back down and enter the corridor through the doorway across from the T-ENG chest you just opened.
Destroy the sensor to the left of the stairs to disable the two Sentry Turrets at the other end of the corridor. There's a Data Post in the room through the doorway to the right of the stairs. Kill the two enemies in this room and destroy the sensor visible through the doorway at the other end of the room before activating Data Post 2.
Proceed up the stairs after activating the Data Post. Dispose of the enemies here and then head up the stairs at the north end of the room to reach Control Unit 2. Clear this room of enemies before activating the control unit. If you didn't start this level with the Battle Armor found during the last mission, equip the suit of Battle Armor by the doorway at the west end of this room before heading up the steps at the north end.
Activate the Data Post on the bottom level before heading upstairs.
The other control unit is at the south end of the ship. Climb up the ladder across from the controls in the ship's bridge to get onto the deck. Fire a rocket at the turret on the platform at the other end of the deck to destroy it. One rocket will do it on the Normal difficulty level. You can also fire a rocket through the narrow window at the other end of the deck to take out some of the enemies surrounding the second control unit.
Make your way to the south end of the deck and enter one of the corridors there. Gun down any enemies at the end of the hall and then destroy the sensor through the doorway up ahead to disable the Sentry Turrets there. Once you've made it past the sensor on your side, destroy the other sensor visible through the doorway at the other end of the room to help your teammates out.
Clear all of the enemies in this room before activating Control Unit 1. Watch out for the Rocket Launcher-wielding soldier at the top of the steps at the south end.
Objective: Stay in Control!
Total Victory -- Do not allow the enemy soldiers to deactivate either of the control units once the 90-second countdown starts to earn this GJ award. This award is extremely difficult if not impossible to earn if you're playing solo, so this is best attempted with human allies.
This is another one of those objectives made much easier with human teammates. Because the control units are at opposite ends of the ship, you'll have to rely on the oft-abysmal AI to defend one of them. Fortunately, the AI won't all follow you during this objective. If you're playing solo, you most likely have two of the AIs with you at Control Unit 1, leaving the third AI to fend for itself at the other end of the ship. If there are two AIs at the other end of the ship, stay where you are, otherwise it might be worth heading over there to support the lone AI there. This is a necessity if you have any hopes of earning the Gold GJ award for this objective.
Activate the Control Posts and stay in control!
The countdown starts and the enemies start coming as soon as both control units are online. Some enemies spawn with Battle Armor. The Shotgun works well for removing Body Armor, as does the Rocket Launcher. If you're defending Control Post 1 and are out of Rocket Launcher ammo, you can find a VS Rocket Launcher in the T-ENG chest up the steps at the south end of the ship. If you're defending Control Unit 2, look for a Shotgun on the ground next to the post.
If the enemies manage to deactivate one of the control units, the countdown will stop. If this happens, you'll need to reactivate the unit to continue the countdown. If you do lose control of one or more of the posts, take your time to clear both rooms of the enemies that spawn. If you kill all of the enemies that spawn, none will spawn when you reactivate the control units, allowing you to finish the mission without any resistance. If you're playing solo, this is probably your best bet, rather than attempting to reactivate the units in the middle of a firefight.
Stay in control of both control units for a total of 90 seconds to start the 'chapter complete' countdown.
Objective: Fiesta Time 2!
Emote: All Players -- To earn this award during the chapter complete countdown, all four players must be performing an Emote at the same time. To perform an Emote, hold the Start button and press one of the shoulder buttons or one of the buttons on the D-Pad.
Human teammates aren't required to earn this award, however AI partners aren't always reliable. You may need to perform an Emote a few times to trigger theirs.
Perform an Emote with your teammates during the 'chapter complete' countdown to earn this GJ award.
Mission 1
Objective: Clean Out the Ship!
First -- Complete the mission in seven minutes or less to earn this GJ award. You must deplete the enemy's Battle Gauge -- which is visible at the bottom of the screen -- to complete the mission.
Head southwest at the start of the level and toss a Hand Grenade at the three soldiers along the walkway. Shoot the grenade when it reaches the group to blow them away. Then, look west and toss a grenade across the gap to kill the three soldiers standing on the walkway there. With that, open the T-ENG chest on the walkway and pick up the VS Rocket Launcher inside. The other T-ENG chest holds a human Rocket Launcher.
Continue south to the other end of the deck and gun down the two soldiers at the top of the stairs. Activate the Data Post at the top of the stairs and then carry the VS Rocket Launcher over to the turret emplacement on the platform at the south end of the ship.
Objective: Smack the Flies Out of the Sky!
Smackdown -- Destroy all of the enemy Ospreys to earn this award.

Shoot down the Ospreys!
Throughout this mission, enemy Osprey VSs will fly in from the south. Rocket Launchers are most effective against Ospreys. You need to wait for the right moment before firing a rocket at one of the Ospreys, otherwise it will be difficult to hit.
Attach the VS Rocket Launcher to the left side of the turret emplacement and hop in. This turret is armed with a Gatling Gun already, which can down Ospreys quite quickly when coupled with the Rocket Launcher. Fire the Gatling Gun at one of the Ospreys as it approaches, but wait until your target stops moving for a moment before firing. Don't waste any rockets firing at an Osprey that's moving to the side, as it'll likely miss.
There's another VS Rocket Launcher in the southwest corner of the platform. Pick it up and attach it to the turret emplacement if it's still intact. The Gatling Gun will run out of ammo quickly, but you can detach the Gatling Gun from the other turret along the west side of the platform and swap it with yours.
Aside from the turret, there are several human Rocket Launchers on the ship you can pick up and use to down the Ospreys. Three direct hits from a Rocket Launcher are required to shoot down one Osprey on the Normal difficulty level.
Objective: Don't Let Those NEVEC Scum Open the Hatch!
NEVEC will eventually send in an advance team to open the hatch in the ship's interior. If they succeed, you'll fail the mission. All these soldiers need to do is activate the two locks next to the hatch. This can happen quite quickly, and you really can't rely on AI teammates to prevent them from doing so. Unfortunately, this is another one of those missions that's a lot easier with humans on your team.
Prevent the NEVEC advance teams from opening the hatch.
Two advance teams will be sent in. The first team will drop in shortly after this objective appears onscreen. So, when this objective appears, stop what you're doing and drop down to the hatch. Hang around the hatch for a bit and kill any enemies that drop down into the ship's interior. Keep an eye on the locks as well, as these enemies will often ignore you and attempt to open the hatch in the middle of a firefight.
Once you've dealt with the first advance team, anchor back up onto the deck and continue destroying Ospreys and anything else NEVEC throws at you. Keep an eye on the lock symbols below your life bar and Battle Gauge just in case you missed an enemy down below. If one of the lock symbols turns white, stop what you're doing and drop down to the hatch before the enemy manages to open the second lock.
Stick around the sides of the ship so you'll be able to see when the second advance team drops in. Just shoot down Ospreys with a human Rocket Launcher while waiting for the second team. When you see the first couple of members of the second advance team drop down to the ship's interior, jump down and fight them off to prevent them from taking control. This second group is composed of quite a few soldiers, so make sure you've killed them all before anchoring back up to the deck.
Once back onto the deck, an Osprey will likely have dropped a Granseed VS onboard at the south end of the ship. Hit the enemy VS with grenades or rockets to destroy it.
Keep killing enemies until the Battle Gauge at the bottom of the screen is completely depleted to start the area complete countdown.
Deplete the enemy's Battle Gauge to complete the mission.
Objective: Fiesta Time 3!
Emote: All Players -- To earn this award during the area complete countdown, all four players must be performing an Emote at the same time. To perform an Emote, hold the Start button and press one of the shoulder buttons or one of the buttons on the D-Pad.
Human teammates aren't required to earn this award, however AI partners aren't always reliable. You may need to perform an Emote a few times to trigger theirs.
Mission 2
You'll need plenty of T-ENG to operate the cannon. Fortunately, the team spawns right next to two T-ENG Chargers. You have some time before the sub-boss arrives, so be sure to gather plenty of T-ENG before manning the cannon. Stand between the two T-ENG Chargers until you have at least 4000 T-ENG. With that, cross to the other side of the deck and activate the Data Post there.
The Baiztencale, a gigantic spider-like akrid, is this episode's sub-boss. Fortunately, this Cat-G Akrid is a pushover with the Overland Battleship cannon at your disposal. Approach the cannon when ready and hop in the seat at the bottom of the steps to take control.
Objective: Fire at Full Power!
Full Charge Shot -- Charge the cannon to level three and fire to earn this GJ award. Earning this award requires more than one player, with one player manning the cannon and the other(s) charging the cannon by shooting T-ENG at its muzzle while it's in firing mode. If you're playing solo, you'll have to settle for the Bronze 'Level 1 Charge Shot' award.
You'll know the cannon is charged to level three when the mass of energy on the muzzle has increased in size twice. About 1000 T-ENG should do it.
Aim the cannon at the T-ENG deposits on Baiztencale's legs.
Once in firing mode, you'll have to wait for the cannon to charge before you can fire. The cannon is ready to fire when the bars on either side of the reticule are full and red.
Objective: Take Out the Legs!
4 Legs - Excellent! -- Destroy the T-ENG deposits on all four of Baiztencale's legs to earn this GJ award.
Aim the cannon at the orange bands on Baiztencale's legs. Keep the beam trained on one of these bands for as long as it takes to burst it.
By the time you've destroyed three or four of the bands with the cannon, Baiztencale should be close to death. The akrid will fall onto the battleship when its life bar is down to about 40 per cent. If when Baiztencale falls on the ship you haven't destroyed all four of the bands on its legs, you can still destroy them with the cannon if the intact band is on one of its front legs.
When Baiztencale falls on the ship, you can remain in the cannon and fire the beam at its face to finish it off. There are two more GJ awards to be earned, however, so hop out of the cannon if you're interested in pursuing those.
Objective: Shoot Down the Akrid Projectiles!
Cleared the Skies -- To earn this award, shoot down 10 of Baiztencale's explosive projectiles.
While Baiztencale is slumped over the battleship, it will continuously release a bunch of homing, explosive projectiles from the pods on its back. The best weapon for shooting down these projectiles is the Gatling Gun, so detach the Gatling Gun from one of the turrets at the north end of the deck.
The Gatling Gun is best for shooting down Baiztencale's projectiles.
Objective: Find the Weak Spot!
Weak Spot Found -- Find the weak spot on Baiztencale's back to earn this award.
To reach the weak spot on Baiztencale's back, anchor onto the wing on the west side of the deck and walk across Baiztencale's arm. The steady stream of projectiles makes getting to Baiztencale's weak spot quite difficult, so clear the skies with your Gatling Gun as you make your approach.
You just need to get close enough to the weak spot to complete the objective. If you are killed by a projectile after earning the reward, hop back in the cannon and finish Baiztencale off with a cannon blast to the face.
Objective: Get Those [?] Boxes!
Got a Bunch -- Collect 10 of the [?] Boxes Baiztencale drops to earn this GJ award.
This is another tough award to earn if you're playing solo because you aren't given much time to collect the boxes once Baiztencale is dead. If you finished Baiztencale with the cannon, you'll have to wait for the seat to lower to the deck before you can get out. If you finished Baiztencale by damaging the weak spot on its back, you'll have to jump down onto the deck and get to the boxes before the cutscene starts. If you're playing with human teammates, the collective number of boxes they collect count toward the award, and you'll earn it too if they do.
Defeating Baiztencale
Another Overland Battleship has appeared in the desert. You must use the cannon to put it out of commission, but you'll need plenty of T-ENG first.
Start by activating the Data Post in front of you when you first spawn. Then, book it to the south end of the deck and activate the Data Post at the end of the western walkway. Activating both of these Data Posts will give you more than 4000 T-ENG, which is more than enough to wreck the enemy's battleship. Hop in the control seat when ready.
If you're playing with one or more human allies, you can charge the cannon by shooting T-ENG at it while it's in firing mode. The cannon fires at level one by default, but with T-ENG you can charge it to level three.
You'll know the cannon is charged to level three when the mass of energy on the muzzle has increased in size twice. About 1000 T-ENG should do it.
Charging the cannon really isn't necessary, especially on the Normal difficulty level. This mission is very doable solo, so don't worry if you're attempting this with AI teammates only.
Knock out the enemy battleship's cannon first.
Objective: Strip It Down!
Way to Get the Job Done! -- Destroy the cannon and all four wings on the enemy battleship in seven minutes or less to earn this GJ award.
Concentrate on destroying the enemy's cannon first. If the enemy manages to fire its cannon and keeps the beam trained on your cannon, you'll be forced out when it's destroyed and have to spend valuable T-ENG repairing it. To avoid this, take out the enemy's cannon first by focusing the beam on the cannon's body. Get the beam onto the body by aiming just below the cannon's muzzle. Only aim the beam at the muzzle when the cannon is open and readying to fire, as doing so will force it out of firing mode.
Continue firing at the cannon until black smoke starts billowing out from of it and it is being continuously lit by a series of small explosions.
With the enemy's cannon down, you can remove the four wings on their ship quite easily and without worry of your cannon being destroyed. Just keep the beam trained on one wing at a time and it will soon come off.
Keep an eye on the enemy's cannon, however, as by the time you've removed three of the wings, the enemy will have likely repaired it. When their cannon is back in order, leave the remaining wing(s) for now and concentrate on wrecking the cannon once more. When you've managed to take down the enemy's cannon for a second time, remove the remaining wings to complete the objective.
Destroying the Overland Battleship's Wings and Cannon
Objective: Storm the Ship - Again!
Your next task is to commandeer the enemy ship. There is a control unit in the hatch area of each ship. Your must capture the enemy's control unit while preventing them from capturing yours. Once captured, you must retain control of the enemy's post for one minute. If the enemy manages to control your post for one minute before you can theirs, you'll fail the mission.
The AI should be able to defend your control unit long enough for you to capture the enemy's. Once you've capture the enemy's control unit, as long as you keep control of it, it won't matter if the enemy overpowers the AI and manages to capture yours.
Drop down to the hatch area and pick up the Rocket Launcher in the northeast corner. Gun down the first few enemies that appear and attempt to capture your control unit and then exit through the doorway in the northwest corner of the area. Use your Rocket Launcher to destroy the two turret emplacements on the enemy ship's walkway. Two direct hits from a Rocket Launcher is enough to destroy one of these turrets on the Normal difficulty level.
With the two turrets out of the way, move north down the walkway and hop across to the other ship. Enter the corridor and be ready with your Machine Gun for enemy soldiers.
There is a Cakti VS defending the enemy's control unit. The VS will most likely remain around the doorway into the hatch area, allowing you to hit it through the doorway with your Rocket Launcher and grenades. If the VS isn't near the doorway, enter the room, hit it with a rocket and then duck back into the corridor to reload and recover any lost health.
Take the Control Post in the enemy's battleship and prevent them from taking yours.
After destroying the Cackti VS, enter the room and use your Rocket Launcher to clear out the enemy soldiers around the control unit. Pick up the two Rocket Launchers at the north end of the ship (behind the control unit) when you run out of ammo. Capture the enemy's control unit once the room is clear and use your Rocket Launcher to fight off the enemies that appear.
Keep control for one minute and NEVEC will initiate the battleship's self-destruct sequence. The countdown is for 90 seconds. A load of [?] Boxes will drop down from above when the countdown starts. Boxes will continue to pour in until the end of the countdown, so it's well-worth sticking around to collect them. You could end up with more than 80 boxes by the end, which makes this chapter ideal for earning Credits.
Provided you still have some Battle Gauge left, it's best to remain in the enemy's battleship until the end. You won't fail the mission if you're in the enemy's ship when it self-destructs unless the death completely depletes your team's Battle Gauge (i.e., you only have 500 points). You'll simply respawn when the ship self-destructs if you have enough left in your Battle Gauge to ride it out.
Commandeering the Overland Battleship
Objective: Team Cheer
Emote: All Players -- To earn this award during the chapter complete countdown, all four players must be performing an Emote at the same time. To perform an Emote, hold the Start button and press one of the shoulder buttons or one of the buttons on the D-Pad.
Human teammates aren't required to earn this award, however AI partners aren't always reliable. You may need to perform an Emote a few times to trigger theirs.
Mission 1
Tap the A/X button while in mid-air to use your thrusters.
Objective: Take Down All Targets!
Targets Eliminated -- Kill all of the enemies on the shuttle during the first part of the level. If you're playing solo and kill all of the enemies onboard and still don't get this GJ award, try with at least one other player.
Toss Hand Grenades at the Battle Armor-wearing soldiers at the other end of the aisle and gun down the Sepia when they break out of their cylinders.
Objective: Get Back to the Shuttle
All Aboard -- Complete the level without any deaths on your team.
Use your thrusters to land on the shuttle. Kill all of the enemies onboard, including the Battle Armor-wearing soldier at the front, and then activate the switch by the cockpit door to complete the mission.
Use your thrusters to reach the shuttle.
Mission 2
Objective: Destroy the VSs!
Zero-G: Total VS Scrapyard -- Destroy every enemy VS on the map (Sentry Turrets included) to earn this GJ award.
At the start of the level, turn around and activate the Data Post at the bottom of the ramp. Data Post 3 is in the area below the bridge further up. There are two Sentry Turrets next to this Data Post, as well as several enemy soldiers and a turret emplacement nearby. The sensor tied to the two turrets is by the railing next to the ramp leading up to them. Disabling these turrets counts toward the GJ award, so make sure you do so.
Toss grenades down at the turret emplacement if you have any left. If not, look for a Bleed VS parked north of the bridge. There may be an enemy Bleed VS nearby, so destroy it before doing anything else. When the area is clear, use the Bleed VS to take down the turret near Data Post 3.
Activate Data Post 3 and then look north. There should be an enemy Granseed VS armed two Missile Launchers below. Hop in one of the turrets beyond the T-ENG Charger and use the turret to destroy the Granseed. Kill the enemy soldiers on the platform across the way and then use your thrusters to get to the other side.
Destroy all enemy VSs to earn the Gold GJ award.
Head up the ramp to the northeast and activate Data Post 6. Look for red triangles on your Radar; these blips denote enemy VSs, most likely Cyclops. Be sure to destroy any Cyclops in the area before moving on.
There is a vacant Triseed VS in the T-ENG locker west of Data Post 6. Use your T-ENG Supplier to open the locker (about 1000 T-ENG should do it) and hop in the Triseed. There is a turret emplacement, two enemy Granseeds and an enemy Bleed VS in the adjacent area. Destroy the enemy turret with your Gatling Guns as you approach. One of the Granseeds has two Homing Lasers attached to it, so quickly close in and take down this Granseed.
Wreck the remaining enemy VSs, then hop out of the Triseed and activate Data Post 7 nearby. There are two Rocket Launcher turrets and another enemy Granseed in the tunnel to the west. There is a Grenade Launcher in the T-ENG chest on the runway across from the tunnel entrance; fetch this weapon and use it to clear out the enemy VSs in the tunnel.
Be sure you've earned the Gold GJ award before entering the tunnel. If you haven't, backtrack and look for enemy VSs you may have missed. Once you're ready to move on, cross the red line at the end of the tunnel to complete the chapter.
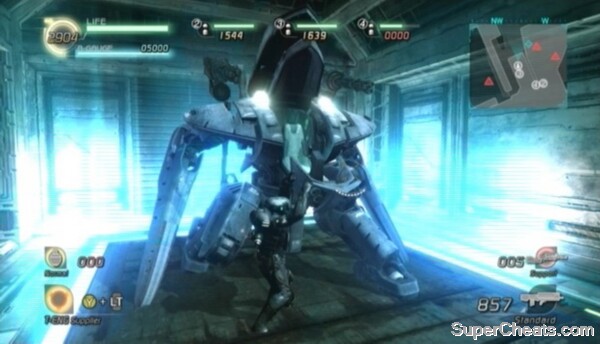
Open the T-ENG locker with your T-ENG Supplier and use the Triseed VS inside.
Area 1
Objective: Activate All Data Posts in Engineering
At the start of the level, move forward and drop down the chute in front of you. There's a Rifle on the way down, just before you reach the bottom. Pick up the Rifle and use it to kill the three enemy soldiers in the corridor at the bottom of the chute.
You're tasked with activating all five Data Posts on the map to unlock the way to the cannon's control area. Engineering consists of several floors and is heavily guarded, making this mission particularly challenging.
Objective: Break Through the Defences!
Mission Accomplished: No Casualties -- Complete the stage without any deaths on your team to earn this award. AI partner deaths do count, so this is best attempted with human allies.
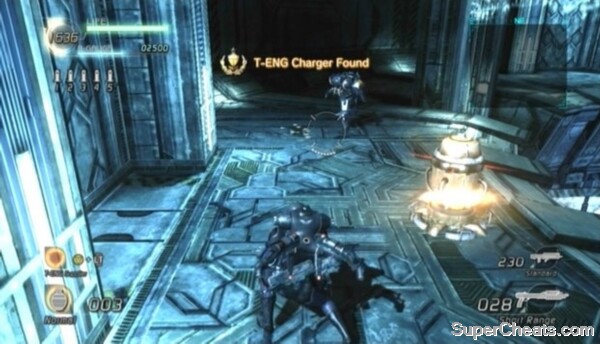
The T-ENG Charger is on the bottom floor.
Objective: Find the T-ENG Charger
T-ENG Charger Found -- Locate the T-ENG Charger on the bottom floor of Engineering. It's right by Data Post 1. Can't miss it.
When you reach the end of the corridor, use your Rifle to snuff out the two snipers further up. Use what's left of your Rifle to damage the enemy soldiers on the underground walkway. Pick up the Shotgun where the two snipers were standing once your Rifle is spent.
Data Post 1 is on the platform on the north end of the cannon's interior. Activating this Data Post will power the cannon. So, once you've activated Data Post 1, a beam of energy will periodically pulse through the cannon for the remainder of the mission. You'll die if you're standing too close to the cannon when this energy pulses through, so get out of there when you notice the beam of energy beginning to form.
The Fastrey VSs are very handy on this map, so get on one of the Fastreys at the bottom of the cannon right after the energy dissipates and fly it up and out. There are several more Fastrey VSs on the map, so don't fret if yours is destroyed.
Head up the ramp on the north side of the cannon after activating Data Post 1. Gun down the snipers with your Machine Gun on your way up. Data Post 2 is on the second floor, surrounded by snipers and one Battle Armor-wearing, Plasma Cannon-wielding soldier. Clear out the snipers with grenades and your Shotgun. Get close to the guy with the Plasma Cannon, break his armour with your Shotgun and then finish him off. Activate Data Post 2 and then get on one of the Fastrey VSs parked on this level if you need one.
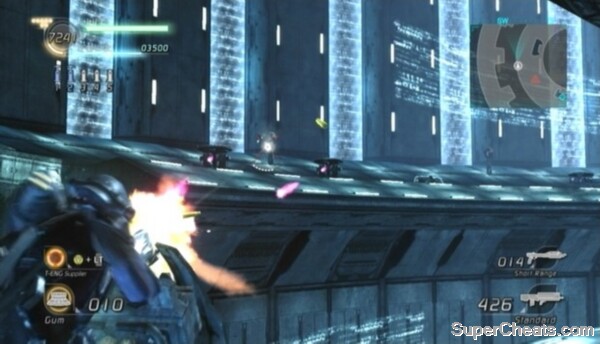
Disable the Sentry Turrets on the outer rim of each floor.
Disable the Sentry Turrets on the outer rim of the third floor before attempting to activate Data Post 3. The sensors tied to these lines of turrets are right behind them. You can destroy the sensors from afar while on your Fastrey. Zoom in by pressing up on the D-Pad and target the sensors with your Machine Gun.
There are a couple of Cyclops hovering around the third floor as well. You've faced Cyclops before, but these ones are a bit different. This type of Cyclops has a shield that covers its weak spot, but the Cyclops is unable to fire its laser while its shield is closed. When facing one of these a Cyclops, unload into it as soon as it opens its shield to fire its laser. If you're on a Fastrey, use the Shotgun at close range to deal massive damage. Don't shoot at a Cyclops while its shield is closed, as doing so will prevent it from opening it.
Make sure all of the turrets along the rim are disabled and any Cyclops destroyed before moving in to activate Data Post 3.
Objective: Fight off Enemy VSs!
All VSs Destroyed -- Destroy the two enemy Triseed VSs and all Cyclops to earn this GJ award.
Things get tough on the fourth floor. There, you'll meet two enemy Triseeds (if you haven't already). These guys are tough to take down, especially considering the only VS you have access to is a Fastrey.
As on the previous floor, clear the Sentry Turrets on the outer rim and the Cyclops flying around as well before doing anything else. Try your best to avoid the Triseeds until then.
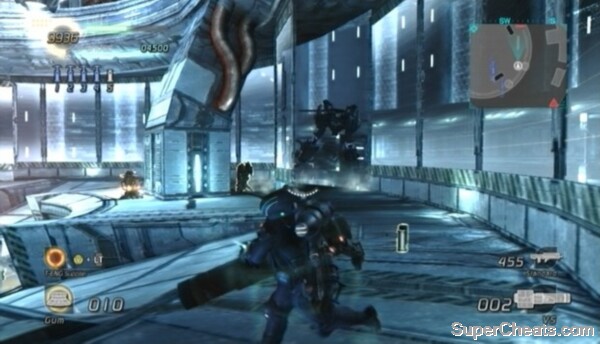
Do your best to take down the two Triseeds that appear.
There's a VS Rocket Launcher right next to Data Post 4. You can also find a Grenade Launcher in the T-ENG chest on the rim at the north end of the fifth floor. The chest is guarded by two missile turrets. The sensor to disable these two turrets is right behind the chest; target it from your Fastrey and dodge to the side to avoid the incoming missiles.
Destroying the two Triseeds is particularly difficult if you only have AI teammates, as they will most likely congregate by Data Post 5 rather than help you take down the enemy. Once you've spent the Rocket Launcher and Grenade Launcher, your best bet is to just go at them on a Fastrey with your Shotgun. You can find more Shotgun ammo at the west end of the fourth-floor walkway where Data Post 4 is.
When the area is clear of VSs, fly to the fifth level and land by Data Post 5 at the south end. Your allies will most likely have cleared the enemies here; if not, you'll face a few enemies wielding EN Lasers.
Activate Data Post 5 and head up one of the ramps toward the control booth. Cross to the north end of the top floor and step over the red line on the ramp there to end the level.
Area 2
Objective: Protect the VSs!
No VSs Lost -- Don't lose any of the Hardballer VSs to earn this GJ award. If your VS is heavily damaged, just get out and get in one of the fresh ones parked on the sidelines to avoid blowing it.
Objective: Time Challenge: Destroy the Enemy VSs!
Super Quick -- Complete the mission in seven minutes or less.
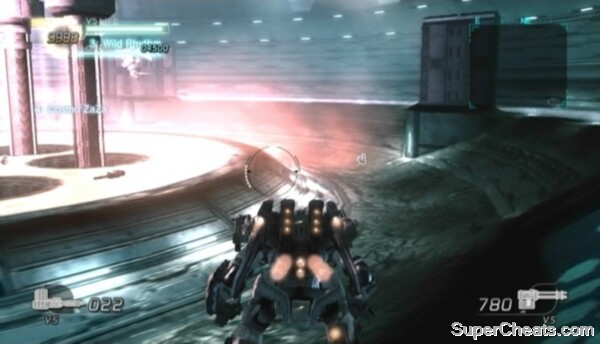
Collect the two VS Shotguns at the start.
All four players start this mission off in a Hardballer VS. You must destroy all of the enemy VSs to complete the mission. At the start of the fight, seek out the two VS Shotguns in the trench and swap your Gatling Guns for these weapons. With dual VS Shotguns, you can rip through enemy VSs quickly.
While in a Hardballer VS you can dash by clicking the Left Stick and pressing the A/X button. You can also hover by pressing the A/X button while in mid-air. The Hardballer also has a melee attack (VS Saw), which you can use by clicking and holding the Left Stick and pressing RT/R2, but stick to using your VS Shotguns with dash and hover to keep out of the enemy's line of fire.
You'll first face Granseeds and Hardballers. After that, a Cakti and a Granseed will drop in and merge to form the powerful Brocakti VS. The Brocakti's life bar is visible at the bottom of the screen. The weakest spot on this heavily-armoured VS is its back. Dash to avoid the barrage of attacks it throws at you and skate around to its weak spot. Blast it with your VS Shotguns to deal massive damage.
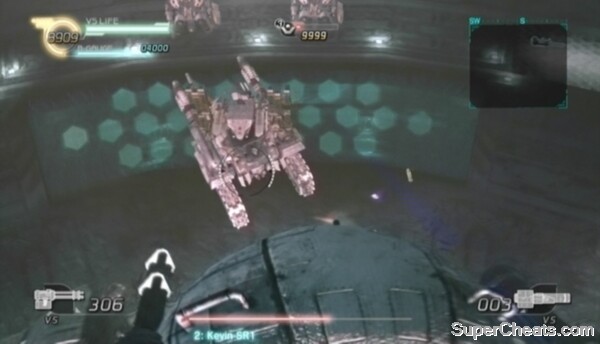
Attack the Brocakti from behind to deal the most damage.
Destroy the Brocakti to complete the chapter.
Mission 1
Blast the floating debris with your VS Lasers as you approach E.D.N. III. Destroy as much of this debris as possible, as you will be scored at the end of this sequence. Asteroids will litter your path as you get closer to the planet. Target one of the barrels attached to an asteroid to destroy it.
Mission 2, Area 1
Objective: Activate all the Data Posts!
All Data Posts Online -- Activate all seven Data Posts on the map to earn this GJ award.
To complete this mission, you just need to regroup with your teammates and cross the red line at the north end of the area. If you want to earn this GJ award, however, you'll have to track down and activate all seven Data Posts on the map, which can be a pain because the snowstorm has knocked out your Radar.
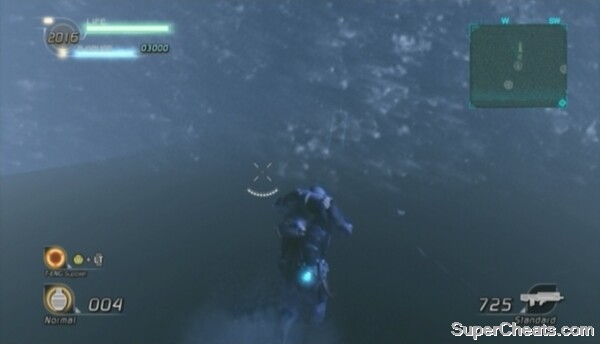
Find your way through the blizzard.
From Data Post 1 (which player one spawns by), head north to reach Data Post 2. Activate the second Data Post and then head west until you reach Data Post 4. From four, walk south to Data Post 3. After activating Data Post 3, backtrack to Data Post 1 and from there head east to Data Post 6. From six, move south until you reach Data Post 5. Finally, keep travelling northeast from five until you come to Data Post 7.
Objective: Fight Off the Akrid!
Outstanding Fighting -- Kill at least 16 akrid to earn this GJ award.
You'll encounter Dongos, Sepia and Chryatis while scouring the area for Data Posts, so be careful. Your team must kill a combined total of at least 16 of these akrid to earn the Gold GJ award.
Once you have the two Gold GJ awards, cross the red line at the north end of the map to complete the area.
Mission 2, Area 2
Objective: Endure the Akrid Siege!
Held the Outpost: No Causalities -- Successfully fight off the akrid without any deaths on your team to earn this award. AI partner deaths do count, so this is best attempted with human allies.
A mess of akrid are headed in your direction, so you'd better suit up.
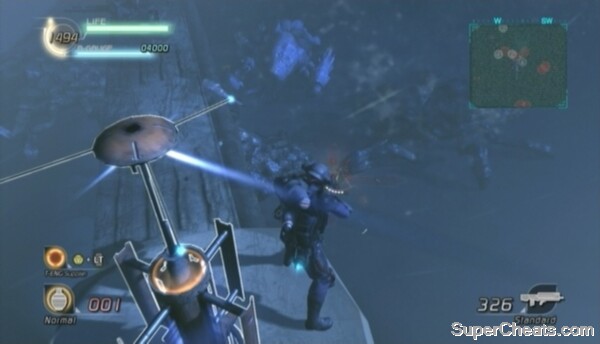
Prepare yourselves for the akrid onslaught.
Start by activating Data Post 1 on the eastern arm of the outpost, and then try not to be too troubled by the numerous red blips now appearing on your Radar. There are several powerful weapons at your disposal here. In the T-ENG chest on top of the outpost is a Gatling Gun with 800 ammo. Even better, in the T-ENG chest under the outpost is a VS Shotgun with 50 ammo. The VS Shotgun is probably your best bet, but you can also use the dual Flamethrower turret on the western arm of the outpost.
Keep fighting until the Ex-NEVEC Adjutant radios in and advises you to leave the area. Make your way north to the Over-G Akrid staging area.
Objective: Defeat the Category G!
Double G Victory -- Kill both Undeeps to earn this GJ award.
You will encounter two Undeeps -- large, terrifying, worm-like akrid -- on your way to the Over-G Akrid staging area. These beasts can swallow you whole if you aren't careful, so get in a VS quickly. There is a Hardballer VS buried in the snow mound east of Data Post 2. If you have a grenade, toss it at the snow mound and shoot the grenade to clear away the snow. You'll have to dig it up if you're out. If at any point during this fight your VS is destroyed, you can find another buried Hardballer VS south of Data Post 2.
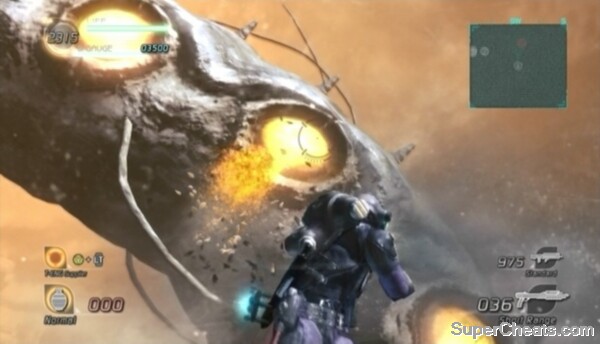
Target the T-ENG deposits on the Undeep's sides.
Target the T-ENG deposits on the Undeep's sides to damage it. The Hardballer is equipped with dual Gatling Guns, which can easily rip through the Undeep's weak spots. Target an Undeep when it raises its head or tail up out of the ground. Be sure to collect whatever T-ENG is dropped when one of its weak spots bursts. Hover (press the A/X button while in mid-air) to avoid being rammed by one of the Undeeps while they're tunnelling underground.
The Undeep can fire damaging explosive projectiles from its tail. When targeting the T-ENG deposits on the tail end of one of the Undeeps, make use of the Hardballer's dash function (click and hold the Left Stick and press the A/X button) to avoid these projectiles.
When both Undeeps are dead, cross the red line at the north end of the area to complete the mission.
Be ready for a couple of quick time events during the ensuing cutscene.
There are multiple routes you can take to the final boss. The different routes branch into each other, making them difficult to map. For the purpose of following this walkthrough, and because this route appears to be the best one, take the route used here.
The best weapons to have with you for this mission are the Shotgun and Rocket Launcher. So always scour the area for Shotgun and Rocket Launcher ammo (and grenades) before moving on. Be sure to activate all of the Data Posts in each area to add to your team's Battle Gauge.
Area 1
Objective: Wear Down the Enemy!
Critical Condition -- Kill all of the Chryatis in the area to earn this GJ award.
Objective: Close Up the Akrid Breeding Grounds!
Akrid Production Levels Near Zero -- Destroy most of the Genessa pods in the area to earn this award.

Kill the Chryatis and Genessa in the area to earn both Gold GJ awards.
There are a couple of Rocket Launchers nearby at the start of the level, and there's a VS Rocket Launcher on the ledge across from Data Post 1. As well, there's a VS Shotgun (which is very effective against Chryatis) between Data Posts 1 and 2.
Kill all of the Chryatis and the Sydsepia in the area before turning your attention to the large Genessa pods attached to the buildings surrounding the area. Sydsepia are a stronger variant of the Sepia. They have a projectile attack that traps its target in a sticky web. If you're ever hit by this projectile, rotate the Left Stick to break free. Alternatively, a teammate can shoot a trapped ally to immediately free him.
Make sure you have both Gold GJ awards (check the PDA menu by pressing the Back/Select button) and have activated both Data Posts before crossing the red line at the northwest end of the area.
Area 2
Objective: Wear Down the Enemy!
Critical Condition -- Kill all Chryatis and destroy the Over G orbs in the area to earn this GJ award.
Objective: Close Up the Akrid Breeding Grounds!
Akrid Production Levels Near Zero -- Destroy most of the Genessa pods in the area.
Upon entering the area, activate the Data Post in front of you and then take to destroying the small Genessa pods on the sides of the crater in the middle of the area to prevent more Sydsepia from spawning.
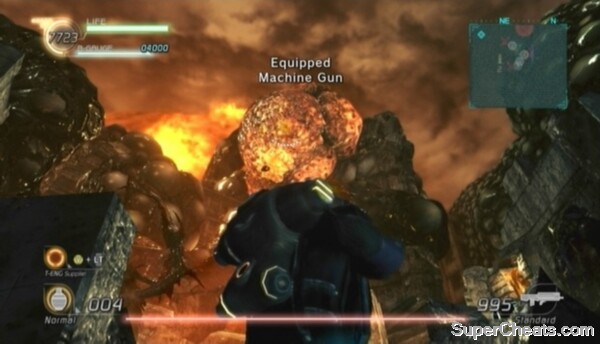
Destroy the Over G orbs.
As well as the Chryatis and Sydsepia in this area, you'll also have the Over G to contend with. The Over G appears in this area as large, orange orbs. The Over G has a one-hit kill projectile attack that requires a precisely timed roll to dodge. You're safe from this attack as long as the Over G is not aiming at you. Be ready to dodge if the black dot that appears in the middle of the orb is focusing on you. Because your character is invulnerable during the first part of the roll animation, you can dodge the projectile by rolling to the side just before it hits you. The projectile travels at a slow enough pace to give you enough time to roll out of the way.
Another of the Over G's attacks involves a large, black claw emerging from the ground to attack you. When you see a bright orange circle forming below you, get away from the circle to avoid the claw. This attack won't kill you if you're at full health, but will leave you in critical condition and may stun your character.
Hit the Over G orbs with explosive weapons such as the Rocket Launcher or Grenade Launcher (or your Shotgun if you're brave enough to get close) until they retract. Keep firing at it as long as the black eye isn't focused on you, otherwise get some distance and be ready to dodge.
A large, red blip on the Radar marks the location of an Over G orb. As soon as you see one of these red blips on your Radar, turn your attention to the orb to avoid being blindsided by one of its projectiles.
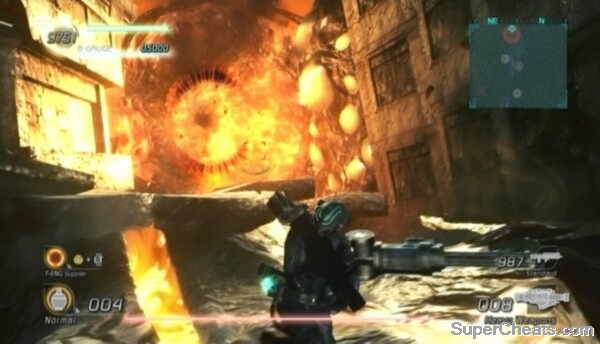
Be ready to dodge if the black eye on an Over G orb is focused on you.
There's a Grenade Launcher on a platform in the crater in the middle of the area, which you can use to destroy the first couple of Over G orbs that appear. Aim a bit above the orb (as opposed to directly at it) so the grenades will sprinkle onto it.
There are two exits to this area: one through a ruined building north of Data Post 2 and the other beyond Data Post 3. The exit to take is the one north of Data Post 2, however make sure you have activated Data Post 3 and destroyed the Over G orb that appears at the other exit to earn the 'Critical Condition' award for this area. Use the Rocket Launcher just beyond Data Post 3 to destroy this orb.
Destroying an Over G orb
When you have both Gold GJ awards and all three Data Posts are online, cross the red line north of Data Post 2 to move on to the next area.
Area 3
Objective: Wear Down the Enemy!
Critical Condition -- Kill all Chryatis in the area to earn this GJ award.
Objective: Close Up the Akrid Breeding Grounds!
Akrid Production Levels Near Zero -- Destroy most of the Genessa pods in the area to earn this award.
Head up the steps and blast the Genessa pod that spawns on the wall. Pick up the Shotgun in the corner and then activate Data Post 1. Push through to the other end of the corridor and pick up the Rocket Launcher, Shotgun ammo and grenades there. Remain where you are and fire your Rocket Launcher at the Genessa pods and Sydsepia on the building to the east. There's a Genessa pod attached to the wall right below you, which you can destroy at close range with your Shotgun and Hand Grenades.
When your Rocket Launcher ammo is spent, pick up the Gatling Gun at the end of the corridor and use it to further damage the Genessa pods in the area. Hop down when the area is clear and activate Data Post 2.
The exit to take is the one at the north end of the street. If you haven't earned the two GJ awards for this area, don't cross the red line just yet. Continue destroying the Genessa pods that spawn on the other side of the line and killing the Chryatis that appear until you've earned both awards.
Cross the red line at the north end of the street once you're ready to move on.
Area 4
At the start of this area, you'll be put in control of the Vagabundos and the Overland Battleship cannon. Charge the cannon and aim the beam at the Genessa pods and Chryatis below to destroy them.
Using the Overland Battleship Cannon
Continue using the Overland Battleship cannon to decimate the akrid until a cutscene is triggered.
Objective: Wear Down the Enemy!
Critical Condition -- Kill all Chryatis in the area to earn this GJ award.
Objective: Close Up the Akrid Breeding Grounds!
Akrid Production Levels Near Zero -- Destroy most of the Genessa pods in the area to earn this award.
This area is packed with akrid, so be careful. You'll get some help from the Vagabundos on the Overland Battleship, but they won't exactly mirror your performance.
Look for a VS Shotgun and Rocket Launcher ammo west of Data Post 2. Activate Data Post 2 and then clear the area of Chryatis and Genessa.
This area has four exits: one at the top of the slope east of Data Post 1, one at the northeast end of the road and two through the ruined building where Data Post 3 is. The exit to take out of this area is the exit east of Data Post 1, however the corridor to the other exit is full of akrid, making it a good way to get kills and rack up score.
To get to the ruined building with Data Post 3, start by anchoring up to the platform with the Disc Grenades just south of Data Post 2. From here, look northeast and anchor to the Gum Grenades on the platform there. Face northeast again and anchor over to the ledge there to reach the corridor entrance.
Proceed down the steps, activate Data Post 3 and then continue down the corridor. When you turn the corner, two Genessa will spawn on the wall there. When this happens, turn around and destroy the two Genessa that also spawned on the wall by Data Post 3. Then, continue down the corridor and use your Gum Grenades and whatever weapon you have to clear away all of the Genessa that spawn.
To find the second exit in the building, destroy the rubble blocking the corridor to the left of the stairs that lead up to the other exit.
Finding the hidden exits
When you have both Gold GJ awards for this area and all three Data Posts are online, scour the area for any Shotgun or Rocket Launcher ammo you may have missed and then cross the red line at the top of the slope east of Data Post 1 to move on to the next area.
Area 5
Objective: Wear Down the Enemy!
Critical Condition -- Kill all Chryatis and destroy the Over G orbs in the area to earn this GJ award.
Objective: Close Up the Akrid Breeding Grounds!
Akrid Production Levels Near Zero -- Destroy most of the Genessa pods in the area to earn this award.
Remain on the tentacle and fire down at the Chryatis, Genessa and Sydsepia below. Drop down when the area below is relatively clear and activate Data Post 1 at the southwest end. You will encounter more Over G orbs here, so be ready.
Clear out the akrid and destroy the Over G orbs to earn both Gold GJ awards for this area before crossing the red line at the north end.
Area 6
Objective: Wear Down the Enemy!
Critical Condition -- Kill all Chryatis and destroy the Over G orbs in the area to earn this GJ award.
Objective: Close Up the Akrid Breeding Grounds!
Akrid Production Levels Near Zero -- Destroy most of the Genessa pods in the area to earn this award.
You really need to be on the ball in this area. You're facing two Over G orbs at the start here, one on either end of the pass. Ignore the Sydsepia and Genessa for now and concentrate on destroying the two orbs. Keep monitoring each orb to determine if one is readying a projectile and aiming at you!
Destroying the two Over G orbs
After destroying both orbs, take to destroying the numerous Genessa pods in the area. Make sure you've earned by Gold GJ awards for this area before moving on. If you haven't earned the 'Akrid Production Levels Near Zero' award yet, scan the sides of the pass for any Genessa you've missed, as a couple of them are quite high up.
Area 7
Objective: Begin Mission 'Safe Return'!
Mission Accomplished: No Causalities -- Complete the mission with no deaths on your team. AI partner deaths do count, so this is best attempted with human allies.
Objective: Hurry!
Blink of an Eye -- Defeat the Over G Akrid in 15 minutes or less to earn this award.
This is the one part of the game that becomes easier with the fewer human teammates you have. To destroy the Over G akrid, you must attach one or more GPSs to it. If you're playing solo, you'll only need to attach one GPS to the Over G. Each human player in the game must attach their own GPS to the Over G. So, if you're playing with three other people, all four of you must attach a GPS to the Over G to complete the mission.
The Over G akrid's core is a large, gelatinous mass of thermal energy. To attach a GPS to it, you must damage one of its 'heads' until it crusts over. When one of the heads has been damaged enough to completely harden over it will begin to fall, at which point you can move in and attach the GPS to it.
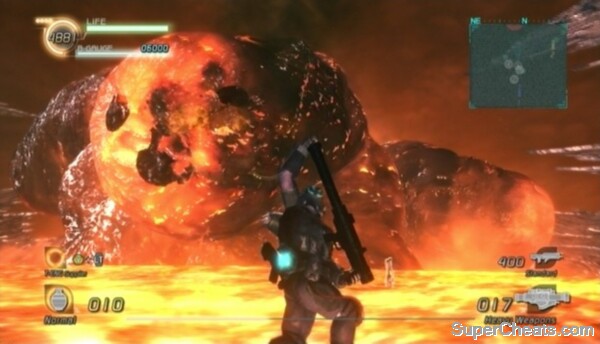
Continue firing rockets at one of the Over G's heads until it completely hardens over.
Objective: Attach the GPS!
Anchor Master -- To earn this GJ award, attach your anchor to the rocky substance covering the Over G's head when it falls (hold the X/Square button to hang on) and press the B/Circle button while hanging there to attach the GPS. Just walking up to the Over G and pressing the B/Circle button to attach the GPS won't count.
The most effective weapon against the Over G is the Rocket Launcher. There are two Rocket Launchers right in front of the Over G. Collect the Rocket Launcher and continue firing at the centre of one of the creature's heads until that head hardens over, at which point move in and attach your GPS to it.
The Over G does have a one-hit projectile attack to watch out for. Just keep an eye on the skies and if you notice a projectile coming toward you, roll to the side just as the projectile is about to hit to dodge it.
When all humans players on the team have attached a GPS to the Over G, the cannon on the NEOS space station will fire down on it, completely depleting it's health bar.
But it's not over yet! When the Over G comes back to life, fire up at the shards of the barrier to open the way for the space station. Continue breaking up the barrier until the cutscene begins to complete the chapter and win the game!
Defeating the Over G Akrid
Episode 1, Chapter 1
Mission 1
All Data Posts Online -- Activate all three data posts in the level.
Akrid Decimated-- Shoot off both of the Chryatis's arms before killing it.
Emote: All Players -- To earn this award during the area complete countdown, all four players must be performing an Emote at the same time.
Mission 2
Enemy Lines Crossed: No Casualties -- Complete the 'Break Through the Enemy Lines!' objective without any deaths on your team.
Survived the Akrid Gauntlet -- When you reach the river at the start of the stage, head north up the river rather than crossing to the other side. Make it to the other end of this route to earn the award.
Mission 3
Perfect Victory -- Do not allow the enemy to deactivate any off the Control Units once you've started the boring poles.
Episode 1, Chapter 2
Mission 1
Hidden Route Found -- Find the hidden route between the two trees along the mountainside at the south end of the starting area.
All Data Posts Online -- Activate all four Data Posts in the level.
All Akrid Defeated -- Clear the map of Akrid.
Mission 1a (via Hidden Route)
Mission Accomplished: No Casualties -- Make your way across the bridge without a single death on your team.
All Akrid Defeated -- You'll encounter a Raibee -- a large, flying bee-like creature -- a couple of Vodoggs and a Chryatis beyond Data Post 3. Kill the Raibee, Vodoggs and Chryatis to earn this award.
Mission 2
Category G Akrid Decimated -- Remove both of the Queen Chryatis's arms at least once during the course of the battle.
Team Member Rescued -- Rescue a teammate encased in ice by shooting him (or be rescued yourself)
Akrid Massacre -- After killing the Queen Chryatis, kill most of the akrid beyond the gate.
Episode 1, Chapter 3
Mission 1
Broke Through: No Casualties -- Complete the level without a single death on your team.
All Turrets Silenced -- Destroy both of the turrets in the enemy base.
VS Completely Destroyed -- Destroy the enemy Nida VS on the second level of the enemy's base.
Mission 2
Victory: No Casualties -- Complete the level without a single death on your team.
VS Strategically Used in Battle -- Kill seven enemies while piloting a VS to earn this GJ award.
Multi-seat VS Procured -- Find the Multi-seat VS parked by a tree at the north end of the road.
Mission 3
All Data Posts Activated -- Activate the three Data Posts on the map.
Total Victory -- Kill Gordiant without a single death on your team.
Core Fighter -- Damage the bright orange spire on Gordiant's back four times.
Super Leg Destroyer -- Destroy four of Gordiant's legs.
Infiltrated: All Players -- All four players must infiltrate the Category G akrid while it is stunned.
We Did It! -- To earn this GJ award during the 'chapter complete' countdown, all four players must be performing an Emote at the same time.
Episode 2, Chapter 1
Mission 1
Infiltrated: No Casualties -- Complete the level without a single death on your team.
Avoided the Searchlights -- Reach the end of the level without being caught by the searchlights.
Emote: All Players -- To earn this award during the area complete countdown, all four players must be performing an Emote at the same time.
Mission 2
S Rank -- Make it to the end of the level without tripping the security system.
All Data Posts Activated -- Activate all three Data Posts on the map.
VS Completely Destroyed -- Trip the security system at least five times and destroy the enemy Nida VS that appears at the end of the level as a result.
Mission 3
All Akrid Defeated! -- Kill the two Defolma akrid in the sewers.
All Bleed VSs Destroyed -- Destroy the three Bleed VSs in the level.
Mission 4
Not a Scratch -- Don't lose a single life by getting run over by the train.
Total Victory -- Do not allow the enemy to deactivate the post once the two-minute countdown starts.
Cyclops Annihilation -- Destroy the three Cyclops Sentries that appear around the one-minute mark.
Episode 2, Chapter 2
Mission 1
All Turrets Silenced -- Disable the three Sentry Turrets.
The Pulverizer is an Ally -- Earning this GJ award requires that an enemy is killed by the Pulverizer -- the large, spinning drills several of the conveyer belts in the factory lead to.
Objective: The Press is Your Friend!
The Press is an Ally -- Like the Pulverizer award, the requirement for this GJ award tends to happen on its own. To earn this award, an enemy must be crushed by the large factory press by the two spinning red lights along the conveyer belt beyond the Pulverizer.
Mission 2
Objective: Window Breaker
Window-Breaking Maniac -- Break at least six panes of glass outside the control room.
Gold -- Complete the area in seven minutes or less.
Enemy Forces Annihilated -- Kill every single enemy on the map.
Mission 3
Total VS Scrapyard -- Destroy at least nine VSs before the level ends.
VS Weapons Strategically Used -- Kill at least 10 enemies with VS weapons.
Episode 2, Chapter 3
Core Fighter -- Severely damage the Category G's weak spots four times.
Pile Bunker: 3 Times -- Hit Akrid X's core with the Pile Bunker three times.
Total Victory -- Deplete Akrid X's second life bar without a single death on your team.
We Did It! -- To earn this GJ award during the 'chapter complete' countdown, all four players must be performing an Emote at the same time.
Episode 3, Chapter 1
Left the Cat-G in the Dust -- Deter Red Eye using the explosive cargo on the train at least seven times.
Emote: All Players -- To earn this award once all of the T-ENG is loaded onto the Ospreys, all four players must be performing an Emote at the same time.
Episode 3, Chapter 2
Akrid Exterminated -- Kill the pair of Debouse that appear.
Avoided the Akrid -- All four players must avoid being detected by the Debouse while they are scanning the area. Stand still and don't shoot to avoid detection. The team must avoid detection together this way at least once.
Episode 3, Chapter 3
Mission 1
No Casualties -- Complete the level without a single death on your team.
All Turrets Destroyed -- Destroy the two Cannon Turrets on the enemy train.
Mission 2
Front of Train: Under 5 Minutes -- Make it to the front of the train in less than five minutes.
Mission 3
Fired Powerful Combo Shot -- Fire at least one charged shell with the railway gun.
Core Fighter -- Destroy four of the T-ENG deposits on Red Eye's sides.
Good as New -- Bring the railway gun from critical status to 50 per cent to earn this GJ award. This objective will only appear if the railway gun's condition falls to around 30 per cent.
Anti-air Expert -- Destroy at least three of Red Eye's projectiles.
Bullseye -- Hit the weak spot in Red Eye's mouth when its life bar is down to about 25 per cent to finish the job.
We Did It! -- To earn this GJ award during the 'chapter complete' countdown, all four players must be performing an Emote at the same time.
Episode 4, Chapter 1
Mission 1
Gold -- Complete the level in seven minutes or less.
All Data Posts Online -- Activate both Data Posts in the level.
Emote: All Players -- To earn this award during the area complete countdown, all four players must be performing an Emote at the same time.
Mission 2
Akrid Massacre -- Kill most of the Sepia, Bolsepia and Genessa in the tunnel with Data Post 2.
All Data Posts Online -- Activate both Data Posts in the level.
All Akrid Defeated -- Kill all three Defolma in the sewers.
Mission 3
All VSs Destroyed -- Destroy all of the enemy VSs.
Episode 4, Chapter 2
Mission 1
Gold -- Complete the level in seven minutes or less.
All VSs Destroyed -- Destroy all of the enemy VSs (three Bleed VSs, one Evax) on the map.
Mission 2
Lightning Quick -- Complete the level in seven minutes or less.
All VSs Destroyed -- Destroy all of the enemy VSs (two Nida VSs, two Evax VSs, two turret emplacements) on the map.
Not a Scratch -- Steal the sub and escape without any deaths on your team.
Episode 4, Chapter 3
Mission 1
Enemy Lines Crossed: No Casualties -- Complete the level without any deaths on your team.
All Bleed VSs Destroyed -- Destroy the three Bleed VSs that appear.
All Ospreys Destroyed -- Destroy all of the enemy Ospreys.
Mission 2
All Data Posts Online -- Activate all five Data Posts on the map.
Akrid Defeated -- Destroy the Tencale 8 at the start of the level.
All Akrid Sentries Defeated -- Destroy the four Dongo Gears (akrid VSs) in the level.
Episode 4, Chapter 4
Mission 1
Akrid Exterminated -- Kill the two Dabulas.
All VSs Destroyed -- Destroy all of the enemy VSs (two Granseeds and two Triseeds) beyond the third underwater gate.
Mission 2
All VSs Destroyed -- Destroy the three enemy VSs (two Bleeds, one Granseed) across the bridge Data Post 2 sits on.
Reached the Other Side -- Fly the Osprey or Fastrey to the rig's left block.
All Ospreys Destroyed -- Destroy the enemy Ospreys that appear when the bridge is lowered.
Episode 4, Chapter 5
Mission 1
All Data Posts Activated -- Activate all five Data Posts on the map.
All Akrid Defeated -- Kill all of the Vodoggs that break free from the cylinders in rooms 2-B and 2-C.
All Sentries Defeated -- Destroy all three of the Dongo Gears in the launch facility. Activate Data Post 5 to find the third Dongo Gear.
Mission 2
Armor Completely Destroyed -- Destroy the two weak spots on the Vital Fortress's wings, the weak spot on its front sensors and the weak spot on its rear thrusters.
Reinforcements Routed -- Kill eight of the enemy reinforcements.
Torpedoes Destroyed -- Destroy at least 20 of the torpedoes fired by Vital Fortress.
Team Member Rescued -- Free in enemy stunned by an Interdiction Torpedo by shooting them (or be rescued yourself).
Completist -- Collect 20 of the [?] Boxes dropped by Vital Fortress when it's destroyed.
Episode 5, Chapter 1
Mission 1
Super Fast -- Complete the mission in seven minutes or less.
Emote: All Players -- To earn this award during the area complete countdown, all four players must be performing an Emote at the same time.
Mission 2
Super Fast -- Complete the mission in seven minutes or less.
Total Victory -- Do not allow the enemy soldiers to deactivate either of the control units once the 90-second countdown starts.
Emote: All Players -- To earn this award during the chapter complete countdown, all four players must be performing an Emote at the same time.
Episode 5, Chapter 2
Mission 1
First -- Complete the mission in seven minutes or less to earn.
Smackdown -- Destroy all of the enemy Ospreys.
Emote: All Players -- To earn this award during the area complete countdown, all four players must be performing an Emote at the same time.
Mission 2
Full Charge Shot -- Charge the cannon to level three and fire to earn this GJ award. Earning this award requires more than one player, with one player manning the cannon and the other(s) charging the cannon by shooting T-ENG at its muzzle while it's in firing mode.
4 Legs - Excellent! -- Destroy the T-ENG deposits on all four of Baiztencale's legs.
Cleared the Skies -- Shoot down 10 of Baiztencale's explosive projectiles when it falls on the battleship.
Weak Spot Found -- Find the weak spot on Baiztencale's back (anchor onto the wing on the west side of the deck and walk across Baiztencale's arm).
Got a Bunch -- Collect 10 of the [?] Boxes Baiztencale drops.
Episode 5, Chapter 3
Way to Get the Job Done! -- Destroy the cannon and all four wings on the enemy battleship in seven minutes or less.
Emote: All Players -- To earn this award during the chapter complete countdown, all four players must be performing an Emote at the same time.
Episode 6, Chapter 1
Mission 1
Targets Eliminated -- Kill all of the enemies on the shuttle during the first part of the level.
All Aboard -- Complete the level without any deaths on your team.
Mission 2
Zero-G: Total VS Scrapyard -- Destroy every enemy VS on the map (Sentry Turrets included).
Episode 6, Chapter 2
Area 1
Mission Accomplished: No Casualties -- Complete the stage without any deaths on your team.
T-ENG Charger Found -- Locate the T-ENG Charger on the bottom floor of Engineering. It's right by Data Post 1. Can't miss it.
All VSs Destroyed -- Destroy the two enemy Triseed VSs and all Cyclops.
Area 2
No VSs Lost -- Don't lose any of the Hardballer VSs. If your VS is heavily damaged, just get out and get in one of the fresh ones parked on the sidelines to avoid blowing it.
Super Quick -- Complete the mission in seven minutes or less.
Episode 6, Chapter 3
Mission 1
None
Mission 2, Area 1
All Data Posts Online -- Activate all seven Data Posts on the map.
Outstanding Fighting -- Kill at least 16 akrid.
Mission 2, Area 2
Held the Outpost: No Causalities -- Successfully fight off the akrid without any deaths on your team.
Double G Victory -- Kill both Undeeps.
Episode 6, Chapter 4
Note: There are more GJ awards for this chapter than those listed here. Replay the chapter and take different routes to reach new areas. The awards listed below pertain to the route described in the walkthrough for this chapter.
Area 1
Critical Condition -- Kill all of the Chryatis in the area.
Akrid Production Levels Near Zero -- Destroy most of the Genessa pods in the area.
Area 2
Critical Condition -- Kill all Chryatis and destroy the Over G orbs in the area.
Akrid Production Levels Near Zero -- Destroy most of the Genessa pods in the area.
Area 3
Critical Condition -- Kill all Chryatis in the area.
Akrid Production Levels Near Zero -- Destroy most of the Genessa pods in the area.
Area 4
Critical Condition -- Kill all Chryatis in the area.
Akrid Production Levels Near Zero -- Destroy most of the Genessa pods in the area.
Area 5
Critical Condition -- Kill all Chryatis and destroy the Over G orbs in the area.
Akrid Production Levels Near Zero -- Destroy most of the Genessa pods in the area.
Area 6
Critical Condition -- Kill all Chryatis and destroy the Over G orbs in the area.
Objective: Close Up the Akrid Breeding Grounds!
Akrid Production Levels Near Zero -- Destroy most of the Genessa pods in the area.
Area 7
Mission Accomplished: No Causalities -- Complete the mission with no deaths on your team.
Blink of an Eye -- Defeat the Over G Akrid in 15 minutes or less.
Anchor Master -- Attach your anchor to the rocky substance covering the Over G's head when it falls (hold the X/Square button to hang on) and press the B/Circle button while hanging there to attach the GPS. Just walking up to the Over G and pressing the B/Circle button to attach the GPS won't count.
To earn these awards, you must complete the described task on one life. Your streak will reset if you die.
Co-op 1
Data Posts Activated: 7 Data Post Streak -- Activate seven Data Posts in one life.
T-ENG Boost: 1000 Supplied -- Use your T--ENG Supplier to give 1000 T--ENG to an ally who has less than 500 T--ENG.
Shield Support: 1000 Guard Points -- Block 1,000 damage with a Shield.
Injection Gun Support: 5 Players -- Hit five allies with an Injection Gun.
Regen Grenade Support: 5 Players -- Restore the health of five players with a thrown Regen Grenade.
V Device Support: 5 Players -- Support five players with the V Device.
Data Post Activation: 5 Kill Streak -- Kill five enemies while they're activating Data Posts.
Support Weapon Transform Attack: 10 Kill Streak -- Kill 10 enemies with a support weapon.
Team Osprey Battle: 5 Kill Streak -- Kill five enemies while riding in a Osprey with another player.
Team Drion Battle: 5 Kill Streak -- Kill five enemies while riding in a Drion with at least one player.
Team VS Battle: 5 Kill Streak -- Kill five enemies while in or hanging off of a VS with another player.
Team Merged VS Battle: 5 Kill Streak -- Kill five enemies while in the Brocakti merged VS.
Co-op 2
Team Emote: 8 Players -- Have eight players performing an emote at the same time.
Anchor Attack: 5 Attacks -- Knock down another player five times by hitting them with your anchor.
Warp Field Opened -- Throw a Warp Grenade.
Leader Heads: 5 Kill Streak -- Kill five players with Leader Heads (the character parts unlocked by attaining a faction Career Level of 90 or 99).
Kill Streak Ended -- End another player's kill streak by ending them.
Points Earned: 10 Points -- Have 10 points in a Points match online.
5-Point Opponents: 5 Kill Streak -- Kill five players with five points in a Points match online.
Akrid Egg Goal: 3 Goal Streak -- Score the Akrid Egg for your team three times in an Akrid Egg Battle match online.
Akrid Eggs Intercepted: 5 Interception Streak -- Kill five players carrying your team's Akrid Egg in an Akrid Egg Battle match online.
5 Fugitive Kill Streak -- Kill five Fugitives in a Fugitive match online.
5 Hunter Kill Streak -- Kill five Hunters while a Fugitive in a Fugitive match online.
VS Leader Killed -- Destroy the enemy leader VS in a VS Annihilator match online.
To earn these awards, you must complete the described task on one life. Your streak will reset if you die.
Weapons
Standard Weapon: 20 Soldier Kill Streak -- Kill 20 enemy soldiers with a Standard weapon.
Standard Weapon: 30 S-size Akrid Kill Streak -- Kill 30 S-size Akrid with a Standard weapon
Standard Weapon: 10 M-size Akrid Kill Streak -- Kill 10 M-size Akrid with a Standard weapon.
Standard Weapon: 7 VS Kill Streak -- Destroy seven VSs with a Standard weapon.
Short Range Weapon: 20 Soldier Kill Streak -- Kill 20 enemy soldiers with a Short Range weapon.
Short Range Weapon: 30 S-size Akrid Kill Streak -- Kill 30 S-size Akrid with a Short Range weapon.
Short Range Weapon: 10 M-size Akrid Kill Streak -- Kill 10 M-size Akrid with a Short Range weapon.
Short Range Weapon: 7 VS Kill Streak -- Destroy seven VSs with a Short Range weapon.
Long Range Weapon: 20 Soldier Kill Streak -- Kill 20 enemy soldiers with a Long Range weapon.
Long Range Weapon: 20 S-size Akrid Kill Streak -- Kill 20 S-size Akrid with a Long Range weapon.
Long Range Weapon: 10 M-size Akrid Kill Streak -- Kill 10 M-size Akrid with a Long Range weapon.
Long Range Weapon: 7 VS Kill Streak -- Destroy seven VSs with a Long Range weapon.
Heavy Weapons: 20 Soldier Kill Streak -- Kill 20 enemy soldiers with Heavy Weapons.
Heavy Weapons: 20 S-size Akrid Kill Streak -- Kill 20 S-size Akrid with Heavy Weapons.
Heavy Weapons: 10 M-size Akrid Kill Streak -- Kill 10 M-size Akrid with Heavy Weapons.
Heavy Weapons: 7 VS Kill Streak -- Destroy seven VSs with Heavy Weapons.
Grenades
Normal Grenade: 15 Soldier Kill Streak -- Kill 15 enemy soldiers with Normal grenades.
Normal Grenade: 20 S-size Akrid Kill Streak -- Kill 20 S-size Akrid with Normal grenades.
Normal Grenade: 7 M-size Akrid Kill Streak -- Kill 7 M-size Akrid with Normal grenades.
Normal Grenade: 7 VS Kill Streak -- Destroy seven VSs with Normal grenades.
Gum Grenade: 15 Soldier Kill Streak -- Kill 15 enemy soldiers with Gum grenades.
Gum Grenade: 20 S-size Akrid Kill Streak -- Kill 20 S-size Akrid with Gum grenades.
Gum Grenade: 7 M-size Akrid Kill Streak -- Kill 7 M-size Akrid with Gum grenades.
Gum Grenade: 7 VS Kill Streak -- Destroy seven VSs with Gum grenades.
Disc Grenade: 15 Soldier Kill Streak -- Kill 15 enemy soldiers with Disc grenades.
Disc Grenade: 20 S-size Akrid Kill Streak -- Kill 20 S-size Akrid with Disc grenades.
Disc Grenade: 7 M-size Akrid Kill Streak -- Kill 7 M-size Akrid with Disc grenades.
Disc Grenade: 7 VS Kill Streak -- Destroy seven VSs with Disc grenades.
Release Grenade: 15 Soldier Kill Streak -- Kill 15 enemy soldiers with Release grenades.
Heavy Weapon: 20 S-size Akrid Kill Streak -- Kill 20 S-size Akrid with Release grenades.
Heavy Weapon: 7 M-size Akrid Kill Streak -- Kill seven M-size Akrid with Release grenades.
Heavy Weapon: 7 VS Kill Streak -- Destroy seven VSs with Release grenades.
Techniques
Kill Streak -- Kill 50 enemies.
Headshot! 12 Kill Streak -- Kill 12 enemy soldiers by headshot.
Jump Shot! 12 Kill Streak -- Kill 12 enemy soldiers while in mid-air after jumping.
Swim For It! 12 Kill Streak -- Kill 12 enemy soldiers while swimming (tap the A/X button while underwater).
Rocketman! 12 Kill Streak -- Kill 12 enemy soldiers while after using your Thrusters or on a Fastrey VS while in space in Episode 6.
Eliminated Immobilized Targets: 5 Kill Streak -- Kill five enemy soldiers by first immobilizing them with Plasma Grenades or a weapon that can stun (such as the EN Laser or Shotgun II).
Injection Gun - Attack: 5 Kill Streak -- Support one or more players with an attack shot from the Injection Gun and have those players collectively kill five enemies while the effect is active.
Injection Gun - Defence: 5 Kill Streak -- Support one or more players with a defence shot from the Injection Gun and have those players collectively kill five enemies while the effect is active.
VS Weapon: 30 Kill Streak -- Kill 30 enemies using VS weapons.
15 VS Kill Streak -- Destroy 15 VSs.
Piloting VS: 15 Kill Streak -- Kill 15 enemies while in a VS.
Akrid Rider: 15 Kill Streak -- Kill 7 enemies while on an Akrid VS (Dongo Gear, Tencale 8, or Battle Neegal).
To unlock a reward, attain the indicated Career Level while playing as that faction.
Full customization allows you to use character parts from other factions.
Rounders
Lv. 10 - Waysider A parts
Lv. 20 - Mercenary B parts
Lv. 30 - Shuriken (Disc)
Lv. 40 - Mercenary C parts
Lv. 50 - Hand Cannon SP (Heavy)
Lv. 60 - Waysider B parts
Lv. 70 - Gun Sword SP (Standard)
Lv. 80 - Full Customization for Rounders
Lv. 90 - Waysider Leader Head
Lv. 99 - Mercenary Leader Head
Fight Junkies
Lv. 10 - Sandraider A parts
Lv. 20 - Vagabundo A parts
Lv. 30 - Jungle Pirate B parts
Lv. 40 - Sandraider B parts
Lv. 50 - Vagabundo B parts
Lv. 60 - Sandraider C parts
Lv. 70 - Jungle Pirate C parts
Lv. 80 - Full Customization for Fight Junkies
Lv. 90 - Vagabundo Leader Head
Lv. 99 - Jungle Pirate Leader Head
Snow Pirate Elites
Lv. 10 - Carpetbagger A parts
Lv. 20 - Mountain Pirate parts
Lv. 30 - Hunter parts
Lv. 40 - Sea Dog parts
Lv. 50 - Akrid Launcher (Short Range)
Lv. 60 - Carpetbagger B parts
Lv. 70 - Bug Rancher parts
Lv. 80 - Full Customization for Snow Pirate Elites
Lv. 90 - Carpetbagger Leader Head
Lv. 99 - Crimson Pirate Leader Head
NEVEC Black Ops
Lv. 10 - NEVEC A parts
Lv. 20 - NEVEC B parts
Lv. 30 - Plasma Gun SP (Long Range)
Lv. 40 - NEVEC C parts
Lv. 50 - Plasma Cannon SP (Heavy Weapon)
Lv. 60 - NEVEC D parts
Lv. 70 - V Device SP (Support)
Lv. 80 - Full Customization for NEVEC Black Ops
Lv. 90 - NEVEC Leader Head
Lv. 99 - NEVEC Leader 2 Head
Femme Fatales
Lv. 10 - Jungle Femme Fatal parts
Lv. 20 - Waysider Femme Fatal parts
Lv. 30 - Firecracker (Release)
Lv. 40 - Desert Femme Fatal
Lv. 50 - Shotgun SP (Short Range)
Lv. 60 - NEVEC Femme Fatal
Lv. 70 - Energy Gun SP (Standard)
Lv. 80 - Full Customization for Femme Fatales
Lv. 90 - Desert Femme Fatale Leader Head
Lv. 99 - Carpetbagger Femme Fatale Leader Head
All of these abilities are unlocked through the LP2 Slot Machine, accessible via the My Page section of the game's main menu.
One Slot
Conserve T-ENG: Prevents constant consumption of thermal energy.
Lifesaver: Prevents your life gauge from diminishing when your thermal energy level reaches zero.
Fire Power I: Increases the strength of your attacks, but also increases the damage you take.
Defence I: Reduces the damage you take, but the trade-off is weaker attacks.
Melee Attack I: Increases the strength of your close-range attacks.
Grenades I: Increases the power of your grenades.
Critical I: Increases the chances of scoring a critical hit, but also increases the damage you take.
Head Start (Ammo): Begin with the maximum amount of ammo for your default weapon at the game's start and every time you respawn.
Head Start (Normal): Begin with the maximum number of Normal grenades.
Head Start (Gum): Begin with the maximum number of Gum grenades.
Head Start (Disc): Begin with the maximum number of Disc grenades.
Head Start (Release): Begin with the maximum number of Release grenades.
Head Start (Plasma): Begin with the maximum number of Plasma grenades.
T-ENG Supply: Begin with an extra amount of thermal energy at the game's start, and every time you respawn.
Soundless: Silences your footsteps, making it more difficult for enemies to find you in the Campaign mode.
T-ENG Weapon Master I: Drastically reduces the amount of thermal energy required to use T-ENG-powered weapons.
VS Master I: Reduces the amount of thermal energy used when operating a VS, and also speeds up repair time.
VS Takedown: Enhances ability to pierce a VS's armoured exterior, and increases damage to weak points.
Invisible: Prevents your position from being shown on the enemy's radar.
Quick Return: Shortens respawn time and time needed to activate Data Posts.
Recovery I: Increases amount of life recovered when using the Harmonizer. Used automatically in Multiplayer.
Sprinter I: Extends the length of time you can dash.
Evasion I: Extends the period of invincibility when evading, but also increases the amount of counter damage you take if hit.
Special Guard I: Protects you from the effects of certain types of damage.
Points I: Increases the number of Career Points you earn.
Two Slots
Fire Power II: A more powerful version of Fire Power I. Further increases your attack power as well as the damage you take.
Defence II: A more effective version of Defence I. Further reduces the damage you take, but also makes your attacks even weaker.
Melee Attack II: A more powerful version of Melee Attack I that further increases the strength of your close-range attacks.
Grenades II: A more powerful version of Grenades I that further increases the power of your grenades.
Critical II: A more powerful version of Critical I. Further increases your chances of scoring a critical hit, as well as the damage you take.
T-ENG Weapon Master II: An advanced version of T-ENG Weapon Master I. T-ENG powered weapons will require even less thermal energy to use.
VS Master II: An advances version of VS Master I. No thermal energy is used when operating a VS, and repair time is sped up even more.
Recovery II: A more powerful version of Recovery I. Further increases amount of life recovered when using the Harmonizer. Used automatically in Multiplayer.
Sprinter II: An advanced version of Sprinter I. Extends the length of time you can dash even further.
Evasion II: A more powerful version of Evasion I. Further extends the period of invincibility when evading, but also further increases the amount of counter damage taken if hit.
Special Guard II: A more effective version of Special Guard I. Increases the variety of effects that you are protected from.
Tough Get Going: Increase your attack power when your life gauge is reduced to a certain level.
Survival: You will be left with a sliver of health even when fatally injured. Does not work on headshots or falls.
Self-Inflicted Injury: Increases the damage you take, but also increases the number of Career Points you earn.
Lag Start: Begins the game with a minimal amount of thermal energy and a limited number of weapons, but also increase the number of Career Points you earn.
Superstar: Your radar won't work but your enemies' will. In co-op it makes you an easy target, but it increases the number of Career Points you earn
Points II: A superior version of Points I. Further increases the number of Career Points you earn.
Standard
Machine Gun
Unlocked: Initially unlocked
Description: Basic weapon of the Standard set. It's the most practical and versatile weapon available.
Machine Gun II
Unlocked: Slot Machine
Description: Provides a wider shot spread than the standard Machine Gun
Machine Gun SP
Unlocked: Play the Lost Planet 2 MP demo
Description: A machine gun that fires a three-round burst. Pull the trigger once to unleash three rounds at a time.
Gun Sword
Unlocked: Slot Machine
Description: A machine gun designed for melee attacks. Press B/Circle to unsheathe and attack.
Gun Sword SP
Unlocked: Attain a Career Level of 70 for Rounders
Description: A more powerful version of the Gun Sword. Repeatedly tap B/Circle to unleash multiple attacks.
Energy Gun
Unlocked: Slot Machine
Description: Fires a concentrated beam of thermal energy. Holding RT/R2 allows you to charge a stronger shot
Energy Gun SP
Unlocked: Attain a Career Level of 70 for Femme Fatales
Description: Shots fired home in on targets and may stun on hit. Deals less damage than the standard Energy Gun.
Short Range
Shotgun
Unlocked: Initially unlocked
Description: Basic weapon of the Short Range set. The wide spread means it's possible to hit even if your aim is a little off.
Shotgun II
Unlocked: Slot Machine
Description: A shotgun variant that momentarily stuns an enemy after impact.
Shotgun SP
Unlocked: Attain a Career Level of 50 for Femmes Fatales
Description: Deals more damage than the basic Shotgun, but at the cost of accuracy and range.
Revolver
Unlocked: Slot Machine
Description: A good weapon for close-quarters combat. Packs a powerful punch, but has a slow rate of fire.
Gold Revolver
Unlocked: 10,000 Credit Slot Machine (unlock all items in the 2,000 credit Slot Machine)
Description: Like the Revolver, but gold.
Flame Thrower
Unlocked: Slot Machine
Description: This is a potent weapon in close quarters. Release a stream of flames when holding RT/R2.
Akrid Launcher
Unlocked: Attain a Career Level of 50 for Snow Pirate Elites
Description: Shoots Trilid.
Long Range
Rifle
Unlocked: Initially unlocked
Description: Basic weapon of the Long Range set. Zoom in on distant targets when you want to stay out of harm's way.
Rifle II
Unlocked: Slot Machine
Description: Zoom-enabled rifle that fires five-round bursts. Pull the trigger once to unleash five rounds at a time.
Rifle SP
Unlocked: Slot Machine
Description: More damage and higher accuracy than the standard Rifle, but only one shot per clip.
Gold Rifle
Unlocked: 10,000 credit Slot Machine (unlock all items in the 2,000 credit Slot Machine)
Description: Like the standard Rifle, but Gold.
Plasma Gun
Unlocked: Slot Machine
Description: A sniper rifle that fires thermal energy shots. Weaker than a standard rifle, but ammo lasts as long as your T-ENG does.
Plasma Gun II
Unlocked: Slot Machine
Description: A plasma gun for melee attacks. Hold RT/R2 to charge the thermal energy blade and then press B/Circle to attack.
Plasma Gun SP
Unlocked: Attain a Career Level of 30 for NEVEC Black Ops
Description: A type of plasma gun. This automatic weapon fires T-ENG shots like a machine gun.
Heavy Weapons
Rocket Launcher
Unlocked: Initially unlocked
Description: Basic weapon of the Heavy Weapons set. It fires a small but powerful warhead.
Rocket Launcher II
Unlocked: Slot Machine
Description: Fires a rocket that travels more slowly than the standard rocket, but makes up for this with a homing function.
Rocket Launcher SP
Unlocked: Slot Machine
Description: Rockets fired from this weapon bounce off of walls once before exploding. Has less range and deals less damage on a direct hit than the standard Rocket Launcher, but has increased blast damage.
Hand Cannon
Unlocked: Slot Machine
Description: Fires a special type of squash-head shell. The head collapses upon impact but stays attached to the target before exploding.
Hand Cannon SP
Unlocked: Attain a Career Level of 50 for Rounders
Description: Fires a special type of squash-head shell. The flame produced in the explosion can pierce through walls.
Plasma Cannon
Unlocked: Slot Machine
Description: A small cannon that fires a concentrated T-ENG shot. Essentially, a thermal energy-powered rocket launcher.
Plasma Cannon SP
Unlocked: Attain a Career Level of 50 for NEVEC Black Ops
Description: A type of Plasma Cannon. Needs to be fired from a close range but can fire three T-ENG shots at once.
Support
Shield
Unlocked: Initially unlocked
Description: A shield that protects from frontal attacks. Hold RT/R2 to set up the shield.
Shield SP
Unlocked: Slot Machine
Description: A variety of the shield. Works the same as a regular shield but has a different design.
Shield SP II
Unlocked: Have a Lost Planet: Extreme Condition save file
Description: Another variety of the shield. Works the same as a regular shield but with a camouflage paint job.
Injection Gun
Unlocked: Slot Machine
Description: Fires a special T-ENG shot. Shoot an ally to boost their attack power. Press B/Circle to switch to a defence-boosting shot.
Injection Gun II
Unlocked: Slot Machine
Description: A type of Injection Gun. Allies shot won't need to use T-ENG. Use B/Circle to switch to a shot that fully restores health.
V Device
Unlocked: Slot Machine
Description: Enables radar functionality without needing to activate a Data Post. By holding RT/R2 you can expand a field that reveals the location of hidden enemies.
V Device SP
Unlocked: Attain a Career Level of 70 for NEVEC Black Ops
Description: Allows you to cloak and become invisible on the Radar.
Normal Grenades
Hand Grenade I
Unlocked: Initially unlocked.
Description: A regular hand grenade. Powerful and easily thrown, it will explode with more force when shot.
Hand Grenade II
Unlocked: Slot Machine
Description: Similar to the standard Grenade, but this one is rolled instead of thrown.
Hand Grenade III
Unlocked: Slot Machine
Description: Similar to the standard Grenade, but won't detonate when shot. Useful in a heated firefight.
Incendiary Grenade
Unlocked: Slot Machine
Description: Will set enemies caught in the blast on fire for a short period of time.
Buster Grenade
Unlocked: Slot Machine
Description: Creates a massive explosion, but cannot be detonated by bullets.
Gum Grenades
Gum Grenade
Unlocked: Initially unlocked
Description: Attach it to an object and watch it detonate. Attach more than one for a bigger bang.
Gum Grenade II
Unlocked: Slot Machine
Description: A gum grenade that can be thrown farther. Takes longer to detonate than the standard Gum grenade.
Gum Grenade III
Unlocked: Slot Machine
Description: Similar to the standard Gum grenade but won't detonate when shot. Not as powerful but keeps you safe.
Chameleon Grenade
Unlocked: Slot Machine
Description: A grenade equipped with a cloaking function. Use Zoom to switch your POV to the grenade's, and use LT/L2 to detonate.
Spark Grenade
Unlocked: Slot Machine
Description: If stuck to a wall, this grenade can damage enemies on the other side.
Disc Grenades
Disc Grenade
Unlocked: Initially unlocked
Description: A disc-shaped grenade perfect for throwing. Creates a wide-reaching explosion.
Disc Grenade II
Unlocked: Slot Machine
Description: A disc grenade that is slower in the air, and has a larger timer.
Disc Grenade III
Unlocked: Slot Machine
Description: Similar to the standard Disc grenade but won't detonate when shot. Not as powerful but keeps you safe.
Energy Grenade
Unlocked: Slot Machine
Description: The explosion from this grenade will oust a VS pilot.
Shuriken
Unlocked: Attain a Career Level of 30 for Rounders
Description: Not a concussive grenade, but one that slices through objects using a T-ENG field.
Release Grenades
Dummy Grenade
Unlocked: Initially unlocked
Description: Creates a dummy human decoy that shows up on radar screens as a real human. Shoot it to detonate it.
Dummy Grenade II
Unlocked: Slot Machine
Description: Similar to the standard Dummy grenade, but stays in one spot after being deployed.
Dummy Grenade III
Unlocked: Slot Machine
Description: Sets up a stationary decoy that shoots a machine gun for a limited amount of time.
Balloon Grenade
Unlocked: Slot Machine
Description: After being thrown, this grenade deploys a balloon that releases a powerful acid upon detonation.
Firecracker
Unlocked: Attain a Career Level of 30 for Femme Fatales
Description: A grenade that explodes once on land and then in the air, creating fireworks. Cannot be detonated with bullets.
Plasma Grenades
Plasma Grenade
Unlocked: Initially unlocked
Description: Releases a plasma field that shocks opponents. Will also momentarily disable a VS's control system.
Plasma Grenade II
Unlocked: Slot Machine
Description: Similar to the standard Plasma grenade, but with a longer timer.
Plasma Grenade III
Unlocked: Slot Machine
Description: Similar to the standard Plasma grenade, but won't detonate when shot.
Regen Grenade
Unlocked: Slot Machine
Description: Creates a large green orb that restores the health of any characters (friend or foe) inside.
Warp Grenade
Unlocked: Slot Machine
Description: When thrown, this grenade creates a warp gate between where the grenade landed and where it was thrown.
Character Skins
Marcus Fenix and Dom Santiago (Xbox 360): Complete all chapters on any difficulty level.
Albert Wesker (Xbox 360 and PlayStation 3): Have a Resident Evil 5 save file.
Frank West (Xbox 360): Have a Dead Rising save file.
Frank West (PlayStation 3): Have a Lost Planet: Extreme Condition save file.
ServBot Head (Xbox 360): Have a Dead Rising save file.
ServBot Head (PlayStation 3): Have a Lost Planet: Extreme Condition save file.
Teddy Bear Backpack (Xbox 360): Have Dead Rising save file.
Teddy Bear Backpack (PlayStation 3): Have a Lost Planet: Extreme Condition save file.
Misc
Extreme Difficulty Level: Complete all chapters on Hard.
Use Custom Characters in Campaign: Complete all chapters once on any difficulty level. To toggle custom characters, press the X/Square button on the Character Selection screen in the My Page section of the game's main menu.
10,000 Credit Slot Machine: Collect all of the items in the 2,000 credit Slot Machine. This slot machine yields character parts you would normally need to unlock by levelling up factions.
AI Enemy Battle: Complete all Training levels (Basic and Advanced) with at least a Bronze medal. This mode is like online battle, but with AI opponents.
Lost Planet 2 features a total of 50 different achievements. Each achievement unlocked contributes a certain amount of points to your overall Gamerscore. You can acquire a grand total of 1000 gamer points by playing Lost Planet 2.
1. Complete Prologue A
Complete Episode 1 Chapter 0-A.
10 points
2. Complete Prologue B
Complete Episode 1 Chapter 0-B.
10 points
3. Complete Episode 1
Complete all the chapters in Episode 1.
10 points
4. Rookie
Complete the game on Easy.
10 points
5. Soldier
Complete the game on Normal.
10 points
6. Super Soldier
Complete the game on Hard.
15 points
7. Snow Pirate
Achieve a Career Level of Lv. 10.
10 points
8. Welcome to the Battle!
Play one Online match.
10 points
Secret Achievements
9. Complete Episode 2
Complete all the chapters in Episode 2.
10 points
10. Complete Episode 3
Complete all the chapters in Episode 3.
10 points
11. Complete Episode 4
Complete all the chapters in Episode 4.
10 points
12. Complete Episode 5
Complete all the chapters in Episode 5.
10 points
13. Complete Episode 6
Complete all the chapters in Episode 6.
10 points
14. 100-Chapter Playback
Play through 100 chapters.
10 points
15. 200-Chapter Playback
Play through 200 chapters.
20 points
16. 300-Chapter Playback
Play through 300 chapters.
30 points
17. Instrument of Destruction
Defeat 9999 enemies (Akrid, VS, or enemy soldiers).
20 points
18. Ultimate Warrior
Complete the game on Extreme.
20 points
19. Snow Pirate Warrior
Achieve a Career Level of Lv. 30.
15 points
20. Snow Pirate Leader
Achieve a Career Level of Lv. 50.
20 points
21. Snow Pirate Commander
Achieve a Career Level of Lv. 80.
25 points
22. Rounder Chief
Achieve a Career Level of Lv. 99 with the Rounders.
30 points
23. Fight Junkie Berserker
Achieve a Career Level of Lv. 99 with the Fight Junkies.
30 points
24. First Among Snow Pirate Elites
Achieve a Career Level of Lv. 99 with the Snow Pirate Elites.
30 points
25. NEVEC Black Ops Commander
Achieve a Career Level of Lv. 99 with the NEVEC Black Ops.
30 points
26. Femmes Fatales Faction Leader
Achieve a Career Level of Lv. 99 with the Femmes Fatales.
30 points
27. Quintuple Factionalism
Achieve a Career Level of Lv. 99 with all 5 factions.
50 points
28. A Thousand Unmarked Graves
Defeat 1000 enemy soldiers.
15 points
29. Endangered Species
Defeat 3000 S- and M-sized Akrid.
15 points
30. VS Graveyard
Destroy 100 enemy VSs.
15 points
31. It's So Easy
Play any combination of chapters 39 times on Easy.
20 points
32. Monster Hunter
Defeat 30 bosses.
20 points
33. Thermal Energy Reactor
Accumulate a combined total of more than 99999 units of thermal energy.
10 points
34. Me Against the World
Complete 93 areas while online without the help of other players.
10 points
35. Prove Your Mettle
Unlock all the Abilities.
25 points
36. Weapons Master
Unlock all regular weapons and grenades.
25 points
37. Honeymoon Period
Celebrate your six-month anniversary with LOST PLANET 2.
20 points
38. A Collector's Collector
Unlock all items (Weapons, Abilities, Noms de Guerre).
50 points
39. All in a Day's Work
Achieve 100 different Good Job awards.
20 points
40. Warrior of Many Names
Unlock 100 Noms de Guerre.
20 points
41. Centurion
Win 100 Online Ranked matches.
15 points
42. Slayer of a Thousand Men
Achieve 1000 kills in Online matches.
15 points
43. Hot Shot
Gain promotion to the rank of Gunner.
15 points
44. Two is Better Than One
Complete 386 areas with one or more other players.
10 points
45. Let's Go VS Force!
Merge two VS units.
10 points
46. Professional Turncoat
Fight for a number of different factions in Faction Match.
10 points
47. War Vet
Play 500 Online matches.
15 points
48. Death Wish
Die more than 444 times.
10 points
49. Good Job, Soldier
Earn all the Good Job awards.
40 points
50. Committed 'til the End
Earn all the Good Job awards, items, and Career Levels available in the game.
100 points
Lost Planet 2 features a total of 51 unlockable trophies. There are 39 Bronze trophies, 9 Silver trophies, two Gold trophies, and a Platinum trophy unlocked by earning every other trophy available in Lost Planet 2.
1. Complete Prologue A
Complete Episode 1 Chapter 0-A.
Bronze
2. Complete Prologue B
Complete Episode 1 Chapter 0-B.
Bronze
3. Complete Episode 1
Complete all the chapters in Episode 1.
Bronze
4. Rookie
Complete the game on Easy.
Bronze
5. Soldier
Complete the game on Normal.
Bronze
6. Super Soldier
Complete the game on Hard.
Bronze
7. Snow Pirate
Achieve a Career Level of Lv. 10.
Bronze
8. Welcome to the Battle!
Play one Online match.
Bronze
Secret Trophies
9. Complete Episode 2
Complete all the chapters in Episode 2.
Bronze
10. Complete Episode 3
Complete all the chapters in Episode 3.
Bronze
11. Complete Episode 4
Complete all the chapters in Episode 4.
Bronze
12. Complete Episode 5
Complete all the chapters in Episode 5.
Bronze
13. Complete Episode 6
Complete all the chapters in Episode 6.
Bronze
14. 100-Chapter Playback
Play through 100 chapters.
Bronze
15. 200-Chapter Playback
Play through 200 chapters.
Bronze
16. 300-Chapter Playback
Play through 300 chapters.
Silver
17. Instrument of Destruction
Defeat 9999 enemies (Akrid, VS, or enemy soldiers).
Bronze
18. Ultimate Warrior
Complete the game on Extreme.
Silver
19. Snow Pirate Warrior
Achieve a Career Level of Lv. 30.
Bronze
20. Snow Pirate Leader
Achieve a Career Level of Lv. 50.
Bronze
21. Snow Pirate Commander
Achieve a Career Level of Lv. 80.
Bronze
22. Rounder Chief
Achieve a Career Level of Lv. 99 with the Rounders.
Silver
23. Fight Junkie Berserker
Achieve a Career Level of Lv. 99 with the Fight Junkies.
Silver
24. First Among Snow Pirate Elites
Achieve a Career Level of Lv. 99 with the Snow Pirate Elites.
Silver
25. NEVEC Black Ops Commander
Achieve a Career Level of Lv. 99 with the NEVEC Black Ops.
Silver
26. Femmes Fatales Faction Leader
Achieve a Career Level of Lv. 99 with the Femmes Fatales.
Silver
27. Quintuple Factionalism
Achieve a Career Level of Lv. 99 with all 5 factions.
Gold
28. A Thousand Unmarked Graves
Defeat 1000 enemy soldiers.
Bronze
29. Endangered Species
Defeat 3000 S- and M-sized Akrid.
Bronze
30. VS Graveyard
Destroy 100 enemy VSs.
Bronze
31. It's So Easy
Play any combination of chapters 39 times on Easy.
Bronze
32. Monster Hunter
Defeat 30 bosses.
Bronze
33. Thermal Energy Reactor
Accumulate a combined total of more than 99999 units of thermal energy.
Bronze
34. Me Against the World
Complete 93 areas while online without the help of other players.
Bronze
35. Prove Your Mettle
Unlock all the Abilities.
Bronze
36. Weapons Master
Unlock all regular weapons and grenades.
Bronze
37. Honeymoon Period
Celebrate your six-month anniversary with LOST PLANET 2.
Bronze
38. A Collector's Collector
Unlock all items (Weapons, Abilities, Noms de Guerre).
Silver
39. All in a Day's Work
Achieve 100 different Good Job awards.
Bronze
40. Warrior of Many Names
Unlock 100 Noms de Guerre.
Bronze
41. Centurion
Win 100 Online Ranked matches.
Bronze
42. Slayer of a Thousand Men
Achieve 1000 kills in Online matches.
Bronze
43. Hot Shot
Gain promotion to the rank of Gunner.
Bronze
44. Two is Better Than One
Complete 386 areas with one or more other players.
Bronze
45. Let's Go VS Force!
Merge two VS units.
Bronze
46. Professional Turncoat
Fight for a number of different factions in Faction Match.
Bronze
47. War Vet
Play 500 Online matches.
Bronze
48. Death Wish
Die more than 444 times.
Bronze
49. Good Job, Soldier
Earn all the Good Job awards.
Silver
50. Committed 'til the End
Earn all the Good Job awards, items, and Career Levels available in the game.
Gold
51. Platinum Trophy
Unlock every other trophy.
Platinum


 3 Sites (and One App) to Complete Your Destiny Experience
 World of Warships (PC) artillery guide
 Nosferatu: Run From The Sun Is A Blood Sucking Good Time
 PS4s Uncharted Gets Personal
 VyprVPN: Minimal Logging, Cross Platform VPN for Everybody