Unofficial LEGO: Harry Potter Years 1-4 Guide by Vhayste for
This walkthrough is meant to assist players maximize their initial run. You can replay previously played chapters so don't fret about missing anything in your first playthrough. You will encounter locked paths, chests and objects but don't worry; the spells and characters you need can only be acquired late in the game so don't feel bad about missing them initially. This walkthrough will list the stuff you can backtrack as soon as you have the means to access them. The same goes with crests; previously acquired crests do count so it means you just need to gather the other pieces again per story chapter. The walkthrough will discuss how to get the crests that you can access without the need of special magic or character. You need two vital things to unlock most of the stuff: the spell Reducto (RE) that can unlock silver locks, chests and gates and the dark version of Wingardium Leviosa called Crucio (CR) exclusive only to dark arts characters. Reducto is automatically learned after complete chapter 2 of Year 4 while the earliest dark character (Tom Riddle) you'll find is in Year 2, chapter 6. (Free play) Another thing to note is that this game has some really annoying glitches that may prevent you from getting 100%. To be safe, I suggest keep a backup of your save game using a USB storage device of your choice. Its better to redo a few chapters than to do restart the whole game, if you're after getting all unlockables. Finally, I am not a Harry Potter fan so excuse me if I don't know the common names of most of the characters nor the fancy terms used to call various stuff. So don't go emailing me correcting my spelling of their spells or telling me to change the names/ terms used in this guide. Year 1, Chapter 1 Press Y to switch to Hagrid. Go the left and use Wingardium Leviosa (will be shortened to WiLe in this guide) on the candles on top of the tables to the left. It will scatter to different blocks so use WiLe again on both of them to reveal a red crest. Use WiLe again on the stools in front of the bar to create a ramp for you to reach the crest.
Use WiLe on the mugs on the bar to make them drop studs, then do the same to the mug on the long table as well as the mugs on the tables to the right end of the room. For those two tables, you can use WiLe several times as they drop several studs at once. Then destroy the barrels by using Hagrid's spell (press X) and keep shooting the ale kegs/ tanks on both sides of the room until they drop no more studs.
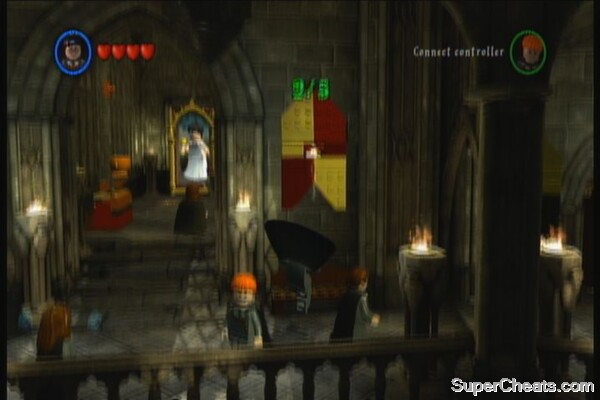
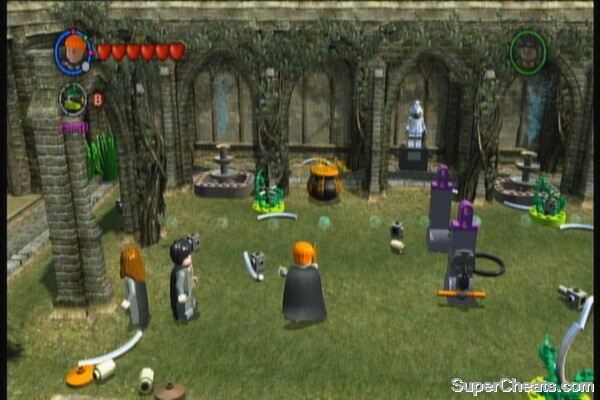
Approach the different colored tiles and Harry will step on it. Use WiLe to raise it, then switch to Harry. Grab the handle bar and drop back to the ground. Place it on the door. Switch to Hagrid and use WiLe to open the door. Grab the studs that will be dropped as well. Use WiLe on the lego pieces on the ground to open the wall ahead. Destroy the destructible objects for more studs. Walk a bit then look for a lady in white, staring from the window to the left. Approach her to get prompt to press B. Do it to wave at her and the second Crest (green) will be yours. Don't forget to use WiLe on the signboard to get more studs.
Then use WiLe on the barrel to the right, so the barrel will turn over and scatter the junk inside it on the ground. Use WiLe on the junk to create a sweeper machine.
Next, use WiLe to bring the green stool/table down from the roof to the right, and use the spell on the scissor sign to drop more studs. Switch to Harry and step on the brown table beside the green ones. Hagrid will lift you up. Jump on the next ledge to meetup with a student. You need to look out for similar students like this since they're part of the game completion. (Students in Peril)
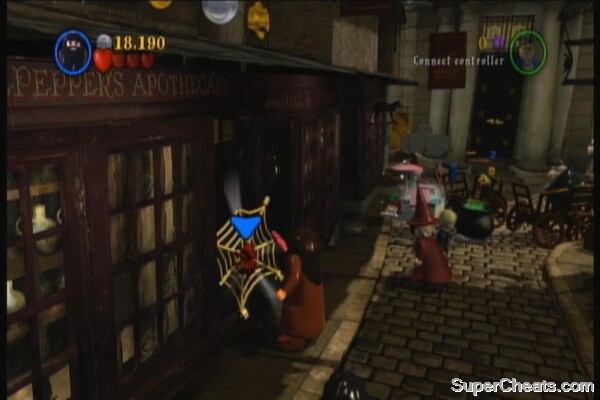
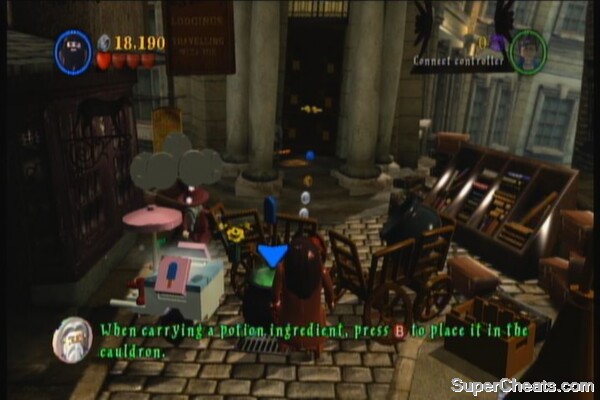
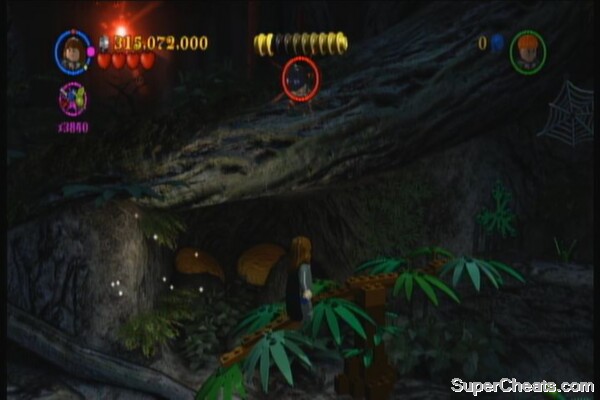
Continue ahead (beware of the green snake like things hiding under the grates to the right - they can damage you) Use the trampoline to reach the studs on the ledge to the left. Continue ahead and here you'll find a cauldron. You need to put the necessary ingredients to it in order to get through. The ingredients needed are the spider, popsicle and flower. They can be found nearby; pick the spider from the cobweb to the left, use WiLe on the ice cream cart to get the popsicle then grab the flower on the table to the right. Put them all together in the cauldron to make it explode and clear the debris.
After clearing the debris, head back to the start of the alley and switch to Harry. Press Y to ride the sweeper and use it to clean the green goo that was left from the cauldron explosion a while ago. This will reveal yet another crest piece (yellow).
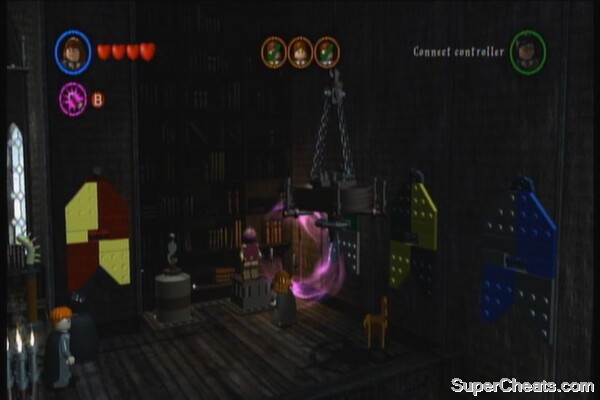
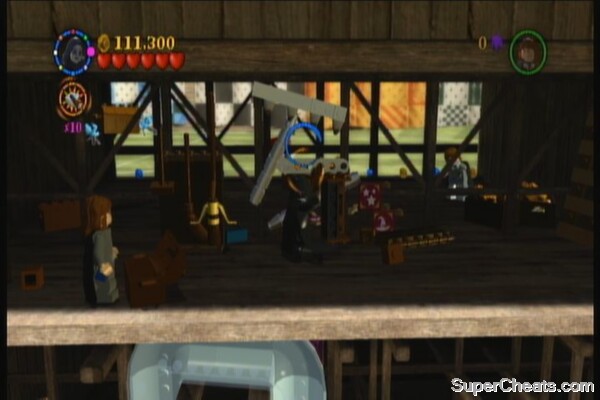
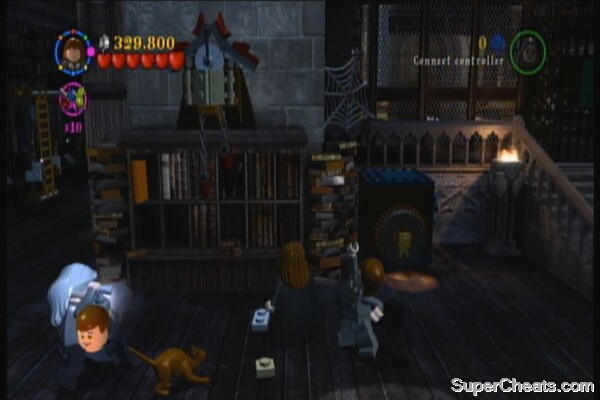
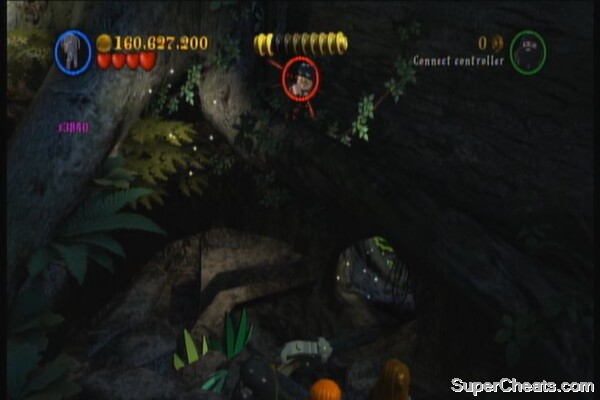
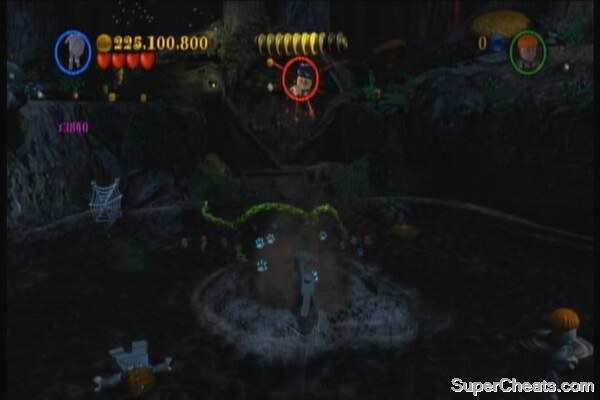
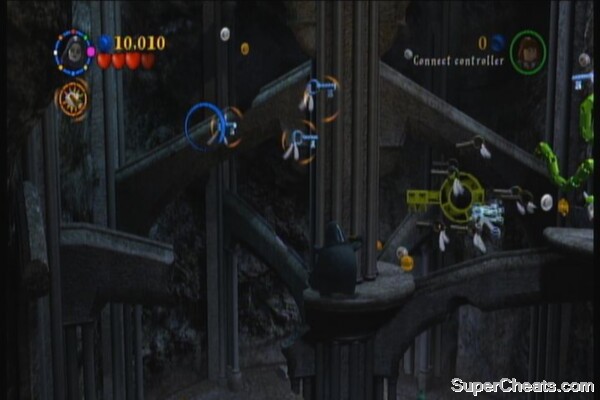
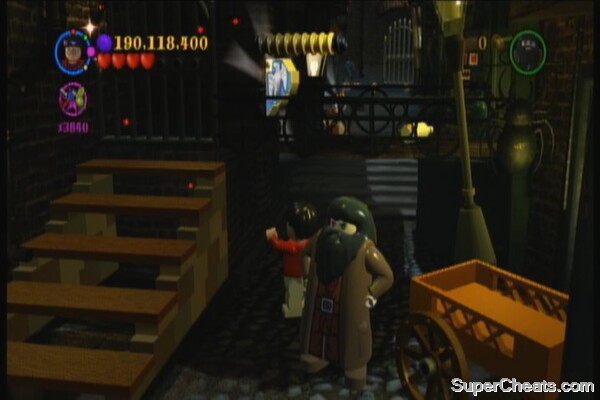
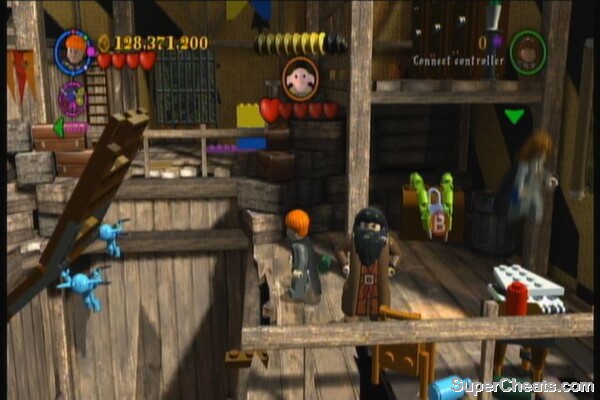
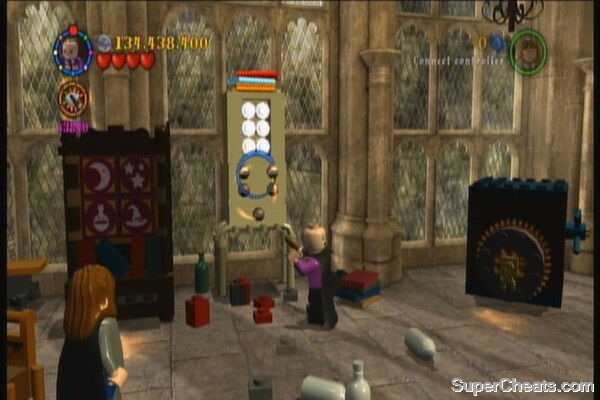
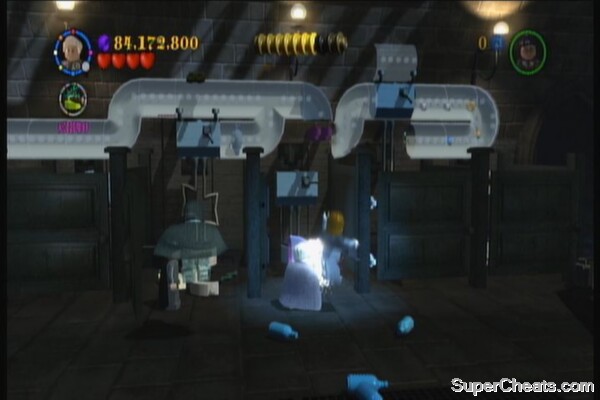
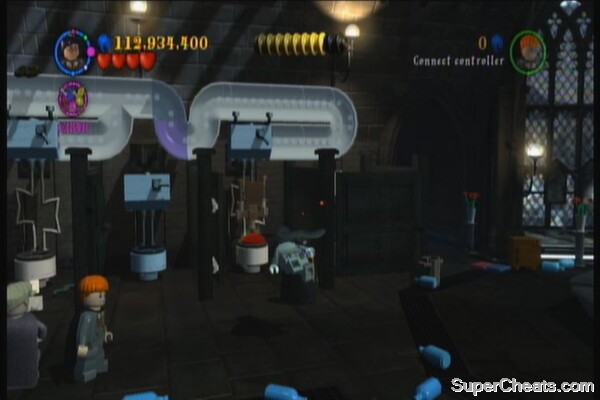
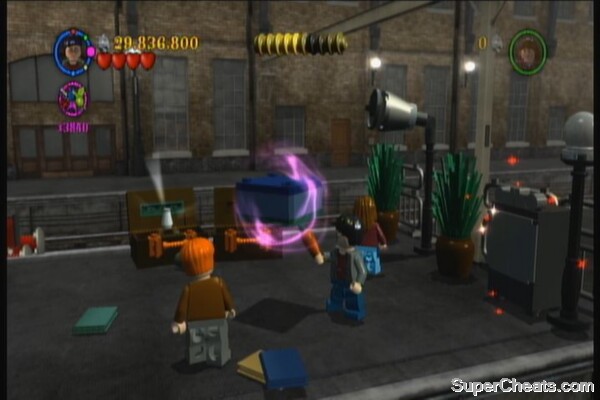
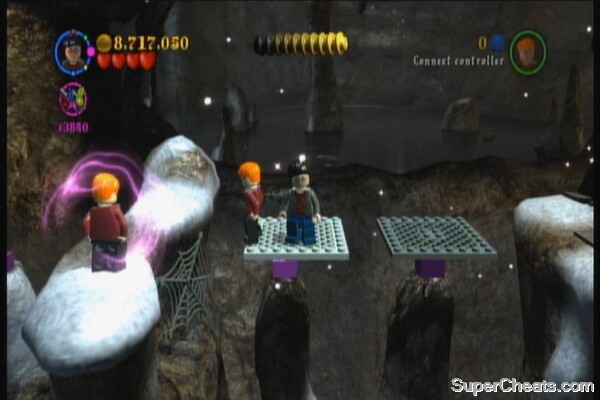
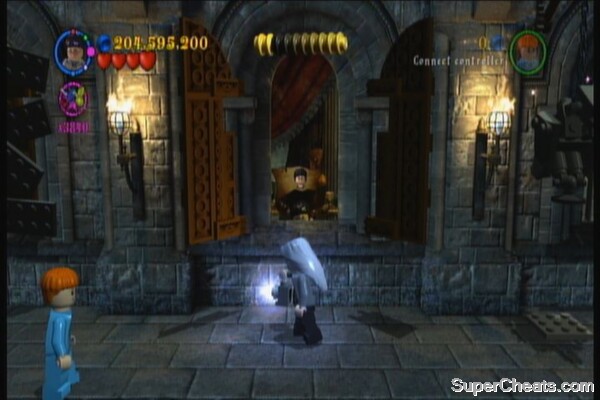
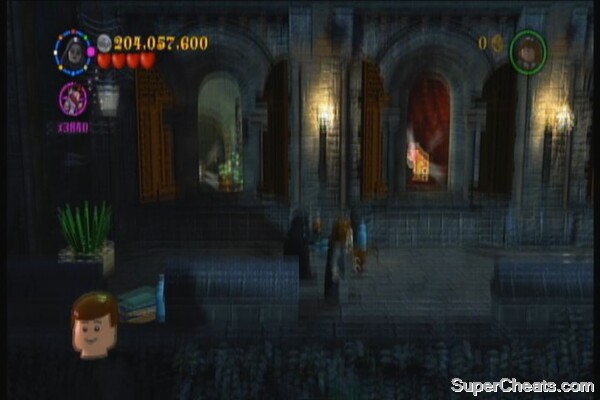
Continue ahead and use Hagrid to pull the chain and open the door. In the next room, grab the blue studs hidden in the lower right corner (they're worth a thousand) There is a locked door there but as suggested by the game, only a goblin can open it. Use WiLe on the unlighted bulbs on both ends of the tables (there are 8 of them) to reveal a purple coin. There is also a gate with a silver lock at the end of the room but then again, you don't have the means to open it yet. Use WiLe on the debris before that gate to create a table where Harry can jump on to get the studs above. Use WiLe or destroy the other interactable objects here then stand in front of the chief goblin and press B. Use the goblin to open the gate to the left. There are two chests here with silver locks so ignore them for now. Use Hagrid to pull the chain and open the gate, then shoot the chest inside for more studs. Switch to the goblin to open the safe, then switch to Hagrid and use WiLe to rebuild the blocks. Press B to wave at the mirror. After riding the mine cart, use WiLe on the torches to arrange them and get some studs. Have the goblin use the key twice on the keyhole to the right to open the safe there. Once inside, use destroy the suitcase so spider-like thing crawls out. Follow it as it leaves a trail of gold studs and a purple coin (worth 10,000) at the end. Go back to that safe and use WiLe on the pieces to make a table. Have Harry stand on it to get more studs up, including another purple coin.
Go to the left and have Hagrid pull the chain so the dragon-head disappears. Use the goblin to open the safe door. Enter the safe afterward. Watch the scenes and when you go back outside, enter the shop to get your own wand and to complete the chapter. Re-run
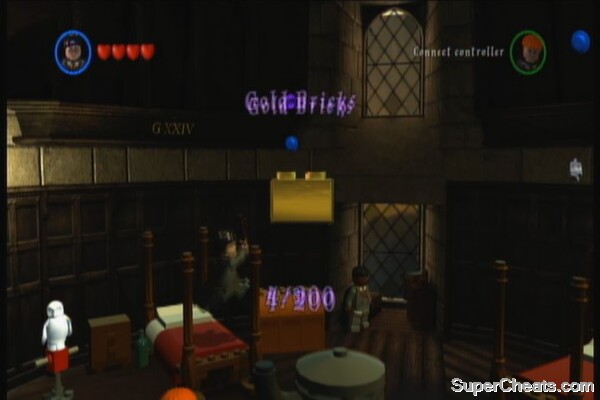
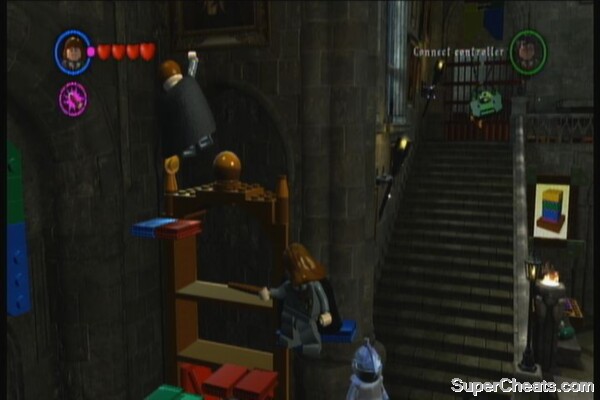
After opening the gate with the help of the goblin key, open the locked chest to the right to obtain the character token of Tom the Innkeeper. Note: Griphook is a KEY character, meaning he can open safes. Hogwarts Shoot the trunk to the right to get Ron's character token. In the room, shoot the “roof” of all the four beds to reveal a gold brick. Then use the beds as trampolines to reach the studs. There is another trunk here that will throw out lego bricks but you don't have WiLe at the moment so ignore them for now. Shoot the cobwebs on the door to unlock it. Head to the next room then shoot the sofa where a student is resting. It will gobble him up. When he gets thrown out, he'll be a sorry lump so help him out. (Student in Peril) Check out the shining token behind the sofa to get the Griffindor Boy character token.
Keep shooting stuff and gather studs. There a small drawer blocking the path so shoot the painting twice to make a lego piece come out and for the drawer to leave its position to gobble it up. Exit the room.
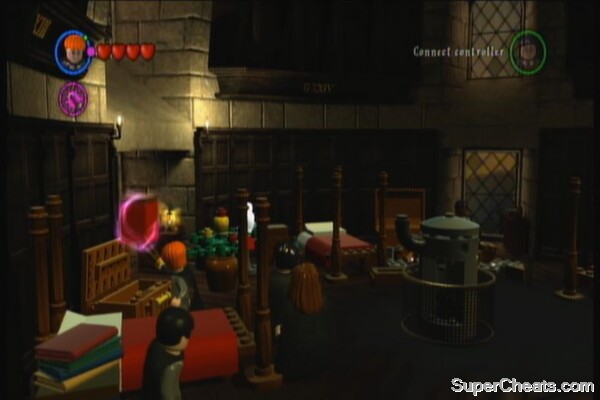
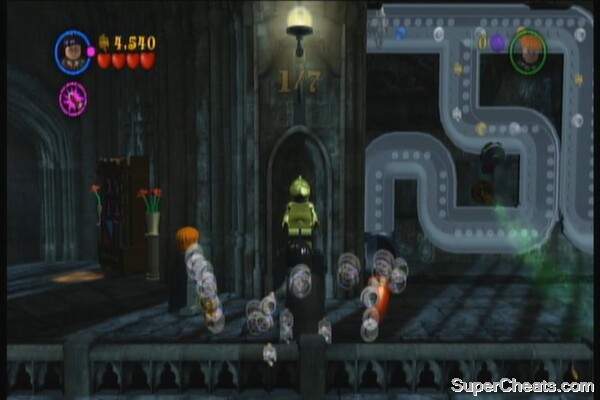
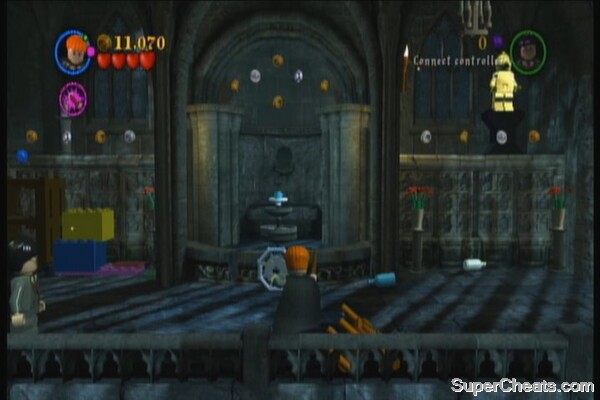
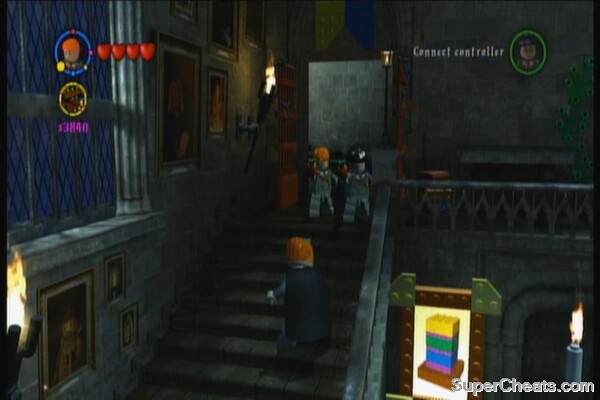
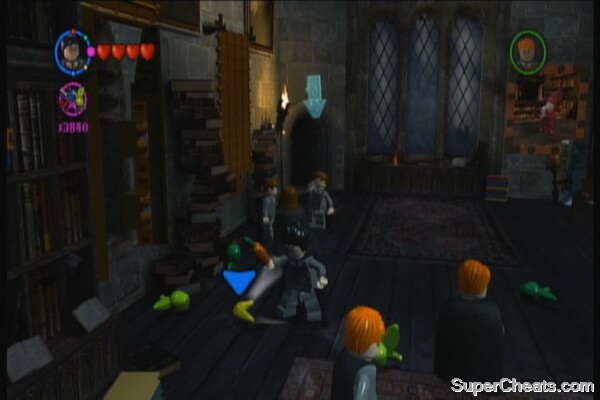
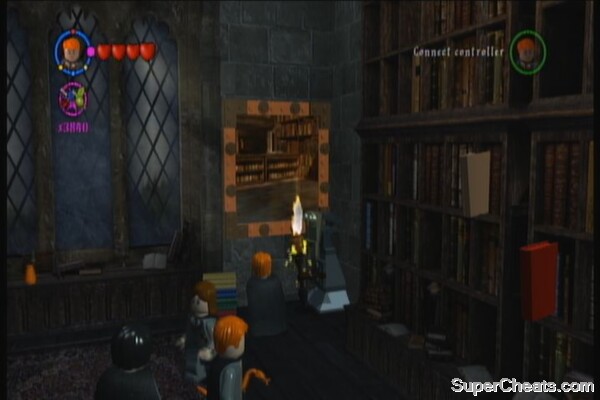
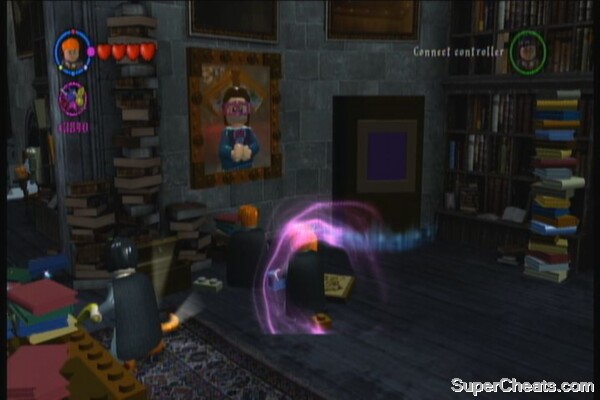
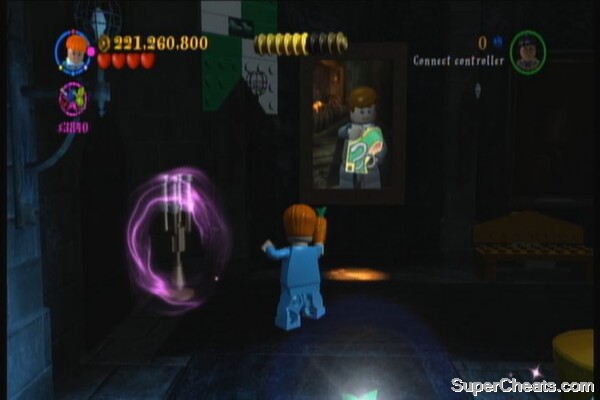
Continue to the hallway and shoot the banners. There are five in this hallway, (2 red, 1 black, 1 green and 1 blue) Shooting all 5 will reward you with a gold brick. Continue downstairs. Go upstairs to the right, switch to Ron then release his pet to enter the pipe and open the door. Go downstairs afterward then press B on the displayed spot to move the stairs. Shoot the armors several times to make them drop more studs, as well as the candles. Follow the path to reach the Great Hall. In this hall, there are tons to do. There are unlit candles here. Find all of them and light them up to get a Gold Brick. Upstairs are some vases. Hit them so they sprout flowers on the wall. Destroy them flowers to get more studs. Follow the ghost to the classroom so you'll learn WiLe. You need to save three students. Save the first one by using WiLe on the nearby statue. Next, you need to go up to the platform. You can arrange the giant lego bricks to make a foothold or your can have one character stand on top of the chair near the teacher, shoot it to expand its legs, switch characters then jump to the next platform. Shoot the painting to get some lego pieces, then use WiLe on it to fix the “hand”. Use WiLe again to lift the statue and save the second student. Use WiLe on the bookshelf by the window several times until the character token Boy is revealed. Continue to the right then assemble the knight armor. Use WiLe on the statue to save the last student. You'll have WiLe permanently as well as a gold brick. Exit the classroom then use WiLe on the apple to the left to save a Student in Peril. Continue to the next room until you reach the hall. To save another student in peril who is hanging above the bookshelf by the entrance, use WiLe to create some platforms using the books. Approach him to save him.
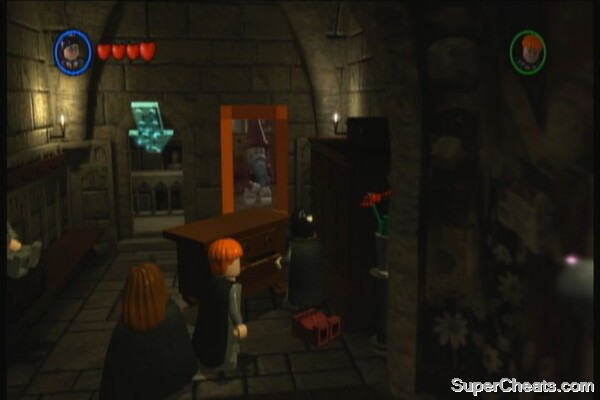
Go back to your room (the starting point) and use WiLe on the lego pieces from the northern trunk to build a clock. Characters with Time Turner abilities can use this. Next, lift the vase off the trunk and open it to reveal a red brick. Place that brick on the spot in front of the owl for it to carry it away.
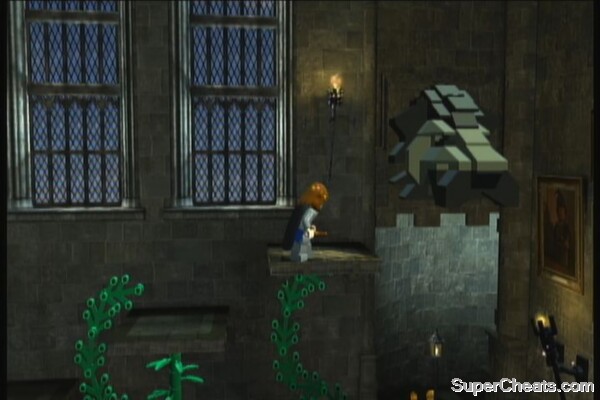
Use WiLe on the torches in this area. There are 6/9 that you can find here. Go upstairs and jump on the platform beside the giant lion head. Use WiLe to lift the crate and place it on the Lion's mouth. This will reveal another path.
In this hallway, you'll find three more torches but the last one is locked. There are also three wall engravings that you can open by shooting magic but you can only reveal 2/3 at this time since the other one is locked.
Head to the left to reach the courtyard. Continue further left to find a student being bullied. Shoot the bastards to scare them away and to help the student in peril. Shoot all the statues surrounding the well in the middle of the courtyard. Use WiLe to assemble the statue to reveal a red brick. Just the plumber to destroy the plants and to gather more studs. That's it for now; head back to the hall and arrange the lego pieces as shown in the picture to open the gate.
Follow the path, then go upstairs to the next area. There seems to be small fair here so gather whatever you can. Shoot the curled up banners on each side of the stairs and another two banners near the central door.
Now assemble the knight armor to the left. The arms are found in the ground. Order Ron's pet (press RB to switch between WiLe and his pet) to go through the pipe and push the head above. Connect the head to the armor to reveal the secret room to the left.
Switch to Hermione and press B to read the symbols. Enter the same pattern to unlock the cabinet and spew out more studs. Gather all studs that you can then enter the door next. Year 1, Chapter 2 You'll find candlesticks that creates flowers when shot. You need to shoot 9 of them to get a Red Crest piece. You can't use the cabinet for now since you'll need Hermione to unlock it. (You can get this after the stage by going back to the Leaky Cauldron and selecting Free Play in this stage) After the troll scene, look above the knight armor to find a bulb that you can activate using WiLe. Activating 7 of these will award you with a Blue Crest piece. Activate it and send Ron's pet rat to navigate the pipes and to turn off the valves releasing the toxic stream.
Look above for another light orb, then continue to the right for another troll scene. There are three candlesticks here. Use WiLe to put the fishes pieces back to the fountain and obtain the Green Crest piece. You can't turn the knob in front of the fountain for now since you don't have the appropriate spell yet. Ignore it for now.
Shoot the lego pieces and make a platform to jump. Go to the other side and WiLe the torch to ignite the statue. Use WiLe again to assemble the lego pieces that will drop to make a trident. Give it to the merman statue and it will clear the path for you. Before you assemble the lego piece there, activate the last few candlesticks to get the Red Crest piece. There are also a couple more light orbs here. Grab the last studs there, assemble the lego piece and shoot the portrait for Ron to get a girl disguise.
Approach the entrance to the girl's room and press B to enter. Search the faucets for more studs (necessary for you to get the True Wizard title in this stage). There is a purple stud in the bottom right corner of the screen. Activate the last three light orbs here to get the blue crest piece. Approach the troll and it will start destroying the cubicles. Shoot the toilets to spew more studs. Make sure to grab them while taking care not to get hit by the boss' attacks. To reach the studs above the cubicles, you need to step on the toilet fountains. There is also a student in peril in one of the cubicles here so approach it after the troll smashes it. When ready to face the boss, you just need to wait for a debris to fall down then use WiLe to throw it to the troll. Next, wait for it to throw something to you then grab it in mid-air using WiLe and throw it back to him. Finally, use WiLe to lift the troll's hammer and smash it to him.
Re-run
At the far end of the hallway, before the bathroom, you'll find a locked desk. Unlock it to get the character token Harry (Hogwarts)
This is a good time to visit Diagon Alley by exiting through the Leaky Cauldron's rear door. There are some extra stuff you can do here, especially accessing Wiseacre's Wizarding Supplies where you can enter cheat codes to get various benefits. Since Diagon Alley is not part of the Story levels, all the unlockables and extra stuff that can be found there will be discussed in its own section. There's limited stuff that you can find here until you get the spell Reducto (used to open silver chests and destroy silver locks) in Year 4. Continue to the next story chapter when you're ready. Hogwarts
If you have used all the red brick cheats in Diagon Alley, it will register that you have 20/20 but you're actually still missing one (check the Extras menu and you'll have one option grayed out) This is the place to get the missing red brick and unlock the achievement Power Up!. To do this, find and shoot all coffee jars (there's six of them) then finally shoot the lego pieces at the edge of the leftmost table. This will transform into a large chicken that will run around the room, leaving a trail of studs until it finally explodes, revealing a red brick. Grab the brick and send it via the owl nearby. Exit the mess hall and follow the ghost guide to the classroom. Here, you'll learn a new spell called Lumos. This serves as a torch and means of getting rid of the vines blocking your path.
While you're at it, shoot the four candlesticks for the Girl character token to appear.
Return to the previous room and take out the vine using Lumos. There is a student in the lower left corner taunting you. Chase him around until he stops near a pot. Use WiLe on the pot to scare him and to get the Griffindor Girl character token. You can light up some of the torches here. Lighting all 8 will reward you with another character token but you can't access the upper level at the moment since the prefects won't let you.
For now, interact with every object possible then use Lumos on the vine blocking the main gate. Go through there for the next lesson. Collect all the studs in the area and keep shooting/ arranging stuff to get more studs. Use WiLe on the debris left to the cauldron then on the snake wrapping the pillar to get the other ingredients. Put them all in the cauldron to create a strength potion.
You'll unlock the strength potion and another Gold Brick. Use it to open the next door. Follow the ghost guide as it leads you to the large courtyard. If you haven't this part of Hogwarts yet, you'll find a student in peril being bullied to the left. You can destroy all the statues surrounding the well in the middle then use WiLe to assemble the statue to reveal a red brick. Just the plumber to destroy the plants and to gather more studs. Use Lumos to take out the vine and go to the next screen. Follow the straightforward path. Check the place for more interactable objects then enter the classroom. After the scene, clear the path and start destroying stuff. Use WiLe to create a large cart and ride it to smash the barricade open. You'll learn Lumos Solem (LuSo) during this sequence. You will also obtain another gold brick. You can now take out the vine traps. Enter the open gate to the left to initiate the Broom Flying event. Gather all studs as you can, then shoot the gargoyle. Keep on shooting it as you chase it around. It will then throw the glass ball to the plant. Shoot all three flowers to release it and complete the event. Harry can pilot the broom with stability so you have no choice but to use him in this event. You'll unlock the Broom Flying and a Gold Brick after getting the ball back. Follow the ghost again as it leads you to a small yard with some pieces that needs to be assembled. Shoot everything here, including the grasses since they have the ingredients for the cauldron. Put all the ingredients in the cauldron. Next, kill the vines using LuSo and for them to release the parts they're holding.
Use WiLe to assemble to contraption and to rejoin them. When the activation spot appears on the contraption's side, drink the strength potion and pull it. It will break through the closed path leading to the next area. Jump across the gap and follow the walkway until you reach another area. Look for a pile of lego pieces along the road going north. Use WiLe to transform it to a raincloud, then use WiLe again to lift it up. Move it left to right to create four flower patches. Use WiLe to smash the flowers and a red brick will appear. Take it to the owl near the entrance. Raise the three stone slabs in the intersection then use the nearby brooms to remove the white stains.
A gold brick will appear on top of the boulder. Head to the right to find a student trapped by a demon's snare. Use LuSo to save the student in peril. There are also four buried carrots here.
Lift them all up to obtain the character token of Pearcy Weasley. That's what you can do for now; destroy stuff here and grab the studs. Follow the ghost studs when ready. You'll be in the entrance area of the Quidditch field. There is a student in peril to the left, who can't go down from the billboard. Use WiLe on the rolled up tapestry nearby to create something he can jump into.
Use WiLe to raise all four green flags along the path for the character token of Padma Patil to appear.
Do the same thing for all red flags and the character token of Katie Bell will appear. Head to the right to find a snack stand with students lined up. Use WiLe to make the nearby stalks to smash to the stand and it will spew out tons of studs. After that, the character token Ravenclaw Boy will appear. Stand on the bench beside the bench and have your teammate lift you. Jump to the roof and use WiLe on the red ball. It will roll down to a chest and will reveal a gold brick.
Enter the tent to start the next story chapter. Year 1, Chapter 3 You'll only control Ron and Hermione. Raise the flag to the left, then go downstairs. Raise another flag, then get rid of the blocks blocking your way. Fly across the gap and go downstairs to find another three flags on the edges, from left to right. Fix the tubes using WiLe, then send Ron's pet to reach the platform above.
After causing some ruckus, the platform containing large lego bricks will fall down. Arrange it so you can jump and reach the Blue crest piece. Arrange the bricks again so you can reach the upper platform. Destroy the stuff blocking your path then use WiLe to assemble them. Solve the cabinet pattern puzzle and the axe will clear the path for you.
Continue then raise the last two flags to get the Red crest piece. Use Ron's pet to reach the Harry (Girl Disguise) character token under the stairs. Shoot the orange cover on the wall, then shoot the painting to remove the prefect. Assemble the lego bricks again then go up the ladder. Solve the cabinet pattern puzzle, then use WiLe to lift the pieces up and to connect them to the wall to create footholds. Create the stairs using the pieces to the left. You can't open the silver cabinet for now so continue up. Destroy the final barricade and continue through to complete the level. Re-run
After getting rid of the prefect and before going up the ladder, do not destroy the box. You need to jump around the barricade. Use Crucio on the barrel to get the Yellow Crest piece.
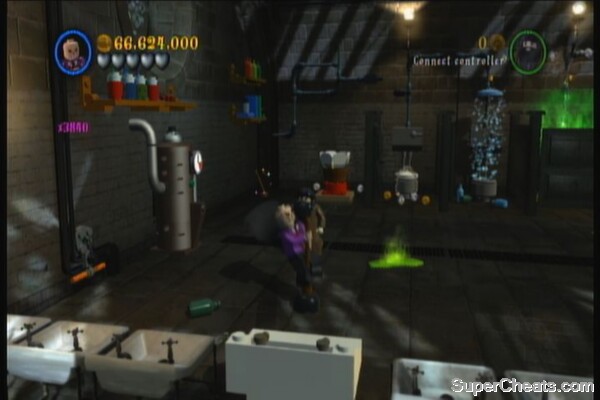
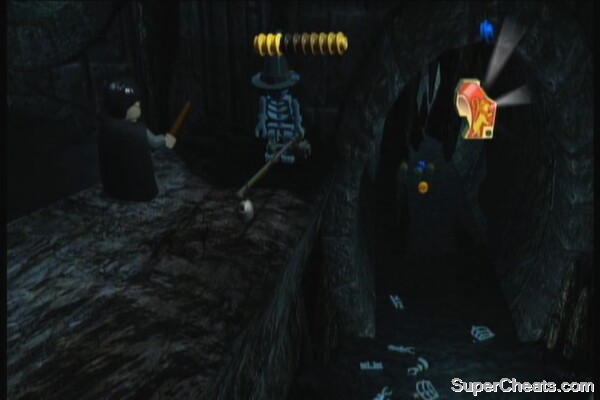
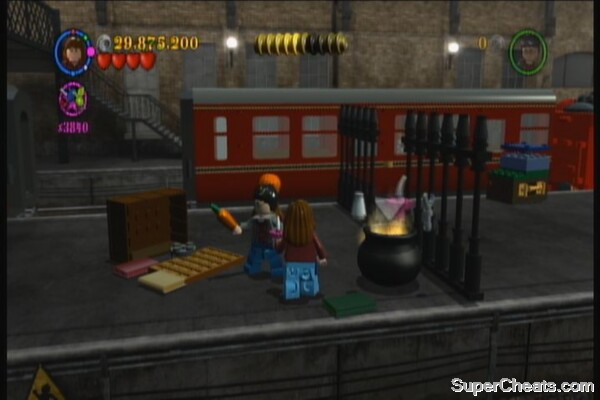
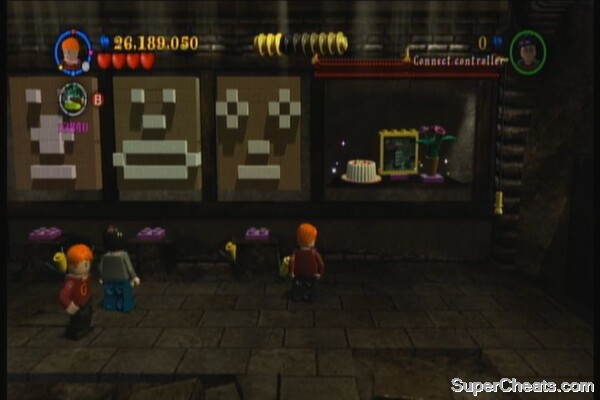
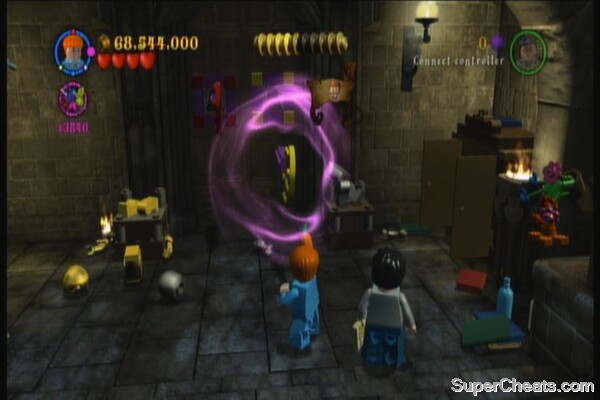
Go up the ladder then shoot the cabinet using a dark arts character to obtain the character token of Marcus Flint. Year 1, Chapter 4 You'll start this stage with just Harry and Ron. You need to look out for the red books on the floor as these serve as sentries. Equip your cloak and approach them; press Y to kill them. After taking out the guard books, approach the ghost lady and wait for her to create a flower bed. Use WiLe to take out the cauldron. Now its time to look for the ingredients. There are four candlesticks in this room so make sure you shoot them to make them sprout flowers. To get the popsicle ingredient, shoot the desk to the left then assemble the blue pieces with WiLe. Jump on the books to reach the ledge to the left. Use WiLe on the torch to melt the wall and grab the popsicle. For the daisy and spider ingredients, you need to stand on the book held by a statue to the right. On the upper ledge, just grab the daisy from the planters there. As for the spider piece, shoot the peculiar looking shelf in the middle and wait for it to crash down, revealing the spider behind. Throw in the ingredients to blow up the door and to the next area.
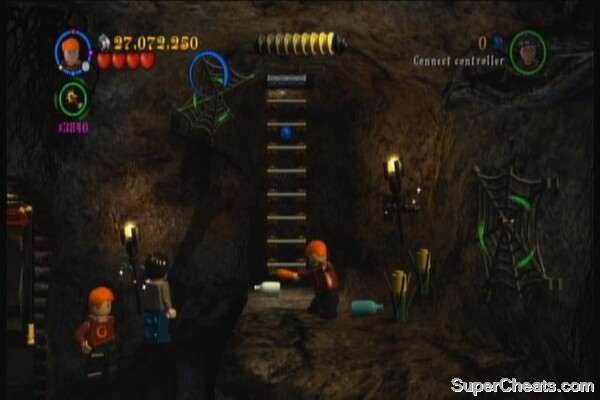
In this section, you'll want to avoid getting caught by the old man. Do this by using the cloak to get past him. If ever he catches you, switch characters and shoot the cat to release Harry. This area is pretty simple; shoot the pile of books to the left to reveal a green piece. Go to the next book shelf and assemble the pieces so they'll find to the gate, according to their colors. Once the gate is opened, grab the green key at the end and use it to open the door. Don't forget to activate the two candlesticks here to get the Yellow crest piece. Go past the newly opened gate then shoot the books blocking the tube. Send Ron's pet to push the pile of books overhead. Use WiLe to place the missing door piece on the door to activate it.Exit there.
In the next room, shoot the spiders off the cobwebs to reveal a Green Crest piece. Those spiders drop a ton of studs so shoot them if you need them (or if you're just really greedy even with the multiplier cheat on)
Use LuSo on the vines to the left, then wait for the bats to perch before shooting them. Approach the mirror for more scenes and to complete this chapter. Re-run Year 1, Chapter 5 Start off by destroying the wasp nest to the left. Next, free the student in peril a bit to the right. The dog, Fang can dig on digging spots that you may have encountered earlier. Fang's character token is located in the lower right corner of the screen. Shoot one of the yellow flowers here as they're part of unlocking a crest piece. Assemble the circular pieces on the upper right to form a raincloud. Control Fang and climb up the ladder. Dig the digging spot there to create another ladder. Climb up to find the second yellow flower. Finally, destroy the last flower under the beehive a short walk to the right. This will reveal a Yellow Crest piece. Continue to the right then use Fang to dig and reveal a subterranean path. In the next part, use LuSo to clear the vine then shoot the obstacle until its cleared. Gather studs if you need; otherwise, continue ahead. Order Fang to dig the blue lego brick then shoot the webs to drop the other bricks. Before assembling it, switch to Fang then swim to the water. Have him dig in the middle mound to drain the water.
Backtrack and arrange the bricks and use them to jump up. Continue to the right then assemble the pieces to create a tree. Use WiLe again to extend its branches so you can reach the cave. Re-run
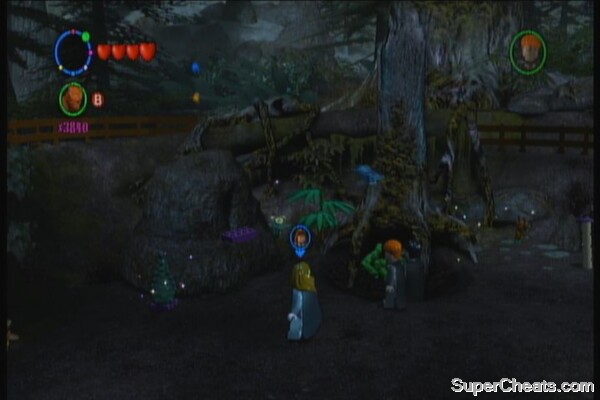
Hogwarts Year 1, Chapter 6 Start off by shooting the painting on the wall. Use the rubber duckie to distract Fluffy, then assemble the harp. Jump down the trapdoor and kill all the snares and vines. Jump down the hole and clear the vines along the way. Use WiLe on the bucket beside the statue so he'll release the flying broom. Ride it up and jump on the platform to the right. Clear the nearby vine to rescue a student in peril.
Use the broom to fly; keep shooting the key until it drops to the ground. Use WiLe on the key to open the door.
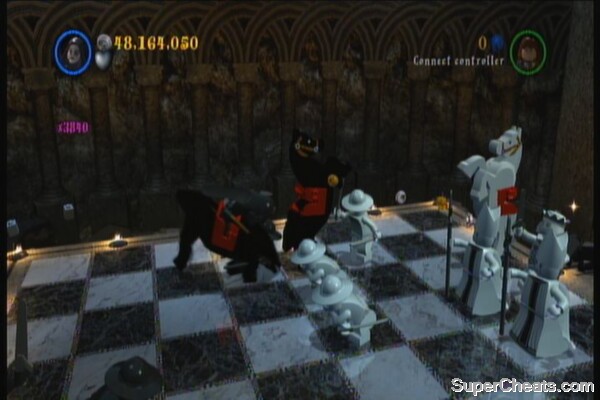
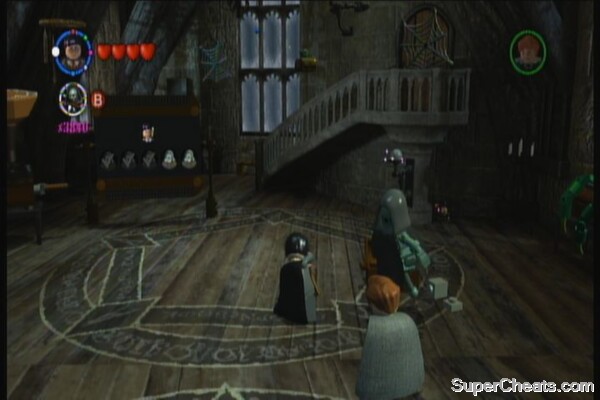
The next room has living chess pieces. Don't worry about moving the pieces on your own since the game will show you which piece needs to be moved next. Just follow the pattern and the door will be opened.
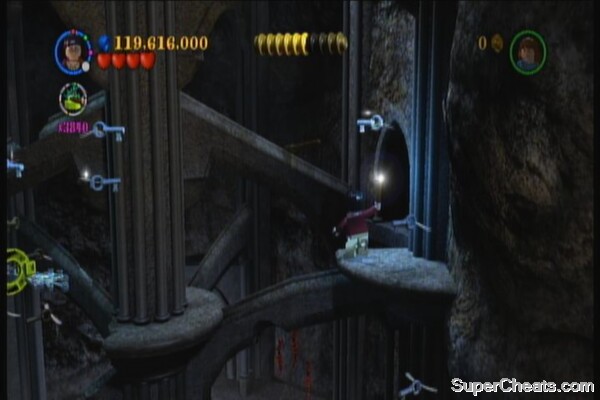
You'll need to defeat the boss using WiLe only so make sure you have it equipped. Avoid the projectiles he's throwing at you then wait for him to throw a green projectile. Send it back to him then quickly jump across the gap and attack him. Repeat the process until he's gone.
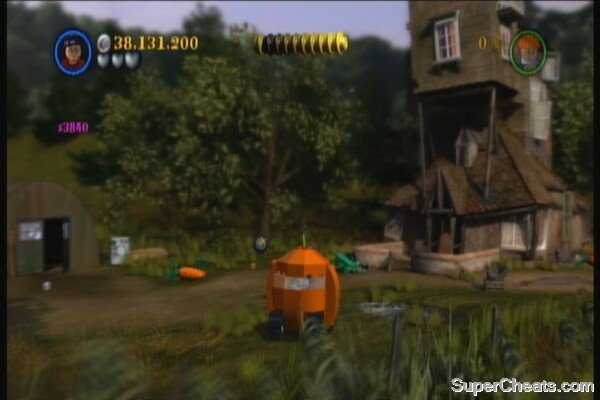
Watch the following scene and Year One will come to an end. Re-run Year 2 Chapter 1 Lift the gnomes, spin them then throw all six of them to get the Red Crest piece. Assemble the pile of lego pieces near the basketball hoop to create a pumpkin-mobile. Drive over the small grass sprouts on the ground and carrots will start popping out of them. There are 7; use WiLe to launch the carrots in the air as mini-rockets. Enter the house and just mess around with the interactive stuff. Continue to the left and use the spells on the chairs. Stand in the spot and wave at the painting. Use WiLe to put the powder on the hearth. Upon reaching the dark magic shop, use WiLe on the broom at the bottom of the stairs to clean the nearby mirror. Switch to Hagrid then pull the chain as reflected on the mirror. Next, walk to the left a bit then shoot the large, man-eating chest for it to throw out some pieces. Assemble them to form a sword, then use WiLe to give it to the man on the painting. He'll drop the green key afterward. Use it on the door to exit. Go outside, then shoot the boxes to the right to reveal some pieces. Use WiLe on them so they'll form the handle for the pull-chain nearby. Pull the chain with Hagrid to open the path. A spider will appear from the debris to the left so be careful. The Blue Crest piece is visible ahead but you can't open the gate for now. The wooden planks can be assembled to stairs to reach the blue crest but ignore it for now. Continue ahead, grab the character token Harry (sweater) from the chest, then have Hagrid open the gate by pulling the chain. Chapter complete. Re-run There's nothing much to do here for now so follow the ghost guide to the next herbology class. Go to the wardrobe and enter it to equip some earmuffs. Exit the classroom, then return to the courtyard. Enter the wardrobe along the left hallway then grab the mandrake on the far right. Use it to destroy the glass-enclosed plants around the courtyard (there are 5) to get the character token Hufflehuff Boy. Pickup the mandrake to the left and break the glass container to the right first (1/6). Go upstairs and destroy the glass barricade blocking the path. Destroy the remaining glass containers here to unlock the character token of Ernie McMillan. In this classroom, you'll learn a new spell called Immobulus (IM). This will allow you to freeze those darn pixies and kill them. Press and hold the X button to target them. Kill the first three then a scene will trigger. Kill the last pixies to complete the lesson and to permanently learn the Immobulus spell. Go downstairs then head to the next classroom to the upper right. Here you'll learn a new spell called Transfiguration. You just need to defeat the wooden dummies by using the red spell (12 oclock) in your spell wheel. Do this twice per character to learn the spell and earn a Gold Brick as well.

The Magic Begins
Red Crest
Green Crest
Yellow Crest
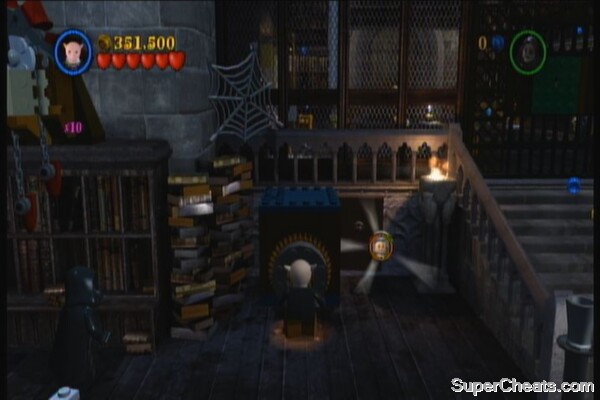
At the far end of the office is a gate with a silver lock. Destroy it with RE, then pull the chain inside to retract the dragon-head and to obtain the Blue Crest piece.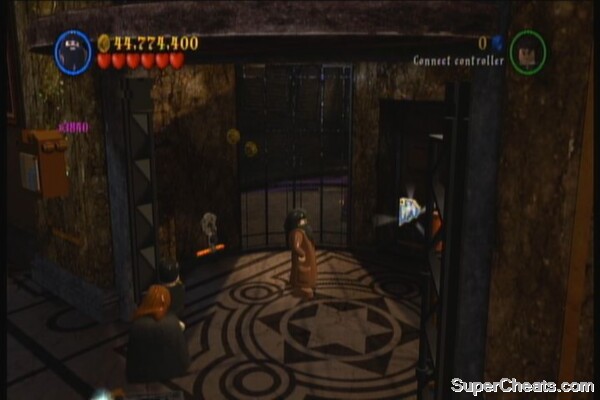
After opening the gate with the help of the goblin key, open the locked chest to the left to obtain the character token of Mr. Ollivander.
After the cart ride, open the locked chest to the right to find the character token of Griphook.


This will reveal a gold brick and a student in peril as well.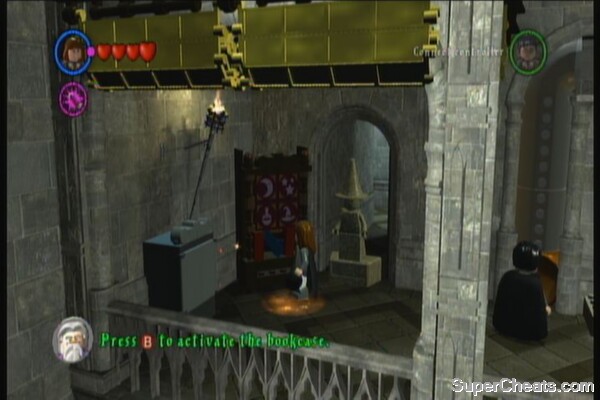
Out of the Dungeon
Green Crest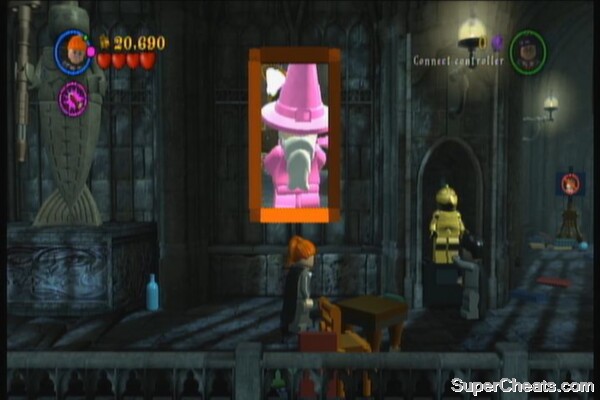
Troll Battle
Continue to the fountain part of the hallway then use RE to destroy the silver knob. Use WiLe to turn it and the Yellow Crest piece will appear above the fountain.
Inside the bathroom, go to the left then use RE to unlock the cabinet. Use the table as trampoline to obtain the character token of Madam Malkin.
You'll start in the mess/ dining hall. There's a student in peril trapped in a cobweb to the left so shoot it to free him.
To complete the lesson, find the pieces and assemble them. You'll be rewarded with a Gold Brick as well. Exit the classroom.
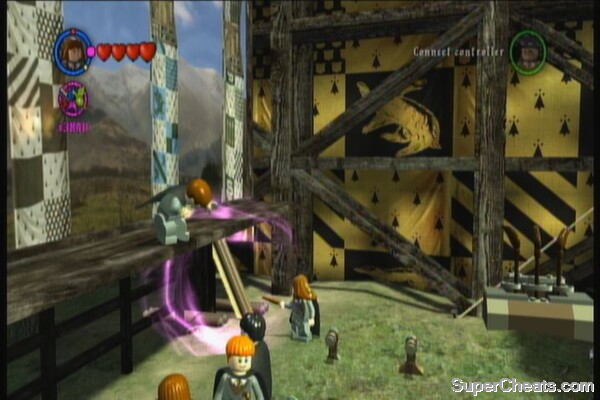
Quidditch Field_Gold Brick
A Jinxed Broom
Unlock the chest beside the pet tunnel to get the character token Fred (Quidditch)
After arranging lego bricks to reach the upper floor, destroy the silver obstacle in the middle to save the student in peril. Destroy the pixies to the left, then shoot the chest to obtain the Yellow Crest piece.
Yellow Crest
Hogwarts
Follow the ghost guide, then fix the bridge. Head to the other side for a scene. You'll be back in the Great Hall. There's not much to do here for now so return to your rooms for more scenes and to start the next story chapter.
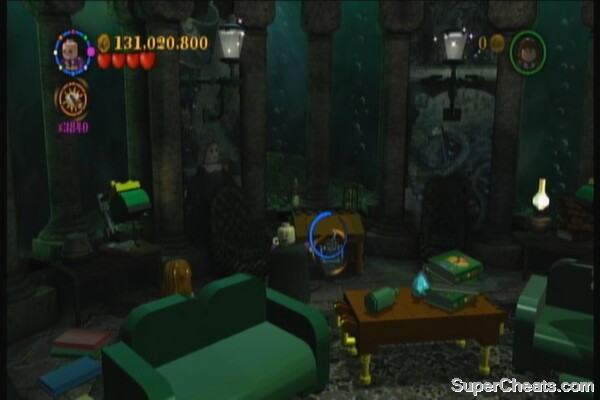
The Restricted Section
Restricted Area
Red Crest piece – if you haven't acquired this yet, use Hermione to solve the puzzle cabinet beside the large statue to the right.
Harry (Pyjamas) - Destroy the silver canvas holder near the bookshelves to the right.
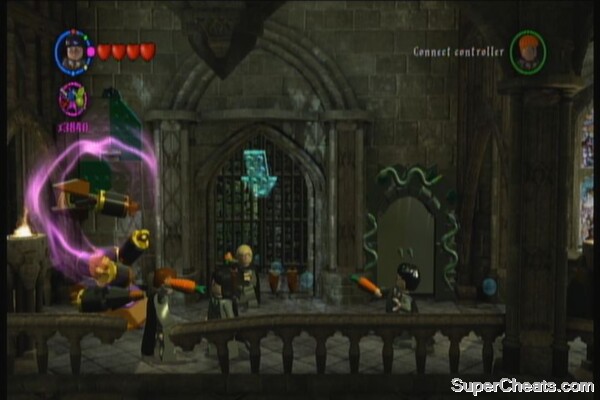
Blue Crest piece – It is located behind the web where you got the spider ingredient. Use Crucio to destroy the obstructions and get the piece.
Student in peril - Shoot the books in the first row then use RE on the silver cage. Use WiLe to reconstruct the pieces, then reconstruct it again to become a clock. Finally use WiLe again to free the student inside.
Filch – Get this character token by using a key character (e.g Griphook) on the safe beside the stairs.
Neville (Pyjamas) – In the last room with three giant webs and a horseman, use CR on the cabinet with dark arts to get this character token.
Hogwarts
Again, there's nothing much to do here for now so follow the ghost guide's trail as it leads you to Hagrid's cottage and to the next story chapter.
The Forbidden Forest
Switch to another character and use WiLe to throw the fishess back to the water. There's six of them; the Red crest piece will appear after completing this task. Next, get rid of the vine up ahead and have Hagrid pull the chain to raise the stone platform in front.
Enter it and watch the scenes to complete the chapter.
Green Crest piece - You need to look out for 10 dark stones. Destroy them using any dark arts character's Crucio spell. Watch the following video to learn more about the locations of these rocks.
Dark Stones
Hagrid – Upon starting the third area, unlock the chest up north to get this character token.
Draco (Hogwarts) – After going up using the lego bricks, shoot the dark orb up north to get this token.
Blue Crest piece – After draining the pond, look for a locked chest in the lower right corner. Unlock it to get this piece.
Once in control, follow the ghost studs. After going upstairs, press B to change the direction of the stairs. Continue up and enter the door to continue.
Face of the Enemy
Fluffy and Flying Keys
Chess
Vol Battle
Red Crest piece - After putting Fluffy to sleep, jump down the trapdoor. Release the chest behind then open it using RE
Harry (Slytherin Disguise) - In the next room with flying keys, unlock the chest to the far right for this character token
Green Crest piece - Shoot all silver keys flying around the room (10/10) to get this crest
Professor Quirrel (Voldemort) – In the chess room, use CR on the statue to the south.
Blue Crest piece – Shoot the silver chest north of the room and another horse will appear. Ride it and it will launch you to the air, capturing the crest in the process
Ron (Cardigan) – Use CR on the black chess piece near the exit.
Yellow Crest piece – Southeast of the board are some rubble. Use CR to get this last piece.
Floo Powder!

George Weasley – The token is found under the digging spot near the basketball hoop outside the Weasley residence.
Upon reaching the weird shop, open the cabinet to the left to release the student in peril.
Green Crest piece – Shoot the monster chest next to the cabinet to the left, then jump inside to find a secret compartment with a dark orb. Break it to get the crest.
Arthur Weasley – Use CR on the dark cabinet near the exit.
Blue Crest piece – Immediately visible along the hallway outside the shop. Use WiLe to build the stairs then use dark arts to open the gate.
Hogwarts Castle
Shoot all the torchers in the hallway (there are 10) to reveal some gold studs and a character token of Angelina Johnson. Next, shoot the grass to the lower right to reveal some skeleton pieces. Assemble them to get more studs and one of the cauldron ingredients. Next, shoot the planter with the pink flower to reveal a monster plant. Destroy it to get another ingredient.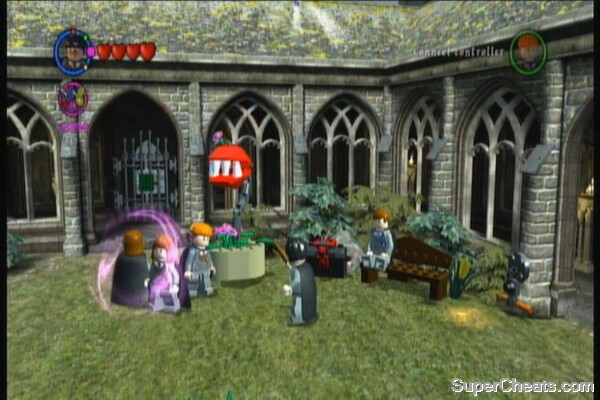
Finally, shoot the bin to the left and wait for it to finish vacuuming the grass to reveal the last ingredient. Put them all in the cauldron, drink it and pull the chain to exit to the next area.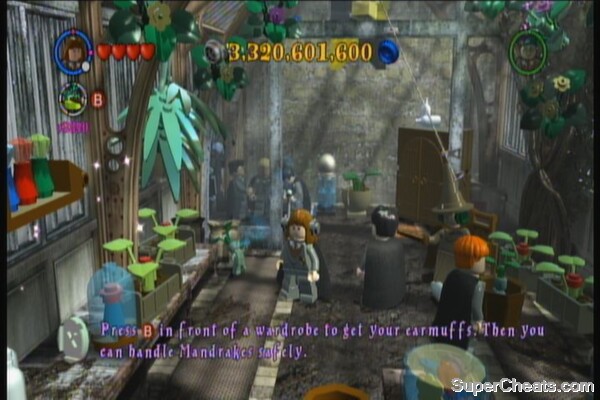
Earmuffs will allow you to handle mandrakes easily. Grab the mandrakes in the room and use them to shatter glass-enclosed items. Put them all inside the pots to silence them. You'll unlock Mandrake Handling afterward.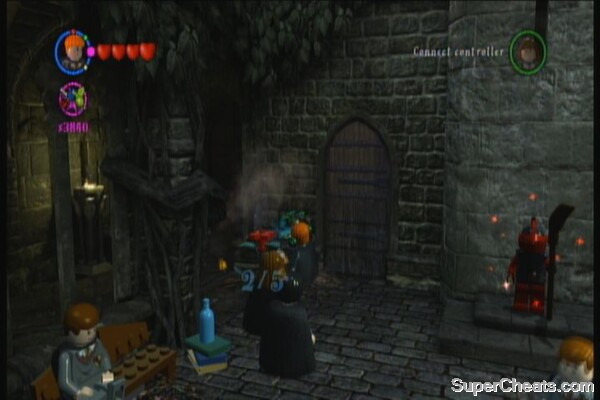
3/5 of these glasses are found to the left, one is immediately visible to the right, the last one is hidden behind the pillars, along the hallway to the right. Follow the mission marker until reach another hall with a mandrake and a glass barrier blocking your path.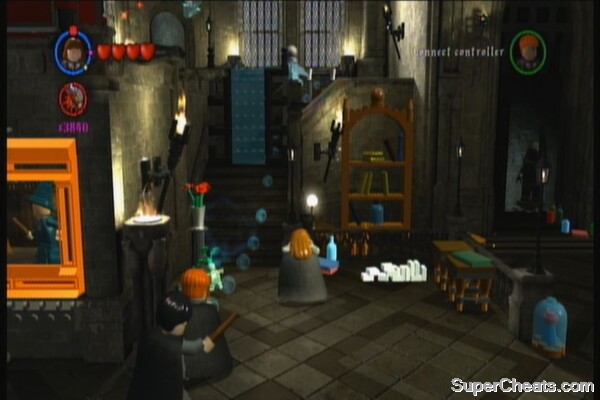
Go upstairs to the east first. You can't access this area before so don't forget to grab the Lee Jordan character token by shooting the golden statues to the far right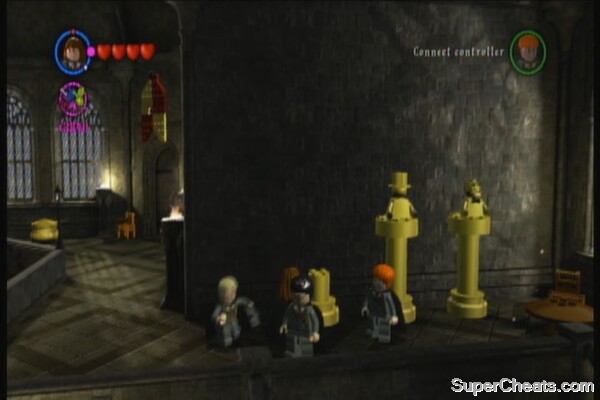
Enter the wardrobe near the stairs to equip your earmuffs then activate the torch nearby (7/8).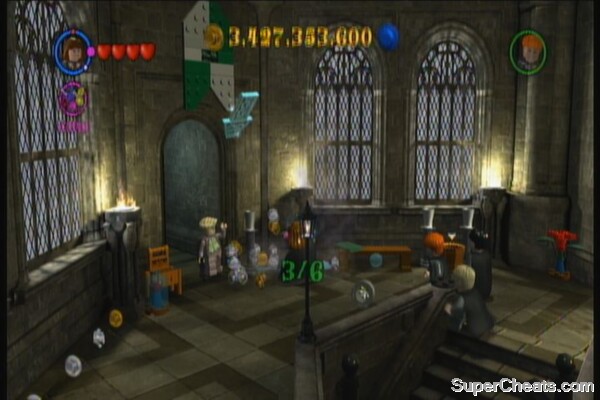
Finally, activate the last torch here to get the character token of Hannah Abbot. Before going through the door check out the jigsaw puzzle to the left. Arrange it to reveal a silver-locked seal. You can't break it for now so leave it be. Head to the mission marker next.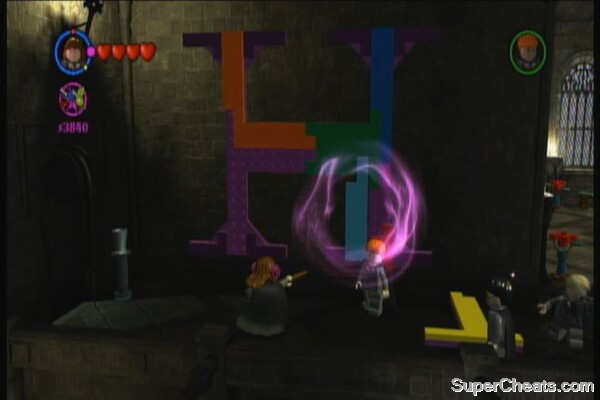
Transfiguration
Follow the ghost studs and watch for the scene. After that, continue following the ghost studs until you reach the grounds. You may kill the pixies here if you want. In the Quidditch Grounds, silence the mandrake then shoot the black ball that's flying around a while ago. It will enter a chest to the left. Shoot the other chest to the right so it brings out pieces that you can assemble using WiLe. Ride the flying brooms to gather all the studs. (This is entirely optional since you probably don't need that much studs now) Enter the tent to start the next story chapter.
Year 2, Chapter 2
As soon as you start, raise the two flags (2/4) using WiLe then open the trapdoor. Shoot the chest in the middle to whack the floating ball and smash the wall to the left. Use WiLe on it to assemble a trampoline.
Shoot the small barrel with a flag on it. (1/4) Jump to the next platform. Shoot the next barrel with a flag, then shoot the goblin.
Switch to Hagrid then pull the chain. Jump across the old geezers then shoot the goblin again on the other side. Use IM on the pixies up ahead. Shoot the barrel on a corner to the right first, then use LuSo on the vine. Use WiLe to assemble stairs from newly created debris. The goblin will run away so destroy the last barrel to unlock the Blue Crest piece. Go up the ladder, raise the last two flags to get the Yellow Crest piece. Lift the purple crushing ball then connect it to the chains to the upper right.
Go through the gate this time. Climb up the ladder to the left then shoot the goblin. Pull the chain to release the bird and for the two bricks to fall down. Create a foothold, then shoot the middle cabinet to reveal the goblin's location. Shoot him again then jump down to the lower level. There will be a couple of pixies here that will raise the bridge, so take them out first to cross. Shoot the barrel the goblin is in and shoot it again to trigger the next story scenes.
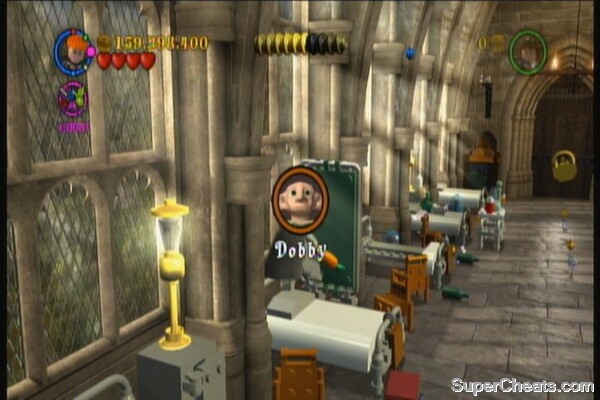
You'll start in the hospital room next. Gather the studs you want then grab the character token Dobby by jumping on the bed to the left.
You can switch to Madame Pomfrey to do most of the work here since she has all the spells and she's immune to the mandrake's wails. You need to find ingredients for the cauldron. The bone piece can be acquired by using WiLe on the skull on the bed in front of the closet to assemble a skeleton. After its dance, grab the piece.
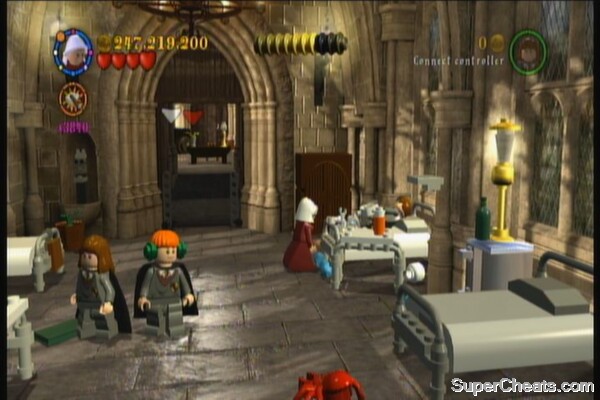
Next is the flower piece. Use the mandrake to break the glass cabinet with the flower inside. Use WiLe again on the student to the left to release a statue that will break the locks and open the door to the next room. Use the purple broom to destroy the cobweb in the corner. After that, another web with a spider on it will appear. Grab the spider piece then throw it to the cauldron to complete this chapter.
Re-run
Draco (Quidditch) – In the hallway where there are pixies blocking the path, continue to the right to find the dark cabinet.
Open the locked chest before the bridge that was lifted by pixies. This contains a student in peril.
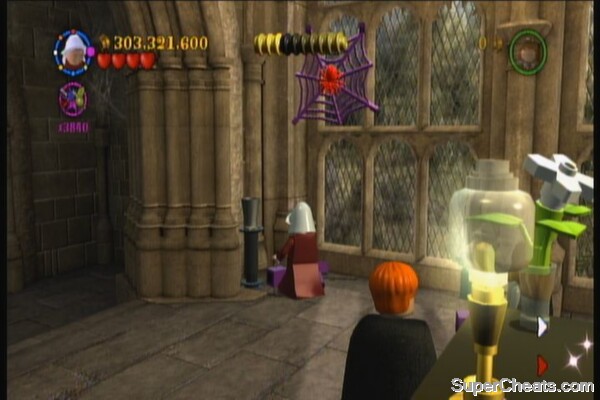
Green Crest piece – You need to spread out two wallscrolls using WiLe. One is located on the ledge above the chest with a student inside, the other one is located across the bridge. You need a Slytherin character (Harry's Slytherin Disguise will work) to wave at both paintings to get the crest. Make sure you don't shoot Dobby or else you'll get transported to the hospital. You need to do the whole thing again when that happens.
Madam Pomfrey – In the second room of the hospital, use CR to remove the lock on the machine beside the puzzle cabinet. Shoot it to get this character token.
Red Crest piece – Switch to Griphook (press RB) then open the safe to get this crest.
Hogwarts
Follow the ghost studs again until you reach the main hall where you'll learn a new spell. For the first part, just stay behind the red line then shoot the dummies by targeting them and releasing the fire button. After a brief cutscene, you'll be in a battle against Draco. Immobilize him with your IM then shoot him. Repeat until he's defeated. You'll learn the new spell Expelliarmus and get a Gold Brick as well. Parseltounge will be unlocked as well as soon as you exit the room.
Expelliarmus
Exit the room and follow the ghost studs again until you reach the hallway with snake glyph. Press B to speak to it and for three snake pieces to appear. Use WiLe to assemble them on the pink stand to the left. The dungeon door will open afterward.
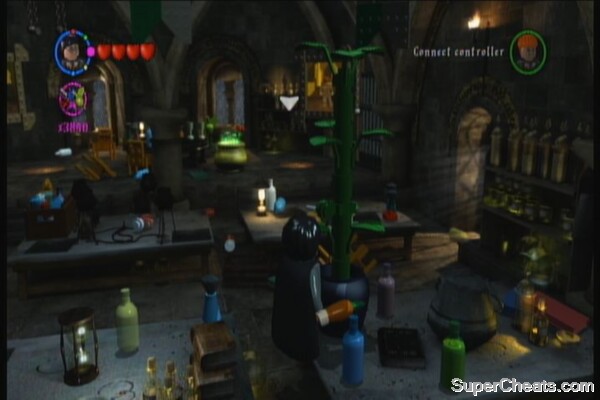
Go downstairs and examine the door to trigger a scene. Follow the ghost studs again and keep following it until a cutscene triggers and you find yourself inside the potion room. Like before, you need to find the three ingredients. Remove the debris to the left to reveal a pot containing a tentacle. It will devour the nearby student. Grab the hair piece left by the unfortunate student. Shoot the green, blue and violet bottles to pour their contents on the pot. A large plant will grow with a cherry piece. Grab it and throw it in the cauldron. The last green piece is located behind the golden door in the lower left part of the room.
Use IM on the pixie and throw the last piece to the cauldron. You'll unlock the character token Justin Finch-Fletchley automatically. Drink the potion and transform to Justin Finch-Fletchley or Hufflepuff Boy. Talk to the nearby painting to unlock the Polyjuice Potion. This will enable you to use any cauldrons you come across.
(Optional) While you're here, look around for some yellow bottles that release balloons when you pop their caps. There are four of them in the room. After transforming into Justin, wave to the painting to the left to get the last bottle. You'll be rewarded with tons of studs by doing this – which is a lot if you're not using the multiplier cheats.
Exit the classroom, then follow the ghost until you reach the hall with a cauldron. The ingredients should be readily accessible so grab them all and throw then in the cauldron to create another transformation potion. Go to the right and wave to the painting (Hufflepuff character required) to open the curtains. Grab the character token Harry (blue shirt) behind the staircase. Go upstairs and enter the door to the next area.
Use Hermione to open the puzzle cabinet, then assemble to pieces to form a safe that you can't open for now. Continue to the right then use WiLe to fix the leak. Continue to the right for a scene. Enter the room to continue with the story chapter.
(Optional) If you continue to the right, you'll find two pixies holding some pieces of the small pet tunnel. Kill them then fix the tunnel. Send Ron's pet to hit the switch. A floating pirate ship will appear and start releasing volleys of fire that explodes to several studs upon impact.
Year 2, Chapter 3
You need to throw in some ingredients again. Use WiLe on the boys to get their hair piece.
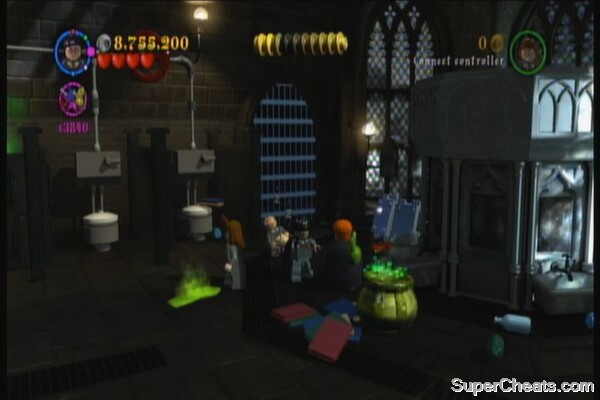
Next, use WiLe on a stick in the upper left corner of the room. Attach the small valve to the broiler to the left then activate it so you can get the red cherry piece. Next, step on any of the two toilets in the middle of the screen, then use WiLe to turn to big red valve overhead. Jump over the toilet lids until you land on the last toilet lid. Grab the pipe piece that will appear then use WiLe on it to fix the pipe above the red pot. Wait for a flower to grow and to explode into several pieces.
Assemble it so it becomes a fan that will take out the green gas in the same cubicle containing the last ingredient. Throw in the last ingredient, then ues the potion to trigger the scene. You'll be taken back to the Slytherin dungeon.
Throw the fishes back to the water for the Yellow Crest piece to appear. You still need to do a few more stuff to enter the next room. Make the vines retract using LuSo, then use WiLe to pull it out and pour its contents. Assemble the pieces to become a giant flute. This will cause giant snakes to pop out of the covers.
You need to shoot the snakes on the mouth to destroy them. Destroy all four then assemble the remnant pieces to a knight armor. It will turn the wheel to stop the water sprinklers blocking the door. Enter the next room.
You need to activate 6 lamps in this room to unlock the Blue crest piece. Next, use WiLe on the broom next to the fireplace then assemble the pieces that will fall down to become a painting. Press B on the spot to interact with the painting and for the man inside to shoot the glass pyramid on the table, saving a student in peril.
Use WiLe on the globe. Follow the escaped fish then place it inside the small aquarium with the skull.
Use WiLe on the skull twice to complete the chapter.
Re-run
Vincent Crabbe – Destroy the silver barricade to the right to access this character token.
Red Crest piece – Switch to Hagrid then pull the chain in the far left wall. Use WiLe to build a plumber. Ride on it and clean all the green goo for this piece to appear.
Green Crest piece – Upon entering the Slytherin dorm, you'll find a dark orb near the entrance. Destroy it to get the piece.
Gregory Goyle – In the far side of the room, near the windows is a dark cabinet. Open it with CR to get the token.
Ron (Slytherin Disguise) – Go to the other side of the room, then unlock the desk further north. Shoot it again to release the character token.
Hogwarts
Continue to the right then enter the bathroom to start the next story chapter.
Year 2, Chapter 4
You'll start the chapter with a fight against Moaning Myrtle. She'll throw debris at you so you need to hurl them back to her using WiLe. This will open the cubicle doors. Once the last cubicle door opens, shoot her to damage her. Repeat this two more times. She'll get stuck after taking her third hit so quickly shoot again to defeat her.
Moaning Myrtle battle
You'll find yourself in a flashback stage. You need to look for ingredients for a potion again so start by blasting the knight armor and the bookshelf to get the first piece. Shoot all six armors in this room to reveal the Red Crest piece. Four are located at ground level while the other two are located in the upper platform. Place it to the cauldron to the right, then step on the piston-like mechanisms to create foothholds on the wall up front. Hop to the upper left, then blast the knight armor again and the pot to get the second piece.
Next, go back again to the pistons and use the footholds again to jump to the upper right. Hit the piston there and jump across the gap to the right to find a shaking brick. Shoot it to destroy it to get the final piece.
After throwing the last ingredient in the cauldron, retract the vine in the middle then use WiLe to repair the closet. Go inside to equip some earmuffs then use the mandrake to shatter the glass cabinet beside the closet and other glasswares in the room if you want to. Drink the strength potion then pull the chain to reveal some lego bricks. Use the bricks here to create a walkway on top of the pink arcs so you can reach the other chain to get out of this area. You don't have to use all the bricks.
Head to the right and kill the pixies holding two more lego bricks. Assemble them on top of the arcs so you can jump through. Remember that you must reach the next chain before the effect of the potion wears off. Pull the chain to remove the obstacle.
In the next area, you'll need to find and shoot all three radios scattered to unlock the Green Crest piece. Follow the path until you reach the first stairs. Jump on the piston to the side then shoot the first radio.
Cross the stairs, then shoot the painting. Use the part the painting threw away to fix the second piston. Step on it to fix the stairs, then shoot the second radio. Place one of your characters beside the bookshelf, then use WiLe on the table to rotate the bookshelf. Switch to the other character and do the same thing to regroup.
Shoot the banner to reveal some pieces. Use WiLe to create a trampoline. Jump to the next platform, then use LuSo to retract the vines and release the footholds. Jump down and place the footholds on the wall so you can jump to the upper part.
Shoot the last radio here to unlock the Green Crest Piece. Finally, arrange the arcs on the side to complete the chapter.
Re-run
Moaning Myrtle – During the boss battle with her, head to the far right of the bathroom then open the dark cabinet to get her token.
Yellow Crest piece – Shoot the silver chest in the upper left corner of the room. Ride the plunger around the room to remove all 5 water puddles. The crest will appear after removing the fifth puddle.
On the first flashback room, head to the far right and have Hermione solve the puzzle cabinet. Grab the key, then use it to open the locked cabinet to the left. This will save the student in peril inside.

Vocalist - At the start of the second area, open the safe behind to get this character token.
Blue Crest piece - In the same hallway as the safe containing the Vocalist token, continue south and use RE to unlock the chest in the corner.
Professor Vector – In the last area before arranging the the pillars to exit, you'll find the safe beside the third radio.
Hogwarts
Follow the trail of spiders then exit to the next area. Just keep following the path of spiders until you reach Hagrid's cottage.
Year 2, Chapter 5
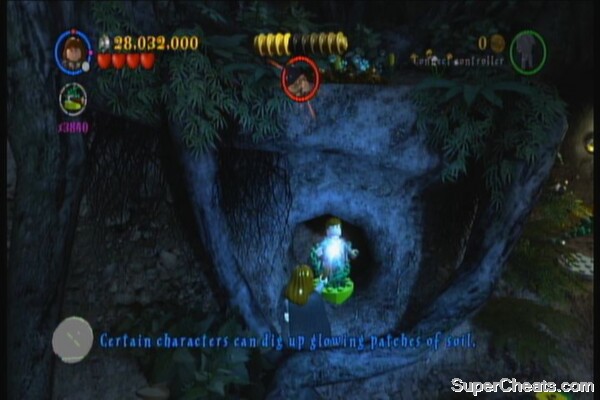
Once in control, shoot the mushrooms behind you. You need to shoot a total of 10 more similar mushrooms to unlock the Green Crest piece. Raise the stump and ride it so you can reach the upper ledge.
Then, clear the grass beside the tree with some boulders to finds some round lego pieces. Use WiLe to transform it to a raincloud. Lift it and let it rain down on the large tree. Midget treefolks will run down and build a ladder for Ron and Fang to climb up. Shoot the mushrooms here then have Fang dig the base of the large tree to bring it down for you to cross.
In the next part, shoot mushrooms and other stuff as usual. Remove the vines on the wooden bridge, then use WiLe to activate the brooms. Fly to the other side (ignore the silver gate for now).
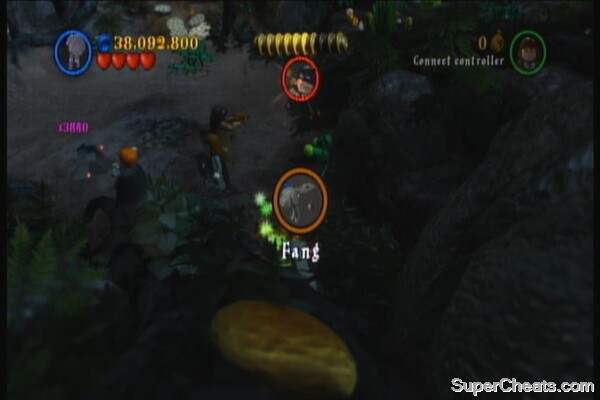
After reaching the other side, use WiLe on the lego pieces to create a ramp for your allies to cross. Continue to the right to find a ladder. Pesky pixies will destroy it so another ladder will be created for you, courtesy of the guys earlier. After climbing the ladder, turn left to find a character token (Ron ~ Sweater). Continue to the right, then kill the pixies. Finally, use Fang to dig open the path to the next area. The final mushroom is found here so if you're short than 10, you may have missed some along the way.
After the scene, you'll be in another boss fight.
During this battle, free the student in peril trapped in the web.
The boss will keep spawning brown and purple spiders. It takes two hits to kill the ordinary brown spiders. As for the purple ones, press B to make them float, then hold B to make it spin. Remember that while you're spinning, you have a few seconds of invulnerability so don't hesitate to hold your ground and concentrate on spinning the spider then releasing it to damage the boss. Repeat this three times to finish this battle.
Spider battle
For the second sequence, take note of boxes that you can smash. Smashing all 5 of them will earn you a Red Crest piece. If you're using the car and a spider climbs up, press X to sound your horn and throw off the spiders. Continue your pace ahead from the boss and this sequence will end automatically after reaching the checkpoint.
Spider escape
Re-run
Blue Crest piece - Cross the pond using the broom then fix the ramp. Stand on the ramp as shown in the screenshot to break the silver gate. Ride the frog and go through the gates to obtain the crest.
Blue Crest
Professor Sinistra - After crossing the pond, open the dark cabinet.
Yellow Crest piece – During the boss fight, destroy the orb to the left using dark arts
Lucious Malfoy – During the boss fight as well, unlock the chest to the right
Hogwarts
Just follow the ghost studs to trigger the next chapter.
Year 2, Chapter 6
Head to the open cubicle then use WiLe to clear the pet tunnel. Continue to the left then shoot the painting to clear the entrance. Send Ron's pet to the tunnel then continue east and press the switch. Switch to another character then use LuSo to kill the vine. This will open the cubicle and rescue the student in peril.
Use WiLe to fit the elbow tubing on the pet tunnel. Do the same thing to the other cubicle, then order Ron's pet to press the switch. Head left then use WiLe on the small cabinet. Assemble a large plumber out of the lego pieces, then ride it. Steer it towards the clogged toilet and more pieces will appear.
Assemble the pieces then using Harry, talk with the snake glyph to proceed further.
After landing, look for the bones that you can assemble. Assembling 4 of these will reveal the Red Crest piece. Three of them are in the ground level while the other is located in the upper level. Head left and approach the tunnel for the squid to appear. Use the nearby plumber to plug its mouth. Once it goes away, build a platform from the pieces it left and step on it as an ally lifts you. Follow the path to reach the last skeleton.
Rebuild it so another squid appears. Cross the gap with the help of the water fountain, then rebuild the pieces on the other side. There are also four dig spots in this area; (you need to come back for this later during free play) dig them all to get a Yellow Crest piece. Cross the bridge, then use WiLe on the snake statue. Jump to its mouth then enter the tunnel for the last part of this chapter.
At the start of the battle, avoid its beam glare as it will cause instant death to your character. You need to find the ingredients first to create the strength potion. There's a piece behind each pile of boulders. Just run around and lure it to the boulders until they're destroyed. You still need to interact with the object behind the boulders before you can get the part. For the snake glyph, just press B to communicate with it, for the bottle piece, just destroy the charmed snake and finally for the bone piece, retract the vines then open the chest. Assemble the skeleton and grab the piece.
Drink the strength potion and go up the ramp to the left. Pull the chain to open the metal gate. Watch the following scene. Use your targeting skill to hit the basilisk's head. Once it dives underwater, search for three piles of lego pieces which you can assemble into various musical instruments. Assemble all of them to get the Green Crest piece. Head to the ramp again then use WiLe to attach the chains and pulling them down. Fall through the large pipe to get near the basilik. Use WiLe on the wizard hat to change it to a weapon, then use the weapon itself kill it.
Basilisk Battle
Re-run
Gilderoy Lockhart – After jumping down from the bathroom and reaching the underground area with lots of bones, head to the far left to find two dark chests bound by vines. Free them then shoot them with dark arts.
Wizard (Green) – Beside the dark chest of Gilderoy.
Tom Riddle – After opening the gate to the left by pulling the chain (after completing and drinking the strength potion), the phoenix will arrive and attack the basilisk. While the basilisk is struggling, send a key character to open the safe to the far right.
Blue Crest piece – Shoot the lock on the circular hatch using RE then assemble the pieces to a clock. It is located before the ramp to the left.
Year 3, Chapter 1
There's a monster book lurking the floor so quickly head to the left and jump on the bed. Fix the painting nearby then shoot the painting where the wizard moved to. Wait as throws his hat and the book chases it, then finally gets eaten and spat out by the dresser. Press B to jump on it and damage it. Go back to the bed, repeat the process; this time you need to light up the fireplace using WiLe on the lego pieces near the hearth. Return to the bed to avoid getting damaged, then fix the painting again for the book to get stunned. Jump on it to defeat it.
Monster Book
You'll be in the train platform next. Shoot the owl cage beside the benches, grab the flower piece that it drops, then use it to plug the steam blocking your path. Keep an eye out of the red shoeboxes/ containers; destroying all five of them will reward you with a Yellow Crest piece.
Four can be found in this platform while the last one is found on the other side. Continue to the right then shoot the plants there then use WiLe on the object to fix the speakers. This will wake up the two passengers napping on the two luggage. Shoot the two for a bottle piece and some lego pieces to appear. Rebuild the pieces to a blue brick.
Have another character carry the bottle piece, then carry the blue brick to the left and place it on top of the green brick near the train window.
Jump on top of the train. There's a dig spot here (do this during free play) that contains a Red Crest piece. Grab the flower piece, then jump to the other side of the station. Wait for the spinning gate breaks open the nearby luggage, then use WiLe to construct the cauldron.
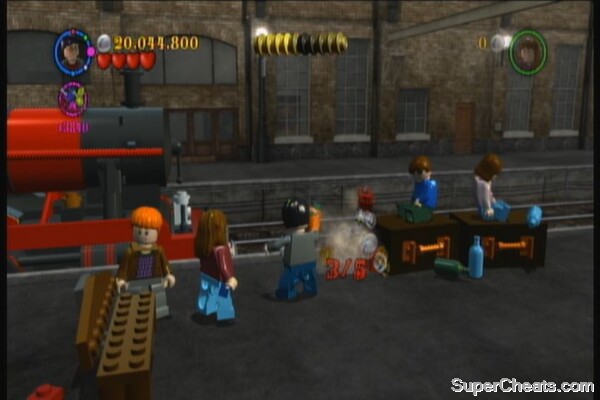
Throw in the ingredients you got so far. Shoot the gold cage to the left to get the final piece. Shoot the black luggage as well then rebuild the lego pieces it drops to create the pull-chain mechanism. The last red shoebox is here so don't forget to destroy it. Drink the potion then pull the chain to connect the two train cars. Ride the car to finish this section.
Follow the trolley then use WiLe to lift the lollipop from the trolley and give it the to the kid. Do this twice, then finally lift the green key from the trolley and use it to open your room. After the cutscene, use Professor Lupin's spell to destroy the wraith to the right. Head left, destroy the wraith then shoot the luggage. Use WiLe to activate the pickaxe and destroy the stone blocking the adjacent room. Rebuild the pieces to a cart then use WiLe to move the boxes unto the cart.
Shoot the cart for it to bash the lock. Continue to the second train.
Shoot the green Slytherin chest until you get a counter. Shoot all 5 of these will award you with a Blue Crest piece. There are three such chests in this section. Destroy the wraith up ahead, then clear the blockade obscuring the entrance of the pet tunnel.
First jump on the boxes beside the tunnel to grab the Green Crest piece. 
Send Ron's rat through the tube and push the luggage overhead to wake up the student. Grab the key from the chest in that room then continue to the right. Shoot the third green chest in the area, then use the key to open the emergency box. Use the pickaxe to destroy the rock again then move to the third car.
Have Hermione access the puzzle cabinet. Solve it to release some lego pieces. Keep using WiLe on it until you finally place it on the purple patch on the floor to block the moonlight from the window. Use the pickaxe to clear the path, then shoot the green chest. Lift the curtain from the floor and place it again to the window. Continue ahead to find the last Slytherin chest. Shoot the wraiths blocking the path to end this chapter.
Re-run
Stan Shaunpike – South of the train engine is a dark chest. Obtain the token by using CR
Ernie Prang – At the train platform, head to the far right to find a dark cabinet. Open it using CR to get the token
After boarding the train, shoot the locks in the first room to find a student in peril.
Trolly Witch – This token is found in the same room as the student in peril above.
Hogwarts
Riddikulus Training
Follow the ghost guide until you reach the classroom. Here, you'll learn a new spell. From here, look for blue books. You need shoot all four books to unlock the character token of Pavarti Patil. The are two lying on the ground to the left, the other is inside the puzzle cabinet and the last one is located above the stairs at the end of the room. Next, use WiLe on the four torches in the room to get another character token (Station Guard)
Make sure you have Riddikulus (RiDi) equipped (yellow spell, 7o'clock on your spell wheel) then step on the boundary. Have Hermione use this three times against the boggarts (created from the character's fear) then do the same thing with Ron to learn this spell permanently. Exit the classroom afterward.
Surely you already came across with rattling chests. These contain boggarts as well; just use Riddikulus to get rid of them. Do that to the boggart that will appear from the chest beside the painting to the right. It will drop a green key you can use to open the next door.
In the courtyard, you'll find another cauldron.
The ingredients are easily found in the area without too much hassle so just shoot the plants and use WiLe to lift the hanging pots and clear the vines. Use the strength potion to pull the chain and to reveal some hoops overhead. Use the flying broom (only harry can effectively use it) and fly through all the hoops and the character token of Oliver Wood will appear.
Enter the classroom. You need to find all three teacups. The first one is immediately visible to the right. The other one is located in the northeast side of the room; shoot the cabinets to reveal the pieces that you need to rebuild. The final teacup is located to the southeast, have Hermione solve the puzzle cabinet then rebuild the pieces. You'll get a gold brick after finding all three.
Head west and lift the vines by using WiLe on one of the hanging pots, if you haven't done so yet. Enter the door to return to the courtyard. Head to the right to the next screen. Keep following the corridor, past the troll, the wooden bridge. Meet up with Hagrid to start his lesson..
Buckbeak Handling lesson
In his garden, head north to find a lone pixie. Kill it then use WiLe on the small plant with a purple base. Put it in the purple piece on the rock to prevent any more pixies from appearing.
Have Hermione release her cat then order it to dig the nearby dig point. Use Luso to clear the vine and grab the food. Bring it back to Hagrid and place it on the plate. Go to the right this time. Use WiLe on the brown ball then use the cat to dig again. The brown guys will create a ladder for you. Before climbing it, continue to the right and keep destroying the plants. The second food piece will be there.
Bring it back to Hagrid, backtrack and take the ladder this time. Grab the last piece in the middle of the pond then return to Hagrid to complete the lesson.
(Optional: There are 9 cobwebs to shoot and 4 fishes to return to the water; completing both tasks will award you with studs)
Hagrid's Garden
Once outside, return to Hagrid's garden again. Clear the plants and dig all the dig spots using Fang or Hermione's cat. Use WiLe on the mushrooms here to get the character token Ron (Brown Jacket). Assemble to pieces to the right to create a Time Turner cabinet. You don't have use for it now so just use WiLe on the various objects here to get more pieces.
When you're able to use WiLe on the basket, you'll find a student in peril inside. He'll throw a seed out. Shoot this seed, then use WiLe again so the student will be carried away.
Assemble the final pieces to get a gold brick.
You'll be taken to the bridge after clearing Hagrid's Garden. Continue to the left then follow the markers for a cutscene. Return to the right to the corridor, then upstairs. (Just follow the markers) In the lobby area, switch to one of the brothers and use RiDi defeat the boggart beside the stairs, then use the key to open the gate to the upper left.
This leads to the library. You can visit it now to get a character token (see below) or just do it later and follow the ghost guide for now. If you wish to do it later, just ignore the paragraph below and skip to the next.
Inside the library, shoot the curtains to the left then use WiLe for a pixie and book to enter.
They'll drop an ingredient and a torch. Use WiLe on the torch to place it on the statue beside the painting in the corner.
Shoot the statue and the wizard on the painting will run to another canvas. Go there and jump on the leftmost plant so your allies lifts you up. You should be able to obtain the character token of Susan Bones. Head to the right and you'll find a chest held by a vine. Untangle it with LuSo then shoot it. Grab the pink glass to throw it to the painting.
The painting in turn will give you a slab. Use it on the nearby relief to open it. You can't enter it for now so just ignore it. The ingredients you find here is to be used on the black cauldron to the left but you can use it for now. That's it for the meantime. Exit the library and go through the main door.
Go upstairs and turn to the left to find the next marker.
Year 3, Chapter 2
You need to destroy 10 webs to get the Yellow Crest piece. There's two overhead from where you started. Clear the vines as you go to the right, then shoot the web overhead, before reaching the pixie (3/10). Kill the pixie then use WiLe to put the piece on the platform. Jump on it and use WiLe again on another board to jump across. Get the two boards and put them on the pillars to the right. Don't forget to shoot the web to the lower left. (4/10). Jump on the next platform. Before lifting the 100KG weight, press Square to enter targeting mode. Find another web to the lower right (5/10). Lift the weight and connect it to the purple line to pull the bridge down.
Cross the bridge, shoot the web to the left (6/10) and the one on the nearby wall. (7/10). Use the torches nearby to warm up the vines and release the platforms where you can jump though. Cross the gap again and shoot the web behind the root. (8/10) Switch to any of the brothers, then use RiDi to destroy the boggart. Pull the purple part to reveal three face reliefs and some items.
You need to place the items on the appropriate “face”. Place the painting in front of the face to the right, cake in front of the middle face and the flowers to the left. If done correctly, the stairs to the right will be fixed. Otherwise, try to lift the part again with WiLe and attempt to fit it again. Continue upstairs to the right. Shoot the last two webs then climb the ladder up.
There's nothing much to do in the candy shop so lift the purple block and place it on the scale to open the path outside.
Head out, then shoot all three owls for them to drop several pieces. Build a snowman out of them. Destroy the snowman to get the Blue Crest piece.
Continue uphill and the Malfoy bastard will make the giant snowman lob snowballs. Grab the torch left behind by the wizard from the scene, use it to melt the large chunks of ice right beside it. Use WiLe on the wooden planks to set fire to the snowman and melt it.
The digging spot past the signboard contains a snowball that you must ride downhill to hit some bowling pins. Doing so will award you with a Red Crest piece but you don't have means of digging it up so try to get this during free play. Head to the right for a snowball fight session against the resident anti-heroes.
Malfoy will throw three fast snowballs at you which you must avoid then wait for him to throw a large, slow one. Use WiLe to throw it back to him. Do this two more time sand he'll create an igloo-cannon. Stand back at a distance and wait for him to shoot his projectile. Use WiLe to plug it back to the cannon then wait for it to throw a much larger snowball. Throw it back to Malfoy to damage him. Do this two more times to finish him.
Snowball Fight
After the snowball fight, you'll be back in the streets. Take the road to the lower left to find a snowman at the end. Shoot it to release the student in peril.
Attach the broomstick nearby to the snowball. Lift the purple cage and put it on a sled so it melts the ice and reveal another broomstick. Use it and fly towards the snowball. Use WiLe to attach it. Next, head down and shoot the pine trees closes to the intersection so they'll fly upwards like rockets and hit the student with the third broomstick. Place it on the snowball to remove the obstacle. The Green Crest piece can be obtained by using the chain device but it requires a strong character. Leave it for now and enter the building to complete the chapter.
Re-run
Crabbe (Sweater) – Destroy the dark orb left of the “face puzzle” in the first area.
Goyle (Sweater) – Right after emerging from the tunnel and finding yourself inside the shop, you'll find a locked kiosk. Break the silver lock with RE then use WiLe to shake it and to get the token.
Draco (Sweater) - After the snowball fight, use RE on the pot beside the snowball. Next, find the red wizard holding the character token down the street to the lower left. Shoot him and he'll teleport to the right side. Shoot him again and he'll teleport beside the pot. Use WiLe on the pot to scare him away and for you to get the token.
Green Crest piece - After placing three brooms on the large snowball, don't go inside the building yet. Follow it to the right and pull the chain to get this crest.
Hogwarts
Nothing much to do here; just follow the ghost guide or the markets until you reach your house's main room. The next chapter will start from there.
Year 3, Chapter 3
To start off, destroy the golden knight armor. (1/5) You need to destroy 5 of these during this stage to get the Blue Crest piece. Use WiLe on the torch to burn the vines and drop the red key. Next, shoot the cabinet to the right, build a silver knight armor then shoot it afterward to get the yellow key. Put both keys on the keyholes then use WiLe on one of them while your AI or co-op partner turns the other.
Go through the door and follow the hallway as you zap two more knight armors. Once you reach the large room, zap the two more armors to get the crest piece. Arrange the bricks in the middle of the room according to the pattern shown. Once activated, you'll find a pull-chain mechanism and a skeleton.
Zap the skeleton for it to drop a bone piece. Go to the right and kill the boggart from the chest. Shoot the cabinet to get some lego pieces which you use to build a cauldron. Place the bone piece nearby.
In the upper right corner you'll find a pixie holding a hammer. Kill the pixie then shoot the chest to reveal a large snake. Use WiLe on the hammer to crack the snake and get the bottle piece.
Finally, shoot the rolled-up banner in the left corner of the room to get the flower piece. Use the strength potion and pull the chain. Use WiLe to lift the iron ball that will appear. The door ahead will be opened after doing all this. Proceed forth.
In the next area, have Ron destroy the boggart, then have Harry talk to the snake to get some lego pieces. Rebuild these as a platform where you can acquire the red spider piece. Next, retract the vines with LuSo then place the spider piece in the cauldron. Go to the right this time and clear the debris in the fountain then use WiLe
to build a wheel. Turn that wheel so the fountain gets filled and plants will grow on the wall.
These can be used as footholds to reach the upper level. Use WiLe to the shovel nearby to grow a plant. Shoot the plant to get the cherry piece. Place it in the cauldron then go up to the upper level.
The old man with a cat is guarding this section so avoid him or shoot his cat if you get caught. Enter the open window to grab the food piece. Make sure to grab the Fred (Sweater) character token inside.
Throw the last ingredient to the cauldron and drink the Invisibility Potion afterward. Have both characters drink it, then jump down to the upper level. Head to the rightmost part and both of you use WiLe to pull the statues down. Enter the window for the next section.
Follow the hallway. As you go ahead you'll find a student in the painting that has the Green Crest piece. You need to wave at him using a Slytherin character to get it – that's during Free Play, of course.
Anyhow, continue on, then shoot the two chests to get some lego pieces. Build a violin from it and wait for the wizard in the painting ahead to fall asleep. The green key will drop from him. Grab it and use to open the door. Chapter completed.
Re-run
George (Sweater) – After reaching the large room, use Hermione to solve the puzzle cabinet to the left. Rebuild the desk and hop on it. Your partner will lift it up for you to get the token.
Yellow Crest piece – In the same room above, after placing the second sphere to open the door, use dark arts to crack open the sphere to the right.
After creating footholds by watering the fountain, you'll find a locked window to the left in the upper platform with Filch and his cat. Open it with RE to rescue the student in peril.
The Grey Lady – In the same room where you rescued the student; just search the left side of the room.
Red Crest piece – Open the dark window, just beside the locked window where you got the two unlockables above.
Green Crest piece - After getting past Filch using the Invisibility Potion, you'll find a painting In the dark hallway holding the crest. Wave at him using a Slytherin character (Harry and Ron's disguises will work) to get the piece.
Hogwarts
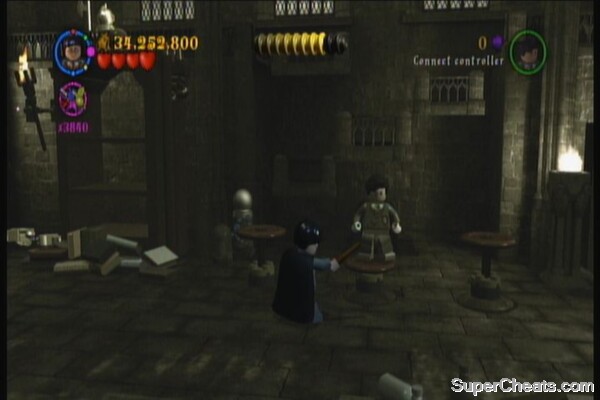
It's time to learn another spell. Just follow the ghost markers until you reach the next classroom. During class, Harry just needs to open the chests and destroy all five wraiths. Don't come too close or he'll get scared.
Two of the chests are on the floor, one is carried by pixie to the left, one to the right is covered with vines. The last one is inside a painting. To get it, shoot the cabinet to the right and build a projector out of the lego pieces. The chest will be thrown out of the painting.
Kill all 5 wraiths for Harry to learn the Expecto Patronum.
Once done, exit the class room and follow the ghost markers. Make your way to Hagrid's cottage to start the next chapter.
Year 3, Chapter 4
Start by clearing the path by destroying the plants, to give you more room. You can ignore the digging spots for now since you need a dark arts character to unlock their contents. The tree will trash around and smashing its branches all over the place. Just run around and avoid it. Wait for the main branch to crash down and press Y to ride on it. Keep shooting until you hit one of the green antennas. Repeat the process twice to defeat it.
Tree battle
Jump on the hole to reach the next area. Shoot the first yellow plant as you start. Shooting all 5 of them in this chapter will unlock the Yellow Crest piece. Jump down to the gap, shoot the second yellow plant to the right, then shoot the roots so a green seed falls off. Now shoot the red plant to the left to water the seed. It will grow to a plant where you can use the leaves as footholds to get back on top.
Continue to the right and shoot the yellow plant (3/5) and jump on the moving platforms. Ride the first one and jump to the left. Use WiLe on the piece there to untangle the red vine covering the far end of the area. One the last platform (held by a single root) wait for it to go down then go to the right.
Shoot the yellow plant (4/5) and use WiLe on the curious-looking piece there to untangle the green vine. Ride the vine again to jump to the right this time. There will be a couple of purple geysers here. Shoot the piece on the ceiling for it to drop two purple seeds. Place them inside the holes of the geysers and watch them turn into plants. The geyser to the far right however, will become high pressured and will allow you to reach the upper levels.
Hop on top of the wood palette, then jump to the left. Use WiLe on the piece there to untangle the last vine. Hope to the right and shoot the last plant to get the yellow crest, then continue to the right to the next area.
In this part, you need to find Ron's pet by shooting at the shaking furniture around the room. Whenever you shoot a furniture, a lego piece is thrown out. The rat won't enter the same furniture twice so its easy to predict where its gonna enter next. After getting all pieces out, use WiLe to construct a giant mousetrap. Watch the following scenes and you'll be outside this time.
Mouse Hunt
The digging spot to the left contains a glass-covered case that requires Reducto in the process of opening it so just come back for it later. For the meantime, go to the right and use LuSo on the vine then use WiLe on the pieces to create a large ball. Shoot it for it to fly away and drop some lego pieces. Construct them so you can have a platform to jump on.
Continue to the right and use Hermione's cat to dig the cauldron out. Pop the green seed beside the werewolf using WiLe to get the flower piece. Next, assemble to skeleton to the left to get the bone piece and finally, shoot the snake head near the werewolf and grab the tooth piece on the ground.
Drink the potion and pull the chain to the left to raise the yellow platforms. Use the cat again to dig and the little brown guys will rush out and create a ladder for you. Climb up and several spiders will rush towards you. Kill them all and release the student in peril that was trapped in the web. Rebuild the mushroom and jump on it to end the chapter.
Re-run
Witch (Grey) – During the boss battle with the tree, dig on the digging spot right to the right of the tree then use dark arts to open it.
Red Crest piece – There is another digging spot, this time to the right. You need to use dark arts as well to open it
Peter Pittigrew – In the room where you need to trap the rat, go to the left and open the dark cabinet
Hermione (Red Hooded Top) – As soon as you start the third area, you'll find this locked chest to your left.
Blue Crest piece - After getting the token above, use the digging spot to reveal a glass case. Continue to the right until you reach a heavy chain. Pull it to raise the yellow platforms, then use RE on the lock. Enter the closet to equip earmuffs, then backtrack to the left, grab the mandrake and use it to break the glass case. You can also bypass the earmuffs by using Death Eater. He is naturally immune against the mandrake's wail.
Green Crest piece – There five large dark rocks that you need to destroy to get this piece. The first one is right after the first stackable lego bricks. There are two more stones near the pull-chain device, a short walk after the first one. The last two are found right after creating a ladder and reaching the area where you'll get attacked by several spiders.
Hogwarts
Follow the ghost studs and take a few short steps to reach the infirmary. Watch the following scenes and you'll start the next chapter.
Start by going to the upper left corner of the garden and equipping earmuffs. Head to the right and shoot the blue plant protruding out of the bucket. Grab the mandrake and place it there, then shoot the blue plant again that popped out by beside the mandrake. It will then pop out of the red water container, spilling the fish inside it. Bring the fish to the griffin. Rebuild the lego pieces to create a grill. Take out the roasted meat and feed it to the griffin again. Finally, grab the axe that will appear from the rubble and use it to cut the chains to free the griffin.
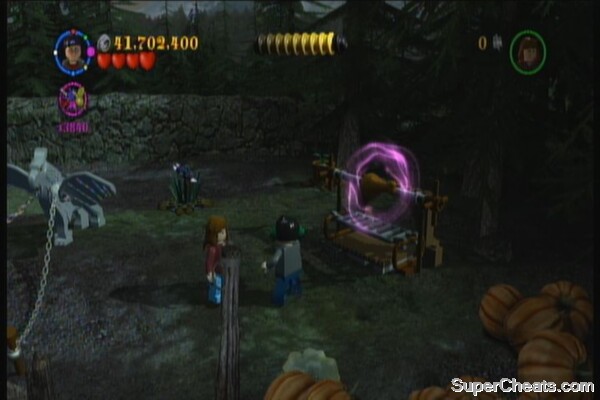
In the next area, head to the left and kill the wasps. You'll also find a student in peril here. To the empty pond and kill the pixies holding the raincloud pieces. Rebuild the cloud and it will rain down, filling the pond. Jump on the lily then use Luso to kill the vine. Jump down and rebuild the music player using the lego pieces. Grab the black record to the left, then dig out the second. Place them both on the player to get the Red Crest piece.

Next, ride the frog and go through the checkpoints that will appear around the pond to get the Green Crest piece.
Green Crest
Jump on the lily to reach the upper pond, then use WiLe to pull out the hook out of the water. Shoot the hook to grab the chest. Shoot the chest to get the yellow record. Bring it back to the player to complete this section.
Head to the northwest and shoot the branches.
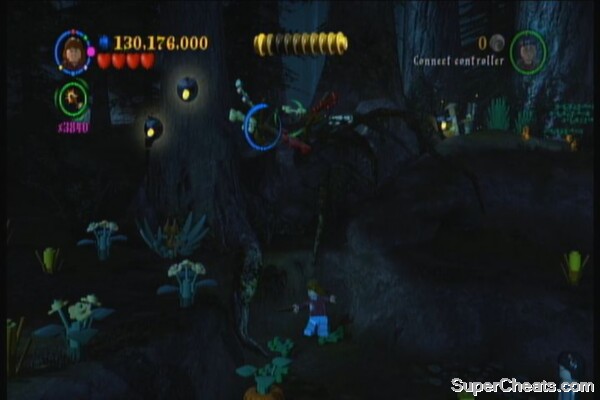
Create a bridge out of the rubble. Backtrack a bit and jump up the stone stairs then cross the bridge. Use LuSo to untangle the vines and to release the boulder. Defeat six wraiths using Harry's Patronum spell to complete the chapter.
Re-run
Blue Crest piece – Hit the bird cage to the left to release it.
Professor Lupin – After refilling the pond, jump to the upper area then look for a golden chest behind the bushes. Destroy the lock using RE then shoot the chest to open it.
Cornelius Fudge – In the last area where you'll need to fight wraiths in the frozen pond, go to the right then shoot the silver leaves to reveal a snake mirror. Talk to it using Harry to get the token.
Yellow Crest piece - After breaking down the boulder, ignore the wraiths then go to the right. Use WiLe to reconstruct the pieces then jump on the hill. You'll find three dark stones on top; the middle contains the crest.
Macnair – Inside the dark stone beside the yellow crest.
Hogwarts
You just need to ride the griffin to proceed to the next chapter however, there's still some stuff to do. Kill the pixies nearby then shoot the chest. Arrange the bricks so you can jump and reach the character token of Hufflepuff Prefect. Now kill the boggart to the lower right and connect the knob to the northern gate. Use WiLe to open it.
Go through the northern gate and follow the path to reach the watchtower. Shoot the two owls holding a scroll to release a student in peril in the process.
Shoot the chest then lift it so the owls feed on it. Next, find some lego pieces upstairs. Rebuild it. Use WiLe on the bridge piece on the ground and it will create a ramp for you to reach the character token of Hermione (Grey Hooded Top). Next, go upstairs and use WiLe to drive the egg out of the maze. Backtrack and shoot it to release the full-grown owl inside and to help carry the platform. Ride the platform next.
In the upper level, use WiLe on the pink feather on top of the table to tickle the painting. It will sneeze and break the wall. Rebuild the lego pieces and get the gold brick from the chest. Next, you need to play three records on the music player. The first one is visible to already, the second is inside the chest, and the last one is located inside the cabinet. You need to shoot the player to stop it from playing and take note that you can't pick up other records while there is a current one playing. After playing all three records, the character token of Cho Chang will appear. That's all for now in this place to return to the previous area and ride the griffin to start the next chapter.
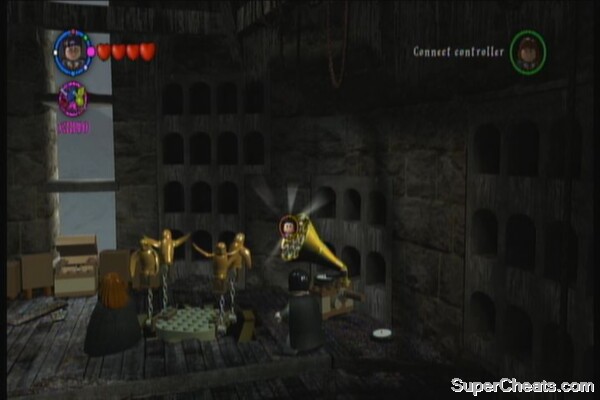
Shoot the green lamp. You need to shoot 5 of these to unlock the Blue Crest piece. Have your Patronum spell ready then continue to the right. Destroy the wraith along the way, then melt the ice covering the second lamp. Shoot the chest then use the hammer to destroy the rock covering the vines. Clear the vines then kill the wraith.
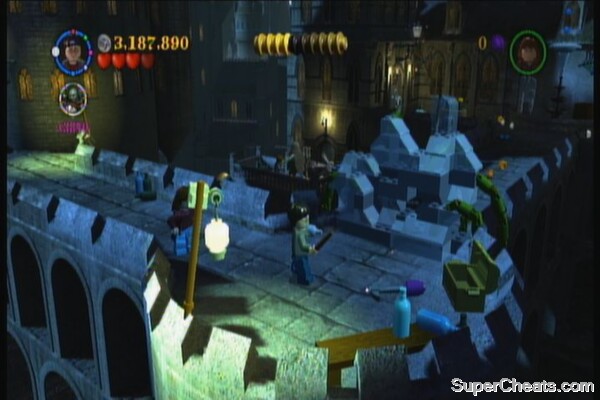
Next melt the ice covering the third lamp in the middle of the bridge. Head to the fountain and melt the ice. Shoot the fourth lamp afterward. Use WiLe to bring the water-filled bucket to the right side and water the seeds. Shoot the flowers and jump on them to reach the upper platform. Shoot the torch-holder to melt half the ice covering the door. Kill the wraith that will appear. You'll also find the fifth lamp here. Shoot the chest to the right then rebuild the second torch-holder. Shoot it so it melts the other half of the door. Enter the door when ready.
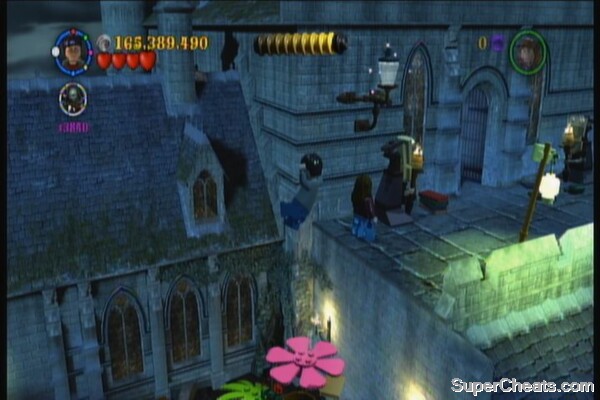
In this section, you'll need to split up. Use WiLe to place the first platform so your partner can proceed. Next, switch to your partner and use the torch to retract the vines and for the wooden palette to drop.
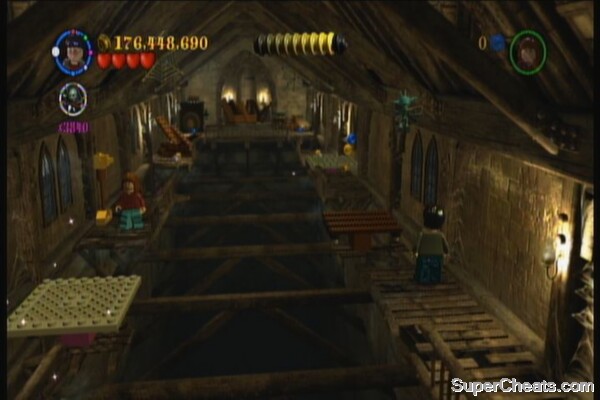
Switch to the character on the right side and continue forth. Place the platform again to the left, switch then use WiLe on the lego pieces to rebuild the path to the right. Switch then continue until you reach the door. Rebuild the path to the left using the debris blocking the door and regroup with your partner. Enter the next room to continue.
In the next area, use WiLe to bring the cauldron down. Use the WiLe again to the small barrel beside the tree. Use the axe to chop the branch where the flower piece is sitting on top off. Next, shoot the planter to the left then destroy the large snake that will appear. Grab the tooth piece. Next, jump/ climb down south and lift the purple gargoyle and place it above the window to smash it.
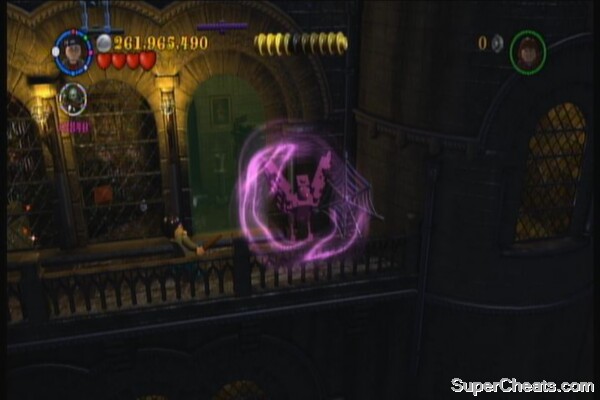
Take the Red Crest piece hiding to the right, then switch to Hermione and solve the puzzle cabinet. Grab the last piece and put it on the cauldron. Take note that two more wraiths will appear. Destroy them, use the strength potion then pull the chain to raise the bridge. Cross the bridge and go upstairs for a boss fight.
During this battle, you need to use multi-lock to destroy multiple wraiths faster. Harry's Patronum spell has a slight delay for every shot so using it normally by pressing B won't help that much. The pattern for this boss is simple. You need to use WiLe on the barrels until you find a plumber. Wait for it to absorb everything around it and the plumber will stuck on its face. This is the time its vulnerable so shoot it to deal damage. Repeat two more times to win the battle and complete the chapter.
Wraith boss battle
Re-run
James Potter (Ghost) - After crossing the frozen bridge, turn left then blast the silver lock on the door.
After getting the character token above, blast the wraith to save the student in peril.
Lily Potter (Ghost) – After entering the building, unlock the chest right in front of you.
Green Crest piece - After getting across the ceiling, use Griphook to open the safe.
Sirius Black – In the third area, jump down south where the purple gargoyle is. Enter the room then destroy the dark cabinet to the left.
Yellow Crest piece - You need to shoot 6 silver gargoyles to get this piece. One is above the door where you came from, two are hanging to the south, there is one each in at the edge of the tree and statue (you'll get a better view of them while crossing the bridge), the last one is right before you go upstairs before crossing the bridge.
Year 4, Chapter 1
Go to the right and use WiLe on the bucket to put the fire out. You need to do this 8 times to get the Red Crest piece. Continue to the right past the tents to find George. Press and hold X to target him and shoot the fireworks to rescue him. There is another bucket here; use it to put out the fire. Continue a little bit to the right to find another fire to put out. Go back to your starting position then go north this time. Put out the fire to the left then go east this time. You'll find Ron trapped under some debris. Shoot the enemy three times as it pops out in different directions then use WiLe to save Ron.
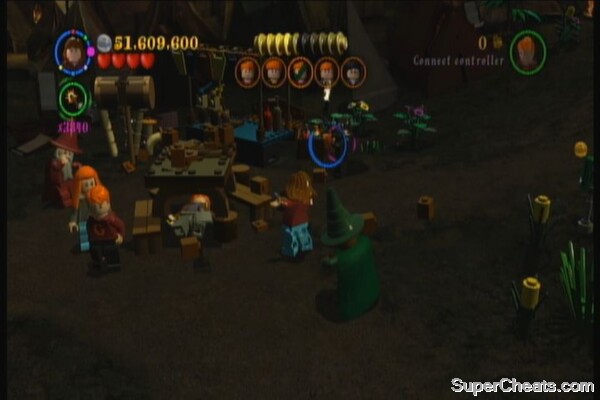
Go uphill to the right two find two more fires to put out. Continue to the right to find Mr. Weasley. Shoot the enemy until he pops out to the left side. When he does, use the frying pan nearby to smack him and free Mr. Weasly.
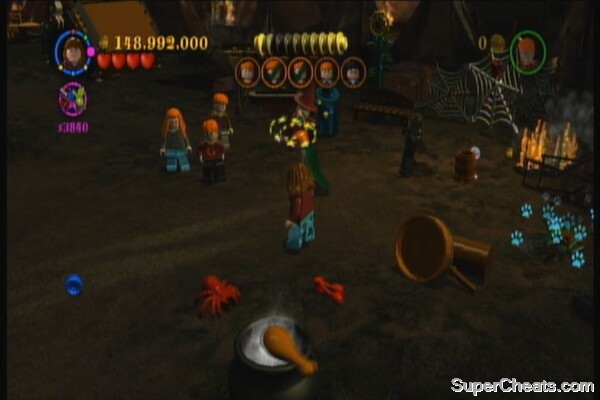
Put out the nearby fire, then dig the nearby digging point and a plant will sprout out. Destroy the plant to grab the cherry piece. Shoot the webs up ahead to get the spider piece. Finally, shoot the grill up north to cook the meat. Grab it and put it on the cauldron. Drink the invisibility potion, then destroy the red monster book to the lower left. Move the cart out of the way, then put out the last fire. Use WiLe on the tent to rescue Fred.
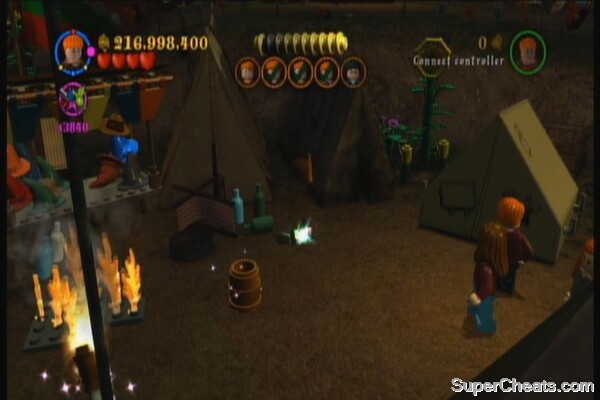
After the cutscene, destroy the banner nearby then build a trampoline out of it. Jump over the fire then shoot the water barrel to put out the fire and to regroup with your team mates. Head south then destroy the pile of rubbel there to get the character token Ginny (Hooded Top).
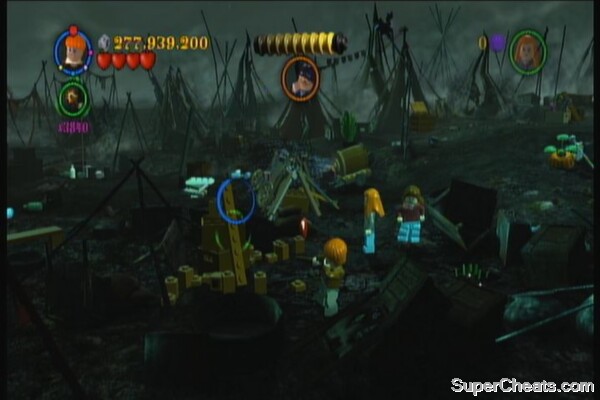
Head north then put out the fire to rescue the person. You need to do this 5 times to get the Yellow Crest piece. Go to the right then use WiLe on the crate to reveal a bucket. Use the bucket to put out the fire up north, then have Hermione's cat dig a green wheel. Attach the wheel to the cart to the right.
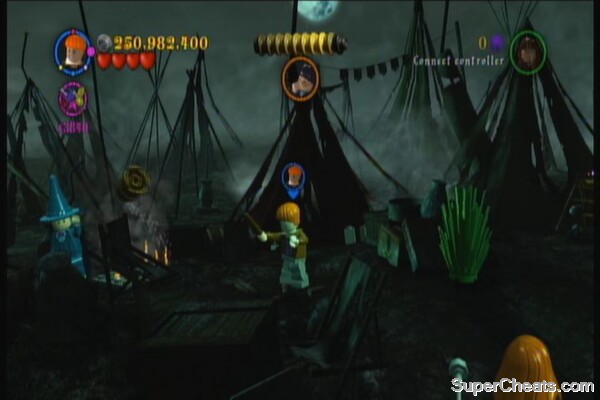
Before pushing the cart, go south to find a red wizard stuck a pile of more debris. Clear them to free him. (2/5). Return to the cart and push it away. Go to the right then shoot the chest to reveal an axe. Use it to destroy the barricade up north. Go north then put out the fire to rescue another civilian. Next, shoot the barrel to the right and wait for the skeleton to stop dancing. Grab the bone piece.

Backtrack then use WiLe on the black cauldron. Put the bone piece in, then kill the pixie nearby for a nozzle. Get that nozzle then attach it to the water barrel to the south to fill the bucket under it with water. Use WiLe on the bucket to put the fire out. Grab the bottle piece in the pit then throw it to the cauldron.
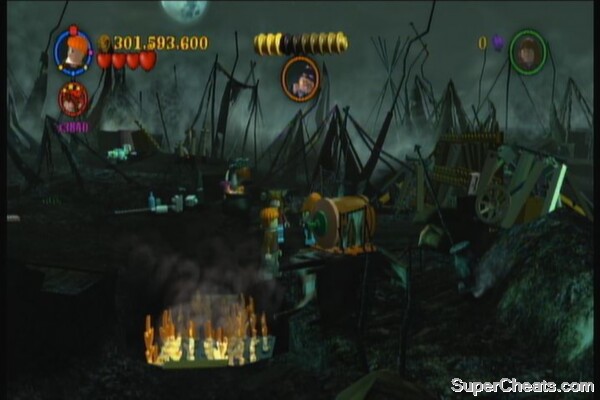
Continue south to find the flower piece and another trapped civilian. Put out the fire to save him then grab the flower piece. Backtrack a bit then head to the left to find another wizard pinned under some rubble. Clear the rubble then return to the cauldron and throw the last ingredient in. Drink the strength potion then pull the chain to clear the path. Press on for a boss battle sequence.
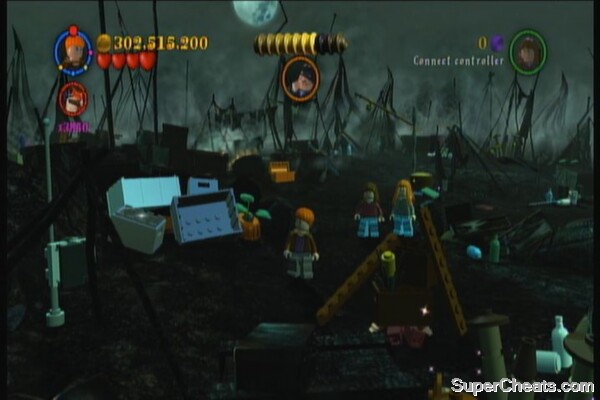
This fight can be a bit annoying especially if you don't have the Extra Heart, Regeneration or Invincibility red brick cheats. Death Eaters will be surrounding you and there are times that you'll get hit with their consecutive shots. Multi-targeting (press and hold X) isn't effective here since you'll probably get hit before you can even get multiple lock-ons. For the first wave, you just need to shoot a few Death Eaters. The second wave will consist of snakes and Death Eaters. These snakes will constrict you if they catch you; if that happens, switch to another character and shoot the snake to break free. Just keep busy and keep shooting; thankfully, the game has aim-assist so it won't be that hard to hit your targets. The third wave will still have both Death Eaters and snakes but there will be more this time. Repeat the process to end the battle and complete the chapter.
Barty Crouch Jr battle
(Re-run after getting Reducto)
Use RE on the locked stall to release the student in peril.
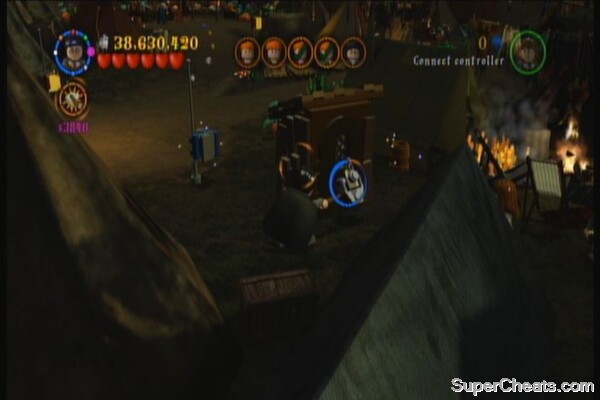
After fixing the cart in the second stage (using the green wheel), head south and find a pile of silver boxes, beside a trapped wizard. Destroy it with RD and dig it. You need a Ravenclaw character to interact with the painting and give you the Blue Crest piece.
In the area where you need to collect the ingredients for the strength potion, you'll find a chest with a silver lock beside the flower piece . Destroy it to get the character token of Barty Crouch Jr.
Use Crucio (CR) on the ball to get the character token of Death Eater left of the cauldron.
Use CR to open the dark tent north of the monster book. Obtain the Green Crest piece inside.
Hogwarts
Follow the markers until you reach the next classroom. You need to find the necessary ingredients to create the required potion. Start off by removing the books blocking the pet tunnel. Next, send Hermione's cat to the tunnel, then take the right tube. It will lead to a red brick. Push it down to release the bird from its cage. Shoot the bird to turn it to tasty drumsticks, then use WiLe to feed them to the piranhas. Grab the banana piece and put it in the cauldron.

Next go south of the room to find a door with a ram lock. Use WiLe to twist its horns and open it. Have Hermione solve the puzzle cabinet, then use WiLe to build some chemistry apparatus. You need to mix two colored liquids at a time, as shown in the book. Red Blue = Purple, Blue Yellow = Green and Yellow Red = Orange. Just a reminder, you need to shoot the purple ball that floats after mixing the purple concoction before you can select again. After doing all three combinations, a synthetic snake will be created.
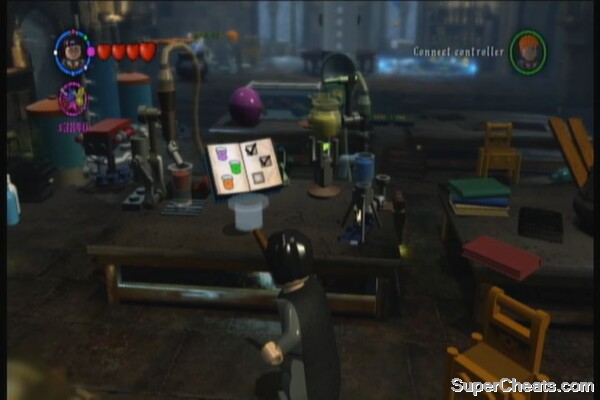
Finally shoot the chest to the right corner of the room then grab the pump platform. Attach it to the missing part of the water tank then step on it. Your partner will step on the other pump. Just keep pumping until the main tank overflows and leak out the last piece. Put the last piece to unlock the Ageing Potion and Gold Brick.
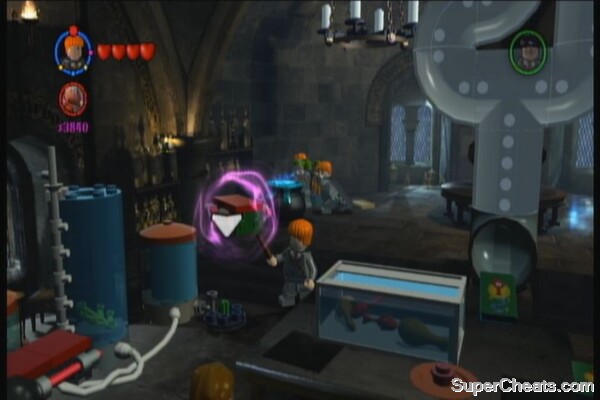
Follow the marker until you reach the main hall but before taking the main door, go upstairs left to the library. If you have checked out this place a while ago while using this walkthrough, then you should find the ingredients for the ageing potion ready for pick up and the door leading to the library annex already open.
In the library annex, find the red brick on top of the shelves to the upper right. Use WiLe on the nearby books and place them individually on the shelf to push the red brick out of the shelf. Use Hermione to solve the puzzle cabinet in the corner. Build a cart out of it and ride it. Collect all 5 pink books on the ground by running over them and the character token of Alicia Spinnet will appear. Kill the two pixies in the other side of the room then zap the pointy hat. Next, shoot the red book to the right and use WiLe on it to create a digging spot. Dig it for the little brown guys to create a ladder for you. Next, step on the yellow book near the entrance, then jump to the upper platform. Shoot the pointy hat on the handrail. Shoot the berserking ghost to calm it the equip some earmuffs from the cabinet to the left. Jump down and climb up the ladder. Grab the mandrake and put it on the pot to save a student in peril. Don't forget to shoot the pointy hat nearby. Shooting all 3 hats will award you with studs and a gold brick.

Now that's done, let's get back on track and continue with the next chapter. Just follow the markers until you reach the dining hall. After the scene, follow the ghost guide's trail again to reach Hagrid's Hut
Year 4, Chapter 2
Shoot the lamp (on a stick) to start the counter. You need to shoot 9 lamps to unlock the Red Crest piece. Next, use WiLe on the purple egg and place it on purple ledge to the upper left. It will roll down and you'll need to use WiLe to guide the egg through the tube to reach the red dragon's cell.
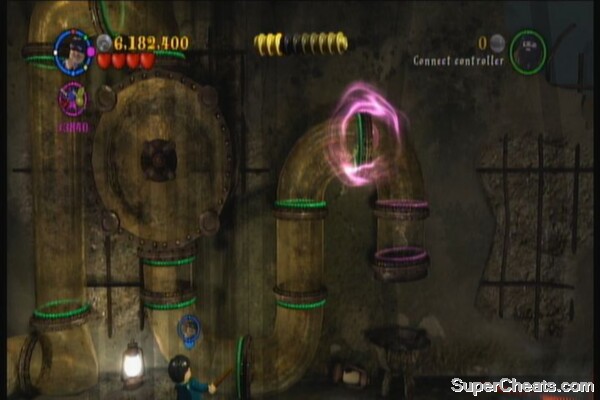
Once the dragon's distracted, continue to the right, shoot the second lamp, then kill the pixies ahead. Assemble a pull-chain device to the left then have Hagrid pull it for you. Cross the bridge; be careful of the powerful flame jets from the wall. Shoot the third lamp, then kill the vines. Use WiLe to reconstruct the red mushroom. As for the digging spot to the left, you can have Fang dig it for you but it only contains a Dark art chest which you can't open for now. Go up the ramp then rebuild the chain device. Pull it with Hagrid to lower the bridge.
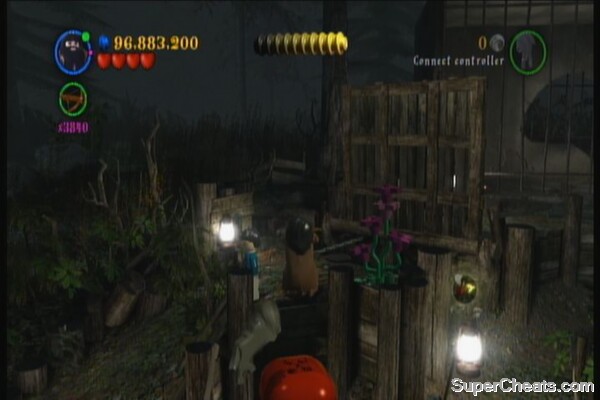
Use WiLe to set up the xylophone, then use WiLe again on the sitck to the left to play it. You need to follow the notes that the green dragon dictates to put it to sleep. Just do the last note if you made a mistake. After putting the dragon to sleep, keep tapping the yellow brick to reveal the Yellow Crest piece.
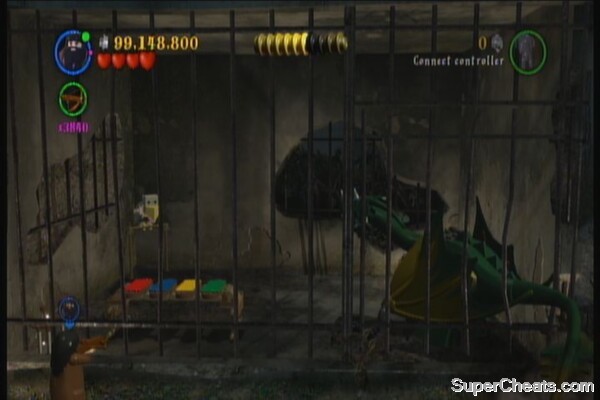
Xylophone and Yellow Crest
Continue to the right, shoot the fourth lamp then carefully jump across the ledges while avoiding the fire jets. Upon reaching the other side, shoot two more lamps here. Use WiLe on the water basin then dip it in the water tank. Sprinkle it over the fire to extinguish them. Once done, use WiLe to create a ramp.
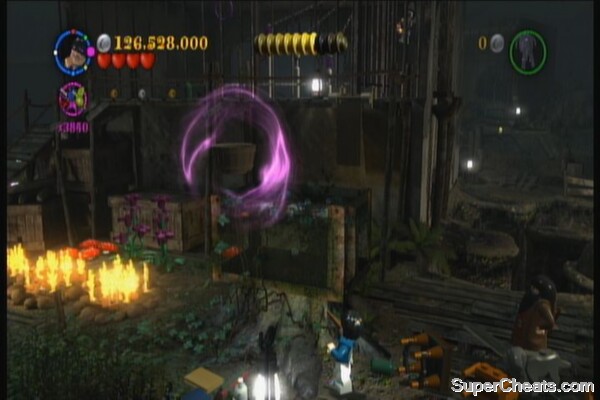
Go up the ramp, then shoot another lamp. Once the blue dragon appears, use WiLe on the purple circle and lure the dragon to shoot it. Place it behind the three binds until they get superheated and eventually destroyed. This will lower the bridge to the right.
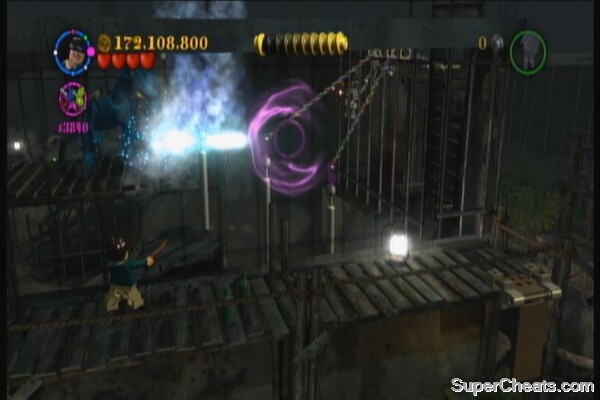
Continue to the right, and shoot another lamp. Build a bridge using the bricks here. You don't need to completely connect the whole thing; just place the bricks so it will be enough for you to jump across. Continue down the ramp and shoot the last lamp for your crest piece. Continue to the right to the next area. Pull down the chain and wait for it to connect. Continue up the ramp.
Order Fang to dig up the nearby digging spot, then continue to the right. Have Hagrid pull the chain, then switch to Harry. Equip Harry's cloak to get past the dragon, then kill the vine ahead. Shoot the plants so the roots will retract. Continue past the gray pillar then use WiLe to lift it out of the way.

Continue to the right as Hagrid will also lift a toadstool below to open a path for you through the tree.
Switch to Fang then dig out the chain. Pull it with Hagrid's WiLe then shoot the lock to snap the chain. Cross the bridge to end the chapter.
Re-run
Durmstrang Student – After crossing the second wave of blue flames, destroy the dark cabinet on the other side.
Blue Crest piece – After luring the blue dragon to destroy the three chains, use dark arts to take the skeleton hanging on the side of the cage down. Reconstruct it using CR again, then wait for it to fish the crest out of the water tank below.
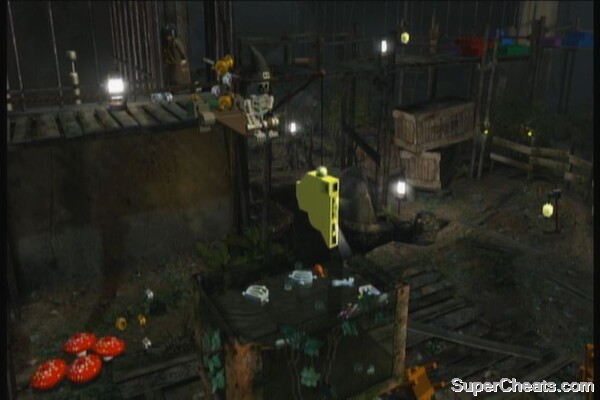
Cedtric (Sweater) – After going down the ramp (after the lego brick bridge), use Griphook to open the safe.
Green Crest piece – A short walk away from the safe is a large box with two silver locks above. Destroy the locks using RE, then use WiLe to spill its contents and use the pieces to build a dragon which in turn will melt down the gate.
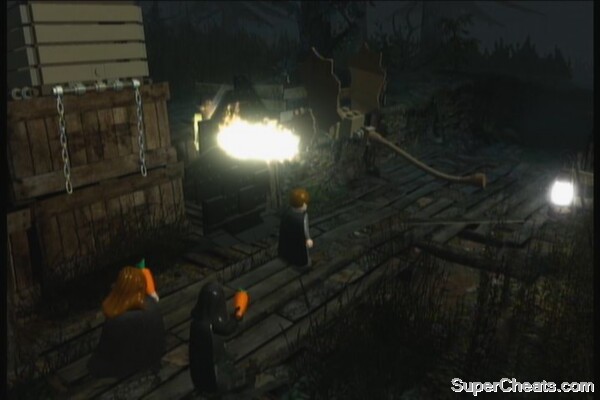
Dragon Handler – As soon as you start the next area, there's a locked chest behind. Open it to get the token.
After connecting the three chains, don't go up the ramp; instead, open the safe to the right to save the student in peril.
Hogwarts
You'll start in your group's dorm. Head out and follow the markers to reach the next classroom. This is where you'll learn the integral spell of the game: Reducto (RE). This spell breaks/ unlocks anything made of silver. You've seen a bunch of such items at this point.
A usual, you'll have a practicum with this spell by saving the students pinned down by the silver pieces. The first one is right beside you. Press B to destroy the piece. Just free the students to permanently learn the spell before doing anything else. You'll also earn a gold brick from learning the spell. There's still a few more things to be done here.
Destroy webs (3/3) unlocks character token of Parvati (Ballgown). Will also make a couple of silver books appear in the middle of the room.
Use WiLe on the all torches (4/4) to unlock the character token Ron (pyjamas).
Destroy the following using RE to get another gold brick.
multi-colored wall beside the stairs
caged owl
silver books in the middle of the room(after destroying cobwebs)
statue piece carried by pixie in the upper left
statue piece carried by pixie in the lower right
skeleton held by vine to the left
silver books inside puzzle cabinet
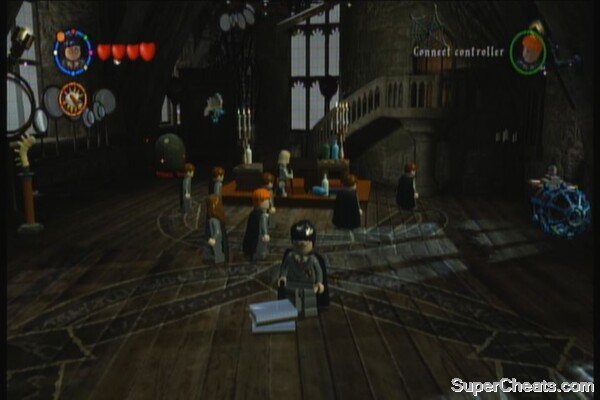
Exit the room, then shoot the silver piece on the wall pattern you fixed a while back. This will reveal a pet tunnel which you can fix. Use WiLe to fix it, then send Hermione's cat inside. Have the cat break the chains to the upper left and reveal another gold brick.
Now that you have this spell, I know you have the urge to check out every pending silver locks, chests and doors you want to open. You can either Free Play the last chapters to complete the crests, student in perils and character tokens. Should you wish to do so, refer to each chapter's end notes for screenshots and directions. You can also visit another extra section in Diagon Alley called Knockturn Alley where you can unlock more characters. (Check out the guide's dedicated section for Knockturn Alley for more details) Otherwise, continue to the next chapter.
Year 4, Chapter 3
Go down the ramp then use WiLe on the barrel to put out the fire. Grab the character token Cedric (Dragon Task) from there. Start by hiding behind the rocks and let the dragon destroy them. After all brown rocks are destroyed, assemble the pieces to a dog. The dragon will destroy it, along with the obstructions.
Run to the right and place the purple stone on the geyser. Assemble the cauldron then find all the ingredients nearby. Drink the strength potion then pull the chain. Jump on the platform then jump over the rocks to the right. Quickly use WiLe to lift the water container and extinguish the fire. Go up the ramp and you'll find several colored bricks. Kill the pixie to the right to drop the red brick. Place it on the platform of the red skeleton. Dig the second blue brick and do the same. Finally, blast all the green pieces until you can use WiLe to assemble them to one big brick. The Red Crest piece will appear afterward. Jump over the bricks and reach the upper platform to trigger the next scenes.
In the next area, you'll be chased down by the dragon. Keep running until you enter the building. As soon as you enter, turn right to grab the character token of Fleur (Dragon Task). Continue running, while taking care not to fall down the broken parts of the floor. Keep an eye to your left to find the Blue Crest piece. Right after that is a locked cabinet to the right. Shoot it immediately and approach the cabinet to save the student in peril. Continue running a few more seconds and the chapter will end automatically.
Re-run
Green Crest piece – As you run around the place, there will be boulders that will be thrown from offscreen. There are three of them. The first one appears a few steps away from the starting area; lift it up and have the dragon destroy it. The next one appears in the area where you need to create a strength potion. The third one appears after extinguishing the fire and right before you reach the colored lego bricks.
Yellow Crest piece – In the first area where you're halted by rocks, have the dragon destroy all brown rocks. Use dark arts on the dark stones underneath to get this piece.
Harry (Dragon Task) – After getting past the stone barricade, you'll come across a dark orb. Destroy it to get the token.
Hogwarts
From your house dorm, follow the ghost guide as it leads you to the Wooden Bridge. After the scene, backtrack and follow the ghost trail until you reach the Bathroom Hallway. If you haven't done so yet, you can shoot the box left of the entrance to get the character token Hermione (Cat). Continue following the ghost studs until you come across a gate that needs to be destroyed using RE. Take control of the battle and have your AI partner move the bricks so you can move the ball out of the maze.
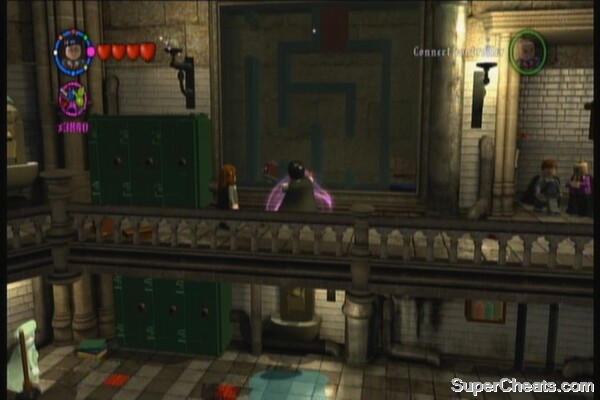
Shoot the ball and it will turn into a snail. Follow it and it will leave behind a gold brick as it crawls up. Enter the door to start the next chapter.
Year 4, Chapter 4
You need to place four green pieces on the well. The first one is right beside it so just grab it and place it. Next, use WiLe on the barrel to the south then assemble a toilet cover using the yellow pieces. Now go to the overflowing toilets, you and your partner use WiLe on both toilet covers and the toilet to the right will burst and throw another green piece out. Next, head to the left then shoot the overflowing faucets. This will make the green piece flow out of the water tank. The Red Crest piece will appear inside the tank but you need a heavy character to get this (re-run). Finally, shoot all the lockers beside the water tank then shoot the yellow stick that will get thrown out. Use WiLe to give that yellow cover to the painting. You'll get the last green piece in return.
There are four hanging cabinets you need to shoot; one is to the right of the well while the other three are located in the far left. You'll get the Green Crest piece for shooting them all.
Kill the boggart in the chest to the south to get the character token of Cedric Diggory. There are also three torches here that you can use WiLe on to get the Yellow Crest piece. Once done collecting, jump down the well.
In the next area, use RE to break the locked cabinet to the left. Shoot it to get the Fleur (Lake Task) character token. Go to the bath then use WiLe to lift the broom and clean the mosaic up north.
Kill the three scorpions it will throw out, then use WiLe to reconstruct the red pieces the mermaid will drop. She'll throw more scorpions so get rid of those as well. Use WiLe on the cloud beside the pillar to bring water back to the mosaic's world and for you to get the purple valve from her. Place it on the handle to the right then turn it to fill the bath with water. Chapter completed.
Re-run
Moaning Myrtle (Swimsuit) - Open the dark cabinet north
Open the dark cabinet south to rescue the student in peril.
Red Crest piece - Pull the heavy chain to the left, after getting the green piece
Blue Crest piece – Use Hermione to solve the puzzle cabinet in the second area
Hogwarts
Follow the ghost guide again and it will lead you to the locked gate leading to the lake. Go downstairs until you reach the lower groun. Use WiLe on the fishing rod, then assemble frogs from the pieces. Ride one of the frogs and go through all the gates to get a gold brick. Next, destroy the crates then use WiLe to construct a footbridge for the student in peril.
The character token Ron (Tuxedo) will appear as well. Finally, keep on shooting on the mole here as it creates new holes until you get the character token Bassist. That's all for this area; head to the next marker.
Year 4, Chapter 5
Blue Crest piece - There are 9 clams you need to shoot to get this piece.
All the clams are located in the area before you assemble a fish to knock over obstructions. If you used the red brick cheats, then activating the house crest detector will help. The colored arrows will point you to the individual pieces.
Red Crest piece – You'll come across large rocks where you need to pull something out. Then a pale creature appears and attaches itself to it. You need to shoot the creature to inflate its head. Do this six times in this chapter to get this piece.
Start by going to the right, shooting a few clams along the way. After exiting the first blue pipe, swim to the left to find one of those large rocks. Pull out the parts of it that you can remove, the shoot at the creatures that will attach to it to lift the boulder up. Continue all the way to the left then shoot the chest to get the character token Harry (Lake Task). Continue swimming to the right. Once you've reached the next pipe, enter it then head to the left. You should come across a skeleton on a boat. Use WiLe to place both oars to the boat then use WiLe again to move the boat out of the way. You'll rescue a student in peril during this process.
Continue to the right and you'll eventually get halted by some tentacles. Destroy the rocks covering the blue pipe so that your partner can move to the background. Use WiLe to remove the two tentacles on the sides and for it to pull down the rock slab and clear the path. Continue to the right, then find another piece of those boulders after passing the third pipe.
Further to the right is a couple of pieces that you must connect to the circular piece on top of the tall platform.
If you reached this part and you still haven't unlocked the Blue Crest piece, then you may have missed some of the clams along the way; backtrack a bit and carefully keep an eye of brown oblong shapes in the foreground/ background. Continue to the right to the next area after getting the blue crest.
As soon as you start in the second area, look for a hidden chest to the leftmost side and shoot it. Obtain the character token Guitarist from it. Continue to the right then take the lower path. Use WiLe to clear the vine, then swim past the bubble jet. Pull the large crab out of the crevice then place it on top of the bubbles so your partner can go through.
Switch to your partner and shoot the eye to clear the path. Continue forth and remove the seaweeds using LuSo. You'll eventually regroup and the squid will squirt black ink. Use LuSo to remove it all and it will leave behind the Yellow Crest piece.

Swim to the upper right first then shoot the thingy there to get the pearl. Bring it back to the clam hindering your path to the lower right. Continue east to the next area.
As you start the third area, shoot the very first chest in the background to get the character token Krum Shark. You need to be careful of the mermaids here; they're like underwater wraiths. You'll also find the last boulder here. To interact with it, you need to detach the anchors on each side, then use WiLe to place the worms in the boulder. The one to the left is covered by vines so use LuSo to free it, then WiLe to detach it from the chain. Do the same thing as you did with the others to get the Red Crest piece.
Go through the pipe, then place the purple ball on the balance. Raise the anchor, then shoot on the chain plates to free all the students. Chapter completed.
Re-run
Green Crest piece – At the start of the second area, use dark arts to open the chest. Use CR or WiLe to reconstruct the skeleton for it to pull the chain to reveal the piece.
Hogwarts
Wave at the painting to move the stairs then go up. Use RE on the chest there, then use WiLe to place the steering wheel to the painting. Shoot the painting to move the stairs again. Go upstairs then shoot the bell on the door to open it. Before entering the room, shoot the two pots in front of the door to get Percy (Sweater) charater token.
In the next room, shoot the painting so it releases a gray rectangle piece. Use WiLe on it and a bunny will appear. The bunny will enter the hamster wheel to the left. Next shoot the blue object on the top of the shelf to release the second bunny. Finally, shoot the TV to the right end of the room four times to release the last bunny. The car will fly away, leaving behind a gold brick.

Shoot the computer and the lcd monitor to reveal the character token of Dudley Dursley.

Shoot the bobblehead on the table, then shoot the other one that will appear. Grab the character token of Mr. Mason. Shoot the printer to get the red brick. Give it to the owl so it counts to your completion rate. That's all for this room; exit then continue upstairs.
Kill the pixies and place the painting on the wall. If haven't shot the painting of the first quidditch player at the bottom of the stairs (found along the way leading to the hall), then painting of another player won't react.
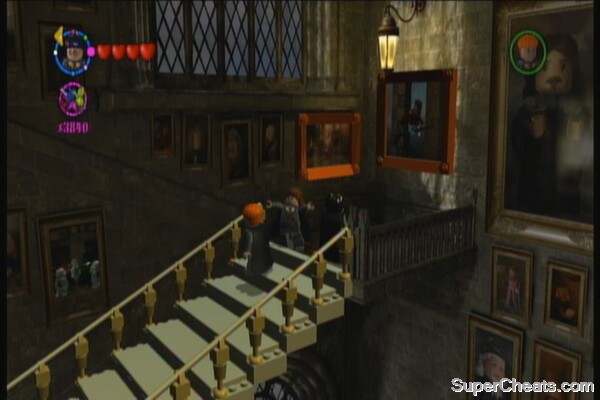
Shoot the painting and it will throw the ball back. Go downstairs a bit then shoot the painting of another player. It will finally throw the ball up to the painting of the dog further upstairs. It will release a gold brick.
Go upstairs then shoot the painting you just fixed a while ago to move the stairs. Continue upstairs and the final set of stairs will be fixed. Don't go to the stairwell yet; continue upstairs to the left to get the gold brick and to save the student in peril.

Finally, use WiLe on the candlestick to the left to light the candle to the right. The character token of Professor Binns will appear. Take the stairwell to proceed to the last chapter of the game.
Year 4, Chapter 6
Cedric (Maze Task) – You need to find and shoot 8 plants that blooms into yellow flowers to get this character token.
As soon as you start, hit the plant in the bottom right corner to make it bloom (1/8). Next, destroy the plants in the area to reveal the armor pieces. Assemble it then shoot the knight armor. It will show you the correct direction so take note of the direction where it swings its sword. Also, you need to go to the directions provided before the statue finish turning; just shoot it again if you made a mistake.
Maze Direction example
In the next area, you'll find some pixies holding armor pieces. Destroy them all, then assemble the statue. The second flower is located in the upper right portion of the area. (2/8) Shoot the armor and follow the directions. The third area has two yellow flowers (4/8). The armor pieces are wrapped with vines so clear it with Luso. Fix the armor and shoot it. Follow the directions again to leave and start with the labyrinth area.
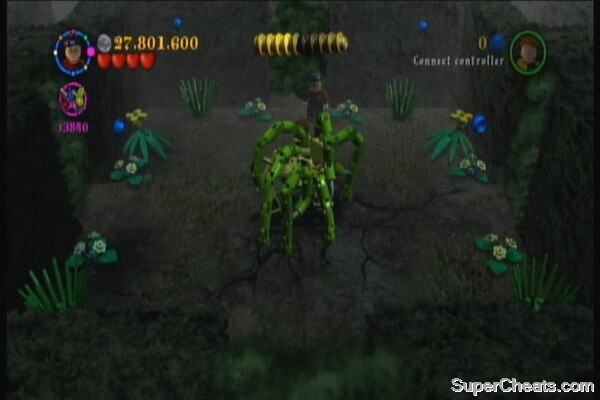
Go past the moving walls then turn left to find another yellow flower. (5/8) Kill the boggart to get Fleur (Maze Task) character token.
Continue along and as you turn in the corner, vines will appear and attack you from the sides. You need to destroy 5 of these to get the Yellow Crest piece. There are two vines here (2/5) so destroy them then continue forward. The third vine is right after the next moving walls. (3/5)
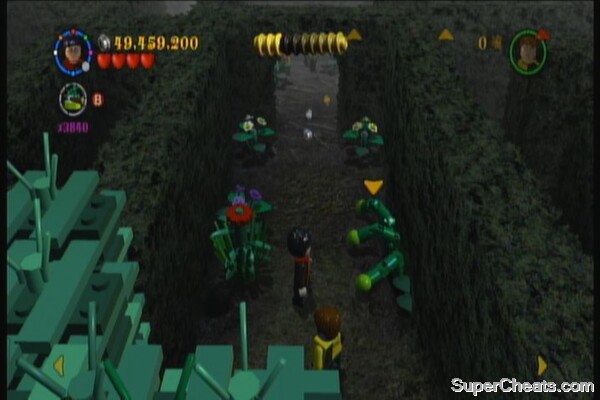
Next, in the area where the Red Crest is visible, find another yellow flower (6/8). The red crest requires dark arts intervention to be accessed so let's get it during Free Play later on.
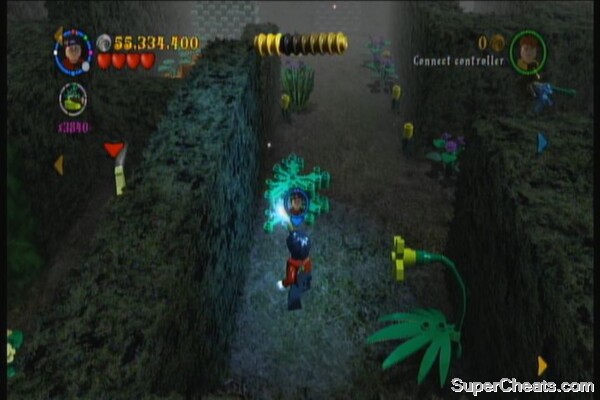
Destroy the pixie nearby then put the arrow it drops to the pole up ahead. Rotate it to open the wall to the left. Go there to reach the next area.
Move a bit forward then destroy the fourth vine. Go up then left from the sphinx to find another yellow flower. (7/8) From the sphinx again, to right a bit then down. You'll find a student in peril along with the last yellow flower.

Next, go right of the green book then kill the last vine to get the Yellow Crest piece. Use WiLe on the book, then make a trampoline out of the pieces it drops. Jump on the trampoline to jump over the wall to the east. Clear the vine the use WiLe to place the fly to the web. A non-hostile spider will eat it and another fly will appear to the west. Do the same so the spider breaks the wall. Construct the pieces to another fly. The spider will try to eat the fly and this will scare off the sphinx, opening a new path for you. Continue forth to get transported to the next area.
This battle is pretty easy; kill the Death Eaters then beat Voldermont during the wand duel. Repeat the process three times and you'll win the battle and complete the story.
Final Boss Battle
Re-run
Blue Crest piece – In the second area, before going past the moving walls, break the dark wall to the left. Dig in the digging spot to get the piece.
Red Crest piece – After killing the pixie holding the arrow, shoot the dark wall to the right.
Viktor (Lake Task) – After getting the red crest, dig the token out of the digging spot to the south.
This section will feature instructions and directions on how to collect the remaining collectibles not covered in the initial walkthrough. To access all collectibles, you should have the following characters/ spells:
Reducto – Learned automatically at Year 4, Chapter 2. Used to break anything silver (locks, chests, gates, etc)
Crucio – Dark version of Wingardium Leviosa, exclusive to dark characters. Used to break down dark-imbued objects.
“Strong/Heavy” characters – Characters like Hagrid or Fang that can pull chains without the need of strength potions.
Griphook – This is the goblin that can open safes using its key.
Time Turner – This is not necessarily a spell; Hermione has this unique and innate ability that can be activated by using grandfather clocks scattered in the area.
For our convenience, I'll start with the Gryffindor Dorm. I don't know what the areas here are really called in the game but I'll just label them the best of my ability.
Gryffindor Dorm
Seamus Finnigan – Unlock chest with the silver lock to the upper right.
Dean Thomas – Shoot the chest to the left.
Shoot the chest in the middle north of the room then jump down to grab the gold brick
Dorm Hall
From the dorm, exit then go the right to find a pixie holding a knob.
Kill it then place the knob on the door. Turn it to open the entrance Hufflepuff Dorm. Before going down, continue to the right then kill the boggart. Place the two blue pieces on the gate to open it and gain access to the transformation cauldron. Have someone change into any Hufflepuff character then go downstairs to the Hufflepuff dorm.
Hufflepuff Dorm Lobby (Hufflepuff character needed)
Neville Longbottom: Enter the closet to equip earmuffs. Grab the mandrake and destroy all the glass pieces here to get this token
After placing the mandrake on the bucket, the student in peril nearby will be saved.
Wave at the fruit painting using a Hufflepuff character to enter the dorm.
Hufflepuff Dorm
Break open the safe to the right then use WiLe to place the cake inside the painting. Obtain a gold brick.
The Fat Friar – Go to the left then shoot the painting. Shoot the cake to reveal the character token.
Destroy the plant on the fireplace to save a student in peril.
Near the entrance is a candlestick. Use WiLe on it to reveal a secret compartment containing a mandrake.

Use the nearby closet to equip earmuff. Grab the mandrake then place it in the bucket to open the bedroom area of the dorm.
Hufflepuff Dorm Bedroom
Hufflepuff Girl - Shoot the chained chest south of the entrance. Reconstruct a radio using the pieces and the token will appear nearby.
Shoot the bucket in the middle of the room to make it grow. Shoot all the flowers to reveal the red brick.
Exit the dorm then return to the hallway. From there, go to the right, use the transformation potion to transform to a Ravenclaw character then go upstairs.
Ravenclaw Dorm Lobby
Penelope Clearwater - Open the gate to the left then reconstruct the telescope from the pieces. The token will appear.
Ravenclaw Dorm
Gabrielle Delacour - After entering, hit the chest and a ball will fly out. Stay in your position for a few seconds and the token will appear to the left.
Jump downstairs and use WiLe to move various objects automatically. This will form a bird; hit the “head” and it will fly, dropping a red brick in the process.
There are three gold books here that you must shoot. You need to do small tasks before you can shoot them like using WiLe to move stuff. There are a total of five so enter the bedroom when ready.
Ravenclaw Dorm Bedroom
Save the student in peril by shooting the chain beside the book. Use WiLe to place it on the cart and get rid of it permanently.
Padma (Ballgown) – Shoot the leftmost bed to remove its roof, then jump on it to reach the token.
Shoot the last two gold books under the beds to obtain a gold brick.
Now exit the dorm and use the transformation potion again. This time, transform one of your characters to a Slytherin character and another one to a strong/ heavy character. Head to the left past the stairs going down and enter the next dorm.
Slytherin Dorm Lobby (Slytherin character, heavy character needed)
Destroy the silver locks on the floor then assemble the pieces to form a chain. Pull both chains to open the valve. Use the water jet to reach the character token of Rita Skeeter above. Enter the dorm next.
Slytherin Dorm
Slytherin Boy – After entering, shoot the first painting to the north. The painting will shoot the sofa, in turn will throw out a box. Destroy the box to get the token.
Slytherin Girl – Use WiLe on all the five green lamps here to get this token.
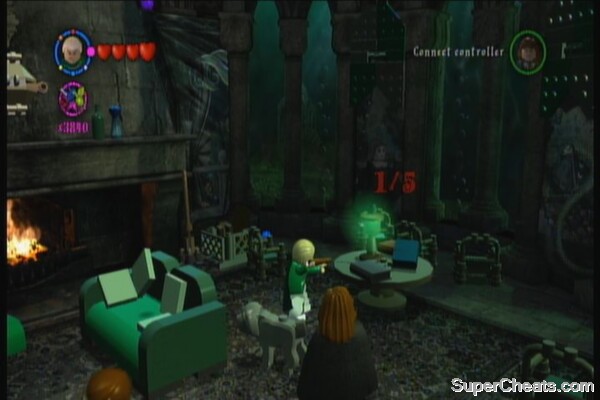
Slytherin Dorm Bedroom
You'll immediately find the red brick to the far right. The owl is located to the left.
Shoot the bookshelf near the entrance and approach the student in peril to save him.
Shoot the chest and the bed to the upper left so stuff will be thrown in the bath. The gold brick will appear there as well.
All done here so head back to the hallway then exit to the moving staircase area. Continue downstairs to the lobby then go to the right to reach the classroom. First, go to the left again to access two more classrooms. There will be silver chest to the far left but that only contains studs.
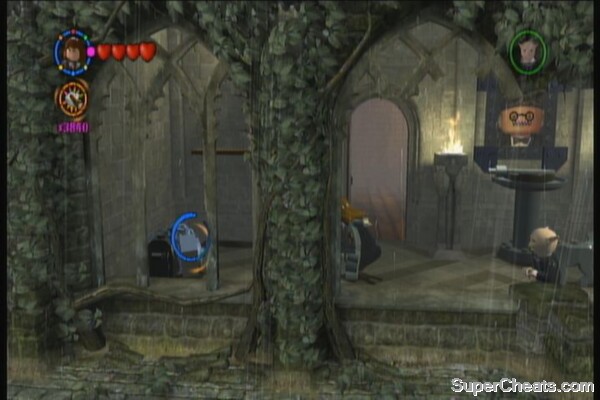
Enter the classroom to the left first. Shoot the lock on the trapdoor to the left then jump down to reach the secret area.
Classroom A (Hermione, Dark Arts character needed)
Mad-Eye Moody – Destroy the two orbs then place the pieces to complete the dragon statue. The token will appear afterward.
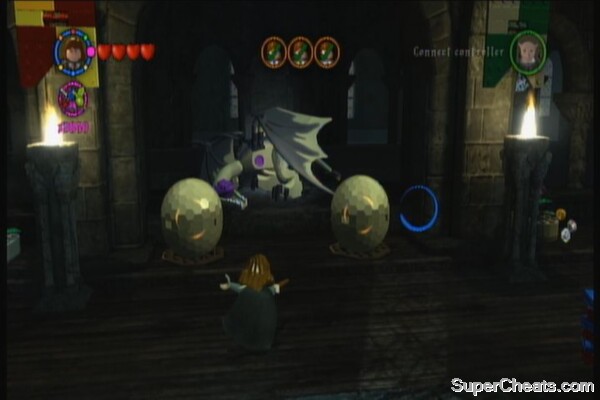
Just to the right after the dragon, there's a student in peril trapped in a web. Free
Destroy the dark orb to the right to reveal a red brick. Bring it back to the owl to the other side of the room.
To return back up, jump in front of the dragon so you'll get catapulted out. You'll get a gold brick by doing this as well.
Classroom B (Harry, Griphook, Dark Arts Character needed)
Use Griphook to open the safe to the lower left and open the trapdoor leading to the secret area.

Professor Flitwick - Get past the vine traps on the floor then destroy the boggart to the right.
Jump down to the canal and follow it to the right to find a student in peril.
Continue to the right past the chained monsters obstacle to the next room. Once there, use LuSo on the vines constricting the claws holding the chains. The cage will drop and you'll obtain the gold brick.
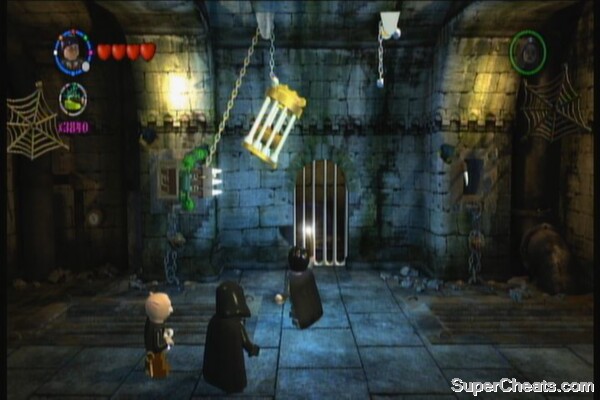
Use Harry and talk to the snake to the right to make a dark orb appear. Have your dark character use CR on it to get the red brick. Use the elevator north to return back.
Exit the classrom then return to the right. Continue to the right to find more classrooms.
Main Classroom Lobby
Millicent Bulstrode - Use CR on the dark cabinet right beside the pet tunnel upstairs.
Classroom C (Dark arts character needed)
This is the classroom to the left of the dark chest pictured above. Use CR on the dark orb at the end of the room to get a red brick.
Classroom D (Dark arts character needed; heavy character optional)
Use DM on the dark gate under the stairs to get the character token of Ginny Weasley. Next, unlock the chest in the far end of the room then use WiLe for it to drop pieces. Construct the pieces so it becomes a portal. Enter it to reach a secret area.
Use WiLe on the large piece as you enter. There are three lamps and a boggart chest here. Jump on the gear and save the student in peril.
Remove the vine and destroy the second boggart chest. Shoot the three banners ahead for the character token of Harry (Maze Task) to appear. There are also three lamps you can shoot here. Grab the bottle piece for now
Jump on the gears to the right until you reach the other side. Shoot the last lamp here to get the character token of Viktor (Tuxedo). Shoot the gears in the middle then reconstruct it with WiLe. This will bring down the third boggart chest. Destroy the boggart then kill the pixies to the right and do the same. Grab the flower piece, then fixt the stairs using the pieces nearby. Continue to the right then put the materials in the cauldron, drink the potion and pull the chain. (if you have a strong character with you, you can just ignore the materials then pull the chain immediately) Destroy the last boggart chest for the red brick to appear.
Exit the room then go through the entrance where the dark gate you destroyed. This will bring you to a room with several pendulums.
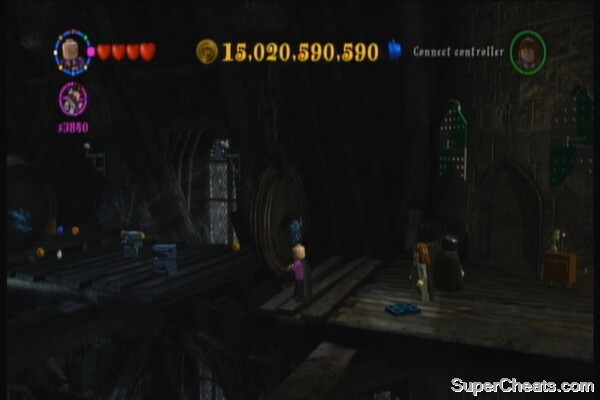
Draco Malfoy - Kill all pixies swinging the pendulums and the token will appear at the end.
Professor Quirrell – Go downstairs and continue making your way to the other end. This token can be found along the way.
Destroy the pixies holding the pillars and watch the platform overhead collapse, along with a statue holding a gold brick.
Classroom E (Hufflepuff character, Ageing Potion, Griphook needed)
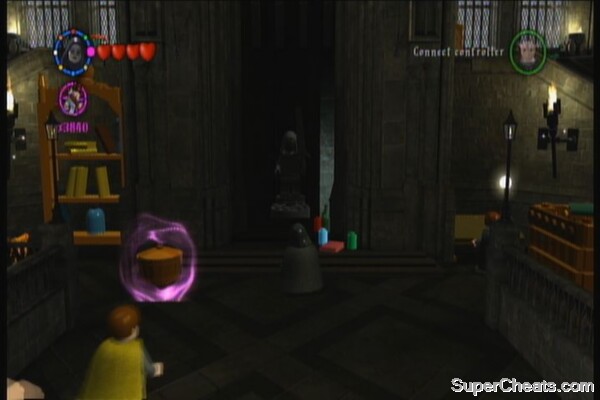
Use the ageing aura then enter the room to the right. Wave at the painting using a Hufflepuff character to receive the first green key. Then use WiLe on the gargoyle head to reveal some pieces. Use WiLe on them to put them in the middle statue. Continue to the right and solve the puzzle cabinet to get another key. Then, use Griphook on the keyhole in the middle of the statue to get the last green key. Place it on the gate and you'll have some bricks to construct.
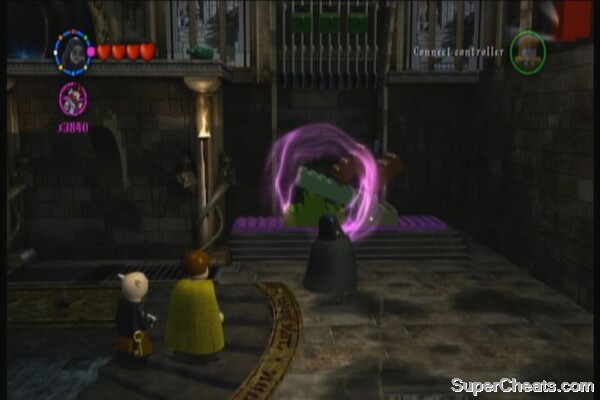
Reach the platform to the right to get the red brick. Jump on the left to find a locked chest. Blast it open to obtain the character token of Professor Snape. Next, switch to your old character and go through the blue barrier to get the gold brick.
Classroom F 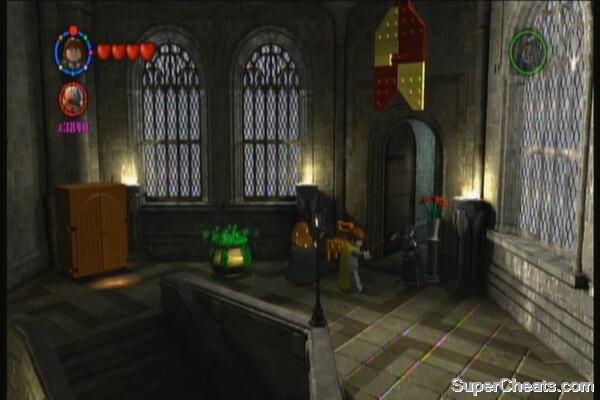
Break the silver lock in the left side of the room. In this room, you need to transfigure the dummies until each cage captures three. The gold brick and the character token of Professor McGonagall will appear. Get behind the chalkboard in the northern corner of the room to find the hidden character token of Fred Weasley.
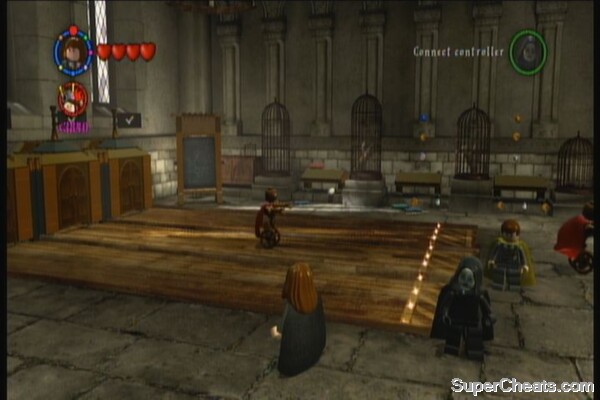
Classroom G (Dark Arts character, Griphook needed)
Professor Trelawney – Have Griphook open the safe in the upper right part of the room
Hermione (Blue Top) – Use CR on the dark cabinet beside the safe.
Courtyard (Dark Arts character needed)
Destroy the dark knight armor then ride the broomstick. Follow the trail of studs that twill appear and the gold brick will appear at the end. If you're able to get the red brick earlier, you'll find a silver knight armor in the middle of the fountain. Blast it with RE and ride the plumber to clean all the goo. The character token of Ravenclaw Prefect will appear in the fountain.
Clock Tower
Kill the boggart and use the key to open the locked path to the right.
Save the student in peril near the entrance. Next, kill the pixies on both ends of the room to reveal the stairs. Shoot the chests to reveal some colored clocks. Place them in the same colored pedestals to get the red brick.
Hit the painting to the right and use WiLe on the purple gear to fix the mechanisms. The bell will ring and will drop a gold brick.
Vernon Dursley – Talk to the snake to the left and shoot the tail of the green snake to get the token.
(Time Turner)
Milkman – Appears immediately after turning back time.
Madam Rosmerta – Shoot the lock off the puzzle cabinet then solve it to get the token.
Have one of your teammates step on the piston to the left then go upstairs. Solve the puzzle cabinet to the right then assemble the pieces. Then, shoot the painting to the left, construct the clock hand and place it on the large clock. Use WiLe to turn the clock automatically. Wait for the two dummies to hit each other and the gold brick will appear. 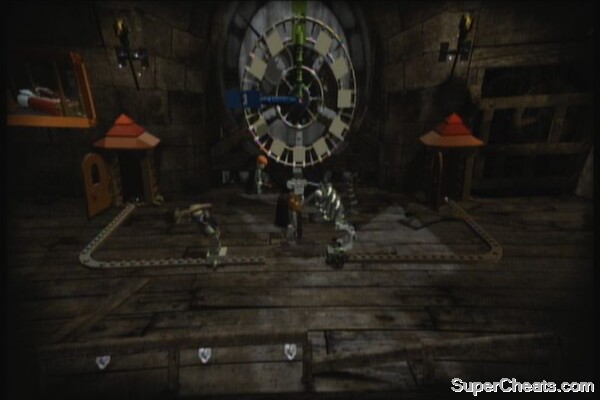
Quidditch Training Field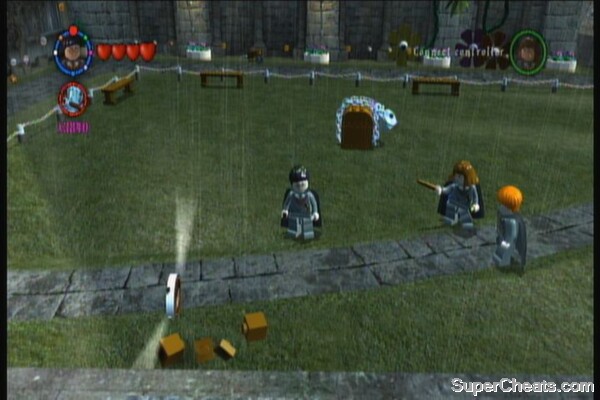
Harry (Quidditch) – Dig all five digging spots and this token will appear
Viktor (Dragon Task) – Destroy the silver lock in the field and fly through all the yellow circles to get this token. A gold brick will appear at the same time as well.
Herbology Classroom (annex)
Destroy the large silver lock at the end of the room to enter the annex. Open the chest along the way to obtain Fleur Delacour character token. Enter the room to the right. Pull the chain either by bringing along a heavy character or just doing it the old way: gather the materials and use the strength potion. After saving the student in peril, shoot the large plant to the right. Use WiLe to construct a staircase. Equip earmuffs the carry all the mandrakes up and place them in the pots to get a red brick. 
After doing all that, exit the room then continue ahead to the next room. 
Go upstairs then destroy the boggart up the platform. Obtain the character token Drummer. Next, grab the mandrake and start destroying all glass objects in this room. There are three found at ground level, while the other two are found upstairs. Obtain the character token of Professor Sprout after destroying all five.
Lobby Hallway
This hallway connects the courtyard and the wooden bridge to reach Hagrid's Hut. There is a locked panel here and a locked torch; if you're following this guide, then you have already activated the other panels and torches in the lobby. If not you can find them back in the lobby by taking the stairs in the middle.
Madam Pince – Activate 3 panels. 2 are back in the lobby while the last one is locked
Doris Crockford – There are 3 torches in this hallway; the others are found in the lobby
Hogwarts Grounds (Dark Arts character needed)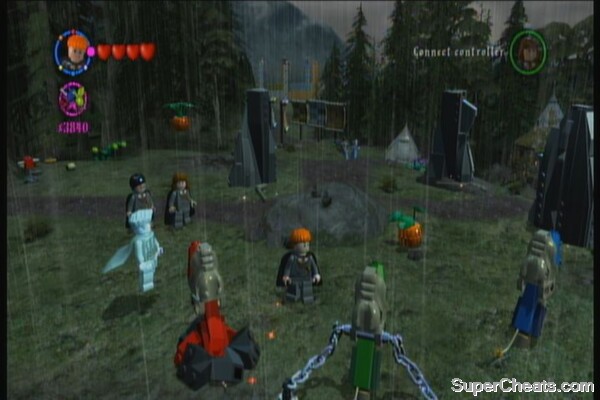
This is the outer area that connects the Quidditch Field, Lakeshore and Hagrid's Garden.
Ginny (Cardigan) - Shoot the pixies near the entrance to free a pumpkin-copter and a blue firecracker. Ignite the blue firecracker and it will fly off and reveal a character token in the air. Equip the pumpkin-copter to reach it.
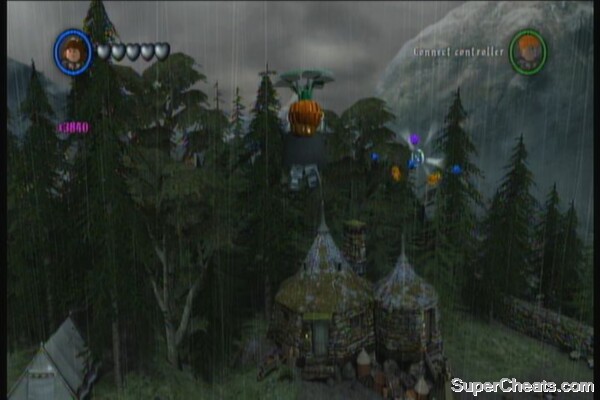
Cedric (Lake Task) – Break the locks holding the green firecracker then ignite it. Use the pumpkin-copter to reach the token.
Viktor Krum – Use dark arts to free the red firecracker then ignite it. Use the pumpkin-copter to reach the token.
Hagrid's Garden
Amos Diggory – Break the lock on the chest to the right then destroy the boggart
(Time Turner)
Gilderoy Lockhart - Destroy the lock to the left to get the token
Petunia Dursley – Dig the digging spot to the far right, beside the water barrel.
There is a student in peril pinned down under a pumpkin to the lower right.
Use the nearby digging spot then use WiLe to place the head on the scarecrow. Dig the new digging spot again, destroy the pumpkins then use WiLe again to construct a pull-chain. Have Hagrid pull it, and the scarecrow will go crazy. Assemble the pieces it will leave behind to create a furnace, then place the egg inside to hatch it. A gold brick will appear afterwards.
Quidditch Field
(Time Turner) 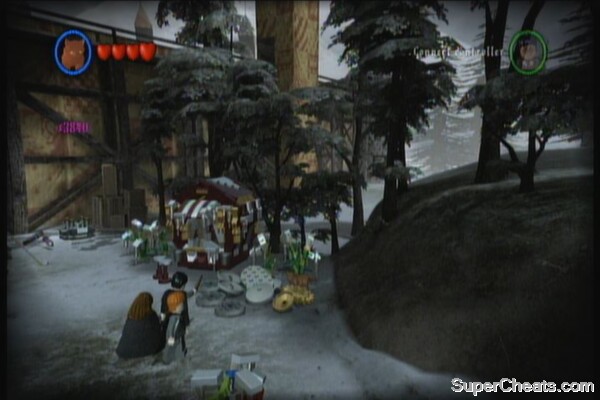
Dig the digging spot near the cabinet then use WiLe to make the instruments play. The gold brick will appear after that.
Break the lock on the chest to the right, beside the tent to save a student in peril.
Chisel away the stone slab in the upper right corner to get the red brick.
George (Quidditch) – Dig the digging spot to the right, beside the stall. Assemble the pieces then use WiLe on the yellow plants for the token to appear.
Library
Ravenclaw Girl – Shoot the lock on the gate then open it with WiLe. Assemble the pieces to a radio then shoot it to play it. Wait for the token to appear.
Library (Annex) (Dark Arts character, ageing potion needed)
Wizard (Red) – Jump on the upper platform to the left then use dark arts to destroy the wall covering the bookshelf. Destroy the spider, wraith and wasp to reveal the character token.
Patio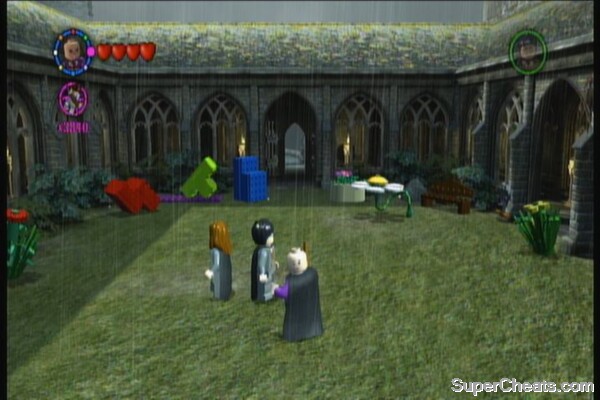
This is the area you can access by going through the large door (with a giant pendulun) in the main courtyard. You can access the Owl Tower from here.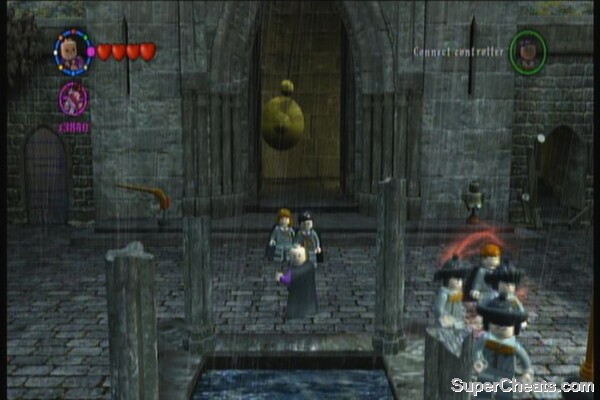
Slytherin Prefect – Destroy the dark chest then use WiLe on the sprinkler to grow a flower. Jump on the flower to get the icon on top.
Owl Tower
If you're following this guide, you should have visited this area before and already done the basic stuff. What's left now is to check out the place in Time Turner mode.
(Time Turner)
Shoot the fountain to release the student in peril.
There are three mailboxes on the floor up north. Place them in their respective colored slots and wait for the gold brick to appear.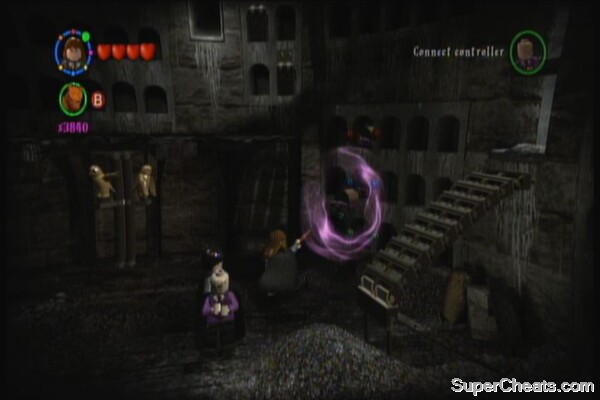
Barty Crouch Sr – Destroy the lock on the cabinet to the right then use WiLe twice to construct a hopping machine. Use it to clear all 5 white bird poop in the area to get the token.
Hermione (Hogwarts) - Go upstairs then shoot the owl portrait to use the bird lift. Once you're in the second level, shoot the flower in the middle then use WiLe on the pieces that will be left behind to fix the music player. The token will appear afterward.
Use WiLe on the piece to the left then turn on the video player. Pull the red brick off the projected image.
Dining Hall Entrance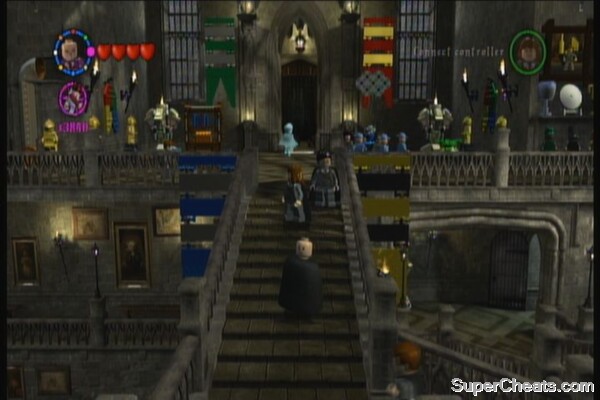
Witch (White) – Destroy the dark cabinet to the right
Dining Hall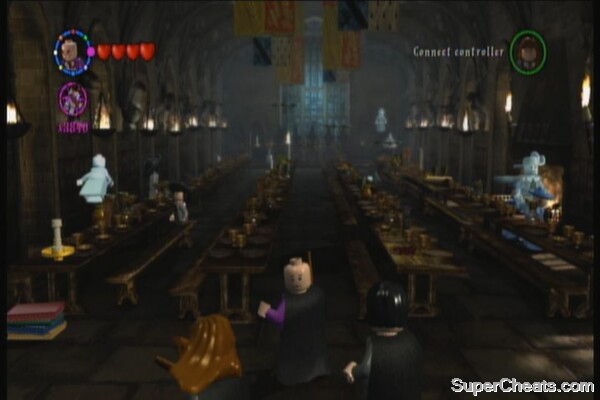
Colin Greevey – Shoot the silver platter to the right
Molly Weasley – Shoot the silver platter to the left
Bathroom (Boys)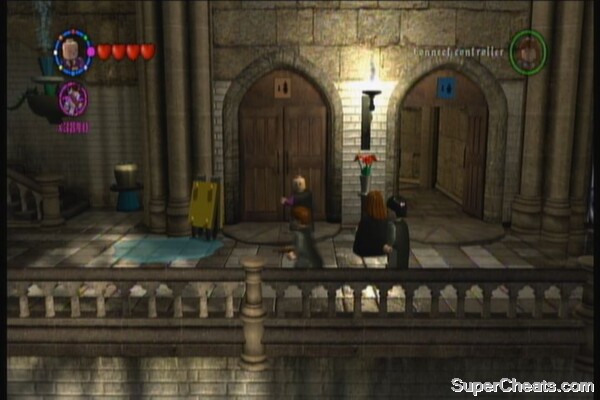
This is located beside the girl's bathroom but you need to destroy the lock with RE
Shoot the first stall open then go inside to save the student in peril.
Fix the two shower heads then shoot all of them to get the red brick.
Madam Hooch - Shoot the garbage can beside the green lockers then use WiLe to spray on the wall. The character token will appear afterward.
Dumbledore's Office (Dark arts character needed, heavy character optional)
You can only access this freely after completing all the four years. It is located at the topmost level of the moving staircase tower.
Destroy the silver chest in the middle of the room to get a gold brick.
Approach the phoenix and the red brick will appear.
Professor Dumbledore – Access the secret room behind the desk then destroy the dark chest to get this token.
Nearly Headless Nick – Shoot the rack to the right and wait for the token to appear.
Professor Dumbledore (Grey) – Pull the chain upstairs for the planet model to appear. Destroy all planets and the sun to reveal a hat. Use WiLe on the hat to reveal this token.
You can access the showroom underneath this place by destroying the silver lock. Here, you can find various pieces representing your completion rate for each year. If you're able to unlock everything in a year (student in peril, crests, true wizard and character tokens), you'll be able to construct a monument and get a gold brick for each.

To use the cheat codes, you must activate them through the Extras menu. The good thing about them? They don't disable the achievements. That's right, you can cheaply enter the invincibility code and x10 score and breeze through the levels without too much worry. The most helpful cheats will be presented below. For a complete list of cheats, check out this guide's Cheat Code section to know the codes and their effects.
Where and How to Enter Cheats
How to Activate Cheats
Score Multipliers:
Note: These multipliers STACK with each other. Activate all of them and watch your studs reach billions.
74YKR7 x2
J3WHNK x4
XK9ANE x6
HUFV2H x8
H8X69Y x10
Invincibility: QQWC6B
If you don't want to use Invincibility, you can still activate the following as alternatives:
Extra Hearts: J9U6Z9
Regenerate Hearts: 89ML2W
If you want to find the crests, red bricks, gold bricks and character tokens easier, you may activate any/all of these detectors:
Character Token Detector: HA79V8
Red Brick Detector: 7AD7HE
Crest Detector: TTMC6D
Gold Brick Detector: 84QNQN
Once ready, let's check out the unlockable stuff here. Enter Madam Malkin's Robes (the shop with the large scissor signboard) and use WiLe on lego bricks on the floor to get the character token Hermione (ballgown). You can also buy the characters you've unlocked so far so you can use them in gameplay. Go upstairs next, approach the dressing room to the right. You'll get the character token Harry (tuxedo).
Exit the shop and enter the next called Eelops Owl Emporium. Inside, you can buy 12 Gold Bricks; if you've activated the multipliers, you should have several millions studs already.
Break the cage to the left and use WiLe to assemble a sweeper. Hop on it and clean EVERY single dust spots on the floor to get another Gold Brick.
Eelops Owl Emp Gold Brick
Use WiLe to fix the door at the end of the alley to access the Gringott safes where you can play 10 bonus levels where you can collect even more studs. Grab the Gold Brick to complete each level.
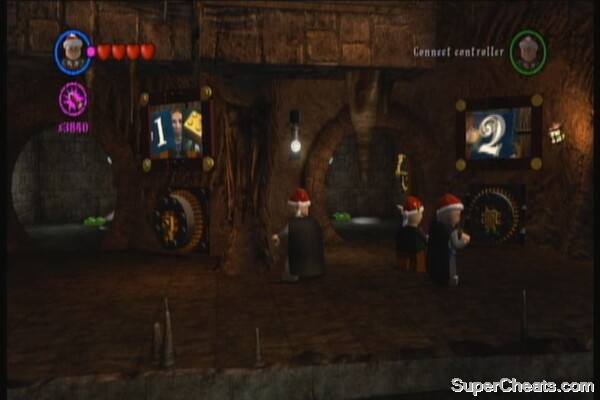
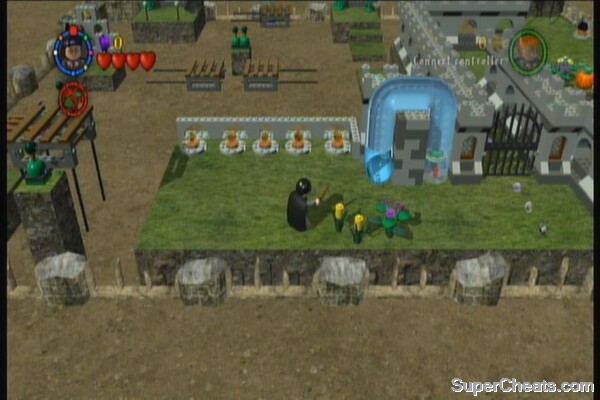
Check out the video walkthroughs for each bonus levels in this guide by following this link.
You need the spell Reducto to access this section. This is also the place where you can unlock the character Voldemort (requires all 200 Gold Bricks) and a handful of other characters. You can find the silver gate that you must unlock in front of Eeylops Owl Emporium in Diagon Alley.
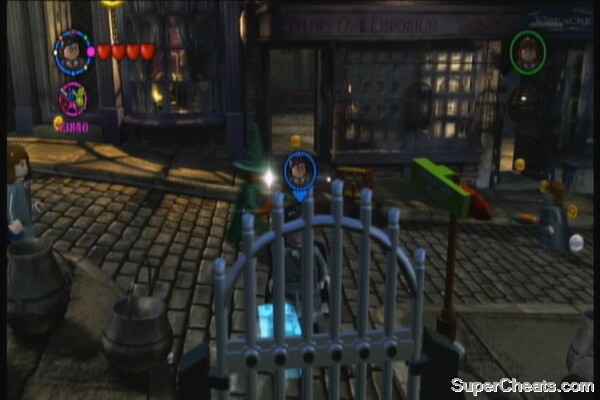
Igor Karkaroff – You'll immediately see this token a short walk from the gate. Use WiLe on the wooden planks to build a stair to grab it.
The Bloody Baron – Stand on the cart and shoot it. You'll be launched upward and get the token as well.
Shifty Wizard – Continue along the path and you'll come across a table. On top of it is a chest that has some vines. Destroy it and shoot the table. Wait for it to move near the lamppost then stand on the table as it launches you in the air, grabbing the token along the way.
Enter the shop to the left then grab the gold brick right behind the main desk.
Since Bonus Level 1 is pretty straightforward, I'll just skip to Bonus LV2 onwards. You can try this as soon as early as you can but take note that some doors won't open unless you use characters from other groups.
Bonus Level 2:
Bonus Level 3:
Bonus Level 4:
Bonus Level 5:
Bonus Level 6:
Bonus Level 7:
Bonus Level 8:
Bonus Level 9:
Bonus Level 10:
Bonus Level 10
Bonus Level 9
Bonus Level 8
Bonus Level 7
Bonus Level 6
Bonus Level 5
Bonus Level 4
Bonus Level 3
Bonus Level 2
Where and How to Enter Cheats
How to Activate Cheats
Red Brick Cheats
AUC8EH Carrot Wands
H27KGC Character Studs
BMEU6X Singing Mandrake
4DMK2R Disguise
F88VUW Ice Rink
QQWC6B Invincibility
HZBVX7 Silhouttes
ZEX7MV Fall Rescue
67FKWZ Stud Magnet
89ML2W Regenerate Hearts
J9U6Z9 Extra Hearts
T7PVVN Christmas
FA3GQA Fast Magic
Z9BFAD Fast Dig
XK9ANE Score x6
J3WHNK Score x4
74YKR7 Score x2
HUFV2H Score x8
H8X69Y Score x10
7AD7HE Red Brick Detector
TTMC6D Hogwarts Crest Detector
84QNQN Gold Brick Detector
HA79V8 Character Token Detector
Spells
VE9VV7 Accio
CD4JLX Engorgio Skullus
UWDJ4Y Stupefy
YZNRF6 Trip Jinx
ND2L7W Flipendo
YEB9Q9 Incarcerous
ERA9DR Glacius
H8FTHL Herbifors
QFB6NR Anteoculatia
6DNR6L Calvorio
9GJ442 Colovaria
UW8LRH Redactum Skullus
2M2XJ6 Locomotor Mortis
KWWQ44 Tarentallegra
MYN3NB Entomorphis
2UCA3M Rictusempra
JK6QRM Multicorfors
U6EE8X Slugulus Eructo
Gold Bricks
QE4VC7 Gold Brick 01
FY8H97 Gold Brick 02
3MQT4P Gold Brick 03
PQPM7Z Gold Brick 04
ZY2CPA Gold Brick 05
3GMTP6 Gold Brick 06
XY6VYZ Gold Brick 07
TUNC4W Gold Brick 08
EJ42Q6 Gold Brick 09
GFJCV9 Gold Brick 10
DZCY6G Gold Brick 11
Junior
Reward: 50 Points
Objective: Complete Year One Story Levels
Refer to the main walkthrough
Senior
Reward: 50 Points
Objective: Complete Year Two Story Levels
Refer to the main walkthrough
Prefect
Reward: 50 Points
Objective: Complete Year Three Story Levels
Refer to the main walkthrough
Head Boy
Reward: 50 Points
Objective: Complete Year Four Story Levels
Refer to the main walkthrough
Teacher's pet
Reward: 70 Points
Objective: Complete All Story Lessons (Single Player Only)
This is unlocked automatically since all story lessons are taught during chapter intermissions.
Story Complete!
Reward: 70 Points
Objective: Complete the Story Levels in all four years
This is unlocked automatically after finishing years and chapters (4 years, 24 chapters in total)
Crest Collector
Reward: 30 Points
Objective: Collect all of the house crests in Year 1 (Single Player Only)
Refer to the main walkthrough and re-run sections of the chapters.
Crest Fanatic
Reward: 30 Points
Objective: Collect all of the house crests in Year 2 (Single Player Only)
Refer to the main walkthrough and re-run sections of the chapters.
Ultra Collector
Reward: 30 Points
Objective: Collect all of the house crests in Year 3 (Single Player Only)
Refer to the main walkthrough and re-run sections of the chapters.
The Ultimate Collector
Reward: 30 Points
Objective: Collect all of the house crests in Year 4 (Single Player Only)
Refer to the main walkthrough and re-run sections of the chapters.
Power Up!
Reward: 45 Points
Objective: Collect all of the Red Bricks (Single Player Only)
There are a total of 20 bricks and you can unlock most of them by using cheat codes. (See this guide's Cheats section). If you used cheats to get the red bricks, the game will register that you have 20/20 bricks but you still won't unlock the achievement. To fix this, you must manually find any red brick for the achievement to be unlocked.
The Bonus Level is Yours
Reward: 70 Points
Objective: Collect all of the Gold Bricks (Single Player Only)
There are a total of 200 gold bricks; below is the rundown of the bricks you can find and those rewarded to you.
72 bricks from completing the story*
16 from completing lessons
50 for saving students in peril**
34 found in Hogwarts
1 found in Diagon Alley and 1 in Knockturn Alley
10 for completing all bonus levels
4 for constructing monuments under the Leaky Cauldron***
*There are 3 bricks that you can unlock per chapter by completing the chapter, finding all crest pieces and finishing the chapter with a True Wizard status. Refer to the main walkthrough for guidance in completing the chapters and finding all crest pieces. The True Wizard status is easily achievable by using multipliers cheats. (See Cheats section)
**Includes the students found in Hogwarts and in campaign stages.
***These pieces can only be constructed by unlocking and completing everything for every chapter per year.
Student Rescue
Reward: 45 Points
Objective: Rescue all students in peril (Single Player Only)
Refer to the main walkthrough for the locations and procedures on how to rescue students in peril in the story levels.
Refer to the Hogwarts section of this guide for the locations and procedures on how to rescue students in peril scattered across the academy
Stud Magnet
Reward: 30 Points
Objective: Get True Wizard in every level (Single Player Only)
True Wizard status is defined by how much studs you have collected. This status can be easily acquired by turning all score multiplers (see Cheats).
You're the Best
Reward: 70 Points
Objective: Complete the game to 100% (Single Player Only)
Here is a checklist of stuff that will affect your completion rate:
Complete all chapters (24/24)
Completing all House Crests (24/24) (each crest has 4 parts which must be collected individually)
Collect all Gold Bricks (200/200)
Collect all Red Bricks (20/20)
Save all Students in Peril (50/50)
Collect all character tokens and purchase them (167/167)
Purchase all spells (18/18)
Complete all story lessons
Complete all bonus and tutorial levels
Dark Wizards
Reward: 10 Points
Objective: Buy every version of Voldemort (Quirrell/Tom Riddle/Voldemort) (Single Player Only)
Professor Quirrel – In the Defense Against Dark Magic Classroom, open the dark gate at the back then go downstairs. The token is within that room.
Tom Riddle – During the boss fight against the basilisk, use Griphook to unlock the vault to the far right. (See Re-run section of Year 2, Level 6)
Lord Voldemort – You need to collect all 200 Gold Bricks then go to Borgin & Bukes, which is the shop at the end of Knockturn Alley.
Quidditch Team
Reward: 10 Points
Objective: Buy the entire Gryffindor Quidditch team from Book One (Single Player Only)
You must find and purchase the following characters:
Oliver Wood
Angelina Johnson
Katie Bell
Alicia Spinnet
Fred Weasley
George Weasley
Harry Potter.
For the last three, you must get their Quidditch uniform versions.
Back in Time
Reward: 10 Points
Objective: Use the Time-Turner
Hermione will be able to use this ability at the start of Year 4. To use this ability, Hermione must stand in front of a grandfather clock then press B.
Building Blocks
Reward: 30 Points
Objective: Complete all the LEGO Builder tutorial levels (Single Player Only)
Reach Gringotts by entering the door to the far right of Diagon Alley. There are four tutorial levels to complete there.
Good Dog
Reward: 10 Points
Objective: Defeat 20 enemies with Fang
Best done in The Forbidden Forest level (Story or Free Play) since there is a wasp hive nearby at the start of the level. Use Fang to destroy 20 wasps. The hive will continuously spawn them as long as you don't destroy it.
Wonderful Weasleys
Reward: 10 Points
Objective: Buy the entire Weasley family (Single Player Only)
The Weasleys are the following: Ron, Ginny, Fred, Percy, George, Arthur and Molley. You just need to purchase at least one version of each.
Quirrell Quandary
Reward: 15 Points
Objective: Defeat Quirrell in the Quirrell boss fight, using Voldemort
You must have unlocked Voldemort and use him in this battle to defeat Quirrel. This is the during the last chapter in Year 1.
Multiplier
Reward: 10 Points
Objective: Collect 10 million studs in one level (Single Player Only)
Just use all the multiplier codes and you should be able to obtain that much studs in a short span of time.
Arachnophobic
Reward: 10 Points
Objective: Defeat 20 spiders with Ron
Best done during the boss battle in Year 2 against a giant spider, control Ron and have him destroy the brown spiders spawned by the boss. Destroy 20 of them to unlock the achievement.
Chilled out
Reward: 10 Points
Objective: Freeze 20 characters using Glacius
You can use the cheat ERA9DR to easily acquire this spell. Just equip the spell and shoot NPCs with it. You can shoot the same NPCs over and over again until the achievement is unlocked. You need to do this 20 times.
Boo!
Reward: 10 Points
Objective: Scare 20 students using a ghost character
Switch to a ghost character and press X to scare NPCs. Scared characters will freeze for a few seconds. You can do this over and over again with the same NPCs until you unlock the achievement.
Animagus
Reward: 10 Points
Objective: Unlock all Animagi (Single Player Only)
Collect and purchase the following characters to unlock this achievement:
Sirius Black
Professor McGonagle
Peter Pettigrew
Rita Skeeter
Professor Lupin
Defeating the Object
Reward: 15 Points
Objective: Defeat the mountain troll, using Quirrell
You must unlock and purchase Professor Quirrell first. (See Re-run section of the chapter “Face of the Enemy” in Year 1) Replay the “Out of the Dungeon” level, use Professor Quirrell to defeat the troll.
Watch Out!
Reward: 15 Points
Objective: Knock over ten characters using a ride-able object
The easiest way to do this is in Diagon Alley. Hop on the large cart there and shoot it to make it move. Keep doing this until you unlock the achievement.
Solid Snape
Reward: 15 Points
Objective: Hide in a barrel as Snape
First you must find Snape's character token (see the Hogwarts section of the guide, Classroom E) and purchase him. You can do this by replaying the first story chapter “The Magic Begins”. There is a barrel after you leave the Leaky Cauldron.
Role Reversal
Reward: 15 Points
Objective: Defeat Harry (as Voldemort), in the Graveyard
You need to have Voldemort unlocked. Replay the last chapter in Year 4 (The Dark Lord Returns), control him and turn the other character as Harry. Equip the green spell (2 o'clock in your spell wheel) then shoot Harry with it.
Quiet Please!
Reward: 15 Points
Objective: Turn the sound and music down to 0 in the options menu whilst in the library
You can unlock this achievement as early as chapter four “Restricted Section” in Year 1. Pause the game to access the options, turn the sound options to 0, then return to the game. The library is also accessible in Hogwarts however you need to learn the spell to defeat boggarts. The library entrance needs a green key, that can only be acquired by destroying a boggart nearby.
Muggle Trouble
Reward: 15 Points
Objective: Defeat 10 enemies with a Muggle character
These are the “basic” characters without any special abilities and can only use melee attacks. Some examples are the Station Guard, Drummer, Bassist, Boy, Girl, etc. Take a Free Play session in The Forbidden Forest level since there is a wasp hive nearby at the start of the level. Destroy 20 wasps to get the achievement. The hive will continuously spawn them as long as you don't destroy it.
Lumos Solem
Reward: 15 Points
Objective: Destroy 50 Devil's Snare plants
If you've been religiously destroying those green vines protruding from the yellow bases, then you just need to destroy a few more to get this achievement. The ones counted are those vines that you need to shoot; not the ones that retract when you light your wand on them. The last chapter in Year 1 has a few of those plants in the starting area of the game. Just save and exit then repeat the process until you get the achievement.
Quick Quidditch
Reward: 15 Points
Objective: Complete the Quidditch level within five minutes
Play this game in Free Play mode then make sure to have Hermione as one of your members. Make a quick run by doing only the stuff needed to proceed. Ignore the other objects like flags, banners and destructible objects.
Ghostly Treasure
Reward: 15 Points
Objective: Collect 500 ghost studs
As the ghost guide leads the way, it will leave a trail of ghost studs. If you've been following him around ever since, then you should be able to collect enough studs to unlock this achievement. Take note that he'll stop leading the way after completing all story levels so make sure you unlock this achievement first before finishing the last chapter.


 Destiny The Taken King - Locations of all Keys and Chests
 Dare House Escape Walkthrough
 Batman: Arkham City – Harley Quinn’s Revenge DLC Walkthrough
 12 Social Media Facts and Statistics You Should Know in 2016
 Crysis 2 Achievements List for Xbox 360