Unofficial Forza Motorsport 4 Guide by CM Boots-Faubert for
The word "Forza" is Italian, and means Force of Strength, and its choice as the name for one of the most celebrated racing game series in console gaming was an inspired one; the original game that set the name for the series emerged onto to the gaming scene as perhaps the most stunning and impressive auto racing game available on the Xbox gaming console, but its emergence was largely a surprise for gamers. When the game landed on store shelves on May 3rd, 2005, its cover sported the iconic image of a Nissan 350Z pursuing an Acura NSX, and if you ask serious racing gamers, they will say that the image tells you everything that you need to know about the game, which featured an impressive 231 cars split among six letter-based classes which continue to be used in the series to represent its cars. These are: -- Class D: Standard production vehicles. Using a series of upgrades, each of the cars (save for the R-Class) can have its performance improved, even to the point that it ends up moving into a new Class as a result, allowing racers to use the same car in a number of different Class events simply by reconfiguring it, a model of play that while not unique to the Forza series certainly made an indelible impression with its fans. Among the stand-out features of the game series are its incredible damage model, which includes the ability to specify cosmetic damage only, or a very realistic damage mode that reflects the damage taken by a car in its handling and performance. Another stand-out feature is the impressive customization options available that allow gamers to not simply change the colour of their car, but also create and apply decal sets (called Vinyls) to it. Included as part of the base game is a decal editor that much to the surprise of the developers became the focus of its own group of player-fans, who use it to not only create the standard sort of decals one expects to find on a racing car, but artistic creations that rival anything you could find on the nose of a bomber! The large and wide variety of cars, combined with an equally impressive variety of tracks and circuits has served as a major draw, keeping players involved in playing long past the time-span that most games can retain their player base, though it should be mentioned that the physics engine with which the game is constructed certainly contributes to the remarkable longevity of the game. Car performance in the game is not simply simulated, but is based upon real-world numbers faithfully translated into the game to the point that, in tests between the real cars and their game forms, their times and performance characteristics were close enough to suggest that the game faithfully recreates the sport of auto racing on your Xbox! -- The Winding Path -- The wide acceptance of the gaming community was quickly followed by rave reviews from gaming websites and magazines -- including feature coverage in Popular Science Magazine -- creating a large and very active gaming community that eagerly awaited the sequel, which developer Turn 10 confirmed was in the works. When it arrived on the new Xbox 360 console in 2007, Forza Motorsport 2 sported a Nissan 350Z drifting around a corner and a large number of improvements that were added to the game that instantly set it apart from the original. These included a new "Simulated" damage level that actually provided a fully realistic effect for damage to the point that a car could actually be put out of commission, and a reduced effect mode called "Limited" that, while it generated control changes that reflected the damage to a lesser degree generally permitted the player to complete a race even when they had rolled or FUBAR'd their ride. The car-count for Forza 2 eventually reached 349, but it was features like the Auction House, where players could sell their artwork and tuning setups offered players the opportunity to acquire in-game money through non-racing transactions, that really garnered attention. The artistic expression possible with the Vinyl Creator in the game quickly re-spawned the art and techie community from the original Forza into a dynamic and popular community within the community in Forza 2, even creating well-known artists who could be hired on a commission-basis to create custom artwork and designs for players. Forza as a game community had, it seems, fully arrived. By the time Forza Motorsport 3 arrived on the scene in 2009 the rivalry between the Forza series and the PS3's Gran Turismo series had created a cold-war like pair of camps constantly tearing into and at the other, so nobody was really all that shocked when it developed that Forza 3 would have over 500 cars, 100 tracks or variations, and fifty manufacturers. The cover for Forza 3 broke the tradition by featuring a regular car that was sitting still instead of racing, and inside the box was a game that included another massive set of game improvements. Newly added to the game was a one button assisted driving scheme, a comprehensive first-person in-car driving position, and vehicle rollover with detailed undercarriages. Lifelike drifting and drag racing debuted and the game included some unlikely cars this time around, such as SUV's and what were initially thought to be rather pedestrian models. Once you got past that the massive expansion to the Vinyl system in the game -- for the first time ALL of the cars could be customized you see -- and it was not clear that the developer had fully embraced the artistic community whose "thing" was creating very awesome looking cars. A very different season-based campaign mode presented players with a different game experience that depended more on what class car they were driving than it did any set schedule, and the physics system had not only been improved but tyres were given their own makeover, to include tyre deformation, and the game grew even closer to a pure simulation of racing. -- Forza 4 --
-- Class C: Sports Cars.
-- Class B: Performance Cars.
-- Class A: High Performance Cars.
-- Class S: Supercars.
-- Class R: Purpose-built Race Cars (non-production vehicles).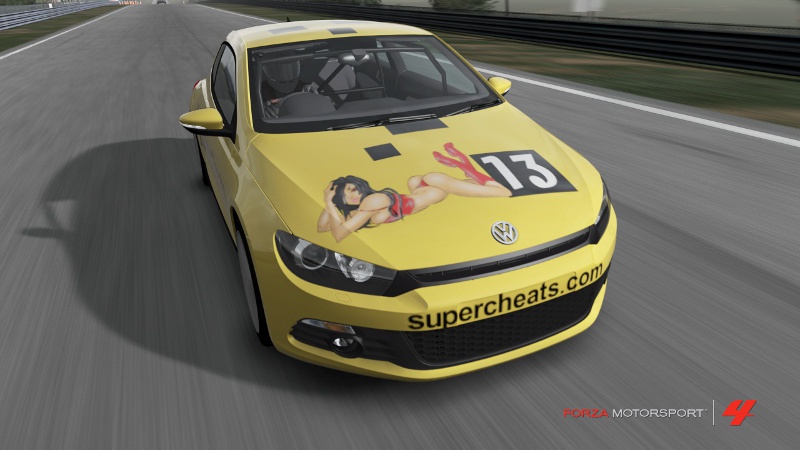
#13 SuperCheats 2009 VW Scirocco GT
The Load Screen Splash Video
Which brings us full-circle to the newest offering in the series, Forza Motorsport 4.
By all accounts it is a new Forza World that we live in, and having spent 200 hours with the game so far, I feel that is an accurate point-of-view. The new additions combined with the plethora of improvements and a new control feel make for almost a new game.
Once again the physics system in the game has been substantially improved, as has the rendering of the game world, but it is the cars themselves that present as the most remarkable and impressive feature. At times, even though I knew that these were painted, created, faux-cars, the balance of light and shadow and the realism level was such that I could not tell the difference between the product of the artist, and that of the factory. In fact within Autovista -- the showroom newly added to this sequel -- it is hard to believe that the cars present there are not simply video images of real cars.
With Kinect support built in and its head-tracking feature makes virtual play as fun -- maybe more fun -- than the traditional controller-based play, but that is still more fun than is probably legal in Florida, I am just saying... The cool factor is not so much that you can play the game via Kinect, but that you can play the game game with the standard controller and still use Kinect to implement the head-tracking system!
New to the series is the modern-day MMORPG equivalent to Guilds, which take the form of Car Clubs, allowing players to group up and game with people they know instead of being forced to play pick-up matches with teenagers more interested in playing smash-up derby than in racing. That bears repeating -- Forza 4 allows you to build your own community of racers within the community using the Car Club guild system! Now that is cool.
Another stand-out feature is the partnership that Turn 10 forged with the blokes from Top Gear, which is only the most motor-headed car-centric and awesome show on TV... Biased? Me?! Don't be silly! Still, between voice work in Autovista by the King of Top Gear, access to the TopGear Test Track, and an amazing and fun mini-game of car bowling, clearly the partnership brings much to the table and to the game.
-- This WTG --
Is a little different than most of the ones I have written in that this is not the sort of game where you need help in completing a given part. A race is a race, so why is a WTG needed? Oh, it is needed, make no mistake about that! The why of it is simple too -- because there is so much packed into this game that it is very easy to get lost in it. To miss out. To grow confused.
In addition to providing reference material on the cars and their values, this WTG also includes specific information on unlocking Achievements, on completing challenges, and the myriad of secrets and almost secrets -- but where it really shines is in answering questions that you don't even know you want to ask... Yet.
It is structured to be helpful in a formal way. In fact it begins with suggested actions that will have very real benefits, from installing the game and game content, to unlocking Achievements that, by themselves, are not really part of normal play, so getting them done and out of the way just makes sense.
It then moves on to covering the basic elements of the game including specifics about what they can do for you, and then moves on to the nitty-gritty details that you need to have to make forward progress in both the game and in its Achievements. Finally it ends up in a diverse Frequently Asked Questions and Answers section that quite literally covers almost every point that you will naturally encounter as you play the game. Cannot say it fairer than that mates.
Being no stranger to the Forza Series (if you check my Gamer Tag you will note that I have 38 of 44 Achievements and 815 GS for Forza 2, and 43 of 50 Achievements and 745 GS in Forza 3 -- and as I write this, in the process of creating this guide I have already unlocked 40 of the 48 Achievements in Forza 4 worth a total of 685 GS!), I am happy to be able to say that it is a marked improvement over the previous games, as is the established tradition of the series.
I enjoyed writing this guide and I hope that you get much from it and that you find it useful! Thanks for reading this and thanks for visiting SuperCheats!
Cheers!
When you get the game your going to want to just slot it and play -- yeah, it is that sort of game -- but before you do that, there are a few things you can and should do, one of which will be a very very kind gesture to your Xbox... So I thought we would start with these minor chores before we get to the meat of the WTG.
First: Install the Game to your hard drive.
Seriously -- Forza 4 disc one is going to make a lot of calls to the disc for information, and installing Disc 1 on your hdd will not only speed up that process nicely, it will save your disc drive lots of wear and tear. It will only take five minutes or so, so why not? Be kind to your Xbox!
Once you have completed installing Disc 1 to the hard drive, go ahead and start the game. Before you can get to the main menu and the rest of the things we need to do, you will need to complete your first race!
First Race and First Achievement
-- Your First Race --
To get to do the rest you are going to need to start the game, select the darkness level, and then find yourself sitting in a car, on the line, about to race! That's right, the very first race in the game comes before you even fully enter the game! Go ahead, try to do your best with this Italian stallion of a race car, and you will find once you cross the finish line that, in addition to getting your first introduction to Forza 4, you will also have unlocked your first Achievement -- "Welcome to Forza Motorsport" (15GS) -- and finally find yourself reaching the real start.
Following the end of your first race the game will check to see if you have a Forza 3 save and, if it finds one, it will then ask you to select it and if you do, it will then import certain cars into your game depending upon your rank and progress, and transfer a certain amount of money depending upon your Level -- for instance at Level 25 you get 35,000 credits plus the first five cars in the list below.
This will only happen one time, when you first start your game, so if you did not have Forza 3 and you now have a saved game from it, you will need to delete or remove your Forza 4 save in order to initiate the process.
These include:
Level 01 -- 2010 Abarth 500
Level 05 -- 2009 Ford Focus RS
Level 10 -- 2010 Chevrolet Camaro SS
Level 15 -- 2010 Audi R8 5.2 FSI Quattro
Level 20 -- 2009 Bugatti Veyron 16.4
Level 30 -- 2009 BMW #92 Rahal Letterman Racing M3 GT2
Level 40 -- 2006 Aston Martin #007 Aston Martin Racing DBR9
Level 50 -- 2009 Peugeot #9 Peugeot Sport Total 908
Now in addition to the above cars that are based on your level, you will also receive any of the Community Reward Cars that you previously unlocked, which include:
1969 Chevrolet Camaro SS Coupe
2002 Mazda RX-7 Spirit R Type-A
2006 Subaru Impreza S204
2007 Lamborghini Gallardo Superleggera
2007 Ferrari 430 Scudena
2009 Chevrolet Corvette ZR1
2010 Ferrari 458 Italia
2010 Lexus LF-A
. . . and . . .
1982 DeLorean DMC-12 (Secret Car)
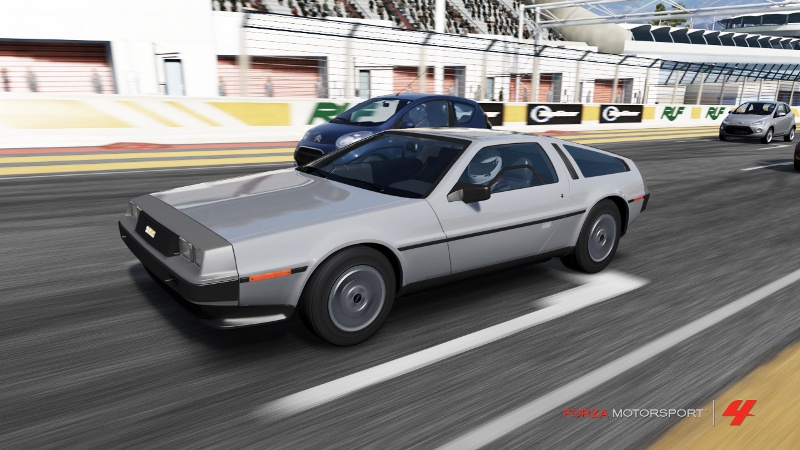
An Homage: DeLorean DMC-12
Now that you have your cars from Forza 3 imported, on to the next step.
-- Your First Car --
After the race you will be prompted to select your first car -- so begin your career by selecting your first car -- I chose the Volkswagen Fox myself -- and then bask in the incredible graphics of the game as you are shown your car! Wow! Freaking awesome! Now confirm that this is really the car you want, and then you are prompted to choose a race... But we do not want to do that just now, thank you!
Instead hit the 'B' button to back out the the top-level of the main menu, then move the selector all the way to the right, to select Install Disc 2. Go ahead and click that now. and you will be asked to change discs. When you do that, you get a screen that shows you how much space you have free and how much that the game will use (2.8 GB). Go ahead and install it. Once you confirm that you have the free space I mean.
Now you get an installation status screen that shows you how nice and fast the disc drive is as it moves a fair chunk of data on to your Xbox. Among that data are some tracks and cars you will want to have in the game, and some other bits of bits. <-- That last was a bit of game humor.
After Disc 2 installs, you will need to swap Disc 1 back in to your slot -- in fact the game tells you when to do that, which is very thoughtful and nice of it, but it is a thoughtful and nice game after all! So, with that done, we are ready to move on to the next chore.
-- Gimme's that Came With the Game --
If you open the case that your came came in, in addition to the sort-of-almost-like-a-manual insert, there is also a card, and on the back of that card are two codes -- one for the Bonus Track Pack, and one for the Launch Bonus Car Pack! So, now it is time to enter those codes.
Hit the Xbox Guide button and then go twice to the left and select Redeem Code, and enter the first code into the box to download the 170.18 MB Track Pack. Now put in the second code to download the 370.93 MB of cars -- woot!
I know, you want to play a game and instead we are doing a lot of waiting around while things get installed and other things get downloaded but believe me it is all worth it in the end, really! nd while you are waiting, take a look at the list of cars that are included in that bonus pack:
1965 Ford Mustang GT Coupe
1997 Lexus SC300
2011 Koenigsegg Agera
2011 RUF RGT-8
2011 Tesla Roadster Sport
No, no! It's OK mate. Crying about those cars is not unmanly, and they are tears of joy after all! Really, we won't look. Go ahead.
Now, in addition to the cars listed above that come in the box, depending upon who you pre-order from you may also have received the following:
Alfa Romeo Giulietta Quadrifoglio Verde (GameStop)
BMW 1 Series M Coupe (Best Buy)
Honda CR-Z EX (Target)
MINI John Cooper Works Clubman (Wal-Mart)
Subaru Impreza WRX STI (Amazon.com)
Between the release pack, the cars you transferred from Forza 3, and the pre-oder bonus, you already have a really great start on your garage mates! Well done!
Making Your Car Your Own
-- Livery --
Note: If you have Vinyl Sets that you created in Forza 3, you have the option to import them into Forza 4 in the Livery Menu... You do not get to pick and choose however, as it will import ALL of the sets from your Forza 3 game.
I don't know if you noticed, but one of the things that was not offered to be moved from Forza 3 to Forza 4 was the custom Livery designs that you created. That is a shame, since a lot of you spent considerable time on those, but it is necessary due to the fact that the car builds in Forza 4 are completely new from-the-ground-up and so the files from Forza 3 simply will not work with them!
While that is a bit annoying, it is understandable, so while we are taking care of the odd bits of chore and whatnot, and while you are waiting for the downloads to finish and get applied, why not take a few minutes to sketch out the design you want to create for your Livery in the new Forza?
Now that you have your design down and you know what you want, start the game, back out to the main menu, and select Play Career > Paint > Create Vinyl Group. Once you are in the menu here, simply create your Livery design layer-by-layer and, once you have what you want, save it to unlock your second Achievement -- "Painter" (10 GS) -- which you get for simply making the design and saving it!
Note: If you want to livery your car with the official Supercheats.com Logos and designs, you can find them shared on the Forza Store for FREE. Just search for the keyword "Supercheats" to find them!
-- Player Card --
Now, from the Main Menu select Play Career > My Profile > Edit Playercard and then Change Badge, and select the new badge icon from what you have unlocked (which admittedly is not much at the moment, but there are some). As soon as you select the new badge, the Achievement -- "Here's My Card" (10 GS) -- will unlock! Well done, that is number three and you have yet to even begin your career!
You can also pick a Title now as well, there should be at least three available. Do that or not, it is up to you!
-- Community --
Now back out to the Main Menu and select Community, then select Car Club to create your own car club! You pick the name, and the initials, and unlock the Achievement -- "Clubbed Up" (15 GS) -- immediately upon creating the club, and then are given the option to invite other players to join.
While you are here, visit the Message Center to read the Events announcements -- if you do that on five days in a row, it will unlock the Achievement -- "Daily Rewards" (5 GS) -- which while it is not a lot, is one more Achievement down!
-- Autovista --
Now pay a visit to Autovista from the Main Menu and you can take a closer look at the Ferrari 458 Italia. Take your time looking it over, and enjoy the wry humor of the narrator as he fills you in on the details for this ride. After you have completed the walk-around and examined the 458 you will be presented with a menu that shows the cars you have currently unlocked in the game, and those that are locked (and thus not accessible here yet until you complete their challenges).
Pick one of the cars that is unlocked -- I chose the 2011 Mercedes SLS AMG -- and begin your tour, looking at everything that you can on the outside. Now enter via the driver's side and examine everything you can inside saving the ignition key for last.
Engage the ignition key to start the car and then look at the steering wheel and you will note that you can take a challenge with this car whose goal is to pass "as many other cars as possible" on the raceway. Now that sounds like you have to pass any you can, but in reality you only need to pass 7 and finish the race to complete this.
Checking out Autovista for fun and Achievements
As you will be passing car after car, here is an excellent opportunity for you to focus upon carefully and perfectly passing a car to unlock the Achievement -- "Nice Pass" (15 GS) -- and another one down! Well done!
When you finish the race and return to Autovista, after you exit the car and, provided you did indeed look at every point, you will unlock the Achievement -- "Car Explorer" (10 GS) -- for a second one in just this one menu option! Excellent!
As a bonus, when you unlock the Car Explorer Achievement you will also unlock the Autovista T-Shirt Avatar Award as well! Excellent, you not only gained Gamer Score, you scored a new T-Shirt for your Avatar!
-- Home Spaces --
Now that you have completed making a livery, applied it to your car, toured Autovista, and gotten a good start upon unlocking the game Achievements, head to the Main Menu and select Play Career > Cars and you will find yourself at your default Home Space. Why not go ahead and take a photo of your car now?
The default Home Space is Mountain Pass -- there are six in total -- the TopGear Test Track, The Hanger, TopGear Studio, Mountain Pass, The Spotlight, and The Warehouse.
Moving to each of these, take a photo of your car at each and save the photo -- you do not need to upload it for this but you can if you like. You can see a photo I took of SuperCheats first team car, which is called "Snowflake" (yup, a Fightclub Reference woot!) by searching through my photos online.
After you take the photo at the 6th location, you will unlock the Achievement -- "On Location" (20 GS) -- and you now have seven Achievements unlocked, and a Gamer Score of 95 for Forza 4 and you have not even started your career!
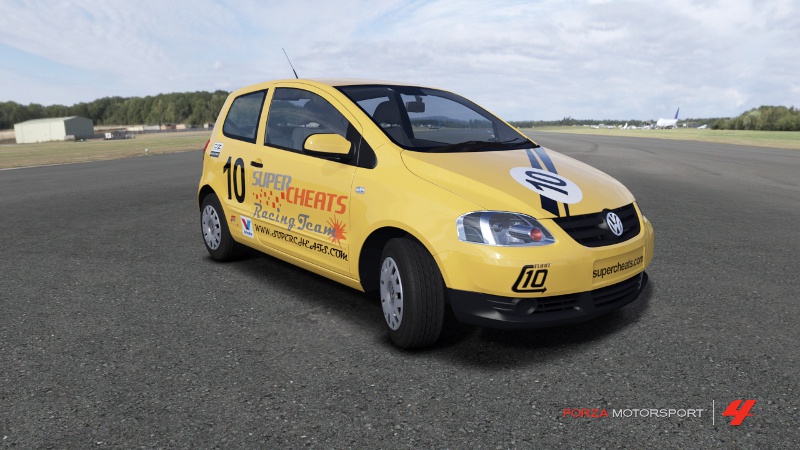
#10 SuperCheats 2011 VW Fox
-- Car Sharing --
Now that you have your car all ready, head to the My Car selection from the Menu and select 'Share Car' to share your car with the members of your Car Club. They can now borrow and use your car for events, but they cannot modify it.
Sharing your car with your Car Club unlocks the Achievement -- "My Car is Your Car" (10 GS) -- your 8th Achievement!
-- Tuning --
Now hit the Main Menu and select Play Career > Upgrade > Tune Setup and you will be presented with the option of tweaking the setup (in other words tuning) your car. Go ahead and make a single small change to the setup, and then hit the Start Button and select Save Current Setup to save the Tuning File, unlocking the Achievement -- "Grease Monkey" (10 GS) -- for your 9th Achievement and a total of 115 GS!
Unlike most other games, in place of a simple set of difficulty settings the dev's at Forza use a graduated system that, while it does indeed have an Easy, Medium, and Hard level to it, it also offers and Advanced and Expert Mode.
The difficulty system has a lot of in-between, or shades of gray as well... The differences between the basic difficulties have everything to do with which Assists you have turned on or off, so rather than deciding on a specific level to play at, instead go to the Assists & Difficulty Menu and choose the ones you need or want.
As you build skill in the the game and get better used to the controls, you will very likely find that you not only can -- but want to -- live without some of the Assists that you use early on. That being the case, all that you need to do is turn them off, and continue playing -- this will not impact your game other than of course making it a little harder. The fewer Assists that you use, the higher the bonus to your earnings from races (prize amounts) are!
A Race with All Assists Engaged
The following Assists are selectable in the game:
Braking -- This is a tricky call as it is one of the most important Assists for new players, as it will keep you from hitting curves at 200MPH... But eventually you will start wanting more control over your car, and so you will be changing it...
Its settings are Assisted, ABS On ( 10%), and ABS Off ( 20%).
If you are not aware, ABS is Anti-Lock Braking System, and in a nutshell it will prevent you from locking the brakes and skidding out of control by rhythmically pumping the brake system to increase stopping power even if you are holding the pedal to the floor.
Steering -- This is probably the most annoying (and necessary) Assist for most new drivers in that when it is on it will keep you from over-steering and making really bad decisions with the front tyres, but in doing so you will find that it can sometimes prevent you from making sharp turns when you actually need to! So while it will keep you from turning more than you should, it will also keep you from turning as much as you need to in some situations. The settings for this are Assisted, Normal ( 10%), and Simulation ( 20%).
When you first start playing this is one of the Assists you will likely want on and benefit from, but as you grow in skill and confidence it is one of the first you will likely turn off or down.
Stability Control -- The point to this setting is to keep you from spinning out, sitting still and burning rubber, or doing things that cause the car to flip. The game will actually prevent you from doing those things with this turned on. If you turn it Off ( 10%) it will actually allow you to do boneheaded moves with the car because it assumes you meant to.
Traction Control -- Your choice is On or Off ( 15%) but the point may not be obvious... You see Traction Control is more about knowing what NOT to do than it is about knowing what to do -- and a good understanding of road types and conditions and good judgment of the same is a critical skill before you switch this one off... YMMV.
Shifting -- This is exactly what it sounds like: Automatic Transmission. Or a simulation thereof, as the game does all the shifting for you. It has three settings: Automatic, Manual ( 15%), and Manual W/Clutch ( 20%).
Honestly there is so much for you to be doing and keeping track of when you first start that you should not feel bad about using it in Automatic Mode, but once you build confidence with the different track types and get more used to driving, changing to a you-shift setting will be something you want to do. But even if you never do, it is all good.
Suggested Line -- This places an overlay of a dotted line on the track to show you what part of it you should be using, allowing you to gracefully set up entries and exits from curves and turns, stay in the best speed position, and benefit from the shape of the surface of the road. The available settings are Full, Braking ( 10%), and Off ( 20%).
When you first start racing you likely will need it set at Full, but once you start to build skill and get some experience with the different track environments you will quickly graduate to Braking, and then Off.
Damage, Fuel & Tyre Wear -- This setting affects how the car takes damage and whether or not the damage that it takes is for appearances only, or actually effects the car and your ability to drive and control it. The available settings are Cosmetic ( 10%), Limited, and Simulation ( 15%)
Rewind -- While racing if you mess up or get messed up, you can hit the 'Y' Button to rewind to a point prior to the mistake, and in essence get a do-over for that section of the race. Your options for this is to turn it off or on, and turning it off gains you 20% to your bonus.
Career Bonus -- While this setting appears in the menu it is actually exclusive to the mode you are in and so cannot be changed. It is there to simply show you what your percentage boost is for the current mode.
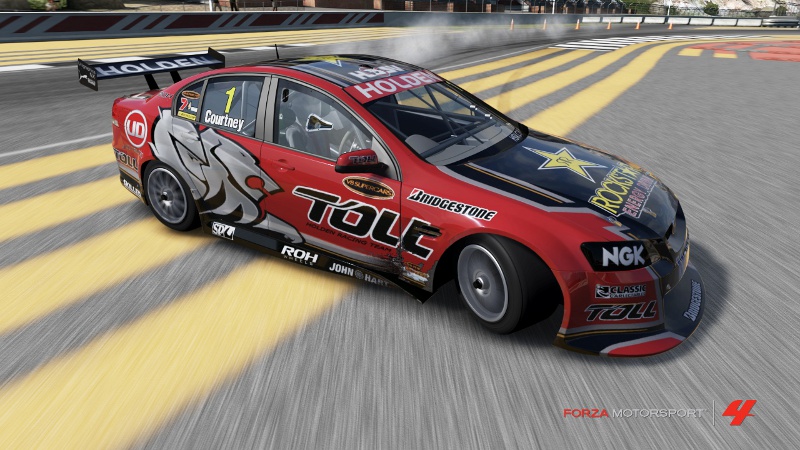
#1 Toll Holden Racing Team 2011 Holden Commodore VE
-- Deciding Which to Use --
This is a personal choice, and it is almost entirely based upon a combination of your actual skill and how skilled you think you are... It also relates to how much fun you want, and how technical a game you want -- meaning that the more you do not have to do (the more assists that you use) the more you can enjoy the pure racing aspect of the game. Conversely if you are into the whole enchilada, then doing everything yourself IS the fun, and there you go!
Your best approach is to experiment with the different settings one at a time until you find your comfort zone, and then work at getting better from there.
The last selection on the right in the Main Menu, The Marketplace is where you will find all of the add-on items that are available for the game. Its menu includes:
-- Popular Cars
-- Car Manufacturers
-- Car Packs
-- Autovista Cars
-- Track Packs
-- Season Pass
-- Car Tokens
-- Extras
Just like it appears, the first pair of selections on the menu provide a sorted view of the cars that can be added to the game based on their popularity or their manufacturer. When you select either you will only be seeing the applicable cars that are part of the DLC expansion packs (some of which you should already own). The same is true for Manufacturers in that the selections you see are just the cars included in the DLC (whether you own them or not).
If you do not own a car you select in those menus you will be given the opportunity to purchase it in several different ways. For instance, if you do not own the pack that the car is part of, selecting it will cause a purchase menu to pop-up. Using the 1965 Pontiac GTO as an example:
-- Purchase Season Pass - 2,400 Microsoft Points
-- Purchase American Muscle Car Pack - 560 Microsoft Points
-- Purchase Pontiac GTO '65 - 160 Microsoft Points
-- View American Muscle Car Pack
The choice you are being asked to make is a simple one: either buy the Season Pass, which gives you a total of six (6) add-on DLC Car Packs, each containing 10 new cars, to be released monthly from November 2011 through April 2012. A Bonus for this includes the American Muscle Car Pack, so you really get seven (7) Car Packs for your 2,400 Microsoft Points.
Alternatively you can purchase the American Muscle Pack or just the GTO (or other cars) from the pack on a car by car basis.
A Race from Inside the Car
-- Car Packs --
When the game was released the following Car Packs were available:
-- 2012 BMW M5
-- American Muscle Car Pack
-- Launch Bonus Car Pack
If you pre-ordered or the copy of the game you bought was from the first production run, you received a DLC code in the game box for the Launch Bonus Car Pack, and the 2012 BMW M5 Car Pack is a free one, so the only one you can purchase is the American Muscle Pack (and if you have the LCE you got that for free anyway).
-- Track Packs --
At launch the available DLC Track Packs for Forza 4 consisted of just the Test Track Benchmark in Odessa, USA, and the Top Gear Soccer Field in Dunsford, England. If you purchased the game as a pre-order or you bought your game from the first production run you received a DLC Code for this in your game box.
-- Car Tokens --
A controversial addition to the game, Car Tokens are exactly what they sound like: a Token that can be used to purchase any Car from the Buy Car Menu in the game. Understand, this does not include DLC cars, rather it is the cars you ordinarily would be paying in-game credits to obtain. So instead of racing dozens of races to earn the money you need to buy the cars, you can alternatively simply pay Microsoft Points and purchase Tokens, then use the Tokens to buy the car.
Tokens are available in the following counts:
1 Token - 80 Microsoft Points
6 Tokens - 400 Microsoft Points
13 Tokens - 800 Microsoft Points
You may think this is rather a pointless resource since you can earn credits free in the game simply by racing consider this -- a 2011 Lamborghini Sesto Elemento costs 2,500,000 credits, which is a LOT of races. That is 2.5 mil for one car, whereas the same 2.5 mil could buy 15 or 20 other cars, so spending some Microsoft Points to acquire it starts to make more sense... But you should be aware that the tokens are not a 1-token 1-car exchange, rather it depends on the price of the car! A 2.5 mil car might cost 1 token, but a 9 million credit car will cost you 3 tokens. Something to keep in mind.
I mention that this is controversial and it is -- the community is not sure how it feels about this if the chatter on the boards is any indication -- partly because there are Achievements that are associated with owning certain cars, so the feeling is that offering players the ability to use real world money to buy cars translates to selling Achievements. The other side of the coin are players who say that what you are really buying is time, so there is nothing wrong with that. You will have to judge how you feel about it on your own...
Free Play Mode in Forza 4 includes the menu selections for Quick Race, Split Screen, and Hot Lap.
Quick Race is just what it sounds like -- a mode in which you can pick any car that is in the game including special cars, and then any track you have access to, and race. Note that unlike online and career races you do not earn either XP or Credits from the races in this mode, but you can unlock Achievements here.
Since you have access to virtually every car in the game in this mode, this is the perfect place for you to go and evaluate cars before you buy them, get to know them, and decide if you want them. Obviously you are going to want every car in the game eventually, but as you work your way through Career Mode knowing which cars you like more than others can help in choosing your rides!
Split Screen is what it sounds like -- a local mode for two-player racing with the screen split in two. To use this mode you need a second controller plugged into the game, and another human player logged in.
Training with the Hot Lap Mode
Hot Lap -- In this mode you can choose any car, any track, and then run laps, with the idea being to practice the tracks and improve your lap time. How this works (as shown in the video) is really simple: the first lap you run sets the time, and then when you begin the next lap a "ghost" of your previous run spawns, and you can then see how much of an improvement or how worse off your next lap is.
Using this you can feel out the right path to take on a given track, which makes it very useful for training specific tracks when you are looking for consistent and good results.
The competition between the Forza Franchise and Gran Turismo is a fierce and brutal one. It does not help that the two games are platform-exclusive titles on different platforms, so that they can never really go head-to-head and be judged in the traditional manner. Excuses will be made; pundits will always point out that anyone who says that this one is better is clearly a platform fanboy, but in the end, as it often the case in this sort of situation, the true battle between opposing games tends to fall into the realm of features and gee-whiz extras -- and in that case the clear winner is not the games, but the gamers -- and such is the case here.
When Gran Turismo 5 released it was an exceptionally massive leap forward for that series, and it according to many gamers in the racing community, it made Forza 3 look old. Clearly the jumps that GT5 took served as a challenge to Turn 10, who then chose to take giant leaps instead of matching or just beating GT's jumps, and what we end up with is a massively entertaining, visually stunning, amazingly technical sequel in Forza 4.
There are many stand-out features, this is true, but the Autovista Mode of the game is probably the one that will instantly pop into the mind of any Forza gamer you ask. Not because it is a solid part of the game play element of the game, for it is not, but because it is impressive. Sorry, no, I meant to say that it is Impressive. There, that's better.
Unlocking and Touring the Hummer H1
What is the big deal?
Well, let me put it to you this way -- Autovista is a Virtual Reality car showroom floor, and the cars in it are not real, they are the same basic car models you drive and own in the game. But it is so realistic looking that it is difficult at times to accept that it is not simply a video of a real car.
Add to that the fact that you can walk-around, practically kick the tyres. Open it up and get in. Turn the key, and then drive that car out to a challenge track, and what you have is a major leap forward. A light-years-leap.
To give you a useful example, watch the video above for a complete tour of the 2006 Hummer H1 Alpha -- and see how you unlock the Achievement "Kingpin" (5 GS) for knocking down a Gold Pin while completing the Car Bowling Challenge to unlock the Hummer!
As we take the tour of the Hummer after successfully completing the Challenge to unlock it, you will be amused to find that Top Gear's Jeremy Clarkson is your tour guide, and in addition to providing lots of genuine technical information he also offers his considerable wit to the process.
One last thing -- you have no doubt heard about the Warthog and Jay Leno's 1931 Bentley 8 Liter Sedan and are wondering why they are not in your game in Autovista? The simple answer is that they actually are -- but you have to unlock them first!
To gain access to Leno's Bentley you need to first complete the challenges and unlock 10 cars in Autovista (there are 23 primary cars in it), and to unlock the Warthog, you simply have to complete the challenges and unlock ALL of the Autovista cars. Simple enough, right? Come on! You were going to do it anyway!
The place where all of your interactive online activity will be taking place, from racing online to organizing or joining a racing club, selling your cars and your creations in your Storefront. This section breaks down as follows:
Race Online -- Self-explanatory and obvious... If you are going to race online, this is where you have to go. There are many types of races to be had here, from Quick Match, Turn 10 Select, Circuit, Mult-Class Circuit, Drift, Motorsports, The Playground, and User-Created Races. A little something for everyone in other words.
My Club -- A Car Club is the equivalent of a guild in an MMO, being a place you can go to be with friends and play with friends. In addition to that, you -- and the other members of your club -- can share your cars, and borrow each others cars once they are shared! You can either create your own club or join one that a mate has created, all you need to be is invited.
Competing in Rival Autocross
Rivals -- Where you can find challenges to beat, both official and often personal. Selecting this option gets you a list of Rival Categories to choose from:
-- Community Monthly: Compete with a rival ghost car for a bounty in a series of timed events created by Turn 10 Studios. These events change every month, and use a variety of rules.
-- TopGear Rivals: Test your driving skills in timed challenges featuring car and track pairings cooked up by TopGear.
-- Spec Hot Laps: They provide the car, you provide your best time.
-- Open Time Attacks: Bring your own car or tuning setup and beat the established hot lap time.
-- Track Days: Compete with a rival ghost car in timed events.
-- Autocross: Compete with a rival ghost car in these highly technical timed competitions.
-- Drift Zone: Best your rival's drift score for a bounty.
Leaderboards -- Self-explanatory but important, the Leaderboards include Rivals, Circuit, Drag, Drift Class, Oval, P2P, Tuner, Graphic Artist, Designer, Photographer, and Director scores.
Auction House -- Another obvious choice, and the place where you can go to get cars cheaper than in the Buy Car shop assuming you are lucky. Also the only place you can go to get Unicorn cars, which have their own tab.
Storefront -- A place for you to purchase Tuning Setups, Designs, and Vinyl Groups, and view photo's and replays. You can also access your Storefront (where you sell your creations) and collect any money you are owed via the Storefront and Auction.
My Profile -- This selection is not just to set your icon and motto, it is also where you can access and view your personal stats, and your media files, set your options, and view the Team Credits.
Message Center -- The place you go to get messages from Turn 10, the Auction House, and your shop.
As with the previous games, Career Mode represents a set of races that you must compete in and complete in each calender year. There are 10 calendar years in total, but the number of races will be different; fewer in the first few years but as you progress there will be more and different types and levels of race as well. Before we discuss that though, we need to address the system that is used by the game to assign the races in each year...
You might be thinking that these will be a set list of races, but that is not the case at all. In fact despite the fact that there is a set list -- and they have an Achievement associated with completing all of them -- the game will often have you replay a race you have already driven and won! Why does it do that? Well, the answer is because it is the nature of the World Tour Mode. But that is not a very informative answer is it?
The reality has more to do with the car you are sitting in when you get to the next race than it does with any logical scheme for which is the next race. Put simply, if you just finished a race in your S-Class car and there is an S-Class race available in the next set, you will be offered that race. If there is not, you will be asked to change cars. The races it shows may be an E, D, and an R2, so you will need to change to a car in those classes -- or -- a car that can be upgraded to one of those classes.
Once you do that, if you have automatic upgrade enabled it will be upgraded when you enter the race, otherwise the game will ask you if you want to upgrade your car. Note that while the game will upgrade a car automatically it will NOT downgrade one. That being the case it is a good idea to have a number of cars from your preferred maker in your garage at any given time, with the Class types spread out so that you always have at least one car in the required class. Note that if your preferred make is Volkswagen (or any other make that does not have R-Class cars) you will still need a couple of R-Class cars to use in your alternate make.
The end of a career or just the start?
-- The Races --
You will encounter a variety of race types from standard races to challenge-type races -- in fact as far as I can tell you will eventually complete ALL of the different types of races in the game as you work your way through World Tour (AKA Career Mode). That is a good thing, but you should be aware that there are some exceptions you need be aware of, as otherwise you may not find this an enjoyable experience, so we need to cover those now.
First: Always upgrade your car.
When you are using a Class for the first time or bumping a car up to the next Class, you should always upgrade it to the highest number in that Class that you can because otherwise you will find yourself losing a lot of races.
The automatic upgrade feature works OK for the most part, and will make the right choices for most races, so you can trust to that if you are not comfortable devising your own upgrade path. You need to understand that all of the AI cars will be upgraded to as close to the top range of that Class as they can be made to go. If you fail to do that as well, you cannot compete with them.
Second: You can lose a race.
I know that is obvious, but it needs to be said. The AI racers in Forza 4 are a bit smarter than the ones from the previous games, and they will capitalize upon your mistakes when you make them. Sadly save for specific and limited cases, you rarely get to capitalize upon THEIR mistakes. A case in point is going off-course -- you do it and you will find that your car is profoundly effected by the process, going from fast to 3 MPH in a heartbeat. When your AI competition does it, nine times out of ten going off-course has abso-bloody-lutely ZERO impact on their speed and handling. They simply drive back onto the course and continue as if nothing happened.
This may be frustrating, hell it may even be a bug! But it is the way that it is, and as there is nothing you can do about it, you should make an effort not to let it upset you.
Third: This is not a Weekend Game.
You are looking at a game that, in order to play it fully, will demand a minimum of 150 hours of play time plus. I say plus because while you will be able to unlock all but two of the Achievements in this game in that 150 hours, the Affinity Achievement and the Bucket List one (and maybe the one for owning the most expensive cars in the game) are going to take you way more than the base 150 hours. Way more.
Considering the variety of game play options here, you are likely to be best served by adding this game to your regular gameplay rotation list and then letting the Achievements pop when they do. You are better off NOT boosting for them, as that will likely cause you to burn out on this title, and that would be a shame.
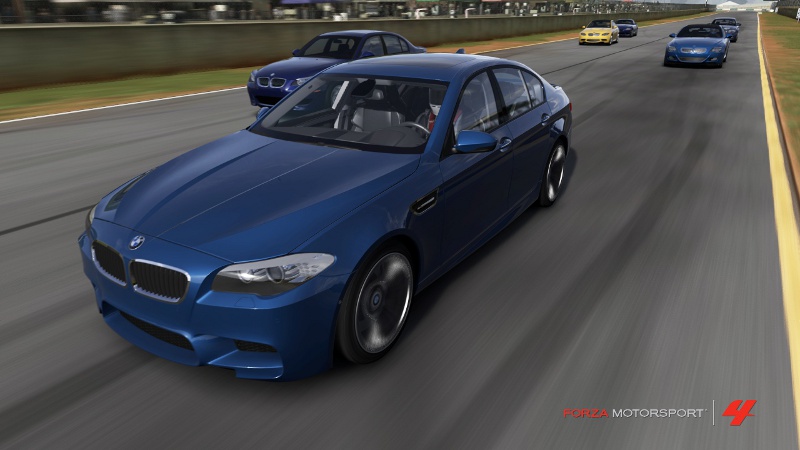
2012 BMW M5 DLC Car
Fourth: Affinity is like chasing a bad roll in Craps.
One of the new additions to the game is manufacturer Affinity -- put simply it is how well they like you and is based on how many miles you have driven in one of their cars. The magic number for Affinity is Level 5, because at Level 5 you get the cash reward from them AND your parts discount is now 100%. After that, any upgrades (save for a few) are free.
When you add another Affinity Level above Level 5 you get a cash reward, and of course when you get any maker's Affinity to Level 50 you get an Achievement -- but that is really not something you even want to think about mates. Seriously. Just keep it in the back of your mind, let it come when (if) it ever comes, and leave it at that, because if you set out to boost that Achievement you are looking at perhaps months of play... Certainly not weeks.
Fifth: You do NOT have to turn your racing into a Grind to gain credits.
In past years the only real way to gain the large amounts of credits required for purchasing the high-end cars was to grind out races with high pay-outs. This naturally had the effect of changing the way that the game was perceived - from a fun and entertaining to a boring series of race after race whose only purpose was to build up a bank of credits with which you can purchase the cars you want. While you can do that here if you want, the game was actually designed with an alternative...
The source of the alternate approach is represented by two factors -- actually four Achievements -- the Ferrari Collector, Factory Driver, Bucket List, and Exclusive Taste Achievements to be specific. What do I mean? Right, well the first factor is the massive increase in Driver Levels in Forza 4, which has 150 Levels as opposed to the 50 found in the previous games. The second factor are those three Achievements, which serve to promote the need for obtaining credits in large numbers.
Fortunately with each Driver Level comes a cash reward, and like unto that, with each Affinity Level comes another Cash Reward! So presuming you are interested in unlocking the Bucket List Achievement you will doubtlessly be working your way through ALL of the outstanding events after you attain Year 10, right? Right!
So... Instead of grinding out the same races over and over again to gain money, you can do something that actually has a feeling of progress to it, and offers a different set of challenges with each race! Seriously... Think about it... You will be completing each of the racing series, which gives you the cash purse for each, plus the rewards for Affinity and Driver Level. To put this in perspective for you, all of the Driver Levels above Level 50 include a sizable cash reward (more than 100,000 credits), and that number increases with each Level. The reward for attaining Level 55 is 115.000 Credits, while Level 56 is rewarded with 117,500 Credits so you can see the progression... Likewise with the Affinity Level, this also increases, so every so many races (which you are also gaining money from) you get a sudden infusion of cash in big chunks -- for example the reward for Affinity Level 20 is 95,000 Credits, while at Level 25 it increases to 105,000 Credits and so on.
I don't have the math handy, but I can say with reasonable confidence that following this alternative to grinding will take you to the same point -- enough funds to manage the purchases you need to manage in order to unlock those Achievements -- than if you forced yourself to do the Grind route, which really, who wants to do? The important thing though is that it will take you to that point while, at the same time, completing the various races on the large chart and so get you ever closer to the Bucket List!
Grinding Credits and the Legendary Battle Achievement
-- Grinding Credits --
On the off-chance that you decide that grinding out the credits is preferable to the longer (but far more entertaining) process as outlined above, there is a method that was widely used in Forza 3 that can be employed in Forza 4 to generate around 300,000 Credits or more in an hour. It works like this (you can also follow it along in the video above):
(01) Select Community
(02) Select Race Online
(03) Create Race
(04) Game Setup
(05) Change the Environment to "Test Track"
(06) Change the track to "Test Track Layout A"
(07) Change Max AI Players to 11
(08) Change Max Players to 12
(09) Change AI Difficulty to "Professional"
(10) Change Laps to "50"
(11) Change Car Class to "Any"
(12) Change Damage to "Limited"
(13) Change your car to one of the fastest R-Class you own
(14) Turn all of the Assists off to maximize your Credit Rate
(15) Start the race
Now once the race begins, instead of following the course as the other drivers are doing, you simply make all left-turns, basically going in a very tight circle to around the inside section of the track. I am told that this can be completed in 20 minutes or so but I found 30 to be closer to average...
As you can see, I combined this example with the Legendary Battle Achievement for convenience sake.
-- The Career Decade --
There are ten years in the World Tour of Racing. Each of these has a different number of events, and each has an Achievement associated with it. Those are:
Year 01 Amateur (25 GS)
Year 02 Clubman (25 GS)
Year 03 Sportsman (25 GS)
Year 04 Semi-Pro (25 GS)
Year 05 Expert (25 GS)
Year 06 Professional (25 GS)
Year 07 Masters (25 GS)
Year 08 Elite (25 GS)
Year 09 Champion (25 GS)
Year 10 Legend (50 GS)
It may look simple enough, and it is certainly a goal worthy of working towards, but would it surprise you to learn that a fair percentage of the gamers who play this game will never unlock the Achievement for Year 10 during their first 6 months of play? It is true. The reason for that has to do with the fact that with each progressive season you have to complete more races -- for example in Year 1 there are 5 races, in year 2 there are 7, but by the time you get to Year 9 there are 24, and in Year 10 you have to complete 27 races!
The hundred-odd races in between often present a significant challenge for casual gamers... But that does not describe YOU! You are a professional gaming driver, so unlocking all 10 seasons will be a cake walk for you!
One minor suggestion that I wanted to make -- most players, once they get above Level 50, tend to stick with the S-Class and above cars, and because of that spend their time racing at speeds above 150 MPH for the most part. Now, don't get me wrong -- this is cool and fun -- but since you have already been doing that for a fairly long time, now would be a great time to take one of the low-end cars from your preferred maker and convert it to, say, a D-Class ride...
Doing that will expose you to some race series that you have not been exploring up to now, and will set the pace speed back around 75 MPH or so (certainly less than 100 MPH), which gives you a different perspective and experience of racing. This is especially valuable and entertaining on the European tracks... I am just saying. Plus, some of these races pay quite well considering.
The Driver Level (Rank) reward system in Forza 4 is very different than it was in the previous game. Instead of being gifted with a specific car, you are now prompted to CHOOSE your own reward from the list of cars that is presented to you at each Level. Because they are reward cars, their cost is not displayed when you are asked to choose, which means you can easily end up mistakenly choosing the wrong car.
To help you with the strategy of picking the right car -- or at least the best car in terms of gaining benefit in the game and saving credits -- I am including the full list of reward cars below. When you reach a Level, consult this list BEFORE you choose your car to be sure that you are getting the best value for your choice.
In addition to that consideration there is an Achievement in the game for owning all of the Ferrari Cars that appear on Game Disc 1 -- some of those cars are included as Level Reward Choices -- but just because it is listed as a Level Reward Choice does NOT mean you should choose it! The values of all of the cars are listed with each level, so you should verify that there is not a substantially more valuable car available before automatically choosing the Ferari.
To assist you in acquiring the Ferrari Achievement all of the cars that apply to it that appear as Reward Choices are marked with a double-asterisk (**).
I strongly recommend that you keep this list handy while playing in order to make the best decision for you. It would be a shame of you chose a 30,000 Credit car when there was a 2 Million Credit car available to choose, right?
-- The Full Level Reward Choice List --
Level 1 Reward Choices
2008 Toyota Yaris S (10,000 Credits)
2009 Ford Fiesta Zetec S (19,000 Credits)
2009 Honda Fit Sport (12,000 Credits)
2009 Scion xD (11,000 Credits)
2010 FIAT Punto Evo SPORT (20,000 Credits)
2011 Mazda 2 (14,000 Credits)
2011 Suzuki SX4 Sportback (14,000 Credits)
Level 2 Reward Choices
1989 Toyota MR2 SC (6,000 Credits)
1992 Volkswagen Golf GTi 16v Mk2 (6,000 Credits)
1994 Honda Civic 1.5 VTi (5,000 Credits)
1994 Mazda MX-5 Miata (7,000 Credits)
1994 Nissan 240SX SE (7,000 Credits)

1965 Alfa Romeo Giulia Sprint GTA Stradale
Level 3 Reward Choices
1965 Alfa Romeo Giulia Sprint GTA Stradale (60,000 Credits)
1969 Nissan Fairlady Z 432 (12,000 Credits)
1971 Lotus Elan Sprint (30,000 Credits)
1971 Nissan Skyline 2000GT-R (28,000 Credits)
1973 BMW 2002 Turbo (28,000 Credits)
Level 4 Reward Choices
2008 Alfa Romeo MiTo (20,000 Credits)
2009 Renault Twingo Renault Sport Cup (16,000 Credits)
2009 SEAT Ibiza CUPRA (17,000 Credits)
2010 Mitsubishi Colt Ralliart (22,000 Credits)
2011 Citroen DS3 (24,000 Credits)
Level 5 Reward Choices
1957 Ford Thunderbird (60,000 Credits)
1960 Chevrolet Corvette (80,000 Credits)
1965 Ford Mustang GT Coupe (26,000 Credits)
Level 6 Reward Choices
1969 Chevrolet Camaro Z28 (12,000 Credits)
1969 Pontiac Firebird Trans Am (45,000 Credits)
1970 Ford Mustang Boss 429 (120,000 Credits)
1970 Mercury Cougar Eliminator (48,000 Credits)
1971 AMC Javelin-AMX (20,000 Credits)
Level 7 Reward Choices
1985 Toyota Sprinter Trueno GT Apex (6,000 Credits)
1988 Mitsubishi Starion ESI-R (5,000 Credits)
1992 Nissan Silvia CLUB K's (6,000 Credits)
Level 8 Reward Choices
1971 Ford Mustang Mach 1 (40,000 Credits)
1973 Ford XB Falcon GT (50,000 Credits)
Level 9 Reward Choices
1969 Oldsmobile Hurst/Olds 442 (40,000 Credits)
1969 Pontiac GTO Judge (44,000 Credits)
1970 Chevrolet Chevelle SS-454 (48,000 Credits)
Level 10 Reward Choices
2009 Volkswagen Scirocco GT (32,000 Credits)
2010 Mazda Mazdaspeed 3 (17,000 Credits)
2010 Peugeot RCZ (34,000 Credits)
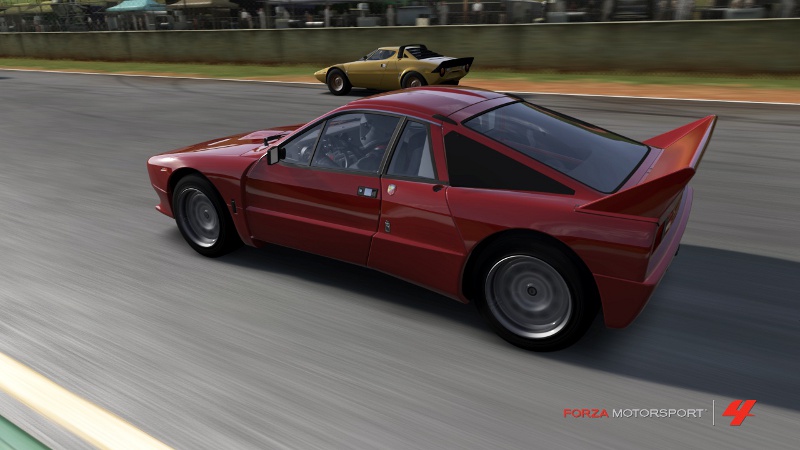
1982 Lancia 037 Stradale
Level 11 Reward Choices
1980 Renault 5 Turbo (38,000 Credits)
1982 Lancia 037 Stradale (240,000 Credits)
1992 Ford Escort RS Cosworth (24,000 Credits)
1992 Lancia Delta Integrale EVO (22,000 Credits)
1994 Toyota Celica GT-Four ST205 (9,000 Credits)
Level 12 Reward Choices
1987 Ford Sierra Cosworth RS500 (52,000 Credits)
1990 Mercedes-Benz 190E 2.5-16 Evolution II (26,000 Credits)
1991 BMW M3 (16,000 Credits)
Level 13 Reward Choices
2006 Dodge Ram SRT10 (24,000 Credits)
2008 Land Rover Range Rover Supercharged (68,000 Credits)
2008 Volkswagen Touareg R50 (65,000 Credits)
2009 Audi Q7 V12 TDI (100,000 Credits)
2009 Jeep Grand Cherokee SRT8 (36,000 Credits)
Level 14 Reward Choices
1995 Mitsubishi Eclipse GSX (6,000 Credits)
1995 Toyota MR2 GT (7,000 Credits)
1997 Honda Civic Type R (9,000 Credits)
2000 Honda Integra Type-R (8,000 Credits)
2000 Nissan Silvia Spec-R (16,000 Credits)
Level 15 Reward Choices
1967 Chevrolet Corvette Stingray 427 (90,000 Credits)
1971 Plymouth Cuda 426 HEMI (120,000 Credits)
Level 16 Reward Choices
1967 Lamborghini Miura P400 (400,000 Credits)
1968 Ferrari 365 GTB/4 (270,000 Credits)**
1971 De Tomaso Pantera (45,000 Credits)
Level 17 Reward Choices
2004 Opel Speedster Turbo (35,000 Credits)
2004 Vauxhall VX220 Turbo (20,000 Credits)
2005 Lotus Elise 111S (21,000 Credits)
Level 18 Reward Choices
1998 Subaru Impreza 22B STi (35,000 Credits)
1999 Mitsubishi Lancer Evolution VI GSR (12,000 Credits)
2008 Mitsubishi Lancer Evolution X GSR (29,000 Credits)
2008 Subaru Impreza WRX STI (25,000 Credits)
Level 19 Reward Choices
2009 Ford Focus RS (38,000 Credits)
2010 Honda Mugen Civic Type-R 3D (55,000 Credits)
2010 Renault Megane RS 250 (29,000 Credits)
2010 SEAT Leon CUPRA R (24,000 Credits)
2010 Volkswagen Golf R (42,000 Credits)
Level 20 Reward Choices
1992 Honda NSX-R (90,000 Credits)
1997 Mazda RX-7 (18,000 Credits)
1997 Mitsubishi GTO (8,000 Credits)
1997 Nissan Skyline GT-R V-Spec (18,000 Credits)
1998 Toyota Supra RZ (28,000 Credits)
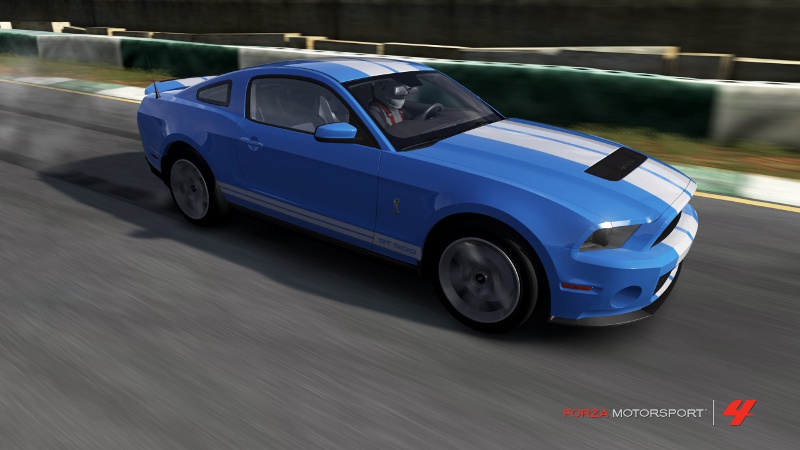
2010 Ford Shelby GT500
Level 21 Reward Choices
2009 Dodge Challenger SRT8 (38,000 Credits)
2010 Chevrolet Camaro SS (36,000 Credits)
2010 Ford Shelby GT500 (48,000 Credits)
Level 22 Reward Choices
2009 Holden HSV w427 (110,000 Credits)
2009 Lexus IS F (51,000 Credits)
2010 Audi S4 (46,000 Credits)
2010 Mercedes-Benz C63 AMG (60,000 Credits)
Level 23 Reward Choices
2007 Audi S5 (42,000 Credits)
2008 BMW M3 (52,000 Credits)
2010 Chevrolet Corvette Grand Sport (55,000 Credits)
2010 Mercedes-Benz SLK 55 AMG (58,000 Credits)
2010 Nissan 370Z (34,000 Credits)
Level 24 Reward Choices
2009 Audi RS 6 (140,000 Credits)
2009 Cadillac CTS-V (58,000 Credits)
2010 Jaguar XFR (80,000 Credits)
2010 Mercedes-Benz E 63 AMG (100,000 Credits)
2012 BMW M5 (90,000 Credits)
Level 25 Reward Choices
1984 Ferrari GTO (320,000 Credits)**
1988 Lamborghini Countach LP5000 QV (150,000 Credits)
Level 26 Reward Choices
2005 TVR Sagaris (56,000 Credits)
2010 Morgan Aero SuperSports (160,000 Credits)
2010 Spyker C8 Laviolette LM85 (250,000 Credits)
Level 27 Reward Choices
2008 Aston Martin DBS (250,000 Credits)
2010 Bentley Continental Supersports (250,000 Credits)
2010 BMW M6 Coupe (95,000 Credits)
2010 Mercedes CL 65 AMG (200,000 Credits)
Level 28 Reward Choices
2003 Dodge Viper SRT-10 (42,000 Credits)
2004 Ferrari F430 (150,000 Credits)**
2005 Aston Martin DB9 Coupe (130,000 Credits)
2005 Ford GT (150,000 Credits)
2006 Chevrolet Corvette Z06 (48,000 Credits)
Level 29 Reward Choices
2009 Jaguar XKR-S (100,000 Credits)
2009 Mercedes SL 65 AMG Black Series (280,000 Credits)
2010 Aston Martin V12 Vantage (270,000 Credits)
Level 30 Reward Choices
1965 Shelby Cobra Daytona Coupe (5,000,000 Credits)
1966 Ford GT40 MkII (1,500,000 Credits)
1967 Ferrari 330 P4 (9,000,000 Credits)**

1995 Ferrari F50
Level 31 Reward Choices
1992 Bugatti EB110 SS (300,000 Credits)
1993 Jaguar XJ220 (180,000 Credits)
1993 McLaren F1 (3,000,000 Credits)
1995 Ferrari F50 (400,000 Credits)**
Level 32 Reward Choices
2008 Dodge Viper SRT10 ACR (100,000 Credits)
2009 Chevrolet Corvette ZR1 (100,000 Credits)
2010 Nissan GT-R SpecV (150,000 Credits)
Level 33 Reward Choices
2006 Lamborghini Miura Concept (420,000 Credits)
2009 Mercedes-Benz SLR Stirling Moss (1,000,000 Credits)
2010 Saleen S5S Raptor (180,000 Credits)
Level 34 Reward Choices
2005 Lamborghini Gallardo (110,000 Credits)
2010 Audi R8 5.2 FSI Quattro (150,000 Credits)
2010 Ferrari 458 Italia (240,000 Credits)**
2011 McLaren MP4-12C (220,000 Credits)
2011 RUF Rt 12 S (270,000 Credits)
Level 35 Reward Choices
2010 Bertone Mantide (1,000,000 Credits)
2010 Devon GTX (300,000 Credits)
2010 Rossion Q1 (120,000 Credits)
2010 Spada Vetture Sport Codatronca TS (400,000 Credits)
2010 Wiesmann GT MF5 (220,000 Credits)
Level 36 Reward Choices
2010 Aston Martin One-77 (1,800,000 Credits)
2010 Lexus LF-A (350,000 Credits)
2011 Ferrari 599 GTO (370,000 Credits)**
2011 Mercedes-Benz SLS AMG (250,000 Credits)
Level 37 Reward Choices
1997 McLaren F1 GT (4,000,000 Credits)
1998 Mercedes-Benz AMG Mercedes CLK GTR (1,200,000 Credits)
1998 Nissan R390 (1,200,000 Credits)
1999 Lamborghini Diablo GTR (200,000 Credits)
Level 38 Reward Choices
2009 Ford #40 Robertson Racing Ford GT Mk7 (1,000,000 Credits)
2010 BMW #79 Jeff Koons BMWM3 GT2 Art Car (1,000,000 Credits)
2010 Ferrari #83 Risi Competizione F430GT (1,000,000 Credits)
2010 Jaguar #33 RSR XKR GT (1,000,000 Credits)
Level 39 Reward Choices
2004 Saleen S7 (320,000 Credits)
2006 Koenigsegg CCX (550,000 Credits)
2009 Bugatti Veyron 16.4 (1,400,000 Credits)
2010 SSC Ultimate Aero (1,000,000 Credits)
2011 Koenigsegg Agera (1,400,000 Credits)
Level 40 Reward Choices
2011 Ford #5 Ford Performance Racing FG Falcon (900,000 Credits)
2011 Ford #19 Mother Energy Racing Team FG Falcon (900,000 Credits)
2011 Holden #1 Toll Holden Racing Team Commodore VE (900,000 Credits)
2011 Holden #11 Pepsi Max Crew Commodore VE (900,000 Credits)
2009 Pagani Zonda Cinque Roadster
Level 41 Reward Choices
2009 Pagani Zonda Cinque Roadster - 1,500,000 Credits)
2010 Gumpert Apollo S - 320,000 Credits)
2010 Joss JT1 - 400,000 Credits)
2010 Mosler MT900S - 320,000 Credits)
Level 42 Reward Choices
2011 Chevrolet #04 Chevrolet Racing Monte Carlo SS Stock Car (900,000 Credits)
2011 Ford #05 Ford Racing Fusion Stock Car (900,000 Credits)
Level 43 Reward Choices
2003 Opel #5 OPC TEAM PHOENIX Astra V8 (1,200,000 Credits)
2004 Audi #8 Audi ABT TT-R (1,200,000 Credits)
2008 Mercedes-Benz Mercedes-AMG C-Class Touring Car (1,200,000 Credits)
2011 Audi #04 Audi A4 Touring Car (1,200,000 Credits)
Level 44 Reward Choices
1997 McLaren #43 Team BMW McLaren F1 GTR (1,500,000 Credits)
1998 Nissan #32 NISSAN R390 GT1 (1,500,000 Credits)
2000 Dodge #91 Team Oreca Dodge Viper GTS-R (1,100,000 Credits)
2003 Saleen #2 Konrad Motorsports S7R (1,500,000 Credits)
2005 Maserati #15 JMB Racing MC12 (1,100,000 Credits)
Level 45 Reward Choices
2003 Nissan #12 CALSONIC SKYLINE (1,500,000 Credits)
2005 Honda #18 TAKATA DOME NSX (1,500,000 Credits)
2005 Toyota #6 EXXON Superflo Supra (1,500,000 Credits)
2010 Lexus #1 PETRONAS TOM'S SC430 (1,500,000 Credits)
2010 Nissan #12 CALSONIC IMPUL GT-R (1,500,000 Credits)
Level 46 Reward Choices
2004 Chevrolet #3 Corvette Racing C5.R (1,100,000 Credits)
2006 Aston Martin #007 Aston Martin Racing DBR 9 (1,100,000 Credits)
2006 Chevrolet #4 Corvette Racing C6.R (1,100,000 Credits)
2008 Aston Martin #009 Aston Martin Racing DBR9 (1,100,000 Credits)
Level 47 Reward Choices
2008 Koenigsegg CCGT (1,500,000 Credits)
2008 Mazda Furai (1,000,000 Credits)
2010 Pagani Zonda R (1,700,000 Credits)
2011 Radical SR8 RX (300,000 Credits)
Level 48 Reward Choices
1999 Toyota #3 Toyota Motorsports GT-ONE TSO20 (2,200,000 Credits)
1999 BMW #15 BMW V12 LMR (2,200,000 Credits)
2003 Bentley #7 Team Bentley Speed 8 (2,200,000 Credits)
2003 Panoz #11 JML Team Panoz LMP-01 (2,200,000 Credits)
2006 Audi #2 Audi Sport North America R8 (2,200,000 Credits)
Level 49 Reward Choices
2008 Acura #15 Lowe's Fernandez ARX-01b (2,000,000 Credits)
2010 Chevrolet #99 Green Earth Team Gunnar Oreca FLM09 (2,000,000 Credits)
2010 Mazda #16 Dyson Racing B09/86 (2,000,000 Credits)
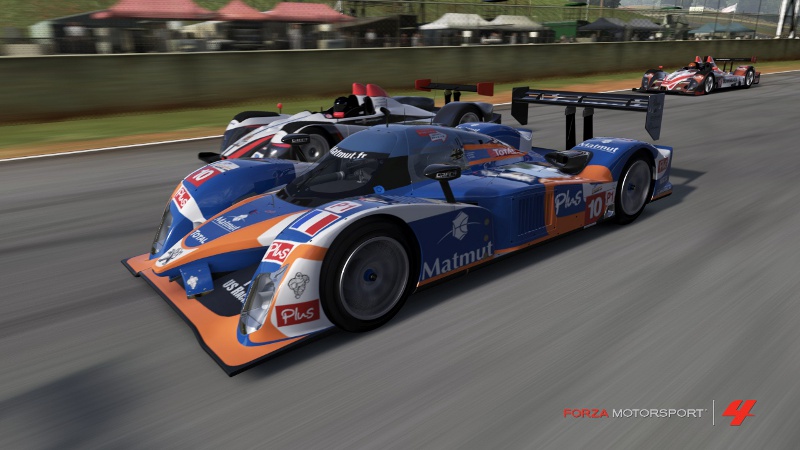
2011 Peugeot #10 Matmut-Oreca 908
Level 50 Reward Choices
2009 Acura #66 de Ferran Motorsport Jim Hall Tribute ARX-02a (2,500,000 Credits)
2009 Audi #2 Audi Sport Team Joest R15 TDI (2,500,000 Credits)
2011 Aston Martin #6 Muscle Milk Aston Martin Lola (2,500,000 Credits)
2011 Peugeot #10 Matmut-Oreca 908 (2,500,000 Credits)
The first thing that you have to remember is that drifting in real life is massively different than drifting in the game, but also pretty similar... What I mean by that is not so much the obvious points, like having to maintain a ready supply of tyres, and trying not to screw up so bad that you slide your $40,000 tuned ride into a Jersey Barrier, ripping off a quarter panel or worse. No, the difference is in the techniques that you use for drifting.
In a real car you have independent control over all of the pedals, which gives you a lot more options in how you initiate your drift, but in the game you have fewer options -- for example you cannot really use the heel-and-toe technique to drift, but there are still several options that you can use to not only get the drift started and keep it going, but also to acquire the skills to get good at it. Considering the very real buzz that most gamers get from accomplishments like that, it is a worthy goal.
Basic Drifting
Most novice drivers find drifting to be a confusing and often hard to manage challenge, mostly because they do not fully understand the physics involved, so the first thing that we are going to do is examine the process of drifting. If you already have a solid understanding of the drift head to the Advanced Drifting section now. Still with us? Good!
Before you continue reading, please sit back, take a deep breath, and say to yourself "knowledge is power" and then take another deep breath. This really is a skill that you can master, despite the fact that many people find it more difficult to drift in a video game than in real life.
Bear in mind that in real life there are important queues that you have access to that you do not have in a video game. The feel of the tyres on the driving surface, the lateral thrust of the force being applied, and the center of gravity of the car, which when you get really good, becomes an extension of your own body. Regardless of whether you are doing this in real life, or in a video game, what this is really about is controlled force and inertia, and keeping that in mind is one of the keys to your success.
Forza 4 Demo Drifting - Onboard cam - 900 Degree
The video above illustrates the major advantages of using a steering wheel controller as opposed to the standard game pad -- the gamer who posted it overlying a shot of the controlled on top of the game video synced together to illustrate the relationship between the moves on screen and their controller moves. While you can still master drifting using the game pad, clearly the wheel has benefits.
The Magic Force Called "Inertia"
Inertia is the word that we use to describe the behavioral characteristics of matter and movement -- in other words the properties of motion. The basic rules governing inertia go back to Sir Issac Newton's first two laws of physics:
Law 1. An object at rest tends to stay at rest.
Law 2. An object in motion tends to stay in motion.
At its very basic level, inertia is defined as the quality in matter (matter being anything you can touch) that permits it to remain motionless when it is not moving, or maintains motion when it is moving. To create inertia you must apply force (transfer energy) to the object. To overcome inertia you must also apply force to counteract the energy that it has.
Force will cause something that is still to begin to move; an easy to grasp example of this is when you are playing pool and you strike the cue ball with the pool stick, and the ball hits another ball that is at rest, transferring some of its energy to the ball that is hit, and altering its state from rest to motion. The ball that is set into motion by this contact moves slower than the cue ball because only some of the energy is transferred to it -- this is due to the resistance that is present in its state of non-motion. Conversely when two balls are in motion in opposite directions and strike each other, the two colliding energy forces counteract each other -- both are transferring energy to each other, and because the energy is moving in opposing directions, the transferred energy has the effect of canceling inertia.
In drifting this basic formula is what you must overcome in order to maintain your drift.. Consider the motive force of your car, which is provided by its engine and transmission, to be the positive energy source. This energy is transferred through the drive train to the wheels, and through the wheels to the driving surface. Under normal conditions a very small amount of the energy automatically dissipates due to the resistance provided by a combination of the driving surface and the air around you, bleeding off the energy so that if you remove the source of positive energy -- take your foot off the gas and put the car in neutral -- the resistance (counter-energy) of the surface combined with the air around you will eventually cause your car to come to a complete stop.
To maintain a drift you must break the connection between the driving surface and both of your rear wheels while at the same time exerting a controlled measure of positive energy sufficient to overcome the resistance that is applied by the negative inertia of the driving surface, and the air around you, while controlling the direction of your motion. It really is as simple as that.
Into the Drift
The process of Drifting at its most basic level refers to a driving technique in which you intentionally over steer into curves, initiating loss of traction in the rear wheels while at the same time maintaining control of the car largely with the front wheels, both creating and overcoming inertia at the same time. You do this by applying power to an imaginary path that we call slip angles.
The technical definition of the process of accomplishing this is to create a condition in which the rear slip angle is greater than the front slip angle prior to approaching the corner apex, at which point control is retained through the front wheels, by pointing them in the opposite direction of the turn -- meaning that when the car is entering a left turn and you have broken the traction of the rear wheels and entered the drift state, the front wheels are turned (over-steered) to the right, providing the driver with control over the inertia as the energy either builds or is expelled in what should be a smooth and predictable arc.
What you are actually doing when this happens is exploiting coupled nonlinearities in the tyre force response by exerting energy and control to sustain the sideslip -- drifting in other words!
In simple terms this means that once you have broken the connections (traction) between the surface and the rear wheels, the car is now in a controlled skid under power, and heading in an outward arc matching the turn. To maintain that arc, you use the front wheels by steering in the opposing direction of the skid, so that you maintain the uneven slip angles of the front and the rear tyres.
Normally you brake into a curve and accelerate out of it, but when you are drifting you accelerate into the curve, through the curve, and out of the curve, leaving the curve at a vastly higher speed than when you entered it.
This is far easier to do in a rear-wheel drive car that is equipped with a standard rather than an automatic transmission -- but if you are really skilled you can not only drift an all-wheel drive or even front-wheel drive car, you can do it with an automatic transmission as well!
- - - -
Car Park Drifting
Car Park Drifting demonstrates that you do not need either high speed or a lot of room to drift.
- - - -
Advanced Drifting
This is where we get to the nitty gritty of drifting -- how to make it happen, how to keep it happening, but more important than that, how to control it. It is critical that you quickly embrace the notion that to get good at this, it is something you will need to practice. Oh, you can unlock the Achievement easily using the guide for that process that is also included in this walkthrough, but if what you want is to be a drifter, simply unlocking that Achievement is not going to be enough for you.
So now it is time to talk about how to enter the drift state in the game, using the different techniques that are actually available to you in the game.
Before you try any of these, bear in mind that which you choose relates directly to the car you are driving, its setup, and the assists you have turned on. You are advised that turning off breaking, handling, and steering assists is a minimum set of steps you will need to complete to really have full control over your car in drifting -- but you should also be aware that doing this makes the car behave like it really would in real life, including susceptibility to all of the forces of inertia. That means it can go bat-shit nuts if you apply too much energy (force) at the wrong time, or you over-steer in the extreme -- because the game is going to assume you meant to do that, and it is going to let you do it!
-- Tuning Your Drift Car --
The first thing that you have to change when setting up a drift car is adding a mechanical limited slip differential (LSD). The preferred form of LSD for drifting is the 2-way clutch type, and then you want to upgrade the clutch to the strongest model available for you car. Of course if you have damage set to appearance only this will not matter as much, but it is a good idea anyway.
Finally you will want to alter the gearsets in your car so that they have closer ratios in order to keep the engine within the power band range.
You can use the standard road-racing suspension and get good results, but jacking up the spring rates will provide a more uniform rate of energy transfer, and using a stiff sway bar will make it a lot easier to break the traction as you enter your turns.
For your engine you will want to tune it so that peak HP is reduced in order to have a wider torque band for easier throttling, regardless of the engine size. Meaning that if you have a mid-size engine or a monster Hemi, you still want it set up this way as that gives you maximum control over acceleration.
Adjustments to steering in order to provide a greater steering angle are widely considered to be a must-do, but it is not really clear how big an advantage this actually provides in the game. Maybe if you are using a steering wheel controller it will be noticeable, but if you are using the standard game pad? Not so much.
Tyre selection is the area that many new drifters make the biggest mistake in -- choosing a tyre that has a lower traction rating thinking that this will help with drifting. In fact it actually makes it harder to drift. You want to be using the tyre with the best traction rating, because the maximum amount of tyre grip is necessary to sustain speed and stability in a drift.
The Drive Setup: regardless of what the stock setup is for the car, you are going to want to change it to Rear-Wheel Drive (RWD) because that is the golden focus. It is simply easier to drift in RWD as opposed to FWD or AWD. Once you get really good at RWD drifting you might want to try it with the other formats, but for now just get good at RWD drifting, right?
As you get better at tuning, you will want to experiment with adjusting the camber and wheel loading to refine how the car behaves when you are transitioning from side to side, but this is far less important than the previous adjustments for the early through medium skill levels, so don't fixate on getting this right until you have enough experience to understand what the adjustments actually do -- which is only going to come with building skill and experience in drifting!
-- Drifting Techniques --
The following techniques can be used in Forza 4 depending upon the setup if your car and what assists you have. For example some will require you to be doing both clutch AND shifting, not simply shifting. Some can be adapted for use with an automatic transmission but you will likely find that your results in that case are less predictable and harder to control...
There are basically two schools here -- brake and clutch. We will look at brake first, because that is what you will probably start with as a novice, and then examine clutch, which is what you really want to be working towards mastering.
-- Emergency Brake Drift
This is probably the most basic drifting technique period, and if you played games like Need for Speed and GT this is the one you are familiar with. The process is simple: as you enter the turn you stomp (push) on the emergency brake, locking the back wheels, and maintain that lock all the way through the turn, steering to get the longest highest arc that you can as the back end swings out.
Technically this is drifting, sure, and you can use it on really abrupt turns to get a drift score, but I have noticed that on shallower turns often the game simply does not recognize this as a drift! It treats it as a skid, and you do not get drift points for doing it!
-- Long Emergency Brake Drift
This technique is used for drifting on long and wide straightaway sections of track. Basically you accelerate to a high speed (over 100 MPH) and engage the Emergency Brake while swaying the car to put it into a flat drift, and then maintain the drift by keeping the tyres spinning and controlling your angle of attack by keeping it shallow, so that you are basically sliding down the straightaway.
An alternate tactic is to do this while approaching a turn; using the Emergency Brake to initiate a long drift and then maintaining it into the turn so that you can use the added inertia created by gravity in the turn to extend this drift over a much longer path that is a combination of the slide turning into an arc.
While this is a simple technique, it is really an extension of the Emergency Brake Drift, so you will need to have mastered that before you add this one to your repertoire.
-- Braking Drift
As you enter the turn apply the brakes to push the car’s weight onto the front wheels; this causes the rear wheels to rise, breaking their traction. You then use a combination of braking and accelerating along with steering to maintain the drift without locking up the back wheels (keeping them spinning).
-- Choku-Dori Swaying Drift
This technique is used to build lateral force adding energy from the first phase of the drift into the second, and is accomplished by putting the car into a long sliding straight drift in the opposite direction of the approaching turn, and then slewing (swaying) the car into the direction of the turn, transferring most of the energy from the first phase into the second.
Choku-Dori performed by Mr. Yasuyuki Kazama
As you can see in the video in the first phase of the drift the rear wheels are spinning but in the second phase they are locked up. Most drifters use a combination of clutch and then brake for this. The second phase is easier accomplished by using the Emergency Brake rather than the main brakes.
-- Clutch Kick Drift
This is the most basic technique, used by most novice drifters because it works every time. As you approach the turn, engage the clutch and apply the gas to raise the RPM, then as you enter the turn immediately downshift while maintaining the high RPM and pop the clutch.
What happens is that the transmission engages smoothly, causing an instant increase in power to the rear wheels, which immediately breaks their traction. This is the technique that is used when you see the drifter smoking into the drift.
-- Shift Lock Drifting
As you approach the turn entrance you quickly downshift, dropping the RPM to slow the drive train; when you pop off the clutch completing the downshift causes the rear wheels to lock up, breaking their traction.
Forza 4 Demo Drift Montage
As you watch the YouTube video above pay attention to the sound -- the constant acceleration that is required for Power Drifting, and how well controlled the car is in this mode of drifting.
-- Power Drift
This is the most complicated type of drift for most racers, and it requires a deft hand on the wheel and a real understanding of where the power is going. Basically you accelerate into and through the entire turn, causing the back end to swing out at a sharper slip angle than the front wheels, causing the weight to shift upon exit. This can only be accomplished in a car that has a lot of horsepower.
Some Final Advice
If you are really new to drifting or to racing in Forza you might find that these lessons come a lot easier if you start out on an open oval track (there are several in the Test Track) so that you can begin in a lower gear and at a lower speed.
Star out in first gear, and just get used to steering around in the circle and arc pattern. Once you get used to that, go up a gear, and keep doing this until you are comfortable driving in tight and wide arcs, then start learning to do small and well-controlled drifts.
The best way to do that is to use the Emergency Brake to break the traction and then release it and accelerate to keep the wheels spinning while you work the steering. Once you complete the drift -- no matter how brief that drift is before your car automatically straightens to correct for what is obviously an unnatural condition, you will now know what it feels like to drift!
Concentrate on larger and longer drifts, and by doing this you will build the skill and confidence that you need to go out on to a real track and make that car scream.
The current generation of video game consoles is the 7th generation, which began with the release of Microsoft's Xbox 360 on November 22, 2005. This was followed by the release of Sony's PlayStation 3 on November 11, 2006, and Nintendo's Wii on November 19, 2006. Unlike the PC, when a console gets released its hardware is locked in, and historically starting with the release game studios begin with a general approach to taking advantage of the capabilities of a console but only later begin to leverage its full capabilities. With the current generation now six years old you might think that there are no new tricks up developers sleeves, but the release of Forza 4 for the Xbox 360 by Turn 10 clearly proves that is far from true.
While the Autovista part of Forza 4 may feel like more flash than substance, the incredible leap forward that the game world represents is anything but flash, and considering that the Forza games have always been more simulation than racing game, their willingness to squeeze every bit of capability out of the aging Xbox 360 has resulted in a new entry in the well-loved series that is every bit the worthy successor to the mantle established by the previous games.
While every effort has been made in preparing this material to make it as complete and helpful as possible, in view of the fact that it is being written for an audience of gamers who may not necessarily be proficient in the math and technical jargon that is particular to the automotive industry and auto racing, the language that is used in this guide has been carefully chosen to make it as easy to read as we could manage.
We address each element that is considered in the process of tuning, with an emphasis upon the hand's-on approach that is celebrated part of the Forza series. While the process of tuning can be highly technical, you may find that it is very helpful to test out different approaches as you work them out so that you can better understand the effects that the changes you are making to your car actually have on it. There is no substitute for experience in tuning, and the best way for you to gain that experience is by doing, by experimenting, and by teaching yourself. This guide will help you with all of that.
Before you begin any tuning adjustments you need to spend some time in the game learning the telemetry system and what the different readings mean. You need to be very familiar with it because it is the key to determining both the state of the element being tuned as well as the state of change as you begin charting the differences.
Advanced Tire Tuning
One area in the game that was given considerable focus and polish is the technical side of the auto, from physics to mechanics and, perhaps of more interest to players, a willingness on the part of Turn 10 to throw out entire parts of the existing game model in order to improve the experience of play by replacing those sections with new content that takes advantage of science and engineering knowledge that was not previously available to them. In particular this includes tires; the team that programed the tires in Forza 4 started from scratch, enlisting the aid of actual manufacturers, who provided unprecedented access to information on performance and physics characteristics that all of the companies that make tires today consider to be confidential information that they go to some lengths to protect.
The tires on a car are a critical element in the chain of technology that is of interest to tuners; put simply, you can actually obtain significant improvements across the board simply by choosing the best tyre for a given track! Professional tuners include the tires in every calculation that they make in the process of tuning, from the motor to suspension, and even body tuning, because that relatively tiny point of contact between the rubber and the road is really what the entire process is about.
With that consideration in mind, the first section for this advanced tuning guide deals with the tires, as that is logically the first and best place for you to start in the process of tuning your car to improve its handling and performance.
Tire Pressure
The air pressure in your tires represents the single most significant influence upon the elements of grip, responsiveness, and wear -- the simple act of adjusting the pressure for specific conditions has an easy to feel and recognize impact upon performance and grip that is obvious to most drivers. Part of this awareness is likely due to the public service programs from the 1970's to today reminding drivers that keeping their tyres properly inflated has a profound effect upon their gas mileage.
While this is an obvious way to influence performance it is also an aspect of tuning that is problematic because many racers try to implement it by eye and feel rather than scientifically. The practice of adjusting pressure in this fashion actually causes more harm than good in both the short and the long term, because of the common misunderstanding of how it applies to racing.
Tyre pressure is always adjusted with the tires in the cold state -- meaning that they have not been driven and thus have not built or retained heat. The reasoning behind adjusting the pressure in a cold state is that it allows the actual pressure to be more accurately measured; adding pressure to a hot tyre lacks the consistency and predictability because the pressure is not going to be the same in each tyre due to the way that heat affects the measurement. So unless all four tires are exactly the same temperature -- an unlikely event -- so that the actual pressure in each -- regardless of how it appears when it is gauged -- will invariably be different, which can apply a negative result.
The reason that this is an issue has to do with the reasoning behind pressure adjustment in the first place, which is not some arbitrary process but is well-grounded in science. Each track you race on has different characteristics and will exert different types of force upon your tires, and that is why you adjust pressure for the specific track. It is not a generic process.
For example under normal driving conditions -- on streets and highways not on tracks -- the ideal pressure to obtain peak friction is generally accepted to be 32 psi -- of course this is a generalization but it is one that has been established through judgment of performance in real world settings. The ideal pressure on a given track is a specific number that is arrived at through examination of temperature and performance characteristics and not a generalization at all.
Examining the temperature conditions is the primary component in determining what adjustments need to be made to pressure, so to recap you start from a cold state, make your estimated adjustments to pressure, and then take the car out on to the actual track you are adjusting for and run three or four laps so that you can then examine the heat characteristics to further refine your adjustments. After you run the laps, replay the run and bring up the telemetry so you can watch the changes.
Properly Adjusting Pressure
The best tool that we have in judging the results of adjustments to tire pressure is the telemetry readings that are available in the game, which provide a very accurate picture of the current state of each tire and, through extrapolation, what we need to do to obtain the best results. The primary objective is to configure them so that after they heat up they provide the best grip range possible.
After testing by running laps, you examine the current state of the tires immediately following the test laps to determine what steps to take next. On thing to bear in mind when testing is that the Peak Grip Temperature is between 180 and 210 degrees, so you should be reaching that area for every test and if you are not, add laps until you do.
If you find that the tire edges are hotter than the center after testing, this indicates that the pressure is too low. The general formula in correcting this is to add 1 psi for each 5 degrees of difference. Conversely when you find that the center of the tire is hotter than the edges, this indicates that pressure is too high, and the standard formula is to reduce pressure by 1 psi for every 5 degrees of difference.
During testing if you experience pronounced handling changes, evaluating tire temperatures often reveals the cause of this effect. When you find that there is significant difference between the temperature in the front and rear tires (which can cause over or under steering), the primary culprit may well be tire pressure, but it can also be the tire itself, which may be either too narrow or too wide, or even the suspension (if you have adjusted it recently) which may be too stiff or too loose.
Correcting the problem by adjusting the suspension is one option, but since you are in the process of determining your optimal tire pressure for the track, you want to begin there and not jump to a different area of tuning straight away as that often creates more problems and can cloud the actual cause of the problem, making your job ten times more difficult.
Altering Tire Width
If you are testing because you have changed the tire configuration on your car -- specifically if you have selected tires with new width characteristics, the likely cause for this new problem is either the pressure or the width of the tires -- but more likely the width -- so if you do not plan to adjust the suspension during your tuning you may want to start over with a different width that is perhaps less extreme a change. Bear in mind though that adjusting the suspension often solves these problems...
When the front tires are hotter than the rear tires, either the front tires are too narrow or rear tires are too wide. This situation will cause the car to under steer, so if the front pressure is not too high it is likely that there is too much front spring sway, not enough rear spring sway, so you may want to adjust the front spring and sway bar, stiffen up the rear spring and sway bar, or decrease the front pressure or increase the rear pressure.
When the rear tires are hotter than front tires your car will over steer, and this is generally caused by the front pressure being too low or the rear pressure being too high. It can also be caused by the rear tires being too narrow or the front tires being too wide. If correcting the pressure fails to provide relief or causes more problems than it solves, the obvious solution is to adjust the rear springs and sway bar to be softer, or to stiffen up the front springs and sway bar.
Properly Configuring Tire Camber
Camber angle is the angle between the vertical axis of the wheels used for steering and the vertical axis of the vehicle when viewed from the front or rear. It is used in the adjustment of steering and suspension, and is a particular focus for tuning. When the top of the wheel is farther out than the bottom, we call that positive camber, and when the bottom of the wheel is farther out than the top, we call that negative camber.
Camber angle adjustments alter the handling qualities for your suspension configuration in specific and predictable ways. For example you use negative camber to improve grip while cornering, so a track with a lot of cornering in its profile would be one in which you would want to adjust negative camber in your tuning plan. If the track includes more straight sections than cornering you would want to adjust for zero camber, because the greatest traction for maximum straight-line acceleration will be attained zero camber angle, so that the tread is flat on the road. If you are tuning for rally racing that includes a lot of off-road and dirt surfaces, you would use positive camber to help achieve a lower steering effort.
When evaluating the camber adjustments you have made, if the inner edge of the tire is hotter than outer edge, you have too much camber and you need to decrease the negative camber, but if the outer edge is hotter than inner edge, there is not enough negative camber, so you need to increase negative camber.
Brake Tuning
Properly configuring the brakes on your car is a key element in handling and performance -- but you know that. When you begin altering the brake setup this will primarily consist of adjusting the balance of braking power between the front and rear wheels, or what is called brake bias.
This is represented by the percentages applied to each, for example a brake bias of 70/30 means that the front brakes are given 70% of the total braking power, while the rear brakes are given 30%. This is a critical setting because it effects handling while cornering, as well as your driving style.
Adjusting the brake bias toward the front makes your car more stable while braking as you enter a turn; if you shift the brake bias toward the rear the car is looser while braking and entering a turn, which can make it less stable. If that makes it sound like giving the car more brake power in front is always best, bear in mind that too much brake power in front can actually hurt your performance and control, because it can result in the brakes locking up. Generally speaking the idea is that the front brakes are used to alter control of the car in turns, while the rear brakes are used strictly for stopping power. Of course none of that applies to setting the car up for drifting, which tends to use the opposite settings.
Your car should always have more front braking power than rear, since the mass and weight are transferred to the front of the car during braking, and with brake bias towards the rear, the car is increasingly less stable because the rear tires will lock when the weight shifts forward.
You may find that the Anti-lock Braking System (ABS) significantly interferes with your handling and performance in turns, so it is a good idea to turn that off before you begin tuning the brakes and tires. In addition to that, you will need to decide what setting you will use for brake pressure -- the choice you make being consistency. Try each of the three settings and decide which works best for your style and then stick with the one that works for you so that you improve with it, rather than having to learn a new handling style.
Differential
The Differential settings control how your car applies its power and torque to the road. In modern cars with automatic differential control this is accomplished by applying more power to the stable wheels, which usually means the outside wheels in a turn.
The setup for racing is the opposite, with power being sent to the inside wheels, which is a product of the frequent and extreme turns. The important setting here is the slip rate, which many drivers set higher because it improves speed and stability coming out of turns. There are two settings to be concerned with -- Acceleration and Deceleration.
The acceleration setting controls when the differential locks while under power, and setting it to a higher percentage has the effect of preventing individual wheels from slipping. This allows you to use more power when exiting a corner, but can make the car less stable. Reducing the percentage has the effect of adding stability in the middle of the turn, but you exchange power on the exit for that stability, so it is a balancing act. There is also a decided impact based on your driving style and skill as well, which means that there is no magic number that will work for everyone -- which is why you tune, right?
Themost effective way to find your personal sweet spot is to start with a higher slip rate, and then do test laps to see how easily you lose control of the rear end in the middle and end of turns, and then adjusting the number down until you find your balance between stability and speed. There really is no point to having massive stability of you cost yourself speed, especially considering that in Forza 4 you will be doing almost ALL of your passing in corners!
The deceleration setting controls when the differential locks when you are not under power, such as when you are entering a turn. Setting it high here will add stability but at the cost of agility. Staring with a lower slip as you do laps will allow you to find the sweet spot in which the trade-off between stability and control is found for you personally.
Engine and Parts Tuning
I am not certain that this was the intention when the developers at Turn 10 implemented the system, but the reality is that the Letter Number rating system that is used to determine the class of a car largely removed much of the need and effectiveness of tuning the engine and parts other than for power and stability (torque). You are going to find that your best results are to use the recommended settings and parts obtained through the auto-tune feature believe it or not.
You can still adjust these if you like, but do not be surprised when the part you want to use sends your car into a different class!
Conclusions
Your power profile in auto-tuning will bring you as close to the top end for horsepower as the game can manage without changing the class of the car, and 99% of the time the selections that it makes are the best for the class. Where you want to concentrate our attention is in the setup of the suspicion and tires, because stability and handling are largely what is going to win you the race.
Tuning in Forza 4 is less about making your car faster and more about making your car an extension of YOU. The more control you have, the better you will race, and you can only obtain that control by tailoring your car to your driving style and the track being raced.
This creates an onus on you, because in order to maintain that effectiveness you have to re-tune for each track, but once you know where your comfort levels are, that becomes less of an adventure and more of a science -- for you.
Remember, tuning in Forza 4 very little resembles the art of tuning a car in real life. In the game we are tuning to increase stability and our control, because these are critical to creating a car that we can control strategically in turns, because that is where all of the real action takes place in the game! No, that does not really reflect the sport in real life, but you work with what you have, right
To unlock the Achievement "Ferrari Collector" (40 GS) you must own every Ferrari that is included on Disc 1 of the 2-Disc Game Set. Because some of these cars are Reward Cars for reaching specific Levels/Ranks in the game, you are advised to select them when it makes sense to do so in order to save on having to spend the credits. Those cars are noted in the list below.
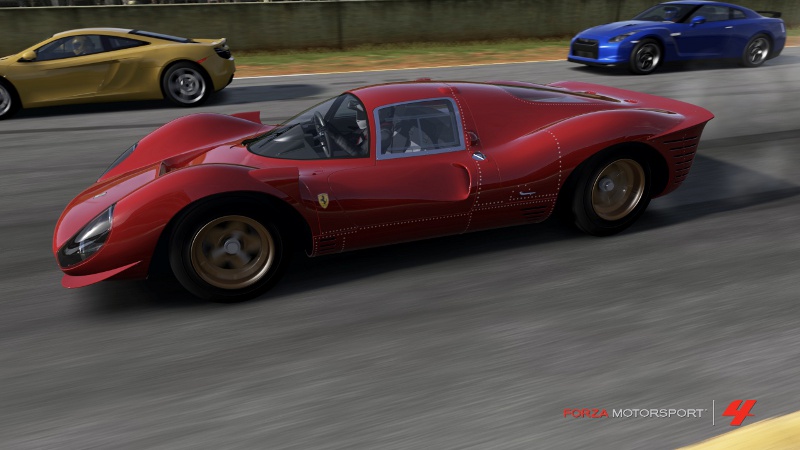
1967 Ferrari 330 P4
Disc 1 contains the following Ferrari Cars (with cost):
(01) 1957 Ferrari 250 California (3 Million Credits)
(02) 1957 250 TR (8 Million Credits)
(03) 1964 250 GTO (10 Million Credits)
(04) 1967 330 P4 (9 Million Credits) -- Level 30 Reward Choice
(05) 1968 365 GTB/4 (270,000 Credits) -- Level 16 Reward Choice
(06) 1969 Dino 264 GT (55,000 Credits)
(07) 1984 GTO (320,000 Credits) -- Level 25 Reward Choice
(08) 1987 F40 (380,000 Credits)
(09) 1991 512 TR (75,000 Credits)
(10) 1995 F50 (400,000 Credits) -- Level 31 Reward Choice
(11) 1998 #12 Risi F333 (2.2 Million Credits)
(12) 1999 360 modena (90,000 Credits)
(13) 2002 Enzo (1.3 Million Credits)
(14) 2004 F430 (150,000 Credits) -- Level 28 Reward Choice
(15) 2006 599 GTB Fiorano (310,000 Credits)
(16) 2009 California (220,000 Credits)
(17) 2010 #83 F430 GT (1 Million Credits)
(18) 2010 #89 F430 GT (1 Million Credits)
(19) 2010 458 Italia (240,000 Credits) -- Level 34 Reward Choice
(20) 2010 599xx (1.5 Million Credits)
(21) 2011 FF (280,000 Credits)
(22) 2011 599 GTO (370,000 Credits) -- Level 36 Reward Choice
Note that just because one of these cars is a reward choice, that does not necessarily mean you should choose it. You must use your best judgment -- when one of them is the most expensive car in the choice list it is obvious that it should be the one that you choose, but if it is NOT the most expensive one (if there is one that is considerably more expensive) you are best off choosing the most expensive car, as that will save you credits in the long run (assuming you plan to acquire every car).
A Reasonably Priced Car Achievement
This Achievement is awarded for simply completing a single lap around the TopGear Test Track while driving a KIA cee'd. To unlock it, from the Main Menu select Free Play > Quick Race and then Kia > Kia c'eed followed by the Top Gear Test Track.
After you choose the Kia c'eed, for the track choose the Top Gear Test Track and select any circuit of the track (you do not have to select the full large circuit, the smaller ones will work). In the example video I chose the West Circuit, so you can see that the shorter tracks do work.
The important thing to note here is that you do not have to own this car to do this race and unlock this Achievement, you simply have to drive it.
To unlock this Achievement all that you need to do is get a DeLorean to 88 MPH -- this being an homage to the Back to the Future movies -- to quote Wikipedia:
"The DeLorean time machine is a fictional automobile-based time travel device featured in the Back to the Future trilogy. In the feature film series, Dr. Emmett "Doc" Brown builds a time machine from a DeLorean DMC-12 with the intent of gaining insights into history and the future but instead winds up using it to travel across 130 years of Hill Valley history (from 1885 to 2015) undoing the negative effects of time travel. The DeLorean is currently on display in the Studio Tour at Universal Studios Hollywood." (1)
Outta Time Achievement
To do this from the Main Menu choose Free Play > Quick Race then DeLorean > DMC-12 and then ideally a very straight track or a nice oval track that you can get it going at speed on... I chose to use the Indianapolis Motor Speedway Brickyard for my run -- but any track with reasonably long straight sections will work.
As you can see in the video above, the Achievement unlocked shortly after I passed the 88 MPH mark. In addition to that, shortly after unlocking "Outta Time" (10 GS) I went on to unlock "Flat Out" (5 GS) for earning a perfect speed score in the race (basically that means going at maximum speed without crashing or going off-course).
Sweet! That is two Achievements in a freaking DeLorean!
(1) http://en.wikipedia.org/wiki/DeLorean_time_machine
"Beat a Ferrari 330 P4 in any race while driving a Ford GT40 Mark II."
The requirement for unlocking this Achievement is actually a lot easier than you might be thinking. The average gamer is going to try to set up a match with a mate who will let them win, but not you! You are the sort of gamer who thinks smarter, not harder, so what you are going to do is save up the 1.5 Million Credits you need to purchase the Ford GT40 Mark II, and once you have that in your garage, you will create a private online race with 11 AI players!
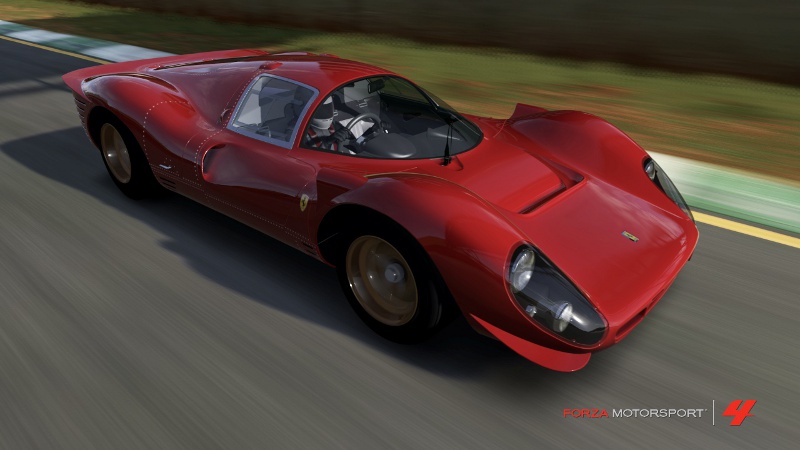
1967 Ferrari 330 P4
Now, before you start the race, you will change the car for one of the AI players to the Ferrari 330 P4, and then the race to 1-Lap and voila! All that you need to do is beat the Ferrari and you unlock this Achievement and another 15 GS!
Alternatively you can use the Grinding Credits setup as explained in the Career Mode Section of this guide to obtain this Achievement as well.
Get any Car Manufacturer to Affinity level 50. (60 GS)
This Achievement probably looks and sounds easier than it will actually turn out to be, largely because there are so many races in the game that require you to use this make of car or that make. Before we discuss the strategy you need to be following to unlock this one though, we should address the while issue of Affinity and why it is important...
When you start the game you should be picking the make of car you plan to drive the most, and then expand your stable of cars from that manufacturer and drive them as much as you can to work towards getting the Affinity up -- but prior to really getting into that, it would be a good idea to spend some time with the major makes in Rivals Mode boosting their Affinity to Level 5 each. Why?
At Level 5 Affinity you get a 100% discount on upgrade parts (excluding wheels, swaps, and body kits), which means that any time you have to use a car from that manufacturer and it needs to be upgraded for a new Class to race, most of the cost of the upgrade is FREE. Now THAT is a good reason to spend a little time boosting Affinity, right?
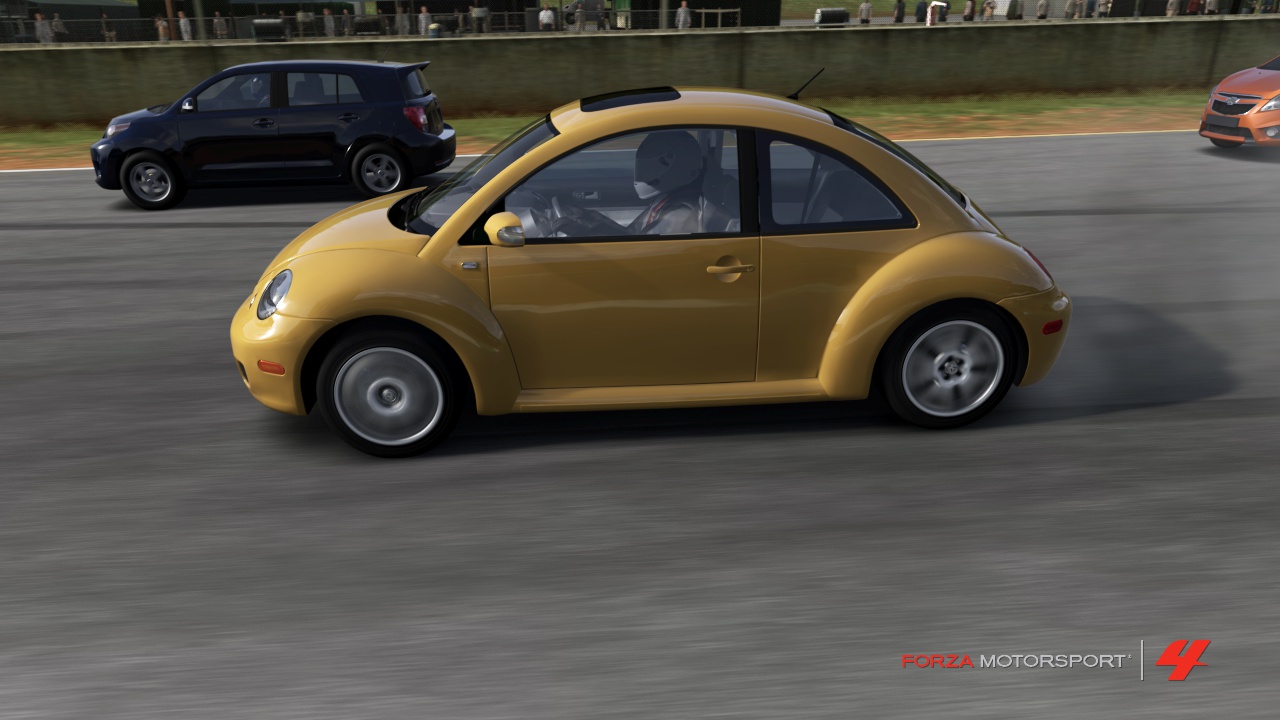
Choose a Maker and Stick with them - I chose VW
There really is not a suggested list for you to simply fill in by leveling them, but you will see certain makes popping up frequently -- Ferrari, Ford, Chevy, BMW, and the like -- but it is hard to predict. The best approach seems to be to continue through career mode and, when confronted with the need to use a car you do not have at Affinity Level 5, back out and level that one.
In any event beyond leveling up the makes you need to in order to keep from spending credits on upgrades, you should focus on one specific make and drive it whenever it is possible to do so, because getting to Affinity Level 50 is actually something that the developer does not expect you to do! Seriously! Here is a quote from a feature piece written by Turn 10:
"Rather than five levels per car, we now have 50 levels per manufacturer. We used logged community data from Forza 3 to set the Affinity level milestone. Our target was to have less than once percent of our players have any manufacturer up to level 50 within 24 months."
Less than 1% in two years! So really, if you unlock this in your first year of play you will be in the top 1% of players...
Before we discuss how to unlock this Achievement, we need to discuss this Achievement, because it turns out that this is the one that 9 out of 10 racers really hate and despise. I have actually witnessed gamers screaming at the screen an anger as their car turns just a wee bit too far, turning their otherwise awesome drift score into a blood-red set of FAIL numbers because the car turned too far around. I confess I have never seen an Achievement that generated this much frustration before, and that witnessed of gamers who I have never seen get frustrated like that before.
So here is the thing -- this very well may be an Achievement that you are better off NOT trying to unlock, and just let it come naturally when you are doing the drift levels, or just drifting for fun, because in simple terms it is only going to come easy to drivers who know how to drift... Now, I am not saying you do not know how to drift, mate. All I am saying is, if drifting is not your "thing" and you do not consider yourself to BE a Drift Racer, then chances are really good that this is going to be a frustrating and illusive experience for you under normal circumstances. So if you want to unlock this Achievement then you need to avoid normal circumstances as much as you can!
Easy Awesome Drift Achievement
-- An Easy Unlock --
If you just want this out of the way, because you are not a Drift Racer, well there is a very easy way to unlock it. Really! Just do the following:
(1) From the Main Menu select: A > Community > Race Online > Create Race
(2) Now choose Game Setup and do the following:
(A) Change Game Type to "Drift"
(B) Change Environment to "Test Track"
(C) Change Track to "Test Track Layout E"
(D) Change Laps to "10" (or higher, you just want to be sure you have enough)
(E) Change Car Class to "Any"
(F) Hit 'A' to save the Game Setup
(3) Now Open Select Car and choose the car you want to use. There are some obvious ones to choose here -- it should either be Rear Wheel Drive (RWD) or All Wheel Drive (AWD), and it should be a relatively fast and stable car but not one of the R-Class.
I used my Honda but really any car you are comfie with will work, because this is not really about skill at all -- which you are about to find out. If you don't have a car of preference I can say that the 1965 Shelby Cobra 427 S/C and the 1969 Oldsmobile Hurst/Olds 442 are both really good cars in stock tune to do this with...
(4) Select Difficulty and change the following settings:
(A) Braking: ABS Off
(B) Steering: Normal
(C) Stability Control: Off
(D) Traction Control: Off
(E) Shifting: Automatic (or Manual, whatever you like)
(F) Suggestion Line: Off
Now save and exit the menu.
(5) Hit the Start Race selection and, when the race starts you will notice that you are in one very large oval area with a very small center.
All that you need to do is score at least 5,000 drift points and then stop the drift (stopping the car or slowing it works) and voila! The Achievement is yours! And the beauty of that is that with this track, you can easily do that by simply driving around it. Once you see the drift counter start racking points, simply gently turn into the drift to keep it going and as soon as it goes above 5,000 points, bring the car to a controlled stop and the Achievement will unlock.
If you have any problems, watch the video embedded above and you will see what I am talking about!
This is one of the more difficult Achievements -- not because of the challenge but rather because it is not one of the ones that is normally unlocked during regular career play. Basically to unlock it you have to have raced on every single circuit of every single track! Now, if you kept track of the circuits on each track that you race in Career Mode then you are a leg-up on the average racer, since you know which ones you have done and which you have not.
If you are working towards the Bucket List Achievement you do not even really need to read this section or bother with this Achievement because it will unlock naturally, as a consequence of you completing the Bucket List one. But if you are not working towards that and you do want this one unlocked, the ticklist below will be very valuable to you.
Simply print this out and use it!
-- Forza World Tourer Achievement Ticklist --
Note: The Benchmark Track -- even if you have it -- does NOT count for this Achievement as it is classified as a DLC track.
(01) Bernese Alps
O -- Club Circuit
O -- Club Circuit Reverse
O -- Festival Circuit
O -- Festival Circuit Reverse
O -- Stadplatz
O -- Stadplatz Reverse
(02) Camino Viejo de Montserrat
O -- Extreme Circuit
O -- Full Circuit
O -- Full Circuit Reverse
O -- Mini Circuit
O -- Mini Circuit Reverse
O -- Short Circuit
O -- Short Circuit Revers
(03) Circuit de Catalunya
O -- Grand Prix Circuit
O -- National Circuit
O -- School Circuit
(04) Fujimi Kaido
O -- Full Circuit
O -- Full Circuit Reverse
O -- New Down Hill
O -- New Hill Climb
O -- Old Down Hill
O -- Old Hill Climb
O -- Stage A
O -- Stage A Reverse
O -- Stage B
O -- Stage B Reverse
O -- Stage C
O -- Stage C Reverse
O -- Stage D
O -- Stage D Reverse
(05) Hockenhiemring
O -- Drag ¼ Mile
O -- Full Circuit
O -- National Circuit
O -- Short Circuit
(06) Iberian International Circuit
O -- Full Circuit
O -- Full Circuit Reverse
O -- Mini Circuit
O -- Mini Circuit Reverse
O -- Short Circuit
O -- Short Circuit Reverse
(07) Indianapolis Motor Speedway
O -- Grand Prix Circuit
O -- The Brickyard Circuit
(08) Infineon Raceway
O -- Drag ¼ Mile
O -- Indy Racing League Circuit
O -- Long Course
O -- NASCAR Circuit
(09) Ladera Test Track
O -- Full Circuit
O -- Full Circuit Reverse
O -- Mini Circuit
O -- Mini Circuit Reverse
O -- Short Circuit
O -- Short Circuit Reverse
(10) Le Mans Circuit de la Sarthe
O -- Full Circuit
O -- Old Mulsanne Circuit
(11) Maple Valley Raceway
O -- Full Circuit
O -- Full Circuit Reverse
O -- Short Circuit
O -- Short Circuit Reverse
(12) Mazda Laguna Seca
O -- Full Circuit
(13) Mugello Autodromo Internazionale
O -- Club Circuit
O -- Full Circuit
(14) Nurburgring Grand Prix Circuit
O -- Full Circuit
O -- Short Circuit
(15) Nurburgring Nordschleife
O -- Full Circuit
O -- Stage A
O -- Stage B
O -- Stage C
O -- Stage D
(16) Rally Di Positano
O -- Full Circuit
O -- Full Circuit Reverse
(17) Road America
O -- Full Circuit
(18) Road Atlanta
O -- Club Circuit
O -- Full Circuit
(19) Sebring International Speedway
O -- Club Circuit
O -- Full Circuit
O -- Short Circuit
(20) Sedona Raceway Park
O -- Drag 1/8 Mile
O -- Drag ¼ Mile
O -- Drag ½ Mile
O -- Drag 1 Mile
O -- Club Circuit
O -- Club Circuit Reverse
O -- Full Circuit
O -- Full Circuit Reverse
O -- Speedway
O -- Speedway Reverse
(21) Silverstone Racing Circuit
O -- Silverstone Grand Prix Circuit
O -- Silverstone International Circuit
O -- Silverstone National Circuit
(22) Sunset Peninsula
O -- Club Circuit
O -- Club Circuit Reverse
O -- Full Circuit
O -- Full Circuit Reverse
O -- Speedway
O -- Speedway Reverse
(23) Suzuka Circuit
O -- East Circuit
O -- Full Circuit
O -- West Circuit
(24) Top Gear Track
O -- Drag ¼ Mile
O -- Drag ½ Mile
O -- Drag 1 Mile
O -- East Circuit
O -- East Circuit Reverse
O -- Full Circuit
O -- Outer Loop
O -- Outer Loop Reverse
O -- West Circuit
O -- West Circuit Reverse
(25) Tsukuba Circuit
O -- Full Circuit
O -- Short Circuit
(26) Twin Ring Motegi
O -- East Circuit
O -- Full Circuit
O -- Super Speedway
O -- West Circuit
The following Frequently Asked Questions and Answers cover a lot of territory, and should be very useful to you!
Q01: How much will a Unicorn cost me at the Auction House? / Is buying a Unicorn from the Auction House the only way to get this Achievement?
A01: The average price should run between 5 million and 10 million or thereabouts once Turn 10 has brought the ban-hammer down on the cheaters who are using the money bug to boost their income. Bear in mind that the Unicorns that go up on the AH are put there by Turn 10 -- players cannot auction off Unicorns. You can also obtain one of them (and the Achievement) by attending one of the special events in which they are gifted online.
You can also get this when you import your Forza 3 save, assuming you either have one in it or you have the VIP DLC. If you have already started your game, you can move your save files onto a USB drive, make sure you have a Unicorn available on Forza 3 and then start a new game. Once the Achievement pops you can restore your old save file and you are good to go!
Q02: Which cars are considered to be Unicorn Cars?
A02: The following cars are known to be Unicorn Cars:
1969 Chevrolet Camaro SS Coupe
1993 MINE'S R32 Skyline GT-R
2002 BMW M3-GTR Street Version
2002 Mazda RX-7 Spirit R Type-A
2002 MINE'S R34 Skyline GT-R
2002 Mugen Integra Type-R
2002 Top Secret 0-300 Supra
2003 Ferrari Challenge Stradale
2004 Mugen Civic Type-R
2004 Top Secret Silvia D1-Spec S15
2005 Honda NSX-R GT
2006 HKS Time Attack Evolution CT230R
2006 Subaru Impreza S204
2007 Ferrari F430 Scuderia
2007 Lamborghini Gallardo Superleggera
2007 Lamborghini Murciélago LP640
2007 Shelby GT500
Q03: Why do I have to own Kinect to play Forza 4? / Do I have to own Kinect to play Forza 4?
A03: You do not have to have Kinect! In fact other than one Achievement worth only 5 GS the motion controller has no other mandatory application in the game. However if you DO own it, it is good to use since you can fully control the game with it, or you can drive with the standard controller and use the Kinect-based head-tracking feature to be able to look around while driving...
Q04: Why are there no Porsches?! / Where are the Porsches??
A04: The simple reason for this is that Porsche licensed out its brand and cars to Electronic Arts exclusively -- and while other companies including Turn 10 have the same deal with other car makers, EA is unwilling to allow the Porsche to be used in games other than its own.
Q05: Can I import my Forza 3 save into the game more than once/again? / I said "No" when it asked me if I wanted to import my Forza 3 file into the game - how do I do that now?
A05: You cannot. Put simply, you are given one and only one opportunity to import the file -- this takes place immediately after the very first race you drive in BEFORE you start Career Mode. If you say no, or you do not have a Forza 3 file to import at that point, that is all she wrote. To do it now, you will have to erase your current save and start over.
If you move your save off the console onto a USB drive and then delete it on the console, you CAN then import the Forza 3 save and you will unlock the Achievement, but if you move your old save back onto the console you will NOT find the gift cars there when you play again. Keep that in mind.
Q06: Some of the cars cost major credits! How do I earn lots of credits fast?
A06: Fast or really fast? Seriously, when you race through Career Mode the purses you win combined with the bonus money you get for Affinity and your Driver Level will add up fast, but if it is not fast enough, you can use the Money Grinding Tactic that is outlined in the Career Mode Section of the guide above.
Using the Grind Method -- which until we are told otherwise is not considered an exploit -- you can average between 300,000 credits and 500,000 credits an hour (depending on your Affinity and Driver Levels).
Q07: Do I have to have a Gold Account to play the Rivals Mode and use the Shops?
A07: Yes -- and No... Yes, you need a Gold Account to do the Online Rival Mode races and to use the shops, but you can do the Offline (Career Mode) Rival races with just a Silver Account.
Q08: Can I hire a driver in Forza 4 like we could in 3?
A08: Yes, but as with Forza 3 the driver takes half the purse, and you do NOT get XP or Affinity when you hire a driver, which is something to consider. But when you take into account the fact that Turn 10 did not include ANY of the endurance races in Forza 4, unless you flat-out hate a track or race in a series, there is no reason to hire a driver.
Q09: Does Forza 4 have Avatar Awards?
A09: It sure does! Two in total -- A Hat and a T-Shirt (the T-Shirt includes a Male and Female verison).
Q10: When I checked Autovista there were only a small number of cars there! How do I get more cars?
A10: For now you don't -- there are only base 23 cars available for use in Autovista plus 2 hidden bonus cars, the Warthog from Halo and Jay Leno's 1931 Bentley 8 Liter Sedan, but to get those you have to unlock the other cars. In addition to the base 25 cars that come with the game, cars will be added via DLC - at launch there is 1 DLC car available that adds itself to Autovista when you install it, and that is the 2012 BMW M5.
Q11: How does Affinity work? / What do I get for Affinity?
A11: The first four levels of Affinity gain you discounts on parts for that manufacturer and, once you reach the fifth level you start to get an increasing amount of bonus credits from them as your reward. The bonus credits increase every five levels. The discount levels are:
Level 1 -- 25% discount
Level 2 -- 50% discount
Level 3 -- 75% discount
Level 4 -- 100% discount
The discounts are only applied to Engine and Power, Platform and Handling, Drivetrain, Tire Compound, and Tire Width upgrades, and do NOT apply to Rim Style or Size, Aero or Appearance, or Conversion upgrades.
Q12: I see that I can buy Car Tokens that I can then use to buy the really expensive cars! Is that a better way to go than grinding for the credits?
A12: That is entirely your call -- but before you go the Token route, be aware of a few restrictions that are placed on cars purchased with Tokens: the first is that the car can NOT be sold in the Auction House. The second, if can NOT be gifted.
You should also be aware that the Tokens are not a 1-to-1 trace; in other words 1 Token does not necessarily equal 1 car, because the amount depends on the cost of the car. An expensive car can cost you up to 3 Tokens. For example to get all of the cars for the five most expensive cars Achievement will require you to spend 12 Tokens in total.
Q13: I was a VIP in Forza 3 but when I transferred my save into Forza 4 I am not -- how do I get that fixed?
A13: You don't. Your VIP Status from Forza 3 does NOT transfer into Forza 4. To have it in 4 you would have needed to puchase the Limited Edition version of the game. But don't worry, there will likely be a DLC added eventually just like in 3 to gain VIP status in the game.
Q14: Why is the game so easy? / Why are the AI racers so easy?
A14: The simple answer is it is not. Not really... You see the AI racers level is directly associated with your skill level, so the better you get at the game, the more competition they will provide. Conversely the more you crash into them, the more they are likely to do it to you. And just like in 3, you can make enemies among the AI drivers if you piss them off. I am just saying...
Q15: I got a warning saying my save file is corrupt! It is telling me to delete it?! What should I do?
A15: This is a known issue, it is being fixed, expect a patch soon. But in the meantime DO NOT delete your main game save or you will have to start over!!!
Turn 10 issued the following official instructions on the Forza 4 boards:
It has recently come to our attention that some of you may be receiving a corrupt save message when trying to save a file. This could happen with tunes, replays, paints or photos. While we are working on this issue please follow the steps below.
The Message: Your save file is corrupt. Please delete it from the Xbox Dashboard and create a new one.
If you receive the message above when trying to save a file please follow these directions:
(1) Go to the Xbox Dashboard.
(2) Move to My Xbox then scroll to the right and select “System Settings”.
(3) From inside System Settings select “Memory” then select the location where your game saves are located (for most people this will be on the hard drive).
(4) Scroll down the list until you find Forza Motorsport 4.
(5) From inside the Forza Motorsport 4 memory saves, you want to select the file that was corrupted. In most cases the file you are looking for will say “Corrupted” and have “!” next to it.
NOTE: PLEASE DO NOT DELETE your Game Save, If you do, you will lose all your game progress. Here is a list of the naming structure of your Forza Motorsport 4 saves:
(Your Gamertag) Saved Game – DO NOT DELETE THIS FILE. This is your main game save file and should only be deleted as a last resort.
(Your Gamertag) Car Setup Files Saved Game - These are your Tune Files.
(Your Gamertag ) PHOTOS Saved Game – This is all of your saved photos.
(Your Gamertag) LAYER GROUPS Saved Game – These are all of your created and purchased layer group files.
(Your Gamertag) Design Catalog Saved Game – These are all of your created and purchased car designs.
(Your Gamertag) Replays Saved Game – This save contains all our your saved replay info.
(Your Gamertag) WMV MOVIES Saved Game – This save contains all our your saved movies.
GHOSTS Saved Game – This is where your best time ghost files are saved locally.
(Your Gamertag) Game Options Saved Game – These are your saved game options.
Q16: How does the Car Club work? / How do I join a Car Club?
A16: The Car Club is Forza 4's version of guilds basically -- you can create one, or be invited to join one. To get invited you need to be on the Friend List of one of the officers or perhaps members - this last is unclear at the moment. They will see you on their list and can invite you.
Once you are a member of a Car Club you can borrow any shared cars from the Club, race against your mates, and challenge their times in Rival Races. This is largely viewed as a good addition to the game, since it creates a regular pool of mates to race against, allowing you to avoid the bumper-car and smash-up derby that largely is found in playing pick-up races.
Q17: What is the best way to unlock the Speed Demon Achievement?
A17: The easiest way to unlock this Achievement found so far is to go from the Main Menu > Free Play > Quick Race, and then select a fast car like the Bugatti Veyron 16.4.
Select the Le Mans Old Mulsanne Circuit and simply race it. When you hit the straight-away floor it and you should unlock it. Alternatively you can also unlock in on one of the long oval circuits in the Test Track.
The following list is organized by make, then year, then model, and represents all of the cars that can be obtained in the game including DLC and special cars that you may not actually have... The idea here is to print out the ticklist and use it to keep track of which you own and which you still need, which can be especially useful if you are interested in owning all of a particular make.
The updated ticklist now includes all of the cars from the base game, the DLC, the monthly Car Packs, and the special expansion content including the Porsche expansion pack. Last revised 24 August 2012.
Source Key: (A) Forza 3 Transfer / (B) Auction House / (D) Pre-Order Exclusive DLC / (E) E3 Car of Show Winner / (F) BMW Art Car Pack DLC / (G) BMW M5 Fan Pack DLC / (H) American Muscle Car Pack DLC / (J) Launch Bonus Car Pack DLC / (K) Yet TBA DLC / (L) Porsche Expansion Pack / (U) "Unicorn" Car / (VIP) VIP Car Pack DLC / (Z) DLC Car - Free or Paid / (MP) = Microsoft Points.
Forza Motorsport 4 is an Xbox 360 Exclusive title that was developed by Turn 10 Studios and published by Microsoft Game Studios for the Xbox 360. It includes 58 Achievements that are worth a total of 1,250GP in Gamer Score (the base game contains 48 Achievements with an additional 10 that are added by the Porsche Expansion Pack for a total of 58).
Where it is appropriate hints and tips are added to each of the Achievements listed below if the addition of that information is thought to be particularly useful or helpful to the player. There are no known bugs effecting any of the Achievements in the game, and all of them can be successfully unlocked.
While there are "legitimate" cheats in the game, gamers should be aware that due to several bugs in the game it is possible to obtain large amounts of in-game money in a manner inconsistent with the intended normal game play actions. Cases have been reported of gamers taking advantage of those bugs in order to obtain the large sums of in-game money/credits that are required to purchase key cars that are part of specific Achievements listed below, only to be permanently banned from Xbox LIVE as well as the Forza Servers operated by Turn 10.
It appears to be the case that Microsoft's PET unit spot-checks the accounts of gamers who unlock certain Achievements -- specifically the Exclusive Taste, Ferrari Collector, and Unicorn Hunter -- and if they determine that the player could not have obtained the in-game funds that were used legitimately they then ban the account. There have been reports of gamers receiving full life console bans for making use of the money/credit bug in the game when they have previous infractions on their record. As is always the case, making use of bugs -- or cheating -- is really never a good idea, and we caution you to avoid even the appearance of cheating in the game, because Microsoft's PET is notorious for sticking by their decision to ban once they have lowered the ban-hammer on a gamer!
The following 48-Achievements are present in the base game:
(01) Welcome to Forza Motorsport (15 GP) Complete the very first race in the game.
(02) Driver Level 1 (20 GP) Reach Driver Level 1 in Career mode.
(03) Driver Level 10 (20 GP) Reach Driver Level 10 in Career mode.
(04) Driver Level 20 (20 GP) Reach Driver Level 20 in Career mode.
(05) Driver Level 30 (20 GP) Reach Driver Level 30 in Career mode.
(06) Driver Level 40 (20 GP) Reach Driver Level 40 in Career mode.
(07) Driver Level 50 (20 GP) Reach Driver Level 50 in Career mode.
(08) Amateur (25 GP) Complete the first year of Season Play.
(09) Clubman (25 GP) Complete the second year of Season Play.
(10) Sportsman (25 GP) Complete the third year of Season Play.
(11) Semi-Pro (25 GP) Complete the fourth year of Season Play.
(12) Expert (25 GP) Complete the fifth year of Season Play.
(13) Professional (25 GP) Complete the sixth year of Season Play.
(14) Masters (25 GP) Complete the seventh year of Season Play.
(15) Elite (25 GP) Complete the eighth year of Season Play.
(16) Champion (25 GP) Complete the ninth year of Season Play.
(17) Legend (50 GP) Complete the tenth year of Season Play.
(18) Autocrosser (10 GP) Complete 10 Autocross events without hitting gate cones.
(19) Awesome Drift (20 GP) Earn a perfect Drift score.
(20) Born Competitor (30 GP) Post a time in every Rivals mode event.
(21) Bucket List (80 GP) Finish 1st in every single race in the Event List in Career play mode.
(22) Car Explorer (10 GP) Fully explore any car in Autovista.
This Achievement has been reported to be bugged, but it is not. Most of the time when a gamer feels like they did not get the Achievement when they should have the issue is their failing to examine one of the outside elements of the car. Simply go along the outside of the car and expand each view option after doing the same inside, and it will unlock.
(23) Clubbed Up (15 GP) Create or join a Car Club.
(24) Daily Rewards (5 GP) Visit the Message Center on at least five unique days.
(25) Entrepreneur (10 GP) Sell a car tuning, paint job, or vinyl group from your storefront.
(26) Exclusive Taste (50 GP) Own the five most expensive cars in the game (not including DLC).
Note that while you can use the Car Tokens to purchase these, be aware that the cars purchased with the tokens cannot be sold on the Auction House and in most cases cannot be gifted. While you can sell them to the game, you do not get anywhere near their list value, but just a token payment of 100 credits.
(27) Factory Driver (60 GP) Get any Car Manufacturer to Affinity level 50.
(28) Ferrari Collector (40 GP) Own every Ferrari included on Disc 1.
Be aware that some of these can be obtained as the bonus reward car for leveling your driver. Be sure to consult the special section on this Achievement in the guide, and the Level Rewards Car Chart elsewhere in the guide for additional information and to help in planning out your strategy.
(29) Flat Out (5 GP) Earn a perfect Speed score.
(30) Forza Faithful (15 GP) Import a file from Forza Motorsport 3.
(31) Forza World Tourer (60 GP) Finish a race on every race track in Forza Motorsport 4.
Unless you change up the car you are driving you will not even come close to unlocking this through regular play. If you choose to use a specific manufacturer in order to work towards the Affinity Achievement (there will be some races where you are forced to use a specific maker) you will need to utilize the events menu to check which venues you have yet to race on and then select them in order to unlock this. A complete ticklist of the tracks that are required is included in the special section for this Achievement in the guide.
(32) Grease Monkey (10 GP) Create a car tuning file for your car.
All that you need to do is change one item on the tuning profile and then save the profile to unlock this Achievement.
(33) Here's My Card (10 GP) Create a custom Player Card with a badge and title.
(34) Kingpin (5 GP) Knock down a gold bowling pin in Car Bowling.
(35) Legendary Battle (15 GP) Beat a Ferrari 330 P4 in any race while driving a Ford GT40 Mark II.
You do NOT need to own these cars in order to unlock this Achievement. You can simply set up an instant race and then select the Ford GT40 as your car, and the Ferrari 330 as your opponents.
(36) Look Ma, No Controller! (5 GP) Use Kinect to drive any car in Free Play.
This is the only Kinect-based Achievement in the game and you are only required to briefly drive a car using Kinect; you do not have to complete the entire race to unlock this.
(37) My Car is Your Car (10 GP) Share a car in your garage with your Car Club.
(38) Nice Pass (15 GP) Earn a perfect Pass score.
(39) On Location (20 GP) Take a photo of any car in every Home Space.
(40) Outta Time (10 GP) Reach 88 mph in a DeLorean.
The easiest way to unlock this is to do an instant race on an oval track.
(41) Painter (10 GP) Create a paint job or vinyl group for your car.
(42) Perfect Turn (15 GP) Earn a perfect Turn score.
(43) Rivals Shootout (10 GP) Race and defeat an opponent in Rivals mode.
(44) Show Off (10 GP) Upload a movie to Forzamotorsport.net.
(45) Slipstreamin' (5 GP) Earn a perfect Draft score.
(46) Speed Demon (10 GP) Reach 240 mph in any car.
The easiest way to do this is to select the Veyron Super Sport or the SSC Ultimate Aero and then select a venue that is either oval or has long straight sections.
(47) Star in a Reasonably Priced Car (10 GP) Complete a lap around the TopGear Test Track while driving a KIA Cee'd.
(48) Unicorn Hunter (10 GP) Be the winning bidder on any "Unicorn" car in the Auction House.
This Achievement's description is a bit misleading -- you are not actually required to win an auction for a car that is designated as a Unicorn (Rare/Special Car), rather you just need to OWN one. There are a number of ways that you can unlock this -- the hardest being to try to win a Unicorn Auction, which will easily cost in the high hundreds-of-millions-of-credits, so that is not an option for most gamers. The easiest way is have one of the rare cars from Forza 3 transfer to the game when you start your new play in Forza 4.
The following cars are designated as Unicorns (and if you have them in Forza 3 they will transfer):
-- 1969 Chevrolet Camaro SS Coupe
-- 1993 MINE'S R32 Skyline GT-R
-- 2002 BMW M3-GTR
-- 2002 Mazda RX-7 Spirit R Type-A
-- 2002 MINE'S R34 Skyline GT-R
-- 2002 Mugen Integra Type-R
-- 2002 Top Secret 0-300 Supra
-- 2003 Ferrari Challenge Stradale
-- 2004 Mugen Civic Type-R
-- 2004 Top Secret Silvia D1-Spec S15
-- 2005 Honda NSX-R GT
-- 2006 HKS Time Attack Evolution CT230R
-- 2006 Subaru Impreza S204
-- 2007 Ferrari F430 Scuderia
-- 2007 Lamborghini Gallardo Superleggera
-- 2007 Lamborghini Murciélago LP640
-- 2007 Shelby GT500
Some of the cars from the Forza 3 VIP Car Pack will unlock this when they are transferred into Forza 4 at the start of the game, particularly the 2007 Lamborghini Gallardo Superleggera and the 2007 Ferrari F430 Scuderia, which are both verified to work. Please be aware that if you have decided to puchase the Forza 3 VIP Pack as your strategy for unlocking this at the start of your new Forza 4 game you will need to actually play Forza 3 and purchase one or more of the cars you want to have transferred to Forza 4, as it only applies to cars that are actually in your player's garage at the time of the transfer request. The prompt to import your Forza 3 cars takes place immediately following the introductory race and before you actually begin your Forza 4 career.
New DLC: The Porsche Expansion Pack
When Forza 4 was first released it contained no cars from car manufacturer Porsche. The reason for that was that Electronic Arts own the license for the use of Porsche in video games and, for whatever reason, decided not to allow Turn 10 to use the licensed cars even though Turn 10 owns the video game license for other makers and has allowed EA to use them in their Need for Speed series. In 2012 EA reversed its decision, and sub-licensed the brand for use in Forza 4, but at a significant premium, which required Turn 10 to include them as paid DLC rather than free content, which might otherwise have been the case.
The Porche Expansion Pack adds a total of 30 new cars to the game, all of which are different models of Porsche, and in addition to adding these new cars it also fills in the 20 missing events on the events list, and adds the following ten new Achievements to the game, worth an additional 250GP, bringing the total GP in the game to 1,250GP.
The cost of the Porsche Expansion Pack when it is purchased via the Xbox LIVE Marketplace is 1600 Microsoft Points, however IF you are a VIP Member (meaning that you either orginally purchased the Limited Collector Edition of the game or you purchased the VIP Pack via the Xbox LIVE Marketplace) you should be aware that you will receive a discount on the Porsche Expansion Pack and other car packs, but ONLY if you make the purchases through the Marketplace inside the game.
To purchase the discounted version of the expansion pack, from the Main Menu of the game select Marketplace > Car Packs > Porsche Expansion Pack and then select any of the cars that are presented in the catalog at the bottom of the screen to initiate the Marketplace Purchase option, at which point you will be prompted to verify that you do in fact wish to purchase the expansion pack, which when it is selected from the Marketplace inside the game is priced at 1,200 Microsoft Points (a savings of 400 Microsoft Points over its price on the Xbox LIVE Marketplace, which is 1,600 Microsoft Points).
Once you confirm the order, the game will then download the DLC and automatically add it to the menus. Please be aware that purchasing this expansion pack or ANY of the car packs does NOT add the cars contained in them to your Garage -- it adds them to the catalog of cars that can be purchased in game. To obtain the car or cars you want, you will need to then purchase them, either with in-game money or using Car Tokens that you have bought from the Marketplace.
The following Ten Achievements were added by the Porsche Expansion Pack:
(49) All Spooled Up (25 points) Earn 30,000CR in the 2007 Porsche 911 Turbo (997).
(50) ALMS Dominator (25 GP) Win online in the 2011 Porsche #45 Flying Lizard 911 GT3-RSR (997).
(51) Backseat Driver (20 GP) Complete 3 online circuit races in the 2010 Porsche Panamera Turbo.
(52) Germany’s Supercar (25 GP) Win online in the 2003 Porsche Carrera GT.
(53) Pieces Of Flare (35 GP) Win online at the Nürburgring Nordschleife Full track in the 2012 Porsche 911 GT2 RS.
(54) Rennsport Originator (25 GP) Win online in the 1973 Porsche 911 Carrera RS.
(55) Special Delivery (25 GP) Earn 30,000CR in the 2008 Porsche #7 Penske Racing RS Spyder Evo.
(56) Throwback (25 GP) Complete 5 online circuit races in the 2010 Porsche 911 Sport Classic.
(57) Track Day Play Toy (20 GP) Complete 3 online circuit races in the 2007 Porsche 911 GT3 RS (997).
(58) Whale Tail (25 GP) Complete 5 online circuit races in the 1982 Porsche 911 Turbo 3.3.
Note: ALL of these can be unlocked in private online races using AI opponents. Simply use the specified car and complete the specified actions.


 Left 4 Dead 2 Guide
 MGS V: The Phantom Pain Cheat, Tips and Tricks On Combat, Mother Base, FOB and more
 Heroes of the Storm is expensive: This is your guide to what to buy, and avoid, in the store
 What's The Real Difference Between A Gaming Laptop And Desktop?
 Supergiant Games on Staying Small and Keeping Busy