

Unoffical guide by Mike Hazleton for
Valve's Left 4 Dead brought zombies back into the living room as its arcade nature and impressive mechanics won over gamers. Now there is a sequel, complete with more dynamic levels, varied set pieces, as well as new 'Special Infected' and weapons. It is set during the same zombie apocalypse as the first game, and while downloadable content is on the way to integrate the characters from the original into Left 4 Dead 2, you play as a new set of characters. This guide aims to give you the low-down on every level, set piece and enemy in the game's campaign. It will also address multiplayer tactics and look at some of the other modes available in Valve's latest classic. This is the bulk of Left 4 Dead 2's content. There are 5 separate levels, each of which will take up to 2 hours, depending on how often you die, the number of players taking part and the difficulty level. You can play in split-screen on Xbox 360 (if additional controllers are connected), or online with up to four-players. It is recommended that you play with the full compliment of human players, simply because escaping the levels at the grand set-pieces that mark their conclusion becomes very difficult with AI slowing you down. The general idea of Left 4 Dead is to survive until the next safe-house, a location where the game loads, you can refresh your ammunition, weapons, and health, and the restart point should your entire party be wiped out. The safe-houses make up the end of each segment or act in the level and the level itself ends with a 'final showdown'. This is where the game throws Infected at you from all angles, including multiple instances of the most difficult Infected in the game, the Tank. Usually there is a timer that, when reached, allows the player to run for an extraction vehicle of some kind. An interesting take on the usual multiplayer from first-person shooters, Versus mode supports up to eight players. One team of four plays as the Survivors, much like in the Campaign mode, and tries to reach each safe-house and finally the end of the level. The difference is that the other four play as 'Special Infected', aiming to stop the Survivors from reaching their goal. Once all the Survivors are killed, or they reach the safe-house, the roles reverse and this continues until the end of the level. As Special Infected you have all the abilities the AI Infected have (though you cannot play as the Witch). The levels are virtually the same, and Common Infected still populate the environment, as do AI controlled Special Infected at key moments. Rather than a whole level, or section, the Survivors are placed in a restricted area (such as the extraction points from the Campaign) and must simply fight against hordes of Infected until they cannot fight anymore. The idea is to stay alive for as long as possible. Survival is an ironic name as this is quite simply impossible. Like Versus mode, this has four Survivors against four Infected players. The idea here is for the Survivors to collect and retrieve fuel, while the Infected must stop them. You can activate Realism Mode with any of the other modes. This removes the silhouette surrounding players (making spotting stranded allies much more difficult), as well as the similar indicators on items, and prevents players from coming back when killed through the Survivor cupboards that they otherwise would spawn in. Infected also take less damage to the body (so aim for the head), and Witches kill in one hit, like they do on Expert. The idea of this mode is to make the difficulty you prefer more interesting and more challenging without ramping it up as significantly as actually moving the difficulty level up one notch. Coach is the leader of the four, and as the name suggests, he was a teacher at the local high-school before the Infected rolled into town. Coming from an early retirement in American Football, he naturally takes command and acts as the father-figure to the group. Coach is originally from Savannah, the town ravaged by Infected at the start of the game, making his battle against the horde all the more poignant. Coming from hustling and gambling roots, Nick is a sharp-dressed, self-obsessed kind of guy. His priorities all revolve around himself, and as he's not originally from the South, is something of an outsider in the group. Still, despite his egocentric nature, Nick recognises that his best chance of survival is with this group and is forced to forge new relationships and bonds of trust to get out alive. 'Ro' to her friends, Rochelle is a determined individual with a love of adventure stemming from her journalistic roots. Sent to Savannah to cover the beginning of the epidemic, Rochelle took her chance to escape with Coach, Nick and Ellis once it was clear things had gone very wrong in the Deep South. Being the only woman in the group is a tough role, but her grit and character allow her to hold her own alongside the others. As a mechanic, Ellis has a vital role in the group to ensure they are able to move across the Deep South. His youth, heavy accent and lack of education are misleading; he is willing to put his life in danger to impress others, and to help them, Ellis adds a strong dose of character to the group striving for survival. Like Coach, Ellis hails from Savannah, and with his mom and all his friends in the town, the Infected now have a date with this kid's vengeance. General Notes for all campaigns in this wlkthrough: Due to the nature of the 'AI Director' which alters the location of items, enemies and even the layout of each level, specific item locations will only be given tentatively as we found them on a number of playthroughs. Note that this guide was written based on the Normal difficulty. Higher difficulties decrease item drops such as medkits and the best weapons, and increase enemy health and their frequency. Intro to Dead Center
The Uncommon Common Infected in this level are CEDA workers, dressed in hazmat suits. They are resistant to fire, so don't be surprised to see them walking through the flames at you in the early sections of this level. You begin in a situation similar to the first game, on top of a roof with medkits and weapons. There are no primary weapons here, however, and you must pick either a melee weapon or a pistol for now. You need the majority of your team to have pistols, as Special Infected lower down the building (such as Smokers, Spitters, Hunters and Jockeys) are very tough to melee without getting caught. When you are ready, head down the stairs and into the door on the left. This is a relatively tame section, but Special Infected can cause a few problems. Open the door and deal with the Infected inside. You can explore most of the side-rooms for additional equipment (no weapons yet, but you should be able to find a second pistol). Continue down the corridor until you find your way blocked by fire. Head into the room adjacent to this blockage, and proceed onto the balcony outside the window.
The second room along the balcony should provide an entry point back into the corridor. Watch out for the fire, as it seriously reduces your health. Follow the corridor and move down the stairs once you come to the end. Enter the door at the bottom before the fire barrier, and you'll find yourself on a very similar floor. Get onto a balcony using one of the rooms on the left and follow it along. You can stop to get equipment on your way. Re-enter the building when you get to the bend in the balcony area and rejoin the hallway. Before long it will open up into a larger room where you can find an open elevator to the left (if you entered from the corridor and not outside). This is home to the first real conversation between the survivors, so listen in to get a grip of the story. Once you exit the lift, pick up the SMG just outside. This is the first set-piece of sorts. You won't face much of the horde, but you should still beware not to move along too quickly and get caught out. Most of the Infected will have to travel through the flames to get to you, so will be slower and easy to spot. TIP: The CEDA Infected cannot be killed by fire, so watch out for them in this section. Move to the end of the corridor once the horde subsides and pick a path through the flames. You will find yourself in a kitchen and will need to jump over a bar to proceed. Continue to follow the fiery path until you find yourself out of the smoke and flames.
Move through these rooms until you come to the safe-house at the end. Stock up on everything you need in this safe-house, and head out of the barred door. Clear the Infected as you make your way up the slope. Once you get to the top, follow the road downhill and enter the door at the bottom on the right. Fight your way down the steps and re-emerge outside via the first door on the right (check the bottom room for a grenade launcher). Take the road underneath the bridge and you will come out by a grassy area. This is a prime location to get ambushed, but nonetheless is the only route ahead. Pass through the brush to get back onto a road (it is a good idea to do this as quickly as possible to get your bearings again). Deal with the horde and check the back of the white truck for weapons.
Locate the ladder on the dumpster underneath the bridge (see picture above) and climb up. Drop down the other side to get to the next part of this level. Move up the steps into a building and then up a flight of stairs to find weapons, an ammunition stash and a medicine cabinet. From the gangway outside you can take out much of the Infected horde in the road below. Once the coast is clear, drop down onto the truck and then onto the containers in front of it. Proceed up the road and then up the steps about half-way along. Take the path into a dark building with yet more stairs. Move upwards into the light and cross the narrow bridge over the road (watch for an ambush by Special Infected here). At the end of the bridge you'll see a sign for 'Whitaker's Gun Shop'. This is our target for now. Go down the steps and into the door of the shop to find a treasure trove of weapons and equipment.
In here you can find plenty of top-notch weaponry, as well as medkits and laser-sights for your currently equipped weapon. This dramatically increases a weapon's accuracy and should certainly be picked up. TIP: A laser-sight remains attached to the weapon and will not move to another if picked up. For this reason, you will rely on ammunition piles if you want to keep the sight active. When you're ready, go round the corner and activate the radio to speak to the gun-shop owner, Whitaker. He'll tell you that he will clear the blocked road ahead with his grenade-launcher if you fetch him some Coke from the nearby shop. This is a set-piece which requires you to pick up the Coke and run back to the gun-shop to deliver it to Whitaker – all while under attack by a horde. Head up the stairs and once outside look for the shop, highlighted in blue. Make your way over to it, taking the stairs to the left to get down. This is also the route you must take to come back, so remember it. Proceed along the road and use the truck to jump onto and cushion your fall. When you get to the front of the store, gather your team. Once you open the doors an alarm will sound alerting the horde. The Cola is located right at the back of the shop and whoever picks it up will be unable to use a gun (note that you can use the Coke as a melee weapon, or drop it and use your main weapons – just make sure you don't lose it!). With the Cola in hand, sprint back out, pushing away any Infected. Make your way back to the van and jump over the fence, before climbing the stairs up to Whitaker. Run up to his door at the end of the balcony and hold the action button to put the Cola into his hatch.
Make use of the stairs for the third time (remember to visit the gun shop again first if you need to). Pass through the destroyed barricade along the main road and turn left at the CEDA EVAC sign. Proceed towards the mall which you should be able to see in the distance as a large building, straight ahead. The first door you come to on the outside is a safe-house, so get inside and close the door to seal out the horde. Ensure you have everything you will need for a lengthy journey to the next safe-house Open the door and bustle your way out, clearing the area and moving up the escalators. Continue on this upper floor and duck under the metal shutter with a gap forced in it.
In the next area move down the escalator after exploring for equipment if you wish. From the bottom of the escalator double-back on yourself and cleave a route through. Pass all the stalls and fences until you come to another escalator. Head up it to the next floor. Go up the ramp in the doorway near to the top of the first escalator and move down the corridor. Explore the toilets and offices if you want to, then head through the last room on the left to find an ammunition stash, a medicine cabinet and the route we need to use to progress. As you enter the next room an alarm will activate. The Infected horde will continue to come at you until someone deactivates it. The button to do so is on the third floor. Once out in the mall again, go up the nearest escalator to reach the third floor. Push on into the security room and make haste to shut off the siren.
Once the siren is down, pick up any medicine or equipment from this room and head out of the door. Go through the corridor and down the steps. Progress through each room, picking up equipment en route, until you come to another open section of the mall. Go for the escalator as usual, and then fight your way to the safe-house at the far end of this floor. Get to the Stock Car and Refuel it: This is the last safe-house, so stock up on everything you will need for a final-showdown. In particular, focus on Adrenaline, as this will make the fetch and retrieve aspect of the final act much easier. Continue along the corridor and then cross the scaffolding bridge once you emerge in the mall again. Get in the elevator at the end of this path, and seal the doors once your team are aboard.
Once you reach the bottom the final battle begins. The idea here is to collect eight or thirteen petrol canisters (depending on the number of human players), bring them back to the blue stock car and pour each one in. Key to this mission is sticking together, and it's a good idea to stay in pairs. Leave one pair down by the stock-car, while the other goes around the mall collecting the canisters. Like the Cola, the person carrying a canister cannot fire and may only melee or shove. Press RT (360) to throw it, allowing you to use your main weapon again. TIP: Go for the fuel that is further away first. This means that if you are low on health and fighting a Tank later, the only fuel to get will be on your level or at least nearby. TIP: Travel in a pair to locations where there are two fuel canisters to save making the same trip twice, or travel to different ones and throw the canisters down to the car. Some canisters are located on the top floor, which is accessed via the stairs nearest the stock car, others are on the floor below, via the stairs further away from the car, and the rest on the ground floor. TIP: Medkits are available at the information desk area near the stock car First do a search of the top floor with Adrenaline and chuck every canister off (preferably near the stock car). Repeat this with every floor until you have enough canisters. If they get destroyed, they will reappear in their original location, just be patient and keep an eye on your screen. You need to be guarded while putting the fuel in the car, so plan ahead for this at the end of the sequence. Note also that some that appear to be accessible by one set of stairs may not be at all – work out how high up the canisters are (highlighted in white) and which set of stairs actually goes to that level. TIP: With two human players, each person can search a different floor, saving time. If you have been doing this on your own you will now need to head back down and pour them all into the car. Once this is done, you can stand next to it with your team and can drive off.
Intro to Dark Carnival The UCI in this level are clowns. Their squeaking shoes attract other Infected so it is vital to take them out as quickly as possible. They also look pretty freaky. You should not see any until you enter the Carnival section. First, make sure each member of the team picks up a med kit and primary weapon from the stash behind the stock car. There should be a machine gun and a shotgun here, so take your pick. Make your way through the cars and lorries, using them to act as walls and prevent Infected such as Smokers from getting hold of you. You need to jump on top of the car underneath the 'West Atlanta' sign, before continuing on along the highway. Infected will come from the undergrowth to the side of the road, and Special Infected such as Chargers, Spitters and Smokers will be in the area. TIP: Use the vehicles in this section to gain a height advantage. Remember too that Common Infected are slow to climb up to such objectives and can't jump! Watch out for Smokers though. If you look to the left when facing down the highway you will see some spotlights – that is our objective, a concert arena at the Carnival. Once the bus blocks one side of the highway, find the path through to resume travel on the right side. TIP: There are a few empty trucks dotted around the highway, some of which contain useful equipment. Near the off-ramp you should find some sleeping bags as evidence of a camp on the road as well as equipment such as Bile Bomb and weapons. Take the off-ramp sloping downwards. Once at the bottom you should find an ammo pile and additional weapons and equipment. Head through the tunnel, watching for Infected dropping from the road above and indeed from the advertising board to the right. This is where you should head next, using the grassy slope to get onto the road and then jumping onto the maintenance platform behind the advertising board. Up here you should find a Hunting Rifle, so use it to pick off as many Infected as you can see. TIP: This is an infinite-spawning weapon, so can be picked up by each team member to assist in clearing the way ahead. Up here the horde will still come to you, but it's not a bad position. Note also that there is an alarmed car in the area. When you have got enough head shots, drop down to the rooftop below, and move through the motel staying on the upper floor by using the path to the right. Search each room if you want to make sure you get as much equipment, ammunition and health (if you need it) as possible, though watch out for Infected hiding within! Follow the green floor around the corner to the left until you come to a break in the walkway. Move into the room to the right and follow through until you drop down safely to the ground floor. Check the rooms down here and move out, taking the grassy path behind the motel building we were just in. Here the Infected can come from anywhere and out of the bushes at close quarters. Stay close to the wall of the motel and don't go over the crest of this steep ridge. Once you do, you will be unable to halt your slide downwards. It's fun but risky without the rest of your group doing the same. Move far to the right and slide down to the camp area not far below. Collect the equipment and slide down further to the next ledge on the left. Try to hit the other ledges with your group until you are on flat ground. Clear the area and then move along the riverbed. Once the dam blocking the way is in sight, look to the left and you should see a path leading out and up away from the stream. Beware as you move over the top here, watching out for Special Infected. You should now see the 'Whispering Oaks' sign indicating the entrance to the theme park. Watch out for the car alarm, check the truck nearby for equipment, and then head to the right of the sign and into the first safe house of the mission. Stock up on ammo, any new weapons you think you may need and of course, with med-kits. There is a hefty set piece before the next safe house, so it's better to ensure you have enough med kits spare than using them all to get your team to 100 health a piece. Head out of the safe house and through the ticket booths (check for equipment). The theme park is a big place, and there are lots of nooks and crannies to investigate. Explore the toilets, buildings and stalls littering the area for more items to help you along the way. Move through the warehouse and out the other side. Follow the path and you will emerge back amongst the rides in an open area. TIP: The Strong Man minigame is in this section, required for the Gong Show achievement. See the Achievements chapter of this guide for more info. Follow the safe-house sign. As with all tight bottlenecks in Left 4 Dead 2, watch out for a charger here. Check the truck and interiors at the end of the alleyway for equipment. The room at the end of this street is the way to the next section, but the game forces you up a ladder (and in one playthrough, it was guarded by a witch sitting right at the bottom!). Make use of the health/equipment on the lower floor, then clear a safe route upwards. Move across the rooftops and you will emerge at the top of a slide. With the area clear below, slide down!
From here, ensure you take the steps into the upper room that overhangs the route ahead. You should find health and equipment in here. Head back outside and onwards. From this vantage point you may be able to spot the Tunnel of Love past the hedge and fence below. The set-piece you are about to encounter is to open the way to this amusement. Drop down and move towards the merry-go-round. TIP: Bear in mind that the horde will not stop coming until you cut the power and the gate seals them off. It is in the interest of your team to shut them out as soon as possible. With the gate shut and the horde under control, head into the Tunnel of Love and the second safe-house.
Stock up and move out. There is another set-piece before the next safe house. The Tunnel of Love is a linear section of the level, so is quite simple to navigate. Turn right once the swan-boats start. Feel free to explore the side-rooms, and once you get to the stage where one is opposite the other, you will find ventilation shafts in the right hand side one. This leads to a maintenance room, if you can stomach the thought of crawling through tight spaces in a horror game. Head back along the ride's path, investigating the vent and room to the right. Soon you will notice a large room on the left where all the swans go to be fixed and when not in use.
Clear the area and head up the stairs. Follow the gangway into a well-lit room. There is an assortment of vents that can be investigated, but the route ahead is to drop down through the hole in the floor. You will now be back on the swan river, but it's considerably darker down here. As before, progress along until you come to a hole in the wall to the left, marked with an arrow. In this room there should be an assortment of weapons. Take what you need, then head outside. Go through the building and back out into the dusk. Follow the path and you will be guided underneath a roller-coaster. This is the stage for the next set-piece. The aim here is to activate the roller-coaster and use the tracks to reach the next stage of the level. As before, it has to be deactivated, but this time to stop the alarm from attracting the horde. It is a long way back to the safe house from here, so it's important to do it right first time.
Once on the tracks bear in mind that going uphill and downhill you travel quicker than normal. If you have AI members in your party they may well get knocked off, which is pretty disastrous, but less so than if you or a fellow human does the same. Use a Pipe Bomb or Bile Bomb to send the horde off the edge of the ride. TIP: You need at least 2 human players to be able to do this set-piece confidently. If one player tries on their own they will be pinned by a hunter or straddled by a jockey, so you need someone their as backup (the AI is somewhat unreliable). Follow the ramp until you find yourself in the roomy safe-house.
Take any ammunition and health necessary, bearing in mind this is a short stint with an easy set-piece before the final safe house. Move amongst the stalls until you come to the dodgems. Walk up the ramp and out of the back of the ride. Once you arrive at a wire fence, locate the building nearby and follow the doors through until you arrive at its back. Use the crates to jump up onto the roof, and move along them to drop down on the other side of the fence.
TIP: This is where you can complete the two Achievements: Stache Whacker and Gong Show (see Achievements chapter below). You will soon find yourself outside the concert hall where there is another set-piece. Find the yellow ladder on the scaffolding and assess any explosives that you can use as defensive items against the horde. When you are satisfied that you know your environment, flip the switch to open the gates and then high-tail it back to the scaffolding. Wait for the message 'The gates are open, run for the safe-room!' and then do just as it says. Drop down and sprint for the final safe house of the level. The horde will keep coming because of the alarm, so there is absolutely nothing to be gained from dawdling.
The idea here is to start up the concert music originally planned for the Midnight Riders to attract the attention of the helicopter that has been flitting overhead for a while. Pick the gun that you will want for the final battle (there is a grenade launcher in the arena, but you should really just use whatever you find best for dealing with Tanks). Head out of the safe house, investigating the restrooms along the way. In one you may find some Bile Bomb, which will help greatly in the final showdown. Once at the arena, head up to the top and turn on the lights in the centre (enemies will not be triggered until you activate another switch on the stage). Just below the technical area on one of the scaffolding towers you will see the grenade launcher. Meanwhile there is an ammo pile lower and in the center complete with weapons. While it may seem best to have a height advantage, the stage is replete with defences to aid you in this final fight. The first of these is directly under the ammo pile in an indentation on the ground floor. There are heaps of fireworks in the box here, so take them and place them around the ground floor of the arena. Tanks may come from the upper seating area, so it can be worth placing a few up there, if you think you can shoot them in the heat of battle.
You should also find a stash of Molotovs nearby. Other things to remember include a switch by the microphone which activates a wall of sparkling fireworks creating a flaming barrier to the Infected (unless they flank it or walk through the middle!). This recharges after a while but should still be used sparingly. There are medkits on the raised platform on stage. Finally, Coach has a humorous interaction with the microphone that is worth experiencing. TIP: It is unlikely your ammunition will last for the duration of this encounter, especially if you are using a gun with a high rate of fire. Remember where the ammunition is and try to reach it during the few lulls in proceedings. With the defences laid and your team ready on stage, press the button to begin the concert. You will see the firework wall activate. There are three directions that must be defended. The route from the right, behind the stage, and the opposite route from the left. You should focus attention on the front of the arena, however, but ensure the flanks are covered for when the horde and Tanks come.
After the first Tank comes (usually when the lights go out) and is defeated you should have a break in proceedings (a short one) to go and stock up on ammo and use any medkits you have available. After a few more rounds of enemies and Tanks the helicopter will come in and wait for you to get on board (its position varies). Now is the time to use the Bile Bomb if you still have it. Lob it high into the arena seating area and sprint for the helicopter. You will probably need to climb either the left or right seating areas to get on board. As you will see from the video below, the AI cannot be trusted to extract intelligently or successfully. This is a particularly difficult level due to the multiple routes up to extraction, and in the case of the example below, they decide to engage a Tank that has come to halt our escape rather than to get out of there as quickly as possible. Once aboard however (make sure you fend off the Infected trying to climb up if you are waiting for anyone else) and with no one surviving outside, it will take off to complete this level.
Intro to Swamp Fever Swamp Fever's UCI are Mud Men or 'Mudders'. These are little crawling Infected that look very similar to Jockeys, but without the characteristic noise. Thankfully they do not have the same effect, but will simply splatter mud on your screen if you let them get too close. In contrast to Dark Carnival, Swamp Fever is a confusing morass of water, undergrowth (though there are some village sections) and Infected. The AI director can change the routes and environment a little more noticeably than in the previous levels, and with a similar theme (with few distinguishing features) throughout, it can be hard to keep track of where you are. You start in a cargo container and can pick up some medkits and primary weapons, but nothing of the melee variety yet. Head out past the petrol station, investigating the warehouse buildings you can access to get your melee weapons. Move along the wooded path, investigating the houses en route if you wish. You may find a second pistol in the first house of the village that you come to. TIP: Locate the jukebox in the bar building to play some music!
Take note of the Charger that the locals strung up at the side of the swamp – this is a very atmospheric moment. By the water flies are swarming, and it is too deep to cross. This is a set piece, and I strongly recommend exploring all the houses to get the necessary equipment for dealing with the horde, and lots of Special Infected. A melee weapon is advisable. You should be able to find guns and explosives by the water's edge. When you are ready, call the ferry to take you across. This boat moves frustratingly slowly. Using the house for cover can be a good idea against enemies such as Smokers, and the lack of entrances for Infected make it good defensively too. The only problem is that you must take notice of the ferry when it arrives. If you stay by the water, however, you can of course be confident that you are covered in the direction of the swamp by the depth of the water. All the Infected come from the village and its surroundings. When the ferry arrives, get on board and press the button. A gate will come across that should stop the Infected from getting on.
Follow the wooden walkway. This area is tough as the Infected can come from anywhere TIP: Stay out of the water! Movement speed is vastly reduced while wading through the swamp. Head underneath the crocodile sign and up the steps onto a raised walkway. You must try not to fall off once up on the walkway, but there are ladders dotted around to allow re-entry to the path above.
Move through the covered area and you will eventually come to a dead end – surrounded by swamp on all sides. Move down to the right and follow the wooden path that goes precariously through the water. TIP: If a horde attacks, retreat back to one of the islands so you can move around and dodge out of the way of any Special Infected. This section is a bit of a maze, and you may get a Witch or Tank to spice things up a bit. It is not that long until the safe-room, however, so find a route going forwards (it is a good idea to remember landmarks in the swamp so that you don't go back on yourself) until you reach the safe room. Re-supply and then head out back into the swamp. Forge a path onwards until you pass the beached rowing boat. After a while you should come across an army paratrooper caught in the trees. He's dead, but still has some health, an explosive item and a top-notch weapon to share with you.
The next landmark is also the focal point for the game's second set-piece. It's a downed jumbo jet. Clear the Infected from the area (ensure there are no Witches lurking around to get in the way – if there are, it is a better idea to take them out before the set-piece [not on Expert, however]). I recommend holding the team back on dry land, well away from the plane. The initial horde will only come from that direction, making it easy to kill them and get the Achievement listed below. If you have two Humans, send one to open the hatch and retreat. With AI, you'll have to do it yourself. When ready, open the hatch. Use Molotovs and Pipe Bombs to deal large damage to the clumped horde – Molotovs will force the horde to cross a wall of fire and most will be dead before they get to you. TIP: This is also where you can get the On a Wing and a Prayer Achievement for not taking any damage in this section (see Achievements section).
With the set-piece completed, jump off the wing and wade out into the swamp. You will shortly come to a house on stilts, which should have some useful equipment and health in. Get back to swamp-level and move through the burnt out building. From here it's pretty much swamp all the way, but you can use the roof of the next building to get a vantage point safely out of the reach of most Infected. TIP: Should you encounter a witch in this area, be aware that she can be underneath the swamp water – only the top of her head will be visible until she reacts to a disturbance and stands up – so be careful! TIP: When navigating these tricky swamp sections try to travel from building to building as this will help you remember which way you have come (and so which way not to go next!) Once you are back on dry land with the raised path leading to a barricade, move up to the blockage and head back into the swamp to the right. Follow the wall and you will soon have access to the village and safe-room ahead.
Emerge from the safe house into the village. Move into the house with the bright light on and then descend the hill into the swamp. Do some house clearing and head up the steps to the higher level. Follow the walkway until you leave the village area. Once you come upon the set of houses on stilts, the next set-piece is nearly ready to begin. This is the easiest one in the level, however. Locate the stilt-house with the lever inside to lower the bridge across. Unlike the ferry, as soon as the lever is pressed you can begin to move across (you may have to wait a short while to allow it to lower far enough – but it doesn't have to be all the way down). When ready, initiate the set-piece. As soon as possible, head across the bridge – make sure the coast is clear, however, so as not to risk falling off. Once on the other side, hold out in the building until the horde stops coming.
Make your way across the various rooftops and gangways until you are back in the swamp. Follow the path into the final safe-house. Get to the Plantation House and Reach the Rescue Boat: Upon leaving this final safe-house you will notice that the sun has risen, making the final section a little clearer. Stock up and head out into the village. Explore the houses (remember that the end of the level is near, so certain items may need to be picked up based on your preferences in these situations) and continue along the road until you come to the row of trees leading to the plantation house.
Proceed along this route until you come into the grounds of the house itself. This is where the final showdown takes place, but you need to get round the front of the building first. Climb the ladder to the right of the main door and move through the house. Once out the front stock up on ammunition and medkits, and use the radio by the front gate. You have to do two interactions before the final showdown begins, so for now just use the radio once. You should also find grenades in the front rooms of the mansion. For this battle the best tactic is to take up residence on the balcony overlooking the garden. It is a pain to get down to the ammunition stash and indeed to escape at the end, but you are better protected than downstairs and there is a mounted gun waiting to be used on the balcony. It must be remembered that you cannot survive the jump down unless you land on the wooden plank that is below the right hand side of the balcony. Players should be willing to battle down through the house and outside. I recommend heading down before the final wave begins and fighting in the front hall of the building. You can then make a quick getaway before the final Tank arrives. This is one of the hardest final stages due to the crowd of Tanks that will come charging at you. In the first wave you should encounter just one (like with the other showdowns, this will occur during a lull from the horde). The second wave finishes with two tanks, so if you are up on the balcony be aware that you could be overwhelmed. The third and final wave has the fourth tank as you have to make your escape. TIP: There should be some Adrenaline on the lower floor of the house – using this can make your escape much, much easier. If you are playing with human allies, get everyone in position and send someone out to signal the boat when you are ready. Then sprint back through the door, up the stairs, over the gap (watch out for this!) and back onto the balcony.
I recommend that you have one man on the mounted turret, one watching the left and another watching the right (while also ensuring the gunner does not get hit by Special Infected or overwhelmed by the horde) with the fourth team member guarding the door into the house – many Infected drop down from the roof and will overwhelm the balcony and turret if this is not done. The Tanks should come from the front. TIP: In the small confines of the balcony, melee weapons can deal devastating damage to the Tank. If you watch its movements you can tell when it has been stunned or is interacting with the scenery. Getting a couple of axe blows in here and there can be vital to bringing the Tank down quickly. Moreover, if it is pummelling a team mate, using a melee weapon is the quickest way to help – though it puts you at considerable risk. Clearly the best tactic is to take them out from range, but this is not often possible, and once the Tank is on the balcony things get pretty hectic. Just after the pair of tanks attacks at the end of the second wave a horde will come, complete with plenty of Special Infected, and the boat will arrive. You may wish to make your way into the house and downstairs as soon as you kill the Tanks – you should be able to deal with the horde from here. Once the boat arrives, sprint out of the house and follow the wall to the right. Use your Adrenaline if you picked some up. The garden can be something of a maze, and the last thing you need is to be trapped by a Tank at a dead end.
If you follow the fence you should come to the front gate and then simply have to make it down the pier, through the shallow water and onto the boat. Intro to Hard Rain The UCI's in this level are construction workers. The sugar mill that is the level's centrepiece is waiting for demolition, and presumably these Infected were once workers there. Their special talent comes as a result of their hard-hat. They are unaffected by explosions and ignore noises such as the pipe bomb's attractive beep. This will not be much of a hindrance to you on lower difficulties, but on Expert or in Realism mode it can make things interesting. It should first be said that this level is not for the faint-hearted. It is one of the few occasions when Left 4 Dead is right up there with the best horror games rather than just being a classy FPS. If you don't like Witches, you might want to give this one a miss! From the dock pick up a melee weapon and second pistol if you wish (you do not start with a primary weapon on this level). You can then climb on top of the pickup truck and jump up onto the roof. Send some of your team in the bottom of the building – there is a hole in the roof stashed with weapons – drop down into it and rendezvous with your squad there. At this point it should be noted carefully that this game involves backtracking. After you get the gas you come back exactly the same way (with a twist), so be sure to leave weapons, ammo and medkits whenever you see them oversupplied (i.e. when the game gives you six medkits and obviously you only have four team mates). This room in particular will be the restock point for the final showdown on this level, so it may be a good idea to leave as many pipe bombs and molotovs as possible. Get a medkit each, a decent gun, and then head outside. Unfortunately the gas station here is out of fuel, so we need to head to the next one. Handily there is a large electronic board pointing the way. Go up the wooden plank and down the other side. Use the ladder to access the next area. Move through the playground and houses, collecting any equipment en route. Once onto the road again follow it past the ambulance and 'Garage Sale' signs (the garage sale itself should have weapons on a table outside). It will begin to rain shortly, if it hasn't already – a sign of things to come. Explore the garage sale house and go out the back door – investigate the house across the road with a pickup truck outside and you will locate a ladder to allow access to the roof. From the roof jump from house to house, using the dumpster to get across the larger gap. Feel free to explore each house if you wish, you can easily get back up to the roof. At the end of the row you will see a stairway leading to the safe-room. TIP: The four safe-rooms in the game come with this one being re-used, one at the gas-station and another back near the dock. TIP: Until you get to Safe House 2 you have the chance to earn the Sob Story Achievement, for not disturbing any witches en route to the gas station. (See Achievements section below) While in this safe-house you may want to read the graffiti on the walls. It will give you an idea of what is waiting for you at the Sugar Mill. Remember to leave medkits for the return trip.
Once you are suitably intimidated, head out of the safe-house down the steps. Note the 'Stay Out! Witches!' sign strung up to the Sugar Mill. This section has to be taken very slowly indeed, as there can be around ten Witches in the Sugar Mill vicinity – many in the same location but on different wandering routes (it's during the day, so they are all moving around). By the time you enter the first great hall you will probably be able to hear the Witches' noise. It is very dark in here but you should not risk shining a torch on a Witch if you can help it. Head outside via the side door (I would not recommend looking in the many rooms in here if you want to avoid any nasty surprises). You may find a Witch (or two) on patrol around here, so proceed with caution. As you move underneath the building and into the next area the glare from the sun will obscure your vision – make sure you don't step on a Witch!
TIP: When a Witch stands up and looks at the aggressor it is not necessarily going to attack. The Witch will only attack if you come into very close contact, shoot it, or set it on fire. Even if it stands up and growls you can move away and it should continue as before. If you hear it scream from a distance it is usually because of a loud noise. Once at the porta-cabin, take a breather and re-supply.
Move through the rubble ahead and up the conveyor belt into the large building full of mechanical equipment. Look out for Witches on the upper gangways in here, and remember to keep torches off. TIP: Defibrillator units are vital on this level as Witches have the potential to wipe out your team (especially on Expert where they kill [as in you cannot be helped up] in one swipe) Move out of the confines of the building and the Sugar Mill proper should come into view. If you thought there were a lot of Witches so far, you haven't seen anything yet. The area leading up to the mill is one of a couple of places where you might see two Witches sharing the same turf.
Use the porta-cabin as a resupply and rest point, then head inside the dark mill. TIP: Witches will only attack one person – the one who originally startled them (unless someone sets them on fire, in which case that person is also targeted). Rather than risk incurring its wrath on your entire party, on Expert difficulty it is a good idea to allow the witch to run off after it kills the startler – this is also apt punishment for ruining a potentially great team maneouvre! Work your way up each floor of the mill until you get to the top. This is the location of the level's only set-piece. If you've got this far without startling any witches then you've done very well indeed, so there is little need to offer any more advice on the subject. However, should you find yourself with a Witch on the top floor, you may want to take it out before you alert the horde by starting the set-piece. Monitor its patrol route and see how close it comes to the lift, but remember, Smokers and Jockeys have a horrible habit of dragging you into a Witch's path. Similarly, if you are knocked off the top floor during the fight, remember that the other floors may have Witches on as you rush back up. Begin the set-piece but stay with your backs to the lift. Keep an eye on it because as soon as it arrives you can get inside and shut the gate by pushing the button. You are then out of harms way (for about 20 seconds until you reach the witch-infested field below...!)
You are likely to encounter at least one Witch almost directly under where the lift lands. They should not patrol up to the door, however, so wait for them to disappear into the field (use the small shack for cover) and then head in yourself (preferably away from the Witches). The problem here is that you obviously cannot see any Witches more than about 5 metres in front. If you are playing on Realism mode, you also can't see your team! You can walk on the pipe going through the middle of the field to help give you a height advantage in terms of spotting Witches, but there will also be hordes and Special Infected to pull you off and into a Witch's path should you take that route. A better idea is to stick to one of the sides of the field. This way you are partially covered in one direction, but the hordes and in particular Jockeys will still cause big problems. The game still forces you into the middle using the farm machinery, but at least you are not going to get Witches on all sides. Make your way out of the field and into the gas station safe-house. Stock up (feel free to take everything from this one as we won't be revisiting this area again) and head outside. Once you re-emerge the reason for the level's name will become apparent. As you were collecting gas an intense storm has brewed up creating hurricane conditions and completely flooding much of the lower parts of the level. There are a few things to bear in mind about the storm: 1) As with swamp water, you can only wade slowly through it With that in mind, head out of the safe-room. You will probably experience the first 'rage' of the storm shortly. Take note of its duration and effects so you are not caught out in the future. If the idea of travelling through the sugar field again fills you with dread, fear not, as the witches head inside to seek shelter (though of course we will be visiting them shortly).
Watch out for dead ends in the corn field and remember to stay still during the storm's rage, before coming out and re-entering the lift as before. Watch out for Special Infected at the top of the lift, and work your way back down to the ground floor. Once outside, climb up the silo using the ladder and stick to the gangways – avoid the water wherever possible and remember to keep an eye out for Witches. They are likely to be inside and should no longer be wandering due to the darkness, but the AI Director may just throw a spanner in the works. Enter the building and make your way across the gangways, onto the pipes and out. Stop off in the porta-cabin we used earlier to get your bearings and wait for any storm rage to subside. From there use gangways, pipes and machinery to stay up high. You should eventually find yourself in the upper floor of the first sugar mill building. Once you get to the bottom head into the building across the street and back into the familiar safe-house! We are now going to a new safe-house near the docks. It is still backtracking, but is not very far from here. Stock up on any medkits you didn't take first time around, and move out.
Climb the ladder directly in front of you as you leave the safe-house. This gets you back on the roof of those houses from earlier and out of harms way. When the storm comes, however, be careful not to fall off. Enter the final house in the row and drop down onto the pickup truck and use the wooden pallets to stay out of the water. Go down the side of the building across the street to emerge by the garage sale. You will have to wade from hereon, but it's not far now. Move from building to building to keep out of the storm's wrath. Once you pass the playground, the final safe-house is just across the street. Stock up, taking everything you need from this safe-house. At least you do not have far to go should you fail this final section. All we need to do is get to the first building by the docks and activate the Burger Tank sign. Head out of the safe-house, up the ramp through the broken fence and into the Burger Tank restaurant (it's where we got all the ammo and guns from at the beginning of this level).
TIP: If you get into heavy combat before reaching Burger Tank, feel free to head back to Safe-House #3 as it's so close and you don't want to waste anything by the docks. Once in the Burger Tank restaurant, stock up and get onto the roof to activate the light and signal your rescue boat. You can access the roof via a pickup truck at the front and a 4x4 at the back, with a ladder at the side. The best location for this final battle is debatable, as if you are on the roof you are exposed to be pushed off and have the full brunt of the storm, while if you are inside movement is restricted and the water slows your actions. I personally found the roof to be preferable, but you have to work together to protect anyone taken off it by Special Infected. Use the gangway around the edge of the restaurant's roof to get good vantage points on incoming enemies, and remember the route to get back up should you fall down. After two Tanks the rescue boat should come in – if you time it well you should be able to fall back to the docks and get on board before a third Tank engages you. With that done, congratulations as you have just completed a very intense level. TIP: Listen out for the boat's horn and as soon as you hear it, fall back to the dock to await its arrival. You can jump on as soon as it arrives.
Intro to The Parish New Orlean's UCIs are riot police. They cannot be taken out from the front, though you can shove them (only chainsaws can kill from the front) and get easy kills from the rear. TIP: As a daylight level you will get wandering Witches making life difficult in New Orleans. You will notice the bright sun that remains throughout this level. Pick up a primary weapon and medkit and then move away from the dock up the slope. Head through the corrugated fence into the next area. You can explore the upstairs of a house using a white ramp on top of a van, before moving on top of the buses to pass through. Drop down at the end and go into the bar nearby (there is a jukebox in there for those who enjoy a tune). Move through and out of the back door. Next you should come to a kitchen, replete with frying pans and Common Infected. Clear the room and make your way into the seating area and back outside (watch out for parked car alarms) Across the street and to the left you will find the first safe-house. Stock up and move out down the road before crossing up the steps and into the park (check the military jeep in the road for medkits). Follow one of the side paths in the park until you find your way to the centre. Watch out for Special Infected here, as well as a few hordes until you find your way out of the other side.
Go out of the gate and once on the road head through the small doorway cut into another corrugated fence. Load up on weapons underneath the highway. Follow the road and you will come to a decontamination trailer. This is one of this level's few set-pieces. Feel free to get in and collect the medkits, but once you open the back door and move out you will trigger an alarm. You must deactivate it before the horde will stop attacking, and it is quite a circuitous route to get there. Take note of the position of the tower (where the alarm deactivation is located) as you exit the trailer, and then get ready to run. TIP: It is a good idea to designate two people to run on and attempt to get to the tower as fast as possible, and have the other two remain by the truck to deal with the majority of the horde from range. Follow the fenced paths backwards and forwards until you finally make it to the tower in the middle (look out for a ladder, and then another one above it).
Go around the corner and move inside the building, following the safe-house arrows. Once you emerge in the bus depot head for the fence and down the alleyway adjacent to it. Cross the lot and you will come to the second safe-house. Tool up and exit the safe house, following the line of the highway above. You will come into a spacious area – keep going forwards until you come across a small road – there is a channel at the end to funnel your team down before it opens up again. Locate the steps near the dead end to climb to the first floor of a house, then drop off the balcony onto the bus below. You will need to go into the grassy area nearby to bypass the fence blocking the route, but then turn around and get back onto the road just past it. Continue along, exploring the nearby house to find your way through an opening and up some steps into another building. Clamber out of the hole in the first floor and drop onto the van underneath. Cross over the road and into the wooden building. Make your way through and out of another convenient hole back into a grassy area before rounding the corner and entering the next structure. You guessed it: move through the house and out of a hole. TIP: Many of these buildings have plenty of equipment in, if you are willing to take the time (and risks involved) in looking for them. In a slight change to the hole-entry gameplay we've been seeing lately, you now have to go down a manhole into the sewers (not a great idea during a zombie apocalypse). Visibility in here is seriously reduced, and you will lose track of your team if you don't stay directly in the middle of the sewer. You should find your way to a ladder in the centre once the tunnel opens up. You will now come to an open area filled with cars – the vast majority of which are alarmed. In some cases the only way through is to jump on them – you must ensure that such cars are not alarmed. That's right, jumping on an alarmed car will set it off and attract a serious horde. TIP: This is where you can get the Violence in Silence Achievement (see Achievement section below) for not setting off any car alarms. TIP: With all these alarmed cars, shotguns are ill-advised (because they spread their fire inaccurately) and melee weapons are recommended for dealing with all except Special Infected. TIP: Shoot at the legs and feet of the enemy (it doesn't alter how difficult most are to kill) to avoid hitting a car with a stray bullet. Begin to move across the field. When a horde comes, watch your fire (look out for enemies coming from behind you, from in the manhole). Once you have to navigate an impassable barrier of cars, locate the one that is not alarmed and jump on it (you may need to move from one car to the next to get down – but the same rule applies: only step on cars with no alarm!). Move over the top and down the other side, and get the hell out of there. You now have to navigate a cemetery (again, not the best idea under the circumstances) more akin to a maze and changed each time thanks to the Director. Trial and error is the only policy here, but as long as you stick together you should make it through. Soon you should be able to see the two towers of the bridge in the distance. That is our target. At the exit of the cemetery, check the van for equipment and head along the road. In the building to the left at the end you will find the third safe-house. The fourth safe-house is up on the bridge, handily located right next to the final showdown. Collect all the equipment you need and exit the building. The military's attacks are coming in closer now. Exit into the urban environment. Move into the building at the end of the square and go up the stairs. You will emerge onto a balcony. Drop down onto the van once you reach it, and proceed along the street. Enter the building at the end of the street by the crashed bus. Make your way through, heading upstairs and then dropping down to come out of the other side. Proceed down the alleyway until you locate a maintenance area with a door leading into another house. Again you need to move upstairs, but this time up two flights of steps to find a way through.
From the balcony drop down onto the small building beneath and clear the area from here. This is the location for the last set-piece of this level. Someone needs to go down the lower floor to activate the float nearby. This will move it into a position allowing us to cross to the next house. Unfortunately, it will also attract the horde in the process. Nominate two people to go and set it up, and the other two can cover them. There is a set of stairs on the other side of the area from the float to find a way back up (see video below). Once everyone is ready, activate the float and get the first half of your team back up onto the small building for an optimal position. TIP: The scaffolding next to the small building has explosive canisters on to make this battle a little easier. It doesn't take long for the float to get where we need it, but you should be wary of any of your team being pulled from the roof. Once it's in the right place, head across in to the upper floor of the house.
Go downstairs and out of the back door. Follow the narrow alleyway until you enter another building that leads back out onto a main road. Stock up on weapons and health inside before heading out. Do some more house-clearing until you locate the route down another alleyway (or through a house) to allow passage back towards the highway. Pass underneath the highway and you will see the bridge looming large above. Pass through the concrete blocks into the final safe-house of the level. There are plenty of medkits in this safe-house and the extraction showdown in this level is probably the most difficult in the entire game. Heal your wounds and equip an additional medkit if possible (there are some downstairs and upstairs). Make sure you have a decent weapon and head out. TIP: This is a frantic, moving extraction, where you are required to plough through the horde until the end. Because of this, a melee weapon (such as the machete) is advisable to help cleave a path. TIP: It is essential to take the Molotov in the safe-house to deal with the Tank on the bridge, unless you plan on bypassing it. Interact with the dead soldier's radio to make contact with the military on the other side of the bridge – they will call off their bombing run to allow you to cross. When you are ready, hit the switch to lower the bridge and allow passage. As you move forward, ensure you first turn around and engage the Special Infected that come from behind. With these enemies dealt with, continue on along the bridge. TIP: This is where you can unlock the Bridge Over Trebled Slaughter Achievement (see Achievement section below) for getting across the bridge in under three minutes. The horde will attack first as you move between the buses. Stick to the right hand side, avoiding the gap in the bridge. Be sure to avoid these holes, or you will fall down and be left hanging for a team mate to pull your up. Soon you will come to a petrol tanker with a ladder at the back – a height advantage is very valuable on the bridge, and while there is a slight risk of being pushed off the edge, it's worth it. You can see the Special Infected coming from a mile off.
Move from vehicle to vehicle going forwards, and switch onto the other truck on the left when you get the opportunity. You will then have to drop down and engage the horde up close, but underneath the lorry just up ahead you should find some more weapons. TIP: Get more ammunition at every opportunity. If this means changing weapons, do it, as your ammo will not last the duration (or even half the duration) of this extraction. Bypass the hole in the bridge and flaming military jeep before heading up the ramp to the top of the bridge. Again, height advantage is invaluable. Move down onto the top of the truck once you get there, and then head into the back of the truck nearby. There should be ammunition in here and once you have made use of it, clear the horde, as a Tank will be inbound. Whoever has the Molotov should go ahead and try to nail the Tank with it. It will be forced into a narrow route, so you should be able to land the Molotov in front of it so it will catch fire as it nears your team. This is the only Tank worth worrying about (you can't do much about the next one!), so concentrate on getting it right. Take note, this Tank will fling cars at you and should you get hit by one, it will knock you down and force your team to help you up – if they've not been hit as well, that is.
TIP: Use the lorry with the ammunition in for cover – the Tank cannot move this and flying cars will not affect it! With a combination of fire and bullets, down the Tank and proceed (after restocking on ammo). Keep an eye out for the gangways protruding from either side of the bridge. Take the one on the right hand side as the Infected have problems getting onto it – move up using a combination of this and the right hand side of the road. You can shoot the Infected through the bars and clear a path. Again, ensure you do not fall or get knocked off (the horizontal poles on the far edge are not consistent and there are some gaps – watch out for Jockeys in particular), as that will rule you out entirely unless you get lucky. Rejoin the road when forced to the first time, then get back on the scaffolding again. TIP: It's a good idea to split your team between the scaffolding gangways and the road as this will create crossfire lethal to Infected.
At the end of the second gangway, get back onto the bridge and scavenge ammunition from the back of the truck. This is a tough section as the quantity of Infected can be overwhelming. When you are able to, climb on top of the petrol tanker using the ladder. You may have to come back down to help other team mates who get pulled off, but this is by far the best way to avoid getting massed by the horde. TIP: This is a good stage to use a Pipe Bomb or Bile Bomb. As you move from petrol tanker to lorry, then up to the next section of the bridge at an obscure angle, the end is not far away but takes a slice of luck to get to easily. Note the helicopter on the shore to the right as you move from this slanted section to get on top of a bus. This is our target. Drop down from the bus and you will be notified that rescue has arrived. There are a number of possible outcomes here. Regardless of where the Tank spawns, you need to forge a path through the horde as quickly as possible. I recommend melee weapons only for this final section, unless you have Special Infected or a Tank to deal with directly. TIP: This is not like most extractions where the rescue vehicle is thirty seconds away through a clear area – this one is more like two minutes filled with Infected, so running and praying may not be enough – you will have to do some fighting. Note also that the horde only stops for the first Tank, so if you try to hold position you will be overwhelmed. Keep moving until you get to the first Tank, stop and then keep moving again until extraction.
Ensure you stick together to help each other with Special Infected traps and head into the area cordoned off by fences and a military humvee (check the bonnet for Pipe Bombs which can be invaluable in clearing a route through). Note that by this point you should be able to resort to running to the helicopter, but only if the Tank is behind you rather than in front (though Adrenaline would help). There is an ammunition pile and a Heavy Machine Gun mounted on the back of a truck not far down this road. If you have stragglers in your team, clear them a path using it. It can also help to deal with the Tank, but that depends on where it has spawned. TIP: Try to spot the Tank so you are not surprised by it, but if you can’t see it just forge a route ahead and hope it's not too close behind you! If the Tank has spawned on the bridge, you may be clear of it by now (but time is of the essence so that it doesn't catch up). If, however, it has spawned in the area by the rescue helicopter, you will struggle to get past it without killing it or at the very least sacrificing a member of your team to delay it. TIP: If you are struggling, make sure you take some adrenaline to run past the first Tank – if you are playing with AI you can leave them behind and speed past the horde to get to the escape helicopter – there is also an achievement for clearing the bridge in under three minutes, so it can be done! Unless you feel that you have to fight this Tank, ignore the mounted gun and drop down where the road is blocked. Head to the right and through the funnel towards the rescue helicopter. Climb on board using the ramp to the rear and your mission is complete. You have successfully survived the infection! For now.
Traditionally, the weapons in Left 4 Dead games are divided into two tiers. Tier 1 are the basic guns that are regularly found in the first few stages of each level, while Tier 2 weapons are considerably rarer and only tend to appear towards the end of a level. Note: Shotgun damage per round refers to the entire spread of the shot hitting the target. For every pellet that misses, damage is reduced, hence the reason for mentioning 'wide' and 'narrow' spreads (a wide spread deals less damage but to more Infected). Note: Total ammunition refers to the total in each weapon's magazine, added to the total amount a player can carry. The standard pistol in Left 4 Dead 2 is a great addition to people with a cumbersome primary weapon, such as the Grenade Launcher, sniper rifles or shotguns. It can also be dual-wielded (doubling each of the statistics below, except damage per bullet, obviously). This is also the weapon that the Survivors pull out when downed by the Infected – even when a player is only carrying melee weapons. Magazine capacity: 15 bullets TIP: Pistols should be picked up if the user's primary weapon cannot function effectively at mid or close range (unless your team is very good at covering while you deal with distant targets). The Magnum has massive damage compared to the P220, but barely half of the magazine capacity and a slow rate of fire. When you also bear in mind that you can dual wield the P220 (though you obviously have to find the second pistol), its benefits are hard to see. It has high recoil, making firing at Special Infected a chore (though it is accurate when crouched), but it kills Common Infected in one and can take out a line of enemies with just a single bullet. The main perk to carrying a Magnum is that it replaces the P220 when incapacitated where its high damage is invaluable. Magazine capacity: 8 bullets TIP: Magnums are good alternatives to shotguns and should be used by players wanting a high-damage, one-hit kill Common Infected-slaying weapon. A pretty standard Uzi style gun that also appeared in the original Left 4 Dead. Its high rate of fire makes burning through ammunition a problem, but it is great at dealing with a horde. Magazine capacity: 50 bullets TIP: The SMG is best for dealing with fast moving enemies or a horde. It comes unstuck against Special Infected, however. The big advantage of this gun is obvious: other Infected may not notice your presence quite so readily as if you were toting a shotgun, for example. It also does more damage than the regular SMG, but has a higher recoil making aiming at distance difficult. Magazine capacity: 50 bullets Shotguns are great against the Infected as you can take out a clump with just one shot. Their big disadvantage in Tier 1 comes with a slow rate of fire, with the Pump Shotgun the worst of a bad bunch. It does, however, dish out slightly higher damage than the Chrome Shotgun, but is less accurate. All these weapons must also be reloaded regularly – not great when a horde or Tank is approaching. Magazine capacity: 8 rounds The most accurate Tier 1 shotgun, this is good for killing Witches in one shot (see Survivor tactics below) as well as when the Infected are lining up to be despatched. It does higher damage in a concentrated area, but less in a wide location, as each part of the spread deals higher damage than the Pump Shotgun, but there are fewer pellets in each shot. Magazine capacity: 8 rounds TIP: For the easier sections at the start of the game the Chrome Shotgun is a good choice to get simple and numerous kills, while its accuracy keeps friendly fire down. This is a very satisfying weapon that fires in bursts of three shots, keeping accuracy high and reducing ammo waste. The main downside is its reload time, a whopping 3-seconds (the most of any assault rifle in the game) Magazine capacity: 60 bullets TIP: The Combat Rifle is best at picking off distant enemies and Special Infected, but also being able to function in close quarters. It's a great multi-purpose weapon. Popular favourite, the AK-47 is a fully automatic assault-rifle. It is very powerful, but as a drawback is slow firing, inaccurate and must be reloaded more regularly than the others. Magazine capacity: 40 bullets TIP: AK-47s are great against Tanks due to their high damage and good range. The M-16 may do the least damage of the assault rifles, but its mammoth rate of fire means you can down the Infected even quicker. The obvious drawback of this is that it wastes a lot of ammunition, but it can be a lifesaver in a horde. It is also relatively accurate, so suits most situations. Magazine capacity: 50 bullets TIP: The M-16's high rate of fire makes it a good choice against a Tank, where you want to down it as fast as possible. The automatic shotguns are some of the most lethal weapons in Left 4 Dead 2. The Combat Shotgun is more accurate than its counterpart the Tactical Shotgun and is akin to the Chrome Shotgun vs. the Pump Shotgun. Magazine capacity: 10 rounds TIP: This is not too bad at medium range, but cannot pick off distant Special Infected. In a team of four humans the Tactical Shotgun is best as the ultimate close-quarters weapon due to its wide spread and heavy damage. It struggles at mid-range, but nonetheless is great against the horde. Magazine capacity: 10 rounds TIP: The Tactical Shotgun is also good for killing Witches in one shot Large capacity magazines and a large ammunition reserve make this a good choice in addition to a pistol or melee weapon. It only functions effectively at close range, but can take out many Common Infected in a row with just a single shot. The main benefit of the rifles in Left 4 Dead 2 is their functionality against Special Infected, whereas many of the game's weapons fail to deal with them effectively. Magazine capacity: 30 rounds TIP: Use a melee weapon to ensure you are covered against close-quarters enemies, or better still a pistol for close and medium-range targets. This is more accurate than the Sniper Rifle, but has just half the capacity in each magazine. It can fire through obstacles, making it great inside buildings when Special Infected are lurking around the corner. It is only truly effective outside at long range, however. It does possess the same ability as the Sniper Rifle, killing Common Infected in one shot, and the bullet continues travelling until it hits an impassable object or Special Infected (allowing for many kills in a straight line with one bullet). Magazine capacity: 15 rounds TIP: Both the sniper rifles' accuracy is greatly reduced while moving (unless scoped). The Grenade Launcher is not strictly a Tier 2 weapon as it spawns on its own, often in relatively hidden locations (i.e. in a room you wouldn't normally check) and very rarely. It does great impact damage (watch out for friendly fire though!) and the explosion will do the same to surrounding Infected. It also causes any Infected in the blast radius to stumble, except for the Tank. Despite its huge damage potential it takes a harmfully long amount of time to reload. It should also be noted that the only way to replenish ammunition for the Grenade Launcher is to find another one (an extreme rarity) or use Incendiary or Explosive ammunition to top it up – these also increase the blast radius of each shot. Ammunition stashes have no effect. Magazine capacity: 1 round TIP: The Grenade Launcher is best during horde attacks or when a clump of enemies (including Special Infected) are in the open. TIP: Rather than saving the Grenade Launcher it is best to use it in a short space of time, allowing you to take advantage of its damage potential but quickly get back to a proper primary weapon. With that said, against a Tank it can cause 1,000 damage per hit (if direct), meaning just four shots would kill it on Normal difficulty, so it may be worth saving it in a good squad. The reload time may not be practical against attack, but just one shot will make things considerably easier for your team. Many of the melee weapons in Left 4 Dead 2 do essentially the same damage, but they can be analysed based on speed and reach (in terms of width – so how many Infected they can kill with one swing) to find the best. There are obvious downsides to melee weapons, the most important include their unsuitability against Spitters and Boomers and obviously limited range, but they are vital against hordes due to the ability to kill many Common Infected (and indeed Special Infected) at once and cleave a path through the level. The headline grabbing chainsaw is undoubtedly the best melee weapon in the game. You can slice through the horde like water, but it only has about a minute of fuel and cannot be recharged (once it runs out, you get a pistol to use). The key with the Chainsaw is that it can deal a possible 1,000 damage per second. It must be revved up prior to use, so allow a few seconds before the horde arrives. Watch out for friendly fire, however. TIP: While great on the Common Infected, the Chainsaw is also great against the Witch (when slicing her from behind), Tanks (when its attention is elsewhere) and Special Infected in general. Even Boomers can be dealt with – you want the horde to be called so you can slice them up! TIP: The Chainsaw is also a good defensive weapon, as it hinders the ability of Jockeys, Hunters and Smokers to grab or pin you. The axe has a wide swing and its sharp blade allows deadly one-hit kill decapitations with every swipe. As a result it can really help out during a horde attack, taking out many Infected each time. It is also fast, allowing many swings per second. Much like the axe, but with a slightly shorter range, the machete is brilliant against a horde and immensely satisfying. It is faster than the axe, however, in fact it is the fastest melee weapon. The katana has long range, but a slower attack time than the Machete. The Axe, Machete and Katana are all relatively evenly matched. TIP: While dealing high damage, the melee weapons (apart from the Chainsaw) should only be used against the Tank and Witch when desperate. Their attack time is too slow and the player will be incapacitated or pushed away too early. The classic Half-Life 2 weapon, the crowbar is a high damage but slow attack time melee weapon. It also will not take out such a wide array of Common Infected in front of the player as some other melee weapons. This was available with preorders of the game or can be used on a multiplayer server where someone else has it. It is fairly average, but can get some satisfying home-run style head decapitations. Much like the Baseball Bat, the Cricket Bat can feel inferior due to its blunt edges, but still kills Common Infected in one hit. The Nightstick is only found in The Parish campaign where players have to contend with the Riot Police Uncommon Common Infected. It has an incredibly fast attack speed (the fastest), but a narrower reach than the likes of the Axe and Machete. It also cannot cause decapitations, which makes it slightly less satisfying (but reduces the amount of blood impeding the screen). TIP: This is a good choice for a last-ditch attack on the Tank as it can (in theory) take it down it quicker than any other melee weapon. The guitar is great fun, with every swing of this melee weapon that connects with an object striking a chord. As you would expect, it's slow to use, but deals the same damage as all the other melee weapons. TIP: The end of the Dark Carnival campaign has tonnes of these guitars on the main stage. It's worth making use of if only to get into the mood of the campaign! The Frying Pan was a well publicised melee weapon which makes a humorous 'clung' noise when it hits a member of the Infected. It has a wide angle of attack, making it able to knock down and kill many Common Infected at once – great for the horde. It has a slow attack time, however. It is usually found in kitchens or houses during the various campaigns. This acts much like the Pipe Bomb, except is more potent and allows your team to do all the killing. It attracts the Common Infected using the boomer bile like a moth to a lamp, drawing their attention away from your team at crucial moments, such as at the end of a level. If thrown at a Common Infected, a horde will arrive to attack the target. If thrown at an empty space, a horde will arrive and swipe at the location of impact, allowing the Survivors to finish them off. You can use it on Special Infected and even Tanks. TIP: The effectiveness of the Bile Bomb on a Witch is minimal, as it will frequently attack you before the horde can get there. TIP: Some CEDA agents (those in hazmat suits) drop Bile Bomb when killed, though this is hardly common. Resurrected from the original Left 4 Dead, the Pipe Bomb emits a loud beeping sound, attracting Common Infected, before exploding in a satisfying mist of blood. The beeping lasts for about six seconds. TIP: Use Pipe Bombs to clear a path to extraction, distract the horde so you can revive a team mate, or simply to take out as many Common Infected as possible. TIP: Pipe Bombs will attract a horde more than a Boomer bile-covered Survivor. By contrast, a canister of Bile Bomb will not (presumably being just about as attractive as fresh Boomer bile!). Requiring accuracy, unlike both the Pipe Bomb and Bile Bomb, the Molotov Cocktail is often the most useful of the equipment in Left 4 Dead 2. Its key functions are in slowing down a Witch, and dealing constant damage to both these enemies and Tanks. By contrast it makes a Tank run faster, but will kill it relatively quickly. It is also good to block off a horde coming through a narrow space – as all the Common Infected will catch fire and likely die before the reach the Survivors (except for CEDA UCIs). TIP: While good against the Tank, primarily for the consistent damage it deals while the Survivors can run away, against the Witch it is important to use the Molotov before startling it. It is easier to aim at while sitting down or moving slowly for one thing, but if someone sets a Witch on fire once it's startled they will be attacked in addition to the person who originally startled it – an unnecessary risk. This ammo upgrade takes the place of a medkit (remember to pick it up again if you swap them out temporarily) and is great against Special Infected. It can also top up ammo, and is the only way of doing so to a Grenade Launcher. It should not be used against a Witch unless the players are confident of their ability to take it down quickly, as it will consider each one who sets it on fire a direct threat. TIP: When used with shotguns with a wide spread the effectiveness of this upgrade is huge, as each pellet will set an enemy on fire. Explosive ammo causes high damage and can cause high-risk enemies such as the Tank and Witch to stumble – it is therefore invaluable – the only downside coming as a result of its spot in the medkit slot. One of the rarest items in the game, the Laser Sight improves the accuracy of the gun it is attached to. It has no effect on shotguns or the Grenade Launcher. There is only one place you are guaranteed to find a Laser Sight and that is in Whitaker's store in the Dead Center campaign. They are non-transferable, so if you die or change weapon you will lose the laser-sight, but they have a noticeable affect to a gun's accuracy (and look awesome!) so are worth hanging on to. Unlike Pain Pills and the Adrenaline Shot, Medkits permanently increase a Survivors health. You can heal yourself or another Survivor with them, removing any injuries (which may cause Survivors to limp slowly otherwise). They don't increase it back to 100 percent from zero, but to 80. There are many tactics surrounding the correct use of medkits, but you should remember that both the Ammunition Upgrades and the Defibrillator can take its place – so its not as simple as holding onto a medkit until your health is as low as possible. TIP: As the medkits only give you 80 health back, there is no point in saving it after you get to 20 health. If you die, it's lost to the team.
The key function of adrenaline is not necessarily to restore health like the Pain Pills (although it does restore health by 25), but more to increase reflexes and speed. It is most useful in the extraction sections, particularly on The Parish and Dead Center, where speed is key. Common Infected also do not slow you down when running through them, whereas otherwise Survivors can get caught up in their swiping. Similarly, when escaping to the rescue vehicle in the other campaigns it can be invaluable in giving a Survivor the pace to outrun a Tank. Returning from the original Left 4 Dead, Pain Pills temporarily increase a Survivor's health. They will boost your health by forty, but the downside is that it decreases by 1 point every five seconds. This can be just long enough to find a med-kit or get to safe-house. Taking up the med-kit slot, Defibrillators have the ability to revive a Survivor from the dead. Simply equip this item and the bodies of allied players will glow, allowing the player to revive them with 50 permanent health to boot. You can also do this when a Survivor is in a closet waiting to be rescued and they will reappear with your main party. TIP: Defibrillators become vital on Realism mode and on Expert difficulty, where one swipe from the Witch will otherwise kill a player and Survivors are only brought back at safe-rooms. Below is a list of tips for dealing with specific enemy Infected, whether in Campaign, Versus, Survival or Scavenge mode. Note that in the latter two, set-piece events and the end extraction do not take place. Also worth bearing in mind is that in Versus mode, certain things (such as damage and health) is changed to even things up in some cases. Also, maps like Hard Rain see aspects altered, like movement speed in water, and the number of Witches is reduced, as is their effectiveness. The horde can be dispatched using any gun in the game, but assault rifles, shotguns and melee weapons are best. It is a good idea to have players with melee weapons in doors and bottlenecks, crouched so the other players can fire over their head. The Boomer is very easy to hear, with loud audio cues and music making it obvious when he is in the area. The AI is adept at keeping the Boomer hidden until the last possible moment, which is vital as it only takes one bullet to burst. The key with the Boomer is to ensure that when you hear the music not to have an itchy trigger finger. If you round a corner and the Boomer is there, push it back (using the LT [Xbox 360] shove), move backwards and then shoot when you are far enough away. If too close, its bile will spill onto you and attract the horde while covering your screen. The Boomers can vomit bile on you, though this is rare in the Campaign (but is an established attack in Versus). Like the Boomer, the Spitter has projectile attacks. However, the difference is that the acid projectiles inflict heavy damage. The most dangerous place to face a Spitter is in a corridor where the swamp of acid will constantly drain your health. You will be incapacitated in seconds if walking through the obstacle. They Jockey is a new brand of Special Infected that acts like the Smoker because it can forcibly separate Survivors. Running like a Hunter but only able to jump at closer range, it sits on the Survivor's head and steers them into obstacles or away from the group, swiping at the target and inflicting damage as it goes. It can be pushed off or shot. Survivors should be very, very careful when near a Witch as Jockeys specialise in steering Survivors into this terrible foe.
Similar in appearance to the Spitter, Smokers return from the original Left 4 Dead and are one of the most difficult Special Infected to kill. They often hide on rooftops or in the distance and use their long tongue to drag Survivors from the group. This is particularly effecting during set-pieces or extractions, as everyone has other priorities at these points. They also love to do this to drag you from heights. You can be saved from a Smoker by either having the Smoker killed by another Survivor (though there are a couple of seconds where the person being dragged off can shoot the Smoker) or from another Survivor pushing you. This will detach the Smoker's tongue, but it will still survive for another attack. The best defence against Smokers is to stay inside buildings as they can rarely pull a Survivor out of a window; the Survivor will get caught on the ledge, making rescue easier. The Hunters are also superb at separating Survivors who have strayed off on their own. They repeatedly inflict high damage on a Survivor until shot or pushed off. You can here them from a distance and it is possible to dodge their attacks, but only for so long. The Charger is another new enemy for the Survivors to face, and can look worryingly like a Tank at first glance. It is large and extremely fast once it gets going. When you hear its loud grunting, be ready to dodge. It is quite easy to avoid the Charger's main attack if you have enough warning, after which it will keep running until it hits a wall, at which point it will be stunned. It can only focus on one target, but will knock any Survivors in the way to the ground. Once on top of its prey it pummels them until death, unless killed by another Survivor. Unlike other Special Infected (excluding the Witch and Tank), Chargers take two shots to kill. It should also be noted that Chargers cannot be pushed like other Special Infected (again with the above exclusions), and the only way to stun it is using explosive ammo or other exploding devices (such as gas cans). The Witch is the most terrifying enemy in Left 4 Dead 2. This is particularly true of the Hard Rain level, where they populate the Sugar Mill. In daylight they wander around on patrol routes, so it's important to keep your distance and learn their path before moving on. In darkness they sit still, making them easier to avoid but also more hostile to noise and light. You can hear a witch from a mile off, and where possible should switch your torches off as soon as this happens. When a Witch knows about your presence it will stand up, arms outstretched to the side, and growl. If the Survivors resume their game and do not disturb it further they will be fine, but linger too long and attack is inevitable. Witches hate light and noise, so torches, explosions and primarily fire should be avoided around them. When set on fire, Witches are slowed, making it a good tactic, but only when planned, as anyone who sets a Witch alight is targeted in addition to the original 'startler'. Witches have the second highest health in the game, a whopping 1,000 HP on Normal difficulty. If it wasn't for their speed, attacking from range would be the best option, but their reluctance to fight and potential lethalness (particularly on Expert or Realism) means avoiding them should be priority number one. You can use a shotgun from behind to kill it in one, but this takes some practice and should not be attempted by newcomers to the game. This is called cr0wning, and requires a head shot on high difficulties, but a body shot (if you're lucky) on the lower ones.
The Tank is the enemy that ruins most Survivors' chances of escaping a campaign in one piece. Positioned strategically by the AI Director, though mainly causing most harm during the extraction finales, the Tank has 4,000 health on Normal difficulty (four times that of a Witch) and requires at least ten hits with a melee weapon to kill. Molotovs, Incendiary or Explosive ammunition are the best counters to a Tank attack. When set alight it moves faster if possessed by AI (no noticeable change if possessed by a Human), but will receive constant damage all the while. It can also be made to stumble from an explosion. There are various animations such as when climbing, swinging to strike or picking up a piece of concrete (which it then throws at a Survivor) that allow a chance to melee attack. This is only recommended when the Tank is right on top of you and you have no chance of downing it with bullets, but the high-damage melee weapons can be a life-saver (at least for some of your team) here.
If you stay together, you will survive. Something to remember about Versus mode is that the pace is relentless and the Special Infected (generally being possessed by human players) are far more aggressive than in the Campaign. They can also spawn very close to you, meaning you can go inside a room with the coast clear only to emerge and find a Hunter waiting outside. If you have to split up, go in pairs so that at least there is one extra player to lend a hand should someone get snagged or pounced on. Bear in mind that four Special Infected able to detain a Survivor cannot spawn at the same time, so there should always be one player free to save the others (other Special Infected that would spawn in this period being Boomers and Spitters). The main tactic for anyone playing on the side of the Infected in Versus mode should be to separate individual Survivors from the group. The best Infected for doing this are Jockeys and Smokers. Witches are not playable by Humans, but can be used as an AI-controlled obstacle in Versus mode to steer or drag Survivors into.
Jockeys can steer Survivors away from the group – into side-rooms, off edges (there is a possibility for an instant-kill here, although usually Survivors can be pulled back up by team mates) or into other Infected – the best target being a Witch. Of course, you needn't find anything else to deal the damage if you can keep the Survivor away from his or her friends for long enough as you will be able to finish the job yourself. Smokers are best at getting up high and using the tongue attack to rope Survivors away. This is particularly effective when one Survivor has gone looking for ammo or medicine and the rest of the group has not followed. It is a good idea to attempt to snag people in mid-air, as this will allow you to drop behind cover while they are constricted in front of it. Hunters are quite easy to defend against providing the Survivors stay together. Watch for players looking for items on their own, or separated from the group during a horde or set-piece. Team up with Smokers so that once the Smoker is killed, the Hunter can then jump on the prey and finish it off. These are very light defensively and should be kept hidden until the last possible moment. Important to remember about Versus mode is that as Infected you can spawn (almost) anywhere so long as it is out of sight of the Survivors. This means hiding around a corner is a viable option to spray your bile on the enemy. Their tactics are much like Boomers', though you can take a little more damage and your size means hiding is easier. Use blind corners, darkness and rooftops to get perfect locations for spitting lethal acid on Survivors. Try to pen them in by spitting when a Survivor is trapped at a dead end or pinned by a Tank, Charger, Hunter, Witch or Smoker – this will mean that when they turn around a pool of acid will be waiting for them. These are particularly good against Survivors who love to stay together! They can knock all the Survivors in a tightly packed group down and carry one off until hitting an object. Note that hitting a Survivor does self-inflicted damage, while hitting a wall does even more. For a guaranteed kill, try to run a Survivor off a cliff (or the bridge on The Parish). If you are able to run a Survivor far enough (large areas are good for this) you can pummel them to death before help arrives. A Charger's great strength and health is good in this situation. The Tank is vital as it can really be the turning point at the end of a Versus battle. The AI Director picks a Infected player at random and they have a set amount of time to locate and deal damage to the Survivors before control switches to a team mate. After two players have tried, the AI will resume control. Unlike in Campaign (usually), the Tank can be assisted by Special Infected, separating members of the group. When the Tank is on the scene other Special Infected also have the chance to kill Survivors as most of their attention will be on the main threat. Be sure to avoid Molotovs or fire (you can put out a fire by jumping in water, but the opportunity for this is a rarity!), and make use of the rock throw from distance. Try to get up close, fast, however, so that the Tank doesn't get frustrated and switch to AI mode (there is a meter to indicate this). If you manage to get the jump on the Survivors by climbing walls, for example, it can be deadly to them. Try to push them off ledges for an instant kill. The Tank can also break walls, safe-house doors and push cars and other objects into Survivors – such interactions are marked on screen. On the bridge in The Parish, hitting a Survivor with a car is an instant knock-down. The Tank can kill other Special Infected, so stay out of its way if you're not in control! Smokers are good in conjunction with a Tank as you can separate someone while staying out of harm's way.
Much like with the Survivors, the best Infected teams work together. It is important not to be greedy (though dealing the most damage is important), because if you can incapacitate the whole team early enough, victory is assured. Try to distract each member of the Survivors' team to do their own thing, separate them, and pick them off. Wait for other Special Infected to be pushed off or killed, and then resume the attack on Survivors while their health is low. Work together and communicate to let your team mates know who has what weapons, and which Survivors are where and in trouble. Use choke points to ambush the entire squad, and you'll win every time. Price Chopper (20G): Midnight Rider (20G): Ragin' Cajun (20G): Weatherman (20G): Bridge Burner (20G): TIP: For the campaign completion achievements (e.g. Price Chopper), this can be done on any difficulty, with AI or Human friends. Still Something to Prove (35G): TIP: The easiest campaign to do this on is Dead Center, as it is the shortest, with one of the easiest extractions. The Real Deal (35G): TIP: The easiest campaign to do this on is Dead Center, as it is the shortest, with one of the easiest extractions. Confederacy of Crunches (30G): TIP: You can still use grenades and turrets, but no pistols (even when downed). Head Honcho (15G): Club Dead (15G): TIP: Baseball Bat doesn't count (as it was a preorder special) and neither does the Chainsaw. Chain of Command (15G): Tank Burger (30G): TIP: The Tank must take no damage from any bullets for this to work. Shock Jock (30G): TIP: You can't just kill your team mates and then defibrillate them – they must be killed in action, though fall damage counts so you could get a Human to jump from height and let them bleed out). The Quick and the Dead (30G): TIP: You can't have downed the Survivor that you are healing. Armory of One (15G): Burning Sensation (15G): Dismemberment Plan (20G): TIP: Do this while the Infected are clawing at a Bile Bomb canister. Septic Tank (15G): Crass Menagerie (20G): TIP: You only need to kill a UCI from each of the first four levels. Dead in the Water (20G): Robbed Zombie (15G): CL0WN'd (15G): TIP: You do this by using the melee attack (LT) on a clown's face – you can repeatedly do it on the same Infected. Fried Piper (15G): Level a Charge (15G): Acid Reflex (15G): A Ride Denied (15G): Stache Whacker (15G): TIP: You must earn a score of 42 in the Whack a Mole minigame during the fourth stage of Dark Carnival – all Survivors taking part in the whacking get the achievement. Gong Show (15G): TIP: Again in Dark Carnival's fourth act, use a melee weapon combined with Adrenaline on the test-your-strength minigame. Guardin' Gnome (30G): TIP: Collect the gnome after getting a score of 760 points in the shooting gallery of Dark Carnival's second act. You must then carry him (like the Cola) to the end of the level and extract to the helicopter. He can be dropped and picked up again, allowing use of a weapon. Wing and a Prayer (30G): TIP: Activate the set-piece during Act Two and then retreat so that the horde comes at you through the door of the plane. Sob Story (30G): TIP: The key here is that as long as you don't kill any witches, you get the achievement. They can kill you, but you can't damage them or the achievement is lost. Violence in silence (30G): Bridge Over Trebled Slaughter (30G): TIP: Ideally without any AI players, use Adrenaline to bypass the Tank and keep on running! Heartwarmer (20G): Strength in Numbers (15G): Qualified Ride (15G): Back in the Saddle (15G): Rode Hard, Put Away Wet (20G): Great Expectorations (15G): A Spittle Help From My Friends (15G): Scattering Ram (20G): Meat Tenderizer (20G): Long Distance Carrier (15G): Beat the Rush (15G): Hunting Party (15G): Gas Guzzler (20G): Cache and Carry (20G): TIP: This is 15 for your whole team in one round. Scavenge Hunt (15G): TIP: Spitters' acid destroys gas cans, which may help with this achievement. Fuel Crisis (15G): Gas Shortage (20G): Bull Shifters Shirt Depeche Mode Shirt Left 4 Dead 2 Shirt Med Kit Accessory Zombie Hand Shirt
Game Modes
Campaign
Versus
Survival
Scavenge
Realism
Characters
Coach

Nick
Rochelle
Ellis
Dead Center
For each campaign level the basic layout of the level and its set-piece moments will be analysed and the best strategies divulged. The 'Uncommon Common Infected' for each level will also be detailed (there is one unique class of enemy on each level, all with a special ability or trait that must be countered by the player).
Our four heroes have been brought together by collective misfortune – they were too late for the helicopter extraction, and now must cooperate to escape the infection. The idea in this campaign is to get to get to the shopping mall and extract using the vehicle inside.
Uncommon Common Infected
Dead Center - Get to Safe House #1:
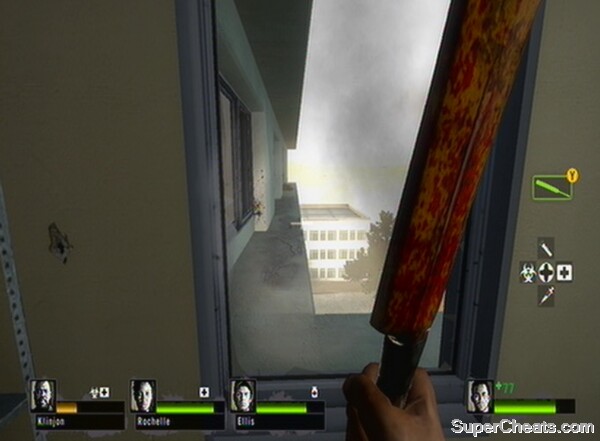
Get away from the fire
Dead Center - Get to Safe House #2
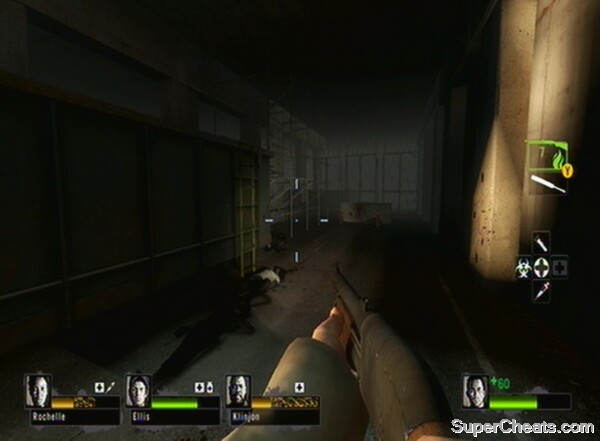
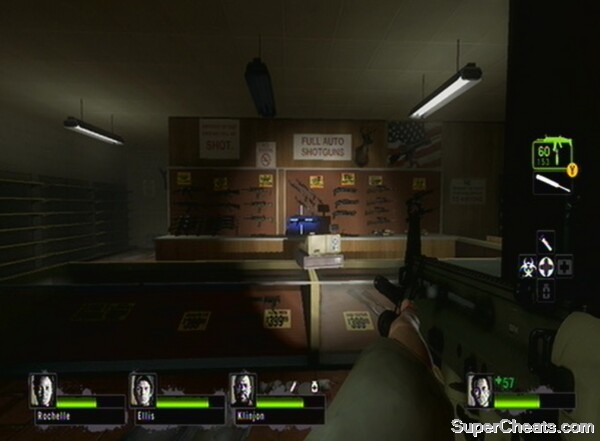
Get Whitaker his Cola.
Dead Center - Get to Safe House #3
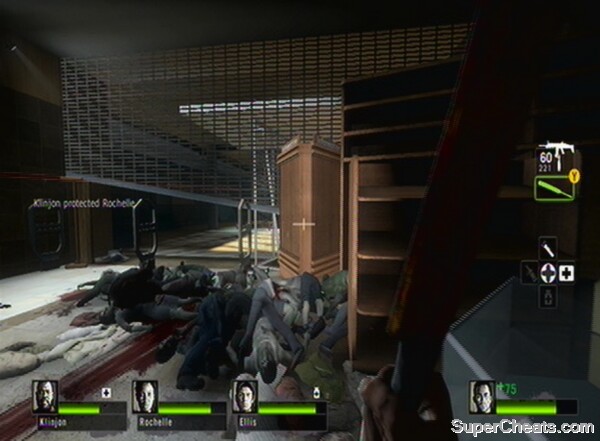
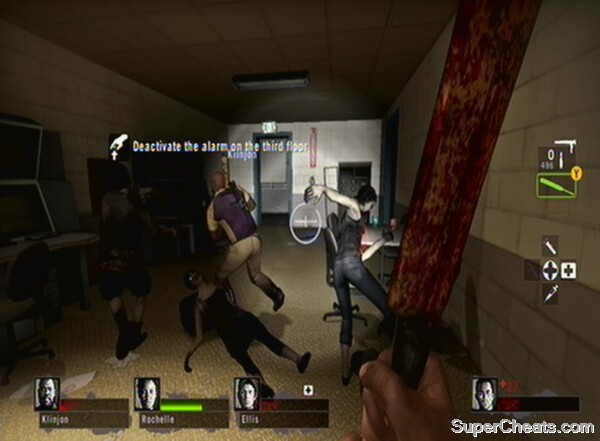
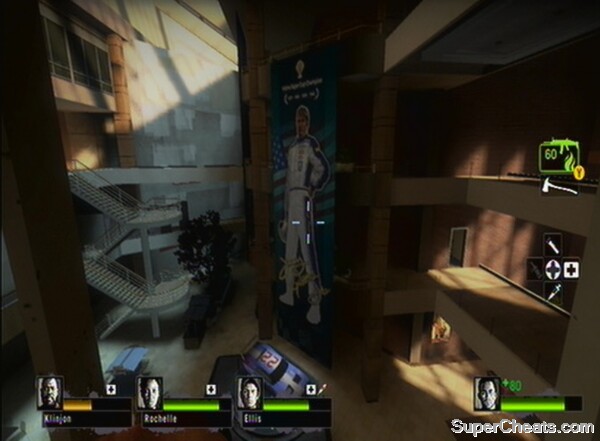
Fill the car with fuel.
Dark Carnival
Having escaped from the shopping mall in the stock car, the group disembarks as the road ahead is blocked. To get to New Orleans, the ultimate objective, they need to pass through a carnival.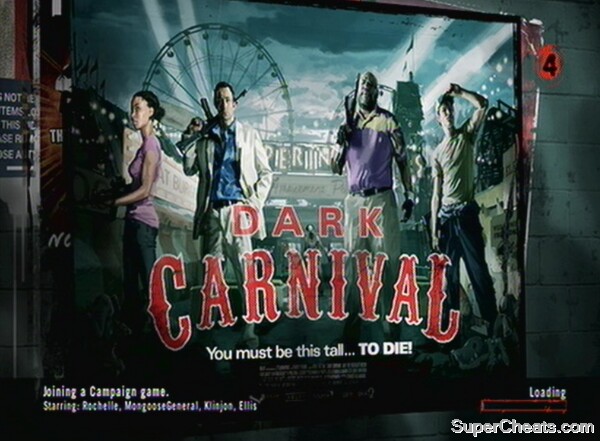
Uncommon Common Infected
Dark Carnival - Get to Safe House #1
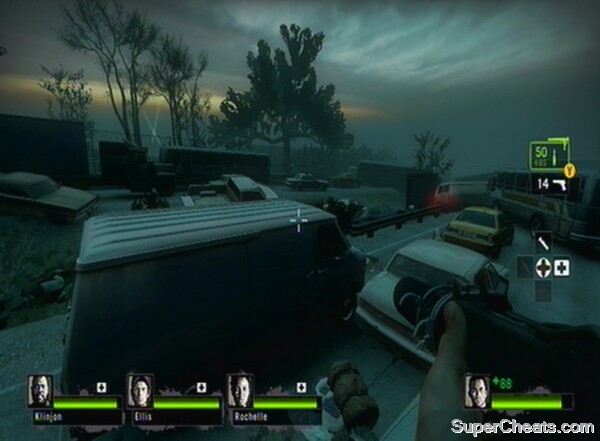
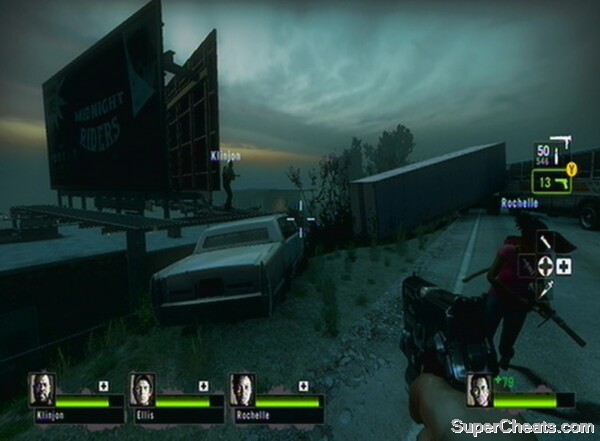
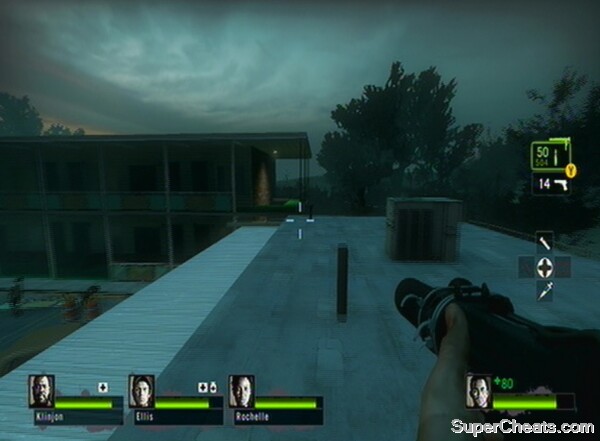
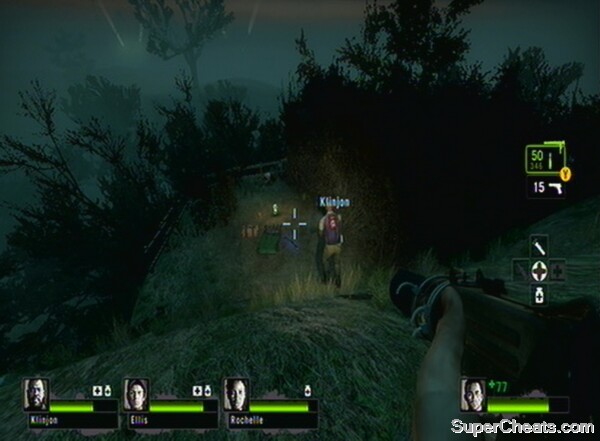
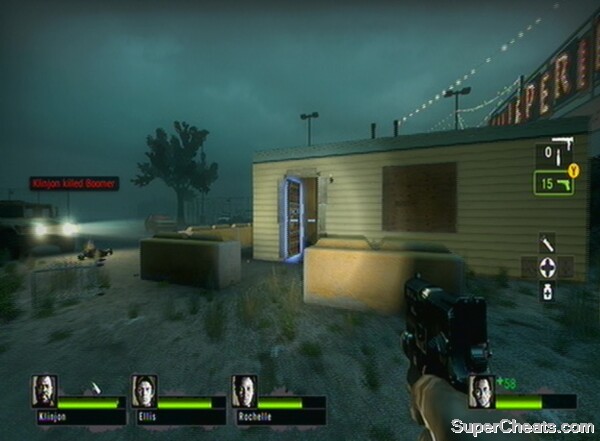
Dark Carnival - Get to Safe House #2
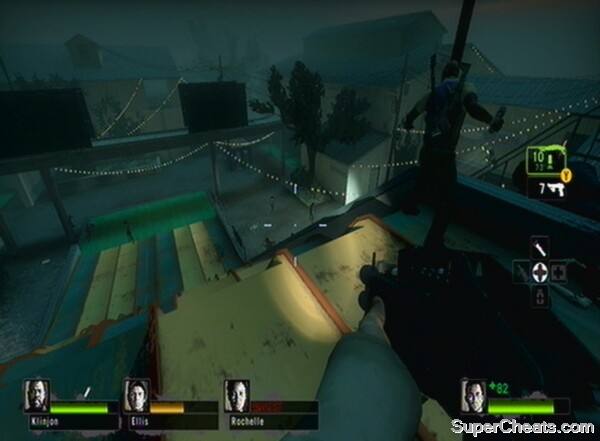
You need to turn on the power to open up access to the ride, and then deactivate it to seal off the horde once safely through. Make sure there isn't a horde attacking as you push the button and then run through the merry-go-round until you are back out in the open. From here, you need to head round to the right to cut the power. Watch out for a tank during this set-piece.
Survive the first set-piece of the level
Dark Carnival - Get to Safe House #3
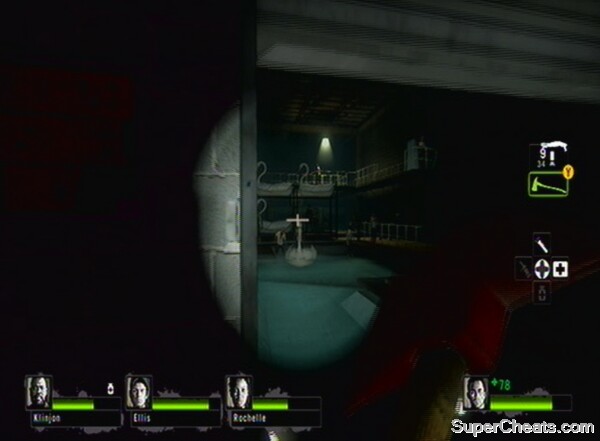
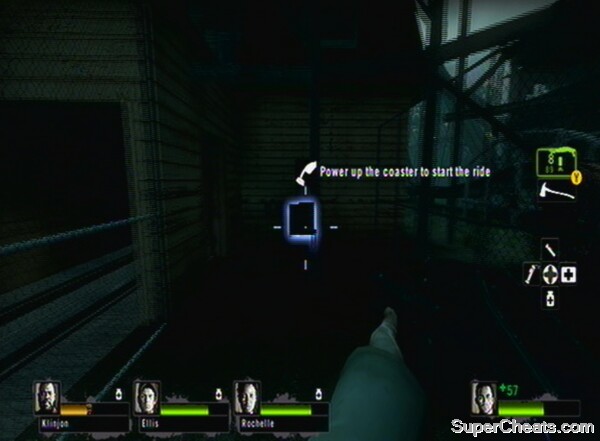
Go through the tunnel and back down to the station before deactivating the ride and thus the alarm. You can hide in the booth where the power button is until the horde begins to thin out.
Ride the roller-coaster to the next safe-house
Dark Carnival - Get to Safe House #4
Get to the Extraction Helicopter:
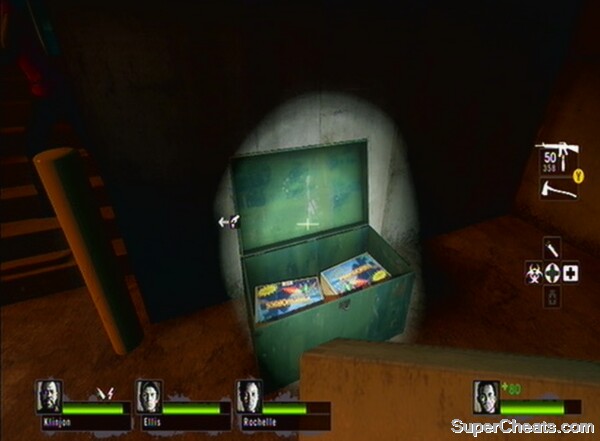
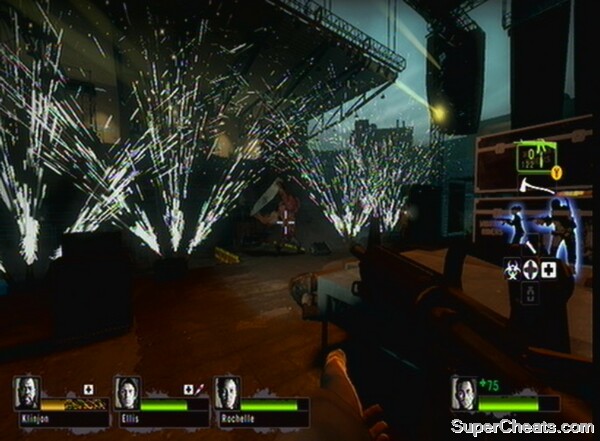
Survive the rock concert and escape
Swamp Fever
Unfortunately the helicopter pilot turned out to have been infected and so had to be killed. The team are stuck in the middle of the alligator-infested swamps looking for a way out to get to New Orleans
Uncommon Common Infected
Swamp Fever - Get to Safe House #1
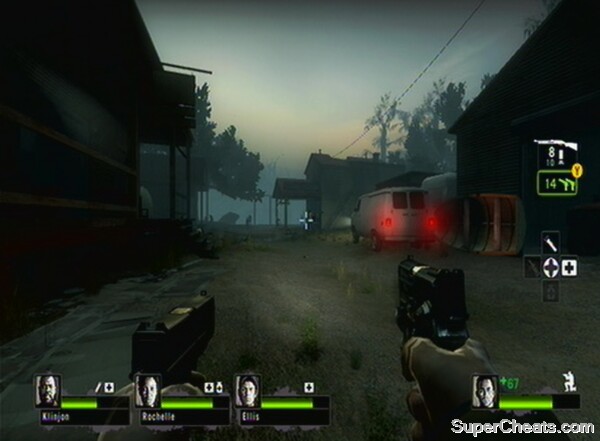
Hold off the Infected until the ferry arrives.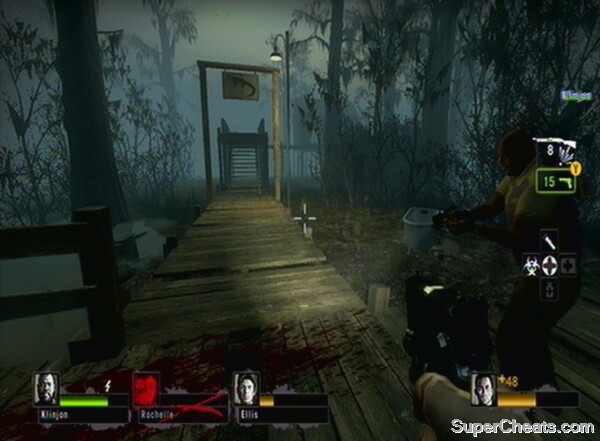
Swamp Fever - Get to Safe House #2
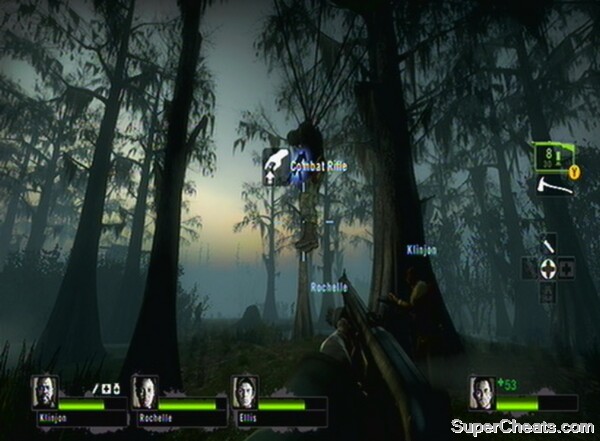
Don't go through the plane door until the horde has been defeated.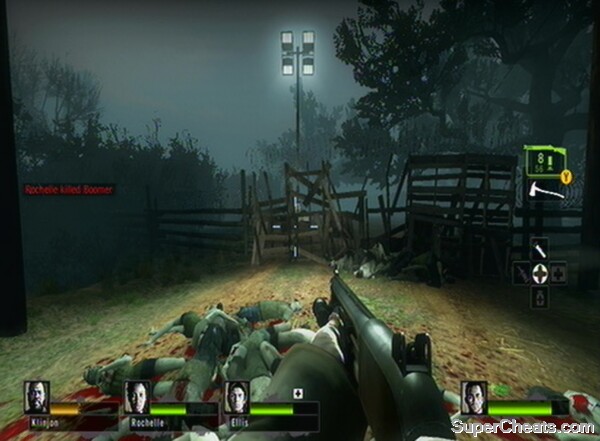
Swamp Fever - Get to Safe House #3
Pass this relatively simple set-piece.
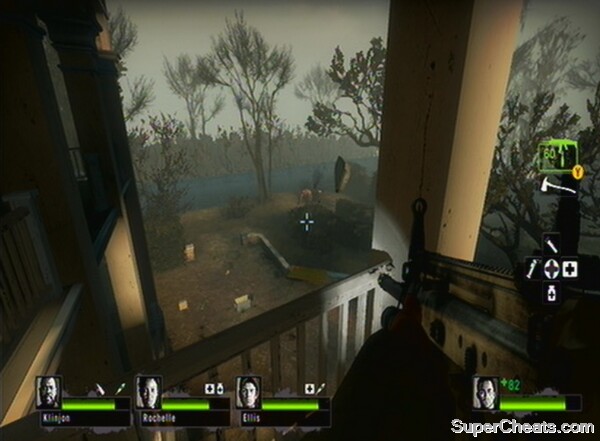
Escape the plantation.
Hard Rain
The boat we are travelling on has run out of fuel and so we have had to stop to get some more gas. Once we have it in hand we will make our way back to the docks and re-board the boat (which will be waiting just offshore for our signal).
Uncommon Common Infected
Hard Rain - Get to Safe House #1
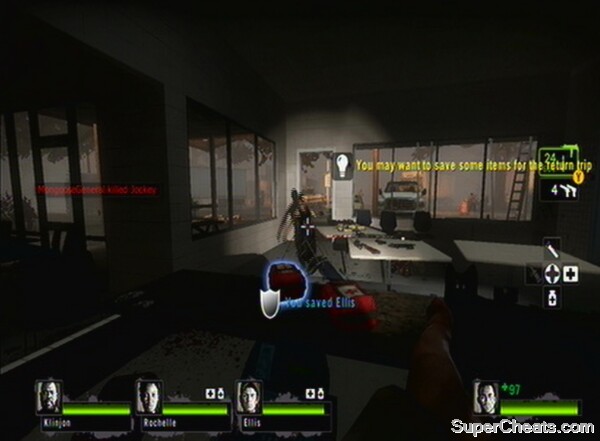
Hard Rain - Get to Safe House #2
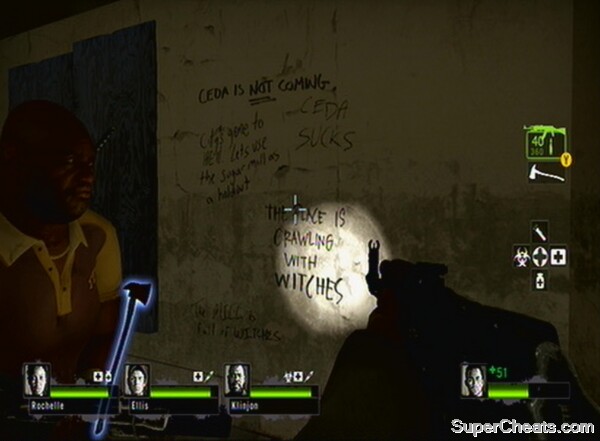
Treat the Witches with extreme care!
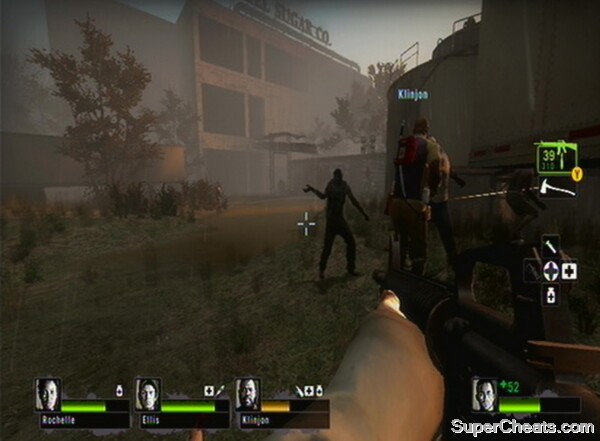
Get into the elevator
Hard Rain - Return to Safe House #1
2) The crash of thunder and lightning will usually attract a horde (or coincide with a horde's arrival)
3) The effect when the storm rages is so intense that you cannot know where you are going or what enemies lie ahead (such as Witches). Seek cover in a building or if outside stay in one place until the rage passes.
4) Witches appear to be alerted by the crash of thunder.
5) Do not get separated from the group during the rage periods – it can be very difficult to locate your allies again, especially on Realism mode.
6) Witches may only have the top of their head visible if they are in the water.
7) There should be far fewer Witches than on the way to the gas station (perhaps 2 or 3), but these are much harder to spot.
8) The Witches will no longer be wandering, due to the dark conditions.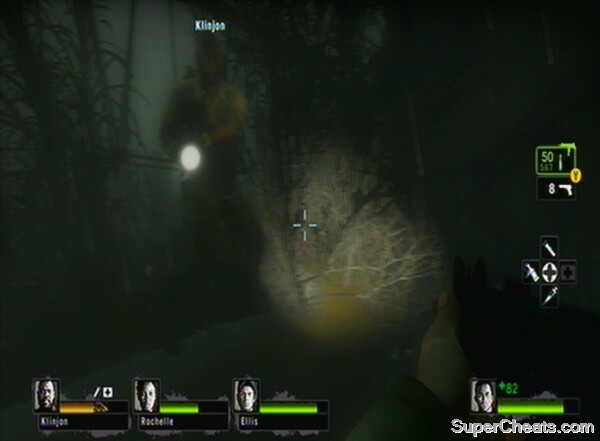
Hard Rain - Get to Safe House #3
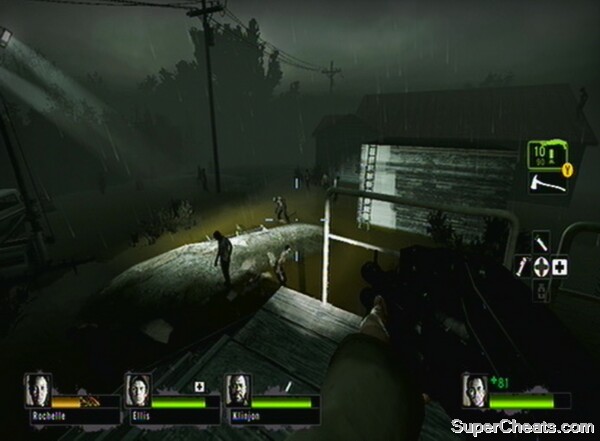
Get to the Docks and Reach the Rescue Boat
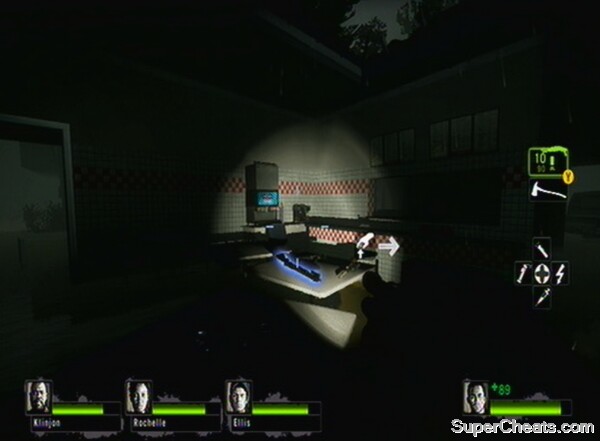
Escape the dock
The Parish
The driver of the boat won't go any further and it's on foot from hereon. We need to locate the military extraction point that is rumoured to be here in New Orleans. The area we will fight in was once a safe zone, then a quarantine zone.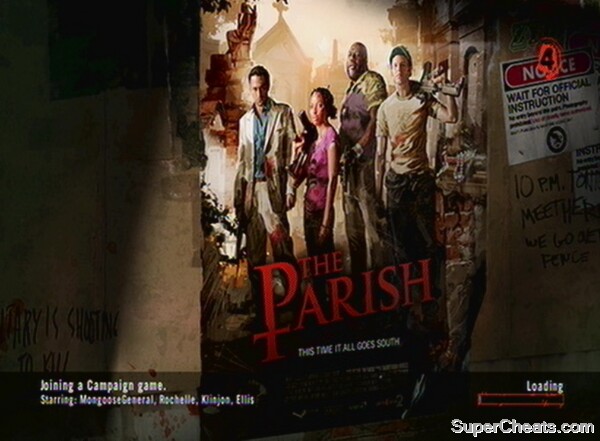
Uncommon Common Infected
The Parish - Get to Safe House #1
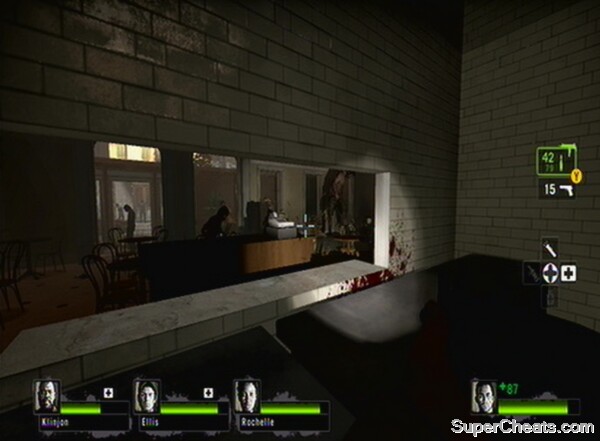
The Parish - Get to Safe House #2
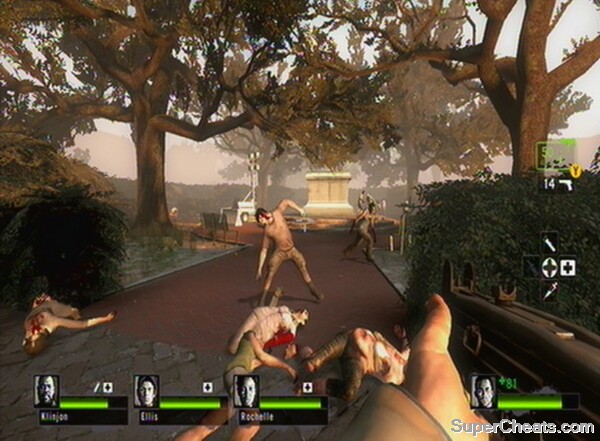
Deactivate the alarm
The Parish - Get to Safe House #3
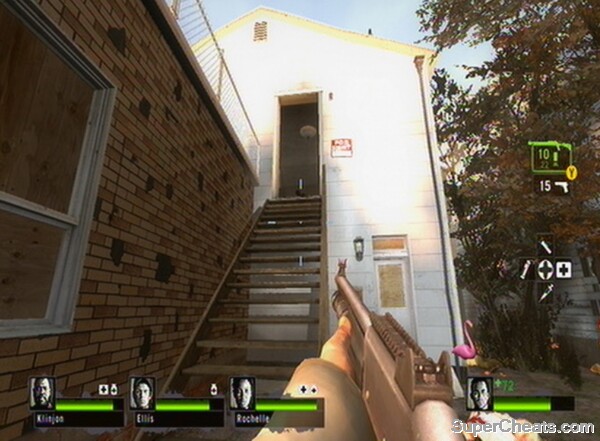
Locate the ladder at the end of the lot and climb up the stairs above it to reach the highway. Loot the ambulance and proceed, taking note of the military's exuberance in the area. Drop down at the broken section, ensuring you take the smallest drop to avoid damage.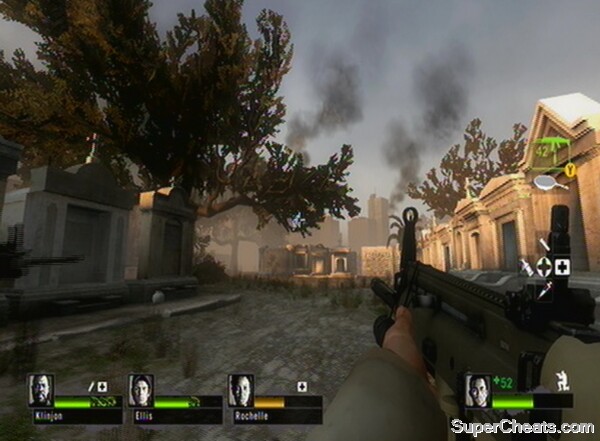
The Parish - Get to Safe House #4
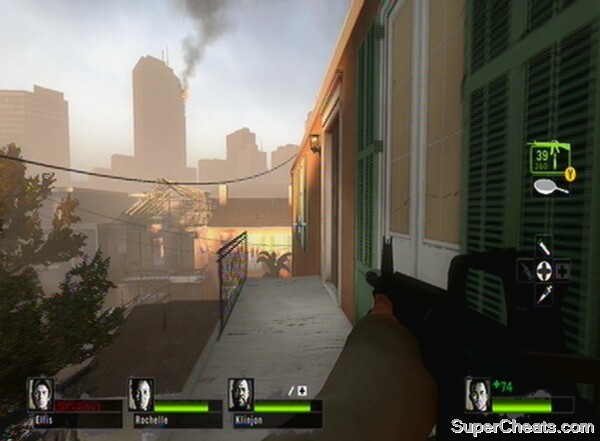
Move the float into place and move across when its readyGet to the Military Extraction Point
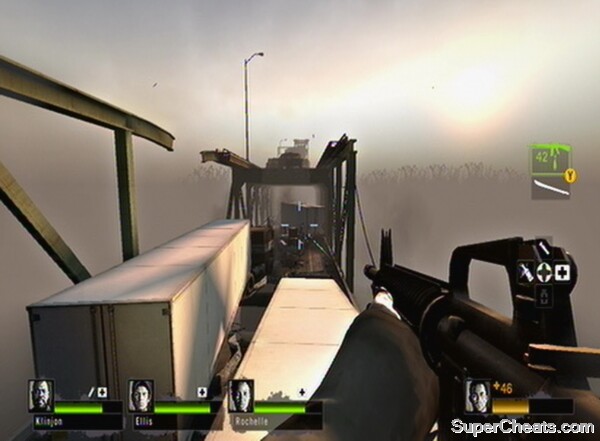
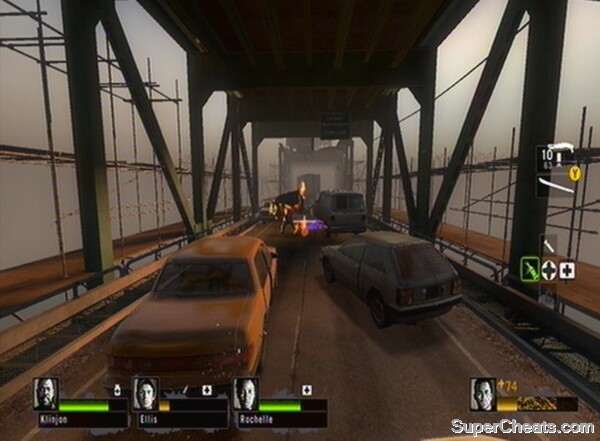
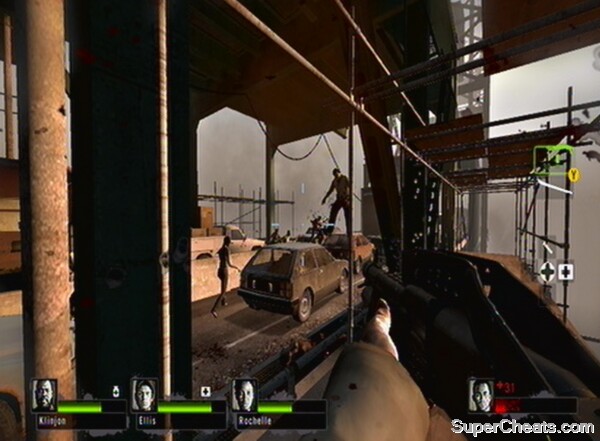
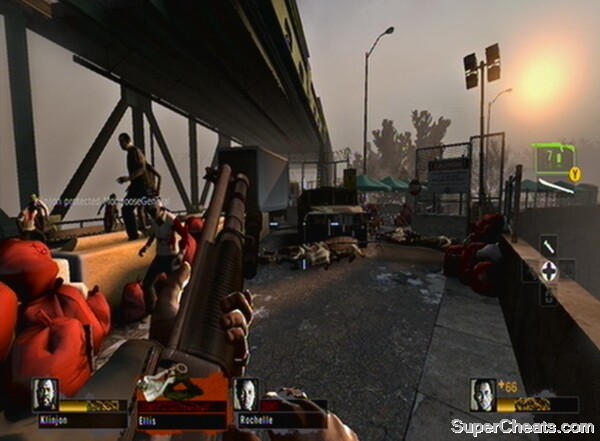
Successfully extract your team
Weapons
P220 Pistol
Total ammunition: Infinite
Damage per bullet: 36
Rate of fire: 300 shots/minute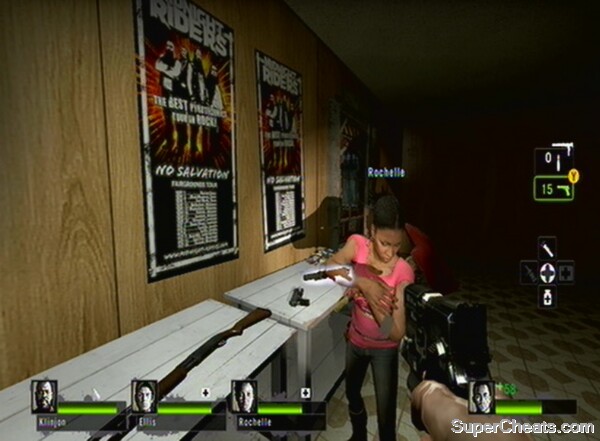
Magnum
Total ammunition: Infinite
Damage per bullet: 80
Rate of fire: 198 shots/minuteTier 1
Sub-Machine Gun
Total ammunition: 700 bullets
Damage per bullet: 20
Rate of fire: 960 shots/minuteSilenced Sub-Machine Gun
Total ammunition: 700 bullets
Damage per bullet: 25
Rate of fire: 960 shots/minute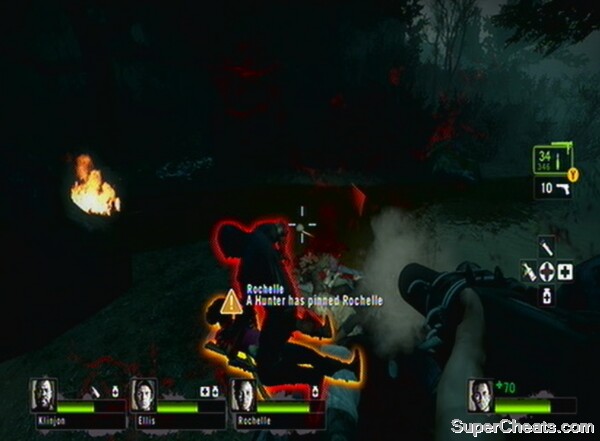
Pump Shotgun
Total ammunition: 64 rounds
Damage per bullet: 250
Rate of fire: 69/minuteChrome Shotgun
Total ammunition: 64 rounds
Damage per bullet: 248
Rate of fire: 120/minuteTier 2
Combat Rifle
Total ammunition: 420 bullets
Damage per bullet: 44
Rate of fire: 540/minuteAK-47
Total ammunition: 400 bullets
Damage per bullet: 58
Rate of fire: 461/minuteM-16 Assault Rifle
Total ammunition: 410 bullets
Damage per bullet: 33
Rate of fire: 684/minuteCombat Shotgun
Total ammunition: 100 rounds
Damage per bullet: 252
Rate of fire: 200/minute
TIP: The Combat Shotgun is a great weapon for one-hit killing Witches.
TIP: The Combat Shotgun is arguably the best weapon for dealing with Tanks, perhaps second only to the M-16.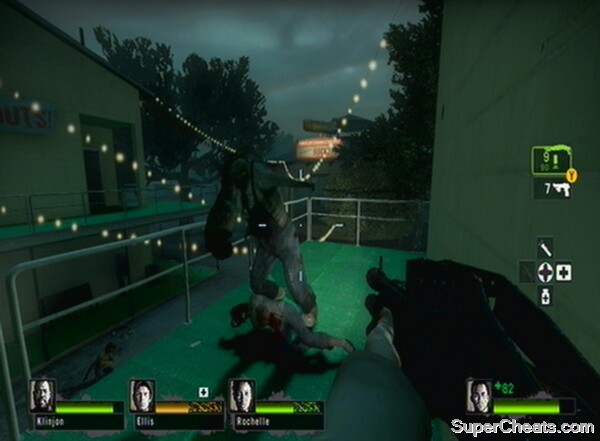
Tactical Shotgun
Total ammunition: 100 rounds
Damage per bullet: 288
Rate of fire: 200/minute
TIP: Shotguns can be fired before all the rounds have been reloaded, in case you get into difficulty while reloading.
TIP: Use Incendiary Ammo with these shotguns to set an Infected alight with every pellet – all the better when there is a wide spread such as on this particular shotgun.Sniper Rifle
Total ammunition: 210 rounds
Damage per bullet: 90
Rate of fire: 240/minuteHunting Rifle
Total ammunition: 165 rounds
Damage per bullet: 90
Rate of fire: 240/minuteGrenade Launcher
Total ammunition: 31 rounds
Damage per bullet: 400
Rate of fire: 16/minute
Melee Weapons
Chainsaw
Axe
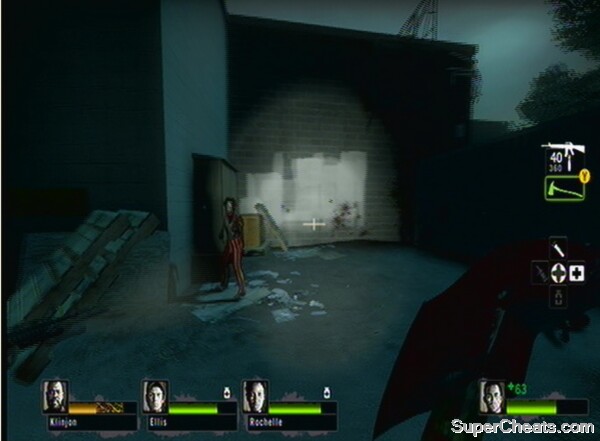
Machete
Katana
Crowbar
Baseball Bat
Cricket Bat
Nightstick
Guitar
Frying Pan
Equipment
Bile Bomb
Pipe Bomb
Molotov Cocktail
Incendiary Ammo Upgrade
Explosive Ammo Upgrade
Laser Sight
Medkit
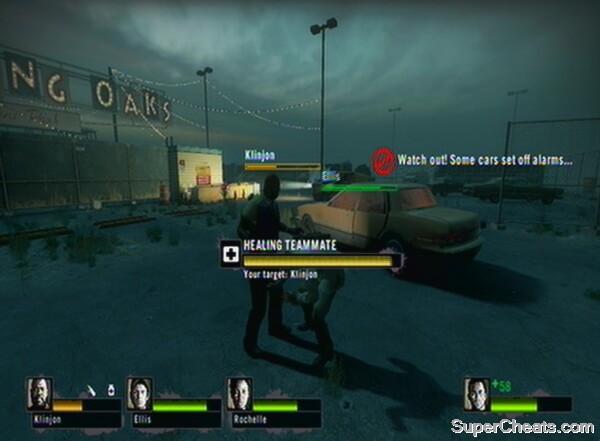
Adrenaline Shot
Pain Pills
Defibrillator
Multiplayer Survivor Tactics
Versus/Survival/Scavenge Mode Survivor Tactics (these also apply to the main game)
Common Infected
Boomer
Spitter
Jockey
Jockeys are adept at steering Survivors into WitchesSmoker
Hunter
Charger
Witch
Tank
Get the Tank into the open and surround it if possible so you can attack it from distance and out of reach of its deadly melee attacksGeneral Tips
Multiplayer Infected Tactics
Versus/Survival/Scavenge Mode Infected Tactics
Witch
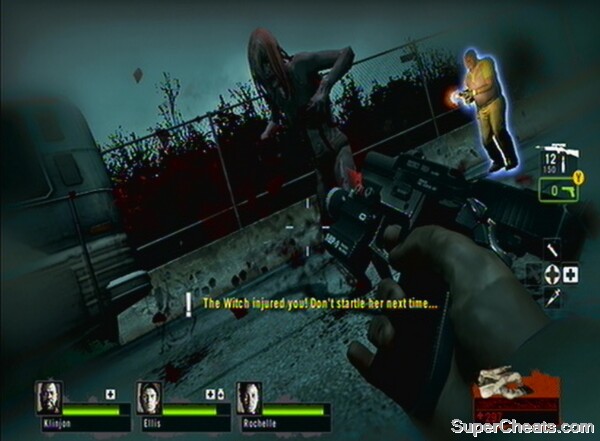
Jockeys
Smokers
Hunters
Boomers
Spitter
Chargers
Tank
To really succeed as a Tank you need to incapacitate multiple Survivors, so avoid getting sidetracked into the open as this AI Campaign Tank has beenGeneral Tips
Achievements and Tips
Survive the Dead Center campaign
Survive the Dark Carnival campaign
Survive the Swamp Fever campaign.
Survive the Hard Rain campaign.
Survive the Parish campaign.
Survive all campaigns on Expert.
Survive a campaign on Expert skill with Realism mode enabled.
Finish a campaign using only melee weapons
TIP: AI Bots can still fire and it won't affect the achievement, so play with as many as possible
TIP: You can complete any campaign on any difficulty to get this
Decapitate 200 Infected with a melee weapon.
Use every melee weapon to kill Common Infected.
Kill 100 Common Infected with the chainsaw.
Kill a Tank with melee weapons.
Revive 10 dead Survivors with the defibrillator.
Revive 10 incapacitated Survivors while under the speed-boosting effects of adrenaline.
Deploy an ammo upgrade and have your team use it.
Ignite 50 Common Infected with incendiary ammo.
Kill 15 Infected with a single grenade launcher blast.
Use a bile bomb on a Tank.
Kill one of each UnCommon Infected.
Kill 10 swampy Mudmen while they are in the water.
Collect 10 vials of Boomer vomit from Infected CEDA agents you have killed.
Honk the noses of 10 Clowns.
Using a Molotov, burn a Clown leading at least 10 Common Infected.
Kill a Charger with a melee weapon while they are charging.
Kill a Spitter before she is able to spit.
Kill a Jockey within 2 seconds of it jumping on a Survivor.
Prove you are faster than Moustachio.
Prove you are stronger than Moustachio.
Rescue Gnome Chompski from the Carnival.
TIP: As long as one person finished the level with the gnome, all will get the achievement.
Defend yourself at the crashed airliner without taking damage.
TIP: You only need to play the second act of Swamp Fever to gain this achievement.
Navigate the sugar mill and reach the safe room without killing any Witches.
Navigate the impound lot and reach the cemetery safe room without tripping any alarms.
Cross the bridge finale in less than three minutes.
TIP: You can do this on any difficulty.
In a Versus round, leave the saferoom to defibrillate a dead teammate.
Form a team and beat an enemy team in 4v4 Versus or Scavenge.
As the Jockey, ride a Survivor for more than 12 seconds.
As the Jockey, ride the Survivors twice in a single life.
As the Jockey, ride a Survivor and steer them into a Spitter's acid patch.
As the Spitter, hit every Survivor with a single acid patch.
As the Spitter, spit on a Survivor being choked by a Smoker.
As the Charger, bowl through the entire enemy team in a single charge.
As the Charger, grab a Survivor and smash them into the ground for a solid 15 seconds.
As the Charger, grab a Survivor and carry them over 80 feet.
In a Survival round, get a medal only using melee weapons.
Win a game of Scavenge.
Collect 100 gas cans in Scavenge.
Collect 15 gas cans in a single Scavenge round.
Stop the enemy team from collecting any gas cans during a Scavenge round.
Make a Survivor drop a gas can during overtime.
Cause 25 gas can drops as a Special Infected.
Unlockable Avatar Items (Xbox 360)
Win 10 games of Versus – Unlocks Ellis's shirt for your Avatar.
Rescue the Gnome from the Dark Carnival i.e. doing the Guardin' Gnome achievement – Unlocks Rochelle's shirt for your Avatar.
Win 10 games of Scavenge – Unlocks a Left 4 Dead 2 shirt for your Avatar.
Beat all campaigns on any difficulty – Unlocks a medkit for your Avatar.
Kill 10,000 Infected – Unlocks a shirt featuring the Left 4 Dead 2 iconic hand for your Avatar.



 MGS V: The Phantom Pain Mission 46 Unlock Guide: Step By Step Procedure On How To Unlock It
 Calvin Harris Stars in Entourage movie trailer
 Essential Tips For Surviving Call Of Duty: Ghosts Multiplayer
 Top 10 New Games of November 2015
 Everything you need to know about Need for Speed Reboot