Castlevania: Lords of Shadow Reverie DLC Walkthrough
Castlevania: Lords of Shadow Reverie DLC Walkthrough
Strap your Combat Cross back on — it’s time for Reverie, the new DLC pack for Konami’s Castlevania reboot Lord of Shadows. Picking up where the end of the boxed game‘s story left off, Reverie will center around the alliance between Gabriel and his vampire buddy Laura as they attempt to track down Laura’s mother, Carmilla. This quest will serve as a set up for the next DLC pack, Resurrection, which will conclude the story.
The main Lords of Shadow game required one of the longest and most detailed GameFront walkthroughs of 2010, Players of the DLC will no doubt benefit from a full guide as well. Check back on release day for the first installments!
Chapter XIII
Castle Hall
After an introduction, you’ll be placed in the Castle Hall. Continue forward into the next large corridor.
Inside you’ll face your first enemy encounter – ghouls. They are susceptible to holy water, you’ll find more secondary weapons inside the destructible objects scattered around the room.
More ghouls will stream out once the first batch is defeated. Skeleton warriors will begin to appear as well. Roll around their shields and attack their flanks.
Laura, Carmilla’s daughter, will appear and assist you in fighting the swarm of ghouls. Be careful, your magic is scarce so play defensively and use those secondary weapons.
When skeleton warriors are defeated, you’ll need to hit their rattling bones with a powerful ground attack to prevent them from regenerating.
Once all the enemies are defeated, you’ll be treated to a cutscene.
Next, you’ll face a large chess board. The goal of this puzzle is to place the chess pieces in their correct places.
Before interacting with the glowing device at the front of the board, cross over to the back wall. A dead Order Knight is lying near the stage, interact with him to get a clue for the puzzle or choose to solve it automatically. Every difficult puzzle will feature a dead Order Knight carrying a scroll allowing the puzzle to be skipped. There’s no penalty for skipping puzzles, you just lose out on experience points.
FRANKENSTEIN FINGER: The finger is to the left of the dead knight, through a large passageway in the back left corner of the room.
Return to the front of the board and interact with the device to begin manipulating the puzzle pieces. Follow the onscreen prompts to looks at the three hanging images – each feature three pieces. Follow these instructions to solve the puzzle:
Columns are listed A-F starting left to right. Rows are listed 6-1 top to bottom.
Black Werewolf; B5. White Werewolf; D5. Black Vampire; C1. White Vampire; D3. Black Lich; E4. White Lich; B3.
Place all the pieces at each of these locations to unlock the secret entrance. Continue down the stairs
LEVEL COMPLETE!
Abandoned Wing
At the beginning of the level, first take the stairs down to face the leviathans. These monsters will only hurt you if you fall into the water. Look for a crooked hole in the gate directly forward facing the platform at the water’s edge.
To cross over, wait for the monsters to swim by, then quickly push forward twice to activate your magic boots. The speed boost allows you to run over water. Run across to the next platform; don’t run into walls or into the exposed fins of the leviathans.
Run up the stairs until you reach a dead end. Across you is a large column covered in broken wooden planks. Use your double jump to cross over and hang from the highlighted ledge.
One the ledge, crawl left and hop up. Continue to move left, hop up, and jump across. Move left again, drop down, and jump across a second gap. Climb onto the platform and carefully walk across the narrow board.
At the end of the narrow board, use your Combat Cross to swing onto a hook. Swing onto the wall and climb your chain until you reach another ledge. Move left, hop up, move left, and hop up again. Try to move quickly here, the wooden construction will begin to break apart.
Continue until you move onto a hanging plank. Use the cross to swing from another hook before the plank breaks off.
Swing across and grab the scaffolding. Crawl left, hop down, and jump across. Hop down, and move right. Use the cross again to grab a hook directly above you and repel down the column.
Follow the stairs down and look for a floating platform. Wait for the leviathans to swim by before charging over the water.
FRANKENSTEIN FINGER: One the first platform, you’ll see a semi-obscured stone area along the right wall. Run over to it to find another one of Frankenstein’s fingers.
Run over the water to reach an ice platform. Quickly continue forward to another nearby stone platform before the ice breaks.
Turn as you run over the water to reach two ice platforms. Reach the first and jump onto the second before running to your right. Dodge the leviathans and jump onto the broken stairwell.
Up the stairs, you’ll find another hook. Swing onto it and climb up to reach more wooden scaffolding. Jump left to reach a protruding plank. Move left, hanging from the plank until a hook lights up. Swing off the hook across to another column covered in wooden boards.
Landing on the balcony, jump to grab the ledge and move right. Hop up and continue right. Jump up and then jump right.
There are two parallel wooden walls here than will begin to break off. Just keep jump from one wall to the next until you’re hanging off a platform.
Climb onto the platform and navigate the thin passage onto some gangplanks. These planks are narrow, so carefully walk over them. Just take your time; you’ll need to move left, down, right, down, and right.
Jump up a level, and walk back onto the scaffolding. Walk forward, down, right and up.
On the next platform, the camera will focus on a hook hanging from a broken column. Double jump toward it and use the combat cross to swing, you’re going to jump to the balcony against the forward wall next.
To the left is a dead Order Knight, interact with the corpse for a note.
Back right is the correct doorway. Inside you’ll be blocked by a raised gate. Ghouls will spawn with skeleton warriors, so take care of them. When they’re dead, use the turning crank in the center of the room to lower the gate.
When the gate is lowered, follow the button prompt to order Laura through.
Now you’ll be playing as Laura. She attacks primarily with lightning; she can also suck blood from stunned ghouls. You’ll learn more about Laura’s abilities as you play.
Take the spiral stairs up and turn to face a barrier. Use Laura’s mist form to cross it.
Inside, ghouls will attack. They’re no different than normal ghouls, but they’re trickier with Laura. She isn’t especially tough, but her wide lightning attacks can do damage to several enemies at once. To quickly escape dangerous situations, use Laura’s mist form, she’s invulnerable while she’s mist.
When low on health, attack the ghouls until they barely have a sliver of health left. At this point, they’ll glow. This means they’re stunned. Grab them and Laura will begin to suck their blood. Your health will refill slowly, then quickly. Make sure to stop tapping the prompted button before the ghoul’s body turns completely black. They explode if drained for too long.
Now that the ghouls are gone, interact with the two glowing chains on the left and right of a door. You’ll electrocute and break each chain, opening the way forward.
Continue down the hallway and turn right. Cross the catwalk where you’ll find a semi-broken walkway. Interact to electrocute the single chain.
Back with Gabriel; use the cross to climb up the fallen walkway. Leap off the wall and jump up onto the circular balcony above to regroup with Laura.
Fill up your Holy Magic and Shadow Magic meters in the hallway.
FRANKENSTEIN FINGER: Return to the room where Laura fought the ghouls. Along this room’s left wall is a doorway blocked by ice. Activate your shadow magic and use the shadow charge to smash through the ice wall. You’ll find another one of Frankenstein’s fingers.
Continue forward into the hallway and turn left to face another ice wall. Use the shadow charge again to break through and exit outside.
Outside, there’s a fork in the rode. Follow the left path, jumping over the gap and continuing up until you face a large red and gold wall. Climb the ledges on the right side. Keep going up until the hook glows blue.
Swing off the hook and you’ll be wall running. The goal of this puzzle is to have all the circular panels lit up at the same time. The circular panels at the top glow longer than those at the bottom, so start wall running at the top and move down from there.
With all the panels activated, the gate below will open.
Follow the path back to the fork, and take the right path down. Through the newly opened gate, you’ll reach a new puzzle.
Jump to the highlighted ledge, and Laura will explain she can give power to the mechanism. The spinning blades will be stopped, but blocking your path. You’ll need to get them moving to get across. To do this, order Laura to increase power. At this point, she can either increase power again to get the blades moving even faster, or decrease power and get them to stop.
With some careful timing, you might be able to stop the blades at just the right moment. Once power is decreased, the blades will usually move forward about three of their own lengths before coming to a stop.
Move slowly and carefully, and stop the blades if you’re not sure what to do. One touch will send you back to the previous checkpoint.
Activate the spinning blades, waiting for the first set of two moving vertically to move just below Belmont before crossing. Wait for the horizontally spinning blade above Belmont to move clear before jumping onto upper ledge.
Next you’ll face two sets of two blades. Wait for the right set to reach the top and the left set to reach the bottom. Quickly shimmy through and hop up to safety.
Now a blue blade is blocking your path. To get these moving, you’ll need to have the power increased twice. They’ll move slowly while the red blades will move faster.
Climb down the ledge, be patient and retreat or shut down power when needed. There’s always a way to escape, either jumping up or down to another ledge. Always move in increments instead of holding down the button, and give yourself as much breathing room as you can afford.
The level exit is down and to the left. Shut down power to the two sets of two blue blades as they pass by one another to stop them on opposite ends.
FRANKENSTEIN FINGER: Instead of continuing left, move down past the red blades. Move carefully, and if you stop power at just the right time you’ll be able to move through all the blades here without a sweat. Move down until stopping at a platform where you can refill your health and nab another Frankenstein finger.
Return to the vertical blue blades, crawl left towards two horizontal blue blades. Stay high until the bottom blade moves left. Follow it, and jump to the upper ledge as the top blade is on your left.
Wait for the vertical red blades to reach their opposite ends, and squeeze through. Release your grip and exit the level through the doorway.
LEVEL COMPLETE!
Founder’s Quarters
Follow the hall forward and turn right. Inside you’ll find a giant clock and a circular puzzle embedded in the floor. Interact with the glowing puzzle to begin solving it.
To solve the puzzle, you’ll need to align all three rings to form an angelic image. Moving each ring will cause the ring below it to turn as it is, while causing the upper ring to turn in the opposite direction. The best way to solve this puzzle is to move each ring in small increments, readjusting each ring as you work until all three rings align.
To solve the puzzle, imagine each ring on a clock and use where the face should be as the hand. Set the outer most ring – the third ring, at 12:00, set the second ring at 10:00 and the first ring at 2:00. Adjust the first ring until the first and second ring meet at 12:00. Adjust the third ring to move all three rings to face upright to solve the puzzle.
If the rings aren’t matched up exactly, don’t worry. This puzzle gives you some leeway.
The gate to your right will open. Take the stairs down towards the chapel. You’ll be attacked by a group of ghouls, so clear them out with Laura’s help.
FRANKENSTEIN FINGER: Before entering the chapel, turn left and follow the outer balcony around the wall. You’ll find another finger.
Use the wheel crank and turn it a few times to open the gate to the chapel.
Inside the chapel, interact with the raised coffin. Interact again and follow the prompt to get your hands on a large crystal. As you leave you’ll be ambushed by Sword Masters.
These ghosts are difficult, but faeries stun them. Holy water is also effective. Otherwise, simply fight them off with holy magic if you’re low on health.
Return up the stairs, leave the clock room and continue up more stairs to reach a mechanism. Insert the crystal into the glowing mechanism, then return to the clock room. Interact with the glowing lever here to turn back time.
Now that the tower is repaired, you can continue up.
Upstairs, you’ll face two doors. Ignore the passage to your left and continue forward. You’re now inside the shrine to the three founders of your Order. Refill your magic here.
Turn left to enter Cornell’s shrine. Down the hall you’ll face Sword Masters. With full magic, go nuts on them. When all the enemies are finished, use the wheel crank to your right.
The wheel crank opens the gate, allowing you to continue. Through the door you’ll enter into a large puzzle chamber.
Check the body on the left wall to find a puzzle clue and the solution option.
FRANKENSTEIN FINGER: For the last finger, follow the right wall into an alcove midway across the room.
Before interacting with the switch to activate the puzzle, find the large glowing pillar. Use your tremor fist to punch it left. Then punch it up the board, and left again. The pillar should rest just right of the top left corner.
With the pillar in position, activate the switch. You now have control of a puppet. The puppet can only move in straight lines and only stops when he reaches a barrier – just like the pillar. The goal is to move the puppet to the center tile.
To reach the center of the board, follow these instructions: move the puppet up, left, down, right, up, left, down, and right.
The shrine at the far end of the room will turn to reveal Cornell’s blood. Run towards it to spring another enemy attack. Defeat the ghouls and ghosts and take the blood.
Return to the shrine’s hub. Continue forward to enter Carmilla’s shrine.
Inside, Laura will use mist form to enter and you’ll be in control. Ghouls will begin to spawn, ahead is a sacrificial font. You’ll need to fill the font with your blood, sacrificing a portion of your health bar. Sacrificing blood five times will unlock Carmilla’s shrine.
First thing’s first, start fighting ghouls and draining their blood while they’re stunned. Fill up your health bar, ignore the extra ghouls, they’ll keep coming and there’s no need to kill them all.
With a full health bar, interact with the statue and sacrifice blood two or three times, however many times you’re comfortable. Then return to the center hall and fight more ghouls, draining their life to refill. Return and sacrifice two or three more times, you only need to do it five, to get Carmilla’s blood.
With the second vial, use mist form to leave through both gates and return to the shrine’s hub.
Enter the right door to reach Zobek’s shrine. Beware, down the hall reapers will attack. Their health is very low, but one strike is instant death. Don’t let them surround you and only use long range swings. Play defensively, and keep your distance.
Kill the reapers, and interact with both glowing emblems while your shadow magic is activated. With both emblems glowing, the gate will lower.
Take the stairs down and investigate the corpse for another puzzle clue and the option for a solution.
Find the glowing object and tremor punch it through the purple portal. The object will slide forward and teleport through the second purple portal, stopping on a different tile.
Stand on the new tile and earthquake punch the revealed button to move the tile down. Now placed in front of the white portal, you need to tremor punch the object through.
Find the white portal and the glowing object. Look for an “L” shaped tile near the bottom blue portal. Earthquake punch the switch to move the tile in front of the green portal.
Punch the glowing object towards the green portal, then go ahead and punch it through.
Now the object is on a tile leading towards a pink portal after exiting a green portal. Punch the object onto the tile directly along the pink portal, but do not punch it into the pink portal. Instead, earthquake punch the tile to move it down. With the trough facing the closed gate, punch the object forward to smash the gates open.
With the gates open, enter and earthquake punch the button in the center of the balcony.
A tile will move. Punch the object back onto the same tile, and earthquake punch the switch. Now punch the object back through the green portal.
Earthquake punch the tile housing the object now to move it down towards the blue portal again. Tremor punch the object all the way across to land on another “L” shaped tile.
Earthquake punch the tile house the object, moving it up towards the pink tile. Now tremor punch the object up.
Return to the button on the balcony passed the gate and earthquake punch it. Return to the object, and punch it right and up through the blue portal. All you have to do now is punch that object left and up to complete the puzzle.
Take Zobek’s blood and leave the shrine’s hub. Use the stairs to the left of the shrine entrance.
Up the stairs you’ll reach a roof. Circle the roof until you find a mechanism against the back wall. Interact to enter a puzzle.
This puzzle looks difficult but actually is fairly simple. The goal is to create an unobstructed path from top to bottom. Each of these three paths can be done separately, so focus on finishing them one at a time.
Take note of where the lines begin and end. The first begins in the center but ends just right of center. The second begins and ends in the center. And the third begins right of center and ends in the center. Make sure all the lines are connected to finish all three steps.


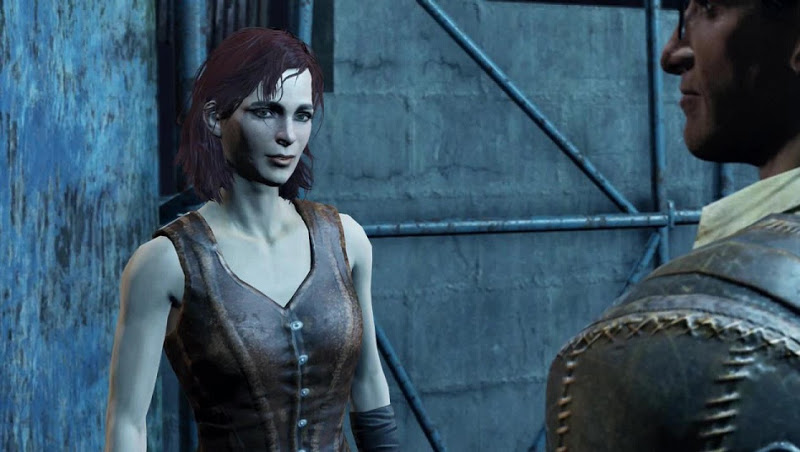 Fallout 4: Unlock Cait as Companion, romance guide
 Irreversible Change: Call of Duty Elite Subscriptions
 Street Fighter X Tekken Game Guide
 5 Tips to Make a Great Profile Picture for More Likes and Followers
 Tekken Tag Tournament 2 Game Guide