

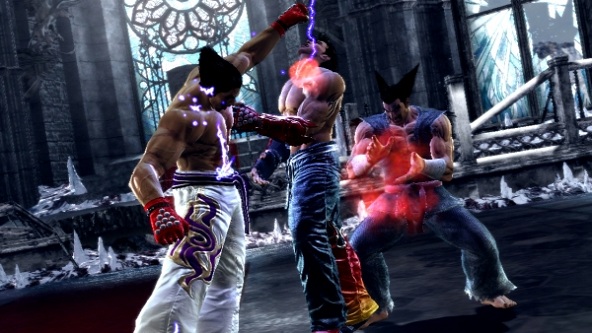
The tournament begins again in Tekken Tag 2, a massive fighter from Namco featuring 55 characters from Tekken’s long history. The game is deviously difficult, so if you expect to survive, stick with our full game guide to learn a heaping handful of tricks and exploits to make the impossible seem possible. If you’re struggling in Survival Mode, pounding your head against the last boss, or just want some help with the achievements, you can find our very own suggestions below.
This isn’t a normal guide, but if you’re looking to ground yourself take some time out of your busy day to check out the Tekken Tag 2 achievements and trophies. If you’re looking for more extras, stop by the cheats page where we collect everything special for Tekken Tag.
Updates incoming!
All 55 Character Endings [HUGE SPOILERS!]
Fight Lab
The fight lab is where you’ll want to begin your Tekken Tag 2 career. Here, you’ll learn the most important gameplay features of Tekken Tag 2 in five stages. The difficulty is totally variable, and each stage will teach you something new.
In every mission, you’ll play as the Combot. As you gain experience, you’ll be able to purchase new moves for Combot. In your first round through each mission, you won’t need to purchase anything — you’ll have all the abilities needed to succeed.
Just as a precaution, we’ll go through each of the Fight Lab Stages, just to give some tips and pointers — most are very simple, but they get more difficulty at each stage.
Stage 1:
Here, you’ll learn basic movement inputs and attack commands. Just follow the instructions on screen, and perform each action three times.
When Violet asks you to move “all four limbs” press each of the face buttons. The four face buttons are set to each limb — left punch, right punch, left kick, right kick.
During the second chapter, you’ll need to follow his commands as he says them — it only gets tricky when Ganryu launches himself at you from offscreen! Sidestep if you’re able to spot him, and try not get the correct input. If you’re quick, you’ll finish before Ganryu can defeat you.
At the Boss Battle, you’ll have to deal with long-range heroes shooting at you. To win, you’ll need to use all of your newly learned movement abilities.
One thing to note; every hero is easy to defeat once you reach them. Attack once to knock them down, then use a low kick. Each low kick will stun the hero on the ground, letting you get in another low kick while they’re down. Repeat the process and you’ll defeat each of the three.
The first hero will shoot at you with a laser, with bomb balloons strewn across the field. To get close, simply inch forward, then sidestep to get around the bombs and lasers.
For the second part, you’ll only have a narrow lane to reach the hero. Rush forward and duck under or jump over the attacks, then use a forward jump to get across the bomb. You’ll likely need to duck again before you’re able to get closer enough to finish the hero off.
The last hero is behind several lines of bombs. He’ll try to drop grenades or bombs in your path, but you’ll have more room to sidestep. Use sidestep to avoid his attacks, and don’t rush into the grenades he throws.
Stage 2:
During this stage, you’ll learn how to use high, mid, and low attacks. You’ll also learn about homing attacks. The Mishima Soldiers will jump down, each with a colored marker. Red equals high, yellow mid, and blue low — you can only defeat each enemy with the correct input.
Violet will remind you which buttons to use, but beware that these Soldiers will fight back. Prepare to guard if they get close.
Later, the soldier will get tougher; a foot or fist icon will appear over their markers, indicating you’ll need to punch or kick at high, mid, or low to defeat them. Especially look out for Purple Soldiers, as their markers will switch mid-fight.
Defeat enough, and enemies with silver markers will appear. These you’ll need to hit several times to break — and watch for their level, you can only damage the silver marker if you hit them with the correct level of attack.
Last, you’ll find enemies with an icon of a small man throwing another. That’s your cue to use a throw.
The second chapter is purely a test of your skill. The only trouble comes in the form of enemies with bomb icons. If you hit these bomb icons, they’ll explode and damage you. Play defensively and don’t rush each enemy. Wait to see if they have bomb icons, back away, and mentally prepare the correct input.
The boss here is a Jack-6 robot. To defeat the robot, you’ll need to hit each marker as it appears — just be wary, if you miss, the Jack-6 will counter and damage you. If you play carefully and don’t attack randomly, this Jack-6 won’t be a problem. Avoid just attacking the Jack, and you’ll pull through.
The first Jack isn’t a problem, but the second Jack has bomb markers and punch/kick specific abilities. The final Jack is covered in silver guard markers, forcing you to break all three. It’ll take about three hits, high/mid/low to break all three.
To defeat the third Jack, make sure to only break the active guard markers. If you attack an area that’s already been broken, Jack will counter.
The third Jack will also attempt to attack you on his own. He only uses slow attacks, just watch where he holds his fist out and guard.
Stage 3:
This training excercise starts with teaching you how to block. It’s pretty simple, while standing you can guard against medium and high attacks, while crouching you’ll guard against low attacks and high attacks will pass over your head.
Soon, Tekken Force soldiers will arrive. The first set will attack medium and low, while the second set attack low only. You don’t have to actually block, you can just charge in and one hit will send each soldier flying.
It isn’t until the last of the soldiers in this section that you have to to change your stance. The last soldier will use switch-up combos, attacking medium one or twice before finishing with a low. He’ll guard against your attacks, so you’ll need to quickly counter-attack after you successfully guard against his combo.
Next, you’ll be crushed by a giant man, just to show there are some slow unblockable attacks. You can always spot them by their charge time and red glow.
Another attack you can’t guard against is the throw. You can crouch to avoid, or grab at the same time to initiate a throw escape.
Here, you’ll have to throw escape several times in a row. To pull them off, you’ll need to grab just as the AI’s hands lay on your character — not when you see their animation begin. Wait until both hands are on your character, then press grab to escape.
Next to learn about are punisher attacks. After guarding against a large combo or powerful attack, attack immediately to deal extra damage to the AI and catch them vulnerable.
To pull a punisher off, you’ll need to attack before the AI’s animation is complete. Attack right after the AI’s attack lands.
Next, you’ll have to find three different versions of Tekken soldiers. Blue will try to throw you, throw them instead just as their hands reach you. Red enemies can only be defeated by punishers, and green requires you to block and attack.
The Green enemies you won’t need to worry about actually blocking or doing anything special. Just attack, one hit past through guard will send them flying.
At the end, you’ll have to defeat a strange Octopus woman. The trickiest part here is defending against the throws. The best indicator for pressing throw to throw escape is the purple plume of energy that appears just as a the throw connects.
Boss:
Here, you’ll need to fight three Mokujins that can only be damaged through punishers. The trick here is knowing how to guard their mix-up combos.
After you defeat each Mokujin, you’ll need to spin them around to build a meter to reach the highlighted spot, then stop the second meter. This is just for score, so if you only want to win, just press [A/X] immediately for each mini-game to throw. It’s a good idea to try to spin them around a little bit, otherwise the Mokujin will land on your character.
The first Mokujin will only attack with a high-medium-combo, or a medium-medium-low combo. Watch out for the low combo, if you see it coming you’ll have no problem landing punishers.
The second Mokujin will add to the first by using throws. When standing near the pink Mokujin, prepare to throw escape just as the purple plume appears.
The last of the Mokujins is just a faster and tougher version of the last two.
Stage 4:
Here, you’ll learn about launchers. Follow the input commands to practice launchers. Launch the knight, then attack as they fall. Now you know the concept behind aerial combos.
For the next series of AI, you’ll need to launch then attack 2 times, then 3 times, then 4 times while they hang midair. Use your Left Punch to quickly attack and keep the opponent in air after launching.
Next up, you’ll learn how to launch then bound. While bound, you’ll be able to launch ground-combos against the downed opponent. Bound opponents are very vulnerable to attack, and won’t have a chance to block.
Just follow the prompts. Launch, bound, then attack. Following that; launch, bound, and knock-back.
For the next chapter, you’ll learn how to use stage gimmicks like breaking through walls, ceilings and floors. This is all pretty self-explanatory, just use bound attacks to break through floors, and knock-backs to break balconies and walls.
When breaking through the wall, use a knock-back then a launcher. When breaking through the balcony, use a knock-back then a launcher. To break the floor, launch then bound, then attack again with any move.
Next, you just need to follow Violet’s instructions.
Boss:
For the boss, there are many changes to the way this area works. First, only aerial combos will damage the AI.
This is one of the easiest bosses. All you need to do is side-step all three AI opponent’s thrown weapons, then hit them with a launcher.
Once they’re in the air, use bound. The increased bound stats will bounce them in the air. Just keep using the same move to bound the AI to the floor, and they’ll bounce back up. You’ll be able to take off half their health bar if you can manage to time it right, or their entire health bar if you’re really good.
Stage 5:
The last of the Fight Labs is also one of the easiest — when you get the hang of Tag Play.
First, you’ll learn just how to switch partners. Do as Violent says, the scenario will get trickier later. First you’ll learn how to accomplish Tag Throws. These are an easy way to switch if your opponent is being careless.
Tag Combo is next. After launching, you can immediately switch to your partner and attack the mid-air opponent.
Last is the Tag Assault. This is the only really tricky move out of the three. To pull this off, launch the AI then press a Tag button while launching a bound attack. Doing so will summon your Tag partner, applying your button inputs to both of them.
When you use a Tag Assault, hold down the Tag button to have your tag partner automatically launch attacks without needing complex inputs from you.
To defeat the group of Red Tekken soldiers, you’ll need to use Tag Assault.
For the second Chapter, you’ll fight what feels like an endless amount of Tekken Soldiers. To defeat the Red Soldiers, you’ll need to use Tag Assault, to defeat the Green soldiers you’ll need to use Tag Combos, and to defeat the Blue Soldiers you’ll need to use the Tag Throw.
Boss:
Three more AI opponents, each more difficult than the last. Still, if you can pull of Tag Assaults with Auto-Assists consistently, this won’t be a difficult series of battles.
Against the first Ken-analogue, you’ll need to use Tag Combo until he begins to float. When he’s hanging in mid-air, use Tag Assault to finish him off.
When the Ryu-analogue appears, use the same tactic. This time you won’t need to switch, just use the Tag Assault to fight and finish Ryu off.
Last is Akuma, and the same technique works. Use Tag Assault to defeat him.
Arcade
To unlock the ending movies for each character, you’ll need to either play all the way through Arcade with each of the 52+ starting characters, or play through Ghost Mode. Find out more about Ghost Mode in the following pages.
Arcade Mode can be a real problem for casual Tekken fans, mostly due to the increase in difficulty if you play with a character that’s risen in rank. Always try to finish Arcade Mode first, before taking your practiced fighter to Ghost or any of the other modes outside Practice.
Why? Because the final boss is a huge hassle. The rest of the opponents are manageable on Medium if you’ve been training and have a few choice combos memorized. Tekken Tag is all about combos and air-juggling, so that’s what you’ll want to remember most.
It’s also important to look for launches, bounds, and spin-attacks. Launches will allow you to quickly switch teammates, just hit a Tag button right after landing a launch.
After launching, you can then bound — a move that plows enemies into the ground. Learn all about Tag Crashes, and the accompanying launches and bounds, in Stage 5 of the Fight Lab. There you can get in some easy practice, and make plenty of easy Fight Money.
Then, it’s just about picking out the right characters that work for you. This might take time and patience, it’s important to test out any of the fighters that fascinate you and run through their moves in Practice.
Remember, in Practice you can choose to watch the combos. It’ll show you when each key needs to be pressed.
The problem with Arcade mode isn’t in the first six battles against the AI. They can be tough, but if you’re having too many problems, just remember to set the Difficulty to Easy in the Start Menu. Then, it’s just all about proper guarding, and knowing when to counter-attack.
By the seventh battle, Arcade Mode gets difficult. The last three boss battles are; 7th: Jinpachi & Heihachi, Ogre, and Jun followed by Unknown.
Jinpachi and Heihachi are a standard Tekken Tag brawl, just beefed up.
Ogre, due to his slow speed, is actually a beatable opponent. Just go all out with your attacks to bring him down, don’t give Ogre time to fight back and you can bring him down with ease.
Be aware, when fighting Ogre and the final battle, you’ll have to bring their health and scratch damage to zero. Usually you’ll only need to bring their health bar to zero, but the last bosses have some extra advantages.
The problems don’t come until you have to fight Jun and Unknown.
One important ability that is often overlooked are Preset Combos. For each character, you can set some Preset Combos they’ll launch into with just a single button press that you can map on your controller. Thankfully, Tekken Tag Tournament 2 is actually light on button inputs, giving you a handful of options to make your life easier.
With your favorite characters, set two or so Preset Combos, and use them when you break Jun or Unknown’s guard, or after launching. Most 10-hit or more combos will propel the fighter forward, keeping your AI opponent locked in the air until it’s complete.
Any move that sends Jun or Unknown backwards will confuse the AI. Once you send them flying, they’ll immediately try dash toward you, leaving them open. If you time it right, the AI won’t know how to respond as you continuously launch them backwards, let them run toward you, then launch them back again while they’re still dashing. It takes timing, but there’s not much the low-level AI will do.
One of Unknown’s deadliest attacks is when she forms a white energy tube on the battlefield. When you see this, side-step far away around it, and make sure you don’t step in it.
Unfortunately, Unknown will try to knock you into it. If that happens, your currently selected character will have their entire health bar converted into scratch damage, and you’ll switch partners.
Theoretically, the lost partner can regain their entire health bar from the moment they were caught in the trap, but it’s more likely they’ll have to sit out the rest of the fight.
Both Jun and Unknown are very fast, with powerful combos and sharp reflexes. It’ll take a few tries, and you won’t be able to easily spam your way through this fight.
If all you want to do is win and don’t care about which characters you finish with, check out our spamming advice in the “Survival” and “Time Attack” modes.
Survival
Survival Mode is all based on skill. The only way to do well is by getting in tons of practice. Complete Arcade Mode and fight Ghosts for awhile to get in some real practice.
But, if you want to blitz through Survival Mode and unlock the Achievement/Trophy “Proof of Your Existence” without much effort, you’ll have two options.
To crush the AI, there are two moves you can use to win easily. Jun/Asuka and Angel are the best options.
For most players, the Jun/Asuka team is your best bet. Use the [Back+LK, RK, RK, RK] ability both of the fighters share to take down the AI fast.
You’ll be amazed how effective this technique is. Play defensively and keep your distance. After the first kick, the next three are low. If you’re close to the downed AI, use your combo to kick them up into the air and follow up.
The AI will often try to roll toward you, making a very easy target for the combo. If the AI is far enough away, and you know they’ll get back up, initiate the combo to hit them with the three low kicks — they’ll travel far forward, letting you knock the AI down all over again.
As useful as this method is, it’ll still take practice.
Another easy method; use Angel’s Laser with [LP+RP]. The trickiest part of this method is at the very start of each battle. The laser attack takes time to charge and fire, leaving Angel vulnerable.
You’ll need to put space between you and the AI. Either knock them down, or get back. Often, you’ll need to defend against their first salvo of attacks.
To almost guarantee a win every time, you’ll only need to land one laser on the AI. Each laser attack sends the AI flying back, but it’s very high. The important thing to remember is, to always hit after the first blast; wait for the AI to get knocked down, then time your laser to hit just as the AI gets back up.
There’s a single frame where the AI will have to stand straight up before they can duck. During that moment, you’ll always hit the AI as they stand up.
At higher levels of Survival Mode, the AI will try to duck for several seconds before moving forward. Watch for it, they’ll have to stand up straight if they want to get closer.
We suggest bringing a character you know well to back Angel up. Use Angel as your second tag teammate, and bring her into the fight once you’ve knocked back or stunned the AI long enough to give yourself some space. If an AI bum-rushes Angel, switch back out to your other teammate.
Time Attack
Our Survival strategy is similar to the Time Attack strategy, but there’s far less randomness you’ll have to deal with. The last three fights are always against the same characters, and our patented method has some new refinements.
First, you’ll want to practice with Angel and Jun. If you want to finish Time Attack and unlock the achievement “Super-Speed Fists” easily and without a lot of practice, use this method. If you’re looking to train yourself, just keep practicing!
To complete Time Attack very quickly, choose Angel as your first, and Jun as back-up. Alternatively, if you’re familiar with Angel, choose her solo. If you don’t have Angel, use Jun and Asuka as your team.
When using Angel, you’ll want to take advantage of her Laser attack. [LP+RP] is easy to pull off, but it takes a moment to charge leaving you vulnerable. This makes each battle a struggle early, where Angel and the AI are very close.
To give yourself some extra room while playing as Angel, press [Back+LK] to send the AI flying backwards. If they get in close wait for an opening, like right after a guard, then kick them back.
When Angel is having problems and the AI is right on top of you, switch to Jun and use [Back+LK, RK, RK, RK] for an easy combo that’ll quickly deplete the AI’s health bar.
If you don’t have Angel at all, spam the [Back+LK, RK, RK, RK] kick combo with Asuka and Jun.
To make these battles even quicker, set the Difficulty to Easy.
Whenever you knock down an AI opponent, always time your laser to hit them as they get back up. There’s a single frame where they have to stand up straight, and the laser lasts long enough that you won’t need to be entirely precise. It’s all about timing.
The fights won’t get especially difficult until you have to face Jinpachi and Heihachi. Surprisingly, Heihachi is the big problem here, as he’ll have a much easier time ducking and weaving around Angel’s laser.
Switch to Jun if Heihachi is a problem and fight him off with her triple low-kick combo until Jinpachi returns, where you can use your Laser without a problem.
Ogre is another easy opponent with this tag team. Just like Jinpachi, he’s slow a slow powerhouse, making him an easy target for spamming Angel’s laser or Jun’s kicks.
The hardest enemy you’ll have to face is Jun during the Final Battle. Here, you might need to drop Angel’s laser, as you’ll have a hard time hitting the AI. Instead, use Jun’s kicks.
During the very final battle, you’ll actually have an easier battle. Unknown, controlled by the AI, doesn’t really know how to respond to Angel or Jun’s kicks, and will actually play defensively. Kick her away where you’re safe, then use Angel’s lasers.
With this method, I was able to complete Time Attack in 8’14″. If you’re able to finish that quickly, you’ll also earn 2 million in Fight Money.
Ghost Battle
Ghost Battle is the go to mode for training against the AI. Here, you’ll slowly gain new ranks as you fight tougher and tougher AI opponents.
It’s a good idea to pick characters you want to stick with before attempting to get far in this mode. There are 25+ ranks to gain before you become the Tekken Lord, so it will take a lot of time and practice.
There are no easy tricks, this mode is all about perseverance. The difficulty slowly ratchets up with each rank, so you may need to spend more time practicing if you’re losing constantly.
You only need to know a handful of relevant facts about Ghost Battle.
1. Each character has their own rank, and that rank carries over to every mode. If you go up in rank here before trying to play Arcade mode, the last bosses will be significantly more difficult.
2. If you don’t want to play as every character, but still want to unlock their special customization options and ending movies, Ghost Battle is the mode to go to. Here, you can unlock new customization options for each character and their ending movies randomly as you progress.
3. To unlock customization options and movies, choose to fight opponents with a GOLD title. If you win, you’ll always unlock special rewards. This is the only way to unlock character endings without having to finish arcade mode.
4. If you just want to spam attacks, set the difficulty to “EASY” and check out our easy-victory strategies in the Survival and Time Attack sections.
How to Make Easy Fight Money
The easiest method to make lots of Fight Money is just by playing Offline’s Ghost Battle mode. That isn’t a very excited explanation, and it’ll take time, effort, and practice to do well. There are easier methods.
First of all, for a quick 2 Million, look at our Time Attack strategy. You’ll make that amount in ten minutes or less.
But, you only gain that large cash prize once with that strategy.
To consistently make a large amount of money, play the Boss Battle in Fight Lab – Stage 5. You’ll need to practice team-switches, but with some repetition they’re easy to pull off, and none of the AI opponents will put up much of a fight. Even the hard version isn’t a challenge.
You can complete the Stage 5 Boss Battle as many times as you like. If you get an A-Rank, you’ll earn 200,000. Even if you mess up, or play slow, you’ll earn 180,000 for a B Rank, so you’ll still make plenty of cash for less than 2 minutes of work.


 Pokémon Rumble World (3DS) tips
 Breaking Down the Inquisition - The Warrior
 How to Unlock Yuuki in Sword Art Online Re; Hollow Fragment
 Learn To Develop Video Games For $49, 99% Off Regular Price
 Kingdom Hearts 358 2 Days Guide