Play to the crowd with a little help from the BattleBlock Theater walkthrough, giving you the best strategies to complete each stage, and instructions for finding every golden collectible yarn. In this cooperative and competitive platformer, play solo or join friends as you try to escape each deadly play.
With access to special weapons and a crushing jump, it’s all about getting to the exit alive. There are explosive blocks, floating blocks, laser blocks and spike blocks — all to make your life difficult. It might seem like a simple 2D platformer, but it’s so much more.
Don’t get caught with your pants down. Learn the nuances and secrets of BattleBlock Theater, just scroll down. If you’re looking for secrets, check out how to earn the Secret Finder achievement, or listen to the best secret song in a game yet.
Check back soon for new updates.
Insane Mode Video Walkthrough
Chapter 1: 1-6
Chapter 1: 7-Finale
Chapter 2: 1-6
Chapter 2: 7-Finale
Chapter 3: 1-3
Chapter 3: 4-Finale
Chapter 4: 1-3
Chapter 4: 4-Finale
Chapter 5: 1-3
Chapter 1
1-1
So begins your adventures in BattleBlock Theater. It’ll be a long adventure, so stick with us. After a quick tutorial, you’ll reach the first chapter.
Each chapter consists of nine levels and one timed finale. After completing the finale, three more difficult levels will unlock. No need to touch those, yet!
The goal of each level, this one included, is to collect three green gems to unlock the exit. But, you earn the best rating you’ll want to collect more extra gems, a ball of yarn, and complete the level under a strict time limit.
This level is like an extended tutorial, teaching your little friend how to jump. Just know these simple facts; the friend can double-jump with two taps of [A]. If you fall or drop, you’ll still be able to jump twice.
A press of [B] allows the friend to use a special weapon, equipped during the Player Setup as the third option. More of these special weapons can be unlocked by collected 5 gold yarns.
The only difference between Normal and Insane Modes are checkpoints. These tiny gold poles will raise the flag once touched.
Past the first checkpoint, and before finding your first instance of water, you’ll encounter a security cat.
The cats are the basic enemies of BattleBlock Theater. Dealing with them isn’t easy. The best ways to defeat them is to push them into water or other deadly hazards.
Use [Down+X] to slide, or [Down+B] to uppercut. Attacking while jumping to slam enemies downward. An attack standing still will shove cats back – useful for knocking them into traps.
At the right corner, you’ll find a series of explosive blocks. These blocks will break in series once stepped on, but they won’t damage your friend. Fall onto the lava blocks to bounce up onto the cloud blocks above.
The cloud blocks can be jumped through, or walked through on the left or right sides. There’s no way to drop through the bottom of the clouds; use these to reach a portal block to the left.
Portal blocks are often used for secrets. Look for a blue line on normal blocks to find hidden places.
To reach the first yarn, go through the portal and use the lava block to reach the clouds on the right. Jump up and onto the blocks to the right, above some water.
The last gem is past the exit. Sometimes, you’ll find secrets hidden beyond the exit. Grab the gem and get back into the exit.
1-2
To the left of the entrance, you’ll find an orange spring. Stand on these for a moment to send your friend flying in an arc over the water.
Past the explosives and water, you’ll find alternating cloud blocks with a gem at the bottom. Walk through the clouds to drop down a space and collect the gem.
To find the golden yarn, step onto the lava on the left corner of the level and brush the lava blocks above, then double-jump to reach the cloud blocks above. Hop into the portal and cross the waters to find the glowing yarn, no problem.
Near the clouds, use the orange spring between the water to find another gem.
1-3
In the right corner of the level, you’ll have to deal with a cat with bouncing bubbles. For now, they’re just an annoying obstruction – later, you’ll need to learn that these orange balls can be used like a stepping stone. Your friend can jump onto them.
Further in the corner, step into the explosives to pop them. Collect the jetpack – you’ll get three charges. Each jump will send your friend flying five blocks high.
Above the clouds on the right, you’ll find a section of lava. Holding forward, the friend will continue to bound forward through the lava passage.
GOLD YARN LOCATION: To get the gold yarn, jump past the exit to find the yarn hanging above explosives and water. If you try to grab the yarn now, you’ll fall into the water as the explosives pop. Instead, hold [RT] near the water to draw the white boat directly underneath the gold yarn. Now with a boat to save you, collect the yarn and fall into the boat, which you can ride to safety.
1-4
To get the first gem, right above the start, climb the clouds to the left and leap into the portal in the grey block above.
GOLD YARN LOCATION: The gold yarn is pretty easy to get this time. Take care of the cats, then drop between the “L”-shaped blocks above the water. The moment the yarn is collected, double-jump back up to safety. Unlike most games, you’ll have two jumps after falling. Don’t jump down to get the yarn.
The third gem can be collected after using lava to reach a false red tree. Against the left wall, there’s an arrow pointing up into what looks like nothing. Double-jump up to the sign and jump into the gray block to see that it’s a fake block.
Eventually, your friend will find an odd corkscrew of explosive blocks before reaching the exit. To survive this section, step onto the explosive to start a chain reaction. Wait for enough of the bombs to pop that the way is clear, before running across the bombs over the water.
On the way to the exit, use the upper path of bomb blocks to easily bypass the cats and grab another gem.
1-5
Very little of note in this level. Here, you’ll get a tutorial for drawing boats toward you when they’re out of reach. Stand near the water, and hold [RT] to pull the boat close.
On the right side, past the waters, you’ll find sludge blocks. These pink blocks will slow your descent while pushing against the wall.
Partway down the sludge blocks is a portal block. Hop into it to grab a gem.
GOLD YARN LOCATION: To get the gold yarn, look for a lava block below and to the right of the exit. On the exit “island” section, use the single lower cloud to find a path of fake blocks leading to the gem.
Chapter 1
1-6
To cross the water, double-jump across to the cloud block underneath a series of explosive blocks. Touch the bomb above the cloud to set the bombs popping, until the boat drops down into the water.
With the boat in the water, draw the boat toward your friend with [RT] and ride it safely across.
Ahead, you’ll find poles stuck against walls. Hold [RT] to cling to the poles and climb up or down. Past the poles, you’ll learn that [RT] can also push or pull certain items, like boats. Push the boat into the water and ride across.
GOLD YARN LOCATION: Look above the water to find a laser block hitting an unexploded bomb block. Across the gap there’s a cat throwing balls. Pop the explosive block to kill the cat, making it easy to jump over to the cat’s position and grab the yarn.
To find a hidden gem, brush up against the green block wall after crossing a section of alternating cloud blocks. If you push against the left wall, you’ll fall through a fake block. Run right and jump up into the portal to reach the gem.
The very last gem is found against the right wall of the level. Jump past the exit and onto the gray blocks. You’ll fall through the fake blocks and immediately find a gem.
1-7
The first gem is collecting by dropping through dark gray fake blocks above and to the left of some cloud blocks.
You’ll also find a laser block. These blocks shoot a deadly beam straight forward that’s blocked by any item or block.
The orange block stopping this first laser is a fake. Drop down through it to discover the first secret level.
Beware spike blocks! These blocks will, simply, kill your friend if he touches them. These traps can be found on the floor, on the walls, and embedded in ceilings.
Against the right wall, there are two lasers and a jetpack. Use two blasts of the jetpack to reach cloud, and save one final use to grab the gem above the platform.
GOLD YARN LOCATION: Use the poles to reach the top right corner with lasers and clouds filling the space. Wait for the laser to cut off, then run right to drop down into the safe space where the friend can walk through the cloud and fall down toward the gold yarn.
Using the lava block to continue left, you’ll find a cat. The cat will retreat with the gem. You’ll need to kill the cat to collect another gem.
1-8
To cross the water directly to the right, you’ll need a boat. To get that much-needed utility, climb the clouds and jump right. Use [RT] to drag the boat over the clouds – you’ll see that boats will fall through cloud blocks.
GOLD YARN LOCATION: For the gold yarn, you’ll need to use the portal found underneath a cloud block through the ice pathway. Navigate the water to reach the portal.
Through the portal, you’ll find a winding line of bomb blocks. Set off one and wait until the bombs have reached their rightmost turn and begin to explode downward. Jump for the blocks and ride them down before dashing left to grab that yarn.
Moving up near the left wall, you’ll find a line of three cloud blocks. Jump through the center cloud to find fake blocks hiding a gem.
Jump past the exit and fall into the lava block to bounce up. Double-jump and fall back down to find the last gem.
1-9
Right above the exit, you’ll see a lava block with gold yarn right below a portal. Be on the lookout for portals, naturally.
Simply drag the boat down into the water above the waters to jump up and pop the bomb block, making another easy gem to collect.
GOLD YARN LOCATION: Gold yarn is easy to find here. Use the boat to cross the purple water and jump up onto the ice blocks sharing an orange spring. Jump across the spring to the blue portal above the single water block in the corner of the small isolated area.
1-Finale
Each finale is especially tough – you’ll be under a tight time-limit to complete the tricky puzzles and platforming.
Starting the finale, don’t run right – there are two cats throwing explosive disks. These can be very tricky to dodge, so skip them entirely. Jump up and left to reach a fan block that’ll launch the friend across the cats’ kill zone.
Past the cats is a question-mark sign. Jump above it to touch the easily-missed bomb blocks above, setting off a chain reaction and dropping a boat into the water.
Ahead, you’ll find an orange spring. Use it, but don’t stand on the second orange spring, it’ll launch the friend right into spikes!
GOLD YARN LOCATION: To get the gold yarn, run by the two security cats and drop down onto a line of conveyor blocks, moving the friend through fake blocks. Jump onto the moving fuzzy block, and grab the valuable yarn.
There are two extra gems near the exit block. But, beware, there’s more. Stepping into the exit block will take the friend to the second part of this finale. The timer will reset, but there are even more challenges.
Don’t worry! The ghosts won’t bite. They’re here to look spooky.
GOLD YARN LOCATION: For that gold yarn, simply drop down onto the conveyor right past the visible yarn. Right it right to discover fake blocks, leading to a portal.
At the end of the path, grab the glowing key to complete your first chapter. This is just the beginning, be prepared for things to get a lot tougher.
Chapter 2
2-1
GOLD YARN LOCATION: This one is easy to find. After crossing the water, you’ll find lava blocks. Launch upward to reach two lava blocks to the left. Send your friend right after landing on these two lava blocks to collect the yarn over a deadly bed of spikes.
A hidden gem is found on the far right corner of the level. Avoid the green bubbles launched by the security cat – they’re deadly. Cross the lava blocks and step on the bomb block to the right of the question-mark sign. You’ll drop through two fake blocks to find the gem below.
Use the orange spring to reach the out-of-reach cloud blocks. To the right you’ll find a tricky gem – get this one by quickly running over the fan block, but avoid dropping down into the lava block against the right wall. Step through the cloud to fall into the gem.
To get past the water, set off the bomb blocks, then jump left to the lava blocks. Touch them with a double-jump to send yourself careening toward the wall of lava on the right, which will in turn shoot the friend to safety on the left.
Ahead, you’ll find the first toast block. These toasts will spawn one toast enemy at a time. These little living pieces of burnt bread will chase you down, but don’t have all the abilities of a cat guard. Jump over them and run!
The toast has one deadly ability – fire won’t hurt them. They’ll keep going while they’re on fire and burn your friend alive. Also, you’ll want to avoid getting caught between two pieces of toast. No one wants to be a friend sandwich.
2-2
To reach the second gem, step onto the ice blocks on the left corner and leap to the higher lava block. The lower block will send your friend onto the platform on the right. The upper block will bounce the friend into another lava block and bounce him into the gem.
GOLD YARN LOCATION: Another simple yarn. This one can be collected once you find two water blocks near a series of spikes on the walls and ceiling. Jump onto the lava block to the left, then use the fuzzy moving platform block to reach the yarn.
To get to a secret level, look for a red shrimp creature with one eye. After bouncing through the path of lava blocks, you’ll find a room with spikes on the ceiling and two bomb blocks covering two lava blocks. Use the second of these lava blocks to leap into the brown block overhead. It’ll push the friend into a blue portal, taking you straight to the secret portal.
Don’t miss the hidden gem behind the tree cut-out to the right of the blue portal.
2-3
GOLD YARN LOCATION: Easy! Wait for the brown blocks to move into a position where your friend can double jump onto one, then you’ll have no problem getting to that sweet yarn.
Avoid the lava blocks in the spike path. Up the moving platforms, you’ll find a gem underneath some cloud blocks to the right of water. To get the gem, squeeze through the fake brown block to the right of the lava. Just beware falling into the lava and shooting into the spikes.
Yet another gem is hidden after jumping up the clouds. Before using the lava blocks to go up, you’ll find a bomb block over four brown blocks. Let the bomb block explode, then drop into the fake brown blocks and run right to find a hidden gem.
Past the running gem cat, you’ll drop down near a lava block. To the right are two more gems guarded by cats. Use the lava block, then double-jump to the lava block embedded in the way to get another gem and use the portal to reach the exit. Simple as that.
2-4
To get across the water, you’ll need to free the fuzzy moving platform. Grab the glowing block and jump, releasing [RT]. These floating blocks will hover where they are left. That’s an important detail to remember, but for now it just needs to get out of the way.
A hidden gem is located above the water, after bouncing between two lava blocks. You’ll reach two cloud blocks, with a bomb block above three lighter colored blue blocks. These three light blue blocks are fakes, hiding a gem.
GOLD YARN LOCATION: Found in the top right corner, protected by a laser block. Simply navigate the ice and don’t fall into the water.
A tricky gem can be collected around the upper left corner. Grab the floating block and jump with it, leaving it up in the air.
2-5
Use the lava block just right of the entrance to bounce through fake blocks. Use a double-jump to reach an early gem.
Reaching the right corner, you’ll encounter the first rocket lift block. As long as you stand on the gray platform, the lift will rise straight up. Stepping off the lift will cause it to slowly fall.
To cross the water, touch the bomb blocks to free the boat. Then hold [RT] near the water to draw the boat to the friend.
GOLD YARN LOCATION: Easy! After sailing across the water in the boat, jump onto the orange spring on the ice blocks. You’ll fly into a portal, and out into the collectible.
The last challenge consists of two floating fuzzy blocks and a cat guard sending over poison bubbles. One useful thing to note of the fuzzy blocks
Chapter 2
2-6
Use the floating blocks (with the gem!) to cover the lasers, then use the highest to double-jump right. Grab hold of the pole and be on your way up.
To get a tough gem, pull the boat into the cloud blocks past the pair of security cats. Time your pull between laser blasts, and jump away at the last minute. Use [RT] to draw in the boat and sail to that gem.
GOLD YARN LOCATION: This yarn is found to the right after dropping down the shaft of sludge blocks. Simply deal with the security cats and get by the spikes to collect the yarn. To sneak up behind the first cat, break the bomb block and use the lava block to double-jump through the cloud. Then you can push the cat into the spikes.
To the left, use the floating block and place it in the beam’s path to safely continue forward.
2-7
GOLD YARN LOCATION: Climb the fuzzy floating blocks until you find a laser and a warning sign. Wait for a trapped green fuzzy to near the bomb block above, then touch it as it moves toward to blow the bomb. Use the lava to jump up to the freed fuzzy, and ride it right to reach the alcove with the yarn.
Don’t miss the gem over a bubble-blowing cat guard. After walking through the portal, grab the helicopter power-up and carefully get behind the kitty. Give him an aerial attack, then a shove to drop the cat into the water, making it safe to cross the remainder of the gap.
After dropping through a path full of tree cut-outs, you’ll land near some ice. To the right, there are six green fake blocks hiding a gem.
Further right, jump into the lava block as the beam stops. It’ll push your little friend through the fans.
Before leaving, you’ll have to deal with two cat guards shooting ice blasts in series of two. To stay safe, stick to the right side and take out the cat guard above with three jump-attacks.
The ice isn’t lethal, so stand still! Don’t move when you’re frozen, it’s very easy to accidentally drop into the water below.
2-8
Through the floating blocks and lasers, you’ll drop down to an area with a visible golden yarn collectible. Step onto the green blocks to the left to see that they’re actually fake! You’ll fall down and grab an easy gem.
Climb the cloud blocks, check out a corner to the right. Here, you’ll find a gem protected by a deadly monster! This raccoon-moose creature will chase down your friend and eat him if you get close. They’re fairly slow, and they can be jumped over.
If you’re ever stuck, lead them around until they get tired – giving you a few seconds to get around them.
When you’re stopped by water, climb the turret blocks and touch the bomb block at the top. This will set off a series of explosions that will, eventually, drop a boat into the water. Use it to reach the exit.
GOLD YARN LOCATION: But wait! Use the boat to sail past the exit, then jump to the portal to the right. It leads right to that wonderful yarn. Jump back into the portal above quickly before the bomb block explodes and drops you into spikes.
2-9
The first gem floats impossibly over water. To grab it, pull the first floating block back, then push the second floating block over the water. Circle around and use this stepping stone to grab the gem.
Continuing right and up, you’ll find a security cat near a turret block. To the right of the turret is a spiked block. If you’re very careful, you can actually use this block to reach the gem.
Jump and land on the very edge of the spiked block to avoid setting the trap off. Take care of the cat first if you’re going to use this method.
Don’t miss the gem in the floating block maze. Halfway through, you should spot a blue line above a maroon block. Jump through the fake block to reach the gem.
Near the end of the maze, look for a gem protected by a security cat throwing explosive paper planes. The flying planes aren’t lethal, but the explosions are. They’ll only explode on the ground.
GOLD YARN LOCATION: At the top of the theater area, you should find a jetpack. There are two pits of spikes – the first contains a gem, the second contains yarn. Save one of your three jetpack charges to snatch the collectible.
Before reaching the exit, you’ll meet a new cat guard. He shoots foam darts forward that stick to walls. They’re nonlethal, and they can be used to gain extra height. While stuck to the wall, you can jump on them and reach the area above.
Don’t miss the gem! Use the darts to reach the upper area, take care of the cat, and grab that gem. This will also completely bypass the water traps.
2-Finale
Prepare for another grueling finale! Leap into the portal to the right, grab the floating block on the other side and push it over the spikes. Go back through the portal and use the floating block to continue out of this starting room.
Use the orange spring and lava to climb up, and jump onto the cloud as soon as you see it.
GOLD YARN LOCATION: This one is tricky. Over the maroon water, there are black fuzzy moving blocks forming a bridge while a cat throws orange balls. Jump onto the ball as it lands below the yarn directly above the moving platforms. You can reach a yellow pole to hang off, then leap to the yarn.
To get past the spikes (with the gem!) ahead, jump through the clouds and drop down near the fan over the ice. You’ll shoot through the spikes. Fight the urge to jump, let your own momentum take you through.
Continuing, you’ll reach two gems over a floor of orange springs. Wait on any of these, and you’ll be launched into the spikes on the ceiling. Don’t stand still, just keep running! To continue on the main path, use the orange spring one space lower than the rest.
Get to the exit by running across the hologram blocks and pushing the floating block one space left. The holograms will shut down, allowing your friend to jump to the lava blocks in the water and bounce up to the exit.
Most of the second level is completely straightforward, with few sneaky traps.
GOLD YARN LOCATION: After crossing maroon water on a black fuzzy platform, you should spot two fans underneath the yarn. Fans, when their backsides are unobstructed, can be shut on or off. Hit both buttons on the underside of the fans then use the lava block under the cloud to collect the yarn.
Dropping down path two lava blocks, you’ll land in a pit with a line of bomb blocks. There are three spikes, between the first two is a yellow pole. Jump up and climb the pole to discover a fake block at the top hiding a gem.
Chapter 3
3-1
Don’t miss the first gem in the upper corner, above the lava blocks after jumping through the portal.
To get by the fan, spike, and ice trap – use the lava block to fling across to the gem on the fan. Landing on the button will deactivate the device, letting you continue.
In the top right corner, you’ll encounter the first puzzle blocks. These blocks must match before they’ll disappear. Each top button will raise the counter, as well as the counter to any adjacent blocks.
GOLD YARN LOCATION: To get the yarn, plus two gems, continue through the level until you find a wing power-up. Instead of flying straight up, take the wings to your right and fly through the gauntlet of lasers. At the top, you’ll find that yarn.
To complete the level, use the wing power-up to fly toward the ceiling. Push the floating block off the holographic block generator to open the way to the exit.
3-2
In this level, you’ll need to push floating blocks onto the holographic block generators to get through the initial traps. The second, you’ll need to remove to continue. After pushing the third into place, climb the poles on the right and shut down the fans to collect a gem.
Over the water, you’ll see a gem seemingly closed in a floating circle of blocks. The bottom block is a fake, grab the wings to the left to get to this gem.
Don’t forget to grab another gem further right, hidden in a high alcove only reachable with the wings. It’s protected by a laser, so watch out.
As you reach the top of the stage by climbing poles, you’ll have to deal with cat guards. Immediately drop down – don’t jump or fly – into the lower area. A guard further back is armed with a vacuum, and it’ll pull you right into the spikes.
GOLD YARN LOCATION: Bring the wing power-up from the water all the way to the area where you encounter a cat guard with a vacuum. Just past the vacuum-cat, you can spot a portal on the ceiling. Fly up to it, and you’ll reach the alcove keeping the yarn.
3-3
Shut down the fans at the start to avoid getting spiked, and grab the first gem. Just press the visible buttons on the back ends of the fans.
Above the water, push the floating block one space forward so you can in turn jump over the laser, and push the boat into the water. Collect the gem, then return to dry land where you can call the boat over.
GOLD YARN LOCATION: After dealing with the monster, and using the portals, you’ll reach an area with water blocked by bomb blocks. There’s a fan, and spikes protecting the roof. Basically, you’ll need to make a very careful jump. Very tricky on insane mode.
The last challenge is easier when equipped with some explosive special weapons. Or, simply jump over the cats and bound to each of the lava blocks until you reach the exit.
3-4
The first room is full of cat guards and turrets. It’s best to just avoid the swarm of cats and jump up to the poles where they’ll have a hard time following you.
GOLD YARN LOCATION: After flying over the water with the wing power-up, you’ll land near the top right corner where a turret is blasting away. Grab the power-up, then drop down to the cat guard below. Take this path left through the lasers and fly over the water, continuing left, to get the yarn. Try to converse your wings uses so they don’t go dead mid-flight.
3-5
This level introduces ceiling poles! They’re no different than the regular wall poles, they’re just on the ceiling instead. Use them to cross the lasers to the right.
Getting the gems here is easy, wait for the laser to stop and drop down. The lava will spring you back up.
Past the laser, you’ll need to move the floating block one space right. Now the fans are free. To give yourself enough life, run through the lower cloud into the fans – that’ll give you enough height to continue.
Use the holographic block generators ahead to get the boat into the water. After dropping the boat down, move the block so that the two fans are keeping the grenade-cat hovering.
That way, when you sail across the water to the right, you can jump into both buttons, shut down the fans, and get rid of that pesky cat.
GOLD YARN LOCATION: Where two jetpacks spawn, you’ll be able to spot a portal just above some precariously placed spikes. Use two blasts of the jetpack to get the right height, then a last to send yourself up into the portal.
One useful skill you’ll learn ahead is how to kick weapons back. A low kick or a slide, or even a push will bounce these grenades back to their owners.
At the second holographic block generator from the top, push the floating block three spaces right to discover a series of fake blocks with a hidden gem at the bottom.
Feed the cats to the monsters at the end – or move from side to side until they’re worn out before trying to get past them.
Chapter 3
3-6
Near the start, brush against the bomb blocks near the top of the whole construction to use them as a stepping stone to jump onto the turret.
Down the left wall, don’t forget to shut off the fans before trying to cross them. Otherwise you’ll get a sharp surprise.
At the bottom, you’ll need to collect wings and run away from a monster. Try to jump over the sludge blocks, they’ll slow you down. But only once! Don’t waste those wings.
Up the stairs of spikes, look in the upper corner to find an alcove of fake blocks hiding a gem.
Another gem is located under the bridge of clouds, guarded by a cat. You’ll need to keep the wings for this. Use them sparingly and wait to fly up between cat throws.
GOLD YARN LOCATION: Above the turret and past the steps of spikes, you’ll find the yarn protected by spikes at every corner. It looks like you’ll need wings – but no! Just run across the bomb blocks to collect this one. There are two fake blocks, making this appear more difficult that it actually is.
The next puzzle is tricky. You need to reach a ledge, but it’s too high. Pull the floating block to the left and leave it underneath the middle spike block. Wait for the laser to cease, then jump across the spike, push the block to the last remaining space to the left, then use it as a stepping stone to reach the high blocks above.
3-7
Look for the orange blocks above while crossing the rocket lift platforms. Those are fake blocks. Ride a lift in to grab your first gem.
GOLD YARN LOCATION: Save your wing power-up after passing through the vertical chamber with lasers shooting down from the top. At the bottom, look up for a line of white blocks between orange. The white blocks are fake – fly up through them to grab the yarn.
Below, you’ll encounter a new enemy. The robot launches homing missiles, and he can’t be destroyed. Blowing up the robot will only give you a moment’s peace. It’s best to lead a single missile out of visual range, then let it collide with a wall. Then you’ll be safe to fly across the gauntlet to the left.
3-8
GOLD YARN LOCATION: This is found right at the start. Jump across the water and ice to reach the gold yarn. You’ll have to land on a button that releases lasers, but these aren’t too difficult to manage.
There’s an easy gem to the right of the start. Right the fuzzy platform through the fake blocks right.
For two hidden gems, there’s a pole on the left side where you’ll pass a visible blue portal and a cloud above it. The block to the left of the portal is fake. Jump through it to enter a small area with two gems.
3-9
To find a secret level, play the level until you cross through a series of lasers that can be blocked off with holographic blocks. Through the portal, you’ll appear in an area with a cat shooting darts across to a wall. Use the darts to reach the alcove above, then jump onto the green cardboard bush.
GOLD YARN LOCATION: Above the missile robot, there are four white blocks. These are fakes. Use the wings to fly over the bot and through, just remember to hold left as you fall and fly back up! There are fans trying to push unlucky players into spikes.
3-Finale
Another finale! Let’s get started. Step onto the orange spring to fly by the spikes. Drop down for the gem, just remember to jump and double-jump to avoid death.
Move the floating block ahead to drop the cat into the water, then jump up to the poles and climb across the water.
Ahead, use the orange springs to climb up. Watch out for hazards, the first spring will send you into spikes if you don’t make a jump beforehand to slow down your momentum. The second spring bounces you into lava.
GOLD YARN LOCATION: Use the spring at the top to fly into the clouds and move the floating block off the generator, killing the cat at the top. Now you can drop down to the bottom left corner to collect a jetpack and fly up the narrow path to grab this yarn.
Above, run across the rocket lifts but stop at the second to last. Ride this one up to safety!
The holographic block puzzle ahead seems confusing. Just know that when you reach the portal down the right side, you’ll appear behind the floating block. Move it off the generator, then step back through the portal to drop down and continue.
To get to the exit, climb the upper path and drop down to the left of the exit. Move the floating block onto the generator, then wait on the bomb block to use the lava below to get back up top.
Now you can move right, turn off the fans, and run to the exit.
For the first puzzle of the second level, move the floating block onto the generator to drop down, then move it back onto the generator. Now you can safely enter the portal on the right.
To get the second gem, you’ll find two orange springs. Skip the first one and stand on the second. It’ll launch you into lava, which will send the friend into the gem. You’ll land on the deadly first spring though, so jump to avoid it.
Past the turret, you’ll find an orange spring. Let it launch you, but don’t move the thumbstick at all. Your natural momentum is enough to get through the spikes alive.
To get rid of the grenade cat, turn off the gray fan, then turn off the yellow fan. Now circle around and turn the gray fan on again. The grenades will fly back into the cat’s face, shutting off the holographic blocks.
GOLD YARN LOCATION: To get the second yarn, lure the monster to the left, wait for it to get tired, then go for the yarn by running through the clouds.
Get by the monster and you’re free to get the key.
Chapter 4
4-1
Say hello to a new block. The rock blocks can be picked up like the floating blocks, but you can’t jump with them. Instead, you’ll have to throw them with the [B] button.
Jump onto the bomb blocks and break the row above to drop down all the rocks. Use them to create steps on the right.
To get across the black water, throw the rock into the portal. It’ll appear over a holographic block generator and make a bridge. Done!
Similarly, climb the poles and jump down to the right. Throw the rock onto the orange spring to reach the holographic block generator.
GOLD YARN LOCATION: Travel to the top right corner (below the exit). You’ll see that rocks can drop through clouds, and they’ll settle in water. Make sure both rocks don’t drop into the water, you’ll need one to make a stepping stone to reach the gold yarn. Place one on the spikes, and the second rock one space left of the spiked platform.
In the corner with the golden yarn, check behind the cardboard tree to find a hidden gem.
At the end, make sure to slow down before sliding into the exit. There’s one last gem to grab.
4-2
Traveling right, you’ll find a portal. But, before jumping in, continue right to find a new item. The suicidal frogs stick to any surface and explore if you get close.
GOLD YARN LOCATION: In the top right corner, you’ll find the yarn. Dodge the cat’s frogs.
Along the left wall, you’ll need to wait for the bomb blocks to explode while dodging lasers. Luckily, a beam that’s stopping in place will now move further left or right. If a bomb blows while a laser is hitting it, that laser will not move once it is unobstructed.
4-3
The first puzzle is easy. Throw the rock to the left of the start onto the conveyor. It’ll drop through the cloud and move onto a holographic generator block.
Beware the bottom right corner. When you drop down by the pole, you’ll land on bomb blocks. Quickly run right and drop to the sign and grab the gem. If you aren’t fast, a holographic block generator will activate and block you off.
GOLD YARN LOCATION: After using the wing power-up to fly up, you’ll need to use the rock blocks that drop down from the portal to activate generators further left. Grab them and carry them – you’ll need to activate the bottom holographic block first, or you’ll block yourself off from the other gem rewards.
Take note! There are fake blocks to the right of the exit hiding one last gem.
4-4
Say hello to caution blocks. These blocks can be activated or deactivated to get around. Grab the floating block and place it on the button to turn off the purple caution blocks.
To cross the top path, you’ll need to grab the rock and throw it over the conveyor gaps until it reaches a green caution block button. If the rock falls into the gaps, it’ll return to the start.
There’s another fake block in the top left corner. Grab the gem before jumping down to the pink pig block-creature.
The pigs will automatically climb single spaces, but if you jump off it’ll be left behind. But, you can call pigs toward you by crying for help.
Pigs can run through spikes and water without a problem. Bring the pig down and across the water to find a wall of spike. Jump off the pig to get to the top.
GOLD YARN LOCATION: To get the gold yarn and a few extra gems, you’ll need to restart the level or start from where you can ride the pig into the spiked area with clouds in the center and two cats. Run on the spikes to the right to discover more fake blocks. You’ll drop down near the exit where you can easily run through the spikes and collect the yarn.
4-5
GOLD YARN LOCATION: Stay left to collect the yarn in the large bomb block spike puzzle.
Most of the gems can be found in the final challenge area. Watch the turrets and explore the cloudy zone to find the last few gems.
Chapter 4
4-6
To get around the first puzzle, you’ll need to jump into the fans and keep moving left. Your momentum combined with the fans will throw you far enough left. If you fall short, be prepared to grab the pole, then double-jump up.
Move the floating block off the green caution button to reactivate the green blocks to the right of the entrance.
To get across the water on the right corner, remember that you have two jumps if you simply fall off the ledge. Getting to the holographic generator, move the floating block to turn it on, then run across the next holo-blocks left to find a hidden gem behind a fake block.
At the conveyor challenge, a cat will throw grenades. To make this part easier, use one of the pushes to get rid of the grenade.
GOLD YARN LOCATION: In the top left corner, move the floating block back to drop a rock onto the caution block button. Now, jump down and land on the green blocks below to discover they’re fakes. You’ll fall into a portal where the yarn is floating, ripe for grabbing!
In the top right corner, cry to call the pig over and ride it across the water! Drop down and continue left to cross another body of water.
Before landing on the exit, jump to the cardboard tree on the left.
4-7
To get to the secret level, use the lava blocks above the entrance to grab a rock. Take it back down to the conveyors, and throw them across each gap to drop it down onto the conveyor below. Follow it – it’ll block the laser. At the end, jump through the clouds and touch the right wall.
GOLD YARN LOCATION: To get this collectible, throw both rocks onto the conveyor and stand between the two to shield yourself from both laser beams. At the end of the path, you’ll be able to grab the yarn.
4-8
There’s a hidden gem behind white fake blocks directly above the entrance.
To get by the laser on the right, don’t forget that you can jump to quickly scale the wall poles. Use the lava block to make a long jump left.
Around the center-left, keep running left to stand on the button to activate the caution block. Stay on it long enough to shut down the fan. Grab the gem and move on.
To climb the right wall, move the floating block onto the button. It activates a rocket lift. Quickly jump up to ride it the remainder of the way up.
After riding the lift, jump onto the lava block on the right to discover some fake blocks. Double-jump to get to the top of the cloud.
GOLD YARN LOCATION: One of the easier yarns to get. After getting the wing power-up, fly underneath the exit in the top left corner.
4-9
To get through this puzzle, lure the monster toward you before jumping to the first caution block. The monster will stop below you, on the button, if you wait on the block.
As the monster pauses on the button, jump to the bomb block and through the cloud. Voila!
Climb the clouds in the second puzzle area and stand on the button to make the caution blocks below vanish. Now, all you have to do is wait for the rock to spring up and onto the holographic block generator.
To get the gem in the top left corner, stand on the white blocks near the spikes to fall through. They’re fake blocks!
GOLD YARN LOCATION: Easy to spot. Throw the rock forward to give yourself enough time before it lands on the caution button. While safe from lasers, jump over the exit and grab the yarn.
4-Finale
Prepare for a challenge. Jump into the clouds and lure the monster forward. Wait for it to get tired, then run across and fall behind the cat standee.
Stand still, and you’ll discover a hidden rock in the cat! Place it on the orange spring, grab it up top and drop it onto the holographic block generator.
Across the water, beware the caution button. Rocks will fall and kill your player if you’re not careful.
Jump down to the water and draw the boat near. Use the fuzzy platforms to climb up, then use the rock and throw it up each level of bomb blocks until it lands on the two conveyor blocks to drop into another caution block.
Now you can run left and onto the ice blocks where a portal has been revealed.
GOLD YARN LOCATION: Under the exit, you’ll just need to dodge a laser and a cat throwing suicide frogs. If you can manage to time it right, this yarn is hard to miss.
In the second section, stand on the caution buttons to wait for the lasers to cease firing, then move forward.
GOLD YARN LOCATION: An easy one. After moving through the lasers and caution blocks, immediately jump forward and land on the monster’s head. Double-jump off the monster to grab the yarn.
Next, lure the monster by standing on the clouds. Wait for it to run onto the buttons, then leap across using the lava block.
Reaching the puzzle in the bottom left corner, use the rock and throw it onto the orange springs, rushing ahead and throwing it manually over the single space gaps until it reaches the caution button blocked by a cloud.
Chapter 5
5-1
The plot thickens! Ahead, you’ll have to deal with something slightly new. A laser will fire, activating the holographic generator, allowing safe passage across the water. Hurry left to get by!
To find a hidden gem, drop down to the lava block in the very bottom-left corner. The lava will blast those who land on it up into fake blocks where a gem has been stashed.
Say hello to the buzzsaws! These deadly traps will kill your friend while sliding back and forth. Don’t touch these little suckers.
Continuing down the path, take note of the gold yarn. Ahead, you’ll find bomb blocks suspended over water. To get over this hurdle, jump to the bomb block above on the right. Setting off the bomb will clear the way for the laser to create a bridge.
GOLD YARN LOCATION: Before blowing up the bomb blocks to create a second bridge of holographic blocks, walk through the blue fake block to the left of the generator and jump into the portal.
The green egg creature is new. For now, all you need to know is that it wants to help. It’ll walk down to the edge of the water and open it’s mouth. Step in and it’ll shoot your friend over the water.
There’s much more to know about the green creatures, but for now, just move on to the exit.
5-2
To get through the first tricky jump, stand against the brown blocks until the holographic blocks disappear. While falling, you’ll have two jumps to cross the water and get to the fan.
For a hidden gem, jump to the sludge block and wall jump, then double-jump up to the cloud. The blue blocks left of the cloud hide the gem.
Getting under the buzzsaw is tricky. You’ll need to use a slide-attack (forward-attack) to get across.
Yet another hidden gem is located above the laser and caution button to the right of the single sludge block. Move out the floating block to create a new stepping stone to reach the fake blue blocks above.
At the bottom right corner, you’ll need to use the green egg creature the same way. Wait for it to break out, stop at the water, and step into its mouth.
GOLD YARN LOCATION: After using the green egg creature to cross the water, use the cat’s darts to reach the clouds above. Run forward, grab the rock, and throw it forward to drop it through the cloud. It’ll kill the cat, but also land on a holographic generator, creating a bridge to the yarn below.
To grab a hidden gem before the exit, step into the blue fake block to the left of the yellow cardboard tree in the area with the rocket lift.
5-3
To get over the water right at the start – just run! Your momentum will take you over the deadly water spaces.
On the ice blocks, don’t forget to slide! You can run and duck this time to get by the buzzsaw.
GOLD YARN LOCATION: To get the yarn, you’ll find the area after taking the portal. Drop down onto the holographic blocks as they appear and run left instead of right. Jump to the caution button to buzzsaw the monster, and you’ll have no problem getting the yarn.
After crossing three blocks of water near the top of the zone, climb up and move the floating block onto the caution button to make some blocks disappear. Dropping back down, step right and drop through the fake blocks underneath the now deactivated block.
Don’t forget to grab the last gem with the jetpack above the exit. Jump from the holographic blocks while they’re around.
5-4
This level is all about caution blocks. The blue blocks will constantly switch on and off.
Against the left wall, after getting by the path with blue caution blocks above bomb blocks, which are themselves over water, you’ll find a single caution block above a lava block. Wait for it to disappear.
You’ll drop down onto the lava through fake blocks. Jump through the clouds, then jump through another caution block to collect a hidden gem.
GOLD YARN LOCATION: Before leaving the area, you’ll have to deal with a room where two cats throw balls. To get the yarn, don’t kill the cat at the top standing on a holographic generator! When moving to the exit, past it by and ride the lift up to the holographic blocks. With the generator active, getting the yarn is easy.
5-5
Take the path right through the laser and climb the shifting blocks. Sliding down the sludge, wait for the blocks on the left to appear before making the jump.
Ride the horse down onto the spikes then across the water.
GOLD YARN LOCATION: This one is easy. After riding the pig-horse-critter over the water, use the lava blocks to jump to the clouds. Wait for the blocks to appear, then run right into the green fake blocks to reach this yarn.
Over the brown water and lasers, you’ll find a buzzsaw trapped behind caution blocks. Stop onto the buttons to free it, then jump away. You’ll need the buzzsaw to hit those buttons for you to continue to the portal.
Through the portal, let the green portal critter cross the water and stand on the holographic generator.
Chapter 5
5-6
GOLD YARN LOCATION: At the steps of fans leading down, fall to the fake green blocks near the bottom to deactivate the two fans above. When they’re off, run across to find more fake blocks to reach a lava block that’ll send the friend into the yarn.
The first tricky puzzle is located through the first portal. Wait for the holographic blocks to protect your friend from flying into the spikes. Move forward and use the lava to keep yourself safe.
In the next maze, be aware that blocks that reactivate will not kill you. They’ll stay off until you move out of the space. Use this trick to climb higher.
Near the end, use the wings to fly to the exit.
5-7
Cross the lift platforms to get by the orange water. Eventually, you’ll reach the right bottom corner. Crack open the green critter’s egg to get him walking – the goal here is to get the creature moving up and into the water above.
Move the floating block so that the critter will have a straight path walking straight up the walls and roof to stop by the water. With the thing’s mouth open, step in to fly over to the lava block.
Through the first portal, use the blocks as they appear to cross the line of fans. If you’re caught in the fans, you’ll fly into the spikes. Past these dangers, use the slide-kick to get under the buzzsaw.
GOLD YARN LOCATION: Past the two buzzsaws and climbing the pole, jump right to the lava block and bounce into the shifting caution block above. When it’s gone, double-jump into the fake blocks above to grab the yarn.
5-8
The puzzles are getting tricky now. Set off the bomb blocks to the left of the generator until you get a holographic bridge. Jump up to the cloud blocks and push the floating block out of the laser’s path – now return to the first floating block and shut the holographic bridge down.
With the laser now active, it’ll activate a holographic generator below. The new blocks will block the spikes, letting you cross the fans.
Hit the button, and the caution blocks will begin to shift on or off. Jump back up to the beginning, then return to the caution block to the left. Drop down to continue.
GOLD YARN LOCATION: After climbing the shifting blocks, cross over onto the bomb blocks and jump into the portal. To get the yarn, jump back into the portal to zip straight up and grab it.
5-9
To get the first gem, stuck enticingly under three fans, just move left to the sludge blocks. Wall-jump upward to find the blocks above are fakes. Move right to shut down all three fans, making this gem very easy to grab.
GOLD YARN LOCATION: Not too hard. After jumping through the portal, run between the two buzzsaws and hide by ducking on the clouds. Wait for the lower buzzsaw to move right, then drop down and run left through the clouds to get the yarn.
To get an slightly hidden gem, move the floating block out of the way of the buzzsaw. The saw will periodically land on the holographic generator, allowing you to run right and use the lava block to reach the gem.
5-Finale
Let’s get started! Climb the shifting blocks and run right, using the blocks as they appear to stay above or behind those killer beams.
After climbing the pole, jump into the safe lower area to the left between spikes. Then jump to another pole, and grab the boulder, dropping it off the generator. That frees another laser to shoot yet another generator, which will create a bridge forward.
Past this puzzle, you’ll find an orange spring between spikes. Wait for the vertical caution blocks to deactivate, and let the horizontal blocks appear before riding the orange spring.
Beware when you push the bomb blocks. Rocks will drop through the clouds – watch out and you’ll be fine.
At the last stretch, use the turret to rest a moment and time the last few jumps.
GOLD YARN LOCATION: Don’t jump into the exit yet! Jump over and wait on the shifting block to the right. Drop down to grab the yarn, then double-jump to survive as the caution block reappears.
In the second area, don’t fall into the sludge! There’s no way to jump away from those buzzsaws. Stay on the shifting blocks to stay alive.
GOLD YARN LOCATION: Climbing up the poles past the shifting block jumping puzzle, you’ll reach a large pool of water with a holographic block generator activated by a laser. Wait for the laser to activate, jump to the shifting block, wait for the vertical wall to drop and use the lava block to reach the yarn.
Through the shifting block maze, you’ll drop out onto some ice. Make sure you’re ducking as you land on the ice, a fan will push you past a low buzzsaw!
Chapter 6
6-1
Take the right path using the pink sludge. Below, you’ll need to crack open the egg critter – wait on the holographic projector, it’ll be important soon.
As the creature steps onto the holographic blocks, jump off the generator to remove the bridge of clear blocks. This will drop your green friend onto the spikes, letting him activate another holographic generator further right.
On the holographic bridge, jump into the single orange fake block to grab a hidden gem.
Climbing up, you’ll enter a room with a rocket robot. Grab the floating block in the top left corner and place it on the caution button at the bottom-right.
Now take the right path, using the pink sludge blocks to climb with wall-jumps.
GOLD YARN LOCATION: Past the spikes and lava, you’ll drop down into a line of ice blocks. Drop down the right side and wall-jump from the sludge to grab the yarn between two buzzsaw blades.
Continue down and right to find a rock block with three floating blocks scattered about. Use the three floating blocks to create steps, allowing you to throw the rock up one space at a time. At the top, drop the rock onto the caution button below the cloud.
With the second button pushed, the exit is now open.
6-2
Starting, jump to the fan block and shut it down, then grab the gem. But, to continue? You’ll need that fan on. Turn it on, set off the bomb block, then quickly drop down to the button. The fan will quickly push you through the shifting caution blocks.
To reach the secret level, move right and grab the helicopter power-up. Further right you’ll spot an empty space in the orange blocks right next to the wall. These are fake blocks – make sure you don’t touch the lava blocks or you’ll launch up right through the clouds and miss it.
GOLD YARN LOCATION: Easily spotted behind shifting blocks through the portal between spikes. To solve this puzzle, move left to find a floating block between two fans. To get the fan onto the button, shut down the left fan, then move the floating block close to the left fan, with enough space for a friend to stand. Turn the fan back on, jump down onto the space right and grab the floating block. Grab it and you’ll lunge forward. Quickly release the floating block as it lands over the button – you’ll only have a split second! If it lands correctly, the way to the yarn will be clear.
6-3
The first jumping puzzles require lava blocks and wall-jumps from sludge blocks. Make sure you’ve got enough air before making the leap!
Landing at the top where you’ll find lines of ice blocks, drop down into the gray fake blocks to find a hidden gem.
GOLD YARN LOCATION: Before jumping into the portal through the buzzsaw gauntlet in the top right corner of the level, simply double-jump to the yarn at the end of the path.
Most of the gems are located in the laser/ice maze. Take some time to explore to grab the extra gems before leaving the area.
6-4
Solve the first puzzle by standing on the buttons below, and wait for the buzzsaw to slide right. Get running, you’ll need the buzzsaw to touch the buttons to open the way right!
GOLD YARN LOCATION: After escaping the buzzsaw, climb the ceiling poles above the gem on the left. Wait for a gap in the cat’s boomerang throwing to jump to the yarn.
Underneath the conveyors, step into the purple blocks to discover they’re fakes. Free gem!
To get through the passage of lasers and spikes, you’ll need to collect to floating blocks to place on two generators. The first is found to the right. Jump onto the lava block and grab the floating block immediately to avoid death.
Above the passage o’ death itself, there are two cats guarding a second floating block.
6-5
To start, use the floating block and shifting blocks to throw the rock upward. Remember, you’ll need a shifting block activated or the rock will drop through.
GOLD YARN LOCATION: At the top of the steps, time breaking the bomb blocks and run right to wait for the holographic generator to activate. Just as it does, leap onto the holographic bridge to get to the yarn.
The rest of the level requires careful jumping, but offers no complicated puzzles.
Chapter 6
6-6
Look behind the black cardboard tree just to the right as the level starts.
Wall-jump up the pink sludge, and you’ll notice a tricky gem above water to your right. Stand on the clouds, then drop down so you’ll still have two jumps. Land on the lava to escape safely.
Before entering the portal on the left, climb the pole on the right and move the floating block right, allowing the laser to shoot down onto a generator.
GOLD YARN LOCATION: To reach this tricky yarn, you’ll need to go down and around the spikes. Use the pink sludge to climb up and up, using the poles to finally reach the yarn by making a careful wall-jump from the lava block.
6-7
The first deadly trap is a repeat of the trap from 6-4. Beware the lava blocks!
GOLD YARN LOCATION: After crossing the water with the alternating holographic bridges, you’ll reach a precarious platforming area with poles, spikes, and water. Climb up early on to get over the alternating holographic blocks. Jump onto the blocks, then use the lava block and double-jump.
Past the maze, you’ll need to grab the floating block and place it on the button. Don’t forget to shut off the fan when you need to.
6-8
Moving the floating block on the right will drop you and small army of cats into a deadly arena. One of the cats has a gem, and to exit the ice-zone you’ll need to grab the rock and place it on the button underneath that annoying rocket robot.
Through the arena, crack open the egg so the green creature places itself in position on the spikes above. Next, you’ll need to free that fuzzy platform to reach the green animal-friend. Set off the bombs as the platform floats near.
Jump into the creature’s mouth to get across the water.
Jump down to another rocket robot guarding a hallway of portals, don’t yet jump into a blue circle. Move the floating block onto the generator, then set off the line of bomb blocks directly above the generator.
Once the entire series of bomb blocks explode, a rock will fall into the water. Now you can safely jump into the portal on the ceiling.
To get rid of the cat ahead, run through the cloud ahead and push the floating block left. The suicide frogs will now turn against their master. Now you can grab the gem and continue forward.
GOLD YARN LOCATION: Jump past the exit once the grenade-throwing cat is dead. Climb the poles, and narrowly grab the top pole before the fans blow you down.
6-9
Set off the bombs and wait for the wall to disappear before using the lava block to cross over. Jump as you land on the ice, it’s very easy to drop into the water here.
Through the portal ahead, it’s time for yet another buzzsaw chase. Jump over the spikes with single leaps to eventually reach a locked-down arena. Move the floating blocks to form steps leading to the black caution block. Throw the rock up to the button to deactivate the shifting blocks in this area.
GOLD YARN LOCATION: Past the rocket robot, drop down and grapple the poles. Use the lava blocks to climb up to the yarn – make sure yo wait for the buzzsaw to move left.
6-Finale
Not another time trial! Jump over the saw to the right and then jump over the bomb block over the water. Use the lava block, ride the fans, and double-jump right to drop into the fan on the wall to launch you left.
Make sure to double-jump again, your momentum will drop you down into the pit!
GOLD YARN LOCATION: Dropping down into the room guarded by a rocket robot, climb up and push the boat into the water. Then ride the boat into the portal – as you fall, jump out to grab the yarn.
To get by the buzz saw, jump into the lava block to bound below the blades as they sweep across.
Passing by the exit through the hole, wall-jump to the lava block. Just as you’re launched, duck to slide under the blade and under the exit.
Time for part 2. Climb up the dangerous area and dodge the rockets. Use the lava blocks on the right to climb higher, then use the ceiling poles to get into the portal on the ceiling. Or jump off the robot’s head.
Falling down the hole with fans and spikes, hold right. Landing on the bombs, quickly switch to left.
GOLD YARN LOCATION: At the bottom right corner, grab a rock and drop into the alcove of lava blocks.
Get one of the rocks into the button on the far end. Hold the rock as a shield to protect yourself from lasers. The rest is just tricky platforming, so get to it.
Chapter 7
7-1
Getting closer to some answers, each level will just get tougher from here. You’ll see that almost all the gems are located in a blocked off area to the left.
Wait for the fans to shut off before making a jump. Jump into the pit below, and move the boat to the right side before continuing. You’ll need the boat in place to get the Gold Yarn later.
Further right, grab the rock as it pops up, and toss it onto the orange spring against the right wall. Leap over to the left and throw the rock into the portal once it’s on the conveyor.
With the rock through the portal, follow it and push it into the caution block under the button to clear the first barrier.
GOLD YARN LOCATION: Return to the pit to the right of the water/fan trap near the entrance. Climb down from the poles and use the boat – previously pushed to the right edge – to sail into the yarn.
Continuing down, you’ll find a danger-area with a cat throwing grenades. Push the boat left onto cat to kill it, and deliver the boat down through the clouds. Use the boat at the bottom level.
After using the boat, you’ll find an all-new enemy. The cat hover vehicle dumps grenades and protects a large group of gems. The hovering battle-egg can be destroyed, it just takes plenty of jump-attacks.
In the same room, move the floating blocks off the generators to dump the rock into the portal at the bottom of the hole.
To get the last rock into position, climb up into the rocket robot area, grab the rock, and throw it onto the higher conveyor while riding a rocket lift.
Return to the barrier room, place the rocks onto the buttons, and grab the gems. Now you’re home free to get into the exit.
7-2
Jump through the clouds and run left to find a horse/pig creature down on the fans. Use the lava blocks to bounce down and land on the pig, so you can ride out.
Use the pig to ride through the spikes and reach the portal that was previously unreachable.
Once the caution button is pressed, return to the spike-portal and check out the fake blocks to the left of the rock after it’s dropped through the shifting caution blocks.
Grab the pig and ride it right using the holographic generator bridge over the water to jump through the spikes.
GOLD YARN LOCATION: Found right above the exit door, use the fan on the right to speed over the ice blocks and double-jump over the water to reach the yarn. If you miss, you can also jump up from the sludge onto the spikes. If you’re very careful, you can land on the very edge of the spike block without activating it.
7-3
To get over the cloud right at the start, launch with the lava block and double-jump.
The gimmick of this level is that you’ll need to replay the entire thing with shifting blocks. After passing through once, you’ll be able to deactivate the black caution blocks.
GOLD YARN LOCATION: On the second level pass, double jump from the last ceiling pole after getting through the section with purple water, turrets, and shifting white blocks.
7-4
Take the lower right path over the shifting blocks and fans pushing up into spikes. Down the path, slide down the sludge and wait for the blocks to activate. Prepare to jump into the lava block, but don’t jump until the shifting blocks disappear.
GOLD YARN LOCATION: Across the pool of orange water, jump over the spikes and brush against the lava blocks. Aim for the brighter brown blocks, these are fakes! Falling down, the fan will push you into the small alcove with the yarn.
Next, take the upper right path. All you need to do is move the floating block out of the rock’s path.
Take the left path, and make sure to slide under the buzzsaw at the end of the road.
Ahead, crack open the green creature’s egg. You’ll want to clear his path to create holographic bridges as you go. Hit the first bomb block above the egg, then rush to the bomb block to the left so you can get onto those hologram blocks before they appear.
At the end of the path, move the last floating block out of the rock’s trajectory to create a bridge to the exit.
7-5
This is another level you’ll need to pass through twice.
GOLD YARN LOCATION: After dealing with the cats and pushing the floating block onto the caution button, simply use the lava blocks to your left to reach lots of gems plus an extra yarn.
Now it’s just a matter of backtracking to the entrance to get to the exit.
Past the floor of lava blocks, enter the newly opened alcove where the sliding buzzsaw appeared to find fake blocks leading to a hidden gem.
Chapter 7
7-6
Through the main path, hit the button and grab the jetpack before rushing through the portal. Use the jetpack to get through the steps of buzzsaws above and to the right of the portal.
Above, you’ll be able to push a boat down a hole, where you can sail it over the water to the right. Here, you’ll be able to crack open a green critter’s egg. The creature will wait on the spikes, use it to jump over the water.
Stand on the light brown button until the buzzsaw is freed, sliding across all four buttons. Now you can climb up and to the portal, where you can now leave the area taking the left path.
GOLD YARN LOCATION: Before leaving, the yarn is located above the dark brown caution blocks. Climb the shifting blocks, then use the lava blocks to grab the yarn.
Continue to climb up and push the boat into the pit. Ride the boat across the orange water to the exit.
7-7
Only one way to go – up! Jump through the portal. Take the right path to continue down into a fork leading two different directions.
Down the right path, you’ll need to kill the cat on the generator – use the fans to blow its grenades into its face.
Down left, you’ll need to shut down both generators to get the pig and ride it onto the green button.
Now you can return to through the portal to grab some gems and exit.
GOLD YARN LOCATION: Before leaving, grab the jetpack against the left wall. Climb up the clouds, and use the jetpack to launch up into the right hole at the center of the level.
7-8
Grab the pig and ride it across the water. Use the poles to escape the laser!
Continuing through the floating block maze, free the green creature from its egg, and wait for it to wait at the high ledge. Hold [RT] and jump through the portal, double-jump up to the critter and he’ll pull you up.
GOLD YARN LOCATION: Tricky to find, this time you’ll need to run toward the laser blaster block right above the visibly trapped yarn. The green block to the right of the laser is a fake.
After switching the floating block to the green button, you’ll need to backtrack through the level to reach the exit.
At the last challenge, don’t forget to cry for help to bring the pig back over the water.
7-9
Welcome to another complicated level. Ignore the portal and the path leading up, they’re both dead-ends. Instead, move right and take out the cat at the bottom of the alternating clouds.
But there’s nothing else to do down there, instead move up through the corridor of lasers. Set off the bomb blocks and quickly rush upward.
Hit the green button, then backtrack down the corridor. Jump up into the room to the right of the jailed cats and push the rock onto another green button.
Drop into the room to the left of the alternating clouds and place the rock stuck on a bomb block onto the right-most orange spring. It’ll launch it into place – on a white button.
GOLD YARN LOCATION: Once both the green and white button are pushed, you’ll need to backtrack to the portal near the entrance. On the way, you’ll find a floating block and a jetpack. Grab the jetpack and ride it into the checkerboard clouds above, then blast up into the pink sludge trap above. Run quickly across the orange springs to safely get to the yarn. Because you’re running on sludge, you’ll need to make jumps to avoid setting the springs off.
Set the holographic generator on, place the pig over the water leading to the exit, then turn the generator off. The path to the exit should now be clear.
7-Finale
Time for time trials! Drop down, ride the orange spring to brush the bomb blocks, then jump back to the spring once the path is clear.
Getting by the hovering cat guard is a pain. Just be sure not to accidentally brush into the bomb blocks above you as you jump.
Passing by the room with cats armed with grenades, carefully drop through the spike-lined hole. Ahead, on the left, be sure to throw the rock off the generator before grabbing the wings.
With the wings, fly up through the path above the pointer signs.
In the second area, throw the rock onto the spring before quickly stepping onto the button. If you’re able to deactivate the blocks, the rock will land in the water, allowing you to get by without drowning.
At the alternating cloud blocks, use the gray blocks to shield yourself on the way up. Climb up on the right, then shift to the left.
GOLD YARN LOCATION: This tricky yarn is located after freeing the group of cats from their prison in the top right corner. A cat guard throwing concussive energy blasts is keeping the yarn safe.
To get to the exit, move the pig onto the right-most button to clear the barrier. Use the pole, and double-jump to the key.
Chapter 8
8-1
From the entrance, drop down and grab the floating block. Move it off the laser and caution button – now the blocks further right will shift.
GOLD YARN LOCATION: At the end of the lava path, with magma blocks on the ceiling and floor, you’ll find the yarn at the left-end in a high corner. Use the lava blocks to reach it.
8-2
Getting by this tricky jumping puzzle at the start, save your double-jump when dropping through the hole. You’ll bounce off one lava block, then a second – then quickly double-jump to bridge the gap.
To get by the monsters, wake them up and lead them around until they get tired. Wait for the creature to pant while standing still to make your move.
At the end of the caution blocks, grab the rock and drop it onto the button. Enjoy a more difficult trip back through many of the same areas.
Backtracking right, jump into the portal that’s now open.
GOLD YARN LOCATION: After entering the portal, you’ll find the yarn. It’s located between two buzzsaws. Tricky to reach, but there’s no puzzle here.
Use the lava block to reach the exit.
8-3
The opening platforming puzzle can be tricky. Start by clearing away both bomb blocks and jumping into the lower portal. Double-jump to the pole, then blow up the bomb block above. Drop down and enter the lower portal to pop through the higher portal – as long as the second portal is still blocked.
Through the springs, jump onto the conveyor and call the pig down. Jump on, and ride it left past the laser.
In the room with the rocket robot and egg creature. Crack open the egg, then move the floating block between the cloud blocks – directly below the robot. That will allow the creature to get to the spikes.
Below, move the floating blocks down and set off the bomb blocks. Wait for the other gray portals to be blocked off, then jump through the yellow portal.
GOLD YARN LOCATION: Just left of the exit. Carefully double-jump from the lava block to reach it.
8-4
To get by the first puzzle, jump over the buttons and grab the rock. Throw it up the steps and attempt to drop it through the cloud onto the floating platform.
Once the rock is on the platform, alternate pressing buttons to get the fuzzy platform further left. Get it all the way left and the rock will drop onto a holographic generator.
Eventually, you’ll reach an egg. Crack it open and wait on the rocket lift.
GOLD YARN LOCATION: Just to the right of the exit. Easy to get, just drop down and double-jump back up.
8-5
Death trap warning! Drop onto the lava block, double-jump, then immediately duck to avoid a buzzsaw-related death.
Using the pig to activate a generator, don’t continue. Instead, use the pig to ride over the ice and jump to the lava block. Grab the gem, and a second pig will drop down. Now, leave one on the generator while the other crosses left and onto the portal.
GOLD YARN LOCATION: Continuing on, you’ll reach two buzzsaws. The yarn is above, grab it by collecting a helicopter power-up found in a secret alcove through fake blocks located one space right of the lava block.
Before reaching the exit, you’ll need to navigate more killer lava blocks. Grab the jetpack on the way down, and mash jump to avoid bouncing down into the water.
Chapter 8
8-6
Climbing up the sludge further in the stage, make sure you move the floating block off the holographic generator.
Move the floating block onto the generator at the top of the screen. The lava block will launch you right into a monster – so watch out!
GOLD YARN LOCATION: Found above the exit. To get it, shut down the three fans below – then reactivate the left and center. Step from the right into the left fans, including the fans one space up. Quickly shift your friend right to avoid the buzzsaw, and you should have enough lift to get the yarn.
8-7
After jumping through the shifting blocks and reaching the ice blocks, you’ll find a buzzsaw sliding over four buttons. Touch the bomb block to give yourself a moment where the buttons are not pressed, allowing you to continue up.
Down into the area with the green-creature signs, crack open the egg below the floating blocks and stand on the holographic generator. Place all three floating blocks to cover the three clouds at the center.
The green creature will wait on the spikes, jump into it’s mouth to launch through the portal.
GOLD YARN LOCATION: Double-jump after getting through the portal and crack open the egg. Move the floating block to let the creature out, then make a bridge to help the creature get up into spiked path above.
8-8
Stand on the button until the rocket lifts reach about the height of your double-jump.
GOLD YARN LOCATION: Climbing through the sludge and buzzsaws, you’ll get to a room full of shifting blocks. Above the pink sludge, there’s a fan making this collectible tough. Jump from one of the higher shifting blocks to the lava surrounded by fake blocks.
The final puzzle requires careful timing. Start from the right-most bomb block and drop down, run across, and you’ll have just enough time to double-jump and catch the new holographic bridge.
8-9
GOLD YARN LOCATION: Collectible from the start. Jump into the portal directly below the spikes, found to the right, and set off the bomb block. Wait for the portals to be covered by holograms before running across the portal again.
Through the deadly shifting block platforming challenge, you’ll come across several piled up rocks. Throw them onto the bomb blocks, but avoid touching them until you absolutely have to. Get one rock to the top and drop it onto the caution button.
8-Finale
This is it, the final time-trial. Wait for the holographic blocks to appear, then jump onto the pig. Jump over the spikes, and call the pig over to continue riding it.
There’s a portal in the bottom right corner. Wait for the laser to stop and run the pig into the portal – then double-jump off.
GOLD YARN LOCATION: Jumping off the pig, you’ll reach a trap gauntlet. Make single jumps over each buzzsaw, if you have enough momentum you can duck and slide under the saws.
Grabbing the jetpack, ride it up, bounce left, then launch up again. Bounce right, and before dropping onto the ice below the bomb block, duck!
Part 2. Draw the boat over and sail left. Climb up, and move through the fans left.
Run through the gauntlet of traps, but things don’t get really difficult until the last room. Ride the conveyor into a room with two pointer signs.
Here, jump right through the shifting blocks to the right, and climb up and jump onto the bomb block. From the bomb, leap into the lava blocks to bounce up into a portal.
Jump onto the laser, then time your jump to get up through the shifting block. Double-jump left to the orange spring so you bounce into the lava, launching you toward the exit.
As you’re flung by the lava, hold left to avoid running into the lava on the right.
Congratulations! You’ve saved your friends!


 5 best Adam Sandlers movies - 2015
 Fallout 4: Total Hack magazines locations
 Newbies To Veterans: 5 Advanced EVE Online Activities
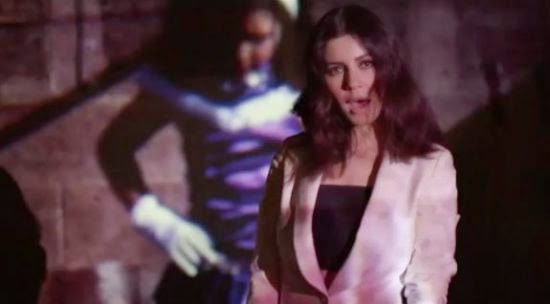 Marina And The Diamonds drops Immortal music video
 Gears of War: Ultimate Edition COG Tag Locations