
Jetstream Sam takes center stage in the new downloadable add-on for Metal Gear Rising: Revengeance. Play as the lone antagonist in a campaign of destruction weaving through Detroit, and other Rising locations. Taking place before the regular game, prepare for an even more challenging experience.
Shrug off each enemy encounter with our techniques and tips, right here. Check out the DLC guide below, with boss strategies and ability tips that’ll safely usher you through this breakneck expansion.
If you’re looking for help getting through the main campaign with Raiden, see how to crush your enemies on the full Metal Gear Rising: Revengeance walkthrough. Need more in-depth guides on farming, unlockables, and secrets? Find all that on our list of Metal Gear Rising cheats.
Metal Gear Rising: Revengeance – DL-Story-01: Jetstream
Metal Gear Rising: Revengeance – Main Campaign
Metal Gear Rising: How to Easily Farm Infinite BP [Exploit]
Metal Gear Rising: How to Unlock All Difficulties with the Konami Code [Easter Egg]
Metal Gear Rising: Revengeance – Officer Left Arms Locations Guide
Metal Gear Rising: Revengeance – VR Mission Terminals Locations Guide
Metal Gear Rising: Revengeance – Data Storage Locations Guide
Metal Gear Rising: Revengeance – DL-Story-01: Jetstream
Part 1: Sewers
The mission begins with Jetstream down in the Denver sewers. Pretty similar to the sewers in Mexico, right? Ignore the visual similarities, because it’s about time you get acquainted with Jetstream Sam.
Jetstream is surprisingly divergent in skills and movement to his rival Raiden. It’ll take some getting used to – first off, Sam doesn’t have the amazingly useful Ninja Run.
There’s no secondary weapons for Sam either, you’ll have to rely on his powerful heavy strike. One of his most useful abilities is the charge. To unleash Sam’s deadliest attacks, you’ll need to charge up.
Holding heavy strike will swell red energy around Sam’s form until it crackles – that’s your signal to release and unleash a devastating attack.
Almost any of Sam’s attacks or combos can end with a charge attack. Give them a try – check out the full moveset in the help menu.
You’ll notice something else very quickly – Sam has no special vision. Instead, he taunts. Taunts are a new ability that’ll instantly make any nearby enemies flash red. While taunted, they’ll attack wildly and dish out more damage if they manage to land a hit. But, they also take far more damage.
Taunting is a fairly advanced technique, and isn’t required to complete the DLC mission. It will become handy later, if you’re willing to take the risk.
Regular enemies can be killed instantly while enraged – just be aware that you’re losing precious opportunities for Zandatsu.
Fuel Cell +1 Chest: Immediately turn around from your starting point and check out the back sewer corner. Slash the black crate open to gain a fuel cell.
Always be on the lookout for black chests and VR Missions. Sam can’t gain HP or BP without these upgrades found throughout the mission. You’ll need every upgrade you can get for the intensely difficult final boss.
Without Ninja Dash, you’ll have to get used to just using Sam’s high double-jump to get around. Crack open the orange chest on the shipping containers to the left of the start for a nanopaste.
There are two cyborgs to the right around the corner. You’ll notice something fast – Sam can’t use stealth kills! Jetstream is a samurai, not a ninja. No need for stealth here, though you can still sneak past enemy encounters.
In the sewer ahead, you’ll find cyborgs patrolling the catwalks with rocket launchers while UG’s skim the surface.
Here, learn a few of Sam’s best moves. Avalanche [Heavy Attack Mid-Jump] is great for hitting enemies below you, while it’s charged version is perfect for aerial opponents.
Endurace +1 Chest: Down to left path from where you first jumped into the lower sewers, look in the corner for an orange chest with an electrolyte pack. Jump onto the platform above and use Blade Mode on the black chest for an upgrade.
There’s another healing item straight down at the end of the catwalks from the starting point, before making a left turn toward the waypoint.
Another UG is at the top of the crates. Use Taunt to make them enter a rage state – the skimmer UG’s are too annoying, and their enraged version is barely dangerous. Stay back when they prepare to spin, and attack from behind while they use flame.
Sam lacks the same quick-strike capability of Raiden, but his range is very good. Use Front Kick [Light Attack x 3] and end with a charge to launch red energy forward at any enemy you don’t want to get close to.
To enter into combat fast, use Charging Slash [Hold Heavy Attack] to get up close and personal. This attack will stagger many enemies, making it easy to follow-up with another combo.
Another important combat tip: Jetstream Sam does not have any unlockable abilities. That means he starts with a dodge that provide precious frames of invincibility. It isn’t quite as mobile as Raiden’s, so it might take practice to get down.
To dodge, look in the help menu to find Backflip [Light Attack + Jump] which can be used to dodge left, right, backwards or forwards depending on which direction you’re moving. It’s incredibly useful, especially later in the mission.
Data Storage #1: Before interacting with the door panel, run past and jump up to the platform above the sewer drain at the end of the path. In one corner, you’ll find the floating collectible.
To continue toward World Marshall HQ, interact with the control panel outside the door.
Through the opening tunnel, you’ll have to deal with a heavy cyborg and two buddies. Use the weaker cyborgs for Zandatsu fodder while practicing against the heavy. Quick Draw [Heavy Attack] is a great way to surprise tough enemies.
VR Mission #1: Inside this maintenance room, look in the left corner to find a mission terminal. Once the enemies are down, Sam will announce his interest.
VR Missions work differently in Sam’s add-on. Instead of unlocking, you’ll have to complete them right away. If you manage to win, you’ll be rewarded with an upgrade. It’s important you go for these whenever possible to bolster Sam’s stats.
The first VR Mission pits Sam against three Cyborgs and two Gekkos. Defeating only one soldier will summon on Gekko, so if you’re overwhelmed by two of the UG’s, avoid killing all the cyborgs. Use the weak soldiers to refill your health with Zandatsu, and focus on the bigger fish.
Endurance +1 Chest: Complete the VR Mission above to make the black chest appear.
Climb the container and exit back into the sewers through the tunnel to meet your first boss.
Boss: LQ-841 “Blade Wolf”
You’ll remember this guy from the second mission in Raiden’s campaign. He’s much beefier here. In fact, he’ll almost always lunge forward right as the fight begins. Dodge or parry right away.
Make sure to set your repair nanopaste into the left slot. There’s more healing items in the orange crates in the dry corner near the catwalk stairs.
Blade Wolf doesn’t play around. He’ll unleash series after series of combo attacks. When his face flashes red, prepare for a three-hit combo with his chainsaw blade. Parry or dodge all three attacks before replying.
Blade Wolf is very active, he’ll run circles around Sam if you don’t lock-on. Watch out when Blade Wolf’s body glows red, he’ll try to lunge forward and grapple Sam, slamming that chainsaw down and dealing a good amount of damage.
When Wolf retreats, he’ll attempt to throw three knives in series. Parry or Dash left and right to escape. If his chainsaw flashes red, prepare for a spinning area-of-effect attack. Answer this one with a well-timed Avalanche.
Endurance +1: Dropped by Blade Wolf once defeated.
Into the next sewer area, you’ll find two patrolling UG’s and a Cyborg. Try to take the UG’s out separately. Look in the sewer drain on the left path to find a handy EM Grenade.
Fuel Cell +1 Chest: To the far right, past the control panel to the shuttered doors.
When you’re ready, interact with the control panel up the stairs to continue into World Marshall HQ.
Metal Gear Rising: Revengeance – DL-Story-01: Jetstream
HQ Lower Floors
Through the hall, look to your right. A Gekko appears, and they’ve been improved since Raiden’s campaign. These models are tougher, with faster attacks, and a tricky jump.
When they rear back, sometimes they’ll jump over Sam’s head instead of charge. When they do, parry directly behind before they deliver a powerful donkey kick.
Use charged Avalanche to hit these Gekkos hard, and use the cyborg it’s paired with to refill your health if you’re in need.
The next room is guarded by a camera turret and a heavy. Down the next hall, you’ll enter the freight elevator.
Endurance +1 Chest: Before getting on the lift, check out the room on the right. Grabbing the upgrade will summon two shielded cyborgs and a slider. Use parry-counter to destroy their shields, or just jump over their heads with a charged Blade Mode to kill them instantly.
Check out the lower lift area for a health pack. Then, interact with the control panel at your waypoint to ride the lift up.
As the elevator goes up, two cyborgs and a swarm of tripods will attack. They’ll barely slow Sam down.
When the elevator stops, things get more interesting. A rocket-armed cyborg will drop onto the shipping crates and shoot down at you while a Raptor engages at close-range.
The Raptors are back and more annoying than ever. Their energy weapon will still cause problems, it’s best to deal with this UG quickly. Jump onto the containers and taunt after finishing off the cyborg.
Use Avalanche, if you’re willing to play it safe and boring, or charge in. Either way, the Raptor isn’t significantly more powerful while enraged. A few attacks will break it’s armor.
Data Storage #2: Jump onto the second lift and look behind the storage containers before climbing up.
Climb up to the waypoint and hit the door controls when you’re ready to continue. But, before you go, look around the room. There’s a healing item in the orange chest, and a homing missile launcher.
VR Mission #2: In one of the corners near the shaft, you’ll find another VR Mission. Here, you’ll have do deal with heavies trying to knock you off a platform.
Use the mid-dash heavy attack followed by a light attack to send these rocket heavies flying off the side to their death. If you’re ever knocked off yourself, don’t forget that Sam has a unique air dash activated with the dash button.
If you have Rocket Launchers handy, this is another good way to instantly get rid of a few heavies. Target them, then let loose a rocket to send them flying off the side.
Take care of the Berserker before handling the sliders. This is the easy part. Ignore the sliders, and don’t let them goad you off the edges.
Handily, all the items will respawn once you return. Press the control panel when you’re ready.
Boss: Metal Gear Ray (Modified)
Ray has more bark than he does bite. He’ll start with a vertical plasma beam attack. Just keep dashing. To dodge most of Ray’s attacks, you’ll want to keep dashing.
Stand too far back, and Ray will attempt to slice Sam with it’s massive blade fins. Avoid it by running in close.
At close-range, Ray will thrust it’s sharp head forward several times. Keep dashing left or right until it slams it’s head down into the ground. This is your chance, it’ll stay stuck for several seconds. Go nuts with charge attacks or combo strings.
Knock it’s health down to about 86% and you’ll get your chance. Use Blade Mode when the icon appears, and slice away it’s head armor. Now it’ll take even more damage.
Follow this basic pattern. When Ray jumps away, dash toward it while dodge plasma or missiles. Stay under it’s mid-section, if you get close to the legs it’ll attempt to stomp.
At about 10% health, you’ll have the fight won. Use Blade Mode when the prompt appears to finish Ray off.
Before leaving the area, take some time to explore.
Fuel Cells +1 Chest: In the Ray Hangar, look for a platform underneath the catwalk leading to the exit. There’s a black chest sitting near the pipes.
VR Mission #3: This mission is located on the catwalks opposite the exit, after fighting Ray. Look for a single catwalk with stairs, and jump to the silver bound crates near the wall. From here, you can jump to another catwalk with the terminal at the end.
Endurance +1 Chest: Complete the mission above for the chest to appear nearby.
Data Storage #3: Another collectible is nearby, from the VR Mission. Before jumping down, look above the crates you used earlier to reach the catwalk to find a section of ducts. Jump to it, then jump to another section of duct above. Ahead, near the ceiling, you’ll see a series of four fans. Double-jump to each, at the end of the row is another area you can reach above, with the data.
Use the catwalks to reach the exit door.
Endurance +1 Chest: Before leaving, jump onto the platform above the doors to find a catwalk. Ahead, there’s another catwalk that’s seemingly out of reach. Double-jump then use an air-dash to reach this hidden section.
Metal Gear Rising: Revengeance – DL-Story-01: Jetstream
Japanese Gardens
After leaving the Ray Hangar, you’ll find yourself in an employee passage guarded by two Berzerkers. If you’re careful, this fight can be avoided.
Through the doors ahead, you’ll find the entrance hallway to the Japanese Gardens. After a short discussion with Monsoon, hit the control panel to enter the area proper.
Fuel Cell +1 Chest: This black chest is found right above the entrance door, on a catwalk attached to the roofs.
The area is lightly guarded. Only a handful of cyborgs and sliders are patrolling this town-like area. Deal with them, and collect any chests you can find.
There are a few interesting easter eggs here, too. Ninja-Cat returns, found on the stone walkways in the center of the “town” area. Inside the gazebo, you’ll find a stack of watermelons too. Slash the melons, and Sam will quip: “At least my Murasame must feel at home here…”
There’s an easy-to-miss battle at the top of the gazebo. Climb it by jumping onto the lowest roof from the large fences, then climbing up on the hanging lanterns.
Endurance +1 Chest: Another black chest can be found outside the gazebo. Facing the tower from the japanese garden (with the bridge) check out the path to the right to discover the upgrade.
Near the exit to the gardens, you’ll have to deal with a cyborg and three Fenrir UG’s. They’re just weaker Blade Wolves, and shouldn’t offer much resistance for your buffed-up Sam.
VR Mission #4: Find this in the hallway leaving the Japanese Garden. Turn left instead of right, and dash down the long hallway to find the terminal.
Turning right from the gardens, deal with the single cyborg guard and run to the waypoint.
Data Storage #4: In the elevator lobby, just as you enter, look left for a panel. Slice it open to find the data inside.
At the waypoint, you’ll encounter a large group of enemies – including Mastifs. Heavies will follow, and more regular cyborgs will join in. You’ll know reinforcements are coming by the ding of the elevators as they arrive.
This is where effective use of counter-parries and charge attacks will save your life. Step into the elevator to continue up toward the server room.
Metal Gear Rising: Revengeance – DL-Story-01: Jetstream
HQ Server Room
On the top floor, crack open the orange box for another nanopaste. Stepping out into the hallway, there’s a locked door to the right. Don’t worry, you’ll get the key later.
Take the path left, and watch out for the patrolling Gekko. Use a jump-charge attack to stun it in one blow, then follow up with another charge to smash through its armor in no time.
Hit the button down the hallway to enter the server room. Heavies and more patrol between the stalks, so watch out. If you stick to the outer rim, you can reach the waypoint easily. But, if you interact with the terminal, you’ll find the door is locked.
Defeat the Mastiffs that appear in the main room to collect security keys. One belongs to the waypoint, but there are more that go to the other doors in the room.
Endurance +1 Chest: Inside the server room, look underneath the stairs.
For a particularly tough fight, use the main entrance doors down on the first floor of the server room. Interact with the console, and you’ll enter a large arena where Raiden first encountered the extra bodies for Monsoon and Mistral.
Back track to the elevators – a new enemy will appear on the way. Take out the cyborg to collect another keycard. Use the console on the right of the lobby to enter a second secret room.
Fuel Cell +1 Chest: After collecting the keycards from the Mastiffs in the server room, return to the locked door near the elevator lobby. Kill the cyborg on the way to collect an extra card. The black chest is inside the locked room.
VR Mission #5: The last terminal is in the same room as the black chest described above.
This is the only non-combat VR Mission. You’ll need to take the lower path to find an extra upgrade under the last set of stairs leading to the mission exit.
Endurance +1: Take the steps down, then run down to the empty chasm. There’s a series of moving platforms moving underneath.
This is a good time to fill up on nanopaste. Each time you enter the VR Mission, all the items on this floor will respawn. An orange chest contains nanopaste near the elevators. Enter the VR terminal, then exit again for the nanopaste to respawn.
Now, return to the server room and hit the control panel at the waypoint. This is the final stretch, prepare for an intense last boss.
Reaching the helicopter pad, an unmanned chopper will appear. It’s just one chopper – take it down with a few heavy charged mid-air attacks.
The moment you step onto the helipad, the last battle begins.
Metal Gear Rising: Revengeance – DL-Story-01: Jetstream
BOSS: Senator
As the battle begins, two helicopters will immediately crash into the pad and streak fire toward you. Jump or dodge out of the path!
Now it’s time to get serious. Lock-on to the Senator, and prepare for a challenge.
Senator Armstrong is faster than before, with several new powers and attacks that make him far deadlier than he was in Raiden’s campaign.
You’ll see the Senator charge up while standing still – this could mean a number of things. If a faint red outline appears on the ground, that means he’ll explode. Stay out of the ring, and you’ll be safe.
But, the Senator can also expend a series of explosive cracks through the ground. You’ll see the cracks criss-cross with the boss at the center. Run away and stay off before they burst in fire. But – be prepared for a powerful lunge attack. Guard when you see Armstrong launch forward.
During both of these area-of-effect moves, you can stun the Senator with a series of attacks. Mix heavy and light to quickly damage him and break his attack before it even starts. This is especially easy to pull off during the smaller red-ring explosion.
If his fist glows red, he’ll punch the ground and launch more burning fireballs forward. Stay away – dodge or jump out of range, and don’t touch them. As the battle progresses, these will move faster and track Sam. If you stay near the Senator, the trails will safely pass by if you’re able to dodge.
Beware when the Senator glows yellow. That means he’ll rush forward and grapple Sam instantly if he reaches you. Jumping will not help. The only way to escape his grapple attack is with a dodge.
When the Senator closes in on you, he’ll attempt to attack with punches or kicks. These can be parried, but unless you plan to counter-parry, there’s no reason to block. Dodge instead, each hit will knock Sam back – dodging will get Jetstream back onto his feet faster.
Knocking Armstrong down to 50% health will cause him to throw five helicopters. Slice them apart in Blade Mode – if one lands, you’ll get hit with a fireball. If you manage to destroy them, you can expect to collect two more nanopaste items.
This is when things get harder. The Senator will speed up, throwing attacks much faster. This is when you need to be even more aggressive. There’s no time to attack – stay close to the Senator and strike while he charges his ground-attacks. Dodge when he punches, and beware when the Senator turns yellow.
Charge attacks between his own. After he unleashes a charge or explosive area-of-effect, he’ll usually pause for a moment. Don’t wait for him to stop, begin charging Sam’s next strike before the Senator waits around.
Charging Slash is one of the best abilities during this fight. You’ll close the distance between the Senator, while also charging a powerful strike from a safe distance.
At 30%, the Senator becomes a true monster. This is a true test of skill. He’ll use his burning charge-punch attack, that can’t be blocked, much more frequently. He’ll also use it in a series of two.
His grapple charge will also come one after another. Be prepared to dodge a second time whenever you see the Senator flash yellow or engulf himself in fire.
Once again, I’ll repeat: do not try to jump over his unblockable charge attacks! He’ll fly up and swat you out of the sky.
This is when you’ll have to be at your most aggressive. Be prepared to dodge often, and attack while the Senator charges his attacks. It’s harder to stun him now, but you’ll have very few safe opportunities to attack.
Once his health is brought down to 0%, you’ll begin the final QTE for this DLC. Congratulations, you just defeated an even harder version of Armstrong!


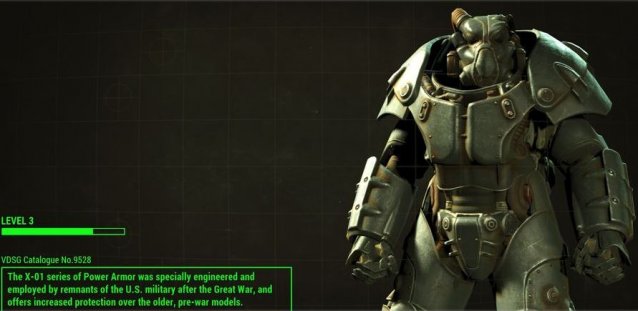 Fallout 4: Find a Full Set of the Enclaves X-01 Power Armor
 Star Wars: Battlefront How to Find All 5 Collectibles in Survival Tatooine
 Getting To Know The New Joker In Batman: Arkham Origins
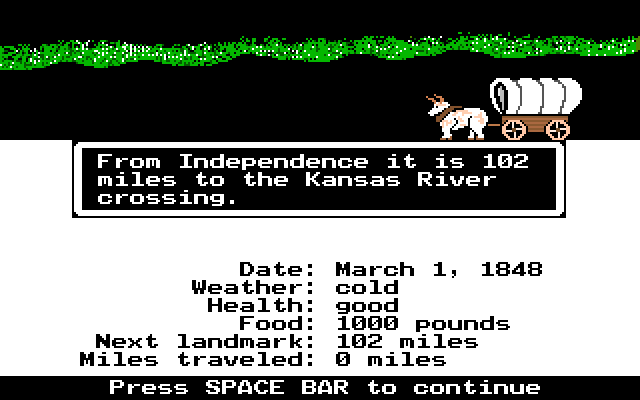 9 Old Educational Games You Can Play Right Now for Free
 Watch Dogs Combat Skills