Japan is at it again. Atlus delivers unto us a quirky, nonlinear, social-simulation and puzzle game. Play as Vincent during his daily life, where he must talk and make decisions concerning the dangerous love-triangle he finds himself in. At night, Vincent is plagued by bizarre nightmares, where Catherine’s real gameplay shows up in the form of a cube-based tower filled with monsters and puzzles. With a nonlinear story and multiple endings, you’ll want to know everything you can about the twisty tale of Catherine — and we’re here to help, with a full text and video walkthrough.
If walkthroughs aren’t your cup of tea, check out GameFront’s many-loving lists, we’ve got achievements, trophies, and an all-encompassing cheats page.
Check back after release for daily updates – give us time, we have to play the game!
Rapunzel Stages [LINK]
Video Walkthrough
Prologue
Underground Cemetery
Head up the staircase of blocks until you reach two blocks. Push the blocks to the right to continue up the stage.
Push the block to the right one space to the left to make a staircase. Remember, you can only move up one square at a time.
Climb up the staircase until you reach another stop. Pull out the third block from the left and continue on, grabbing the coins you see as you go.
Continue up until you see a third pile of coins. At this point, go to the far left and push the block to the right to grab the coins on the ledge.
Continue all the way over to the right and pull out a white block to reach the ledge above you.
Follow the coins up the stairs until you reach a series of bronze blocks with faces. These cannot be moved. Pull out the block directly in the middle to move up.
Continue up the staircase and collect the coins on the path. Eventually you’ll find a path on the right that leads to more coins and a block that must be pushed to the left.
Climb up to the stairs to the red block to pull the lever and finish the level.
First Day
You’ll be treated to a series of cut-scenes. When you finally regain control of Vincent, you’ll find yourself sitting in the Stray Sheep bar alone. You’ll be able to check your text messages on your phone. Pick up the one from Katharine.
You’ll be able to choose several different responses to her message. To cycle through the list of responses, delete everything you’ve written to see another option. You can choose to respond to however you want. Just know that, like all the other questions you’ll be given in the game, your answers will determine the way the story plays out.
Hit the Diary function on your phone to save your game. Put your phone away when you want to move on with the game.
Second Night: Prison of Despair
Area 1
Go to the very right and follow the path upwards. Be wary of cracked blocks, which break when you walk over them too many times.
Continue up the path of stairs to the pillow. This will give you extra retries, which will be invaluable on your treacherous climb up the tower. Go for pillows when you can.
Once you make it to the dark blocks, drop down to hang on the block beneath you. Move right along the edge to reach a block with a pile of coins.
Continue up the path and keep edging over the piles of coins. Follow them and you’ll make it through the labyrinth.
Follow the staircase up until you hear the ringing of the bell. Pull out all the blocks and continue up the staircase.
Once you get to the wall of dark-faced blocks, pull out the movable blocks and make a platform to continue.
Push two blocks all the way to the right to reach the coins and the checkpoint.
Continue up the stairs and push the two blocks to the left make a bridge. Pull the lever and finish the floor.
Landing: Floor 1
You’ll arrive on a platform with a number of other sheep. To your left is a pedestal that allows you to save if you wish. You’ll find one of these every time you beat an area, so consider them a sort of break room.
Talk to the sheep in the green vest and the sheep in the red vest in the upper left corner. They’ll give you helpful techniques to help you climb the tower. It’s wise to check in with the sheep on each landing. Usually they’ll have something interesting to say as well.
When you’re ready to move on, head into the Confessional building in front of you. The person in the booth will ask you a personal question, which he asks you to answer honestly. This time, it’s about whether you think life begins or ends with marriage.
You’ll notice when you answer the question a blue and pink meter will appear. This meter represents Vincent’s alignment towards Order and Chaos. When the scale tilts to the right, Vincent follows the path of Order. When it tilts to the left, he leans towards Chaos, and is more likely to . This meter will affect how story sequences play out.
Area 2
Move up the stairs ahead of you. Go three spaces to the right to follow the coins to another wall of immovable blocks.
Drop down and edge along from here to find the Create-A-Block item, which lets you create a regular white block anywhere. Save it for now, as you’ll need it later.
From there you can climb up the stairs. Avoid the sheep because they can block your path and move blocks, which can screw up your climbing. You can shove them away if you’re in front of them, although avoiding them is easy enough.
Continue up the left path and pull out two left blocks and one above the very left that you just pulled out to make a small staircase.
Afterwards, continue the path until you find a wall. Edge around the wall and climb the two steps to the coins above.
Use the Create-A-Block item in order to complete the staircase and obtain the coins.
Move through the stairs to the left and continue upwards. You’ll reach a flat level. Move all the way to the right and pull out the blocks to make a staircase. Pull three more blocks out on the far right to continue moving up.
Push the dark block to the left and pull the block over it directly over it. Then pull the dark block back towards you to make a staircase and end the level.
Fist of Grudge
Here’s where you’ll face your first boss battle, which takes the form of two giant arms and a grisly fork capable of skewering you in one hit. To win this fight, you’ll need to get to the end door before the boss destroys the stage or manages to reach you.
Fist of Grudge has two abilities: one is a basic stab and the other is a downward slash that turns all blocks it hits into the bronze dark blocks, which move more slowly than regular white blocks.
Start by climbing up the stairs already set out for you. Continue all the way up to the right and follow the stairs until you see the piles of coins out of your reach.
Pull up a block on the right to make a staircase. Collect the coins and the Bell power-up, which turns all blocks in the vicinity into white blocks. You can save this for when you’re in a pinch. Pull out a block on the left to make a staircase.
Climb up the stairs. Make another staircase on the right in the same way as before to continue.
Grab the create a block upgrade and immediately move three blocks down to the right and use to make a path up to another Bell power-up. From the bell, pull out the block to make a staircase and hit the checkpoint.
Make a small L-staircase on the left side to move up. Push the block with the coins on top of it to the left and then grab the next two sets of coins. Pull this block under the block with the coins on it and climb up to get the coins.
Repeat the process on the next level until the path brings you to the end door. Enter the door and escape. Congratulations! You’ve beaten your first boss.
Second Day
When you regain control of Vincent, you’ll find yourself in the bar with your buddies. There are a number of things to do here: you’ll want to cover everything before you head home.
Talk to the other customers in the bar. You’ll recognize that a few of them look very similar to the sheep you met in the Nightmare World.
Check your texts as well. The girl you met last night, Catharine has started texting you as well.
Order some drinks when you get the chance. Getting drunk will make you move more quickly in the Nightmare World. Additionally, every time you get a drink you’ll get some trivia about the type of alcohol you’re drinking. You can check how much you’ve drank on the bottom left.
Third Night: Torture Chamber
Area 1
Go to the left up the stairs, jump quickly over the bloodied block with spikes under it. This is a Trap Block. Jump over it quickly as not to get skewered.
Pull out the leftmost block to make a stair. On the next ledge you’ll find a pile of coins on the edge of two spike blocks. Run to the coins and then run IMMEDIATELEY back. Alternatively you can just drop down once you’ve triggered the spike block and edge your way back to safety.
Pull a block over the left of the two spike blocks to continue upwards. Take the stairway to the left to grab some coins and head back down.
Pull out the block next to the dark-faced block to reach a ledge where you’ll see another pile of coins. Pull the block under the coins towards you on the right to reach the coins. Then push the block that had the coins on it to the left. Do the same thing with the block under it to make a staircase.
On the next level pull the white block out to make a path. Push the block underneath the coins to the right. Drop down and edge over to the right to grab the Bible and the coins. You can use the Bible to remove all enemies, which is helpful since sheep often get in your way or move blocks in places you don’t want them to be.
Head left to see a stairway of cracked blocks. Move quickly up the stairway, as the cracked blocks will break. You’ll soon see a sheep, but don’t bother using the Bible on him. The Trap Blocks will kill him as soon as he sees you. Pull out the block to your right to make a stairway to reach the checkpoint.
Head up the path and dodge a spike block. Push the white block over the spike block to reach a space. Push the block to your left one space to access the coins and another stairway. Move up the stairway to the right to get coins, but be careful of the spike blocks.
Go back down the staircase and pull the leftmost block to the right to make a stairway that leads you to the end of the level.
Area 2
Go the right and climb up the left over the Trap Block. Pull out the block to your right and climb up to the dark block. Go right and continue up the stairs. Push the block to your left one space. Drop down and edge your way around to the dark block. Climb up past the Trap Block to grab some coins.
If you still have the Bible, use it to destroy the long horned sheep. Pull out the dark block on the far right to make a path. Quickly jump over the Trap Blocks.
Climb up to the left to find the Create-A-Block and continue to the checkpoint.
Pull out two blocks, and one on top to make an L-staircase and continue moving up.
On the next ledge, move up on the staircase to the right. Pull out the block on your far right. Climb over this block and pull out the block directly above it. Push this block to the left to reach some coins. Use the Create-A-Block on your left to connect this pillar to the other.
Climb up the stairs to grab the Bell. Push the block directly in front of you out so that it falls. Drop down to the left and do the same with the block under the Trap Block. The two blocks will sink and you can reach the coins.
Go to the left of the Trap Block and you’ll see one block holding up an entire section. Push it out. Climb up the Trap Block to get to the coins. Go over the block you just created to reach the pillar on the left.
Go over to the Trap Block and pull out the statue block. Push it to the left and climb over the stairs to get some coins. Pull out the block directly over the Trap Block out. Climb up and push the Trap Block to your right one space. Pull the block under the end block towards you and claim victory.
Immoral Beast
Your second boss battle is against the disturbing Immoral Beast, but thankfully this fight is actually pretty simple. This thing likes to slow your progress by occasionally spewing a volley of hearts that will reverse your controls for a short time. You should also avoid blocks that glow red, as that means those blocks will be hit by the volley. Standing under blocks will also protect you from this attack.
This level starts out pretty simply. Pull out a block to your right to make a staircase over the dark blocks. Do this on the next platform as well to keep moving up. Rinse and repeat to reach some coins.
You’ll hit a platform with traps blocks. Run over them to disengage them and then pull out a white block to get to two dark blocks. Pull out one more block on top of these to keep moving up.
Pull out a block on the left side to reach the checkpoint. Pull out a block to reach the two dark blocks and some coins and continue going up.
You’ll reach a platform with two blocks missing in the middle. Pull them out and then edge your way over the dark blocks to climb up. Pull out a block on top of the middle blocks to reach either set of dark blocks.
Pull out a block to reach the middle platform. Follow the stairs past some Trap Blocks to get coins. Keep evading the Beast’s attacks. Pull out a block above the Trap Blocks to go up. Pull up a block to reach a level entirely made of coins. Open the door and get out of here.
Fourth Night: Inquisition
Head up and grab the Bible in front of you. Try to avoid the spear-wielding sheep and fry them with the Bible. There are no other enemies in this night besides the boss on the next stage.
When you reach an area of regular blocks pull out all four, and then three on the right, and so on. Follow the path upwards past the dark blocks.
You’ll reach another wall of white blocks. Pull out all four blocks on the bottom level to begin making a large staircase to your left. Pull out three blocks on the left, and then two, but make sure to pull the block on the right for the final step. If you pull the block to your left, you’ll collapse part of the pillar and lose valuable coins.
Head up the stairs to finish the level.
The Child
This boss moves quickly but only has one trick you need to worry about. Occasionally, the Child will fire a blast directly up the tower that will knock you down several floors if it hits you. Otherwise this boss isn’t too much trouble.
Head up to the left and pull out a block to start moving upward and grab coins. Pull the block on your right one space to the left to keep moving up.
Note that you can go down the flight of stairs to your right to grab more coins, but make sure to do so quickly or the boss will crush you.
Make a platform of three blocks to start building a pyramid to the next level. On the next ledge, pull out a block to the left to make an L-shaped stair to reach the next floor.
Climb up the dark blocks to pass the checkpoint. Head upwards and to the left. Pull out a block to grab the Energy Drink, an extremely useful power-up that allows you to jump two blocks at a time.
Head to the right and pull out a block to start scaling the right wall. Pull out the block on the left and push it to the left to make a bridge.
On the other side, pull out a block and head up. On the right, pull out a block and push it to the right to make another bridge. Head right and pull out a block. Push it to the right to grab the Create-A-Block power-up.
Go back to the bridge you made, and pull out the block above the right side of it. Create a block to your right and push in the block in front of you. Pull the block to your left over to grab the coins.
Pull the rightmost block out, and push both blocks to your left over to make a bridge. On the left side of the bridge, pull one block towards you to grab the coins and move up.
Once you’re right below the end level, pull out both white blocks under the coins and push them to the right to bridge to the gap. One of the coin blocks above you will fall allowing you to grab both coin piles. Head across the bridge and up to finish the stage.
Fifth Night: Quadrangle
Area 1
Here you’ll face a deadly new kind of block known as the Ice Block. They move and connect just like normal blocks, but if you move over one you will slide all the way in one direction until you hit another kind of block or fall off. Holding onto another kind of block will also anchor you and prevent you from sliding to your death.
Go down a step to grab some coins, then head upwards to the icy blocks. Pull out a regular block to reach another ledge of ice blocks. Slip over to the left to grab some more coins.
Pull out a block on the icy ledge to move up. When you get to the next floor, slide to reach a white block on the far right. Pull out the block in front of you as well as the block to your left to make an L-staircase.
Climb up the icy stairs to the left. Knock the sheep out if he’s in your way. Pull out a white block to reach the next floor. Pull out two blocks to make a small L-staircase.
lSlide to the right and pull out the block in front of you. Jump onto the reverse L-staircase of icy blocks. Push the upper two icy blocks to the right. Drop down and edge your way to the Create-A-Block. DO NOT slide or you will fall off the stage and die. Pull out the white block on top of the two Icy blocks to move up to the checkpoint.
Pull out a block to reach another level of icy blocks. Slide to the left and pull the block towards you to reach some coins. From there, pull the block to your left one space to the right. Do the same with the block under you. Move up.
Pull the icy block to the right, then drop down and edge to the left of it. Push it to the right to make a bridge.
On the other side, pull out a block to the left of the dark-faced block. Move up to grab some coins, but be careful not to slide to the right and fall. Once you’re on top, pull the white block to your right over to the left two spaces.
Edge over to the other side and push it to the left to reach the exit. You can also grab some coins by edging around the exit block.
Area 2
Head up the stairs until you reach two dark blocks. Pull one out to keep moving up. Pull out a white block on the ledge to continue up. Pull out the dark block above that block to advance again.
Pull out a white block and push it over to the right, so that it hangs over the edge. The block will now prevent you from falling. Pull out another block to the left of the hanging block and then climb up.
Pull out the block to the far right, then drop down and edge over to the left of the two ice blocks. Pull out the two blocks on top of the ice blocks to make an L-staircase. Pull out a block on the next level to advance.
You’re now at a level with three ice blocks and one white block beneath you. Move to the white block and edge down to the right to stand on the ice block. Pull the block in front of you out and climb up.
Push the two ice blocks to your left away and then pull out the block under ice block to your right to reach a Bible.
Climb up to the three ice blocks to your left. Pull out the white block nearest you, and pull it one to the left to keep climbing.
Once you’re up the staircase, edge over to the right side of the stack of three blocks. Move to the right and get on top of the white block. Pull out the ice block and push it one space to the right. Climb up the steps to reach some coins.
Grab the Create-A-Block and pull out a white block to your left to reach the checkpoint. Ignore the fat sheep, as it will slide off the stage. Pull out the white block to move up and get coins.
When you reach the dark-faced blocks, edge over to the left. Pull out a block to climb up. Once you’re on the next ledge, pull out the block to your right to make a staircase and reach more coins.
Walk over the bridge to reach the other wall. Pull out the ice block on the left and then climb up. Pull out the block directly in front of you and edge over to get more coins. Climb up to get another pile of coins and go back to the other wall.
On the other side, pull out the lowest part of the bridge to the left to climb up to the next level. Edge over to the right. Push the ice blocks to the right so one ice block falls down. Edge over to the side of the block that just fell, and push it to the left.
Edge over to the left side and climb up one. Pull out the ice block in front of you. Climb on top of the block you just pulled out and pull out the block in front of you. Go back down and pull the block underneath it to your right.
Drop down and edge over to the left and drop in front of the dark-faced block. Once again, edge to the left. Pull the block out, and then edge to the right side of it. Pull it once to the right. Edge over to the climb the staircase and grab some coins. Pull out the block below the exit block to end the level.
Doom Bride
This Doom Bride has two attacks to look out for. The first move she does is an avalanche that causes you to fall down if it hits. Her second ability is a cyclone that throws blocks at you, which will kill you in one hit if it connects. This boss moves pretty quickly, so don’t stop for anything if you can help it.
Climb up on the left staircase. Pull out a white block and push it to the right to move up. Pull the block underneath the Energy Drink towards you. Grab the power-up, then go down one block and walk to the left. Pull the block to your left towards you and climb up.
Keep climbing until you reach a platform with one white and one ice block. Pull the block over the white block and then push it over the ice block to move up.
Pull out the block next to the block on the your left. Climb up one floor and pull the block over the block you just pulled out. Edge over to the left side and then push the block to the right. Climb up the level and pull out the block directly in front of you.
You’ll reach two vertical blocks. Pull the bottom block towards you and edge over to the other side. Push the block one more space to the right. Dodge the falling block and continue climbing.
Pull out the block in front of you and edge to the right. Climb on top of the blocks and pull out the block on the far left. Move up the stairs to grab a ton of coins.
Jump over to the side of the two ice blocks and push them all the way to the right. Head over the bridge to reach the checkpoint.
Head up the icy stairs to reach a platform of dark blocks. Pull out a block to climb up the stairs to the right. Follow the trail of coins upward, avoiding the avalanches and cyclones the boss throws at you.
Continue following the path of coins until you reach a ledge right before the top. Pull the white block on your left to the right, and edge around to the left. Climb up the block to finish the level.
Sixth Night: Clock Tower
Area 1
In this area you’ll be faced with a new and dangerous kind of block, the Bomb Block. When lit, the Bomb Block explodes and turns all normal blocks surrounding it into cracked blocks. Dark blocks will not be affected.
Go up the stairs to the right, avoiding the bomb block. Pull out a dark block in front of you and climb up to the next level. Walk over to the left to grab some coins. Pull out a dark block to advance.
Go to the right and pull out the right most white block. Head up the stairs of Bomb Blocks to get an Energy Drink.
Go to the left and pull out a block to access the staircase on the left. Pull out a white block next to one of the stone blocks to make an L-staircase.
Climb up to the next level and make a stair without using the bomb blocks to reach the checkpoint.
Make an L-staircase on top of the dark blocks. Run over the trap blocks to disengage them, then pull the white block to your right toward you to grab some coins.
Push the white block back to the right. Pull out the Trap Block to make a staircase on the right. Look out for the Black Sheep. Pull out an ice block to reach some coins, then push it to the right to advance over the dark blocks.
Pull out a block and push it to the left to move up. Pull out the white block under the dark blocks to your right to make a stair. You can also grab some coins to the right.
Move up until you reach a platform with an ice block. Pull the block on your right towards you, and then pull out a block in front of you to make an L-staircase.
On the next level, pull out a block to keep moving up. Then, make an L-staircase on the next floor (preferably not using Bomb Blocks) to move up.
Pull out another block to make a step, being wary of the Black Sheep. Head over to the right to find some Trap Blocks and the Create-A-Block upgrade. Walk over to the left of the wall and climb up until you find yourself three blocks below a bomb block. Push a block to your right to bridge the gap.
Pull out the block in front of you and climb up to your right. Push the block to your right one space farther to the right. Do the same thing on the descending level.
Keep pushing until you manage to drop all the blocks one level. Run to the left to avoid getting stuck. At the top of this new stair, pull out a block to move up.
Pull out a white block next to the Trap Block to make an L-staircase. Push out the bomb block your right, and the blocks over you will fall. Move to the right and climb up to the exit.
Area 2
Climb up the linear staircase. When you reach the huge wall, pull out four blocks to start building a huge staircase. Once you’ve built the staircase, move quickly to avoid any Bomb Blocks damaging your structure. Climb up to reach the checkpoint.
From the checkpoint, pull out three white blocks to start making another staircase, but this time, make sure it leans towards the left. Before you finish the staircase, push the third level all the way to the left. Climb over to hit the spring block and jump up five levels.
Make an L-staircase leaning right to move up the tower, then pull out another block on the top to climb up a floor.
Walk over to the right and pull out a spring block from the column of spring blocks. Jump on top of the column to grab a Bell power-up. Pull the spring block two spaces to the left and jump.
Climb up the stair, quickly moving over the Bomb Block, to reach a wall three blocks wide. Make an L-staircase to reach one of the columns. You’ll reach a checkerboard of blocks, with white blocks and immovable blocks.
Pull out the two white blocks and push them together to make a stair. Pull out a bomb block to advance over the dark-faced blocks and reach the checkpoint.
After the checkpoint, head over to the right to grab some coins. Climb up the staircase of Trap Blocks quickly to avoid getting killed.
On the next ledge, run over to the coins and disengage the Trap Blocks. Make an L-staircase on the left side. Walk past the Trap Block to get some coins. Push the two dark blocks to your right twice to move up.
You’re very close to the end now. Make a row of four white blocks on the bottom level. When there are four, pull the rightmost one space to the right. Climb on top of it and pus the block to your left one space to the left.
Climb back onto the right side of the block you were standing. Push it once to the left. Climb up the stairs and push the Bomb Block out so that the other blocks fall. Pull a white block underneath the Bomb Block, then drop down and edge over to the left. Climb up the stairs to complete the level.
Area 3
Climb up the stairs to your right to grab a Bible. Use it to destroy the Ant that you see. Push the block on the left one space to the left. Climb onto the block and pull the block in front of you out. Pull the block under you to the right and the climb the staircase of dark-faced blocks.
When you see the checkpoint, push the ice block in front of you one space to the right. Then pull out the white block in front of you. Edge over to the left of this block to pull it towards you. Then advance up the stairs to reach the checkpoint.
Climb up and push the white block to your left to grab the Energy Drink. Save this Energy Drink.. you’ll need it for later.
Head back to the platform you were on before you entered the diamond. Pull the block over the white block you just pushed. Pull the block underneath you to the right one space.
Climb on top of the bottom and push the block above it one space to the left. Drop back down and push the bottom block to the left once.
Repeat the process one more time. Pull out the white block in the left corner towards you. Pull it out so it lands on top of the higher of the two blocks you’ve been pushing. Keep pulling the blocks out to make a staircase heading left. Climb up on top to reach the top of the diamond.
Head to the right and climb up the stairs heading left. Move up the stairs until you reach a wall with bomb blocks and two piles of coins. Repeat the process of pulling out blocks and extending the staircase just like you did with the diamond puzzle. Once there’s only two blocks separating you from the top, use your Energy Drink to jump the final two blocks.
Climb up the stairs all the way to the checkpoint. Then climb up all the way until you find another diamond shaped wall and a Create-A-Block upgrade.
Push the block all the way to the left to grab the power-up.
Push the trap block and Dark Block to your right over one space. then push the trap block once to the right. Pull the white block over to your right so that its front of the dark block and Trap Block.
Edge over and pull the block underneath the Trap Block out to make a stair. Keep climbing under you reach a wall of checkerboard style white blocks.
Pull out the two bottom white blocks and push them both all the way to the left. When the other blocks fall, pull out one and add it to the row.
Pull one of the blocks on top of the row all the way to the right. Climb over the right side of the wall and then push the block to your left one space to the left. Edge over to end up on the right side of the dark blocks.
Pull out the block to your left and them climb over the stair. On the other side, pull the white block on your right to the left and complete the level.
Child With a Chainsaw
This boss has quite a few ways to mess with you. At certain points in the stage, the boss will slice off the right most columns of blocks, narrowing the playing field. The boss can also makes blocks fall from the sky, and summons chainsaw robots that go up the stage and circle around you.
Head up to the left and climb up. When you reach a wall, pull out a block and climb up. From there, pull out another block to advance.
You’ll reach a very wide wall. Make an L staircase on the right. On the next level, pull out a block on the row of two blocks to move up.
You’ll see a row of two dark blocks on the right side of the wall. Pull out a block under the leftmost dark block to collect two piles of coins. On the dark blocks, pull out the white block in front of you and then pull out a descending staircase to reach a spring block. Launch yourself up the tower.
Make an L-staircase to climb up to the next level. Make another staircase in the middle to keep moving. On the next floor, you’ll find some more coins and a Create-A-Block power-up.
Pull out a dark block, then climb up to pull out another block. Avoid the right side of the tower, as the boss will destroy the right most columns. Pull out a block to head to the next level.
The Child will start firing its machine gun above you. Don’t worry about the bullets: they can’t hurt you. However, the blocks that fall down most certainly will. Avoid the saw robots as well. Pull out the middle block on this floor to grab some coins.
Pull out another block to reach a level with three blocks and a dark block on either side. Push all the white blocks to the right. Pull out the two white blocks on top of them. Pull out another block to advance.
Make an L-staircase to climb up. Pull out as many blocks as you can to start building a large staircase. Be careful of sneaky robots. Build the staircase until you find a spring block. Use it to jump up.
Make a staircase to reach the Create-A-Block. The Child will destroy the right two columns. Try to pull the spring block towards you and out of harm’s way.
Pull out a spring block to the left of a pillar to launch yourself up. Push the block to the right of you all the way to your right. Push the block to the left one to the left. The blocks will fall, allowing you to climb up.
Climb over the blocks to your right, quickly moving over the bomb blocks, then pull out a block to head up the level. The Child will destroy the rightmost side of the stage again.
You’ll reach a wall with four dark blocks in the middle. Make a staircase and grab the coins at the top. Make another L-staircase to climb up to the next level. Pull out a block to reach the next level. From here, pull out blocks as needed to reach the exit.
Seventh Night: Spiral Corridor
Area 1
Pull out two blocks and push them to the left, stopping before the dark-faced block. Climb up the stair.
On the next ledge, pull out a block and push it so that it meets the block on the right. Push them both one space to the right. Then pull out a block on top of the row you just pushed to advance.
Jump up until you reach a large wall. Jump to the two blocks to your right. Pull out the block above the one on the left and push it over to the left once. On the platform to your left, pull out the block directly above the block on your right. Push it to the right to grab the Bible.
Pull out the block to your left and push it to the left to access the large space of dark blocks and the checkpoint.
Fry the enemies with the Bible. On this wall, pull out the two blocks on the right. Pull out a block above them to move up. At the top of the stair, pull out the block to your left towards you. Edge over to the left, and push it one space to the right to bridge the gap.
On the next ledge, pull out the block to your right and push it to the left. Pull out the block in front of you and push both blocks to the left to make a bridge. Pull out a block to reach the checkpoint.
Head up the stairs until you reach a wall checkered with white and dark-faced blocks. Essentially what you need to do is pull out both white blocks and push them two spaces to the left to access the next row of blocks. Rinse and repeat until you reach the exit.
Area 2
This area can be a breeze if you know what you’re doing. Grab the coins on both sides before attempting the puzzle. For the purpose of this guide, we used the right side of the wall, but both sides are identical.
Climb up onto the white block and push the white block to your right. Move over one space to avoid getting crushed. Push the block to your left one space to the left.
Climb up and then pull the block over to the right. Edge over to the right most block.
Pull out the block underneath the block you just pulled. Pull the block in front of you towards you. You now have a staircase. Push the blocks to the left to reach the checkpoint.
You’ll reach another mirrored puzzle. Start on the right side. Jump on top of the two blocks and push the block to the right. Quickly jump on top of the block you just pushed as the blocks will fall to make a staircase.
When you reach a dark block ledge with checkerboard pattern, edge all the way over to the left. You’ll find a reverse L of blocks. Climb up and push the block to your right to the right. Edge over to the block in the middle and you’ll have access to the end block.
Area 3
Pull the two blocks in front of you out. Then pull out the block above it on the right to make an L-staircase. Pull out a block and push it to the left to reach some dark blocks. Pull out the block in front of you and push it to the left, under the dark blocks.
Push the block to your left to drop the dark-faced block down. Crawl around to go up the dark-faced stair. At the top, drop down and edge your way over to the spring block. Take the spring to the checkpoint.
At the fork, head right up the stairs of coins. You’ll be faced with a very tricky puzzle.
Start by pulling out both white blocks. Push the block to your left one space to the left, then pull the other over until its next to it. On top of the right block, pull out another white block and then push it all the way to right. The block will fall: you now have three white blocks on the platform.
Pull the middle block until it is touching the right most block. Pull out the white block above the block you just pushed. Jump on that block and pull out the block above it. Push the column of blocks to the left until they form a bridge.
Pull out a block on the other side to reach the spring block. Jump on the spring to advance up the stairs. Grab the coins on the staircase and advance to the checkpoint.
Climb up to the left and up the stairs to get some coins. Pull the blocks to the left to make a staircase. At the bottom, pull out the white block, and then move it one space to the right. Climb on top and then pull out a block above it. Go down and pul the white block you just moved one space to the left. Climb up the stairs.
Once you’re at the top, push the block over one space. Push the block underneath one space to the left. Pull the block on your right to the left, then edge around to the right of it. Climb on top and push the block to the right. Do the same with the block under it to reach the exit block.
Area 4
This area consists of only one very complex puzzle. Start by pushing out the block in front of you. Then edge around to pull the block in the two columns to the left of the starting point.
Climb up and edge over to the third column. Pull out the block in front of you. Edge back to the second column and pull out the block.
On the third column, pull the block to your left towards you. Edge back to the second column. Push the block to the right to make a staircase. Climb up and push the block with the coins on it to make a stair. Climb onto the exit block.
Shadow of Vincent
This boss doesn’t participate much in the fight itself but can be confusing if you aren’t sure what to do. Look out for the purple Void Blocks: they destroy anything that is placed above them, including Vincent.
Walk all the way to the right so that the cracked blocks break beneath you. The boss will destroy a wall to your left. Climb on the middle block and edge over to the dark block. Climb up and push the block forward to bridge the gap.
On the left side of the wall there will be two blocks on a column. Pull the top block and bottom block to the right to make a staircase up. Climb to the right and push the two blocks over to the right. One of them will fall down.
Climb onto the block that fell down, then jump forward: there will be a spring block hidden there. Take it to the checkpoint.
From the checkpoint, pull out the block underneath the column to your left and push it to the left. Climb up and pull out the block to the left of the pillar of dark blocks.
Pull out the white blocks and move them right in sequence to build a staircase. Climb up and you’ll be faced with a carbon copy of the puzzle from Area 3.
Start by pulling out both white blocks. Push the block to your left one space to the left, then pull the other over until its next to it. On top of the right block, pull out another white block and then push it all the way to right. The block will fall. You’ll have three white blocks to move around now.
Pull the middle block until it is touching the right most block. Pull out the white block above the block you just pushed. Jump on that block and pull out the block above it. Push the column of blocks to the left until they form a bridge.
Push the top block to the right and climb up. Pull out the block in front of you. Climb back down and pull out the block to your right one space to the left to make a staircase. Climb up to the checkpoint.
The boss will now make everything dark, which makes it harder to see what you’re doing. Climb over the stair of dark blocks until you reach a platform of white blocks. Pull out a white block to move up, but make sure the block you pull allows you to reach a white block on the next level.
Pull out a block to climb up. Do the same on the next level. You’ll reach a platform with ice blocks and a sole spring block. Unfortunately, the spring block is not helpful. Pull out the moveable dark blocks to make a row of four, but be careful not to slide to your death.
Pull out three white blocks on top of the row. Then pull out a block and push it to the left to make a platform. Make a small stair to keep climbing.
Keep climbing and you’ll find a separated wall. Climb over to the right wall to reach some coins. Pull out the white block and the block on top of it. Push the bottom one to the left. Backtrack to where the wall separates, and climb up to the left wall.
Make a small staircase to reach the bridge that you made. Climb up the stair of dark blocks to finish the level.
Eight Night: The Cathedral
Catherine
The battle against Catherine’s true form isn’t too tricky. Catharine’s main attack is a bolt of lightning, which you can easily predict by avoiding blocks that glow red. A block hit by this attack will become cracked. Other than that, she can smash you or Katherine with her claws if you take too long.
The stage isn’t particularly difficult either: you’ll never have to do more than pull out single blocks or make small L-stairs. You’ll never encounter any dark blocks or bomb blocks, so you don’t have to worry about them either.
However, In addition to climbing the tower yourself, you’ll need to guide Katherine as well. If she dies, you fail the level. Katherine will take the shortest route available up the tower, so all you need to do is make a path for her to follow. You can tell her to either stay put or follow you, the former of which is useful for keeping her away from lightning strikes.
As you make your way upwards, try to keep Katherine within line of sight. If she falls too far behind, you might lose her. Remember that cracked blocks can only be jumped on twice before they break. Keep moving up and checking on Katherine’s progress. As long as you make sure to keep a path for her to follow, this level will be over before you know it.
Final Night: The Empireo
First Sphere
This is it: the first area of the final floor of the tower. Achieve victory here and Vincent will be free. The Empireo introduces two new blocks. The first of these is the Mystery Block, which is marked by a red curtain. These blocks reveal themselves when you jump on them and can be almost any of the blocks you’ve faced before.
Climb up the stairs and grab the Bible. Keep moving up and fry the enemies with the Bible. Climb up and grab the checkpoint.
Pull out a block on the stairs to the right to move up. On the ledge, pull out a block and push it to your left to grab some coins. Climb up to the dark block on your right. Pull out a white block and quickly run over the trap blocks.
You’ll find a Create-A-Dark-Block power-up. Pull out a block to bridge the gap to the left. Climb up to get some coins. Pull out a white block to get even more coins.
Pull out the mystery block and push the two blocks over to the left. Pull out the dark block to move up.
Pull out a white block and push it to the right to bridge the gap. Drop down and pull out a block to climb up.
Pull out the dark block in front of you and push it your left. Pull out the white block and the wall will collapse. Climb up and push the white block to your left to bridge the gap, Climb up and pull out another block to climb up. Quickly run over to the left to avoid the bomb block.
On the left side, make a staircase to advance. On the next level, pull a block out and push it to the right. Make a staircase over the gap. Climb up to grab the checkpoint.
Make a small staircase using the mystery block to climb up to a level with dark blocks and coins. You’ll eventually reach a pillar of checked dark blocks and white blocks.
Pull out blocks to make a staircase going left. At the top of the stair, use your Create-A-Block to reach the end.
Second Sphere
In this area you’ll face more of the Monster Blocks. These blocks have mouths on them and move randomly. In addition, if you try to edge or grab onto a monster block, it will lash its tongue at you and knock you off. They can be killed by stepping on their heads.
The presence of Mystery Blocks make this area much more random than the previous ones. If you get a spring block, sometimes it will be easier. Sometimes you’ll get a bomb block, and that makes things harder. Use the techniques you’ve picked up to improvise when you need to.
Head up the stairs and make an L-staircase. Pull out a block and push it to your left to reach a stair that leads to a spring block. Launch yourself up and grab onto the platform.
Gather up the coins and head over to the right. Drop off the ledge to land onto another spring block. Climb up and grab the pillow. Pull out the Monster Block and jump on its head to kill it. Push it over to the left to grab an Energy Drink. Pull a Mystery Block to make a staircase.
Make an L-staircase to access a Create-A-Block item. Pull out the blocks to make a staircase leading up. When you make it as tall as you can, use the Create-A-Block to bridge the gap and access some coins.
When you’re on the right side of the tower, pull out blocks to collapse the wall until you can make a staircase to the checkpoint.
Grab the Bible and destroy the two red sheep. Make an L-staircase to move up. Edge over to grab a pillow. Go back and push blocks to the right to make a staircase. Doing this will make a block fall which completes the staircase.
Edge around really fast to avoid getting knocked off by a monster block. Jump on its head to kill it, then push the block to your left over the Void Block.
You’ll reach a large wall, checkered with monster blocks. Their movement is random so kill them when you can. Make a regular staircase to reach the exit block.
Third Sphere
Climb up the stairs and pull out a block on the right side to make a staircase. Pull out blocks to make a large ascending staircase. Push a block over to the left to make a bridge which allows you to reach a pillow.
Pull out two blocks and push them to the right. Go up and pull out another block to climb up to the left.
You’ll see a Bible. Pull the block one space above you to the right to make a bridge. Pull a bunch of blocks out from the wall and pull them over to make a bridge. On the other side, make an L-staircase to reach some coins. Make a single block bridge to reach the Bible. Fry the enemies now.
Pull out two blocks on the right side to bridge the gap. Make an L-staircase to get up to the left. You’ll see some dark-faced blocks. Pull out the block on the right and push it one space to the right. Jump on it, and pull out a block underneath the dark-faced blocks.
Pull these blocks out to make a staircase that gets you over the dark blocks. You’ll reach the checkpoint.
Pull out a block to head to the right side. You’ll find another pillow. Pull out blocks and push them to the left until you can climb over the gap. When you’re on top of the gap, go forward and pull a block towards you. Climb over the staircase.
Pull out a block to get the Bible. Pull out a few blocks to make an even ledge. Drop down and climb back up. Push out a block to bridge the gap. Remember to kill any monster blocks you run into.
Push the rightmost monster block to the right, then pull the one to your left over to where you’re standing. Edge over to the left side. Pull out the block underneath the monster block to the left. Pull out the block in front of you.
Edge over to the block that’s sticking out of the left side. Climb onto it. Use the technique of pulling out blocks to extend the staircase. When you see the enemies, zap them with the Bible.
You’ll see some Ice blocks. This next part is a bit difficult because of the monster blocks. Your goal is to try to bridge the gap to reach the right side. There isn’t one way to do it, but once you’re on the right side you can easily make a staircase to get to the checkpoint.
Keep climbing until you run into a void block. Make a staircase by pulling out blocks on the left side. Once you’re up, pull out the stone blocks to make a staircase. Keep heading up the staircase until you run into a bunch of monster blocks.
Bridge the gap to the left, then push blocks over so that you can access the monster block with the Create-A-Block on top of it. Climb up until you reach a trap block. Pull out the trap block and climb up. Edge over and fall down until you reach a lone column.
Use your Create-A-Block to reach the right side. Pull out any blocks you can reach to build a staircase to complete the level.
Climb up the stairs for a long time until you reach the Bible. Move out a block to grab the Bible and reach the checkpoint. Use the book to destroy the sheep.
Pull out two blocks and push them over to the left. Jump on top and pull out a block. Push it to the left, then edge around to climb up past some trap blocks. Pull out a block to reach another Bible.
Build an L-staircase to reach some coins. Avoid the enemy and pull out a block to reach some more coins. Get the Create-A-Block or the Bible here. On the right side, pull out a block to climb up.
Climb up and get some coins. Pull out a block to climb up, then pull out the bomb block under the monster block. You’ll reach the checkpoint.
Head left to grab some pillows. On the right side, pull out a block to advance. Pull out a block to the left to move up and past some trap blocks. Rinse and repeat until you reach a void block.
Climb up and pull the void block to the right. Push it over the edge. Keep climbing over to the left. Make an L-staircase and pus the block with coins on it to the right. Get the checkpoint.
Go left and make an L-staircase to get up. Edge over to the right side to get some coins. Pull out a block and climb up.
Pull out the dark block to get the Bible. Fry the red sheep and pull out a block to make a staircase. Climb over to the left side and pull out a block. Pull out the block underneath it to the right. Climb on top of the first block you pulled out.
Pull out the block in front of you. Drop and pull out blocks until you’ve built a staircase. Run past the trap blocks to reach a wall of mystery blocks.
From here, anything goes. Try your best to build a stair with the blocks you get and consider yourself lucky if you find a spring block. Pull out another block on the top.
You’ll be rewarded with coins and pillows on the final staircase. Climb up to the end.
Thomas Mutton
This boss has three attacks you need to be aware of. Occasionally, he transforms block at random. He also attempts to kick you, which will kill if it connects, and can knock you down if you’re near it. He will also attempt to shoot you, but you can easily avoid the shots if you avoid blocks that glow red.
Climb up and pull out a block. Make a staircase on the right to keep moving. Head up.
Pull out a block and climb up. Pull out a block on the right side of the three block ledge to reach a pillow. Pull out a block on the two block ledge to move up.
Make an L-staircase to move up. Pull out another block to get up. Grab the coins then pull out a block to reach the checkpoint. Evade his shooting attack.
Pull out a block to move up. Rinse and repeat, while continuing to evade his attacks. You’ll reach a single ledge of white blocks, with one block on top. Push the block over to the left and climb up.
Pull out blocks to make a staircase leading up. Pull out a block on the right side to move up. Pull out another block to move up and get some coins.
Make an L-staircase to get up. Keep moving, pulling out a block if you need to. You’ll reach a ledge with three blocks. Pull out the middle block to climb up onto the dark block.
Push a block on the next ledge over to the right and climb up the next few levels. Pull out a block on the left side. Climb up a few more levels until you hit a wall, then pull out a block to advance up.
The checkpoint will be in sight. Make an L-staircase to reach it.
From the checkpoint, pull out a block and climb up. Move up from there to find a block that leads to another. Climb onto the next level. Pick up the coins on the right and head to the left to make a staircase.
Push the two middle blocks to the right. Pull out the leftmost block on the ledge of three. Pull it out in front of you and push it over one space to the left. Climb on top of it. Pull the block directly in front of you out.
Drop back to the ledge. Pull the block out to your left and climb up. You’ll see a Bell. Push the middle block over to the left. Make an L-staircase up to the item.
Use the bell to make all the blocks normal. On the right or left side, pull out a block to move up. Make a staircase to hit the end.
Final Battle: The Dumuzid
The true form of Thomas Mutton has three attacks. He will fire a beam that destroys a large section of blocks, which is easy enough to dodge if you have been moving quickly. Occasionally the boss will randomly transform some of the blocks. There’s nothing you can do to stop this, so you have to think on your feet to work around this attack.
His final attack happens much later in the stage, and takes the form of a deadly rain of fireballs. Get out of the way or hide under other blocks to avoid getting burnt.
Pull out a block and push it all the way over to the right. Climb up a pull out the dark block. Pull out the blocks under it in sequence to make a staircase. Pull out a block and climb up.
Push the two white blocks on the ledge over the right. Walk over to where there’s a ledge hanging over you. Push the block immediately in front of you, and run over the right side as the block will fall. Then pull out the block underneath the trap block, climb up, and use the spring block to launch yourself up.
Grab the pillow and pull out a spring block to move up. Pull out a block on your side and climb up. Pull out a block and push them both to the left. Go in the small space under the ledge. Push all the blocks to make the ledge fall.
Climb up and pull the block over the next one. Use the ascending staircase technique to extend the stair. Climb up.
Pull out a dark block to move up further. Pull out a regular block to climb up. Careful of the trap block. Jump up to disengage another trap block. Push the block to your left one space to the left to bring down a spring block. Launch yourself into another spring block to move up. Pull out a block and move up.
Make an L-staircase to find a level with a trap block and some coins. Pull out a block to move up. Make a large staircase to move up to the checkpoint.
Pull out a few blocks to keep climbing. Rinse and repeat until you reach a large wall with dark-faced blocks. Grab the two piles of coins, and be careful of the bomb blocks.
The tower splits slightly. Move onto the right side and make an ascending staircase to move up. You’ll hit a large wall.
Make a large staircase with the wall and climb up it. Pull out a block on the ledge to move on, and climb onto the left side of the tower.
You’ll reach a ledge with a dark block in the middle. Pull out a mystery block to advance. Make an ascending staircase to advance. Make an L-staircase to keep moving.
Climb over to the right and over the mystery blocks to get to the next level. Pull out a block on the left side to climb up, and pull out another on the next level to move on.
On this level, you’ll be faced with a wall with a few holes in it. Jump into any slot and pull the block forward. Build an ascending staircase to hit the checkpoint.
Climb up several levels and make an L-staircase to climb up. Make another staircase to hit the next level unless the boss makes a spring block. Make another L-staircase to hit a dark block with coins on it.
Head right and pull the mystery block over to the right. The boss will begin shooting fireballs at you, but if you stay mobile you should be fine. Build an ascending on the left side. Edge over to the right side and push blocks over to the left to complete the stair.
You’ll now be in a row between two void blocks. Pull out four blocks, and three on top of them. Then pull out two blocks and push them to the left all the way to make a zig-zag platform that takes you up. Repeat this until you reach a long stairway bordered by void blocks.
Pull out blocks to reach each level. Keep doing this until you hit some trap blocks. Pull out a trap block and quickly move over it to reach a ledge with three blocks. Climb over the stairs to reach a narrower path.
Pull out blocks on each floor to keep moving. Continue avoiding the fireballs and pulling out blocks to reach the top. Congratulations! Freedom is yours.


 Metal Gear Solid V Guide - How to Get a Higher Heroism Score
 Gran Turismo 7 Wiki – Everything you need to know about the game .
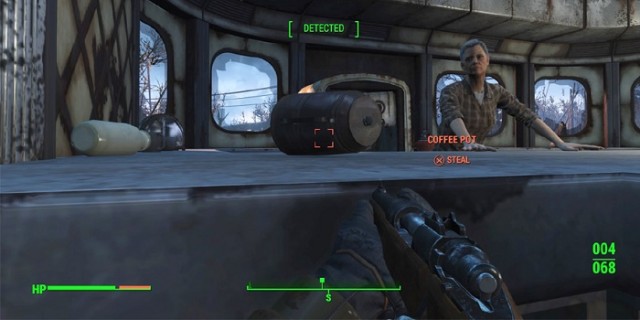 How to Steal like Pro without getting caught in Fallout 4
 Review: Fractal Define R5 Black Computer Case
 4 Tips for Doing Real Research on Android