The ending of Dead Rising 2 certainly offered the opportunity for more, and what better way to provide it than by bringing back the beloved protagonist from the first game: Frank West, photojournalist.
The leather-jacketed shutterbug will fight side-by-side with Chuck Greene in this DLC, helping to get to the bottom of the shadowy conspiracy that unleashed the zombie plague into the shopping malls and casino cities of America. Featuring new combo weapons and the return of the camera mechanic from the first game, it ought to be well worth your downloadable Monopoly money.
Take a look at our complete walkthrough below, and take advantage of our walkthrough for the original game, our full cheats page, or our complete list of Dead Rising 2 Combo Weapons.
The Walkthrough
After the opening cinematic, you’ll find yourself dropped into a room full of zombies. Quickly snag a weapon off the ground and start hacking away. Even if you get something kind of useless, like the push broom, you can use it to knock zombies away from the more effective wrench.
Kill zombies until the nearby door opens. When that happens, you’ll have to fight your way through a mess of geeks to get to the back door. Don’t worry about Frank — he can handle himself. Use a strong weapon to cut a path to the back and let yourself out of the container.
When you get out, you can wander around, finding more weapons. Watch out for the security guard near the staircase — you’ll have to drop him. You can also stop by the maintenance room to the left of the staircase to make combo weapons, like the Hail Mary, which you can make with a football and grenade found in the room.
ACHIEVEMENT: You’ll be dealing with annoying security guards from here on out. Once you’ve killed 20 of them, however, you’ll get the “Phenotrans Nuisance” Achievement.
Wander around a bit and you’ll eventually get a tutorial about taking photos. Scattered around the game are 10 PP stickers, which give you bonus PP toward leveling up.
ACHIEVEMENT: Snap a photo of all 10 PP stickers in a single playthrough and your reward is the “Professional Photography” Achievement. We’ll mark them off as we pass them so you can find them.
ACHIEVEMENT: You can snap photos of whatever you want by holding the Left Trigger and then pressing RB to access the camera. Once you take your first, you’ll get the “Amateur Photography” Achievement.
PP STICKER: Before you head up to the Shipping Office, stand with your back to the container you exited and then turn right. Face the container and you’ll see a place where you can climb up on the concrete beside your container, with a blue one to your left. Look for a tiny white mark on the side of the blue container, near some yellow railings. Snap a photo of it to notch your first sticker.
When you’re done, head up the stairs to the Shipping Office. You’ll watch a cutscene and then have to take on some security guards. Try to move toward them between bursts of fire to avoid getting shot, while keeping walls between you in the meantime. If you have one of their assault rifles from when you took out the guard downstairs, you’ll be in even better shape against these guys.
Another cutscene kicks on after you kill those guys. Head back out of the room when they’re gone.
TIP: The Shipping Office is pretty much your safe room. You can save at the back of it, near the lockers, by using the bathrooms.
Back in the loading bay, you’ll see a few Phenotrans employees trying to zap zombies. You can fight or ignore them: you want to head to the right and up the ramp, following the Guide Arrow.
ACHIEVEMENT: Those guys with the cattle prods are zombie handlers. If you take out 10 of them, the “Phenotrans Bubble Burster” Achievement is yours.
PP STICKER: Right at the top of the ramp, when you enter the next room, turn right and look at the wall beside the entrance way you just passed through. There’s a yellow sign there that says “Keep ‘Em Moving!” and beneath it is your PP sticker.
Stick with the Guide Arrow, following it around the corner to the right. You’ll enter another room where security guards are blasting away at zombies. Dodge them and head up the stairs to the Security Station.
Inside the Security Station, you’ll find two more guards; one ahead near the computer terminals, another in the locker room beyond. Take out both, then get to the computers and input the codes.
PP STICKER: Before you leave here, head back toward the door you used to enter, then turn left into the lounge area. There’s a map hanging on the wall, with the PP sticker set right in the center of it.
Leave the way you came and keep following the Guide Arrow. Stick to the wall on the right side as you go to avoid taking fire from security guards on the second floor of the area. You’ll see a half-open door with yellow hazard symbols drawn on it — hack through zombies and head through.
As soon as you get into the harvesting room, you’ll see stairs ascending in front of you. If you get to the top of the platform, you’ll find a security guard unloading in your general direction, so quickly get up there and deal with him.
PP STICKER: A quick way to get to the fourth sticker is to hop up on the orange equipment on top of the platform near where you killed the guard. It’s along the right wall if you’re facing toward where you fought the guard. On top of that equipment, move forward and climb onto the equipment above it, then jump to the walkway just beyond. Follow that around the corner to the left and stop halfway down to the door beyond. Turn left and break the glass. You’ll see a hanging, spinning piece of machinery through the window, with the PP sticker on it.
PP STICKER: We need to get to the server room, but before we do, there are more stickers we can snag. Keep following the hallway you’re in to the door at the end. When you go through, you’ll find yourself on a catwalk. Just below that catwalk and to the left if you’re facing the stairs is a room marked “Refrigerated Containment.” Hop down and go inside — look at the refrigeration unit in the center of the room. On the glass in the middle is PP sticker No. 5.
SECURITY CAMERA: There are actually two cameras in the Refrigerated Containment room — one just above the sign outside of it, and one on the back wall above the door leaving the room.
PP STICKER: Go through the Refrigerated Containment room to find a door at the back. Turn left to find another room — the Zombrex Research Lab. Open the door and go down the first aisle on the left. Turn right to face the chemical dispensing machines about halfway down and look up to find the sticker on one of the tanks.
SECURITY CAMERA: There’s a camera right above the sign as you enter the Zombrex Research Lab.
PP STICKER: Find a staircase — there’s one around the corner of the Zombrex Research Lab to the left as you leave. When you get onto the second floor with the catwalks, look for a section in the middle of the area with a bunch of red painted machinery and tanks. Get to the platform with the red tanks and you’ll find the PP sticker on the one marked “Queen Storage” all the way at the end — to the left if you’re facing the tanks. Watch out for gunfire when you go to grab it.
Follow the Guide Arrow back down: you’ll have to square off against a guard along the way if you follow the arrow back toward the maintenance room on the second floor. When you get to the bottom of the steps, you’ll head toward Gas Control, and then into the Cafeteria beyond.
PP STICKER: Keep moving through the Cafeteria and you’ll emerge in the Living Quarters. Move forward toward the second room on the right, the one with the pool table inside. Go in and shoot a picture of the Zombrex poster on the back wall, left side. That’s PP Sticker No. 8.
Leave and keep moving to the back of the Living Quarters. Kill the two security guards that show up there and you’ll find the Server Room just beyond. In the back left corner, you’ll find the terminal to input your codes.
Finally — done with that. Time to head back to the Shipping Office. If you’ve got a second, however, we can go find PP Sticker No. 9.
PP STICKER: Leave the Server Room and find a staircase on the left side of the area, past the room where you found the last sticker. At the top of the stairs, turn right and enter the room right next to you, marked A8. Inside, immediately to the left of the door, is a picture of the state of Texas with a PP sticker in the center.
PP STICKER: We’re really close to the final sticker, so best to just get it now. Leave room A8 and face over the railing of the catwalk you’re standing on. You’ll see another catwalk across from you, and that’s where you’re headed. If you carefully hop over the railing of the catwalk, you can land on one of the crossbeams connecting the two catwalks. Cross to the far catwalk and take the stairs up to a lounge area that’s tiki-themed, with a totem pole in the center. Check the face of the totem pole for your final PP Sticker.
Now that that’s done, haul back toward the Shipping Office. The Guide Arrow will take you there through the harvesting room, but it shouldn’t be hard to get back. Enter the room to get a cutscene and complete Case 1-2.
Your next case doesn’t actually start for a few hours, so in the meantime, you can go start looking for survivors. Unlike in the other Dead Rising games, you don’t have to escort them, only help them escape their initial jams.
The first survivor you’ll encounter is Hernando, right outside of the Shipping Office. Head down the stairs and across the loading dock to find him standing on some crates.
Clear out the zombies around Hernando and you can climb up and talk to him. He’ll take care of himself once you’ve rescued him, but he asks you to go find his friend Lisa in the Cafeteria.
Leave Hernando and cross the Holding Pens toward the Harvesting Room. It’s the same path you just took to find the Server Room.
Follow the Guide Arrow to the Cafeteria. When you get there, go into the kitchen, where you’ll find a note on the ovens in the center of the room. Picking it up changes your destination to the Security Tower, which is located back on the second floor of the Holding Pens section.
Double-back through the Harvesting Room. You’ll follow the arrow up to the second floor of the area, but you’ll have to fight four security guards as you approach the Security Tower in the center of the room. Be careful as you approach and use ranged weapons if you’ve got them.
There’s a second note inside the Security Tower, which directs you to the Living Quarters. Now you get to run all the way back to the other side of the Cafeteria.
When you finally make it to the Cafeteria, follow the arrow to find Lisa in one of the rooms on the bottom floor of the Living Quarters area. Get to her and kill the zombies in the area, then talk to her. It’ll take three attempts, but she’ll eventually take off — but not before giving you the Emergency Pass to get back to the Holding Pens.
Set your Guide Arrow to Case 2-1 and it’ll lead you directly to the Emergency Door, which lets you open a passage straight back to the Holding Pens without having to go through the Harvesting Rooms or the Lab area. Should be a lot faster.
Once it hits 4 p.m., head to the Shipping Office. There you’ll get another cutscene. You’ll need to get to the Lab to finish the case. To get there, head toward the Security Station where you entered your first access code, near the Holding Pens.
On the lower floor beneath the Security Station, you’ll find another scientist, Robert, holed up and hiding from zombies. Once you clear the area, he’ll ask you for a Security AR (a security guard’s gun) so he can use it to escape.
Nearby from where you find Robert are staircases you can use to get up to the Security Station above you. Inside are two security guards — they always respawn there, every time you reload the area. Kill one and grab his gun.
Return the gun to Robert to save him. Once you’re done, break for the Harvesting Room. Stop either at Robert’s location or in the Harvesting Room and kill a Zombie Handler to get an electric prod. You’ll want it in a minute.
Pass through the Harvesting Room and follow the Guide Arrow until you reach the Labs. The first one on the left will have the Lab Keycard, which you need to reach the Director’s Office.
While you’re here, make your way to the Zombrex Research Lab — it’s further into the Lab, along the way the Guide Arrow takes you.
Pop inside and you’ll find Alicia, another scientist, hiding around the corner to the left inside the room. She’ll ask for an electric prod.
If you don’t have a prod, you’ll need to go find a Zombie Handler and get one. If you got one before you came over however, you can just hand it over to save Alicia now.
There’s still another survivor you need to deal with before heading to the Director’s Office. If you complete Cases 2-2 and 2-3 first, you’ll lose the ability to save this one.
It might be a little boring, but head back to the Holding Pens and sit tight until 6:40. Run around and make weapons, kill zombies, whatever.
After 6:40, you can head back to the Harvesting Room. When you arrive, you’ll immediately get a glimpse of a woman named Alicia fighting for her life on the second floor of the chamber, near where you got one of the PP Stickers.
Get up the stairs and kill the security guard so he doesn’t hassle you, then climb up on the orange equipment on the side of the platform. Jump up again onto the overhanging section, and blow out the glass near Alicia either by shooting it or throwing something at it.
You can deal with the zombies from a distance if you have that capability, but if not, jump to the walkway Alicia’s in and start killing them. Clear the zombies out in the area and speak with her to save her. It should be easy, and once it’s done, you’re ready to head out.
You can head to the Director’s Office now. It’s on the second floor of the Storage Bays area, and you can access the walkway to get to it from the back door of the Shipping Office. Backtrack out of the Harvesting Room and get up to the second floor, following the Guide Arrow to the right place.
Eventually you’ll make your way up to the Secure Labs Observatory, which is what you needed the key for. Grab food along the way, because you’re about to need it.
Once inside, just follow the arrow around to the proper doorway. Going through will trigger another cutscene when you arrive.
The cut ends with you having to fight two Hazard Units — big guys in bomb squad getups, carrying pneumatic impact hammers. These guys are bad news, and will seriously hurt you; hence the food.
You’ll want to do your best to divide and conquer here. If you’re playing with a co-op teammate, try to have one of you draw the two Hazard troops while the other wails on one. You must concentrate fire, however — killing one as fast as possible is your goal.
If you’re playing alone, let Frank take the brunt of the beating. He can’t be killed, not ever, so that makes him your human shield. Let him draw the Hazard guys while you get in close and hit them from behind.
Watch out for the two enemies slamming their hammers down on the ground — it’ll cause a shockwave that’ll knock you off your feet. The best time to attack them, then, is just following when they do the ground slam attack, so you can hit them once or twice without worrying about it.
TIP: You can avoid the impact hammer shockwave by jumping.
Hit and run tactics are best. The Hazard guys will also slam those hammers into you, which isn’t as bad as the ground slam, but still pretty painful.
Keep your health up (especially if you have weak health items like snacks) and do your best to finish one off. Once that happens, you can use Frank or your teammate to draw the enemy while you hit it in the back. With two-on-one odds, you should win the fight handily.
Another cutscene plays right after, wrapping up Case 2-2. Time to head back toward the Shipping Office.
Heal up on your way out and head back to the Shipping Office. Once you do, you’ll trigger another cutscene and the “end” of Case 2-3. At this point, you’re free to mess around until 1 a.m.
ACHIEVEMENT: Hazard Unit troops will now be tooling around everywhere. Kill three more of them to get the “Phenotrans Sabotage” Achievement. Beating these guys is easier than it sounds — use the tactics you did against the bosses. In a two-on-one, it should be easy. Once you’ve beat one, take his impact hammer. Combine it with a blast force gun to create a Blast Hammer, an awesome weapon that will drop Hazards in just four hits. Keep one handy at all times.
Make your way out of the staircase exit of the Shipping Office after you’ve been there. Head up the ramp ahead and you’ll find a woman named Regina right around the corner to the right. She’ll give you a mission: retrieve some human organs for her.
Run through the Holding Pens to the Harvesting Room, then cut right to the Labs.
The Guide Arrow will lead you straight to your first organ: a human liver. Make space in your inventory, because you’re going to need it.
Head up to the second floor from the lab where you found the liver, and you’ll discover the human heart in another nearby lab. Snag that as well.
You’ll need to backtrack to the Storage Bay again, where Regina is hiding behind a makeshift barricade. Clear the zombies and deliver the organs and she’ll hand off the Underground Tunnel Key.
Now you can quickly go save another survivor by accessing the Underground Tunnels, and you’ll have quick access to the Harvesting Room when you need it.
In order to get to Muzaki, you’ll need to find the entrance to the Underground Tunnels, which is in the Holding Pens area. The best way is to go from the Shipping Bay, near the Shipping Office. With the office staircase at your back, head left and go through the blue shipping container, then turn left to find a maintenance room and the staircase down to the tunnel. On your map, it’s the staircase just next to the Secure Laboratories section.
Head down into the tunnel and you’ll find a crazy scientist named Muzaki. Talk to him and he’ll spew nonsense at you — then he’ll attack you.
Use a weaker weapon, like the electric prod, and give Muzaki what for. It’ll take a few seconds for you to knock some sense into him, but once you do, he’ll be saved.
Muzaki takes off down the hall. From here, you have a quick an easy means of accessing the Harvesting Room without zombie or security guard interference.
We’ve still got some time before the start of Case 3-2, so we’ve got some time to save another survivor.
Before you head to Jerry, you’ll need a few things. In the tunnel is a maintenance room, and in that maintenance room are gems. In the tunnel itself is a flashlight — combine the gems and flashlight to fashion a Laser Sword.
Next, you’ll need a blast frequency gun, which should also be available in the tunnel, and an electric prod, which you can get just about anywhere. Combine those two to make a Lightning Gun.
Keep both those weapons and don’t waste them: they’re the price of admission for saving Jerry, the survivor we’re after. Next you’ll want to get to the Living Quarters, which you can access quickly from the door you unlocked in the Holding Pens.
Jerry is on the second floor of the Living Quarters, in Unit X1, but he won’t show up until sometime after 10 p.m. When you get to him, he’ll ask for a Lightning Gun and a Laser Sword — which is why we had you bring them, or at least the components to make them. If you need pieces, you can find them scattered around, but there are gems in X1 and a flashlight in the nearby server room for the Laser Sword.
Talk to Jerry repeatedly, handing over the weapons, and he’ll construct you a Laser Gun, as well as give you a combo card for it. The gun is pretty awesome — shoot a zombie with it and after a second, it’ll explode, giving you 300 PP for the initial kill and 200 for any zombie killed by the blast. Stay back when you use it, though.
After that, talk to Jerry again and he’ll take off, giving you another notch on your Saved list.
That’s it for survivors. Kill time until 1 a.m., when you’ll need to be back in the Shipping Office for the start of the next case.
A cutscene will play when you head to the Shipping Office. Afterward, you’ll be dispatched on another fetch quest.
Leave the Shipping Office and head into the Storage Bay. Follow the Guide Arrow until it starts to spin, near a stack of pallets. Climb up on a nearby crate and get on the second level of the stack to find the detonator.
Make your way to the nearest staircase and head toward the Security Tower. You’ll have to fight guards along the way, somewhere in the order of two to four, so bring strong weapons if you’ve got them.
Clear the Security Tower and you’ll find C4 there. With both items in-hand, you’ll need to make your way to Labs, so follow the Guide Arrow.
Note that as you enter the Labs section, you’ll encounter even beefier Gas Zombies, which can pin you down and seriously hurt you. Bring along a good melee weapon to keep yourself out of trouble.
Follow the arrow through the Labs to the Electrical Room. When you get there, you’ll discover security guards holding off zombies at your goal. Grab a strong weapon (Blast Hammer is useful) and take them down.
Get inside the Electrical Room and head to the generator in the back of the room. Interact with it to plant the explosives you brought and complete the case file.
You have a little time to do what you want. Here’s how you should spend it: bulk up on powerful weapons (if you can build three or four Laser Guns and Burst Hammers, you’ll be in great shape; bring along some Security AR guns as well, if you can spare the space) and strong food, like blended drinks or orange juice.
With the power down, you can enter the Secure Labs, where the game’s final battle lives. You also have another survivor to garb, and you need to do everything you want to finish before you head through those doors. Once you pass into the Secure Labs, it’s End of Game or bust.
Our last survivor is in the Living Quarters, but you’ll have to reach a loading screen in order to make him appear. First, though, we’ll get what he needs: an Energizer drink. Make your way to the Cafeteria.
Once you make it to the Cafeteria, go into the kitchen and find the blender. Behind it should be a bunch of apples. Grab one and pop it in.
Next, you’ll need whiskey. If there’s none in the kitchen, make your way to Living Quarters unit RR, where you’ll find some against the back wall. Bring it back to the blender.
Mix the apple and the whiskey to make an Energizer blended drink. Put it in your inventory, then make your way to a door that loads the Holding Pens. The quickest is the door you unlocked in the Living Quarters.
Return to the Living Quarters once you’ve reloaded the area and make your way to the Server Room. There you’ll find Dean, who, just as we expected, requests your Energizer drink. Hand it over to save him.
ACHIEVEMENT: Dean is your last survivor, and saving him along with everyone else nets you the “Savior” Achievement.
With nothing else to do, you’re free to kill zombies, make weapons, or head out to the Secure Labs. You should note, however, that whatever time you leave on the clock is the time you’ll get to deal with the game’s last boss — screw around too long and you’ll be fighting the clock as well. He takes a while to kill, but if you’re sufficiently prepared, it won’t be too hard.
Once you hit the Secure Labs, there’s no going back. If nothing else, bring food and Burst Hammers, as both will get you through this fight.
You’ll watch a long cutscene when you get into the Secure Labs. After that, it’s time to do battle with a huge boss called The Commander. See those stars next to his life bar? Those represent two additional life bars.
Here’s the key to beating The Commander — staying the hell away from him. Play keep-away as much as possible, and if you’re in single-player, let Frank draw as much of the boss’ attention as possible.
With a partner, you might be in better shape. One of you should draw the boss from the other, either attacking him in the back or shooting at him from a distance. The best way to kill this guy is to do so without letting him get close to you.
The Commander carries a pair of impact hammers, and he’s pretty devastating with them. That said, he doesn’t have too many moves: he has a three-hit combo move he does by essentially punching; he has the ground-slam move the Hazard Unit guys use; and he has a charge move in which he runs across the floor toward you, and will carry you along with him.
You’ll also have to deal with a punishing attack whenever The Commander gets any of those metal shelves that litter the room between you and him. He’ll punch the shelf, sending it rocketing toward you — it’s really hard to dodge.
The best way to get clear of these attacks is to push L3 in order to execute a roll move. That will generally get you clear of the charge attack and the punching attacks, as well as the flying shelf move. For the most part, you’ll want to just keep running around the central pile of equipment in the room to keep clear of The Commander and his attacks.
After you’ve dealt some damage to The Commander, or after some time has passed, The Commander will jump up up on a catwalk above the action. From there, he’ll either jump down and do a big shockwave move on you, or he’ll call backup in the form of security guards, zombie handlers or Hazard Units. These guys will come in different combinations, but only two at a time.
Kill the smaller enemies and grab any guns off the security guards, then train those guns on The Commander before he comes back down. Your best bet is to use those picked-up guns, as well as any you brought with you, to hit The Commander hard whenever possible. If you brought Burst Hammers, they make a viable alternative at close quarters, specifically because hitting The Commander with them staggers him and knocks him out of whatever attack he’s about to use on you.
Keep repeating the run-away process. You’ll want to open fire on The Commander only when you’re not in danger of getting run over by his charge move or squashed by flying shelves.
Pay attention to the area around you for more weapons and food, should you need them. There are quite a few weak pieces of food all over the place, but it’ll be hard to consume them with the boss chasing you around.
If you’re persistent and smart about your attacks, The Commander will be a fairly easy fight. He’s no pushover, but with smart play between teammates or simply keeping your distance, you should be able to best him in one try.
ACHIEVEMENT: Defeating The Commander triggers the game’s final cutscene and unlocks the “Fantastic” Achievement for completing the game.


 Waluigi: Unwrapping the Enigma
 How the Internet Has Changed My Life in a Wheelchair
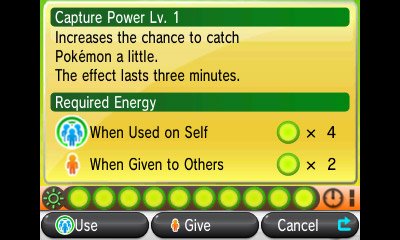 Pokemon X and Y: O-Power Locations Guide
 Water in the Desert: An Aquatic Look at Journey
 Bloodborne Gehrman, the First Hunter Guide: How to Beat, Strategy, and Tips