PuppetShow: The Face of Humanity Walkthrough, Guide, & Tips
PuppetShow: The Face of Humanity Walkthrough

Welcome to the PuppetShow: The Face of Humanity Walkthrough
The mayor’s daughter is missing and you must find her!
Whether you use this document as a reference when things get difficult or as a road map to get you from beginning to end, we’re pretty sure you’ll find what you’re looking for here.
This document contains a complete PuppetShow: The Face of Humanity game walkthrough featuring annotated screenshots from actual gameplay!
We hope you find this information useful as you play your way through the game. Use the walkthrough menu below to quickly jump to whatever stage of the game you need help with.
Remember to visit the Big Fish Games Forums if you find you need more help. Have fun!
This walkthrough was created by Amanda Barrera, and is protected under US Copyright laws. Any unauthorized use, including re-publication in whole or in part, without permission, is strictly prohibited.
General Tips
- This is the official guide for Puppetshow: The Face of Humanity.
- This guide will not show when you have to zoom into a location; the screenshots will show each zoom scene.
- Hidden-object puzzles are referred to as HOPs. This guide will not show screenshots of the HOPs, however, it will mention when an HOP is available and the inventory item you’ll collect from it.
- Use the Map to fast travel to a location.
F
Chapter 1: Saltsbruck

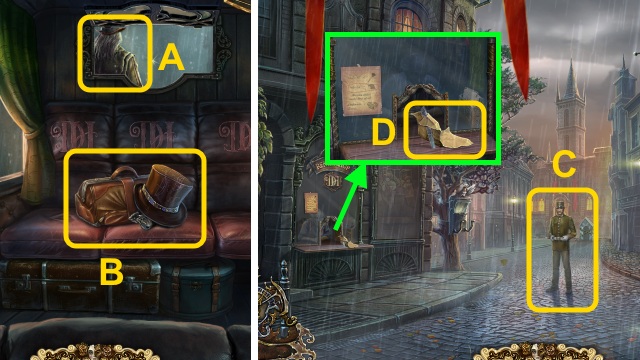
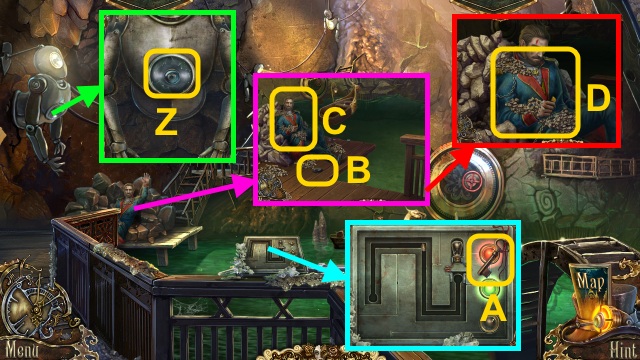
- Talk to the coachman (A).
- Take the Hat and BAG (B).
- Walk left.
- Talk to the man (C).
- Take the PAPER SHEET and MULTI-TOOL (D).

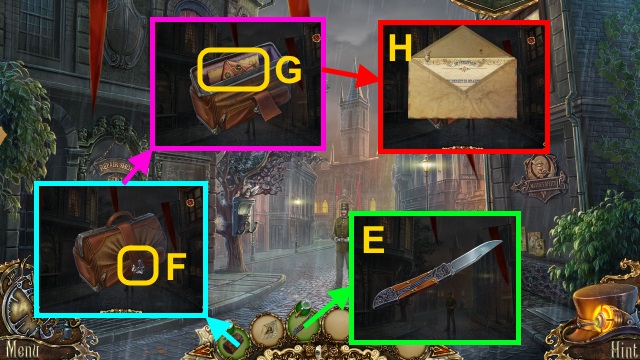
- Examine the MULTI-TOOL 3x (E).
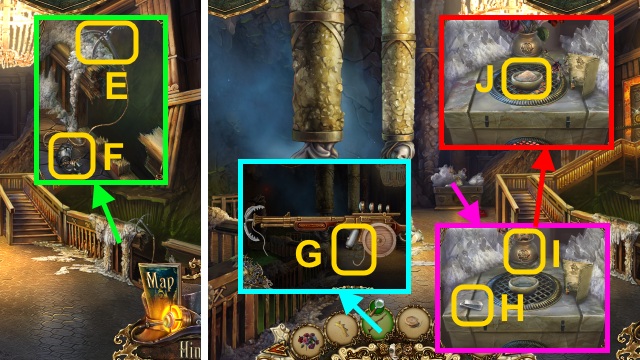
- Examine the BAG (F); use the MULTI-TOOL.
- Open the BAG; take the WALLET (G).
- Open the letter; take the INVESTIGATION INVITATION (H).

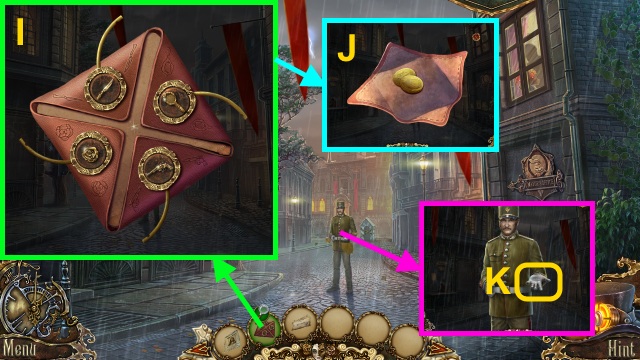
- Examine the WALLET; arrange the tokens (I).
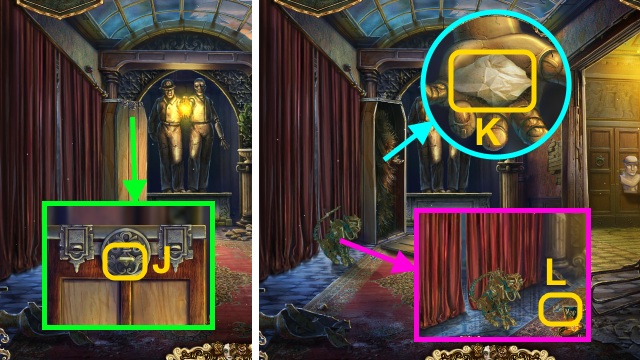
- Open the WALLET (J).
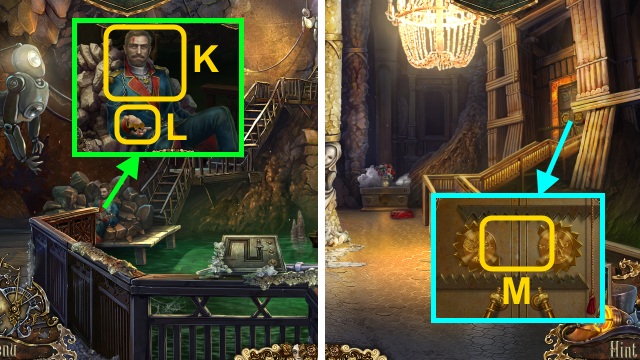
- Give the INVESTIGATION INVITATION (K).
- Walk forward.

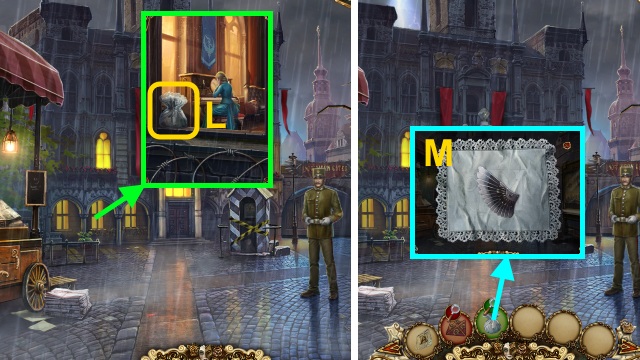
- Open the window; take the HANDKERCHIEF (L).
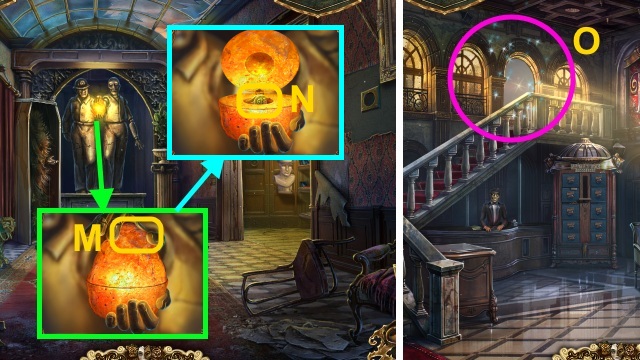
- Open the HANDKERCHIEF; take the WHITE WING and HANDKERCHIEF (M).
- Walk down.

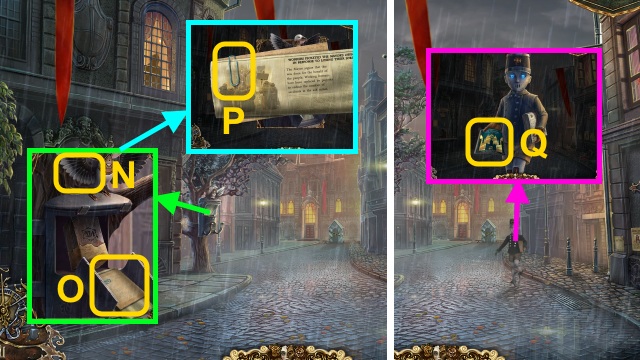
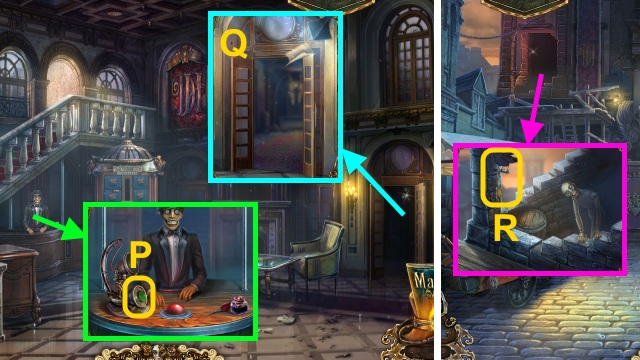
- Place the WHITE WING (N); read the newspaper (O).
- Take the PAPER CLIP (P).
- Talk to the puppet 2x; take the Map (Q).

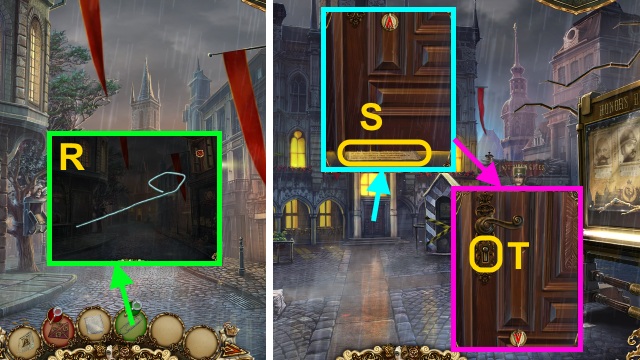
- Examine the PAPER CLIP 2x (R); take the BENT WIRE.
- Walk forward.
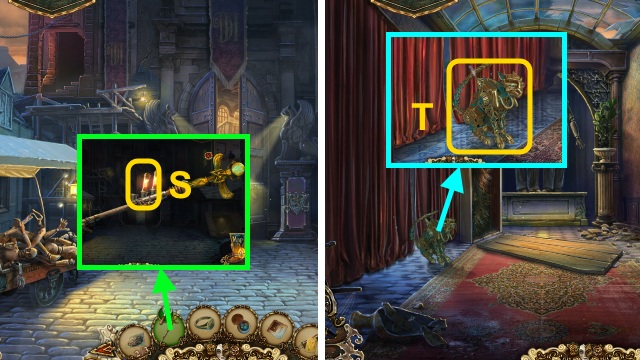
- Scroll down; place the PAPER SHEET (S).
- Scroll up; use the BENT WIRE (T).

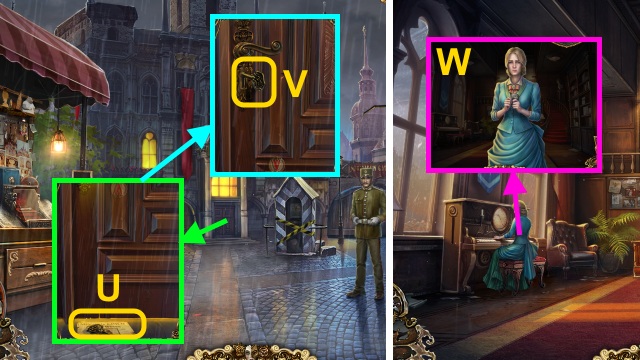
- Scroll down; take the CITY HALL KEY and PAPER (U).
- Scroll up; use the CITY HALL KEY (V).
- Walk forward.
- Give the PAPER (W).

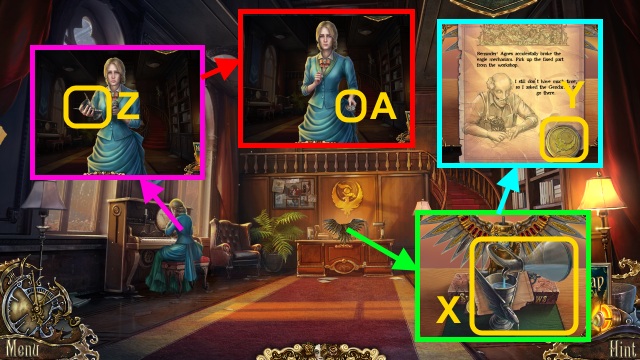
- Pour the water; take the GLASS OF WATER and note (X).
- Take the COIN (Y).
- Give the GLASS OF WATER; take the MAYOR’S GOBLET (Z).
- Take the LOCKET (A).

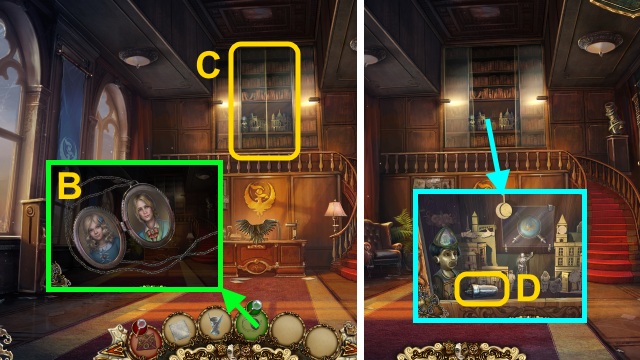
- Open the LOCKET; take the FAMILY LOCKET (B).
- Open the case (C).
- Take the LIGHT BULB (D).
- Walk down.

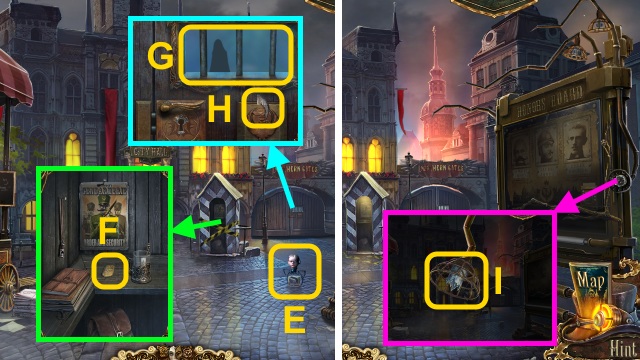
- Examine the puppet (E).
- Take the REPAIR TOKEN (F).
- Examine the gate (G); take the NOTE CHARM (H).
- Remove the bulb (I); place the LIGHT BULB.

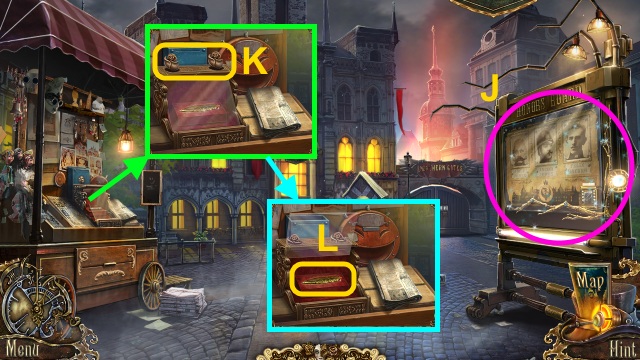
- Play the HOP to receive the ROSE HANDLE (J).
- Place the ROSE HANDLE; press the roses (K).
- Take the GOLDEN FEATHER (L).
- Walk forward.

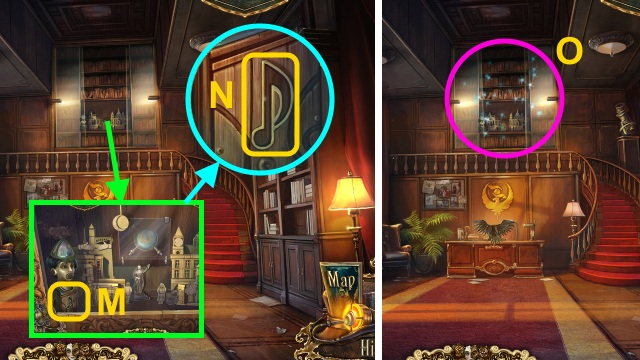
- Examine the box (M); place the NOTE CHARM (N).
- Play the HOP to receive the EAGLE’S HEART (O).
- Walk down twice.

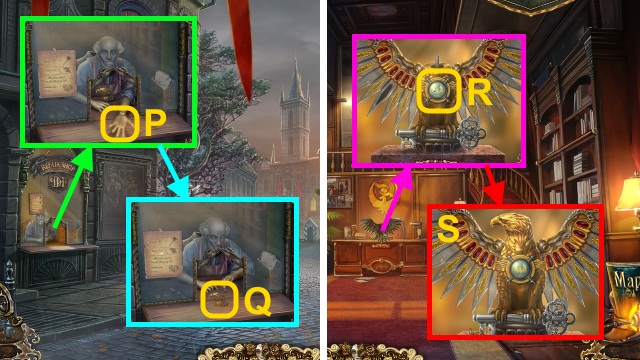
- Give the REPAIR TOKEN (P).
- Take the EAGLE’S HEAD (Q).
- Walk forward twice.
- Remove the decoration (R); place the EAGLE’S HEART, GOLD FEATHER, and EAGLE’S HEAD for a mini-game (S).

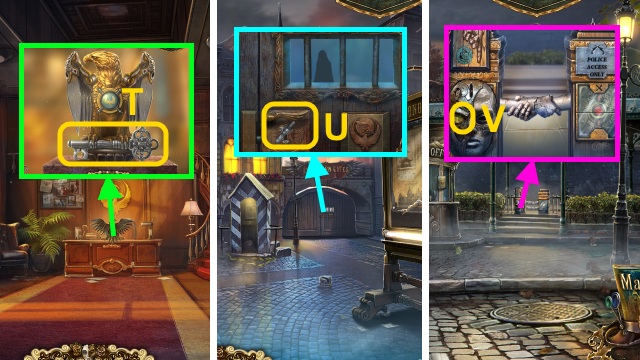
- Solution is random; take the GATE KEY (T).
- Walk down.
- Use the GATE KEY (U); open the gate.
- Walk right.
- Take the COIN (V).

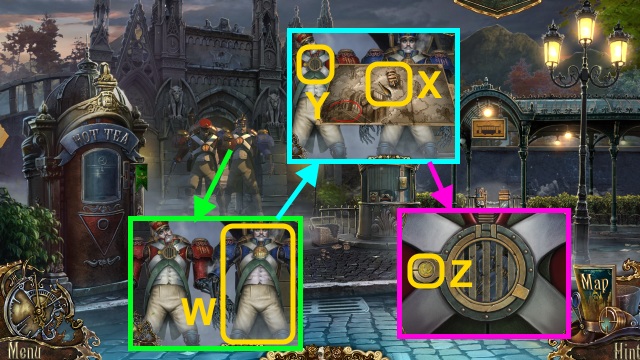
- Talk to the puppets (W); take the BROKEN MASTER KEY (X) and Map.
- Examine the puppet (Y); take the COIN (Z).

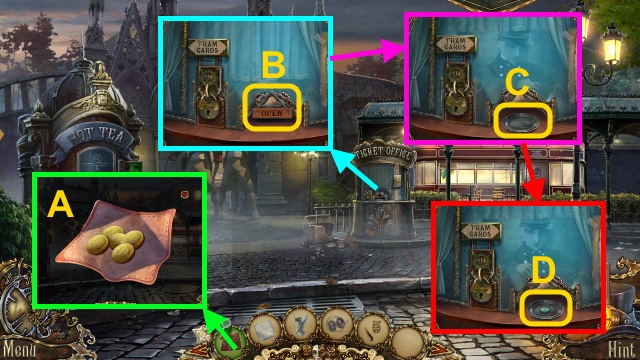
- Examine the WALLET; take the 5 COINS (A).
- Remove the sign (B).
- Give the 5 COINS (C).
- Take the TRANSPORT TOKEN (D).

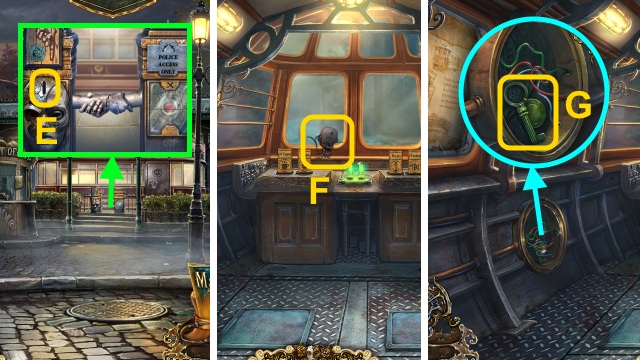
- Use the TRANSPORT TOKEN (E).
- Go right.
- Examine the puppet (F).
- Move the wires; take the SMALL KEY (G).
- Walk down.

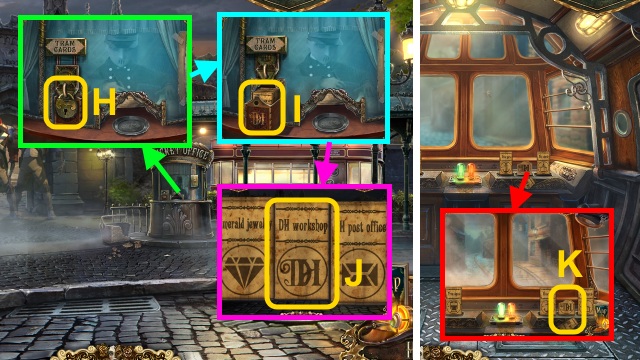
- Use the SMALL KEY (H).
- Move the box (I); examine the cards 6x.
- Take the TRAVEL CARD (J).
- Walk right.
- Remove the card (K); place the TRAVEL CARD for a mini-game.

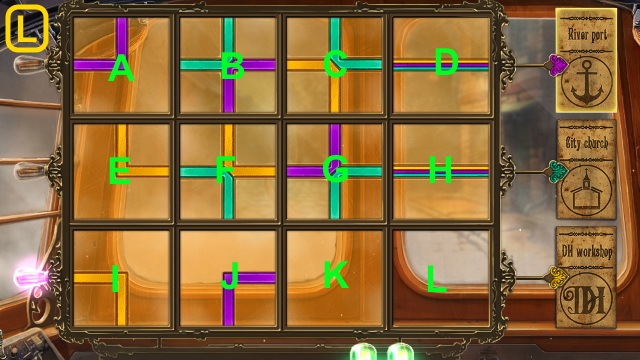
- Solution (L).
- Part 1: K-G-C-D-H-G-K-J-F-E-A-B-F-J-I-E-A-B-F.
- J-K-G-F-J-K-G-C-B-F-J-K-G-C-B-F-G-K-J-F-B-C-G.
- Part 2: H-L-K-G-F-E-I-J-K-L-H-D-C-B-A-E-I-J-F-G-H-D.
- Part 3: C-G-K-L-H-G-C-B-F-J-K-G-C-B.
- F-E-I-J-K-G-H-D-C-B-A-E-F-J.
- Walk right.
Chapter 2: David and Hannah

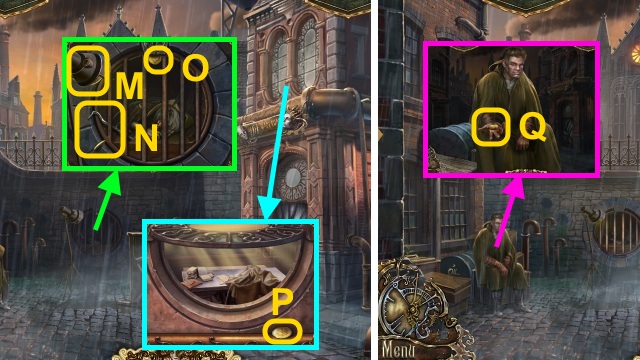
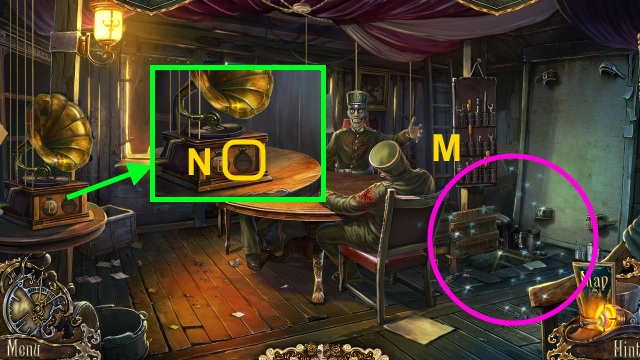
- Turn on the light (M).
- Take the 2 COINS and CROWBAR (N-O).
- Open the window; take the COIN (P).
- Talk to the man; take the COINS (Q).
- Walk down.

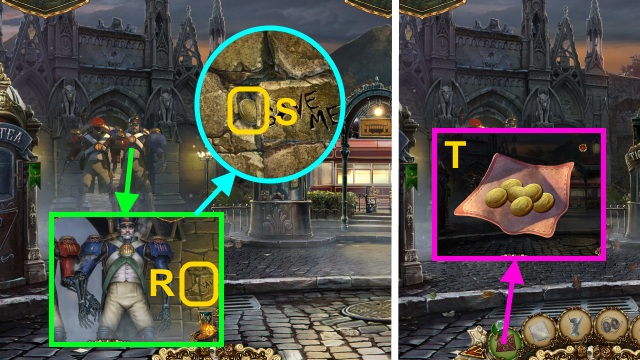
- Examine the wall (R).
- Use the CROWBAR; take the COIN (S).
- Examine the WALLET (T); take the 6 COINS.

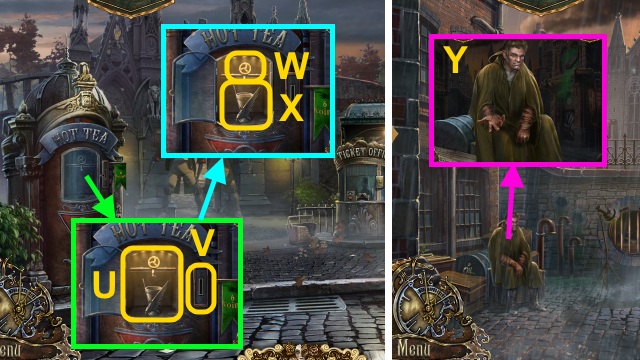
- Open the case; place the MAYOR’S GOBLET (U) and 6 COINS (V).
- Turn the VALVE (W); take the HOT TEA (X).
- Walk right.
- Give the HOT TEA (Y).

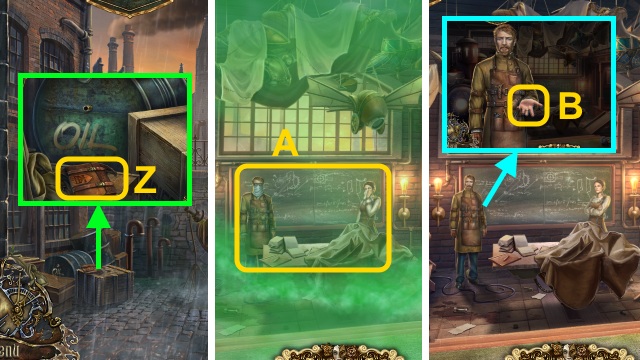
- Take the DH SATCHEL (Z).
- Walk right.
- Examine the scene (A).
- Talk to the couple; give the FAMILY LOCKET (B).

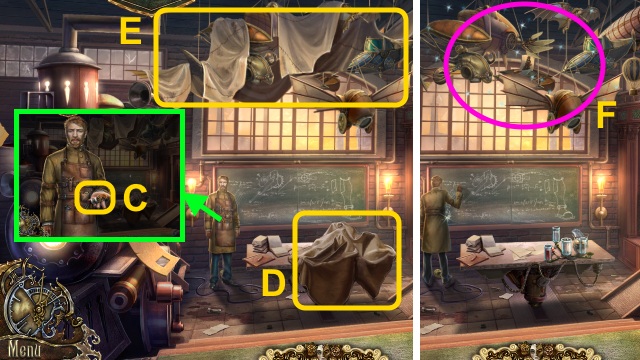
- Give the BROKEN MASTER KEY; take the CHESS PIECE (C).
- Move the tarps (D-E).
- Play the HOP to receive the SEWER KEY (F).

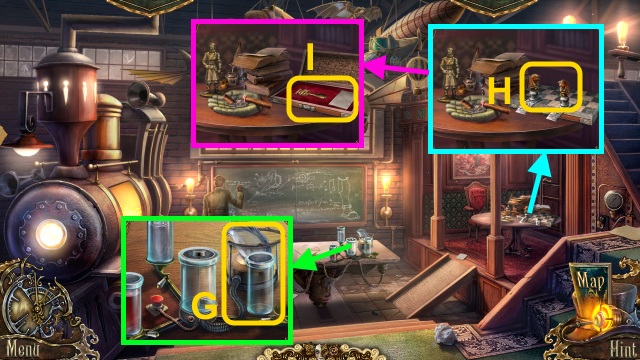
- Take the EMPTY FLASK and GLASS PART (G).
- Place the CHESS PIECE (I); open the box.
- Take the MASTER KEY and HEART DIAGRAM (I).
- Walk down.

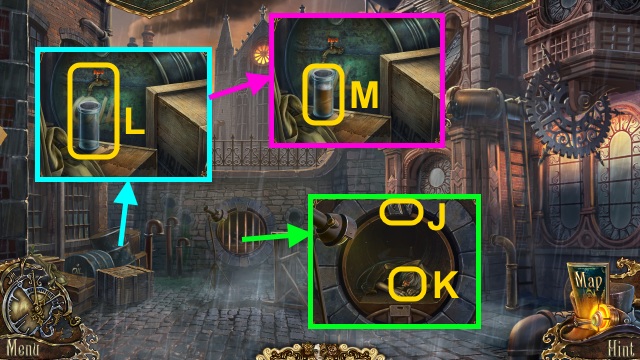
- Use the SEWER KEY (J); take the FAUCET (K).
- Place the FAUCET and EMPTY FLASK (L); turn the handle.
- Take the FLASK WITH OIL (M).
- Walk down.

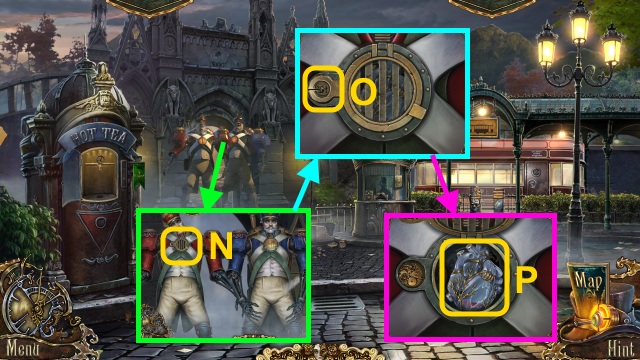
- Examine the puppet (N).
- Use the MASTER KEY (O).
- Take the BROKEN HEART (P).

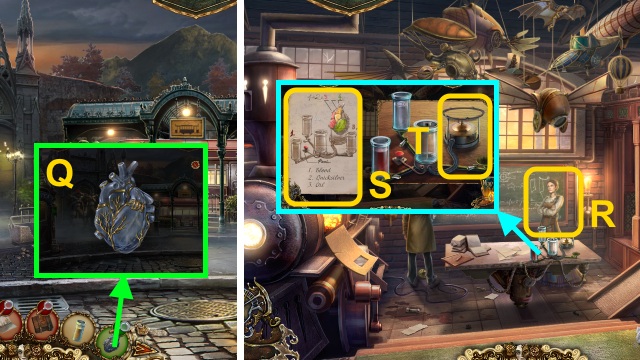
- Examine the BROKEN HEART 2x; place the GLASS PART (Q).
- Take the EMPTY GLASS HEART.
- Walk right twice.
- Talk to Hannah (R).
- Use the HEART DIAGRAM (S); place the FLASK WITH OIL and EMPTY GLASS HEART for a mini-game (T).

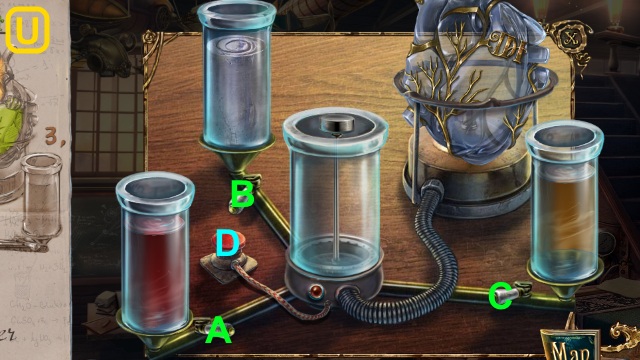
- Solution (U): A-B-D-C-B-D-A-C-D.

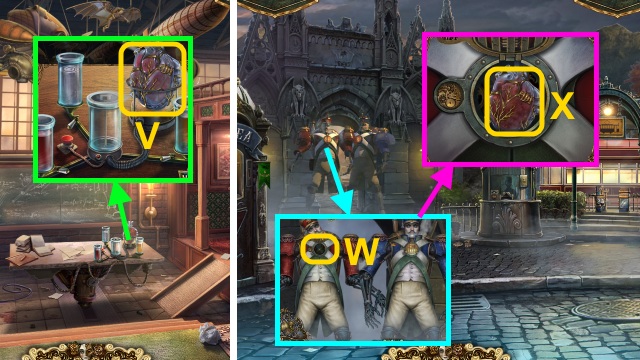
- Take the GLASS HEART (V).
- Walk down twice.
- Examine the puppet (W); place the GLASS HEART (X).
- Walk left.

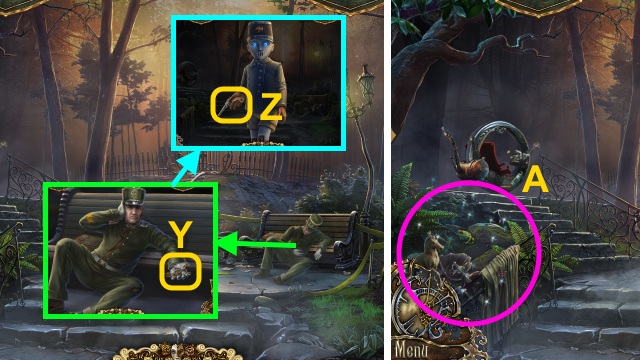
- Talk to the man; take the GENDARME’S KEYCHAIN (Y).
- Take the EMPTY GUN (Z).
- Play the HOP to receive the ROSE BOUQUET (A).

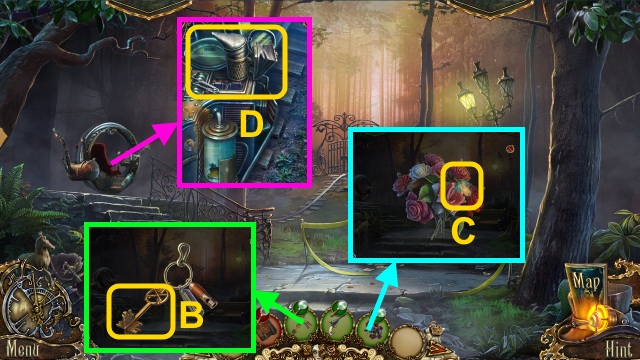
- Examine the GENDARME’S KEYCHAIN; take the GENDARME’S KEY (B).
- Examine the ROSE BOUQUET; take the FIREFLY PUPPET (C) and ROSE BOUQUET.
- Take the EMPTY SMOKER and LOCKPICK (D).

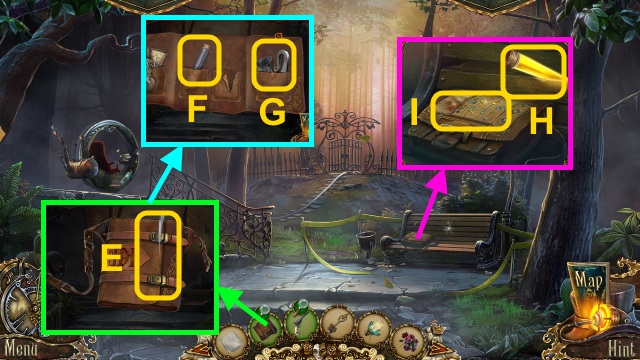
- Use the LOCKPICK on the DH SATCHEL (E); open it.
- Take the GLOW STICK (F) and FLINT AND STEEL (G).
- Use the GLOW STICK (H); examine the bag for a mini-game (I).

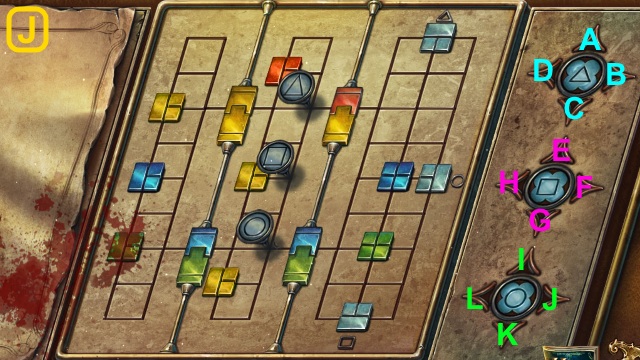
- Solution (J): H-L-K-Dx3-Ex2-H-Gx4-H-Cx2.
- I-Jx3-Fx4-Ex2-F-Cx2-Bx4-Ax6-B-J-Ix2-Gx4.

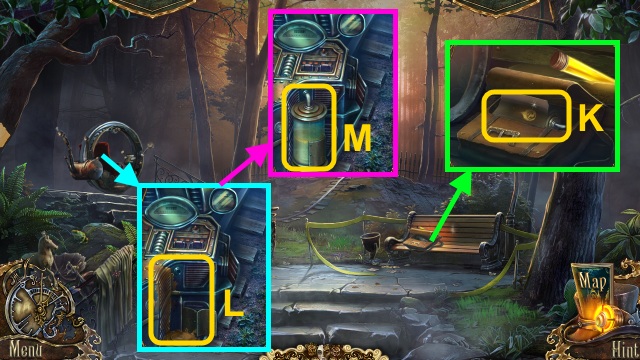
- Take the Map and FULL TANK (K).
- Remove the tank; use the HANDKERCHIEF (L).
- Place the FULL TANK (M).

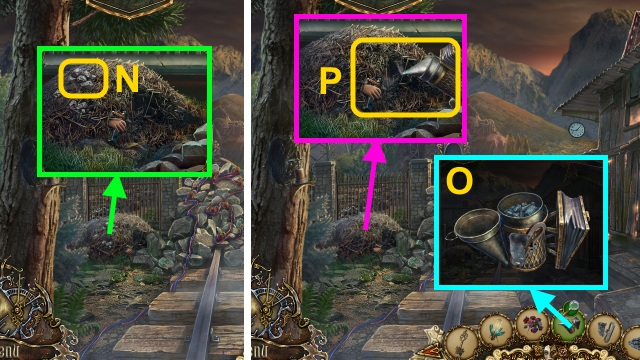
- Take the COAL (N); examine the hay 3x.
- Open the EMPTY SMOKER; use the COAL and FLINT AND STEEL (O).
- Take the SMOKER.
- Use the SMOKER; take the SIGNALER FIGURINE (P).

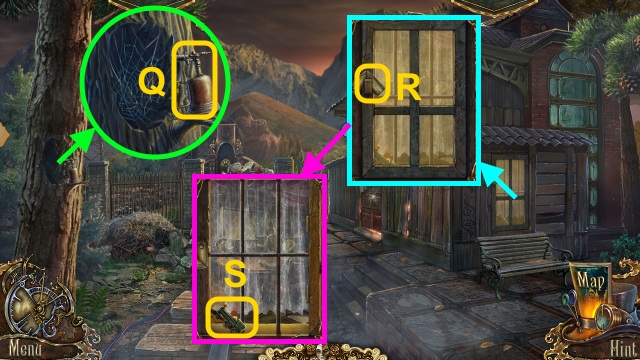
- Take the BLOWTORCH (Q).
- Move the latch (R); open the window.
- Take the TRAIN FIGURINE (S).

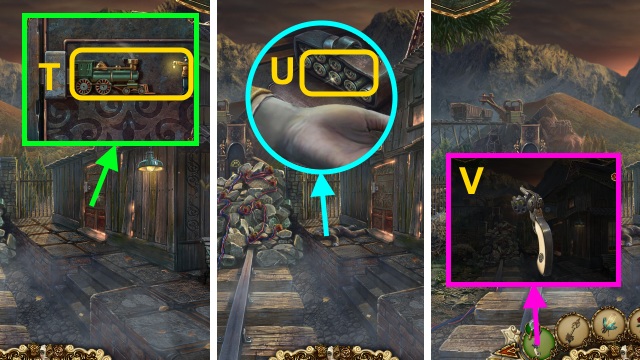
- Place the TRAIN FIGURINE and SIGNALER FIGURINE (T).
- Examine the man; take the AMMUNITION (U).
- Open the EMPTY GUN; place the AMMUNITION (V).
- Take the LOADED GUN.
- Walk right.
Chapter 3: The Forest

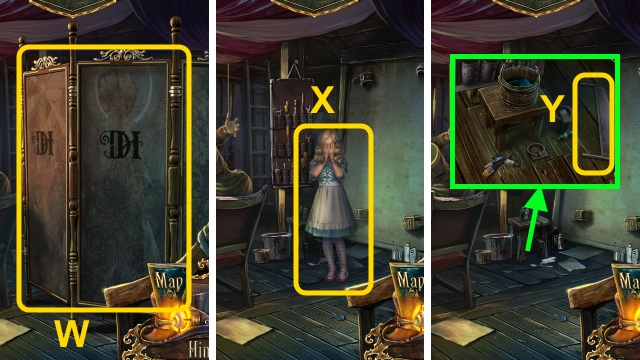
- Move the screen (W).
- Talk to Agnes (X).
- Take the SAW (Y); move the furniture.

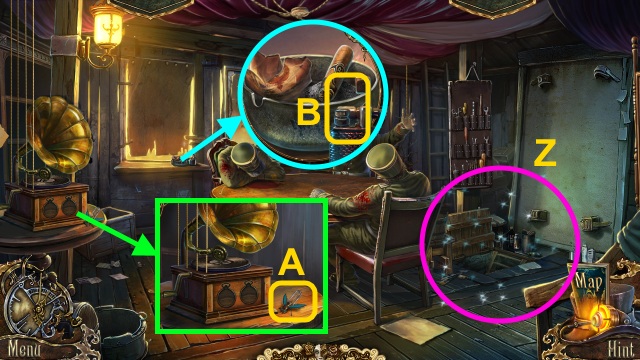
- Play the HOP to receive the DETONATOR (Z).
- Take the BROKEN FIREFLY (A).
- Take the LIGHTER (B).
- Walk down.

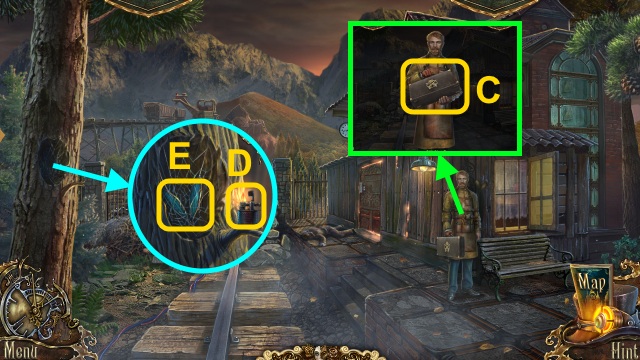
- Talk to David; take the SENTRY CONTROL UNIT (C).
- Use the LIGHTER (D); take the TINY WINGS (E).

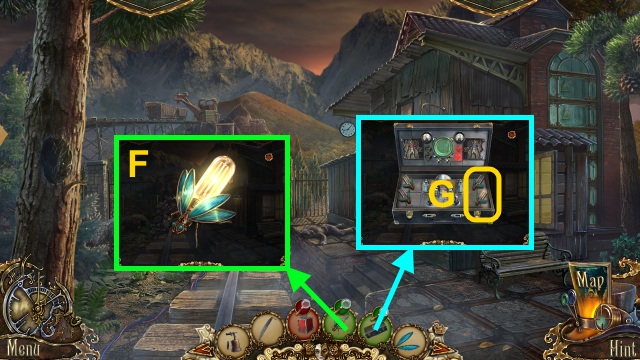
- Combine the BROKEN FIREFLY and TINY WINGS (F); take the FIREFLY PUPPET.
- Open the SENTRY CONTROL UNIT; place the 2 FIREFLY PUPPETS (G).
- Take the SENTRY CONTROL UNIT.
- Walk down.

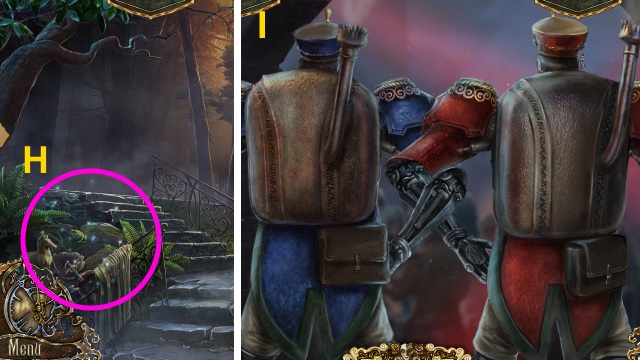
- Play the HOP to receive DAVID’S POCKET WATCH (H).
- Walk down.
- Use the SENTRY CONTROL UNIT for a mini-game (I).

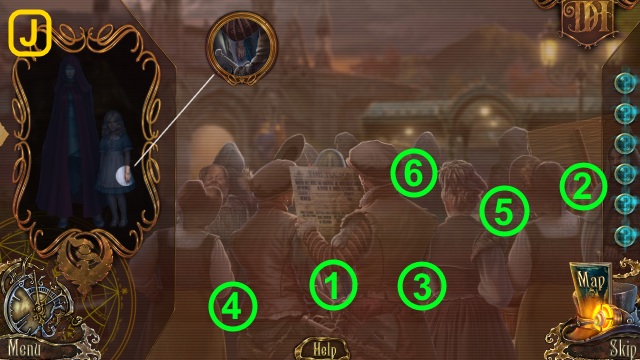

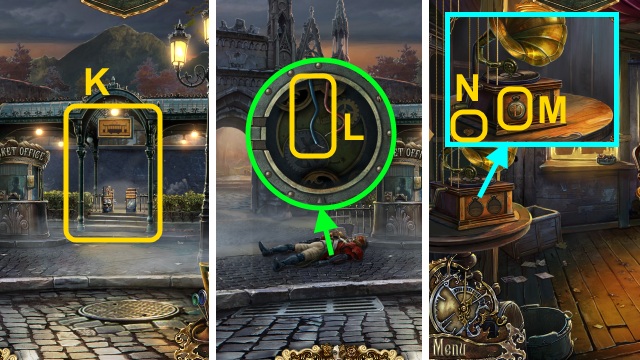
- Examine the station 2x (K).
- Take the BLUE WIRE (L).
- Walk left, forward, then right.
- Place DAVID’S POCKET WATCH (M); take the HEART WITH GEARS (N).
- Walk down three times.

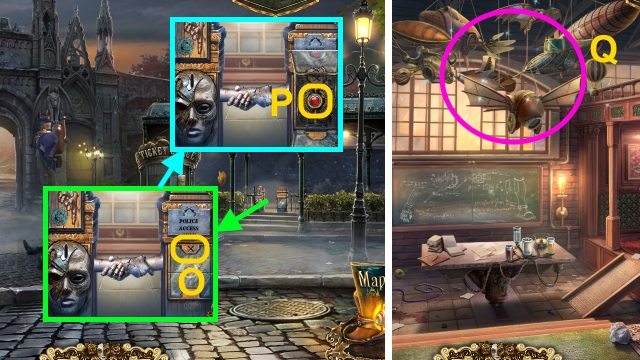
- Use the GENDARME’S KEY (O); press the button (P).
- Go right twice.
- Play the HOP to receive the WOODEN BOX (Q).

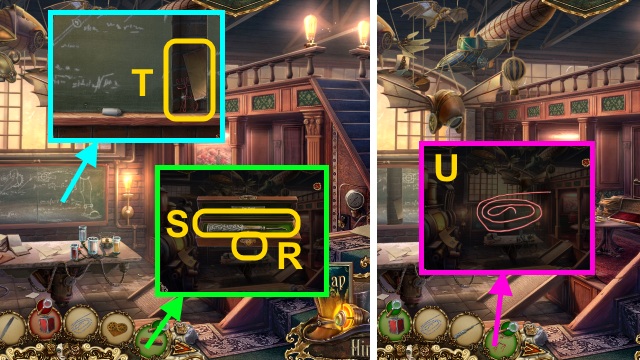
- Combine the HEART GEARS and WOODEN BOX (R); take the SCREWDRIVER (S).
- Examine the chalkboard; take the note and WIRE MOOSE (T).
- Examine the WIRE MOOSE 2x; take the RED WIRE (U).

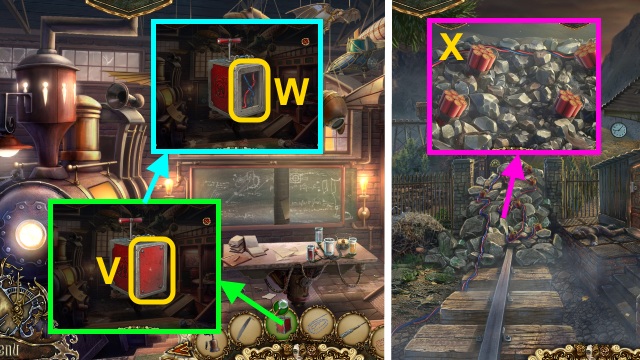
- Use the SCREWDRIVER on the DETONATOR (V); place the BLUE WIRE and RED WIRE (W).
- Walk down twice, left, then forward.
- Place the DETONATOR for a mini-game (X).

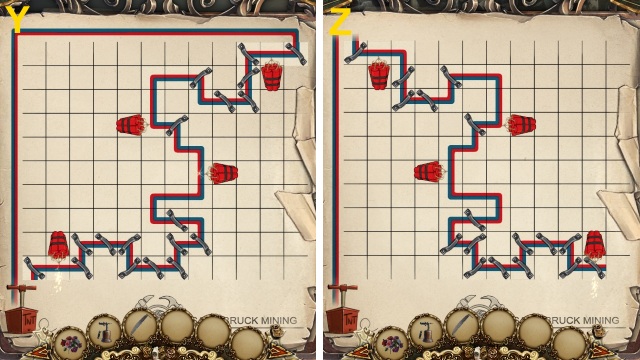
- Solution (Y-Z).
- Walk forward.

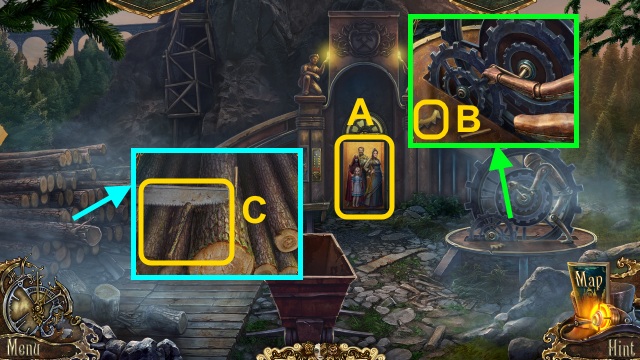
- Examine the elevator (A).
- Take the GEAR PART (B).
- Use the SAW; receive the BRANCH (C).

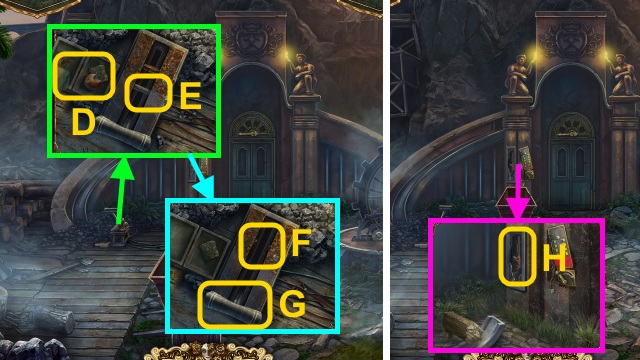
- Take the GLOVE and BITTEN APPLE (D); remove the nail (E).
- Use the BLOWTORCH (F); pull the lever (G).
- Take the BROKEN GUN (H).
- Walk down twice.

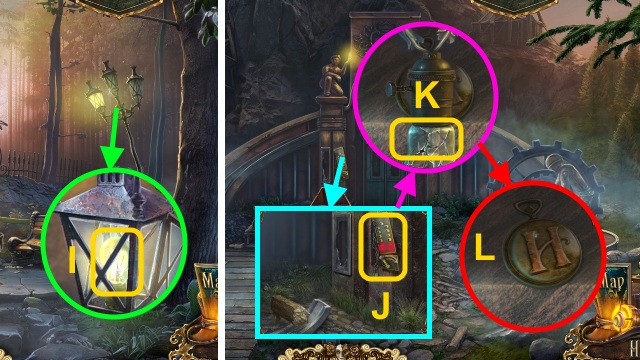
- Open the lamp; use the GLOVE (I).
- Receive the LIGHT BULB.
- Walk forward twice.
- Examine the panel (J).
- Remove the bulb (K); place the LIGHT BULB.
- Take HANNAH’S POCKET WATCH (L).
- Walk down, then right.

- Play the HOP to receive the PUPPET ARM (M).
- Place HANNAH’S POCKET WATCH (N).

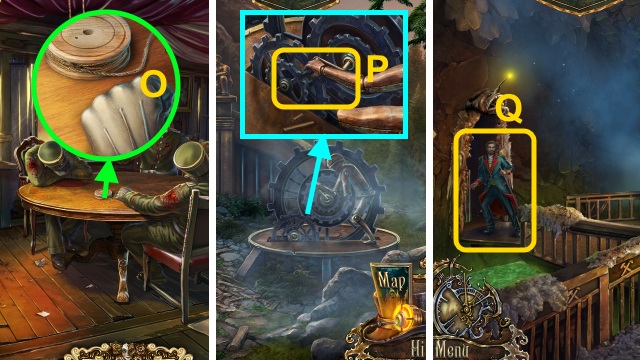
- Take the REEL WITH ROPE (O).
- Walk down, then forward.
- Place the PUPPET ARM and BRANCH (P).
- Go forward.
- Talk to the mayor (Q).

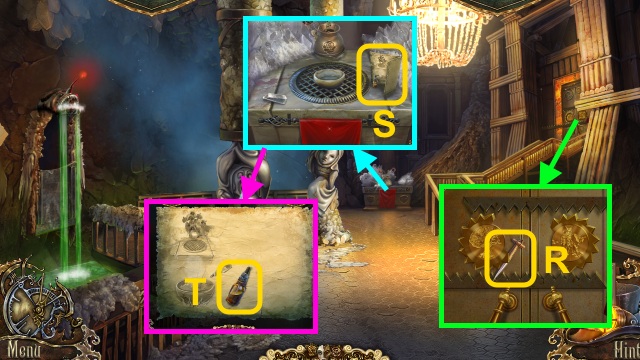
- Take the WEDGE (R).
- Examine the paper (S); take the PUNGENT LIQUID (T).

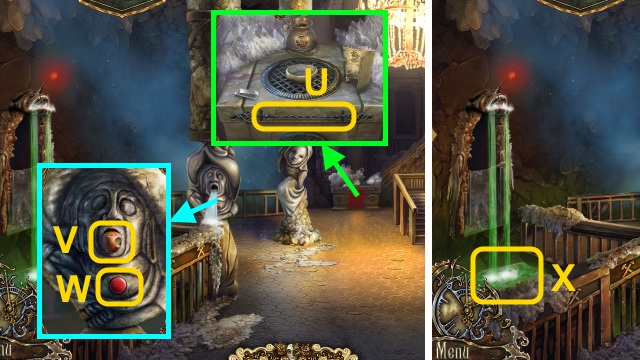
- Move the cloth; take the METAL ROD (U).
- Place the BITTEN APPLE (V); press the button (W).
- Examine the water for a mini-game (X).

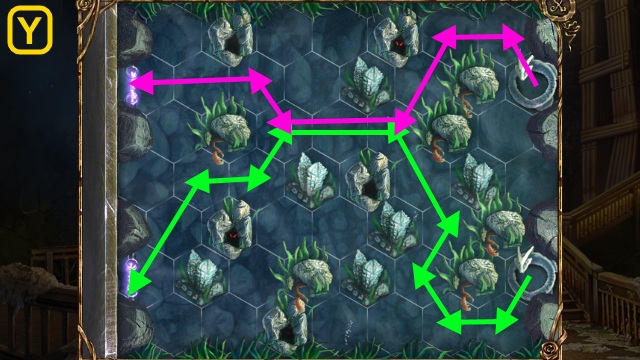

- Use the METAL ROD; take the LENS (Z).
- Take the BRONZE KEY (A).
- Take the HEAVY STONE (B); talk to the mayor (C).
- Move the stones 3x (D).
- Walk down.

- Examine the hook; take the HOOK (E) and MASK (1/2) (F).
- Combine the BROKEN GUN, REEL WITH ROPE, LENS, and HOOK; connect the rope (G).
- Receive the GRAPPLING GUN.
- Move the crystal (H) and roses (I); place the ROSE BOUQUET.
- Use the HEAVY STONE and PUNGENT LIQUID (J); take the SMELLING SALTS.
- Walk left.

- Use the SMELLING SALTS (K); take the GEAR PART (L).
- Walk down.
- Place the 2 GEAR PARTS (M); examine the gears.
- Walk right.
Chapter 4: The Workshop

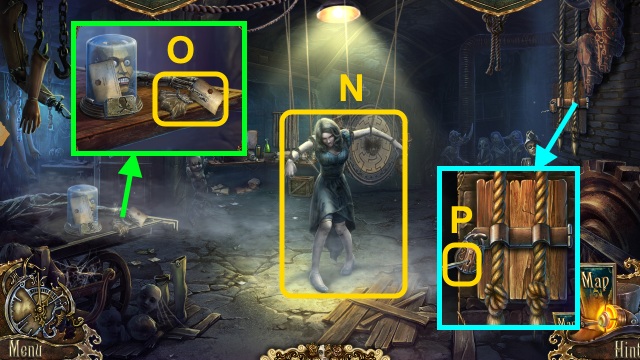
- Examine the puppet (N).
- Read the note; take the FEATHER DUSTER (O).
- Take the TWEEZERS; use the BRONZE KEY (P).

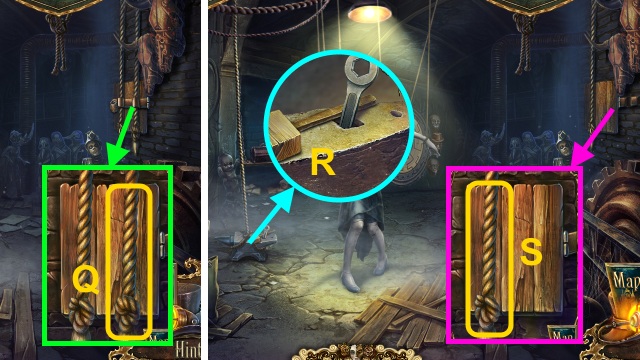
- Remove the lock; pull the rope (Q).
- Take the MALLET and WRENCH (R).
- Pull the rope (S).

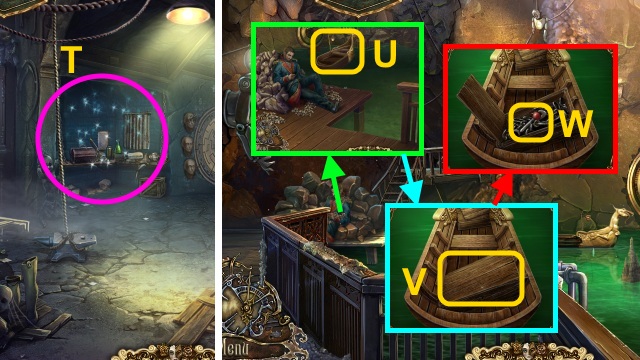
- Play the HOP to receive the MIRROR (T).
- Walk down, then left.
- Use the GRAPPLING GUN (U).
- Place the WEDGE; use the MALLET (V).
- Open the crate; take the LEVER (W).

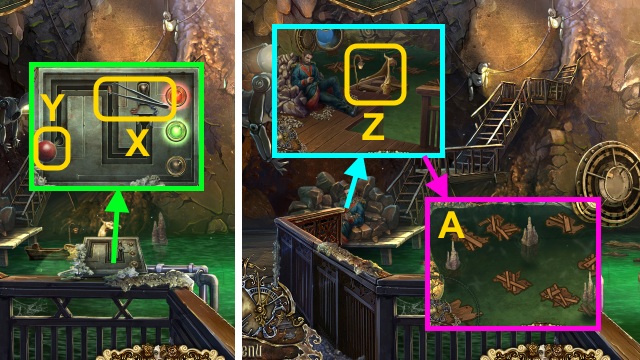
- Use the TWEEZERS (X).
- Place the LEVER (Y); pull it 5x.
- Examine the boat (Z); use the GRAPPLING GUN for a mini-game (A).

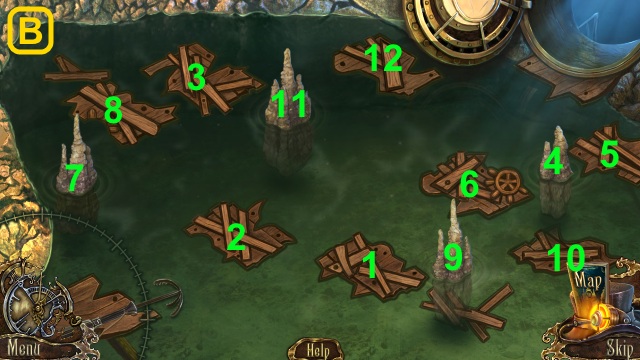

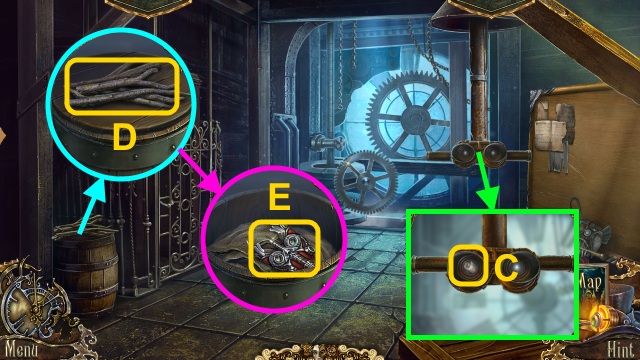
- Use the TWEEZERS (C); take the BUG CODE.
- Take the BRUSHWOOD (D); open the barrel.
- Use the FEATHER DUSTER; take the MASK (2/2) (E).
- Walk down.

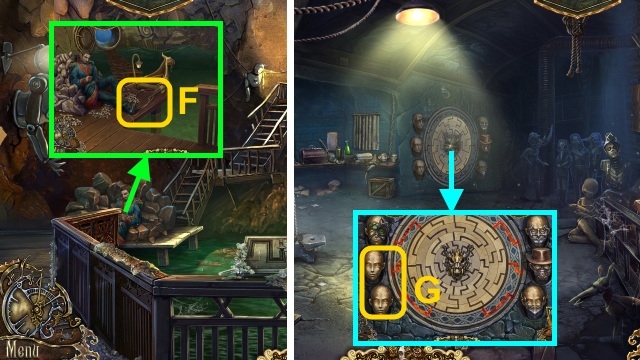
- Take the ROPE AND HOOK (F).
- Walk down, then right.
- Place the MASK (2/2) for a mini-game (G).

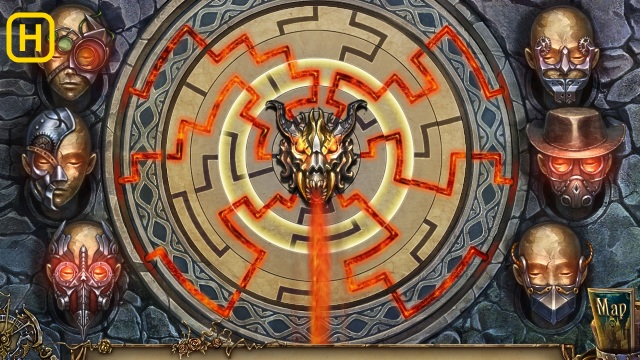
- Solution (H).
- Walk forward.

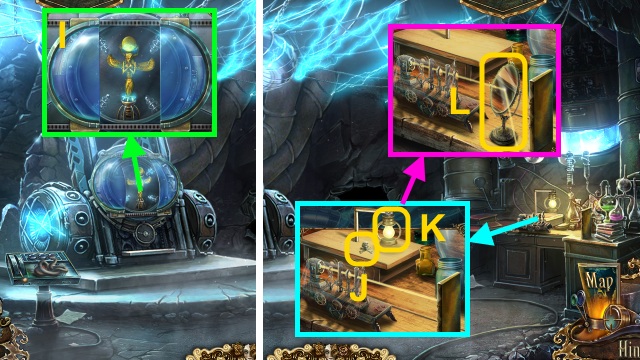
- Examine the machine (I).
- Take the SILVER CROSSBONES (J).
- Use the WRENCH; take the LANTERN (K).
- Place the MIRROR (L); turn it.

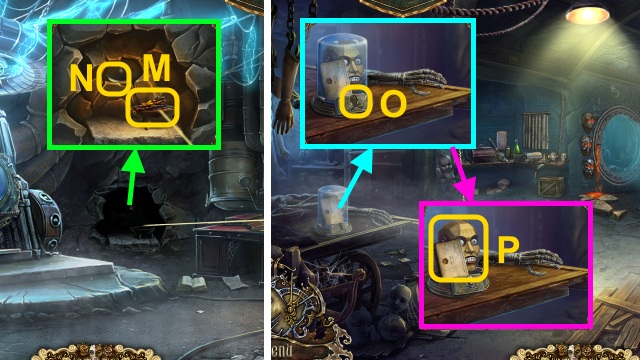
- Place the BRUSHWOOD (M); take the SILVER LEAF (N).
- Walk down.
- Place the SILVER CROSSBONES (O); open the case.
- Read the notes; take the BROKEN HEAD (P).
- Walk down, left, then forward.

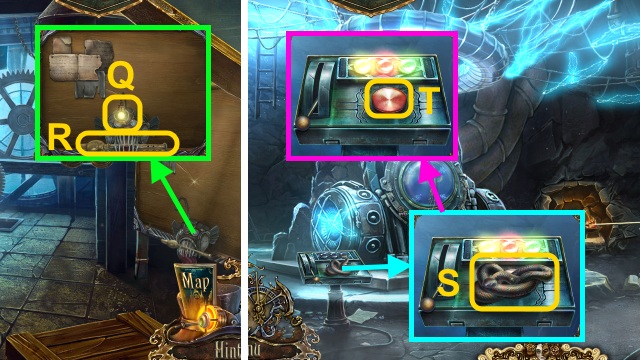
- Place the LANTERN (Q); take the FLUTE (R).
- Walk down twice, right, then forward.
- Use the FLUTE; take the SLEEPING COBRA (S).
- Press the button (T).

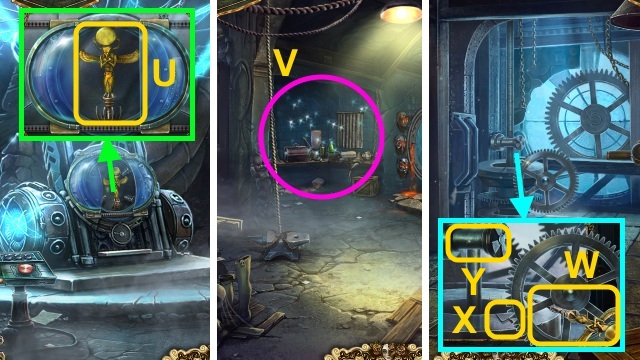
- Take the MAGIC SCEPTER (U).
- Walk down.
- Play the HOP to receive the CREATURE TOKEN (V).
- Walk down, left, then forward.
- Use the MAGIC SCEPTER (W); take the CRANK (X).
- Use the ROPE AND HOOK (Y).

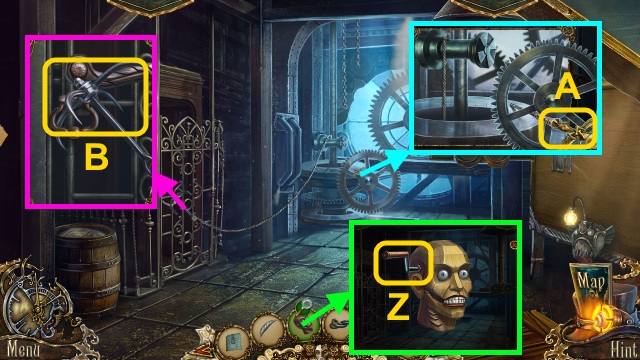
- Combine the BROKEN HEAD and CRANK (Z); take the MECHANICAL HEAD.
- Attach the hook (A).
- Take the MAGIC SCEPTER (B).
- Walk left.

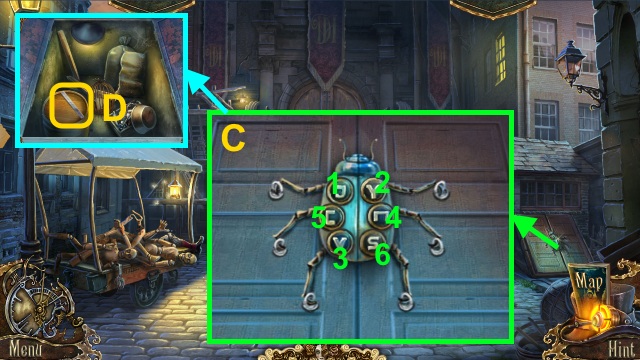
- Use the BUG CODE; press the buttons (C).
- Take the RULER (D).

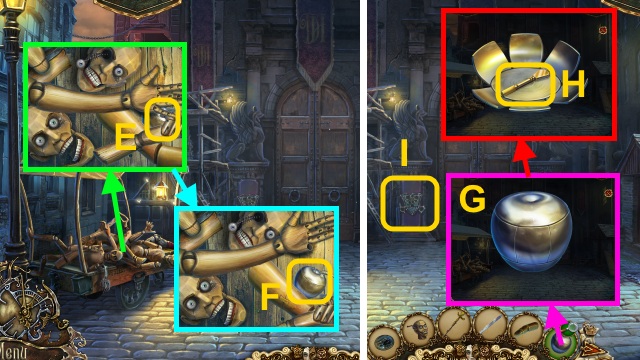
- Take the WOODEN FINGER (E); move the parts.
- Take the SILVER APPLE (F).
- Combine the SILVER APPLE and SILVER LEAF (G); take the TRIANGULAR KEY (H).
- Examine the wall for a mini-game (I).

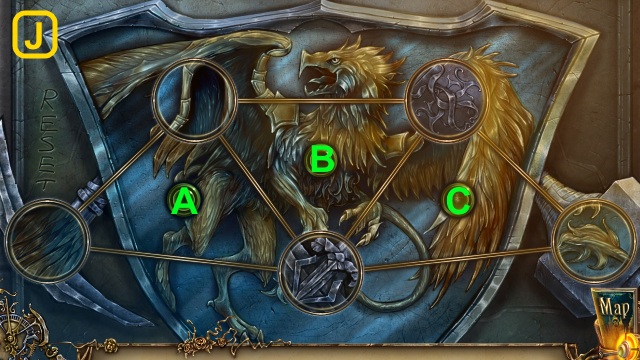

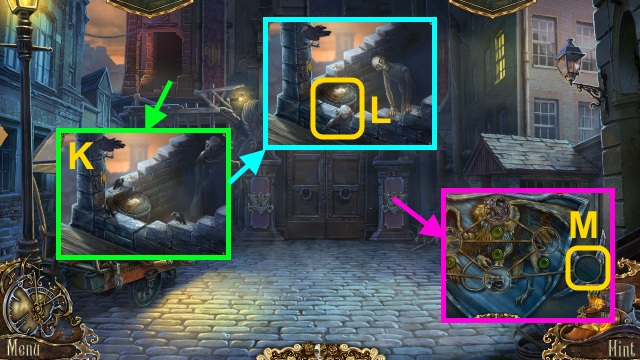
- Use the MECHANICAL HEAD (K).
- Take the DOCTOR MASK and BIRD SEED (1/3) (L).
- Place the CREATURE TOKEN for a mini-game (M).

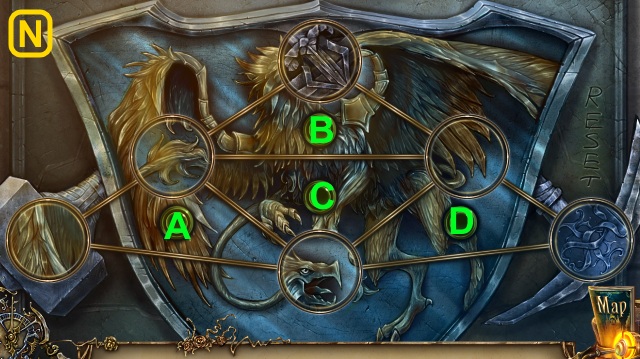
- Solution (N): (C-B-Dx2-Ax2-D).
- Walk forward.

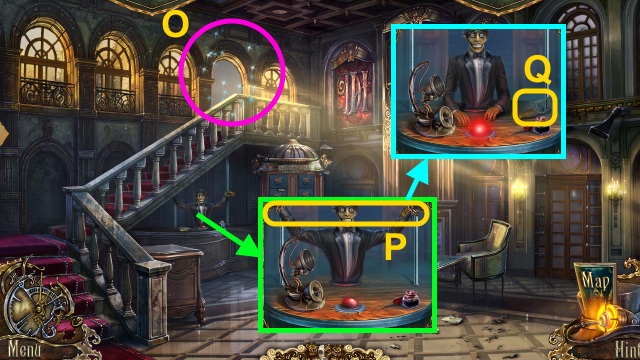
- Play the HOP (O); receive the S TILE.
- Talk to the puppet; untie the ropes (P).
- Take the HACKSAW (Q).
- Walk down.

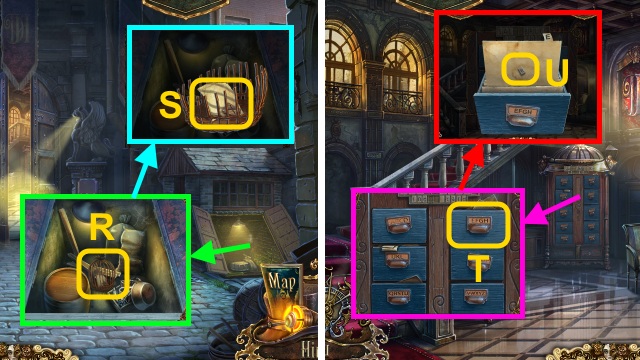
- Examine the cage (R).
- Use the HACKSAW; take the note and X TILE (S).
- Walk forward.
- Open the drawer (T).
- Examine the file; take the E (U).

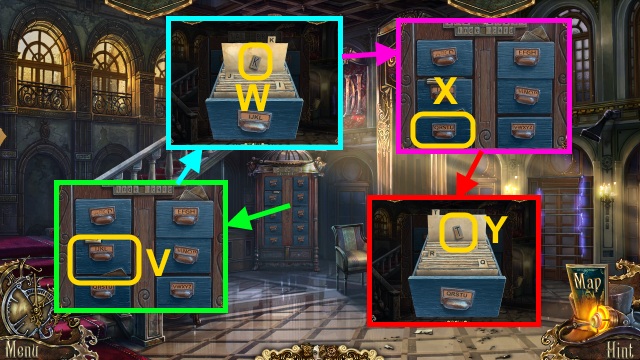
- Open the drawer (V).
- Examine the file; take the K (W).
- Open the drawer (X).
- Examine the file; take the T (Y).

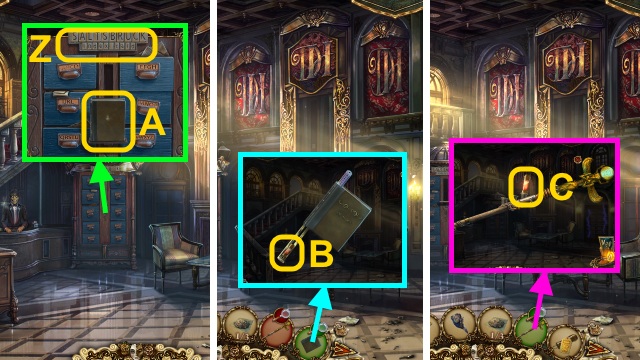
- Place the S TILE and X TILE (Z); take the RECEPTIONIST PROTOCOLS (A).
- Use the RULER on the RECEPTIONIST PROTOCOLS; take the RECEPTIONIST BLOOD (B).
- Combine the MAGIC SCEPTER and RECEPTIONIST BLOOD (C); take the PROGRAMMED SCEPTER.

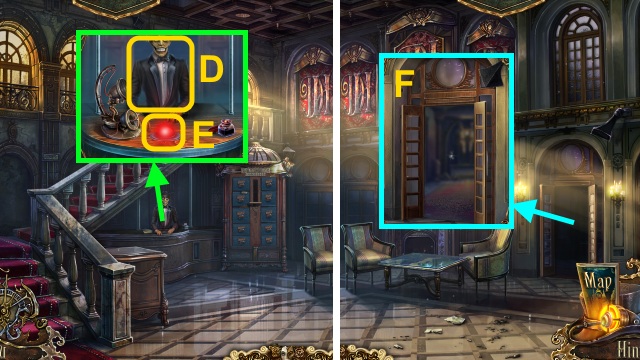
- Use the PROGRAMMED SCEPTER (D); receive the MAGIC SCEPTER.
- Press the button (E).
- Go through the door (F).
Chapter 5: Eva

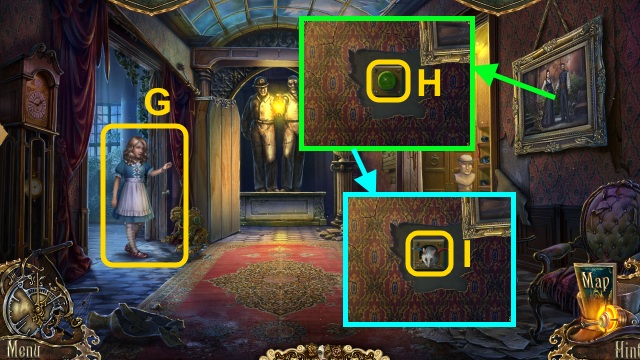
- Examine Agnes (G).
- Move the painting; press the button (H).
- Use the SLEEPING COBRA (I); take the GREEN BUTTON.

- Use the TRIANGULAR KEY (J).
- Take the note and BIRD SEED (2/3) (K).
- Examine the puppet; take the MOUSE PUPPET (L).

- Place the WOODEN FINGER (M); take the SIGNET RING (N).
- Walk down.
- Play the HOP to receive the COMPACT MECHANISM (O).

- Place the GREEN BUTTON; press it (P).
- Take the SAFE CODE (Q).
- Walk down.
- Use the MOUSE PUPPET; take the CAT BLOOD (R).

- Combine the MAGIC SCEPTER and CAT BLOOD (S); take the PROGRAMMED SCEPTER.
- Walk forward, then right.
- Use the PROGRAMMED SCEPTER (T); receive the MAGIC SCEPTER.
- Walk left.

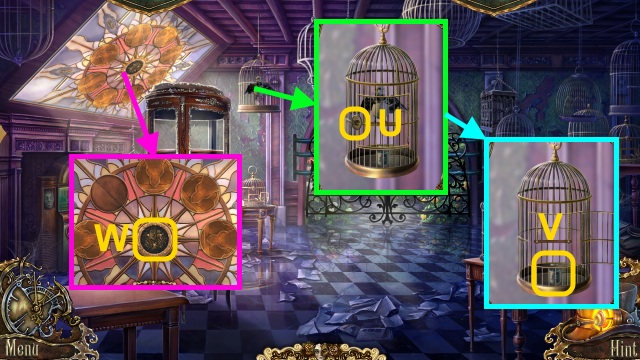
- Use the SIGNET RING (U).
- Open the cage; take the WEIGHT (V).
- Place the COMPACT MECHANISM for a mini-game (W).

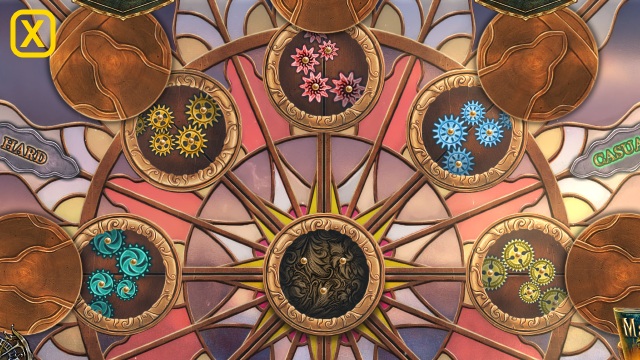
- Solution (X).
- Walk forward.

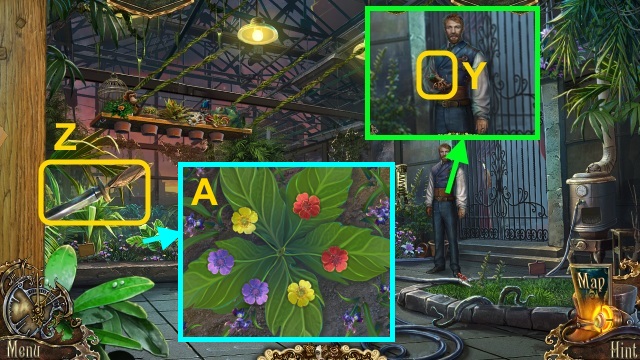
- Talk to David; take the ACID (Y).
- Take the DAGGER (Z).
- Match The flowers; solution is random.
- Take the WILD FLOWERS (A).

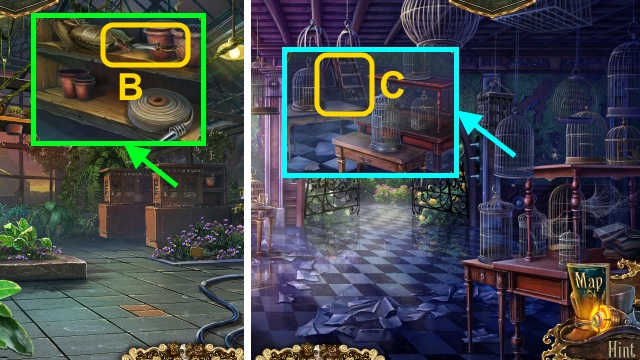
- Use the DAGGER (B); take the BIRD SEED (3/3).
- Walk down.
- Use the BIRD SEED (3/3) (C); take the LADDER.
- Walk forward.

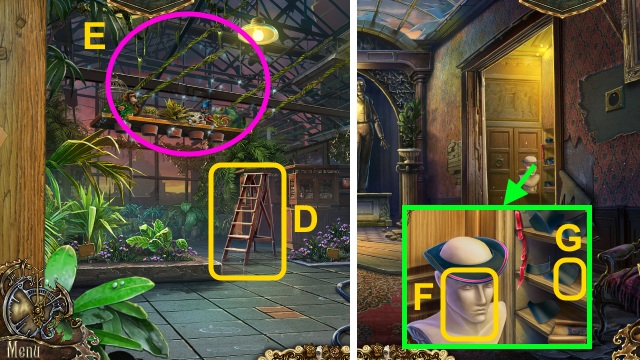
- Place the LADDER (D).
- Play the HOP (E); receive the BOW TIE.
- Walk down twice.
- Place the DOCTOR MASK (F) and BOW TIE for a mini-game (G).

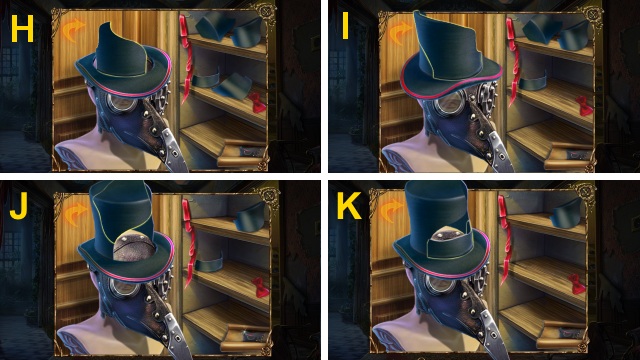

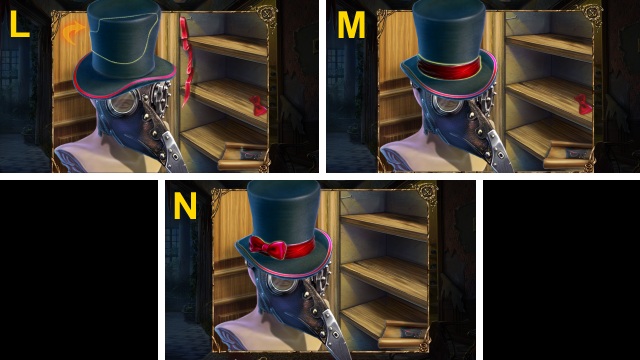
- Solution (H-N).
- Walk right.

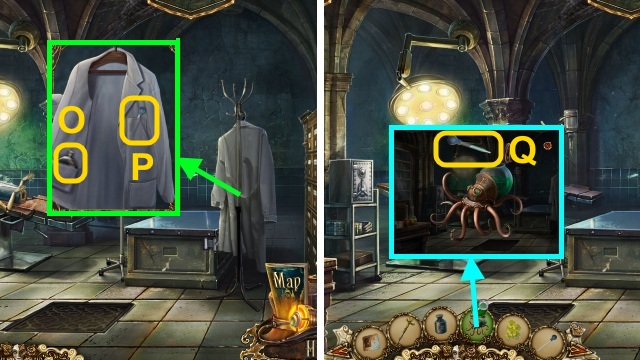
- Open the coat; take the ALCOHOL (O) and PIPETTE (P).
- Combine the ACID and PIPETTE; take the ACID (Q).

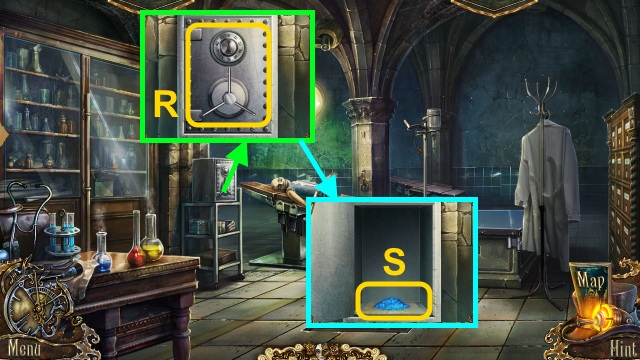
- Use the SAFE CODE (R).
- Take the BLUE CRYSTALS (S).
- Walk down, left, then forward.

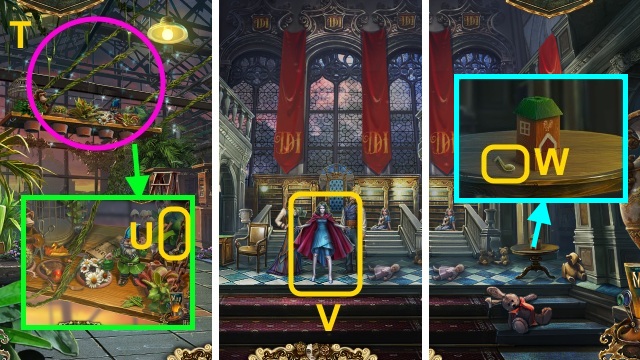
- Play the HOP (T); use the ACID (U).
- Walk right.
- Examine Eva (V).
- Take the METAL NOTE (W).

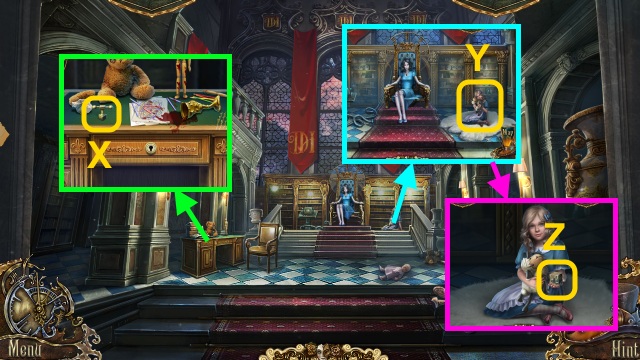
- Take the VALVE (X).
- Examine Agnes (Y).
- Take the SCRAMBLED CUBE (Z).
- Walk down twice.

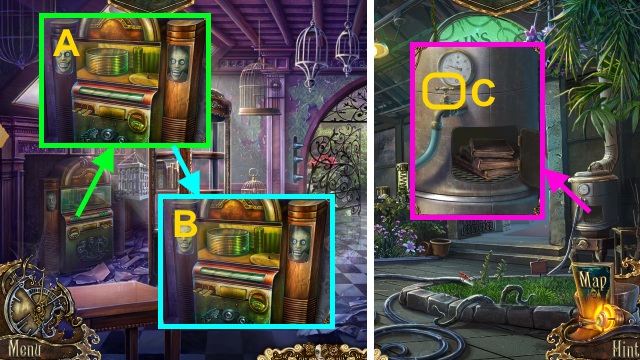
- Place the METAL NOTE (A); take the GREEN PYRAMID (B).
- Walk forward.
- Place the VALVE (C); turn it.

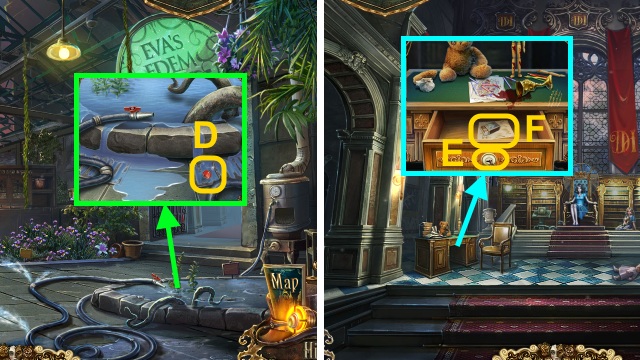
- Take the BOBBER KEY (D).
- Walk right.
- Use the BOBBER KEY (E).
- Take the MATCHES and BLURRY DRAWING (F).
- Walk down.

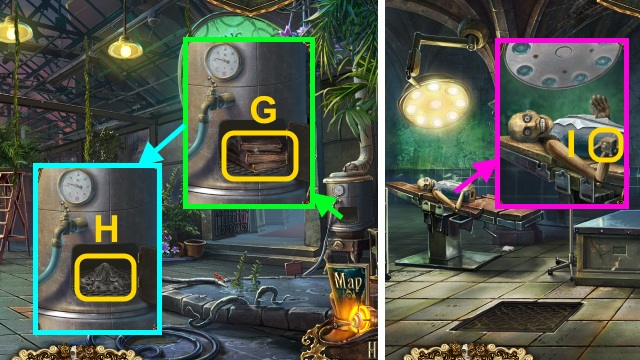
- Pour the ALCOHOL; use the MATCHES (G).
- Take the ASHES (H).
- Walk down twice, then right.
- Give the SCRAMBLED CUBE; take the FINISHED PUZZLE CUBE (I).

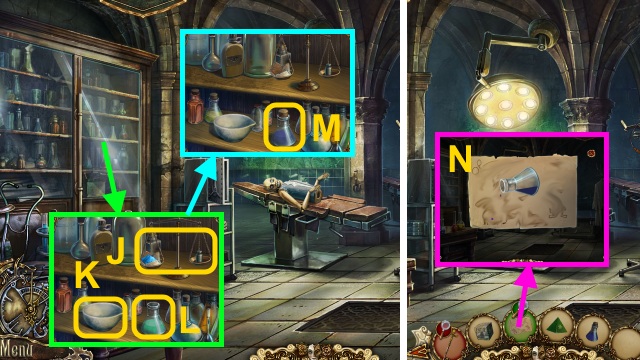
- Open the cabinet; place the BLUE CRYSTALS and WEIGHT (J).
- Place the WILDFLOWERS (K) and ASHES (L).
- Take the REAGENT (M).
- Combine the BLURRY DRAWING and REAGENT (N); take AGNES’S DRAWING.
- Walk down, left, forward, then right.

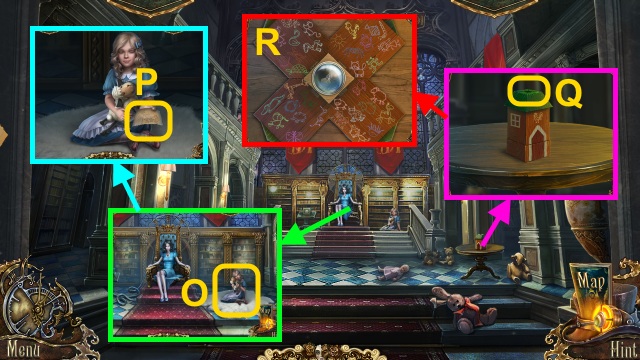
- Examine Agnes (O).
- Give the FINISHED PUZZLE CUBE; take AGNES’S DRAWING (P).
- Place the GREEN PYRAMID (Q); use the 2 AGNES’S DRAWINGS for a mini-game (R).

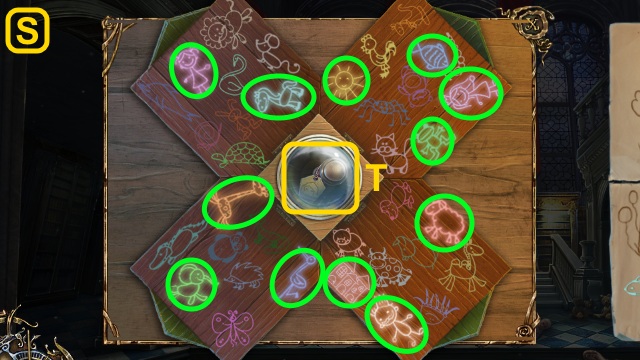
- Solution (S).
- Take EVA’S BLOOD (T).

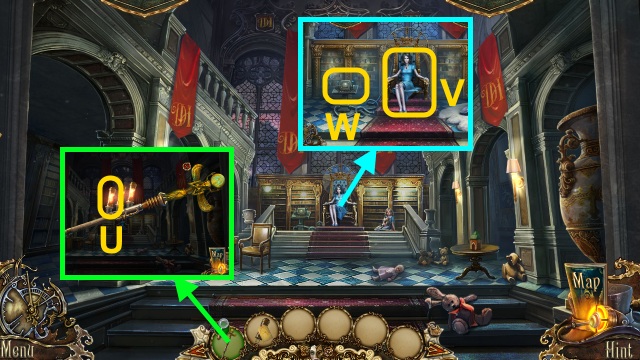
- Combine the MAGIC SCEPTER and EVA’S BLOOD (U); take the PROGRAMMED SCEPTER.
- Use the PROGRAMMED SCEPTER (V); examine the controls for a mini-game (W).

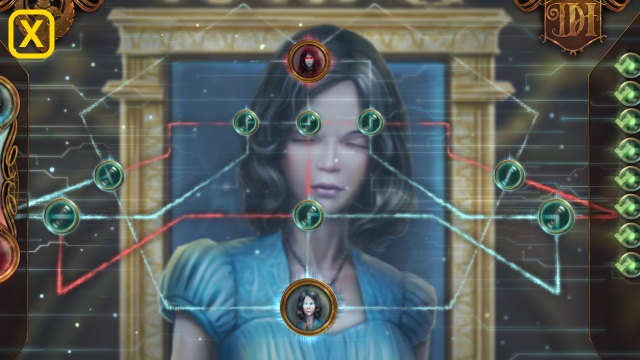
- Solution (X).
- Congratulations! You have completed Puppetshow: The Face of Humanity.




 Cajun Cop: The French Quarter Caper Walkthrough, Guide, & Tips
 Living Legends: Frozen Beauty Walkthrough, Guide, & Tips
 PuppetShow: Lost Town Walkthrough, Guide, & Tips
 Echoes of the Past: The Kingdom of Despair Walkthrough, Guide, & Tips
 Becky Brogan: The Mystery of Meane Manor Walkthrough, Guide, & Tips