Twilight Phenomena: The Incredible Show Walkthrough, Guide, & Tips
Twilight Phenomena: The Incredible Show Walkthrough

Welcome to the Twilight Phenomena: The Incredible Show Walkthrough
Underneath the big top, people aren’t always what they seem.
Whether you use this document as a reference when things get difficult or as a road map to get you from beginning to end, we’re pretty sure you’ll find what you’re looking for here.
This document contains a complete Twilight Phenomena: The Incredible Show game walkthrough featuring annotated screenshots from actual gameplay!
We hope you find this information useful as you play your way through the game. Use the walkthrough menu below to quickly jump to whatever stage of the game you need help with.
Remember to visit the Big Fish Games Forums if you find you need more help. Have fun!
This walkthrough was created by Nina de Boo, and is protected under US Copyright laws. Any unauthorized use, including re-publication in whole or in part, without permission, is strictly prohibited.
General Tips
- This is the official guide for Twilight Phenomena: The Incredible Show.
- This guide will not mention each time you have to zoom into a location; the screenshots will show each zoom scene.
- Hidden-object puzzles are referred to as HOPs. This guide will not show screenshots of the HOPs, but it will mention when a HOP is available and the inventory item you’ll collect from it.
- This guide will give step-by-step solutions for all puzzles that are not random. Please read the instructions in the game for each puzzle.
Chapter 1: The Magician

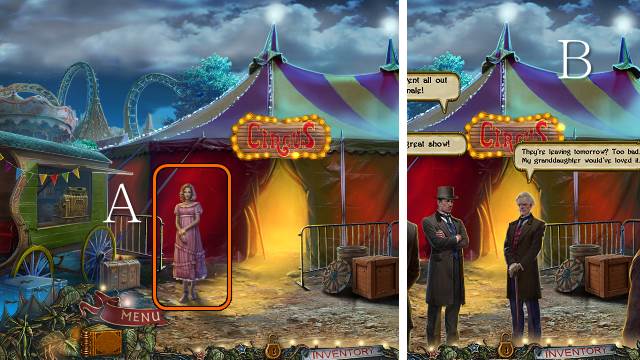
- Talk to Judith (A).
- Walk forward.
- Interact with the crowd and walk forward (B).

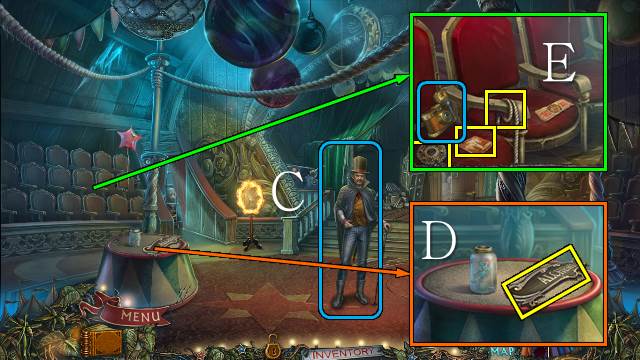
- Talk to the Magician (C).
- Take the ALCHEMY PLATE (D).
- Take the GEAR, ROPE, PALM TREE PATCH and camera (E).

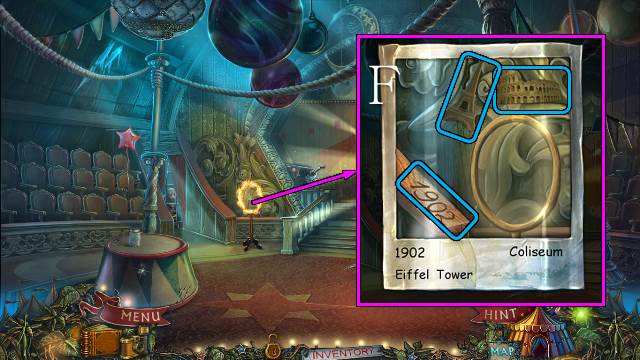
- Take a picture.
- Find the listed items (F).

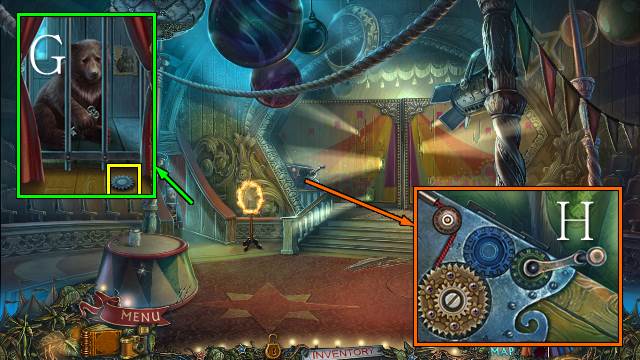
- Take the GEAR and use the ROPE (G).
- Place the two GEARS and turn the handle (H).

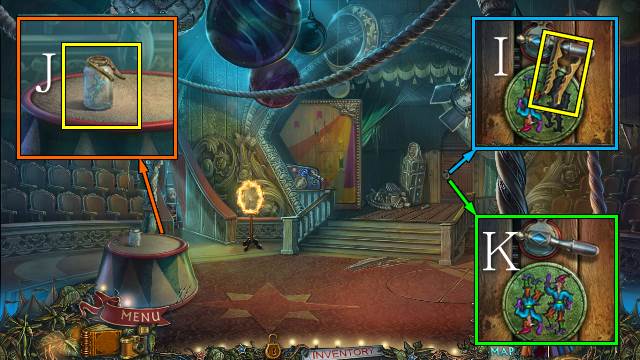
- Take the JAR OPENER (I).
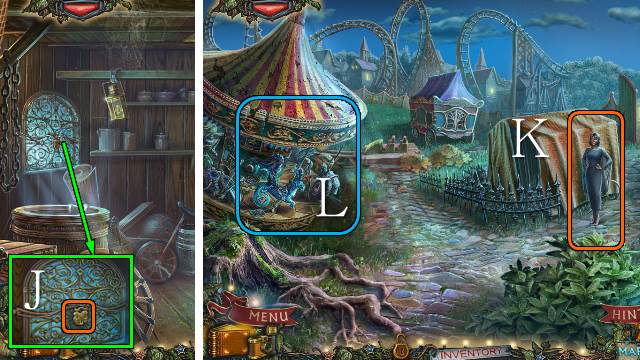
- Use the JAR OPENER; take the JESTER EMBLEM (J).
- Place the JESTER EMBLEM and pull the handle (K).
- Walk forward.

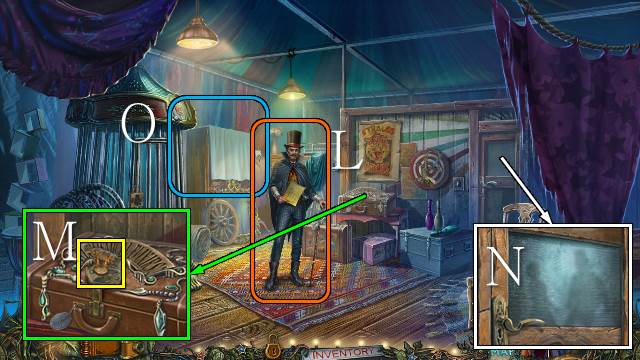
- Talk to the Magician (L).
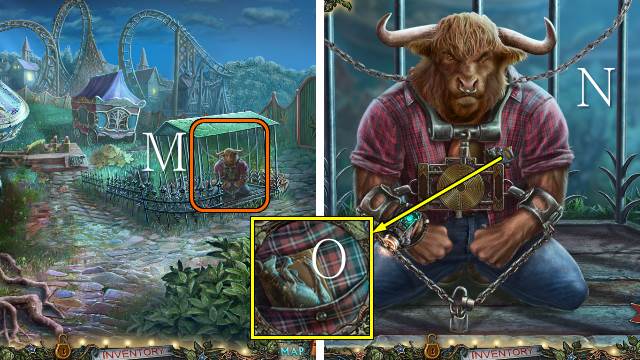
- Take the ELEPHANT (M).
- Look through the door (N).
- Play the HOP (O).
- You receive a BEAR EMBLEM.

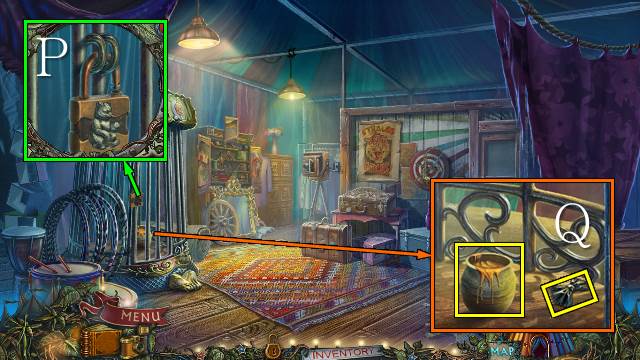
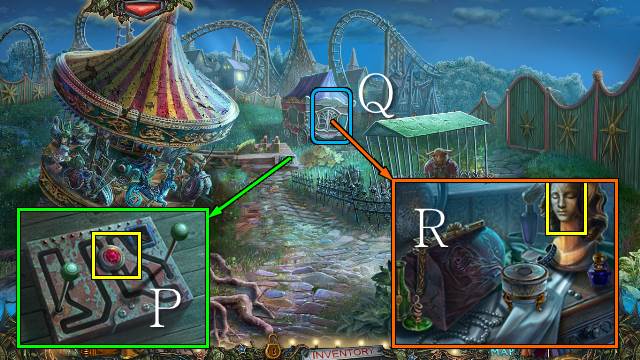
- Place the BEAR EMBLEM; open the lock (P).
- Take the BOW TIE and HONEY POT (Q).
- Walk down.

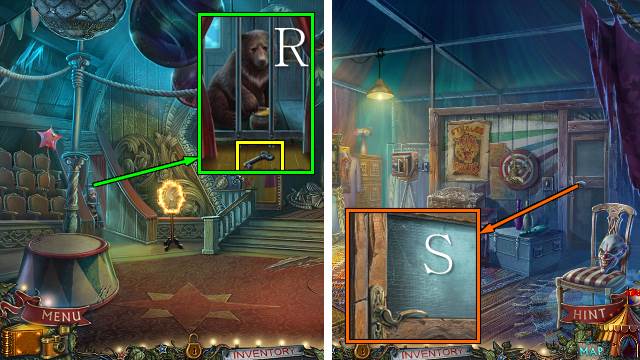
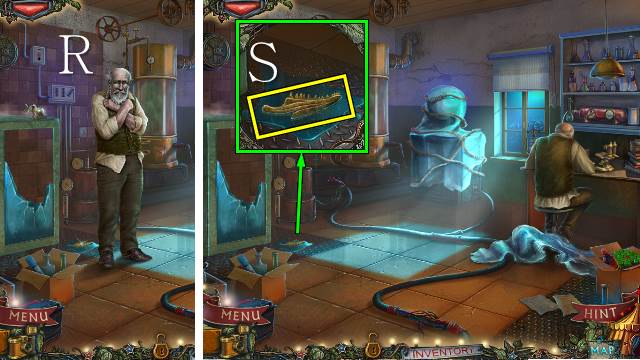
- Give the HONEY POT to the bear; take the SILVER KEY (R).
- Walk forward.
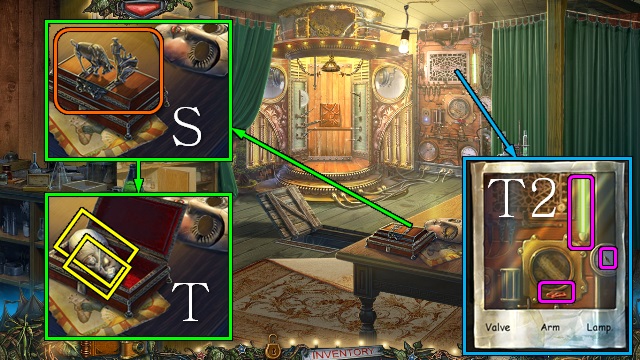
- Use the SILVER KEY; open the door (S).
- Walk forward.

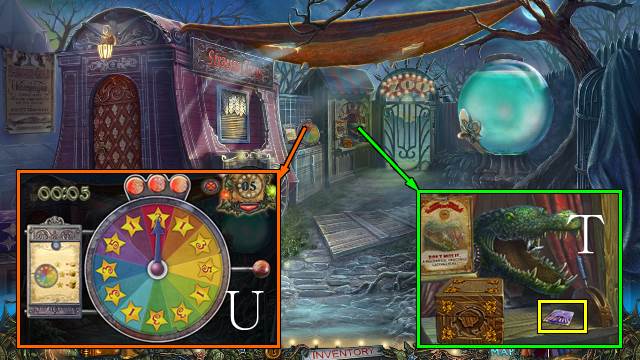
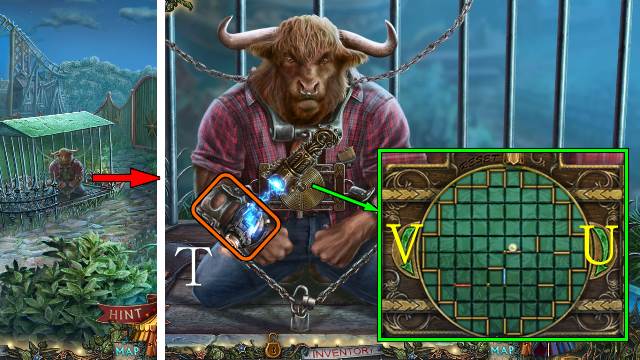
- Take the CIRCUS TENT PATCH (T).
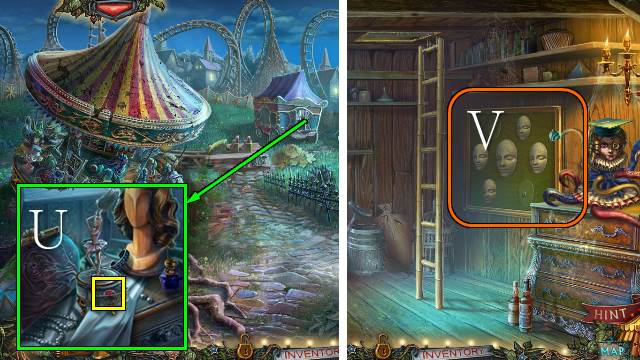
- Play the Wheel of Fortune to collect at least 20 coins (U).
- Zoom into the reservoir.

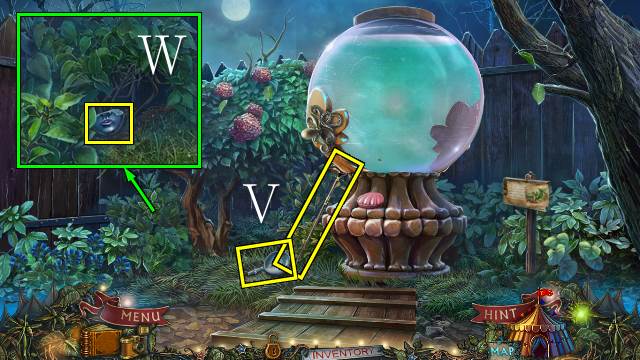
- Take the FLASH BULB and CANE (V).
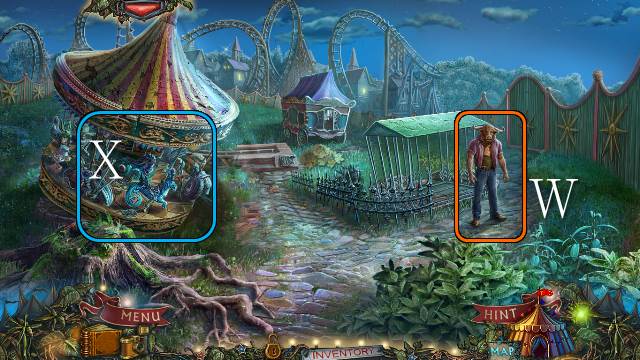
- Use the CANE and take the MASK (W).
- Back out and walk down.

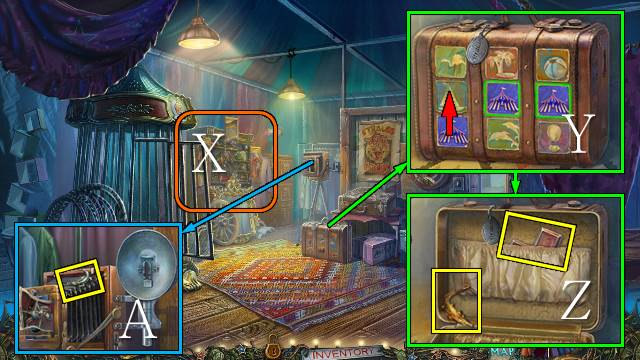
- Play the HOP (X).
- You receive a TOKEN.
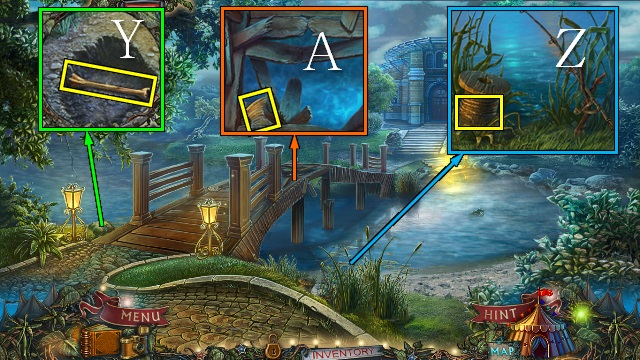
- Place the PALM TREE PATCH and CIRCUS TENT PATCH and move the patches (Y); take the GOLD CROCODILE and CROSS (Z).
- Remove the drape and place the FLASH BULB; take the SILVER CROCODILE (A).
- Go forward.

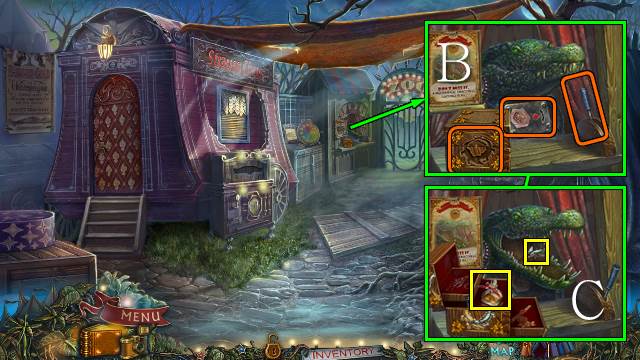
- Close the crocodile mouth, use the TOKEN and place the GOLD CROCODILE and SILVER CROCODILE (B); open the box and pull the lever and take the FLY and OIL (C).
- Walk down.

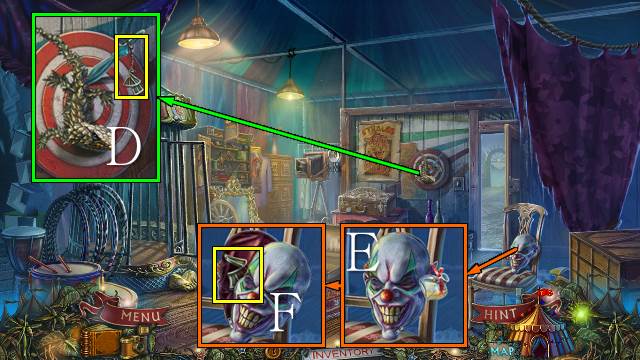
- Use the FLY; take TENT EMBLEM 1/2 (D).
- Use the OIL and open the zipper (E); take TENT EMBLEM 2/2 (F).
- Go forward.

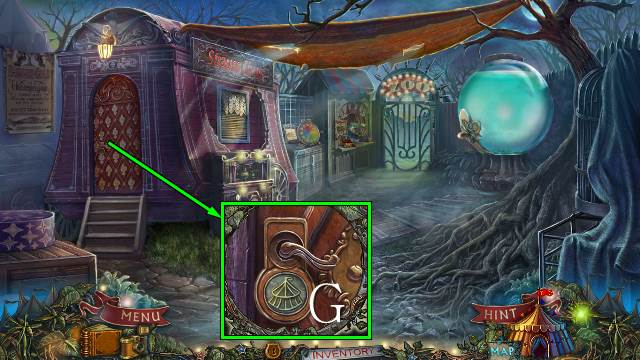
- Place the TENT EMBLEM and open the door (G).
- Go left.

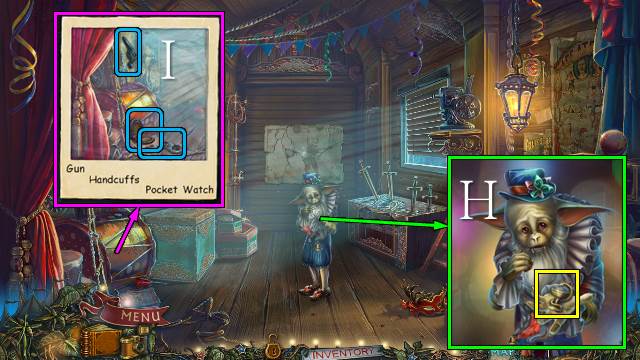
- Talk to the creature; take the MEDICAL SYMBOL (H).
- Take a picture; select the listed items (I).

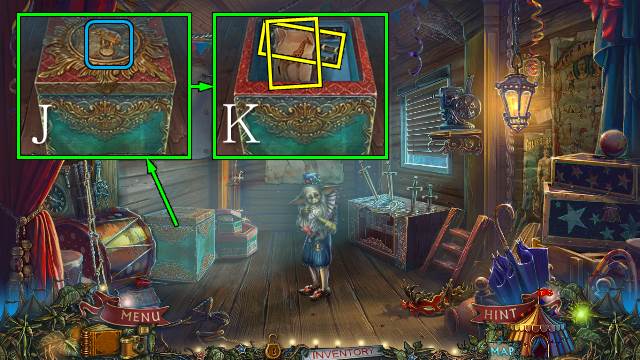
- Place the ELEPHANT and push it (J); take the GIRAFFE FOOD and CHAIN (K).

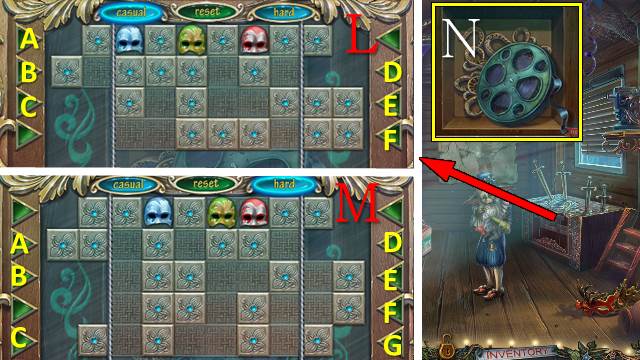
- Place the MASK for a mini-game.
- Casual solution (L): Bx2-A-Dx2-E-F-C-F.
- Hard Solution (M): Ex2-Ax2-D-F-G-Cx2-D-B-F-B.
- Take the FILM REEL (N).

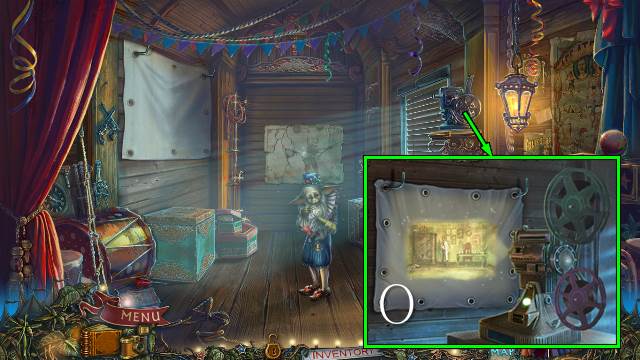
- Place the FILM REEL and play it; zoom in for a HOP (O).
- You receive an AQUARIUM PLUG.
- Walk down twice.

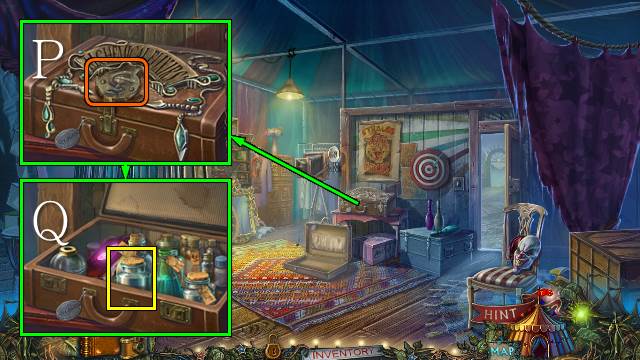
- Place the MEDICAL SYMBOL and open the case (P); take the BLUE LIQUID and read the journal (Q).
- Go forward.

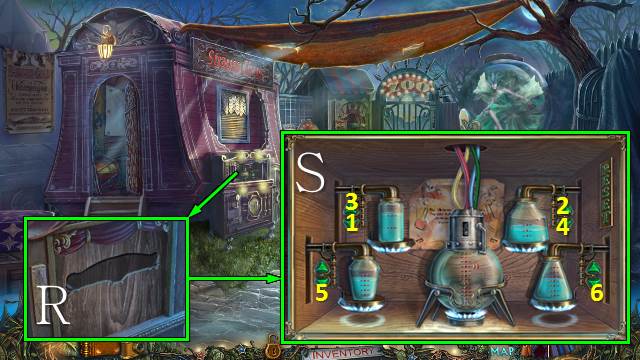
- Place the ALCHEMY PLATE (R); open the cabinet and place the BLUE LIQUID for a mini-game (S).
- You receive the TRANSFIGURATION ELIXIR.
- Zoom into the reservoir.

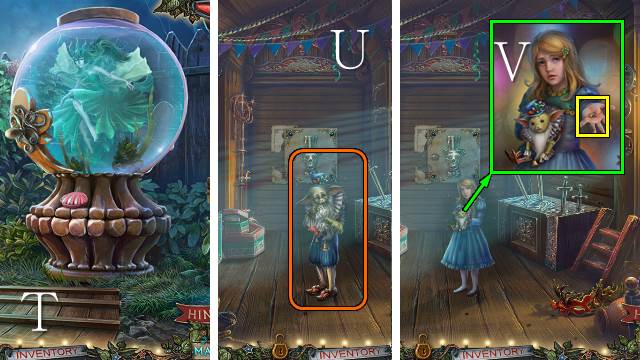
- Talk to Tula (T).
- Back out and go left.
- Use the TRANSFIGURATION ELIXIR (U).
- Talk to the girl and take JUDITH’S RING (V).
- Walk down and zoom into the reservoir.

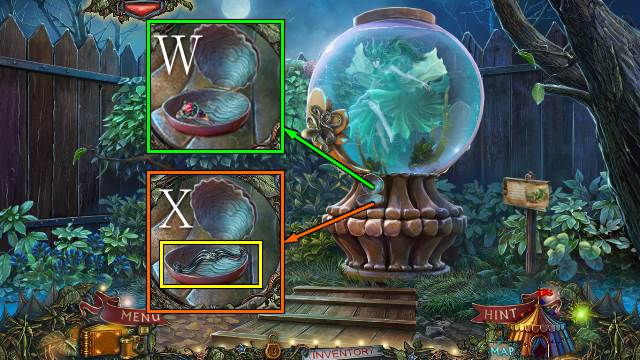
- Open the shell, place JUDITH’S RING and close the shell (W).
- Take the IRON MUSTACHE (X).
- Back out and go left.

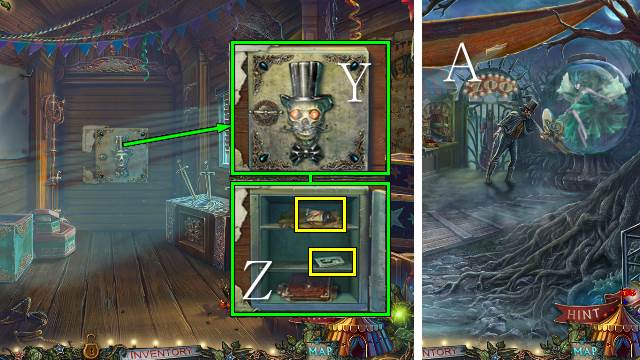
- Remove the poster and place the BOW TIE and IRON MUSTACHE (Y); open the safe, take the GLUE and NUMBER TILE and read the journal (Z).
- Walk down.
- Interact with the Magician (A).
- Zoom into the reservoir.

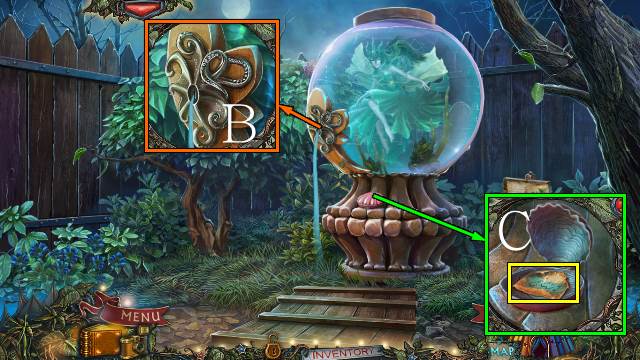
- Place the AQUARIUM PLUG (B).
- Take the GATE CODE (C).
- Back out.

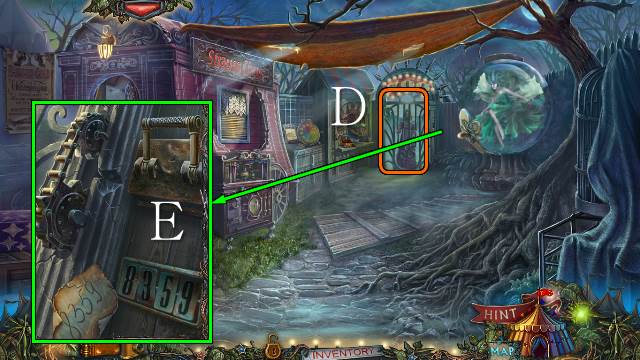
- Talk to Judith (D).
- Pull the lever, remove the chain, and place the CHAIN, NUMBER TILE and GATE CODE; change the code and pull the lever (E).
- Go forward.

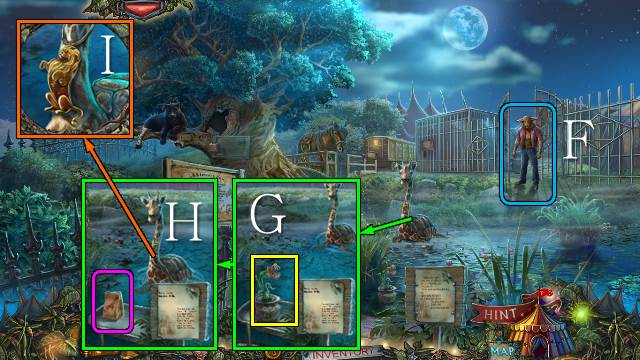
- Interact with the creature (F).
- Take the PREDATORY FLOWER (G); place the GIRAFFE FOOD (H) and take the LION EMBLEM (I).

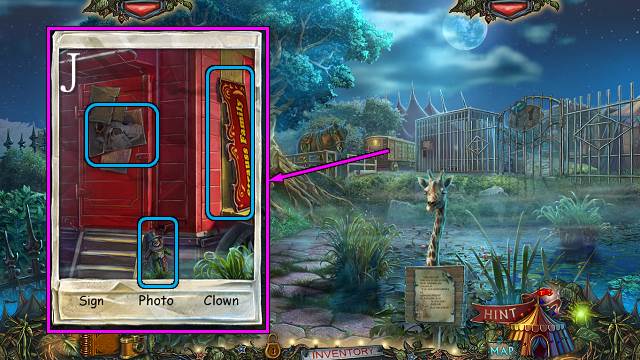
- Take a picture and select the listed items (J).

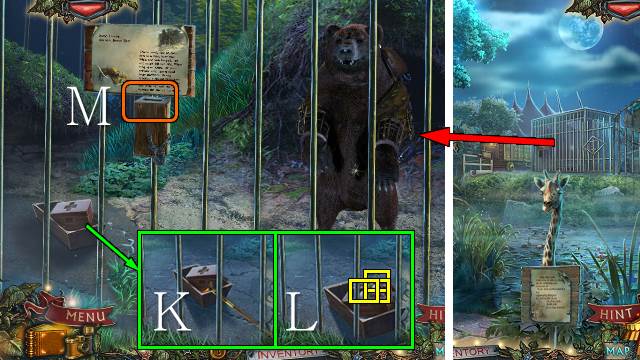
- Use the CANE and place the CROSS (K); open the box and take the PEROXIDE, BANDAGE and PLANT HEAD (L).
- Donate coins and cure the bear if you like (M).

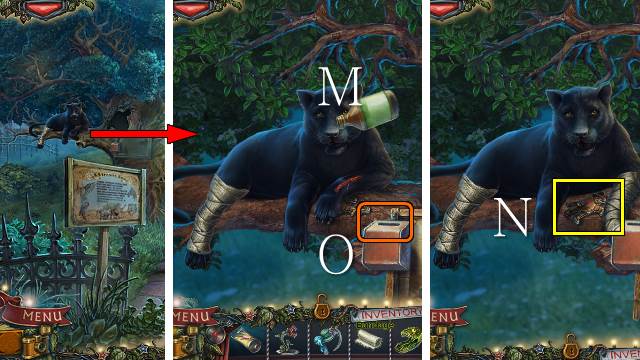
- Use the PEROXIDE and BANDAGE (M); take the TAMER EMBLEM (N).
- Donate coins and cure the panther if you like (O).

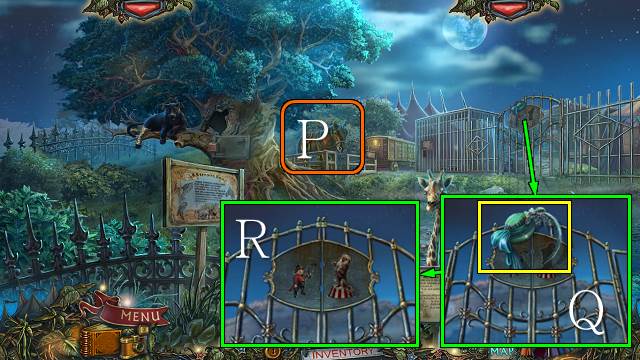
- Donate coins and cure the horse if you like (P).
- Take the HAT (Q).
- Place the LION EMBLEM and TAMER EMBLEM, open the gate and go forward (R).
Chapter 2: The Fairground

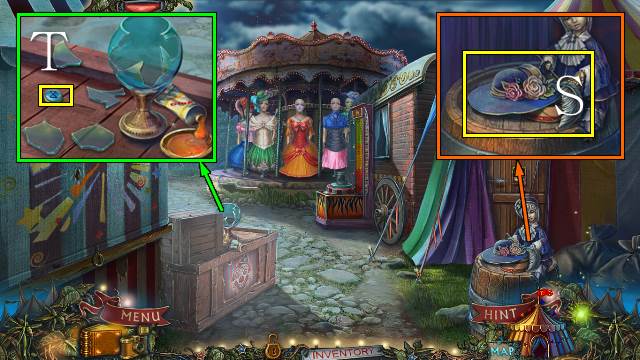
- Take the HAT (S).
- Place the GLUE, move the shards and take the BUTTON (T).
- Go left.

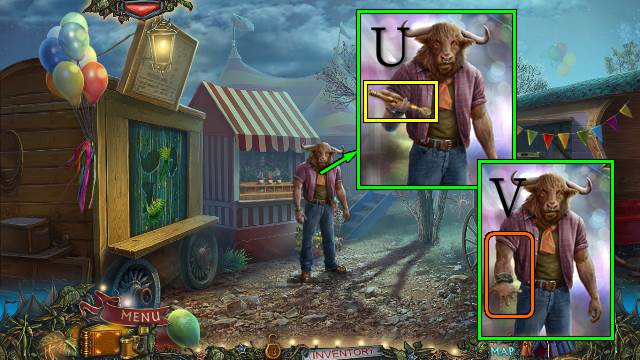
- Talk to Bart.
- Take the HAMMER HANDLE (U) and touch Bart’s arm (V).

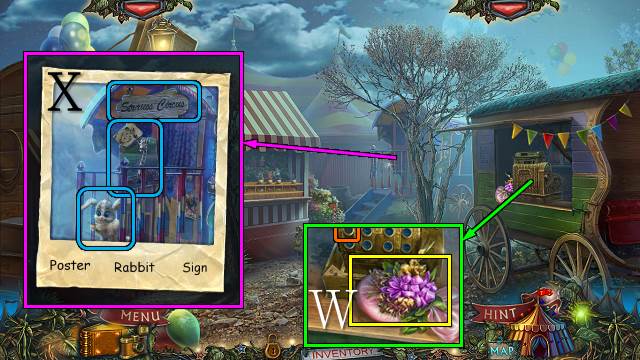
- Take the HAT and place the BUTTON (W).
- Take a picture and select the listed items (X).

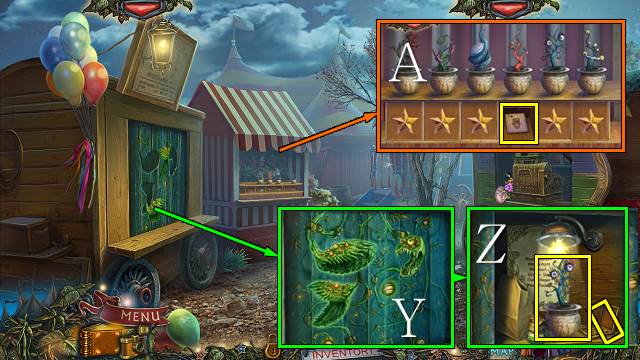
- Place the PLANT HEAD and put the heads in place (Y); open the compartment, switch on the light and take the BRUSH and EYE FLOWER (Z).
- Place the PREDATORY FLOWER and EYE FLOWER for a mini-game; the solution is random (A); take CARD 1/3.
- Walk down.

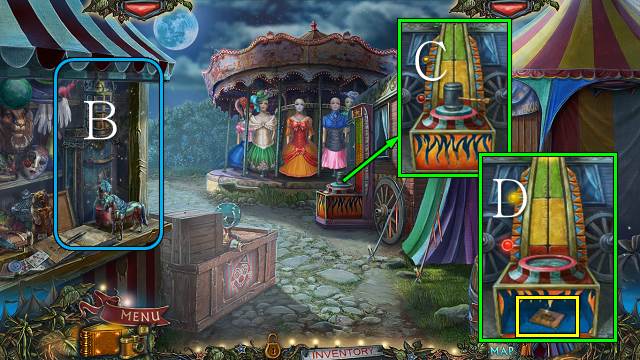
- Play the HOP (B).
- You receive the POWDER MAKEUP.
- Place the HAMMER HANDLE (C); use the hammer three times and take CARD 2/3 (D).

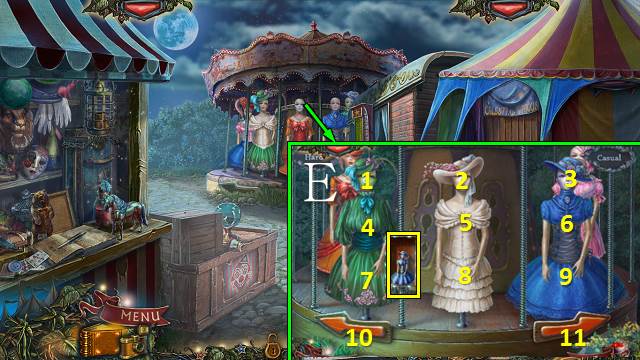
- Place the three HATS for a mini-game (E).
- Casual solution: 1-3, 5-6, 7-8, 11, 7-9, 11, 4-5, 11, 4-5, 11, 7-9.
- Hard solution: 1-3, 5-6, 7-8, 11, 4-5, 11, 7-9, 5-6, 11×2, 8-9.
- Take the BLUE DOLL.
- Go left.

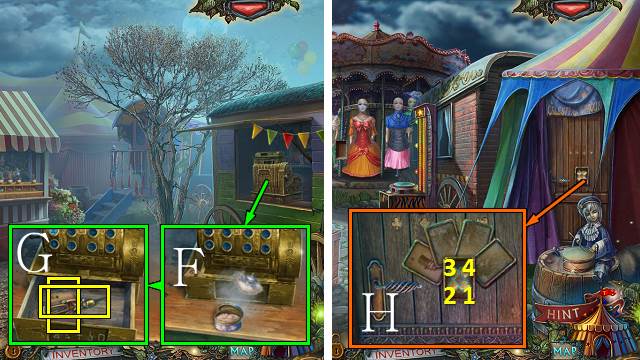
- Use the POWDER MAKEUP (F); enter the code and take the TIN SOLDIER and CARD 3/3 (G).
- Walk down.
- Push the buttons in order; place the CARDS and open the door (H).
- Go right.

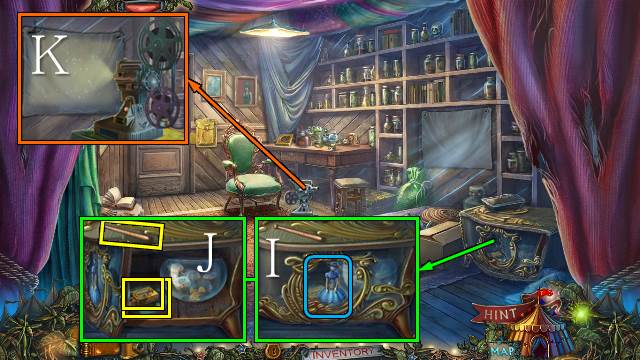
- Place the BLUE DOLL and turn the handle (I); take DRUMSTICK 1/2, the MATCH and the FILM REEL (J).
- Place the FILM REEL and play it; zoom in for a HOP (K).
- You receive a BURNER PART.

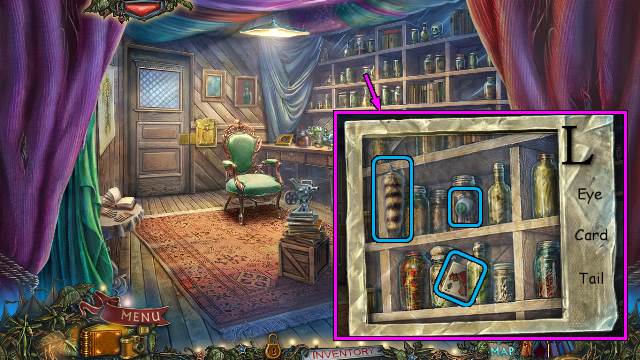
- Take a picture and find the listed items (L).

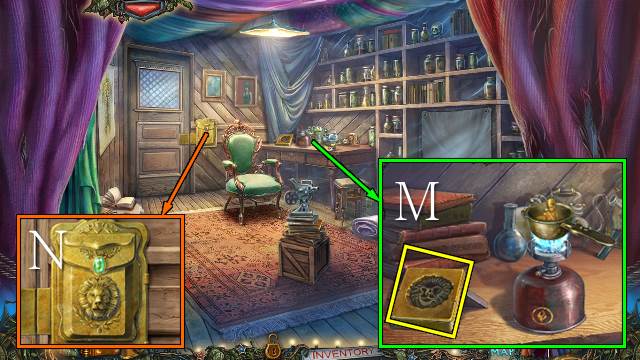
- Place the BURNER PART and use the MATCH; place the pot and TIN SOLDIER, pour out the tin and take the LION KEY (M).
- Place the LION KEY and open the door (N).
- Go forward.

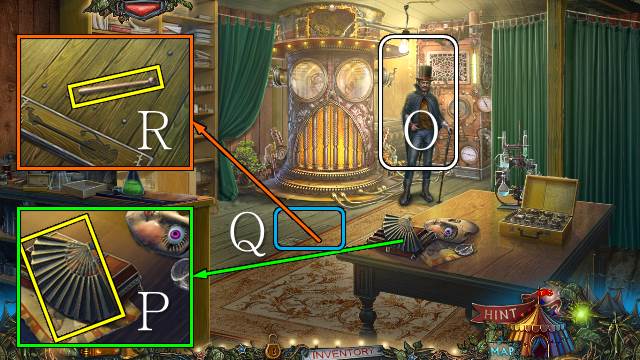
- Talk to Strauss (O).
- Take the FAN (P).
- Move the rug (Q).
- Take DRUMSTICK 2/2 (R).
- Walk down twice.

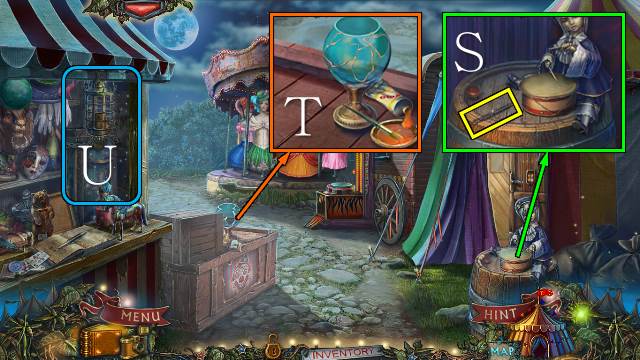
- Place the DRUMSTICKS and take the NET HANDLE (S).
- Place the BRUSH; put glue on each of the shards, place the shards and take the GOBLET (T).
- Play the HOP (U).
- You receive a GOLDEN ANGLER.
- Go right and forward.

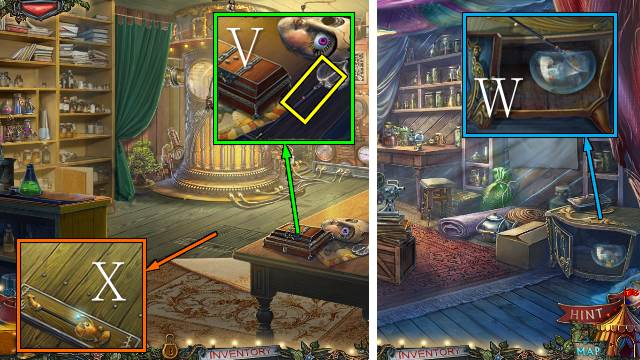
- Place the NET HANDLE and take the HOOP NET (V).
- Walk down.
- Take the GOLD FISH with the HOOP NET (W).
- Go forward.
- Place the GOLDEN ANGLER and GOLD FISH; open the hatch (X).
- Go down the hatch.

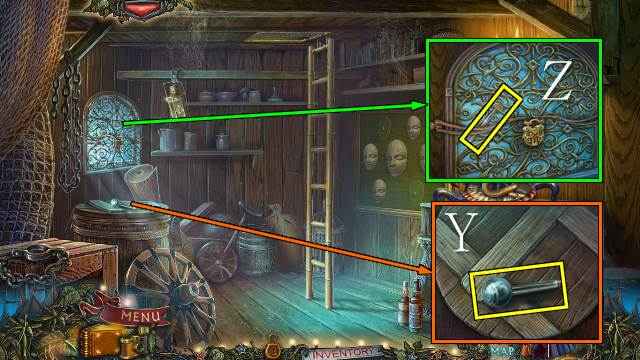
- Take the LEVER (Y).
- Take the GLASS CUTTER (Z).
- Go up and walk down.

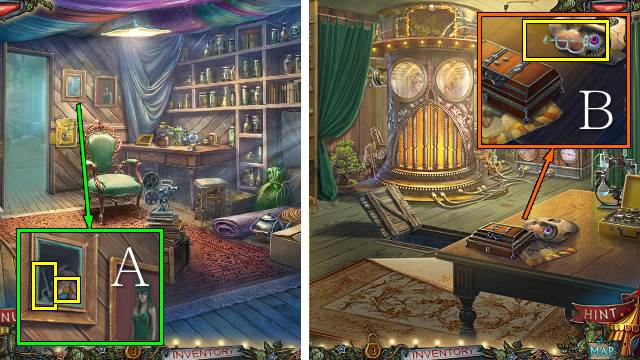
- Use the GLASS CUTTER and remove the painting; take YELLOW EYE 1/2 and the STONE REMOVING DEVICE (A).
- Walk forward.
- Take PINK EYE 2/2 with the STONE REMOVING DEVICE (B).
- Go down the hatch.

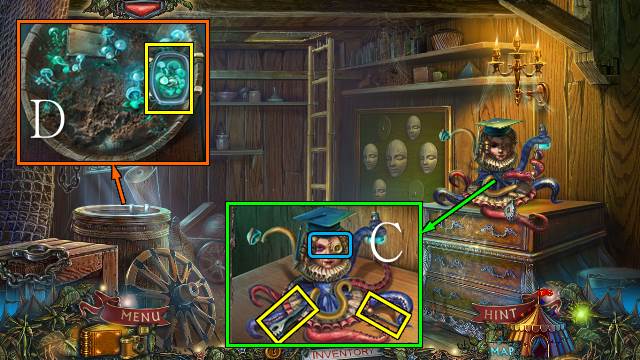
- Place the MAKESHIFT EYES and take the PIPETTE and FORCEPS (C).
- Open the barrel, use the FORCEPS and take the ACID MUSHROOMS (D).
- Go up.

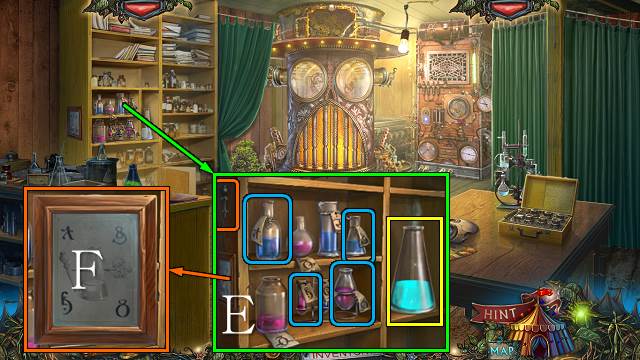
- Place the PIPETTE and ACID MUSHROOMS (E); add the four solutions (F) to the flask with the pipette and take the CORROSIVE ACID.

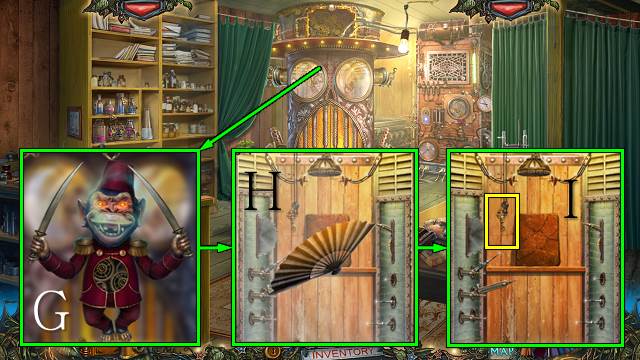
- Interact with the reactor; use the CORROSIVE ACID (G).
- Use the FAN (H); take the WINDOW KEY and read the journal (I).
- Back out and go down the hatch.

- Use the WINDOW KEY, open the grate and open the window (J).
- Go left.
- Talk to Mrs. Strauss (K).
- Play the HOP (L).
- You receive a TOREADOR.

- Remove the tarp (M).
- Talk to Bart (N).
- Take the BULL FIGURINE (O).

- Use the FAN, place the LEVER and take CHECKER 1/2 (P).
- Open the shutters (Q).
- Take PLASTER MASK 1/2 (R).
- Walk down and go up.

- Place the TOREADOR and BULL FIGURINE (S); take the PRIMA BALLERINA and PLASTER MASK 2/2 (T).
- Take a picture; find the listed items (T2)
- Go down the hatch and go left.

- Place the PRIMA BALLERINA; take CHECKER 2/2 (U).
- Walk down.
- Place the PLASTER MASKS (V).

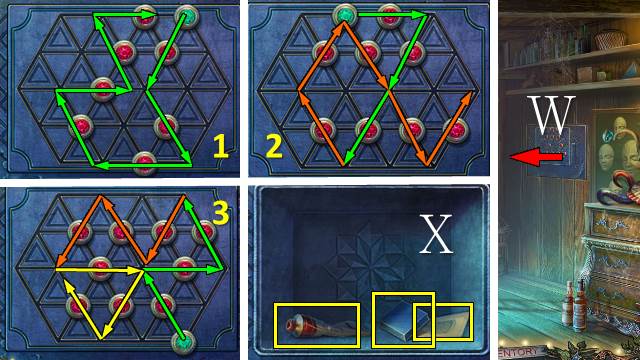
- Place the CHECKERS for a mini-game (W).
- Take the BLUE BUTTON, SODA TICKET and RED DYE (X).
- Go left.

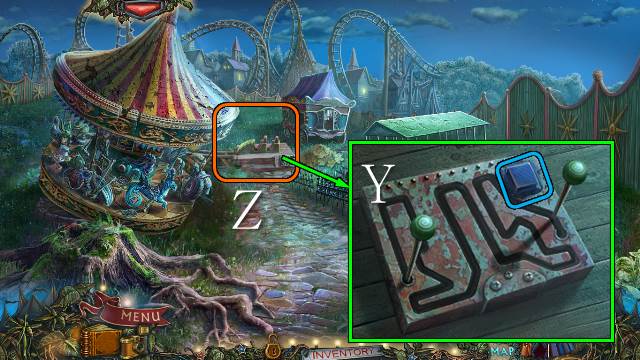
- Place the BLUE BUTTON and push it (Y).
- Ride the rollercoaster (Z).
Chapter 3: Professor Spiegel

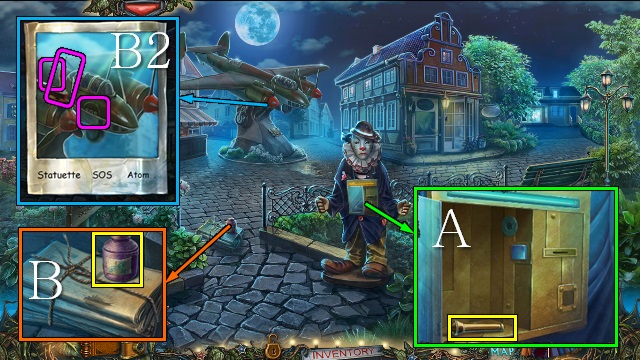
- Enter the SODA TICKET, open the door and take the HANDY HANDLE (A).
- Take the EPOXY RESIN (B).
- Take a picture; find the listed objects (B2).
- Go right.

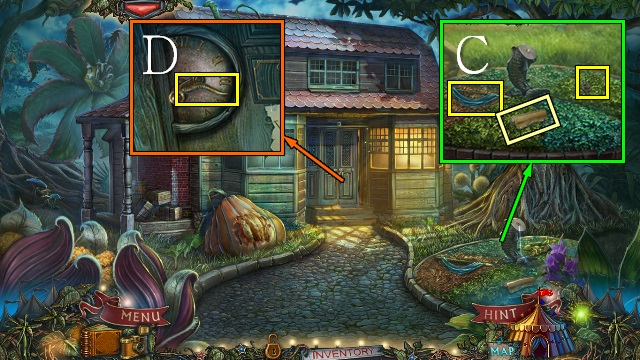
- Move the leaves; take the note, PEARL ROSE and BLUE FLAGPOLE (C).
- Take the GOLDEN HORN (D).
- Walk down twice.

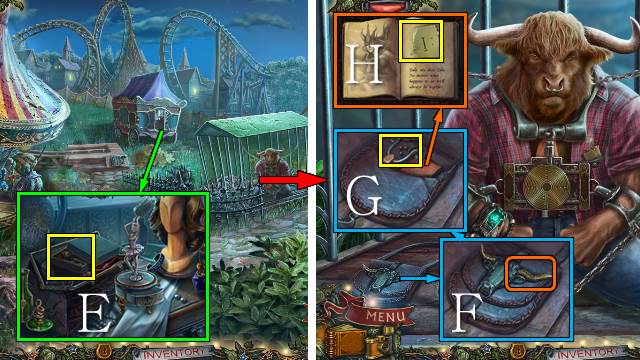
- Place the PEARL ROSE, open the bag, open the box and take the MODEL PLANE (E).
- Place the GOLDEN HORN and open the bag (F); take the POWERFUL SLINGSHOT (G), open the journal and take the TIME SOLUTION (H).
- Go forward and right.

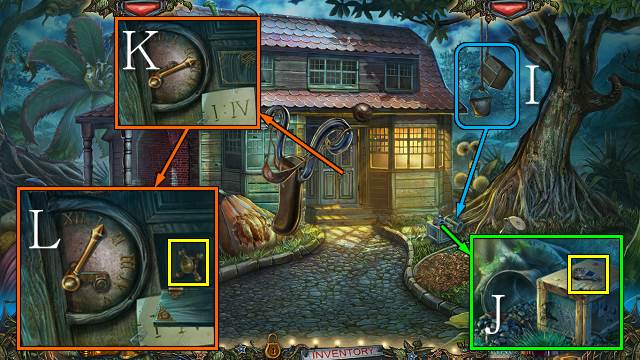
- Use the POWERFUL SLINGSHOT (I).
- Take the PLANE WHEEL (J).
- Place the HANDY HANDLE and TIME SOLUTION (K); move the handles to I and IV and take the VALVE (L).
- Go forward.

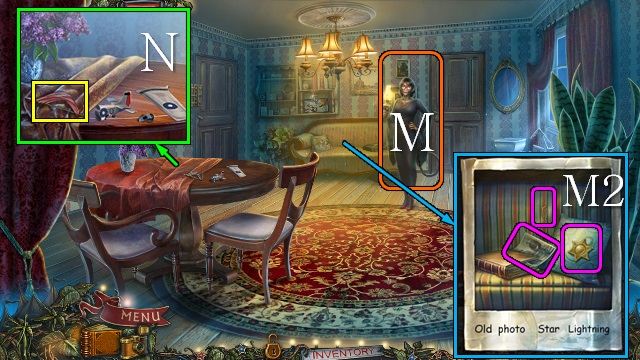
- Talk to Mrs. Strauss (M).
- Take a picture; find the listed objects (M2).
- Place the PLANE WHEEL and use the RED DYE; take the RED FLAGPOLE (N).
- Walk down twice.

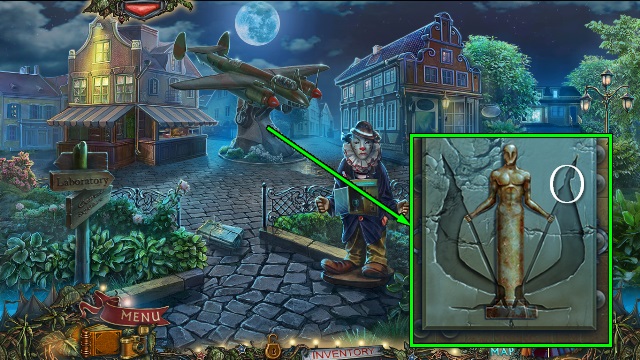
- Place the BLUE FLAGPOLE and RED FLAGPOLE for a mini-game (O).

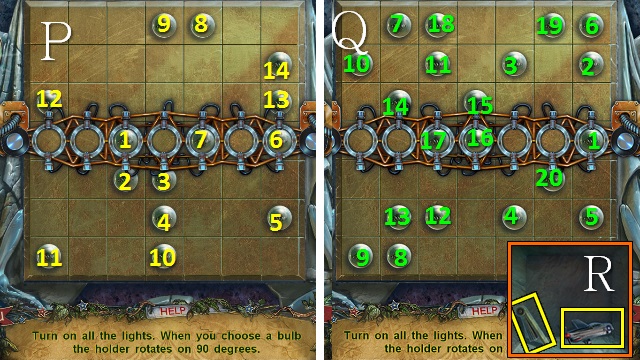
- Casual (P) and Hard (Q) solutions.
- Take the FIN LEVER and UNFINISHED PLANE MODEL (R).
- Go right and forward.

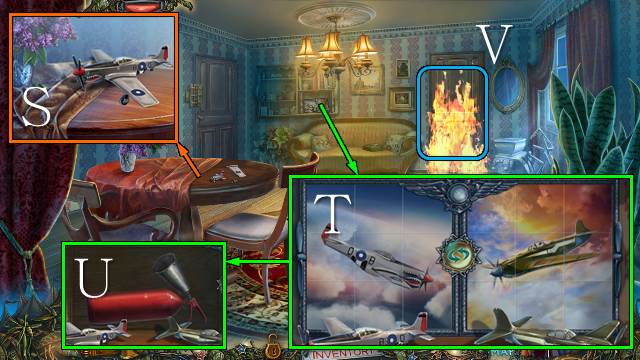
- Place the UNFINISHED PLANE MODEL and EPOXY RESIN; put the MODEL PLANE back together and take it (S).
- Place the two MODEL PLANES for a mini-game (T).
- Take the EXTINGUISHER (U).
- Use the EXTINGUISHER (V).
- Go forward.

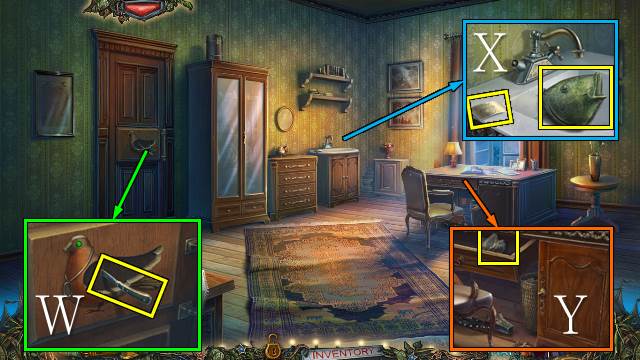
- Take the PENKNIFE (W).
- Take the FOUNTAIN STATUE HEAD and ELEPHANT SCHEME; place the VALVE (X).
- Open the drawer and take OLYMPUS (Y).
- Walk down twice.

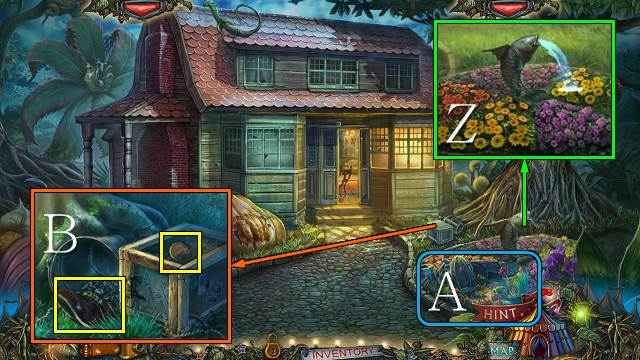
- Place the FIN LEVER and FOUNTAIN STATUE HEAD; push the lever (Z).
- Play the HOP (A).
- You receive a TROWEL.
- Use the TROWEL and PENKNIFE; take the BULLFINCH’S DIRTY WING and BIRD’S TOKEN (B).
- Walk down.

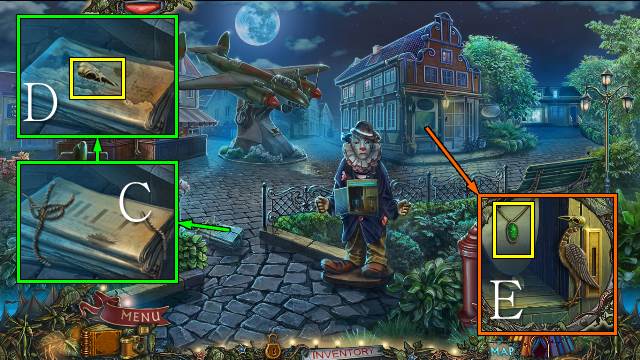
- Use the PENKNIFE (C), read the paper and take the BIRD’S HEAD (D).
- Place the BIRD’S HEAD and BIRD’S TOKEN; take the BULLFINCH AMULET (E).
- Go right and twice forward.

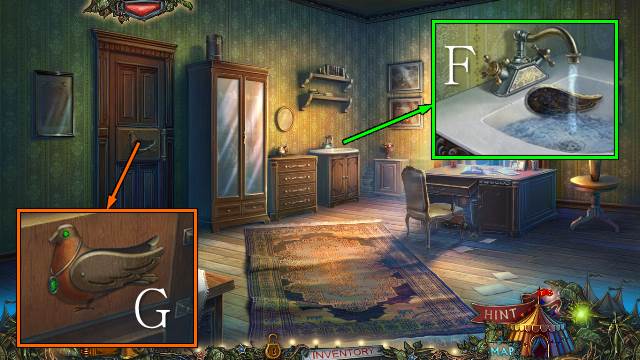
- Turn on the tap and wash the BULLFINCH’S DIRTY WING (F); you receive the BULLFINCH’S WING.
- Place the BULLFINCH’S WING and BULLFINCH AMULET (G).
- Go forward.

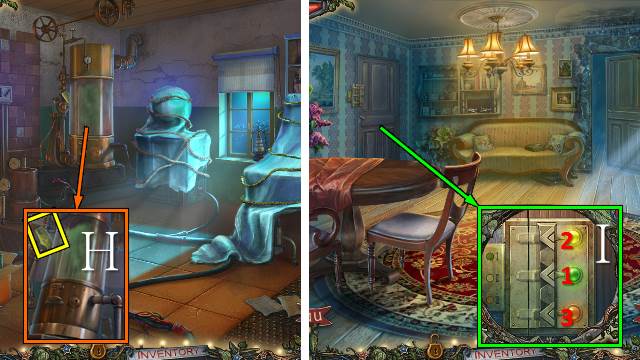
- Take BART’S ROOM KEY (H).
- Walk down twice.
- Place BART’S ROOM KEY; push the buttons in order and open the door (I).
- Go left.

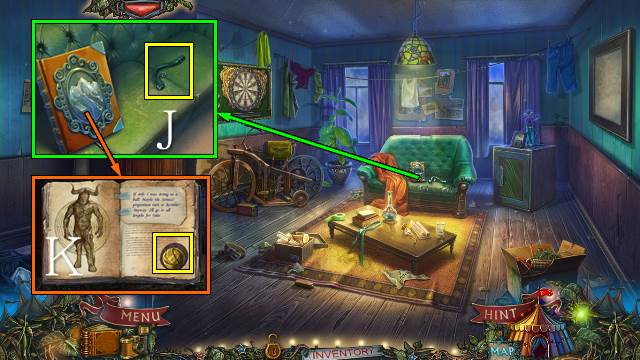
- Place OLYMPUS and take the FAUCET (J); open the journal, turn the page and take ADRIADNE’S THREAD (K).
- Walk down three times.

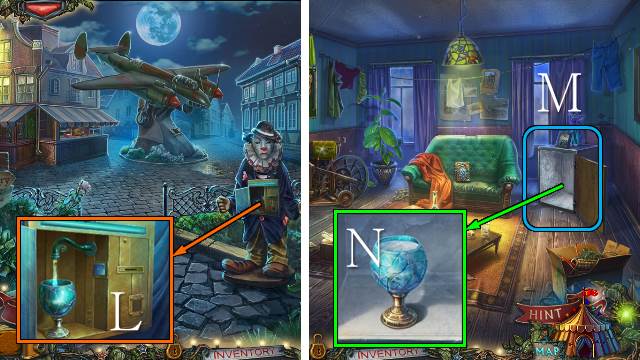
- Place the GOBLET and FAUCET; push the button and take the GOBLET WITH WATER (L).
- Go right, forward and left.
- Open the freezer (M).
- Place the GOBLET WITH WATER, break the goblet and take the ICE PIECE (N).
- Walk down.

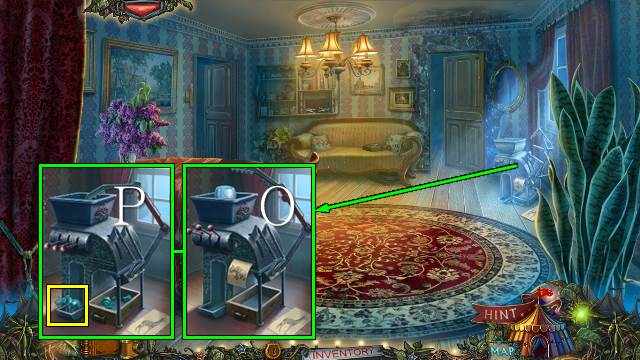
- Move the papers and place the ELEPHANT SCHEME and ICE PIECE (O); pull the levers and take the ICE ELEPHANT (P).
- Go forward twice.

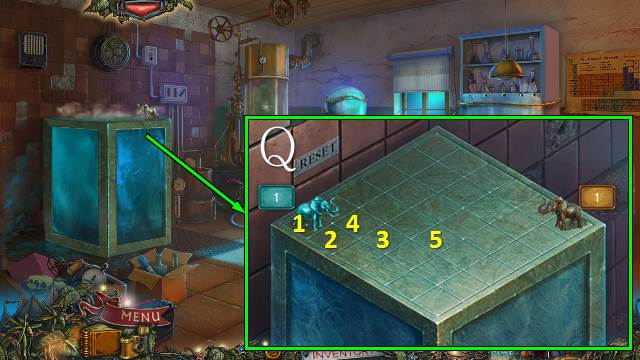
- Place the ICE ELEPHANT for a mini-game (Q).
- Solution: 1-2, 2-3, 2-4, 3-5.

- Talk to Professor Spiegel; you receive SPIEGEL’S COIL (R).
- Take the PREDATOR’S JAW (S).
- Walk down five times.

- Use SPIEGEL’S COIL (T).
- Place ARIADNE’S THREAD for a mini-game.
- Solution: Ux5, V.

- Talk to Bart (W).
- Play the HOP (X).
- You receive an EMPTY JAR.
- Go right.
Chapter 4: The Museum

- Use the TROWEL; take BONE 1/2 (Y).
- Take the ROPE (Z).
- Take the PREDATOR’S TAIL (A).
- Go down and forward.

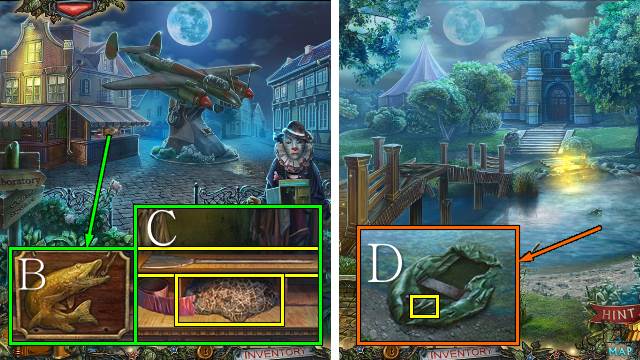
- Place the PREDATOR’S JAW and PREDATOR’S TAIL and open the cabinet (B); take PADDLE 1/2 and the FISH NET (C).
- Walk down and right.
- Use the FISH NET; take the BELLOW’S PIPE (D).
- Go to Spiegel’s Office (down, forward, right and forward twice).

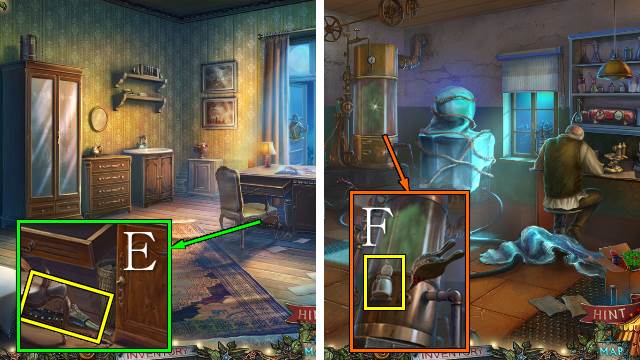
- Place the BELLOW’S PIPE and take the BELLOWS (E).
- Go forward.
- Place the EMPTY JAR and use the BELLOWS; take the JAR WITH TERMITES (F).
- Go to Bart’s Room (down twice and left).

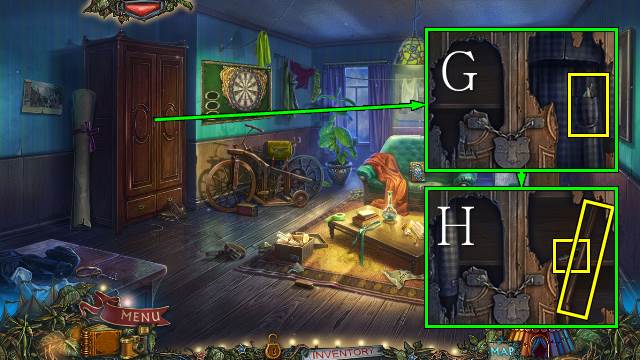
- Use the JAR WITH TERMITES and take the RAZOR (G); move the coat and take the HOOK and PADDLE 2/2 (H).
- Walk down three times.

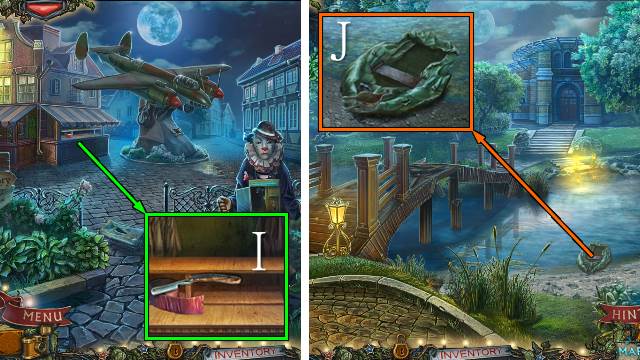
- Take the ADHESIVE PATCH with the RAZOR (I).
- Go down and right.
- Place the ADHESIVE PATCH and use the BELLOWS; place the PADDLES (J).
- Go forward.

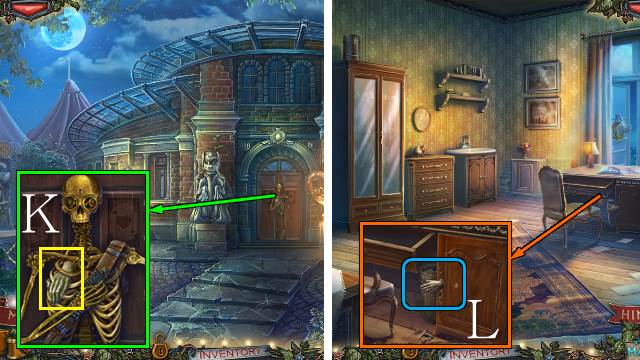
- Take the BRONZE HAND (K).
- Go to Spiegel’s Office.
- Remove the hand and place the BRONZE HAND; open the cabinet and play the HOP (L).
- You receive the LIGHTER.
- Go to the Museum Square (down four times, right and forward).

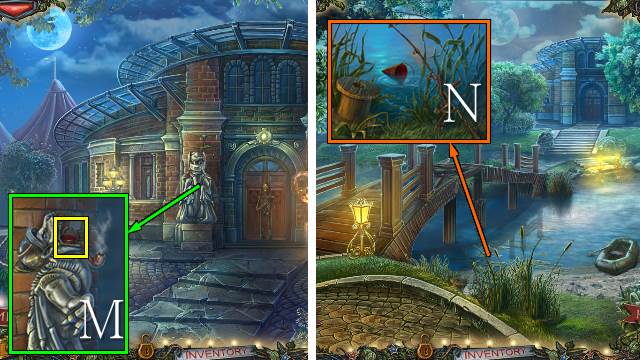
- Use the LIGHTER and take the EMPTY BUCKET (M).
- Walk down.
- Use the EMPTY BUCKET to get a BUCKET WITH WATER (N).
- Go forward.

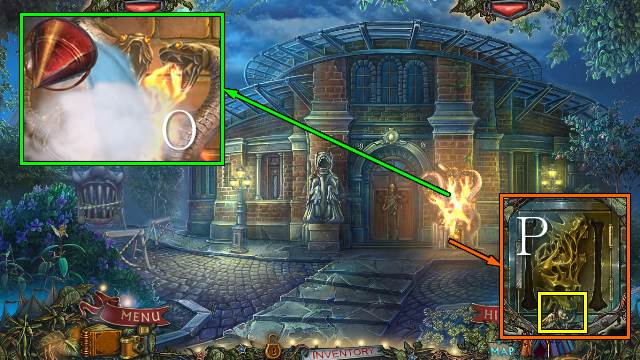
- Use the BUCKET WITH WATER (O).
- Take the WINGED SKULL (P).
- Go to Bart’s Room.

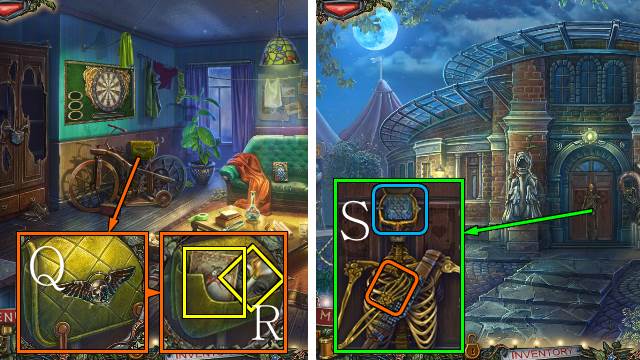
- Place the WINGED SKULL (Q); open the bag and take the JOKER and WOODEN MASK (R).
- Go to the Museum Square.
- Move the skeleton’s hand and place the JOKER; zoom in for a mini-game (S).

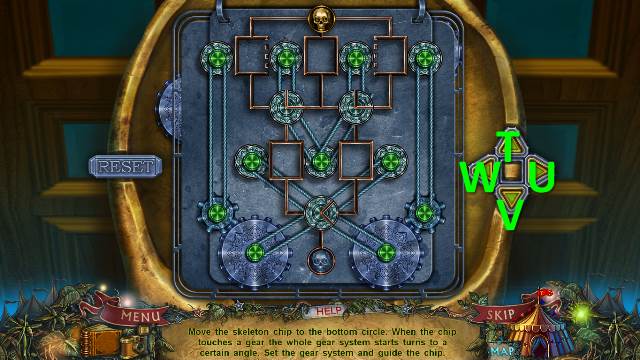
- Solution: U-V-U-V-Wx2-T-U-T-W-V-U-V-W-V-U-V-W-V-U-V-W-V.
- Go forward.

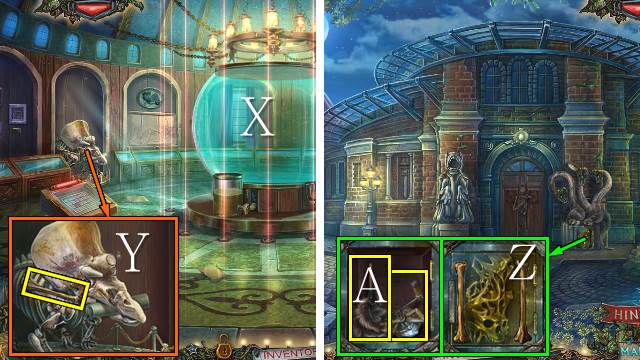
- Remove the tarp (X).
- Take BONE 2/2 (Y).
- Walk down.
- Place the BONES (Z); open the compartment and take the DUSTER and SEA LINE (A).
- Go forward.

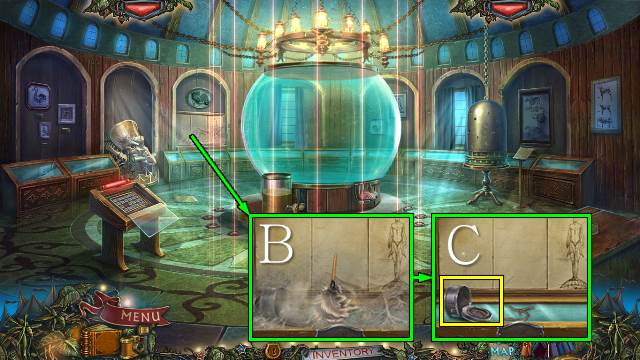
- Use the DUSTER (B); move the worm and take the BAIT CONTAINER (C).
- Go down twice, forward and right.

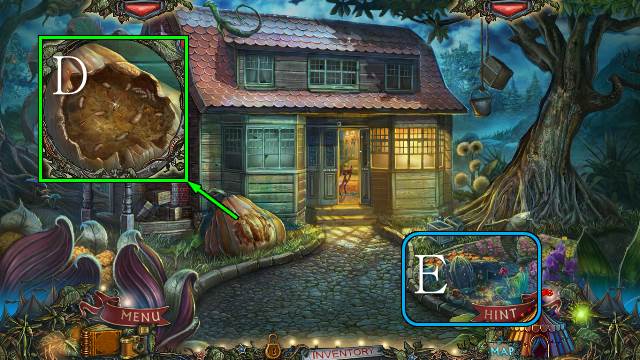
- Pick out the pumpkin and take the FEEDING WORMS with the BAIT CONTAINER (D).
- Play the HOP (E).
- You receive a MURDERER’S MASK.
- Go to the River.

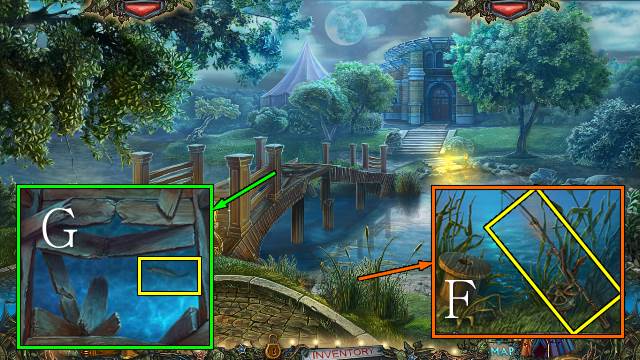
- Place the SEA LINE and take the FISHING ROD (F).
- Use the FEEDING WORMS and get the FISH with the FISHING ROD (G).
- Go forward twice.


- Place the HOOK (I).
- Open the cage and use the FISH to get the FISH TILE (J).

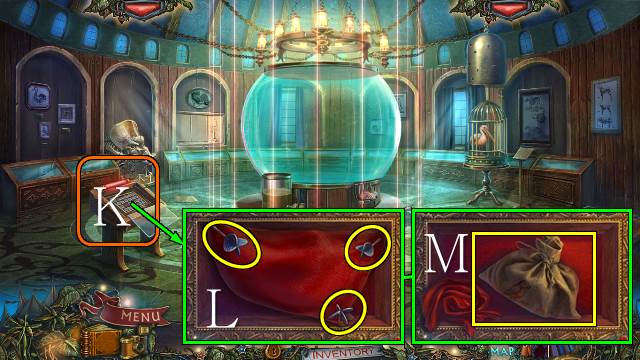
- Place the FISH TILE for a mini-game; the solution is random (K).
- Take the three darts for a SET OF DARTS (L); remove the drape and take the BIRD SEED (M).

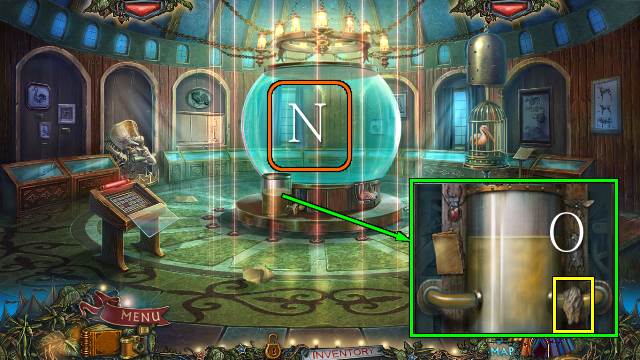
- Talk to Tula (N).
- Take the LIQUID SAMPLE (O).
- Go to Spiegel’s Office.

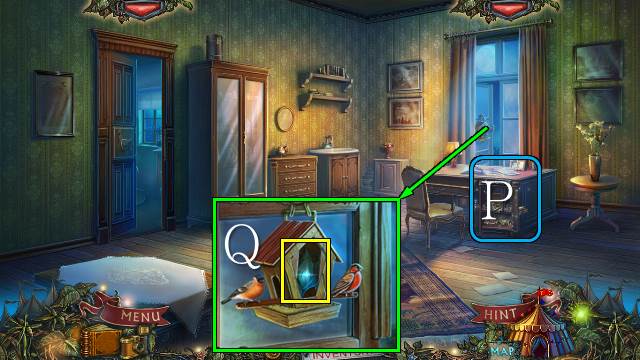
- Play the HOP (P).
- You receive an EMPTY SPRAYER.
- Place the BIRD SEED and take TULA’S TIARA (Q).
- Go forward.

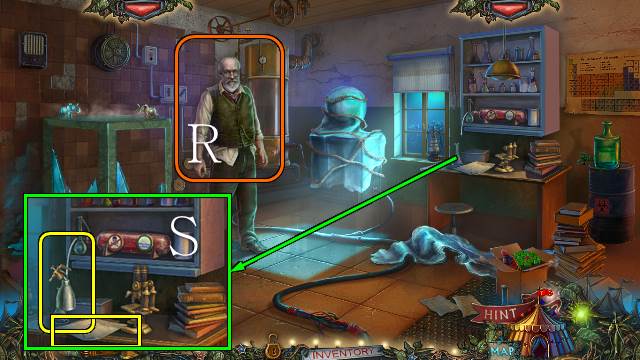
- Talk to Professor Spiegel (R).
- Give Spiegel the LIQUID SAMPLE and talk to him again.
- Take the FISH SCHEME and take the TOXIN NEUTRALIZER with the EMPTY SPRAYER (S).
- Go to Bart’s Room.

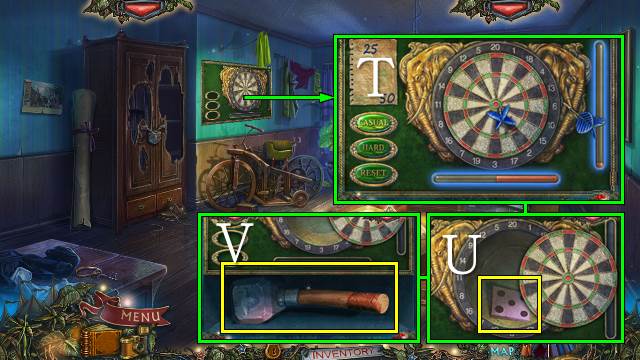
- Place the SET OF DARTS for a mini-game (T).
- Take DICE FACET 1/2 (U); take the SLEDGEHAMMER (V).
- Go to the Museum.

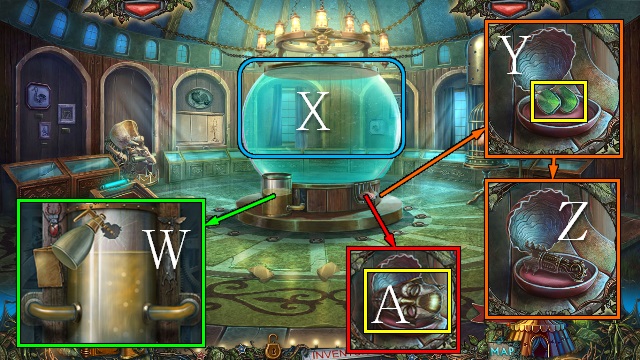
- Use the SLEDGEHAMMER and TOXIN NEUTRALIZER (W).
- Talk to Tula (X).
- Take the DAMAGED SCALES (Y); use SPIEGEL’S COIL (Z).
- Talk to Tula.
- Take the CREEPY MASK (A).
- Walk down.

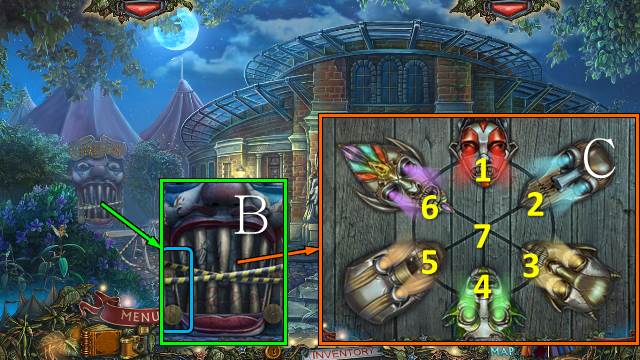
- Remove the tape and broken rope and place the ROPE (B); place the WOODEN MASKS, MURDERER’S MASK and CREEPY MASK for a mini-game (C).
- Solution: 2-1-7-3-4-5-6-7.
- Go left.
Chapter 5: The Antidote

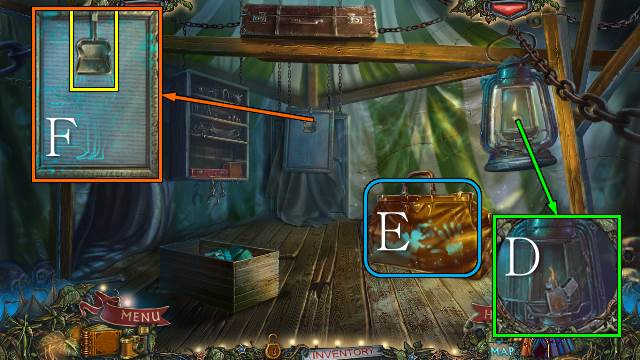
- Open the lantern and use the LIGHTER (D).
- Open the bag and play the HOP (E).
- You receive a DINO’S HORN.
- Take the SHOVEL (F).
- Go left.

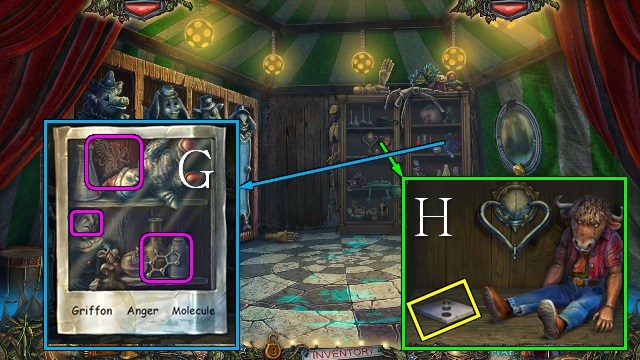
- Take a picture; find the listed items (G).
- Take DICE FACET 2/2 (H).
- Walk down.

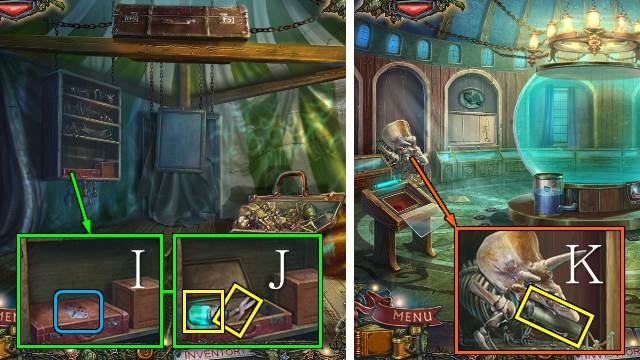
- Place the DICE FACETS and open the suitcase (I); take the LUMINESCENT DYE and SCISSORS (J).
- Walk down and forward.
- Place the DINO’S HORN; take the DRAWING PAPER (K).
- Walk down and left.

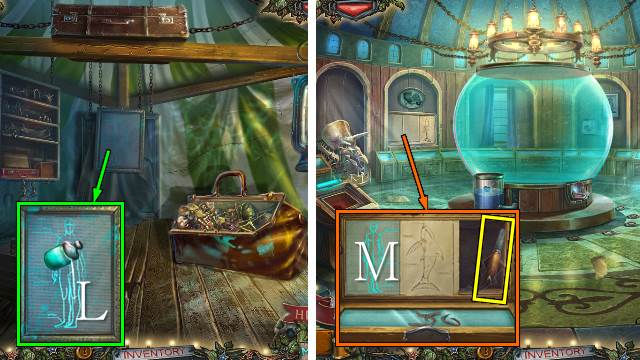
- Use the LUMINESCENT DYE and DRAWING PAPER; you receive the HUMAN SCHEME (L).
- Go down and forward.
- Place the FISH SCHEME and HUMAN SCHEME; take the SAW FISH (M).
- Walk down and left.

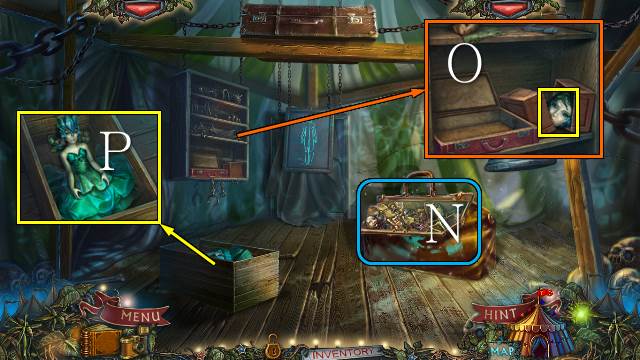
- Play the HOP (N).
- You receive a COGWHEEL.
- Use the SAW FISH and open the crate; take the DOLL’S HEAD (O).
- Place the DOLL’S HEAD and TULA’S TIARA; take TULA’S DOLL (P).
- Go left.

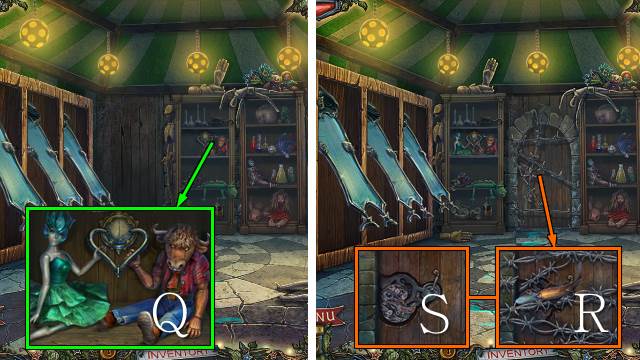
- Place TULA’S DOLL and move Bart and Tula’s arms (Q).
- Use the SAW FISH (R), place the COGWHEEL and open the door (S).
- Go forward.

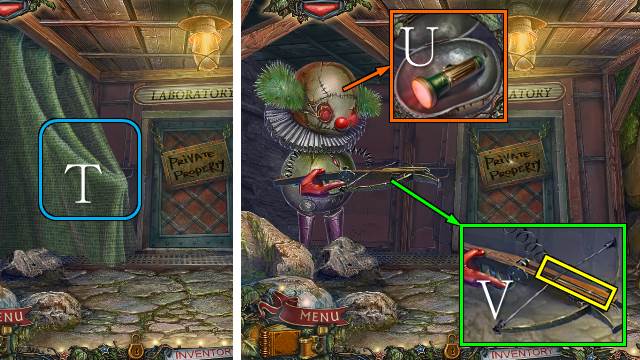
- Open the curtains (T).
- Open the head; take the BRIGHT FLASHLIGHT (U).
- Take the TWEEZERS (V).
- Walk down.

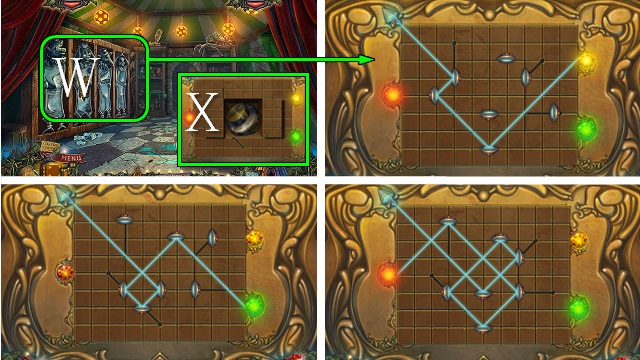
- Use the BRIGHT FLASHLIGHT (W).
- Play the mini-game.
- Take the CODE HANDLE (X).
- Walk forward.

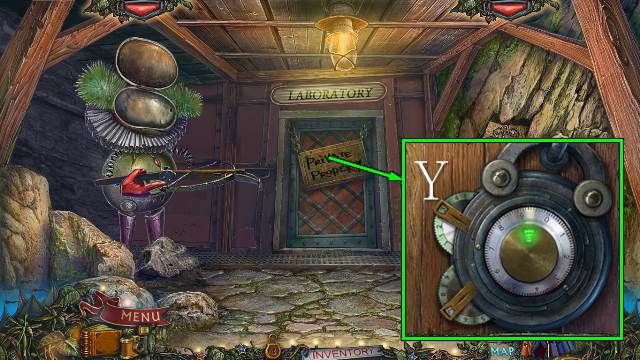
- Use the SCISSORS and place the CODE HANDLE; turn the knobs to 3 and 7 (Y).
- Go forward.

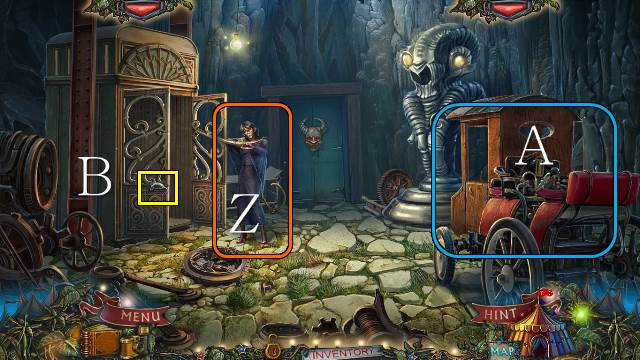
- Talk to Mrs. Strauss (Z).
- Play the HOP (A).
- You receive the CLOWN HAND.
- Take the MECHANICAL RAT (B).
- Walk down twice.

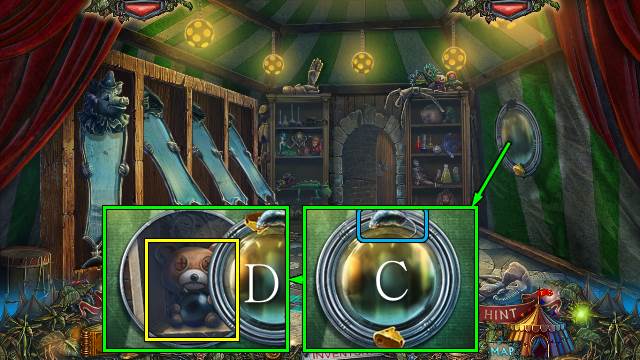
- Place the MECHANICAL RAT (C); take the FRAG BOMB (D).
- Go forward twice.

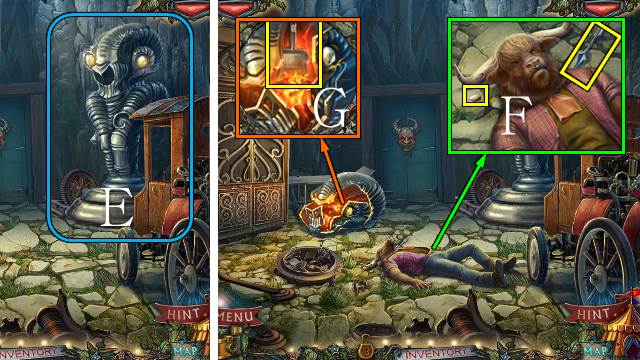
- Use the FRAG BOMB (E).
- Take the CROSSBOW BOLT and HORN CHUNK (F).
- Use the SHOVEL to get a SHOVEL WITH COAL (G).
- Walk down.

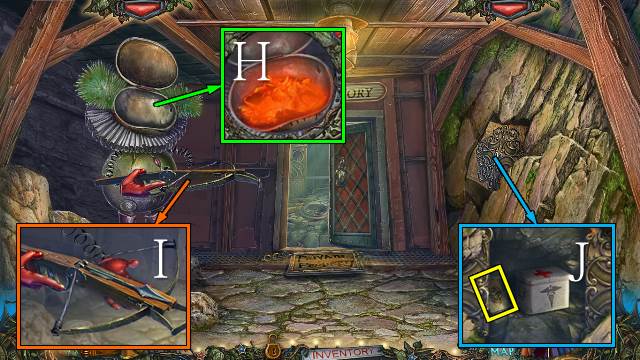
- Use the SHOVEL WITH COAL and close the head (H).
- Place the CLOWN HAND and CROSSBOW BOLT (I).
- Take the MAGNET CARD (J).
- Go forward.

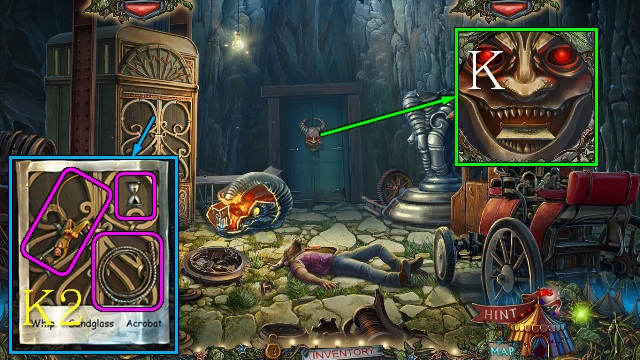
- Use the MAGNET CARD (K).
- Take a picture; find the listed items (K2).
- Go forward.

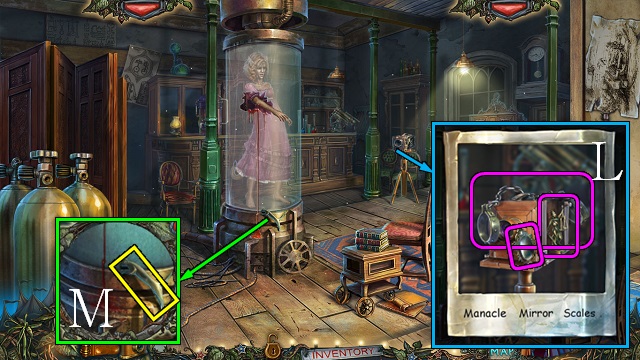
- Take a picture; find the listed items (L).
- Take the PREDATORY CAT (M).

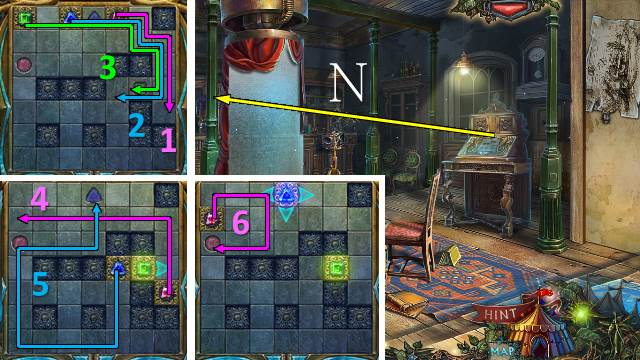

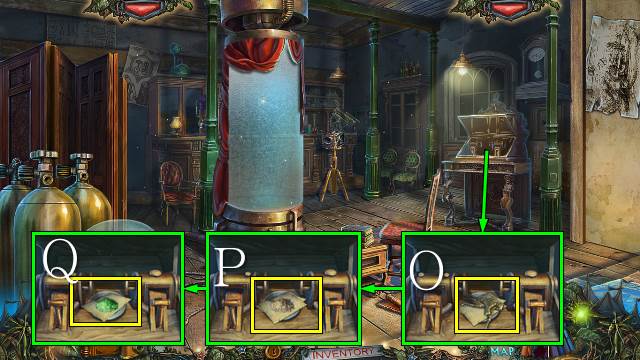
- Take the CAT HUNTER (O); place the HORN CHUNK and take BART’S DNA SAMPLE (P), and place the DAMAGED SCALES and take TULA’S DNA SAMPLE (Q).
- Go to Spiegel’s Lab (down seven times, forward, right and forward three times).

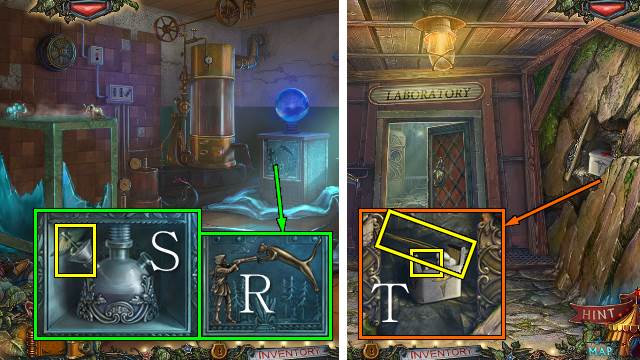
- Place the PREDATORY CAT and CAT HUNTER (R); take the CADUCEUS (S).
- Go down five times, right, forward, left twice and forward.
- Place the CADUCEUS; take the STERILE COTTON with the TWEEZERS and take the SMELLING SALTS (T).
- Walk forward.

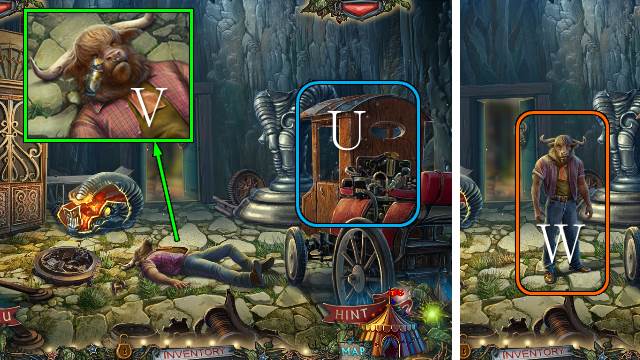
- Play the HOP (U).
- You receive an INJECTOR.
- Use the SMELLING SALTS (V).
- Talk to Bart (W).
- Go forward.

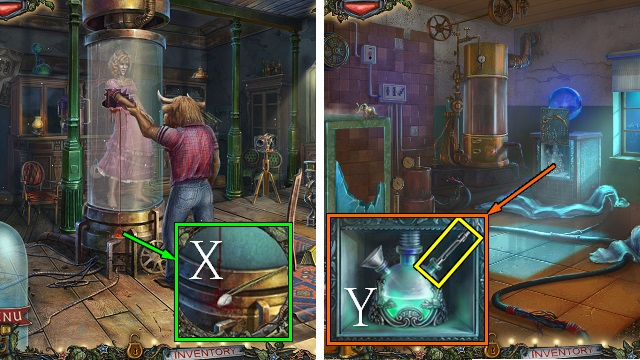

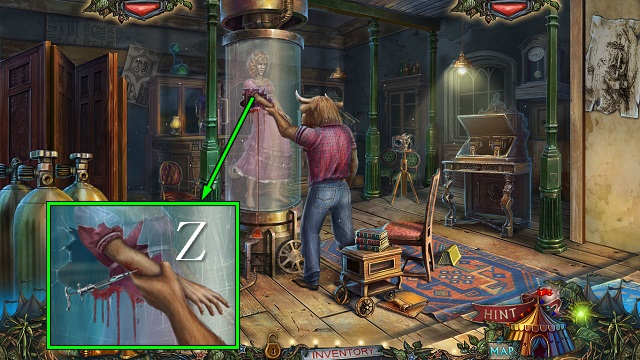
- Take JUDY’S BLOOD with the STERILE COTTON (X).
- Go to Spiegel’s Lab.
- Use BART’S DNA SAMPLE, TULA’S DNA SAMPLE and JUDY’S BLOOD; take the MUTANT’S ANTIDOTE with the INJECTOR (Y).
- Go down five times, right, forward, left twice, and forward three times.
- Use the MUTANT’S ANTIDOTE (Z).
- Congratulations, you have completed Twilight Phenomena: The Incredible Show.


 Murder, She Wrote Walkthrough, Guide, & Tips
 Calavera: Day of the Dead Walkthrough, Guide, & Tips
 Skymist: The Lost Spirit Stones Walkthrough, Guide, & Tips
 Dreampath: The Two Kingdoms Walkthrough, Guide, & Tips
 PuppetShow: Return to Joyville Walkthrough, Guide, & Tips