Dark Tales: Edgar Allan Poe's The Tell-tale Heart Walkthrough, Guide, & Tips
Dark Tales: Edgar Allan Poe’s The Tell-tale Heart Walkthrough

Welcome to the Dark Tales: Edgar Allan Poe’s The Tell-tale Heart Walkthrough
A scream in the night… a brutal crime… a mysterious figure with eyes red as blood. Can you get to the heart of this shocking murder?
Whether you use this document as a reference when things get difficult or as a road map to get you from beginning to end, we’re pretty sure you’ll find what you’re looking for here.
This document contains a complete Dark Tales: Edgar Allan Poe’s The Tell-tale Heart game walkthrough featuring annotated screenshots from actual gameplay!
We hope you find this information useful as you play your way through the game. Use the walkthrough menu below to quickly jump to whatever stage of the game you need help with.
Remember to visit the Big Fish Games Forums if you find you need more help. Have fun!
This walkthrough was created by Nina de Boo, and is protected under US Copyright laws. Any unauthorized use, including re-publication in whole or in part, without permission, is strictly prohibited.
General Tips
- This is the official guide for Dark Tales: Edgar Allan Poe’s The Tell Tale Heart.
- This guide will not mention each time you have to zoom into a location; the screenshots will show each zoom scene.
- Hidden-object puzzles are referred to as HOPs. This guide will not show screenshots of the HOPs, but it will mention when a HOP is available and the inventory item you’ll collect from it.
- This guide will give step-by-step solutions for all puzzles that are not random. Please read the instructions in the game for each puzzle.
Chapter 1: A Murder in Gurtos

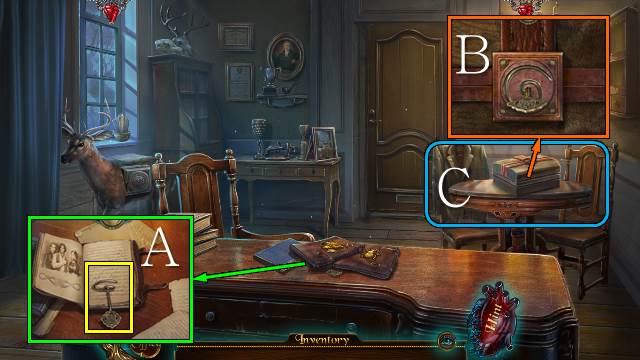
- Move the journals, open the bottom one and take the KEY (A).
- Place and turn the KEY (B).
- Play the HOP (C).
- You receive the VALISE.
- Walk forward.

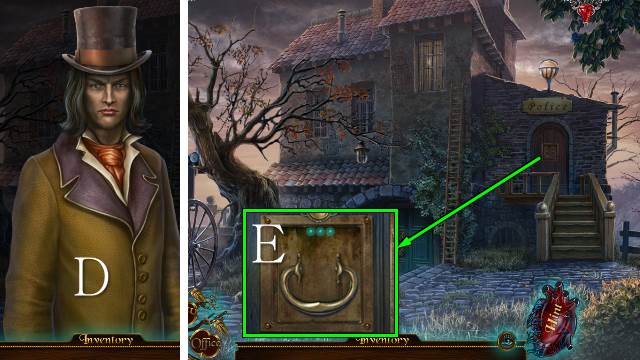
- Talk to Auguste (D).
- Knock three times (E).

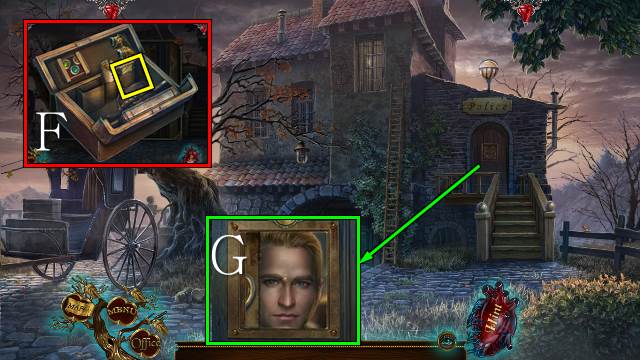
- Access the VALISE, open it and take the ID (F).
- Show your ID (G).
- Go into the Police Station.

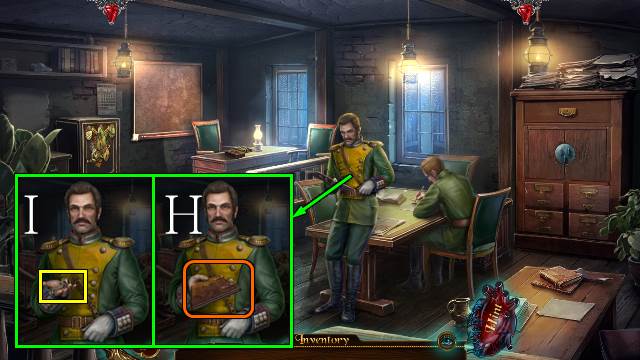
- Talk to the Police Chief and take the file for a HOP (H).
- Take SAFE KEY 1/3 (I).

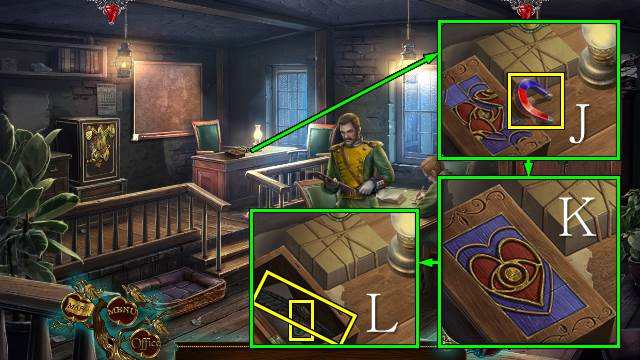
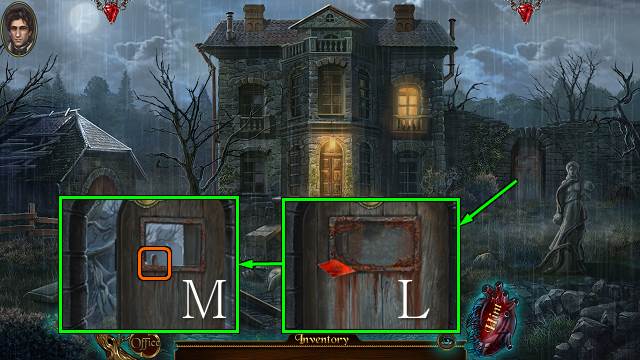
- Take the MAGNET (J); solve the puzzle (K), take the PENCIL and SAFE KEY 2/3 and read the note (L).
- Walk down.

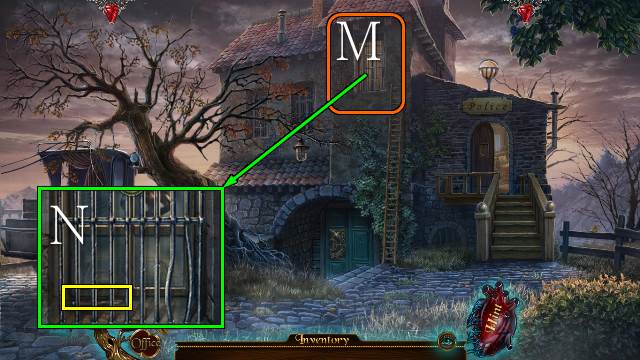
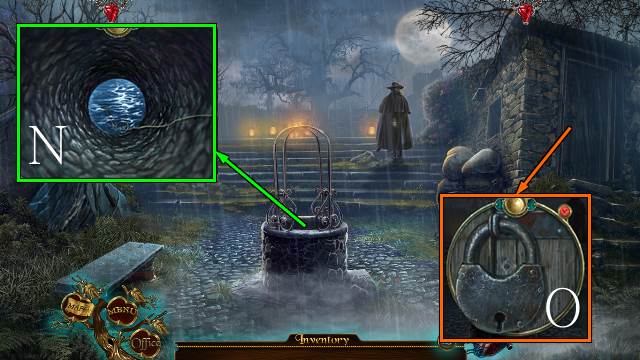
- Look through the window (M); take the SCALPEL with the MAGNET (N).
- Go right.

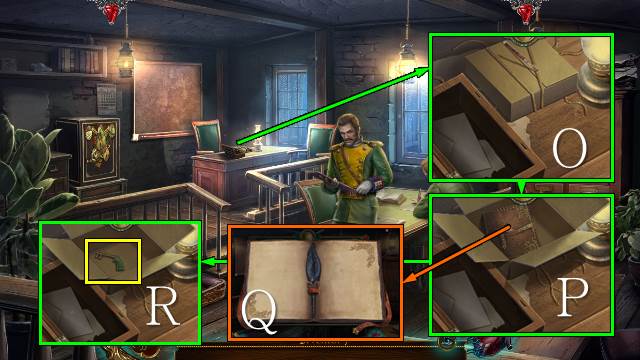
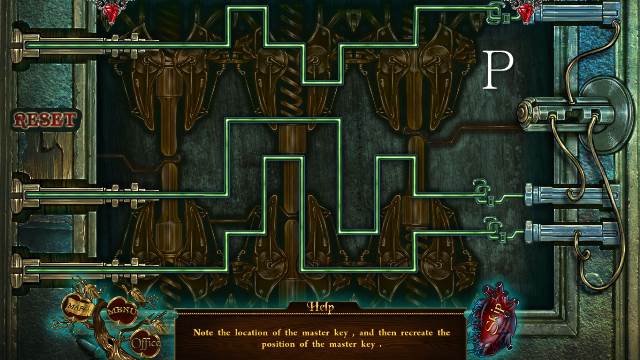
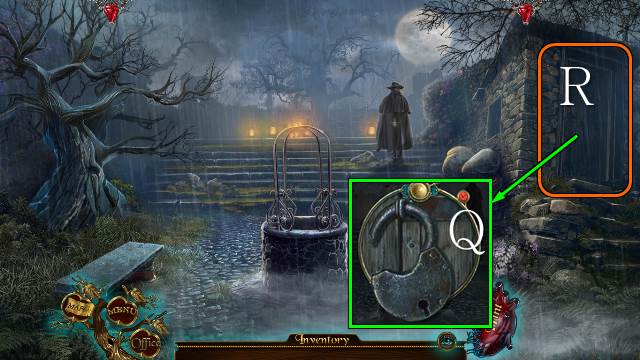
- Use the SCALPEL five times (O) and open the box (P); take the NOTEBOOK open it and place the PENCIL (Q).
- Take SAFE KEY 3/3 (R).

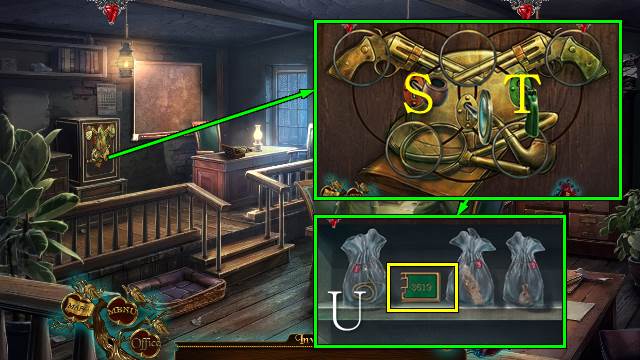
- Place the SAFE KEYS for a mini-game.
- Solution: turn T-T-S-S.
- Inspect the evidence bags and take the MORGUE CODE (U).
- Walk down.

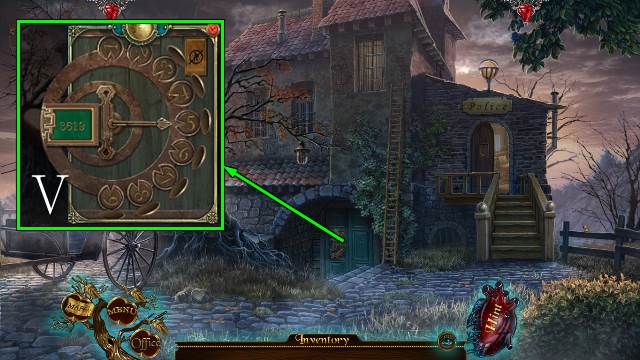
- Place the MORGUE CODE; pick up the arrow and select your numbers (V).
- Go forward.

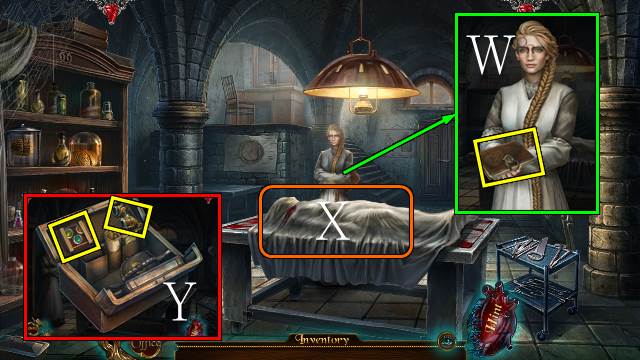
- Talk to Valentina and take the AUTOPSY RESULTS (W).
- Inspect the table (X).
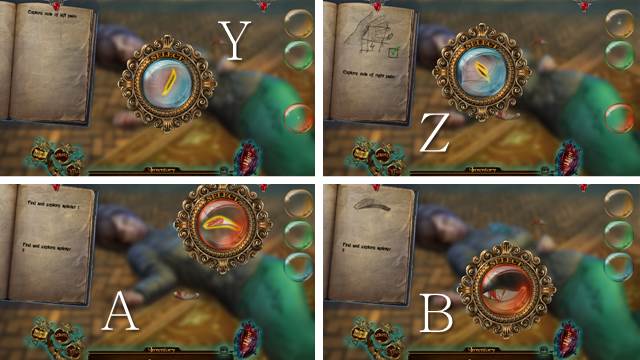
- Access the VALISE and take the GOGGLES; access it again and take the BOX OF LENSES (Y).

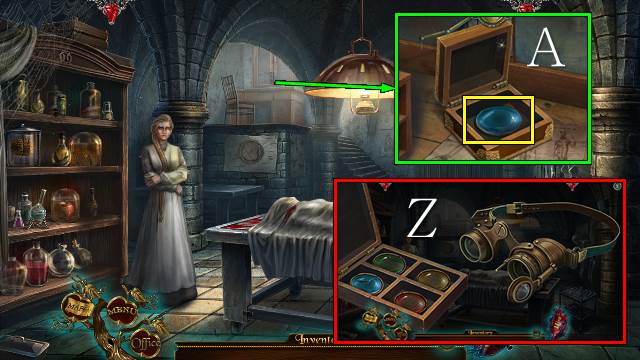
- Access the GOGGLES and open the lens; place the BOX OF LENSES, open it, take the blue lens and remove the shards (Z).
- Open the box and take the BLUE LENS (A).
- Access the GOGGLES, place the BLUE LENS and take the GOGGLES WITH LENSES (Z).

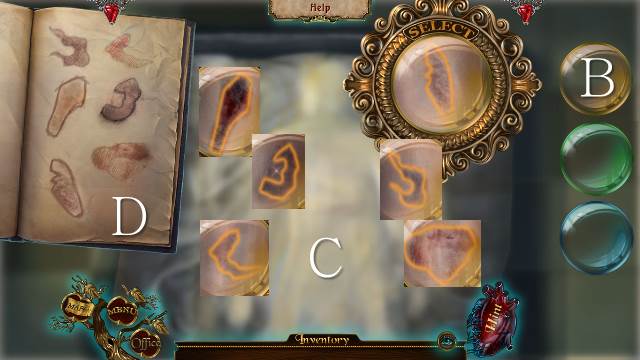
- Place the GOGGLES WITH LENSES and AUTOPSY RESULTS on the table for a mini-game.
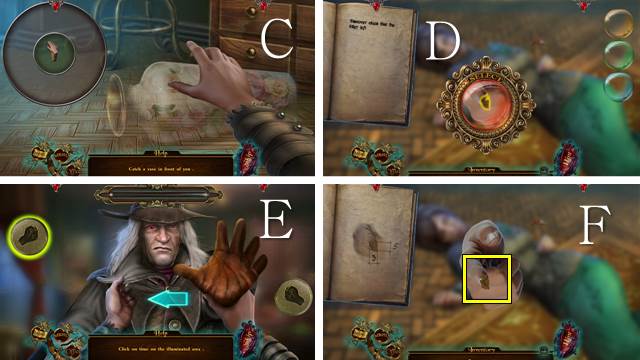
- Take the yellow lens (B) and find the hematomas on the arms (C); turn the page (D).

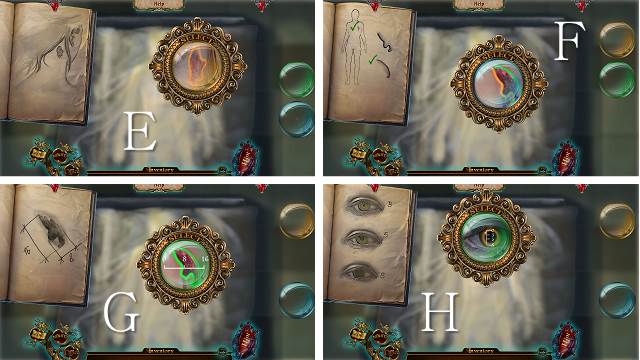
- Find the hematoma and turn the page (E).
- Take the blue lens and find the wound, then find the edges of the wound; turn the page (F).
- Take the green lens and measure the edges; turn the page (G).
- Measure the pupil (H).

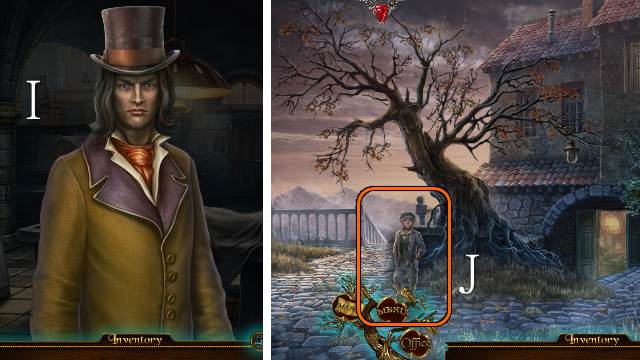
- Talk to Auguste (I).
- Walk down.
- Talk to the boy (J).

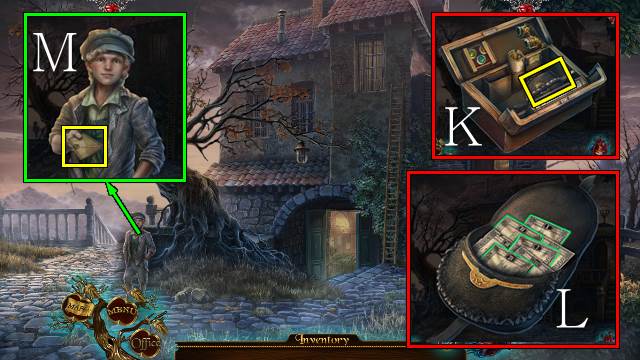
- Access the VALISE and take the PURSE (K).
- Access the PURSE and take the 20, 10, 5 and 2 notes; you receive the MONEY (L).
- Give the MONEY to the boy; take the LETTER and open it (M).
- Go left.
Chapter 2: The Witness Statement

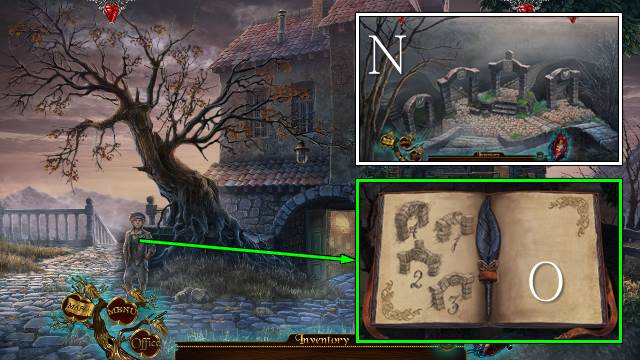
- Choose any of the archways (N).
- Walk down.
- Talk to the boy.
- Select the heart, snake, eye and lightning; take the LABYRINTH CLUE (O).
- Go left.

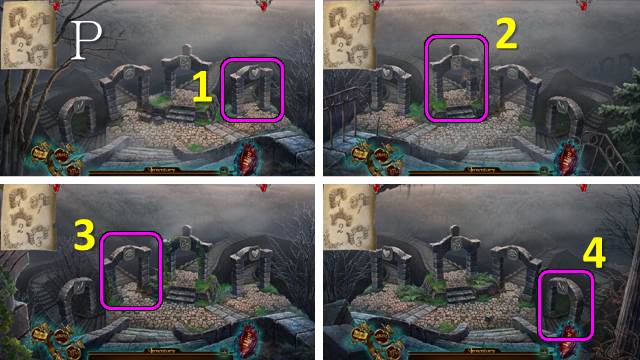
- Place the LABYRINTH CLUE and follow route according to the clue (P).

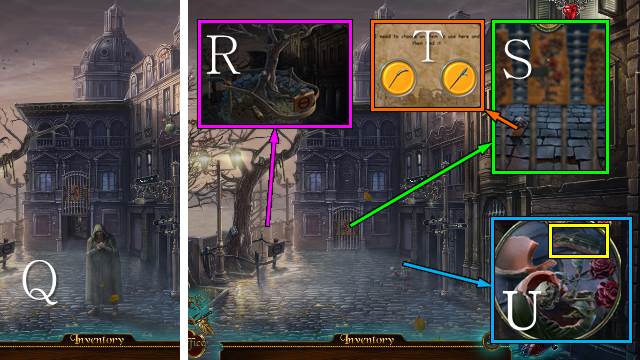
- Interact with the man (Q).
- Go forward.
- Inspect the evidence by the tree (R).
- Try to take the plate (S); select either object (T).
- Take the VASE FRAGMENT (U).
- Walk down.

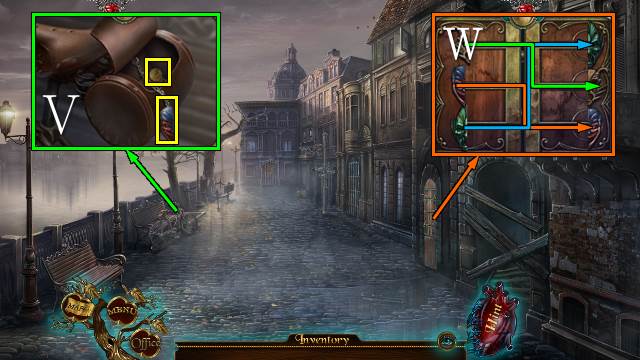
- Use the VASE FRAGMENT and open the bag; take the MASK HALF and COIN (V).
- Place the MASK HALF for a mini-game (W).

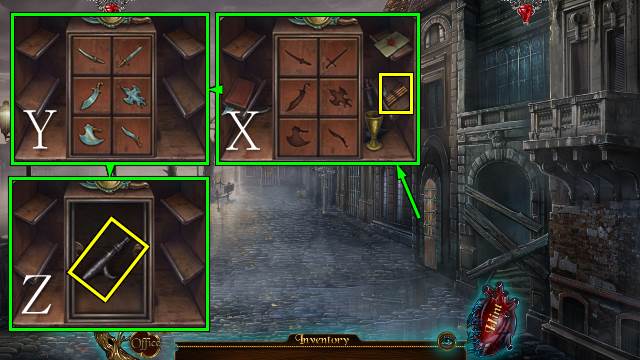
- Open the door, remove the items and take the TUBES (X); find all the symbols and remove the panel (Y), use the COIN twice, remove the panel and take the AXE or BEAK (depending on the object you chose) (Z).
- Walk forward.

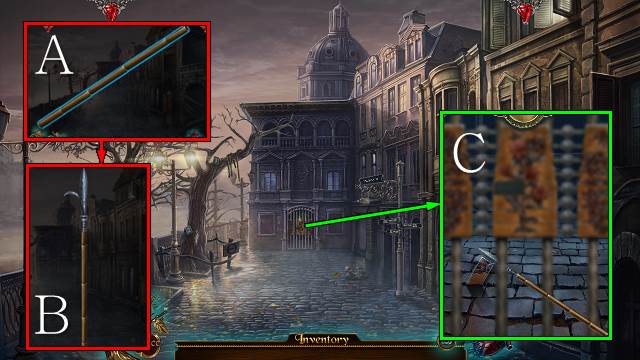
- Access the TUBES and reassemble the rod (A); place the AXE or BEAK, screw it on and take the LANCE WITH AXE/BEAK (B).
- Take the PLATE with the LANCE WITH AXE/BEAK (C).

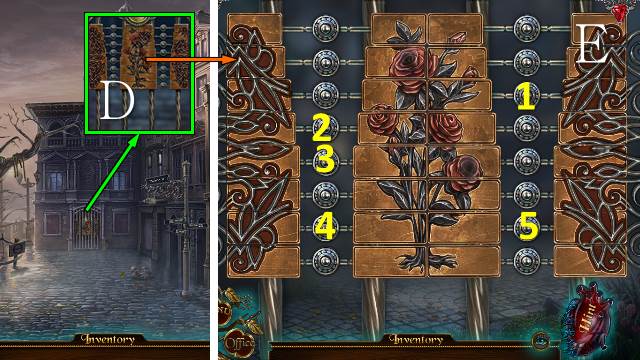
- Place the PLATE (D) and zoom in for a mini-game (E).
- Go forward.

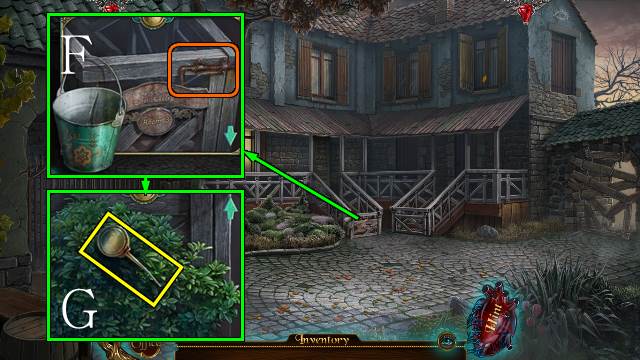
- Shake the bucket, scroll down (F), move the branches and take the OILCAN (G); scroll up, use the OILCAN and open the gate (F).

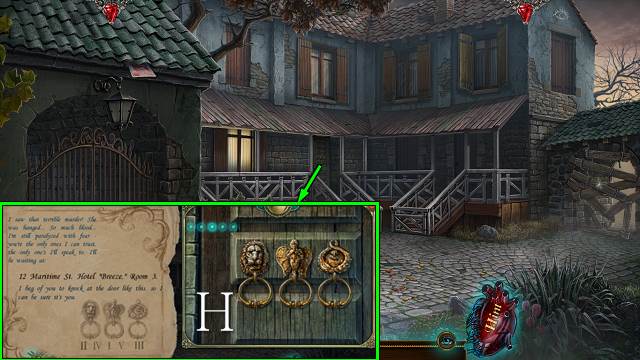
- Place the LETTER and knock as indicated (H).

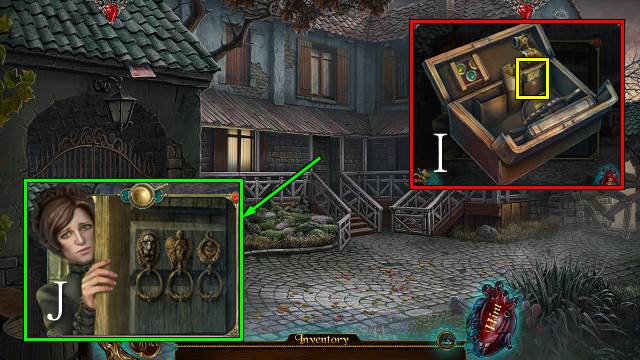
- Access the VALISE and take the ID (I).
- Show your ID and go forward (J).

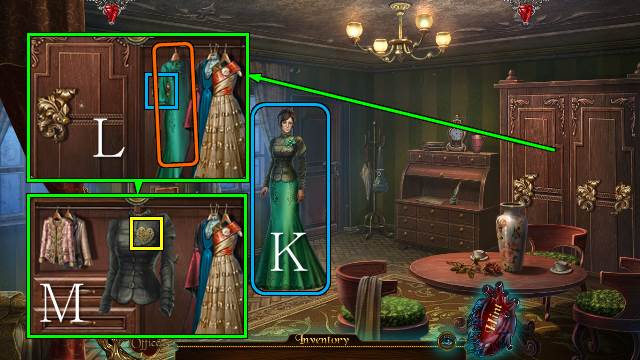
- Talk to the woman (K).
- Open the right door, move the dresses and take the green one; use the handle to open the left door (L).
- Move the jackets and take the HEART and black jacket (M).

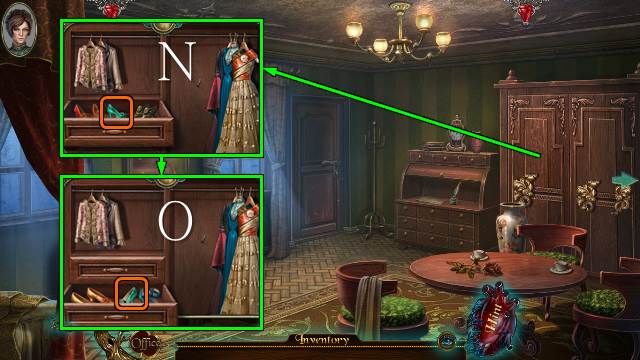
- Open both drawers and take the green shoes (N, O).

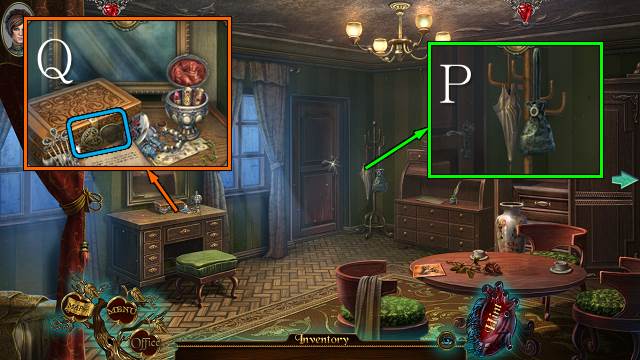
- Take the HANDBAG and UMBRELLA (P).
- Place the HEART and zoom in for a HOP (Q).
- You receive the HANDBAG KEY.

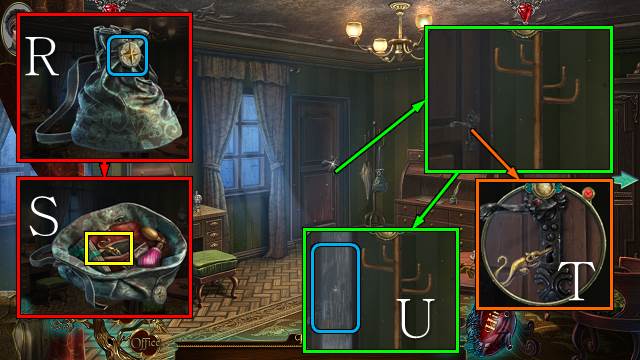
- Access the HANDBAG, place the HANDBAG KEY and open the bag (R); move the items and take the ROOM KEY (S).
- Open the door with the ROOM KEY (T); use the UMBRELLA and go forward (U).
- Go right.
- Go right.

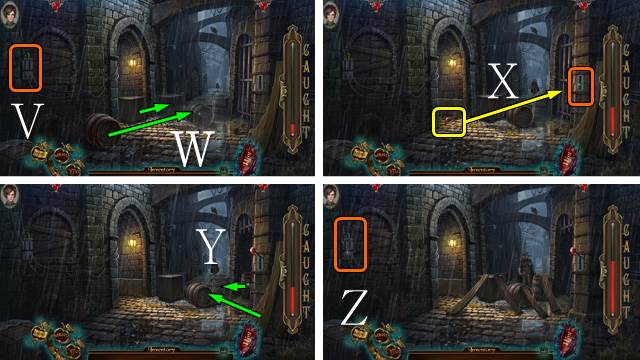
- Move the lever (V).
- Move the crate and barrel (W).
- Place the lever and move it (X).
- Move the barrel and place the planks (Y).
- Pull the left lever again (Z).
- Walk down.

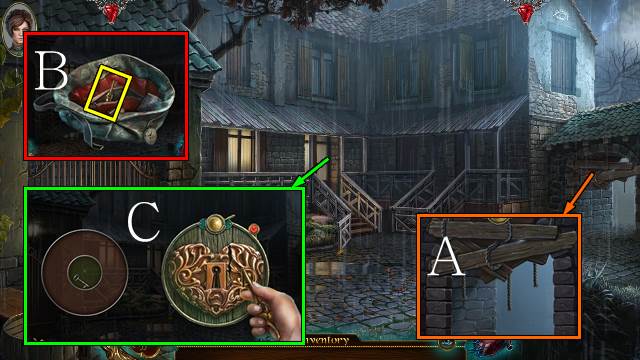
- Pull the ropes (A).
- Access the HANDBAG, move the items and take the KEY FOR HOTEL ROOM (B).
- Place the KEY FOR HOTEL ROOM for a mini-game (C).
- Go forward.

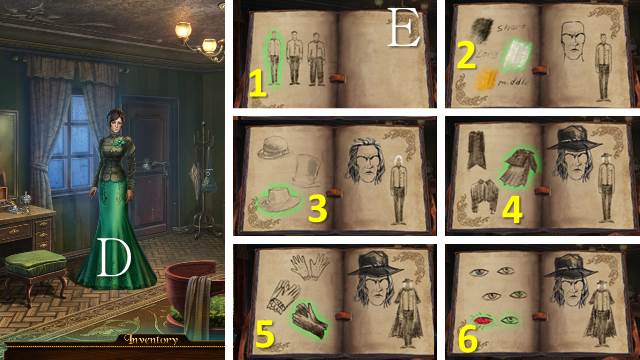
- Talk to the woman (D).
- Play the mini-game; you receive the FEATURES OF THE SUSPECT (E).
- Go to the Police Station.
Chapter 3: A Second Victim

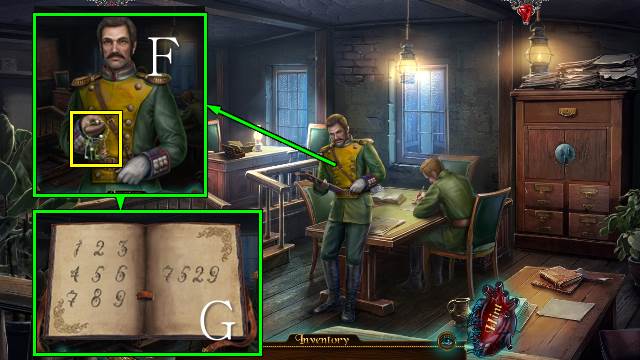
- Talk to the Police Chief and take the BUNCH OF KEYS (F).
- Talk to the Chief again and note 7529; you receive the MORGUE CODE (G).
- Walk down.

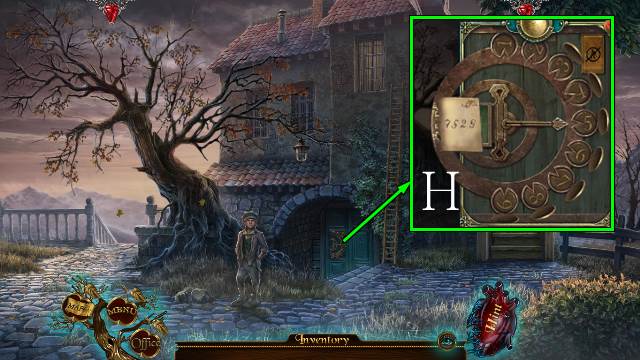
- Place the MORGUE CODE, take the arrow and select 7529 (H).
- Go forward.

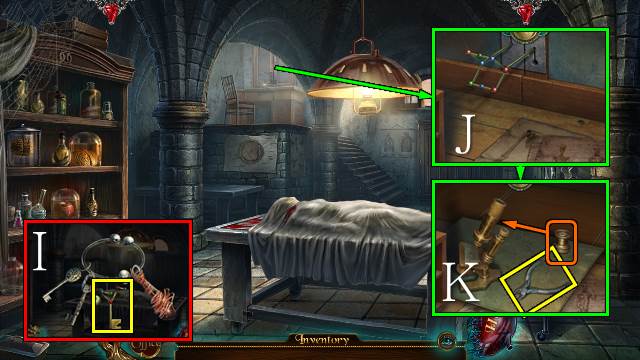
- Access the BUNCH OF KEYS and take the KEY OF CRYSTAL LATTICE (I).
- Use the KEY OF CRYSTAL LATTICE to open the cabinet (J); slide out the tray, take the PLIERS and place the ocular (K).

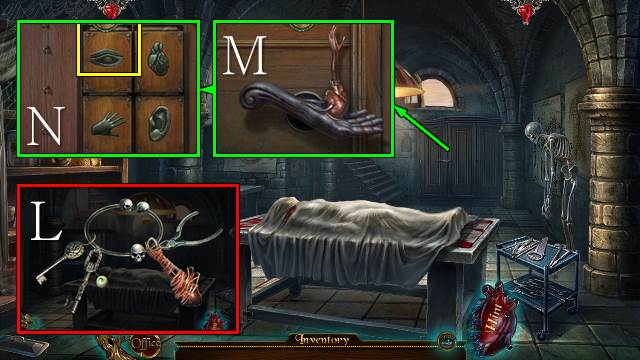
- Access the BUNCH OF KEYS and use the PLIERS; take the KEY HEART (L).
- Place and turn the KEY HEART (M); place the symbols and take the LIST OF SUSPECTS (N).

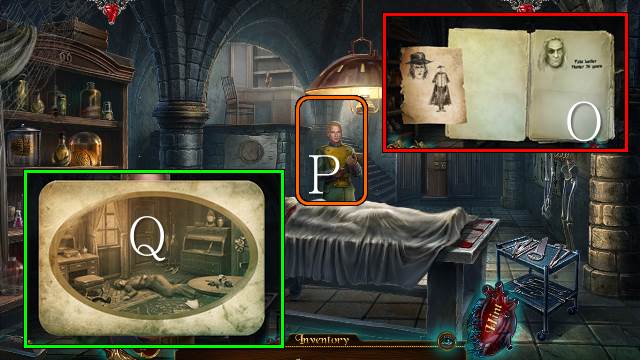
- Access and open the LIST OF SUSPECTS; place the FEATURES OF THE SUSPECTS and leaf through the pages (O).
- Talk to the Constable (P).
- Go forward into the picture (Q).

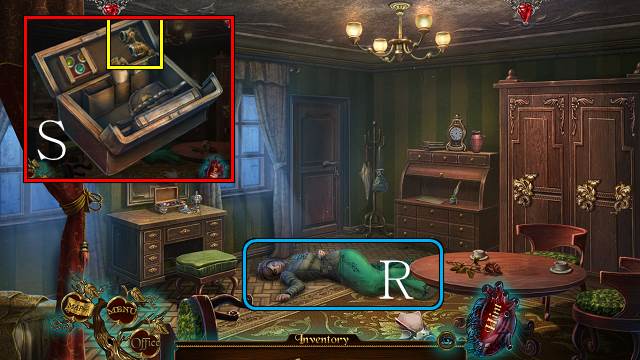
- Inspect the victim (R).
- Access the VALISE and take the GOGGLES WITH LENSES (S).

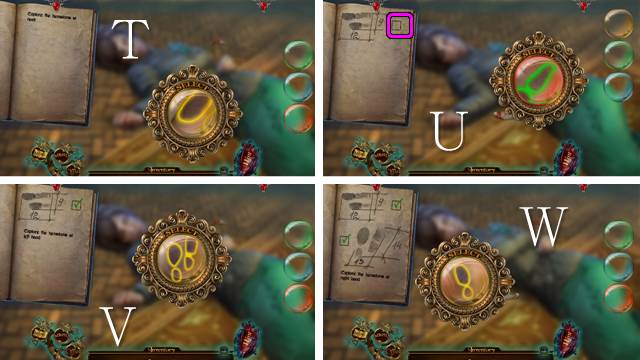
- Place the GOGGLES WITH LENSES, select the yellow lens and find the fingerprints (T), then measure them with the green lens and check the box (U); repeat the process for the left (V) and right hand (W).

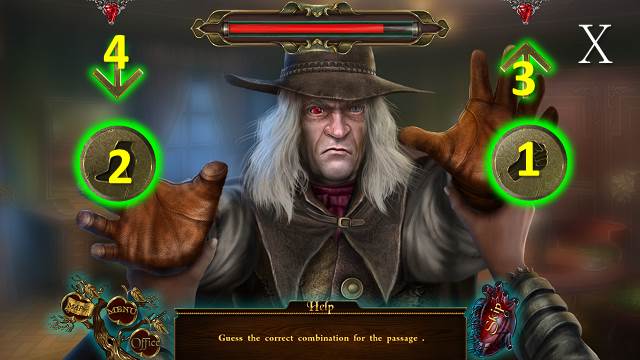
- Fight your assailant (X).

- Turn the page, use the blue, then green lens and check the box (Y); repeat for the right palm and turn the page (Z).
- Find the splinters with the red lens (A, B), then measure them with the green and check the box.

- Play the mini-game (C).
- Turn the page; use the red and green lens (D).
- Alternate left and right as fast as you can (E).
- Take the PATCH (F).
- Go to the Morgue.

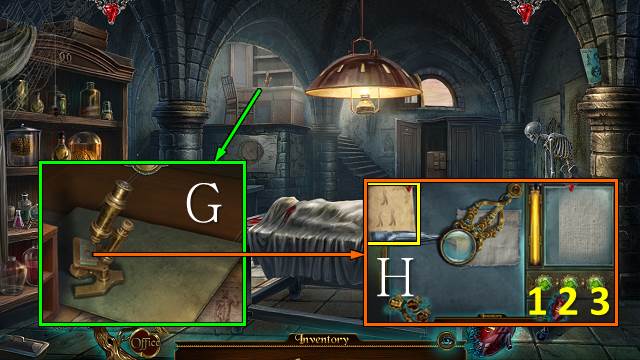
- Place the PATCH (G) for a mini-game.
- Particles can be found with lenses 1 and 3, 2 and 3, and 1, 2 and 3.
- Take the LIST OF PARTICLES (H).

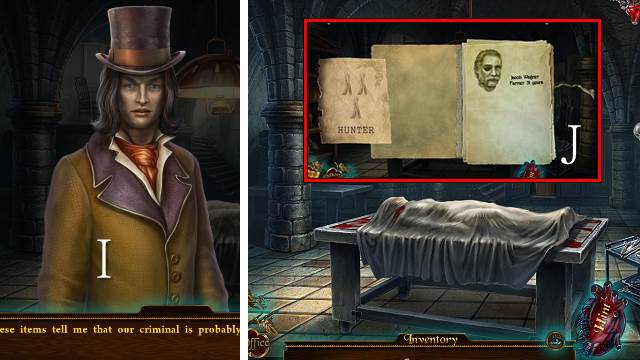
- Show the LIST OF PARTICLES to Auguste (I); you receive the ANALYZED EVIDENCE.
- Access the LIST OF SUSPECTS and place the ANALYZED EVIDENCE; leaf through the pages (J).
- Go down and right.

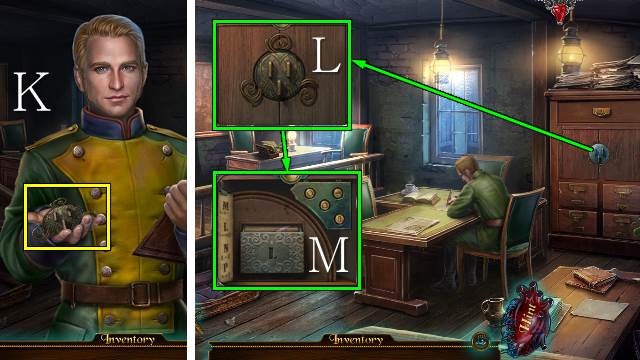
- Give the ANALYZED EVIDENCE to the Constable; take the ROUND KEY (K).
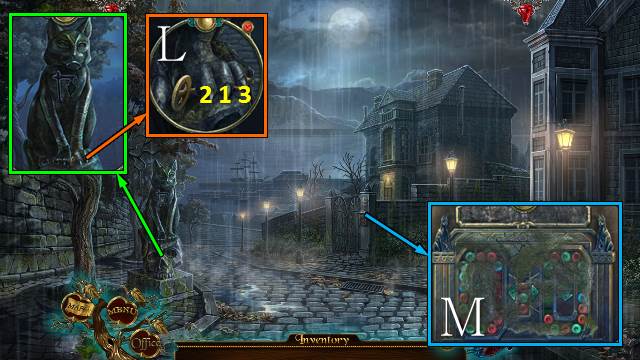
- Place the ROUND KEY and turn it (L).
- Enter the symbols for L, open the drawer and take the FILES (M).

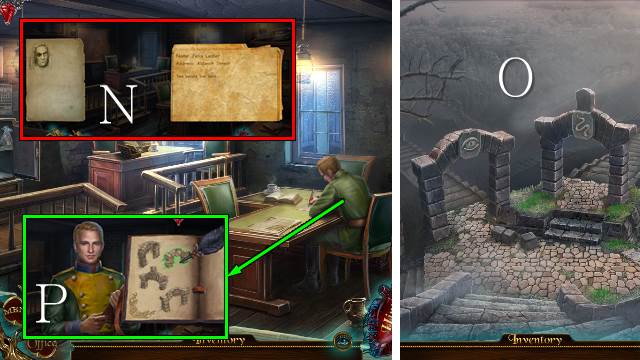
- Access the FILES and leaf through the folders; you receive the SUSPECT’S ADDRESS (N).
- Go down and left.
- Interact with one of the gates (O).
- Go down and right.
- Talk to the Constable; select heart, heart, eye, and snake; you receive the LABYRINTH CLUE (P).
- Go down and left.

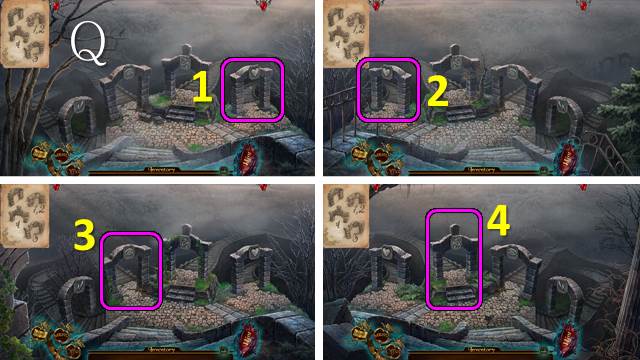
- Place the LABYRINTH CLUE and follow the route (Q).
Chapter 4: The Suspect’s House

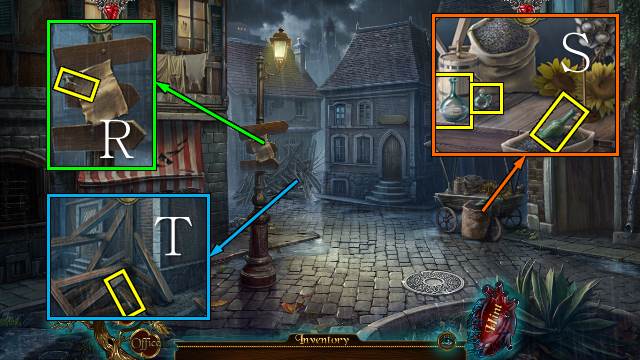
- Move the SWORD until you can take it (R).
- Take the BOTTLE OF WATER and BOTTLE OF ALCOHOL; open the press, put in some seeds, close the lid, turn the handle and take the JAR WITH OIL (S).
- Move the boards until you can take the NAIL PULLER (T).
- Go right.

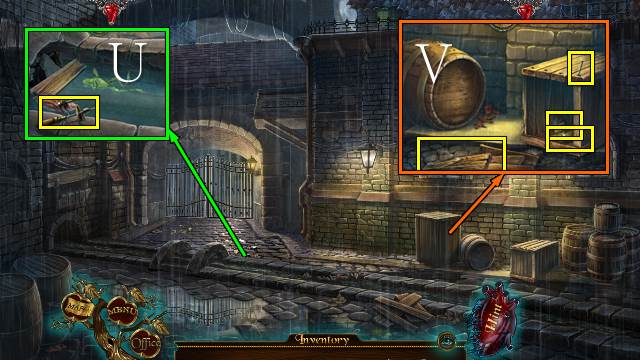
- Take the DRILL (U).
- Use the NAIL PULLER; take the NAIL, BUTTERFLY, ZINC and BOARD (V).
- Walk down.

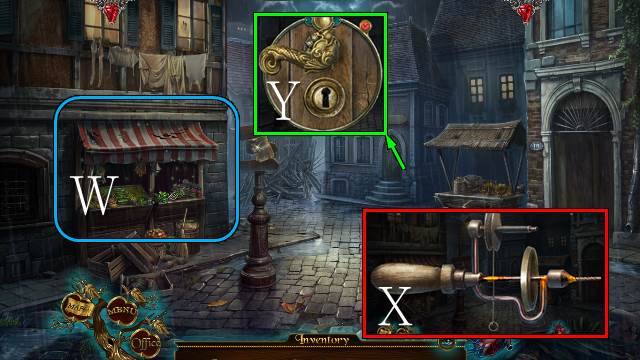
- Place the BOARD; play the HOP (W).
- You receive a CABLE.
- Access the DRILL, place the CABLE and use the JAR WITH OIL (X).
- Use the DRILL and open the door (Y).
- Go forward.

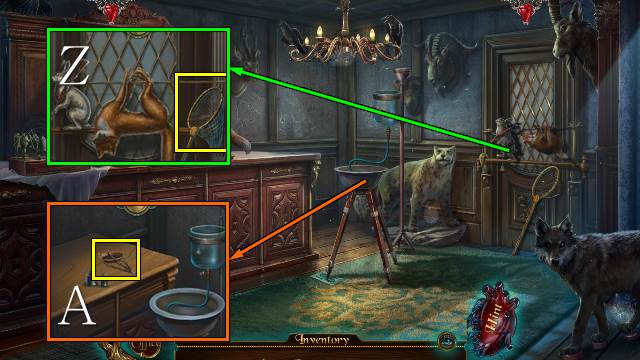
- Take the NET (Z).
- Take the PART OF SCALES (A).
- Walk down.

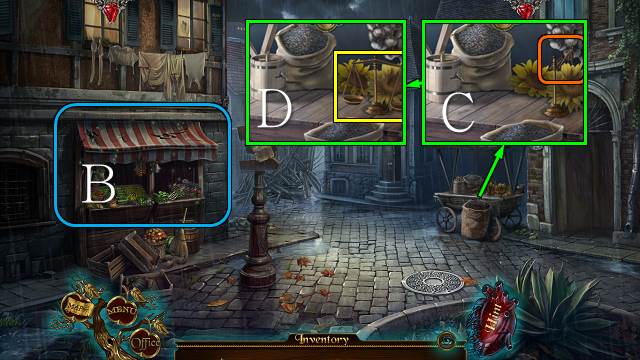
- Play the HOP (B).
- You receive a GEAR.
- Move the scales (C); place the PART OF SCALES and NAIL and take the SCALES (D).
- Go right.

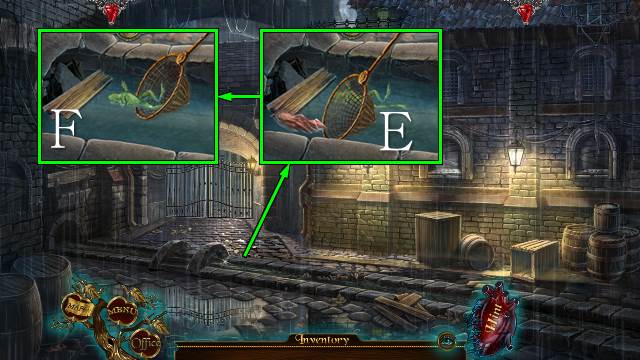
- Use the net to first get the WET CLOTH (E), then the DEAD FROG (F).
- Go down and forward.

- Open the turtle shell and place the GEAR; take the PIECE OF RECIPE (G).
- Place the PIECE OF RECIPE, ZINC, SCALES, BOTTLE OF WATER and BOTTLE OF ALCOHOL, place the weights and ZINC on the scales, put the zinc, water and alcohol in the beaker, turn the tap, and put the DEAD FROG and SWORD in the bowl (H); take the EMBALMED FROG (I).

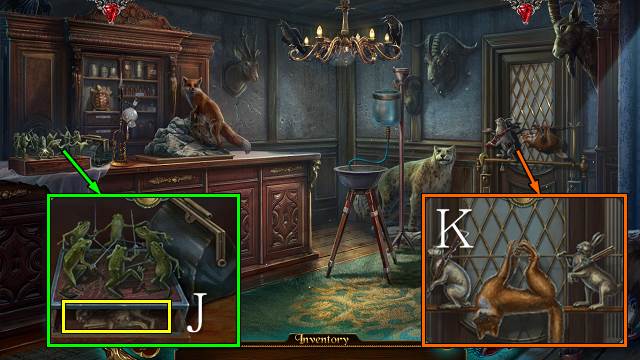
- Place the EMBALMED FROG and take the HARE (J).
- Place the HARE (K).
- Go forward.


- Move the toes and take the CASE KEY (L).
- Use the WET CLOTH and place the SUSPECT’S ADDRESS (M).

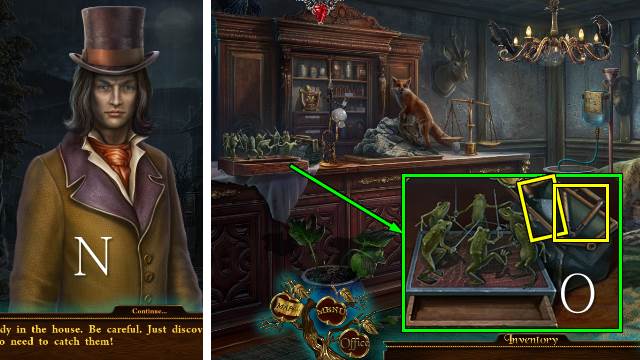
- Talk to Auguste (N).
- Walk down.
- Use the CASE KEY; take the TROWEL and PRUNING SHEARS (O).
- Go forward.

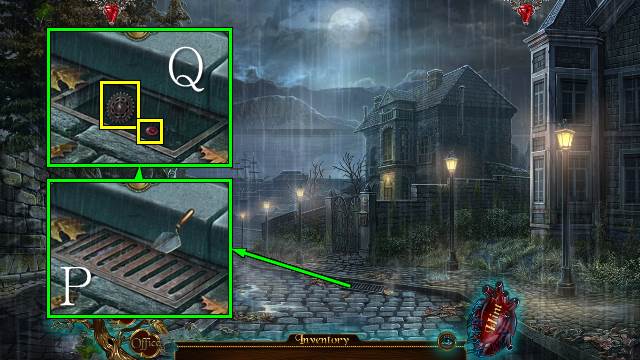
- Use the TROWEL (P); take MARBLE 1/3 and the GEAR (Q).
- Walk down.

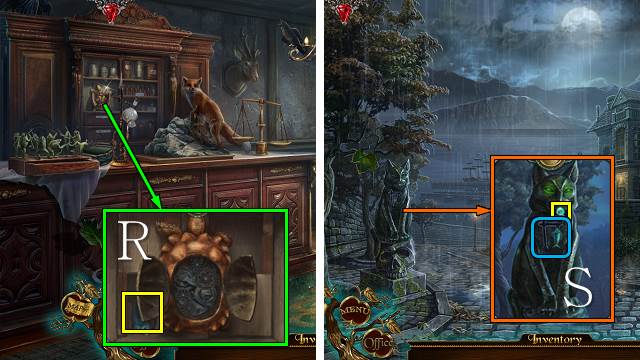
- Place the GEAR; take the FISH (R).
- Go forward.
- Place the FISH and take MARBLE 2/3 (S).
- Go forward.

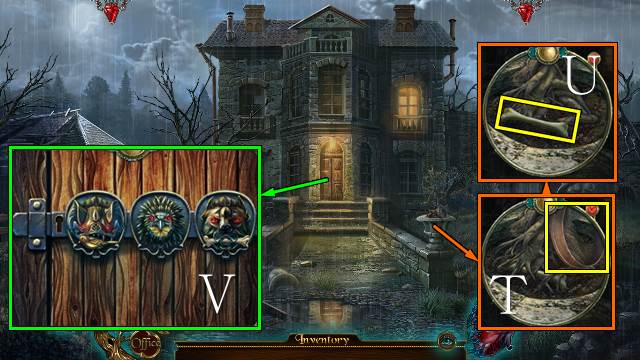
- Take the SIEVE (T); use the PRUNING SHEARS and take the BONE (U).
- Place the BUTTERFLY and BONE and give each head its correct food (V).
- Go forward.

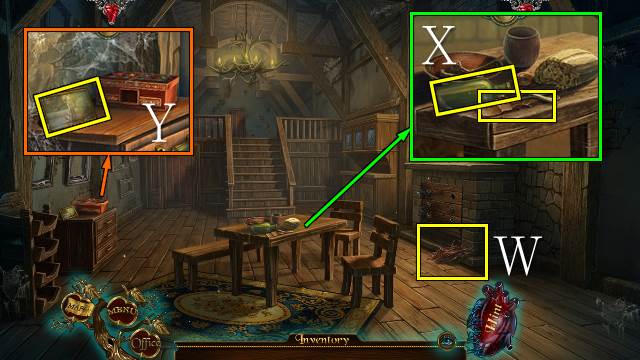
- Take the THREAD (W).
- Take the BOTTLE and WOODEN SPATULA (X).
- Take the PHOTO (Y).
- Walk down.

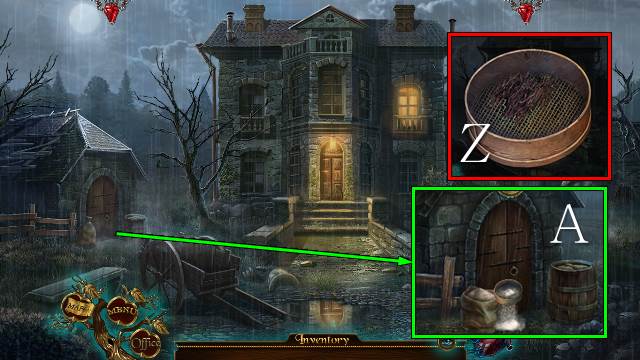
- Access the SIEVE and fix it with the THREAD (Z).
- Open the sack and use the SIEVE; you find MARBLE 3/3 (A).
- Walk down.

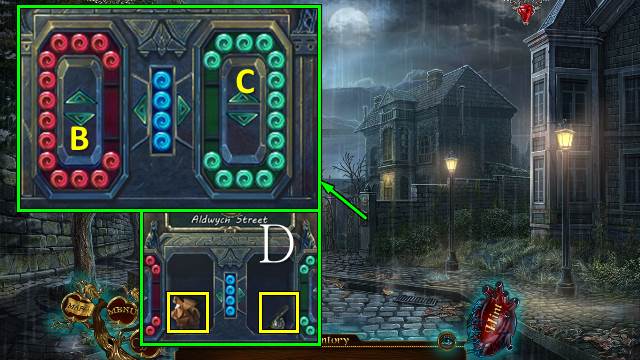
- Place the MARBLES for a mini-game.
- Move four marbles to the left or right in between each of these steps: left-B7-C5-B-C-B-C-B-C3-B4-C2-B2-C-B2-C2-B3-C-B3-C-B3-C-B-C-B-C-B8-(C-B)x8-C3-B-C4-left.
- Take the COMBINATION and HOOK (D).
- Go forward twice.

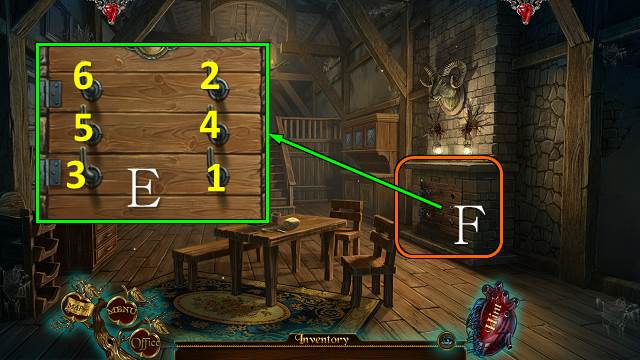
- Place the hook and move the hooks in order (E).
- Zoom into the fireplace (F).

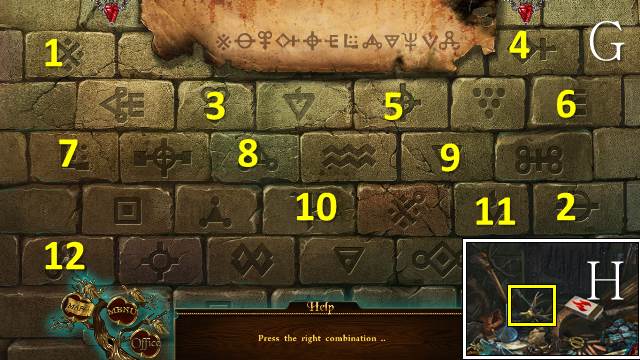
- Place the COMBINATION for a mini-game (G).
- Take the DOOR KEY (H).
- Back out.
- Go forward.

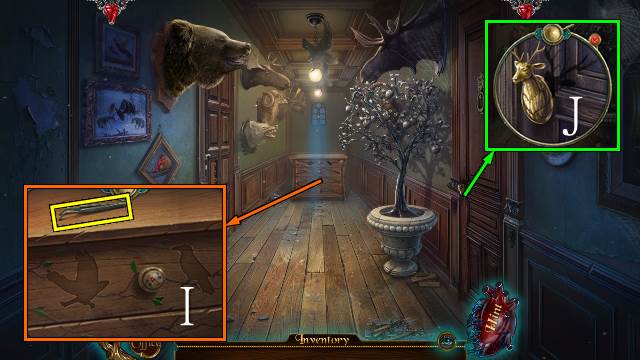
- Take the TWEEZERS (I).
- Place the DOOR KEY (J).
- Go right.

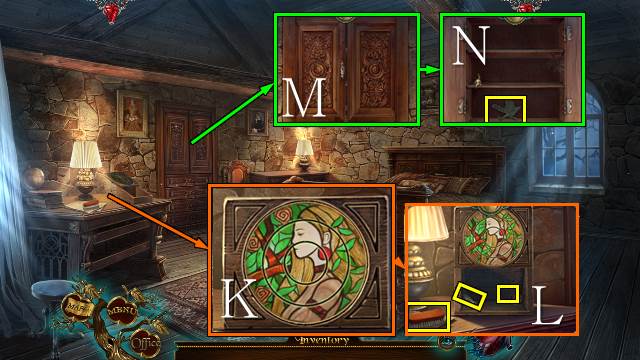
- Play the mini-game (K).
- Take the BRUSH, BEAR TOOTH 1/2, and ZODIAC SIGN 1/2 (L).
- Use the WOODEN SPATULA (M); take the WICK and METAL CROW 1/2 (N).
- Walk down.

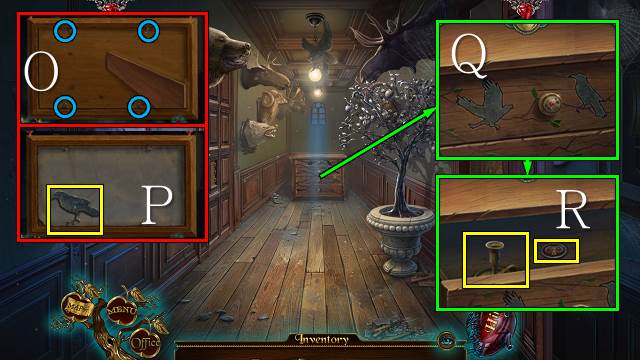
- Access the PHOTO, turn it over and use the TWEEZERS four times (O); remove the back panel and take METAL CROW 2/2 (P).
- Place the METAL CROWS (Q); take the CANDLESTICK and ZODIAC SIGN 2/2 (R).
- Walk down.

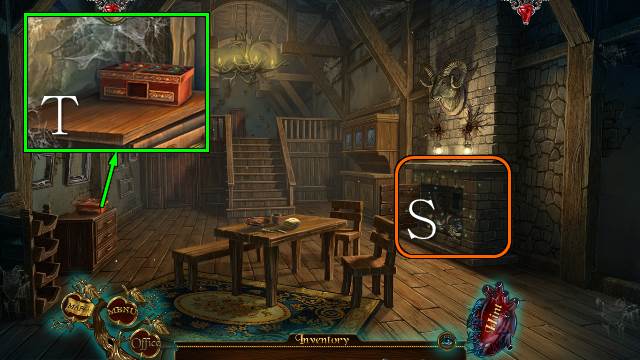
- Use the BRUSH and play the HOP (S).
- You receive the MATCHES.
- Zoom into the box (T).

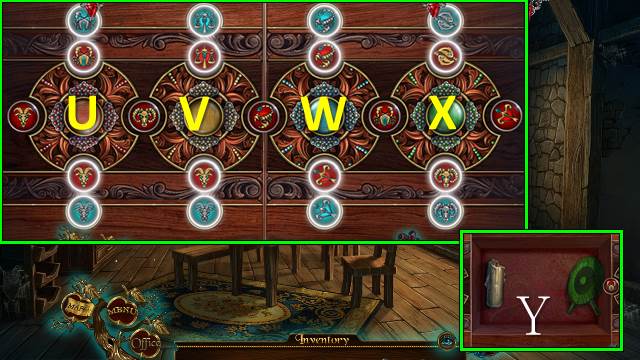
- Place the ZODIAC SIGNS for a mini-game.
- Solution: U-V-U-V3-U-V-X3-W2-V-W2-X-W-X2-W2-X3-W2-X3.
- Take the CANDLE and TARGET (Y).
- Go forward and right.

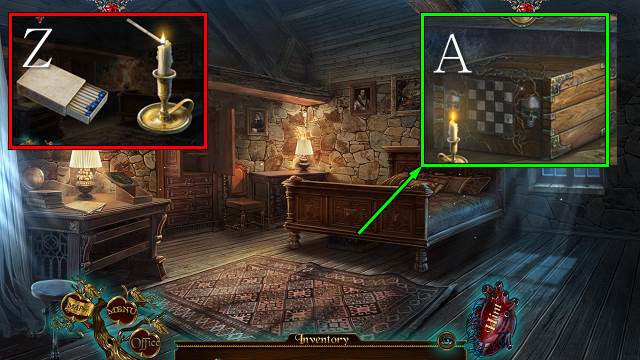
- Access the CANDLESTICK and place the CANDLE, WICK and MATCHES; take the LIT CANDLE (Z).
- Place the LIT CANDLE and zoom in for a mini-game (A).

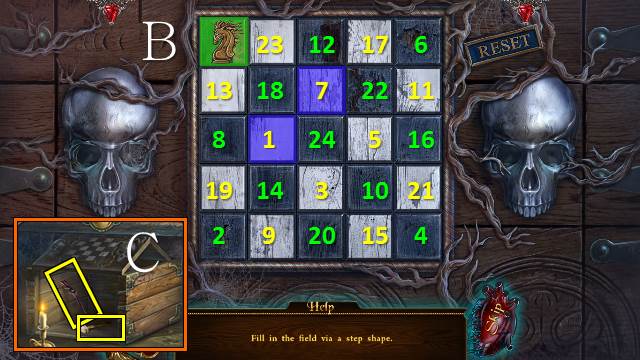
- Solution (B).
- Take RIFLE 1/2 and the GLASS CUTTER (C).
- Walk down.

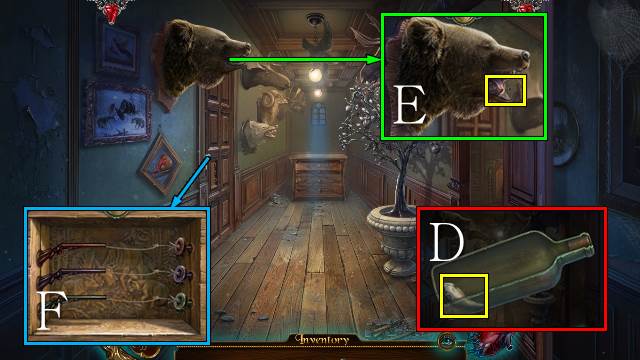
- Access the BOTTLE and use the GLASS CUTTER; take BEAR TOOTH 2/2 (D).
- Place the BEAR TEETH; take RIFLE 2/2 (E).
- Place the TARGET and RIFLES (F).
- Go left.
Chapter 5: Paul’s Story

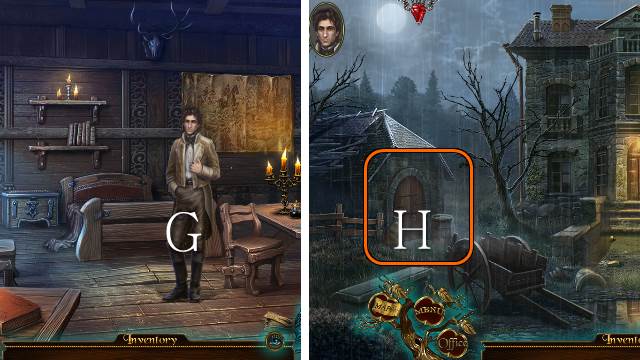
- Talk to Paul (G).
- Inspect the barn (H).

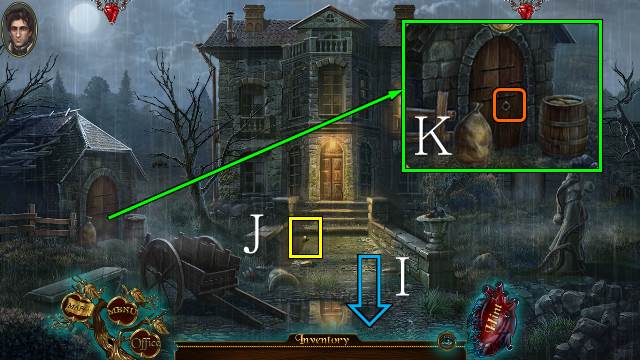
- Walk down to hide (I).
- Take the BARN DOOR HANDLE (J).
- Place the BARN DOOR HANDLE, open the door and go in (K).

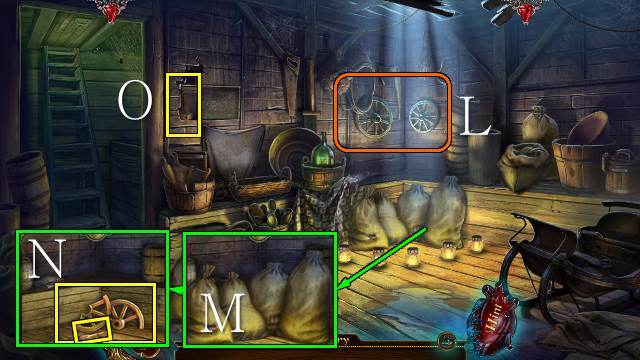
- Move both wheels (L).
- Remove the sacks (M); take the WHEEL and WEDGE (N).
- Take the HAMMER (O).
- Walk down.

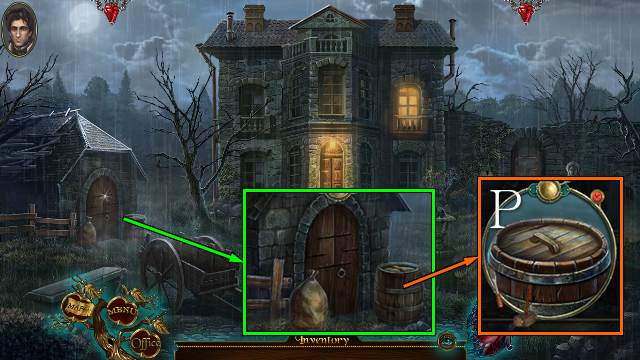
- Use the WEDGE and HAMMER and take the METAL RING (P).
- Go left.

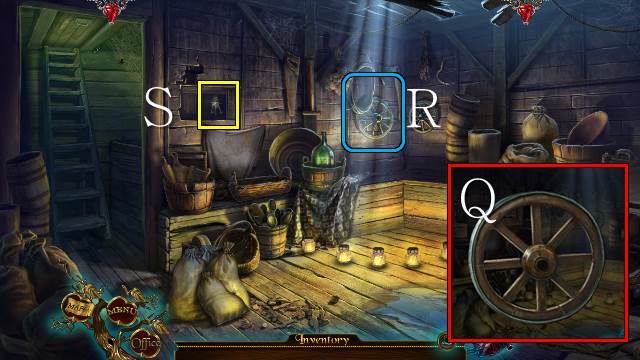
- Access the WHEEL, put the pieces together and place the METAL RING; take the WHEEL (Q).
- Place the WHEEL and turn it (R).
- Take the BUNCH OF KEYS (S).
- Walk down.

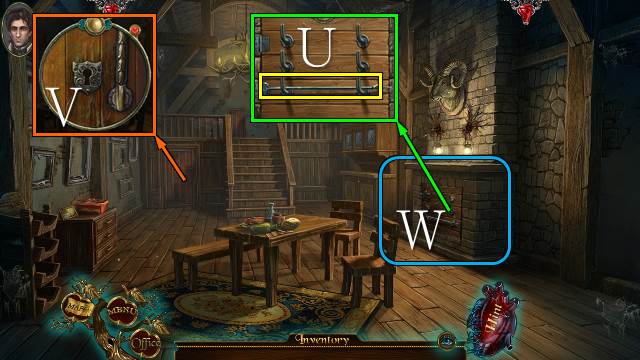
- Use the BUNCH OF KEYS; go forward (T).


- Take the POKER (U).
- Use the BUNCH OF KEYS (V).
- Hide behind the fireplace (W).
- Go left.

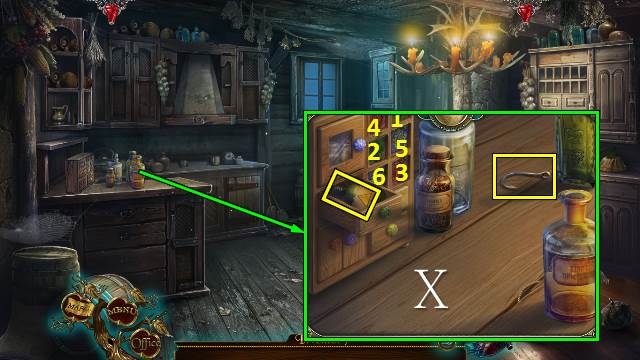
- Move the bottles and take the FISH HOOK; push the buttons and take the KEROSENE (X).

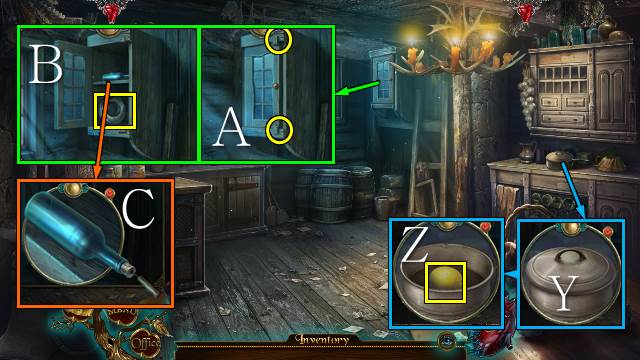
- Lift the lid (Y), remove the fruit and take the LEMON (Z).
- Undo the latches (A), open the cabinet and take the FISHING LINE WITH HOOK with the FISH HOOK (B); take the bottle and remove the CORKSCREW (C).
- Walk down and forward.

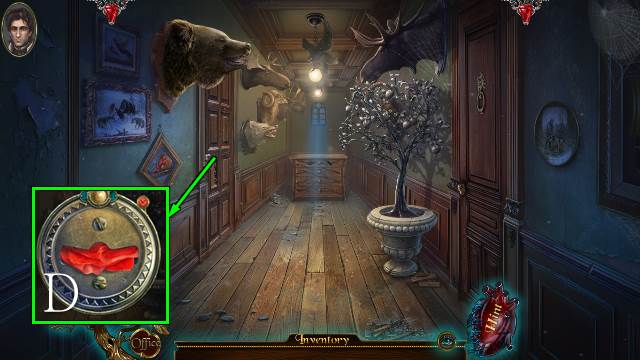
- Take the NAPKIN with the CORKSCREW (D).

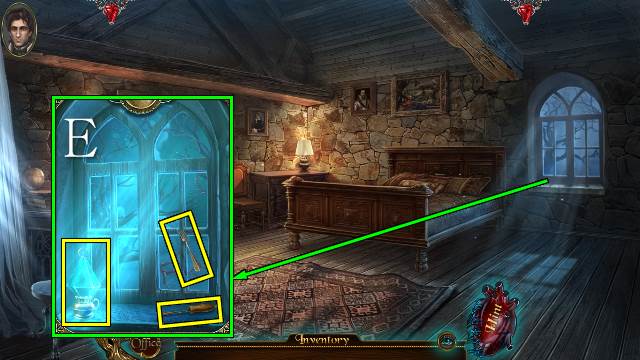
- Look through the window; take the FORK, FLINT 1/2 and the EMPTY LAMP (E).
- Walk down twice and go left.

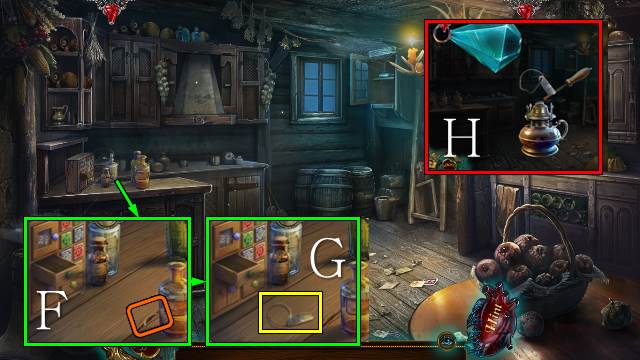
- Use the FORK (F) and take FLINT 2/2 (G).
- Access the EMPTY LAMP, fill it with KEROSENE and use the FLINT; take the LAMP (H).
- Go to the Barn.

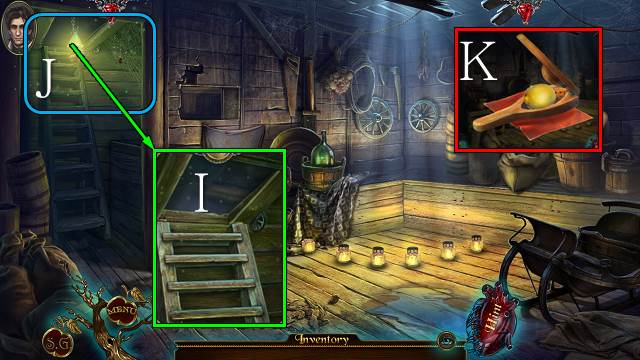
- Use the POKER, open the hatch and use the LAMP (I).
- Play the HOP (J).
- You receive a CITRUS JUICER.
- Access the CITRUS JUICER, place the LEMON and NAPKIN and close the juicer; take the NAPKIN WITH ACID (K).
- Walk down.

- Use the NAPKIN WITH ACID and open the hatch (L); pull the lever and go forward (M).

- Take the PICKLOCK with the FISHING LINE WITH HOOK (N).
- Place the PICKLOCK for a mini-game (O).


- Remove the lock (Q).
- Play the HOP (R).
- Play the HOP that follows.

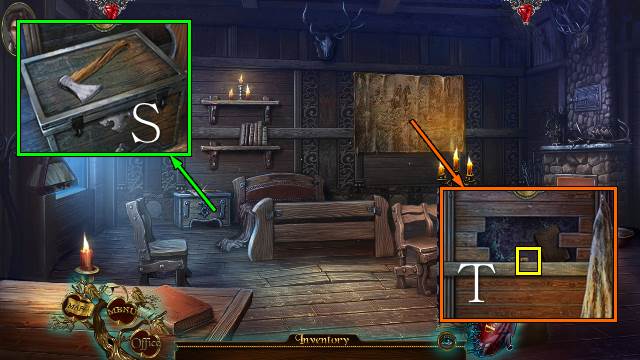
- Take the AXE (S); open the clasps and open the chest.
- Remove the tapestry and use the AXE; take the BLOCK (T).

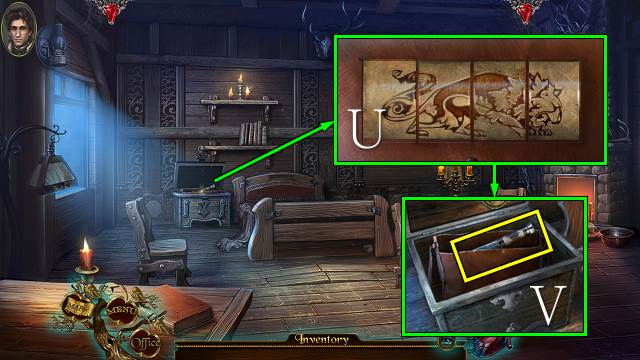
- Place the BLOCK, solve the puzzle (U) and take the BLOODY KNIFE (V).

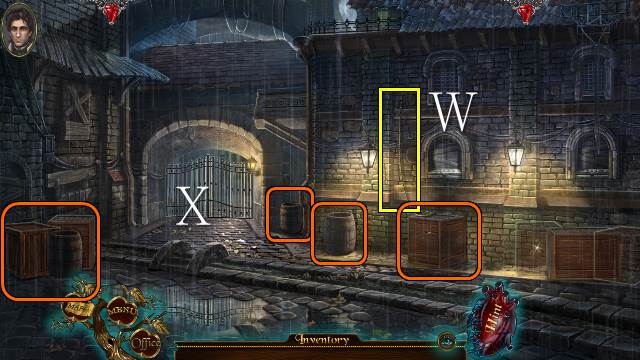
- Take the GRAPPLING HOOK (W).
- Move the crates and barrels (X).

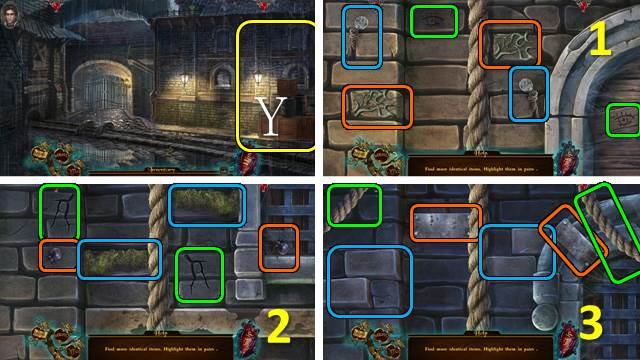
- Climb the rope (Y) and find the pairs of items.
- Go up.

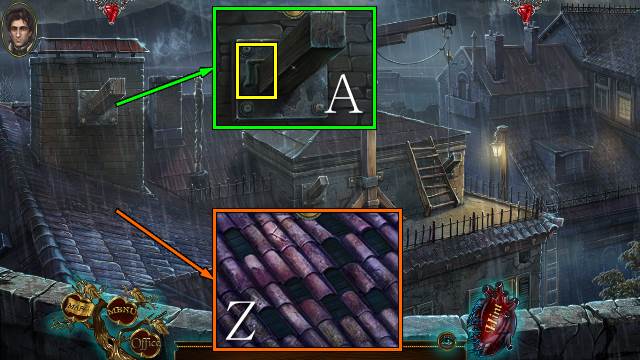
- Move the cracked roof tiles (Z).
- Take the WHEEL HANDLE and place the GRAPPLING HOOK (A).

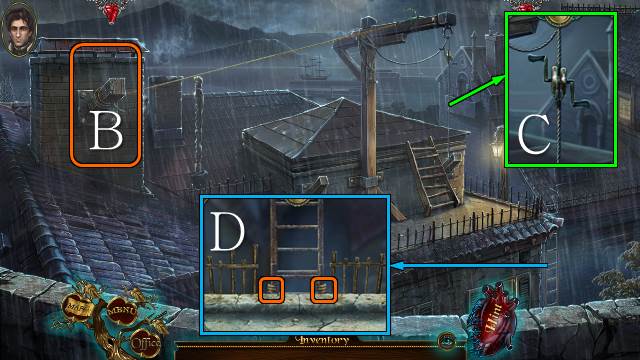
- Move the rope (B).
- Place the WHEEL HANDLE and move it five times (C).
- Use the BLOODY KNIFE twice (D).
- Go down the ladder.

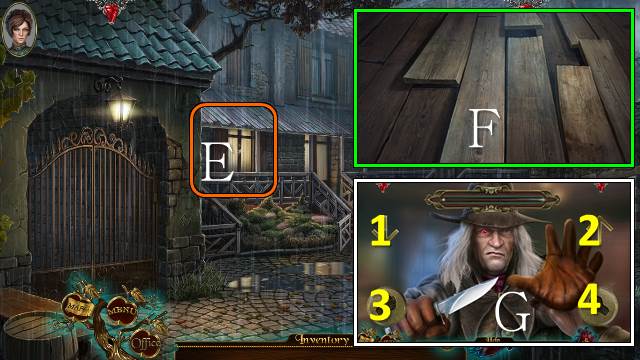
- Look through the window (E).
- Move the boards (F).
- Fight your assailant by selecting 3-4-2-1, 3-1-4-2 (G).
- Congratulations, you have completed Dark Tales: Edgar Allan Poe’s The Tell Tale Heart.


 Tesla's Tower: The Wardenclyffe Mystery Walkthrough, Guide, & Tips
 Letters from Nowhere Walkthrough, Guide, & Tips
 Mystic Diary: Missing Pages Walkthrough, Guide, & Tips
 Haunted Manor: Painted Beauties Walkthrough, Guide, & Tips
 Secrets of the Dark: Mystery of the Ancestral Estate Walkthrough, Guide, & Tips