Dragon Age Origins Walkthrough Part 3 – Circle Magi
You are to enter into the Harrowing. After a short conversation with First Enchanter Irving and Knight-Commander Greagoir, you enter into the Fade to begin your trial.
Inside the fade, go to the left and investigate the statue there to gain the codex entry for “Beyond the Veil: Spirits and Demons”. Now head to the right and look into the vase of healing to gain a Healing Poultice. Now head down the slope nearby the vase.
You will encounter a Wisp Wraith. Use your spells to bring it down, it will not be much of a challenge. Continue to follow the path and you will take the slope up and encounter a second then a third.
As the slope starts to descend again you will find yourself talking with a rat. This will eventually transform into a man who calls himself “Mouse”. He tells you a bit about your task here. Head on forward from there. Stop when you see a circle on your right. Mouse will state this is where your test will take place. There is also Lyrium Vein, interact with it to gain the “Lyrium” codex entry, the vein will refresh between now and when you need it.
Head on forward after that. You will meet another Wisp Wraith, kill it then head down. One more Wisp Wraith is waiting around the corner. Kill it then turn to the left. There is someone to talk to there, “Spirit of Valor”. You can challenge him to a duel. You can either just keep it at a duel until he is convinced you will win against your demon or you can kill him for more experience; Your call. Be sure to head straight across from the Spirit of Valor as well to find to find another vase of healing with a Health Poultice. Behind it is a twisted structure that you can look at to get the codex entry for the “Black City”.
Go to the northwest. You will be attacked by a pack of 3 spirit wolves. Continue forward and you will find a Sloth Demon in front of you. Talk with him some and you can get him to teach Mouse to take a Bear Form if you answer his three riddles. The answers are:
1 – A Map
2 – My Tongue
3 – A Dream
With this, Mouse is now a bear. Head back toward the circle that Mouse pointed out where the Demon will appear. Here you will find a Spirit of Rage that will talk to you. Mouse will be shown to be in a bargain with this demon. He will take his bear form and help you in battle.
The Spirit of Rage and its four Wisp Wraiths are easy to beat, especially with Mouse in bear form. Just fire off a few spells from a distance at the Spirit of Rage and the battle will end. Kill some of the wisp to get some easy experience.
After the battle you need to deal with Mouse. Just take whatever path you would like to get through. Mouse will reveal his true form and you will complete your test.
A Mage Of The Circle
When you awake you will find your friend Jowan. You can talk with him to learn more about the Circle of Magi, the Harrowing and the Tranquil. After all that he will tell you that First Enchanter Irving has summoned you. He is in his study. Head over to the left and back to the wall. There is a chest with a Buckle of the Winds inside it. Now head all the way to the north in the Apprentice Quarters and look into the Vanity to find some blank vellum. Now head out of the quarters and hop over to the next set of Apprentice Quarters. In the middle of the beds is another chest with 11 copper inside it. Again head to the end of the quarters and search the vanity. Inside it you will find an Apprentice Cowl. Head back to the main hall.
Head around to the library area and explore it. There you will find the codex entry for “The Fade”. Talk with some of the people to catch up on the happenings about the tower. Continue onto the next area and explore it to find the codex entry on “Mana and the Uses of Magic”. Head up the nearby steps.
Floor 2
Talk with Owain if you want to learn something more about the Tranquil. After that head through the door in the southeast. Just on the other side of the door is Senior Enchanter Sweeney. You talk with him for a quick and amusing conversation. You can also talk with Senior Enchanter Torrin in the back of the room to learn about the different fraternities within the Circles of Magi and gain their codex entry. Explore this room to find the codex entries for the four schools of magic, “Primal”, “Creation”, “Entropy” and “Spirit”, the entry for the “Hierarchy of the Circle” and “History of the Circle”.
Take a little time to explore the Mage's Quarters and pick up some alchemy ingredients and potentially a lesser lyrium potion. This exploration will likely turn up Collen as well, who will be infatuated with a Female Mage character. In between the Mage Lab and dorms, you will find the codex entry for the “Cardinal Rules of Magic”. This is inside the room the Collen is standing guard at. Be sure to investigate the Mag Laboratory as well to get more supplies and the codex entry for “Maleficarum”. Head int othe next room for the codex entries: “Rite of Annulment”, “The Chant of Light: The Blight”, “The Maker”, “The Founding of the Chantry” and”Andraste: Bride of the Maker”.
Head now to the north, toward the First Enchanter's Office. There you will meet Duncan, a Grey Warden. After introductions, you will be asked to show him to his quarters as a courtesy. You can talk with him to learn his take on the war and the relations between the Chantry and the Circle. This conversation will grant you the “Darkspawn” codex entry. When you and Duncan make it to his guest quarters, you will receive the “Grey Warden” codex entry.
Head outside and you will encounter Jowan. Talk with him and agree to follow him to learn what is going on. You will meet Lily, Jowan's lady interest. This is all a prelude to Jowan asking for your help to aid them in their escape and attempt to destroy Jowan's Phylactory.
Now you have some choices, you can report them to Irving and you will be asked to play along with their plan. So, either way you need a Rod Of Fire request form. Talk to him and he
If you do not want to report them then head to the Mage Laboratory. Talk with Senior Enchanter Leorah. After a little effort you will reveal that there is a spider infestation in the store room behind her. Inside the storeroom you will find many good items that will help a lot. Head into the back and turn to the east. Just a bit past the first turn you will encounter the first of the spiders. Kill it then keep moving backward. When you get to the northeast corner, expect a pair of spiders to attack you. Be sure to investigate both parts of the store area here to find some goods in the wooden crate behind the boxes to the east and the Wooden Barrel to the north. Start to the west and you will find another spider waiting for you. Continue on after you kill it.
About the center you will encounter another spider. Be sure to loot the nearby chest as well since they have some mage-only boots. As you continue west there is another spider that will attack you when you get close to a hanging cocoon. When you approach the second hanging cocoon, two spiders will attack you. Kill them then head a little to the south. Behind the boxes you will find another wooden crate with some treasure inside it. Now head to the north. As you approach the entryway, one last spider will attack you. Kill it to complete the quest. Head on out and talk with Leorah. Now head into the center room and talk with Owain to get the form for a Rod of Fire.
Now, depending on your course of action, you can get most of the Senior Enchanters to sign off on this. Sweeney in the library can be persuaded. You can also get Senior Enchanter Torrin, also in the library, to sign off for your form but he wants a research proposal. If you complete(d) Infested Storeroom, then Loerah will without a second thought. If you reporting to First Enchanter Irving he will in order to get the scheme to move forward. Once it is signed, return to Owain to get the rod, then head to the Chapel and talk with Lily and Jowan.
Either way, you need to head for the repository now. Go down to the first floor and to the northern end. Use the door to get into the basement. Head up to the first door, Just respond to Lily to get through. When you try to get through the second door, there is an unexpected complication. Now head for the third door. Once there, you automatically use the Rod of Fire on it, which in turn, activates a nearby Sentinel. Defeat it then head through the door, turning north. As you do, there are two more Sentinels that will come at you. Defeat them then go into the room on your left to loot a chest, and after, continue on your way north. There is another room you can look into just before the next door.
In the next room you face another pair of Sentinels. Defeat them, loot the nearby chests, then continue north. In the following room you have three Sentinels, one of which is robed, thus a spellcaster. Defeat them to move on. Through the next door you will need to kill three Deepstalkers and one Deepstalker Leader. Head a little to the north to loot the area then go south through the next pair of doors. Between them through is another trio of Sentinels, again with one robed. Kill them then head through the southern door. Loot the room and after head west. Turn south to find a straight trio of Sentinels. Be sure to also loot the second cell you find for some treasure from the wooden crate in the back of it behind the table and get the chest in the cell opposite. Now head through the western door.
On the other side of that door you will encounter four sentinels, one of which is robed. Kill them then head on south. You will find your way into the Repository at this point. Explore around. None too far from a decaying wall is a statue, in the western part of the room. Talk with it to learn about the Tevinter Imperium. Be sure to look into the chest in the northern for a Blackened Heartwood Staff. Now move the statue in the southern part of the room to learn it amplifies spells. Move the bookcase in front of it then use it again to destroy the wall behind the book case. This will gain you access to the phylactery chamber.
Once inside the phylactery chamber you will encounter a trio of Sentinels, one of which is a guardian. The guardian will be tougher but your party will win with fair ease. Loot the chest on the far side of the entrance then head up the stairs. You will see Jowan's phylactery to the left. Now head back down the stairs and out the previously locked door. Head out of the basement to the first floor. Now, depending on your choices you must face the consequences and decide just how much you want to lie or attempt to talk your way out of. Either way, Duncan will come forward and claim for you for the Grey Wardens.





 Heroes of Ruin Gunslinger Skill Trees - GamersHeroes
 Metal Gear Solid 5: The Phantom Pain Episode 45 – A Quiet Exit
 Walkthrough Life is Strange – Episode 4: Dark Room
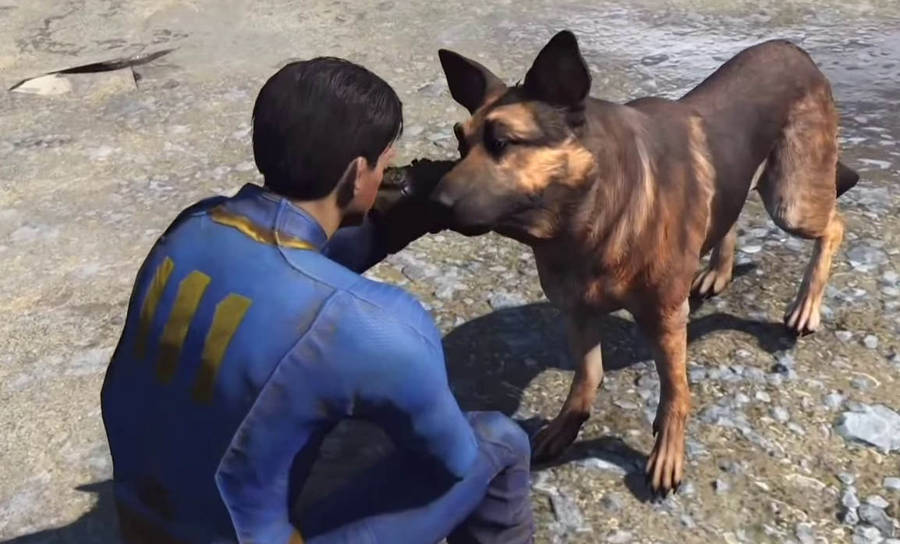 Fallout 4 Complete Companions Location Guide - Where To Find All Companions & Special Perks
 . Plays October 23, 2011