White is almost maze-like in its layout. Instead of the large open areas of some other maps, like Dagger or Giant, this map focuses more on hallways and straightaways. That said, the action never becomes truly stifling thanks to the fact that much of this map operates on multiple levels, making ramps and ladders very important to gaining control of this level. If you remember the N7 mission from the campaign in which you had to reactivate three beacons in order to save a doctor from Cerberus, you will be right at home here, as these two levels are actually one in the same.
You will begin your mission at the landing pad. This circular area is all the way at the southern end of the map, and protrudes slightly past everything else, making it a lousy place to hold up towards the beginning of the mission but a surprisingly great spot to funnel the enemies through during your final stand. You can take cover behind the Cerberus ship directly in the center of the landing pad to protect yourself from almost all of the enemy’s fire coming from the stairs to the north. You will also find a few barriers erected behind the fighter, although they won’t do a whole lot of good unless the enemies manage to breach your defenses at the northern stairs. The only downside to holding out at the landing pad is that there are no ammo crates here, so you will have to venture out to grab some at some point. This is what makes defending the landing pad during some of the earlier and middle waves a lousy proposition, and what makes it okay to defend during the last wave; since you won’t be fighting any more waves, feel free to use every bullet you have during the final wave. The closest ammo crate to the landing pad is up the steps to the right and then down to the south. You will find it nestled by itself in a corner.
Heading in the opposite direction of the ammo crate will take you to the catwalks on the upper level or the area. From here, you can look down upon the landing pad and the hallways leading to it from the north. While enemies can come up here when you are defending the landing pad to try and make your life tough, you can turn it around by clearing them out of the catwalks and taking up position here yourself while the rest of your squad defends the landing pad during the final wave. Using a Sniper Rifle, you can eliminate a decent number of enemies before they can reach your squad. Just be sure to keep an eye on your right flank, as enemies will spawn from the hallways above. You can even bring the rest of your squad up here to help you out, as the ammo crate at the back of this area will ensure that you never run out of ammo, while the door in front of it will lead you right back to the landing pad. If you control the catwalks, there won’t be many spots for the enemies to rush you from, as they will only be able to enter the catwalks from the northern, southern, and eastern hallways, all of which converge on the same opening. Keep your guns trained on this opening to mow the enemies down as they rush to get to you. This works especially well against the Reapers, because many of their units have to get close to you in order to deal the best damage.
Heading straight out of the catwalks will lead you to a ladder heading down to the lower level and the stairs leading back to the landing pad. The lower level is possibly the most open area of the White map. It takes the form of a wide corridor, open to all sides. While this area may initially seem a poor place to mount a defensive, it can be very useful in the right situations. When Atlas mechs, Brutes, or Geth Pyros attack, facing them in close quarters can be deadly. It can therefore be helpful to lead them into battle in the lower level of the map. Use the wide open space to circle around your enemies, and have your squad hit them from all sides. When not facing hulking brutes of enemies such as these, steer clear of the lower level. The last thing you need is to take fire from multiple sides during a stressful wave. A small path at the southern end of this area makes for a decent escape route, as it will lead you south and to the lower stairs.
The stairs leading back to the landing pad are the better way to go when leaving the catwalks. If you are simply overwhelmed on the catwalks, you can jump down the ladder, sprint to the south, down the stairs, and loop back around from the landing pad to come up behind your enemies on the catwalks, by the ammo crate. If you choose to launch your offensive from the stairs themselves, there will be just enough cover to hide your whole squad behind. This can make the stairs valuable for weakening enemy squads before a final retreat to the landing pad, since you can focus your fire on the same targets to take them out quickly. Just note that a sustained battle on the stairs is not the wisest strategy because of multiple flanking opportunities on the enemy’s part. The small path leading to the south from the lower level can become deadly when enemies start using it to flank you, while ladders and stairs along the right side of the stairs can be used by enemies to quickly jump down onto your level.
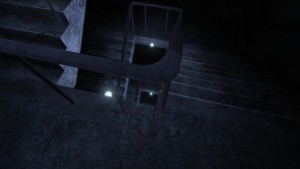
You would be better off leaving the catwalks by heading north, towards the staircase and the northernmost room on the map. This tiny area is rife with cover, with chairs and desks providing great points for you to pop out from when attacking. Vanguards and Sentinels will feel right at home in here, as their close range abilities like Nova and Tech Armor will be at their best in situations such as these. Just as this area makes a great spot for you to hold up, though, it also makes a great spot for enemies to make camp. Because of all of the cover in the area, it can be very difficult to drive a determined enemy away from the upper room, especially the more cover-minded Cerberus forces. Use Biotic Charge, Pull, and Singularity to render the cover useless before dashing in and taking it for yourself. Set up some Proximity Mines or Turrets around the room if you can, and hold out for the long haul.
The hallway on the right-hand side of the upper room will lead down to a west-facing hall that will spit you out into the launch ramp area. There will be an ammo crate in the corner of this first hallway, so head down here if you are holding out in the upper room and need to refill your ammo. Although the interior of the lab in front of the launch ramp has a few decent cover spots, it is also open to entry from multiple angles. It’s okay to hold out in here during a desperate battle, but don’t make it your first choice. The launch ramp outside consists of several catwalks arranged into an H shape. Melee-focused Vanguards will find that Biotic Charging out here can be effective, and an ammo crate rests at the top of the area, but otherwise there is little value to holding this spot. Cover is thin and you will be open to attack from most sides. Stick to the upper room or the landing pad if you really want to wear the enemies down.


 5 Quality Multiplayer Games With Low System Requirements
 LEGO Marvel Super Heroes – Deadpool Bricks Guide
 Pokemon X and Y Review: First Impressions
 Why PES 2013s early release date could be a yellow card for FIFA
 Natural Doctrine Guide: Ursa Goblin Mine Guide