Borderlands 2 Captain Scarlett and Her Pirate's Booty Walkthrough Part 8 – Two Easy Things: Getting To Sandman
Borderlands 2 Captain Scarlett and Her Pirate's Booty Walkthrough Part 8 – Two Easy Things: Getting To Sandman
Scarlett wants you to go and kill Sandman in Hayter's Folly to collect his piece of the mystic compass. Head on back into Oasis. Once you get there head over to the West then turn to the North as you get close to the town itself. Head through the archway just to the North of it. Head to the Northwestern corner to find the area you are looking for. As you close in, the way is barred to your 'skiff so hop out and head to the North, facing West. Scarlett is kind enough to first test catch phrases on you and to explain why she is sending you after Sandman.
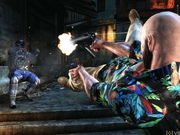
As you head into the camp go over to the left and hug against the chests on the metal platform This gives you a nice vantage point to fire on everyone else. There are a number of pirates below you who will fire once they notice you. If you are quick you can get some surprise shots in on them first. A few will spawn close to the top of the slope you are on so watch over to the North. As you head down the slope you will encounter Gunners as well so be ready. You will likely encounter Rogues as well, a shielded version of the Rapscallion. As the fight so on, some Powder Monkeys will make their appearance. Remember to pick them off from as far away as possible. They love to explode on you and lob grenades. Head on down the slope after taking out the pirates and go into the cave that you find at the base of the slope. There you will find the entrance to Hayter's Folly. Loot what bodies you can then head inside.
Things get more difficult once you are inside. Thankfully you will find an Ammo Dump just a little ways down and to the right. To the right of that you will find the Guns Vending Machine. Opposite those is located the Fast travel Station and the Dr. Zed's Vending Machine. When you are restocked head around to the far side of the pond.
Head on up the stairs and you will encounter a Badass Cannoneer. These are a much tougher version of the Pirate that you encountered earlier. Pull out some Electric to sluice through their shield then Fire-type to kill them quickly. Remember head shots are your friends (save for shotguns where you want to see the whites of their eyes). Things do not get any easier as you head down to go deeper into the folly. There is a second Badass Cannoneer before too long. Just head down the slope after that.
As you enter the next chamber of the folly you will find there are Crystalisks in this section. Try to take them out at a distance or just run in and smash the crystals that cover their 3 legs. There are few that will appear as you head to the North. If you hug against the Western wall you can avoid pulling most of them, or least ensure you get the first shot. There are also skags that appear here too. They roam a much wider area so watch out for them. Be extra careful as you get to the Northern tip as there is likely a Badass Skag waiting for you. Take your time if you get caught fighting here. There are a lot of enemies if they get pulled onto you as most fighting will draw in the Crystalisks. In a way, it is better to just kill them as you come upon them. Kill whatever attacks you and head around to the bend toward the South.
As you go around the bend, after all the beasts, you will find more pirates waiting for you. Fight your way on over to the West and find the lever. Give it a pull to get things moving forward once again. Of course, as you make for the South, staying in the water you encounter more Crystalisks. Remember to aim for their crystalline legs. Melee attacks are a great way to quickly kill these creatures. Keep going to the South and head on up the stairs along the Western side of the cavern. There is one final pair of Crystalisks that appears as you close in on the stairs. Take it out then start on up them.


