The original Unreal Tournament was released in 1999, and eight years later it continues to live on in a new incarnation now simply known as Unreal Tournament 3. For people who've never played Unreal Tournament, UT3 is a good introduction to the frenetic gameplay that is UT; to existing UT2004 and UT99 players, it's a mixture of the old and the new. Some UT veterans like it, some prefer older versions, but either way UT3 is proof that a venerable online gaming franchise can continue to evolve and possibly gather new fans along the way.

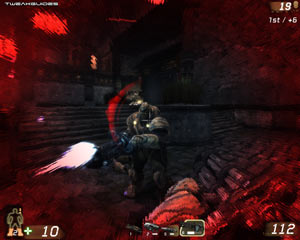
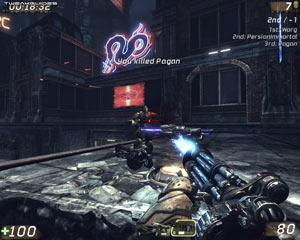
The heart of UT has always been deathmatch, and UT3 provides a deathmatch experience which is at once both new and very familiar to UT players. The theme music, weapons, tactics, environments and sound effects are all altered, but still recognizably 'UT' in nature. If anything the pace feels even faster than before, and there are times when playing UT3 that you may feel it's all just one great big blur of explosions, death and carnage. Fortunately UT3 has four other game modes besides straight Deathmatch which may suit those who want a slower pace, or want the opportunity to use team-based strategy: Team Deathmatch, Capture the Flag, Vehicle Capture the Flag and Unreal Warfare. There's something for everyone in UT3, as long as you're not too squeamish.
Given the game utilizes the new Unreal Engine 3 to full effect, this guide covers all aspects of the new engine in detail, from basic to advanced, and gives you all the information you need to tweak and customize both UT3 and other games based on the Unreal Engine 3 to suit your particular needs. Wade right in and see for yourself what the guide can do for you.
Note: This guide refers to the latest version of Unreal Tournament 3, Version 2.1. Make sure to check back regularly for updates.
Before getting into any game-specific settings and tweaks, this section covers the obligatory system optimization information I include in all my guides. If you've followed this advice recently, you can skip this section.
Many people report problems with this game and in almost all cases these are due to general system issues and not the game itself. With that in mind I strongly urge you to take some time and follow the advice below if you truly want this game, and indeed every other game you own, to run at its fastest and most trouble-free.
The place to start is with the TweakGuides Tweaking Companion. It is the complete system optimization guide for Windows users. Designed for novice and advanced users alike, it is written in plain English to help you genuinely understand all aspects of Windows and your PC. The guide covers every major topic, from the correct installation of Windows and critical drivers and software, through to recommendations for every significant setting and feature, all the major performance and convenience tweaks and customizations, as well as detailed troubleshooting advice. There are also links to a range of reliable free applications which can enhance your system and give you viable alternatives to purchasing commercial software. There are separate versions available for Windows XP, Windows Vista and Windows 7.
If you've ever wondered what common graphics and display settings like FPS, VSync, Refresh Rate, Antialiasing and Anisotropic Filtering are, and how they really work, then check out my Gamer's Graphics & Display Settings Guide for all the details in an easy to understand format. The guide also gives you a rundown on exactly how a game goes from a being a set of files on your hard drive to a 3D image on your screen, including relevant performance tips.
Finally, if you run an ATI or Nvidia graphics card, I have written two comprehensive guides which you should check out: the ATI Catalyst Tweak Guide and the Nvidia Forceware Tweak Guide. These guides cover absolutely everything about the latest graphics drivers, how to set them up correctly, as well as advanced tweaking, overclocking and benchmarking tips. They're a must-read for configuring your graphics card correctly.
The above information really will serve you well in the long run, not just in this game. If you don't optimize your system and keep everything updated and maintained correctly you will keep running into "mysterious" problems time and time again. Do yourself a favor and when you get a chance spend an afternoon or two optimizing your machine the right way with the guides above.
The next section goes into more detail about specific troubleshooting tips which address common performance issues with the game.

This section contains specific troubleshooting tips which address many of the common problems experienced by UT3 players. I can't stress enough the importance of taking the time to go through the checklist of advice below if you're having a problem with the game.
Official Support: The first place to look for official support details is in the ReadmeDemo.rtf file in your \Program Files\Unreal Tournament 3\UTGame\Localization\INT directory. Make sure your system meets all the System Requirements, and check all the known issues. In terms of community support, make sure to check through the Official UT3 Forums. There's plenty of valuable advice out there if you spend some time searching for it. Finally, make absolutely certain you're patched to the latest version of the game as it resolves many issues - see Page 4 for details of the latest patch.
The Latest Graphic Drivers: UT3 requires the latest graphics drivers to function correctly, otherwise the game may crash or glitch. ATI users should use Catalyst 7.10 or newer, and Nvidia users need to use the 163.71 Forceware or newer. See my ATI Catalyst Tweak Guide or Nvidia Forceware Tweak Guide for more details on where to download the latest drivers and how to install and configure them correctly.
Stuttering/Freezes: If you're experiencing stuttering or hitching, first make sure to completely defragment your system, and then refer to the Advanced Tweaking section for a range of variables which can help reduce stuttering and improve performance in the game. If you get long freezes on an Nvidia card, try the 169.28 Forceware or newer which are specifically designed to resolve this issue.
Lag: If you are experiencing lag when playing online, keep in mind that there is no single cause of lag. It is not necessarily related to your network connection or the server on which you're playing - check your Ping using the Stat Net console command, and if it is low (e.g. below 100) then it's unlikely to be your connection. Just to be sure, untick the Dynamic Netspeed setting, and try joining another server to see if this changes things. If lag persists, check your FPS using the Stat FPS command, and if it often dips below 25 or so, especially in heavy combat, then you will need to further adjust your settings to increase your minimum framerate; low framerates are the most common cause of 'lag', including mouse lag. Finally, untick the 'Mouse Smoothing' setting as this only exacerbates any feelings of lag.
Antialiasing and Anisotropic Filtering: If you're unfamiliar with what Antialiasing or Anisotropic Filtering do, see this page of my Gamer's Graphics & Display Settings Guide. Details of how to enable Antialiasing in UT3 are under relevant area of the In-Game Setting section, as it can be tricky. Anisotropic Filtering is covered under World Detail in the In-Game Settings section, as well as in the Advanced Tweaking section.
Background Programs: Game developers recommend that you disable all background applications - especially virus, trojan and spyware scanners and messaging utilities - before playing games. These background applications can and do use up valuable CPU resources, take up precious RAM, cause memory conflicts and crashes to desktop, but most importantly they interfere with read/writes to your hard drive effectively slowing it down and causing even more in-game freezes and stuttering. Full instructions on how to identify your startup programs and services and how to correctly disable unnecessary ones are in my TweakGuides Tweaking Companion. This is an important step you should not miss.
Overclocking: UT3 can be sensitive to overclocking, so if you are experiencing graphical glitches or crashing in the game, set everything back to its default speeds and see if this impacts on the problem. If you don't experience the same problems at default speed, or they're reduced in severity, then your overclock is the primary culprit. Either permanently reduce your overclock and/or increase cooling to regain stability. Don't assume that because other games run with stability at a particular speed that UT3 will do the same.
These are just a few of the common fixes for problems in UT3. However if you follow the advice in this guide, you should be able to play the game more smoothly. Just be realistic about balancing eye candy with performance, and focus on tightening up your system as much as possible - make absolutely sure to read the guides I link to under Essential Optimization on page 2 of this guide above for more details on how to do that.
Read the remainder of this guide for specific settings and tweaks which can help improve your performance and resolve any problems. The next section looks at patches, maps and mods.
Official Patches
Another major patch has been released for UT3, bringing it up to Version 2.1. The patch has a range of changes in all areas, from gameplay to UI and bug fixes. It also includes all the changes from the previous patches.
Note: If you experience any strange glitches or issues after installing the latest patch, delete your existing UTEngine.ini, UTGame.ini and UTInput.ini files (See the Advanced Tweaking section for location details) and allow the game to create new ones, then tweak them again from scratch.
I will update this section accordingly with details of any future patches so check back often.
Copy Protection
UT3 doesn't use any copy protection as such, it is only protected via a serial key - a valid serial number is required to play online. There is no disc check component, so you do not need to keep your game DVD in the drive when playing UT3, and this is an excellent move by Epic.
Mods
Unreal Tournament is famous for all the modifications that have been developed for it over the years, whether to change certain aspects of its gameplay, or to turn the game into something else all together (total conversions). This is primarily because the game has always been based on the extremely solid and customizable Unreal Engine, and UE3.0 is no exception. Keep an eye on places like the Official UT3 Mod Forums and the BeyondUnreal UT3 ModWorks. I will provide more details of prominent mods here as they are released.
For now Epic has released the first free UT3 Bonus Pack, containing 3 new maps including the classic Morbias and Facing Worlds.
A new free official Titan Pack has also been released, containing a range of new maps, game modes, vehicles and weapons.
It's also worth noting that there is an official modification available for owners of PhysX cards - the UT3 PhysX Mod Pack which provides additonal custom levels in which the environment is fully destructible, and there are a range of PhysX-specific special effects. You can see a practical screenshot and video analysis of the various effects in this mod pack in this article.
Update: The PhysX Mod Pack is now part of the first Nvidia GeForce Power Pack, and all GeForce 8, 9 and 200 series (and newer) owners can now access the enhanced effects on these custom levels with improved performance courtesy of GPU-based PhysX. Full details of how to enable and configure GPU-based PhysX are on this page of the Nvidia Forceware Tweak Guide.
The next section begins our detailed look at UT3's in-game settings.
This section contains full descriptions and recommendations for UT3's in-game settings. You can use these to get a good balance between image quality and performance on your machine, however I can't give you specific instructions on what to turn on or off, nor can I provide precise performance impacts. It all depends on your particular hardware combination, and more importantly your personal taste for the trade-off between performance and image quality.
To access the in-game settings, click the Settings link in the main menu, then refer to the relevant sections below. Make sure to click the Apply button each time you change any settings, and note that some settings require a restart of the game to be applied properly.
Video
Screen Resolution: This setting allows you to select the resolution of the game image, measured in pixels wide by pixels high. The higher the resolution, the more detailed the image on screen, and also the less jagged lines there will be (See Antaliasing further below), but the lower your performance. For more details see the Resolution section of my Gamer's Graphics & Display Settings Guide. The number of resolutions available is limited by what both your graphics card and monitor can handle. Resolution has a noticeable impact on UT3 performance, so if nothing else works to improve your FPS, lower your resolution, or check the Screen Percentage setting further below for an alternative.
Note: UT3 does not have 'proper' widescreen support at the moment, see here for more details, and also check out the 'Player's FOV' setting further below.
Screen Mode: This option can be set to Windowed or Fullscreen. If set to Windowed, the game will run in a window rather than in full screen mode. In general for stability and performance I always recommend full screen mode, as there can be memory and resource management issues when a game is run in windowed mode.
Brightness: This slider controls the overall brightness of the game, and has no performance impact.
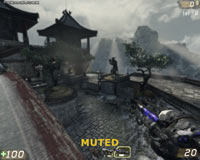
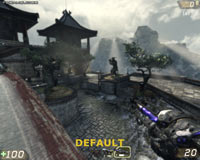


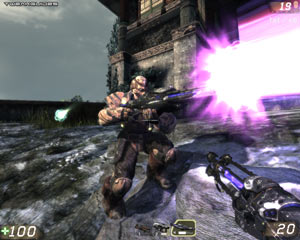
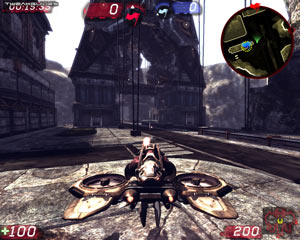
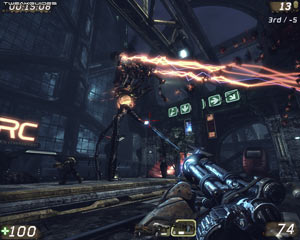
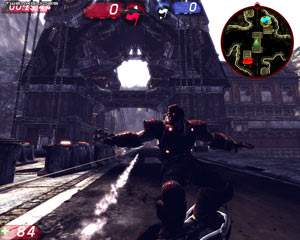
Post Processing: This setting is quite important for overall image quality. The available options are Muted, Default, Vivid and Intense. A screenshot comparison of the same scene using these four settings is provided above. Each effect is slightly different in the amount of bloom and light contrast it contains, but in terms of framerate, it appears they all perform much the same, at least on more recent graphics cards. Note that if you see a great deal of blurring, make sure your Screen Percentage slider is set to 100 - see further below for details. Also note that the various post processing options all effect the amount of aliasing (jaggedness) shown. There are a range of advanced variables, including DepthOfField and FloatingPointRenderTargets which can further customize the post processing used in the game - see the Advanced Tweaking section for details.
Antialiasing Support: UT3 uses a technique called Deferred Lighting, which doesn't allow for the use of normal Anti-Aliasing, at least in DX9 mode. Epic has stated that when running in DX10 mode in Vista, the game will allow the use of AA in the future. For the moment there are two ways to force Anti-Aliasing in the game:
A better alternative to either of the above is simply to adjust your Post Processing setting to something like Vivid, which helps cover up aliasing extremely well at a minimal cost in performance.
Reduced Gore: If ticked, this option disables much of the gore in the game, removing the large blood splatters when you shoot the enemy for example. While disabling gore may improve FPS slightly, you should set this to suit your taste.
Subtitles: This option enables text subtitles for dialog, but appears to be for the singleplayer campaign mode only.
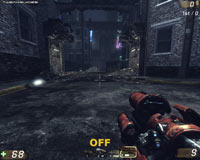
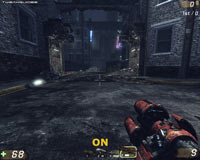
Hardware Physics: If ticked, this option takes advantage of an Ageia PhysX card to enhance physics effects. More details and a demonstration can be found here, as well as at the bottom of the previous page. If you have a PhysX card, you can tick this option, though it may reduce your FPS. If you don't have a PhysX card, leave the option unticked as there is no benefit to ticking it. Note that regardless of whether or not you have a PhysX card, the PhysX drivers will be installed with the game as these are needed for the normal software physics in the game.
Update: All GeForce 8, 9 and 200 series (and newer) owners can now access the enhanced effects of PhysX courtesy of GPU-based PhysX. See the previous page for the details of the UT3 PhysX Mod Pack, and for full details of how to enable and configure GPU-based PhysX see this page of the Nvidia Forceware Tweak Guide.
Advanced
Screen Percentage: This slider controls the amount of screen space to render the game world in, and the lower the screen percentage, the smaller the game image will be on the screen. However, what actually happens is that the game takes this smaller image and by default upscales it to fill your screen (if UpscaleScreenPercentage=true in your UTEngine.ini file - see the Advanced Tweaking section). The result is that the in-game image becomes noticeably more blurry the lower the screen percentage setting is taken, and in return you gain more performance. In practice this is very similar to running the game at a specified proportion of your current resolution. For example a 50% screen percentage on a 1280x1024 resolution gives the visual equivalent of running at half the resolution. The difference is that your main menus and in-game HUD elements (graphics and text) will not be reduced in resolution, which helps legibility, particularly for people using LCD screens at native resolution, and the setting can also help those already running a low resolution, or those who want to only slightly decrease their resolution. To observe the difference for yourself, you can see an animated screenshot comparison by clicking this link: UT3_ScreenPerfect.gif (553KB). If you want the best image quality don't reduce screen percentage below 100, unless you're truly struggling for FPS. If you want to decrease this setting below 50%, use the ScreenPercentage setting in the Advanced Tweaking section.
Texture Detail: This setting controls the appearance of textures, which are the surfaces of all objects in the game world. The further to the right the slider, the clearer and crisper textures will be, but you may experience reduced performance and possibly increased stuttering. The setting not only controls texture resolution, it also controls the level of Anisotropic Filtering applied to textures to make them clearer as they recede into the distance. At level 5 on the slider, 16x AF is automatically applied; at Levels 4 and 3, 4x AF is applied; and at Levels 2 and 1 on the slider, no AF is applied. To see an animated screenshot comparison click this link: UT3_Textures.gif (1.2MB). As you can see, particularly at Level 3 and below, textures become noticeably blurry. Note that you can manually adjust the level of Anisotropic Filtering regardless of the texture setting, by altering the MaxAnisotropy variable, as well as the base type of filtering used with the Trilinear variable - see the Advanced Tweaking section.
Update: As of the 2.0 Patch (See Page 4), the Advanced section of the in-game menu has a range of options rather than the simple 'World Detail' slider covered below. All of the new advanced settings are covered either in this section, or in the Advanced Tweaking section under their relevant names.
World Detail: This setting controls the world geometry, but in reality it also controls a wide range of special effects in the game - more than 14 .ini variables can change based on where this slider is set. As such it can have a significant impact on performance. So aside from geometry, the following are the main impacts at each level:
You can see an animated screenshot comparison by clicking this link: UT3_WorldDetail.gif (1.3MB). As can be seen, by Level 1 virtually all post processing and special effects have been removed, however obviously no screenshot comparison can show the full impact of all the effects which are removed. It is generally recommended that you set World Detail to 5 to start with, and then manually go into your .ini file and selectively enable or disable the various effects to get a better balance of performance and image quality. See the Advanced Tweaking section.
Enable V-Sync: Vertical Synchronization (VSync) is the synchronization of your graphics card and monitor's abilities to redraw an image on the screen a number of times each second, measured in Hz. It is explained clearly on this page of my Gamer's Graphics & Display Settings Guide. When VSync is enabled your maximum FPS will be capped at your monitor's maximum refresh rate at your chosen resolution, and more importantly in some areas your FPS may drop by as much as 50% or more if the graphics card has to wait to display a whole frame. Thus setting VSync to On can have a major negative performance impact, though you can counter the performance drop by enabling Triple Buffering - see this page for details of how to enable it properly. Note that the game also has two other FPS caps regardless of what you set VSync to - see below for details.
Update: The following settings were added as of the 1.1 Patch:
Framerate Smoothing: When this option is enabled, the game engine is capped to a maximum framerate, as determined by the value of the MaxSmoothedFrameRate variable (see Advanced Tweaking), which is 62FPS by default. This is done by the developers to prevent FPS spikes and thus provide smoother performance. However, by disabling this option you can completely remove this FPS cap. Keep in mind though that if you then find your framerate varying a great deal and causing jerkiness, this option is best enabled again. Also note that uncapping your FPS doesn't increase overall performance as such, i.e. if you got 35 FPS in certain areas with the cap, you'll still do so without the cap. Finally, the game is capped to a maximum of 90FPS online, and that cannot be altered using this or any other setting - it is a hard cap.
FOV: This slider controls the Field of View (FOV) for the game, which is essentially how many degrees your character can see of the game world at once. The default is 90 degrees, and raising the value means your character sees more; conversely lowering the FOV slider will show less of the game world. The main purpose of this slider is for subtle adjustments to the FOV, as some users prefer a slightly different Field of View, such as 85 degrees. Note that changing FOV may impact on performance as well.
Update: The following setting was added as of the 1.3 Patch:
Motion Blur: Ticking this box enables Motion Blur, a form of effect most noticeable when you change your view rapidly; the resulting slight blur in the image may improve visual quality and realism for some people, while others may find it distracting. For the most part the performance impact of motion blur should be minimal, but if you find it annoying or need the extra FPS, leave this option unticked. Note that the Screen Percentage setting needs to be at 100% for this option to work properly.
The next page continues the In-Game setting descriptions.
Audio
Hardware OpenAL: If ticked, the game will use your sound card's OpenAL driver, allowing for hardware acceleration which can improve audio quality and performance. I recommend ticking this option if your sound card has its own OpenAL driver, which most do - check under \Windows\System32 for the file OpenAL32.dll. Note that you will need to tick this option if you have a multi-channel audio system and want to use more than 2 channels. Vista users with Creative sound cards in particular should enable this option, as it allows for proper hardware acceleration without the need for ALchemy.
SFX, Music, Voice, Ambience, Announcer Volumes: These sliders control the volume level for the various effects, dialog and announcements in the game. Set them to suit your preference, as they have no performance impact. Note that you can also individually adjust the volume of (or turn off) certain effects such as the menu selection noises, weapon sounds, etc. - see the SoundGroups setting under the Advanced Tweaking section for details.
Announcement Type: This setting controls the in-game announcements, such as "Killing Spree" and "Multi Kill". You can select to disable them altogether (Off); only have the announcer read out the main announcements (Minimal); or have all announcements read out (Full). The difference between Full and Minimal doesn't seem to be much, at Minimal most announcements are still read out. There's no performance impact, so set to suit your taste.
Automatic Taunts: If unticked, this option disables the taunts which are automatically played when a character completes a successful kill.
Mute Voice: If ticked, this option disables the voice chat system in multiplayer. If you don't use voice chat, I recommend ticking this option.
Text-to-Speech Mode: This setting controls whether the in-game chat text is read out loud by a synthesized computer voice. If set to All, all chat text will be read out loud; if set to Team, only teamsay text is read out; if set to None, this disables Text-to-Speech mode. The performance impact is negligible so set to suit your taste.
Input
Invert Y: If ticked, pushing your mouse forward will make your character look down, and pulling your mouse back will make him look up. Set to suit your taste, has no impact on performance.
Auto Aim: This option assists you in aiming at the enemy, but as expected it does not have any effect in online multiplayer, it is only for offline singleplayer mode.
Mouse Smoothing: Ticking this setting will mean your mouse movements will be smoothed. While it doesn't impact on framerate, using this option may result in a greater feeling of 'lag' at times, so untick it if this is the case. Note, see the bViewAccelerationEnabled setting in the Advanced Tweaking section if you want to disable mouse acceleration.
Mouse Sensitivity: As of the 1.1 patch, this slider has been converted into a text box. The value you enter here controls how sensitive the mouse will be to your movements. The default is 2500, and the higher the value, the greater your view movements will be in the game when you move the mouse. If you're experiencing 'mouse lag', that is a feeling of reduced sensitivity or sluggishness in your mouse, regardless of how high you set the mouse sensitivity slider, you should first make sure you are consistently getting sufficient FPS, especially in more complex scenes with lots of effects. Use FRAPS or the Stat FPS console command to check your FPS, and keep in mind that typically anything below 15-20FPS will bring about mouse lag in any game, so you will have to lower your settings appropriately to prevent this as much as possible. Next, make sure to disable VSync as not only is it know to cause mouse lag, it also reduces performance which can make mouse lag even worse.
Update: The following two settings were added as of the 1.2 Patch:
Dodge Double Click Time: This setting controls the time period within which two clicks of a key counts as a double-click. For example if you press the A key twice within a set period of time as specified here, it counts as a dodge to the left. Raising this value makes triggering a dodge easier, while lowering it can prevent accidental double clicks. The default here is 25, which equates to 0.25 seconds between clicks. This setting is the same as the DoubleClickTime variable, and note that if you want to disable double click dodging altogether see the bEnableDodging variable - both are covered in the Advanced Tweaking section.
Enable Gamepad: This option should be enabled if you wish to use a gamepad otherwise disable it. Note that this option used to be called 'Enable Joystick' prior to the 2.0 Patch.
Player
Clan Tag: This option allows you insert a clan tag in front of your player name.
Network Connection: This is an important setting, as it determines the network rate at which UT3 communicates with the game server when you are playing online. Make sure to set it correctly to your connection type, and if in doubt select Unknown. If you're experiencing a lot of 'lag', see the Dynamic Netspeed option below as well as the Troubleshooting Tips section. Of course you should always make sure you only connect to servers with the lowest Ping when checking the server browser, as regardless of your connection type, connecting to servers with high pings will always bring about feelings of lag.
Dynamic Netspeed: If this option is ticked, the game will automatically attempt to adjust your Netspeed to suit your connection type and the server you are connected to. This should result in an optimal Ping, and I recommend that people tick this option to start with, and then if you find you're having periods of lag or other connection-related problems on a range of servers, untick this option. You can manually set the threshold at which Dynamic Netspeed kicks in with the DynamicPingThreshold variable - see the Advanced Tweaking section for details.
Allow Custom Characters: If ticked, this option will allow players to customize their characters and have those customizations shown when playing online. You can access the customization screen by clicking 'Customize Character' at the bottom of the screen, and going through the various prompts to alter your character's appearance accordingly. If this option is unticked, you will only see generic character models.
Weapons
Update: The following setting was added as of the 1.2 Patch:
Crosshair Scaling: This setting controls the size of the weapon crosshairs in the game. The further to the left the slider is taken, the smaller the crosshairs will be.
Crosshair Type: This setting controls your weapon crosshairs in the game. The available options are Normal, Simple and Hidden. Hidden completely removes all crosshairs; Simple uses the same generic crosshair for all weapons; Normal uses a different type of crosshair for each weapon. Has no impact on performance so set to suit your taste.
Weapon Switch on Pickup: If ticked, this option automatically switches your weapon if you pick up (run over) a weapon which is higher on your weapons priority list than your currently equipped weapon. Has no impact on performance so set to suit your taste.
Weapon Hand: The options here are Right, Left or Hidden, and determine which hand your weapon is depicted as being held in. If you choose Hidden, no weapon is shown - this may improve performance slightly since weapon models are complex - however it may also cause confusion if you're not aware of which weapon you're holding at any time.
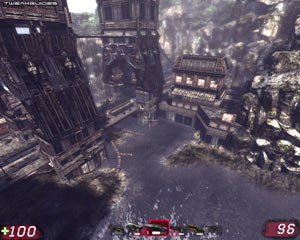
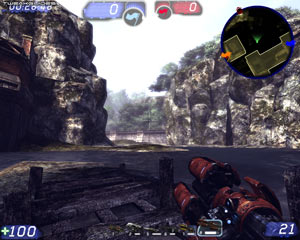
Small Weapons: Ticking this option changes your weapon models to slightly smaller versions, more reminiscent of classic UT. The screenshot comparison above shows the default rocket launcher model on the left, and the small weapon version of it on the right. Using a smaller weapon can provide a small FPS improvement in some circumstances, but generally you should set this to suit your taste. Note that using smaller weapons may provide a gameplay advantage since you can see slightly more of your surroundings at any time.
Display Weapon Bar: If ticked, the weapon selection bar will be displayed at the bottom of your Heads Up Display (HUD). This bar shows small icon depictions of weapons you are currently carrying, and even those you aren't if 'Only Show Available Weapons' is unticked (See below). There is no performance impact as such, so set to suit your taste.
Only Show Available Weapons: If ticked, your Weapon Bar (if enabled) will only show weapons you are carrying. If unticked, all possible weapons are shown. There is no performance impact, but it is recommended you tick this option if you are using the Weapon Bar, since there is no real point in displaying weapons you don't currently have.
HUD
Zoomed Minimap: If ticked, and you have the map enabled, in some modes you will see a zoomed-in top-down minimap of your surroundings in the top right hand corner of the HUD.
Show Map: If ticked, a small map is shown in the top right corner of your HUD in some game modes. By default it shows the entire map and your location on it, but if you have the 'Zoomed Minimap' option (see above) ticked, it will show your more immediate surroundings.
Show Clock: If ticked, a clock counting down towards the end of the match is shown in the top left hand corner of the HUD.
Update: The following setting was added as of the 1.2 Patch:
Show Objective Paths: This setting determines whether to display the white arrow pointers which lead to the objective on objective-based modes such as CTF or Warfare. If unticked, these arrows are removed. Obviously this is only recommended for more experienced players.
Show Scoring: If ticked, shows the scoreboard for the game at the top of the HUD, which can differ by game mode.
Show Leaderboard: If ticked shows the names of the current three leaders in the match in the top right corner of the HUD.
Show Vehicle Armor: If ticked, when you are using a vehicle you can see the vehicle armor status on the bottom right of your HUD.
The next section looks at the Advanced Tweaking possible in Unreal Tournament 3.
The Unreal Tournament series has a long history of being a highly tweakable game, and UT3 is no exception. Aside from the in-game settings, there are a large number of configuration variables and console commands you can use to alter the way the game plays and looks. In this section we look at the major variables and commands, starting with the .ini (initialization) files which store your settings.
The main .ini files can be found under your \Documents and Settings\[User]\My Documents\My Games\Unreal Tournament 3\UTGame\Config directory in Windows XP, or \Users\[User]\Documents\My Games\Unreal Tournament 3\UTGame\Config in Windows Vista. These .ini files can be edited using a text editor like Windows Notepad, but I recommend backing them up before changing any settings. If something goes wrong and you want to return these files to their defaults, simply delete them and they'll be recreated using the original templates (found under \Program Files\Unreal Tournament 3\Engine\Config) the next time you start the game. For this reason, don't ever edit or delete the Base .ini files; make sure to only edit those under the directory specified further above.
The main .ini files we will be examining here are UTEngine.ini which holds your main graphics and audio-related settings; UTGame.ini which holds your player-specific gameplay settings; and UTInput.ini which holds key bindings. Each config file is covered in separate sections below. Note: commands which are unclear, appear to have no significant or useful impact, or can be adjusted fully using the in-game settings are not covered in this section. Furthermore the developers have stated that some areas of the .ini files do not have any impact on the PC version of UT3, or are designed for debugging or for the Unreal Editor and hence are excluded (e.g. the [Texture Streaming] or [Editor.EditorEngine] sections have no impact). Just because a setting has a tempting name, doesn't mean it has any impact at all on the game. I've pesonally tested all the relevant settings and hence what is included below are the settings which do have some useful impact.
UTEngine.ini
[Engine.Engine]
bAllowMatureLanguage=False
This setting appears to control whether mature taunts can be used in the game.
bDisablePhysXHardwareSupport=True
This setting seems to work independently of the 'Hardware Physics' option in the in-game settings. Setting it to False should force hardware physics for systems with PhysX cards, but it seems to just cause a crash for both PhysX and non-PhysX users.
Update: As of the 1.2 patch, several of the options which use to work under [Engine.Engine] now only work when altered under [Engine.GameEngine], such as the bUseSound and DepthBias variables.
[Engine.ISVHacks]
bInitializeShadersOnDemand=False
Epic recommend setting this option to True as a workaround if you are experiencing crashes with an Nvidia card. Otherwise it is best left at False for optimal performance.
DisableATITextureFilterOptimizationChecks=True
This setting appears to be an ATI-specific troubleshooting option, and should only be set to False if you are having issues.
UseMinimalNVIDIADriverShaderOptimization=False
If set to True, this setting can reduce stuttering and hitching on GeForce 6 and 7 series graphics cards. Once again, as primarily a troubleshooting option, it shouldn't be set to True unless necessary.
[Engine.GameEngine]
bSmoothFrameRate=True
The game engine is capped to a maximum framerate, as determined by the value of the MaxSmoothedFrameRate variable (see below), which is 62FPS by default. This is done by the developers to prevent FPS spikes and thus provide smoother performance. However, by setting this option to False, you can completely remove this FPS cap. Keep in mind though that if you then find your framerate varying a great deal and causing jerkiness, this option is best set back to True. Uncapping your FPS doesn't increase overall performance as such, i.e. if you got 35 FPS in certain areas with the cap, you'll still do so without the cap.
Update: As of the 1.1 Patch, you can now also adjust this setting using the in-game 'Framerate Smoothing' option found under the Advanced Video Settings.
MinSmoothedFrameRate=22
MaxSmoothedFrameRate=62
These settings control the framerate range between which the game engine attempts to smooth frames. As covered under the bSmoothFrameRate setting above, if that setting is set to True, the framerate limit specified by the value of MaxSmoothedFrameRate will be enforced. Although you can disable this FPS cap, ideally if you want smooth FPS but don't want the default 62FPS cap, one thing you can do is to set the MaxSmoothedFrameRate to a higher value, e.g. 85. It's usually best to set your FPS cap to match your Refresh Rate, since even with VSync disabled, any framerates above your monitor's refresh rate will simply be partial frames anyway. There's no reason why uncapping your FPS will necessarily provide you a better gameplay advantage, and in fact it may do the opposite due to greater FPS variability, so experiment to see if simply using a higher framerate cap is actually a better compromise of smoothness and performance.
Note: When playing online, the engine is capped at 90FPS regardless of these settings, and can't be uncapped.
bClearAnimSetLinkupCachesOnLoadMap=True
I am unclear as to what this setting does. It appears to clear certain caches on map loads, and disabling it does not seem to have any noticeable impact, so it is best kept at its default to prevent memory management problems.
bUseSound=True
If set to False, this disables all sound in the game. The main use for this would be when troubleshooting an issue such as stuttering, to see if audio is the culprit.
bUseTextureStreaming=True
The Unreal Engine 3 uses a streaming approach to loading up textures. Streaming is actually designed more for loading times on consoles. However if this option is set to False, textures won't be streamed in at all, and instead most of the environment will be black due to a lack of textures. The only reason to use this would be for troubleshooting a suspected texture-related issue. Note that the UseStreaming=True variable found further above this setting seems to have no impact on the streaming system if set to False.
bUseBackgroundLevelStreaming=True
This setting is related to the streaming textures in UT3, and appears to control whether streaming occurs in the background or not. In my testing setting this to False made no significant difference to the streaming behavior or stuttering.
ShadowFilterRadius=2.000000
This setting controls the shadow filtering in the engine, basically determining how sharp or dispersed the outlines of shadows appear. The higher the value, the more 'blob-like' shadows become, the lower the value, the sharper the outlines of shadows.
DepthBias=.012000
This setting controls depth calculations, and effectively determines the way dynamic shadows are drawn. Higher values reduce shadows - a value close to 1 totally removes dynamic shadows on objects (but leaves static shadows such as those of buildings), and this may improve performance. Ideally if you just want to disable shadows, it's best to set the relevant shadow options to False - i.e. DynamicShadows and LightEnvironmentShadows.
Update: As of the 1.3 Patch, this variable seems to default to 0.912000.
ModShadowFadeDistanceExponent=.2
This setting controls the distance at which shadows fade into/out of view. The higher the value, the shorter the distance from the object at which shadows fade in/out. Higher values may improve performance and also remove distracting shadows in the distance.
[Engine.Client]
MinDesiredFrameRate=35.000000
This setting is designed to attempt to maintain a minimum framerate, possibly by reducing or removing effects on the fly. However in my testing I've found that it seems to have no impact at all both on image quality or FPS, so it's quite possible it's non-functional. It can't hurt to set it to your desired minimum framerate regardless.
[Engine.Player]
ConfiguredInternetSpeed=10000
In the past, this setting controlled your netspeed, which determines how much information is transferred between you and the server on which you're playing. The value is in bits per second (bps), and the maximum on most servers is 10,000. However in experimenting with this setting and the in-game Network Connection setting, it doesn't seem as though this variable has any impact, nor is it altered when the Network Connection setting is changed. I haven't been able to find where the network rate setting has been moved to in the .ini files, or even indeed if it's possible to alter it using an .ini variable or the Netspeed command anymore.
[ALAudio.ALAudioDevice]
MaxChannels=32
This option controls the maximum number of individual audio channels used for sound in UT3. Almost all modern sound cards support at least 32 channels; Audigy series cards can support up to 64; X-Fi cards support up to 128. If you're having audio problems set this value to the maximum channels supported by your audio device, or to try to improve performance or reduce audio glitches, try a lower value such as 32 or even 16 or 8 if all else fails. Note though that if set this too low you will get missing sounds.
UseEffectsProcessing=True
This setting doesn't appear to be the same as the Hardware OpenAL in-game option, since ticking or unticking Hardware OpenAL doesn't change this setting. In fact setting Hardware OpenAL to off changes the DeviceName setting to = Generic.Software, which indicates this setting is not the same. It appears to have no impact on audio quality or performance if set to False, so is best left at its default.
The next page continues our look at Advanced Tweaking.
UTEngine.ini (Cont.)
[SystemSettings]
Note: Most of the settings below are already altered depending on what the World Detail slider is set to - see the In-Game Settings section for more details. Also note that altering some of these settings can result in other settings also being changed, so examine this section of your .ini file closely to make sure all your settings are as you'd prefer after applying some of these changes.
StaticDecals=True
Static decals are markings or posters in the game world which are placed on surfaces as decoration by the map designer, and are not created by players. Setting this option to False removes these, and depending on the map the visual and performance difference may or may not be noticeable.
DynamicDecals=True
Dynamic decals are the marks left by players when using weapons on the surroundings. If this option is set to False, while weapons will still show impact marks initially, some weapons will not leave dark scorch marks and the like on scenery. Disabling this option may improve performance particularly in heavy combat. Note that you can alter the lifespan of dynamic decals using the DecalLifeSpan variable covered later in this section.
DynamicLights=True
This setting controls the use of Dynamic Lighting, which is lighting that interacts realistically with the game world. For example when this setting is enabled and you fire a ball from the shock rifle, the blue light from the ball will reflect on surrounding surfaces as it passes them. This can noticeably reduce performance, so if you wish to increase your FPS, particularly in heavy combat, then set this option to False.
DynamicShadows=True
This setting controls whether interactive objects in the game world, such as characters and vehicles, cast shadows, both on themselves and other surfaces. If set to False, these objects will not cast any shadows, which can improve performance at the cost of some realism.
LightEnvironmentShadows=True
This setting controls whether the Light Environment, namely the general lighting in a level, such as sunlight, creates shadows. When set to False, it disables many shadows similar to disabling the DynamicShadows setting, but it still does not remove the shadows for objects with fixed shadows, such as buildings and terrain.
CompositeDynamicLights=False
If set to True, this option appears to enable a less accurate form of dynamic lighting, which may improve performance at the cost of image quality. In practice the visual difference is not noticeable.
DirectionalLightmaps=True
This technique allows for improved image quality, as surfaces will have additional depth, bump and detailing. Setting this option to False can increase performance but reduce image quality by making surfaces appear flatter.
MotionBlur=True
This option controls the use of Motion Blur, which is additional blurring seen when turning around or moving rapidly. If you want to disable this effect either because it annoys you, or to gain improved performance during motion, set this option to False. Note that his option does not relate to the general blurring effects used in the game. Note further that I haven't actually seen any motion blur in UT3.
Update: As of the 1.3 Patch, Motion Blur can now be accessed under the in-game settings menus (See In-Game Settings section), and motion blur is now fully functional in UT3.
DepthOfField=True
This option controls the use of Depth of Field, which is an effect used to simulate the way in which objects within focus are sharper than objects outside our direct field of focus. It's noticeable in particular when zooming in on objects - objects which you are aiming directly at will appear crisp, while surrounding objects will be blurred. You can set this option to False to gain improved performance, or if you just don't like this effect. Note that while standard Depth of Field is not visible (e.g. zooming in with the Sniper Rifle does not display it), disabling this setting seems to alter the impact of Bloom lighting significantly, and has a major impact on image quality; a great deal of Bloom and all blurring is removed. I'm not sure whether this is a glitch or done intentionally.
Bloom=True
This setting controls the use of Bloom Lighting, which is a form of lighting that exaggerates the brightness and glow of lights, creating a slightly hazy, more atmospheric look. With this option set to False, Bloom is not supposed to be used, however oddly enough, disabling Bloom (and QualityBloom, see below) doesn't seem to remove bloom lighting as such, while disabling the DepthOfField setting while leaving Bloom enabled does seem to disable most of the bloom lighting. Again I'm unsure as to whether this is done by design, or a bug, as it does not make any sense.
QualityBloom=True
As with Bloom above, this setting controls Bloom lighting effects, and if set to True uses a more accurate form of Bloom. Disabling this may gain additional performance without a noticeable change in image quality. Once again, in practice disabling this and/or the Bloom setting above doesn't actually appear to diminish or remove Bloom lighting.
Distortion=True
This option controls the distortion effects seen around things such as explosions or exhaust fans. For example when this is enabled, rockets or flak shells hitting objects will show heat distortion around the impact, shock combo explosions will show distortions in the air surrounding them, and Manta fans will show air distortions. Disabling this option will remove such effects, improving performance particularly during heavy combat.
DropParticleDistortion=False
After some testing I'm unclear as to what this setting does. I do know that when the World Detail slider is reduced, this option automatically goes from False to True, so it appears that setting it to True may improve performance, possibly at the cost of the visual quality of particle effects.
SpeedTreeLeaves=True
SpeedTreeFronds=True
These two settings control how the SpeedTree foliage rendering system works. If set to False, these settings will remove some - but not all - of the foliage on certain maps, which can improve performance and also increase visibility. For example with these settings disabled, on ShangriLa some bamboo plants are removed from the main courtyard; in Heat Ray the leaves on the trees near the blue and orange billboards disappear.
OnlyStreamInTextures=True
This option appears to relate to the streaming system, but whether set to True or False, appears to have no impact
LensFlares=True
Lens Flare is an effect seen when staring at a bright light source, such as the Sun. There are halo effects or changes in light intensity when this happens. When this option is set to False, these effects are removed. Note that I don't notice any visual quality change with this effect set to False, as there doesn't appear to be any prominent Lens Flare used regardless.
FogVolumes=True
This option appears to relate to the fog system in the game, and if set to False should disable volumetric fog.
FloatingPointRenderTargets=True
This setting enables or disables Floating Point Render Target technology, which is used to provide certain post processing effects, such as the ability to enable HDR and Anti-Aliasing at the same time. The main impact of setting this option to False is that it alters the appearance of the game, removing certain post processing effects. It provides a slightly different appearance to any other option, and some may like it, however there will be some minor visual glitches, such as light boxes around explosions.
Trilinear=True
This option controls the use of Trilinear Filtering, which can improve the appearance of textures. Disabling this option may slightly reduce texture clarity but can improve performance. Note that the general appearance of textures is more dependent on the MaxAnisotropy variable, as well as the Texture Detail in-game setting.
UpscaleScreenPercentage=True
This setting only has an impact if the Screen Percentage setting is below 100%; if it is, and this option is set to True, the game will upscale the image to fill the entire screen, although this results in a reduced image quality as described under the Screen Percentage setting in this guide. If this option is set to False, and the Screen Percentage setting is set below 100%, then the game image will only take up a portion of the screen. E.g. at 50% Screen Percentage and with this variable set to False, the image will only take up 50% of the screen, and will be surrounded by black borders.
AllowD3D10=True
This setting appears to allow DirectX10 mode when running in Windows Vista; it has no impact in XP since XP cannot run DX10. When enabled in Vista it seems to reduce performance, possibly in return for better image quality. At the moment it is difficult to see any improvements in image quality with this option enabled, so it is recommended that Vista users set this option to False to gain a noticeable improvement in FPS without any real image quality decline.
EnableHighPolyChars=True
If set to False, this option reduces the polygon complexity of characters, which can improve performance. In general the image quality difference is not significant, so set this to False if you need the extra FPS, particularly on servers with lots of players.
SkeletalMeshLODBias=0
ParticleLODBias=0
LOD Bias affects the clarity of textures, by determining how Mipmapped textures appear. Higher positive values make things blurrier but can improve performance, while lower values, including negative values, make things clearer at the cost of performance, and can also introduce further aliasing (jaggedness and shimmering) to the scene. The SkeletalMeshLODBias setting relates to animations, while ParticleLODBias relates to particle effects. In practice the impacts of altering these settings is not major.
DetailMode=2
This setting controls the additional details on various maps, such as fog, ice and dripping water. Lowering this value to 1 or 0 removes such additional effects, which can reduce atmosphere but may increase FPS and also may provide a gameplay advantage.
ShadowFilterQualityBias=1
This setting controls the quality of the shadow filtering used (if shadows are enabled). Higher values provide better quality at the cost of performance, but once again with testing I was unable to note any real differences in shadow quality using this setting.
MaxAnisotropy=16
This setting controls the level of Anisotropic Filtering used in the game to make distant textures clearer. As noted in the In-Game Settings section under Texture Detail, depending on your texture settings some AF may automatically be applied. Here you can manually specify a particular sample rate for AF, from 16x which is the highest, to 0 which is no AF. The more AF is used, the lower your performance.
MaxMultisamples=1
This setting appears to control the use of Multisampling, which is a common form of Anti-Aliasing, used to reduce jaggedness. However at the moment altering this setting has no impact (either in DX9 or DX10 mode) since UT3 does not properly support AA - see Anti-Aliasing under the In-Game Settings section for more details of how you can force AA in UT3. In the future, Epic has stated that an AA option is possible for DX10 mode in Vista.
MinShadowResolution=32
MaxShadowResolution=512
These settings determine the minimum and maximum possible values for shadow resolution. The higher the minimum value, the darker and richer more shadows will appear; conversely the lower the maximum value, most shadows will appear less distinct and grey. Raising or lowering shadow resolutions can result in performance drops/rises, and also visual glitches. In particular, the higher you raise the shadow resolutions, the more the edges of shadows may display jaggedness depending on your shadow filtering setting.
ResX=1280
ResY=1024
These settings control the width (ResX) and Height (ResY) of your display resolution. While this can normally be adjusted using the in-game settings, you can use these values in case you can't access the in-game settings, or to try a custom resolution.
ScreenPercentage=100.000000
This setting is the same as the in-game 'Screen Percentage' option, the difference is that here you can set a value below the 50% mark. Of course the lower the percentage, the more blocky and blurry the game will appear, but the higher your performance. Note again that so long as the UpscaleScreenPercentage setting further above is set to True, the image will fill the whole screen.
ShadowTexelsPerPixel=2.000000
This setting affects the overall smoothness of shadows. A value of 0 disables shadows altogether, and higher values increase the sample rate which results in improved shadow quality at the possible cost of performance. In my testing anything above 1 doesn't show significant improvement.
TEXTUREGROUP_World=(MinLODSize=256,MaxLODSize=1024,LODBias=1)
There are a range of TEXTUREGROUP settings here relating to different aspects of the game world, objects, lighting and shadows. Each has a MinLODSize, a MaxLODSize and LODBias which you can experiment with to alter image quality. For example, to alter the overall quality of vehicle surface reflections, find the line starting with TEXTUREGROUP_VehicleSpecular, and you can raise the MinLODSize value, or change the LODBias. In my testing unfortunately most changes seem to cause crashes.
[Engine.AudioDevice]
SoundGroups=(GroupName=Ambient,Properties=(Volume=0.24))
There are a range of SoundGroups settings here, and these can actually be altered in a very useful manner. Each SoundGroup has a name, and has certain properties including volume, and whether there is any reverb (reverberation - or echo effect - attached). If you wish, you can disable specific sounds, or raise their volume, by altering the Volume= value of each one. For example, to disable the Main Menu sound effect when you click on an option, find the line with the relevant GroupName - in this case GroupName=UI - and change the Volume property to Volume=0. This will remove the sound effect without altering or removing the menu music or any other menu sounds. Conversely, if you wish to raise the volume of weaponry in the game, find the line with GroupName=Weapon and change the Volume value; raising the volume will make weapon sounds louder relative to other sounds and effects. You can also change the bNoReverb value from True to False if you wish to add reverberations to particular sound effects, though in my experimentation this didn't seem to have any real impact.
[FullScreenMovie]
StartupMovies=EpicLogo
If you wish to remove all the introductory startup movies, you can insert a ';' in front of every line starting with StartupMovies (e.g. they should each look like this: ;StartupMovies=EpicLogo). I don't recommend altering any of the other lines as this will disable possibly important in-game cutscenes and movies when playing the singleplayer campaign. Note that there is another way to disable startup movies - see the last page of this guide for details.
The next page continues the Advanced Tweaks.
UTGame.ini
[Engine.GameInfo]
Update: As of the 1.3 Patch, the following options have been added to this section of UTGame.ini - they are specifically designed for use by players running listen servers:
TotalNetBandwidth=32000
This setting determines the total upstream bandwidth to be apportioned.
MaxDynamicBandwidth=7000
MinDynamicBandwidth=4000
These values set the minimum and maximum bandwidth that can be given to each client.
[Engine.HUD]
bMessageBeep=true
This setting controls whether the game beeps whenever a new chat message appears on screen. Setting this to False disables the beeps.
HudCanvasScale=0.95
This setting controls the area in which text is displayed - the lower the value, the closer to the center of the screen text messages will appear.
ConsoleMessageCount=4
This setting controls the total number of lines of message text which can be shown at any one time on screen.
MessageFontOffset=0
This setting controls the size of the text font used on HUD and for game messages (excluding chat) - the higher the value, the larger the font will be.
bShowHud=true
If set to False, this option completely removes the HUD, including all text messages, graphical elements and warnings. Note that you can use the Showhud console command to toggle the HUD on or off at any time.
[Engine.PlayerController]
DynamicPingThreshold=400.000000
This setting controls the Ping threshold at which the Dynamic Netspeed option kicks in (if enabled) and alters your Netspeed value. The lower this setting, the more likely Dynamic Netspeed will continually alter your Netspeed to maintain your ping below this value. If you want to alter it you should only try to set it to something which is realistically achievable on the servers on which you play, otherwise the constant changing of your Netspeed by the Dynamic Netspeed option could see you experience more rather than less lag.
[Engine.WorldInfo]
DefaultPostProcessSettings=
The values for this setting appear to control the level of Bloom and Depth of Field (DOF) effects when Post Processing is at Default, however in my experimentation changing these appear to have no impact.
[Engine.DecalManager]
DecalLifeSpan=30.0
This setting controls how many seconds a dynamic decal lasts before it fades away. Lowering this can improve performance especially in heavy combat, and can be a better alternative to disabling dynamic decals altogether.
[UTGame.UTPawn]
Bob=0.010
bWeaponBob=true
If you wish to remove the bobbing motion when your character is moving, set Bob=0.000 and bWeaponBob=false.
[UTGame.UTPlayerController]
bEnableDodging=true
If set to False, you cannot use the standard dodge moves, namely double-tapping a movement key to dodge in that direction. There should be no reason to disable this, as dodging is an important part of UT.
bLandingShake=true
If set to False, disables the slight shaking of your view when you land from a height.
bFirstPersonWeaponsSelfShadow=true
If set to False, this option disables the detailed self shadowing on weaponry, which reduces realism slightly but improves performance. Note that weapons will still have some general shadow and light effects displayed on them.
[UTGame.UTDeathMessage]
bNoConsoleDeathMessages=true
If set to False, this option allows for classic UT death messages to be shown in green in the lower left of the screen. The death of all players will be described in a sentence as they happen.
[UTGame.UTGame]
Update: As of the 1.3 Patch, the following server-side commands have been added to this section of the UTGame.ini file (not covered here in detail since they are server options - see the patch release notes):
bMidGameMapVoting
MapVotePercentage
MinMapVotes
InitialVoteDelay
[UTGame.UTHUD]
bShowDoll=true
If set to False, removes the small human icon on the bottom left of the HUD which is shown when you have a powerup, as well as your Health indicator.
bShowAmmo=true
If set to False, removes the ammo count display from the bottom right of the HUD
bShowPowerups=true
If set to False, removes the display of powerups on the human icon on the HUD (if it's enabled).
UTInput.ini
[Engine.PlayerInput]
DoubleClickTime=0.250000
This setting determines the time period within which two clicks of a key counts as a double click. The default is 0.25 seconds, during which for example if you press A twice, it will count as a dodge to the left. You can raise this value if you wish to make dodging easier, or lower it to prevent accidental double clicks. A value of 0.0 disables double clicks altogether.
Bindings=(Name="F9",Command="shot")
For the most part you can alter your key bindings in the in-game settings. Here you can see all your key bindings and the commands they invoke. In the example above, you can see that the F9 key has been bound to the command 'Shot', which takes a screenshot. You can edit the line to change the key from F9 to F11 for example, and that will bind the Shot command to the Function 11 key. Changing and creating complex bindings can be quite an art, and is impossible to detail here due to space requirements. If I find an appropriate guide to binding in UT3, I will link to it here.
[UTGame.UTConsolePlayerInput]
bViewAccelerationEnabled=TRUE
If set to False, this option should disable mouse acceleration, which some people find annoying.
That brings the .ini file tweaking to a close, but keep in mind that as new tweaks are discovered and as more details come to hand, the information above will be updated.
Console Commands
In UT3 you can open and close the in-game command console at any time by pressing the TAB key by default for smaller command line, or press F10 to open the full console. There are a range of console commands you can use, and below is a list of the most common commands and a brief description for each:
General Commands
Say [text] - Shows specified text in global chat
Teamsay [text] - Shows specified text in team chat
FOV [degrees] - Changes the Field of View to the specified degrees
Slomo [speed] - Alters the speed of the game to the value specified. Values above 1 speed up the game, values below 1 slow it down
Showhud - Toggles whether to display or hide the HUD
Togglescreenshotmode - Toggles 'screenshot mode' which removes all text, the HUD and your gun
Setbind [Key,Command] - Binds the specified command to the specified key
Setsensitivity [value] - Changes your mouse sensitivity to the specified value
Shot - Takes a screenshot in .BMP format
Exec [filename] - Executes a file under the \Program Files\Unreal Tournament 3\Binaries directory
Brightness [value] - Changes the brightness to the specified value
Contrast [value] - Changes the contrast to the specified value
Gamma [value] - Changes the gamma to the specified value
Demorec [demoname] - Starts recording an in-game demo with the name specified
Demostop - Stops recording a demo
Demoplay [demoname] - Plays back a demo with the name specified
Switchlevel [mapname] - Changes the level to the map specified
Switchteam - Toggles you to the other team
Suicide - Kills your character
Open [mapname or IP] - Loads up the specified map, or joins the specified IP address
Reconnect - Reconnects to the last connected server
Disconnect - Disconnects from current server
Exit, Quit - Exits the game to desktop immediately
Information Commands
Stat FPS - Toggles the display of your framerate
Stat Net - Toggles the display of network statistics including Ping
Stat Audio - Toggles information about the audio system
Stat Engine - Toggles information about the rendering system
Stat Game - Toggles information about the game engine
Cheat / Fun Commands
Behindview - Toggles between 1st and 3rd person view
God - Makes your character indestructible, toggles on or off
Fly - Allows your character to fly
Ghost - Allows your character to fly and move through solid objects
Walk - Switches off Fly and Ghost modes
Allweapons - Gives you all weapons
Allammo - Gives you maximum ammo for all your weapons
Loaded - Gives a combination of all weapons and all ammo
Playersonly - Freezes all bots
Addbots [number] - Adds the specified number of bots to the current game
Killbots - Kills all bots in the game
Giveweapon [itemname] - Gives yoou a weapon with the specified name. For example to summon the instagib rifle, or translocator, try the following commands:
Instagib Rifle: giveweapon utgame.utweap_instagibrifle
Translocator: giveweapon utgamecontent.UTWeap_Translocator_Content
Summon [itemname] - Summons an item/vehicle with the specified name. For example, to summon vehicles, try the following commands:
Fury: summon utgamecontent.utvehicle_fury_content
Hellbender: summon utgamecontent.utvehicle_hellbender_content
Darkwalker: summon utgamecontent.utvehicle_darkwalker_content
Manta: summon utgamecontent.utvehicle_manta_content
Scorpion: summon utgamecontent.utvehicle_scorpion_content
Cicada: summon utgamecontent.utvehicle_cicada_content
Goliath: summon utgamecontent.utvehicle_goliath_content
Nemsis: summon utgamecontent.utvehicle_nemesis
Paladin: summon utgamecontent.utvehicle_paladin
Hellfire SPMA: summon utgamecontent.utvehicle_spma_content
Raptor: summon utgamecontent.utvehicle_raptor_content
That concludes the list of all the major .ini variables and console commands. In addition to alll the variables and commands above, I'm aware that UT3 accepts a range of command line parameters, for example the -nomoviestartup, -login and -password parameters covered on the last page of this guide. Aside from those however I haven't found many others which are of much general use (e.g. the ones used for benchmarking are not of great benefit in other respects). As always, if you are aware of an important omission or error, please Email Me with the details. Please make sure to only provide verified details and not guesses, and keep in mind that the list above is designed to provide commands which will be useful to most players; as noted earlier I've tested every relevant .ini option and many obscure commands or those which have minimal impact are deliberately omitted. I will keep this section updated with new commands and tweaks as I learn about them, so check back often.
The next page concludes the guide with some useful tips and information.
The guide is coming to a conclusion, but below are some important performance tips, tweaks and advice which should not be skipped.
Skipping Introductory Movies
If you want to remove all the introductory movies which play before you reach the main menu, there are several ways you can do this. The quickest is to right-click on your UT3 launch icon, select Properties, and in the Target box, one space after the last character, add -nomoviestartup. It should look similar to this:
"C:\Program Files\Unreal Tournament 3\Binaries\UT3.exe" -nomoviestartup
This is the easiest method, however it can also prevent single player cinematic cut-scene movies from playing. So there are other ways you can remove the startup movies which won't cause any issues - open your UTEngine.ini file, go to the [FullScreenMovie] section, and put a ; in front of all the lines starting with StartupMovies, so they look like this ;StartupMovies=. Alternatively, you can go to your \Program Files\Unreal Tournament 3\UTGame\Movies directory and rename the relevant movie files, but this is not recommended.
Automatic Login
As of the 1.2 Patch (See page 4), UT3 now supports automatic login via two new command line switches you can add to the Target line of your UT3 launch icon:
-login=username -password=password
Since UT3 already has an 'Automatically Login' option which you can tick on the main login screen, that is the best way to automatically login. However the above command line method can be useful if launching UT3 from third party utilities for example.
Measuring FPS, Taking Screenshots & Videos, & Benchmarking
To measure your FPS in UT3, open the in-game command console (default is the TAB or ~ key) and type Stat FPS, and a framerate display will appear at the top right of the screen. If you wish to take screenshots at any time, you can press the F9 key which is bound to the screenshot commadn by default, or you can open the console and type shot. In either case, a screenshot will be saved in .BMP format under your \My Games\Unreal Tournament 3\UTGame\ScreenShots directory. If you want to take nicer screenshots, you hide the HUD temporarily by using the Showhud console command, or alternatively use the Togglescreenshotmode console command to remove all on-screen text, the HUD and your own weapon. Finally, you can use FRAPS to record in-game movies in .AVI format, such as this one, and FRAPS also provides an FPS counter and screenshot facility as well if you need it.
If you also want a utility which automates the benchmarking of UT3, you can use the HOCBench UT3 Benchmark tool.
Basic Gameplay Tips
One of the biggest impediments to newer people enjoying the Unreal Tournament series is the fact that they die very quickly and can't seem to master the gameplay. I am by no means an expert player of UT, but having played for many years, I can provide the following basic tips for beginners - at least until I can find a good UT3 Gameplay/Strategy Guide to link to here. Keep these tips in mind when practicing in offline mode against bots, steadily increasing the bot difficulty as you become more capable:
Again, these are just the very basics, and as always the key to success is practice, so use offline mode to learn the maps, use bots to challenge and hone your strategies, but ultimately only a lot of playing against actual online human opponents can sharpen you up, and don't get discouraged if you keep dying.
Conclusion
That brings the guide to a conclusion for now, and I hope it improves your UT3 experience. As always, if you find errors or important omissions in the guide, make sure to Email Me with the details so I can keep the guide as accurate and up-to-date as possible. Remember though that unfortunately I can't provide any tech/tweaking support, and I also don't provide permission for the guide to be reproduced or translated elsewhere for several reasons.
Until next time, take care!