The original Unreal Tournament, released in 1999 is one of my all-time favorite games. I remember many, many hours of finger-stiffening, carpal tunnel-developing online deathmatches. At that time I truly thought it was the pinnacle of gaming heaven. Amazing graphics, great sound and almost perfectly balanced gameplay, not to mention real human opponents to provide a genuine challenge.

When Unreal Tournament 2003 was released I was anticipating even more online fun and mayhem. Sadly, UT2003 never enjoyed the same level of popularity as the original UT. Some credit the many "Quake-like" changes the game underwent, others couldn't quite put their finger on it. Either way, it just wasn't UT. Fortunately the Unreal Engine which powers the game has been used to great effect in other popular games like Raven Shield and America's Army.
Now Epic Games, Digital Extremes and Atari have worked long and hard to introduce Unreal Tournament 2004. More than just an incremental upgrade from UT2003, it returns Unreal Tournament to its roots. The character models, guns, music and maps all look and play like UT. Bigger, better and with a great new gameplay mode called Onslaught, UT2004 is the real thing.
Following up on my UT2003 Tweak Guide, I've written this guide to provide you with everything you need to know to improve your UT2004 experience. As a compilation of detailed setting descriptions, recommendations, tweaks and links to important resources it guarantees something for every fan of this great game.
Note: This guide refers to the latest version of UT2004 Version 3369 and the 64-Bit Version. Make sure to check back regularly for updates.
Before getting into any game-specific settings and tweaks, this section covers the obligatory system optimization information I include in all my guides. If you've followed this advice recently, you can skip this section.
Many people report problems with this game and in almost all cases these are due to general system issues and not the game itself. With that in mind I strongly urge you to take some time and follow the advice below if you truly want this game, and indeed every other game you own, to run at its fastest and most trouble-free.
The place to start is my free TweakGuides Tweaking Companion. It is the complete system optimization guide for Windows users. Designed for novice and advanced users alike, it is written in plain English to help you genuinely understand all aspects of Windows and your PC. The guide covers every major topic, from the correct installation of Windows and critical drivers and software, through to recommendations for every significant setting and feature, all the major performance and convenience tweaks and customizations, as well as detailed troubleshooting advice. There are also links to a range of reliable free applications for optimizing and maintaining your system, as well as to important resources for finding out even more about Windows and your PC. There are two separate versions: one for Vista and one for XP.
If you've ever wondered what common graphics and display settings like FPS, VSync, Refresh Rate, Antialiasing and Anisotropic Filtering are, and how they really work, then check out my Gamer's Graphics & Display Settings Guide for all the details in an easy to understand format. The guide also gives you a rundown on exactly how a game goes from a being a set of files on your hard drive to a 3D image on your screen, including relevant performance tips.
Finally, if you run an ATI or Nvidia graphics card, I have written two comprehensive guides which you should check out: the ATI Catalyst Tweak Guide and the Nvidia Forceware Tweak Guide. These guides cover absolutely everything about the latest graphics drivers, how to set them up correctly, as well as advanced tweaking, overclocking and benchmarking tips. They're a must-read for configuring your graphics card correctly.
The above information really will serve you well in the long run, not just in this game. If you don't optimize your system and keep everything updated and maintained correctly you will keep running into "mysterious" problems time and time again. Do yourself a favor and when you get a chance spend an afternoon or two optimizing your machine the right way with the guides above.
The next section goes into more detail about specific troubleshooting tips which address common performance issues with the game.

This section contains specific troubleshooting tips which address most of the common problems experienced by UT2004 players. Most of the tips below are actually drawn from one of my guides mentioned in the Essential Optimization section. This is no coincidence, since most of the common UT2004 problems are not game bugs, but specific sub-optimal system conditions which lead to problems. UT2004 is a new and very system intensive game, and hence brings out instability and problems in all but the most rock-solid of machines. Again, I can't stress the importance of taking the time to go through the checklist of advice below:
Official Support: The first place to check for a solution to your specific issue is the UT2004 Official Support Forum. There are several common problems listed, with suggested solutions you can try. This is also where you can request official Technical Support if you're really struggling. Also make sure you read the Readme.int.txt file found in your \UT2004\Help directory for more handy troubleshooting tips straight from the game's developers.
Windows Vista Users: If you're having problems running this game under Windows Vista, first make sure that you're using the latest Vista graphics and audio drivers for your hardware, and the latest version of this game (see page 4 for patch details). Next, make sure you don't change your UAC settings after the game has been installed, as due to Virtualization this can change the location of the game files and settings. If you can't launch the game successfully when UAC is enabled, you will need to run the game with full Admin privileges. To do this either right-click on the launch icon and select 'Run as Administrator', or right-click on the launch icon, select Properties and under the Compatibility tab tick 'Run this program as an administrator' then click OK. I strongly recommend that you refer to the TweakGuides Tweaking Companion for Windows Vista for more information - in particular check the 'Gaming in Vista' section of the Graphics & Interface chapter; the UAC section of the PC Security chapter; and the 'Personal Folders' and 'Directory Junctions & Symbolic Links' sections of the Windows Explorer chapter. These will tell you how you can fix game-related issues and also explain the relevant differences of Vista.
Virus Scan: Do a full scan of all your files using a virus scanner such as AVG Virus Cleaner, a trojan cleaner such as A-Squared, and a spyware cleaner such as Ad-aware. Viruses and trojans can cause unexplained behavior like forced disconnection from the net, ping spikes or crashing of UT2004 to the desktop while loading. Note if you are crashing to the desktop while loading and it's not a virus, try the official solution here.
Background Programs: Disable all background applications, especially virus, trojan and spyware scanners and messaging utilities. These applications can and do use up valuable CPU resources, take up precious RAM, and raise ping, but far more importantly they interfere with read/writes to your hard drive effectively slowing it down and causing more in-game freezes and increasing load times. Full instructions on how to identify your startup programs and services and how to correctly disable unnecessary ones are in my TweakGuides Tweaking Companion.
Overclocking: The Unreal Engine is extremely sensitive to overclocking. If you've overclocked any component(s) on your system, set everything back to the default settings and try running the game. If you don't experience the same problems at default then your overclock is the primary culprit. In particular, read through my TweakGuides Tweaking Companion for tools and instructions on how to correctly stress-test an overclocked system and determine which components are being pushed too far. Even if every other game and program you run works just fine at your current overclock, UT2004 is likely to want even more stability. Each game has different tolerances based on the way it stresses different components in your system, and UT2004 is about as overclocking-unfriendly as you can get.
CPU Speed: UT2004 is extremely CPU hungry, so if you have a high-end graphics card (e.g. Radeon 9800 Pro) but a lower powered CPU (e.g. P4 1.6Ghz), or vice versa, then you will find that this will hold back your performance significantly. Put simply the Unreal Engine requires both CPU and rendering power. The only solution to this problem is an upgrade.
RAM & Virtual Memory: UT2004 is also extremely memory hungry. This is evident from the long loading times and in-game loading hitches and freezes some people are experiencing. Aside from buying more RAM (1GB or more is ideal), one thing you should do to address this problem is to optimize your Virtual Memory settings following the step-by-step instructions in my TweakGuides Tweaking Companion. Combined with the tweaks covered later in this guide (such as the Preload All Player Skins setting), this should help resolve most of your problems. Note that there will still be some loading pauses, but they should be less severe.
Hard Drive Speed: UT2004 takes up over 5.2GB of game information on your hard drive, and quite obviously a lot of that will need to be loaded up at some point. On a modern operating system like WindowsXP, memory management is quite good, however it can't work miracles. The whole process of continually loading information from your hard drive into RAM and back onto the drive is dependent on both the speed of your actual hard drive, and your Windows File Cache and Memory Management settings. You can optimize your Windows memory management settings as covered in the tips above, but if you have low RAM (i.e. 512MB or less) and/or a slow hard drive then expect a lot more hard disk activity and hence longer loading times and in-game stuttering and freezes as UT2004 data loads into and out of RAM.
Defragging: Make sure that after you've installed UT2004 you run through the system maintenance procedures detailed in my TweakGuides Tweaking Companion. In particular it is vital that you run the Windows Defragmentation utility after installing such a massive game as UT2004. Defragging ensures that the game's files are all on the same place on your hard drive, greatly reducing loading pauses/freezes and loading times.
General Protection Faults: If you are continually crashing to desktop with a General Protection Fault then this is directly related to the memory subset on your system. That means either the L2 Cache on your CPU, your RAM (including Virtual Memory), or a background program in memory are having problems. The solutions are covered in the tips above that is, disable all unnecessary background programs, make sure your system is not highly overclocked, and optimize your Virtual Memory settings.
Antialiasing/Anisotropic: If you have mysteriously low frames per second (FPS) despite being certain that your hardware is capable of more, then one place to check would be your Antialiasing and Anisotropic Filtering settings. These are explained in detail in my Gamer's Graphics & Display Settings Guide. Even 2x Antialiasing for example can turn UT2004 from playably smooth (e.g. 30+ fps) to unplayable (e.g. 18 fps) depending on your hardware and in-game settings. For maximum framerates set both AA and AF to 0x or "Application Controlled".
That's just a basic rundown of troubleshooting tips. Read the remainder of this guide for more specific setting and tweak information, and of course although I've said it a dozen times by now (you want to kill me, right?) you really do need to go through my various tweak guides to make fully certain you've covered all your bases. These guides have been around for quite a while and are tried and tested by literally tens of thousands of readers.
Epic and Digital Extremes have a history of providing some very cool content and upgrades for the Unreal Tournament series of games for absolutely nothing, nix, nada. These upgrades are most commonly released in two forms: Official patches and Bonus Packs. Patches usually contain bug fixes, performance improvements and game refinements designed to address any major issues identified by the UT community. Bonus packs are exactly that a bonus downloadable package with new maps, new skins, new voices and new gameplay modes.
Official Patch
Another official patch has been released for the game and brings it up to Version 3369. The patch is a must-install, and you can download it from a variety of places including BeyondUnreal or Fileshack. To install the patch simply double-click on the .exe file and it will update your UT2004 automatically. Note that the patch contains all the fixes from the previous patches as well, so you don't need to install those if you're starting with a fresh install of UT2004 - only the latest patch.
The patch contains a great many bug fixes and minor game changes to make UT2004 even better, but if you want to see the full list of changes for yourself, after installing the patch go to your \UT2004\Help\ directory and read the ReadMePatch.int.txt file for all the details. Note that if you only install the latest patch, the experimental DirectX9 renderer will not be installed (it was part of the first patch only). If you've installed the first patch previously on your current installation of the game however your D3D9 driver will still be there, though D3D9 mode (See Advanced Tweaking section) may not work properly. This patch also doesn't change your existing .ini files, so all your tweaks/changes should also remain as they were.
Note, you should install this patch after you have installed the Editor's Choice Edition Bonus Pack (see below), since the patch changes some aspects of that pack as well.
There is also a 64-bit Update for UT2004, which is designed for systems with 64-bit CPUs on a 64-bit OS, like Windows x64. This update will improve performance on such machines.
Bonus Packs
The first small Onslaught Bonus Pack has been released, containing two new Onslaught maps which can be downloaded here. More importantly however, the UT2004 Editor's Choice Edition Bonus Pack has now been released. Weighing in at 85MB, it contains six new characters, three new vehicles (the Paladin, the Cicada, and the SPMA), and four new Onslaught maps. You need to be patched up to version 3323 to be able to use it though, so make sure you have installed the latest patch first. This bonus pack is highly recommended!
Epic has recently released the UT2004 Bonus MegaPack, which weighs in at 200MB and contains new maps, as well as the contents from the Editor's Choice pack, and the latest patch, all rolled into one. So you can use this pack to bring a new installation of UT2004 right up to date for example, rather than downloading any individual previous packs, or you can install it over your current UT2004 install and it will add new content. Well worth downloading.
Since UT2004 comes with the easy-to-use UnrealEd game editor, you don't have to wait for Official Patches or Bonus Packs to be released before you try new content for UT2004. Just go to an Unreal Tournament community site (See the Credits & Links section below), or places like the FilePlanet UT2004 section to download one of several free user-made maps or modifications ("mods") for UT2004. If diving into using UnrealEd takes your fancy, then a tutorial such as one of those listed here might be what you need. If you're fortunate enough to have the DVD edition of UT2004, it comes with a second DVD which has tutorials on using UnrealEd in full step-by-step DVD-quality detail.
A group of people who have put UnrealEd to good use are the folks who have put together two Community Bonus Pack over at PlanetUnreal. The community-developed packs have 20 new maps, 4 new characters and a new mod type each for you to enjoy, all for free. The packs are 195MB download each, but well worth it.
Or perhaps you can try the acclaimed Red Orchestra total conversion for UT2004. This free mod completely converts UT2004 into a classy WWII shooter, where you play a soldier on the Eastern front. It features excellent environments, accurate weaponry and physics and great sounds. It's a huge download (410MB) but effectively gives you hours and hours more gameplay with UT2004 in a totally different genre. Give it a try!
No-CD Cracks
Important Update: As of the 3204 Patch onwards, UT2004 no longer checks for the presence of your game CD in the drive. That effectively means the game now has a "built-in" No-CD patch, which means you don't need to download and install any other No-CD patches, executables or cracks from anywhere else.
I've made the decision not to provide any information on where to obtain, and how to install No-CD cracks in this guide. This is purely for legal reasons, as in a recent Halo Tweak Guide I initially included No-CD details but then received a friendly but firm email from the President of Bungie Software thanking me for the guide and asking me to remove the No-CD information. Copyright laws differ in various countries, but essentially you can't modify executable files or bypass copy protection without the author's permission. Morally I support the use of No-CDs, but legally, I am going to take the safe route, especially since TweakGuides.com is a new site and I don't want to jeopardize its existence.
What I can tell you is that No-CDs and Virtual Images don't improve game performance for UT2004. They reduce the initial loading time, since the CD/DVD doesn't have to spin up to be checked prior to starting up the game, but the copy protection used on UT2004 isn't the kind that will affect framerates. In the past, Epic/DE have recognised the annoyance caused by CD/DVD-checking copy protection systems on Unreal Tournament games and have eventually released a patch which removes the CD/DVD check. Once the initial period in which sales are at their peak is over, expect to see such a patch for UT2004.
Cheats and Hacks
Just a quick note that any modifications to game files, or use of scripts or utilities which give players an unfair advantage online (i.e. cheats/hacks) are simply not on. Epic/DE and Atari have made it clear in a recent announcement that the use of cheats is against the End User License Agreement you explicitly agreed to when installing UT2004, and if you're discovered cheating your unique CD Key will be banned from all servers, and you will be legally required to fully uninstall the game. The moral of the tale of course is don't cheat, no matter how tempting or fun it may seem. It's lame, it's pointless and now it's illegal. Stop it, or you'll go blind.
The next section describes all the UT2004 in-game settings, and their impact on performance.
In this section we go through all the UT2004 settings which can be accessed within the game. The Advanced Tweaking section will cover the settings which are accessible outside the game in the UT2004.ini and User.ini files.
The precise performance impact of a setting will depend on the particular hardware combination you are running. Also keep in mind that everyone has different performance vs image quality preferences, so I can't give hard and fast settings rules for everyone to follow.
To access the in-game settings, start up UT2004 and click on the Settings option on the main menu. You can also access settings during a game by pressing ESC, clicking on the Game button at the top of the screen, then the Settings button at the bottom. There are 7 settings screens. Each screen and its associated settings are covered in detail below:
Display
Resolution: This setting determines how many pixels (the individual dots which make up a computer image) are displayed on the screen. A resolution of 800x600 implies 800 pixels wide by 600 pixels high on your monitor. Obviously the higher the resolution (the more pixels), the more detailed and clearer the game image, but it takes more graphics card and CPU power and hence you will see less Frames Per Second (FPS). The highest resolution available in this list of resolutions is limited to what your graphics card and monitor are actually capable of rendering (drawing on screen). The resolution alone will have the biggest impact on your framerate, along with texture settings.
Color Depth: This determines how many different colors can be displayed on screen. The two options are 16-bit and 32-bit, with 32-bit only shown if your graphics card supports it. 32-bit color looks the nicest, with 16-bit color showing more color "banding" that is, the gradation between colors is more apparent. 32-bit color also resolves a lot of problems with flickering and missing textures, especially in OpenGL mode. However 32-bit color requires a bit more power than 16-bit, so if you need more FPS, switch to 16-bit.
Full Screen: Tick this option to run UT2004 in full screen mode, for the least likelihood of errors or crashes. If unticked, UT2004 will run in a window on your Windows desktop and this may cause problems.
Gamma, Brightness, Contrast: These three settings affect how bright/dark and crisp/soft your image looks. Set these to taste, using the picture provided in the Gamma Test window below these settings as a guide to how it will impact on the in-game images. It really depends on your monitor's brightness/contrast settings as well. For reference, my monitor's Brightness is 70% and Contrast 100%, while my UT2004 settings are: Gamma of 0.90, Brightness of 0.70, and Contrast of 0.70.
Texture Detail: This determines how detailed the in-game textures (the images that cover the surface of every 3D object) will look. The options range from Lowest to Highest. The higher the setting, the crisper and more detailed the textures around you will look. Higher texture settings primarily impact on loading times and loading pauses in-game, and less on FPS. The more Video RAM your graphics card has (ideally 128MB or more), and the more system RAM you have (ideally 512MB or more) the less stuttering and freezing you will get with higher texture settings, as these are loaded into and out of RAM from your hard drive.
Character Detail: Similar to the Texture Detail setting above, from Lowest to Highest this determines how detailed the textures on all the characters look. The higher the setting combined with the number of players in a match determines the performance impact, particularly on loading times.
World Detail: Options are Low, Normal and High. The higher this setting the richer your surroundings, as more optional 3D objects are loaded onto the landscape, but the higher the computing power required (and hence the lower your FPS) especially on levels where you can see further and/or there are more optional objects to see. If you have a slower graphics card and/or CPU lower this setting to improve your FPS.
Physics Detail: Options are Low, Normal and High. This setting changes the level of detail for the simulation of physics in the UT2004 gaming world. The higher the setting the more CPU effort required to crunch the numbers to show more realistic effects ranging from the basic "ragdoll" effects through to effects such as water ripples. I would recommend that the slower your CPU (i.e the closer to the 1GHz minimum spec), the lower your Physics setting, as this can really affect your FPS.
Dynamic Mesh LOD: This setting controls the degree to which the Level of Detail (LOD) on Dynamic Mesh objects (i.e. animated objects like characters and vehicles) is affected by distance. The higher this setting, the less quickly the level of detail (number of polygons) on such objects is removed as they move into the distance. Put another way, the higher the setting, the better the visual quality but the greater the impact on your FPS depending on how many dynamic objects are on screen. A setting of Normal is recommended for most people.
Decal Stay: This setting, if the Decal option is ticked (and Projectors is also ticked), will determine how long decals (scorch marks and the like) will remain on surfaces. The three settings are Low, Normal and High, and unless you are a stickler for detail, Normal or even Low should be just fine. Setting it to High may negatively impact your FPS, especially with lots of weapons fire on screen.
Character Shadows: This setting determines the type of shadows cast by animated characters, and can have a major impact on performance. When set to None, characters do not cast a shadow. This provides the fastest performance. When set to Blob, characters cast a generic, low detailed 'blob-like' shadow. This setting is recommended for most people. Setting Character Shadows to Full provides full-detailed shadows but can impact FPS quite noticeable, especially when there are many characters onscreen.
Decals: Decals are the dynamic marks left on surfaces by weapons fire, explosions and the like. Ticking this option turns them on to improve the realism of the game, but may affect FPS negatively, especially on levels where there are lots of players firing lots of weapons. I recommend leaving Decals on unless you're really struggling for FPS.
Dynamic Lighting: Ticking this option allows the various lights in the game to react realistically with objects, shining at different angles off weapons, characters and walls based on the light's position. This makes for great effects but can decrease your framerate, so untick it if you need more FPS.
Detail Textures: Adds a level of fine detail or "grain" to certain textures (such as pitted or brushed metallic surfaces) when examined close up. However this can reduce your FPS and use up more RAM, so untick it if you need better performance.
Coronas: A corona is the halo of glare given off from light sources, such as lamps and shock-combo explosions. Unticking this option will give you slightly more FPS, especially if you also have Dynamic Lighting ticked.
Trilinear Filtering: This rendering method makes the graphics and colors seem smoother and cleaner, but can reduce performance noticeably if you have an old (e.g GeForce2) video card. Most newer systems should notice little if any performance drop from having this enabled. If you're unsure about this setting, or are struggling for performance then leave it unticked. For more details see my Gamer's Graphics & Display Settings Guide.
Projectors: Projectors covers a range of images projected onto textures, such as shadows from characters and objects (like tree shadows) and Decals (see above). The noticeable effects of unticking this option include removal of such shadows and decals, even if Character Shadows are enabled and the Decals option is ticked. Only untick Projectors if you really need a few extra FPS, as it makes things look fairly unrealistic.
Foliage: As the setting name suggests, ticking this option enables grass and other decorative foliage. Unticking it will improve your FPS by reducing foliage details, particularly on maps like ONS-Primeval which have a lot of trees and grassland.
Weather Effects: Ticking this option enables the various weather effects found on several maps, like raindrops, lightning, etc. Unticking this option will improve FPS on such maps by reducing the load on your CPU and graphics card.
Fog Distance: Using the slider, a value range between 0.00 and 1.00 can be set. Lower values reduce visible distance (increasing the 'fog') and hence reduce the number of objects rendered onscreen, improving performance. Experiment with various values to determine your own performance vs image quality preference.
In-Game settings are continued on the next page
Audio
Music Volume, Effects Volume, Announcer Volume: These independently determine the volume of the background music, general effects like character voices, weapons fire and explosions, and the Announcer's voice volume respectively. Adjust to taste, no performance impact.
Audio Mode: The available options for this setting are covered below:
[Safe Mode] - This option is only provided for those having sound problems with other sound modes. If your sound problems are resolved by switching to Safe Mode, then chances are you need to update or reinstall your sound card driver, or address another general system issue (See the Essential Optimization section above, and my TweakGuides Tweaking Companion).
[3D Audio] - This is the most basic audio in UT2004, and uses your CPU to process the sound. It's actually quite acceptable, and does provide good 3D audio. If you have a sound card or decent onboard audio, you can use that instead to provide better quality audio. However software audio will provide the best framerate performance.
[H/W 3D Audio] - If you have a sound card, this option will make use of your sound card's hardware capabilities to extend the audio experience. It sounds better than Software 3D, but may reduce your FPS slightly due to extra processing.
[H/W 3D Audio + EAX] If you have a sound card capable of running Creative Lab's EAX 3.0 (Environmental Audio), such as the SoundBlaster Audigy series, then you can enable this option. EAX adds special effects to the sound and gives you advantages such as being able to determine with greater accuracy where people are (true positional), and being underwater or behind walls will sound more realistic (occlusion culling). However with this option enabled, you may notice a drop in FPS. Note that you may also have to update your sound card's drivers to get correct 3D audio with EAX on UT2004.
Play Voices: Here you can choose which type of character voices you hear. The options are All which plays everything, No Auto Taunts which only allows taunts which you or opponents manually select to be heard, No Taunts which blocks all taunting voices, and None which removes all character voices, including taunts and screams/grunts. Has no noticeable effect on performance.
Low Sound Detail: If ticked this changes the sampling rate of the sound, in effect lowering its quality. This might improve general performance, but it's not recommended for most people unless you are really struggling for extra FPS.
Mature Taunts: If ticked, will allow the more "mature" taunts to be heard in-game. If you are a parent and don't want your kids hearing "Holy Sh*t!" in the middle of a UT2004 match, untick this option, otherwise the taunts are not that shocking for most. Has no effect on performance.
System Driver: This option determines whether UT2004 uses the game's generic OpenAL sound driver, or an OpenAL driver specific to your sound card. If this setting is ticked, the game will use the default UT2004 driver (which seems counter-intuitive). However if you check in your \Windows\System32 directory and find an OPENAL32.DLL file, then unticking this option will use your sound card-specific driver. This may resolve any audio problems you are having, and it will improve your performance and audio quality. I recommend unticking this option if you have OPENAL32.DLL in your \Windows\System32\ directory.
Auto Taunt: Your character will automatically say a random taunt when he kills an opponent or with special moves/events. Usually this annoys other players after a while, so I recommend you leave it unticked. If you need to taunt, bind specific taunts to a key, or use the speech key. Has no effect on performance.
Reverse Stereo: Reverses the left and right audio channels. Leave unticked unless you really want your left speaker to put out sounds coming from your character's right and vice versa. Has no effect on performance.
Message Beep: If ticked, produces a small beep whenever a text message is sent by any players in the game. Has no effect on performance.
Announcements: The settings are None, Minimal and All. Some people may get annoyed with the somewhat obvious things the in-game announcer will say, so this setting allows you to determine the frequency of announcements. Minimal is recommended so you can hear the important announcements like time left in the match and whose flag has been captured. Remember that important announcements will also be shown as text on screen, so setting this option to None won't put you at a playing disadvantage. Has no effect on performance.
Status Announcer: Select which announcer type you want to provide you with Status updates. The choice is personal taste, and has no impact on performance.
Reward Announcer: Select which announcer type you want to announce the various rewards (such as "Monster Kill!"). The choice is personal taste, and has no impact on performance.
Text To Speech: The various options under this section relate to the new UT2004 ability to translate text message to synthesized audible speech (voiced by Stephen Hawking), as well as the built-in voice chat system. Note that you can adjust the voice used for Text-to-speech by going to your Windows Control Panel and choosing the Speech option. Disabling Text-to-speech can give a noticeable performance improvement.
[Enable in Game] Ticking this option enables the text-to-speech functionality during gameplay in UT2004. It will have some performance impact in that extra CPU processing is required, but it may not be significant depending on your CPU's speed. Unselect all the text-to-speech options if they're not to your taste and you want extra game performance.
[Enable in IRC] Enables the text-to-speech functionality in Internet Relay Chat (IRC).
[Team Messages Only] Ticking this option will force text-to-speech to only operate for messages sent by teammates in team-based game modes.
[Voice Chat] Ticking this option enables the ability to talk to other players online via a microphone. Enabling voice chat can have an impact on your ping, as voice data is transferred over your internet connection. Untick this option (and subsequent ones below) if you don't use voice chat to conserve bandwidth and maintain the lowest possible ping. See the Voice Chat Options below for more details.
[Voice Chat Options] Click the Configure button here, and on the next screen you can adjust various options:
Voice Chat Volume: Adjust the volume at which you hear other voices over the chat link. No performance impact. Autojoin Public Channel: If selected, you will automatically join the Public channel each time you join a server, allowing you to chat to all players on the server. Untick this option if you don't use voice chat and want to conserve bandwidth and/or if you don't want to automatically join the Public channel. Autojoin Local Channel: If selected (and enabled on the server) you will automatically join the Local channel each time you join a server. Every time you speak, the broadcast will come from your online character's current location. Those further away from you will hear you less clearly than those who are close. Untick this option if you don't use voice chat and want to conserve bandwidth and/or if you don't want to automatically join the Local channel. Autojoin Team Channel: If selected, you will automatically join the Team channel each time you join a server with a team-based map. Any voice broadcasts you make on this channel will only be heard by team members, and not by the opposing team. Untick this option if you don't use voice chat and want to conserve bandwidth and/or if you don't want to automatically join the Team channel. Auto Select Active Channel: If selected, you will automatically select the default channel on the server. If you want to specify a particular channel yourself, enter the name in the Default Channel Server box below this setting, or leave it blank to join the server's default channel. Once again, untick this setting if you don't use voice chat and want to conserve bandwidth and/or you don't want to set a particular channel. Chat Password: Every time you join a server, a personal Chat Room is created for you, which others can join to privately chat. If you want to set a password on this channel, enter one in this box to prevent unwanted access. Internet Quality: This setting determines the amount of bandwidth on your internet connection used to transmit and receive audio broadcasts. This in turn affects the voice audio quality. The Less Bandwidth setting uses less bandwidth, but this results in lower quality voice audio. The Better Quality setting sacrifices more bandwidth to give higher quality voice audio. Select Less Bandwidth if you have a slower internet connection such as 56K modem or 128kpbs DSL, or if you simply want to conserve bandwidth due to ping spikes/lag. LAN Quality: Same as Internet Quality above, except affects voice audio when connected to other machines on a LAN configuration. Since most LAN connections are fast, Better Quality is the preferred setting here.
In-Game settings continue on the next page.
3D View: This panel shows your currently selected character appearance when playing online and offline. You can rotate the 3D character model by click on it and moving your mouse right or left. You can switch between 2D and 3D view by clicking the Portrait button. Has no impact on performance.
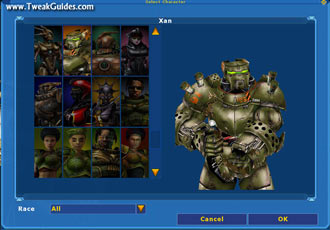
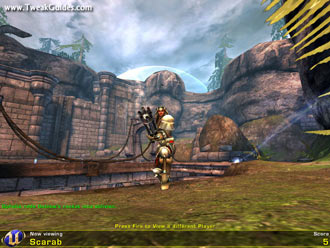
Change Character: Click this button to scroll through a list of available characters to select from. None of the characters are faster or more agile than each other, these are simply different "skins" which will represent what you look like to others when you play online. Choose one which reflects your online personality and playing style. You can sort by race, or view them All. Note some character boxes will have "?" in them to indicate a unique character type which is opened up through completion of the single player campaign (or by using the tweak in the Advanced Tweaking section on Page 9).
Name: Select your character name, limited to 16 characters in the box.
Voice Type: You can set the type of voice your character uses online when making taunts or announcements/orders to other players. Has no impact on performance.
Default FOV: This setting changes your Field Of View (FOV), that is how much of your surroundings you can see at once. The default is 90, however you can increase this value, with higher values giving you more of a "fish eye" view of the world. Changing this setting is more for the hardcore players who want the advantage of seeing more of their surroundings and hence reacting faster to people approaching from their sides. This setting can also be changed in-game using the FOV console command (See Console Commands section). The wider the FOV from default, the more details are visible onscreen and hence the greater the impact on your FPS.
Preferred Team: For team games like Team Deathmatch or Onslaught, and on evenly balanced servers, this will determine whether you start on blue or red. Has no impact on performance.
Weapon Hand: Select whether your weapon is visible or not in first person view (i.e only to you), or whether you hold it in your character's right hand, left hand, or centered. Doesn't affect your accuracy, and your weapon will still be visible to others regardless of this setting. Invisible weaponry may improve your graphics performance slightly due to not rendering a large, highly detailed weapon on your screen, but for the most part this setting is personal preference.
Small Weapons: If selected, this reduces the size of the weaponry you see in the game. The nostalgic among us select this option to take us back to the days of the original Unreal Tournament. This is based on your personal preference, and has no performance impact.
Game
Weapon Bob: Ticking this option makes your movements seem a bit more realistic the weapon you're holding will bob up and down slightly as you run. You may want to untick it to maintain a smoother view, with no performance impact either way.
Gore Level: This setting determines how much blood and guts (and partial body pieces) go flying around during a game. Selecting No Gore turns off all gore, but is not recommended as it's against the UT spirit of unbridled carnage. Reduced Gore removes some of the more gratuitous gore, while Full Gore is the way UT is really meant to be played! Set to your personal taste, has no impact on performance.
Dodging: Ticking this option will allow you to perform the special dodge moves (See the Special Moves section below). If you double tap a movement key quickly your character performs a rapid "dodge" in that direction. The only reason you may want to untick this option (as it has no effect on FPS) is that some people accidentally cause a dodge while rapidly moving around and find it annoying or off-putting.
Auto Aim: This option will help you aim at targets (other characters) better, but if ticked will only work in the offline Single Player matches. It has no performance impact, and will not work in online games.
Screen Flashes: Ticking this option allows your screen to briefly flash as you take damage from weapons. It can be a useful reminder of the "pain" your character is experiencing, but may bother some people. Has no effect on fps, so set to taste.
High Beacon Trajectory: Ticking this option will mean that whenever you use the Translocator, it will shoot the beacon disc out at a high angled trajectory, in classic UT-style, as opposed to a flatter trajectory. Has no impact on performance.
Switch On Pickup: With this setting ticked, as you pick up different weapons during a game, if your active weapon has a lower priority (based on Weapon Priorities you set see below) than the one you've just picked up, you will automatically switch to the higher priority weapon. After a while you may decide it is simply easier to switch off this option and manually select the best weapon based on the circumstances. Has no impact on performance.
Landing Viewshake: With this setting ticked, whenever you land from a height your view will shake slightly to represent the jarring your character has received. Switching this off may suit most people. Has no impact on performance.
Connection: Choose the type of internet connection you have available on your machine. Your connection will determine how "laggy" your online experience will be. When you see a list of servers, a setting called Ping will be displayed in the server details. The lower this number, the less delay in milliseconds (ms) there will be between any action you perform in UT2004 (such as firing a gun) and the actual impact it has on the online world. For example, with a ping of 500, it would take 250ms (or a quarter of a second) for a bullet I fire from my gun to actually register as a hit on the target, and another 250ms for me to see that hit. In that time the target may well have moved three inches to the left on the screen. This is known as lag, and is a part of all online action games to some extent.
To fine-tune your network connection speed in UT2004 see the Advanced Tweaking section below. Optimal connection speed helps reduce lag and ping variations, particularly for slower connections such as Dialup Modems.
Dynamic Netspeed: This is a new option which if selected allows UT2004 to dynamically alter your Netspeed setting (see Advanced Tweaking and Console Commands sections below) to maintain optimal ping. However I have found that if enabled this can cause variations in your ping which can be difficult to adjust to during a game. I highly recommend unticking this option as it can lead to more lag and ping variability.
Track Stats: Just like a real sporting tournament, UT2004 provides a means of recording your game statistics such as overall online ranking, kills, deaths, time spent playing etc. To make sure that only you can record this information for your character, the game has username and password fields which you must fill out to protect your stats. If you tick the Track Stats option, every time you play a game on a server with statistics enabled, relevant statistics will be recorded, and can be viewed by clicking the View Stats button. Note that some servers require that this option to be ticked before you can join, so if you can't seem to connect to a particular server, tick this option and try again.
Speech Recognition: This is a new UT2004 feature, which if ticked basically uses voice recognition to translate your spoken commands into actual commands given to bots on your team (if any are in the current game). Enabling this option will impact on your performance, so unless you absolutely want this feature turn it off for a noticeable performance improvement.
Preload All Player Skins: When this setting is ticked, UT2004 will attempt to load up all player skins into memory while loading up maps. It does so in an attempt to reduce in-game loading pauses which can occur every time you see a new character (and hence their skin is suddenly needed). However this feature is causing a lot of problems for those with 512MB or less of RAM. It is highly recommended you disable this feature unless you have 1GB of RAM or more, and you will see a noticeable improvement in loading times and in-game freezes. With this setting disabled you may however notice a lot more small loading hitches/pauses during the game, particularly in the first few minutes as player skins are loaded up "on the fly". See the Troubleshooting Tips section for more tips on reducing loading pauses and loading times, as well as the Advanced Tweaking section.
The next section finishes off the In-Game settings
Aside from Reduce Mouse Lag, none of the settings below have any impact on performance and are all purely based on personal preference. Hence no performance impact commentary is noted against them.
Configure Controls: This section is fairly self-explanatory. Click on the key assignments you want to change in the Key1 column and type in the new key you wish to use. The default control settings are actually very good, so not much should need to be changed.
Speech Binder: This section allows you to assign taunts to specific keys, so you won't have to press several keys to access individual taunts. This can also be done through the User.ini file (See Advanced Tweaking section), but doing it here is much more convenient and is recommended.
Auto Slope: Ticking this option means that whenever your character runs up (or down) a sloped surface, the view will automatically tilt to be level with the surface.
Invert Mouse: Ticking this setting will mean that pushing your mouse forward will make you look down, and pulling your mouse backward will make your character's view tilt upward.
Mouse Smoothing: As the name implies, ticking this setting will mean your mouse movements will result in smoother movement on screen. Ticking this option will not affect your framerate (whereas Reduce Mouse Lag will), so tick it unless it gives you problems.
Reduce Mouse Lag: If you have issues with your mouse "lagging" on screen, then ticking this option will help resolve them. Unfortunately it will also reduce your performance to a fair extent, so if you have no mouse lag problems leave it unticked for an increase in FPS. Most of the time "mouse lag" problems are actually caused by low FPS (and/or extremely high ping) in any case, so look to lowering some of your other settings first and see if that improves your mouse lag. If nothing else works you may have to enable this setting.
Enable Joystick: Fairly obviously, if you have a joystick connected and wish to use it with UT2004, you'll need to tick this option, otherwise leave it unticked.
Mouse Sensitivity (Game): The higher the number, the more sensitive your character's movements will be to mouse movements. This setting only applies to the actual game movements and not moving the mouse around the user interface. There is no "correct" setting - it all depends on your mouse, the surface it's on, your general Windows mouse speed and your personal preference.
Mouse Sensitivity (Menus): Just like the above option, the higher the number, the more quickly your cursor will move in response to a mouse movement in the user interface (menus, settings screens, etc.).
Mouse Smoothing Strength: This setting lets you change the extent to which mouse smoothing occurs on your movements (If Mouse Smoothing is ticked). I experimented with various values but didn't notice any real difference on my optical mouse. If you are experiencing problems with your mouse smoothness, try varying values.
Mouse Accel. Threshold: This value affects the acceleration of your mouse and can increase or decrease mouse precision. The higher the setting, the more movement of the mouse is needed before mouse acceleration kicks in. That means the higher the value, the more accuracy you'll have with the crosshairs, but your mouse will feel slightly slower for smaller movements.
Dodge Double-Click Time: With Dodging enabled (See the Game section above) this setting controls the length of time in seconds during which a double-click of a keyboard movement key is registered as a dodge. That is, with dodging enabled, and at the default setting, if you press A (default move left key) twice within 0.25 seconds then it will register a dodge to the left. Higher values mean more time during which two presses of a key will register as a dodge. I personally recommend a setting of 0.40.
TouchSense Force Feedback: If your mouse supports Force Feedback then you can tick any or all of the four feedback areas to give you more of a "connected feel" to your environment. Using this option shouldn't affect framerate noticeably, and of course if your hardware doesn't support this feature, untick these options.
Weapons
Weapon Priorities: Lists the available weapons in UT2004 in order of priority, from highest through to lowest. The priority list only has an effect on gameplay if you have Switch On Pickup ticked (See above). You can change the weapon priority order by clicking on a weapon name, then selecting either the up arrow to the right of this panel (Raise Priority) or the down arrow (Lower Priority). Rearrange the list until you have your favorite weapons near the top and the weaker/less preferred weapons at the bottom. If you want to set the priority list back to the default priorities when you first ran the game, click the Defaults button on the bottom right of the screen. When you click on each weapon you also get the same weapon description as is in the manual displayed in the box beneath the weapon's picture.
Swap Fire Mode: Highlighting a weapon in the Weapon Priorities list and ticking this option will swap that weapon's Primary and Secondary firing modes. For example, if you highlight the Shock Rifle and tick this option, left-clicking your mouse will now shoot an energy ball, and right-clicking it will shoot the beam (the opposite of the Shock's default).
Classic Model: When highlighting certain weapons in the Weapon Priorities list, you will see the Classic Model option become available on the right of the screen. If selected, you will see a change in the 3D weapon picture to reflect the fact that you will now see these weapons as the "classic" UT2003-style model. This has no impact on the weapon's abilities, only the model which portrays it.
Custom Weapon Crosshair: If selected, this option will allow the use of a separate crosshair style for each different weapon. You can then highlight each weapon and use the settings below to adjust the style, color, opacity (transparentness) and scale (size) of each the crosshair. If this option is unselected, a single crosshair, as specified by these settings, will be used for all weapons your character wields.
HUD
The HUD is the Heads Up Display, the display around the edges of your screen which show your health, ammunition etc.
Hide HUD: Ticking this option completely removes the HUD. The information displayed on the HUD is very important and at least some of it is best left showing. Use the options below to select which parts you wish to show.
Show Enemy Names: This option is ticked by default, so that putting your crosshair on an enemy will show their name beneath the crosshair.
Weapon Bar: Ticking this will show the weapon bar at the bottom of the screen.
Show Weapon Info: Ticking this will show the current weapon you've equipped and how much ammo it has.
Show Personal Info: Ticking this will show your current health and armor.
Show Score: Ticking this will show your ranking or team's score in the current game.
Show Portraits: Ticking this will allow a briefly displayed small portrait of any character who says something important (like an order) during the game in the mid-left of the screen.
Show VoIP Portraits: Same as Show Portraits above, except is triggered by Voice Chat.
No Console Death Messages: As the name implies, turns off the reporting of characters' deaths in the console area.
Max Chat Count: The number you enter in this box determines how many in-game chat messages will be displayed at one time on the screen (maximum 8).
Chat Font Size: The number in this box will determine the size of the font (how big the text will be) for in-game chat messages (maximum 8).
Message Font Size: Similar to Chat Font Size, this number will determine how big the in-game messages (other than chat) will be (maximum 4).
HUD Scaling: Determines how big the HUD items are on the screen, starting at 100% (default size) to a minimum of 50% of default size.
HUD Opacity: Determines how transparent the HUD items are, down to 50% transparent.
Custom HUD Color: If you tick this option, you can choose a unique HUD color.
Configure: The configure button at the bottom left allows you to configure the HUD items specific to the Onslaught and Assault gameplay modes. Click on configure to adjust the various HUD settings for these game modes, such as the size, transparency and viewable items.
Phew! That brings us to the end of all the options available for configuration in the in-game settings. Once you get these adjusted to suit your personal taste and performance vs image quality preferences, go to the next section for some Advanced Tweaking.
While the in-game settings for UT2004 cover almost all of your customisation needs, this wouldn't be a TweakGuides.com tweak guide if we didn't go a lot further than that. As most people know, games based on the Unreal Engine can be tweaked by editing the game settings in the initialisation (.ini) files. UT2004 follows that tradition by having a lot of tweakability if you know where to look in the .ini file and what each tweak actually does.
In this section of the guide we examine the two main .ini files which hold all the major UT2004 settings. These files are UT2004.ini and User.ini. They both sit in the \UT2004\System\ directory. Now before you do anything with these files, firstly make all the changes you want using the in-game settings as covered in the section above. The changes you make there are recorded in both of these files. Next, exit UT2004 and make a copy of each .ini file, rename the copies and put them somewhere safe as a backup.
Note that the default UT2004.ini settings - the settings which ship with UT2004 the first time it's run - are in a file called Default.ini in the same directory as the other two .ini files. Don't delete, rename, move or change the Default.ini file at any point.
Now, having safely backed up these files, you can open them up using Notepad or any other text editor and begin the tweaking journey. I won't cover any settings which can be changed using the in-game settings screens - you should stick to changing these within the game. I'll only cover the tweaks which are purely accessible through the .ini files, and which can't be changed using the in-game options.
User.ini
[DefaultPlayer]
Name=
This setting holds your online character's name. Whether you use the in-game settings or enter a name here, you're limited to 16 characters maximum being displayed on a server. The only point of entering/changing it here rather than in-game is that you can paste in special characters here if you so like.
[Engine.Input]
All the key commands assigned under the Controls and Speech Binder sections of the in-game settings are recorded here. You should change key and taunts in-game. However you can assign special key commands in the User.ini file, such as in the example below.
To edit a key function, find the key entry you want to change (e.g. the E= line for the "E" key on your keyboard) and insert/edit the code following it to change its function. For example, to assign two weapons to one key, where pressing the same key will switch between the two weapons, use the following command (example shows the command bound to the "E" key):
E=pipedswitchweapon 5 | pipedswitchweapon 7
This now allows you to switch back and forth between the Link Gun and the Flack Cannon by pressing E. Note the character after the 5 above is the "pipe" symbol, and is usually inserted by pressing the SHIFT key and the \ key. There are other commands you can assign to keys, and a range of taunts.
[Engine.Vehicle]
bVehicleShadows=True
Set this option to False if you want to turn off shadows cast by vehicles, gaining a slight performance improvement on maps with vehicles.
[Engine.Player]
ConfiguredInternetSpeed=10000
This is a vital setting. It determines your network rate in bits per second. Tweaking this setting can improve lag problems.
For 56K modems, depending on your connection speed try values between 2400 and 3000 for optimal ping. As a rule of thumb, try and match your average connection speed (in kbps).
For ADSL/DSL/Cable and faster connections try higher values, ranging from 6000 - 8000. You can try the default value of 10000 but I find this is just too high to maintain a steady low ping, and use 8000.
Remember that depending on the ping of the server you join, where its located, who else is playing and how many others, you may still experience some lag regardless, particularly at the start of each round, or when lots of people join. Also remember that servers have a cap on this rate, so even if you set it very high it may still be limited by the maximum bandwidth the server is set to allocate to each player.
Something interesting to note is that your frames per second are limited by your netspeed. Netspeeds below 5000 will noticeably cap framerates for those with faster machines. For example, I get 60 FPS maximum with a netspeed of 5000, but 90 FPS maximum with a netspeed of 8000. You can adjust Netspeed "on the fly" using the Netspeed command (see Console Commands section below) to find which network rate gives you the best ping and framerate on the current server.
[XInterface.GUIController]
bQuietMenu=False
Set this to True if you don't want any sound effects while you're navigating the UT2004 menus. No performance impact.
bNoToolTips=False
Set this to True if you want to disable the small grey description boxes which popup every time your mouse moves over a setting or option in the UT2004 menus. No performance impact.
[Engine.PlayerInput]
MouseSamplingTime=+0.008333
This setting affects how fast/slowly your mouse moves by taking samples at more/less frequent intervals (in seconds). As this number decreases from the default the more responsive your mouse will seem as samples of your mouse movement are taken at more frequent intervals. Experiment with this setting if the default sampling time doesn't seem to help your mouse speed.
[UnrealGame.UnrealPawn]
bPlayOwnFootSteps=True
Setting this option to False will turn off the sound of your own footsteps.
[GUI2K4.UT2k4MainPage]
TotalUnlockedCharacters=Malcolm;ClanLord;Xan
There are three special characters which you can only access by completing the single player campaign. These show up as "?" in the Character Selection screen. However if you want to access these characters without completing the game, enter the text shown above next to this setting and they will become available to you. Oh, and shame on you if you do this ;)
That covers the major User.ini tweaks. While looking around the file you'll notice a lot of commands that can be adjusted in-game. Again, I would recommend that you change these in-game where possible to minimise the possibility of errors and hence problems down the track. Next up, we look at the UT2004.ini file.
UT2004.ini
[URL]
LocalMap=NvidiaLogo.ut2
If you don't like the Nvidia Logo showing up as you load UT2004, and you want to skip the intro screen altogether then replace the NvidiaLogo.ut2 entry with NoIntro.ut2. This will speed up your loading time. One thing to note is that if you make this change to skip the entry logo your UT2004 menu music (which is similar to the original UT99 music) changes to the UT2003 menu music.
If you own an ATI Graphics card, you can replace the Nvidia startup logo with this one. Just download the file, and extract the ATILogo.ut2 file to your \UT2004\Maps directory. Then change the LocalMap=Nvidialogo.ut2 entry to LocalMap=ATILogo.ut2 and you will now see an ATI Radeon logo greeting you everytime you load up UT2004.
[Engine.Engine]
RenderDevice=D3DDrv.D3DRenderDevice
By default, UT2004 will run using the Direct3D API. This is the best option for most people, however, you may be able to resolve some problems on particular hardware/software combinations - and maybe get more FPS - by running UT2004 in one of the other available modes: OpenGL, D3D9 (D3D DirectX9), or Pixomatic (Software) mode.
To run in another mode, first place a ';' in front of the first line in this section of the .ini file. That means it should look like this:
;RenderDevice=D3DDrv.D3DRenderDevice
Next, go to the relevant line below it, and remove the ';'. For example, if you want to run in OpenGL mode, remove the ';' in front of the OpenGL line so it looks like this:
RenderDevice=OpenGLDrv.OpenGLRenderDevice
Next time you start UT2004, even though it may not look different, it will be running in this new mode.
Generally speaking, Nvidia cards perform better in OpenGL than in Direct3D, and ATI cards vice versa. On a Radeon 9800 Pro I personally found OpenGL far slower than Direct3D with no visual improvements. In Pixomatic (software) mode, UT2004 looked terrible and ran incredibly slowly. This mode would only be suitable for those with high-end CPUs but low-end graphics cards.
The D3D9 (Direct3D DirectX9) mode was included in the 3204 UT2004 patch, so you can use this mode by using the appropriate line in the section above if you have installed the 3204 patch on your system at some point. However if you've only installed the latest patch, you may not have the D3D9 renderer and hence can't use this mode. Using the D3D9 renderer may result in the occasional tiny glitches (it is an experimental renderer after all), but in my testing I found the performance and image quality on my Radeon 9800 Pro to be similar to that under the default Direct3D mode. If you have a card which is not built around the latest DirectX9 features (i.e. older Radeons, and GeForce4 and below) then you may see a drop in performance and/or problems using the D3D9 mode. Experiment for yourself. Note that I've been informed the D3D9 mode may not work properly with the 3323 patch installed, so be aware of this if you notice animation problems and missing effects.
[Engine.GameEngine]
CacheSizeMegs=32
This value represents the amount of System RAM set aside for caching game information. I recommend a Cache size of 64 for most systems with 512MB of RAM or more. Given UT2004's need for RAM, I don't suggest increasing this value higher than 64. This tweak will not impact on FPS as such, it is designed to reduce loading pauses in-game, and should be used in conjunction with the other tips to do so throughout this guide.
UseSound=True
If you're desperate to improve your framerate, and you don't mind going without any sound whatsoever, change this setting to False and it might help your struggling system improve. Of course it's not recommended at all, but the option is here if you want it.
[WinDrv.WindowsClient]
Brightness=0.700000
Contrast=0.700000
Gamma=0.870000
Although they can (and should) all be adjusted in-game, you can fine tune these setting here.
MinDesiredFrameRate=35.000000
UT2004 will attempt to maintain a framerate approximately equalling this number as a minimum. That is, if your system starts to drop its FPS below this number, perhaps due to the level of detail on the screen or complexity of textures, UT2004 will do what it can to reduce the less noticeable eye-candy to improve FPS again. The higher this number, the more UT2004 will dynamically adjust details and complexity to maintain at least the framerate you indicate in this setting. If you don't want the game to do that (perhaps you have a fast machine), and want the eye-candy to stay at its absolute best, lower this number.
MouseYMultiplier=1.000000
MouseXMultiplier=1.000000
These settings control how "magnified" your mouse movements are. The MouseYMultiplier setting controls your mouse's up and down movements, the MouseXMultiplier setting controls the left and right ones. The larger the number you enter for these, the more exaggerated will be the translation of your physical mouse movements into in-game and in-menu movements on screen. Only change these settings if you cannot improve your mouse responsiveness with the in-game mouse settings.
[ALAudio.ALAudioSubsystem]
CompatibilityMode=False
This option may help people who are having sound problems. Set to True and see if it helps, otherwise leave at the default False for best audio quality.
UsePrecache=True
By default this is set to True, meaning UT2004 will attempt to load all necessary sounds into memory when loading up a map. However as discussed earlier in this guide, this can increase loading times and cause freezes and pauses for people with 512MB or less of RAM. Set this to False if that is the case, and sounds will be loaded "on the fly", perhaps resulting in more, smaller, loading pauses during gameplay.
Channels=32
You can set the number of audio channels used for sound/music in UT2004 manually by editing this number. 32 Channels provides excellent quality audio, however a lower number of channels (such as 16) will improve your overall performance at the cost of audio quality.
AmbientVolume=0.300000
While you can adjust the Effects and Music volumes in-game, and should do so there, this setting allows you to change the ambient sound level (background noises aside from music or character voices/taunts). Higher values for this setting will increase the level of the ambient sounds in the game.
[Engine.DemoRecDriver]
NetServerMaxTickRate=30
LanServerMaxTickRate=30
When using the Demorec command (See Console Commands section below), your demos are capped at 30 FPS. To increase the framerate at which they are recorded, change this setting to a higher value, e.g. 40 or 60. Note the LanServerMaxTickRate value applies only to demos recorded on LAN connections.
UT2004.ini Tweaks are continued on the next page
UT2004.ini Part 2
[D3DDrv.D3DRenderDevice]
If you're using the default renderer (Direct3D) then changing settings in this area will affect your graphics performance. If you're using OpenGL or Pixomatic modes (See the [Engine.Engine] section above to find out how) then ignore this section as tweaks here have no effect on those modes, and vice versa.
HighDetailActors=True
Set this to True for a slight performance loss but a slight improvement in Actor (character) details.
SuperHighDetailActors=True
When set to True, this allows the highest quality of detail on the characters in the game. Set this to False if you need the performance boost.
UsePrecaching=True
As with Audio precaching and preloading of player skins (See above), when set to True this option loads graphics textures into memory before you actually see them to reduce in-game jerkiness when textures load "on the fly". However if you are experiencing long loading times and long freezes during games, set this to False and see if you get an improvement. As before, without precaching you may notice more, smaller, loading pauses during gameplay.
UseTripleBuffering=True
Set this option to True to improve overall performance when VSync is enabled. Using Triple Buffering may cause problems for graphics cards with lower Video RAM, so set to False if youre experiencing problems such as mouse lag.
UseHardwareTL=True
If your graphics card has onboard Transform and Lighting (T&L) set this to True. Most recent graphics cards do feature T&L, so unless you have an older card don't set this to False for best graphics performance.
UseHardwareVS=True
Similar to T&L above, this option makes use of the hardware Vertex Shader on modern graphics cards. Most recent graphics cards feature VS. If you have an older card set this to False, otherwise leave at True for best graphics performance.
UseCubemaps=True
This is a trick used to make some reflective surfaces (like the water puddles in DM-Antalus for example) look like theyre actually reflecting whats around them in 3D. Turning it off (set to False) can improve graphics performance without any noticeable drop in image quality. If you have a faster system, set it to True for best visual quality at the cost of minimal FPS.
DesiredRefreshRate=60
If you have VSync enabled (See UseVsync setting below for more info) then your refresh rate will be limited to whatever this setting is. However, to reduce monitor flickering and eyestrain, you should set this value to the highest refresh rate supported by your monitor at the desired resolution. For example, your monitor may support a maximum refresh rate of 85Hz (85fps) at 1280x1024 resolution. This setting is at 60 by default, but you could set it to 85 to make full use of your monitor's capabilities and ease the strain on your eyes. Again, this setting has no impact if you have VSync disabled.
UseCompressedLightmaps=True
Using compressed lightmaps can improve your performance quite noticeably, hence it is on by default. If you have a monstrously fast system with a large amount of Video RAM (i.e 256MB) and system RAM (i.e. 1.5GB or more), set this option to False for the absolute best image quality and slightly quicker loading times, but at the cost of a few FPS.
Use16bitTextures=False
UT2004 can be run in either 16-bit or 32-bit (See In-game Settings section). While you can determine this in the settings screens, if you choose to run at 16-bit, there's no point in 32-bit quality textures being loaded for each game. Set this option to True to use the lower quality 16-bit textures to match the 16-bit color depth you've chosen. This will improve FPS noticeably at the cost of more visible color banding on textures.
UseVSync=False
Without going into too much detail, Video Synchronization (VSync) is the synchronization of your graphics card and monitors' abilities to redraw the screen a number of times each second. This is measured in Hz (which is the same as frames per second), and your monitor will have a maximum rating in Hz for each resolution e.g 1280x1024 at 85Hz. When set to False, your FPS will improve slightly, however, you may see some image "tearing" as your monitor and graphics card go slightly out of synchronization when the refresh rate exceeds the monitor's abilities. Turn off VSync (set to False) for best graphics performance, however if the image tearing is annoying then set to True. Setting TripleBuffering to True (See TripleBuffering above) will help reduce any tearing. For details, see my Gamer's Graphics & Display Settings Guide.
Also note that the VSync settings in your graphics control panel may conflict with this setting, so make sure they match what you select for UT2004.
LevelOfAnisotropy=1
This setting controls the amount of Anisotropic Filtering in UT2004. Basically Anisotropic Filtering improves texture quality, however it comes at the cost of some performance, particularly on older graphics cards. Setting this to 0 will improve performance on most machines without a noticeable drop in image quality. Of course increasing the value will improve image quality at a variable rate of performance loss based on your hardware. I recommend leaving this setting at default and using your graphics card's control panel to determine the level of Anisotropic Filtering applied to UT2004 (as detailed in my Gamer's Graphics & Display Settings Guide.
AvoidHitches=False
Setting this to True might help reduce the occurrence of substantial hitches (pauses, stuttering) in UT2004, but it can reduce average framerates, so leave this option at default and first try to minimize the loading/freezing issues with the other tweaks mentioned in this guide.
DecompressTextures=False
Just as with compressed lightmaps, compressed textures reduce image quality slightly, however they improve graphics performance dramatically (especially with Precaching set to True) as more textures can be loaded into video memory when compressed. Set this option to True only if you have an extremely fast machine and a graphics card with 256MB of VRAM or more, and you want the absolute highest quality of textures showing. Setting this option to True will cripple most machines' performance.
OverrideDesktopRefreshRate=False
If set to true, this setting will allow you to exceed any refresh rate limitations Windows may have imposed on UT2004. Set to True just to be safe, but if you already use a refresh rate fix, such as Refresh Force, changing this setting will have no effect.
[D3D9Drv.D3D9RenderDevice]
[OpenGLDrv.OpenGLRenderDevice]
[PixoDrv.PixoRenderDevice]
Tweaking the options under these sections will only have an impact if you're using the Direct3D9, OpenGL or Pixomatic renderers rather than Direct3D (See [Engine.Engine] section above to see how). The settings under here are essentially the same as those in the Direct3D section above, and setting them to True or False will have the same impact on performance. I recommend sticking to Direct3D as your renderer, as it gives the best performance and stability with UT2004 on all graphics cards.
[xInterface.ExtendedConsole]
bSpeechMenuUseMouseWheel=True
By default, the speech menu can be scrolled through using the mouse wheel (if you have one). However setting this to False will turn off that feature, in case it annoys you.
bSpeechMenuUseLetters=False
By default the speech menu uses numbers to specify taunts/orders. For example, saying "Affirmative" using the Speech menu requires that you press the speech menu key (V by default), then 1, then 1. Setting this line to True will change the numerical menu items to letters, so that in the above example, you'd have to press V, then W, then W (by default) to say "Affirmative". You can change which keys are assigned to which items in this section as well. For example, LetterKeys[1]=IK_W shows that the "W" key is assigned in place of the "1" key when the letter menus option is enabled. Replace the "W" in the "IK_W" with another letter if you wish to change it.
Once again, another long list of tweaks and commands! After you've tweaked your UT2004.ini and User.ini files, save them and close them before running UT2004. The next section covers the Console Commands and Adrenalin/Special Moves which can be used in UT2004.
UT2004 Console Commands
To bring up the UT2004 console, press the ~ (tilde) key. To close the console press the ~ key again. You can type a range of commands in the console to perform tweaks, change settings or look at information. I have included a full list of console commands below, with a brief description of what each does. Note that many of these commands can be changed using the in-game settings screens and also in the .ini files.
Player / Bot Commands
ADDBOTS [number] - Adds the specified number of bots
BEHINDVIEW 1 - Changes to third person view
BEHINDVIEW 0 - Changes to first person view
DISCONNECT - Disconnect from current server
EXIT - Quits the game
KILLBOTS - Gets rid of all bots
OPEN [IP address] - Connect to a specific server IP
OPEN [mapname] - Opens specified map
QUIT - Quits the game
RECONNECT - Reconnect to the current server
SWITCHLEVEL [mapname] - Switches to the specified level
SWITCHTEAM - Switch your player's team
SUICIDE - Kills yourself
TEAMSAY [text] - Displays your message in team chat
PLAYERSONLY - Freezes \ pauses the bots
SAY [text] - Displays your message in global chat
SETNAME [playername] - Changes your player name
Statistics
MEMSTAT - Displays Windows memory usage
STAT ALL - Shows all stats
STAT AUDIO - Shows audio stats
STAT FPS - Displays your frames per second
STAT GAME - Displays game stats
STAT HARDWARE - Shows hardware stats
STAT NET - Shows network game play stats
STAT NONE - Turns off all stats
STAT RENDER - Displays rendering statistics
Demo Commands
DEMOPLAY [demoname] - Plays the specified demo
DEMOREC [demoname] - Records a demo using the demoname you type
STOPDEMO - Stop recording a demo
Admin Commands
ADMIN SWITCHLEVEL [mapname?game=gametype?mutator=mutator] - Changes the current level to the specified level, game type and mutators
ADMIN [command] - Performs the specified command
ADMINLOGIN [password] - Logs the admininstrator onto the server using the specified password
ADMINLOGOUT - Logs the administrator off the server
ADMIN SET UWeb.Webserver bEnabled True - Enables the remote admin webserver (after level change)
ADMIN SET UWeb.Webserver bEnabled False - Disables the remote admin webserver (after level change)
KICK [playername] - Kicks the specified player from the server
KICKBAN [playername] - Kicks and bans the specified player from the server using their IP address. To unban the player, edit the server.ini or use the web admin interface
Other Commands
BRIGHTNESS [number] - Changes the brightness level to the specified number
CDTRACK [number] - Plays the specified CD track number
CONFIGHASH - Displays configuration info
CONTRAST [number] - Changes the contrast level to the specified number
DEBUG CRASH - Test crashes the game with an error
DEBUG EATMEM - Tests memory allocation until full
DEBUG GPF - Test crashes the game with a general protection fault error
DEBUG RECURSE - Test crashes the game by infinite recursion
DUMPCACHE - Displays the memory gcache contents
EXEC [filename] - Executes a file in the UT2004/system/ directory by default
FLUSH - Flushes all caches and relights
FOV [number] - Changes the field of view to the specified number
GAMMA [number] - Changes the gamma level to the specified number
GETCOLORDEPTHS - Displays the maximum color depth supported by your hardware
GETCURRENTCOLORDEPTHS - Displays your current color depth
GETCURRENTRES - Displays your current resolution
GETCURRENTTICKRATE - Displays your current tick rate
GETMAXTICKRATE - Displays the maximum allowed tick rate
MUSICORDER [number] - Change to a certain track in the song (0=ambient, 1=action, 2=suspense)
NETSPEED [number] - Sets the net speed, default is 10000
OBJ CLASSES - Displays a list of object classes
OBJ GARBAGE - Collects and purges objects no longer in use
OBJ HASH - Displays object hashing statistics
OBJ LINKERS - Displays a list of active linkers
PAUSESOUNDS - Pauses all sounds
PREFERENCES - Opens advanced settings
RELAUNCH - Relaunches the engine
REPORT - Copies a report of the current game to clipboard
SET [class variable value] - Sets a specified class and specified variable with the specified value
SETSENSITIVITY [number] - Sets the mouse sensitivity to the specified number
SETRES [WxHxD] - Sets your screen resolution to the specified width, height, and color depth
SLOMO 1 - Sets the speed of the game back to normal real time speed
SLOMO 2 - Sets speed to double. Increase number to go faster
SLOMO .5 - Sets speed to half. Decrease number to go slower
SOCKETS - Displays a list of sockets in use
TOGGLEFULLSCREEN - Toggles fullscreen mode
TYPE [text] - Displays the specified text on the console
UNPAUSESOUNDS - Un-pauses all sounds
Adrenalin Combos and Special Moves
There are a range of special moves which can be performed by your character under certain circumstances. Some require that you have 100 Adrenalin. Others, like the Dodging moves require that you have the Dodge setting ticked (See In-game Settings section). You can get Adrenalin points through various methods:
Picking up a red and white adrenalin pill: 3 points
A Kill: 2 points
Headshots: 5 points
The first kill during a round (First Blood): 12 points
Killing sprees: 12 points
Adrenalin Combos:
Once your Adrenalin reaches 100 points, you will be allowed to perform one of the following special moves, the effects of which will only last for a while. The following key combinations need to be pressed in rapid succession to activate the Adrenalin effect:
Speed: Forward, Forward, Forward, Forward
Regeneration: Back, Back, Back, Back
Invisibility: Right, Right, Left, Left
Berserk: Forward, Forward, Back, Back
Special Moves:
These can be performed at any time, but require a fair bit of practice and skill to master. Remember, you need to activate the Dodge setting to use the dodge moves.
Double Jump: Jump and then press jump again in the arc of the jump
Dodge: Tap Left, Right, Forward or Back twice quickly
Dodge Jump: Perform a Dodge, and jump just before you lose your air
Wall Dodge: Run alongside a wall, jump and quickly Dodge away from it
Goo Jump: Shoot some goo from the Biorifle, get a shield up using the Shield Gun, jump just when goo explodes (You can also use the shield gun to bounce energy weapons, break your fall and of course block normal weapons.)
Lift Jump: Jump while on a lift to get an extra boost
Death from Above: If you jump from a great height and land on someone you'll cause them damage.
We're fast approaching the conclusion to this guide. The next section covers a few more neat things about UT2004, and wraps the whole show up.
Replacing the UT2004 Loadup Graphic
The UT2004 loadup graphic which starts the moment you run UT2004 is relatively ugly, but can be customized quickly and easily. Just go to your \UT2004\Help directory and make a backup copy of the UT2004Logo.bmp file. You can now replace this with any picture you like, give it the name UT2004Logo.bmp (make sure it's an 8-Bit Bitmap picture though), and it will load instead each time you run UT2004. If you're really lazy like me, you can copy the InstallerLogo.bmp file in the same directory and rename it to UT2004Logo.bmp, giving a smaller, cleaner looking startup logo, and saving 200KB of RAM at the same time!
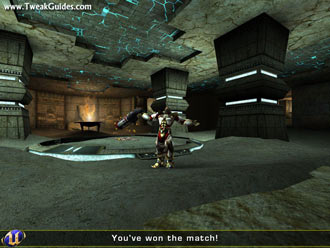
UT2004 Music
All of the UT2004 music is in Vorbis .Ogg format, and can be found under the \UT2004\Music directory. You can use a free music player like WinAmp to listen to these songs. For more details on how to extract and convert .Ogg files to other formats, see my Game Music Extraction Guide.
Benchmarking UT2004
As of the 3204 Patch, UT2004 has gained an official built-in benchmark (like the one UT2003 had). To use the benchmark, go to your \UT2004\System\ directory and run the Benchmark.exe file (double-click on it). You will be put through a series of four benchmarks, with results provided at the end of the run in a small dialog box. These results are also recorded in various sub-directories under your \UT2004\Benchmark\ directory.
Note that if you've only installed one of the more recent UT2004 patches, such as the very latest one, and haven't installed the previous patches (especially the 3204 patch) at some point then the Benchmark program may not be in your \UT2004\System\ directory. Usually, installing the latest patch applies all the changes and updates from all previous patches as well, but in this case Epic has removed the Benchmark file from the latest patches. As a solution you can either uninstall and reinstall UT2004, applying the 3204 patch first, then the latest patch. Alternatively, I recommend you use UMark to benchmark UT2004 as it is much better and doesn't require that you mess around with your existing install of UT2004.
Conclusion
Well after an exhausting 13 pages this guide comes to a close. I know some of you are wondering "Man, couldn't you have cut this thing down a bit?". Well, no, not really. I prefer to give as full a description as possible for each setting and tweak, giving the reader the information they need to make their own performance vs image quality choices. I definitely don't want to tell people to simply "turn this off" or "set that to False". I just don't write guides like that.
Anyway, I hope you found this guide useful. There will always be more tweaks and tips discovered, and more changes to UT2004 due to patches and bonus packs. So please keep coming back to TweakGuides.com for details on the impacts of these changes.
If you have any feedback on this guide please Email Me. Please remember though that I can't provide personal tech support or tweaking advice for time reasons.
Credits and Links
I've compiled this guide based on my knowledge of the Unreal Engine, which I've used in the past to write the original UT2003 Tweak Guide, and my America's Army Tweak Guide . Much of what you see here has been drawn from those earlier guides.
However in researching UT2004 I have learnt a great deal from various posts, articles and tidbits found on the following websites and forums. I urge you to check these sites out if you're a fan of UT2004:
Official UT2004 Website
Official UT2004 Forums
PlanetUnreal
BeyondUnreal
FilePlanet UT2004 Section
Basic UT2004 Tweak Guide
StratosGroup UT2004 Strategy Guide
Finally, I want to extend a big thanks to all the great guys and gals on the Overclockers Australia Forums who have supported my guides, and helped me in starting up my new site.
Until next time, take care!


 Nintendo Land Guide: Pikmin Adventure Swamp Master Guide
 Watch Dogs: Dressed in Peels – Raul Lionzo, exit prison, escape police
 Sonic: Lost Cause?
 Complete Thief walkthrough: how to find all collectable loot & beat each chapter
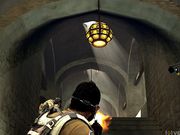 . Plays February 12, 2012