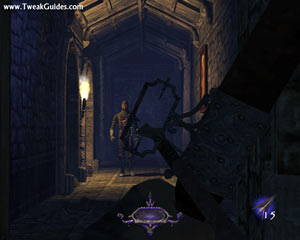
The original Thief: The Dark Project was released in 1998 and broke the mold when it came to first person shooters. Here was a game which encouraged stealth above all else: the avoidance of detection was a primary objective. Well, that and stealing everything that wasn't nailed down of course. Thief created a new genre known as the 'First Person Sneaker', and really only the Thief series has ever occupied this genre successfully. A combination of tight storyline, an intriguing and likeable main character, incredible atmosphere and meticulous attention to detail made Thief stand out from the crowd. The second Thief game, Thief II: The Metal Age was released in 2000 and continued the tradition, but flash forward to 2004 and it's been a long while in between drinks for the eager Thief community.
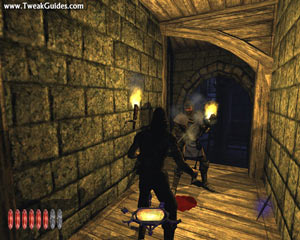
When the third Thief game was announced, there was a great deal of trepidation amongst loyal Thief fans. Would this be another poor quality console-to-PC port? Would there be too much change to the winning Thief formula just to appease the masses? Would Garrett turn straight and start building homeless shelters? Well I am extremely happy to say that the answer to all these questions is a resounding "No!". Thief: Deadly Shadows is a superb game and worthy of the mantle of 'Thief III'. It continues the tradition of atmospheric, stealthy, plot-driven gameplay which is highly immersive and extremely familiar to Thief fans. Some features of the game are clearly console-derived (like loading zones), however in some ways this is compensated by new features such as the cinematic 3rd person view, and Garrett's newfound ability to see his own body parts and shadow.
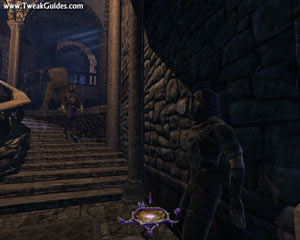
The Thief: Deadly Shadows game engine is also a pleasant surprise. A heavily modified version of the Unreal Engine, it uses incredible dynamic lighting, pixel and vertex shading effects and ragdoll physics to raise the bar on previous Thief games, and matches many recent first person shooter. Not that Thief was ever about cutting-edge graphics, but the atmospheric visuals of this game greatly assist in immersion, along with the state-of-the-art EAX audio and some of the best voice acting and dialogue you will find in any modern game. If you've never tried the Thief series, Thief: Deadly Shadows is a great way to get hooked.
However, just like any other modern game Thief: Deadly Shadows comes with its fair share of issues. The Unreal Engine, modified or not, needs some decent hardware to pump out the eye candy, and just as important is the need for a great deal of fine tuning to get the most out of it. Funnily enough, that's exactly what this guide does show you how to tune your system and the game's settings to get the smoothest performance possible. To round out the detailed descriptions of settings and tweaks, there are also links to important troubleshooting and community information resources. All in all, the guide is a steal.
Note: This guide refers to the latest version of Thief: Deadly Shadows (Version 1.1). Make sure to check back regularly for updates.
Before getting into any game-specific settings and tweaks, this section covers the obligatory system optimization information I include in all my guides. If you've followed this advice recently, you can skip this section.
Many people report problems with this game and in almost all cases these are due to general system issues and not the game itself. With that in mind I strongly urge you to take some time and follow the advice below if you truly want this game, and indeed every other game you own, to run at its fastest and most trouble-free.
The place to start is my free TweakGuides Tweaking Companion. It is the complete system optimization guide for Windows users. Designed for novice and advanced users alike, it is written in plain English to help you genuinely understand all aspects of Windows and your PC. The guide covers every major topic, from the correct installation of Windows and critical drivers and software, through to recommendations for every significant setting and feature, all the major performance and convenience tweaks and customizations, as well as detailed troubleshooting advice. There are also links to a range of reliable free applications for optimizing and maintaining your system, as well as to important resources for finding out even more about Windows and your PC. There are two separate versions: one for Vista and one for XP.
If you've ever wondered what common graphics and display settings like FPS, VSync, Refresh Rate, Antialiasing and Anisotropic Filtering are, and how they really work, then check out my Gamer's Graphics & Display Settings Guide for all the details in an easy to understand format. The guide also gives you a rundown on exactly how a game goes from a being a set of files on your hard drive to a 3D image on your screen, including relevant performance tips.
Finally, if you run an ATI or Nvidia graphics card, I have written two comprehensive guides which you should check out: the ATI Catalyst Tweak Guide and the Nvidia Forceware Tweak Guide. These guides cover absolutely everything about the latest graphics drivers, how to set them up correctly, as well as advanced tweaking, overclocking and benchmarking tips. They're a must-read for configuring your graphics card correctly.
The above information really will serve you well in the long run, not just in this game. If you don't optimize your system and keep everything updated and maintained correctly you will keep running into "mysterious" problems time and time again. Do yourself a favor and when you get a chance spend an afternoon or two optimizing your machine the right way with the guides above.
The next section goes into more detail about specific troubleshooting tips which address common performance issues with the game.

This section contains specific troubleshooting tips which address most of the common problems experienced by Thief: Deadly Shadows players. Many of the tips below are drawn from my guides mentioned in the Essential Optimization section. This is no coincidence, since some of the common T:DS problems are not game bugs, but specific sub-optimal system conditions which lead to problems. Thief Deadly Shadows can be quite system intensive and uses some advanced features, and this brings out instability and problems on many systems. I can't stress enough the importance of taking the time to go through the checklist of advice below:
Official Support: If you have a problem with the game, the first place to visit is The Official Eidos Support Site. It is also absolutely vital that you read the extremely useful information on troubleshooting the game in the Readme.rtf file found in your \Thief - Deadly Shadows\ directory. This document addresses a wide range of common problems with the game, and I urge you to read it for more details. It is genuinely helpful and the information comes straight from the game's developers.
Unofficial Support: One of the great things about the Thief series is that it has a fantastic community of players who are willing to help each other out. There are several forums you can visit to ask questions and read about other peoples' experiences with this game, both in terms of technical problems/solutions and general hints/tips/spoilers. I recommend that you visit the Eidos Thief: Deadly Shadows Forums and the TTLG Thief Forums. Remember, correct forum etiquette is to try and search for an answer to your problems through existing posts before posting your own question. A good starting point is this List of Bug Fixes.
Minimum System Requirements: You need to remember that T:DS is only designed to run on Windows XP and Windows 2000 and also requires DirectX9.0b. Not meeting these simple requirements can and will result in a great many problems. Another important requirement is at least a 64MB graphics card with hardware support for Pixel Shader 1.1 - basically this means the game will not run on any MX card, or anything older than a GeForce3 or Radeon 8500. The CPU requirement is also fairly steep, at 1.5GHz or higher (2.0Ghz + recommended). If you don't meet these hardware requirements, or barely meet them, then expect to see poor performance, visual anomalies, and in some cases the game simply will not run. Unfortunately there are no "software hacks" or tweaks available to assist you - it's time for an upgrade, as some of the advanced features of the game require full hardware support and nothing less.
Windows Vista Users: If you're having problems running this game under Windows Vista, first make sure that you're using the latest Vista graphics and audio drivers for your hardware, and the latest version of this game (see page 4 for patch details). Next, make sure you don't change your UAC settings after the game has been installed, as due to Virtualization this can change the location of the game files and settings. If you can't launch the game successfully when UAC is enabled, you will need to run the game with full Admin privileges. To do this either right-click on the launch icon and select 'Run as Administrator', or right-click on the launch icon, select Properties and under the Compatibility tab tick 'Run this program as an administrator' then click OK. I strongly recommend that you refer to the TweakGuides Tweaking Companion for Windows Vista for more information - in particular check the 'Gaming in Vista' section of the Graphics & Interface chapter; the UAC section of the PC Security chapter; and the 'Personal Folders' and 'Directory Junctions & Symbolic Links' sections of the Windows Explorer chapter. These will tell you how you can fix game-related issues and also explain the relevant differences of Vista.
Installation Problems: This is usually due to the copy protection system on the game discs. One solution is to copy the contents of all the discs to an empty directory on your hard drive then install from there. Also make sure you have disabled any virtual drive software such as Alcohol. Furthermore, certain CD/DVD drives are incompatible with T:DS' copy protection system and hence won't read the discs correctly. One more thing to note is that you must be logged in to Windows using an account with Administrator-level access to install and play T:DS.
Game Runs Too Fast/Doesn't Load: These are due to CPU-related issues. If the game runs too fast and you run an AMD CPU, make sure to disable the 'Cool'n'Quiet' feature in your BIOS. If the game doesn't load up properly and you have a Dual Core or HyperThreading CPU, see the last page of this guide for more details of a fix.
Virus Scan: Do a full scan of all your files using a virus scanner such as Norton's Antivirus, a trojan cleaner such as A-Squared, and a spyware cleaner such as Ad-aware. Viruses and trojans can cause unexplained behavior and general file corruption, so it's best to make sure your system isn't infected before moving on to other troubleshooting measures. However make sure to disable any background scanning once you're done (See Background Programs below).
Latest Graphics and Sound Card Drivers: You must have DirectX9.0b or newer installed to run T:DS, but more importantly you need to have the very latest drivers installed for all of your major system components, particularly your graphics card and sound card. If you do not, you may experience strange game glitches, crashes and freezes. Most crashes to desktop are either related to the memory-subset (See Memory Subset below) or due to older and/or poorly installed drivers. Lockups during the loading menu are typically due to outdated sound card drivers.
Background Programs: Disable all background applications, especially virus, trojan and spyware scanners and messaging utilities. These applications can and do use up valuable CPU resources, take up precious RAM, cause memory conflicts and crashes to desktop, but most importantly they interfere with read/writes to your hard drive effectively slowing it down and causing more in-game freezes and increasing load times. Some programs like Nortons Antivirus and Nortons Crash Protector are known to conflict with T:DS and must be disabled (More details in the Readme.rtf file). Full instructions on how to identify your startup programs and services and how to correctly disable unnecessary ones are in my TweakGuides Tweaking Companion.
Overclocking: Thief: Deadly Shadows runs on a modified version of the Unreal Engine, which is very sensitive to overclocking. If you have overclocked any components on your system and are having problems, set everything back to the default speeds and try running the game. If you don't experience the same problems at default then your overclock is the primary culprit. In particular, read through my TweakGuides Tweaking Companion for tools and instructions on how to correctly stress-test an overclocked system and determine which components are being pushed too far. Even if every other game and program you run works just fine at your current overclock, T:DS may well be crashing because of your overclock.
Fast CPU and Fast Graphics Card: People are complaining about how difficult it is to get playable framerates in T:DS, but upon closer examination their systems reveal a weak CPU or a slow graphics card which explains why this is so. As with most recent games, especially games based on the Unreal Engine (like UT2004 and America's Army), T:DS requires a balance of both a medium to fast CPU and a medium to fast graphics card for optimal performance. If you have a fast CPU but a slow graphics card for example (e.g. P4 3.2Ghz combined with an FX5200), or vice versa, then your machine will struggle. The CPU in particular comes under heavy load in T:DS because of the steep AI (Artificial Intelligence), Physics and rendering requirements, while the graphics card shares the load by undertaking advanced lighting, shadows and pixel shader effects. While you can reduce the load by reducing the in-game settings and undertaking some tweaking, you cannot turn off the advanced lighting effects, tone down the physics or reduce the AI hence the steep requirements.
Memory Subset: It is highly recommended that you run Thief: Deadly Shadows on at least 512MB of RAM for smooth gameplay. The game developers also recommend a Virtual Memory size of at least 600MB. To gain even better performance optimize your Virtual Memory settings by following the step-by-step instructions in my TweakGuides Tweaking Companion. Combined with the tweaks covered later in this guide, this should help resolve most of your problems. A lack of RAM and sub-optimal virtual memory settings, especially when combined with overclocked memory (and/or aggressive RAM timings), can lead to lots of small in-game loading pauses, longer loading times and memory conflicts leading to crashes to desktop, GPFs and even sudden reboots.
Defragging: Make sure that after you have installed T:DS that you run through the system maintenance procedures detailed in TweakGuides Tweaking Companion. If you only do one thing on that list though, make sure you run the Windows Defragmentation utility after installing a large game like T:DS (which takes up over 2GB of space). Defragging ensures that the game's files are all on the same place on your hard drive, greatly reducing loading pauses/freezes and loading times. It may take a little while but it is well worth it.
Antialiasing/Anisotropic/Multisampling: If you have mysteriously low frames per second despite being certain that your hardware is capable of more, then one place to check would be your graphics card's Antialiasing and Anisotropic Filtering settings. These are explained in detail in my Gamer's Graphics & Display Settings Guide. Even 2x Antialiasing for example can turn T:DS into a slideshow in certain areas, depending on your hardware and in-game settings. For maximum framerates set both AA and AF to 0x or "Application Controlled" in your graphics card's control panel. Also make sure that the Multisampling setting in T:DS is set to 1x (the lowest possible) for maximum performance. Multisampling is basically a form of Antialiasing, and while it improves graphics quality it brings with a hefty performance hit at progressively higher levels (See In-Game settings for more details).
Known Bugs: Thief Deadly Shadows does have several known bugs, such as the blue selection spotlights remaining in the bottom right or left corner of your screen after you've put away an item. While many issues with the game can be resolved through changing appropriate settings and optimizing your system, keep in mind that certain odd behaviors and glitches in the game are known bugs and should be fixed by the developers in an upcoming patch (See the Patches and Fan Missions section).
That's just a basic rundown of troubleshooting tips. Read the remainder of this guide for more specific settings and tweaks which can help resolve your problems, and make absolutely certain you read the Readme.rtf file in your \Thief - Deadly Shadows\ directory.
In many ways it is fortunate that Thief: Deadly Shadows is based on the Unreal game engine, since this is a highly customizable and tweakable game engine. If you've read my UT2004 Tweak Guide, you would know that already there is a patch, several bonus packs and some good fan-made mods available for UT2004. There is no reason why the same won't happen for T:DS given its large fan base.
Official Patch
An official patch has been released for Thief: Deadly Shadows, bringing it up to Version 1.1. You can download this patch from Eidos Interactive, or at FileShack among other places. It is relatively small, and only fixes the AI bug in T:DS, whereby loading/saving a game reset the difficulty to Normal regardless of what it was set to previously. The patch is a must-install. Even with the new patch and on Expert settings, the AI is not quite difficult enough for me. If you need more of a challenge like I do, use Thiefbot, a tool for manually changing the various difficulty settings in the game.
Important: While the patch is 100% compatible with previous save games, if you have manually edited any of your .ini files, you should restore the original versions of them before attempting to install the patch, otherwise you may experience problems. If you haven't kept the original versions of your .ini files (it is always strongly recommended that you back them up before editing), then uninstall and reinstall Thief: Deadly Shadows to prevent any issues further down the track. Most people report no problems patching with modified .ini files, but it's better to be safe than sorry.
A more detailed patch is unlikely to be released for Thief: Deadly Shadows any time soon. However if another patch is released this guide will be one of the first places where you will hear all about where to get it, what it changes and all of its performance impacts so keep an eye on this guide.
No-CD Cracks
As always, unfortunately for purely legal reasons I cannot provide any information on where you can find, and how to use, a No-CD crack for this game. Contrary to popular belief the use of No-CDs is not legal because they are designed to circumvent copy protection and also involve modifying code without the author's permission. However morally I completely agree with their use by legitimate owners of games to defeat the annoying CD check on most games.
In any case what I can tell you is that because T:DS uses a somewhat blunt and brutal copy protection system (SecuROM), there are incompatibilities with certain CD/DVD drives, and performance issues such as slightly reduced framerates and a greater potential for crashes. That's not to say that using a No-CD will suddenly double your framerates and fix all the issues you may be experiencing - the bulk of these are still related to general system optimization, inadequate hardware and inappropriate game settings.
Hopefully, just as Atari have quickly released a patch with a built-in No-CD for Unreal Tournament 2004, Eidos will do the same for Thief: Deadly Shadows to relieve their faithful consumers of this counterproductive measure a measure which penalizes legitimate purchasers and has no affect on pirates.
Fan Missions
If you are a fan of the Thief series then you will know that one of the reasons these games remain so popular to this day is the vast amount of user-made Fan Missions (FMs). Fan missions like the classic The Inverted Manse sometimes outshone the original missions included with the retail Thief games. These missions provide the ability to explore new environments, add new functionality and importantly, create whole new scenarios for Garrett to become immersed in.
The good news is that T:DS continues the tradition of Thief FMs, because it is based on a customizable game engine. Recently, an official editor has been released for Thief 3. You can download it from FileFront, FileShack or FilePlanet. If you need help using the editor, you can also download the Thief 3 Editor Documentation.
A couple of good places to find user made missions for Thief Deadly Shadows are ShadowDarkKeep and Thief: The Circle. Have a hunt around and see what you can find on these and other Thief fan sites.
The next section deals with Thief: Deadly Shadows' in-game settings.
In this section we go through all the Thief: Deadly Shadows settings which can be accessed within the game. The Advanced Tweaking section will cover the settings which are accessible outside the game in the various .ini files.
The precise performance impact of a setting will depend on the particular hardware combination you are running. Also keep in mind that everyone has different performance vs image quality preferences, so I can't give hard and fast settings rules for everyone to follow, however my recommendations should be appropriate for most people.
To access the in-game settings, start up T:DS and click on Options in the main menu screen. You can also access these settings during a game by pressing ESC, clicking on the Title Menu button at the bottom right of the screen, then the Options button on the main menu screen.
There are three main sections for the In-Game settings, and various settings underneath each. All are covered in detail below. Just a quick note that to access all of these settings, do not click on the up/down arrows on the scroll bar. This will jump straight to the top/bottom of the settings screen. Instead manually click and hold down on the ball in the scroll bar and slowly shift it up or down.
A/V (Audio/Visual)
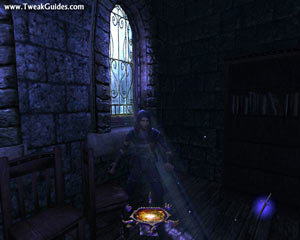
Brightness: Click the small sphere next to the word 'Brightness...' to adjust the brightness of in-game graphics. This is extremely important in T:DS because the entire game centers around sneaking in the shadows. If you raise the brightness too high the graphics will appear washed out and you will not be able to accurately determine when the visibility gem is dark enough for you to be hidden, or where the darkest shadows are. Not to mention that too high a brightness will detract from the game's realism. Note that if you access the Brightness setting during a game, it will take you back to a screenshot of your current in-game surroundings and lets you adjust the brightness there - very handy for instantly seeing what looks best.
Resolution: This setting determines how many pixels (the individual dots which make up a computer image) are displayed on the screen. For example a resolution of 800x600 implies 800 pixels wide by 600 pixels high on your monitor. The higher the resolution, the more detailed and clearer the game image, but it takes more graphics card and CPU power and hence you will see less FPS (Frames Per Second - See the 'Using FRAPS to Measure Framerate' section on Page 8). The resolution has the greatest impact on framerates in Thief: Deadly Shadows. If you are experiencing stuttering or slow graphics then you may have to lower your resolution. Note that resolutions above 1024x768 should only be enabled on graphics cards with 128MB or more of Video RAM for optimal performance.
Shadow Detail: This setting affects the quality of the shadows cast from the many dynamic light sources in the game. Moving the slider to the right improves shadow quality but reduces FPS, however the difference in shadow quality and performance is virtually unnoticeable. The performance drop from lowest to highest shadow quality settings is around 5%, but it may be higher for older graphics cards. If you want the fastest performance for no discernable drop in image quality, move the slider to the far left.
Bloom: Also called 'Light Bloom', when ticked this option gives everything a slightly hazy, glowing look. This can be quite attractive, however it can reduce FPS slightly, especially on machines with older graphics cards. Disabling Bloom can increase FPS and make the graphics appear slightly sharper and clearer. If enabled, Bloom may result in some additional flickering of light sources (some lights are meant to flicker though) and will provide more noticeable color banding around the light sources. If you notice a lot of lighting anomalies, or simply don't like the effect, disable Bloom. Note that Bloom and Multisampling are incompatible - that is if Bloom is enabled, Multisampling cannot be set above 1x (See Multisampling below). Alternatively if you raise Multisampling above 1x, Bloom will automatically be forced off. I personally recommend enabling Bloom and not Multisampling since Bloom has far less of a performance hit, but achieves a more 'atmospheric' result in my opinion.
Light Cutoff: Moving the slider to the right increases lighting quality ever so slightly but also decreases FPS. The performance impact of changing this setting appears minimal (around 5%), and the visual impact is virtually unnoticeable, but this can vary depending on your graphics card. If you want the fastest performance move the slider to the far left for no discernable drop in lighting quality.
Multisampling: This setting controls a form of Antialiasing which basically makes the jagged edges of objects seem smoother (See my Gamer's Graphics & Display Settings Guide). The base level of Multisampling is 1x and it cannot be reduced. Higher values of 2, 3, and 4 progressively smooth jagged edges but impact quite noticeably on performance. At the highest setting the performance impact can be well over a 50% reduction in FPS. Note that if you have Antialiasing enabled in your graphics card's control panel it may conflict with or override this setting, so set it to 'Application Preference' if you want to use Multisampling in T:DS, or set Multisampling to 1x and enable Antialiasing in your graphics card's control panel - but not both. Importantly, T:DS' Multisampling currently has a bug whereby at the start of each map it reverts back to 1x, even if it says it is set higher than 1x (See Advanced Tweaking section for a workaround to this issue).
Level of Detail: Moving this slider to the right increases the detail on characters, particularly those in the distance, at the expense of FPS. This setting appears to have minimal impact on both image quality and performance. At the most there is around 5% FPS drop from having the highest level of detail, although this may be higher for older graphics cards. If you want the fastest performance move the slider to the far left for no discernable drop in character detail.
Low Quality Textures: Ticking this option makes T:DS use lower quality textures. Textures are the images which cover surfaces in the game, so using low quality textures improves FPS, reduces loading times and uses less RAM, at the expense of reduced image quality. Graphics cards with less than 128MB of memory see the most improvement in FPS from using low quality textures. However if you have a better graphics card I recommend leaving this option unticked as T:DS' textures are already relatively less complex, and the FPS gain is not major (10% or more). Note you have to restart the game to implement a change in this setting.
VSynch: Vertical Synchronisation (VSynch) is the synchronization of your graphics card and monitor's abilities to redraw the screen a number of times each second (measured in FPS or Hz). If VSync is disabled (unticked), your FPS will improve however you may see some image "tearing" as your monitor and graphics card go slightly out of synchronization when the refresh rate exceeds the monitor's abilities. I recommend you turn off VSynch for maximum graphics performance in T:DS. Also make sure that in your graphics card's control panel the 'Wait for Vertical Sync' (or similar) option for Direct3D is set to 'Application Preference' or 'Off', otherwise it will override this setting and enable VSynch. For more details see my Gamer's Graphics & Display Settings Guide.
Subtitles: If ticked, all dialog in the game will have text subtitles. This can help if you are finding it hard to comprehend what is being said. The subtitles are a bit buggy, sometimes appearing a fair bit after the actual spoken words, sometimes not at all if beyond a set distance, and sometimes even after a character has just died. There may be a slight performance impact from using this setting, although I recommend unticking this option purely because it detracts heavily from the game's realism.
Sound Effects Volume, Music Volume: Adjust these sliders to suit your taste. There is no performance impact for various settings. I recommend keeping the sound effects volume at a reasonably high level, since Thief is very much an audio-based game. At the same time a reduction in the music volume will help you hear noises and conversations better, so lower it relative to the sound effects volume.
Audio Hardware Mixing: If selected, this option uses your sound card hardware to produce improved 3D audio. This option also enables full surround sound support for people with surround speaker setups (e.g. 5.1 speakers). The performance impact depends on your sound card, but for the most part appears negligible. If you are using the audio hardware built into your motherboard you may experience audio anomalies if hardware mixing (or EAX) is enabled, so the developers recommended that you do not enable any of these options unless you have an add-in sound card. If you do have an add-in sound card I strongly recommend you enable this option, since audio is a very important element of the Thief series.
EAX Advanced HD: EAX is Creative's proprietary Environmental Audio standard. This option is only available to sound cards which support EAX 3.0 or above. That basically means only the Creative SoundBlaster Audigy 1 and 2 range of sound cards. Hardware mixing must first be enabled before this option can be selected. When turned on, EAX Advanced HD enables "reverb", which creates more realistic echoes and reverberations in the game. If you have an Audigy sound card I strongly recommend that you enable this option, as the performance impact is negligible but the audio improvement and added realism is excellent.
EAX Multiple Environments: This option is only available to sound cards which support EAX 4.0, which is again only the Creative SoundBlaster Audigy 1 and 2 range of sound cards, and requires the latest Audigy drivers (available from the Creative SoundBlaster Site). When enabled, this option allows "multiple simultaneous reverb environments", which basically means even more of an improvement in realistic audio over Advanced HD. Once again if you have an Audigy card, I strongly recommend enabling this option as the performance impact appears negligible but the audio improvement is well worth it.
Control
Invert Mouse-Look: Ticking this option means that pushing your mouse forward will make you look down, and pulling your mouse backward will make your view tilt upward. Has no impact on performance, set according to your taste.
Look Spring: When selected your view will keep returning to the center of the screen after each movement. Has no impact on performance, set according to your taste.
Auto Bow Zoom: Ticking this option means that when using your bow, after a few moments the view will automatically zoom in on the targeting scope. You can still zoom in much sooner if you press your Zoom key. If unselected you can zoom in at any time while using the bow by pressing your Zoom key, however it will not zoom unless you do. Has no impact on performance, set according to your taste.
See the Advanced Tweaking section for details on how to adjust the Mouse sensitivity settings, as they cannot be changed from within the in-game menus.
Inputs
You can select the keys and buttons to assign to various commands here. To assign a new key/button to an existing command, click once on the key you wish to change, then press the new key or button you wish to assign to it. See the Advanced Tweaking section for ways of changing certain key assignments not able to be altered here, such as changing the fact that Garrett runs by default.
Note also that if you press the SHIFT key 5 times in a row during T:DS Windows will activate the 'Stickykeys' feature which can disrupt the game. To disable this feature go to Control Panel>Accessibility Options and under the Keyboard tab, click the first Settings button and untick 'Use shortcut'. While you're there, click the remaining Settings buttons and untick 'Use shortcut' for FilterKeys and ToggleKeys as well.
Also note that there are known issues with certain keyboards and gamepads which are covered in the Readme.rtf file in your \Thief Deadly Shadows\ directory.
That covers all the in-game settings. You will notice there are not as many in-game settings as in other games, and that is mainly due to Thief: Deadly Shadows' console heritage. However in the next section we look at ways of altering many settings not available in-game.
Thief: Deadly Shadows does not provide a great deal of customization or performance tweaking in its in-game settings, so we have to look at more detail in the various .ini files which come with the game and control a range of behind-the-scenes settings.
The main .ini files covered in this guide are Options.ini (found in \Documents and Settings\[username]\Documents\Thief - Deadly Shadows\SaveGames\User Options\), and the following .ini files all found under \Thief - Deadly Shadows\System\: Default.ini, T3UI.ini, T3UILights.ini and T3UISoup.ini. While there are many more .ini files for the game, some of them are beyond the scope of this guide and require too much detail, or could be perceived as 'cheating' if altered. See the Conclusion section for links to guide which cover those types of tweaks in more detail.
To edit an .ini file you can use any text editing tool such as Windows Notepad, however before you make changes to any .ini file, back it up first. That means create a copy of it and keep it somewhere safe. This is very important since should you change a setting which causes problems you can instantly restore the original version and not end up pulling your hair out wondering which setting it was. Also note that you should close all .ini files before running Thief: Deadly Shadows, since the game may need to write to them and cannot while they are open.
Options.ini
This file contains details of all the options you have selected in the in-game settings for your character. It is recommended that you use the in-game settings to change most of the settings in this file, however we can make one very useful change here:
W=MoveForwardBackward 0.500000
S=MoveForwardBackward -0.500000
A=StrafeRightLeft -0.500000
D=StrafeRightLeft 0.500000
By default Garrett runs when you use the movement keys (W, A, S, D are the default movement keys), and walks only while you hold down the SHIFT key. This can't be changed in-game, however if you want the more traditional default walk/SHIFT to run configuration, change the key assignments for movement to the values shown above, and this will halve the default movement speed, effectively making it the same as walking.
Now to make the SHIFT key a run key, you need to go into the Default.ini file (See Default.ini section below), and under the [T3Settings] section of the file, change the following line:
WalkMultiplier=1.0
By changing the value from 0.5 to 1.0, the SHIFT key now works as a run key.
Vibration=0
If you have a gamepad connected to your system and it continually vibrates or takes over controls during lockpicking, set this value as shown above. If that fails, disconnect the device from your machine.
Default.ini
This file contains the majority of Thief: Deadly Shadows' important settings. Note that since T:DS is based on the Unreal Engine, this file has similarities to the UT2004.ini file (See my UT2004 Tweak Guide), however many of the settings are related to the XBox, or relate to portions of the Unreal Engine not implemented (or heavily altered) in T:DS, and hence have no impact on the game.
The following sections should have some impact on the game, however once again settings which can be changed from within the game are not covered here - it is strongly recommended you change them using the in-game menus:
[T3Settings]
CreepMultiplier=0.33
This setting determines how slow Garrett moves when you use Creep mode (CTRL key by default). Lowering this setting results in even slower movement while creeping.
WalkMultiplier=0.50
This setting determines how fast Garrett moves when you use the Walk mode (SHIFT key by default). Lowering this value will reduce Garrett's walking speed, raising it will increase it (See the Options.ini section above for more details).
[Engine.GameEngine]
CacheSizeMegs=16
This value represents the amount of System RAM set aside for caching game information. Try a Cache size of 16 for most systems with 512MB of RAM or more. I don't suggest increasing this value beyond 64. Assigning a large amount of memory to the cache won't help performance - it may actually reduce it since the cache is not where the entire game is meant to reside. Changing this setting will not impact on FPS significantly, it is mainly designed to reduce loading times and loading pauses in-game.
[D3DDrv.D3DRenderDevice]
None of the options under this section appear to have any impact on the performance or visual quality of the game, as they normally would with an Unreal engine game. If you want to experiment with these, see this section of my UT2004 Tweak Guide for more details on what they are supposed to do. Since T:DS is a heavily modified version of the Unreal engine, it is fairly clear many of the options in the Default.ini file simply aren't used to determine the game's settings.
[PCStartup]
ShowIntroMovies=True
Setting this to False skips all the introductory movies shown when you load up Thief: Deadly Shadows. Setting this to False can also help resolve issues where you may be crashing to the desktop while loading.
ShortIntroMovies__t=
This setting shows the full list of movies which will play at startup (if ShowIntroMovies=True). If for some reason you want to play particular movies at startup, find the movie in your \Thief - Deadly Shadows\CONTENT\T3\VideoTextures\ directory, and enter it as follows after the '=' sign above:
d:\content\t3\VideoTextures\ThiefTrailerNoESRB.bik
Note that as shown in the above example, the "_engl_none_30" needs to be dropped from the filename. If you want multiple movies shown in a row, insert a ';' character in between each full path and movie name.
[Locale]
Language=english
;Language=french
;Language=italian
;Language=german
;Language=spanish
To select a different language for the game, remove the ';' in front of that language and make sure a ';' appears in front of all the other languages. Note, Spanish is not supported at present.
Changing the language using this setting has several effects: If you select another language, since the spoken dialogue is still in English, subtitles will automatically become enabled and show the dialogue in the new language. All menu and loading screen texts will also change to the chosen language. Your game will also start using a new Option.ini file (losing all existing Option.ini tweaks) which is created in a new directory under your \Documents and Settings\[username]\Documents\Thief - Deadly Shadows\SaveGames\ directory - the directory name will be 'User Options' in the new language you've selected.
[Engine.PlayerInput]
MouseSensitivity=50
This setting can be used to determine your mouse sensitivity in the game, since the option does not exist in the in-game menus to change it. Increasing the value makes your mouse more reactive, decreasing it dampens the sensitivity.
[FontMappings]
Papyrus20__tp=Papyrus_21,0.81,0.80
Papyrus14__tp=Papyrus_21,0.61,0.80
Papyrus12__tp=Papyrus_21,0.50,0.80
Papyrus10__tp=Papyrus_21,0.40,0.80
Papyrus08__tp=Papyrus_21,0.28,0.80
Papyrus06__tp=Papyrus_21,0.17,0.80
Papyrus04__tp=Papyrus_21,0.06,0.80
Papyrus02__tp=Papyrus_21,0.01,0.80
To understand the lines in this section, here is a basic description. For example:
Papyrus14__tp=Papyrus_21,0.61,0.80
Means that wherever the font type 'Papyrus14' is used in the game (_tp is for PC, _tx is for XBox), it will be equal to the original Papyrus_21 font, scaled down by 61% of its original size (0.61 - the bolded section) and used. The 0.80 at the end of the line is just a necessary feature of all the font files and must stay unchanged.
To change the fonts used in the game so that they are not so large, find the bolded value shown above in each line and reduce it. Ideally you should make it equivalent to the value below it, or the one below that, to maintain the appropriate relativities between fonts. For example:
Papyrus14__tp=Papyrus_21,0.61,0.80
becomes:
Papyrus14__tp=Papyrus_21,0.50,0.80
Do this for all the fonts in each particular group, and they should all be relatively smaller when you next start the game. You can even switch font types by changing the font name after the '=' sign to another one of the three font types used in T:DS - 'Papyrus_21', 'VTCGoblinHand_18', and 'Fixed'. These font files can be found in your \Thief - Deadly Shadows\CONTENT\T3\PCTextures\Fonts\ directory. They can be edited using a program like Photoshop or 3dsmax and plugins from this page.
Note that by decreasing the font sizes, in many text windows you will have a lot more blank space underneath the text. The way to fix this is increase the NumVisibleRows values under the T3UI.ini file. Open T3UI.ini, and search for all instances of NumVisibleRows, then change their values to something safe like 10. This will make the text come down further in each text space, and not leave glaringly large gaps.
[Vendor_1002]
4e48=2
There are several Vendor sections here, each relating to ATI, Nvidia, Matrox and SiS. Find the relevant section for your graphics card's manufacturer. Under the relevant Vendor section, find your graphics card's specific Device ID line (e.g. 4e48=). To get your particular Device ID, go to Control Panel>Display>Settings>Advanced>Adapter and on the line 'Chip Type' your Device ID should be in brackets after the graphics card type, e.g. 'Chip Type: RADEON 9800 AGP (0x4E48)' which corresponds with the 4e48 device ID line in this section.
Once you've found the right device ID, changing the value after '=' to 0, 1 or 2 determines the type of Pixel Shader support used. 0=Pixel Shader 1.1, 1=Pixel Shader 1.4, and 2=Pixel Shader 2.0. By lowering this value (if above 0), you may gain some FPS at the cost of minimal image quality loss. If you can't find your specific device id, change the value for the 'Other' line under the relevant vendor.
[Movies]
MaxVolume__p=1.0
Gamma__p=1.0
Contrast__p=1.0
Brightness__p=1.0
These particular entries determine the volume, and brightness/contrast/gamma of the in-game movies. The possible values for these entries range from 0.0 to 1.0 (only the entries ending in _p apply to the PC - those ending in _x apply to the XBox). For example, if you want to reduce the volume of the in-game movies, change MaxVolume_p=1.0 to a lower value.
The next page continues the Advanced Tweaking section with the T3UI.ini file.
T3UI.ini
This file contains a range of User Interface (UI) settings, such as which objects are visible in particular windows, and the positions of various components. While you can experiment with these, the most interesting section relates to the Heads Up Display (HUD):
[HUDWindow]
ChildWindow_2=LightGem
ChildWindow_3=ItemCycleWindow
ChildWindow_4=WeaponCycleWindow
ChildWindow_5=HealthMeter
ChildWindow_10=CompassWindow
The items shown above relate to important sections of the HUD - the Light Gem, the Items and Weapons selection windows, and the Health Meter. To remove any one of these components (although not recommended), place a ';' in front of the relevant line.
The references to HUDLight_1 and HUDLight_2 in this section are covered in the T3UILights.ini section below. These control the color and lighting of the HUD.
[LightGem]
Pos_Y=-50
Pos_Z=10
You can move the position of screen elements, like the LightGem in this example, by changing the Pos values.
Scale_X=1.0
Scale_Y=1.0
Scale_Z=1.0
You can change the size of screen elements by changing their Scale value. In this example changing 1.0 to 0.5 for the three entries above will halve the size of the Light Gem. Reducing the Scale values to 0.0 effectively removes the item from screen.
Note that other screen elements like lights, text and borders may need to be resized and/or moved as well to remain in correct positions to the newly resized element.
T3UILights.ini
[HUDLight_1], [HUDLight_2]
[MetaGameLight_1], [MetaGameLight_2]
[MetaGameLight_3], [MetaGameLight_4]
[MapLight], [Lockpicklight1]
The HUDLight_1 section relates to the metallic borders around the HUD elements. HUDLight_2 relates to bluish the lighting behind the HUD elements. The MetaGameLight sections each relate to the various lights behind menus and popup windows through out the game. The MapLight and Lockpicklight1 sections relate to Map and Lockpick screen lighting.
Color_R=250
Color_G=225
Color_B=175
Changing the lines shown above alters the Red, Green and Blue values and hence the overall color of the element.
Intensity=.65
Changing the Intensity value increases or decreases the brightness of the element.
Active=VISIBLE
Changing this setting to NOT removes the element altogether.
T3UISoup.ini
[SmokeySoup]
Active=VISIBLE
Changing this setting to =NOT removes the smokey blue background behind the menu screens.
The last page of this guide has several more handy tweaks which are not in the .ini files, and wraps up the entire guide with some useful links
Here are some final tips and tweaks before we wrap up the guide.
Thief: Deadly Shadows Console Commands?
Thief: Deadly Shadows doesn't appear to have a working console. The '~' key is hard-coded as the console key, but it doesn't work and it's likely it has been disabled on purpose. Perhaps future patches will enable access to the console.
Dual-Core CPU Issues
If you run a dual core CPU, such as a Pentium D or AMD X2, or even a Pentium 4 with HyperThreading, you may notice that the game has a range of problems, such as not loading up properly. To resolve this issue, use one of the methods below:
Setting Processor Affinity Manually: Launch Thief: Deadly Shadows, and as soon as the game appears to begin loading, or after it has loaded up, press CTRL+ALT+DEL to bring up the Task Manager. Under the Processes tab, find the t3.exe and t3main.exe processes, right-click on each one, select 'Set Affinity' and in the box which appears, untick 'CPU 1'.
Setting Processor Affinity Automatically: If you want to force the game to only use one of your CPUs automatically each and every time you run the game, see the instructions here for using the Imagecfg utility, a small Windows NT file you can safely copy into your \Windows\System32 directory and then use to permanently set the affinity for particular programs. I recommend you backup your t3.exe and t3main.exe files before applying this tweak, as the only way to undo it is to restore the original .exe files. Furthermore, note that you may have to redo this tweak each time you patch the game, since the executable will change.
Both these methods basically force the system to effectively see, and use, only one of the CPU cores on your dual core CPU to run the game, thereby resolving this problem.
Using Fraps to Measure Framerate
A common question people have is "How do I measure my framerate in Thief: Deadly Shadows?". Well the most accurate and least troublesome way is to download a small free utility called Fraps. Once installed, simply run the utility in the background (minimize it), and it will show a small yellow counter in the corner of the screen with the current frames per second.
Before running Fraps though, make sure you go through each configuration screen and check the key assignments. For example by default Fraps uses the F9 to start recording a demo. This can cause problems in T:DS if you've assigned F9 to something like Autosave. So make sure the Fraps key assignments don't conflict with your T:DS keys. To change a key assignment in Fraps, left-click in the box with the key name, and then press a new key to assign it. Alternatively you can click the Disable button to disable that functionality in Fraps.
Some people have cast aspersions on how accurate Fraps is, and whether having it run in the background actually reduces performance. This is all completely untrue. Fraps is extremely accurate - I have personally compared it with the in-game framerate counter on various games and it is within 1% of them. At the same time it has no performance impact because of the way it has been developed. It has been around for many, many years and is known as one of the best independent tools to use for measuring framerate. The latest version of Fraps even has a built-in Benchmarking tool if you want to compare framerates with others who use similar settings in T:DS. It's a highly recommended tool.
Taking Screenshots
You can take screenshots of T:DS using the default Windows screenshot key (PRINT SCREEN). Pressing the PRINT SCREEN key during the game places a single screenshot into memory, and once you exit Thief: Deadly Shadows, you can paste the last screenshot taken into a paint/photo editing program and modify or save it from there.
However to take multiple screenshots and have them saved while you're playing the game, you can use a utility like Fraps (See the section above). Fraps can take as many screenshots as you like during gameplay, and stores them in high-detail .bmp format in the directory of your choice. Alternatively if you want to be even more fancy, a utility called Hypersnap DX will meet any and all your screenshot needs, but requires paid registration to enable full functionality.
For most people I highly recommend using Fraps as it is free and has many useful functions.
Custom High Resolution Textures
Some of the textures used in Thief: Deadly Shadows are relatively low resolution and hence can look quite bad. While there is no official way of improving these low resolution textures, an unofficial set of high resolution textures has been released by John P. and can be downloaded here: John P.'s High Res Texture Page. Each pack comes in a self-installing file, so there is no file editing or messing around. Full instructions on how to download and install the packs are on John P's page, along with screenshots showing before and after textures for each pack so you can see what they look like before you use them. In addition to higher res textures, John has also a small pack which changes the frob (the blue highlighting whenever Garret can select an object) to a more appropriate tone, and several other graphical fixes which you are sure to like. Give them a try!
Further Tweaking
I need to make a special mention here that many of the tweaks in this guide were originally discovered by the great people on the TTLG Thief Forums. This Thief 3 Tweak Guide in particular (compiled by Mentalepsy) is extremely useful and highly detailed. Although most of the major Thief: Deadly Shadows tweaks are in the guide you've just read, I strongly recommend you go through that guide for more customization and tweaking options.
Some final tweaks from the above guide which I found very handy, but do not involve manual .ini tweaking are:
Disable Loadscreen Tips
If you find the painfully obvious tips presented on the Loading screen when loading up saved games or during map loads to be very annoying, you can quickly disable them by going to your \Thief - Deadly Shadows\CONTENT\T3\Books\English\ directory, and renaming the file HelpText.sch to something else (e.g. HelpText.sch_BAK). Doing so will skip the Loadscreen tips, although you will still see the various storyline quotes which are a bit more interesting.
Changing the Blue Object Selection Highlight
Whenever Garrett highlights an object he can pick up or use, such as a crate, candlestick or corpse, it becomes covered in an electric blue highlight which seems quite out of place, especially in the darkness. To change this color to something more neutral, you can download a special patch created by Myagi from here. Place the T3_patcher.exe in your \Thief - Deadly Shadows\System\ directory and run the file. It will give the option to change the Frob (highlighting) color, as well as several other things like Loot Glint.
Ghosting - The Ultimate Challenge
Just in case you think playing Thief: Deadly Shadows is easy, and you've finished the game once, you can first try raising the difficulty using Thiefbot, as mentioned in the Patches and Fan Missions section of this guide.
If you're after even more of a challenge, you can try "ghosting", which involves going through a level without being seen, nor heard, nor doing any damage. You can read all about it here: The Official Rules of Ghosting. If you want to prove that you're a Master Thief, ghosting is the only way to do it.
Note that you must patch Thief: Deadly Shadows to Version 1.1 (See Patches and Fan Missions section) to resolve an AI bug in Version 1.0 of T:DS which resets the difficulty to 'Normal' no matter how high you set it.
Conclusion
Well that brings to end another guide from TweakGuides.com. But that's definitely not the end of the tweaking story for Thief: Deadly Shadows. For starters I want you to send me your working tweaks and tips if you believe they are worth sharing with other tweakers out there. The most significant ones will be included in this guide. I also want to hear your feedback on this guide (and anything else on my site) - whether good, bad or otherwise, so Email Me. Please remember though that I can't provide personal tech support or tweaking advice.
Finally, keep in mind that this guide will constantly be updated to remain as up-to-date and accurate as is possible. Check back regularly for updates, especially when a patch is released for Thief: Deadly Shadows.
Credits and Links
As mentioned above, this guide is not a one-man effort. It is a piece of work researched from a variety of sources. These sources - and indeed some great places to continue reading about Thief: Deadly Shadows - are listed below:
The Official Thief3 Website
Eidos Thief: Deadly Shadows Forums
Thief 3 Tweak Guide on TTLG Forums
Thief Fan Missions Site
Check them all out if you love this game.
Ok, well until the next guide comes along, happy sneaking guys!

 GamesCom: The True Arrival Of Next
 Dark Souls 2 Walkthrough Part 5: The Lost Bastille
 Pokemon X & Y Guide: Pokemon in Route 3 - Ouvert Way - GamersHeroes
 9 Simple Tricks for Counter Strike: Global Offensive
 Deus Ex The Human Revolution Hengsha Side Quest Guide