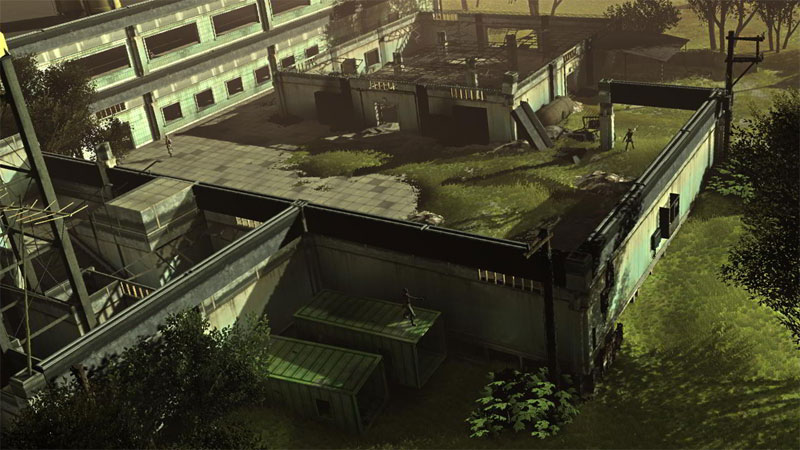
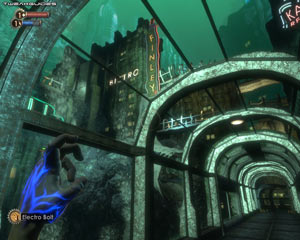
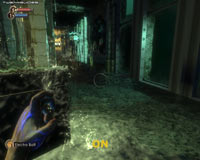
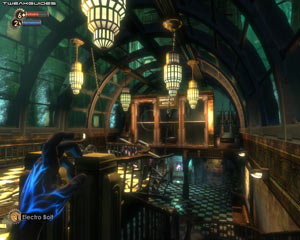
Imagine if the most talented scientists, artists, writers - the intellectual cream of humanity - all got up and left one day. Picture them moving to a large underwater city built in the 1940s called Rapture, a place where the great are not constrained by the small, a place of discovery and absolute freedom. Then it all starts to go wrong, and somehow you wind up in the midst of all this madness through no choice of your own. This is the basic premise of BioShock, a game which follows in the footsteps of the classic System Shock series.
BioShock is an attempt to blend a primarily action/horror first person shooter game with elements of adventure and role playing games. Though touted as revolutionary, the game is in reality more evolutionary, being a standard FPS that contains innovative new gameplay touches and highly atmospheric graphics, placing it one step above recent action/horror FPS titles. At its core however the gameplay often resembles games like Doom 3 or FEAR. What saves the game from being just another horror shooter is its intriguing storyline, the sheer immersiveness and detail of the environments, and the quirky 1940s-like setting. Since surprise is a major part of the game, I won't give away too much more about it here, but I do believe it's well worth playing. If you have any doubts, download the Demo and give it a go.

To provide the atmospheric graphics, BioShock utilizes the Unreal Engine 3, giving it advanced capabilities in both DirectX 9 and DirectX 10. The graphics of this game are very detailed and immersive, but obviously this can also cause problems for some people. Furthermore there's been much controversy over the game's widescreen support, issues with anti-aliasing, the fact that it has as a minimum requirement a graphics card with Shader Model 3.0 capabilities, and of course its copy protection mechanism.
Fortunately after a fair bit of research and experimentation, I've been able to prepare this guide as a compilation of all the important information for the game: all the tips, tweaks, fixes and descriptions you need to make sure your BioShock experience is as good as it can possibly be. I encourage you to give it a read through and see for yourself - there should be something for everyone.
Note: This guide refers to the latest version of BioShock Version 1.1. Make sure to check back regularly for updates.
Before getting into any game-specific settings and tweaks, this section covers the obligatory system optimization information I include in all my guides. If you've followed this advice recently, you can skip this section.
Many people report problems with this game and in almost all cases these are due to general system issues and not the game itself. With that in mind I strongly urge you to take some time and follow the advice below if you truly want this game, and indeed every other game you own, to run at its fastest and most trouble-free.

The place to start is with the TweakGuides Tweaking Companion. It is the complete system optimization guide for Windows users. Designed for novice and advanced users alike, it is written in plain English to help you genuinely understand all aspects of Windows and your PC. The guide covers every major topic, from the correct installation of Windows and critical drivers and software, through to recommendations for every significant setting and feature, all the major performance and convenience tweaks and customizations, as well as detailed troubleshooting advice. There are also links to a range of reliable free applications which can enhance your system and give you viable alternatives to purchasing commercial software. There are separate versions available for Windows XP, Windows Vista and Windows 7.
If you've ever wondered what common graphics and display settings like FPS, VSync, Refresh Rate, Antialiasing and Anisotropic Filtering are, and how they really work, then check out my Gamer's Graphics & Display Settings Guide for all the details in an easy to understand format. The guide also gives you a rundown on exactly how a game goes from a being a set of files on your hard drive to a 3D image on your screen, including relevant performance tips.
Finally, if you run an ATI or Nvidia graphics card, I have written two comprehensive guides which you should check out: the ATI Catalyst Tweak Guide and the Nvidia Forceware Tweak Guide. These guides cover absolutely everything about the latest graphics drivers, how to set them up correctly, as well as advanced tweaking, overclocking and benchmarking tips. They're a must-read for configuring your graphics card correctly.
The above information really will serve you well in the long run, not just in this game. If you don't optimize your system and keep everything updated and maintained correctly you will keep running into "mysterious" problems time and time again. Do yourself a favor and when you get a chance spend an afternoon or two optimizing your machine the right way with the guides above.
The next section goes into more detail about specific troubleshooting tips which address common performance issues with the game.

This section contains specific troubleshooting tips which address some of the most common problems experienced by Bioshock players. I can't stress enough the importance of taking the time to go through the checklist of advice below if you're having a problem with the game.
Official Support: The first place to look for official support details is in the Readme.txt file in your \Program Files\2K Games\BioShock directory. Importantly, check out the minimum system requirements in that file, as well as the supported hardware list, since if any of your hardware is not supported or doesn't meet the requirements then you will likely experience problems with the game, or quite simply won't be able to run it. In particular if you don't have a graphics card which supports Shader Model 3.0 (i.e. a GeForce 6600 or ATI X1300 and above), then you won't be able to run the game at all - though see the last page of this guide for one possible solution.
If you're still having problems you should then check this Official Knowledgebase for answers to common problems. If that's of no help, visit the Official BioShock Forums to look for solutions or post a question, and while you're at it, take the time to read through the TweakGuides BioShock Thread. Finally, for general information on BioShock, including future updates, check the official Cult of Rapture BioShock Blog.
Windows Vista Users: If you're having problems running this game under Windows Vista, first make sure that you're using the latest Vista graphics and audio drivers for your hardware, and the latest version of this game (see page 4 for patch details). Next, make sure you don't change your UAC settings after the game has been installed, as due to Virtualization this can change the location of the game files and settings. I strongly recommend that you refer to the TweakGuides Tweaking Companion for Windows Vista for more information on Vista-specific settings and issues.
Crash Resets: Each time you crash in Bioshock the game automatically loses all your altered settings and any customizations (including .ini changes) you've made. This happens because it replaces your Bioshock.ini and User.ini files - which hold your custom settings - with new ones based on the standard Default.ini and DefUser.ini files. You can however prevent this reset by going into the folder where your Bioshock.ini and User.ini are stored immediately after a crash (and before restarting BioShock), and deleting the new Running.ini file held there. This file informs BioShock that an incidence of the game was stopped improperly, and by deleting it you prevent the .ini file reset. To find out more about these files and where they're located, see the Advanced Tweaking section.
BioShock Graphic Drivers: BioShock is based on a relatively new engine, and is also quite graphically strenuous. As such it requires specific graphics drivers to make sure you get the most of the game and also reduce the chance of problems. For Nvidia owners, make sure you are using the 163.44 or newer drivers designed for BioShock, and for ATI owners make sure to use the 7.10 Catalysts or newer. If you still have graphical issues make sure to do a full cleanout and reinstall of only these drivers or newer, and set up your graphics control panel correctly - see my ATI Catalyst Tweak Guide or Nvidia Forceware Tweak Guide for details.
Mouse Lag: If you're experiencing a laggy or sluggish response from your mouse in the game, make sure to read the Customize Controls area of the In-Game Settings section of the guide for a range of solutions, as well as installing the latest patch as covered on page 4.
Sound Issues: If you're having issues with audio in BioShock, read the Audio Options area of the In-Game Settings section of the guide for more details, as well as installing the latest patch as covered on page 4.
Antialiasing and Anisotropic Filtering: If you are unfamiliar with what Antialiasing or Anisotropic Filtering do, see this page of my Gamer's Graphics & Display Settings Guide. Details of how to enable Antialiasing in BioShock are under the Graphics Options area of the In-Game Setting section, as it can be fairly tricky. Anisotropic Filtering is also covered in the In-Game Settings section, as well as in the Advanced Tweaking section.
Background Programs: Game developers recommend that you disable all background applications - especially virus, trojan and spyware scanners and messaging utilities - before playing games. These background applications can and do use up valuable CPU resources, take up precious RAM, cause memory conflicts and crashes to desktop, but most importantly they interfere with read/writes to your hard drive effectively slowing it down and causing even more in-game freezes and stuttering. Full instructions on how to identify your startup programs and services and how to correctly disable unnecessary ones are in my TweakGuides Tweaking Companion. This is an important step you should not miss.
Overclocking: BioShock can be quite sensitive to overclocking, so if you are experiencing graphical glitches or crashing in the game, set everything back to its default speeds and see if this impacts on the problem. If you don't experience the same problems at default speed, or they're reduced in severity, then your overclock is the primary culprit. Either permanently reduce your overclock and/or increase cooling to regain stability. Don't assume that because other games run with stability at a particular speed that BioShock will do the same.
These are just a few of the common fixes for problems in BioShock. However if you follow the advice in this guide, you should be able to play the game more smoothly. Just be realistic about balancing eye candy with performance, and focus on tightening up your system as much as possible - make absolutely sure to read the guides I link to under Essential Optimization on page 2 of this guide above for more details on how to do that.
Read the remainder of this guide for specific settings and tweaks which can help improve your performance and resolve any problems. The next section looks at patches, maps and mods.
Official Patch
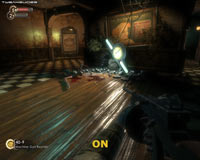
The first official patch has been released for BioShock, bringing it up to Version 1.1. This patch contains a range of fixes for various issues and bugs in the game, and also adds some new content - mainly new Plasmids and Tonics - and several new in-game options including 'Horizontal FOV Lock' and 'Disable Vita-Chamber' settings, as well as a Walk/Run toggle binding under Customize Keys. See the In-Game Settings section for more details of the new settings.
There may be additional patches released for BioShock, so check back here regularly for details.
Copy Protection
BioShock has already been the subject of a great deal of controversy over the copy protection used for the game. BioShock's retail DVD comes with a missing BioShock.exe and several related files; these must be downloaded during the installation process for the game to work. The game then uses an Activation Process which checks and validates your serial number online, and is protected using the SecuROM copy protection system. Finally, there is an activation limit, in that you cannot activate more than 5 concurrent installs of the game - it was 2 installs, but the limit was later raised to 5.
These steps have been taken because BioShock is a singleplayer game, and unlike multiplayer games, singleplayer-only games are more easily pirated since they don't normally require regular online serial number checks to play. In principle I agree that some protection is needed, given the prevalence of piracy these days. However the implementation of this protection system has caused problems, especially with the activation servers often being offline or under too much stress to activate copies of the game in a timely manner, and poor fallback methods. Thankfully these are now being resolved, and it is important to note that despite recent panicky statements, the SecuROM protection used for the game is not a rootkit, nor is it malicious or intrusive, or as problematic as people would have you believe. Many, many games use SecuROM and I've personally never had any system problems due to SecuROM. If you are having problems with SecuROM when launching the game, check the SecuROM FAQ. For more details about the SecuROM registry keys/services and removing them see here.
Despite these issues, I do want to stress that nobody has any legitimate excuse to pirate BioShock. 2K games have already indicated that they will remove the online activation requirement at some point in the future, so concerns about failing activation in a year or two's time are unfounded. This game is completely worthy of purchase given the effort that's clearly gone into developing the game. Pirating it will simply result in even more intrusive anti-piracy measures in the future.
Update: An Activation Revoke Tool has been released to allow users to free up 'activation credits' when they uninstall BioShock from a PC.
Update 2: Activation limits for the game have now been removed, meaning you can activate the game as many times and across as many machines as you wish.
Mods
As yet there are no major mods available for BioShock, but if any prominent mods are released I will update this section with details. Note that 2K Games have Officially Stated that there will not be an Editor released for BioShock at any point, so this will obviously make the development of any genuine mods for BioShock extremely difficult if not impossible.
The next section of the guide covers In-Game Settings for Bioshock.
This section contains full descriptions and recommendations for BioShock's in-game settings. You can use these details to get a good balance between image quality and performance on your machine, however I can't give you specific instructions on what to turn on or off. It all depends on your particular hardware combination, and more importantly your personal taste for the trade-off between performance and image quality.
To access the in-game settings, click the Options link in the main menu, then refer to the relevant sections below. Make sure to click the Apply button each time you change any settings, and note that some settings require a restart of the game (where noted) to be applied properly.
Graphics Options
Resolution: This setting allows you to select the resolution of the game image, measured in pixels wide by pixels high. The higher the resolution, the more detailed the image on screen, and also the less jagged lines there will be (See Antaliasing below), but the lower your performance. For more details see the Resolution section of my Gamer's Graphics & Display Settings Guide. The number of resolutions available here are limited by what both your graphics card and monitor can handle.
Note: Widescreen users will find that although they can select widescreen resolutions here, the image displayed will be cropped at the top and bottom to fit your screen due to the field of view being held constant. If you want to correct this, you can use this Widescreen Fix.
Update: As of the 1.1 Patch, there is now a 'Horizontal FOV Lock' option under Graphics Options which you can switch On or Off to control the Horizontal Field of View. If using a widescreen resolution, try changing this option to Off first to see if it resolve any FOV issues.
Antialiasing Support: By default BioShock does not support any Antialiasing (AA) to smooth out jagged lines. The reason the game doesn't support AA natively is because it uses a form of rendering called Deferred Lighting, which is supposed to be incompatible with Antialiasing in DX9. It may be possible to allow AA under DX10 according to the developers of the Unreal Engine 3, but this will likely require a patch and if this occurs I will update this section accordingly. In any case If these 'jaggies' bother you, you can attempt to force AA to be applied in Bioshock, though note that you will experience a decrease in performance, and you may experience graphical glitches. The procedure is not completely straightforward, so read the following to determine how to do it for your system:
"E:\Program Files\2K Games\BioShock\Builds\Release\R6Vegas_Game.exe" -dx9
Anisotropic Filtering: By default BioShock applies 4x Anisotropic Filtering - see the bottom of this page for details of what AF does. This helps to make the surfaces of objects clearer, especially as they recede into the distance. However this can also lower performance, so if you wish to disable this, or if you wish to alter or raise the level of Anisotropic Filtering in the game, see the LevelofAnisotropy setting in the Advanced Tweaking section.
Windowed Mode: If set to On, the game will run in a window rather than in fullscreen mode. In general for stability and performance I always recommend full screen mode, as there can be memory and resource management issues when a game is run in windowed mode.
Vertical Sync: Vertical Synchronization (VSync) is the synchronization of your graphics card and monitors' abilities to redraw an image on the screen a number of times each second, measured in Hz. It is explained clearly on this page of my Gamer's Graphics & Display Settings Guide. When VSync is enabled your maximum FPS will be capped at your monitor's maximum refresh rate at your chosen resolution, and more importantly in some areas your FPS may drop by as much as 50% or more if the graphics card has to wait to display a whole frame. Thus setting VSync to On can have a major negative performance impact, though you can counter the performance drop by enabling Triple Buffering - see this page for details of how to enable it.
Note that since VSync relies on the Refresh Rate used in the game, if you do leave VSync on you should set the correct refresh rate by altering the DesiredRefreshRate variable in the Bioshock.inii file - see the Advanced Tweaking section for details. Finally, VSync can be a major contributor to mouse lag, so disable it if that's the case, and see further below for more details.
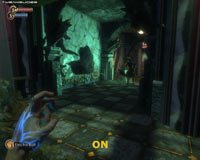
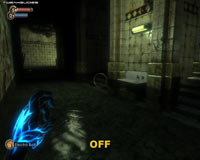
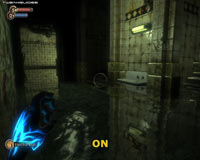
Shadow Maps: When this option is set to On, all objects which can be moved, as well as characters, will cast realistic shadows. These shadows will react dynamically to the light sources in the environment. A screenshot comparison is shown above, and note that with Shadow Maps disabled on the left, the main dynamic objects in this scene - the lady and the pram - do not cast any shadows, while shadows from static objects like walls remain. Enabling this option can greatly increase realism, but it can also significantly reduce framerates, particularly when there are multiple objects/characters and multiple light sources in a scene.
High Detail Post Processing: When set to On, this option enables a range of Bloom/HDR effects which makes lights and lit objects appear brighter, slightly hazier and much more atmospheric at the cost of some FPS. A screenshot comparison is provided above, with the difference quite noticeable between the two scenes.
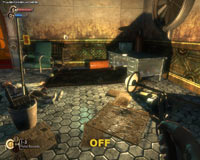
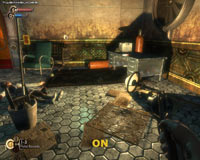
High Detail Shaders: One of the most noticeable features of the BioShock game world is the extensive use of shaders to provide detailed reflective surfaces almost everywhere you look. These effects are due to this setting, and the screenshot comparison above shows the impact of disabling it - the wooden floor, the poster in the background and the furthest walls all shine realistically due to the lighting when this option is enabled. But when it is disabled the environment becomes quite flat and bland. Although it does have an impact on performance, I would generally recommend leaving this option enabled if possible as disabling it detracts quite a bit from the realism of the game.
Real Time Reflection: When set to On, certain reflective surfaces such as calm pools of water will dynamically reflect exactly what is in their surroundings. When disabled, some basic reflections will still remain but will be done through a trick called Cube Mapping. In general the difference is not very noticeable in most areas, but as the screenshot comparison above shows, in some areas where the water is reflective, the visual and FPS difference is very noticeable. Disable this option if you notice significant slowdowns in water areas.
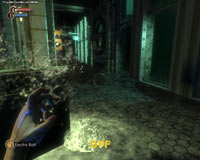
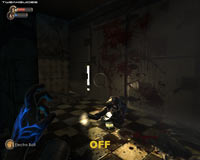
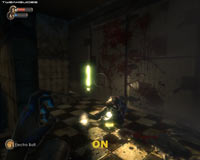
Distortion: When set to On, this option allows translucent material such as thick glass or water to accurately distort the images seen through them. It also affects heat distortion in the air surrounding fires. The screenshot comparison above illustrates water distortion - on the left with Distortion Off the wall of water is virtually invisible, and the water on the ground doesn't distort the tiles beneath it; on the right the water is correctly distorting all objects behind and beneath it. Enabling this option will reduce performance in areas with water, of which Rapture has quite a few. It will also reduce your FPS when you have the Incinerate plasmid visible on your left hand for example.
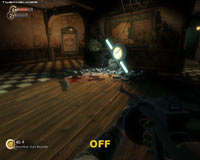
Force Global Lighting: When set to On, this option enables a less accurate form of lighting which can improve performance. The screenshot comparison above shows that when enabled, the use of Global Lighting causes numerous inaccuracies in the scene. Notice for example the orange gas cylinder in the top right is incorrectly lit up when it should actually be dark due to the desk's shadow thrown by the lamp on the ground; the shadows on the body of the nurse are also harsher and less realistic; the shadows in the inside of the bucket on the bottom left are missing, etc. In general though it doesn't reduce image quality noticeably while playing, so if you're struggling for FPS - particularly in heavy combat scenes - then you should enable this option.
Update: The following option has been added as of the 1.1 Patch:
Horizontal FOV Lock: This setting is related to your Resolution setting, and is specifically for widescreen users. It appears to control whether the Horizontal Field of View (FOV) is locked, thus affecting the overall aspect ratio of the image. See the Resolution section above for more details.
The next page continues our look at BioShock's in-game settings.

DirectX 10 Detail Surfaces: This option is only available if you're running Windows Vista and you are using a DirectX 10-capable graphics card, such as a GeForce 8 or Radeon HD2X00 series graphics card or newer. If set to On, the game will use DirectX 10 Shader Model 4.0 rendering to add the following effects:
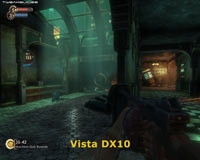
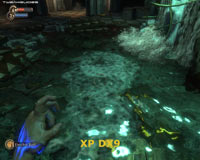
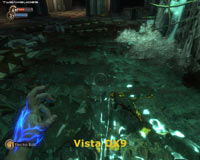
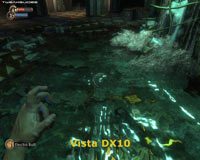
The first set of screenshot comparisons above shows that the difference between DX9 and DX10 is not greatly noticeable in an average scene. It would be difficult to distinguish between the two unless you are looking at fire or water effects, or at shadows, and even then the difference can be subtle until you look closely. The second set of screenshots above highlights the difference in the details between DX9 and DX10 for water effects. The three screenshots all show water ripples from the character walking backwards through a puddle of water. The XP DX9 image shows generic 'splash marks' in the wake, while both Vista DX9 and Vista DX10 show accurate DX10 ripple physics in action.
Importantly, this highlights an oddity which currently occurs with BioShock: it appears that if your graphics card is DX10-capable, then BioShock uses full DX10 effects even when you have the 'DirectX 10 Detail Surfaces' set to Off. This explains why Antialiasing is not possible in Vista DX9 mode, while it is in XP DX9 mode. It also explains why performance comparisons between Vista DX9 and DX10 mode which demonstrate that DX10 has minimal image quality or performance impact (e.g. in this article) are not entirely correct, because under Vista BioShock will always run in DX10 mode if it detects a DX10 graphics card.
There are three main ways to get BioShock to correctly run in DX9 mode on a DX10 card in Vista: In Games Explorer right-click on the BioShock icon and select 'Play-DirectX9'; or right-click on your BioShock launch icon, select Properties, and add -dx9 one blank space after the last character in the Target box; or you can disable individual DX10 effects by editing the relevant DX10 .ini settings (See Advanced Tweaking section for details). In any case the actual performance difference between proper DX9 and DX10 mode can be quite pronounced in some areas, so if you're struggling for FPS run in proper DX9 mode, or use BioShock under XP for maximum FPS.
Actor Detail: This option can be set to Low, Medium or High. It doesn't actually relate to just the details on actors (i.e. characters), rather it is supposed to determine the overall level of detail in the environment. As it is lowered, 'decoration objects' and some effects will be removed. However in testing I have not noticed any real difference from changing this setting. Also note that you will need to restart the game each time you alter this setting for the changes to come into effect.
Texture Detail: This setting has three options: High, Medium and Low. As Texture Detail is lowered, textures become progressively more blurry. You can see an animated screenshot comparison of the different texture levels by clicking this link: Bioshock_Textures.gif (858KB). As demonstrated, there is a clear increase in blurriness even at Medium, and by Low textures are so blurry that the text on the poster is illegible. Given most textures in BioShock are already not very high resolution, and the fact that you won't gain any real performance by reducing this setting, I recommend keeping this slider at High. The only reason you should lower it is if you notice a great deal of stuttering and loading pauses as you move around the game world, and given BioShock's engine uses a streaming approach for textures, stuttering should be minimal.
Adjust Brightness: Use the slider to adjust your brightness so that the grey text on the wall to the left is visible but barely so. Has no performance impact. You can also adjust Contrast and Gamma separately if you wish - see the relevant settings under the Advanced Tweaking section.
Finally, note that as you adjust the various graphics options in this section, the Graphics Quality slider will show either Low, Medium, High or Custom. This slider doesn't control any specific setting itself, it's just an overall indication of the rough level of graphics options you're using. You should adjust each of the graphics settings individually to get optimal results rather than using this slider.
Customize Controls
Mouse Sensitivity: This slider controls how sensitive the mouse will be to your movements. The further to the right the slider, the greater your view movements will be in the game when you move the mouse. If you wish to adjust the mouse sensitivity even higher than the maximum of 9 here, see the MouseSensitivity setting in the Advanced Tweaking section.
Mouse Acceleration: Some people are complaining about the feeling of mouse acceleration in BioShock. While there's no in-game fix for this, see under User.ini in the Advanced Tweaking section for a binding which can help reduce this.
Mouse Lag: If you are experiencing 'mouse lag', that is a feeling of reduced sensitivity or sluggishness in your mouse, regardless of how high you set the mouse sensitivity slider, you should first make sure you are consistently getting sufficient FPS, especially in more complex scenes such as during combat. Use FRAPS to check your FPS, and keep in mind that typically anything below 20-15FPS will bring about mouse lag in any game, so you will have to lower your settings appropriately to prevent this as much as possible. Importantly, make sure to disable VSync as not only is it know to cause mouse lag, it also reduces performance which can make mouse lag even worse. If these steps don't help to reduce mouse lag, see the ReduceMouseLag, DoubleBufferMouseLag and CaptureMouse variables in the Advanced Tweaking section.
Invert Look: If set to On, pushing your mouse forward will make your character look down, and pulling your mouse back will make him look up. If set to Off, the opposite will occur. Set to suit your taste, has no impact on performance.
Vibration: This option enables or disables vibration on an XBox 360 controller connected to the PC. If no such controller is connected the option is greyed out.
Use XBox 360 Controller: If you have an XBox 360 controller for Windows and it is connected to your PC, you can enable this option to use that instead of the normal mouse/keyboard combination. If no such controller is connected the option is greyed out.
Customize Keys: Clicking this button at the bottom of the screen allows you to customize all your major key bindings. For the most part the default setup is quite good, however you can change any bindings here, or you can do it in your User.ini file, which also allows more complex bindings and customizations (See Advanced Tweaking section).
Audio Options
Audio Mode: This slider controls the number of audio channels the game will use. Make sure it matches your current speaker configuration.
Use Reverb: If set to On, this option enables reverberation, which basically makes sounds echo more in larger spaces. This adds to the realism and atmosphere of Rapture. Disabling this option makes sounds much flatter, but on sound cards which don't support EAX, Reverb can cause problems and reduce performance so it should be disabled. Even sound cards or onboard sound solutions which are EAX-compatible might benefit from disabling Reverb if you are having audio problems.
Use Creative EAX Audio: If your sound card supports Creative's Environmental Audio (EAX), then you can turn this option on to improve audio richness and quality in the game at the cost of some performance. Once again, some sound cards or onboard sound solutions which are nominally 'EAX compatible' may have issues with crackling or popping audio when EAX is enabled, so this option should be turned off to see if it helps.
Sound Effects, Music, Voice Over Volume: These sliders control the volume levels for the game's sound effects, music and any voice overs. They have no performance on impact so set to suit your taste.
If you're having problems with sound in BioShock, make sure that you've installed (or even reinstall) the latest game patch (see page 4), the latest audio drivers for your audio device, the latest DirectX update found here, and uninstall any third party 'codec packs' you may have installed, or third party media players which install custom codecs of their own, as these can interfere with the game's FMOD Audio Engine. Finally, see the MaxChannels setting under the Advanced Tweaking section.
Note: Since Bioshock uses the FMOD audio engine you don't need the Creative ALChemy patch in Windows Vista to experience full hardware functionality from your Audigy or X-Fi sound card.
Gameplay Options
Adaptive Training: If set to On, this option provides various messages on the screen highlighting relevant features of the game and the environment as you wander the game world. It is adaptive in that it tries to only tell you things it feels you don't already know or aren't noticing. It's useful when you're new to the game, but after a while it can become annoying so you can disable it once you're familiar with BioShock. Then if at any time you need a hint as to what to do if you get stuck, press the H key (or press the M key to bring up the map).
Dialog Subtitles: If set to On, displays text subtitles whenever there is spoken dialog in the game. Has no performance impact, set to suit your taste.
Art Subtitles: If set to On, displays text subtitles for the various text written on in-game graphics, such as posters and banners. This is mainly useful for people using non-English versions of the game, or those who find some of the graphical text hard to read due to low settings for example. Has no performance impact, set to suit your taste.
Quest Arrow: When set to On, a large arrow appears at the top of the screen highlighting the direction you should go to complete your current mission. You can enable or disable this depending on whether you need this feature, as it has no significant performance impact.
Item Shimmer: If set to On, all objects you can pick up will periodically display a shimmer effect to get your attention. This makes things easier to find when you're searching, but if you find this annoying and want an extra challenge and more realism turn this Off. Has no significant performance impact either way.
Usable Object Highlight: When set to On this option surrounds all usable objects in the game world, such as levers, buttons, etc. with a golden glow. Once again this makes finding usable objects much easier, but for an extra challenge and greater realism you can disable this effect. The performance impact is not significant either way, so set to suit your play style.
Note: Objects or characters which are part of your current mission Goal will still retain a gold glow regardless of these settings.
Update: The following option has been added as of the 1.1 Patch:
Disable Vita-Chamber: This setting allows you to disable the use of Vita-Chambers. If set to Off, whenever your character dies in the game, rather than being reincarnated at the nearest Vita-Chamber, you will be sent to the main menu and will have to reload an existing save game to continue. This makes the game more challenging for those who prefer it. This option can be enabled or disabled at any time during a game.
The next section looks at advanced tweaking for BioShock.
Bioshock is based on the Unreal Engine 3.0, which fortunately has a range of advanced options you can configure outside the main in-game settings. These allow you to change both visual quality and performance parameters, as well as customizing the game in other ways. To access these settings, go to your \Documents and Settings\[Username]\Application Data\Bioshock directory (in Windows XP) or \Users\[Username]\AppData\Roaming\Bioshock (in Windows Vista). Note that to see these directories you need to go to Control Panel>Folder Options>View and select 'Show hidden files and folders'. Now look for the files Bioshock.ini and User.ini - these are the main files we will be editing. You can view and edit the contents of these files using a text editor like Windows Notepad, but I recommend that you back them up before making any changes. However if something does go wrong and you don't have a backup, you can delete these two files and new ones will be created with default settings, removing all your customizations. Any time BioShock crashes, these files will also be reset to the defaults.
Under the game's main directory you will also find Default.ini and DefUser.ini. These files hold the game's default configuration, and they're used as a template when the game needs to create new copies of Bioshock.ini or User.ini. Editing the Default.ini or DefUser.ini files results in permanently losing the default settings. It is generally not recommended, however if you wish to prevent your settings being lost then edit these files instead of Bioshock.ini and User.ini, but make sure to back them up first before doing so. In the first instance though I would strongly recommend making changes to Bioshock.ini and User.ini until you're sure your changes are stable and desirable.
There are a large number of sections and commands within Bioshock.ini and User.ini which have absolutely no impact whatsoever on BioShock. They are either parts of the UE3.0 engine which have not been implemented in BioShock, legacy parts of the engine no longer used, parts used for debugging/testing purposes, or which apply to platforms other than the PC. For example all Xenon-related sections in the .ini files relate only to the XBox 360 version of BioShock. These will obviously not be covered here, nor will settings you can change completely within the in-game options, or commands which have no impact. I've tested all the settings in these two .ini files, and only the major working settings are provided below:
Bioshock.ini
The main purpose of Bioshock.ini is to hold graphics, audio, and gameplay settings.
[Engine.Engine]
RenderDevice=D3DDrv.D3DRenderDevice
This setting determines which API the game uses for graphics, and the only choices are DX9 (D3DDrv.D3DRenderDevice) or DX10 (D3DDrv10.D3DRenderDevice10). You can already select these within the game if they're available for your hardware. You cannot force DX10 mode in XP, nor if you don't have a DX10 graphics card in Vista. You also cannot force OpenGL (OpenGLDrv.OpenGLRenderDevice) mode as this is not supported by the game. Depending on which API is shown as being used here, you should check the relevant section further below as to which rendering settings will apply to the game.
AudioDevice=FMODAudio.FMODAudioSubsystem
This setting determines which Audio API is used. By default the game uses the proprietary FMOD audio engine, and you cannot successfully alter BioShock's audio system to another one, such as the generic OpenAL sound renderer (ALAudio.ALAudioSubsystem). This is because the game's main audio found under the \Program Files\2K Games\BioShock\Content\Sounds_Windows directory comes in FMOD's proprietary streaming .fsb format and so can only be played back by the FMOD engine. So altering the audio renderer will only result in sound playback in the game's main menu and duirng .bik movie files, but not in the game itself. If you're having sound issues with FMOD see the Audio Options under the In-Game Settings section for details of solutions.
[Engine.GameEngine]
CacheSizeMegs=32
This value represents the amount of System RAM set aside for temporarily caching game information. This setting is not designed to impact on FPS as such, it is more for reducing loading pauses in-game. You can try a cache size of 64 or 128, however I don't suggest increasing this value any higher since the cache is not where the entire game can load into. In general given that BioShock is relatively smooth, altering this value will likely have no major impact on stuttering, but try raising it if you do notice stuttering.
[WinDrv.WindowsClient]
WindowedViewportX=1024
WindowedViewportY=768
These settings control the resolution of the game when run in Windowed mode. In case something prevents you from changing them in-game after a crash for example, alter them here.
FullscreenViewportX=1280
FullscreenViewportY=1024
These settings control the resolution of the game when run in fullscreen mode, and can be adjusted within the game. However if you want to try a custom resolution change the X (width) and Y (height) values above accordingly.
Brightness=0.500000
Contrast=0.500000
Gamma=1.000000
You can already adjust the Brightness using the in-game settings, however here you can also adjust the Contrast and overall Gamma of the picture using these settings, giving you finer control. Note however that altering these settings may temporarily override your Windows Desktop brightness, contrast and gamma settings as well after you exit the game. Rebooting or reversing any changes here will fix that.
CaptureMouse=True
This setting controls the way mouse movement is recorded by the game, and in general you won't gain anything by altering it. However for people who experience mouse lag, setting this option to False may help. See the In-Game Settings section for a discussion of mouse lag and fixes.
MouseYMultiplier=0.000000
MouseXMultiplier=0.000000
These settings control how magnified your mouse movements are. The MouseYMultiplier setting controls your mouse's up and down movements, the MouseXMultiplier setting controls the left and right ones. The larger the number you enter for these, the more exaggerated will be the translation of your physical mouse movements into in-game and in-menu movements on screen.
[FMODAudio.FMODAudioSubsystem]
As noted above, BioShock uses the FMOD audio engine, and not the generic OpenAL (ALAudio.ALAudioSubsystem) engine. Therefore only the settings under this section and audio-related options under the ShockGame.ShockUserSetting section further below affect the audio in the game.
MaxChannels=128
This option controls the maximum number of individual audio channels used for sound in BioShock. Almost all modern sound cards support at least 32 channels; Audigy series cards can support up to 64; X-Fi cards support up to 128. If you're having audio problems set this maximum to the maximum channels supported by your audio device, or a lower value such as 32 or even 16 if all else fails. This can reduce audio glitches and may improve performance, but if set too low will result in missing sound effects.
MaxStreams=8
BioShock uses a streaming audio system, and this setting appears to determine the maximum number of concurrent streams of audio which are possible at any time. Experimentation with this setting didn't show any real benefit, but if you find you're getting a lot of stuttering you might want to try lowering this value (e.g. to 4).
StreamBufferSize=256
This option determines the buffer size in KB for each audio stream. Buffering the audio before playback prevents skips and stutters. The default seems optimal, but if you find you have audio stuttering or skipping, or audio delays, try lowering this value this value, e.g. to 128, especially on systems with only 1GB of RAM.
[D3DDrv.D3DRenderDevice]
HighDetailActors=True
SuperHighDetailActors=True
It is worth noting that the above settings in combination are the same as the in-game Actor Detail setting (See In-Game Settings section). When both are False this is the same as Low Actor Detail; when both are True this is the same as High; and when only the first is True this is equal to Medium.
UsePrecaching=True
If set to True this allows the game to precache (load in advance) a range of graphics data. This helps reduce loading pauses, choppiness and hitches in the game (see also AvoidHitches below). Only set this to False if troubleshooting a problem, such as crashes during game loads, or if you want to try to reduce loading level loading times in return for more in-game stuttering. In general there should be no real reason to ever disable precaching in BioShock.
UseTrilinear=True
If set to False this option disables Trilinear Filtering and uses basic Bilinear Filtering for textures instead. The results are a slight decline in the crispness of textures in return for potentially improved performance, but in practice the performance and image quality impact is minimal. The image quality impact is most visible if you've also lowered the default Anisotropic Filtering (See LevelofAnisotropy below).
ReduceMouseLag=True
This option is clearly designed to reduce mouse lag, however unfortunately it can also reduce FPS as well. I recommend setting this option to False (along with the one below), and then check Customize Controls under the In-Game Settings section for more details of why mouse lag occurs and the main solutions for reducing it.
DoubleBufferMouseLag=True
Another option designed to fix mouse lag, likely specifically for lag caused when VSync is On and Triple Buffering is not enabled. Ideally you should disable VSync, or use Triple Buffering if you have VSync On. I recommend setting this to False and again refer to the In-Game Settings section for more details of VSync, Triple Buffering and mouse lag.
DesiredRefreshRate=60
If you have VSync enabled (See In-Game Settings section) then your Refresh Rate will be limited to whatever this setting is. You should set this value to the highest refresh rate supported by your monitor at your desired resolution. For example, your monitor may support a maximum refresh rate of 85Hz at 1280x1024, so you would alter this setting to =85. Note that this setting has no impact if you have VSync disabled.
LevelOfAnisotropy=4
This setting controls the level of Anisotropic Filtering used in BioShock. For more details of Anisotropic Filtering see this page. The minimum value is 1 which turns off AF. A value of 2 provides 2x AF, 4 is 4x AF and so forth. Note that you can also force Anisotropic Filtering through your graphics card's control panel - for optimal performance choose one method or the other of applying AF to BioShock, not both.
OverrideDesktopRefreshRate=False
If set to True, this setting allows you to exceed any refresh rate limitations Windows imposes. Set to True just to be safe, but if you already use a refresh rate fix or override then such as Refresh Force, changing this setting will have no effect.
AvoidHitches=False
Hitches are small pauses/stutters, caused by your system pausing to load new data. If set to True, this setting may help reduce the occurrence of substantial hitches in the game, but it can also reduce average framerates, so leave this option at False unless you have very serious stuttering issues.
Use8bitBackBuffer=False
If this option is set to True, it uses a lower precision back buffer which can save graphics memory but results in a very noticeable reduction in image quality. In particular color banding - a clear gradation between colors - and purplish tinges will become visible. Some advanced special effects may also not be visible. In return performance will also improve noticeably, so only use this option if you're genuinely struggling for FPS or getting serious stuttering.
Use8bitOpacity=False
If set to True, this option uses 8-bit opacity for transparent surfaces. I'm not completely certain as testing showed no real difference in image quality or performance, but this option may provide slightly improved image quality, especially when any Transparency Antialiasing is used.
The next page continues the Bioshock.ini settings, and also looks at User.ini
[D3DDrv10.D3DRenderDevice10]
This render device is only used when running Windows Vista with a DX10-capable graphics card. In all other respects the settings in this section have the same functionality as that under the regular DX9 renderer above. There is however one additional setting:
UseHighDetailShadowMaps=True
When DX10 mode is being used, this option is set to True by default. Shadows in the game will be even sharper and more detailed. You can however specifically disable this particular aspect of DX10 rendering if you wish to gain an improvement in FPS, by setting this option to False.
There are two other DirectX 10-specific options which you can find under the [Engine.RenderConfig] section further below: UseRippleSystem and UseHighDetailSoftParticles.
[Engine.LevelInfo]
PhysicsDetailLevel=PDL_Medium
BioShock uses the Havok Physics engine, and so this line which seems to be a legacy of the rival Karma Physics engine should have no impact even if you change it to PDL_High for example.
[Havok]
HavokNumThreads=2
BioShock benefits significantly from running on a multi-core CPU (See Conclusion section). This setting controls the maximum number of separate 'threads' on which the Havok physics engine may run. For example if you have a dual core CPU, this should be set to 2; if you have a quad core CPU try setting this to 4. However you cannot force the physics engine to run more threads than you have physical cores.
[Engine.RenderConfig]
UseSoftwareAntiAliasing=True
In theory this setting should affect whether a blurry form of Antialiasing is used to smooth jagged edges; in practice it seems to have no impact at all on image quality or performance whether enabled or disabled. It is likely only for the XBox 360, as are the EdgeDetectCutoff and EdgeBlurSize settings. To enable real antialiasing in BioShock check Antialiasing under the In-Game Settings section of the guide.
UseRippleSystem=True
When DX10 mode is being used, this option controls the additional ripple physics effects used on water. For example if you're wading through water, the ripples from your wake will be realistic, whereas in DX9 mode you will just see generic a splash. You can individually disable this aspect of DX10 by setting this to False for an FPS improvement in water areas.
UseHighDetailSoftParticles=True
As with UseHighDetailShadowMaps and UseRippleSystem, this variable controls one of the additional features which DX10 mode offers over DX9 mode - soft particles. You can see this effect when looking at things like fire; when soft particles are used fire blends with its surroundings more smoothly, there is no noticeable 'clipping' between the fire and other objects. However once again if you wish to disable this option individually, you can set it to False to gain FPS in areas where such effects are used.
UseSpecCubeMap=True
This setting appears to determine whether cube mapping is used on certain specular (shiny) surfaces. Setting it to false can cause some graphical glitches (e.g. on melting ice), so it is not recommended.
UseMultithreading=True
Should be set to True for optimal performance if you have a multi-core system. See the Conclusion section for more details of multithreading.
[ShockGame.ShockUserSettings]
MouseSensitivity=3.000000
This option is the same as the in-game Mouse Sensitivity option available under Customize Controls (See In-Game Settings section). However here you can adjust it more finely if you wish, and also set it above the in-game maximum of 9.
AutoAim=True
By default the game makes sure that you automatically hit enemy targets with things like electro-bolts as long as the target is anywhere within your red circular aiming reticule. Setting this option to False removes this auto-aim tendency for Plasmids, and means that your shot goes exactly where the middle of the aiming reticule is currently pointed. This makes the game slightly harder for those who want a challenge.
User.ini
The main purpose of User.ini is to hold key bindings and user interface settings. For the most part you shouldn't need to alter the settings in this file as you can customize your key bindings by using the options under Customize Controls in the in-game settings. However for those who want to get involved with customizing the commands or troubleshooting control difficulties, editing User.ini is necessary.
[Engine.Input]
This section of User.ini lists aliases, which are like macros - you can bind multiple commands to a particular alias, and then assign the alias to a particular key. The game engine has a set of predefined engine commands, and although you can assign these commands directly to keys (See the Default section further below), the aliases can translate those commands into something more workable for binding to keys. For example look at the following line:
Aliases[29]=(Command="DuckKeyPressed | onRelease DuckKeyReleased",Alias=Duck)
It contains two commands bound to one alias called Duck, each command separated by the pipe symbol (the | symbol). When this alias is bound to a key - which in Bioshock is C by default (for Crouch) - using that key will execute both commands. In this case when you press C the engine will execute the DuckKeyPressed command, which results in the character crouching. When you let go of C, the DuckKeyReleased command is executed, which in this case leaves the character ducked, until you press C again.
One of the reason aliases are used is so that if you want to change the way a command works, you can alter the alias in this section, and everywhere that the alias is used in User.ini the action will also change. For example at the moment the Crouch key works as a toggle; that is if you press it once you're crouched, and you need to press it again to stand up. But say you want to make the Crouch key behave such that you crouch only for as long as you hold down the key, and as soon as you let go you stand up again. You would alter the above Alias line to:
Aliases[29]=(Command="DuckKeyPressed | onRelease DuckKeyPressed",Alias=Duck)
The changed portion is bolded, and basically the new alias says that when the Crouch key is pressed and held down, it's counted as being pressed as normal, but the onRelease function has been changed so that when you release the key it runs the DuckKeyPressed function again, which in effect makes the character stand up.
To really understand and take advantage of aliases, you will need to experiment and try various things as it can be quite complex. For example try changing your default movement speed. By default aliases 2, 3, 4 and 5 set your moveforward, moveback and move side to side (strafe) speeds. So to alter the default move forward speed of your character, edit this alias:
Aliases[2]=(Command="Axis aBaseY SpeedBase=1.0 Speed=+1200.0|HACK_TriggerEffectEvent PlayerMoved|onRelease HACK_UnTriggerEffectEvent PlayerMoved",Alias=MoveForward)
Remove SpeedBase=1.0, and change the Speed=+1200.0 value to whatever you wish, e.g. Speed=+800.0 to move forward at a slower speed.
[Default]
Whether using an alias defined above, or inputting a command directly, it can be bound to a key function in this section, which is the main area for the standard PC keyboard and mouse bindings used in Bioshock. To further use the example above, the alias Duck has been bound to the C key by default in this section, as seen by the line:
C=Duck
You can find all the individual keyboard keys, including function and numeric keys, in this section. You can alter them relatively easily by adding, deleting or moving the binding from one key to another. For example to move Quicksave from the Function 8 key, go to F8=QuickSave and delete the word Quicksave. You can now make any other free key =Quicksave if you wish. Obviously for normal key bindings it's much wiser to do this from within the in-game settings.
There are also various other sections under User.ini which have key bindings, but these are bindings for particular interfaces in the game, such as when using a vending machine. Sometimes these different interfaces have a different use for a particular key which is defined in the default area, but only when using that interface.
Once again experiment to see which bindings will suit your taste.
Mouse Acceleration: Note that for those having problems with mouse acceleration in BioShock, you might be interested in changing the following bindings in this section:
MouseX=IF_MOUSE_LOOK_ENABLED Count bXAxis | IF_MOUSE_LOOK_ENABLED Axis aMouseX Speed=2500.0
MouseY=IF_MOUSE_LOOK_ENABLED Count bYAxis | IF_MOUSE_LOOK_ENABLED Axis aMouseY Speed=2500.0
The lines above control the speed of the mouse along the X and Y axes, and if you change the Speed= value of each to something lower you can reduce the feeling of acceleration in the game. You should go to the [Engine.Input] section above and disable (put a ; in front of each) the lines for Aliases 6 - 9, and Aliases 20 - 23.
Console Commands
Although BioShock doesn't have a proper in-game console you can open, there is a way you can use a range of common Unreal Engine console commands: you can bind them to specific keys in User.ini above, and then use the keys in the game to invoke the command. For example you can bind the command FLY to the Function 11 key by editing User.ini under the [Default] section to show F11=FLY. When you press F11 in the game your character will be able to fly around, and to disable it you'll need to bind another key to use the WALK command (e.g. F12=WALK).
Some of the confirmed working commands you can bind are as follows:
God - Invincibility
Fly - Allows you to fly around
Walk - Disables fly and ghost mode
Ghost - Allows you to move through solid objects
Suicide - Kills your character
Killpawns - Kills all enemy on the level
ToggleshowAIs - Toggles the presence of enemy On/Off
Givehealth - Refills your Health bar
Givebioammo - Refills your Eve bar
IGBigbucks - Gives you $500
HideHUD - Disables the on-screen HUD elements
ShowHUD - Enables the on-screen HUD elements
ToggleHUD - Toggles the on-screen HUD elements On/Off
Slomo - Slows everything down
Freezeframe - Freezes the game
Shot - Takes a screenshot in BMP format and places it in the same folder as BioShock.ini
Togglesoundeffects - Turns sound effects (but not music or ambient sounds) On/Off
SetFOV [degrees] - Sets your Field of View to the specified degrees, e.g. SetFOV 90
ResetFOV - Resets Field of View to default
GEP [Plasmid/Tonic name] - Gives you a specific tonic or plasmid, e.g. GEP ElectricBoltThree
Note: A full list of all plasmid and tonic names can be downloaded from here.
Thanks to Jonas Beckman and Burning Fish from the TweakGuides Forums for the heads-up on this method and some of the commands. Thanks in particular to Veegun for a large number of additional working commands and the tonic and plasmid names. You can view a more detailed list of console commands here.
More Tweaks
I've tested all the applicable settings in both Bioshock.ini and User.ini thoroughly, and unfortunately many of them, although they have tempting titles, are non-functional. This is common in many games, because they are built on third party game engines, and the developers of the game do not use particular portions of the engine so the generic variables in the .ini file may remain, but the functionality is superceded or not implemented. I've only tried to document all the major working commands in this section, excluding those which can already be completely altered using in-game settings.
However I'm sure there may be other tweaks of value, so if you find something which you genuinely believe is working (and have evidence of it making a difference), please Email Me so I can include it in the guide for others to use. Again, please no guesses or speculation about what something does, unfortunately there are already many invalid/non-functional BioShock tweaks being distributed and promoted on various forums. I only want to document actual working tweaks of significance.
Also note that there are several command line switches for BioShock, including the -dx9 and -nointro ones noted in other sections of this guide. The -log switch is not of great use to people so it's been excluded. If you have any other working command line switches worth sharing, please submit them for inclusion as well.
The next page brings the guide to a conclusion with some important information.
The guide is rapidly coming to a conclusion, but not before I detail some important tips, tweaks and useful information.
Disabling Introductory Movies
If you find it tedious to sit through the introductory company logos for BioShock each time you play, you can remove them quite easily. Right-click on your BioShock launch icon, select Properties, and at the end of the Target box, one blank space after the last character, add -nointro. Your Target box contents should look something like this:
"C:\Program Files\2K Games\BioShock\Builds\Release\Bioshock.exe" -nointro
You can also remove the introductory movie by renaming the file 2KG_logo_720P.bik found under your \Program Files\2K Games\BioShock\Content\BinkMovies directory, but that is not the recommended method.
Playing on a Shader Model 2.0 Card
Many people who own graphics cards which only support Shader Model 2.0 have been upset by BioShock's minimum requirement for a Shader Model 3.0 graphics card, i.e. a GeForce 6600 or ATI X1300 graphics card or higher. This is understandable, however it is going to become an ever-more-common occurrence given the way games developers are trying to push the boundaries in terms of game graphics.
However all is not lost, there is one way you can run BioShock with an SM2.0 card, and that's by trying the SM2.0 Project. This is a work in progress, and there are plenty of graphical glitches, so it is obviously only for the die-hard BioShock fans who can't upgrade their graphics cards. Still, it's worth a go and is the only option available for SM2.0 card owners unless 2K releases a patch to make BioShock run on non-SM3.0 cards. More details, and the latest versions, are on the Official ShaderShock Forums.
BioShock and Dual/Multi-Core CPUs
Something that will come as good news to dual or quad core CPU owners is that BioShock is a game which is specifically designed to properly utilize multi-core CPUs. Running it on my dual core system, I notice both cores are at times reaching close to 100% each, which marks the first time I've seen a game actually using the CPU to its limits. This means that if you're after a performance boost in BioShock, and indeed other upcoming titles especially those based on the Unreal Engine 3.0, then you should seriously consider a multi-core CPU and not just focus on upgrading the graphics card alone.
Measuring FPS and Taking Screenshots & Videos
BioShock doesn't have a built-in framerate counter, so if you want to see what sort of FPS you're getting in the game - which is particularly important if you want to tweak or diagnose problems like mouse lag - then use the free FRAPS utility. This utility also allows you take in-game screenshots and record gameplay videos, such as these BioShock Gameplay Videos I've put on YouTube.
Alternatively, if you want to take screenshots in the game without FRAPS, you can use the shot key binding, as well as the ToggleHUD binding to hide the HUD for cleaner screenshots - see the Console Commands section of the previous page for more details.
BioShock Music and Art Book
If you're a big BioShock fan then you'll probably want these two freebies from 2K. The first is the BioShock Soundtrack (21MB), and the other is the BioShock Art Book available as a Low Res (15MB) or High Res (75MB) PDF download. In both cases it's nice to see the developers providing something for free for the fans.
Conclusion
Well that brings the guide to a conclusion. I hope you find it useful in improving your BioShock gameplay experience, and as always, if you find errors or important omissions in the guide, make sure to Email Me with the details so I can keep the guide as accurate and up-to-date as possible. Remember though that unfortunately I can't provide any tech/tweaking support, and I also don't provide permission for the guide to be reproduced or translated elsewhere for several reasons.
Until next time, take care!