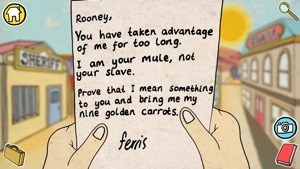
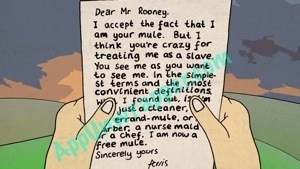
1. After the cutscenes end, you’ll have a letter in your inventory. Keep that in mind.
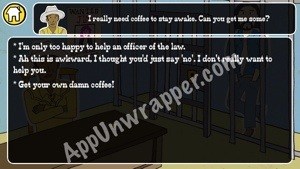
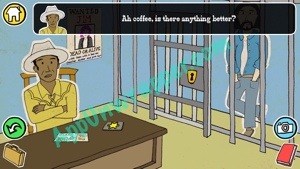
2. Enter the Sheriff’s Office. Talk to him and he’ll ask you to get him a coffee. Agree and he’ll put a voucher on the desk. Look at it and snap a photo for later. Also take a look at the poster on the wall.

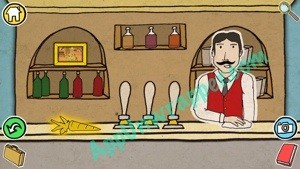
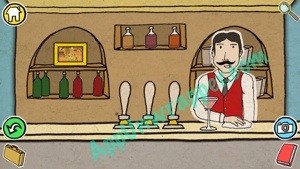
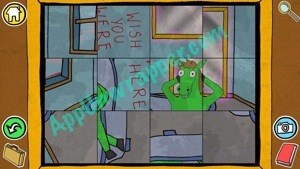
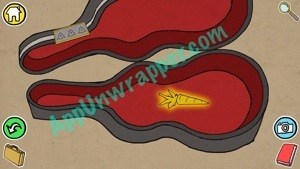
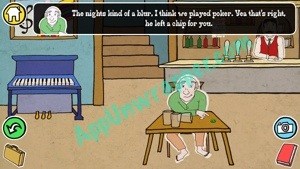
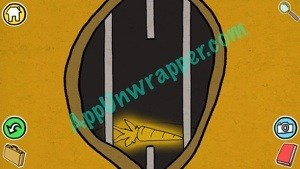
3. Leave and enter Paddy’s Saloon. Take the Golden Carrot from the bar and talk to the bartender. Ask him to make you some drinks and take them. Also take a look at the picture behind the bar. Notice the rainbow in it. Look at the rainbow photo by the piano. Then talk to the man sitting at a table.
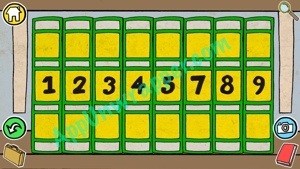
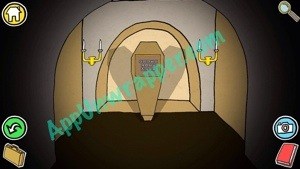
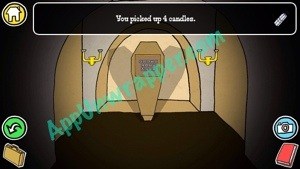
4. Go up the stairs. Enter the Poker Room. Pick up the four candles. Look at the poker table. You can turn over the cards. Look at the poster on the wall.
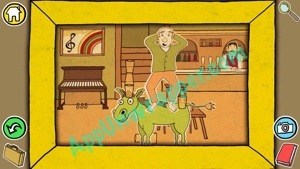
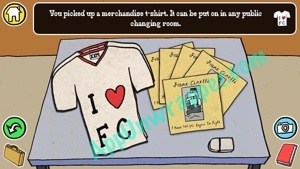
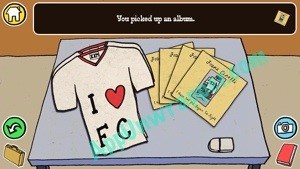
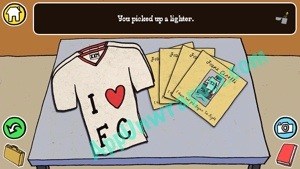
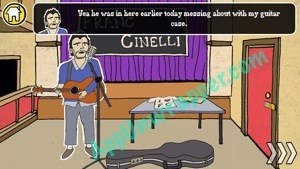
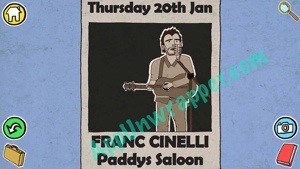
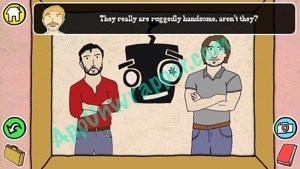
5. Leave that room and enter the Mane Stage. Pick up a t-shirt, album and lighter from the merchandise table. Talk to Franc Cinelli. Learn more about his music. Take note of the lock on the guitar case and the lock on the door.


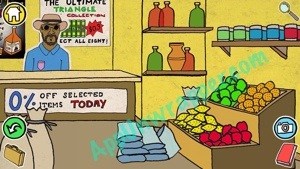
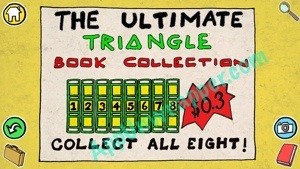
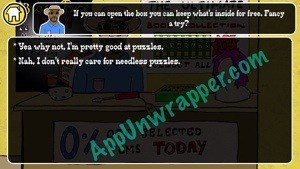
6. Leave the saloon. Tap on the ground to the left of the Saloon. Look at the poster on the wall, then enter the General Store. Go up to the counter and take a look at the two posters on the wall. Also talk to Django (the store owner) and see what he has for sale. A bunch of items will appear on his counter. Look at the puzzle box and make note of the items for sale.
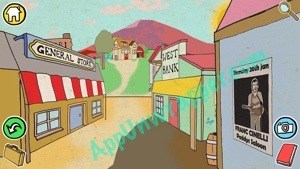
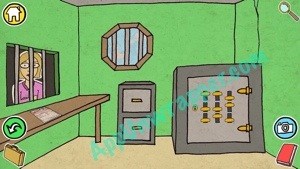
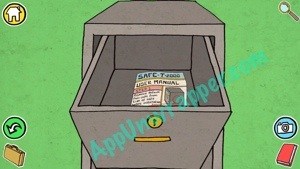
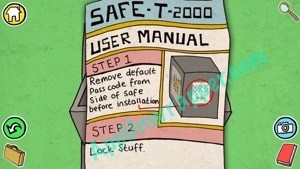
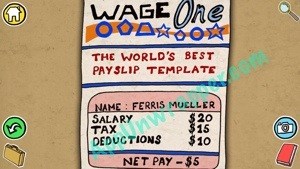
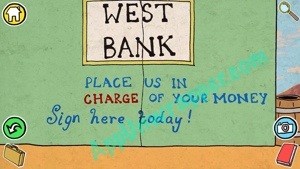
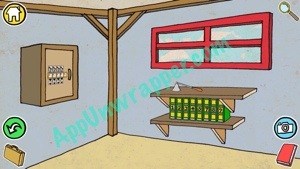
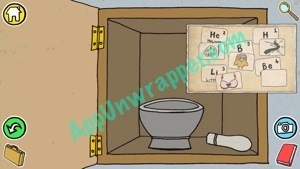
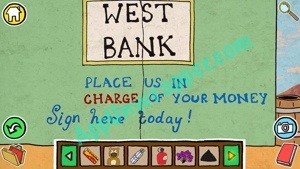
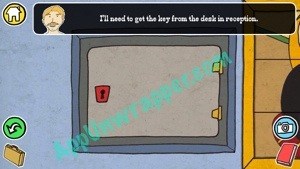
7. Leave the store and go to the West Bank. Open the drawer and look at the safe User Manual. Take a look at the safe. Look at the pay slip by the teller, then talk to the teller to learn a bit more about your safe. Leave the bank.
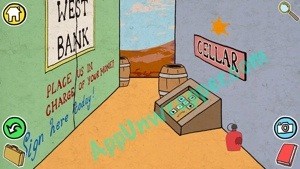
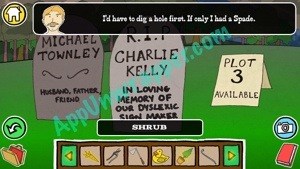
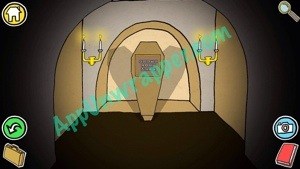
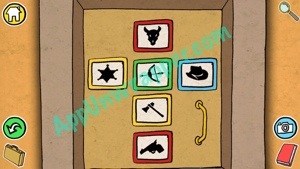
8. Go to the alley between the bank and the saloon. Notice the gold star on the wall above the word “Cellar.” Notice the broken container. Look at the writing on the wall. Look at the puzzle lock on the cellar door.
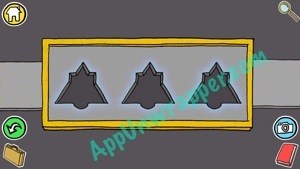
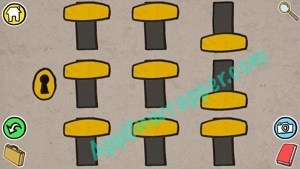
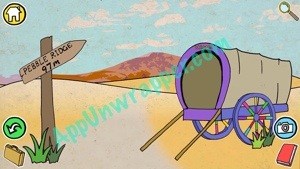
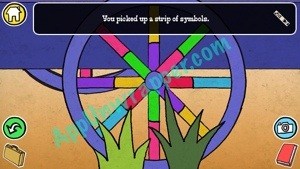
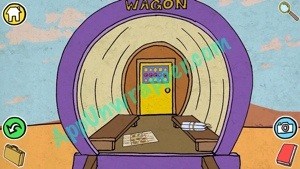
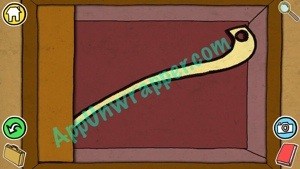
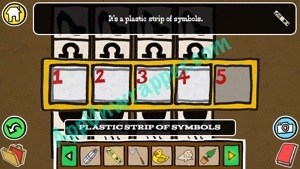
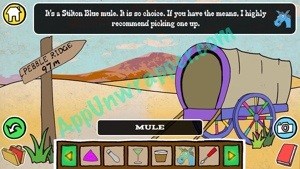
9. Go back two screens and tap on the ground between the saloon and the hotel. You’ll see a wagon. Tap on the wheel and take the strip of symbols leaning against it. Take a picture of the wheel. Go inside the wagon and take the four candles and look at the Heist List. There’s also a shapes puzzle in the back that we can solve.

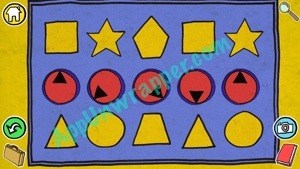
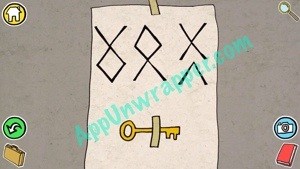
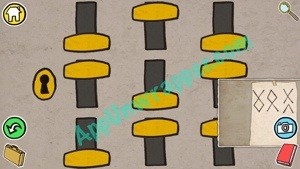
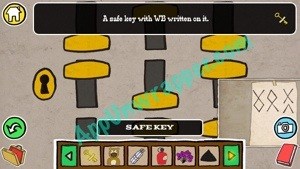
Use the clue from the pay slip in the bank to solve the shapes puzzle. It goes like this (just change the last dial to the circle — I couldn’t get he photo in time).

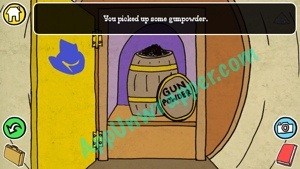
Take the gunpowder from inside and make note of the blue hat.
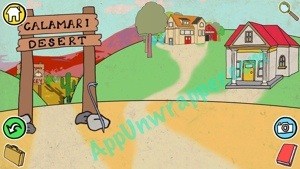
10. Now go back a screen and tap on the left of the saloon. Continue on towards the house on the hill. Take the crowbar that’s leaning against the Calamari Desert sign. Then head to the house on the right with the red roof.
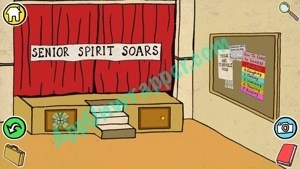
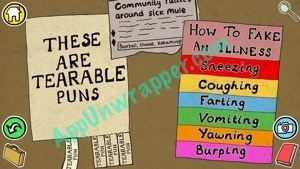
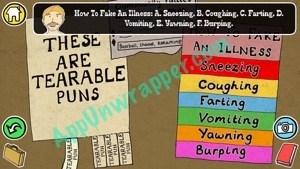
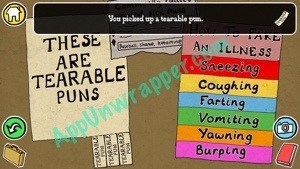
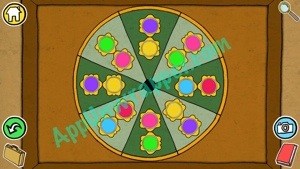
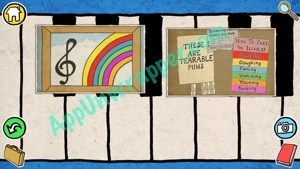
11. There’s a stage here. Look at everything on the bulletin board. Take one of the “Tearable Puns.” Look at the colored puzzle by the stage and take the pump handle from the stage.

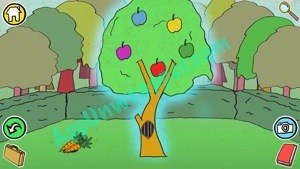
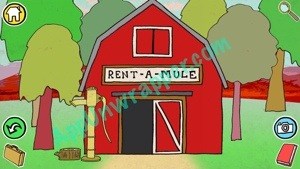
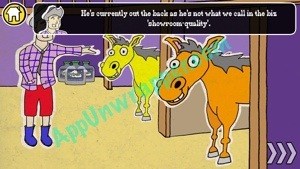
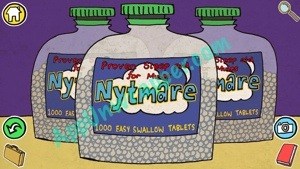
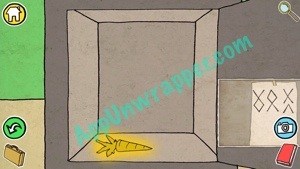
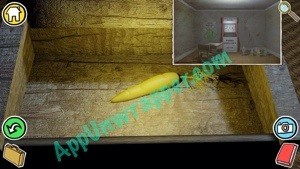
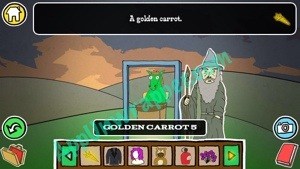
12. Leave and head to the orange-roofed building. Tap on the glowing apple tree to the left/back. To the left of the tree, there’s what looks like a patch of grass. Tug at it. It’s actually three carrots! Take them. Then make note of the apples in the tree. There’s also a golden carrot inside the hole of the tree but we can’t get to it just yet.
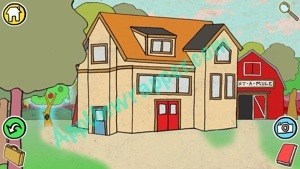
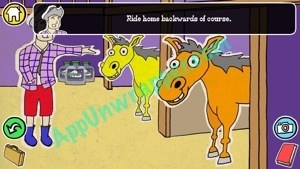
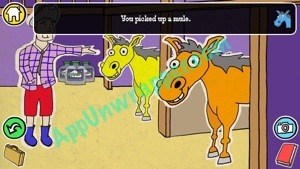
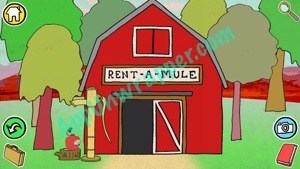
13. Go back and go to the “Rent-A-Mule.” Put the pump handle on the pump and try pumping some water. Then do inside and talk to the owner. He has three mules, but you can only afford one. Give him the three carrots for the blue mule. Also take a bottle of Nytmare pills from the back.


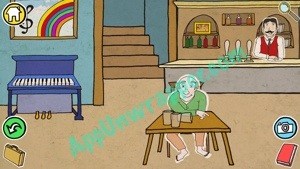
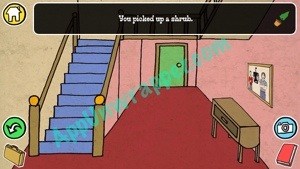
14. Leave and enter the house. Look inside the drawer. Take the token and pick up the brochure to see another clue — a green arrow. Pick up the shrub in the room and notice the photo on the wall.
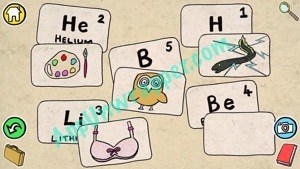
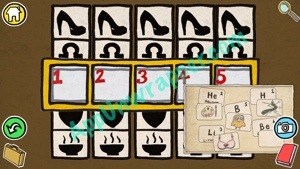
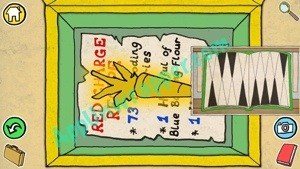
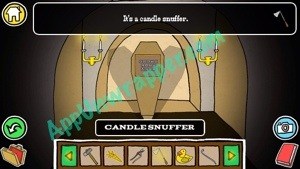
15. Enter the room towards the back, with the green door. Take the candle snuffer. Look through the books on the shelf. The one you want to focus on is #9 (it’s really #6 upside-down, based on the poster in the general store). Take a photo of the black-and-white pattern inside it. Put the strip of symbols into the puzzle on the wall with the others and leave the room.

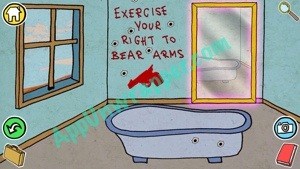
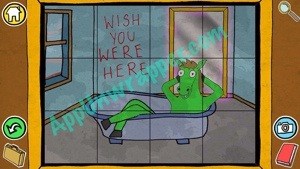
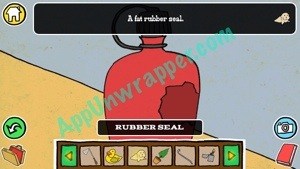
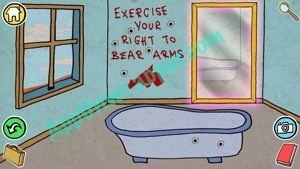
16. Go upstairs. Open the green door to the bathroom. Look inside the tub and take the rubber seal and duck toys. Look at the message on the wall and make note of the red gun. You can also look in the mirror if you’d like.

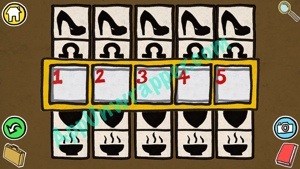
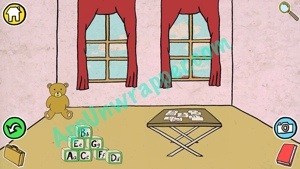
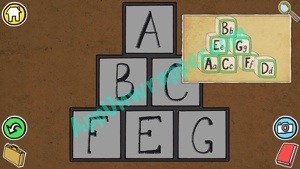
17. Leave that room and open the pink door to the children’s play room. Take a photo of the Blox on the floor and notice the lumpy teddy bear. Take a photo of the cards on the table. It’s a clue for the symbols puzzle (we’ll come back to that in a bit).

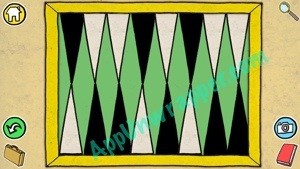
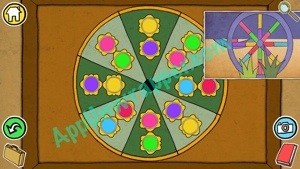
18. Leave the house and go back to the room with the stage. Solve the color puzzle using the wagon wheel and get the gardening scissors.
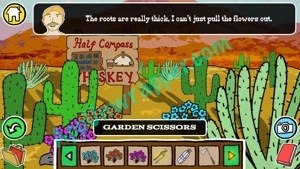
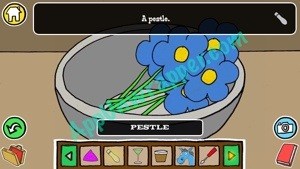
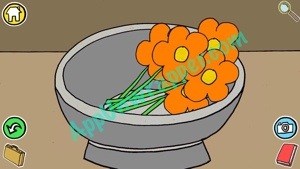
19. Go back to the Calamari Desert and use the gardening scissors to cut the three different colored flowers.
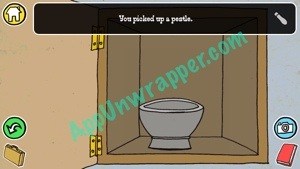
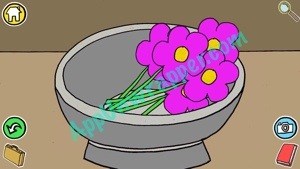
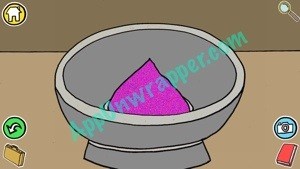
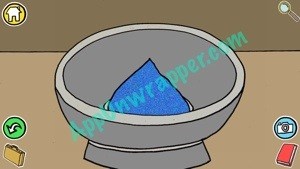
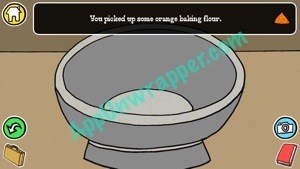
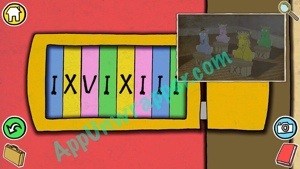
20. Go back to orange-roofed house next to the Rent-A-Mule. Go to the green door at the back. We’re going to solve the symbols puzzle using the cards we found in the children’s room. Ignore the elements and focus on the numbers and pictures. The trick here is to rhyme the pictures on the cards with the pictures in the puzzle. So 1 is an eel, which rhymes with “heel,” so 1 is the shoe. 2 is art, which rhymes with heart. 3 is the “Libra” sign, because it rhymes with “bra.” 4 is blank. And 5 is the bowl because it rhymes with owl. Once you solve it, the safe will open and reveal a mortar & pestle. Take the pestle and put each of the flowers into the mortar separately to turn them into baking powder.
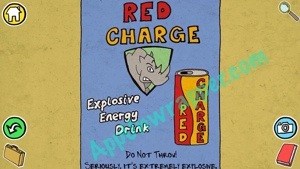
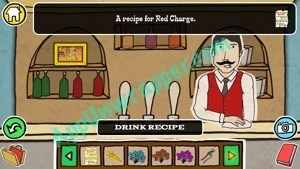
21. Go back to the General Store. Ask to see the box so you can open it. You need the clue from the book with the 9 on it, but you need to turn it upside-down (I’ve done so below). Take the golden carrot and the drink recipe from inside the box.
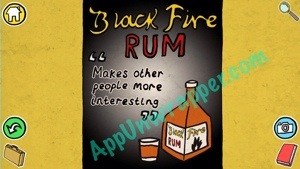
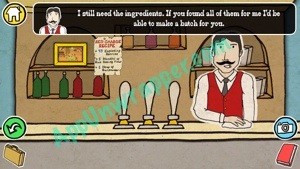
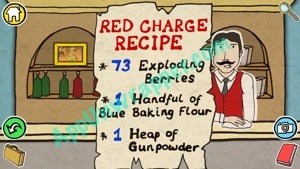
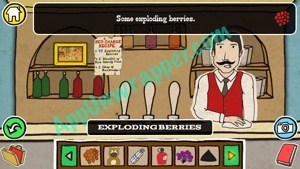
22. Go back to the Saloon and give the Red Charge Recipe to the bartender. He’ll post it up behind the bar so you can see what you need. Give him the ingredients you have so far (gun powder and blue baking powder).
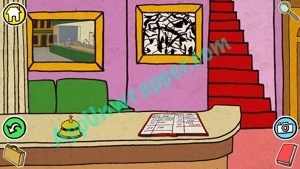
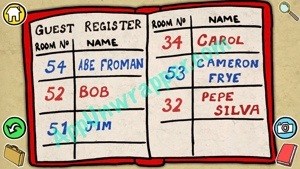
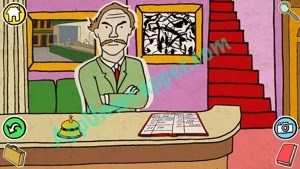
23. Leave the saloon and enter the hotel. Go to the front desk and read the Guest Register. Ring the bell to call the front desk manager. Talk to him as much as you’d like.
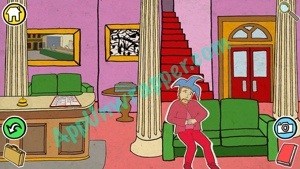
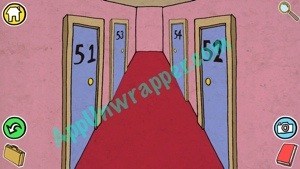
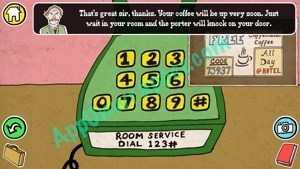
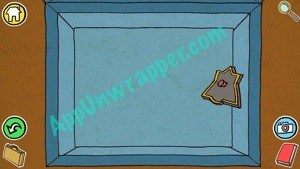
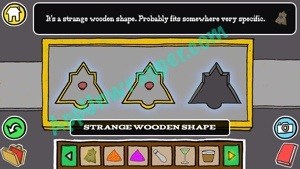
24. Talk to the jester sitting in the lobby. He’s sad and needs a joke. Give him your “Tearable Pun” and he’ll give you a puzzle piece (or “strange wooden shape”) in exchange.

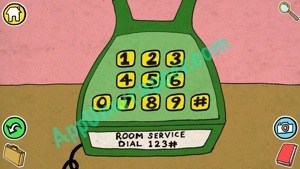
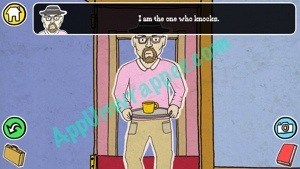
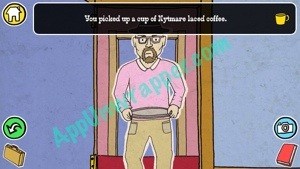
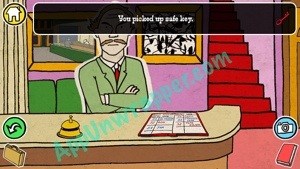
25. Go upstairs. Head into the only unlocked room, #51. Dial room service on the telephone (123#) and order a coffee, fully caffeinated with 5 sugars (the first choice). Choose to pay for it with a voucher. Then use the code from the voucher the sheriff gave you and press #.
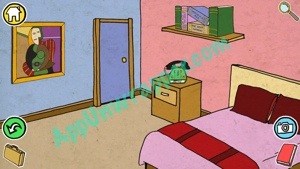
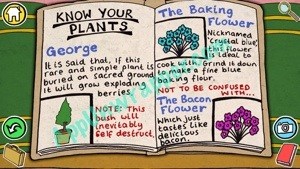
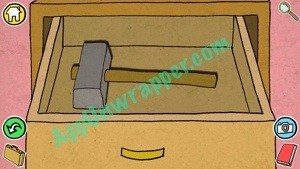
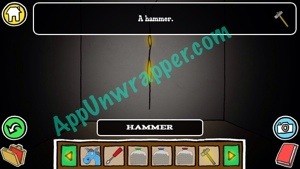
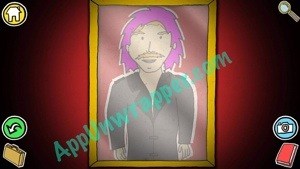
26. You’ll hear a knock at the door. It’s room service with your coffee (and a “Breaking Bad” nod). Take the coffee. Also look at the Picasso painting on the wall and take a look inside one of the books on the shelf to see descriptions of plants. Take the hammer from the drawer under the telephone.
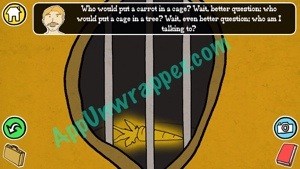
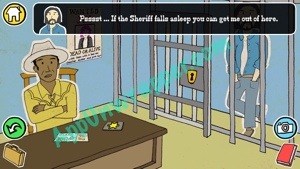
27. Go back to the sheriff’s office and give him the coffee. The guy behind bars will tell you that if the sheriff falls asleep, you can get him out of jail. And for some reason, this seems like a good idea.

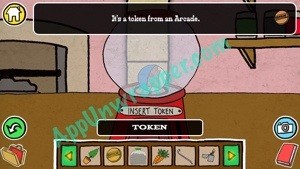
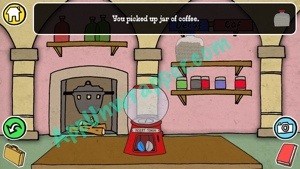
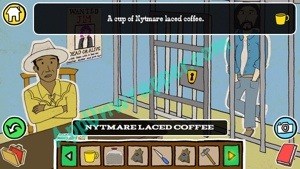
28. Go back to the hotel. Go through the double red doors to the right. Pick up the knife and put the token into the gumball machine to get a second “strange wooden shape.”
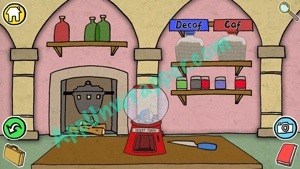

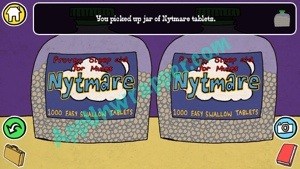
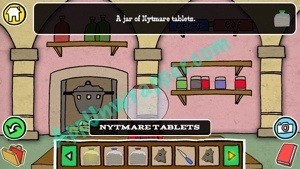
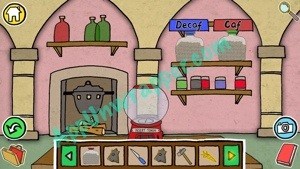
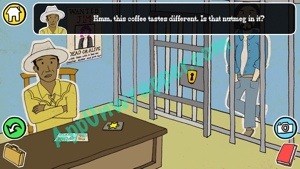
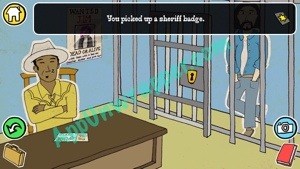
29. Ok, now for drugging the sheriff (yay!). Take down the jar of caffeinated coffee from the shelf and put the Nytmare tablets in its place. Then go back upstairs and order another fully caffeinated coffee with 5 sugars. This time the coffee will be laced with Nytmare.
30. Now go back to the sheriff and give him the Nytmare coffee. He’ll drink it and fall asleep. Take his badge from the desk. Talk to the guy behind bars and he’ll ask you to find him a sharp file.
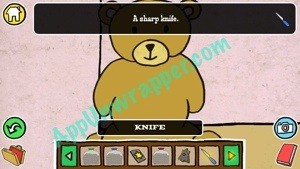
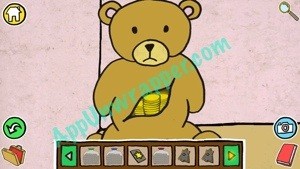
31. Leave and go back to the house on the hill. Enter the children’s room and alive open the lumpy bear with your knife. Take the pile of gold coins from inside his tummy.
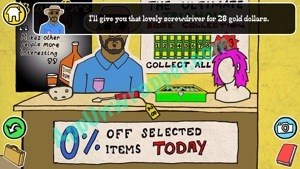
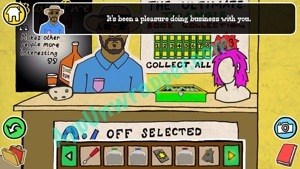
32. Go back to the General Store and give the owner the gold coins in return for the screwdriver.
33. Go back to the hotel and tap on the little blue box near the front desk. It’s a tile puzzle. Rotate the tiles to form the picture and you’ll get the third strange wooden piece.
34. Go back to the Mane Stage in the saloon and use the three wooden pieces to open the guitar case and get another golden carrot.
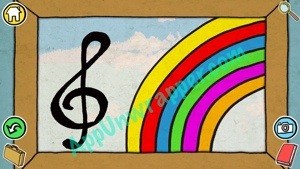
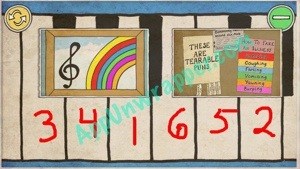
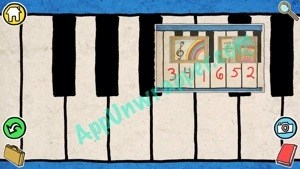
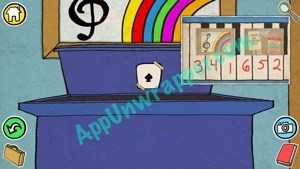
35. Go back downstairs. We’re going to solve the piano puzzle. Using the rainbow picture on the wall and the chart from the bulletin board in the theater, you are told which order to play the keys. The in-game camera and drawing tool is incredibly useful here. I used it to match the sound of each key to the color. You want to press them in the order shown on the rainbow picture (so yellow first, then red, and so on). Here is the solution if you’re still stuck. Just press the keys in the order I numbered them. Take the Spade when you’re done.
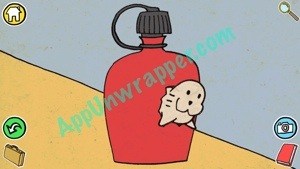
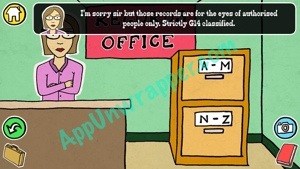
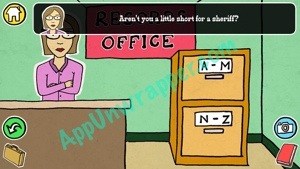
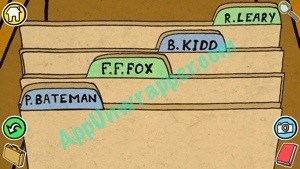
36. Go back into the alley behind the saloon and put the rubber seal in the canteen hole (get it? Rubber seal? Yeah, know…). Pick up the canteen and take it to the water pump to fill it with water. Now you can use your cheap mule with the wagon to travel.
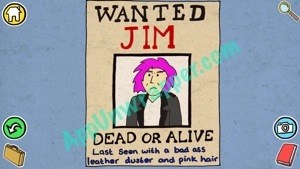
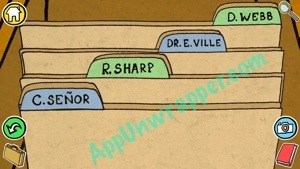
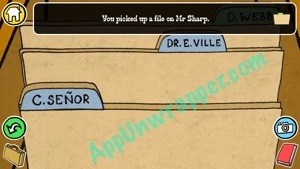
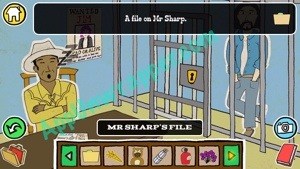
37. Now you’re in Pebble Ridge. Go into the Public a Records office and show her your badge so she’ll let you see the files. You can only take one at a time, though. Open the bottom drawer and take the file on Mr. Sharp (Sharp file. Get it? 😉 )
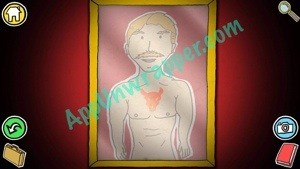
38. Leave and go into what looks like a phone booth but is actually a changing room (Superman?). Choose to change into a suit, and then choose “Birthday” (as in nude). Look in the mirror and you’ll see you have a red skull tattoo. This is another clue for the cellar door lock.
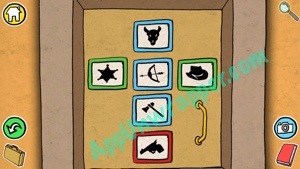
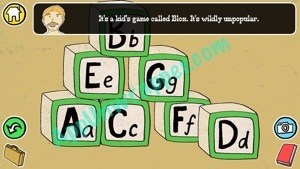
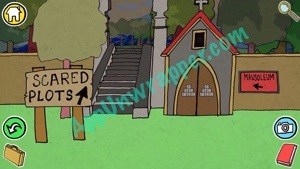
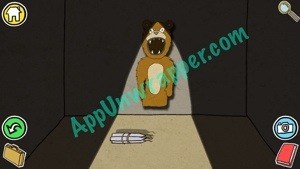
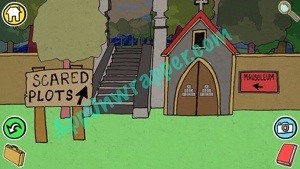
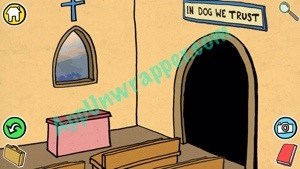
39. Leave the changing room and continue on towards the church. Tap on the “Scared Plots” sign and notice the letters on the mausoleum doors. They look familiar. Use the Blox clue to rearrange the letters and open the doors. Then go in and take the four candles and the bear suit. Also note the yellow axe on the wall. This is the final symbol for the cellar lock.

40. Leave the mausoleum and go up the stairs to the “Scared (Sacred) Plots”. The third plot is empty, so it’s a perfect place to plant the exploding shrub (remember? It needs to be planted on sacred ground). If only you had a spade to dig with! Oh wait, you do! Another play-on word here. Use the spade card to dig the hole and plant the shrub. Then tap on in a couple of times and get the exploding berries.


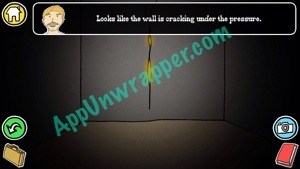
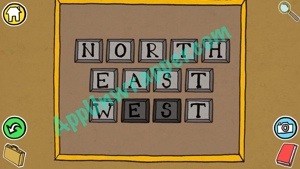
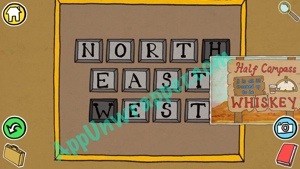
41. Go back a couple of screens to the church. Enter and go into the dark room. There’s a crack in the wall. Use the hammer to break down the wall and you’ll encounter another puzzle with the letters of North, East, West. We’ll come back to this later.
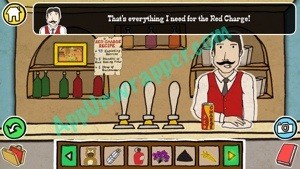
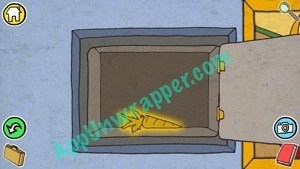
42. Go back to the saloon and give the exploding berries (and any other Red Charge ingredients you still have) to the bartender. He’ll make you a Red Charge.
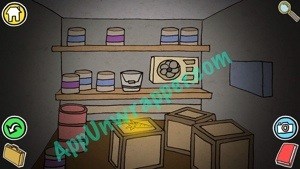
43. Go back to the alley behind the bar and unlock the cellar using the clues we found. The star is gold, not yellow. Otherwise, everything is the same as the photo below:
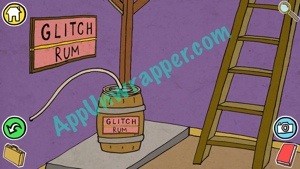
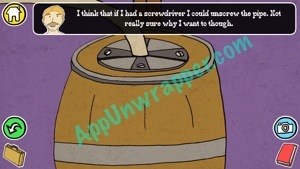
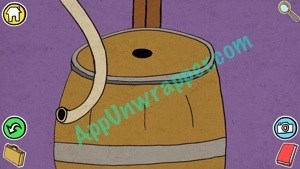
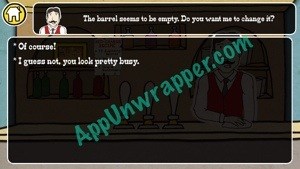
44. Now you’re in the cellar. Use the screwdriver to remove the lid of the barrel of Glitch Rum, then go back upstairs.
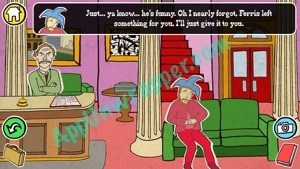
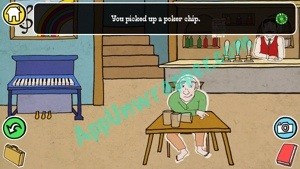
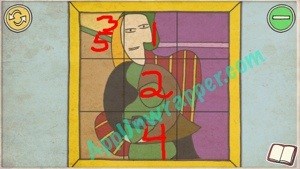
45. Ask the bartender for a Glitch Rum. He’ll tell you the barrel is empty. Tell him to go change it. While he’s gone, steal the painting. Then show it to the guy at the table and he’ll give you a green poker chip that Ferris left for you.

46. Go upstairs to the Poker Room. Place the green chip on the table and arrange the chips according to the apples on the tree. We’ll come back to finish the puzzle later.
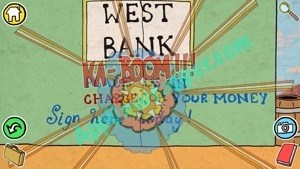
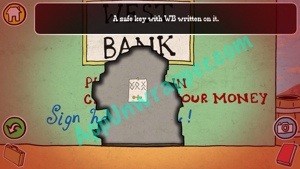
47. Go back to the alley behind the bank/saloon. Throw the can of Red Charge at the crack in the bank wall and you’ll get a safe key and clue to open the safe.
48. Go into the bank and use the clue to arrange the levers on the safe (the drawing is made up of up and down arrows). Put the key in the lock and turn it to get another golden carrot.
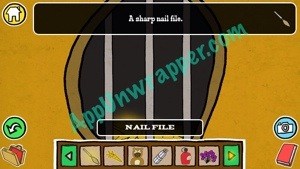
49. Go back to the Sheriff’s Office and give the Sharp file to…well, Mr. Sharp. He wants to study his case file. He’ll give you an sharp nail file in return.
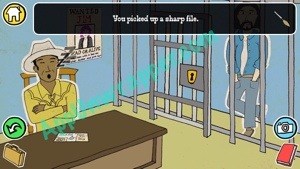
50. Go back to the Apple tree and use the nail file on the metal bars to get another golden carrot.
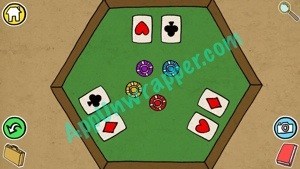
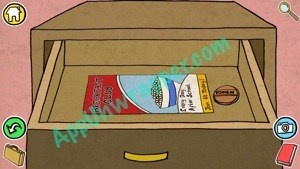
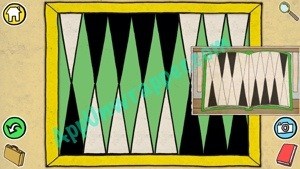
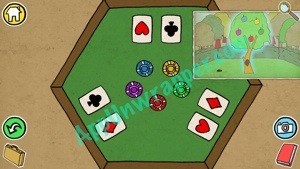
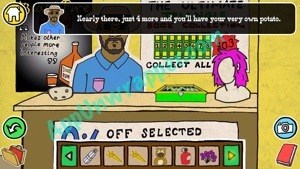
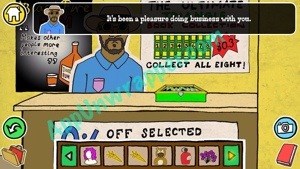
51. Go back to the church and use the candle snuffer to snuff out the candles. Take them and you’ll now have the full 16 candles (heh). Take them to the General Store and trade them all for the potato. Then trade the potato for the pink wig.

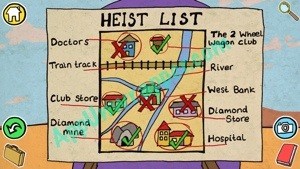
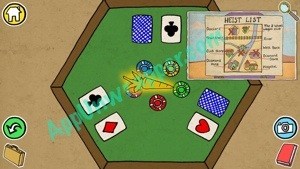
52. Go to the poker table and use the Heist Map from the wagon to figure out which cards to flip over. Take another golden carrot.
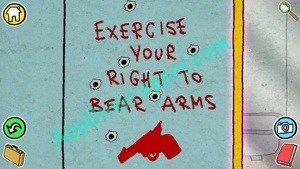
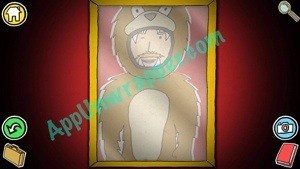
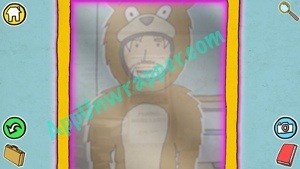
53. Remember the message on the wall in the bathroom? The right to bear arms? Well, it’s another pun. Go to the changing room and change into the bear costume. Then stand in front of the mirror in the bathroom to open up a secret door.
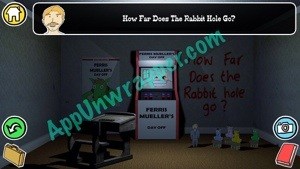
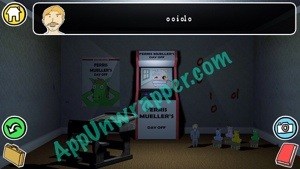
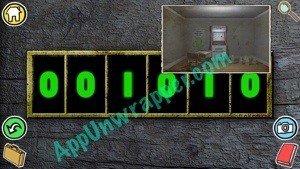
54. Take a photo of the cardboard class of mules. You’ll need it in a bit. Tap on the arcade game and keep doing so (go through the rabbit hole) until the message on the wall changes to only only a few letters. On the big desk is a combination lock. Using the message on the wall, change some of the 0s to 1s and you’ll get another golden carrot.


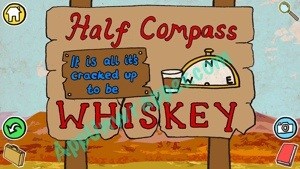
55. Go back to Franc Cinelli and use the cardboard horses to unlock the red door. Get another golden carrot.

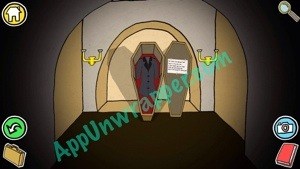
56. Remember the sign in the desert? If you don’t, go back and take a photo of it. Notice the cracks in the word “WHISKEY.” They break up the word to tell you that “WH is key.” Go back to the church and press only the W and H on the North East West wall.
57. The coffin will open, revealing a riddle and a leather duster. Take the duster and take a photo of the note.
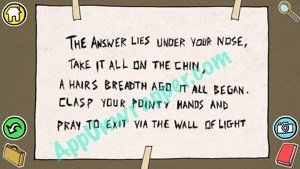
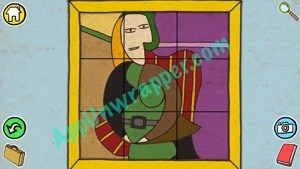
58. Go to the changing room and put on the pink wig and leather duster. Then go back to the hotel and and ask for your safe key.
59. Go upstairs to room 51 and tap on the Picasso painting. Take out the photo of the coffin riddle. Use the clues to figure out which order to press the tiles. It goes top middle (nose), middle (chin), top left (hair), bottom middle (hands) and top left again. The painting will lift up, revealing the safe. Use the safe key to open it and get the last golden carrot!

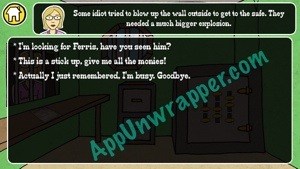
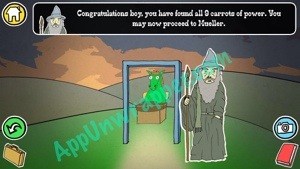
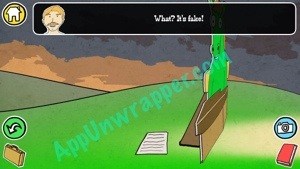
60. Go back to the hill with the church. Take the path to the right and you’ll see Gandalf guarding what appears to be Mueller. Give Gandalf all nine golden carrots and he’ll let you go to Mueller. But it’s just a trick! Congrats, you finished the game! Enjoy the ending! And make sure to watch the credits. 


If you liked this game, try Forever Lost by the same developer. You might also like these other escape games.


 Math Academy U Answers
 Blood & Glory: Legend Hack for Coins, Rubies & Credits - AppGameCheats.com
 Swamp Attack Cheat for Coins and Potions - AppGameCheats.com
 100 Pics – Colours – Level 1-25 Answers
 Escape Game: “Eyes to Ambush” Walkthrough